

Page 1
This product works with allThis product works with all
This product works with all
This product works with allThis product works with all
Windows Operating SystemsWindows Operating Systems
Windows Operating Systems
Windows Operating SystemsWindows Operating Systems
Before You Begin
You must have at least the following:
• PS/2 Keyboard
• PS/2 Mouse
• VGA or Higher Monitor
Check Your Package Contents
These are the items included with your purchase:
• DKVM-2K KVM Switch with Built-In
Cables
DKVM-2KDKVM-2K
DKVM-2K
DKVM-2KDKVM-2K
2-Port KVM Switch
with Built-in Cables
• Quick Installation Guide
If any of the above items are missing, please contact your reseller.
©2003 D-Link Systems, Inc. All rights reserved. Trademarks or registered trademarks are the property of
their respective holders. Software and specifications subject to change without notice. DKVM-2K.07242003
Page 2
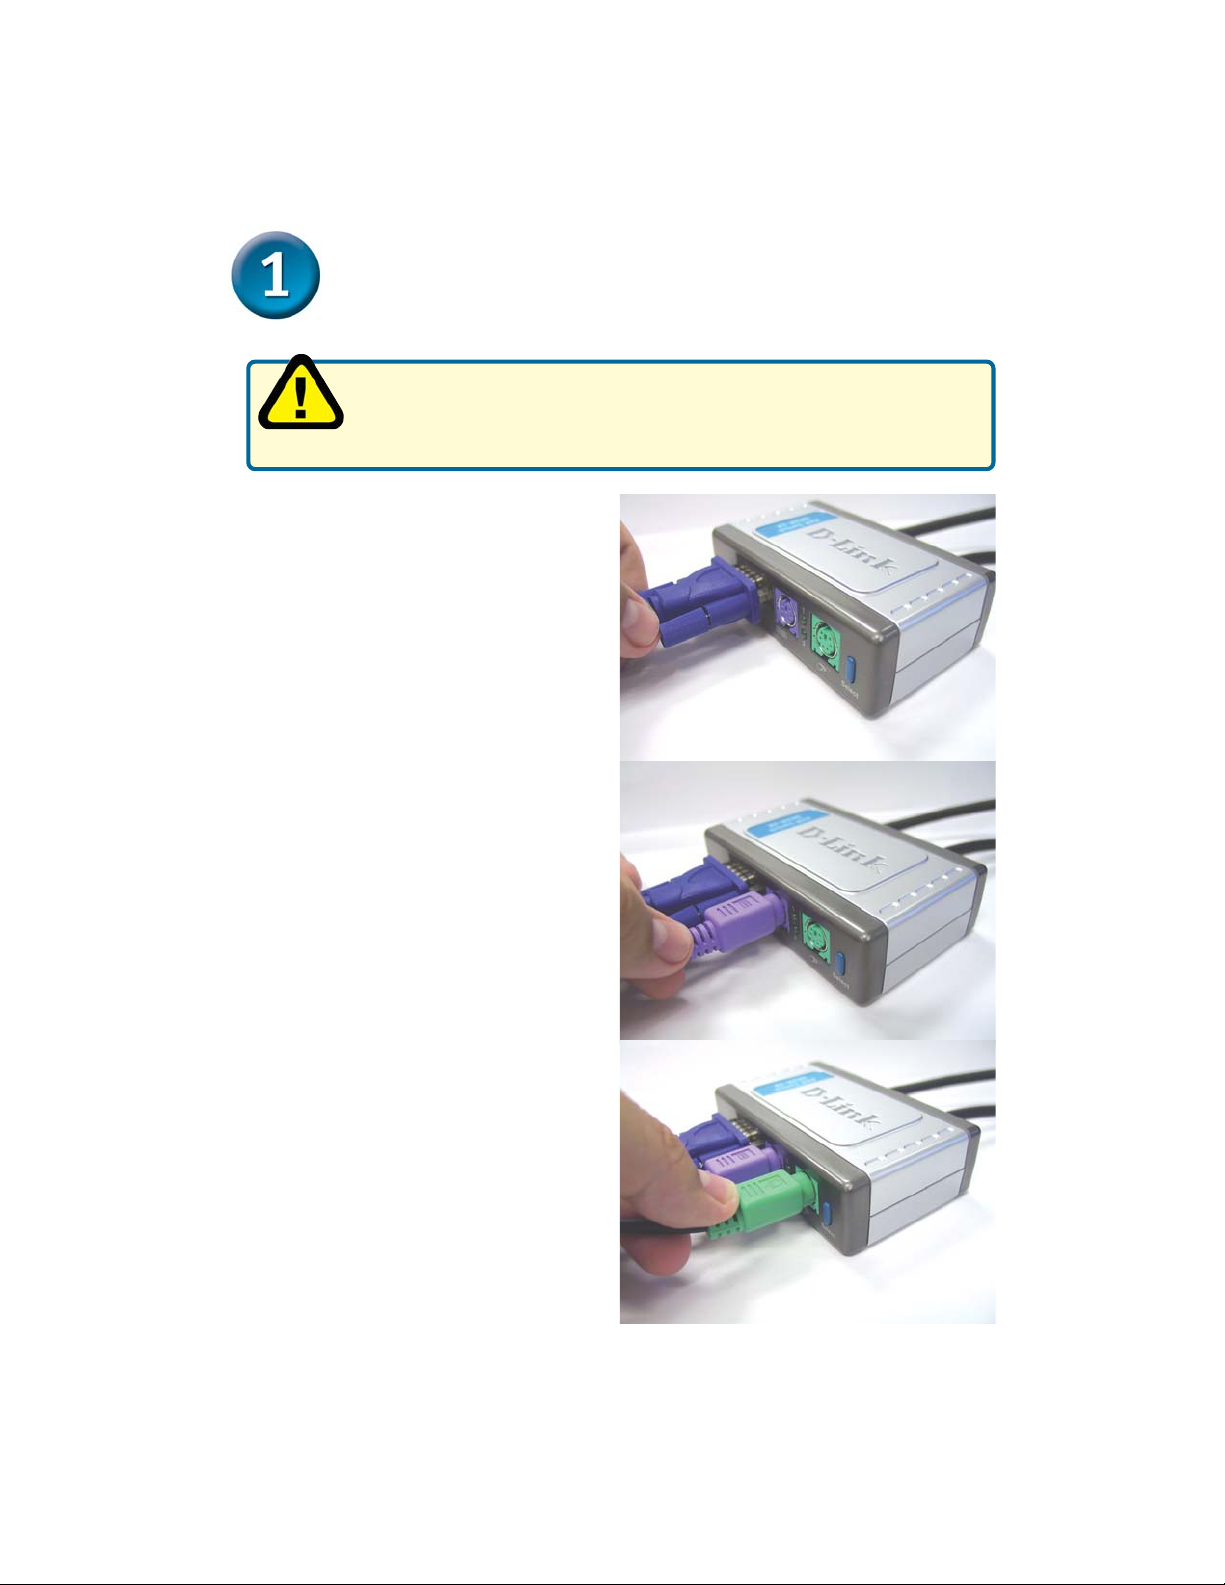
Installing the DKVM-2K
Make sure that all your computers are turned OFF before
installing the DKVM-2K to avoid mouse and keyboard errors
when booting up your computers.
Attach your monitor’s HDDB 15 VGA
connector to the console port of the
DKVM-2K.
Attach your computer’s 6-pin PS/2
male keyboard connector to the
DKVM-2K keyboard port.
Attach your computer’s 6-pin PS/2
male mouse connector to the
DKVM-2K mouse port.
2
Page 3

Installing the DKVM-2K
The following steps below apply to both the computers that you are using with your
DKVM-2K.
Attach the DKVM-2K‘s built-in
monitor cable to the VGA port
located on the back of your
computer case.
Attach the DKVM-2K’s built-in
keyboard cable to the PS/2
keyboard port located on the
back of your computer case.
Attach the DKVM-2K’s built-in
mouse cable to the PS/2 mouse
port located on the back of your
computer case.
Power ON all your attached computers after you have
Type A
completed the DKVM-2K installation.
3
Page 4

Switching with the DKVM-2K
The DKVM-2K features a Select Button located on the front panel and keyboard Hot
Keys to switch quickly and easily between both your computers.
Select
Button
You can also use your keyboard to switch between your computers. Press the Scroll
Lock key twice to enter Hot Key switching mode. A beep confirms that the Hot Key mode
is activated.
Hot Key Menu
Scroll Lock + Scroll Lock + 1 : Switches to PC 1
Scroll Lock + Scroll Lock + 2 : Switches to PC 2
Scroll Lock + Scroll Lock + S : Activates Auto Scan Mode. Each
computer will be scanned every 10
seconds.
Scroll Lock + Scroll Lock + ESC : Exits Auto Scan Mode and Hot
Key Mode.
4
Page 5

Troubleshooting Tips
Keyboard
If your keyboard is not functional, not detected, or there is a keyboard error on boot-up,
check the following:
• Make sure that the keyboard is properly connected to the
computer and to the DKVM-2K. Check that the keyboard is plugged into the
correct PS/2 keyboard port and not the PS/2 mouse port.
• Verify that the keyboard works when plugged into the computer directly. You
will have to shut down your computer first to do this.
• Read your motherboard documentation and make sure that the PS/2
keyboard’s IRQ is enabled. This can be set for most computers in the
BIOS setup.
• Try using a different keyboard.
Mouse
If your mouse is not functional, not detected, or there is a mouse error on boot-up, check
the following:
• Make sure that the mouse is properly connected to the
computer and to the DKVM-2K. Check that mouse is plugged into the
correct PS/2 mouse port and not the PS/2 keyboard port.
• Verify that the mouse works when plugged into the computer directly. You
will have to shut down your computer first to do this.
• Read your motherboard documentation and make sure that the PS/2
mouse’s IRQ is enabled. This can be set for most computers in the
BIOS setup.
• Try using a different mouse.
• If mouse movement is random when switching between computers, try shutting
down your computer and rebooting.
• Verify that your computers do not have more than one mouse driver installed
(check your config.sys and autoexec.bat files for Windows) and that you are
using the latest mouse driver.
• If a special mouse is used such as a cordless or scrolling mouse, make sure
you use generic PS/2 mouse drivers. A non-standard PS/2 mouse may have
extensions on the PS/2 protocol that are not supported by the DKVM-2K.
• Do not move the mouse or press any mouse buttons when switching from one
PC to another.
• Try resetting the mouse by unplugging it from the DKVM-2K for about 3 seconds
and reconnecting.
Video
If the image on your monitor is not clear, check the following:
• Verify that all video monitor cables are inserted properly.
• Try lowering the resolution and refresh rate of your monitor.
• Try using a shorter video cable.
5
Page 6

Technical Support
You can find software updates and user documentation on the D-Link website.
D-Link provides free technical support for customers within the United States and
within Canada for the duration of the warranty period on this product.
U.S. and Canadian customers can contact D-Link Technical Support through our
website, or by phone.
Tech Support for customers within the United States:
D-Link Technical Support over the Telephone:
(877) 453-5465
24 hours a day, seven days a week.
D-Link Technical Support over the Internet:
http://support.dlink.com
email:support@dlink.com
Tech Support for customers within Canada:
D-Link Technical Support over the Telephone:
(800) 361-5265
Monday to Friday 8:30am to 9:00pm EST
D-Link Technical Support over the Internet:
http://support.dlink.ca
email:support@dlink.ca
 Loading...