

Page 1
M-DFE-670TXD-NEW.QXD 3/15/2001 11:01 AM Page 1
Quick Install Guide
for Windows Me
D F E - 6 7 0T X D
10/100 Ethernet PC Card
Please note that you will need Cat5, RJ-45 cable to complete your network
installation. Please see Appendix B for more information regarding cables.
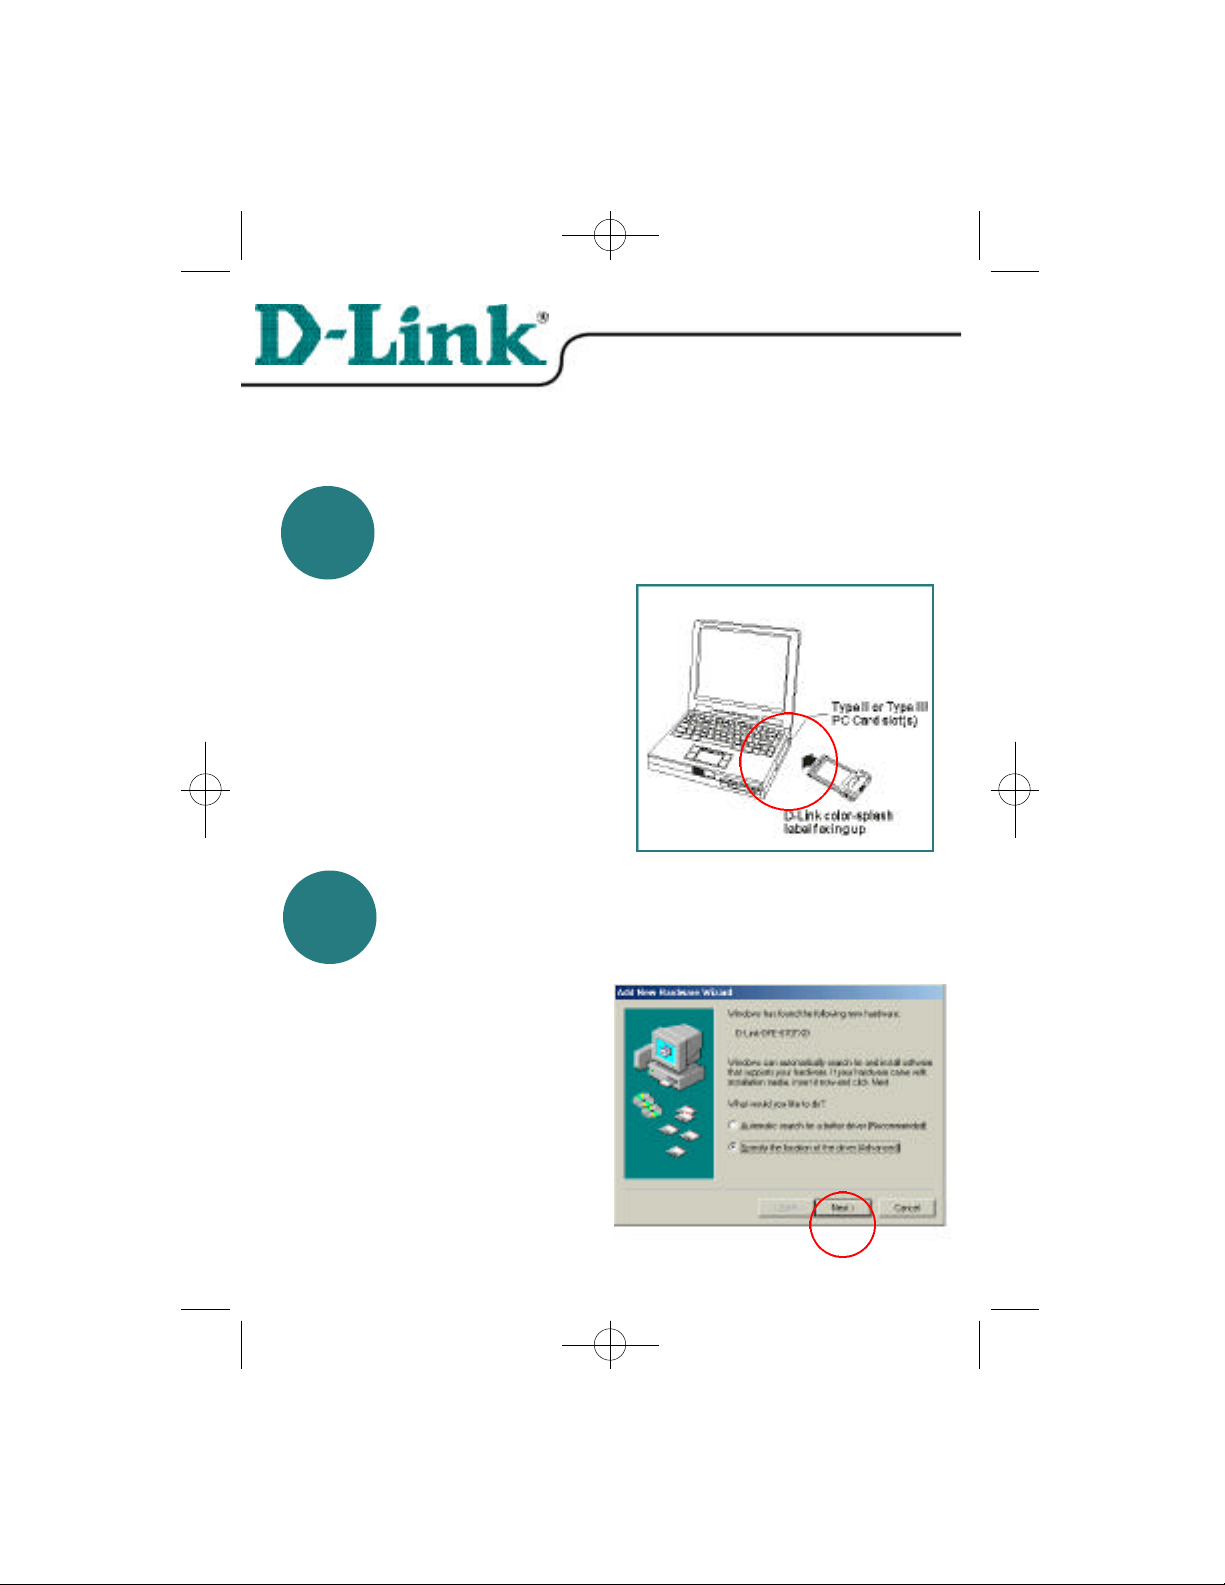
Inserting the DFE-670TXD 10/100
1
With the laptop turned ON, insert
the DFE-670TXD 10/100 Ethernet PC
Card into your laptop.
Gently insert the front end (with the
yellow arrow on the card pointing
toward the computer) of the PC Card
all the way into the PCMCIA slot on
your laptop, until it is firmly seated.
Ethernet PC Card into your laptop.
Running the Add New Hardware
2
Windows will automatically detect
new hardware and begin searching
for drivers.
Insert the CD that is included with
your purchase of the DFE-670TXD.
Select Specify the location of the
driver.
Click Next.
Wizard
Page 2
M-DFE-670TXD-NEW.QXD 3/15/2001 11:01 AM Page 2
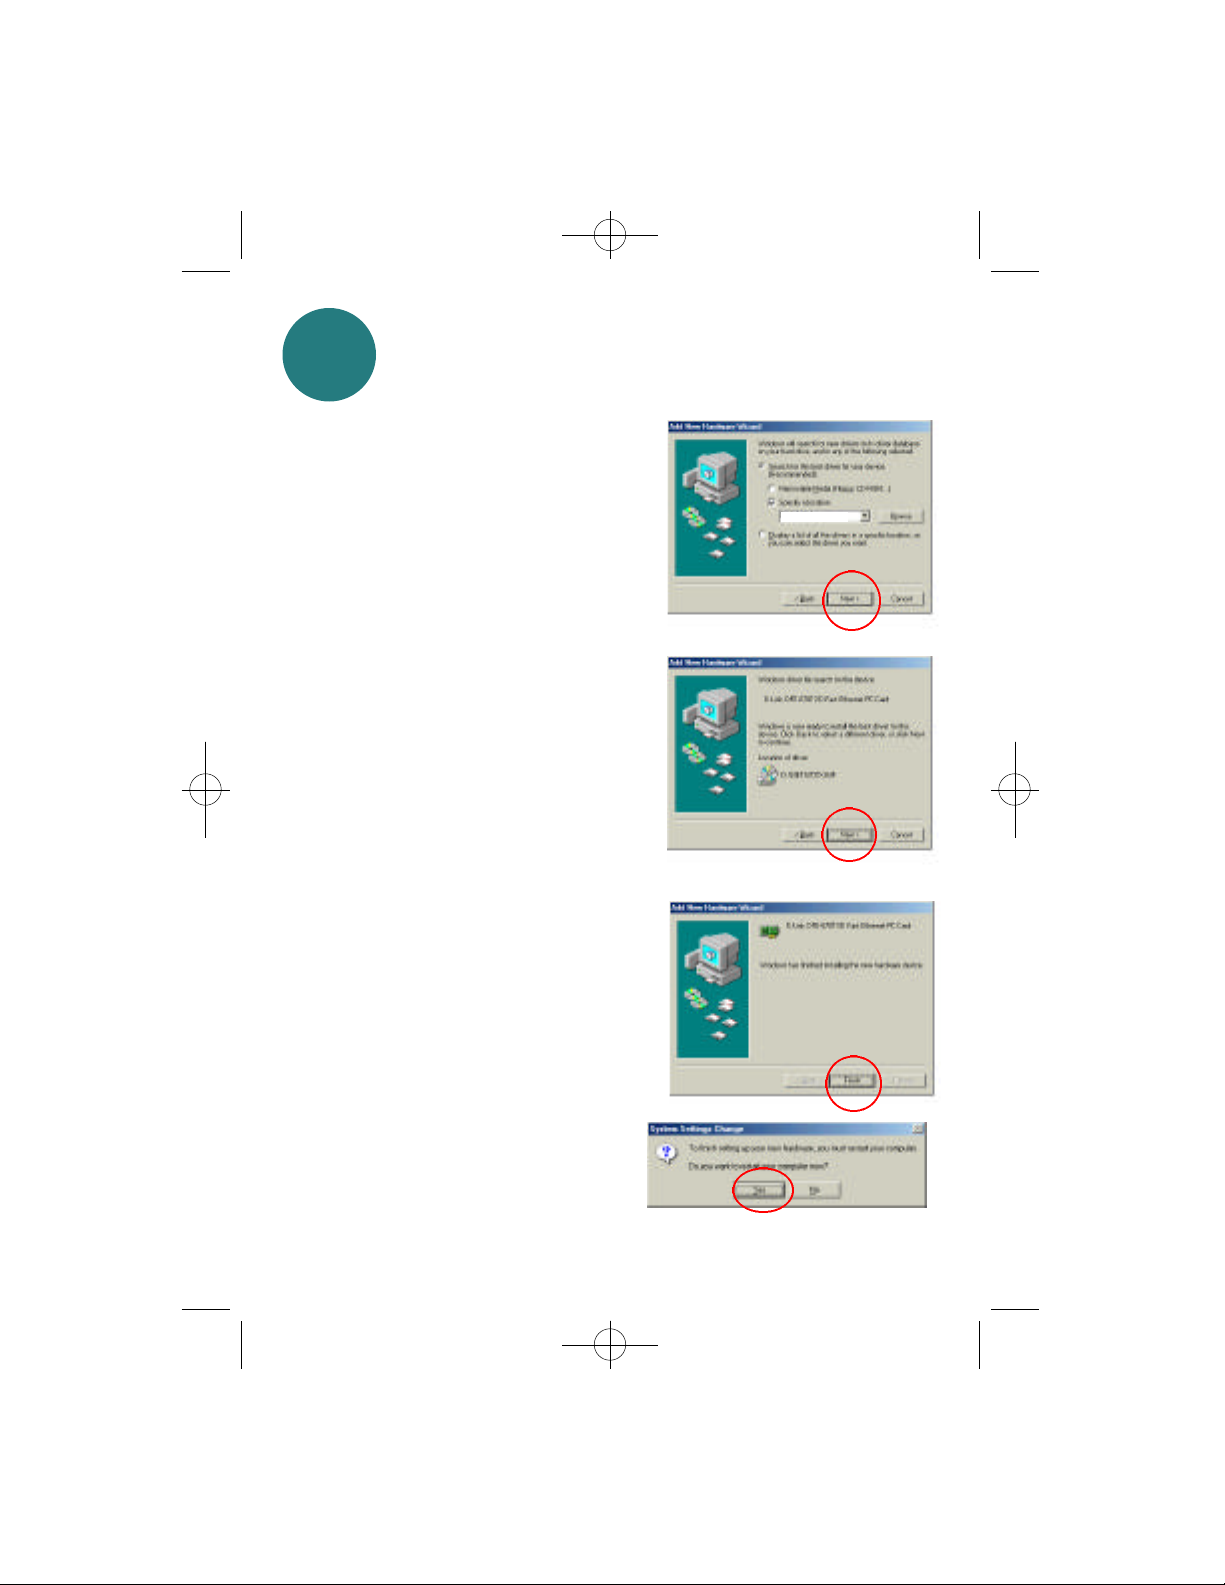
Running the Add New Hardware
2
At the next screen,
select Search for the best driver for your
device.
Select Specify a location:
Type D:\ in the box.
Click Next to continue the installation.
The Wizard has located the driver.
Click Next.
Windows will copy the files to the
hard drive.
Wizard
D:\
Windows has finished installing
the DFE-670TXD.
Click Finish, to complete installation.
At this window, please select Ye sto restart
the computer.
Page 3

M-DFE-670TXD-NEW.QXD 3/15/2001 11:01 AM Page 3
Connecting to your network
3
After the Hardware Wizard has
completed the installation of the
DFE-670TXD, you can make your
network connection.
Please insert one end of the RJ-45 plug
into the opening in the DFE-670TXD
Ethernet PC Card, and then insert the
other end of the RJ-45 cable into your
networking hub or switch.
You are now networked!
Please see Appendix A to check for proper installation of your DFE-670TXD using the
Device Manager.
Please see Appendix B for more information on types and lengths of cable that can be
used to connect your network.
Note: For more information on alternate networking possibilities, please see the
Networking Basics and the Getting Started sections of the User's Manual.
Page 4

M-DFE-670TXD-NEW.QXD 3/15/2001 11:01 AM Page 4
.
AA P P E N D I X
To check for the proper installation of
your DFE-670TXD, please go to
START > SETTINGS > CONTROL
PANEL>
Double click on the SYSTEM icon.
At the SYSTEM PROPERTIES
window,click on the HARDWARE tab,
and then click on the DEVICE
MANAGER tab.
Your DFE-670TXD will appear under
NETWORK ADAPTERS, as shown.
BA P P E N D I X
Connecting Your Network Cable
Category 5 UTP cable can be used for both
Fast Ethernet cabling and for traditional
Ethernet cabling.
Connecting for Fast Ethernet cabling
Cat5 cable is required for Fast Ethernet operation.
The maximum cable length between the DFE670TXD and the supporting hub is 300 ft. The
cable must be straight (not a crossover cable),
with an RJ-45 plug at each end.
Connecting for traditional (10Mbps) Ethernet cabling
Category 3, Category 4, and Category 5 UTP cable, as well as EIA/TIA-568 100-ohm STP
cable, all qualify under traditional Ethernet cabling rules. The maximum cable run
between the DFE-670TXD and the supporting hub is 300 ft.
The cable must be straight (not a crossover cable) with an RJ-45 plug at each end.
 Loading...