

Page 1

Downloader
Module
Operation & Installation Manual
DIGI-ST AR
790 WEST ROCKWELL A VENUE
F3511 01/00
FORT A TKINSON, WI 53538
PHONE (920) 563-1400
FAX (920) 563-9721
www.digi-star.com
Page 2

Digi-Star
Downloader
The Digi-Star Downloader is designed to work with the Digi-Star EZ 150, EZ 210, and 320 Scales; all must
have RS232 (print) option. Foreign language is not supported, use English only . The Downloader can hold as
many as 682 different print cycles from the scale; enough for a whole day’s worth of use. The Downloader’s
advanced electronics requires no batteries, and there is no bulky interface box to attach to your computer. The
Downloader can be used over and over again for about (1 1) eleven years of daily use.
Each entry shows a Load, Unload, or T otal Load operation, as well as the T ime, Date, Weight, and ID number
(when available).
For Example:
GROSS ID 60110 -54321 LB 05:01 17 OCT 96
MEMORY+ ID 54 769830 LB 17:22 1 1 OCT 96
RECIPE 57
05:01 17 OCT 96
INGRD# 34 12345LB
INGRD# 56 67890LB
TOTAL 80235LB
T o retrieve information from the Downloader Module, attach the interface cable to your PC’s printer port and
plug the Downloader Module into the cable. The program provided with the Interface Cable will transfer all
information from the Downloader Module into your PC. The Downloader program will run from DOS on any
IBM compatible PC. Y ou can run the Downloader program from a floppy disk, or create a directory in your
computer’s hard drive. In either case, make certain to copy the contents of the supplied floppy disk and keep
the original in a safe place.
Example: Make a directory on your hard drive. From the DOS C: prompt type
CD\MKDIR DOWNLOAD
CD DOWNLOAD
Then copy all of the files on the supplied floppy disk over to the new directory . The following line assumes that
you have the floppy disk in your A drive.
COPY A:*.*
C: If the supplied floppy is in your B drive then type COPY: B:*.*
C: Now type: DLOAD
and the Downloader program will start.
2
Page 3
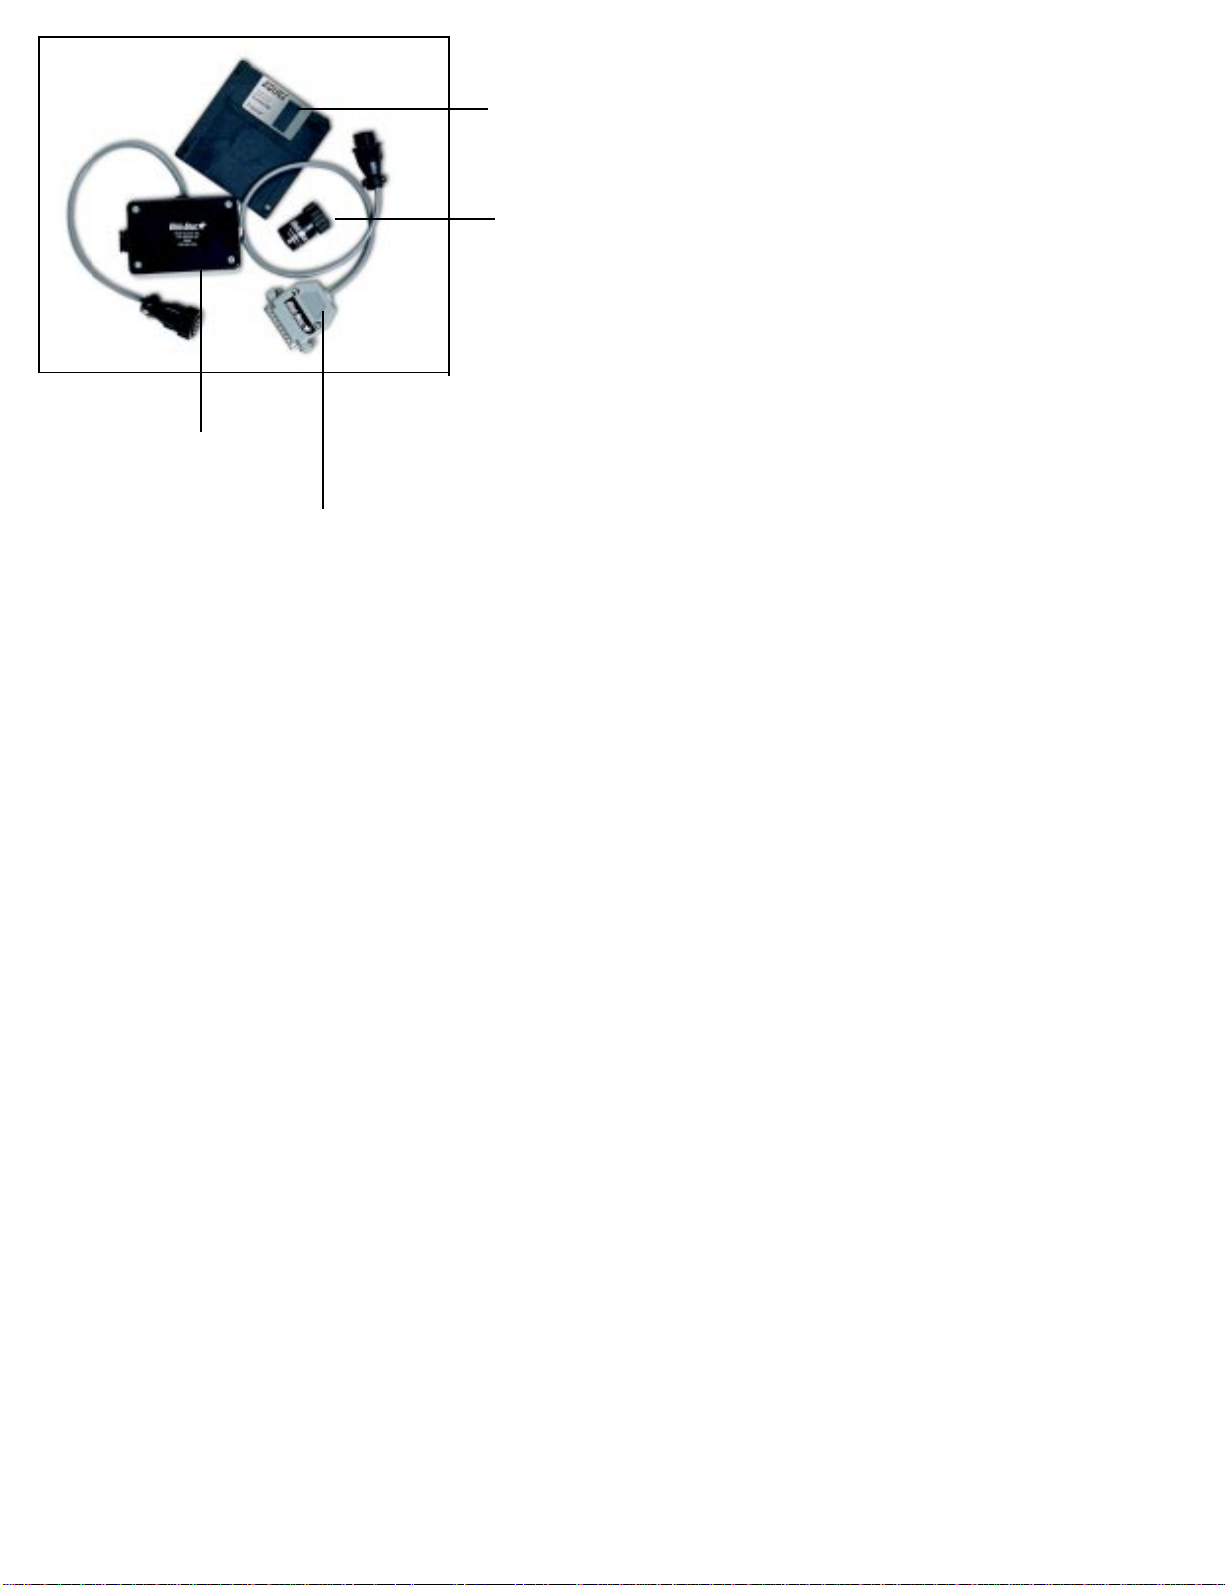
Memory Converter
DLOAD LPTn
Interface Cable
Software
Downloader
Module
The program makes the assumption that you are using
LPT1 for the Downloader Cable and LPT1 for your
printer cable. We strongly recommend that you use a
second printer port if you have one in your computer or
purchase an “AB switch”, so that you can switch between
your printer and the Downloader . This will make it easier
for you to use your computer and your Downloader, so
that you won’t have to reach behind your computer and
play with the cables every time you want to use your
printer. If you use your Downloader in a printer port other
than LPT1 than start the program by typing:
where LPTn can be LPT1, LPT2, or LPT3, depending on where the Downloader is connected.
Y ou can also have the program work in Kilograms, but keep in mind that it will only print “KG”, it won’t perform a
conversion. Both the Scale and the Downloader must be set up for “Kg”.
As an example: DLOAD KG would start the Downloader program with the Downloader port in LPT1 and KG units.
DLOAD LPT3,KG would start the Downloader program with the Downloader in port 3 and KG units. DLOAD
LPT2 would start the program with port 2, etc.
The optional parameters can be in any order .
When using the Downloader with a Digi-Star scale. MAKE CERT AIN that you are using an EZ150, Model EZ
210, or 320 [all with print option] Also, MAKE CERT AIN to use the Memory Converter . The one line print mode is
part of the scale’s “Long Form Calibration” and is set by selecting {1L PRT} to ON.
The Downloader will store all information that the scale normally sends to a printer.
When using the Downloader with a Digi-Star scale you first attach the Memory Converter to the scale’s printer
connector and then attach the Downloader Module to the Memory Converter. All power to run the Downloader
and its memory Converter is taken from the scale, there are no additional cables to attach. Data will be saved
into the Downloader each time the scale normally sends information to the printer.
3
Page 4

The Downloader will retain 682 lines of information before it is full and then all additional information will simply
be lost. All the information will be retained even after the Downloader has been disconnected from the scale.
No information is erased from the Downloader until you erase it. A Downloader Module can be removed from
the scale, send its information to the computer, and then be plugged back into the scale without losing any
information. All new data is added into the end of the existing information, but remember that the Downloader
Module can only hold 682 lines of information. This means that you should clear the Downloader Module once
you have retrieved all the information from it.
The Memory Converter never needs to be removed from the Digi-Star scale, since only the Downloader Module
needs to be plugged into your computer. You can unplug the Downloader Module or Memory Converter at any
time, but it’s best to turn the scale off before removing either unit from the scale.
T o use a computer with your Downloader , first install your software in a hard drive, or save it to another floppy so
that it’s safe.
Attach the Interface Cable to your computer’s printer
port.
Start the program by typing DLOAD and any of the
optional parameters.
Plug the Downloader into the Interface Cable.
The screen now shows three options; Display , Clear,
Help, and Quit.
“Display” will attempt to receive all information from
your Downloader. “ Clear” erases all information in the
Downloader module. “Help” gives a quick description of how to use the Downloader, and “Quit” exits you to DOS.
When you press D, the screen then displays Reading
Downloader Modules, and when it’s finished all the
stored data will be displayed.
4
Page 5

If the information is too large to fit on a screen you can
press the arrow keys, PgUp, or PgDn to display all of
the information retrieved. The first entry is labeled
“Start” and the last is labeled “Finish”. Pressing ESC
will exit you back to the main menu, but now there are a
few extra choices.
“Print” will allow you to send the stored information to
your printer. You will be reminded to hook your printer
back up, since you may have disconnected it. If you are
using an A/B switch to switch between the printer an the
Downloader, simply flip the switch over to the printer
position. If you have been using a different printer port
for the Downloader, than you don’t have to do anything.
Save is used to save all the data to a CSV file. CSV stands for Comma Separated V alue, and is the type of file
that most spreadsheet and database programs use to import information. When you press Save all the data will
be appended to the file DLOAD.CSV in the current directory . This means that if the file does not exist, it will be
created and if it does exist the new information will be added to the end of the existing file. If you always want a
new file, instead of adding to the old one, then start the Downloader with the command DLOADER (as in,
DLOAD Erase). This batch file that erased DLOAD.CSV before starting so that you always have a fresh file.
Quit will take you back to the main menu.
Quick Guide
1. Plug the Memory Converter into the scale and the Downloader Module into the Memory Converter.
2. Operate the scale normally , making sure to press PRINT whenever you want the Downloader to store
data.
3. Remove only the Downloader Module when you
are finished weighing.
4. Plug the Interface Cable into your computer’s
parallel (printer) port and attach the Downloader
Module to the Interface Cable.
5. Start the Downloader program by typing
DLOAD. (Use DLOADER if you want to save
only new data to your file.)
6. Follow the onscreen instructions to Display ,
Save, or Print your data.
7. Clear the Downloader Module when you have
finished so that more data can be stored into it.
5
Page 6

T rouble Shooting
The Downloader has been tested with all computers from a base XT to a Pentium. Most problems are caused
by not knowing which parallel port you are using and by attempting to read an empty module.
Problem: Downloader Module Not Found.
Make sure that all connections are tight.
Make sure that you have plugged ONL Y the Downloader Module into the Adapter Cable. Start the pro-
gram by typing DLOAD LPT2, and DLOAD LPT3 to see if you are in a different parallel port than LPT1.
Some computers have their ports swapped.
Problem: Downloader Module Garbled.
Clear the Downloader Module and attempt to store new data in it.
Problem: Downloader Module is empty .
Make sure that the Downloader Module AND the Memory Converter are plugged into the scale.
Make sure that the scale is configured for one line print.
Scale Setup
In order for the scale to store data in the Downloader Module, you must make certain that the scale is configured properly . Follow these instructions carefully , since changing any calibration parameters will make the scale
read improperly .
Press and hold the scale’s NET/GROSS key , and the ON key . This will place the scale in the Calibration
Mode.
Now press the ON key until the display reads “PRESS NET/GROSS FOR CALIBRA TION - T ARE FOR
SETUP - ON TO EXIT”
Now press the T ARE key and then press the ON key until the display reads “T AREAP”. This is T are Auto
Print and must be on so that the scale will store data in the Downloader Module each time you press the
T ARE key on the scale. Press the NET/GROSS key if the display does not read “ON”.
Now press the ON key again and the display will read “1LPRT”. This tells the scale to print all
information on one line and must be set ON for the Memory Converter to work. If the option is not ON press
NET/GROSS until the scale displays “ON”.
Now press the OFF key to exit the calibration mode.
NOTICE: Downloader will only work with EZ Series Indicators with help messages programmed in
English.
6
Page 7

Memory Converter Protocol
1200 Baud RS232, +/- 8 VDC. Pin2 Data, Pin6 Signal Ground.
1 Start bit
7 Data bits
1 Even Parity (ignored)
1 Stop bit
Digi-Star Single line format, each line terminated with a carriage return (0X0D) and a line feed (0X0A).
7
 Loading...