

Page 1

EN
ESP
FR
DOC100270391
PT
Please read these instructions before operating the product
Lea estas instrucciones antes de utilizar el producto
Bien lire ces instructions avant d’utiliser le produit
Leia estas instruções antes de operar o produto
www.De WALT.com
DW089LR, DW089LG: 3 x 360° Line Laser
DW0811LR, DW0811LG: 2 x 360° Line Laser
DW089LR, DW089LG: 3 x láser de línea de 360°
DW0811LR, DW0811LG: 2 x láser de línea de 360°
DW089LR, DW089LG : Laser à ligne 3 x 360°
DW0811LR, DW0811LG : Laser à ligne 2 x 360°
DW089LR, DW089LG: Três Lasers de Linha de 360°
DW0811LR, DW0811LG: Dois Lasers de
Linha de 360°
Page 2

2
3
Quick Start Guide / Guía de inicio rápido / Guide de démarrage rapide /
Guia de Início Rápido
180°
OR
1A
1B
1C
2
1D
3
4
5
7
8
b
90°-90°
8
6A
6B
A
A
B
C
DDE
F
F
J
G
E
H
I
K
M
L
N
Page 3

4
5
Quick Start Guide / Guía de inicio rápido / Guide de démarrage rapide /
Guia de Início Rápido
33’ (10m)
18’
(5m)
10
Notes / Notas / Remarques / Observações
Page 4

6 7
User Manual
EN
User Safety
Definitions: Safety Guidelines
The definitions below describe the level of severity for each
signal word. Please read the manual and pay attention to these
symbols.
DANGER: Indicates an imminently hazardous situation
which, if not avoided, will result in death or serious injury.
WARNING: Indicates a potentially hazardous situation
which, if not avoided, could result in death or serious
injury.
CAUTION: Indicates a potentially hazardous situation
which, if not avoided, may result in minor or moderate
injury.
NOTICE: Indicates a practice not related to personal injury which,
if not avoided, may result in property damage.
If you have any questions or comments about this or any dewalt
tool, call 1-800-4-DeWALT (1-800-433-9258)
or go to www.dewalt.com on the Internet.
WARNING:
Read and understand all instructions. Failure to follow
the warnings and instructions may result in electric shock,
fire and/or serious injury.
SAVE THESE INSTRUCTIONS
WARNING:
Laser Radiation Exposure. Do not disassemble or
modify the laser level. There are no user serviceable
parts inside. Serious eye injury could result.
Contents
• Safety
• Product Overview
• Batteries and Power
• Operation
• Accuracy Check and Calibration
• Specifications
WARNING:
Hazardous Radiation. Use of controls or
adjustments or performance of procedures other than
those specified herein may result in hazardous
radiation exposure.
The label on your tool may include the following symbols.
V volts
mW milliwatts
laser warning symbol
nm wavelength in nanometers
2 Class 2 Laser
Warning Labels
For your convenience and safety, the following labels are on
your laser.
WARNING: To reduce the risk of injury, user must
read instruction manual.
WARNING: LASER RADIATION. DO NOT STARE
INTO BEAM. Class 2 Laser Product
5002595
≤1.5mW @ 630-680nm
IEC 60825-1: 2014
Laser Artwork
5002595
5002595
≤1.5mW @ 510-530nm
IEC 60825-1: 2014
≤1.5mW @ 630-680nm
IEC 60825-1: 2014
≤1.5mW @ 630-680nm
IEC 60825-1: 2014
5002595
Visual Result
≤1.5mW @ 630-680nm
IEC 60825-1: 2014
≤1.5mW @ 510-530nm
IEC 60825-1: 2014
5002595
5002595
• Do not operate the laser in explosive atmospheres, such
as in the presence of flammable liquids, gases, or dust.
Power tools create sparks which may ignite the dust or fumes.
• Use the laser only with the specifically designated
batteries. Use of any other batteries may create a risk of fire.
• Store idle laser out of reach of children and other
untrained persons. Lasers are dangerous in the hands of
untrained users.
• Use only accessories that are recommended by the
manufacturer for your model. Accessories that may be
suitable for one laser, may create a risk of injury when used on
another laser.
• Tool service must be performed only by qualified repair
personnel. Service or maintenance performed by unqualified
personnel may result in injury. To locate your nearest DeWALT
service center call 1-800-4-DeWALT (1-800-433-9258) or go to
www.dewalt.com on the Internet.
• Do not use optical tools such as a telescope or transit to
view the laser beam. Serious eye injury could result.
• Do not place the laser in a position which may cause
anyone to intentionally or unintentionally stare into the
laser beam. Serious eye injury could result.
• Do not position the laser near a reflective surface which
may reflect the laser beam toward anyone’s eyes. Serious
eye injury could result.
• Turn the laser off when it is not in use. Leaving the laser on
increases the risk of staring into the laser beam.
• Do not modify the laser in any way. Modifying the tool may
result in hazardous laser radiation exposure.
• Do not operate the laser around children or allow children
to operate the laser. Serious eye injury may result.
• Do not remove or deface warning labels. If labels are
removed user or others may inadvertently expose themselves
to radiation.
• Position the laser securely on a level surface. Damage to
the laser or serious injury could result if the laser falls
Laser Information
• The DW089LR, DW089LG 3-Beam 360° Line Laser and
the DW0811LR, DW0811LG 2-Beam 360° Line Laser are
Class 2 laser products. The lasers are self-leveling laser
tools that can be used for horizontal (level) and vertical
(plumb) alignment projects.
This product complies with 21 CFR 1040.10 and 1040.11 except for deviations pursuant
to laser Notice 50, dated June 24, 2007.
Conforms to UL STDS 61010-1 & 2595
Certified to CSA STD C22.2 No. 61010-1
WARNING:
Read and understand all instructions. Failure to follow
all instructions listed below may result in electric shock, fire
and/or serious personal injury.
Work Area
• Keep your work area clean and well lit. Cluttered benches and
dark areas invite accidents.
• Do not operate laser tools in explosive atmospheres, such as in
the presence of flammable liquids, gases, or dust.
• Keep children and bystanders away while operating a laser tool.
Distractions can cause you to lose control.
Electrical Safety
• Use battery operated tool only with the specifically
designed batteries. Use of any other batteries may create a
risk of fire.
Product Overview
WARNING:
Never modify the tool or any part of it. Damage to the
laser or personal injury could result.
Figure 2 - Battery Interface
A
Figure 1A - Pendulum Lock
B
Figure 1B - Keypad
C
Figure 1B - ON/OFF button: horizontal laser line
D
Figure 1B - ON/OFF button: side laser line
E
Figure 1B - ON/OFF button: front vertical laser line
(DCE089R/G only)
F
Figure 2 - Magnetic pivot bracket
G
Figure 4 - Tripod thread fitting (1/4 - 20 & 5/8 -11)
I
Figure 1B - Battery level indicator
J
Figure 5 - Ceiling Mount Clamp
K
Figure 5 - Ceiling Mount
L
Figure 5 - Screw Hole
M
Page 5

8 9
User Manual
EN
Batteries and Power
• This tool is powered by the following DeWALT 12V Battery packs:
DCB120, DCB127 or may also be powered using the DEWALT
AA Starter pack which can carry 4 x AA batteries. Note: The AA
starter pack is recommended only for use with the red laser.
Battery Installation / Removal
Using the AA Starter Pack:
CAUTION:
The AA starter pack is designed specifically for use only
with the DeWALT 12V compatible laser products and
cannot be used with any other tools Do not attempty to
modify the product.
To install batteries:
• Lift up the battery compartment cover as shown in
Figure 6A.
• Insert four fresh AA batteries in the compartment, placing
the batteries according to (+) and (–) on the inside of the
compartment.
• Install the AA starter Battery pack as shown in Figure 6B.
Using the 12V DEWALT Rechargeable Pack:
• Install the 12V Battery pack as shown in
Figure 6B.
WARNING:
Batteries can explode, or leak, and can cause
injury or fire. To reduce this risk:
• Carefully follow all instructions and warnings on the battery label
and package and accompanying Battery Safety Leaflet.
• Always insert batteries correctly with regard to polarity (+ and –),
marked on the battery and the equipment.
• Do not short battery terminals.
• Do not charge disposable batteries.
• Do not mix old and new batteries. Replace all of them at the same
time with new batteries of the same brand and type.
• Remove dead batteries immediately and dispose of per local
codes.
• Do not dispose of batteries in fire.
• Keep batteries out of reach of children.
• Remove batteries when the device is not in use
• Use only the charger specified for your rechargeable battery pack.
Personal Safety
• Stay alert, watch what you are doing and use common sense
when operating a laser tool. Do not use tool while tired or under
the influence of drugs, alcohol, or medication. A moment of
inattention while operating power tools may result in serious
personal injury.
• Use personal protective equipment. Always wear eye protection.
Protective equipment such as dust mask, non-skid safety shoes,
hard hat, or hearing protection used for appropriate conditions
will reduce personal injuries.
Tool Use and Care
• Do not use tool if switch does not turn it on or off. Any tool that
cannot be controlled with the switch is dangerous and must be
repaired.
• Store idle laser tools out of the reach of children and do not
allow persons unfamiliar with the tool or these instructions to
operate the tool. Laser tools may be dangerous in the hands of
untrained users..
• Use only accessories that are recommended by the manufacturer
for your model. Accessories that may be suitable for one tool,
may become hazardous when used on another tool.
Service
• Tool service must be performed only by qualified repair personnel.
Service or maintenance performed by unqualified personnel could
result in a risk of injury.
• When servicing a tool, use only identical replacement parts.
Follow instructions in the Maintenance section of this manual.
Use of unauthorized parts or failure to follow Maintenance
Instructions may create a risk of electric shock or injury.
To locate your nearest DeWALT ser vice center call
1-800-4-DeWALT (1-800-433-9258) go to
http://www.dewalt.com on the Internet.
Operating Tips
• Use only new, high-quality, name brand AA batteries or specified
rechargeable DEWALT12V Li-Ion pack for best results.
• Ensure batteries are in good working condition. If the low battery
red indicator light is flashing, the batteries need replacement.
• To extend battery life, turn laser off when not working with or
marking the beam.
• To ensure the accuracy of your work, check to make sure your
laser is calibrated often. See Field Calibration Check.
• Before attempting to use the laser, make sure it is positioned
securely, on a smooth, flat surface.
• Always mark the center of the beam created by the laser.
• Extreme temperature changes may cause movement of internal
parts that can affect accuracy. Check your accuracy often while
working. See Field Calibration Check.
• If the laser has been dropped, check to make sure your laser is
still calibrated. See Field Calibration Check.
Low Battery Indication
The DW089LR, DW089LG, DW0811LR, DW0811LG lasers
are equipped with a battery gauge as shown in Figure 1B.
The battery gauge indicates remaining power with each LED
representing 25%. The bottom LED will illuminate and blink
indicating that the level is low (below 12.5%) and the batteries
need to be replaced. The laser may continue to operate for
a short time while the batteries continue to drain, but the
beam(s) will quickly dim. After fresh batteries are installed
and the laser is turned on again, the laser beam(s) will return
to full brightness and the battery indicator level will indicate
full capacity. (A flashing laser beam is not caused by low
batteries; see Out of Tilt Range Indicator.) If all 4 LED’s on the
battery meter LED’s continuously flash this does not indicate
a low battery; see “The Battery Meter LED’s Flash” under
Troubleshooting.
Operation
To Turn the Lasers On and Off
(See Figure 1)
With the laser off, place it on a flat surface. Slide the Pendulum
Lock switch B to the Unlocked/ON position. The DCE089G/R
model has three ON/OFF buttons on the keypad C one for a
horizontal laser line D, one for a side vertical laser line E and
one for a front vertical laser line F (DCE089G/R only). The
DCE0811G /R has two lines -a horizontal line and side vertical
line. Each laser line is powered on by pressing its
ON/OFF button on the keypad. The laser lines can be powered
one at a time or all at the same time. Pressing the ON/OFF keys
again turns the laser lines off. Slide the Pendulum Lock switch
to the OFF/Locked position when the laser is not in use. If the
pendulum lock switch is not placed in the lock position all
4 LED’s will continuously flash on the Battery Meter.
Using the Lasers
Out of LEVEL Range Indicator
The lasers are designed to self-level. If the laser has been tilted
so much that it cannot self-level ( > 4° ), the laser beam will
flash. There are two flashing sequences associated with the
out of level condition: (i) between 4° and 10° the beams flash
with a constant blink cycle; (ii) at angles greater than 10° the
beams flash with a three blink cycle. When the beams flash
THE LASER IS NOT LEVEL (OR PLUMB) AND SHOULD NOT BE
USED FOR DETERMINING OR MARKING LEVEL OR PLUMB.
Try repositioning the laser on a more level surface.
Using the Pivot Bracket (See figure 2)
WARNING:
Position the laser and/or wall mount on a stable surface.
Serious personal injury or damage to the laser may result
if the laser falls.:
The laser has a magnetic pivot bracket G permanently attached
to the unit. This bracket allows the unit to be mounted to any
upright surface made of steel or iron. Common examples of
suitable surfaces include steel framing studs, steel door frames
and structural steel beams. The bracket also has a keyhole slot
H
allowing the unit to be hung from a nail or screw on any
kind of surface.
Using the Laser with the CEILING Mount
(See Figure 5 )
The laser ceiling mount L (if included) offers more mounting
options for the laser. The ceiling mount has a clamp K at one end
which can be fixed to a wall angle for acoustic ceiling installation.
At each end of the ceiling mount is a screw hole M, allowing the
ceiling mount to be attached to any surface with a nail or screw.
Page 6

10 11
User Manual
EN
Once the ceiling mount is secured, its steel plate provides a
surface to which the magnetic pivot bracket G can be attached.
The position of the laser can then be fine-tuned by sliding the
magnetic pivot bracket up or down on the wall mount.
Using the Lasers with Accessories
The lasers are equipped with 1/4” - 20 and 5/8” - 11
female threads on the bottom of the unit. This thread is to
accommodate current or future DeWALT accessories. Only use
DeWALT accessories specified for use with this product. Follow
the directions included with the accessory.
CAUTION:
The use of any other accessory not recommended for use
with this tool could be hazardous.
If you need any assistance in locating any accessory, please
contact your nearest DeWALT service center or go to
www.dewalt.com on the Internet.
Leveling the Lasers
As long as the laser is properly calibrated, the laser is selfleveling. Each laser is calibrated at the factory to find level as
long as it is positioned on a flat surface within average ± 4° of
level. No manual adjustments are required.
Maintenance
• To maintain the accuracy of your work, check the laser often to
make sure it is properly calibrated. See Field Calibration Check.
• Calibration checks and other maintenance repairs may be
performed by DeWALT service centers.
• When not in use, store the laser in the kit box provided. Do not
store your laser at temperatures below -5˚F (-20˚C ) or above
140˚F (60˚C).
• Do not store your laser in the kit box if the laser is wet. The laser
should be dried first with a soft dry cloth prior to storage.
Cleaning
Exterior plastic parts may be cleaned with a damp cloth.
Although these parts are solvent resistant, NEVER use solvents.
Use a soft, dry cloth to remove moisture from the tool before
storage.
Accuracy Check and Calibration
Checking Accuracy –
Horizontal Beam, Scan Direction (See figure 7)
Checking the horizontal scan calibration of the laser requires
two walls 9m (30’) apart. It is important to conduct a calibration
check using a distance no shorter than the distance of the
applications for which the tool will be used.
1. Attach the laser to a wall using its pivot bracket, with the
laser facing straight ahead toward the opposing wall (0 degree
position).
2. Turn on the laser’s horizontal beam and front vertical beam and
mark the beam position on the opposing wall directly across from
the laser. Always mark the center of the beam’s thickness.
3. Pivot the laser 180 degrees and mark the beam position on the
opposing wall.
4. Measure the vertical distance between the lowest mark Aand
the highest mark B. If the measurement is greater than the
values shown below, the laser must be serviced at an authorized
service center.
Distance Between Walls Allowable Distance
Between Marks
30’ (9m) 1/8” (3.0mm)
40’ (12m) 5/32” (4.0mm)
50’ (15m) 7/32” (5.0mm)
Checking Accuracy –
Horizontal Beam, Pitch Direction (See figure 8)
Checking the horizontal pitch calibration of the laser requires a
single wall at least 30’ (9m) long. It is important to conduct a
calibration check using a distance no shorter than the distance
of the applications for which the tool will be used.
1. Attach the laser to one end of a wall using its pivot bracket.
2. Turn on the laser’s horizontal beam and pivot the laser toward
the opposite end of the wall and approximately parallel to the
adjacent wall.
3. Mark the center of the beam at two locations (c, d) at least
30’ (9m) apart.
4. Reposition the laser to the opposite end of the wall.
5. Turn on the laser’s horizontal beam and pivot the laser back
toward the first end of the wall and approximately parallel to
the adjacent wall.
6. Adjust the height of the laser so that the center of the beam is
aligned with the nearest mark d.
7. Mark the center of the beam e directly above or below the
farthest mark c.
8. Measure the distance between these two marks
(c, e). If the measurement is greater than the values shown
below, the laser must be serviced at an authorized service
center.
Distance Between Walls Allowable Distance
Between Marks
30’ (9m) 1/4” (6.0mm)
40’ (12m) 5/16” (8.0mm)
50’ (15m) 13/32” (10.0mm)
Checking Accuracy –
Vertical Beam (See Figure 9)
Checking the vertical (plumb) calibration of the laser can be
most accurately done when there is a substantial amount of
vertical height available, ideally 30’ (9m), with one person on
the floor positioning the laser and another person near a ceiling
to mark the position of the beam. It is important to conduct a
calibration check using a distance no shorter than the distance
of the applications for which the tool will be used.
1. Place the laser on the floor and turn on both vertical beams.
2. Mark two positions where the beams cross on the floor
(f, g) and also on the ceiling h. Always mark the center of
the beams’ thickness.
3. Rotate the laser 180 degrees, and reposition it close to the
second mark gso the beam crossing is exactly on the original
marks (f, g) on the floor.
4. Mark the position where the beams cross on the
ceiling j.
5. Measure the distance between the two ceiling marks
(h, j). If the measurement is greater than the values shown
below, the laser must be serviced at an authorized service
center.
Ceiling Height Allowable Distance
Between Marks
8’ (2.5m) 1/16” (1.5mm)
10’ (3m) 3/32” (2.0mm)
14’ (4m) 1/8” (2.5mm)
20’ (6m) 5/32’ (4m)
30’ (9m) 1/4’ (6m)
Checking 90º Accuracy Between Vertical Beams (DW089LR/G)
(See Figure 10)
Checking 90º accuracy requires an open floor area at least 33’ x
18’ (10m x 5m). Refer to Figure 9 for the position of the laser at
each step and for the location of the marks made at each step.
Always mark the center of the beams’ thickness.
1. Set up the laser in one corner of the floor and turn on the side
vertical beam.
2. Mark the center of the beam at three locations
(a, b, c)on the floor along the side laser line. Mark b
should be at the midpoint of the laser line.
3. Move the laser to mark b and turn on both vertical beams.
4. Position the beam crossing precisely at mark b, with the side
beam aligned with mark c.
5. Mark a location d along the front vertical beam at least 5m (18’)
away from the unit.
6. Rotate the laser cross over mark b so that the side vertical beam
now passes through mark b, d.
7. Mark the location e where the side vertical beam passes by
mark d.
8. Measure the distance between marks d and e. If the
measurement is greater than the values shown below, the laser
must be serviced at an authorized service center.
Page 7

12 13
User Manual
EN
Distance from A to B Allowable Distance
Between Marks
14’ (4m) 5/32” (3.5mm)
17’ (5m) 3/16” (4.5mm)
20’ (6m) 7/32” (5.5mm)
23’ (7m) 1/4’ (6m)
Troubleshooting
The Laser Does Not Turn On
• Make sure AA batteries (when used) are installed correctly
according to (+) and (–) on the inside of the battery door.
• Make sure the batteries or rechargeable pack are in proper
working condition. If in doubt, try installing new batteries.
• Make sure that the battery contacts are clean and free of rust
or corrosion. Be sure to keep the laser level dry and use only
new, high-quality, name brand batteries to reduce the chance of
battery leakage.
• If the laser unit is heated above 120˚F (50˚C), the unit will not turn
on. If the laser has been stored in extremely hot temperatures,
allow it to cool. The laser level will not be damaged by pressing
the on/off button before cooling to its proper operating
temperature.
The Laser Beams Flash
The lasers are designed to self-level up to an average of 4°
in all directions If the laser is tilted so much that the internal
mechanism cannot level itself, the laser beams will flash
indicating that the tilt range has been exceeded. THE FLASHING
BEAMS CREATED BY THE LASER ARE NOT LEVEL OR PLUMB
AND SHOULD NOT BE USED FOR DETERMINING OR MARKING
LEVEL OR PLUMB. Try repositioning the laser on a more level
surface.
The Laser Beams Will Not Stop Moving
The laser is a precision instrument. Therefore, if it is not
positioned on a stable (and motionless) surface, the laser will
continue to try to find level. If the beam will not stop moving,
try placing the laser on a more stable surface. Also, try to make
sure that the surface is relatively flat, so that the laser is stable.
The Battery Meter Led’s Flash
When all 4 LED’s continuously flash on the Battery Meter this
indicates that the unit has not been fully powered off using the
Pendulum Lock switch B. The Pendulum Lock switch should
always be placed in the LOCKED/OFF position when the laser
is not in use.
Accessories
WARNING:
Since accessories, other than those offered by DeWalt,
have not been tested with this product, use of such
accessories with this tool could be hazardous. To reduce
the risk of injury, only DeWalt recommended accessories
should be used with this product.
Using the Laser with Accessories
(See Figure 2), inset)
The laser is equipped with both 1/4 - 20 and 5/8 - 11 female
threads (I) on the bottom of the unit. This thread is to
accommodate current or future DeWALT accessories. Only use
DeWALT accessories specified for use with this product. Follow
the directions included with the accessory.
Recommended accessories for use with your tool are available
at extra cost from your local dealer or authorized service center.
If you need assistance in locating any accessory, please visit our
website: www.dewalt.com.
Service and Repairs
• Note: Disassembling the laser level(s) will void all warranties
on the product.
To assure product SAFETY and RELIABILITY, repairs,
maintenance and adjustment should be performed by authorized
service centers. Service or maintenance performed by
unqualified personnel may result in a risk of injury. To locate
your nearest DeWALT service center call 1-800-4-DeWALT
(1-800-433-9258) or go to www.dewalt.com on the Internet.
Three Year Limited Warranty
DeWalt will repair, without charge, any defects due to faulty
materials or workmanship for three years from the date of
purchase. This warranty does not cover part failure due to normal
wear or tool abuse. For further detail of warranty coverage
and warranty repair information, visit www.dewalt.com or call
1-800-4-DeWALT (1-800-433-9258). This warranty does not
apply to accessories or damage caused where repairs have been
made or attempted by others. This warranty gives you specific
legal rights and you may have other rights which vary in certain
states or provinces.
In addition to the warranty, DeWALT tools are covered by our:
1 Year Free Service
DeWalt will maintain the tool and replace worn parts caused
by normal use, at no cost, any time during the first year after
purchase.
90 DAY money back GUARANTEE
If you are not completely satisfied with the performance of your
DeWalt Laser for any reason, you can return it within 90 days
from the date of purchase with a receipt for a full refund – no
questions asked.
Reconditioned Product:
Reconditioned product is covered under the 1 Year Free Service
Warranty. The 90 Day Money Back Guarantee and the Three Year
Limited Warranty do not apply to reconditioned product.
Free Warning Label Replacement:
If your warning labels become illegible or are missing, call
1-800-4-DeWALT or visit your local service center for a free
replacement.
Notes
Page 8

14 15
User Manual
EN
Specifications
Laser Tool
Light Source Laser diodes
Laser Wavelength 620 – 690nm visible (RED) 510 – 530nm visible (GREEN)
Laser Power ≤1.50mW (each beam) CLASS 2 LASER PRODUCT
Working Range 20m (±65’) RED 35m (±115’) GREEN
50m with detector 60m with detector
Accuracy (plumb) ±1/8” per 30’ (±3mm per 9m)
Accuracy (Level): ± 1/8” per 30’ (±3mm per 9m)
Indicators
Battery Low 1 x LED Flashing on Battery meter
Unit Not Powered Off With Pendulum
Lock Switch
4 x LED Flashing on Battery meter
Flashing Laser Beams Tilt range exceeded/unit is not level
Power Source 4 AA (1.5V) size batteries (6V DC) or 12V Dewalt Battery Pack
Operating Temperature 14°F to 122°F (-10°C to 50°C)
Storage Temperature -5°F to 140°F (-20°C to 60°C)
Humidity Maximum relative humidity 80% for temperatures up to 88°F (31°C) decreasing
linearly to 50% relative humidity at 104°F (40°C)
Environmental Water & Dust Resistant to IP65
Notes
Page 9

Manual del Usuario
16 17
ESP
Seguridad del usuario
Definiciones: Lineamientos de seguridad
Las siguientes definiciones describen el nivel de gravedad
de cada advertencia. Lea el manual y preste atención a estos
símbolos.
PELIGRO: Indica una situación inminentemente peligrosa
que, si no se evita, resultará en la muerte o lesiones
serias.
ADVERTENCIA: Indica una situación potencialmente
peligrosa que, si no se evita, podría resultar en la muerte
o lesiones graves.
ATENCIÓN: Indica una situación potencialmente
peligrosa que, si no se evita, puede resultar en lesiones
menores o moderadas.
AVISO: Indica una práctica no relacionada con lesiones personales
que, si no se evita, puede resultar en daños a los bienes.
Si tiene alguna pregunta o comentario sobre esta u otra
herramienta de Dewalt, llame al 1-800-4-DeWALT
(1-800-433-9258) o visite www.dewalt.com en Internet.
ADVERTENCIA:
Lea y comprenda todas las instrucciones.
El incumplimiento de las advertencias e instrucciones puede
provocar descargas eléctricas, incendios o lesiones graves.
GUARDE ESTAS INSTRUCCIONES
ADVERTENCIA:
Exposición a radiación láser. No desensamble ni
modifique el nivel láser. Este aparato no incluye
piezas internas que puedan ser reparadas por el
usuario. Podrían producirse lesiones graves a la
visión.
Contenido
• Seguridad
• Descripción del producto
• Baterías y energía
• Funcionamiento
• Comprobación de precisión y calibración
• Especificaciones
ADVERTENCIA:
Radiación peligrosa. El uso de controles, ajustes o
ejecución de los procedimientos, distintos a los indicados
en la presente podrán provocar una exposición peligrosa
a la radiación.
La etiqueta de su herramienta puede incluir los siguientes símbolos.
V voltios
mW milivatios
símbolo de advertencia del láser
nm longitud de onda en nanómetros
2 Producto láser de Clase 2
Etiquetas de advertencia
Para su comodidad y seguridad, se incluyen las etiquetas
siguientes en su láser.
ADVERTENCIA: Para reducir el riesgo de lesiones,
el usuario debe leer el manual de instrucciones.
ADVERTENCIA: RADIACIÓN LÁSER. NO MIRE
FIJO EL RAYO. Producto láser Clase 2
5002595
≤1.5mW @ 630-680nm
IEC 60825-1: 2014
Laser Artwork
5002595
5002595
≤1.5mW @ 510-530nm
IEC 60825-1: 2014
≤1.5mW @ 630-680nm
IEC 60825-1: 2014
≤1.5mW @ 630-680nm
IEC 60825-1: 2014
5002595
Visual Result
≤1.5mW @ 630-680nm
IEC 60825-1: 2014
≤1.5mW @ 510-530nm
IEC 60825-1: 2014
5002595
5002595
• No haga funcionar el láser en atmósferas explosivas,
como ambientes donde haya polvo, gases o líquidos
inflamables. Las herramientas eléctricas generan chispas que
pueden combustionar el polvo o generar un incendio.
• Use el láser solamente con las baterías específicamente
designadas. El uso de cualquier otra batería puede generar un
riesgo de incendio.
• Almacene el láser apagado fuera del alcance de los
niños y demás personas no capacitadas. El láser puede ser
peligroso en las manos de usuarios no capacitados.
• Use únicamente los accesorios recomendados para su
modelo por el fabricante. Los accesorios que pueden ser
adecuados para un láser pueden generar un riesgo de lesión
cuando se usan en otro.
• Las tareas de servicio deben ser realizadas solamente
por personal calificado de reparación. El servicio o
mantenimiento realizado por personal no calificado puede
resultar en lesiones. Para ubicar el centro de servicio DeWALT
más cercano llame al 1-800-4-DeWALT (1-800-433-9258) o visite
http://www.dewalt.com en Internet.
• No utilice herramientas ópticas, tales como un telescopio
o un teodolito, para ver el rayo láser. Podrían producirse
lesiones graves a la visión.
• No coloque el láser en una posición que pueda causar
que una persona mire fijamente el rayo láser de forma
intencional o accidental. Podrían producirse lesiones graves
a la visión.
• No coloque el láser cerca de una superficie reflectiva que
pueda reflejar el rayo láser hacia los ojos de una persona.
Podrían producirse lesiones graves a la visión.
• Apague el láser cuando no está en uso. Al dejar el láser
encendido aumenta el riesgo de mirar fijamente hacia el rayo láser.
• No modifique el láser de ninguna forma. Modificar la
herramienta puede resultar en exposición peligrosa a la
radiación láser.
• No opere el láser cerca de niños ni permita que estos lo
usen. Pueden producirse lesiones oculares graves.
• No extraiga ni deteriore las etiquetas de advertencia.
Si las etiquetas se retiran, el usuario u otras personas pueden
quedar accidentalmente expuestos a la radiación.
• Coloque el láser en una superficie estable de forma segura.
Podría producirse daño al láser o lesiones graves si el láser se cae.
Información sobre el láser
• El láser de línea de 360° de 3 rayos DW089LR, DW089LG
y el láser de línea de 360° de 2 rayos DW0811LR,
DW0811LG es un producto láser de Clase 2. Los láseres
son herramientas láser de autonivelación que pueden
usarse para proyectos de alineación horizontal (nivel) y
vertical (plomada).
Cumple con el Título 21 del CFR, Partes 1040.10 y 1040.11, con excepción de las
desviaciones en virtud del Aviso sobre Láser N.° 50, de fecha 24 de junio de 2007.
Cumple con UL STDS 61010-1
Con certificación CSA STD C22.2 No. 61010-1
ADVERTENCIA:
Lea y comprenda todas las instrucciones. Si no sigue
todas las instrucciones siguientes, podrían provocarse
descargas eléctricas, iniciarse un incendio y/o causarse
lesiones graves.
Área de trabajo
• Mantenga su área de trabajo limpia y bien iluminada. Los bancos
desordenados y las áreas oscuras propician accidentes.
• No opere las herramientas láser en atmósferas explosivas, como
ambientes donde haya polvo, gases o líquidos inflamables.
• Mantenga alejados a los niños y a los espectadores de la
herramienta láser en funcionamiento. Una distracción puede
hacerle perder el control.
Seguridad eléctrica
• Use la herramienta accionada por batería solo con las
baterías específicamente designadas. El uso de cualquier
otra batería puede generar un riesgo de incendio.
Descripción del producto
ADVERTENCIA:
Nunca modifique la herramienta ni ninguna pieza de ella.
Podría producirse daño al láser o lesiones personales.
Figura 2: Interfaz de la batería
A
Figura 1A: Bloqueo del péndulo
B
Figura 1B: Teclado
C
Figura 1B: Botón de ENCENDIDO/APAGADO: línea láser
horizontal
D
Figura 1B: Botón de ENCENDIDO/APAGADO: línea láser
lateral
E
Figura 1B: Botón de ENCENDIDO/APAGADO: línea láser
vertical delantera (solo DCE089R/G)
F
Figura 2: Soporte de pivote magnético
G
Figura 4: Accesorio roscado para el trípode
(1/4 - 20 y 5/8-11)
I
Figura 1B: Indicador de nivel de la batería
J
Figura 5: Abrazadera de montaje para techo
K
Figura 5: Montaje para techo
L
Figura 5: Orificio del tornillo
M
Page 10

Manual del Usuario
18 19
ESP
Baterías y energía
• Esta herramienta es alimentada con los siguientes paquetes de
baterías de 12 V de DeWALT: DCB120, DCB127 o también puede
alimentarse con el paquete inicial AA de DEWALT que puede
alojar 4 baterías AA. Nota: El paquete inicial AA se recomienda
solo para usar con el láser rojo.
Instalación/extracción de la batería
Uso del paquete inicial AA:
ATENCIÓN:
El paquete inicial AA está diseñado específicamente
para usar solo con productos láser compatibles de 12 V
DeWALT y no puede usarse con otras herramientas.
No intente modificar el producto.
Para instalar las baterías:
• Levante la cubierta del compartimiento de baterías como
se muestra en la Figura 6A.
• Inserte cuatro baterías AA nuevas en el compartimiento,
colocando las baterías de acuerdo con (+) y (-) en el
interior del compartimiento.
• Instale el paquete inicial de baterías AA como se muestra
en la Figura 6B.
Usando el paquete recargable de 12 V
DEWALT:
• Instale el paquete de baterías de 12 V como se muestra
en la Figura 6B.
ADVERTENCIA:
Las baterías pueden explotar o tener fugas y pueden
causar lesiones o incendios. Para reducir este riesgo:
• Siga atentamente todas las instrucciones y advertencias en
la etiqueta y el paquete de la batería y el folleto adjunto de
seguridad de la batería.
• Siempre inserte las baterías correctamente con respecto a la
polaridad (+ y -), según la marca en la batería y el equipo.
• No coloque los terminales de la batería en cortocircuito.
• No cargue las baterías desechables.
• No mezcle baterías viejas y nuevas. Reemplace todas las baterías
al mismo tiempo por baterías nuevas de la misma marca y tipo.
• Quite las baterías muertas de inmediato y deseche de acuerdo
con los códigos locales.
• No deseche las baterías en el fuego.
• Mantenga las baterías alejadas del alcance de los niños.
• Quite las baterías cuando no utiliza el dispositivo.
• Use solo el cargador especificado con su paquete de baterías
recargables.
Seguridad personal
• Permanezca alerta, controle lo que está haciendo y utilice el
sentido común cuando emplee una herramienta láser. No use la
herramienta cuando esté cansado o bajo la influencia de drogas,
alcohol o medicamentos. Un momento de descuido mientras
se opera una herramienta eléctrica puede provocar lesiones
personales graves.
• Utilice un equipo de protección personal. Utilice siempre
protección ocular. Los equipos de protección, tales como una
máscara antipolvo, zapatos de seguridad antideslizamiento, casco
o protector auditivo que se utilicen en condiciones apropiadas
disminuirán las lesiones físicas.
Uso y cuidado de la herramienta
• No use la herramienta si el interruptor no la enciende o
apaga. Las herramientas que no puedan ser controladas con el
interruptor constituyen un peligro y deben repararse.
• Guarde la herramienta láser que no esté en uso fuera del alcance
de los niños y no permita que otras personas no familiarizadas
con ella o con estas instrucciones operen la herramienta. Las
herramientas láser pueden ser peligrosas si son operadas por
usuarios que no tienen formación.
• Use únicamente los accesorios recomendados para su modelo
por el fabricante. Los accesorios que pueden ser adecuados para
una herramienta pueden ser peligrosos cuando se usan en otra
herramienta.
Servicio
• Las tareas de servicio deben ser realizadas solamente por
personal calificado de reparación. El servicio o mantenimiento
realizado por personal no calificado podría resultar en riesgo
de lesiones.
• Al realizar tareas de servicio en una herramienta, utilice
exclusivamente piezas de repuesto idénticas. Siga las
instrucciones en la sección de Mantenimiento de este manual.
El uso de piezas no autorizadas o la inobservancia de las
instrucciones de Mantenimiento pueden crear el riesgo de
descarga eléctrica o lesiones.
Para ubicar el centro de servicio DeWALT más cercano
llame al 1-800-4-DeWALT (1-800-433-9258) o visite
http://www.dewalt.com en Internet.
Sugerencias de funcionamiento
• Use solo baterías AA nuevas de marca, de alta calidad o el
paquete especificado recargable DEWALT de 12 V de iones de
litio para obtener mejores resultados.
• Verifique que las baterías estén en buenas condiciones. Si la luz
del indicador rojo de batería baja parpadea, debe reemplazar las
baterías.
• Para extender la duración de las baterías, apague el láser cuando
no trabaja o marca el rayo.
• Para asegurar la precisión de su trabajo, con frecuencia
compruebe que su láser esté calibrado. Vea Comprobación de
calibración en campo.
• Antes de intentar usar el láser, asegúrese de que esté colocado
firmemente en una superficie suave y plana.
• Siempre marque el centro del rayo creado por el láser.
• Los cambios extremos de temperatura pueden causar el
movimiento de partes internas que pueden afectar la precisión.
Compruebe la precisión con frecuencia al trabajar. Vea
Comprobación de calibración en campo.
• Si el láser se ha caído, compruebe que aún esté calibrado. Vea
Comprobación de calibración en campo.
Indicación de batería baja
Los láseres DW089LR, DW089LG, DW0811LR y DW0811LG
están equipados con un indicador de batería como se muestra
en la Figura 1B. El indicador de batería señala la potencia
restante, donde cada LED representa el 25 %. El LED inferior se
encenderá y parpadeará, indicando que el nivel es bajo (menos
de 12.5 %) y que deben reemplazarse las baterías. El láser
puede continuar operando por un tiempo breve hasta que
las baterías se agoten por completo, pero el rayo se apagará
rápidamente. Una vez que se colocan baterías nuevas y el
láser se enciende nuevamente, el rayo láser volverá a su brillo
completo y el nivel indicador de batería señalará la capacidad
completa. (Un rayo láser parpadeante no es causado por
baterías bajas; vea Indicador fuera del rango de inclinación).
Si los 4 LED en el LED del medidor de batería parpadean
continuamente, esto no indica una batería baja; vea “Los
LED del medidor de la batería parpadean” en Resolución de
problemas.
Funcionamiento
Para encender y apagar el láser
(Vea la Figura 1)
Con el láser apagado, colóquelo en una superficie plana.
Deslice el interruptor de bloqueo de péndulo B a la posición
de Desbloqueo/ENCENDIDO. El modelo DCE089G/R tiene
tres botones de ENCENDIDO/APAGADO en el teclado C uno
para una línea láser horizontal D, uno para una línea láser
vertical E y uno para una línea láser vertical delantera F
(solo DCE089G/R). El DCE0811G/R tiene dos líneas: una
línea horizontal y una línea vertical lateral. Cada línea láser se
enciende presionando el botón de ENCENDIDO/APAGADO en
el teclado. Las líneas láser pueden encenderse una a la vez o
todas al mismo tiempo. Al presionar las teclas de ENCENDIDO/
APAGADO nuevamente se apagan las líneas láser. Deslice el
interruptor de bloqueo del péndulo a la posición de APAGADO/
Bloqueo cuando el láser no está en uso. Si el interruptor de
bloqueo de péndulo no se coloca en la posición de bloqueo, los
4 LED parpadearán continuamente en el medidor de la batería.
Uso de los láseres
Indicador de RANGO fuera de NIVEL
Los láseres están diseñados para autonivelarse. Si el láser se
inclina en exceso de forma tal que no pueda autonivelarse (>4°),
el rayo láser parpadeará. Hay dos secuencias de parpadeo
asociadas con la condición fuera de nivel: (i) entre 4° y 10°,
los rayos parpadean con un ciclo de parpadeo constante; (ii)
en ángulos mayores de 10°, los rayos parpadean con un ciclo
de tres destellos. Cuando los rayos parpadean, EL LÁSER
NO ESTÁ A NIVEL (O PLOMADA) Y NO DEBE USARSE PARA
DETERMINAR O MARCAR EL NIVEL O PLOMADA. Intente
cambiar la posición del láser en una superficie más nivelada.
Uso del soporte de pivote (vea la figura 2)
ADVERTENCIA:
Coloque el láser y/o el montaje para pared en una
superficie estable. Pueden producirse lesiones personales
graves o daños al láser si el láser cae.
El láser posee un soporte de pivote magnético G conectado
de forma permanente a la unidad. Este soporte permite que
la unidad se monte en cualquier superficie vertical de acero o
hierro. Ejemplos comunes de superficies adecuadas incluyen
pernos para marcos de acero, marcos de puerta de acero y vigas
estructurales de acero. El soporte también tiene una ranura para
llave H que permite que la unidad se cuelgue de un clavo o
tornillo en cualquier tipo de superficie.
Uso del láser con el montaje para TECHO (Vea la Figura 5)
El montaje para techo del láser L (si se incluye) ofrece más
opciones de montaje para el láser. El montaje para techo tiene
una abrazadera K en un extremo que puede fijarse a un ángulo
de pared para la instalación de cielos rasos acústicos. En cada
extremo del montaje para techo hay un orificio para tornillos M
que permite que se coloque un montaje para techo a cualquier
superficie con un clavo o tornillo.
Page 11

Manual del Usuario
20 21
ESP
Una vez que se ha fijado el montaje para techo, su placa de
acero ofrece una superficie donde puede sujetarse el soporte
de pivote magnético G. La posición del láser luego puede
ajustarse deslizando el soporte de pivote magnético hacia arriba
o abajo en el montaje de pared.
Uso del láser con accesorios
Los láseres están equipados con roscas hembra de 1/4” - 20 y
5/8” - 11 en la parte inferior de la unidad. Esta rosca se incluye
para adaptarse a los accesorios actuales o futuros de DeWALT.
Solo use accesorios DeWALT especificados para usar con este
producto. Siga las instrucciones incluidas con el accesorio.
ATENCIÓN:
El uso de otros accesorios no recomendados para utilizar
con esta herramienta puede resultar peligroso.
Si necesita asistencia para ubicar un accesorio, contacte a su
centro de servicio DeWALT más cercano o visite www.dewalt.com
en Internet.
Nivelación del láser
Mientras el láser está correctamente calibrado, tendrá la
función de autonivelación. Cada láser está calibrado en fábrica
para encontrar nivel cuando se coloca en una superficie plana
dentro de un promedio de ±4° del nivel. No se requieren ajustes
manuales.
Mantenimiento
• Para mantener la precisión de su trabajo, con frecuencia
compruebe que su láser esté debidamente calibrado. Vea
Comprobación de calibración en campo.
• Las comprobaciones de calibración y otras reparaciones de
mantenimiento deben ser realizadas en los centros de servicios
DeWALT.
• Cuando no se utiliza, almacene el láser en la caja del kit provista.
No almacene su láser a temperaturas inferiores a -5 ˚F (-20 ˚C) ni
superiores a 140 ˚F (60 ˚C).
• No almacene su láser en la caja del kit si está mojado. El láser
debe secarse primero con un paño seco y suave antes del
almacenamiento.
Limpieza
Las partes externas de plástico deben limpiarse con un paño
húmedo. Aunque estas partes son resistentes a los solventes,
NUNCA use solventes. Use un paño suave y seco para quitar la
humedad de la herramienta antes del almacenamiento.
Comprobación de precisión
y calibración
Comprobación de la precisión:
Rayo horizontal, dirección de exploración (Vea la figura 7)
La comprobación de la calibración de exploración horizontal del
láser requiere dos paredes con una separación de 9 m (30’).
Es importante realizar una comprobación de calibración usando
una distancia no menor a la distancia de las aplicaciones para
las que se usará la herramienta.
1. Sujete el láser a la pared usando su soporte de pivote, con
el láser mirando derecho hacia la pared opuesta (posición de
0 grados).
2. Encienda el rayo horizontal del láser y el rayo vertical delantero
y marque la posición del rayo en la pared opuesta directamente
frente al láser. Siempre marque el centro del espesor del rayo.
3. Gire el láser 180 grados y marque la posición del rayo en la
pared opuesta.
4. Mida la distancia vertical entre la marca inferior A y la marca
superior B. Si la medición es mayor a los valores que se indican
a continuación, el láser debe ser reparado en un centro de
servicio autorizado.
Distancia entre las paredes Distancia permitida
entre las marcas
30’ (9 m) 1/8” (3.0 mm)
40’ (12 m) 5/32” (4.0 mm)
50’ (15 m) 7/32” (5.0 mm)
Comprobación de la precisión:
Rayo horizontal, dirección de inclinación (Vea la figura 8)
La comprobación de la calibración de inclinación horizontal del
láser requiere una pared única de al menos 9 m (30’) de largo.
Es importante realizar una comprobación de calibración usando
una distancia no menor a la distancia de las aplicaciones para
las que se usará la herramienta.
1. Coloque el láser sobre un extremo de una pared usando su
soporte de pivote.
2. Encienda el rayo horizontal del láser y gire el láser hacia el
extremo opuesto de la pared y aproximadamente paralelo a la
pared adyacente.
3. Marque el centro del rayo en dos ubicaciones (c, d) al
menos a 9 m (30´) de distancia.
4. Vuelva a colocar el láser en el extremo opuesto de la pared.
5. Encienda el rayo horizontal del láser y gire el láser hacia
atrás hacia el primer extremo de la pared y aproximadamente
paralelo a la pared adyacente.
6. Ajuste la altura del láser de forma tal que el centro del rayo
esté alineado con la marca más cercana d.
7. Marque el centro del rayo e directamente arriba o debajo de
la marca más lejana c.
8. Mida la distancia entre estas dos marcas (c, e). Si la
medición es mayor a los valores que se indican a continuación,
el láser debe ser reparado en un centro de servicio autorizado.
Distancia entre las paredes Distancia permitida
entre las marcas
30’ (9 m) 1/4” (6.0 mm)
40’ (12 m) 5/16” (8.0 mm)
50’ (15 m) 13/32” (10.0 mm)
Comprobación de la precisión:
Rayo vertical (Vea la Figura 9)
La comprobación de la calibración vertical (plomada) del
láser puede realizarse con mayor precisión cuando hay una
cantidad sustancial de altura vertical disponible, idealmente
9 m (30’), con una persona en el piso colocando el láser y otra
persona cerca del cielo raso para marcar la posición del rayo.
Es importante realizar una comprobación de calibración usando
una distancia no menor a la distancia de las aplicaciones para
las que se usará la herramienta.
1. Coloque el láser en el piso y encienda los dos rayos verticales.
2. Marque dos posiciones donde los rayos se crucen en el piso
(f, g) y también en el techo h. Siempre marque el centro
del espesor del rayo.
3. Gire el láser 180 grados y vuelva a colocarlo cerca de la segunda
marca gpara que el rayo que cruza esté exactamente en las
marcas originales (f, g) en el piso.
4. Marque la posición donde los rayos se cruzan en el cielo raso j.
5. Mida la distancia entre las dos marcas en el techo (h, j).
Si la medición es mayor a los valores que se indican a continuación,
el láser debe ser reparado en un centro de servicio autorizado.
Altura del techo Distancia permitida
entre las marcas
8’ (2.5 m) 1/16” (1.5 mm)
10’ (3 m) 3/32” (2.0 mm)
14’ (4 m) 1/8” (2.5 mm)
20’ (6 m) 5/32’ (4 m)
30’ (9 m) 1/4’ (6 m)
Comprobación de la exactitud de 90º entre los rayos verticales
(DW089LR/G) (Vea la Figura 10)
La comprobación de la precisión de 90º requiere un área de piso
abierto de al menos 33’ x 18’ (10 m x 5 m). Consulte la Figura 9
para ver la posición del láser en cada paso y la ubicación de las
marcas realizadas en cada paso. Siempre marque el centro del
espesor del rayo.
1. Configure el láser en una esquina en el piso y encienda el rayo
vertical lateral.
2. Marque el centro del rayo en las tres ubicaciones (a, b, c) en
el piso a lo largo de la línea láser lateral. La marca b debe estar
en el punto intermedio de la línea láser.
3. Mueva el láser a la marca b y encienda los dos rayos verticales.
4. Coloque el cruce de los rayos exactamente en la marca b, con el
rayo lateral alineado con la marca c.
5. Marque una ubicación d a lo largo del rayo vertical delantero al
menos a 5 m (18´) de distancia de la unidad.
6. Gire el cruce del láser sobre la marca b para que el rayo vertical
lateral ahora pase por la marca b, d.
7. Marque la ubicación e donde el rayo vertical lateral pasa por
la marca d.
8. Mida la distancia entre las marcas d y e. Si la medición es
mayor a los valores que se indican a continuación, el láser debe
ser reparado en un centro de servicio autorizado.
Page 12

Manual del Usuario
22 23
ESP
Distancia de A a B Distancia permitida
entre las marcas
14’ (4 m) 5/32” (3.5 mm)
17’ (5 m) 3/16” (4.5 mm)
20’ (6 m) 7/32” (5.5 mm)
23’ (7 m) 1/4’ (6 m)
Resolución de problemas
El láser no se enciende
• Asegúrese de que se hayan instalado correctamente las baterías
AA (cuando se utilizan), de acuerdo con las marcas (+) y (-) en el
interior de la puerta del compartimiento de baterías.
• Asegúrese de que las baterías o el paquete recargable estén en
condiciones apropiadas de funcionamiento. En caso de duda,
pruebe instalar nuevas baterías.
• Asegúrese de que los contactos de la batería estén limpios y
libres de óxido o corrosión. Asegúrese de mantener el nivel láser
seco y use solo baterías nuevas de marca de alta calidad para
reducir la probabilidad de fugas de la batería.
• Si la unidad láser se calienta por encima de 120 ˚F (50 ˚C),
la unidad no se encenderá. Si el láser se ha almacenado en
temperaturas extremadamente calurosas, déjelo enfriar. El nivel
láser no se dañará al presionar el botón de encendido/apagado
antes de enfriarse a su temperatura correcta de funcionamiento.
Los rayos láser parpadean
Los láseres están diseñados para autonivelarse a un promedio
de 4° en todas las direcciones. Si el láser se inclina tanto que el
mecanismo interno no puede nivelarse, el rayo láser parpadeará
indicando que se ha excedido el rango de inclinación. EL RAYO
PARPADEANTE CREADO POR EL LÁSER NO ESTÁ A NIVEL O
NO PUEDE ESTABLECER LA PLOMADA Y NO DEBE USARSE
PARA DETERMINAR O MARCAR EL NIVEL O PLOMADA. Intente
cambiar la posición del láser en una superficie más nivelada.
El rayo láser no deja de moverse
El láser es un instrumento de precisión. En consecuencia, si
no se coloca en una superficie estable (y estática), el láser
continuará intentando encontrar un nivel. Si el rayo no deja
de moverse, intente colocar el láser en una superficie más
estable. Asimismo, intente asegurarse de que la superficie esté
relativamente plana, para que el láser esté estable.
Los LED del medidor de batería parpadean
Cuando los 4 LED parpadean continuamente en el medidor
de batería, esto indica que la unidad no ha sido apagada por
completo usando el interruptor de bloqueo de péndulo B. El
interruptor de bloqueo de péndulo siempre debe colocarse en la
posición de BLOQUEADO/APAGADO cuando el láser no se utiliza.
Accesorios
ADVERTENCIA:
Como los accesorios, fuera de los ofrecidos por DeWalt,
no han sido probados con este producto, el uso de tales
accesorios con esta herramienta podría ser peligroso. Para
reducir el riesgo de lesiones, solo debe usar accesorios
recomendados por DeWalt con este producto.
Uso del láser con accesorios
(Vea la Figura 2, fotografía incluida)
El láser está equipado con roscas hembra (I) de 1/4” - 20 y
5/8" - 11 en la parte inferior de la unidad. Esta rosca se incluye
para adaptarse a los accesorios actuales o futuros de DeWALT.
Solo use accesorios DeWALT especificados para usar con este
producto. Siga las instrucciones incluidas con el accesorio.
Los accesorios recomendados para usar con su herramienta
están disponibles a un costo adicional con su distribuidor local
o centro de servicio autorizado. Si necesita asistencia para
ubicar un accesorio, visite nuestro sitio web: www.dewalt.com.
Servicio y reparaciones
• Nota: Desensamblar el(los) nivel(es) del láser anulará las
garantías del producto.
Para garantizar la SEGURIDAD y CONFIABILIDAD del producto,
las reparaciones, mantenimiento y ajustes deben ser realizados
por centros de servicio autorizados. El servicio o mantenimiento
realizado por personal no calificado podría resultar en riesgo
de lesiones. Para ubicar el centro de servicio DeWALT más
cercano llame al 1-800-4-DeWALT (1-800-433-9258) o visite
www.dewalt.com en Internet.
Garantía limitada por tres años
DeWalt reparará, sin cargo, cualquier falla que surja de defectos
en el material o la fabricación del producto, por hasta tres
años a contar de la fecha de compra. Esta garantía no cubre
fallas de las piezas causadas por su desgaste normal o abuso
a la herramienta. Para obtener más información sobre la
cobertura de la garantía y la información de reparación de la
garantía, visite www.dewalt.com o llame al 1-800-4-DeWALT
(1-800-433-9258). Esta garantía no aplica a accesorios o a
daños causados por reparaciones realizadas o intentadas por
terceros. Esta garantía le otorga derechos legales específicos,
además de los cuales puede tener otros dependiendo del estado
o la provincia en que se encuentre.
Además de la garantía, las herramientas de DeWALT están
cubiertas por nuestro:
1 año de servicio gratuito
DeWalt mantendrá la herramienta y reemplazará las piezas
desgastadas por el uso normal sin costo y en cualquier
momento durante el primer año después de la compra.
GARANTÍA DE REEMBOLSO DE SU
DINERO DE 90 DÍAS
Si no está completamente satisfecho con el desempeño de
su láser DeWalt, cualquiera sea el motivo, podrá devolverlo
hasta 90 días de la fecha de compra con su recibo y obtener el
reembolso completo de su dinero –sin necesidad de responder
a ninguna pregunta.
Producto reacondicionado:
El producto reacondicionado está cubierto por la garantía de
servicio gratuito de 1 año. La garantía de devolución del dinero
de 90 días y la garantía limitada de tres años no se aplican a los
productos reacondicionados.
Reemplazo gratuito de las etiquetas de
advertencia:
Si sus etiquetas de advertencia son ilegibles o faltan, llame al
1-800-4-DeWALT o visite a su centro de servicio local para que
se las reemplacen gratuitamente.
Notas
Page 13

Manual del Usuario
24 25
ESP
Especificaciones
Herramienta láser
Fuente de luz Diodos láser
Longitud de onda del láser 620 – 690 nm visible (ROJO) 510 – 530 nm visible (VERDE)
Potencia del láser ≤1.50 mW (cada rayo) PRODUCTO LÁSER CLASE 2
Rango de trabajo 20 m (±65’) ROJO 35 m (±115’) VERDE
50 m con detector 60 m con detector
Precisión (plomada) ± 1/8” por 30’ (±3 mm por 9 m)
Precisión (nivel): ± 1/8” por 30’ (±3 mm por 9 m)
Indicadores
Batería baja 1 x LED parpadeante en el medidor de la batería
La unidad no se apaga con el
interruptor de bloqueo de péndulo
4 x LED parpadeante en el medidor de la batería
Rayos láser destellando Rango de inclinación excedido/la unidad no está nivelada
Fuente de alimentación 4 baterías tamaño AA (1.5 V) (6 VCC) o paquete de baterías de 12 V Dewalt.
Temperatura de funcionamiento 14 °F a 122 °F (-10 °C a 50 °C)
Temperatura de almacenamiento -5 °F a 140 °F (-20 °C a 60 °C)
Humedad Humedad relativa máxima de 80 % para temperaturas de hasta 88 °F (31 °C)
con una reducción lineal hasta una humedad relativa de 50 % a 104 °F (40 °C)
Ambiental Resistente al agua y el polvo según IP65
Notas
Page 14

Manuel d’utilisation
26
27
FR
Sécurité des utilisateurs
Définitions : Règles de sécurité
Les définitions ci-dessous décrivent le niveau de danger pour
chaque mot indicateur employé. Lire le mode d’emploi et porter
une attention particulière à ces symboles.
DANGER : Indique une situation dangereuse imminente
qui, si elle n’est pas évitée, occasionnera des blessures
graves ou mortelles.
AVERTISSEMENT : Indique une situation potentiellement
dangereuse qui, si elle n’est pas évitée, pourra occasionner
des blessures graves ou mortelles.
MISE EN GARDE : Indique une situation potentiellement
dangereuse qui, si elle n’est pas évitée, pourrait
occasionner des blessures mineures ou modérées.
AVIS : Indique une pratique ne posant aucun risque de dommages
corporels mais qui par contre, si rien n’est fait pour l’éviter, pourrait
entraîner des dommages matériels.
Pour toute question ou tout commentaire au sujet de ce
produit ou d’un autre outil dewalt, appeler au 1-800-4-DeWALT
(1-800-433-9258) ou aller sur le site Web : www.dewalt.com.
AVERTISSEMENT :
Lire et assimiler toutes les directives. Le non-respect
des avertissements et des directives peut entraîner un
choc électrique, un incendie ou une blessure grave.
CONSERVER CES DIRECTIVES
AVERTISSEMENT :
Exposition au rayonnement laser. Ne pas démonter
ou modifier le laser. Aucune pièce à l’intérieur ne
peut être réparée par l’utilisateur. Risque de lésions
oculaires graves.
Contenu
• Sécurité
• Aperçu du produit
• Piles et alimentation
• Fonctionnement
• Vérification de la précision et étalonnage
• Caractéristiques techniques
AVERTISSEMENT :
Rayonnement dangereux. L’utilisation de commandes
ou de réglages non prévus ou encore l’exécution de
procédures autres que celles indiquées ici peuvent
entraîner une exposition dangereuse aux rayonnements.
L’étiquette apposée sur l’outil pourrait comprendre les symboles
suivants.
V volts
mW milliwatts
symbole de mise en garde du laser
nm longueur d’onde en nanomètres
2 laser de classe 2
Étiquettes de mise en garde
Pour plus de commodité et de sécurité, les étiquettes suivantes
sont apposées sur votre laser.
AVERTISSEMENT : Afin de réduire le risque de
blessures, l’utilisateur doit lire le mode d’emploi.
AVERTISSEMENT : RAYONNEMENT LASER.
NE PAS REGARDER DIRECTEMENT LE FAISCEAU.
Produit laser de classe 2.
5002595
≤1.5mW @ 630-680nm
IEC 60825-1: 2014
Laser Artwork
5002595
5002595
≤1.5mW @ 510-530nm
IEC 60825-1: 2014
≤1.5mW @ 630-680nm
IEC 60825-1: 2014
≤1.5mW @ 630-680nm
IEC 60825-1: 2014
5002595
Visual Result
≤1.5mW @ 630-680nm
IEC 60825-1: 2014
≤1.5mW @ 510-530nm
IEC 60825-1: 2014
5002595
5002595
• Ne pas faire fonctionner le laser dans un milieu déflagrant,
comme en présence de liquides, de gaz ou de poussières
inflammables. Les outils électriques produisent des étincelles
qui peuvent enflammer la poussière ou les vapeurs.
• Utiliser le laser uniquement avec les piles spécifiquement
conçues à cet effet. L’utilisation de toute autre pile pourrait
provoquer un incendie.
• Ranger le laser inutilisé hors de la portée des enfants et
des personnes sans expérience. Les lasers sont dangereux
entre les mains d’utilisateurs inexpérimentés.
• N’utiliser que les accessoires conseillés par le fabricant
pour le modèle de l’outil. Les accessoires adaptés à un laser
donné peuvent être dangereux lorsqu’ils sont utilisés avec un
autre laser.
• Toute réparation de l’outil ne doit être effectuée que par
des réparateurs professionnels. Toute réparation ou tout
entretien réalisé par un personnel non formé peut entraîner des
blessures. Pour trouver le centre de réparation DeWALT le plus
près, composer le 1-800-4-DeWALT (1-800-433-9258) ou visiter le
site Web : www.dewalt.com.
• Ne pas utiliser d’instruments optiques comme un
télescope ou un théodolite pour observer le faisceau laser.
Risque de lésions oculaires graves.
• Ne pas mettre le laser dans une position où une
personne pourrait fixer du regard le faisceau laser,
intentionnellement ou non. Risque de lésions oculaires graves.
• Ne pas positionner le laser près d’une surface
réfléchissante qui pourrait renvoyer le faisceau laser dans
les yeux de quelqu’un. Risque de lésions oculaires graves.
• Éteindre le laser lorsqu’il n’est pas utilisé. Laisser le laser
allumé augmente le risque de fixer du regard le faisceau laser.
• Ne modifier le laser en aucun cas. Les modifications
apportées à l’outil laser pourraient entraîner une exposition à des
rayonnements laser dangereux.
• Ne pas utiliser le laser près des enfants et ne pas laisser
les enfants utiliser le laser. Il pourrait en résulter des
blessures oculaires graves.
• Ne pas enlever ni altérer les étiquettes de mise en
garde. Si des étiquettes sont enlevées, l’utilisateur ou d’autres
personnes pourraient être exposés à la radiation par mégarde.
• Placer le laser sur une surface stable et plane. Le laser
risque d’être endommagé ou de causer des blessures graves en
cas de chute.
Renseignements sur le laser
• Les lasers à ligne à 360° à trois faisceaux DW089LR et
DW089LG et les lasers à ligne à 360° à deux faisceaux
DW0811LR et DW0811LG sont des produits laser de
classe 2. Il s’agit d’outils laser autonivelants pouvant être
utilisés pour l’alignement horizontal (niveau) et vertical
(aplomb).
Ce produit est conforme aux normes 21 CFR 1040.10 et 1040.11 à l'exception des cas
divergents énumérés dans le document « laser Notice 50 » du 24 juin 2007.
Conforme à la norme UL STDS 61010-1
Certifié conforme à la norme CSA STD C22.2 No. 61010-1
AVERTISSEMENT :
Lire et assimiler toutes les directives. Le non-respect
des directives indiquées ci-dessous peut entraîner des
risques de choc électrique, d’incendie ou de blessures
corporelles graves.
Espace de travail
• Tenir l’espace de travail propre et bien éclairé. Les établis
encombrés et les lieux sombres sont propices aux accidents.
• Ne pas faire fonctionner d’outils laser dans un milieu déflagrant,
par exemple en présence de liquides, de gaz ou de poussières
inflammables.
• Éloigner les enfants et les autres personnes au moment d’utiliser un
outil laser. Une distraction pourrait vous en faire perdre la maîtrise.
Sécurité en matière d’électricité
• N’utiliser l’outil qu’avec les piles spécifiquement conçues
à cet effet. L’utilisation de toute autre pile pourrait provoquer
un incendie.
Aperçu du produit
AVERTISSEMENT :
Ne jamais modifier l’outil ou l’une de ses parties. Cela
pourrait endommager le laser ou causer des blessures
corporelles.
Figure 2 - Interface à piles
A
Figure 1A - Verrou du pendule
B
Figure 1B - Clavier
C
Figure 1B - Bouton MARCHE/ARRÊT : ligne laser
horizontale
D
Figure 1B - Bouton MARCHE/ARRÊT : ligne laser latérale
E
Figure 1B - Bouton MARCHE/ARRÊT : ligne laser verticale
avant (DCE089R/G seulement)
F
Figure 2 - Support pivotant magnétique
G
Figure 4 - Raccord fileté du trépied (6,35 mm - 20 et
15,8 mm - 11 [1/4 - 20 et 5/8 -11])
I
Figure 1B - Indicateur du niveau des piles
J
Figure 5 - Pince pour montage au plafond
K
Figure 5 - Support de montage au plafond
L
Figure 5 - Trou de vis
M
Page 15

Manuel d’utilisation
28
29
FR
Piles et alimentation
• Cet outil est alimenté par les blocs-piles 12 V DeWALT suivants :
DCB120, DCB127. Il peut également être alimenté à l’aide
du bloc de démarrage AA DEWALT, qui peut contenir 4 piles
AA. Remarque : Le bloc de démarrage AA est recommandé
uniquement avec le laser rouge.
Installation et retrait des piles
Utilisation du bloc de démarrage AA :
MISE EN GARDE :
Le bloc de démarrage AA est conçu pour être utilisé
uniquement avec les produits laser compatibles 12 V
DeWALT et il ne peut pas être utilisé avec d’autres outils.
Ne pas essayer de modifier le produit.
Pour poser les piles :
• Soulever le couvercle du compartiment à piles, comme
illustré à la figure 6A.
• Insérer quatre piles AA neuves dans le compartiment,
en les positionnant selon le schéma (+) et (-) indiqué à
l’intérieur du compartiment.
• Installer le bloc de démarrage AA comme indiqué à la
figure 6B.
Utilisation du bloc rechargeable 12 V
DEWALT :
• Installer le bloc-piles 12 V comme indiqué à la figure 6B.
AVERTISSEMENT :
Les piles peuvent exploser ou couler et causer des
blessures ou un incendie. Pour réduire ce risque :
• Suivre attentivement l’ensemble des instructions et des
avertissements indiqués sur l’étiquette, l’emballage et le guide
de sécurité des piles.
• Veiller à toujours insérer les piles selon la polarité correcte
(+ et –), comme indiqué sur les piles et le matériel.
• Ne pas créer de court-circuit dans les bornes des piles.
• Ne pas charger les piles jetables.
• Ne pas mélanger piles neuves et usagées. Les remplacer toutes
en même temps par des piles neuves de la même marque et du
même type.
• Retirer immédiatement les piles déchargées et les éliminer en
fonction de la réglementation locale en vigueur.
• Ne pas jeter les piles dans les flammes.
• Garder les piles hors de la portée des enfants.
• Enlever les piles lorsque l’appareil n’est pas utilisé
• N’utiliser que le chargeur conçu pour votre bloc-piles
rechargeable.
Sécurité personnelle
• Rester vigilant, faire attention au travail en cours et faire preuve
de jugement dans l’utilisation de tout outil laser. Ne pas utiliser
d’outil en cas de fatigue ou sous l’emprise de drogues, d’alcool
ou de médicaments. Un moment d’inattention, durant l’utilisation
d’un outil électrique, peut se solder par des blessures graves.
• Utiliser des équipements de protection individuelle. Toujours
porter une protection oculaire. Le port d’équipements de
protection comme un masque anti-poussière, des chaussures
antidérapantes, un casque de sécurité ou des protecteurs auditifs
lorsque la situation le requiert réduira les risques de blessures
corporelles.
Utilisation et entretien de l’outil
• Ne pas utiliser l’outil si l’interrupteur ne fonctionne pas. Tout outil
qui ne peut être commandé par l’interrupteur est dangereux et
doit être réparé.
• Ranger les outils laser hors de la portée des enfants, et ne
permettre à aucune personne n’étant pas familiarisée avec un
outil laser ou son mode d’emploi d’utiliser l’outil. Les outils laser
sont dangereux entre les mains d’utilisateurs inexpérimentés.
• N’utiliser que les accessoires conseillés par le fabricant pour le
modèle de l’outil. Des accessoires qui conviennent à un outil peuvent
devenir dangereux lorsqu’ils sont utilisés avec un autre outil.
Réparation
• Toute réparation de l’outil ne doit être effectuée que par des
réparateurs professionnels. Toute réparation ou tout entretien
réalisé par un personnel non qualifié peut entraîner des risques
de blessures.
• Pour réparer un outil, n’utiliser que des pièces de rechange
identiques. Suivre les directives figurant à la section « Entretien »
du mode d’emploi. L’utilisation de pièces non autorisées ou le
non-respect des directives d’entretien peuvent entraîner des
risques de décharge électrique ou de blessure.
Pour trouver le centre de réparation DeWALT le plus près,
composer le 1-800-4-DeWALT (1-800-433-9258) ou aller sur le
site Web : http://www.dewalt.com.
Conseils d’utilisation
• Pour de meilleurs résultats, utiliser uniquement des piles AA
neuves de marque connue et de qualité supérieure, ou le blocpiles au lithium-ion de 12 V DEWALT rechargeable recommandé.
• Veiller à ce que les piles soient en bon état de fonctionnement.
Les piles doivent être remplacées lorsque le voyant rouge
clignote.
• Pour prolonger la durée de vie des piles, éteindre le laser si le
faisceau n’est pas utilisé.
• Pour un travail précis, veiller à étalonner le laser fréquemment.
Consulter la section Vérifier le calibrage sur le terrain.
• Avant d’utiliser le laser, s’assurer qu’il est correctement installé,
sur une surface lisse et plate.
• Veiller à toujours marquer le centre du faisceau créé par le laser.
• Les changements extrêmes de température peuvent provoquer
le déplacement de composants internes et compromettre la
précision. Vérifier souvent l’exactitude durant le travail. Consulter
la section Vérifier le calibrage sur le terrain.
• En cas de chute du laser, vérifier s’il est toujours étalonné.
Consulter la section Vérifier le calibrage sur le terrain.
Voyant de pile faible
Les lasers DW089LR, DW089LG, DW0811LR et DW0811LG
sont équipés d’un indicateur de niveau des piles, comme
illustré à la figure 1B. Celui-ci indique la charge restante,
chaque voyant DEL représentant 25 % de la charge totale. Le
voyant DEL du bas s’illumine et clignote pour indiquer que la
charge est faible (inférieure à 12,5 %) et que les piles doivent
être remplacées. Le laser continuera à fonctionner quelque
temps pendant que les piles se déchargent, mais les faisceaux
faibliront rapidement. Après l’installation de nouvelles piles et
la remise sous tension du laser, les faisceaux retrouveront leur
pleine luminosité et l’indicateur de niveau des piles indiquera
qu’elles sont pleinement chargées. (Le clignotement du faisceau
n’est pas causé par des piles faibles; voir Voyant d’erreur
d’inclinaison.) Si les 4 voyants DEL de l’indicateur de niveau
des piles clignotent de manière continue, ce n’est pas un signe
de piles faibles. Voir « Les voyants DEL de l’indicateur de niveau
des piles clignotent » dans la section Dépannage.
Fonctionnement
Marche et arrêt des lasers
(Voir figure 1)
Placer le laser éteint sur une surface plane. Faire glisser
l’interrupteur de blocage du pendule B en position Débloqué/
MARCHE. Le clavier du modèle DCE089G/R est doté de
trois boutons MARCHE/ARRÊT C, un pour une ligne laser
horizontale D, un pour une ligne laser verticale latérale E
et un pour une ligne laser verticale avant F (DCE089G/R
seulement). Le modèle DCE0811G /R propose deux lignes :
une ligne horizontale et une ligne verticale latérale. Chaque
ligne laser apparaît sur pression du bouton MARCHE/ARRÊT
correspondant sur le clavier. Les lignes laser peuvent être
activées une à la fois ou toutes en même temps. Pour les
désactiver, appuyer à nouveau sur les touches MARCHE/ARRÊT.
Faire glisser l’interrupteur de blocage du pendule en position
ARRÊT/Bloqué lorsque le laser n’est pas utilisé. Si l’interrupteur
de blocage du pendule n’est pas en position verrouillée, les
4 voyants DEL clignoteront de manière continue sur l’indicateur
de niveau des piles.
Utilisation des lasers
Voyant d’erreur de NIVEAU
Les lasers sont conçus pour s’autoniveler. Si l’inclinaison du
laser est telle qu’il ne peut pas s’autoniveler (> 4°), le faisceau
clignote. Deux séquences de clignotement sont associées à une
erreur de niveau : (i) entre 4° et 10°, les faisceaux clignotent
selon un cycle constant; (ii) à des angles de plus de 10°, les
faisceaux clignotent selon un cycle de trois clignotements.
Lorsque les faisceaux clignotent, LE LASER N’EST PAS DE
NIVEAU (OU D’APLOMB) ET IL NE DOIT PAS ÊTRE UTILISÉ
POUR DÉTERMINER OU MARQUER LE NIVEAU OU L’APLOMB.
Essayer de repositionner le laser sur une surface plus à niveau.
Utilisation du support pivotant (voir figure 2)
AVERTISSEMENT :
Positionner le laser ou le support mural sur une surface
stable. Une chute du laser pourrait causer des blessures
graves ou endommager l’appareil.
Le laser est équipé d’un support pivotant magnétique
G
intégré à l’appareil. Ce support permet d’installer l’appareil sur
n’importe quelle surface droite en acier ou en fer. Les surfaces
utilisables sont, par exemple, des montants en acier, des cadres
de porte en acier ou des poutres en acier profilé. Le support est
aussi muni d’un œillet H permettant de suspendre l’appareil à
un clou ou une vis sur n’importe quelle surface.
Utilisation du laser avec le support de montage au PLAFOND
(voir figure 5 )
Le support de montage du laser au plafond L (si inclus) offre
plus d’options de montage pour le laser. Le support de montage
au plafond est doté d’une pince K à une de ses extrémités.
Celle-ci peut être fixée à l’angle d’un mur pour l’installation d’un
plafond acoustique. Chaque extrémité du support de montage au
plafond est dotée d’un trou de vis Mpermettant de fixer celui-ci
à n’importe quelle surface à l’aide d’un clou ou d’une vis.
Page 16

Manuel d’utilisation
30
31
FR
Une fois le support de montage au plafond bien fixé, sa
plaque en acier offre une surface à laquelle le support pivotant
magnétique G peut être fixé. La position du laser peut alors
être ajustée en faisant glisser le support pivotant magnétique
vers le haut ou vers le bas sur le support mural.
Utilisation des lasers avec accessoires
Les lasers sont équipés d’un filetage femelle de 6,35 mm
(1/4 po) - 20 et 15,8 mm (5/8 po) - 11 sous l’appareil. Ce
filetage sert à fixer des accessoires DeWALT existants ou futurs.
Utiliser uniquement les accessoires DeWALT spécifiés pour ce
produit. Suivre les instructions fournies avec l’accessoire.
MISE EN GARDE :
L’utilisation de tout autre accessoire non recommandé
avec cet outil pourrait s’avérer dangereuse.
Pour obtenir de l’aide afin de trouver un accessoire,
communiquer avec le centre de réparation DeWALT le plus près
ou visiter le site Web : www.dewalt.com.
Mise au niveau des lasers
Si le laser est bien étalonné, il sera en mesure de s’autoniveler.
Chaque laser est étalonné à l’usine pour trouver le niveau tant
qu’il est posé sur une surface plane d’une inclinaison maximale
de ± 4°. Aucun réglage manuel n’est requis.
Entretien
• Pour garantir l’exactitude du travail, vérifier souvent le laser pour
s’assurer qu’il est bien calibré. Consulter la section Vérifier le
calibrage sur le terrain.
• Les vérifications de calibrage, l’entretien et les réparations
peuvent être effectués par les centres de réparation DeWALT.
• Après utilisation, ranger le laser dans la mallette fournie à cet
effet. Ne pas ranger le laser à un endroit où la température est
inférieure à -20 °C (-5 °F) ou supérieure à 60 °C (140 °F).
• Ne pas ranger le laser dans la boîte s’il est mouillé. Avant
l’entreposage, le laser doit être asséché à l’aide d’un chiffon doux
et sec.
Nettoyage
Les pièces extérieures en plastique peuvent être nettoyées avec
un chiffon humecté. Bien que ces pièces soient résistantes aux
solvants, ne JAMAIS utiliser de solvants. Utiliser un chiffon doux
et sec pour éliminer l’humidité de l’outil avant de le ranger.
Vérification de la précision et
étalonnage
Vérification de la précision –
Faisceau horizontal, direction du balayage (voir figure 7)
Pour vérifier l’étalonnage du balayage horizontal du laser, il faut
deux murs séparés par une distance d’au moins 9 m (30 pi).
Il est important de vérifier l’étalonnage sur une distance au
moins équivalente à celle de l’installation pour laquelle le laser
sera utilisé.
1. Fixer le laser à un mur à l’aide de son support pivotant, le laser
pointant droit devant en direction du mur opposé (position à
0 degré).
2. Allumer le faisceau horizontal et le faisceau vertical avant du
laser et marquer la position du faisceau sur le mur directement
opposé au laser. Toujours marquer le centre du faisceau dans le
sens de l’épaisseur.
3. Faire pivoter le laser de 180 degrés et marquer la position du
faisceau sur le mur opposé.
4. Mesurer la distance verticale entre la marque la plus basse
A
et la marque la plus haute B. Si la mesure est supérieure aux
valeurs indiquées ci-dessous, le laser doit être réparé dans un
centre de réparation autorisé.
Distance entre les murs Distance autorisée entre
les marques
9 m (30 pi) 3,0 mm (1/8 po)
12 m (40 pi) 4,0 mm (5/32 po)
15 m (50 pi) 5,0 mm (7/32 po)
Vérification de la précision –
Faisceau horizontal, direction de l’inclinaison (voir figure 8)
Pour vérifier l’étalonnage de l’inclinaison horizontale du laser, il
faut un mur d’au moins 9 m (30 pi). Il est important de vérifier
l’étalonnage sur une distance au moins équivalente à celle de
l’installation pour laquelle le laser sera utilisé.
1. Fixer le laser à une extrémité d’un mur à l’aide de son support
pivotant.
2. Allumer le faisceau horizontal et faire pivoter le laser vers
l’autre extrémité du mur, à peu près parallèlement au mur
adjacent.
3. Marquer le centre du faisceau à deux endroits (c, d) distants
d’au moins 9 m (30 pi).
4. Repositionner le laser à l’autre extrémité du mur.
5. Allumer le faisceau horizontal et faire pivoter le laser vers la
première extrémité du mur, à peu près parallèlement au mur
adjacent.
6. Régler la hauteur du laser de manière à ce que le centre du
faisceau soit aligné sur la marque la plus proche d.
7. Marquer le centre du faisceau e directement au-dessus ou en
dessous de la marque la plus éloignée c.
8. Mesurer la distance entre ces deux marques (c, e). Si la
mesure est supérieure aux valeurs indiquées ci-dessous, le laser
doit être réparé dans un centre de réparation autorisé.
Distance entre les murs Distance autorisée entre
les marques
9 m (30 pi) 6,0 mm (1/4 po)
12 m (40 pi) 8,0 mm (5/16 po)
15 m (50 pi) 10,0 mm (13/32 po)
Vérification de la précision –
Faisceau vertical (voir figure 9)
La vérification de l’étalonnage vertical (aplomb) du laser sera
plus efficace si elle est effectuée sur une grande hauteur,
idéalement de 9 m (30 pi), et qu’une personne au sol positionne
le laser tandis qu’une autre marque la position du faisceau au
plafond. Il est important de vérifier l’étalonnage sur une distance
au moins équivalente à celle de l’installation pour laquelle le
laser sera utilisé.
1. Mettre le laser sur le plancher et allumer les deux faisceaux
verticaux.
2. Marquer deux positions où les faisceaux se croisent sur le
plancher (f, g) et au plafond h. Toujours marquer le centre
du faisceau dans le sens de l’épaisseur.
3. Faire pivoter le laser de 180 degrés et le repositionner près de
la deuxième marque gde manière à ce que le faisceau croise
exactement les marques d’origine (f, g) sur le plancher.
4. Marquer la position où les faisceaux se croisent au plafond j.
5. Mesurer la distance entre les deux marques au plafond (h, j).
Si la mesure est supérieure aux valeurs indiquées ci-dessous, le
laser doit être réparé dans un centre de réparation autorisé.
Hauteur du plafond Distance autorisée entre
les marques
2,5 m (8 pi) 1,5 mm (1/16 po)
3 m (10 pi) 2,0 mm (3/32 po)
4 m (14 pi) 2,5 mm (1/8 po)
6 m (20 pi) 4 m (5/32 pi)
9 m (30 pi) 6 m (1/4 pi)
Vérification de la précision à 90º entre les deux faisceaux
verticaux (DW089LR/G) (voir figure 10)
La vérification de la précision à 90º nécessite un espace
de plancher ouvert d’au moins 10 m x 5 m (33 pi x 18 pi).
Consulter la figure 9 pour connaître l’emplacement du laser à
chaque étape et l’emplacement des marques inscrites à chaque
étape. Toujours marquer le centre du faisceau dans le sens de
l’épaisseur.
1. Placer le laser à un coin du plancher et allumer le faisceau
vertical latéral.
2. Marquer le centre du faisceau à trois endroits (a, b, c) sur le
plancher le long de la ligne laser latérale. La marque b devrait
être effectuée au milieu de la ligne laser.
3. Déplacer le laser sur la marque b et allumer les deux faisceaux
verticaux.
4. Positionner le faisceau de manière à ce qu’il croise précisément la
marque b, le faisceau latéral étant aligné avec la marque c.
5. Marquer un emplacement d le long du faisceau vertical avant à
une distance d’au moins 5 m (18 pi) de l’appareil.
6. Faire pivoter le laser pour qu’il croise la marque b et que le
faisceau vertical latéral traverse maintenant la marque b, d.
7. Marquer l’emplacement e où le faisceau vertical latéral passe
devant la marque d.
8. Mesurer la distance entre les marques d et e. Si la mesure
est supérieure aux valeurs indiquées ci-dessous, le laser doit être
réparé dans un centre de réparation autorisé.
Page 17

Manuel d’utilisation
32
33
FR
Distance de A à B Distance autorisée entre
les marques
4 m (14 pi) 3,5 mm (5/32 po)
5 m (17 pi) 4,5 mm (3/16 po)
6 m (20 pi) 5,5 mm (7/32 po)
7 m (23 pi) 6 m (1/4 pi)
Dépannage
Le laser ne s’allume pas
• S’assurer que les piles AA (s’il y a lieu) sont installées correctement
selon les signes (+) et (-) à l’intérieur de la porte du compartiment.
• Vérifier que les piles ou le bloc-piles rechargeable sont en bon
état de marche. Dans le doute, installer de nouvelles piles.
• Vérifier que les contacts des piles sont propres et exempts de
rouille ou de corrosion. Veiller à ce que le niveau au laser reste au
sec et n’utiliser que des piles neuves de qualité supérieure et de
marque connue pour réduire les risques de fuite.
• L’appareil ne s’allumera pas s’il est chauffé à plus de 50 ˚C
(120 ˚F). Si le laser a été entreposé à une forte chaleur, le laisser
refroidir. Le niveau au laser ne sera pas endommagé si le bouton
marche/arrêt est enfoncé avant qu’il ait refroidi jusqu’à sa bonne
température de fonctionnement.
Les faisceaux laser clignotent
Les lasers sont conçus pour s’autoniveler jusqu’à une moyenne
de 4° dans toutes les directions. Si l’inclinaison du laser est
telle que le mécanisme interne ne peut se mettre de niveau
par lui-même, les faisceaux laser clignoteront, ce qui indique
un dépassement de la plage d’inclinaison. LES FAISCEAUX
CLIGNOTANTS CRÉÉS ALORS PAR LE LASER NE SONT PLUS
AU NIVEAU OU D’APLOMB ET NE DOIVENT PAS ÊTRE UTILISÉS
POUR DÉTERMINER OU MARQUER LE NIVEAU OU L’APLOMB.
Essayer de repositionner le laser sur une surface plus à niveau.
Les faisceaux laser bougent sans cesse
Le laser est un instrument de précision. Aussi, s’il n’est pas
placé sur une surface stable (et immobile), il continuera à
chercher le niveau. Si le faisceau n’arrête pas de bouger, essayer
de placer le laser sur une surface plus stable. Essayer également
de faire en sorte que la surface soit relativement plane, afin que
le laser soit stable.
Les voyants DEL de l’indicateur de niveau
des piles clignotent
Lorsque les 4 voyants DEL de l’indicateur de niveau des piles
clignotent de manière continue, cela indique que l’appareil n’a
pas été complètement éteint à l’aide de l’interrupteur de blocage
du pendule B. L’interrupteur de blocage du pendule doit
toujours être mis en position ARRÊT/BLOQUÉ lorsque le laser
n’est pas utilisé.
Accessoires
AVERTISSEMENT :
Puisque les accessoires autres que ceux offerts par
DeWalt n’ont pas été testés avec ce produit, l’utilisation
de ceux-ci avec l’outil pourrait s’avérer dangereuse. Pour
réduire le risque de blessures, utiliser exclusivement les
accessoires DeWalt recommandés avec ce produit.
Utilisation du laser avec accessoires
(Voir figure 2), encart)
Le laser est équipé d’un filetage femelle de 6,35 mm (1/4 po) 20 et 15,8 mm (5/8 po) - 11 (l) sous l’appareil. Ce filetage sert
à fixer des accessoires DeWALT existants ou futurs. Utiliser
uniquement les accessoires DeWALT spécifiés pour ce produit.
Suivre les instructions fournies avec l’accessoire.
Les accessoires recommandés pour cet outil sont vendus
séparément chez le distributeur ou au centre de réparation
autorisé le plus près. Pour obtenir de l’aide afin de trouver un
accessoire, visiter notre site Web : www.dewalt.com.
Entretien et réparations
• Remarque : Le démontage du ou des niveaux laser annulera
toutes les garanties du produit.
Pour assurer la SÉCURITÉ et la FIABILITÉ du produit, les
réparations, l’entretien et les réglages doivent être réalisés par
un centre de réparation agréé. Toute réparation ou tout entretien
réalisé par un personnel non formé peut causer un risque de
blessures. Pour trouver le centre de réparation DeWALT le plus
près, composer le 1-800-4-DeWALT (1-800-433-9258) ou
visiter le site Web : www.dewalt.com.
Garantie limitée de trois ans
DeWALT effectuera gratuitement toutes les réparations liées
à des défauts de matériau ou de fabrication pendant trois
ans à compter de la date d’achat. Cette garantie ne couvre
pas les défaillances de pièces dues à une usure normale ou
à une mauvaise utilisation de l’outil. Pour plus de détails
relatifs à la couverture de la garantie et aux réparations sous
garantie, visiter le site Web www.dewalt.com ou composer
le 1-800-4-DeWALT (1-800-433-9258). Cette garantie ne
s’applique pas aux accessoires ni aux dommages causés par
des réparations réalisées ou tentées par des tiers. Cette garantie
confère des droits légaux particuliers à l’acheteur, mais celui-ci
pourrait aussi bénéficier d’autres droits variant d’un État ou
d’une province à l’autre.
En plus de la garantie, les outils DeWALT sont couverts par
notre :
Service d’entretien gratuit d’un an
DeWalt entretiendra l’outil et remplacera les pièces usées par
une utilisation normale, et ce gratuitement, à tout moment
pendant la première année à compter de la date d’achat.
GARANTIE de remboursement de 90 JOURS
Si vous n’êtes pas entièrement satisfait des performances de
votre laser DeWalt pour quelque raison que ce soit, vous pouvez
le renvoyer accompagné d’un reçu dans les 90 jours suivant
la date d’achat, et nous vous rembourserons entièrement sans
poser de questions.
Produit remis à neuf :
Tout produit remis à neuf est couvert par une garantie
d’entretien gratuit d’un an. La garantie de remboursement après
90 jours et la garantie limitée de trois ans ne s’appliquent pas
aux produits remis à neuf.
Remplacement gratuit des étiquettes
d’avertissement :
Si les étiquettes d’avertissement deviennent illisibles ou sont
manquantes, composer le 1-800-4-DeWALT ou visiter le centre
de réparation le plus près pour un remplacement gratuit.
Remarques
Page 18

Manuel d’utilisation
34
35
FR
Caractéristiques techniques
Outil laser
Source de lumière Diodes laser
Longueur d’onde du laser 620 – 690 nm visible (ROUGE) 510 – 530 nm visible (VERT)
Puissance du laser ≤1,50 mW (par faisceau) ÉQUIPEMENT LASER DE CATÉGORIE 2
Portée 20 m (± 65 pi) ROUGE 35 m (± 115 pi) VERT
50 m avec détecteur 60 m avec détecteur
Précision (aplomb) ± 3 mm par 9 m (± 1/8 po par 30 pi)
Précision (niveau) : ± 3 mm par 9 m (± 1/8 po par 30 pi)
Voyants
Piles faibles 1 x DEL clignotant sur l’indicateur de niveau des piles
Appareil non éteint à l’aide de
l’interrupteur de blocage du pendule
4 x DEL clignotant sur l’indicateur de niveau des piles
Faisceaux laser clignotants Plage d’inclinaison dépassée/l’appareil n’est pas de niveau
Source d’alimentation 4 piles AA (1,5 V) (6 V CC) ou bloc-piles Dewalt de 12 V
Température de fonctionnement -10 °C à 50 °C (14 °F à 122 °F)
Température d'entreposage -20 °C à 60 °C (-5 °F à 140 °F)
Humidité Humidité relative maximale de 80 % pour les températures inférieures à 31 °C
(88 °F), diminuant linéairement jusqu’à 50 % à 40 °C (104 °F)
Environnement Résistant à l’eau et à la poussière selon la norme IP65
Remarques
Page 19
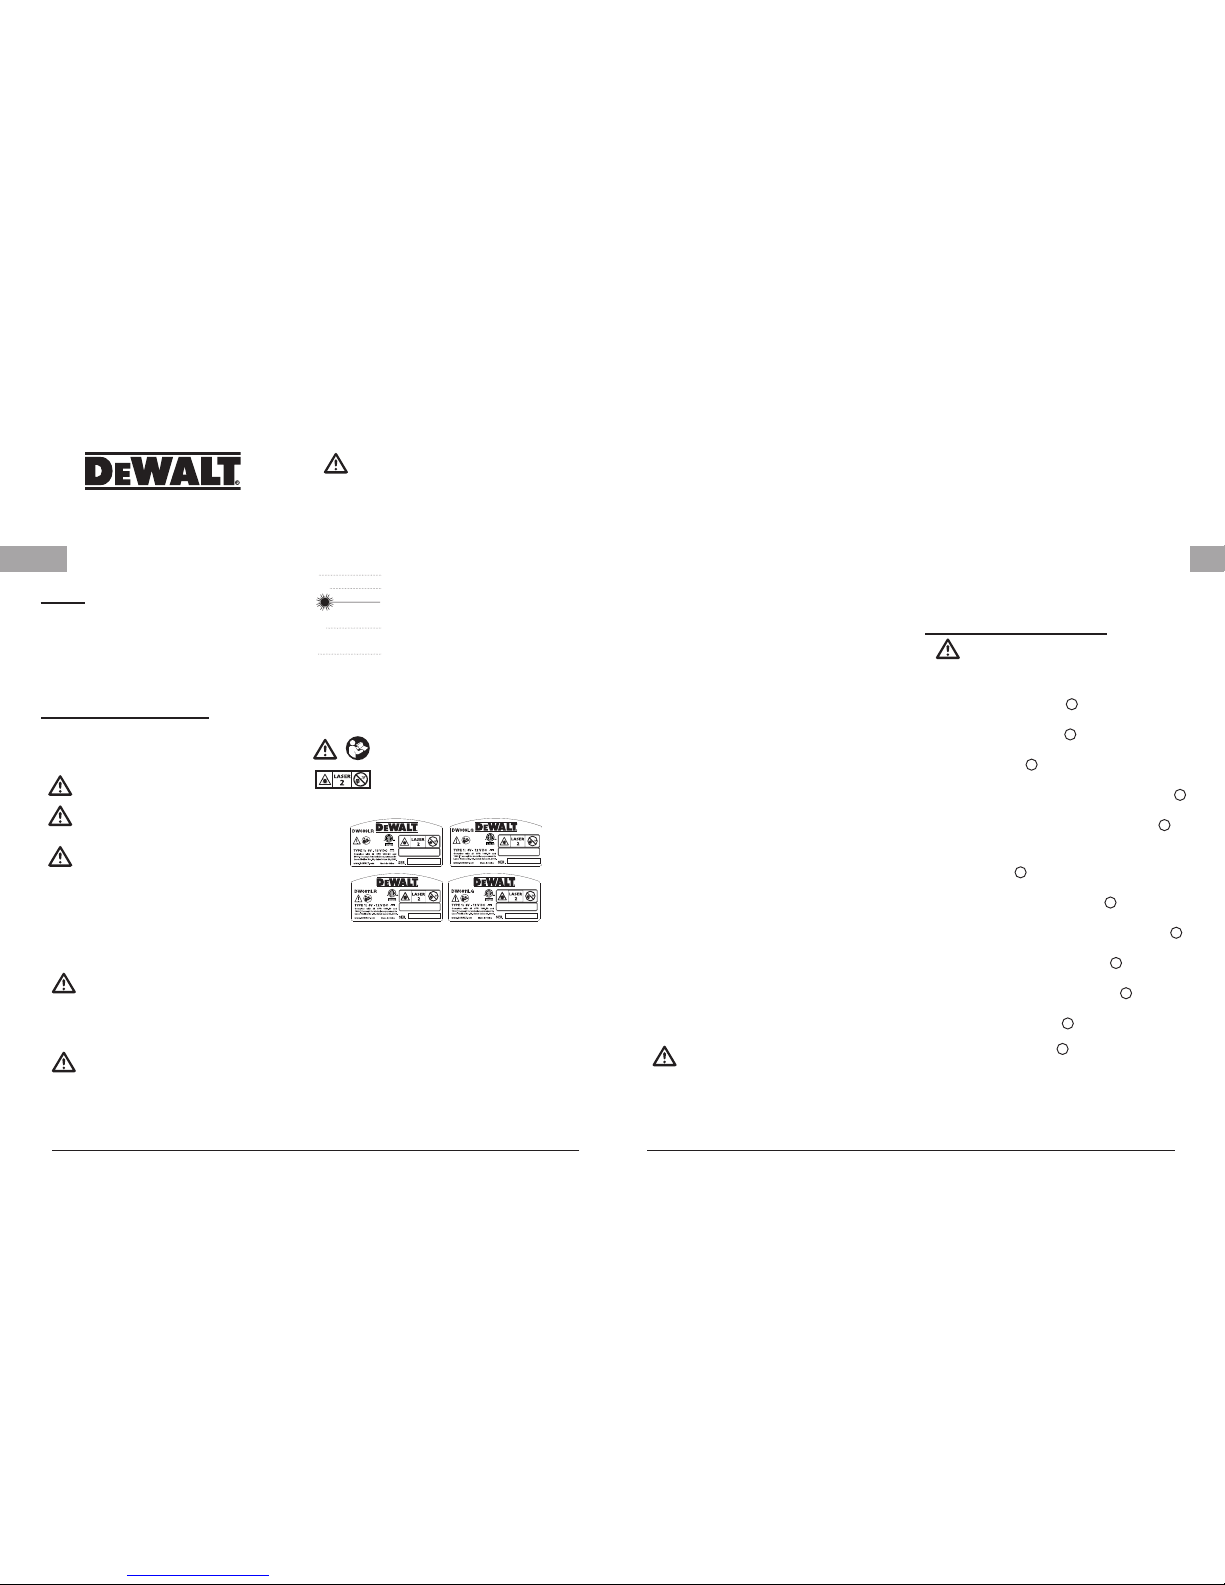
Manual do Usuário
36
37
PT
Segurança do Usuário
Definições: Orientações de segurança
As definições a seguir descrevem o nível de gravidade dos
alertas. Leia o manual e preste atenção a estes símbolos.
PERIGO: Indica uma situação de risco iminente que, se
não evitada, acarretará morte ou ferimento grave.
ADVERTÊNCIA: Indica uma situação potencialmente
perigosa que, se não for evitada, poderá resultar em morte
ou ferimento grave.
CUIDADO: Indica uma situação potencialmente perigosa
que, se não evitada, poderá resultar em ferimentos
moderados a leves.
AVISO: Indica uma prática não relacionada a ferimentos pessoais
que, se não evitada, poderá acarretar danos à propriedade.
Se você tiver dúvidas ou comentários sobre isso ou sobre
qualquer ferramenta da DeWalt, ligue para 1-800-4-DeWALT
(1-800-433-9258) ou acesse o site www.dewalt.com na Internet.
ADVERTÊNCIA:
Leia e entenda todas as instruções. O não
cumprimento das instruções e advertências acarretará
choque elétrico, incêndio e/ou ferimentos graves.
GUARDE ESTAS INSTRUÇÕES
ADVERTÊNCIA:
Exposição à Radiação de Laser. Não desmonte ou
modifique o nível do laser. Não há peças reparáveis
pelo usuário na parte interna. Poderá acarretar
ferimento grave nos olhos.
Índice
• Segurança
• Visão Geral do Produto
• Baterias e Alimentação
• Operação
• Verificação de Precisão e Calibração
• Especificações
ADVERTÊNCIA:
Radiação Perigosa. Usar controles, ajustes ou execução
de procedimentos diferentes daqueles especificados
neste manual pode resultar em exposição à radiação a
laser perigosa.
O rótulo na ferramenta poderá conter um ou mais dos símbolos a
seguir.
V volts
mW miliwatts
símbolo de advertência do laser
nm comprimento de onda em nanômetros
2 Laser Classe 2
Etiquetas de Advertência
Para sua conveniência e segurança, as seguintes etiquetas estão
no seu laser.
ADVERTÊNCIA: Para reduzir o risco de ferimentos
o usuário deverá ler o manual de instruções.
ADVERTÊNCIA: RADIAÇÃO LASER. NÃO OLHE
DIRETAMENTE PARA O FEIXE. Produto Laser
Classe 2
5002595
≤1.5mW @ 630-680nm
IEC 60825-1: 2014
Laser Artwork
5002595
5002595
≤1.5mW @ 510-530nm
IEC 60825-1: 2014
≤1.5mW @ 630-680nm
IEC 60825-1: 2014
≤1.5mW @ 630-680nm
IEC 60825-1: 2014
5002595
Visual Result
≤1.5mW @ 630-680nm
IEC 60825-1: 2014
≤1.5mW @ 510-530nm
IEC 60825-1: 2014
5002595
5002595
• Não opere o laser em áreas explosivas, tais como na
presença de líquidos inflamáveis, gases ou poeira. As
ferramentas elétricas produzem fagulhas que podem provocar a
ignição de poeiras ou gases.
• Use o laser apenas com as baterias feitas especialmente
para ele. O uso de outras baterias pode criar um risco de
incêndio.
• Armazene o laser quando não estiver em uso fora do
alcance de crianças e outras pessoas não treinadas.
Lasers tornam-se perigosos quando manipulados por usuários
não treinados.
• Use somente os acessórios recomendados pelo fabricante
e que sejam específicos para o seu modelo. Os acessórios
que podem servir para um laser podem trazer risco de danos se
utilizados com outro laser.
• A manutenção da ferramenta deve ser executada apenas
pelo técnico de reparo qualificado. A assistência ou
manutenção executada por pessoas desqualificadas pode
resultar em ferimentos. Para localizar o seu centro de
assistência DeWALT mais próximo, ligue para 1-800-4-DeWALT
(1-800-433-9258) ou acesse www.dewalt.com.
• Não use ferramentas óticas como um telescópio ou
instrumento de trânsito para ver o raio laser. Poderá
acarretar ferimento grave nos olhos.
• Não posicione o laser em uma posição que possa
fazer com que qualquer pessoa fique intencional ou
acidentalmente na frente do feixe de laser. Poderá acarretar
ferimento grave nos olhos.
• Não posicione o laser próximo de uma superfície refletora
que possa refletir o feixe do laser em direção aos olhos de
alguém. Poderá acarretar ferimento grave nos olhos.
• Desligue o laser quando não estiver em uso. Deixar o laser
ligado aumenta o risco ao ficar na direção do feixe de laser.
• De maneira nenhuma modifique o laser. Modificar a
ferramenta pode resultar na exposição perigosa da radiação
do laser.
• Não coloque o laser em funcionamento com crianças
ao redor ou permita que crianças operem o laser. Poderá
acarretar ferimento grave nos olhos.
• Não remova ou desfigure as etiquetas de advertência.
Se as etiquetas forem removidas, os usuários poderão se expor
acidentalmente à radiação.
• Coloque o laser com segurança em uma superfície
nivelada. Se o laser cair, poderá ser danificado ou acarretar
ferimentos graves.
Informação sobre o Laser
• O Laser de Linha de 360° com 3 Feixes DW089LR,
DW089LG e o Laser de Linha de 360° com 2 Feixes
DW0811LR, DW0811LG são produtos de laser Classe
2. Os lasers são ferramentas laser autonivelantes
que podem ser usadas para projetos de alinhamento
horizontal (nível) e vertical (prumo).
Este produto está em conformidade com 21 CFR 1040.10 e 1040.11, exceto para
divergências concernentes à "Laser Notice 50 ", com data de 24 de junho de 2007
Em conformidade com UL STDS 61010-1
Certificado para CSA STD C22.2 Nº 61010-1
ADVERTÊNCIA:
Leia e entenda todas as instruções. O não cumprimento
das instruções citadas a seguir poderá resultar em choque
elétrico, incêndio e/ou ferimentos pessoais graves.
Local de trabalho
• Mantenha seu local de trabalho limpo e bem iluminado. Locais
bagunçados ou escuros favorecem os acidentes.
• Não opere ferramentas a laser em áreas explosivas, tais como na
presença de líquidos inflamáveis, gases ou poeira.
• Mantenha crianças e outras pessoas afastadas ao operar uma
ferramenta laser. As distrações podem fazer com que você perca
o controle.
• Segurança elétrica
• Use ferramentas a bateria apenas com as baterias feitas
especialmente para elas. O uso de outras baterias pode criar
um risco de incêndio.
Visão Geral do Produto
ADVERTÊNCIA:
Não modifique a ferramenta nem suas peças. Isso poderá
danificar o laser ou acarretar ferimentos pessoais.
Figura 2 - Interface da bateria
A
Figura 1A - Trava do pêndulo
B
Figura 1B - Teclado
C
Figura 1B - Botão Liga/Desliga: linha horizontal do laser
D
Figura 1B - Botão Liga/Desliga: linha lateral do laser
E
Figura 1B - Botão Liga/Desliga: linha frontal vertical do laser
(apenas DCE089R/G)
F
Figura 2 - Suporte pivotante magnético
G
Figura 4 - Fixação de rosca do tripé (1/4 - 20 e 5/8 -11)
I
Figura 1B - Indicador de nível da bateria
J
Figura 5 - Braçadeira de montagem no teto
K
Figura 5 - Montagem no teto
L
Figura 5 - Furo do parafuso
M
Page 20

Manual do Usuário
38
39
PT
Baterias e Alimentação
• Esta ferramenta é alimentada pelos seguintes pacotes de
baterias 12V da DeWALT: DCB120, DCB127 ou também o pacote
iniciante DEWALT AA, que suporta 4 baterias AA. Observação:
O pacote iniciante AA é recomendado somente para uso com o
laser vermelho.
Instalação/Remoção da Bateria
Uso do Pacote Iniciante AA:
CUIDADO:
O pacote iniciante AA foi projetado especificamente para
uso somente com produtos a laser compatíveis de 12 V da
DeWALT e não pode ser usado com outras ferramentas.
Não tente modificar o produto.
Para instalar as baterias:
• Levante a tampa do compartimento da bateria, como
mostrado na Figura 6A.
• Insira quatro baterias AA novas no compartimento,
seguindo as indicações (+) e (-) na parte interior do
compartimento.
• Instale o pacote iniciante de baterias AA como mostrado
na figura 6B.
Uso do pacote de baterias 12V recarregáveis
da DEWALT:
• Instale a Bateria de 12 V como mostrado na Figura 6B.
ADVERTÊNCIA:
As baterias podem explodir ou vazar e provocar
ferimentos ou incêndio. Para reduzir esses riscos:
• Siga atentamente todas as instruções e advertências contidas no
rótulo e na embalagem da bateria e que acompanham o Folheto
de Segurança da Bateria.
• Sempre insira as baterias corretamente prestando atenção à
polaridade (+ e -) marcada na bateria e no equipamento.
• Não coloque os terminais da bateria em curto-circuito.
• Não carregue baterias descartáveis.
• Não misture baterias velhas e novas. Substitua todas ao mesmo
tempo, por novas da mesma marca e tipo.
• Remova as baterias descarregadas imediatamente e descarte-as
de acordo com as leis locais.
• Não jogue as baterias no fogo.
• Mantenha as baterias fora do alcance das crianças.
• Remova as baterias quando o dispositivo não estiver em uso.
• Use apenas o carregador especificado para seu conjunto de
baterias recarregáveis.
Segurança Pessoal
• Mantenha-se alerta, veja o que está fazendo e use de bom
senso ao operar uma ferramenta a laser. Não use a ferramenta
quando estiver cansado ou sob o efeito de drogas, álcool ou
medicamentos. Um momento de distração ao operar ferramentas
elétricas pode resultar em ferimentos pessoais graves.
• Use equipamentos de segurança pessoal. Use sempre proteção
ocular. Equipamentos de proteção como máscara contra poeira,
calçados de segurança antiderrapantes, capacete ou protetores
auditivos usados nas condições apropriadas reduzem os
ferimentos.
Uso e Cuidado com a Ferramenta
• Não use a ferramenta se o interruptor não a ligar ou desligar.
A ferramenta que não puder ser controlada pelo interruptor é
perigosa e deverá ser consertada.
• Armazene as ferramentas de laser que não estiverem sendo
utilizadas fora do alcance das crianças e não permita que
pessoas sem experiência com ferramentas ou que não tenham
lido estas instruções manipulem a ferramenta. As ferramentas
de laser podem ser perigosas quando manipuladas por usuários
não treinados.
• Use somente os acessórios recomendados pelo fabricante e que
sejam específicos para o seu modelo. Acessórios que podem ser
adequados a uma ferramenta podem tornar-se perigosos quando
usados em outra ferramenta.
Manutenção
• A manutenção da ferramenta deve ser executada apenas pelo
técnico de reparo qualificado. A assistência ou manutenção
executada por pessoas desqualificadas pode resultar em
ferimentos.
• Ao fazer a manutenção de uma ferramenta, use apenas peças de
reposição idênticas. Sigas as instruções na seção Manutenção
deste manual. O uso de peças não autorizadas ou o não
cumprimento das Instruções de Manutenção podem gerar risco de
choque elétrico ou ferimentos.
Para localizar o centro de assistência DeWALT mais próximo,
ligue para 1-800-4-DeWALT (1-800-433-9258) ou acesse
http://www.dewalt.com.
Dicas de Operação
• Use apenas baterias AA novas, de alta qualidade e marca
conhecida ou o conjunto de baterias de íon de lítio de 12 V DEWALT
recarregável especificado para obter melhores resultados.
• Assegure-se de que as baterias estejam em boas condições de
trabalho. Se a luz vermelha do indicador de bateria descarregada
estiver piscando, é necessário substituir as baterias.
• Para estender a vida da bateria, desligue o laser quando não
estiver usando ou marcando o feixe.
• Para garantir a precisão do seu trabalho, verifique com frequência
se o seu laser está calibrado. Consulte Verificação de Calibração
de Campo.
• Antes de tentar usar o laser, assegure-se de que ele esteja
firmemente posicionado em uma superfície lisa e plana.
• Sempre marque o centro do feixe criado pelo laser.
• Mudanças extremas de temperaturas podem deslocar
peças internas e afetar a precisão. Verifique sua precisão
frequentemente enquanto trabalha. Consulte Verificação de
Calibração de Campo.
• Se o laser cair, verifique se o feixe ainda está calibrado. Consulte
Verificação de Calibração de Campo.
Indicador de Bateria Descarregada
Os lasers DW089LR, DW089LG, DW0811LR, DW0811LG
são equipados com um medidor de bateria, como mostrado
na Figura 1B. O medidor de bateria indica a carga restante,
com cada LED representando 25%. O LED inferior acenderá
e piscará indicando que o nível está baixo (abaixo de 12,5%)
e que as baterias precisam ser substituídas. O laser pode
continuar a operar por um tempo curto enquanto as baterias
continuam a descarregar, mas os feixes perderão intensidade
em breve. Após as baterias novas serem instaladas e o laser
ser novamente ligado, o brilho do feixe de laser retomará sua
intensidade e o indicador de nível de bateria indicará capacidade
total. (Um feixe de laser piscando não é causado por bateria
com carga baixa, consulte Indicador de Fora do Intervalo
de Inclinação.) Se todos os 4 LEDs no medidor de bateria
piscarem continuamente, isso não é sinal de bateria com carga
baixa; consulte "LEDs do Medidor de Bateria Piscando" em
Solução de Problemas.
Operação
Para Ligar e Desligar os Lasers
(Veja a Figura 1)
Com o laser desligado, coloque-o em uma superfície plana.
Deslize o interruptor de Trava do Pêndulo B para a posição
Destravado/LIGADO. O modelo DCE089G/R tem três botões Liga/
Desliga no teclado C, um para uma linha de laser horizontal D,
um para uma linha de laser vertical lateral E e um para uma linha
de laser frontal vertical F (somente DCE089G/R). O DCE0811G
/R tem duas linhas: uma linha horizontal e uma linha vertical
lateral. Cada linha de laser é ativada pressionando o botão liga/
desliga correspondente no teclado. As linhas de laser podem
ser ativadas individual ou simultaneamente. Pressionar as teclas
Ligar/Desligar novamente desliga as linhas de laser. Deslize o
interruptor de Trava do Pêndulo para a posição Desligado/Travado
quando o laser não estiver em uso. Se o interruptor da trava de
pêndulo não for colocado na posição de travamento, todos os
4 LEDs piscarão continuamente no medidor de bateria.
Uso do Laser
Indicador de Fora de NÍVEL
Os lasers são projetados para se autonivelarem. Se o laser
estiver inclinado de modo a não conseguir se autonivelar (> 4°),
o feixe de laser piscará. Há duas sequências de intermitência
assocadas à condição de fora de nível: (i) entre 4° e 10°, os
feixes piscam com um ciclo de intermitência constante; (ii) em
ângulos maiores que 10°, os feixes piscam com um ciclo de
três intermitências. Quando os feixes piscam, O LASER NÃO
ESTÁ NIVELADO (OU NO PRUMO) E NÃO DEVE SER USADO
PARA DETERMINAR OU MARCAR O NÍVEL OU PRUMO. Tente
reposicionar o laser em uma superfície mais nivelada.
Uso do Suporte Pivotante (Veja a Figura 2)
ADVERTÊNCIA:
Posicione o laser e/ou suporte de parede em uma
superfície estável. Ferimentos graves ou danos ao laser
podem resultar caso o laser caia.
O laser possui um suporte pivotante magnético
G
permanentemente fixado à unidade. Este suporte permite que
a unidade seja montada em qualquer superfície vertical de aço
ou ferro. Exemplos comuns de superfícies adequadas incluem
estruturas de aço, batentes de porta feitos de aço e vigas de aço
estrutural. O suporte também possui um orifício H que permite
que a unidade seja suspensa em um prego ou parafuso em
qualquer tipo de superfície.
Uso do Laser com Suporte de TETO (Veja a Figura 5)
O suporte de teto L (se incluso) oferece mais opções de
suporte ao laser. O suporte de teto tem uma braçadeira K em
uma extremidade que pode ser fixada em um ângulo da parede
para instalação em teto acústico. Em cada extremidade do
suporte de teto está um orifício de suspensão M, que permite
sua fixação em qualquer superfície com um prego ou parafuso.
Page 21

Manual do Usuário
40
41
PT
Quando o suporte de teto está fixado, sua chapa de aço serve
como superfície à qual o suporte pivotante magnético G
pode ser fixado. A posição do laser pode então ser ajustada
deslizando o suporte pivotante magnético para cima ou para
baixo no suporte de parede.
Uso do Laser com Acessórios
Os lasers vêm equipados com uma rosca de 1/4" x 20 e uma
rosca fêmea de 5/8" x 11, no fundo da unidade. Essa rosca deve
acomodar acessórios DeWALT atuais ou futuros. Use somente
os acessórios DeWALT especificados para o uso com este
produto. Siga as instruções incluídas com o acessório.
CUIDADO:
O uso de qualquer outro acessório não indicado para uso
com esta ferramenta pode ser perigoso.
Se você precisar de assistência para localizar qualquer
acessório, entre em contato com a assistência técnica da
DeWALT mais próxima ou acesse www.dewalt.com.
Nivelamento dos Lasers
Desde que o laser esteja adequadamente calibrado, será
autonivelado. Cada laser é calibrado na fábrica para encontrar
o nível enquanto estiver posicionado em uma superfície plana
dentro de uma média de ± 4° do nível. Nenhum ajuste manual
é necessário.
Manutenção
• Para manter a precisão de seu trabalho, verifique o laser
constantemente para garantir que esteja sempre calibrado
adequadamente. Consulte Verificação de Calibração de Campo.
• As verificações de calibração e outros reparos de manutenção
podem ser realizados em assistências técnicas da DeWALT.
• Quando não estiver sendo usado, armazene o laser na caixa
fornecida com o kit. Não armazene o laser em temperaturas
abaixo de -5 ˚F (-20 ˚C ) ou acima de 140 ˚F (60 ˚C).
• Não armazene seu laser na caixa do kit se ele estiver molhado.
Antes do armazenamento, primeiro ele deve ser secado com um
pano seco e macio.
Limpeza
As peças de plástico da parte externa podem ser limpas
com um pano úmido. Apesar de essas peças serem resistentes
a solventes, NUNCA use solventes. Use um pano seco e
macio para remover a umidade da ferramenta antes do
armazenamento.
Verificação de Precisão
e Calibração
Verificação da Precisão -
Feixe Horizontal, Direção de Varredura (Veja a figura 7)
A verificação da calibração da varredura horizontal do laser
exige duas paredes a 30' (9 m) de distância. É importante fazer
a verificação da calibração usando uma distância que não seja
menor do que a distância das aplicações nas quais a ferramenta
será usada.
1. Fixe o laser em uma parede usando seu suporte pivotante, com o
laser voltado diretamente para a parede oposta (posição de 0°).
2. Ligue o feixe horizontal e o feixe vertical frontal do laser e
marque a posição do feixe na parede oposta diretamente através
do laser. Sempre marque o centro da espessura do feixe.
3. Incline o laser 180° e marque a posição do feixe na parede
oposta.
4. Meça a distância vertical entre a marca mais baixa Ae a marca
mais alta B. Se as medidas forem maiores do que os valores
mostrados abaixo, o laser precisa ser enviado para um centro de
serviço autorizado.
Distância entre as Paredes Distância Permitida
entre as Marcas
30' (9 m) 1/8" (3,0 mm)
40' (12 m) 5/32" (4,0 mm)
50' (15 m) 7/32" (5,0 mm)
Verificação da Precisão -
Feixe Horizontal, Direção do Passo (Veja a figura 8)
A verificação da calibração do passo horizontal exige
uma parede com pelo menos 30' (9 m) de comprimento.
É importante fazer a verificação da calibração usando uma
distância que não seja menor do que a distância das aplicações
nas quais a ferramenta será usada.
1. Fixe o laser a uma extremidade da parede usando seu suporte
pivotante.
2. Ligue o feixe horizontal do laser e gire o laser em direção à
extremidade oposta da parede e aproximadamente paralelo à
parede adjacente.
3. Marque o centro do feixe nas duas localizações (c, d) a pelo
menos 30' (9 m) entre si.
4. Reposicione o laser na extremidade oposta da parede.
5. Ligue o feixe horizontal do laser e gire o laser novamente em
direção à extremidade inicial da parede e aproximadamente
paralelo à parede adjacente.
6. Ajuste a altura do laser para que o centro do feixe esteja
alinhado com a marca mais próxima d.
7. Marque o centro do feixe e diretamente acima ou abaixo da
marca mais distante c.
8. Meça a distância entre estas duas marcas (c, e). Se as
medidas forem maiores do que os valores mostrados abaixo, o
laser precisa ser enviado para um centro de serviço autorizado.
Distância entre as Paredes Distância Permitida
entre as Marcas
30' (9 m) 1/4" (6,0 mm)
40' (12 m) 5/16" (8,0 mm)
50' (15 m) 13/32" (10,0 mm)
Verificação da Precisão -
Feixe Vertical (Veja a Figura 9)
A verificação da calibração vertical (prumo) do laser pode
ser feita com mais precisão quando houver uma quantidade
substancial de altura vertical disponível, idealmente 30' (9 m),
com uma pessoa no chão posicionando o laser e outra pessoa
perto do teto para marcar a posição do feixe. É importante fazer
a verificação da calibração usando uma distância que não seja
menor do que a distância das aplicações nas quais a ferramenta
será usada.
1. Coloque o laser no chão e ligue os dois feixes verticais.
2. Marque as duas posições onde os feixes cruzam no chão
( f, g) e também no teto h. Sempre marque o centro da
espessura do feixe.
3. Gire o laser 180° e reposicione-o próximo à segunda marca
g
, de forma que o cruzamento do feixe seja exatamente nas
marcas originais (f, g) no chão.
4. Marque a posição onde os feixes cruzam no teto j.
5. Meça a distância entre as duas marcas no teto (h, j). Se as
medidas forem maiores do que os valores mostrados abaixo, o
laser precisa ser enviado para um centro de serviço autorizado.
Altura do Teto Distância Permitida
entre as Marcas
8' (2,5 m) 1/16" (1,5 mm)
10' (3 m) 3/32" (2 mm)
14' (4 m) 1/8" (2,5 mm)
20' (6 m) 5/32" (4 m)
30' (9 m) 1/4" (6 m)
Verificação da Precisão de 90º entre os Feixes Verticais
(DW089LR/G) (Veja a Figura 10)
A verificação da precisão de 90º exige uma área do chão aberta
de, pelo menos, 33' x 18' (10 m x 5 m). Consulte a Figura 9 para
posicionar o laser a cada passo e para localizar as marcas feitas
a cada passo. Sempre marque o centro da espessura do feixe.
1. Fixe o laser em um canto do chão e ligue o feixe vertical lateral.
2. Marque o centro do feixe nas três localizações (a, b, c) no
chão, ao longo da linha de laser lateral. A marca b deve estar no
ponto central da linha do laser.
3. Mova o laser para a marca b e ligue os dois feixes verticais.
4. Posicione o cruzamento do feixe precisamente na marca b, com
o feixe lateral alinhado com a marca c.
5. Marque uma localização d ao longo do feixe vertical frontal a
pelo menos 18' (5 m) de distância da unidade.
6. Gire o laser cruzando sobre a marca b, de forma que o feixe
vertical lateral agora passe pela marca b, d.
7. Marque a localização e onde o feixe vertical lateral passa pela
marca d.
8. Meça a distância entre as marcas d e e. Se as medidas forem
maiores do que os valores mostrados abaixo, o laser precisa ser
enviado para um centro de serviço autorizado.
Page 22

Manual do Usuário
42
43
PT
Distância de A para B Distância Permitida entre
as Marcas
14' (4 m) 5/32" (3,5 mm)
17' (5 m) 3/16" (4,5 mm)
20' (6 m) 7/32" (5,5 mm)
23' (7 m) 1/4" (6 m)
Solução de Problemas
O Laser Não Liga
• Confira se as baterias AA (quando usadas) estão instaladas
corretamente de acordo com as marcações (+) e (-) na parte
interior da tampa das baterias.
• Assegure-se de que as baterias ou o pacote recarregável estejam
em boas condições de trabalho. Se estiver em dúvida, coloque
baterias novas.
• Verifique se os contatos da bateria estão limpos e livres de
ferrugem ou corrosão. Assegure-se de manter o nivelador laser seco
e use apenas baterias novas, de marcas reconhecidas e de alta
qualidade, para reduzir a possibilidade de vazamento das baterias.
• Se a unidade laser for aquecida acima de 120˚F (50˚C), ela não
será ligada. Se o laser tiver sido armazenado em temperaturas
extremamente altas, espere que ele esfrie. O nível do laser não
será danificado ao pressionar o botão ligar/desligar antes de ser
resfriado à sua temperatura operacional adequada.
Os Feixes de Laser Piscam
Os lasers são projetados para autonivelamento até uma média
de 4° em todas as direções. Se o laser for inclinado demais,
de forma que o mecanismo interno não possa nivelá-lo, os
feixes do laser piscarão, indicando que a faixa de inclinação foi
excedida. OS FEIXES PISCANDO CRIADOS PELO LASER NÃO
ESTÃO NIVELADOS OU NO PRUMO E NÃO DEVEM SER USADOS
PARA DETERMINAR OU MARCAR O NÍVEL OU PRUMO. Tente
reposicionar o laser em uma superfície mais nivelada.
Os Feixes de Laser Não Param de se Mover
O laser é um instrumento de precisão. Desta maneira, se não
estiver posicionado em uma superfície estável (e imóvel), o
laser continuará tentando buscar o nível. Se o feixe não parar
de se mover, tente colocar o laser em uma superfície mais
estável. Além disso, tente se certificar de que a superfície seja
relativamente plana, para que o laser fique estável.
Os LEDs do Medidor de Bateria Piscam
Quando todos os 4 LEDs piscam continuamente no medidor de
baterias, isso indica que a unidade não foi totalmente desligada
usando o interruptor da trava de pêndulo B. O interruptor
da trava de pêndulo deve sempre ser colocado na posição
TRAVADO/DESLIGADO quando o laser não está em uso.
Acessórios
ADVERTÊNCIA:
Uma vez que acessórios, diferentes dos oferecidos pela
DeWalt, não foram testados com este produto, o uso de tais
acessórios com esta ferramenta pode ser perigoso. Para reduzir
o risco de ferimentos, apenas os acessórios recomendados
pela DeWalt devem ser usados com este produto.
Uso do Laser com Acessórios
(Veja a Figura 2)
O laser vem equipado com uma rosca de 1/4" x 20 e uma
rosca fêmea de 5/8" x 11 (I), no fundo da unidade. Essa rosca
deve acomodar acessórios DeWALT atuais ou futuros. Use
somente os acessórios DeWALT especificados para o uso com
este produto. Siga as instruções incluídas com o acessório.
Os acessórios recomendados para uso com a sua ferramenta
estão disponíveis a um custo extra em seu distribuidor local ou
centro de serviço autorizado. Se você precisar de assistência
na localização de qualquer acessório, visite nosso site:
www.dewalt.com.
Manutenção e Reparos
• Observação: Desmontar os níveis do laser anulará todas as
garantias do produto.
Para garantir a SEGURANÇA e CONFIABILIDADE do produto,
os reparos, manutenção e ajustes devem ser realizados por
assistências técnicas autorizadas. A assistência ou manutenção
executada por pessoas desqualificadas pode resultar em
ferimentos. Para localizar o seu centro de assistência DeWALT
mais próximo, ligue para 1-800-4-DeWALT (1-800-433-9258) ou
acesse www.dewalt.com.
Garantia limitada de 3 anos
A DeWalt efetuará reparos, sem cobrança de taxa, de todos
os defeitos provocados por falha do material ou de fabricação
por 3 anos contados a partir da data da compra. Esta garantia
não cobre falhas da peça provocadas pelo desgaste natural ou
por uso incorreto da ferramenta. Para obter mais informações
sobre a cobertura da garantia e sobre as informações de
reparos abrangidos, visite www.dewalt.com ou telefone para
1-800-4-DeWALT (1-800-433-9258). Esta garantia não se aplica
a acessórios ou danos provocados onde já tiver havido reparo
ou tentativa de reparo por terceiros. Esta garantia oferece a você
os direitos legais específicos e você poderá ter outros direitos
que podem variar de acordo com a sua região.
Além da garantia, as ferramentas da DeWALT têm a cobertura de:
1 ano de manutenção gratuita
A DeWalt efetuará manutenção na ferramenta e substituirá as
peças desgastadas por uso normal, gratuitamente, a qualquer
momento durante o primeiro ano depois da compra.
GARANTIA de 90 DIAS ou seu
dinheiro de volta
Caso não esteja totalmente satisfeito com o desempenho de
sua ferramenta elétrica, laser ou colocador de pregos da DeWalt
você poderá devolver o equipamento em até 90 dias contados
a partir da data da compra com um recibo para reembolso
completo - e não precisará responder a perguntas.
Produto Recondicionado:
Produtos recondicionados são cobertos pela Garantia de
Manutenção Gratuita de 1 Ano. A Garantia de 90 Dias ou Seu
Dinheiro de Volta e a Garantia Limitada de Três Anos não se
aplicam a produtos recondicionados.
Substituição Gratuita da Etiqueta de Aviso:
Se as etiquetas de aviso se tornarem ilegíveis ou estiverem
faltando, telefone para 1-800-4-DeWalt ou visite a assistência
técnica para substituição gratuita.
Observações
Page 23

Manual do Usuário
44
45
PT
Especificações
Ferramenta Laser
Fonte de Luz Diodos de laser
Comprimento de onda do laser 620 – 690 nm visível (VERMELHO) 510 – 530 nm visível (VERDE)
Alimentação do Laser PRODUTO LASER CLASSE 2 DE ≤1,50 mW (cada feixe)
Intervalo Operacional 20 m (±65') VERMELHO 35 m (±115') VERDE
50 m com detector 60 m com detector
Precisão (prumo) ±1/8" por 30 pés (±3 mm por 9 m)
Precisão (Nível): ± 1/8" por 30' (±3 mm por 9 m)
Indicadores
Bateria Descarregada 1 LED Piscando no Medidor de Bateria
Unidade Não Desligada com
Interruptor de Trava de Pêndulo
4 LEDs Piscando no Medidor de Bateria
Feixes do Laser Piscando Intervalo de inclinação excedido/unidade não nivelada
Fonte de Alimentação Baterias no tamanho 4 AA (1,5 V) (6 VCC) ou Conjunto de Baterias DeWalt de 12 V
Temperatura Operacional 14°F a 122°F (-10°C a 50°C)
Temperatura de Armazenamento -5°F a 140°F (-20°C a 60°C)
Umidade Umidade máxima relativa de 80% para temperaturas até 88°F (31°C),
diminuindo linearmente até 50% de umidade relativa a 104°F (40°C)
Ambiental Resistência a Água e Poeira Nível IP65
Observações
Page 24

DEWALT Industrial Tool Co.,
701 Joppa Road, Towsen, MD 21286
OCTOBER / OCTUBRE / OCTOBRE / OUTUBRO DE 2015
DOC100270391 DW089L /DW0811L Copyright © 2015 DeWALT
www.De WALT.com
 Loading...