

Page 1

AVR-X2800H/AVR-X2800H DAB
INTEGRATED NETWORK AV RECEIVER
Quick
star t
guide
Page 2

Welcome
Thank you for choosing a Denon AVR.
Use the Setup Assistant function to help configure the settings for this unit when you first set it up.
Follow the guidance displayed on the TV screen connected to this unit to configure the settings.
This manual describes the procedure up until starting the Setup Assistant.
Please do not return this unit to the store – call for assistance.
If you need help… :
If you need additional help in solving problems, contact Denon customer service in your area.
www.denon.com
1
Page 3
Before you begin
EN
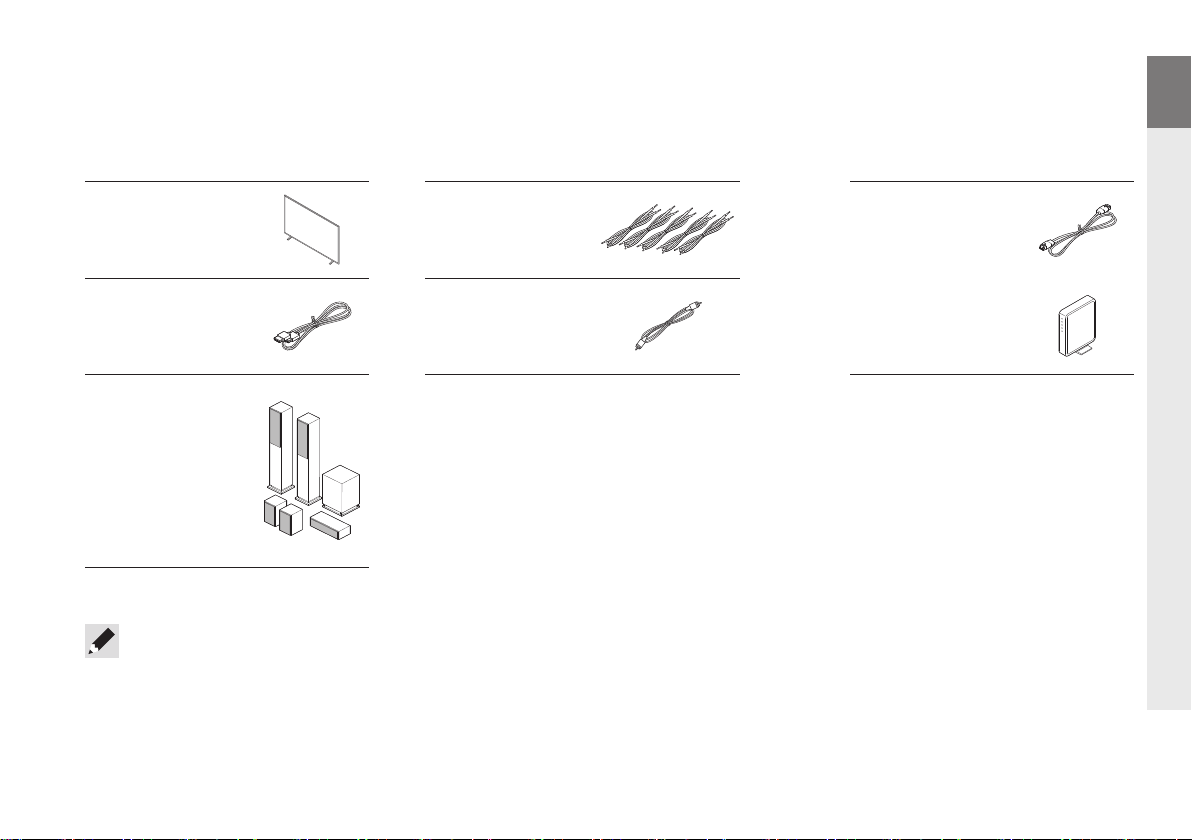
Required for setup
TV Speaker cables
HDMI® cable Subwoofer cable
Speakers
• When connecting this unit to a device that is compatible with the Deep Color, 4K, ARC and eARC functions, use a “High Speed HDMI cable
with Ethernet” that displays the HDMI logo.
• When connecting this unit to a device that is compatible with 8K and 4K 120Hz video, use a certified “Ultra High Speed HDMI cable”. If you
use a different HDMI cable, the video may not display or other problems may occur.
Optional
LAN cable
or
Wi-Fi® router
DE
FR
IT
ES
NL
SV
RU
PL
2
Page 4
What’s in the box
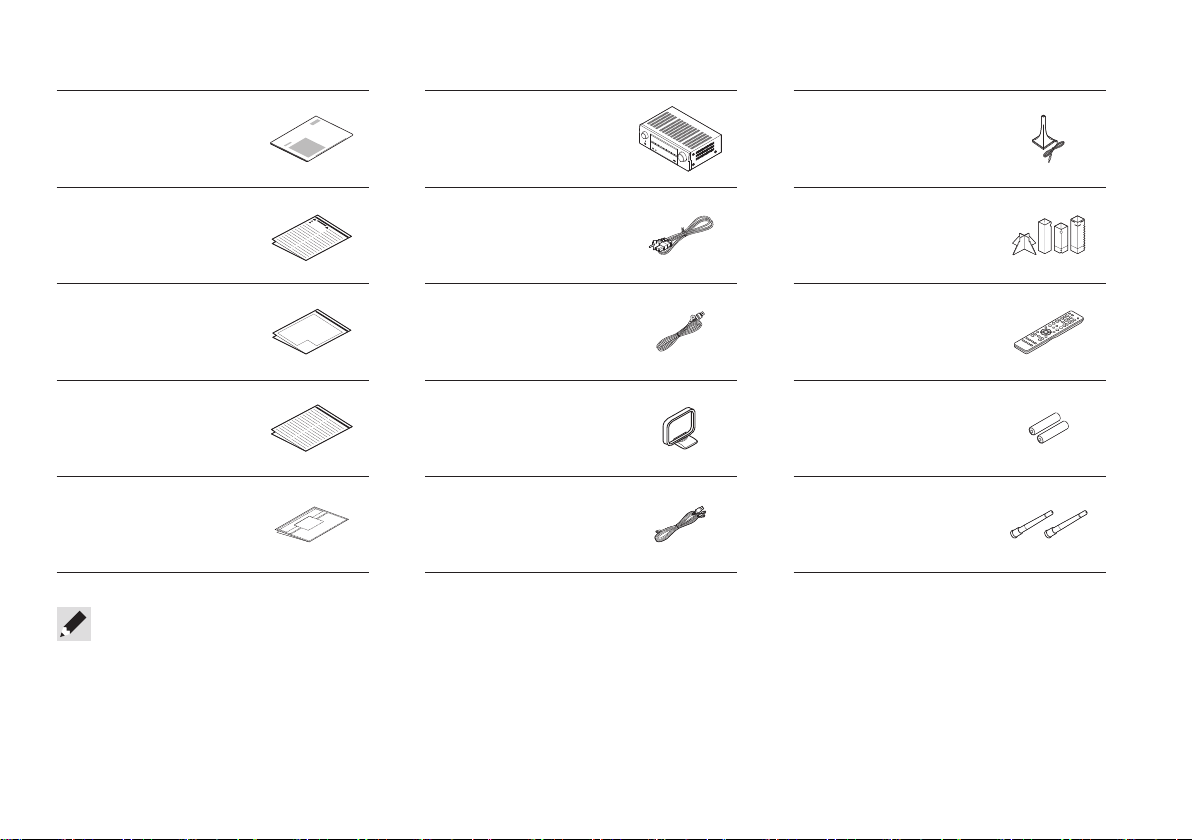
Quick start guide AVR
Safety instructions Power cord
Cautions on using
batteries
Notes on radio
Cable labels
• The included sound calibration microphone stand is convenient for performing speaker calibration. Using your own tripod or the supplied
Sound calibration microphone stand enables settings to be automatically configured to the optimum listening environment, providing
exceptionally high performance.
FM indoor antenna
(for AVR-X2800H only)
AM loop antenna
(for AVR-X2800H only)
DAB/FM indoor
antenna
(for AVR-X2800H DAB
only)
Sound calibration
microphone
Sound calibration
microphone stand
Remote control
(RC-1253)
2× R03/AAA batteries
External antennas
for Bluetooth®/Wi-Fi
connectivity
3
Page 5
Attach the included cable labels
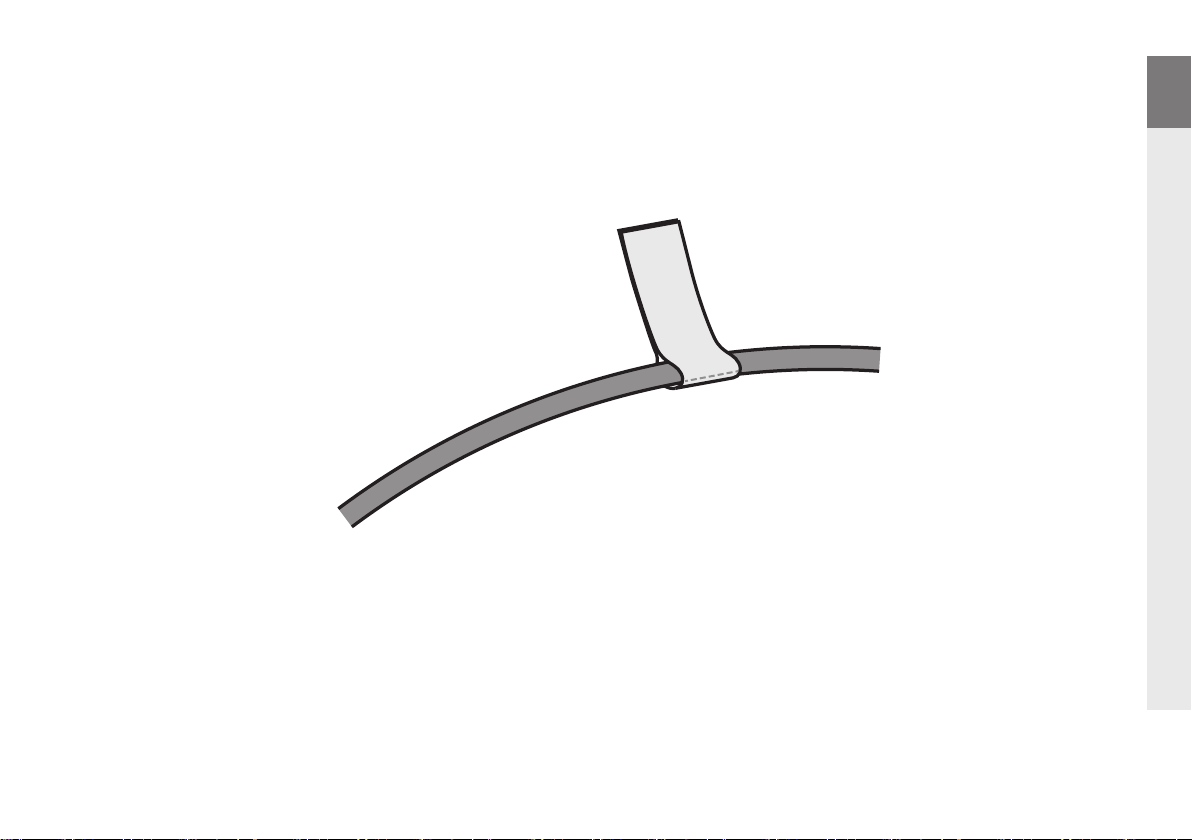
The supplied cable labels include labels for the speaker and HDMI cables.
Attach a cable label to each cable that matches the speakers and HDMI devices being connected, as shown below.
This makes it easy to identify and properly connect the cables between your components.
EN
DE
FR
IT
ES
NL
SV
RU
PL
4
Page 6
Setup
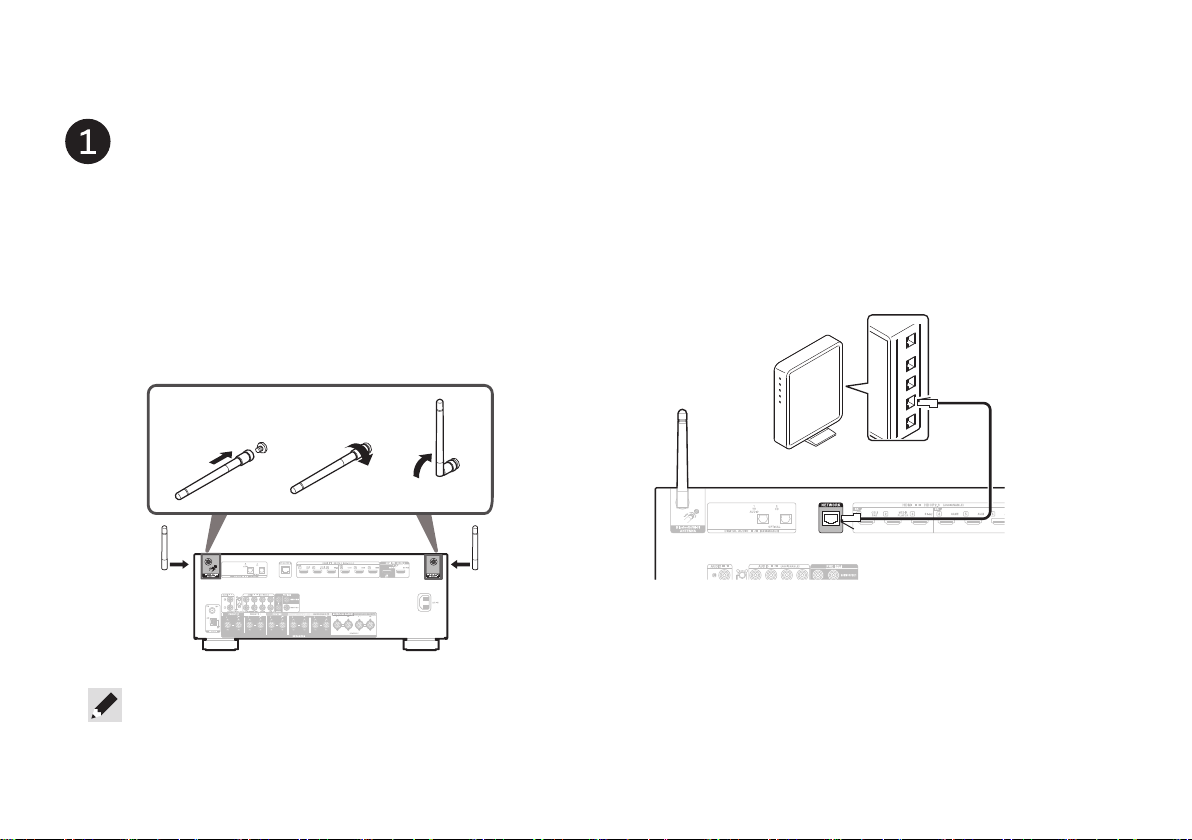
Connect the antennas
1) Place the antenna evenly over the antenna terminal
located at the upper left or right corner of the rear
panel.
2) Turn the antenna clockwise until it is fully connected.
Do not over tighten.
3) Rotate the antenna upwards for the best possible
reception.
1) 2) 3)
Optional
If you are connecting the AVR to a wired network, connect an
Ethernet cable (not included) between the AVR and your router.
Do not connect the Ethernet cable if you are connecting the
AVR to a wireless network.
LAN port
Router
• The antennas are required for both Bluetooth and Wi-Fi
functions.
5
Page 7
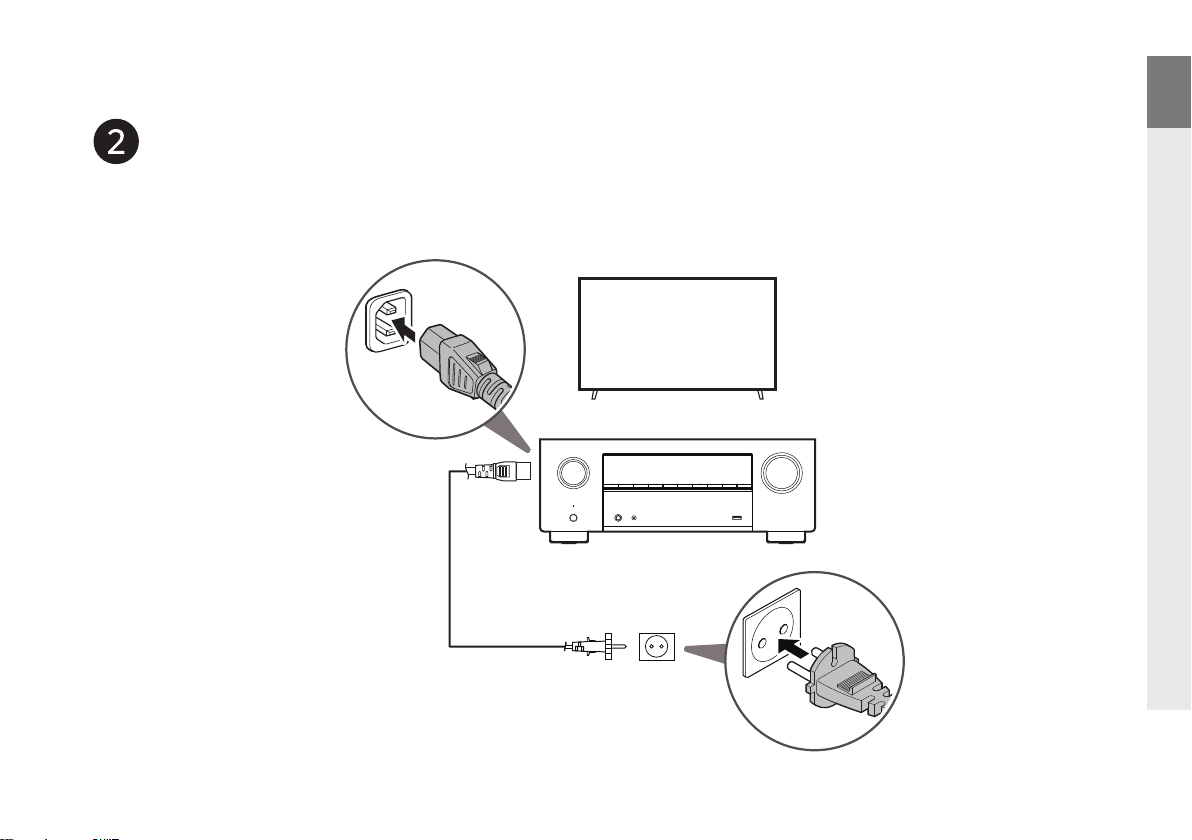
EN
Connect the power cord
Place the AVR near your TV and connect the power cord.
Power cord
DE
FR
IT
ES
TV
NL
SV
AVR
RU
PL
6
Page 8
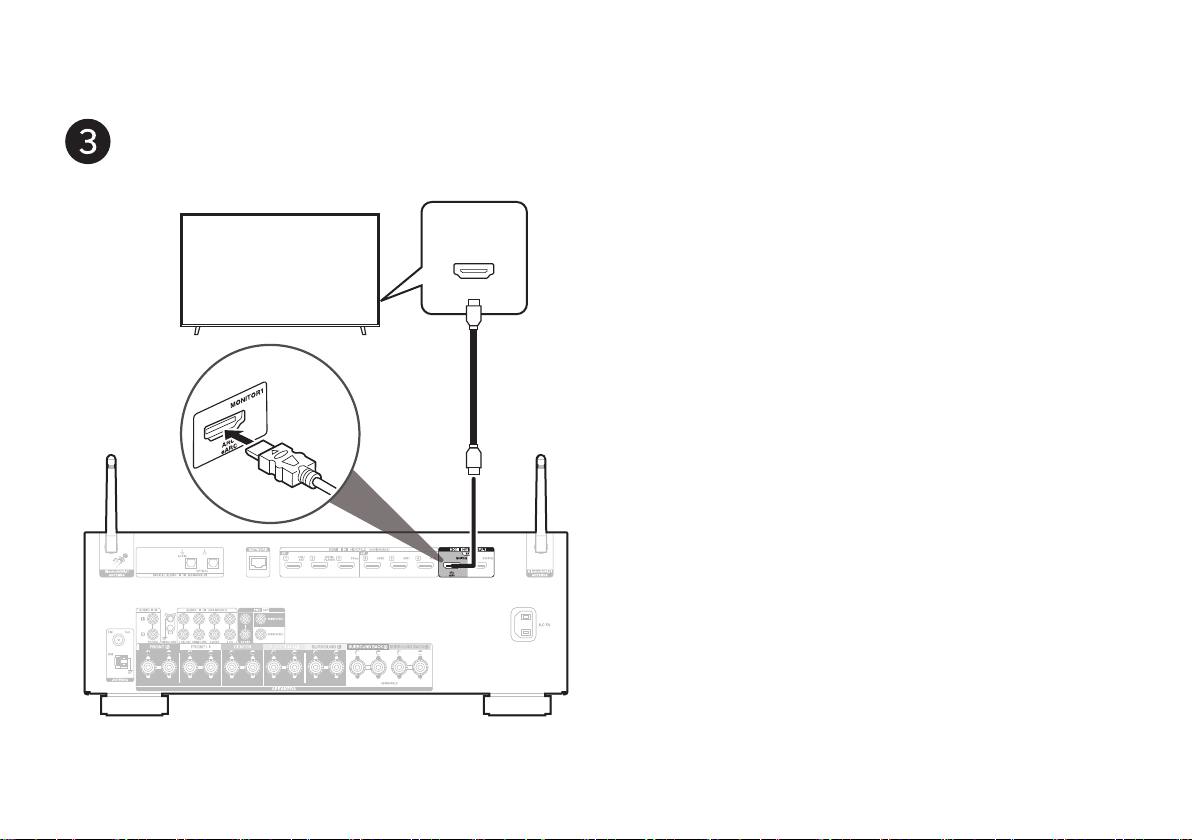
HDMI OUT
MONITOR 1
(ARC/eARC)
Connect the AVR to your TV
HDMI cable
AVR (Rear panel)
HDMI IN
(ARC/eARC)
Using a high quality HDMI cable*, connect one end to the HDMI
port labeled “eARC” or “ARC” on your TV. Connect the other
end to the HDMI OUT MONITOR 1 port on your AVR.
What is ARC and eARC?
Audio Return Channel or “ARC” sends audio back to the AVR
using the same HDMI cable that sends video from your AVR
to your TV. This allows your AVR to process the sound from
your TV’s built-in tuner and apps. TVs with an Enhanced Audio
Return Channel or “eARC” port provide additional support for
high bitrate multichannel audio (Dolby Atmos, Dolby TrueHD,
DTS-HD and DTS:X). Please refer to your TV owner’s manual for
details about eARC support for your particular model.
* For 4K TVs, we recommend using an HDMI cable labeled
“High Speed” and “with Ethernet” .
* For 8K TVs, we recommend using an HDMI cable labeled
“Ultra High Speed”.
7
Page 9
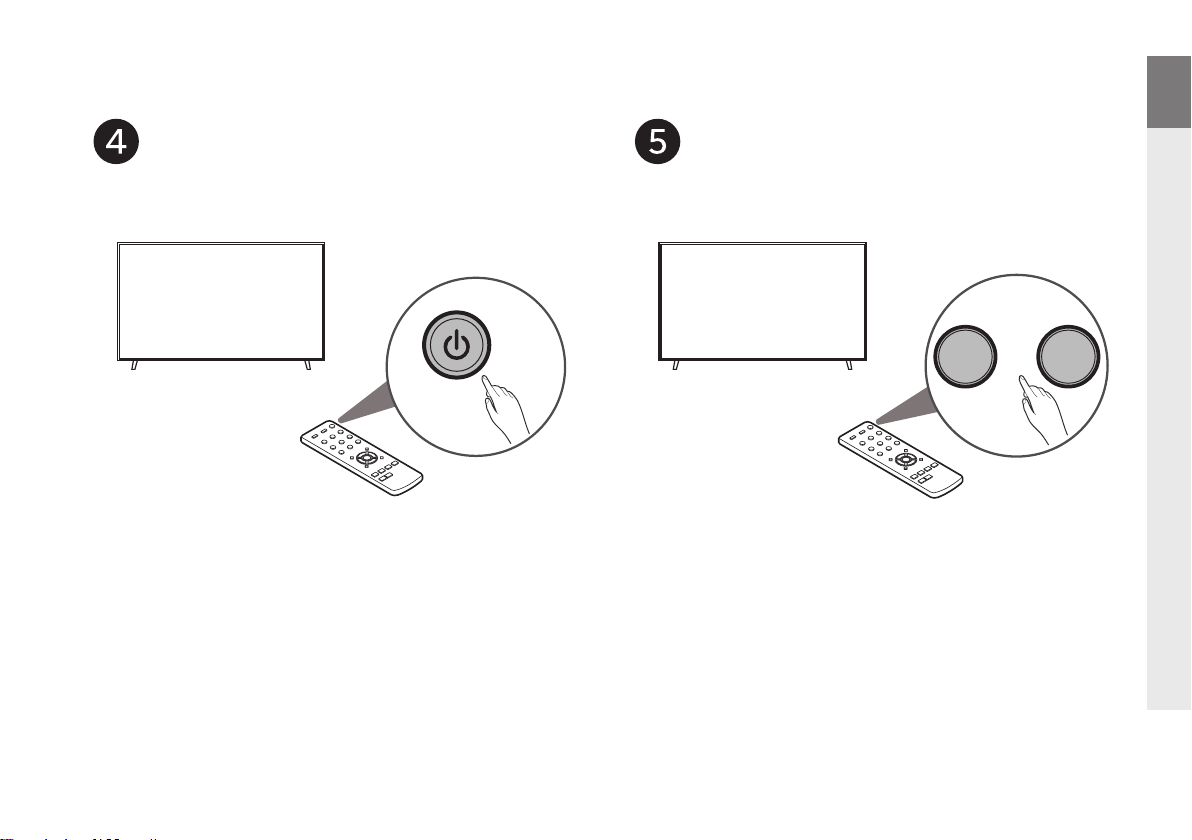
EN
Turn on the TV
TV remote control
Select the appropriate HDMI
input on your TV
HDMI
INPUT
TV remote control
or
TV/
VIDEO
DE
FR
IT
ES
NL
SV
RU
PL
8
Page 10
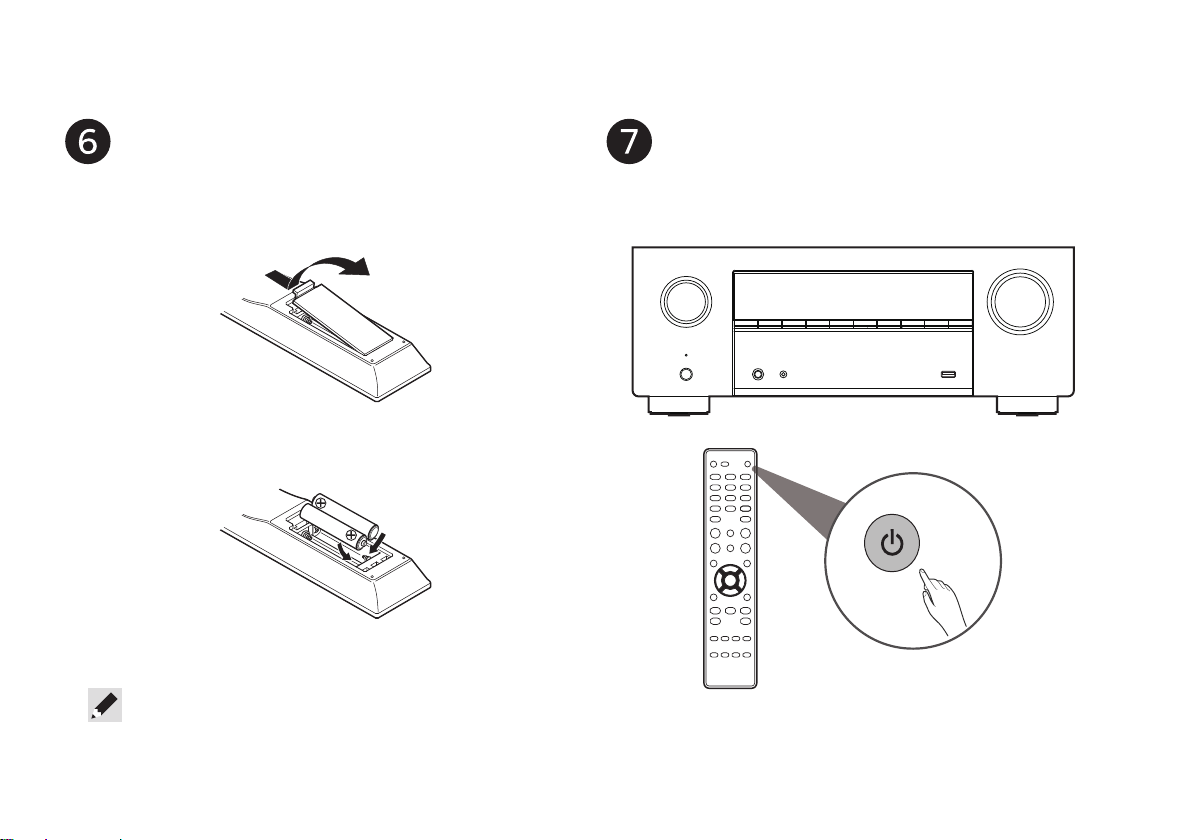
Install batteries in the AVR
remote control
Turn on the AVR
• Press X on the remote control.
• Batteries can be taken out in reversed order.
9
Page 11
EN
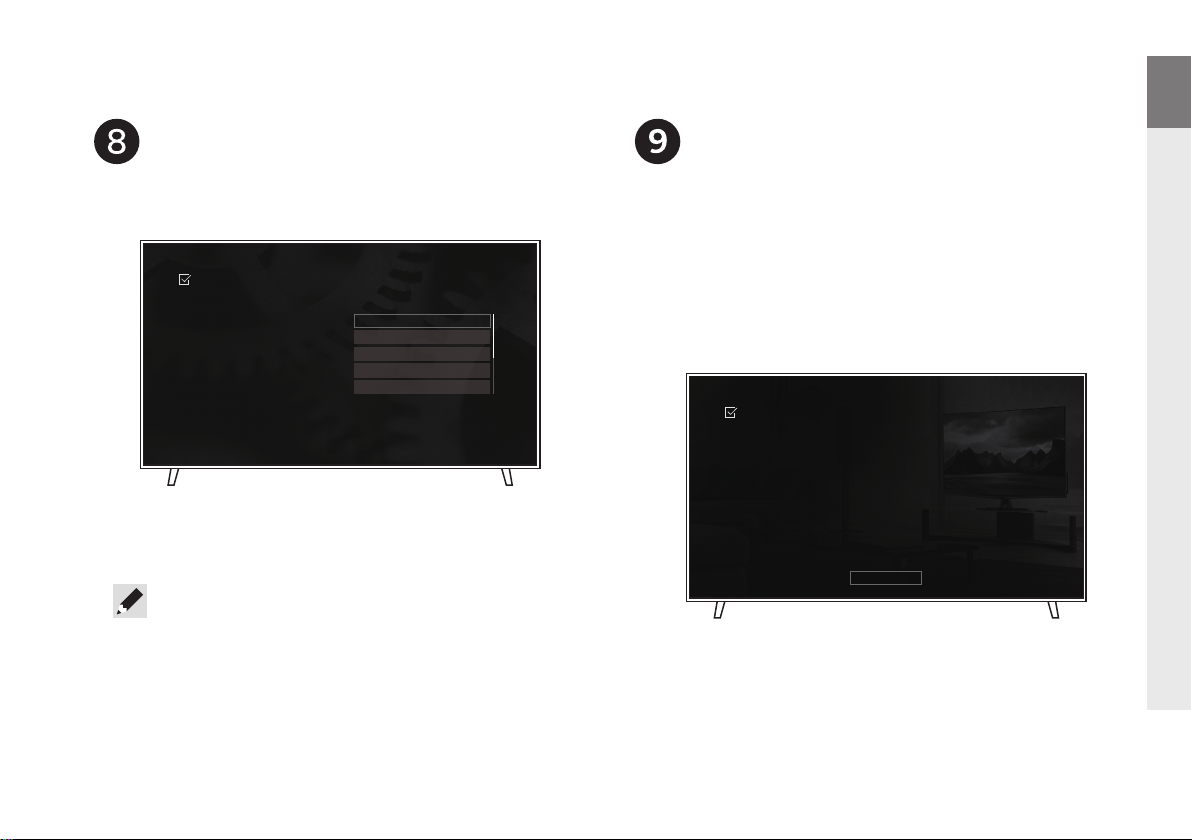
Verify the connection
• Verify that you can see this screen on your TV.
English
Deutsch
Français
Italiano
Español
[1/7]
AV Receiver Setup Assistant
Please selec t a language...
If this screen is not displayed, please go back and retry
the steps again in the recommended sequence.
• In case the unit was already setup back in time the Setup
Assistant won't start automatically and you only see the
Denon logo on screen. In such case you can access the Setup
Assistant by pressing SETUP on the remote control and
selecting Setup Assistant from the menu.
Follow the on-screen Setup
Assistant
The TV is now connected to the AVR.
The Setup Assistant will walk you through connecting and
confi guring your speakers and components to your Denon
AVR. Use the remote control and follow the instructions
on the TV screen to complete the AVR settings using the
Setup Assistant.
Setup Assistant Complete!
Setup is now comp lete.
Your AVR is now properly c onfigured to prov ide you
with the best po ssible sound an d video experi ence.
Enjoy!
Done
DE
FR
IT
ES
NL
SV
RU
PL
10
Page 12
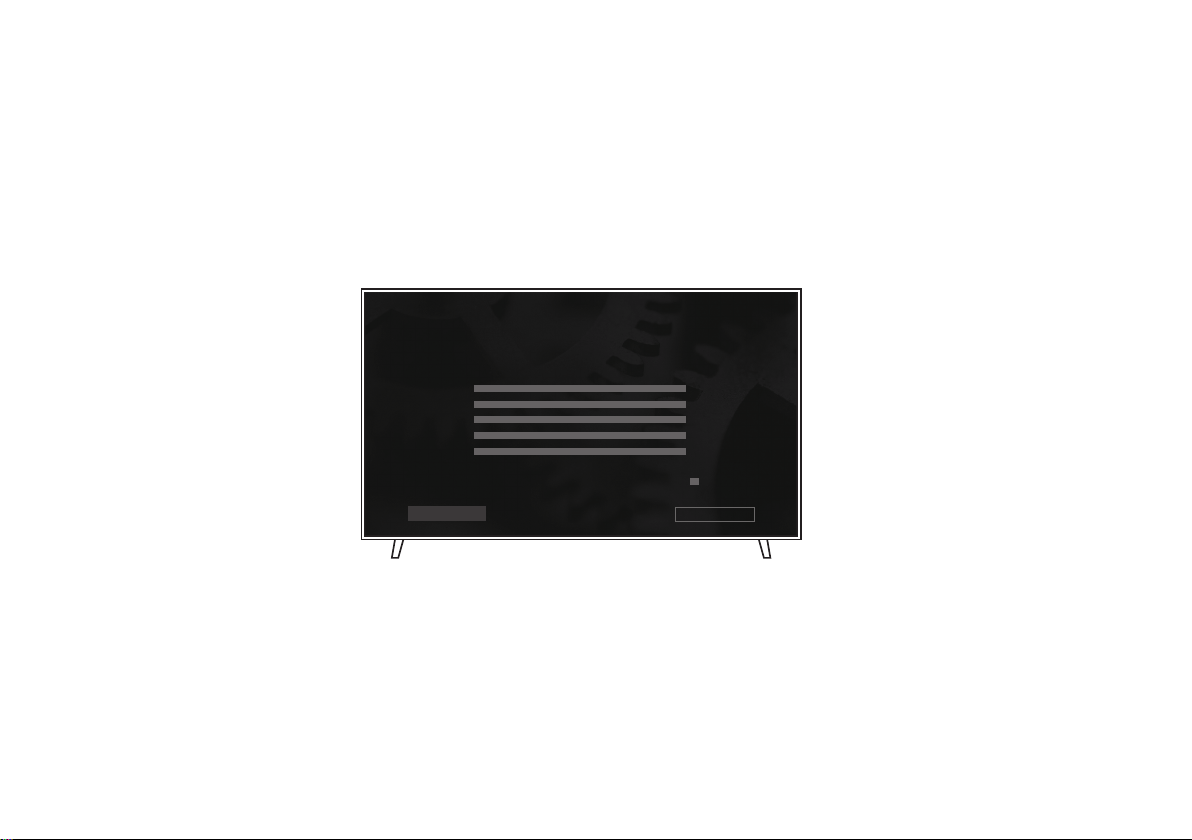
Firmware update
If you see this screen after completing Setup Assistant, select Update Now to make sure your new AVR is up to date with the latest
firmware and features.
The followin g features are avail able for your AVR.
11
Estimate d time to install:
Update Later Up date Now
min
Page 13
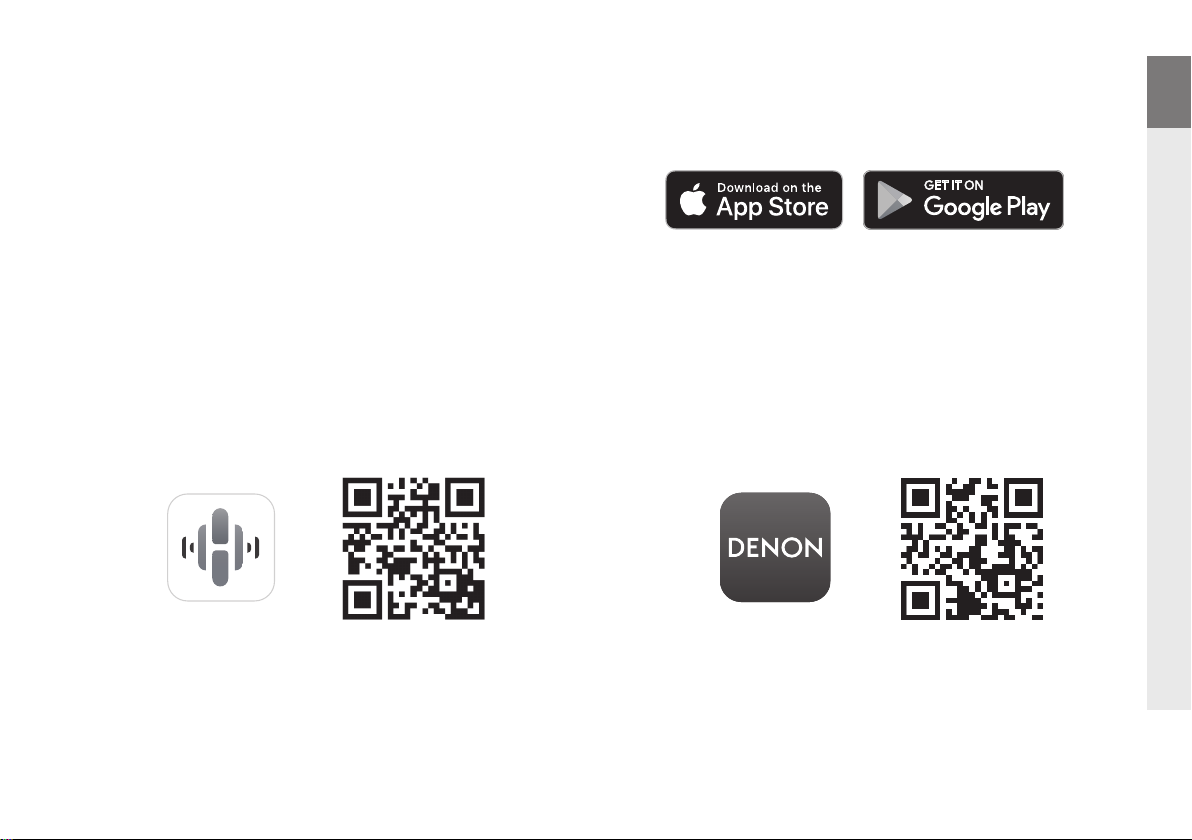
Download the mobile apps
Download both the “HEOS” app and the “Denon AVR Remote”
app for the full home entertainment experience. The HEOS app
is required to access online music through your AVR.
EN
DE
FR
IT
HEOS app
The HEOS app allows you to explore, browse, and play music
from many online streaming services or from your own music
library.
Denon AVR Remote
Control your new AVR with the latest Denon AVR Remote app.
ES
NL
SV
RU
PL
12
Page 14
Owner’s manual
Refer to the online manual for other functions information and
operation procedure details.
manuals.denon.com/AVRX2800H/EU/EN/
Online manual
For more information, visit www.denon.com
13
Page 15

Page 16
Trademark information
The Bluetooth® word mark and logos are registered trademarks owned
by the Bluetooth SIG, Inc. and any use of such marks by D&M Holdings
Inc. is under license. Other trademarks and trade names are those of their
respective owners.
Manufactured under license from Dolby Laboratories. Dolby, Dolby Atmos,
Dolby Audio, Dolby Vision, and the double-D symbol are trademarks of
Dolby Laboratories Licensing Corporation. Confidential unpublished works.
Copyright © 1992-2022 Dolby Laboratories. All rights reserved.
For DTS patents, see http://patents.dts.com. Manufactured under license
from DTS, Inc. DTS, DTS:X, and the DTS:X logo are registered trademarks
or trademarks of DTS, Inc. in the United States and other countries. © 2021
DTS, Inc. ALL RIGHTS RESERVED.
The Wi-Fi CERTIFIED logo is a registered trademark of the Wi-Fi Alliance.
Wi-Fi Certification provides assurance that the device has passed the
interoperability test conducted by the Wi-Fi Alliance, a group that certifies
interoperability among wireless LAN devices.
The terms HDMI and HDMI High-Definition Multimedia Interface, and the
HDMI Logo are trademarks or registered trademarks of HDMI Licensing, LLC
in the United States and other countries.
App Store® is registered in the U.S. and other countries.
Google Play and the Google Play logo are trademarks of Google LLC.
Page 17

Page 18

www.denon.com
Printed in Vietnam 5411 12022 00AD
© 2022 Sound United. All Rights Reserved.
 Loading...