

Page 1

FAN HEATER
INSTRUCTION MANUAL
GB.qxd 6-08-2003 10:20 Pagina 1
Page 2
2
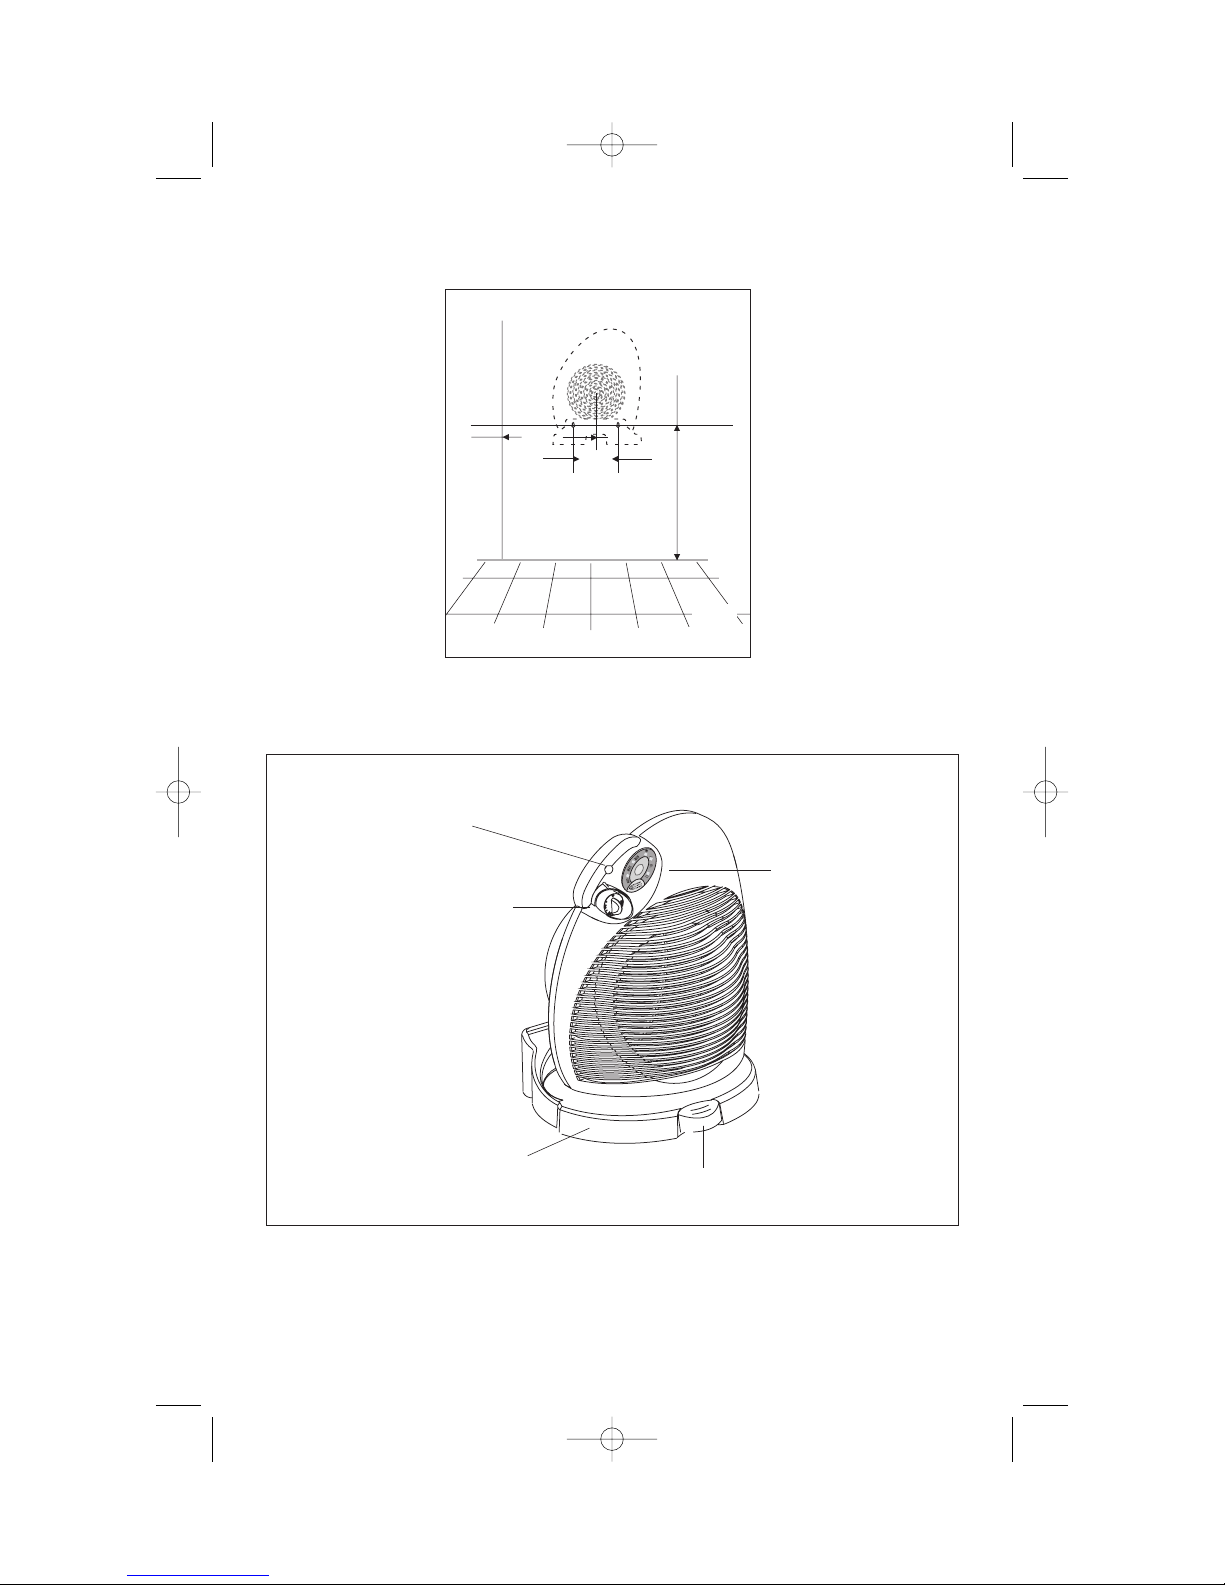
390 mm
140 mm
1
2
Electronic thermostat
Electronic climate control
Motorised oscillating base
Foot switch (only on some models)
Infrared receiver for remote control
GB.qxd 6-08-2003 10:20 Pagina 2
Page 3
ELECTRICAL CONNECTION
- Before using the appliance check that your supply voltage is the same of that shown on the
rating label of the unit.
- THIS APPLIANCE CONFORMS TO DIRECTIVE 89/336/CEE GOVERNING RADIO INTERFERENCE.
INSTALLATION
The heater can be used on a horizontal surface.
Models with a motorised base can be wall-mounted, using 3 screws and 3 wall plugs.
To wall-mount, proceed as follows:
Drill holes in the wall, as shown in Fig.1, paying particular attention to the minimum distances indicated.
Hang the applince on the wall and fasten it using the third screw at the bottom.
Portable appliances are not suitable for use in a bathroom.
The appliance must not be positioned directly underneath a fixed power point.
FUNCTIONING AND USE
This heater has ECC (electronic climate control) which automatically monitors and selects the ideal power
to maintain the chosen temperature.
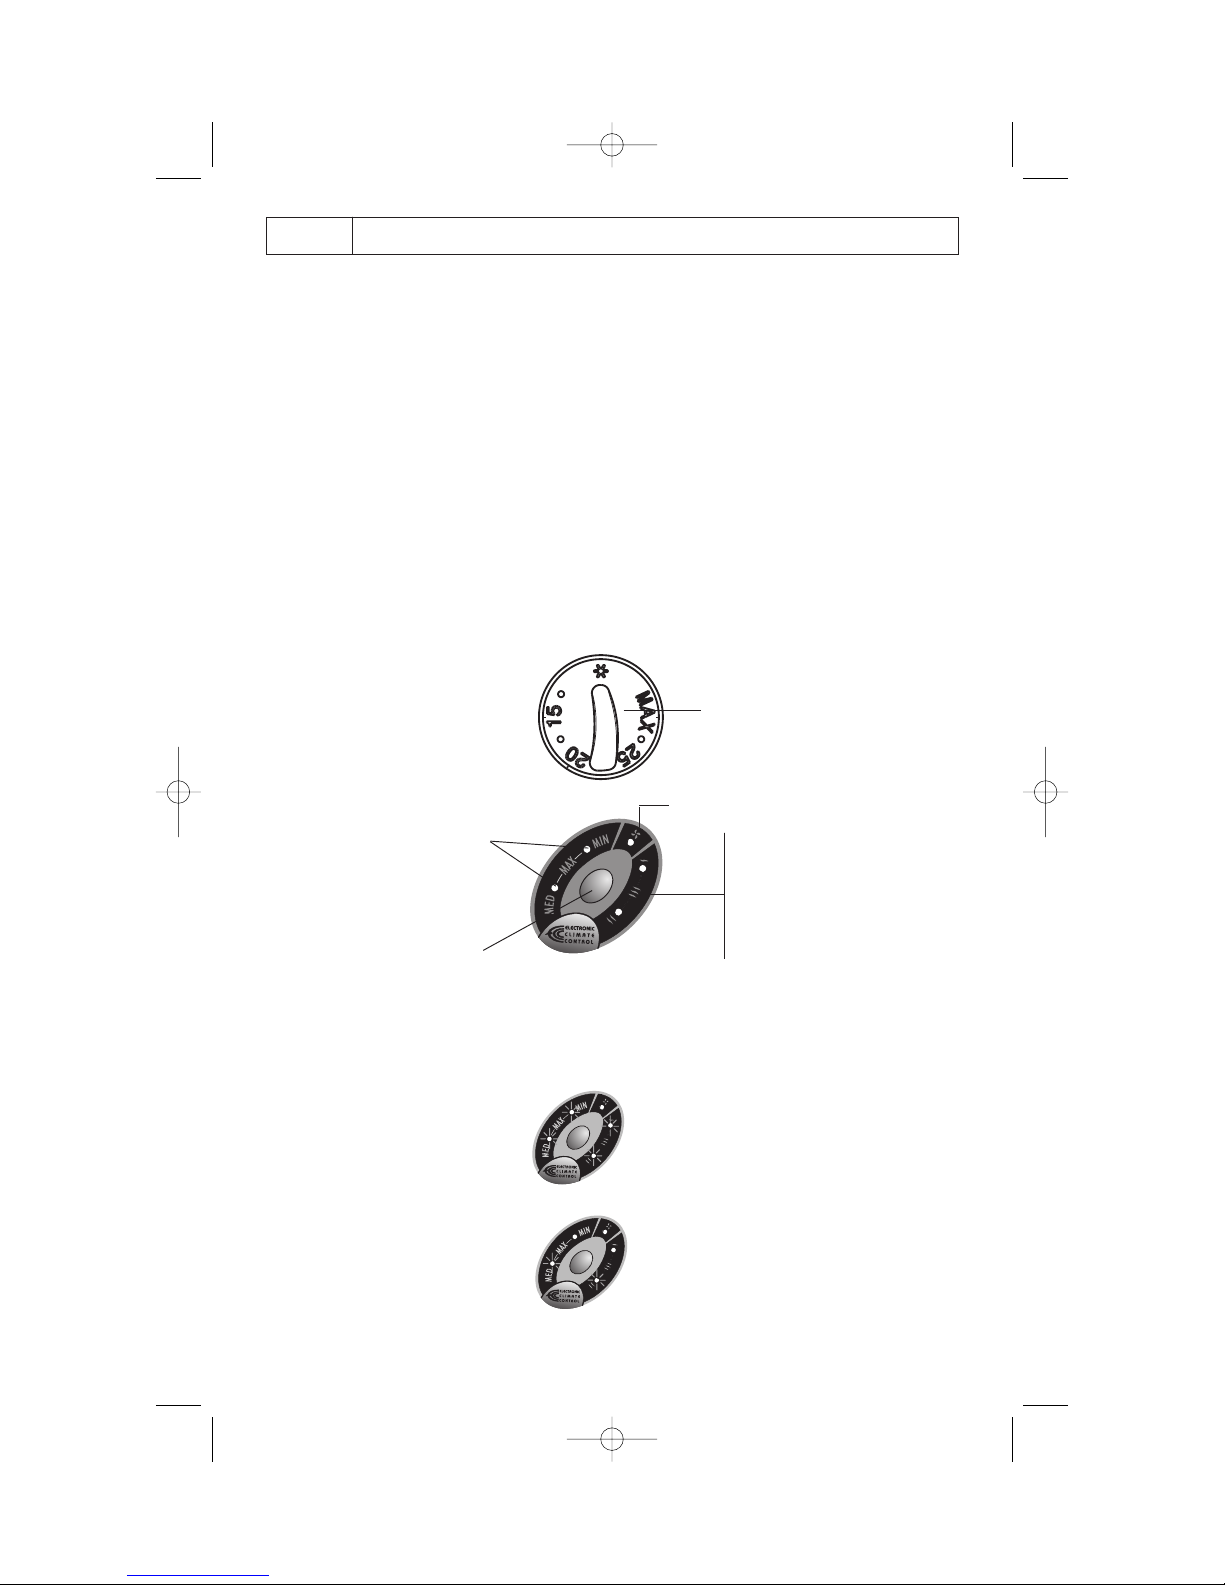
FAN HEATER CONTROLS: The thermostat will adjust the set temperature .
OPERATION AND USE
By pressing the “ON/OFF” button (Fig. 3) one or more times (a beep will confirm each selection), the appliance will select the operating heating power, as follow:
Max (maximum power)
Med (medium power)
thermostat dial
Fig.3
These two LEDs indicate the
selected power level
As the appliance cycles
between the different power
levels when it is in use, these
two LEDs indicate the level
currently in use
ON/OFF button
ventilation only
Voltage
Wattage
See rating label
GB.qxd 6-08-2003 10:20 Pagina 3
Page 4

Min (minimum power)
Fan only (cool air facility)
off
If “Max” maximum appliance operating power has been selected, adjust the thermostat dial (Fig.
4) to the desired comfort temperature, from (5°C) and max (35°C).
If the selected temperature is higher than the actual room temperature, the appliance will start automatically and rapidly heating the room until it reaches the selected temperature. The unit will automatically mantain the temperature at a constant level, by cycling between “max”, “med” and “min”,
as it approaches the selected comfort temperature.
If the room temperature exceeds the selected temperature level, the appliance will turn itself off.
The appliance will turn on automatically again when the room temperature falls below the selected temperature level.
If a power level below “Max” has been selected using the “ON/OFF” button, the appliance will
modulate between the selected level and the lower power levels.
FROST PROTECTION
Press the “ON/OFF” button to select the “Max” power level.
Set the thermostat dial to the “ ” position (Fig. 3).
When set in this way, the appliance will turn on automatically only if the room temperature falls
below 5°C, to prevent it from freezing at minimum energy consumption.
This function is not guaranteed in the event of black outs, even if lasting just a few seconds.
Models with a motorised oscillating base
Some models feature a motorised oscillating base to distribute the airflow over a larger area.
To turn the oscillation on press the footswitch at the front of the heater.
To stop the heater in a particular position, simply press the footswitch again.
The heater can also be tilted manually on its base to vary the airflow up and down.
Please note: This heater is fitted with a tip over switch, which turns the heater off should it be
accidentally knocked over. To restart the heater, simply place it upright again.
MAX
MAX
MAX
MED
MAX
MIN
MAX
OFF
Selected power
Power used
GB.qxd 6-08-2003 10:20 Pagina 4
Page 5

MODELS WITH REMOTE CONTROL
Some models are equipped with a remote control to provide ease of operation.
The appliance can be completely controlled with the remote control.
Two AAA 1,5V batteries are required (not included):
• remove the cover located on the back side of the remote control;
• insert the two AAA 1,5V batteries positioning them correctly (see the instructions in the batteries compartment);
•replace the cover.
REMOTE CONTROL OPERATION
- When you press the “ON power selection” push button, the appliace operates at the maxi-
mum power. With each further press of the “power selection” push button, the power will
change from MAX to MED/MIN/MAX.
- If you want to operate with the fan only, press the “Fan Only” pushbutton.
- Only when a function is selected it is possible to activate the oscillation of the appliance, by
pushing the “ON/OFF oscillating base” push button.
- The “Off” push button switches off the appliance.
Every time you press a button, the appliance will confirm the selection with a “beep” and the
pilot light on the remote control will illuminate.
MAINTENANCE
- Before cleaning always switch off and remove the plug from the elettrical socket.
-
Periodically clean the air intake and outlet grilles during the period in which the heater is
in use.
- To clean the unit, do not use solvents or abrasive detergents. A soft dry cloth should be used to
clean the surfaces of the heater.
Fig. 4
ON power selection
pushbutton
Fan Only pushbutton
ON/OFF oscillating base
pushbutton
Off
Pilot light
GB.qxd 6-08-2003 10:20 Pagina 5
Page 6

6
WARNINGS
-
Do not use the heater in a bathroom or in the vicinity of bathtubs, wash basins, showers or
swimming pools.
-Never use the heater to dry laundry.
- Only use the heater in an upright position.
- The heater must be positioned at least 50cm from walls, curtains, furniture or other objects.
- If the power cable is damaged, it must be replaced by the manufacturer or an authorised
technical service centre.
- Do not use this appliance in rooms which have a floor area smaller than 4m
2
as this may
lead to overheating.
- The heater must never be placed immediately under a fixed mains socket.
- Never obstruct the heaters intake and outlet grilles as this could cause dangerous overheating.
- IMPORTANT: Never for any reason cover the appliance during operation as this could lead
to dangerous overheating.
- A safety device intervenes and turns the appliance off in the event of overheating. To reactivate the heater, remove the plug from the mains, allow the appliance to cool (for about 30
minutes), remove the cause of the overheating and then plug the appliance back into the
mains and turn it back on.
- The use of an extension lead is not recommended, as overheating of the extension lead may
occur during the operation of the heater
- In order to avoid any danger caused by an accidental resetting of the safety system, this
appliance must not be powered through an external timer.
- As with any electrical appliance, whilst the instructions aim to cover as many eventualities as
possible, caution and common sense should be applied when operating your appliance, particularly in the vicinity of young children.
Important: never for any reason cover the appliance during operation as this
could lead to dangerous overheating.
GB.qxd 6-08-2003 10:20 Pagina 6
Page 7

5714008500/08.03
A) If your appliance comes fitted with a plug, it will incorporate a 13 Amp fuse. If it does not fit your socket, the plug
should be cut off from the mains lead, and an appropriate plug fitted, as below.
WARNING: Very carefully dispose of the cut off plug after removing the fuse: do not insert in a 13 Amp socket
elsewhere in the house as this could cause a shock hazard.
With alternative plugs not incorporating a fuse, the circuit must be re-fitted when changing the fuse using a 13 Amp
Asta approved fuse to BS 1362. In the event of losing the fuse cover, the plug must NOT be used until a replacement fuse cover can be obtained from your nearest electrical dealer. The colour of the correct replacement fuse
cover is that as marked on the base of the plug.
B) If your appliance is not fitted with a plug, please follow the instructions provided below:
IMPORTANT
The wires in the mains lead are coloured in accordance with the followin code:
Blue: Neutral
Brown: Live
As the colours of the wires in the mains lead of this appliance may not correspond with the coloured markings identifying the terminals in your plug, proceed as follows:
The wire which is coloured blue must be connected to the terminal which is marked with the letter N or coloured black.
The wire which is coloured brown must be connected to the terminal which si marked with the letter L or coloured red.
ELECTRICAL CONNECTION (U.K. ONLY)
GB.qxd 6-08-2003 10:20 Pagina 7
 Loading...