

Page 1

XPS 13
Setup and Specications
Computer Model: XPS 13-9370
Regulatory Model: P82G
Regulatory Type: P82G001
Page 2

Notes, cautions, and warnings
NOTE: A NOTE indicates important information that helps you make
better use of your product.
CAUTION: A CAUTION indicates either potential damage to hardware or
loss of data and tells you how to avoid the problem.
WARNING: A WARNING indicates a potential for property damage,
personal injury, or death.
Copyright © 2017 Dell Inc. or its subsidiaries. All rights reserved. Dell, EMC, and other
trademarks are trademarks of Dell Inc. or its subsidiaries. Other trademarks may be
trademarks of their respective owners.
2017 - 12
Rev. A00
Page 3

Contents
Set up your computer....................................................5
Create a USB recovery drive for Windows..................... 8
Reinstall Windows using a USB recovery drive.......................................... 8
Views............................................................................10
Front........................................................................................................10
Left..........................................................................................................10
Right.........................................................................................................11
Base.........................................................................................................12
Display..................................................................................................... 13
Bottom.....................................................................................................14
Specications...............................................................15
Computer model...................................................................................... 15
System information..................................................................................15
Dimensions and weight............................................................................ 15
Operating system.....................................................................................15
Memory................................................................................................... 16
Ports and connectors...............................................................................16
Communications...................................................................................... 16
Wireless..............................................................................................17
Audio........................................................................................................17
Storage.................................................................................................... 17
Media-card reader....................................................................................18
Keyboard..................................................................................................18
Camera.................................................................................................... 19
Touchpad................................................................................................. 19
3
Page 4

Touchpad gestures.............................................................................19
Power adapter......................................................................................... 19
Battery....................................................................................................20
Display..................................................................................................... 21
Video.......................................................................................................22
Computer environment........................................................................... 22
Keyboard shortcuts......................................................23
Getting help and contacting Dell..................................25
Self-help resources..................................................................................25
Contacting Dell........................................................................................26
4
Page 5
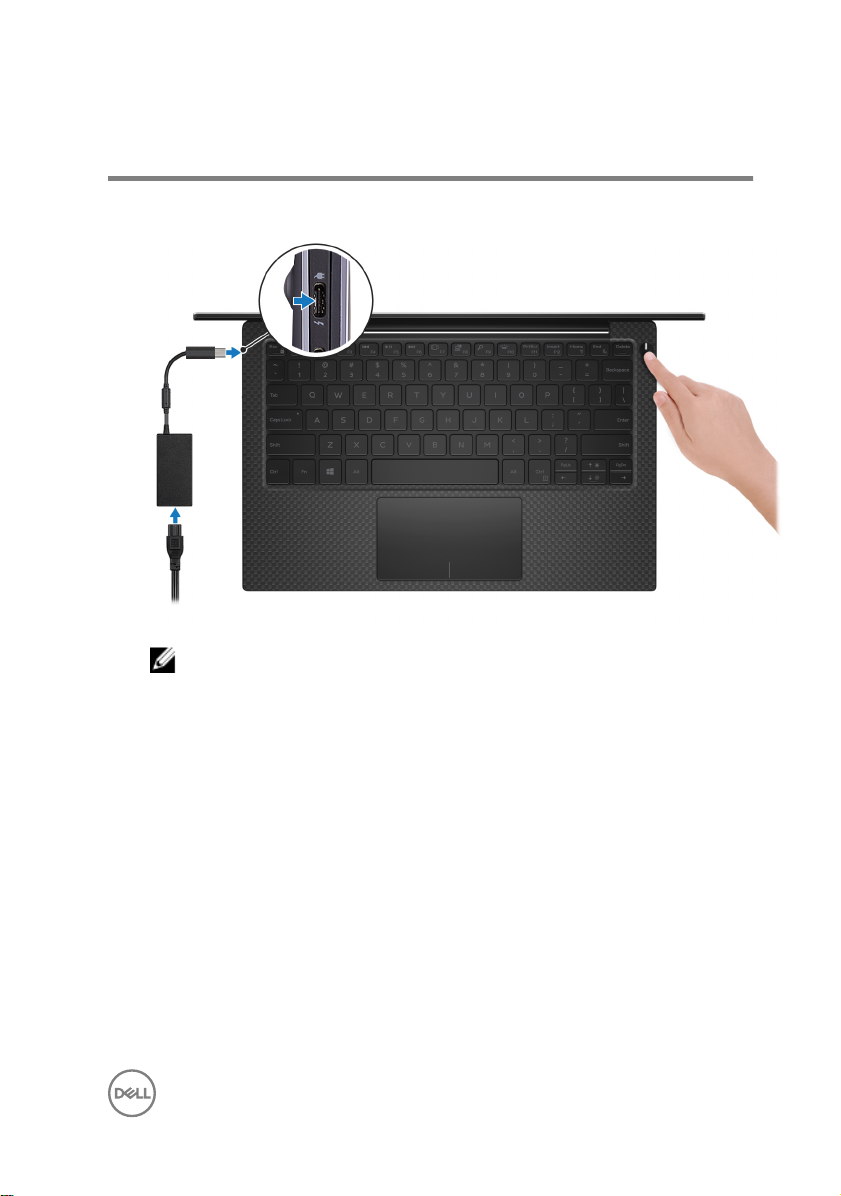
Set up your computer
1 Connect the power adapter and press the power button.
NOTE: To conserve battery power, the battery might enter power
saving mode. Connect the power adapter and press the power button
to turn on the computer.
5
Page 6
2 Finish operating system setup.
For Ubuntu:
Follow the instructions on the screen to nish setup.
For Windows:
Follow the on-screen instructions to complete the setup. When setting up, Dell
recommends that you:
– Connect to a network for Windows updates.
NOTE: If connecting to a secured wireless network, enter the
password for the wireless network access when prompted.
– If connected to the internet, sign-in with or create a Microsoft account. If not
connected to the internet, create an oine account.
– On the Support and Protection screen, enter your contact details.
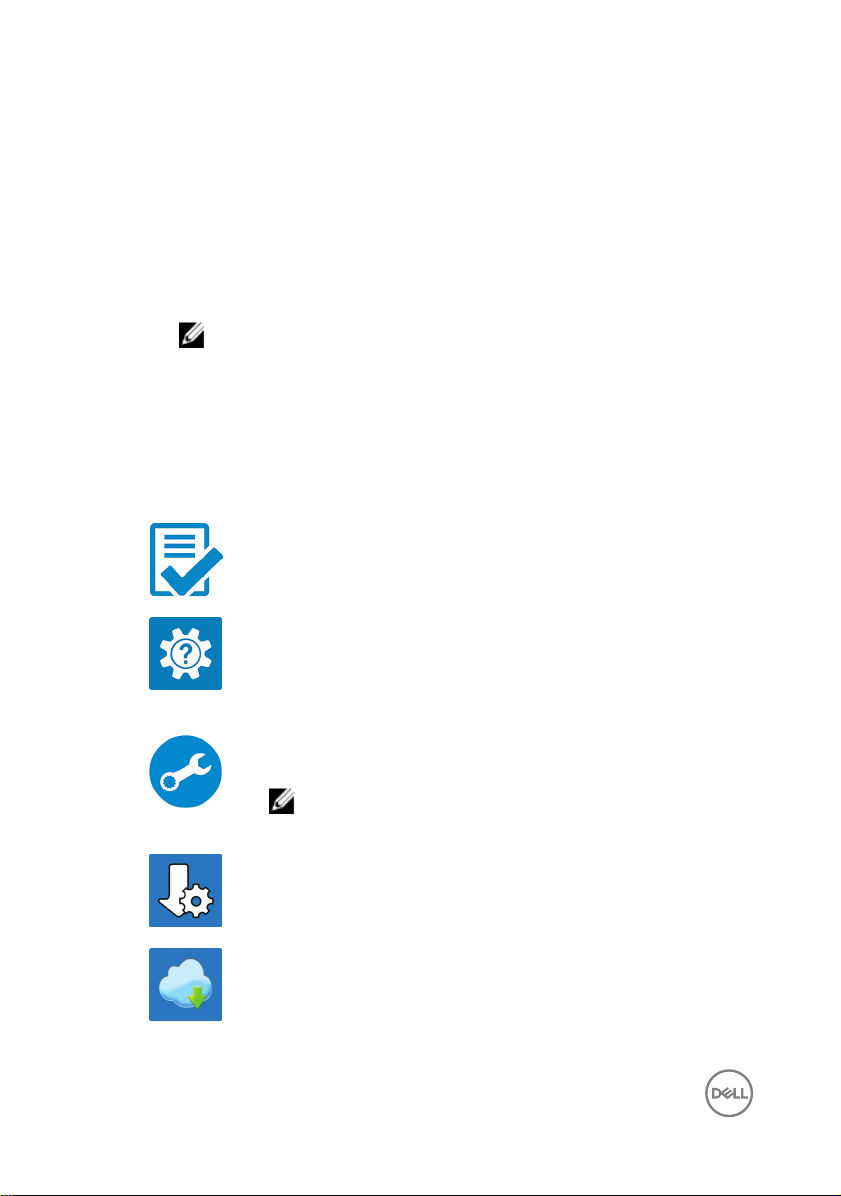
3 Locate and use Dell apps from the Windows Start menu—Recommended
Table 1. Locate Dell apps
Dell Product Registration
Register your computer with Dell.
Dell Help & Support
Access help and support for your computer.
SupportAssist
Proactively checks the health of your computer’s hardware and
software.
NOTE: Renew or upgrade your warranty by clicking the
warranty expiry date in SupportAssist.
Dell Update
Updates your computer with critical xes and important device
drivers as they become available.
Dell Digital Delivery
Download software applications including software that is
purchased but not pre-installed on your computer.
6
Page 7

4 Create recovery drive for Windows.
NOTE: It is recommended to create a recovery drive to troubleshoot
and x problems that may occur with Windows.
For more information, see Create a USB recovery drive for Windows.
7
Page 8

Create a USB recovery drive for Windows
Create a recovery drive to troubleshoot and x problems that may occur with
Windows. An empty USB ash drive with a minimum capacity of 16 GB is required to
create the recovery drive.
NOTE: The following steps may vary depending on the version of Windows
installed. Refer to the
1 Connect the USB ash drive to your computer.
2 In Windows search, type Recovery.
3 In the search results, click Create a recovery drive.
The User Account Control window is displayed.
4 Click Yes to continue.
The Recovery Drive window is displayed.
5 Select Back up system les to the recovery drive and click Next.
6 Select the USB ash drive and click Next.
A message appears, indicating that all data in the USB ash drive will be deleted.
7 Click Create.
NOTE: This process may take up to an hour to complete.
8 Click Finish.
Microsoft support site for latest instructions.
Reinstall Windows using a USB recovery drive
CAUTION: This process formats the hard drive and removes all data on your
computer. Ensure that you back up data on your computer before beginning
this task.
NOTE: Before reinstalling Windows, ensure your computer has more than 2
GB of memory and more than 32 GB of storage space.
1 Connect the USB recovery drive to your computer.
2 Restart your computer.
8
Page 9

3 Press F12 after the Dell logo is displayed on the screen to access the boot menu.
A Preparing one-time boot menu message appears.
4 After the boot menu loads, select the USB recovery device under UEFI BOOT.
The system reboots and a screen to Choose the keyboard layout is displayed.
5 Choose your keyboard layout.
6 In the Choose an option screen, click Troubleshoot.
7 Click Recover from a drive.
8 Choose one of the following options:
– Just remove my les to do a quick format.
– Fully clean the drive to do a complete format.
9 Click Recover to start the recovery process.
This may take up to an hour to complete and your computer will restart during
this process.
9
Page 10

Views
Front
1 Power and battery-status light
Indicates the power state and battery state of the computer.
Solid white—Power adapter is connected and the battery is charging.
Solid amber—Battery charge is low or critical.
O—Battery is fully charged.
2 Microphones (4)
Provide digital sound input for audio recording, voice calls, and so on.
Left
1 Security-cable slot (for Noble locks)
Connect a security cable to prevent unauthorized movement of your computer.
2 Thunderbolt 3 (USB Type-C) port with Power Delivery (Primary)
Supports USB 3.1 Gen 2, DisplayPort 1.2, Thunderbolt 3 and also enables you to
connect to an external display using a display adapter. Provides data transfer
rates up to 10 Gbps for USB 3.1 Gen 2 and up to 40 Gbps for Thunderbolt 3.
10
Page 11

Supports Power Delivery that enables two-way power supply between devices.
Provides up to 5V/3A power output that enables faster charging.
NOTE: Adapters (sold separately) are required to connect standard
USB and DisplayPort devices.
3 Thunderbolt 3 (USB Type-C) port with Power Delivery
Supports USB 3.1 Gen 2, DisplayPort 1.2, Thunderbolt 3 and also enables you to
connect to an external display using a display adapter. Provides data transfer
rates up to 10 Gbps for USB 3.1 Gen 2 and up to 40 Gbps for Thunderbolt 3.
Supports Power Delivery that enables two-way power supply between devices.
Provides up to 5V/3A power output that enables faster charging.
NOTE: Adapters (sold separately) are required to connect standard
USB and DisplayPort devices.
4 Battery-charge status button
Press to check the charge remaining in the battery.
5 Battery-charge status lights (5)
Turns on when the battery-charge status button is pressed. Each light indicates
approximately 20% charge.
6 Left speaker
Provides audio output.
Right
1 Right speaker
Provides audio output.
2 microSD-card slot
Insert a microSD card to expand the computer’s storage capacity. Your
computer supports a microSD card with capacity up to 128 GB.
3 USB 3.1 Gen 1 (Type-C) port with Power Delivery/DisplayPort
11
Page 12

Connect peripherals such as external storage devices, printers, and external
displays.
Supports Power Delivery that enables two-way power supply between devices.
Provides up to 7.5 W power output that enables faster charging.
NOTE: An adapter (sold separately) is required to connect a
DisplayPort device.
4 Headset port
Connect headphones or a headset (headphone and microphone combo).
Base
1 Touchpad
Move your nger on the touchpad to move the mouse pointer. Tap to left-click
and two nger tap to right-click.
2 Left-click area
Press to left-click.
3 Right-click area
Press to right-click.
4 Power button with optional ngerprint reader
Press to turn on the computer if it is turned o, in sleep state, or in hibernate
state.
12
Page 13

When the computer is turned on, press the power button to put the computer
into sleep state; press and hold the power button for 10 seconds to force shutdown the computer.
If the power button has a ngerprint reader, place your nger on the power
button to log in.
NOTE: Before using the ngerprint reader, congure it in Windows to
recognize your ngerprint as a passcode and enable access. For more
information, see www.dell.com/support/windows.
NOTE: You can customize power-button behavior in Windows. For
more information, see
manuals.
NOTE: The power-status light on the power button is available only on
computers without the optional ngerprint reader.
Me and My Dell
at www.dell.com/support/
Display
1 Infrared emitter
Emits infrared light, which enables the infrared camera to sense depth and track
motion.
2 Infrared camera
Depth-sensing feature of the camera enhances security when paired with
Windows Hello face authentication.
3 Camera-status light
13
Page 14

Turns on when the camera is in use.
4 Camera
Enables you to video chat, capture photos, and record videos.
5 Infrared emitter
Emits infrared light, which enables the infrared camera to sense depth and track
motion.
Bottom
1 Service Tag label
The Service Tag is a unique alphanumeric identier that enables Dell service
technicians to identify the hardware components in your computer and access
warranty information.
14
Page 15

Specications
Computer model
XPS 13-9370
System information
Table 2. System information
Processor 8th generation Intel Core i5/i7
Chipset Integrated in the processor
Dimensions and weight
Table 3. Dimensions and weight
Height
Width 301.76 mm (11.88 in)
Depth 199.24 mm (7.84 in)
Weight 1.27 kg (2.8 lb)
• Black color: 16.14 mm (0.63 in)
• White color: 16.24 mm (0.64 in)
NOTE: The weight of your laptop
varies depending on the
conguration ordered and the
manufacturing variability.
Operating system
Table 4. Operating system
Operating systems supported
• Windows 10 Home 64-bit
• Windows 10 Professional 64-bit
15
Page 16

• Ubuntu
Memory
Table 5. Memory specications
Slots Onboard memory
Type Dual-channel LPDDR3
Speed 1866 MHz and 2133 MHz
Congurations supported
Per memory module slot 2 GB, 4 GB and 8 GB
Total memory 4 GB, 8 GB, and 16 GB
Ports and connectors
Table 6. Ports and connectors
External:
USB/Video
• Two Thunderbolt 3 (USB Type-C)
ports with Power Delivery
• One USB 3.1 Gen 1 (USB Type-C)
port with Power Delivery/DisplayPort
Audio One headset (headphone and
microphone combo) port
Table 7. Ports and connectors
Internal:
M.2 card One M.2 slot for Solid-State Drive (SSD)
Communications
Table 8. Supported communications
Wireless
16
• Wi-Fi 802.11a/b/g/n/ac
Page 17

• Bluetooth 4.2
• Miracast
NOTE: Windows 10 currently
supports up to Bluetooth 4.1.
Wireless
Table 9. Wireless
Transfer rate (maximum) 867 Mbps
Frequency bands 2.4 GHz/5 GHz
Encryption
• 64-bit/128-bit WEP
Audio
Table 10. Audio specications
Controller Realtek ALC3271-CG with Waves
MaxxAudio Pro
Speakers Two
Speaker output
• Average: 2 W
• Peak: 2.5 W
Microphone Digital-array microphones
Storage
Table 11. Storage
Interface
Solid-state drive (SSD) One M.2 drive
Capacity supported Up to 1 TB
specications
• SATA 6 Gbps
• PCIe Gen 3 x4, up to 32 Gbps
17
Page 18

NOTE: RAID SATA support in the BIOS Settings menu is only available on
computers supporting Windows 10.
NOTE: AHCI SATA support in the BIOS settings menu is only available on
computers supporting Ubuntu.
Media-card reader
Table 12. Media-card reader specications
Type One microSD-card slot
Cards supported
• mSD
• mSDHC
• mSDXC
Keyboard
Table 13. Keyboard specications
Type Backlit keyboard
Shortcut keys Some keys on your keyboard have two
symbols on them. These keys can be
used to type alternate characters or to
perform secondary functions. To type
the alternate character, press Shift and
the desired key. To perform secondary
functions, press Fn and the desired key.
NOTE: Press Fn+Esc to switch
the primary behavior of the
function keys (F1-F12) between
two modes - multimedia key mode
and function key mode.
Keyboard shortcuts
18
Page 19

Camera
Table 14. Camera specications
Resolution
Camera
Infrared camera 340 x 340 (VGA)
Diagonal viewing angle
Camera 86.7 degrees
Infrared camera 70 degrees
• Still image: 0.92 megapixel (HD)
• Video: 1280 x 720 (HD) at 30 fps
Touchpad
Table 15. Touchpad
Resolution
Dimensions
• Horizontal: 305
• Vertical: 305
• Width: 105 mm (4.13 in)
• Height: 60 mm (2.36 in)
Touchpad gestures
For more information about touchpad gestures for Windows 10, see the Microsoft
knowledge base article 4027871 at support.microsoft.com.
Power adapter
Table 16. Power adapter
Type 45 W USB Type-C
Dimensions (connector) 8.25 mm x 2.4 mm
specications
19
Page 20

Input voltage 100 VAC–240 VAC
Input frequency 50 Hz–60 Hz
Input current (maximum) 1.30 A
Output current (continuous)
Rated output voltage 20 VDC/15 VDC/9 VDC/5 VDC
Temperature range (operating) 0°C to 40°C (32°F to 104°F)
Temperature range (storage) –40°C to 70°C (–40°F to 158°F)
• 20 VDC/2.25 A
• 15 VDC/3 A
• 9 VDC/3 A
• 5 VDC/3 A
Battery
Table 17. Battery specications
Type 52 WHr "smart" lithium-ion
Dimension:
Width 257.60 mm (10.14 in)
Depth 98.60 mm (3.88 in)
Height 4.30 mm (0.17 in)
Weight (maximum) 0.22 kg (0.49 lb)
Voltage 7.60 VDC
Charging time when the computer is o
(approximate)
Operating time Varies depending on operating conditions
Life span (approximate) 300 discharge/charge cycles
Temperature range: Operating 0°C to 35°C (32°F to 95°F)
Temperature range: Storage –40°C to 65°C (–40°F to 149°F)
4 hours
and can signicantly reduce under
certain power-intensive conditions.
20
Page 21

Coin-cell battery ML1220
NOTE: It is recommended that
you use a Dell coin-cell battery for
your computer. Dell does not
provide warranty coverage for
problems caused by using
accessories, parts, or components
not supplied by Dell.
Display
Table 18. Display specications
Type 13.3-inch UHD touchscreen
Resolution (maximum) 3840 x 2160
Viewing angle (Left/
Right/Down/Up)
Pixel pitch 0.0765 mm
Refresh rate 60 HZ
Operating angle 0 degrees (closed) to 135 degrees
Controls Brightness can be controlled using shortcut keys
Dimension:
Height (excluding
bezel)
Width (excluding
bezel)
Diagonal (excluding
bezel)
80/80/80/80 degrees
165.24 mm (6.51 in)
293.76 mm (11.57 in)
337.82 mm (13.30 in)
21
Page 22

Video
Table 19. Video specications
Type Integrated
Controller Intel UHD Graphics 620
Memory Shared system memory
Computer environment
Airborne contaminant level: G1 as dened by ISA-S71.04-1985
Table 20. Computer environment
Operating Storage
Temperature range 0°C to 35°C (32°F to
95°F)
Relative humidity
(maximum)
Vibration (maximum)
Shock (maximum) 110 G
10% to 90% (noncondensing)
*
0.66 GRMS 1.30 GRMS
†
Altitude (maximum) –15.2 m to 3048 m (–50 ft
to 10,000 ft)
* Measured using a random vibration spectrum that simulates user environment.
† Measured using a 2 ms half-sine pulse when the hard drive is in use.
‡ Measured using a 2 ms half-sine pulse when the hard-drive head is in parked position.
–40°C to 65°C (–40°F to
149°F)
0% to 95% (noncondensing)
160 G
–15.2 m to 10,668 m (–50
ft to 35,000 ft)
‡
22
Page 23

Keyboard shortcuts
NOTE: Keyboard characters may dier depending on the keyboard language
conguration. Keys used for shortcuts remain the same across all language
congurations.
Table 21. List of keyboard shortcuts
Keys Description
Mute audio
Decrease volume
Increase volume
Play previous track/chapter
Play/Pause
Play next track/chapter
Launch Task View
Switch to external display
Search
23
Page 24

Keys Description
Toggle keyboard backlight
Printscreen
Insert
Turn o/on wireless
Sleep
Increase brightness
Decrease brightness
24
Open application menu
Toggle Fn-key lock
Page 25

Getting help and contacting Dell
Self-help resources
You can get information and help on Dell products and services using these self-help
resources:
Table 22. Self-help resources
Information about Dell products and
services
Dell Help & Support app
Tips
Contact Support In Windows search, type Help and
Online help for operating system www.dell.com/support/windows
Troubleshooting information, user
manuals, setup instructions, product
specications, technical help blogs,
drivers, software updates, and so on.
Dell knowledge base articles for a variety
of computer concerns.
www.dell.com
Support, and press Enter.
www.dell.com/support/linux
www.dell.com/support
1 Go to www.dell.com/support.
2 Type the subject or keyword in the
Search box.
3 Click Search to retrieve the related
articles.
Learn and know the following information
about your product:
• Product specications
• Operating system
See Me and My Dell at www.dell.com/
support/manuals.
25
Page 26

• Setting up and using your product
• Data backup
• Troubleshooting and diagnostics
• Factory and system restore
• BIOS information
To locate the Me and My Dell relevant to
your product, identify your product
through one of the following:
• Select Detect Product.
• Locate your product through the
drop-down menu under View
Products.
• Enter the Service Tag number or
Product ID in the search bar.
Contacting Dell
To contact Dell for sales, technical support, or customer service issues, see
www.dell.com/contactdell.
NOTE: Availability varies by country and product, and some services may
not be available in your country.
NOTE: If you do not have an active internet connection, you can nd
contact information on your purchase invoice, packing slip, bill, or Dell
product catalog.
26
 Loading...