

Dell D631, XP140 User Manual

Dell™ Latitude™ D631
Quick Reference Guide
Model PP18L
www.dell.com | support.dell.com

Notes, Notices, and Cautions
NOTE: A NOTE indicates important information that helps you make better use of your computer.
NOTICE: A NOTICE indicates either potential damage to hardware or loss of data and tells you how to avoid the problem.
CAUTION: A CAUTION indicates a potential for property damage, personal injury, or death.
Abbreviations and Acronyms
For a complete list of abbreviations and acronyms, see the Glossary in your
If you purchased a Dell™ n Series computer, any references in this document to Microsoft
User’s Guide
.
®
Windows®
operating systems are not applicable.
NOTE: Some features or media may be optional and may not ship with your computer. Some features or media may not
be available in certain countries.
___________________
Information in this document is subject to change without notice.
© 2007 Dell Inc. All rights reserved.
Reproduction in any manner whatsoever without the written permission of Dell Inc. is strictly forbidden.
Trademarks used in this text: Dell, the DELL logo, Latitude, Wi-F i Catcher , ExpressCharge are trademarks of Dell Inc.; AMD and combinations
thereof are trademarks of Advanced Micro Devices, Inc; Windows Vista is a trademark and Microsoft Outlook and Windows are registered
trademarks of Microsoft Corporation.
Other trademarks and trade names may be used in this document to refer to either the entities claiming the marks and names or their products.
Dell Inc. disclaims any proprietary interest in trademarks and trade names other than its own.
Model PP18L
March 2007 P/N XP140 Rev. A00

Contents
Finding Information . . . . . . . . . . . . . . . . . . . . . . . . . . . . . . . . 5
Setting Up Your Computer
About Your Computer
Using a Battery
Troubleshooting
. . . . . . . . . . . . . . . . . . . . . . . . . . . . . . . . 9
. . . . . . . . . . . . . . . . . . . . . . . . . . . . . . . . . . 12
. . . . . . . . . . . . . . . . . . . . . . . . . . . . . . . . . 15
. . . . . . . . . . . . . . . . . . . . . . . . . . . . . 8
Contents 3

4 Contents
Finding Information
NOTE: Some features or media may be optional and may not ship with your computer. Some features or media may
not be available in certain countries.
NOTE: Additional information may ship with your computer.
What Are You Looking For? Find It Here
• A diagnostic program for my computer
• Drivers for my computer
• My device documentation
• Notebook System Software (NSS)
• Warranty information
• Terms and Conditions (U.S. only)
• Safety instructions
• Regulatory information
• Ergonomics information
• End User License Agreement
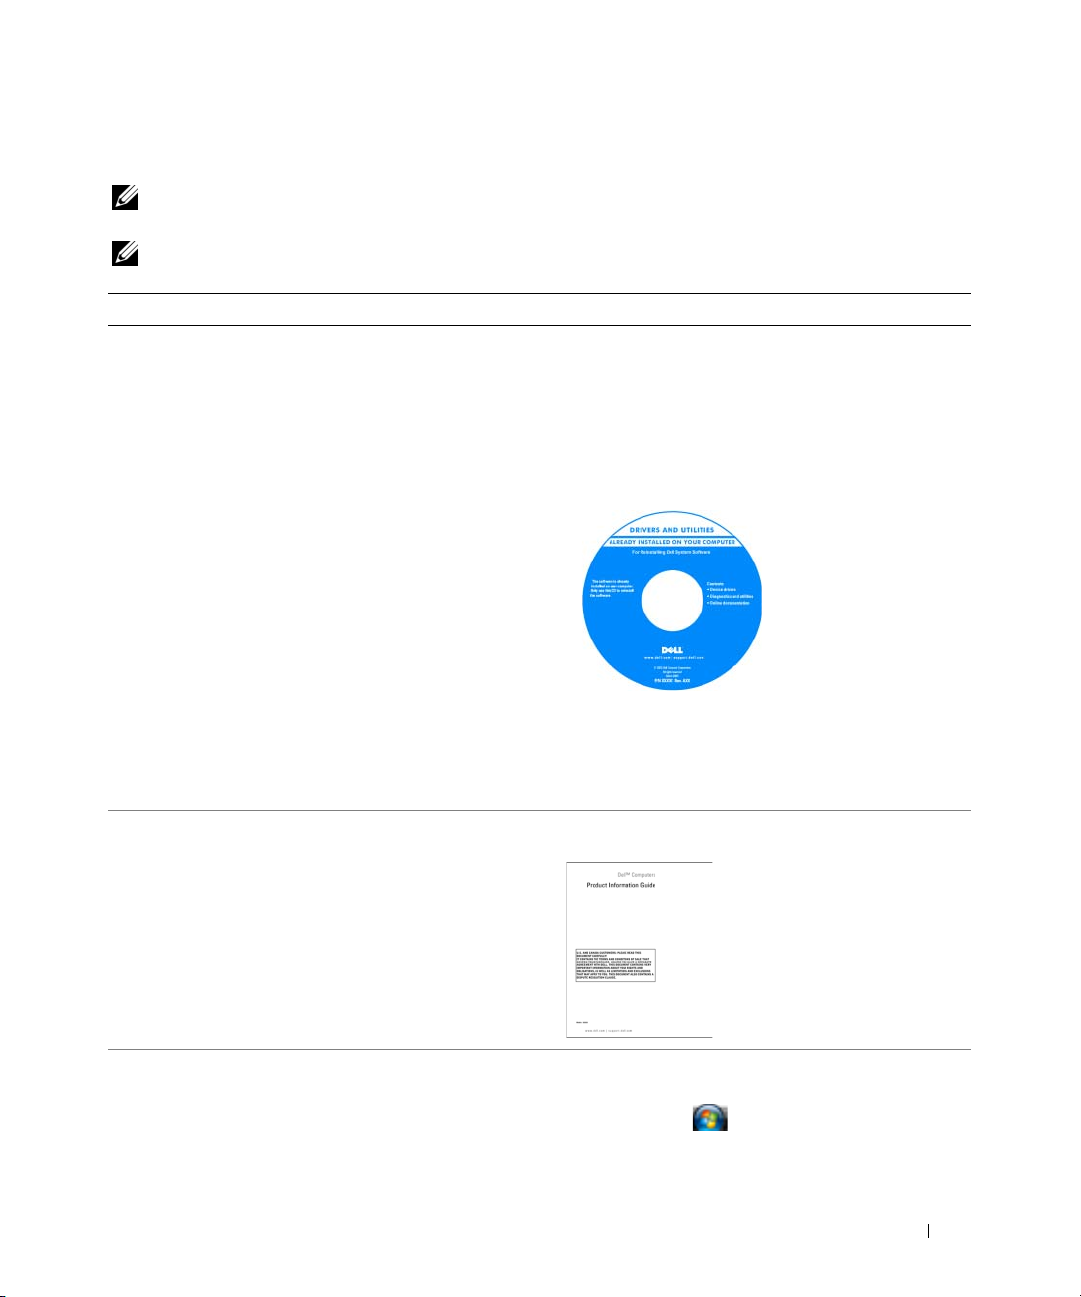
Drivers and Utilities Media
NOTE: The Drivers and Utilities media may be optional
and may not ship with your computer.
Documentation and drivers are already installed on
your computer. You can use the media to reinstall
drivers and to run the Dell Diagnostics (see "Dell
Diagnostics" on page 17).
Readme files may be
included on your media
to provide last-minute
updates about technical
changes to your
computer or advanced
technical-reference
material for technicians
or experienced users.
NOTE: Drivers and documentation updates can be
found at support.dell.com.
NOTE: The Drivers and Utilities media may be optional
and may not ship with your computer.
Dell™ Product Information Guide
• How to remove and replace parts
• Specifications
• How to configure system settings
• How to troubleshoot and solve problems
User’s Guide
Microsoft Windows Help and Support Center
1
Click
Start
or
→ Help and Support→ Dell
User and System Guides
2
Click the
User’s Guide
→ System Guides
for your computer.
Quick Reference Guide 5
.

What Are You Looking For? Find It Here
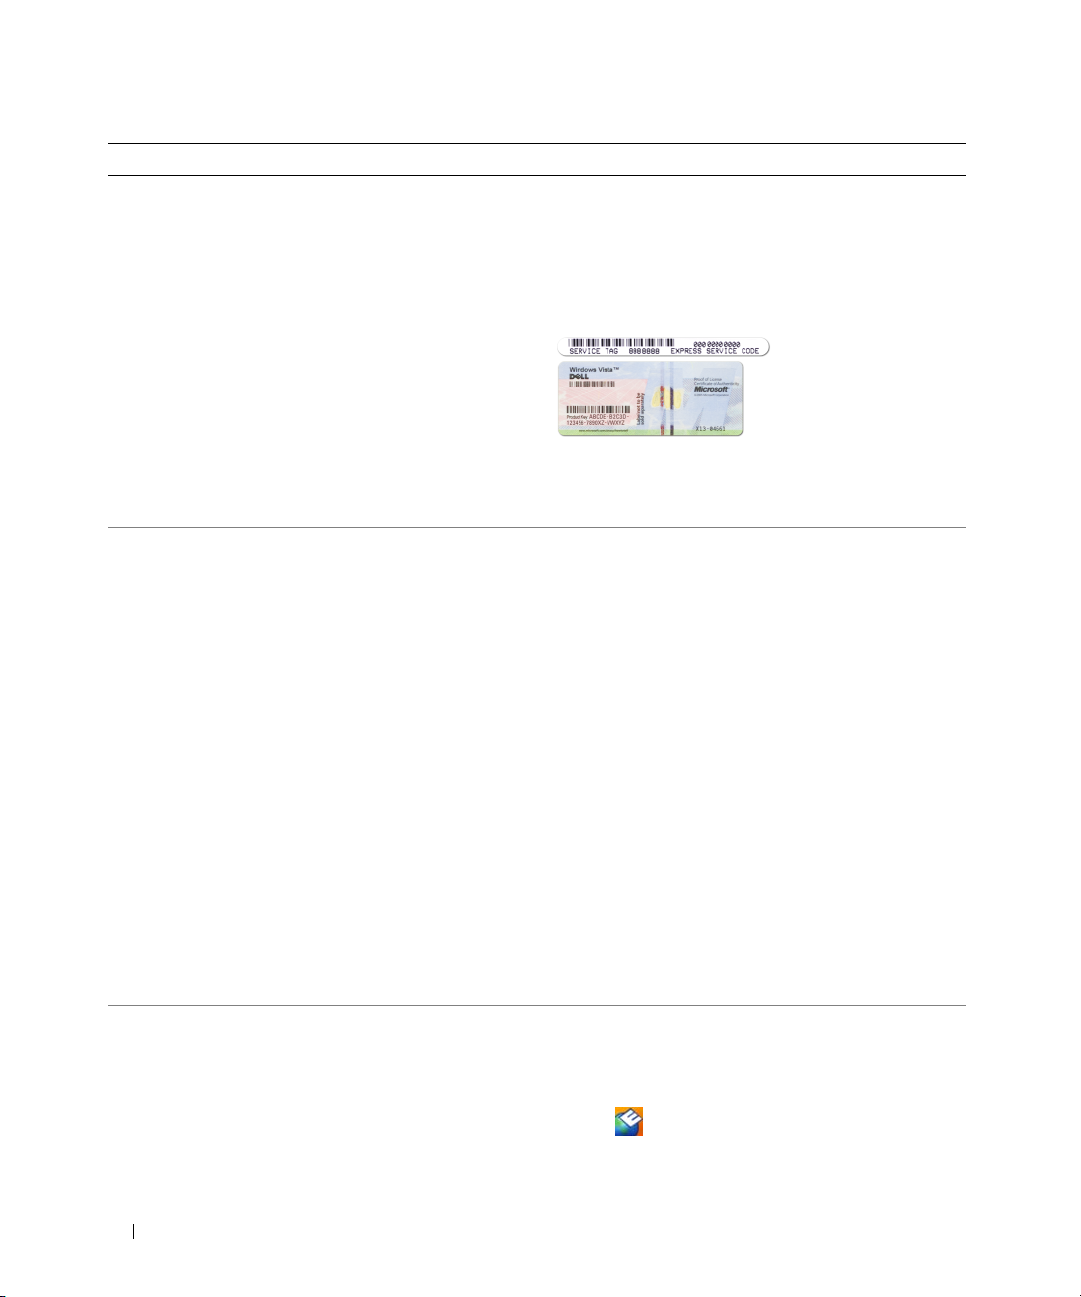
• Service Tag and Express Service Code
• Microsoft Windows License Label
Service Tag and Microsoft® Windows® License
These labels are located on your computer.
• Use the Service Tag to identify your computer when
you use
• Enter the Express Service Code to direct your call
when contacting support.
NOTE: The Microsoft Windows License label has been
redesigned with a hole, or "security portal," as an
increased security measure.
• Solutions — Troubleshooting hints and tips, articles from
technicians, online courses, and frequently asked questions
• Community — Online discussion with other
Dell customers
• Upgrades — Upgrade information for components, such as
memory, the hard drive, and the operating system
• Customer Care — Contact information, service call and
order status, warranty, and repair information
• Service and support — Service call status and support
history, service contract, online discussions with technical
support
• Reference — Computer documentation, details on my
computer configuration, product specifications, and
white papers
• Downloads — Certified drivers, patches, and
software updates
• Notebook System Software (NSS) — If you reinstall the
operating system for your computer, you should also
reinstall the NSS utility. NSS provides critical updates for
your operating system and support for Dell™ 3.5-inch USB
floppy drives, AMD™ processors, optical drives, and USB
devices. NSS is necessary for correct operation of your Dell
computer. The software automatically detects your
computer and operating system and installs the updates
appropriate for your configuration.
Dell Support Website — support.dell.com
NOTE: Select your region or business segment to view
the appropriate support site.
To download Notebook System Software:
1
Go to
support.dell.com
business segment, and enter your Service Tag.
2
Select
3
Click your operating system and search for the
keyword
NOTE: The support.dell.com user interface may vary
depending on your selections.
support.dell.com
Drivers & Downloads
Notebook System Software
or contact support.
, select your region or
and click Go.
.
6 Quick Reference Guide

What Are You Looking For? Find It Here
• Software upgrades and troubleshooting hints — Frequently
asked questions, hot topics, and general health of your
computing environment
Dell Support Utility
The Dell Support Utility is an automated upgrade
and notification system installed on your computer.
This support provides real-time health scans of your
computing environment, software updates, and
relevant self-support information. Access the Dell
Support Utility from the
more information, see "Dell Support Utility" in your
User’s Guide
• How to use Windows operating systems
• How to work with programs and files
• How to personalize my desktop
Windows Help and Support Center
1
Click
Start
2
Type a word or phrase that describes your problem
and click the arrow icon.
3
Click the topic that describes your problem.
4
Follow the instructions on the screen.
• Information on network activity, the Power Management
Wizard, hotkeys, and other items controlled by Dell
QuickSet.
Dell QuickSet Help
To view
Dell QuickSet Help, right-click the QuickSet
icon in the Microsoft
For more information on Dell QuickSet,
see "Dell™ QuickSet" in your User’s Guide.
• How to reinstall my operating system
Operating System CD
NOTE: The Operating System CD may be optional and
may not ship with your computer.
The operating system is already installed on your
computer. To reinstall your operating system, use the
Operating System CD. See "Reinstalling Microsoft
Windows
icon in the taskbar. For
.
or
→
Help and Support.
®
Windows® taskbar.
®
XP" in your User’s Guide.
After you reinstall your
operating system, use
the optional Drivers and
Utilities media to
reinstall drivers for the
devices that came with
your computer.
Your operating system
product key label is
located on your computer.
®
NOTE: The color of your CD varies based on the
operating system you ordered.
Quick Reference Guide 7

Setting Up Your Computer
CAUTION: Before you begin any of the procedures in this section, follow the safety instructions in the
Product Information Guide.
1
Unpack the accessories box.
2
Set aside the contents of the accessories box, which you will need to complete the setup of your computer.
The accessories box also contains user documentation and any software or additional hardware (such
as PC Cards, drives, or batteries) that you have ordered.
3
Connect the AC adapter to the AC adapter connector on the computer and to the electrical outlet.
4
Open the computer display and press the power button to turn on the computer (see "Front View" on
page 9).
NOTE: It is recommended that you turn on and shut down your computer at least once before you install any cards
or connect the computer to a docking device or other external device, such as a printer.
8 Quick Reference Guide

About Your Computer
Front View
13
12
1
2
3
11
10
9
8
7
1 display latch 2 display 3 power button
4 device status lights 5 keyboard 6 touch pad
7 fingerprint reader (optional) 8 touch-pad/track-stick buttons 9 track stick
10 keyboard status lights 11 volume control buttons 12 ambient light sensor
13 mute button
6
4
5
Quick Reference Guide 9

Left Side View
1 2 3 65 7 84 9
1 security cable slot 2 air vent 3 audio connectors (2)
4 smart card slot (with blank) 5 1394 connector 6 wireless switch
7 Wi-Fi Catcher™ light 8 PC Card slot 9 hard drive
Right Side View
1 optical drive in media bay 2 media-bay device latch release 3 USB connectors (2)
10 Quick Reference Guide
1
2
3

Back View
CAUTION: Do not block, push objects into, or allow dust to accumulate in the air vents. Do not store your
computer in a low-airflow environment, such as a closed briefcase, while it is running. Restricting the airflow
can damage the computer or cause a fire.
1 2 63 4 75
1 network connector (RJ-45) 2 modem connector (RJ-11) 3 USB connectors (2)
4 serial connector 5 video connector 6 AC adapter connector
7 air vents
Bottom View
1
8
7
6
1 battery charge gauge/health gauge 2 battery 3 battery-bay latch release(2)
4 device locking screw (if present) 5 memory module cover 6 docking-device connector
7 air vent 8 hard drive
2
3
4
5
Quick Reference Guide 11

Using a Battery
Battery Performance
NOTE: For information about the Dell warranty for your computer, see the Product Information Guide or separate
paper warranty document that shipped with your computer.
For optimal computer performance and to help preserve BIOS settings, operate your Dell™ portable
computer with the main battery installed at all times. One battery is supplied as standard equipment in
the battery bay.
NOTE: Because the battery may not be fully charged, use the AC adapter to connect your new computer to an
electrical outlet the first time you use the computer. For best results, operate the computer with the AC adapter
→
until the battery is fully charged. To view battery charge status, click Start
Power Options→ Power Meter.
NOTE: Battery operating time (the time the battery can hold a charge) decreases over time. Depending on how
often the battery is used and the conditions under which it is used, you may need to purchase a new battery during
the life of your computer.
Settings→ Control Panel
Battery operating time varies depending on operating conditions. You can install an optional second
battery in the media bay to significantly increase operating time.
Operating time is significantly reduced when you perform operations including, but not limited to,
the following:
• Using optical drives
• Using wireless communications devices, PC Cards, ExpressCards, media memory cards, or USB devices
• Using high-brightness display settings, 3D screen savers, or other power-intensive programs such as
complex 3D graphics applications
• Running the computer in maximum performance mode (see "Configuring Power Management
Settings" in your
User’s Guide
).
→
NOTE: It is recommended that you connect your computer to an electrical outlet when writing to a CD or DVD.
You can check the battery charge before you insert the battery into the computer (see "Checking the
Battery Charge" on page 13). You can also set power management options to alert you when the battery
charge is low
CAUTION: Using an incompatible battery may increase the risk of fire or explosion. Replace the battery only
with a compatible battery purchased from Dell. The lithium-ion battery is designed to work with your Dell
computer. Do not use a battery from other computers with your computer.
CAUTION: Do not dispose of batteries with household waste. When your battery no longer holds a charge, call
your local waste disposal or environmental agency for advice on disposing of a lithium-ion battery. See "Battery
Disposal" in the Product Information Guide.
CAUTION: Misuse of the battery may increase the risk of fire or chemical burn. Do not puncture, incinerate,
disassemble, or expose the battery to temperatures above 60°C (140°F). Keep the battery away from children.
Handle damaged or leaking batteries with extreme care. Damaged batteries may leak and cause personal injury
or equipment damage.
(see "Configuring Power Management Settings" in your
User’s Guide
).
12 Quick Reference Guide

Checking the Battery Charge
The Dell QuickSet Battery Meter, the Microsoft Windows Power Meter window and icon, the battery
charge gauge and health gauge, and the low-battery warning provide information on the battery charge.
Dell™ QuickSet Battery Meter
If Dell QuickSet is installed, press <Fn><F3> to display the QuickSet Battery Meter. The Battery Meter
displays status, battery health, charge level, and charge completion time for the battery in your computer.
For more information about QuickSet, right-click the QuickSet icon in the taskbar, and click Help.
Microsoft® Windows® Power Meter
The Windows Power Meter indicates the remaining battery charge. To check the Power Meter,
double-click the icon on the taskbar.
If the computer is connected to an electrical outlet, a icon appears.
Charge Gauge
By either pressing once or pressing and holding the status button on the charge gauge on the battery,
you can check:
• Battery charge (check by pressing and
• Battery health (check by pressing and
The battery operating time is largely determined by the number of times it is charged. After hundreds of
charge and discharge cycles, batteries lose some charge capacity—or battery health. That is, a battery can
show a status of "charged" but maintain a reduced charge capacity (health).
releasing
holding
the status button)
the status button)
Check the Battery Charge
To check the battery charge, press and release the status button on the battery charge gauge to illuminate
the charge-level lights. Each light represents approximately 20 percent of the total battery charge.
For example, if the battery has 80 percent of its charge remaining, four of the lights are on. If no lights
appear, the battery has no charge.
Check the Battery Health
NOTE: You can check battery health in one of two ways: by using the charge gauge on the battery as described
below and by using the Battery Meter in Dell QuickSet. For information about QuickSet, right-click the QuickSet
icon in the taskbar, and click Help.
To check the battery health using the charge gauge, press and hold the status button on the battery
charge gauge for at least 3 seconds. If no lights appear, the battery is in good condition, and more than
80 percent of its original charge capacity remains. Each light represents incremental degradation. If five
lights appear, less than 60 percent of the charge capacity remains, and you should consider replacing the
battery. See "Specifications" in your User’s Guide for more information about the battery operating time.
Quick Reference Guide 13

Low-Battery Warning
NOTICE: To avoid losing or corrupting data, save your work immediately after a low-battery warning.
Then connect the computer to an electrical outlet. If the battery runs completely out of power, hibernate mode
begins automatically.
By default, a pop-up window warns you when the battery charge is approximately 90 percent depleted.
You can change the settings for the battery alarms in QuickSet or the Power Options Properties window.
See
"Configuring Power Management Settings" in your
User’s Guide
for information about accessing
QuickSet or the Power Options Properties window.
Charging the Battery
NOTE: With Dell™ ExpressCharge™, when the computer is turned off, the AC adapter charges a completely
discharged battery to 80 percent in about 1 hour and to 100 percent in approximately 2 hours. Charge time is longer
with the computer turned on. You can leave the battery in the computer for as long as you like. The battery’s internal
circuitry prevents the battery from overcharging.
When you connect the computer to an electrical outlet or install a battery while the computer is
connected to an electrical outlet, the computer checks the battery charge and temperature. If necessary,
the AC adapter then charges the battery and maintains the battery charge.
If the battery is hot from being used in your computer or being in a hot environment, the battery may
not charge when you connect the computer to an electrical outlet.
The battery is too hot to start charging if the light flashes alternately green and orange. Disconnect
the computer from the electrical outlet and allow the computer and the battery to cool to room
temperature. Then connect the computer to an electrical outlet to continue charging the battery.
For more information about resolving problems with a battery, see "Power Problems" in your User’s Guide.
Removing the Battery
CAUTION: Before performing these procedures, turn off the computer, disconnect the AC adapter from the
electrical outlet and the computer, disconnect the modem from the wall connector and computer, and remove any
other external cables from the computer.
CAUTION: Using an incompatible battery may increase the risk of fire or explosion. Replace the battery only
with a compatible battery purchased from Dell. The battery is designed to work with your Dell™ computer. Do not
use a battery from other computers with your computer.
NOTICE: You must remove all external cables from the computer to avoid possible connector damage.
For information about replacing the second battery, which is located in the media bay, see "Using Multimedia" in
your User’s Guide.
To remove the battery:
If the computer is connected to a docking device (docked), undock it. See the documentation that
1
came with your docking device for instructions.
2
Ensure that the computer is turned off.
3
Slide and lift the battery out of the battery bay.
14 Quick Reference Guide

1
2
1 battery-bay latch release 2 battery
To replace the battery, place the battery in the bay and press down until the battery-bay latch release clicks.
Storing a Battery
Remove the battery when you store your computer for an extended period of time. A battery discharges
during prolonged storage. After a long storage period, recharge the battery fully before you use it (see
"Charging the Battery" on page 14).
Troubleshooting
Lockups and Software Problems
CAUTION: Before you begin any of the procedures in this section, follow the safety instructions in the
Product Information Guide.
The computer does not start up
ENSURE THAT THE AC ADAPTER IS FIRMLY CONNECTED TO THE COMPUTER AND TO THE ELECTRICAL OUTLET.
The computer stops responding
NOTICE: You might lose data if you are unable to perform an operating system shutdown.
T
URN THE COMPUTER OFF — If you are unable to get a response by pressing a key on your keyboard or
moving your mouse, press and hold the power button for at least 8 to 10 seconds until the computer
turns off. Then restart your computer.
Quick Reference Guide 15

A program stops responding or crashes repeatedly
NOTE: Software usually includes installation instructions in its documentation or on a floppy disk or CD.
ND THE PROGRAM —
E
1
Press <Ctrl><Shift><Esc> simultaneously.
2
Click
Task Manager
3
Click the program that is no longer responding.
4
Click
End Task
CHECK THE SOFTWARE DOCUMENTATION — If necessary, uninstall and then reinstall the program.
.
.
A program is designed for an earlier Microsoft® Windows® operating system
RUN THE PROGRAM COMPATIBILITY WIZARD — The Program Compatibility Wizard configures a program
so that it runs in an environment similar to non-Windows XP operating system environments.
1
Click
Start→
2
Follow the instructions on the screen.
All Programs→ Accessories→
Program Compatibility Wizard→ Next
.
A solid blue screen appears
TURN THE COMPUTER OFF — If you are unable to get a response by pressing a key on your keyboard or
moving your mouse, press and hold the power button for at least 8 to 10 seconds until the computer
turns off. Then restart your computer.
Other software problems
CHECK THE SOFTWARE DOCUMENTATION OR CONTACT THE SOFTWARE MANUFACTURER FOR TROUBLESHOOTING
INFORMATION —
• Ensure that the program is compatible with the operating system installed on your computer.
• Ensure that your computer meets the minimum hardware requirements needed to run the software.
See the software documentation for information.
• Ensure that the program is installed and configured properly.
• Verify that the device drivers do not conflict with the program.
• If necessary, uninstall and then reinstall the program.
BACK UP YOUR FILES IMMEDIATELY.
SE A VIRUS-SCANNING PROGRAM TO CHECK THE HARD DRIVE, FLOPPY DISKS, OR CDS .
U
S
AVE AND CLOSE ANY OPEN FILES OR PROGRAMS AND SHUT DOWN YOUR COMPUTER THROUGH THE Start MENU.
CAN THE COMPUTER FOR SPYWARE — If you are experiencing slow computer performance, you
S
frequently receive pop-up advertisements, or you are having problems connecting to the Internet, your
computer might be infected with spyware. Use an anti-virus program that includes anti-spyware
protection (your program may require an upgrade) to scan the computer and remove spyware. For more
information, go to support.dell.com and search for the keyword spyware.
16 Quick Reference Guide

RUN THE DELL DIAGNOSTICS — See "Dell Diagnostics" on page 17. If all tests run successfully, the error
condition is related to a software problem.
Dell Diagnostics
CAUTION: Before you begin any of the procedures in this section, follow the safety instructions in the
Product Information Guide.
When to Use the Dell Diagnostics
If you experience a problem with your computer, perform the checks in "Lockups and Software
Problems" on page 15 and run the Dell Diagnostics before you contact Dell for technical assistance.
It is recommended that you print these procedures before you begin.
NOTICE: The Dell Diagnostics works only on Dell™ computers.
NOTE: The Drivers and Utilities media is optional and may not ship with your computer.
Enter system setup (see "System Setup Program" in your User’s Guide), review your computer’s
configuration information, and ensure that the device you want to test displays in system setup and is active.
Start the Dell Diagnostics from either your hard drive or from the Drivers and Utilities media.
Starting the Dell Diagnostics From Your Hard Drive
The Dell Diagnostics is located on a hidden diagnostic utility partition on your hard drive.
NOTE: If your computer cannot display a screen image, contact Dell (see "Contacting Dell" in your User’s Guide).
1
Shut down the computer. Turn on (or restart) your computer.
2
If the computer is connected to a docking device (docked), undock it. See the documentation that
came with your docking device for instructions.
3
Connect the computer to an electrical outlet.
4
Diagnostics can be invoked in one of two ways:
a
Turn on the computer. When the DELL™ logo appears, press <F12> immediately. Select
Diagnostics from the boot menu and press <Enter>.
NOTE: If you wait too long and the operating system logo appears, continue to wait until you see the
Microsoft
Press and hold the <Fn> key while powering the computer on.
b
NOTE: If you see a message stating that no diagnostics utility partition has been found, run the Dell
Diagnostics from the Drivers and Utilities media.
®
Windows® desktop. Then shut down your computer and try again.
Quick Reference Guide 17

The computer runs the Pre-boot System Assessment, a series of initial tests of your system board,
keyboard, hard drive, and display.
• During the assessment, answer any questions that appear.
• If a failure is detected, the computer stops and beeps. To stop the assessment and restart the
computer, press <Esc>; to continue to the next test, press <y>; to retest the component that
failed, press <r>.
• If failures are detected during the Pre-boot System Assessment, write down the error code(s) and
contact Dell (see "Contacting Dell" in your
If the Pre-boot System Assessment completes successfully, you receive the message
Diagnostic Utility Partition. Press any key to continue
5
Press any key to start the Dell Diagnostics from the diagnostics utility partition on your hard drive.
Starting the Dell Diagnostics From the Drivers and Utilities Media
1
Insert the
2
Shut down and restart the computer.
Drivers and Utilities
media.
User’s Guide
).
Booting Dell
.
When the DELL logo appears, press <F12> immediately.
If you wait too long and the Windows logo appears, continue to wait until you see the Windows
desktop. Then shut down your computer and try again.
NOTE: The next steps change the boot sequence for one time only. On the next start-up, the computer boots
according to the devices specified in the system setup program.
3
When the boot device list appears, highlight
IDE CD-ROM DeviceCD/DVD/CD-RW Drive
press <Enter>.
4
Select the
5
Ty p e 1 to start the
6
Select
Boot from CD-ROM
ResourceCD
option from the menu that appears and press <Enter>.
menu and press <Enter> to proceed.
Run the 32 Bit Dell Diagnostics
from the numbered list. If multiple versions are listed, select
the version appropriate for your computer.
7
When the Dell Diagnostics
Main Menu
appears, select the test you want to run.
and
18 Quick Reference Guide

Dell Diagnostics Main Menu
1
After the Dell Diagnostics loads and the
Main Menu
screen appears, click the button for the option
you want.
Option Function
Express Test Performs a quick test of devices. This test typically takes 10 to 20 minutes and
requires no interaction on your part. Run Express Test first to increase the
possibility of tracing the problem quickly.
Extended Test Performs a thorough check of devices. This test typically takes 1 hour or more and
requires you to answer questions periodically.
Custom Test Tests a specific device. You can customize the tests you want to run.
Symptom Tree Lists the most common symptoms encountered and allows you to select a test
based on the symptom of the problem you are having.
2
If a problem is encountered during a test, a message appears with an error code and a description of the
problem. Write down the error code and problem description, and follow the instructions on the screen.
If you cannot resolve the error condition, contact Dell (see "Contacting Dell" in your
NOTE: The Service Tag for your computer is located at the top of each test screen. If you contact Dell, the
technical support representative will ask you for your Service Tag.
3
If you run a test from the
Custom Test
or
Symptom Tree
option, click the applicable tab described in
User’s Guide
the following table for more information.
).
Tab Function
Results Displays the results of the test and any error conditions encountered.
Errors Displays error conditions encountered, error codes, and the problem description.
Help Describes the test and may indicate requirements for running the test.
Configuration Displays your hardware configuration for the selected device.
The Dell Diagnostics obtains configuration information for all devices from the
system setup program, memory, and various internal tests, and it displays the
information in the device list in the left pane of the screen. The device list may not
display the names of all the components installed on your computer or all devices
attached to your computer.
Parameters Allows you to customize the test by changing the test settings.
4
When the tests are completed, if you are running the Dell Diagnostics from the
Drivers and Utilities
media, remove the media.
5
When the tests are complete, close the test screen to return to the
Diagnostics and restart the computer, close the
Main Menu
screen.
Main Menu
screen. To exit the Dell
Quick Reference Guide 19

20 Quick Reference Guide

Index
A
anti-virus software, 16
B
battery
charge gauge, 13
charging, 14
checking the charge, 13
performance, 12
power meter, 13
removing, 14
storing, 15
C
CDs
operating system, 7
computer
crashes, 15-16
slow performance, 16
stops responding, 15
D
Dell Diagnostics
about, 17
starting from the Drivers and
Utilities media, 18
starting from the hard
drive, 17
using, 17
Dell support site, 6
diagnostics
Dell, 17
documentation
End User License
Agreement, 5
ergonomics, 5
online, 6
Product Information Guide, 5
regulatory, 5
safety, 5
User’s Guide, 5
warranty, 5
E
End User License
Agreement, 5
ergonomics information, 5
H
hardware
Dell Diagnostics, 17
Help and Support Center, 7
help file
Windows Help and Support
Center, 7
L
labels
Microsoft Windows, 6
Service Tag, 6
M
Media
Drivers and Utilities, 5
O
operating system
CD, 7
reinstalling, 7
P
problems
blue screen, 16
computer crashes, 15-16
computer does not start up, 15
computer stops responding, 15
Dell Diagnostics, 17
lockups, 15
program crashes, 16
program stops responding, 16
programs and Windows
compatibility, 16
slow computer
performance, 16
software, 15-16
spyware, 16
Index 21

Product Information Guide, 5
Q
U
User’s Guide, 5
QuickSet Help, 7
R
regulatory information, 5
ResourceCD
Dell Diagnostics, 17
S
safety instructions, 5
Service Tag, 6
software
problems, 16
spyware, 16
support website, 6
system views
back, 11
bottom, 11
front, 9
left side, 10
right side, 10
W
warranty information, 5
Windows XP
Help and Support Center, 7
Program Compatibility
Wizard, 16
reinstalling, 7
wizards
Program Compatibility
Wizard, 16
T
troubleshooting
Dell Diagnostics, 17
Help and Support Center, 7
lockups and software
problems, 15
22 Index

Dell™ Latitude™ D631
快速参考指南
型号 PP18L
www.dell.com | support.dell.com

注、注意和警告
注 : “注”表示可以帮助您更好地使用计算机的重要信息。
注意 : 注意表示硬件的潜在损坏或数据丢失,并且告诉您如何避免此类问题。
警告 : “警告”表示可能导致财产损失、人身伤害或死亡的潜在危险。
缩写和缩写词
对于缩写和缩写词的完整列表,请参阅您的 《用户指南》中的 “词汇表”。
如果您购买了
不适用。
注 : 一些功能或介质可能为可选项,并且可能不会随您的计算机提供。一些功能或介质对于您的计算机或在
某些国家或地区可能不适用。
Dell™ n
系列计算机,本说明文件中的任何有关
Microsoft® Windows®
操作系统的参考都将
___________________
本说明文件中的信息如有更改,恕不另行通知。
© 2007 Dell Inc. 版权所有,翻印必究。
未经 Dell Inc. 书面许可,严禁以任何方式进行复制。
本文件中使用的商标:Dell、DELL 徽标、Latitude、Wi-Fi Catcher、ExpressCharge 为 Dell Inc. 的商标; AMD 及其组合为 Advanced
Micro Devices, Inc. 的商标; Windows Vista 为 Microsoft Corporation 的商标, Microsoft Outlook 和 Windows 为其注册商标。
本说明文件中述及的其它商标和商品名称是指拥有相应标记和名称的公司或其制造的产品。 Dell Inc. 对不属于自己的商标和商品
名称不拥有任何所有权。
型号 PP18L
2007 年 3 月 P/N XP140 Rev. A00

目录
查找信息 . . . . . . . . . . . . . . . . . . . . . . . . . . . . . . . . . . . . . 27
安装计算机
关于您的计算机
使用电池
故障排除
. . . . . . . . . . . . . . . . . . . . . . . . . . . . . . . . . . . 30
. . . . . . . . . . . . . . . . . . . . . . . . . . . . . . . . . . . . . 34
. . . . . . . . . . . . . . . . . . . . . . . . . . . . . . . . . . . . . 37
. . . . . . . . . . . . . . . . . . . . . . . . . . . . . . . . . 31
目录 25

26 目录

查找信息
注 : 一些功能或介质可能为可选项,并且可能不会随您的计算机提供。一些功能或介质对于您的计算机
或在某些国家或地区可能不适用。
注 : 附加信息可能随计算机提供。
要查找的内容 在此处查找
•
适用于我计算机的诊断程序
•
适用于我计算机的驱动程序
•
我的设备说明文件
•
笔记本电脑系统软件 (
•
担保信息
•
条款和条件 (仅限于美国)
•
安全说明
•
管制信息
•
人机工程学信息
•
最终用户许可协议
NSS
)
驱动程序和公用程序介质
注 : 驱动程序和公用程序介质可能为可选项,并且可
能不会随您的计算机提供。
您的计算机已经安装了说明文件及驱动程序。可使用
介质来重新安装驱动程序并运行 Dell 诊断程序 (请参
阅“Dell 诊断程序”,在第 39)。
您的介质上可能包含自述文
件,该文件用于为技术人员
或经验丰富的用户提供关于
其计算机技术变更或先进技
术参考材料的最新更新。
注 : 驱动程序和说明文件的
更新可在 support.dell.com
上找到。
注 : 驱动程序和公用程序介
质可能为可选项,并且可能
不会随您的计算机提供。
Dell™ 《产品信息指南》
•
如何卸下和装回部件
•
规格
•
如何配置系统设置
•
如何排除故障并解决问题
《用户指南》
Microsoft Windows 帮助和支持中心
1
单击 Start
助和支持)
户和系统指南)
2
单击适用于您的计算机的 《用户指南》。
(开始)
或
→ Help and Support
→
Dell User and System Guides(Dell
→ System Guides
快速参考指南 27
(帮
用
(系统指南)。
要查找的内容 在此处查找
•
服务标签和快速服务代码
• Microsoft Windows
许可证标签
服务标签和 Microsoft® Windows® 许可证
这些标签位于您的计算机上。
•
当访问 support.dell.com 或联系支持部门时,请使用
服务标签来标识您的计算机。
•
当联系支持部门时,请输入 “快速服务代码”来导
向您的呼叫。
注 : Microsoft Windows 许可证标签已重新设计有一个
孔 (或称为 “安全保护端口”),作为一种增强的安
全保护措施。
•
解决方案
章、在线课程和常见问题
•
团体
•
升级
信息
•
客户服务中心
态、担保和修复信息
•
服务和支持
同、与技术支持部门的在线讨论
•
参考资料
细信息、产品规格以及白皮书
•
下载
新
•
笔记本电脑系统软件 (
新安装了操作系统,则还应该重新安装
序。
Dell™ 3.5-
光盘驱动器以及
Dell
机和操作系统,并安装适合于您配置的更新。
•
软件升级和故障排除提示
计算环境的一般性能
—
故障排除提示和技巧、技术人员的文
—
与其他
Dell
客户进行在线讨论
—
组件如内存、硬盘驱动器和操作系统的升级
—
联系人信息、服务电话和订购状
—
服务通话状态和支持历史、服务合
—
计算机说明文件、有关计算机配置的详
—
经认证的驱动程序、修补程序以及软件更
NSS)—
NSS
为您的操作系统提供重要更新,并支持
英寸
USB
软盘驱动器、
USB
设备。
计算机所必需的。该软件将自动检测您的计算
—
如果您的计算机重
NSS
公用程
AMD™
处理器、
NSS
是正确操作您的
常见问题、热门话题、
Dell 支持 Web 站点 — support.dell.com
注 : 选择您的区域或业务分段以查看相应的支持站点。
要下载笔记本电脑系统软件:
1
访问 support.dell.com
并输入您的服务标签。
2
选择 Drivers & Downloads
Go(运行)。
后单击
3
单击您的操作系统,搜索关键字 Notebook System
Software
注 : support.dell.com 用户界面随您的选择而不同。
Dell 支持公用程序
“Dell 支持公用程序”是安装在您计算机上的一个自
动化升级和通知系统。该支持提供对您的计算环境、
软件升级和相关自我支持信息的实时健康扫描。从任
务栏中的
详细信息,请参阅您的 《用户指南》中的 “
公用程序”。
,选择您的区域或业务分段,
(驱动程序和下载),然
(笔记本电脑系统软件)。
图标访问 “
Dell
支持公用程序”。有关
Dell
支持
28 快速参考指南

要查找的内容 在此处查找
•
如何使用
•
如何使用程序及文件
•
如何使我的桌面个性化
•
有关由
导、热键和其它项目的信息。
Windows
操作系统
Dell QuickSet
控制的网络活动、电源管理向
Windows 帮助和支持中心
1
单击 Start
助和支持)。
2
键入说明问题的字或短语,并单击箭头图标。
3
单击说明问题的主题。
4
遵循屏幕上的说明操作。
Dell QuickSet 帮助
要查看 Dell QuickSet Help(Dell QuickSet
Microsoft
®
击鼠标右键。
有关 Dell QuickSet 的详细信息,请参阅 《用户指南》
中的 “Dell™ QuickSet”。
•
如何重新安装操作系统
操作系统 CD
注 : Operating System CD (操作系统 CD)可能为可选
项,并且可能不会随您的计算机提供。
您的计算机上已经安装了操作系统。要重新安装操作
系统,请使用操作系统 CD。请参阅 《用户指南》中
的 “重新安装 Microsoft
(开始)或 →
Help and Support (帮
帮助),
在
Windows® 任务栏上的 QuickSet 图标上单
®
Windows® XP”。
重新安装操作系统之后,
使用可选的驱动程序和公
用程序介质来为计算机附
带的设备重新安装驱动程
序。
您的操作系统产品密钥标签
位于您的计算机上。
注 : CD 的颜色随您订购的
操作系统而有所不同。
快速参考指南 29

安装计算机
警告 : 在开始执行本节的任何步骤之前,请遵循 《产品信息指南》中的安全说明。
1
打开附件箱。
2
将附件箱中的物品放在一边,您将需要使用它们来完成计算机的安装。
PC
附件箱中还包含用户说明文件以及您所订购的任何软件或附加硬件 (如
池)。
3
将交流适配器分别连接到计算机上的交流适配器连接器和电源插座上。
4
打开计算机显示屏,然后按电源按钮以开启计算机 (请参阅 “正面视图”,在第31)。
注 : 在安装任何卡或将计算机连接到一个对接设备或其它外部设备之前 (如打印机),建议开启并关闭
计算机至少一次。
卡、驱动器或电
30 快速参考指南
 Loading...