

Page 1

Dell™ Proximity
Printing Solution
Administrator’s Guide
Page 2

Notes and Cautions
NOTE: A NOTE indicates important information that helps you make better use of
your computer.
CAUTION: A CAUTION indicates potential damage to hardware or loss of data if
instructions are not followed.
____________________
Information in this document is subject to change without notice.
© 2010 Dell Inc. All rights reserved.
Reproduction of these materials in any manner whatsoever without the written permission of Dell Inc.
is strictly forbidden.
Trademarks used in this text: Dell and the DELL logo are trademarks of Dell Inc.; Microsoft, Windows,
Windows Vista, and Active Directory are either registered trademarks or trademarks of Microsoft
Corporation in the United States and/or other countries; Wi-Fi is a trademark of the Wi-Fi Alliance.
Other trademarks and trade names may be used in this document to refer to either the entities claiming
the marks and names or their products. Dell Inc. disclaims any proprietary interest in trademarks and
trade names other than its own.
May 2010 Rev. A00
Page 3

Contents
Dell Proximity Printing Solution . . . . . . . . . . . 5
Introduction . . . . . . . . . . . . . . . . . . . . . . . . 5
Requirements for setting up DPPS
Server Operating System
Server Hardware Requirements
Client Hardware and Software Requirements
Server Installation
Installating DPPS Client
. . . . . . . . . . . . . . . . . . . . . 7
. . . . . . . . . . . . . . . . . . 7
Downloading DPPS Client
Installing DPPS Client
. . . . . . . . . . . . 5
. . . . . . . . . . . . . . . 5
. . . . . . . . . . . 6
. . . . 6
. . . . . . . . . . . . . . 7
. . . . . . . . . . . . . . . . 8
Updating DPPS Client. . . . . . . . . . . . . . . . . 8
DPPS Administrator Mode Interface . . . . . . . . . . . 9
Connecting to the Server
. . . . . . . . . . . . . . . 9
Menu Options. . . . . . . . . . . . . . . . . . . . 10
Using the Main Interface
Floor Manager
. . . . . . . . . . . . . . . . 12
. . . . . . . . . . . . . . . . . . . 12
Managing Buildings . . . . . . . . . . . . . . . . 12
Managing Floors
Managing Printers
Icon Manager
Adding an Icon
Adding a Filter
. . . . . . . . . . . . . . . . . . 14
. . . . . . . . . . . . . . . . . 16
. . . . . . . . . . . . . . . . . . . . . . 23
. . . . . . . . . . . . . . . . . . . 24
. . . . . . . . . . . . . . . . . . . 24
Contents 3
Page 4

Configuring Assistance Settings . . . . . . . . . . . . 25
DPPS Client Mode Interface
Connecting to the Server
Selecting Your Home Printer
. . . . . . . . . . . . . . . 26
. . . . . . . . . . . . . . 26
. . . . . . . . . . . . 26
Sending Print Jobs . . . . . . . . . . . . . . . . . 27
Managing Active Print Jobs
Auto-Print Options
. . . . . . . . . . . . . . . . . 29
. . . . . . . . . . . . 28
4 Contents
Page 5

Dell Proximity Printing Solution
Introduction
The Dell™ Proximity Printing Solution (DPPS) allows you to configure your
network printers so that end users can easily select a printer closest to them
while printing their documents.
Requirements for setting up DPPS
• A physical or virtual server to install DPP server. For more information on
DPP server requirements, see "Server Hardware Requirements" on page 6.
•A WiFi
• Network based printers.
• An IT professional with advanced knowledge of:
• A network infrastructure with
®
network with reasonably distributed access points for the
proximity printing feature.
NOTE: DPP does not support USB printers.
a
Linux
b
Microsoft® Active Directory® (AD)
c
Domain Name Services (DNS)
a
Microsoft Active Directory
b
Domain Controller (DC)
c
Domain Name Services
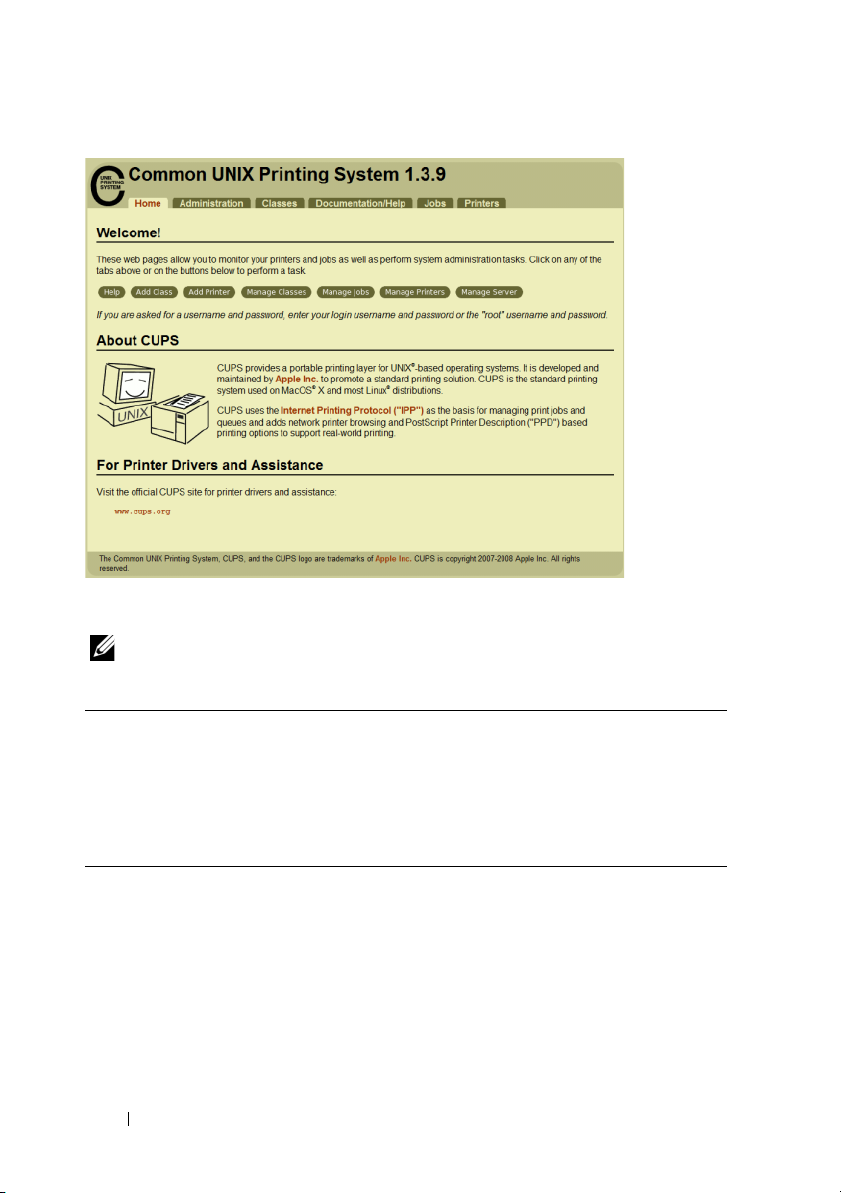
Server Operating System
The DPPS server uses Ubuntu Linux distribution for printer management
utilizing Common UNIX Printing System (CUPS) 1.3.9. This allows for
portability across multiple OS clients and a simple unified interface for
server interactions.
DPPS – Administrator’s Guide 5
Page 6
Server Hardware Requirements
NOTE: The specifications mentioned below are approximate and also relatively
apply to virtual machines.
Processor 2 GHz dual-core or 3 GHz single-core processor
Memory 2 GB (4 GB recommended for a large database)
Free hard disk space 10 GB
Client Hardware and Software Requirements
Processor No special requirements beyond what is necessary to run the
installed operating system
Memory No significant requirements beyond what is necessary to run the
Free hard disk space 25 MB hard disk space for installing the DPPS client. Some free
Operating system Windows
6 DPPS – Administrator’s Guide
installed operating system
hard disk space is also needed for the DPPS map cache
®
XP SP2 or higher, Windows Vista® SP1 or higher,
Windows 7
Page 7

Server Installation
The DPPS server uses Linux as the base operating system.
See the DPPS Installation Guide for more information on supported Linux
releases and installation instructions.
Installating DPPS Client
You can download and install DPPS client from the Dell Support website
at support.dell.com.
Downloading DPPS Client
1
Go to
support.dell.com.
2
Click
Start Here
3
Click the icon below
4
Click
Select Model
5
Click
Printers
6
Click
Imaging Solutions
7
Click
Dell Proximity Printing Solution (DPPS)
8
Find the appropriate entry and click
9
Follow the on-screen instructions to download and save the MSI file
to your computer.
under any of the options.
Drivers and Downloads
.
.
.
.
Download
and then click
.
Confirm
.
DPPS – Administrator’s Guide 7
Page 8

Installing DPPS Client
1
Open the file that you downloaded or were provided by your IT team.
The
Dell Proximity Printing Solution - InstallShield Wizard
2
Click
Next
. The message
3
Click
Install
. The message
4
Click
Finish
.
To run DPPS client as an administrator, start the program with the
-admin switch. For troubleshooting, you can additionally specify -debug
and -debughttp switches. The -debug switch enables logging all
activities. The -debughttp switch shows a connection dialog with all
active and inactive connections to the server, when you click the network
connectivity icon.
Ready to Install the Program
InstallShield Wizard Completed
appears.
appears.
appears.
Updating DPPS Client
You can update the DPPS client on the server by performing a package update.
Once the server has an updated client, end users connecting to the DPPS
server are automatically notified to update the client on their computers.
8 DPPS – Administrator’s Guide
Page 9
DPPS Administrator Mode Interface
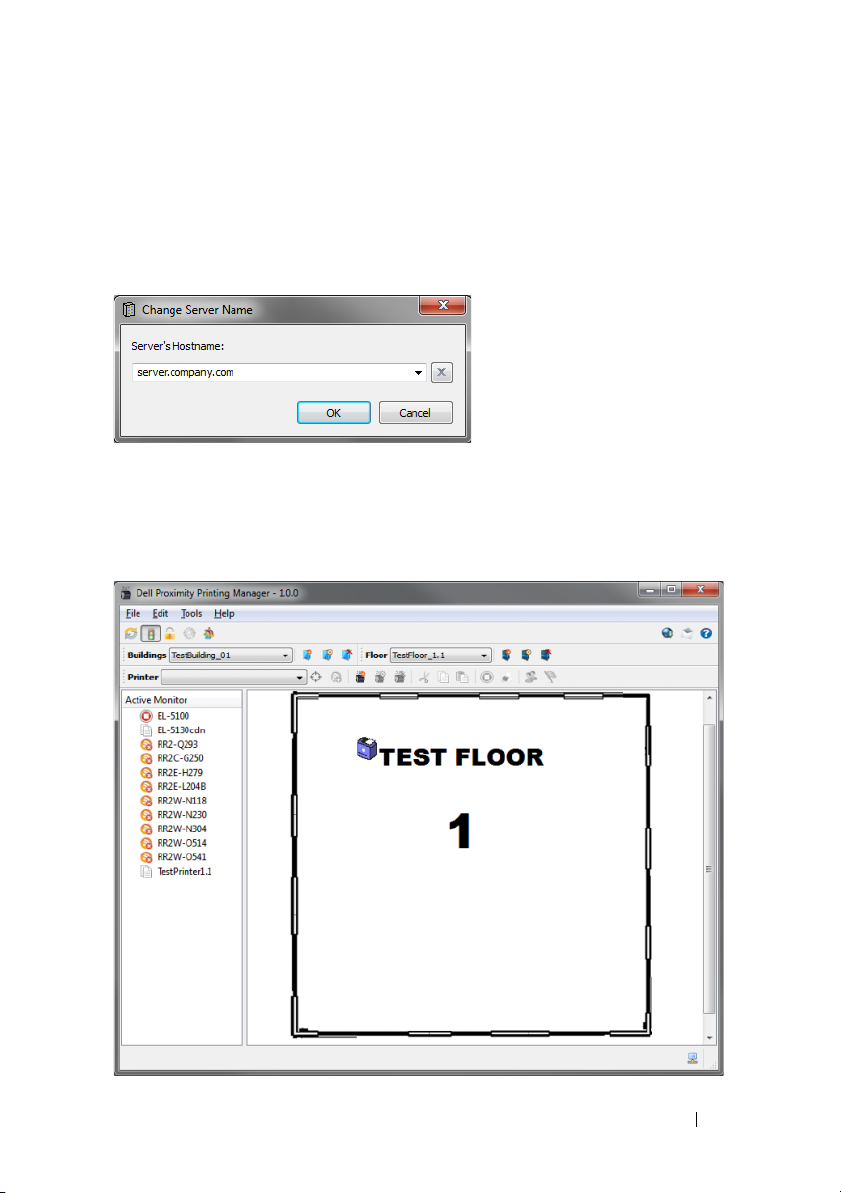
Connecting to the Server
You must set the server address when you launch DPPS client for the first time.
On the Change Server Name window, type the DPPS server name and click OK.
After you set the DPPS server address, the DPPS client automatically
connects to the local DPPS server and downloads the necessary maps and
information to your computer. Once the information is downloaded, you can
utilize the administrator mode of the DPPS client to manage printers across
multiple buildings and icons associated with the printers.
DPPS – Administrator’s Guide 9
Page 10

If you open DPPS using a computer that does not have an active Kerberos
ticket, the authentication fails and you are prompted for your credentials.
After you type your Active Directory account information, DPPS generates
a Kerberos ticket for itself.
Menu Options
The following commands are available in the main menu of DPPS client.
The Enabled in column indicates which mode of DPPS client is the
command enabled in.
Menu Options
Item Details Shortcut Key Enabled in
File
New
Building
Floor
Printer
Refresh View
Move Job
Cancel Job
Shutdown
Edit
Building
Floor
Printer
Create a new building.
Create a new floor to associate with the
current building and include a map file.
Creates a new printer and associates it
with the current floor.
Refreshes the utility by downloading
information from the DPPS server.
Moves the currently selected job to a
different DPPS printer.
Cancels the current print job. Ctrl+Del Client
Closes the program. Ctrl+Q Both
Change the name of the current building. Admin
Change the name of the current floor
and optionally upload a new map file.
Change the information of the
current printer.
F5 Admin
Ctrl+M Client
Admin
Admin
Admin
10 DPPS – Administrator’s Guide
Page 11

Menu Options
Item Details Shortcut Key Enabled in
(continued)
Tools
Set Server
Use Automatic /
Manual Credentials
Use Active Monitor
Lock/Unlock Printers
Icon Manager
Set Home Printer
Printer Selection
Options
Pop-ups Stay on Top
Hide Tray Icon When
Idle
Customize Buttons
Allows you to change the address of the
DPPS server.
If this option is enabled, DPPS client uses
your Microsoft Windows (or other
Kerberos) login credentials. If this option
is disabled, you are prompted for your
username and password
Provides a list of printers that are
considered to be in a failed state.
Determines whether or not the printers
can be moved on the map.
Opens the Icon Manager window Admin
Allows you to set your home printer for
printing without a wireless connection.
Open the Auto-Print Options window. Client
The windows displayed by DPPS client
are displayed over other windows.
Unless DPPS client needs attention, the
system tray icon remains hidden.
This allows you to change the size of the
icons and set whether or not to display
the text for the buttons.
Ctrl+S Both
Both
Admin
Admin
Ctrl+Home Client
Ctrl+P Client
Ctrl+H Client
Both
Help
Help
Request for Assistance
Check for Updates
About Dell Proximity
Printing Solution
Opens the help documentation. F1 Both
Send an E-Mail to the support team. Both
Checks for DPPS client updates. Both
Opens the About window showing
information about DPPS client.
Both
DPPS – Administrator’s Guide 11
Page 12

Using the Main Interface
The main interface has three primary sections—main menu and the toolbar,
the Floor Manager, and the Active Monitor.
Floor Manager
The Floor Manager appears in the administrator mode of DPPS client.
Using the Floor Manager interface, you can graphically manage the DPPS server.
Managing Buildings
Buildings are used to organize floors, which store printers based on a
co-ordinate system overlaid on an image of a map.
Adding a Building
1
Click
File →
New →Building
The
Add New Building
2
Type the name of the building and click
NOTE: You must use a unique name for each building.
12 DPPS – Administrator’s Guide
window appears.
or click on the toolbar.
Add
.
Page 13

Editing a Building
1
Click
Edit →
2
Type the new name for the building and click
Deleting a Building
1
Click the delete building icon on the toolbar. The
Building
.
Save
window appears. You can choose from the following options:
a
Remove only this building — Removes the specified building but the
floors remain on the server with their attached printers. You can
manually re-associate the orphaned floors with a new building.
b
Delete this building and associated floors/printers — Removes the
specified building along with any associated floors and printers.
.
Delete Building
2
Choose the desired option and click
Confirm
DPPS – Administrator’s Guide 13
.
Page 14

Managing Floors
Floors are associated with buildings and store images of maps. The floors
allow you to position printers on a co-ordinate system.
Adding a Floor
1
Click
File →
New →Floor
The
Add New Floor
2
Type the floor name.
NOTE: You must use a unique name for every floor in a building.
If you have multiple buildings, you can use the format Building Name–Floor
Name to name the floors so that you can easily distinguish them.
3
Select the building to which you want to associate this floor.
4
Click to browse and select a map image of the floor.
or click on the toolbar.
window appears.
NOTE: The map image must be in .png format and must be already scaled to
the needed size. It is recommended that you scale the image so that you can
easily fit multiple printers next to each other relative to their actual location.
NOTE: It is recommended to use black and white images for maps showing
only the walls, entrances and physical objects on the floor. Images with more
objects are of larger size and take longer to load on end user’s computer.
5
Click
Add
.
14 DPPS – Administrator’s Guide
Page 15

Editing a Floor
To edit any property of a floor, click Edit →Floor. The Edit Current Floor
window appears.
Edit the required fields and click Save to save your changes.
NOTE: If you also need to upload a new map image for this floor, check the box
Upload a new Mapfile, and click to browse and select the new map image.
Deleting a Floor
1
Click the delete floor icon on the toolbar. The
Delete Floor
window
appears. You can choose from the following options:
a
Remove only this floor — Removes the specified floor but the
associated printers remain on the server. You can manually re-associate
the orphaned printers with a new floor.
b
Delete this floor and associated printers — Removes the specified
floor and any associated printers.
2
Choose the desired option and click
Confirm
DPPS – Administrator’s Guide 15
.
Page 16

Managing Printers
Adding a Printer
To add a new printer to a floor:
1
Click
File →
New →Printer
The
Add New Printer
window appears showing the
or click on the toolbar.
Basics
tab.
2
Type the printer name.
NOTE: To avoid confusion for the end users, ensure no two printers have the
same name.
3
Type a description for the printer. This description is used by the
Icon Filter to associate an icon to the printer.
4
Type a printer location (optional).
16 DPPS – Administrator’s Guide
Page 17

5
Select a connection type used by the printer. Selecting this option
simplifies the configuration process as it automatically adds the necessary
connection information.
LPD Print Queue
is the recommended option.
You may use a different option depending on your network setup.
6
Select the printer manufacturer in the
printer model in the
Name/Model
Make
dropdown and then select the
dropdown. The DPPS server can store
all the necessary drivers for various models of printers so they do not need
to be installed locally on the your computer. If you cannot find the desired
manufacturer, select
NOTE: Raw is tested to work with most features of most printers, however some
specific functions may be unavailable depending on the printer.
Raw
to choose a generic driver.
You can optionally configure more settings on the Specifics and
Allowed Users tab of the Add Printer window.
DPPS – Administrator’s Guide 17
Page 18

Change your desired settings and click OK.
The new printer appears on the top-left corner of the map.
18 DPPS – Administrator’s Guide
Page 19

Mapping the First Printer
After you add a printer, you can position the printer at a desired location on
the map.
1
The newly added printer appears on the top-left corner of the map with
the
No Admin Scans
2
Click and drag the printer on the map as close as possible to its
icon on it.
physical location.
DPPS – Administrator’s Guide 19
Page 20

3
Select the printer icon and click or right-click the printer icon and
click
Add Admin Scan
. The following messages appear from the system
tray and in the DPPS client’s status bar:
• Checking proximity to printers. Please wait.
• Sending scan to server.
• Scan successfully sent.
4
Verify that the scan was successfully sent to the server using one of the
following methods:
a
The
No Admin Scans
icon disappears from the printer icon once
the scan is successfully sent to the server.
b
Position the mouse pointer over the printer icon and read the tool tip
that appears. You should see
Scans: 1 [Admin: 1 User: 0]
. If the number
of scans is less than 1, you will need to run the admin scan again.
NOTE: It is recommended that you initially create at least five admin scans
per printer at different times of the day to ensure that the averaging
calculations are accurate.
NOTE: If no admin scans are associated with a printer, it will not be read
correctly by end user scans and the printer will not be recommended to users
even if they are standing right next to it.
Mapping Additional Printers
You can map additional printers using one of the following methods:
1
Create copies of existing printers: DPPS allows you to create copies of
existing printers. This method reduces the time taken to add new printers
as you do not have to re-enter all the fields.
2
Manually create new printers: Right-click the point on the map where you
would like to create a new printer and click
3
Click
File →New →Printer
. The
Add New Printer
Create New Printer
window appears.
.
For more information on adding printers using this method, see "Adding a
Printer" on page 16.
20 DPPS – Administrator’s Guide
Page 21

Restricting Access to Printers
You can specify the users/user groups that can print to specific printers by:
• Adding the users/user groups while adding the printer.
• Editing the printer properties after you create the printer.
Adding a User or a User Group
1
Click .
2
If you are adding a single user, type the Kerberos authenticated login
name, without the domain information. If you are adding a user group,
prefix the user-group name with @.
NOTE: If you type a single user name with the domain information, CUPS may
not recognize the account.
NOTE: For information on adding users to a user group, see the
CUPS documentation.
3
Click OK. The user/user-group appears in the list.
Removing a User or a User Group
1
Click on the user/user group that you want to remove.
2
Click and confirm the message that appears.
DPPS – Administrator’s Guide 21
Page 22

Editing a Printer
To edit the settings for a printer, click Edit →Printer. The Edit Printer
window appears.
Edit the required fields and click OK to save your changes.
NOTE: The printer name cannot be edited in this version of DPPS.
Deleting a Printer
Click the delete printer icon on the toolbar.
The Delete Printer window appears.
CAUTION: Deleting a printer using this method will remove the printer from the
server. If you just want to remove the printer from the map, use the selector on the
Floor Manager window and select Cut From Map.
22 DPPS – Administrator’s Guide
Page 23

Icon Manager
The Icon Manager appears in the administrator mode of Dell Proximity
Printing Solution (DPPS) client. This utility allows you to manage the printer
icons that appear on the map. You can add icons and then associate the icons
with filters. The printers appearing on the map will automatically use the
icons you specify if the printer description, defined while adding a printer,
matches the filter string you specify in the Icon Manager.
To open the Icon Manager, click Tools →Icon Manager. The Icon Manager
window appears.
DPPS – Administrator’s Guide 23
Page 24

Adding an Icon
To add an icon:
1
Type a name for your icon in the
2
Click . The file browser window appears.
3
Select your desired icon file and click .
NOTE: The icon file must be in .png format and 16x16 pixels in size. If the icon file
does not have proper transparency set up in the alpha layer of the file, it may not
show up correctly on maps.
Name
field.
Adding a Filter
To add a filter:
1
Type the string of the filter to use in the Filter String field.
NOTE: You can use * for wild card strings and ? for wild card single character.
2
Select an icon, that you want to associate with the filter, from the
dropdown and click .
Sorting Filters
Select the desired filter and click or to move the filter up or down
the list. The printers use the icon of the first matching filter.
For example, printer XYZ-237 with a description of Dell 5330 + 2 Trays
is posted on a map. In the filter list, you have four entries in this order:
• 5330
•Dell
• *5330*
•*Tray*
According to this list of priorities, the first matching filter would be *5330*
and the printer uses the icon for the filter names *5330*. The reason for this
is the first two filters do not utilize wild card characters. Without the
wildcards, the utility assumes that you want items labeled exactly 5330 or
Dell, and not strings containing these words. The search doesn't proceed
beyond *5330* to search *Tray* as the filter named *5330* has a higher
priority rating.
Icon
24 DPPS – Administrator’s Guide
Page 25

Configuring Assistance Settings
You can configure whether the end users can send an E-Mail for support using
the DPPS client interface, and specify the E-Mail address.
To configure E-Mail settings, click To ol s →Options.
The Options window appears.
• Type the E-Mail address to which end users can send the E-Mails.
•Click on
A test E-Mail is sent to the E-Mail address you typed.
• Specify whether end users can see the request for assistance option on the
DPPS client interface.
Change the desired settings and click OK.
Te st
if you want to test the validity of the E-Mail address.
DPPS – Administrator’s Guide 25
Page 26

DPPS Client Mode Interface
Connecting to the Server
You must set the server address when you launch DPPS client for the first time.
On the Change Server Name window, type the DPP server name and click OK.
After the DPPS server address is set, the utility will automatically connect to
the local DPPS server and download the necessary maps and information to
your computer. After the information is downloaded, the client will prompt
you to set your home printer.
Selecting Your Home Printer
After you specify a valid DPPS server address, a window appears showing the
resource map where you can choose your home printer.
NOTE: The home printer will be automatically centered on by DPPS client if your
computer is not connected to a wireless network, or if your computer is out of
range of any of the printers added to the DPPS server, but still able to reach the
DPPS server.
26 DPPS – Administrator’s Guide
Page 27

To set the home printer on the Choose Home Printer window:
1
Select your building in the
2
Select your floor in the
3
On the map, double-click the printer that you want to set as your
home printer.
Building
Floor
dropdown.
dropdown. The floor map appears.
Sending Print Jobs
During the installation process, the DPPS installer adds a new printer
named Dell Proximity Printer to your computer and sets this printer
as the default printer.
1
Open the document you want to print and start the print job using
Dell Proximity Printer
2
If the DPPS client is running, a window with the resource map appears.
If the DPPS client is not running, the DPPS client starts in the
background, processes the job, and then displays the resource map.
3
DPPS client highlights the most recommended printers on the map based
on your location. Lighter shades indicate higher recommendations.
4
On the map, double-click the printer to which you want to print and the
DPPS server pushes the print job to your selected printer. Alternatively,
you can choose to print to a specific printer by right-clicking on the printer
and clicking the appropriate option from the context menu.
as the printer.
DPPS – Administrator’s Guide 27
Page 28

NOTE: You can point the cursor to a printer icon or right-click the printer icon to
see its name.
Managing Active Print Jobs
To view the active print jobs, double-click the DPPS icon in the system tray to
display the job list window. This window allows you to cancel a job or move a
job to another printer available on the map.
28 DPPS – Administrator’s Guide
Page 29

Auto-Print Options
The auto-print options allow you to configure the way print jobs are processed
by the DPPS client.
Auto-Print Options
Option Description
Provide me a map every
time
Hold All Jobs in the
Queue
Always Send Jobs to the
Home Printer
Send to the Nearest
Printer Every Time
Shows the map every time a print job is received.
This is the default option.
Does not show the map and holds the job till you manually move it
to a printer.
Sends all jobs to the home printer.
Does not show the map and automatically sends the print job to the
most recommended printer based on the user’s location.
NOTE: Future release of DPPS client will allow you to send the print
job to specific type of printers, such as monochrome or color printers.
DPPS – Administrator’s Guide 29
 Loading...