

Dell Inspiron 7706, P98F User Manual

Inspiron 7706 2-in-1
Setup and Specifications
Reg ula tor y M ode l: P98 F
Reg ula tor y T ype : P 98F 001
Sep tem ber 20 20
Rev . A 00

Notes, cautions, and warnings
NOTE: A NOTE indicates important information that helps you make better use of your product.
CAUTION: A CAUTION indicates either potential damage to hardware or loss of data and tells you how to avoid
the problem.
WARNING: A WARNING indicates a potential for property damage, personal injury, or death.
© 2020 Dell Inc. or its subsidiaries. All rights reserved. Dell, EM C, and other trademarks are trademarks of Dell Inc. or its subsidiaries. Oth er
trademarks may be trademarks of their respective owners.

Contents
Chapter 1: Set up your Inspiron 7706 2-in-1................................................................................... 4
Chapter 2: Using the privacy shutter.............................................................................................6
Chapter 3: Views of Inspiron 7706 2-in-1....................................................................................... 7
Right........................................................................................................................................................................................7
Left.......................................................................................................................................................................................... 7
Base........................................................................................................................................................................................ 8
Display.................................................................................................................................................................................... 9
Bottom..................................................................................................................................................................................10
Modes................................................................................................................................................................................... 10
Chapter 4: Specifications of Inspiron 7706 2-in-1.........................................................................12
Dimensions and weight..................................................................................................................................................... 12
Processor............................................................................................................................................................................. 12
Chipset..................................................................................................................................................................................13
Operating system............................................................................................................................................................... 13
Memory.................................................................................................................................................................................13
External ports......................................................................................................................................................................14
Internal slots........................................................................................................................................................................ 14
Wireless module..................................................................................................................................................................14
Audio..................................................................................................................................................................................... 15
Storage................................................................................................................................................................................. 15
Intel Optane Memory H10 with Solid State Storage (optional).............................................................................. 16
Media-card reader............................................................................................................................................................. 16
Keyboard.............................................................................................................................................................................. 16
Camera..................................................................................................................................................................................17
Touchpad..............................................................................................................................................................................17
Power adapter.................................................................................................................................................................... 18
Battery.................................................................................................................................................................................. 18
Display...................................................................................................................................................................................19
Fingerprint reader..............................................................................................................................................................20
GPU—Integrated.............................................................................................................................................................. 20
GPU—Discrete.................................................................................................................................................................. 20
Operating and storage environment............................................................................................................................. 20
Chapter 5: Keyboard shortcuts of Inspiron 7706 2-in-1................................................................ 22
Chapter 6: Getting help and contacting Dell................................................................................ 24
Contents 3
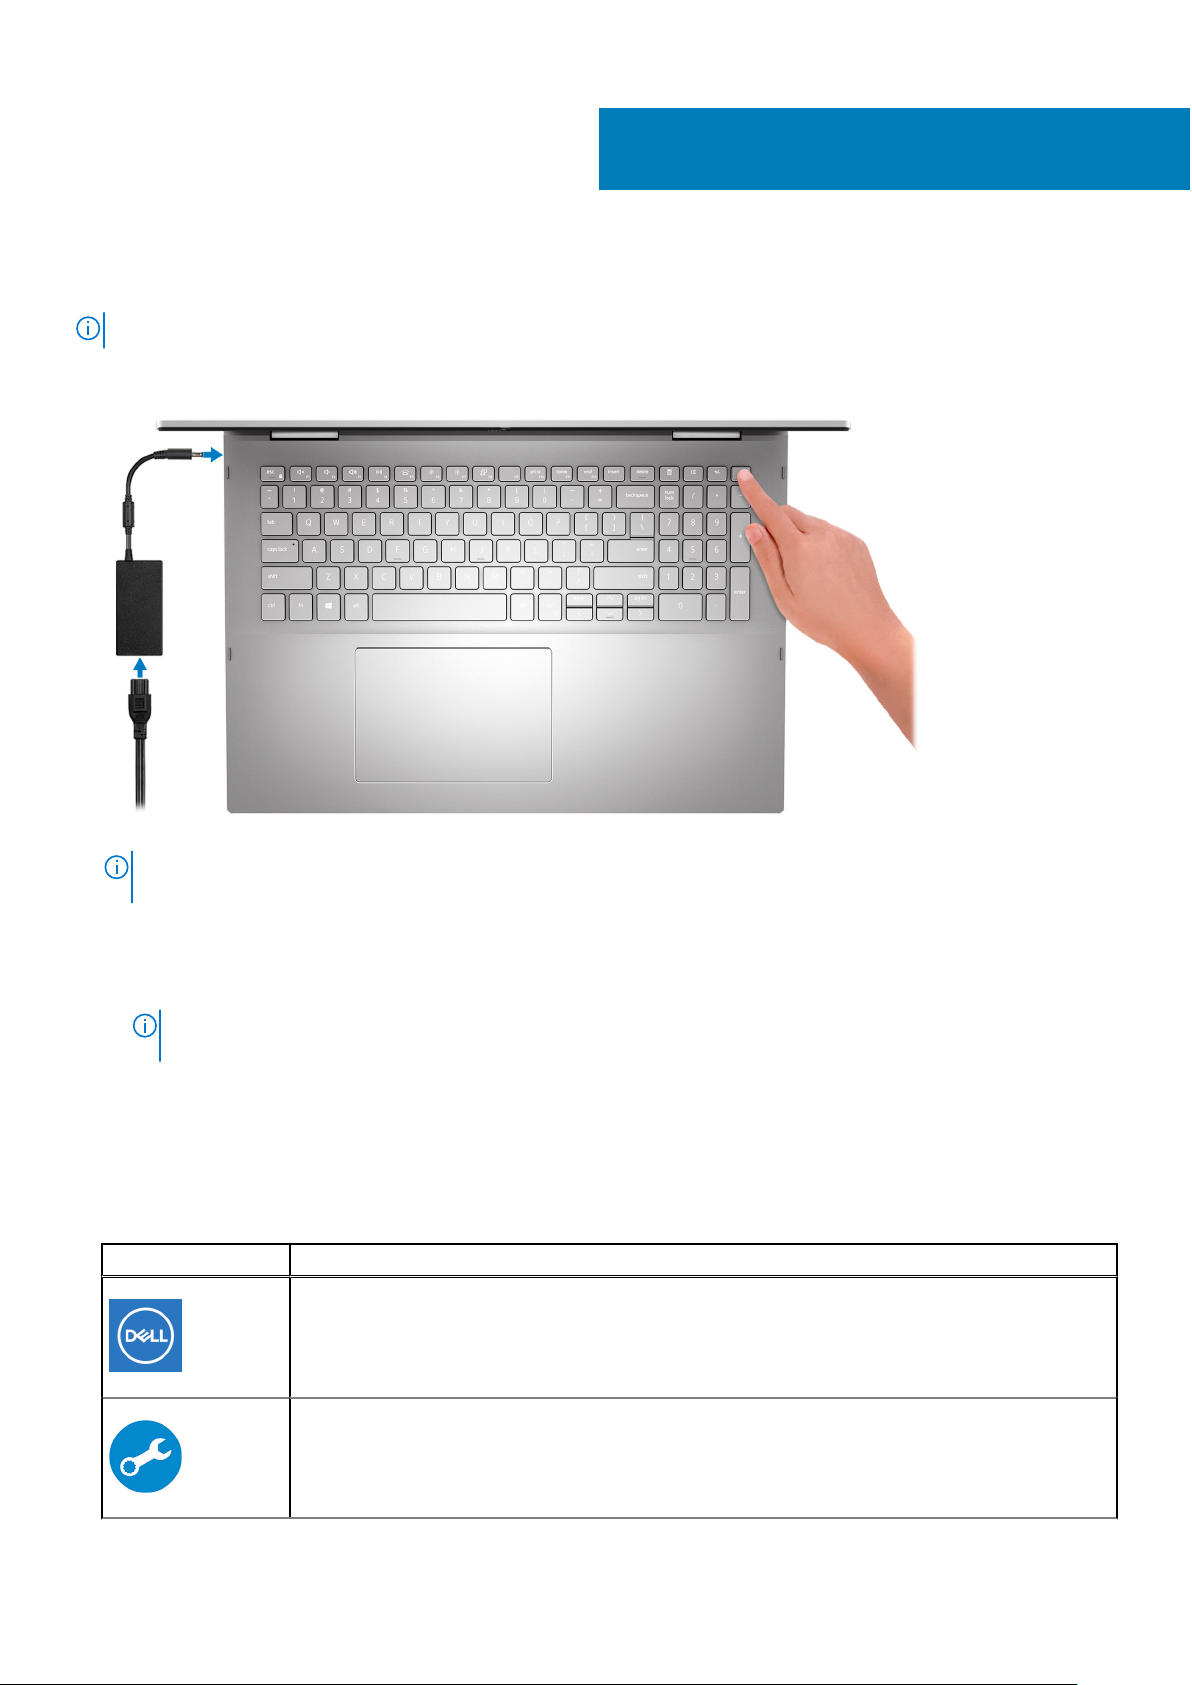
Set up your Inspiron 7706 2-in-1
NOTE: The images in this document may differ from your computer depending on the configuration you ordered.
1. Connect the power adapter and press the power button.
1
NOTE: The battery may go into power-saving mode during shipment to conserve charge on the battery. Ensure that the
power adapter is connected to your computer when it is turned on for the first time.
2. Finish Windows setup.
Follow the on-screen instructions to complete the setup. When setting up, Dell recommends that you:
● Connect to a network for Windows updates.
NOTE:
If connecting to a secured wireless network, enter the password for the wireless network access when
prompted.
● If connected to the Internet, sign in with or create a Microsoft account. If not connected to the Internet, create an
offline account.
● On the Support and Protection screen, enter your contact details.
3. Locate and use Dell apps from the Windows Start menu—Recommended.
Table 1. Locate Dell apps
Resources Description
My Dell
Centralized location for key Dell applications, help articles, and other important information about
your computer. It also notifies you about the warranty status, recommended accessories, and
software updates if available.
SupportAssist
Proactively checks the health of your computer’s hardware and software. The SupportAssist OS
Recovery tool troubleshoots issues with the operating system. For more information, see the
SupportAssist documentation at www.dell.com/support.
4 Set up your Inspiron 7706 2-in-1

Table 1. Locate Dell apps (continued)
Resources Description
NOTE: In SupportAssist, click the warranty expiry date to renew or upgrade your warranty.
Dell Update
Updates your computer with critical fixes and latest device drivers as they become available. For
more information about using Dell Update, see the knowledge base article SLN305843 at
www.dell.com/support.
Dell Digital Delivery
Download software applications, which are purchased but not pre-installed on your computer. For
more information about using Dell Digital Delivery, see the knowledge base article 153764 at
www.dell.com/support.
Set up your Inspiron 7706 2-in-1 5

2
Using the privacy shutter
1. Slide the privacy shutter to the left to access the camera lens.
2. Slide the privacy shutter to the right to cover the camera lens.
6 Using the privacy shutter
Views of Inspiron 7706 2-in-1
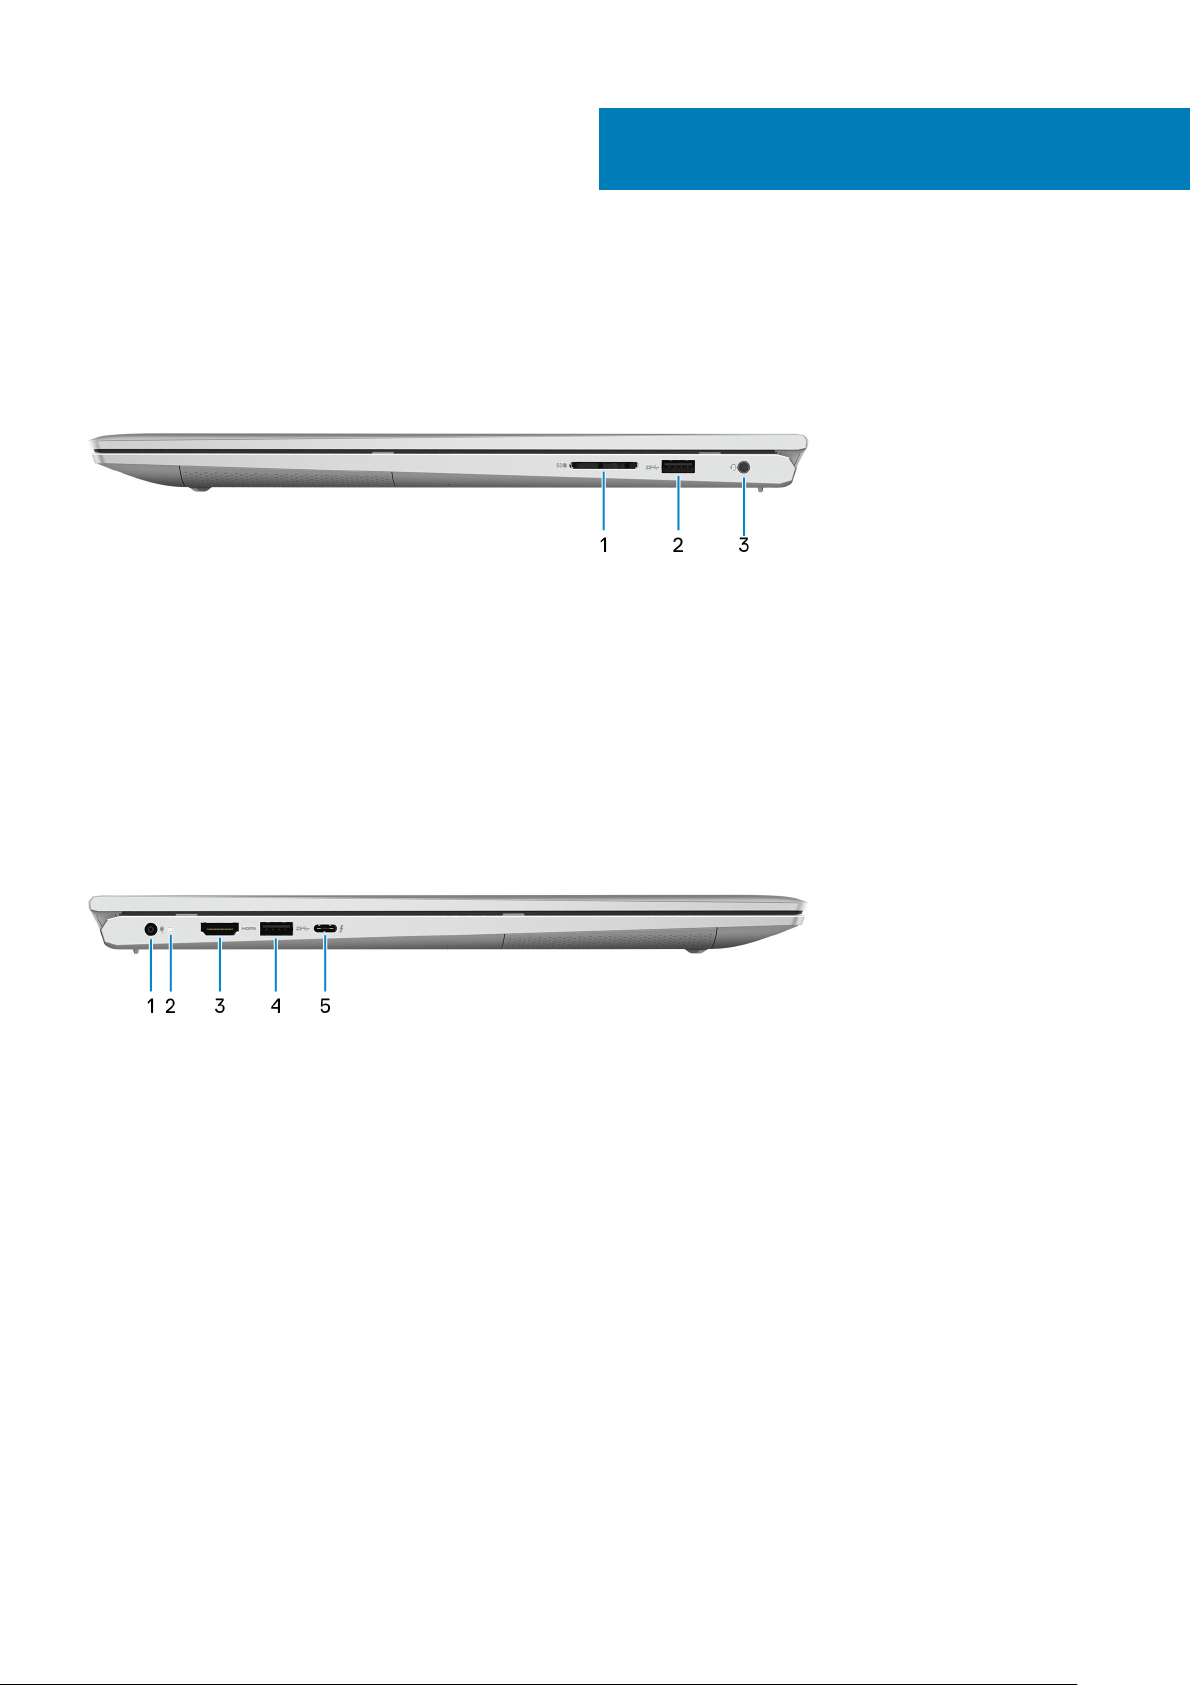
Right
1. SD-card slot
Reads from and writes to the SD card.
2. USB 3.2 Gen 1 port
Connect peripherals such as external storage devices and printers. Provides data transfer speeds up to 5 Gbps.
3. Headset port
Connect headphones or a headset (headphone and microphone combo).
3
Left
1. Power-adapter port
Connect a power adapter to provide power to your computer.
2. Power and battery-status light
Indicates the power state and battery state of the computer.
Solid white—Power adapter is connected and the battery is charging.
Solid amber—Battery charge is low or critical.
Off—Battery is fully charged.
3. HDMI port
Connect to a TV or another HDMI-in enabled device. Provides video and audio output.
4. USB 3.2 Gen 1 port
Connect peripherals such as external storage devices and printers. Provides data transfer speeds up to 5 Gbps.
5. Thunderbolt 4 USB Type-C port with Power Delivery
Connects to an external display using a display adapter. Provides data transfer rates of up to 40 Gbps.
Supports Power Delivery that enables two-way power supply between devices. Provides up to 5 V/3 A power output that
enables faster charging.
Views of Inspiron 7706 2-in-1 7
NOTE: You can connect a Dell Docking Station to the Thunderbolt 4 port. For more information, see the knowledge
base article SLN286158 at www.dell.com/support.
NOTE: A USB Type-C to DisplayPort adapter (sold separately) is required to connect a DisplayPort device.
NOTE: Connecting a USB Type-C power adapter to this port provides power to your computer and charges the battery.
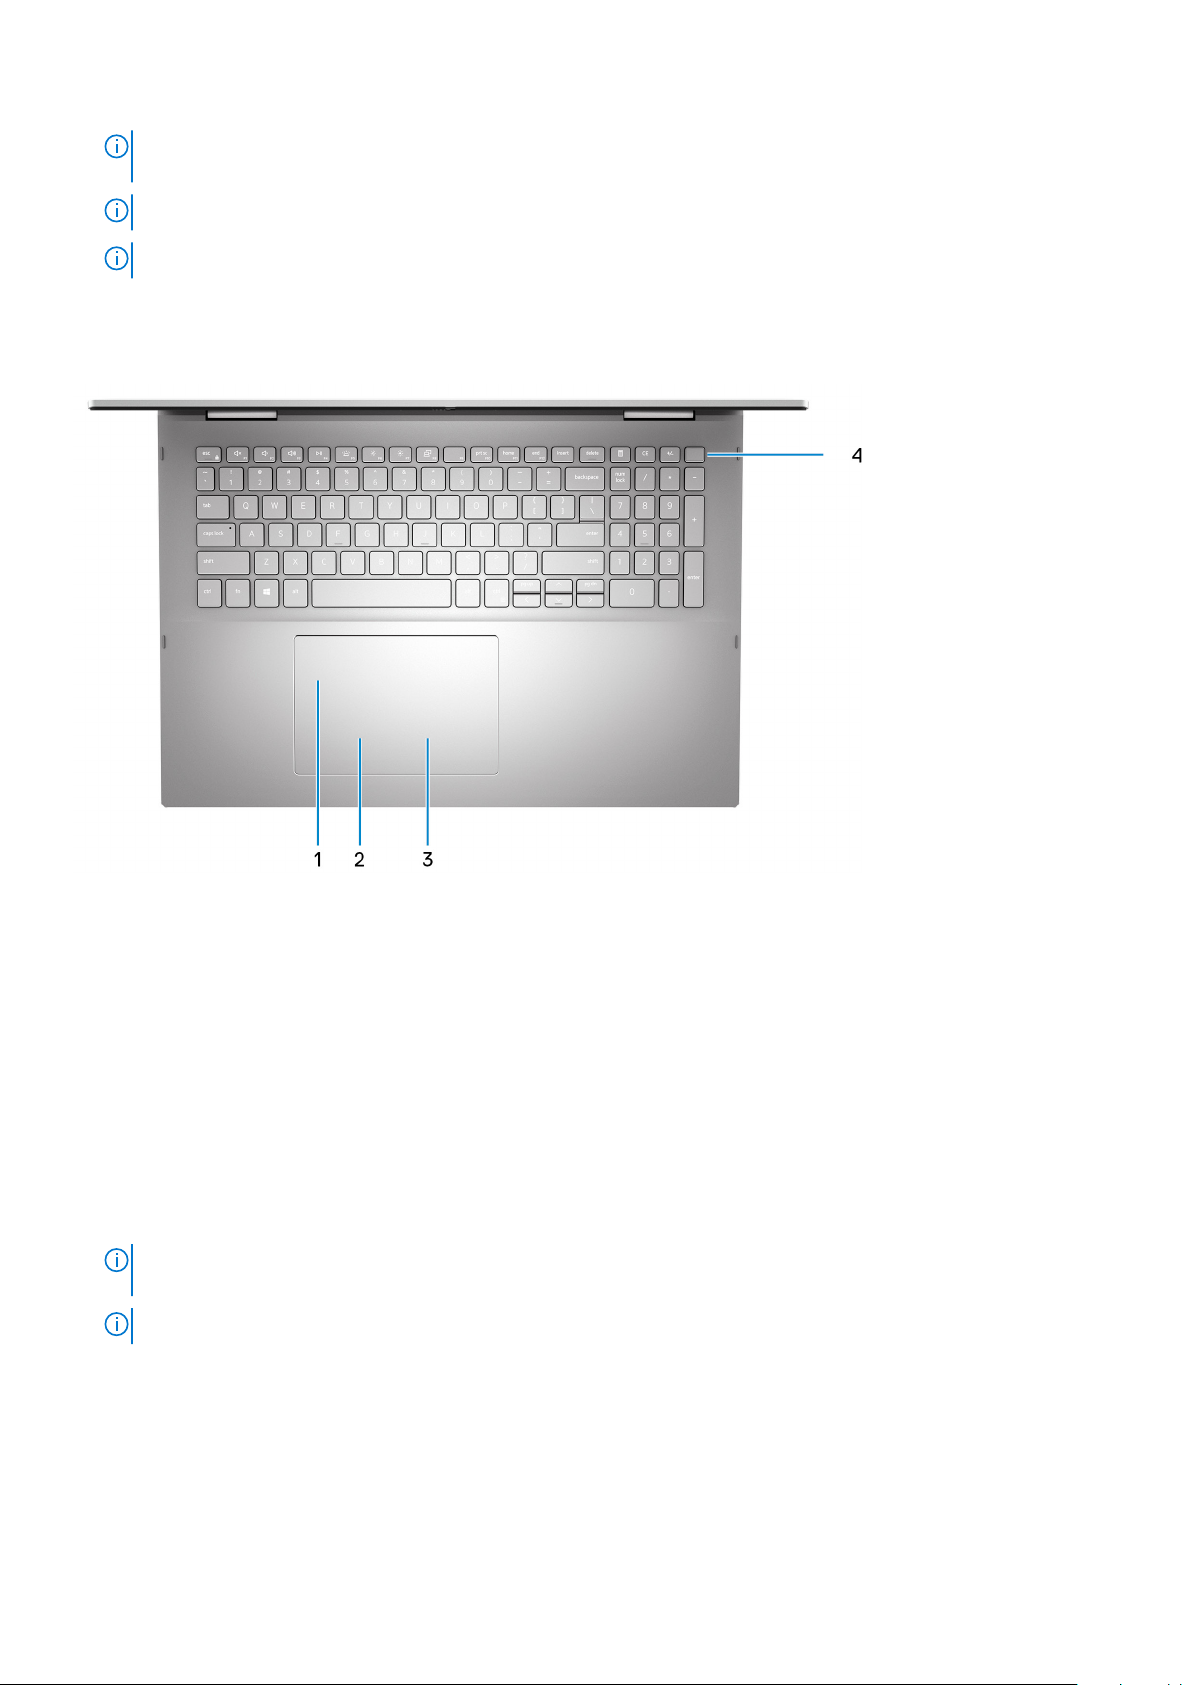
Base
1. Touchpad
Move your finger on the touchpad to move the mouse pointer. Tap to left-click and two finger tap to right-click.
2. Left-click area
Press to left-click.
3. Right-click area
Press to right-click.
4. Power button with fingerprint reader
Press to turn on the computer if it is turned off, in sleep state, or in hibernate state.
When the computer is turned on, press the power button to put the computer into sleep state; press and hold the power
button for 10 seconds to force shut-down the computer.
The power button has a fingerprint reader, place your finger on the power button to log in.
You can customize power-button behavior in Windows. For more information, see Me and My Dell at
NOTE:
www.dell.com/support/manuals.
NOTE: To reset the battery, press and hold the power button for 25 seconds.
8 Views of Inspiron 7706 2-in-1
 Loading...