

Page 1

Dell™ OptiPlex™ Systems
Setup and Quick Reference Guide
Guide de configuration et de référence rapide
Setup- und Schnellreferenzhandbuch
Guida di installazione e consultazione rapida
Guía de instalación y de referencia rápida
Kurulum ve Hızlı Referans Kılavuzu
Models DHS, DHP, and DHM
www.dell.com | support.dell.com
Page 2

Page 3

Contents
English
Français
Deutsch
Italiano
Español
Türkçe
. . . . . . . . . . . . . . . . . . . . . . . . . . . . . . . . . . . . 5
. . . . . . . . . . . . . . . . . . . . . . . . . . . . . . . . . . . . 17
. . . . . . . . . . . . . . . . . . . . . . . . . . . . . . . . . . . . 31
. . . . . . . . . . . . . . . . . . . . . . . . . . . . . . . . . . . . 45
. . . . . . . . . . . . . . . . . . . . . . . . . . . . . . . . . . . . 59
. . . . . . . . . . . . . . . . . . . . . . . . . . . . . . . . . . . . . 73
Page 4

Page 5

Dell™ OptiPlex™ Systems
Setup and Quick Reference Guide
www.dell.com | support.dell.com
Page 6

Notes, Notices, and Cautions
NOTE: A NOTE indicates important information that helps you make better use of your computer.
NOTICE: A NOTICE indicates either potential damage to hardware or loss of data and tells you
how to avoid the problem.
CAUTION: A CAUTION indicates a potentially hazardous situation which, if not
avoided, may result in minor or moderate injury.
____________________
Information in this document is subject to change without notice.
© 2000–2001 Dell Computer Corporation. All rights reserved.
Reproduction in any manner whatsoever without the written permission of Dell Computer Corporation is strictly
forbidden.
Trademarks used in this text:
Microsoft, MS-DOS, Windows NT
Other trademarks and trade names may be used in this document to refer to either the entities claiming the marks and
names or their products. Dell Computer Corporation disclaims any proprietary interest in trademarks and trade names
other than its own.
July 2001 P/N 51FMX Rev. A04
Dell, OptiPlex
, and
, and the
Windows
DELL
are registered trademarks of Microsoft Corporation.
logo are trademarks of Dell Computer Corporation;
Page 7

About This Guide
This document contains solving problems and safety and regulatory
information about your Dell™ OptiPlex™ computer.
To obtain the latest versions of the documents on your hard drive, go to the
Dell support website at http://support.dell.com.
Regulatory model numbers appear throughout this document; their chassis
type equivalents are shown below:
Regulatory Model Numbers and Chassis Types
DHS = small desktop (SD) chassis
DHP = small form-factor (SF) chassis
DHM = small mini-tower (SMT) chassis
Finding Information and Assistance
Resources and Support Tools
Resource Contents Using the Resource
Dell OptiPlex ResourceCD
•Dell Diagnostics
•Drivers
• Utilities
•Computer and device
documentation
Service and Registration
Labels—located on the front or
side of your Dell computer.
• Express Service Code and
Service Tag Number
• Product Key (also called the
Product ID or Certificate of
Authenticity [COA])
See the main menu on the ResourceCD that was shipped
with your computer. Use the pull-down menu to make
selections appropriate for your computer. You can perform
the following tasks:
• Diagnose a problem
• Install or reinstall drivers
• Obtain information on your computer and devices
NOTE: User documentation and drivers are already
installed on your computer when shipped from Dell. You
can use this CD to access documentation, reinstall drivers,
or run diagnostics tools.
The Express Service Code and Service Tag Number are
unique identifiers for your Dell computer.
You may need the Product Key (or Product ID) number to
complete the operating system setup.
Setup and Quick Reference Guide 5
Page 8
Resources and Support Tools
(continued)
Resource Contents Using the Resource
Operating system CD To reinstall your operating system, use the operating
system CD that was shipped with your computer.
NOTE: The operating system CD may not include all the
latest drivers for your computer. If you reinstall your
operating system, use the
for the devices shipped with your computer.
For more information about reinstalling your operating
system, see the operating system installation
documentation that was shipped with your computer.
www.dell.com | support.dell.com
Operating system installation
guide
See the operating system installation guide for
information on reinstalling and configuring your
operating system.
Click the Start button and select Help or Help and
Support, depending on your operating system, to obtain
more information on your operating system.
ResourceCD
to reinstall drivers
User’s guides for your computer
and devices
User’s Guides
6 Setup and Quick Reference Guide
Depending on your operating system, double-click the
User’s Guides icon on your desktop, or click the Start
button and then select Help and Support to access the
electronic documentation stored on your hard drive.
Obtain information on the following:
• Using your computer
• Configuring system settings
• Removing and installing parts
• Installing and configuring software
• Diagnosing a problem
• Technical specifications
• Device documentation (on selected operating systems)
• Getting technical assistance
Page 9

Resources and Support Tools
Resource Contents Using the Resource
Dell support website
• Technical support and
• Downloads for your
•Order or delivery status
• Hints and tips, technology
Dell Premier Support website
•Service call status
•Top technical issues by
• Frequently asked questions
• Customized service tags
• System configuration detail
(continued)
information
computer
papers, service information
product
by product number
Go to http://support.dell.com and complete the one-time
registration.
• Get help with general usage, installation, and
troubleshooting questions
• Obtain answers to technical service and support
questions
• Get the latest versions of the drivers for your computer
• Access documentation about your computer and
devices
• Join online discussions with other Dell customers and
Dell technical professionals
• Explore a list of online links to Dell's primary vendors
Go to http://premiersupport.dell.com:
The Dell Premier Support website is customized for
corporate, government, and education customers.
This site may not be available in all regions.
Setup and Quick Reference Guide 7
Page 10

Solving Problems
Dell provides a number of tools to help you if your system does not perform
as expected. For the latest troubleshooting information available for your
system, see the Dell support website at http://support.dell.com. You can
also find descriptions of Dell troubleshooting tools in the section titled
“Getting Help” in your online User’s Guide.
If computer problems occur that require help from Dell, write a detailed
description of the error, beep codes, or diagnostics light patterns; record
your Express Service Code and Service Tag Number below; and then
contact Dell from the same location as your computer.
www.dell.com | support.dell.com
See “Finding Information and Assistance” on page 5 for an example of the
express service code and service tag numbers.
Express Service Code: ___________________________
Service Tag Number: ___________________________
Your computer includes the following tools that can help you solve a
problem:
D
ELL DIAGNOSTICS
computer and help to identify the cause of computer problems. For more
information, see "Running the Dell Diagnostics" on page 10.
S
YSTEM LIGHTS
indicate a computer problem. For more information, see your User’s Guide.
D
IAGNOSTIC LIGHTS
indicate a computer problem. For more information, see your User’s Guide.
S
YSTEM MESSAGES
current or possible failure. For more information, see your User’s Guide.
B
EEP CODES
help identify a problem. For more information, see your User’s Guide.
8 Setup and Quick Reference Guide
— The Dell Diagnostics test various components in your
— Located on the front of the computer, these lights can
— Located on the back of the computer, these lights can
— The computer reports these messages to warn you of
— A series of audible beep codes emitted by your computer can
Page 11

Using the
Dell OptiPlex ResourceCD
To u se t he Dell OptiPlex ResourceCD while you are running the Microsoft®
Windows
1
2
®
operating system, perform the following steps.
NOTE: To access device drivers and user documentation, you must use the
ResourceCD
while you are running Windows.
Turn on the computer and allow it to boot to the Windows desktop.
Insert the Dell OptiPlex ResourceCD into the CD drive.
If you are using the Dell OptiPlex ResourceCD for the first time on this
computer, the ResourceCD Installation window opens to inform you
that the ResourceCD is about to begin installation.
Click OK to continue.
3
To complete the installation, respond to the prompts offered by the
installation program.
Click Next at the Welcome Dell System Owner screen.
4
Choose the appropriate System Model, Operating System, Device
5
Ty p e , and To pi c.
Drivers for Your Computer
To display a list of device drivers for your computer, perform the following
steps:
Click My Drivers in the Top i c pull-down menu.
1
The ResourceCD scans your computer’s hardware and operating
system, and then a list of device drivers for your system configuration
is displayed on the screen.
Click the appropriate driver and follow the instructions to download
2
the driver to your computer.
To view all available drivers for your computer, click Drivers from the Top ic
pull-down menu.
Setup and Quick Reference Guide 9
Page 12

Running the Dell Diagnostics
The Dell Diagnostics is a program that tests various components in your
computer. Run this program whenever you have a computer problem to
help you identify the source of the problem.You can run the Dell
Diagnostics from your hard drive or the ResourceCD.
NOTICE: If your hard drive fails, run the Dell Diagnostics from the
ResourceCD
Turn on your computer (if your computer is already on, restart it).
1
.
2
When
F2 = Setup
appears in the upper-right corner of the screen,
press <Ctrl><Alt><F10>.
www.dell.com | support.dell.com
The diagnostics initialization begins immediately; then the
Diagnostics Menu appears.
Select the appropriate diagnostic option for your computer.
3
To use the diagnostics, follow instructions on the screen.
Changing the Boot Sequence
To run the Dell Diagnostics from the ResourceCD, perform the following
steps to enable your computer to boot from the CD:
Insert the Dell OptiPlex ResourceCD into the CD drive.
1
Turn on (or restart) your computer.
2
3
When
F2 = Setup
appears in the upper-right corner of the screen,
press <Ctrl><Alt><F8>.
NOTE: This feature changes the boot sequence for one time only. On the next
start-up, the computer boots according to the devices specified in system setup.
The Boot Device Menu appears.
If you wait too long and the Windows logo appears, continue to wait
until you see the Windows desktop. Then shut down your computer
and try again.
Select the CD-ROM Device option.
4
10 Setup and Quick Reference Guide
Page 13

Running the Dell IDE Hard Drive Diagnostics
The Dell IDE Hard Drive Diagnostics is a utility that tests the hard drive to
troubleshoot or confirm a hard drive failure.
Turn on your computer (if your computer is already on, restart it).
1
2
When
F2 = Setup
appears in the upper-right corner of the screen,
press <Ctrl><Alt><D>.
Follow the instructions on the screen.
3
If a failure is reported, see “Hard Drive Problems” in your User’s Guide.
Safety Instructions
Use the following safety guidelines to help protect your computer system
from potential damage and to ensure your own personal safety.
When Working Inside Your Computer
Before you remove the computer cover, perform the following steps in the
sequence indicated.
NOTICE: Do not attempt to service the computer yourself, except as
explained in your online Dell documentation or otherwise provided to you.
Always follow installation and service instructions closely.
CAUTION: There is a danger of a new battery exploding if it is
incorrectly installed. Replace the battery only with the same or
equivalent type recommended by the manufacturer. Discard used
batteries according to the manufacturer’s instructions.
Turn off your computer and any peripherals.
1
Ground yourself by touching an unpainted metal surface on the
2
chassis, such as the metal around the card-slot openings at the back of
the computer, before touching anything inside your computer.
While you work, periodically touch an unpainted metal surface on the
computer chassis to dissipate any static electricity that might harm
internal components.
Setup and Quick Reference Guide 11
Page 14

Disconnect your computer and peripherals from their power sources.
3
Also, disconnect any telephone or telecommunication lines from the
computer.
Doing so reduces the potential for personal injury or shock.
In addition, take note of these safety guidelines when appropriate:
• To avoid shorting out your computer when disconnecting a network
cable, first unplug the cable from the network interface controller
(NIC) on the back of your computer, and then from the network jack
on the wall. When reconnecting a network cable to your computer,
first plug the cable into the network jack, and then into the NIC.
www.dell.com | support.dell.com
• When you disconnect a cable, pull on its connector or on its strainrelief loop, not on the cable itself. Some cables have a connector with
locking tabs; if you are disconnecting this type of cable, press in on the
locking tabs before disconnecting the cable. As you pull connectors
apart, keep them evenly aligned to avoid bending any connector pins.
Also, before you connect a cable, make sure both connectors are
correctly oriented and aligned.
• Handle components and cards with care. Do not touch the
components or contacts on a card. Hold a card by its edges or by its
metal mounting bracket. Hold a component such as a microprocessor
chip by its edges, not by its pins.
When Using Your Computer System
As you use your computer system, observe the following safety guidelines.
CAUTION: Do not operate your computer system with any cover(s)
(including computer covers, bezels, filler brackets, and frontpanel inserts) removed.
• To help avoid damaging your computer, be sure the voltage selection
switch on the power supply is set to match the AC power available at
your location:
– 115 volts (V)/60 hertz (Hz) in most of North and South America
and some Far Eastern countries such as South Korea and Taiwan
– 100 V/50 Hz in eastern Japan and 100 V/60 Hz in western Japan
12 Setup and Quick Reference Guide
Page 15

NOTE: The voltage selection switch must be set to the 115V position
even though the AC supply in Japan is 100 V.
– 230 V/50 Hz in most of Europe, the Middle East, and the Far East
Also be sure your monitor and attached peripherals are electrically
rated to operate with the AC power available in your location.
NOTE: Auto-select power supplies do not require a voltage selection
switch. Your power supply may not have this switch.
• To help prevent electric shock, plug the computer and peripheral
power cables into properly grounded power sources. These cables are
equipped with three-prong plugs to help ensure proper grounding. Do
not use adapter plugs or remove the grounding prong from a cable. If
you must use an extension cable, use a three-wire cable with properly
grounded plugs.
• Before working inside the computer, unplug the system to help prevent
electric shock or system board damage. Certain system board
components continue to receive power any time the computer is
connected to AC power.
• To help avoid possible damage to the system board, wait 15 seconds
after unplugging the system before disconnecting a device from the
computer.
NOTICE: Observe when the auxiliary power light-emitting diode (LED)
indicator on the system board turns off to verify that system power is off (see
your
User’s Guide
for the location of this LED).
Setup and Quick Reference Guide 13
Page 16

• To help protect your computer system from sudden, transient
increases and decreases in electrical power, use a surge suppressor, line
conditioner, or uninterruptible power supply (UPS).
• Be sure nothing rests on your computer system’s cables and that the
cables are not located where they can be stepped on or tripped over.
• Do not spill food or liquids on your computer. If the computer gets
wet, consult your User’s Guide.
• Do not push any objects into the openings of your computer. Doing so
can cause fire or electric shock by shorting out interior components.
www.dell.com | support.dell.com
• Keep your computer away from radiators and heat sources. Also, do not
block cooling vents. Avoid placing loose papers underneath your
computer; do not place your computer in a closed-in wall unit or on a
bed, sofa, or rug.
Ergonomic Computing Habits
CAUTION: Improper or prolonged keyboard use may result in
injury.
CAUTION: Viewing the monitor screen for extended periods of
time may result in eye strain.
For comfort and efficiency, observe the ergonomic guidelines in your
User’s Guide when setting up and using your computer system.
Regulatory Information
Electromagnetic Interference (EMI) is any signal or emission, radiated in
free space or conducted along power or signal leads, that endangers the
functioning of a radio navigation or other safety service or seriously
degrades, obstructs, or repeatedly interrupts a licensed radio
communications service.
Your Dell computer system is designed to comply with applicable
regulations regarding EMI. Changes or modifications not expressly
approved by Dell could void the user’s authority to operate the equipment.
NOTE: Additional regulatory information regarding your system can be found
in your
14 Setup and Quick Reference Guide
User’s Guide
.
Page 17

Systèmes Dell™ OptiPlex™
Guide de configuration et de référence rapide
www.dell.com | support.dell.com
Page 18

Remarques, avis et précautions
REMARQUE : Une REMARQUE indique une information importante qui peut vous aider à
mieux utiliser votre ordinateur.
AVIS : Un AVIS vous avertit d’un risque de dommage matériel ou de perte de données et vous
indique comment éviter le problème.
PRÉCAUTION: Une PRÉCAUTION vous avertit d’une situation qui, si elle n'est pas
évitée, peut entraîner des blessures plus ou moins graves.
____________________
Les informations contenues dans ce document sont sujettes à modification sans préavis.
© 2000–2001 Dell Computer Corporation. Tous droits réservés.
Toute reproduction, sous quelque forme que ce soit, sans l'autorisation écrite de Dell Computer Corporation, est
strictement interdite.
Marques utilisées dans ce texte†:
Microsoft, MS-DOS, Windows NT
D'autres marques et noms commerciaux peuvent être utilisés dans ce document pour faire référence aux entités se
réclamant de ces marques et de ces noms ou à leurs produits. Dell Computer Corporation dénie tout intérêt propriétaire
vis-à-vis des marques et des noms commerciaux autres que les siens.
Juillet 2001 P/N 51FMX Rév. A04
Dell, OptiPlex
et
Windows
et le logo
sont des marques déposées de Microsoft Corporation.
DELL
sont des marques de Dell Computer Corporation ;
Page 19

À propos de ce guide
Ce document contient la résolution de problèmes ainsi que des informations concernant la sécurité et les réglementations de votre ordinateur
Dell™ OptiPlex™.
Pour obtenir les dernières versions de ces documents sur votre unité de
disque dur, allez sur le site Web de support Dell à l'adresse
http://support.dell.com.
Les numéros de modèle réglementaires apparaissent tout au long de ce
document ; les types de châssis correspondants sont répertoriés ci-dessous :
Numéros de modèle réglementaires et types de
châssis
DHS = petit châssis de bureau
DHP = châssis de faible encombrement
DHM = châssis micro-tour
Obtention d'informations et
d'assistance
Ressources et outils de support
Ressource Sommaire : Utilisation de la ressource
Cédérom ResourceCD Dell
OptiPlex
• Diagnostics Dell
•Pilotes
• Utilitaires
• Documentation sur
l'ordinateur et sur les
périphériques
Guide de configuration et de référence rapide 17
Consultez le menu principal du cédérom ResourceCD qui
a été livré avec votre ordinateur. Utilisez le menu
déroulant pour sélectionner les choix correspondant à
votre ordinateur. Vous pouvez réaliser les tâches
suivantes :
• diagnostiquer un problème
• installer ou réinstaller des pilotes
• obtenir les informations concernant votre ordinateur et
ses périphériques
REMARQUE : La documentation utilisateur et les
pilotes sont déjà installés dans votre ordinateur lorsqu'il
est expédié de l'usine Dell. Vous pouvez utiliser ce
cédérom pour accéder à la documentation, réinstaller les
pilotes ou exécuter les outils de diagnostic.
Page 20

Ressources et outils de support
(suite)
Ressource Sommaire : Utilisation de la ressource
Étiquettes de service et
d'enregistrement—situées à
l'avant ou sur le côté de votre
ordinateur Dell.
• Express Service Code (Code
Le code de service express et le numéro de service
identifient votre ordinateur Dell de manière exclusive.
Il vous faudra peut-être le code clé du produit (ou l'ID du
produit) pour réaliser la configuration du système
d'exploitation.
de service express) et Service
Tag Number (Numéro de
service)
• Product Key (Code clé du
produit) (appelé aussi
www.dell.com | support.dell.com
Product ID [ID du produit]
ou COA, pour Certificate of
Authenticity [certificat
d'authenticité])
Cédérom du système
d'exploitation
Pour réinstaller le système d'exploitation, utilisez le
cédérom du système d'exploitation livré avec votre
ordinateur.
REMARQUE : Il est possible que le cédérom du système
d'exploitation ne comprenne pas tous les pilotes les plus
récents pour votre ordinateur. Si vous réinstallez votre
système d'exploitation, utilisez le cédérom
pour réinstaller les pilotes pour les périphériques livrés
avec votre ordinateur.
Pour de plus amples informations concernant la
réinstallation de votre système d'exploitation, consultez la
documentation sur l'installation du système d'exploitation
qui a été livrée avec votre ordinateur.
Guide d'installation du système
d'exploitation
Reportez-vous au guide d'installation du système
d'exploitation pour les informations sur la réinstallation et
la configuration du système d'exploitation.
Selon votre système d'exploitation, cliquez sur le bouton
Start (Démarrer) et sélectionnez Help (Aide) ou Help
and Support (Aide et assistance) pour obtenir de plus
amples renseignements sur votre système d'exploitation.
ResourceCD
18 Guide de configuration et de référence rapide
Page 21

Ressources et outils de support
Ressource Sommaire : Utilisation de la ressource
Guides d'utilisation de votre
ordinateur et de ses
périphériques
Guides d'utilisation
Site Web de support de Dell
• Renseignements et
assistance techniques
• Téléchargements pour votre
ordinateur
• Suivi de commande ou de
livraison
• Conseils et astuces, articles
technologiques,
informations sur les services
(suite)
En fonction de votre système d'exploitation, doublecliquez sur l'icône User’s Guides (Guides d'utilisation)
de votre bureau ou cliquez sur le bouton Démarrer puis
sélectionnez Aide et assistance pour accéder à la
documentation électronique stockée sur votre unité de
disque dur.
Vous obtiendrez ainsi des informations sur les points
suivants :
• l'utilisation de votre ordinateur
• la configuration des paramètres système
• le retrait et l'installation de pièces
• l'installation et la configuration des logiciels
• le diagnostic d'un problème
• les spécifications techniques
• la documentation sur les périphériques (sur certains
systèmes d'exploitation)
• l'obtention d'assistance technique
Allez à http://support.dell.com et remplissez une fois
pour toutes le formulaire d'enregistrement.
• Obtenez de l'aide concernant les questions sur l'usage
général, l'installation et le dépannage
• Obtenez des réponses à vos questions sur les services et
l'assistance techniques
• Procurez-vous les versions les plus récentes des pilotes
pour votre ordinateur
• Accédez à la documentation se rapportant à votre
ordinateur et à ses périphériques
• Prenez part à des discussions en ligne avec d'autres
clients de Dell et des spécialistes du service technique
de Dell
• Consultez la liste des liens en ligne des principaux
fournisseurs de Dell
Guide de configuration et de référence rapide 19
Page 22

Ressources et outils de support
Ressource Sommaire : Utilisation de la ressource
Site Web « Dell Premier
Support »
• État de l'appel de service
•Problèmes techniques
principaux par produit
• Questions les plus
fréquentes par numéro de
produit
• Étiquettes de service
personnalisées
www.dell.com | support.dell.com
• Détail de configuration du
système
(suite)
Allez sur le site http://premiersupport.dell.com pour :
The site Web Dell Premier Support est conçu pour les
grandes entreprises, les gouvernements et les institutions
d'enseignement.
Ce site n'est pas disponible partout.
Résolution de problèmes
Dell met à votre disposition plusieurs outils d'aide si votre système ne fonctionne pas comme prévu. Pour obtenir les informations de dépannage les
plus récentes pour votre système, allez sur le site Web de support de Dell à
l'adresse http://support.dell.com. Vous trouverez également une description
des outils de dépannage Dell dans la section intitulée « Obtention d'aide »
de votre Guide d'utilisation en ligne.
Si vous avez des problèmes d'ordinateur qui requièrent l'intervention de
Dell, écrivez une description détaillée des erreurs, des codes sonores ou des
voyants de diagnostic ; reportez votre code de service express et votre
numéro de service en dessous puis placez-vous près de votre ordinateur pour
contacter Dell.
Reportez-vous à la section “Obtention d'informations et d'assistance”,
page 17, pour obtenir des exemples de code de service express et de numéro
de service
Code de service express :___________________________
Numéro de service : ___________________________
20 Guide de configuration et de référence rapide
Page 23

Votre ordinateur dispose des outils suivants pour vous aider à résoudre un
problème :
D
IAGNOSTICS DELL
votre ordinateur et vous aide à identifier la source des problèmes de l'ordinateur.
Pour obtenir de plus amples informations, reportez-vous à la section "Exécution
des Diagnostics Dell", page 22.
V
OYANTS DU SYSTÈME
indiquer un problème de l'ordinateur. Pour de plus amples informations,
consultez votre Guide d'utilisation.
V
OYANTS DE DIAGNOSTIC
peuvent indiquer un problème de l'ordinateur. Pour de plus amples informations,
consultez votre Guide d'utilisation.
M
ESSAGES DU SYSTÈME
alerter de pannes en cours ou possibles. Pour de plus amples informations,
consultez votre Guide d'utilisation.
C
ODES SONORES
vous aider à identifier un problème. Pour de plus amples informations, consultez
votre Guide d'utilisation.
Utilisation du cédérom
— Les Diagnostics Dell testent divers composants de
— Situés à l'avant de l'ordinateur, ces voyants peuvent
— Situés à l'arrière de l'ordinateur, ces voyants
— L'ordinateur affiche ces messages pour vous
— Une série de codes sonores émis par votre ordinateur peut
Dell OptiPlex ResourceCD
Pour utiliser le cédérom Dell OptiPlex ResourceCD pendant l'exécution du
système d'exploitation Microsoft
®
Windows®, suivez les étapes suivantes :
REMARQUE : Pour accéder aux pilotes de périphériques et à la documenta-
tion d'utilisation, vous devez utiliser le cédérom
Windows.
Allumez votre ordinateur et attendez qu'il démarre jusqu'au bureau
1
ResourceCD
en exécutant
Windows ait démarré.
Insérez le cédérom Dell OptiPlex ResourceCD dans le lecteur de
2
CD-ROM.
La première fois que vous utilisez le cédérom Dell OptiPlex
ResourceCD sur cet ordinateur, la fenêtre Installation du cédérom
ResourceCD s'ouvre pour vous informer que le cédérom ResourceCD
va commencer l'installation.
Guide de configuration et de référence rapide 21
Page 24

Cliquez sur OK pour continuer.
3
Pour terminer l'installation, répondez aux invites du programme
d'installation.
Cliquez sur Next (Suivant) dans l'écran Welcome Dell System Owner
4
(Bienvenue au propriétaire du système Dell).
Sélectionnez les System Model (Modèle du système), Operating Sys-
5
tem (Système d'exploitation), Device Type (Type de périphérique) et
Topic (Rubrique) appropriés.
Pilotes pour votre ordinateur
www.dell.com | support.dell.com
Pour afficher une liste des pilotes de périphériques pour votre ordinateur,
effectuez les étapes suivantes :
Cliquez sur My Drivers (Mes pilotes) dans le menu déroulant
1
Rubrique.
Le cédérom ResourceCD explore le matériel et le système
d'exploitation de votre ordinateur puis une liste des pilotes de
périphériques correspondant à la configuration de votre système
s'affiche à l'écran.
Cliquez sur le pilote qui convient et suivez les instructions pour le
2
télécharger sur votre ordinateur.
Pour afficher tous les pilotes disponibles pour votre ordinateur, cliquez sur
Pilotes dans le menu déroulant Rubrique.
Exécution des Diagnostics Dell
Les Diagnostics Dell correspondent à un programme qui sert à tester divers
composants de votre ordinateur. Exécutez ce programme dès que vous
avez un problème d'ordinateur pour vous aider à identifier la source du
problème. Vous pouvez exécuter les Diagnostics Dell à partir de votre unité
de disque dur ou du cédérom ResourceCD.
AVIS : Si votre unité de disque dur est en panne, exécutez les Diagnostics Dell
à partir du cédérom
Allumez votre ordinateur (s'il l'est déjà, redémarrez-le).
1
Quand
2
F2 = Setup (F2 = Installation)
supérieur droit de l'écran, appuyez sur <Ctrl><Alt><F10>.
22 Guide de configuration et de référence rapide
ResourceCD
.
apparaît dans le coin
Page 25

L'initialisation des diagnostics commence immédiatement puis le
Diagnostics Menu (Menu des diagnostics) apparaît.
Sélectionnez l'option de diagnostic appropriée à votre ordinateur.
3
Pour utiliser les diagnostics, suivez les instructions qui s'affichent à
l'écran.
Modification de la séquence d'amorçage
Pour exécuter les Diagnostics Dell à partir de votre cédérom ResourceCD,
effectuez les étapes suivantes pour permettre à votre ordinateur de démarrer à partir du cédérom :
Insérez le cédérom Dell OptiPlex ResourceCD dans le lecteur de
1
CD-ROM.
Allumez (ou redémarrez) votre ordinateur.
2
3
Quand
F2 = Setup (F2 = Installation)
apparaît dans le coin
supérieur droit de l'écran, appuyez sur <Ctrl><Alt><F8>.
REMARQUE : Cette fonction modifie la séquence d'amorçage pour un seul
démarrage. Au démarrage suivant, l'ordinateur s'initialisera en fonction des
périphériques spécifiés dans la configuration de votre système.
Le Boot Device Menu (Menu des périphériques d'amorçage)
apparaît.
Si vous attendez trop longtemps et que le logo Windows apparaît,
patientez jusqu'à ce que le bureau Windows apparaisse. Éteignez
ensuite votre ordinateur et essayez de nouveau.
Sélectionnez l'option CD-ROM Device (Lecteur de CD-ROM).
4
Exécution de Dell IDE Hard Drive Diagnostics
Le Dell IDE Hard Drive Diagnostics est un utilitaire qui teste l'unité de disque dur pour dépanner ou confirmer une panne d'unité de disque dur.
Allumez votre ordinateur (s'il l'est déjà, redémarrez-le).
1
Quand
2
F2 = Setup (Installation)
rieur droit de l'écran, appuyez sur <Ctrl><Alt><D>.
Suivez les instructions qui s'affichent à l'écran.
3
Si une panne est signalée, reportez-vous à la section « Problèmes
d'unité de disque dur » de votre Guide d'utilisation.
apparaît dans le coin supé-
Guide de configuration et de référence rapide 23
Page 26

Consignes de sécurité
Observez les consignes de sécurité suivantes afin de vous aider à protéger
votre système informatique d'éventuels dommages et d'assurer votre propre
sécurité.
Interventions à l'intérieur de l'ordinateur
Avant de retirer le capot de l'ordinateur, suivez les étapes suivantes dans
l'ordre indiqué.
AVIS : N'essayez jamais d'entretenir votre ordinateur vous-même, sauf si les
www.dell.com | support.dell.com
explications nécessaires vous sont données dans la documentation de Dell en
ligne ou vous sont fournies. Suivez toujours scrupuleusement les instructions
d’installation et d'entretien.
PRÉCAUTION: Une nouvelle pile mal installée risque d'exploser.
Remplacez la pile par une pile de type identique ou d'un type
équivalent recommandé par le fabricant. Débarrassez-vous des
piles usagées selon les instructions du fabricant.
Éteignez votre ordinateur et tous ses périphériques.
1
Mettez-vous à la terre en touchant une surface métallique non peinte
2
du châssis, comme le métal autour des ouvertures du connecteur de
carte à l'arrière de l'ordinateur, avant de toucher quoi que ce soit à
l'intérieur de votre ordinateur.
Pendant que vous travaillez, touchez périodiquement une surface
métallique non peinte du châssis de l'ordinateur pour dissiper
l'électricité statique qui pourrait endommager les composants
internes.
Débranchez votre ordinateur et ses périphériques de leurs sources
3
d'alimentation. Débranchez également tous les fils de téléphone et de
télécommunication de l’ordinateur.
Ceci réduit le risque de blessure et d'électrocution.
24 Guide de configuration et de référence rapide
Page 27

De plus, prenez connaissance des consignes de sécurité suivantes qui
s'appliquent à votre cas :
• Pour éviter de court-circuiter votre ordinateur quand vous déconnectez un câble de réseau, débranchez d'abord le câble du NIC (Network
Interface Controller [contrôleur d'interface réseau]) de l'arrière de
votre ordinateur, puis de la prise réseau murale. Lorsque vous reconnectez un câble réseau à votre ordinateur, branchez d'abord le câble
dans la prise réseau, puis dans le NIC.
• Lorsque vous déconnectez un câble, tirez sur le connecteur ou la boucle de serrage, et non pas sur le câble lui-même. Certains câbles possèdent un connecteur à languettes de verrouillage ; si vous déconnectez
un câble de ce type, appuyez sur les languettes de verrouillage avant de
déconnecter le câble. Lorsque vous séparez des connecteurs, veillez à
les maintenir alignés pour ne pas tordre leurs broches. De plus, avant
de connecter un câble, assurez-vous que les deux connecteurs sont correctement orientés et alignés.
• Manipulez les composants et les cartes avec soin. Ne touchez pas les
composants ou les contacts d’une carte. Tenez une carte par ses bords
ou par ses pattes de montage métalliques. Un composant tel qu'une
puce de microprocesseur doit être tenu par ses bords et non pas par ses
broches.
Lorsque vous utilisez votre système informatique
Quand vous utilisez votre système informatique, suivez les consignes de
sécurité ci-après.
PRÉCAUTION: N'utilisez pas votre système informatique si des
capots (y compris capots de l'ordinateur, cadres, languettes
métalliques et caches de panneau avant) sont retirés.
• Pour ne pas endommager votre ordinateur, vérifiez que le sélecteur de
tension (si celui-ci est fourni) du bloc d’alimentation est bien réglé sur
la tension en CA de l'endroit où vous vous trouvez†:
– 115 volts (V)/60 hertz (Hz) dans la plupart des pays d’Amérique
du Nord et du Sud, et dans certains pays d’Extrême-Orient,
comme la Corée du Sud et Taïwan
– 100 V/50 Hz dans l'est du Japon et 100 V/60 Hz dans l'ouest du
Japon
Guide de configuration et de référence rapide 25
Page 28

REMARQUE : Le sélecteur de tension doit être réglé sur la position
115V même si l'alimentation en CA au Japon est de 100 V.
– 230 V/50 Hz dans presque toute l’Europe, au Moyen-Orient et en
Extrême-Orient
Assurez-vous également que votre moniteur et les périphériques
connectés sont approuvés pour fonctionner avec l'alimentation en CA
d'où vous vous trouvez.
REMARQUE : Les blocs d'alimentation à sélection automatique ne
nécessitent pas de sélecteur de tension. Votre bloc d'alimentation n'est
peut-être pas muni de ce sélecteur.
www.dell.com | support.dell.com
• Pour éliminer les risques de décharges électriques, branchez
l'ordinateur et les câbles d'alimentation dans des prises de terre. Ces
câbles sont équipés de prises à trois broches pour assurer une mise à la
terre correcte. N’utilisez pas d'adaptateur et n’essayez pas de retirer la
broche de mise à la terre d’un câble. Si vous devez utiliser une rallonge,
utilisez une rallonge munie de prises de terre.
• Avant de manipuler des composants à l'intérieur de votre ordinateur,
débranchez le système pour éviter de vous électrocuter ou
d'endommager la carte système. Certains composants de la carte
système continuent à être alimentés tant que l'ordinateur est connecté
à une source d'alimentation en CA.
• Pour éviter d'endommager la carte système, attendez 15 secondes
après avoir éteint le système avant de déconnecter un périphérique de
votre ordinateur.
26 Guide de configuration et de référence rapide
Page 29

AVIS : Attendez que le voyant LED (Light Emitting Diode [diode électrolumi-
nescente]) d'alimentation auxiliaire sur la carte système s'éteigne pour être sûr
que l'alimentation du système est coupée (reportez-vous au
pour connaître l'emplacement de cette LED).
Guide d'utilisation
• Afin de protéger votre système informatique des augmentations et
diminutions soudaines et passagères de courant, utilisez un limiteur de
surtension, un onduleur ou un UPS (Uninterruptible Power Supply
[système d'alimentation sans coupure]).
• Assurez-vous que rien ne repose sur les câbles de votre système
informatique et qu'ils ne sont pas disposés de façon à ce que quelqu'un
marche ou trébuche dessus.
• Ne renversez ni nourriture, ni liquide, sur votre ordinateur. Si vous
mouillez l'ordinateur, consultez votre Guide d'utilisation.
• N’insérez pas d’objets dans les ouvertures de votre ordinateur. Cela
pourrait court-circuiter des composants internes et présenter un risque
d'incendie ou de décharge électrique.
• Placez votre ordinateur à l'écart des radiateurs et des autres sources de
chaleur. Ne bloquez pas les grilles de refroidissement. Évitez de mettre
des feuilles volantes sous votre ordinateur ; ne le placez pas dans un
espace mural renfermé ou sur un lit, un canapé ou un tapis.
Conseils en ergonomie
PRÉCAUTION: Une mauvaise utilisation ou une utilisation
prolongée du clavier peut provoquer des blessures.
PRÉCAUTION: Le fait de regarder l’écran de votre moniteur
pendant de longues périodes peut provoquer une fatigue oculaire.
Pour un maximum de confort et d'efficacité, suivez les conseils d'ordre
ergonomique de votre Guide d'utilisation lors de l'installation et de
l'utilisation votre système informatique.
Guide de configuration et de référence rapide 27
Page 30

Informations sur les réglementations
Une EMI (ElectroMagnetic Interference [interférence électromagnétique])
est un signal ou une émission, rayonné en espace libre ou transmis par
conduction le long des fils électriques ou d’interface. Cette perturbation
nuit au fonctionnement de la radionavigation et d’autres systèmes de sécurité ou dégrade sérieusement, empêche ou interrompt de façon répétée un
service de radiocommunication autorisé.
Votre système informatique Dell est conçu de façon à être conforme à la
réglementation en vigueur concernant les EMI. Les modifications qui ne
sont pas approuvées expressément par Dell peuvent résilier le droit de
www.dell.com | support.dell.com
l'utilisateur d'utiliser cet équipement.
REMARQUE : Vous trouverez d'autres informations sur les réglementations
qui s'appliquent à votre système dans votre
Guide d'utilisation
.
28 Guide de configuration et de référence rapide
Page 31

Dell™ OptiPlex™-Systeme
Setup- und Schnellreferenzhandbuch
www.dell.com | support.dell.com
Page 32

Anmerkungen, Hinweise und Vorsichtshinweise
ANMERKUNG: Eine ANMERKUNG macht auf wichtige Informationen aufmerksam, mit denen
Sie den Computer besser einsetzen können.
HINWEIS: Ein HINWEIS warnt vor möglichen Beschädigungen der Hardware oder Datenver-
lust und zeigt, wie diese vermieden werden können.
VORSICHT: Ein VORSICHTshinweis zeigt eine mögliche gefährliche Situation an,
die bei Nichtbeachtung zu leichten oder mittelschweren Verletzungen führen
könnte.
____________________
Irrtümer und technische Änderungen vorbehalten.
© 2000-2001 Dell Computer Corporation. Alle Rechte vorbehalten.
Nachdrucke jeglicher Art ohne die vorherige schriftliche Genehmigung der Dell Computer Corporation sind strengstens
untersagt.
Warenzeichen in diesem Text:
Microsoft, MS-DOS, Windows NT
Alle anderen in dieser Dokumentation genannten Warenzeichen und Handelsbezeichnungen sind Eigentum der entsprechenden Hersteller und Firmen. Die Dell Computer Corporation verzichtet auf alle Besitzrechte an Warenzeichen und
Handelsbezeichnungen, die nicht ihr Eigentum sind.
Juli 2001 P/N 51FMX Rev. A04
Dell, OptiPlex
und
und das
Windows
DELL
sind eingetragene Warenzeichen der Microsoft Corporation.
Logo sind Warenzeichen der Dell Computer Corporation;
Page 33

Zu diesem Handbuch
Dieses Dokument enthält Informationen zur Behebung von Problemen und
zur Sicherheit und die Betriebsbestimmungen des Dell™ OptiPlex™
Computers.
Die neuesten Versionen der Dokumente auf der Festplattenlaufwerk finden
Sie auf der Dell Support-Website unter http://support.dell.com.
Modellnummer-Bestimmungen sind in diesem gesamten Dokument enthalten; die entsprechenden Gehäusetypen werden im folgenden angezeigt:
Bestimmungen zu Modellnummern und
Gehäusetypen
DHS = SD-Gehäuse (Small Desktop [Kleiner
Desktop])
DHP = SF-Gehäuse (Small Form-Factor
[Kompaktgehäuse])
DHM = SMT-Gehäuse (Small Mini-Tower [Kleiner
Minitower])
Informationen und Hilfe
Ressourcen und Support-Hilfsmittel
Ressource Inhalt Verwenden der Ressource
Dell OptiPlex ResourceCD
•Dell Diagnose
•Treiber
• Dienstprogramme
• Dokumentation des
Computers und der Geräte
Informationen hierzu finden Sie im Hauptmenü auf der
ResourceCD, die zusammen mit dem Computer geliefert
wurde. Verwenden Sie das Pulldown-Menü, um die für
den Computer entsprechende Auswahl zu treffen. Sie
haben die folgenden Möglichkeiten:
• Problemdiagnose durchführen
• Treiber installieren oder neu installieren
• Informationen über den Computer und die Geräte
erhalten
ANMERKUNG: Dell liefert den Computer mit
installierter Benutzerdokumentation und installierten
Treibern. Sie können die CD verwenden, um die
Dokumentation aufzurufen, Treiber neu zu installieren
oder um die Diagnose-Hilfsprogramme auszuführen.
Setup- und Schnellreferenzhandbuch 31
Page 34

Ressourcen und Support-Hilfsmittel
(fortgesetzt)
Ressource Inhalt Verwenden der Ressource
Service- und
Registrierungsetiketten
befinden sich auf der
Vorderseite des Dell
Computers.
• Express-Servicecode und
Mit dem Express-Servicecode und der ServiceTag-Nummer ist Ihr Dell Computer eindeutig
gekennzeichnet.
Der Produktcode (oder die Produkt-ID) wird u. U.
benötigt, um das Setup des Betriebssystems
durchzuführen.
Service-Tag-Nummer
• Produktcode (auch als
Produkt-ID oder COA
[Certificate of Authenticity
www.dell.com | support.dell.com
(Echtheitsbestätigung)]
bezeichnet)
CD zum Betriebssystem Um das Betriebssystem neu zu installieren, verwenden Sie
die CD des Betriebssystems, die zusammen mit dem
Computer geliefert wurde.
ANMERKUNG: Eventuell enthält die BetriebssystemCD nicht alle neuesten Treiber für den Computer. Wenn
Sie das Betriebssystem neu installieren, verwenden Sie
zur Installation der Treiber für die mit dem Computer
gelieferten Geräte die
Weitere Informationen über die Neuinstallierung des
Betriebssystems finden Sie in der Setup-Dokumentation
des Betriebssystems.
Installationshandbuch zum
Betriebssystem
Informationen zur Neuinstallation und Konfiguration des
Betriebssystems finden Sie im Installationshandbuch zum
Betriebssystem.
Klicken Sie auf die Schaltfläche Start und wählen Sie,
abhängig vom Betriebssystem, Help (Hilfe) oder Help
and Support (Hilfe und Support), um weitere
Informationen über das Betriebssystem zu erhalten.
ResourceCD
.
32 Setup- und Schnellreferenzhandbuch
Page 35

Ressourcen und Support-Hilfsmittel
Ressource Inhalt Verwenden der Ressource
Benutzerhandbücher zum
Computer und zu den Geräten
Benutzerhandbücher
Dell Support-Website
• Technischer Support und
Informationen
• Downloads für den
Computer
• Bestell- oder Lieferstatus
•Tips und Tricks,
Technologiedokumente,
Serviceinformationen
Dell Premier Support-Website
• Status des Serviceanrufs
• Häufig auftretende
technische Probleme nach
Produkt sortiert
• Häufig gestellte Fragen nach
Produktnummer sortiert
• Kundenspezifische ServiceTag-Nummern
•Details der
Systemkonfiguration
(fortgesetzt)
Doppelklicken Sie, abhängig vom Betriebssystem, auf das
Symbol User’s Guides (Benutzerhandbücher) auf dem
Desktop, oder klicken Sie auf die Schaltfläche Start und
wählen Sie dann Hilfe und Support, um die auf dem
Festplattenlaufwerk gespeicherte elektronische
Dokumentation anzuzeigen.
Die folgenden Informationen werden angezeigt:
• Computer verwenden
• Systemeinstellungen konfigurieren
• Komponenten aus- und einbauen
• Software installieren und konfigurieren
• Problem-Diagnose durchführen
• Technische Daten
• Gerätedokumentation (auf ausgewählten
Betriebssystemen)
• So erhalten Sie technische Unterstützung
Gehen Sie auf die Website http://support.dell.com und
füllen Sie die einmalige Registrierung aus.
• Lassen Sie sich bei der allgemeinen Verwendung,
Installation und Fehlerbehebung helfen
• Erhalten Sie Antworten zu Ihren Fragen zu
technischem Service und Support
• Besorgen Sie sich die neuesten Versionen der Treiber
für den Computer
• Greifen Sie auf die Dokumentation zu Computer und
Geräten zu
• Nehmen Sie an Online-Diskussionen mit anderen Dell
Kunden und Dell Technikern teil
• Durchsuchen Sie eine Liste mit Online-Verknüpfungen
für die Hauptanbieter von Dell
Weiter mit http://premiersupport.dell.com:
Die Dell Premier Support-Website ist den Bedürfnissen
von Firmenkunden, Behörden und Schulen angepaßt.
Diese Website steht möglicherweise nicht in allen
Regionen zur Verfügung.
Setup- und Schnellreferenzhandbuch 33
Page 36

Problemlösungen
Dell bietet eine Anzahl von Hilfsmitteln für den Fall, daß das System nicht
erwartungsgemäß funktioniert. Die neuesten Informationen zur Fehlerbehebung für das System finden Sie auf der Dell Support-Website unter
http://support.dell.com. Beschreibungen der Dell Hilfsprogramme zur
Behebung von Störungen finden Sie auch im Abschnitt “Wie Sie Hilfe
bekommen” im Online-Benutzerhandbuch.
Wenn Computerstörungen auftreten, bei denen Hilfe von Dell erforderlich
ist, beschreiben Sie den Fehler, die Signaltoncodes oder die DiagnoseLichtmuster genau; notieren Sie auch den Express-Servicecode und die
www.dell.com | support.dell.com
Svice-Tag-Nummer; kontaktieren Sie dann Dell von dem Ort, an dem sich
der Computer befindet.
Beispiele für den Express-Servicecode und die Service-Tag-Nummern finden Sie unter “Informationen und Hilfe” on seite 31.
Express-Servicecode: ___________________________
Service-Tag-Nummer: ___________________________
34 Setup- und Schnellreferenzhandbuch
Page 37

Der Computer verfügt über folgende Hilfsprogramme zur Lösung von
Problemen:
D
ELL DIAGNOSE
Computers und hilft, die Ursache von Computerproblemen zu bestimmen.
Weitere Informationen finden Sie unter "Dell Diagnose durchführen" seite 36
S
YSTEMLEUCHTEN
Computers durch diese Leuchten angezeigt werden. Weitere Informationen
finden Sie im Benutzerhandbuch.
D
IAGNOSELEUCHTEN
Computers durch diese Leuchten angezeigt werden. Weitere Informationen
finden Sie im Benutzerhandbuch.
S
YSTEMMELDUNGEN
gegenwärtiges oder mögliches Versagen aufmerksam zu machen. Weitere
Informationen finden Sie im Benutzerhandbuch.
S
IGNALTONCODES
damit ein Problem identifiziert werden kann. Weitere Informationen finden Sie
im Benutzerhandbuch.
Dell OptiPlex ResourceCD
— Die Dell Diagnosen testet verschiedene Komponenten des
— Computerprobleme können auf der Vorderseite des
— Computerprobleme können auf der Rückseite des
— Der Computer gibt diese Meldungen aus, um auf
— Der Computer gibt eine Reihe von Signaltoncodes aus,
verwenden
Führen Sie die folgenden Schritte durch, um die Dell OptiPlex ResourceCD
®
unter dem Betriebssystem Microsoft
Windows® zu verwenden:
ANMERKUNG: Um auf die Gerätetreiber und Benutzerdokumentation zuzu-
greifen, müssen Sie die
Schalten Sie den Computer ein und warten Sie, bis der Windows-
1
ResourceCD
unter Windows öffnen.
Desktop angezeigt wird.
Legen Sie die Dell OptiPlex ResourceCD in das CD-Laufwerk ein.
2
Wenn Sie die Dell OptiPlex ResourceCD zum ersten Mal auf diesem
Computer verwenden, wird das Fenster ResourceCD Installation
(ResourceCD-Installation) geöffnet, um Sie darüber zu informieren,
daß die Installation von der ResourceCD gestartet wird.
Setup- und Schnellreferenzhandbuch 35
Page 38

Klicken Sie auf OK, um fortzufahren.
3
Um die Installation abzuschließen, folgen Sie den Anweisungen des
Installationsprogramms.
Klicken Sie im Bildschirm Welcome Dell System Owner (Wir heißen
4
Sie als Dell Systembesitzer willkommen) auf Next (Weiter).
Wählen Sie das entsprechende System Model (Systemmodell) und
5
Operating System (Betriebssystem), den entsprechenden Device
Type (Gerätetyp) und das entsprechende Topic (Thema) aus.
Treiber für den Computer
www.dell.com | support.dell.com
Um eine Liste von Gerätetreibern für den Computer anzuzeigen, führen
Sie folgende Schritte durch:
Klicken Sie auf My Drivers (Meine Treiber) im Pulldown-Menü
1
Thema.
Das auf der ResourceCD befindliche Programm durchsucht die Hardware des Computers und das Betriebssystem und zeigt dann eine Liste
der Gerätetreiber für die Systemkonfiguration auf dem Bildschirm an.
Klicken Sie auf den entsprechenden Treiber und folgen Sie den Anlei-
2
tungen, um den Treiber auf den Computer herunterzuladen.
Um alle für den Computer verfügbaren Treiber anzuzeigen, klicken Sie auf
Treiber im Pulldown-Menü Thema.
Dell Diagnose durchführen
Die Dell Diagnose ist ein Programm, das verschiedene Komponenten im
Computer testet. Führen Sie dieses Programm immer dann aus, wenn ein
Computerproblem auftritt und Sie die Fehlerquelle identifizieren möchten.
Die Dell Diagnose kann vom Festplattenlaufwerk oder von der ResourceCD
ausgeführt werden.
HINWEIS: Wenn das Festplattenlaufwerk ausfällt, führen Sie die Dell
Diagnose von der
Schalten Sie den Computer ein (starten Sie ihn neu, wenn er bereits
1
eingeschaltet ist).
36 Setup- und Schnellreferenzhandbuch
ResourceCD
aus.
Page 39

Drücken Sie <Strg><Alt><F10>, wenn das Fenster
2
F2 = Setup
in
der oberen rechten Ecke des Bildschirms angezeigt wird.
Die Diagnose-Initialisierung wird sofort gestartet und das Diagnostics
Menu (Diagnose-Menü) wird angezeigt.
Wählen Sie die entsprechende Diagnoseoption für den Computer.
3
Folgen Sie den Anweisungen auf dem Bildschirm, um die Diagnose
anzuwenden.
Startsequenz ändern
Um die Dell Diagnose von der ResourceCD zu starten, führen sie folgende
Schritte durch, damit der Computer von der CD starten kann:
Legen Sie die Dell OptiPlex ResourceCD in das CD-Laufwerk ein.
1
Schalten Sie den Computer ein (oder starten Sie ihn neu).
2
Drücken Sie <Strg><Alt><F8>, wenn das Fenster
3
F2 = Setup
in
der oberen rechten Ecke des Bildschirms angezeigt wird.
ANMERKUNG: Diese Funktion führt eine einmalige Änderung der Startse-
quenz durch. Beim nächsten Systemstart startet der Computer gemäß den im
System-Setup angegebenen Geräten.
Das Boot Device Menu (Startgerätemenü) wird angezeigt.
Wenn Sie zu lange warten und das Windows-Logo angezeigt wird,
warten Sie, bis der Windows-Desktop geladen ist. Fahren Sie dann
den Computer herunter und versuchen Sie es erneut.
Wählen Sie die Option CD-ROM Device (CD-ROM-Gerät).
4
Führen Sie die Dell IDE-Festplattenlaufwerk-Diagnose aus.
Die Dell IDE-Festplattenlaufwerk-Diagnose ist ein Dienstprogramm, mit
dem das Festplattenlaufwerk getestet wird, um einen Festplattenlaufwerkfehler zu beheben oder zu bestätigen.
Schalten Sie den Computer ein (starten Sie ihn neu, wenn er bereits
1
eingeschaltet ist).
Drücken Sie <Strg><Alt><D>, wenn das Fenster
2
der oberen rechten Ecke des Bildschirms angezeigt wird.
F2 = Setup
in
Setup- und Schnellreferenzhandbuch 37
Page 40

Folgen Sie den Anweisungen auf dem Bildschirm.
3
Wenn ein Fehler angezeigt wird, lesen Sie “Störungen bei einem Festplattenlaufwerk” im Benutzerhandbuch.
Sicherheitshinweise
Beachten Sie die folgenden Sicherheitsrichtlinien, um das Computersystem
vor möglichen Schäden zu schützen und Ihre persönliche Sicherheit zu
gewährleisten.
www.dell.com | support.dell.com
Arbeiten im Innern des Computers
Führen Sie vor dem Entfernen der Computerabdeckung folgende Schritte
in der angegebenen Reihenfolge durch.
HINWEIS: Versuchen Sie nicht, Wartungsarbeiten am Computersystem
durchzuführen, die über die in dieser Dell Online-Dokumentation oder in anderen Dokumentationen beschriebenen Arbeiten hinausgehen. Befolgen Sie die
Installations- und Wartungsanleitungen immer genau.
VORSICHT: Eine neue Batterie kann bei falscher Installation
explodieren. Ersatzbatterien müssen vom gleichen Typ sein bzw.
dem Typ entsprechen, der vom Hersteller empfohlen wird. Entsorgen Sie die verbrauchte Batterie entsprechend den Anleitungen
des Herstellers.
Schalten Sie den Computer und alle Peripheriegeräte aus.
1
Sorgen Sie für Potentialausgleich mit dem Gehäuse. Berühren Sie
2
hierzu eine unbeschichtete Metallfläche am Gehäuse, wie z. B. die
Metallkomponenten um die Steckplatzöffnungen an der Rückseite des
Computers, bevor Sie Komponenten im Innern des Computers
anfassen.
Berühren Sie während der Arbeit im Computer regelmäßig unbeschichtete Metallflächen am Computergehäuse, um statische Aufladung abzuleiten, die die internen Komponenten beschädigen könnte.
Trennen Sie den Computer und die Peripheriegeräte von der Strom-
3
quelle. Trennen Sie auch alle Telefon- und Telekommunikationsleitungen vom Computer.
Hierdurch wird die Gefahr von Verletzungen oder elektrischen Schlägen reduziert.
38 Setup- und Schnellreferenzhandbuch
Page 41

Darüber hinaus sind gegebenenfalls folgende Sicherheitsrichtlinien zu
beachten:
• Um Kurzschlüsse des Computers beim Trennen eines Netzwerkkabels
zu vermeiden, trennen Sie zunächst das Kabel vom NIC (Network
Interface Controller [Netzwerkschnittstellen-Controller]) auf der
Rückseite des Computers und danach von der Netzwerkbuchse in der
Wand. Wenn ein Netzwerkkabel wieder am Computer angeschlossen
wird, schließen Sie zunächst das Kabel an der Netzwerkbuchse und
danach am NIC an.
• Halten Sie beim Trennen eines Kabels immer dessen Stecker oder die
Kabellasche fest, niemals jedoch das Kabel selbst. Einige Kabel verfügen über Stecker mit Verriegelungsklammern. Drücken Sie erst die
Verriegelungsklammern zusammen, bevor Sie Kabel dieser Art trennen. Beim Trennen von Steckverbindungen sollten Sie die Anschlüsse
immer gerade herausziehen, um keine Pins zu verbiegen. Ebenso sollten Sie vor dem Anschließen eines Kabels sicherstellen, daß beide
Anschlüsse stets korrekt ausrichtet sind.
• Behandeln Sie Komponenten und Karten sorgfältig. Die Komponenten oder Kontakte auf einer Karte dürfen nicht berührt werden. Halten
Sie die Karten nur an den Rändern oder den Montageblechen. Komponenten, wie z. B. Mikroprozessor-Chips, sollten an den Kanten, nicht
an den Pins gehalten werden.
Beim Betrieb des Computersystems
Beachten Sie beim Einsatz des Computersystems die folgenden Sicherheitsrichtlinien:
VORSICHT: Das Computersystem darf nicht mit
entfernter/entfernten Abdeckung(en) betrieben werden
(einschließlich der Computerabdeckungen, Blenden,
Abdeckbleche, Frontblendeneinsätze).
• Der Spannungs-Wahlschalter für die Netzspannung muß in der für
den Einsatzort erforderlichen Position stehen, damit die eingestellte
Stromversorgung des Computers mit der Netzspannung übereinstimmt. Andernfalls könnte der Computer beschädigt werden:
– 115 V/60 Hz vorwiegend in Nord- und Südamerika sowie einigen
Fernostländern, einschließlich Japan, Südkorea und Taiwan
– 100 V/50 Hz in Ost-Japan und 100 V/60 Hz in West-Japan
Setup- und Schnellreferenzhandbuch 39
Page 42

ANMERKUNG: Der in Japan verfügbare Netzstrom hat eine Spannung
von 100 Volt (V), der Spannungs-Wahlschalter muß jedoch auf 115V eingestellt sein.
– 230V/50 Hz vorwiegend in Europa, dem Mittleren und Fernen
Osten
Stellen Sie außerdem sicher, daß der Monitor und die angeschlossenen
Peripheriegeräte mit der verfügbaren Netzspannung betrieben werden
können.
ANMERKUNG: Netzteile mit automatischer Auswahl benötigen keinen
Spannungs-Wahlschalter. Ihr Netzteil besitzt möglicherweise keinen solchen Schalter.
www.dell.com | support.dell.com
• Zur Verhinderung eines elektrischen Schlags sind die Netzkabel des
Computers und der Peripheriegeräte an ordnungsgemäß geerdete
Stromquellen anzuschließen. Diese Kabel besitzen Schuko-stecker,
um eine ordnungsgemäße Erdung zu gewährleisten. Verwenden Sie
keine Zwischenstecker und entfernen Sie den Erdungskontakt eines
Kabels nicht. Wenn Sie ein Verlängerungskabel verwenden müssen,
nehmen Sie ein dreiadriges Kabel mit ordnungsgemäß geerdeten
Steckern.
• Bevor Sie im Innern des Computers arbeiten, trennen Sie das System
vom Netz, um einen Stromschlag oder Beschädigungen an der Systemplatine zu vermeiden. Einige Komponenten der Systemplatine werden
weiter mit Strom versorgt, solange der Computer am Netzstrom angeschlossen ist.
40 Setup- und Schnellreferenzhandbuch
Page 43

• Um mögliche Beschädigungen an der Systemplatine zu vermeiden,
warten Sie 15 Sekunden, nachdem das System vom Netz getrennt
wurde, bevor Sie ein Gerät vom Computer entfernen.
HINWEIS: Achten Sie darauf, daß die LED-Anzeige (Light-Emitting Diode
[Leuchtdiode]) auf der Systemplatine erlischt. So überprüfen Sie, ob das
System vom Stromnetz getrennt ist (die Position dieser LED finden Sie im
Benutzerhandbuch
).
• Um das Computersystem vor plötzlichen Spannungsspitzen oder abfällen zu schützen, sollten Sie einen Überspannungsschutz, einen
Leitungsfilter oder eine USV (Unterbrechungsfreie Stromversorgung)
verwenden.
• Stellen Sie sicher, daß keine Gegenstände auf dem Netzkabel des
Computersystems stehen. Außerdem müssen die Kabel so verlegt sein,
daß man nicht darauf treten oder darüber stolpern kann.
• Verschütten Sie keine Lebensmittel oder Flüssigkeiten auf dem Computer. Wenn der Computer feucht wird, ziehen Sie das Benutzerhand-
buch zu Rate.
• Stecken Sie keine Gegenstände in die Öffnungen des Computers.
Hierdurch besteht die Gefahr eines elektrischen Schlags; außerdem
könnte es im Gerät zu Kurzschlüssen und damit zu einem Brand
kommen.
• Halten Sie den Computer von Heizkörpern und anderen Wärmequellen fern. Blockieren Sie die Belüftungsöffnungen nicht. Legen Sie kein
loses Papier unter den Computer; stellen Sie den Computer nicht in
eine Schrankwand oder auf ein Bett, ein Sofa oder einen Teppich.
Ergonomisches Arbeiten am Computer
VORSICHT: Falsche oder zu lange Verwendung der Tastatur kann
zu körperlichen Schäden führen.
VORSICHT: Langes Arbeiten am Bildschirm kann zu Überanstren-
gung der Augen führen.
Beachten Sie beim Aufstellen und Benutzen des Computersystems die
ergonomischen Richtlinien im Benutzerhandbuch, um Arbeitskomfort und
Produktivität zu maximieren.
Setup- und Schnellreferenzhandbuch 41
Page 44

Betriebsbestimmungen
Elektromagnetische Interferenzen (EMI) sind Signale oder Emissionen, die
im freien Raum abgestrahlt oder durch Hochspannungs- oder Signalleitungen geleitet werden. Sie können die Funktion eines Funknavigations- oder
anderen Sicherheitsgerätes gefährden bzw. einen lizenzierten Funkkommunikationsverkehr ernsthaft beeinträchtigen, stören oder wiederholt
unterbrechen.
Das Dell Computersystem erfüllt bestehende Bestimmungen bezüglich
EMI. Bitte denken Sie daran, daß Änderungen bzw. Modifizierungen des
Systems, die nicht ausdrücklich von Dell genehmigt wurden, die Ungültig-
www.dell.com | support.dell.com
machung des Rechts des Benutzers zur Bedienung des Geräts zur Folge
haben können.
ANMERKUNG: Zusätzliche Betriebsbestimmungen zum System finden Sie
Benutzerhandbuch
im
.
42 Setup- und Schnellreferenzhandbuch
Page 45

Sistemi Dell™ OptiPlex™
Guida di installazione e consultazione rapida
www.dell.com | support.dell.com
Page 46

Note, avvisi e messaggi di attenzioni
NOTA: Una NOTA indica informazioni importanti che contribuiscono a migliorare l'utilizzo del
computer.
AVVISO: Un AVVISO indica un danno potenziale all'hardware o perdita di dati e spiega come
evitare il problema.
ATTENZIONE: un messaggio di ATTENZIONE indica una situazione di potenziale
pericolo che, se non evitata, potrebbe risultare in lesioni di lieve o moderata
entità.†
____________________
Le informazioni contenute in questo documento sono soggette a modifica senza preavviso.
© 2000 –2001 Dell Computer Corporation. Tutti i diritti sono riservati.
È rigorosamente vietata qualsiasi riproduzione senza l'autorizzazione scritta della Dell Computer Corporation.
Marchi utilizzati in questo testo:
Dell Computer Corporation;
Microsoft Corporation.
In questo documento possono essere utilizzati altri marchi di fabbrica e denominazioni di marca per riferirsi sia alle
ditte che rivendicano i marchi o denominazioni sia ai loro prodotti. La Dell Computer Corporation declina qualsiasi
interesse proprietario in marchi di fabbrica e denominazioni di marca diversi da quelli che le appartengono.
Luglio 2001 Nº di parte 51FMX Rev. A04
Dell, OptiPlex
Microsoft, MS-DOS, Windows NT
e l'emblema della
e
DELL
sono marchi di fabbrica della
Windows
sono marchi depositati
Page 47

Informazioni sulla guida
Questo documento contiene informazioni sulla risoluzione dei problemi,
sulla sicurezza e sulle normative relative al computer Dell™ OptiPlex™ in
dotazione.
Per ottenere le versioni più recenti della documentazione sul disco
rigido, recarsi al sito Web di supporto della Dell all'indirizzo
http://support.dell.com.
Di seguito è riportato l'abbinamento tra telai e numeri di modello di conformità alle normative a cui viene fatto riferimento in tutto il documento:
Numeri di modello di conformità alle
normative e tipi di telaio
DHS = telaio del desktop piccolo (SD)
DHP = telaio di dimensioni ridotte (SF)
DHM = telaio minitorre piccolo (SMT)
Ricerca di informazioni ed assistenza
Risorse e tool di supporto
Risorse Indice Uso delle risorse
Dell OptiPlex ResourceCD
• Diagnostica della Dell
•Driver
• Utilità
• Documentazione del
computer e delle periferiche
Guida di installazione e consultazione rapida 45
Consultare il menu principale del ResourceCD di corredo
al computer in dotazione. Usare il menu a discesa per
effettuare le scelte adeguate al computer in dotazione. È
possibile eseguire le seguenti operazioni:
• Diagnosi del problema
• Installare o reinstallare gli opportuni driver
• Ottenere informazioni sul computer e sulle periferiche
in dotazione
NOTA: La documentazione dell'utente e i driver sono
preinstallati sul computer consegnato dalla Dell.
Utilizzare questo CD per accedere alla documentazione,
reinstallare driver o eseguire gli strumenti diagnostici.
Page 48

Risorse e tool di supporto
(seguito)
Risorse Indice Uso delle risorse
Etichette di servizio e di
registrazione—situate sulla
parte anteriore o sul fianco del
computer Dell.
• Codice del servizio espresso
e numero di servizio
Il codice del servizio espresso e numero di servizio
identificano in maniera univoca il computer Dell in
dotazione.
È necessario il codice della chiave del prodotto (o ID del
prodotto) per completare l'installazione del sistema
operativo.
• Chiave del prodotto (anche
detta ID del prodotto o
certificato di autenticità
www.dell.com | support.dell.com
[COA])
CD del sistema operativo Per reinstallare il sistema operativo, utilizzare il CD del
sistema operativo di corredo al computer in dotazione.
NOTA: Il CD del sistema operativo potrebbe non
contenere i driver più recenti per il computer in dotazione.
Se si reinstalla il sistema operativo, usare il
per reinstallare i driver per le periferiche di corredo al
computer.
Per ulteriori informazioni su come reinstallare il sistema
operativo, fare riferimento alla guida di installazione del
sistema operativo di corredo al computer in dotazione.
Guida di installazione del
sistema operativo
Fare riferimento alla guida di installazione del sistema
operativo per ottenere informazioni su come reinstallare e
configurare il sistema operativo.
Per ottenere ulteriori informazioni sul sistema operativo,
fare clic sul pulsante Start (Avvio) e selezionare Help
(Guida) o Help and Support (Guida e assistenza), in
base al sistema operativo.
ResourceCD
46 Guida di installazione e consultazione rapida
Page 49

Risorse e tool di supporto
Risorse Indice Uso delle risorse
Guide dell'utente
(seguito)
Guide dell'utente per il
computer e le periferiche in
dotazione
Sito web di supporto Dell
• Supporto tecnico e
informazioni
• Download per il computer in
dotazione
• Ordini o stato della consegna
• Suggerimenti,
documentazione tecnica,
informazioni di servizio
In base al sistema operativo, fare doppio clic sull'icona
User’s Guides (Guide dell'utente) sul desktop o fare clic
sul pulsante Avvio e quindi selezionare Guida e assistenza
per accedere alla documentazione elettronica
memorizzata sul disco rigido.
Si ottengono informazioni relative ai seguenti argomenti:
• Utilizzo del computer in dotazione
• Configurazione delle impostazioni del sistema
• Rimozione e installazione di componenti
• Installazione e configurazione del software
• Diagnosi del problema
• Specifiche tecniche
• Documentazione delle periferiche (per sistemi
operativi selezionati)
• Come ottenere assistenza tecnica
Recarsi a http://support.dell.com e completare il modulo
di registrazione.
• Ricevere risposte alle domande generali riguardo l'uso,
l'installazione e la risoluzione dei problemi
• Ricevere risposte a domande relative all'assistenza e al
supporto tecnico
• Ottenere le versioni più recenti dei driver per il
computer in dotazione
• Accedere alla documentazione relativa al computer ed
alle periferiche
• Conversare in linea con altri clienti e tecnici
specializzati Dell
• Esaminare l'elenco dei link in linea relativo ai fornitori
principali della Dell
Guida di installazione e consultazione rapida 47
Page 50

Risorse e tool di supporto
Risorse Indice Uso delle risorse
www.dell.com | support.dell.com
(seguito)
Sito Web Dell Premier Support
• Stato della chiamata di
assistenza
• Principali problematiche
tecniche suddivise per
prodotto
• Domande più frequenti
suddivise per numero di
prodotto
• Etichette del servizio
personalizzate
•Dettaglio della
configurazione del sistema
Recarsi all'indirizzo http://premiersupport.dell.com:
Il sito Web Dell Premier Support è personalizzato per i
clienti di società, istituzioni governative e dell'istruzione.
Questo sito potrebbe non essere disponibile in tutte le
regioni.
Come risolvere i problemi
Dell fornisce all'utente una serie di strumenti quale ausilio nel caso il
sistema non funzionasse come previsto. Per ottenere le informazioni più
recenti sulla risoluzione dei problemi del sistema in dotazione, recarsi al sito
Web di supporto della Dell all'indirizzo http://support.dell.com. È possibile, inoltre, ottenere descrizioni sugli strumenti messi a disposizione dalla
Dell per la risoluzione dei problemi, nella sezione “Assistenza” della
Guida dell'utente in linea.
In presenza di un problema del computer che richiede l'assistenza della
Dell, annotare la descrizione dell'errore, i codici bip o gli schemi delle spie
diagnostiche; inserire il codice del servizio espresso e il numero di servizio a
margine e quindi rivolgersi alla Dell del posto.
Consultare “Ricerca di informazioni ed assistenza” on pagina 45 per ottenere un esempio del codice del servizio espresso e dei numeri di servizio.
Codice del servizio espresso:___________________________
Numero di servizio: _______________________________
48 Guida di installazione e consultazione rapida
Page 51

Il computer comprende i seguenti strumenti d'ausilio nella risoluzione dei
problemi:
D
IAGNOSTICA DELLA DELL
— La Diagnostica della Dell esamina i
componenti del computer ed è in grado di aiutare ad identificare l'origine dei
problemi. Per ulteriori informazioni, consultare "Esecuzione della Diagnostica
della Dell" on pagina 51
S
PIE DEL SISTEMA
— Collocate sulla parte anteriore del computer, queste spie
possono indicare eventuali problemi del computer. Per ulteriori informazioni,
consultare la Guida dell'utente in dotazione.
S
PIE DIAGNOSTICHE
— Collocate sul retro del computer, queste spie possono
indicare eventuali problemi del computer. Per ulteriori informazioni, consultare
la Guida dell'utente in dotazione.
M
ESSAGGI DI SISTEMA
— Questi messaggi sono riportati dal computer per
avvertire l'utente della presenza di un guasto effettivo od eventuale. Per ulteriori
informazioni, consultare la Guida dell'utente in dotazione.
C
ODICI BIP
— Una serie di codici bip sonori emessi dal computer possono
aiutare a identificare un problema. Per ulteriori informazioni, consultare la Guida
dell'utente in dotazione.
Guida di installazione e consultazione rapida 49
Page 52

Uso del
Dell OptiPlex ResourceCD
Per usare il Dell OptiPlex ResourceCD in ambiente operativo
Microsoft
1
®
Windows®, eseguire le seguenti fasi.
NOTA: Per accedere ai driver di periferica ed alla documentazione dell'utente,
è necessario usare il
ResourceCD
da Windows.
Accendere il computer ed attendere la visualizzazione del desktop di
Windows.
Inserire il Dell OptiPlex ResourceCD nell'unità dei CD.
2
Al primo utilizzo del Dell OptiPlex ResourceCD, si apre la finestra
www.dell.com | support.dell.com
ResourceCD Installation (Installazione del ResourceCD) informando che l'installazione sta per avere inizio.
Fare clic su OK per continuare.
3
Per completare l'installazione, rispondere alle richieste del programma
di installazione.
Fare clic su Next (Avanti) nello schermo Welcome Dell System
4
Owner (Benvenuto proprietario del sistema Dell).
Scegliere il System Model (Modello del computer), Operating Sys-
5
tem (Sistema operativo), Device Type (Tipo di periferica), e Topic
(Argomento) idonei.
Driver per il computer in dotazione
Per visualizzare un elenco dei driver di periferica per il computer in dotazione, eseguire le seguenti fasi:
Nel menu a discesa Argomento, fare clic su My Drivers (Driver del
1
computer) .
Il ResourceCD ricerca l'hardware e il sistema operativo del computer,
quindi visualizza un elenco dei driver di periferica per la configurazione del sistema.
Fare clic sul driver appropriato e seguire le istruzioni per trasferire il
2
driver nel computer in dotazione.
Per visualizzare tutti i driver disponibili per il computer in dotazione, dal
menu a discesa Argomento fare clic su Driver.
50 Guida di installazione e consultazione rapida
Page 53

Esecuzione della Diagnostica della Dell
La Diagnostica della Dell è un programma che esamina i diversi componenti del computer. Eseguire questo programma per identificare l'origine
dei problemi del computer ogni qual volta si presentano. È possibile eseguire la Diagnostica della Dell dal disco rigido o dal ResourceCD.
AVVISO: Se si dovesse guastare il disco rigido, eseguire la Diagnostica della
Dell dal
Accendere il computer (se è già acceso, riavviarlo).
1
ResourceCD
.
Quando si visualizza
2
F2 = Setup (F2 = Configurazione)
nell'angolo in alto a destra dello schermo, premere
<Ctrl><Alt><F10>.
L'inizializzazione della diagnostica è immediata; segue la visualizzazione del Diagnostics Menu (Menu della diagnostica).
Selezionare l'opzione diagnostica idonea per il computer in dotazione.
3
Per usare la diagnostica, seguire le istruzioni visualizzate sullo
schermo.
Modifica della sequenza d'avvio
Per eseguire la Diagnostica della Dell dal ResourceCD, è necessario che il
computer si avvii dall'unità del CD, eseguire pertanto le seguenti fasi:
Inserire il Dell OptiPlex ResourceCD nell'unità dei CD.
1
Accendere (o riavviare) il computer.
2
Quando si visualizza
3
F2 = Setup (F2 = Configurazione)
nell'angolo in alto a destra dello schermo, premere
<Ctrl><Alt><F8>.
NOTA: Questa funzione modifica la sequenza d'avvio solo per l'immediato. Al
successivo avvio, il computer si avvierà in base a quanto specificato nella configurazione del sistema.
Appare il Boot Device Menu (Menu unità d'avvio).
Se si attende troppo e appare l'emblema di Windows, continuare ad
attendere che sia visualizzato il desktop di Windows. Quindi arrestare
il computer e riprovare.
Selezionare l'opzione CD-ROM Device (Periferica CD-ROM).
4
Guida di installazione e consultazione rapida 51
Page 54

Esecuzione della Diagnostica del disco rigido IDE della Dell
La Diagnostica del disco rigido IDE della Dell è un'utilità che esamina il
disco rigido per risolverne i problemi o per confermarne l'eventuale guasto.
Accendere il computer (se è già acceso, riavviarlo).
1
Quando si visualizza
2
F2 = Setup (F2 = Configurazione)
nell'angolo in alto a destra dello schermo, premere
<Ctrl><Alt><D>.
Seguire le istruzioni visualizzate sullo schermo.
3
Nel caso di un guasto, consultare “Problemi del disco rigido” nella
www.dell.com | support.dell.com
Guida dell'utente.
Istruzioni di sicurezza
Usare le seguenti indicazioni di sicurezza per proteggere il sistema informatico da danni potenziali e garantire la sicurezza personale dell'utente.
Interventi all'interno del computer
Prima di rimuovere il coperchio del computer, procedere nel modo e
nell'ordine indicati:
AVVISO: Non tentare di eseguire interventi di manutenzione sul sistema
informatico da soli, tranne se specificato nella guida in linea della documentazione Dell o in altro materiale fornito. Seguire sempre rigorosamente le istruzioni di installazione e di assistenza.
ATTENZIONE: una batteria nuova non correttamente installata
potrebbe esplodere. Sostituire la batteria solo con una dello
stesso tipo o equivalente come consigliato dal produttore. Smaltire le batterie usate secondo le istruzioni del produttore.
Spegnere il computer e tutte le eventuali periferiche.
1
Avere una messa a terra, toccando una superficie metallica non verni-
2
ciata del telaio, quale il metallo intorno alle aperture degli slot schede
sul retro del computer, prima di toccare qualsiasi cosa all'interno del
computer.
Ogni tanto, mentre si lavora, toccare una superficie metallica non verniciata del telaio del computer per scaricare eventuale elettricità statica, che potrebbe danneggiare i componenti interni.
52 Guida di installazione e consultazione rapida
Page 55

Scollegare il computer e le periferiche dalle rispettive fonti di aliment-
3
azione. Inoltre scollegare dal computer eventuali linee telefoniche o di
telecomunicazione.
Facendo ciò si riduce la possibilità di lesioni personali o di scosse
elettriche.
Inoltre, prendere nota di queste indicazioni di sicurezza quando è il caso:
• Per evitare il corto circuito del computer nello scollegare un cavo di
rete, disinserire prima il cavo dal NIC (Network Interface Controller
[controllore d'interfaccia di rete]) sul retro del computer e quindi dallo
spinotto di rete dal muro. In fase di riconnessione del cavo di rete al
computer, inserire prima il cavo nello spinotto di rete e quindi nel
NIC.
• Quando si scollega un cavo, tirare sul relativo connettore o sul relativo
occhiello serracavo, non sul cavo stesso. Alcuni cavi dispongono di un
connettore con linguette di blocco; se si scollega questo tipo di cavo,
premere sulle linguette di blocco prima di scollegare il cavo. Nel separare i connettori, mantenerli allineati per evitare di piegare un eventuale piedino. Inoltre, prima di collegare un cavo, accertarsi che
entrambi i connettori siano orientati e allineati correttamente.
• Maneggiare con cura i componenti e le schede. Non toccare i componenti o i contatti su una scheda. Mantenere una scheda dai bordi o
dalla staffa metallica di montaggio. Mantenere un componente, ad
esempio un chip di un microprocessore, dai bordi, non dai piedini.
Usando il sistema informatico
Nell'utilizzo del sistema informatico, seguire attentamente le seguenti indicazioni sulla sicurezza.
ATTENZIONE: Non azionare il sistema informatico con uno qualsi-
asi dei coperchi (compresi coperchi del computer, cornici, mensole di riempimento e inserti del pannello anteriore) rimossi.
• Per evitare danni al computer, verificare che il selettore della tensione
dell'alimentatore sia impostato in base all'alimentazione c.a. del luogo:
– 115 volt (V)/60 hertz (Hz) nella maggior parte del Nord e Sud
America ed alcuni Paesi dell'Estremo Oriente, quali Corea del Sud
e Taiwan
Guida di installazione e consultazione rapida 53
Page 56

– 100 V/50 Hz nel Giappone orientale e 100 V/60 Hz in quello
occidentale
NOTA: Il selettore della tensione deve essere impostato sulla posizione
dei 115 V anche se l'alimentazione c.a. erogata in Giappone è di 100 V.
– 230 V/50 Hz nella maggior parte dei Paesi europei, del Medio
Oriente e dell'Estremo Oriente
Verificare, inoltre, che il monitor e le periferiche collegate siano omologati per funzionare con l'alimentazione c.a. erogata sul posto.
NOTA: Gli alimentatori a selezione automatica non richiedono il selet-
tore della tensione. L'alimentatore in dotazione potrebbe, pertanto, non
www.dell.com | support.dell.com
essere dotato del selettore.
• Per prevenire scosse elettriche, inserire i cavi d'alimentazione del computer e delle periferiche in fonti d'alimentazione con messa a terra corretta. Questi cavi sono dotati di spine tripolari per assicurare una
messa a terra adeguata. Non usare spine adattatrici né rimuovere il
polo di messa a terra dal cavo. Se si presenta l'esigenza di usare una
prolunga, usare un cavo trifase con adeguate spine con messa a terra.
• Prima di intervenire all'interno del computer, disinserire il sistema per
prevenire eventuali scosse elettriche o danni alla scheda di sistema.
Determinati componenti della scheda di sistema continuano ad essere
alimentati quando il computer è collegato ad una fonte d'alimentazione c.a.
• Per evitare possibili danni alla scheda di sistema, attendere 15 secondi
dallo scollegamento del sistema prima di scollegare una periferica dal
computer.
54 Guida di installazione e consultazione rapida
Page 57

AVVISO: Lo spegnersi dell'indicatore ausiliario del diodo ad emissione lumi-
nosa (LED) d'alimentazione sulla scheda di sistema indica che il sistema non è
più alimentato (consultare la
LED).
Guida dell'utente
per individuare la posizione del
• Per proteggere il sistema informatico da improvvisi incrementi e decrementi transienti dell'energia elettrica, usare un soppressore di transienti, un UPS (Uninterruptible Power Supply [compensatore di linea
o un gruppo di continuità]).
• Nulla deve essere appoggiato sui cavi del sistema informatico e i cavi
non devono essere in un luogo di passaggio dove possono essere calpestati o dove vi si può inciampare.
• Non far cadere cibo o sostanze liquide sul computer. Se il computer si
inumidisce, consultare la Guida dell'utente.
• Non ostruire le aperture del computer. Ciò può provocare un corto circuito dei componenti interni del computer, generando incendi o
scosse elettriche.
• Tenere il computer lontano da riscaldamenti o fonti di calore. Inoltre,
non ostruire le aperture di raffreddamento. Evitare di lasciare fogli
sparsi sotto il computer, facendo inoltre attenzione a non collocarlo in
unità rinchiuse a parete o su un letto, un divano o un tappeto.
Abitudini di elaborazione ergonomica
ATTENZIONE: un utilizzo della tastiera non corretto o prolungato
potrebbe provocare lesioni.
ATTENZIONE: la visualizzazione dello schermo del monitor per
periodi prolungati potrebbe provocare stanchezza agli occhi.
Per il comfort e l'efficienza, rispettare le seguenti indicazioni ergonomiche
descritte nella Guida dell'utente per impostare e usare il sistema
informatico.
Guida di installazione e consultazione rapida 55
Page 58

Informazioni sulle normative
L'EMI (Electromagnetic Interference [Interferenza elettromagnetica]) rappresenta un segnale oun'emissione, irradiata nello spazio aperto o trasmessa
tramite condutture della corrente o a impulsi,in grado di compromettere il
funzionamento di un servizio di radionavigazioneo altro servizio di sicurezza nonché di diminuire, ostruire o interrompere ripetutamente il serviziodi trasmissione radio autorizzato.
Il sistema informatico della Dell è progettato per essere conforme alle normative vigenti riguardanti l'EMI (emissione di interferenze). Cambiamenti
o modifiche non approvate esplicitamente dalla Dell potrebbe privare
www.dell.com | support.dell.com
l'utente dell'autorità ad utilizzare questa apparecchiatura.
NOTA: Informazioni sulle normative supplementari per il sistema in dotazione
sono riportate nella
Guida dell'utente
.
56 Guida di installazione e consultazione rapida
Page 59

Sistemas Dell™ OptiPlex™
Guía de instalación y de referencia rápida
www.dell.com | support.dell.com
Page 60

Notas, avisos y precauciones
NOTA: Una NOTA indica información importante que le ayuda a conseguir un mejor rendimiento
de su equipo.
AVISO: Un AVISO indica la posibilidad de daños al hardware o pérdida de datos y le explica
cómo evitar el problema.
PRECAUTIÓN: Una PRECAUCIÓN indica una situación potencialmente peligrosa
que, si no se evita, puede provocar lesiones menores o moderadas.
____________________
La información contenida en este documento puede modificarse sin aviso previo.
© 2000–2001 Dell Computer Corporation. Quedan reservados todos los derechos.
Queda estrictamente prohibida la reproducción de este documento en cualquier forma sin la autorización por escrito
de Dell Computer Corporation.
Marcas comerciales utilizadas en este texto:
Dell Computer Corporation;
Microsoft Corporation.
Otras marcas y otros nombres comerciales pueden utilizarse en este documento para hacer referencia a las entidades
que los poseen o a sus productos. Dell Computer Corporation renuncia a cualquier interés sobre la propiedad de marcas
y nombres comerciales que no sean los suyos.
Julio de 2001 P/N 51FMX Rev. A04
Microsoft, MS-DOS, Windows NT
Dell, OptiPlex
y el logotipo
y
Windows
DELL
son marcas comerciales de
son marcas comerciales registradas de
Page 61

Acerca de esta guía
Este documento contiene procedimientos para solucionar problemas así
como información sobre la garantía y las normas referentes al equipo
Dell™ OptiPlex™.
Para obtener las versiones más recientes de los documentos sobre la unidad
de disco duro, visite la web de asistencia de Dell en http://support.dell.com.
Los números de modelos exigidos por la normativa aparecen a lo largo de
este documento; a continuación se muestran los equivalentes del tipo de
chasis:
Números de modelos exigidos por la normativa
y tipos de chasis
DHS = chasis de escritorio pequeño (SD)
DHP = chasis de factor de forma pequeño (SF)
DHM = chasis de minigabinete vertical pequeño
(SMT)
Búsqueda de información y asistencia
Recursos y herramientas de asistencia
Recurso Contenido Utilización del recurso
ResourceCD Dell OptiPlex
• Diagnósticos Dell:
• Controladores
•Utilidades
• Documentación del equipo
y de los dispositivos
Consulte el menú principal del ResourceCD que se
entrega con su equipo. Use el menú desplegable para
realizar las selecciones apropiadas para su equipo. Puede
realizar las tareas siguientes:
• Diagnóstico un problema
• Instalar o reinstalar controladores
• Obtener información sobre su equipo y sus dispositivos
NOTA: La documentación del usuario y los controladores
ya vienen instalados en el equipo cuando Dell lo envía.
Puede utilizar este CD para acceder a la documentación,
instalar controladores o ejecutar las herramientas de
diagnóstico.
Guía de instalación y de referencia rápida 59
Page 62

Recursos y herramientas de asistencia
(continuación)
Recurso Contenido Utilización del recurso
Etiquetas de servicio y registro,
situadas en la parte delantera o
lateral de su equipo Dell™.
• Código de servicio rápido y
número de etiqueta de
El Código de servicio rápido y el Número de etiqueta de
servicio son identificadores únicos de su equipo Dell.
Es posible que necesite el número de código del producto
(o identificación del producto) para completar la
instalación del sistema operativo.
servicio
• Clave del producto (llamada
también identificación del
producto o COA (Certificate
www.dell.com | support.dell.com
of Authenticity [Certificado
de autenticidad])
CD del sistema operativo. Para volver a instalar el sistema operativo, use el CD del
sistema operativo que se entrega con su equipo.
NOTA: Es posible que el CD de sistema operativo no
incluya todos los controladores más recientes para el
equipo. Si reinstala el sistema operativo, utilice el
ResourceCD
para reinstalar los controladores de los
dispositivos incluidos con el equipo.
Para obtener más información sobre cómo reinstalar el
sistema operativo, consulte la documentación de
instalación del sistema operativo incluida con el equipo.
Guía de instalación del sistema
operativo
Para obtener información sobre cómo reinstalar y
configurar el sistema operativo, consulte la guía de
instalación del sistema operativo.
Haga clic en el botón Start (Inicio) y seleccione Help
(Ayuda) o Help and Support (Ayuda y asistencia),
dependiendo del sistema operativo, para obtener más
información sobre el sistema operativo.
60 Guía de instalación y de referencia rápida
Page 63

Recursos y herramientas de asistencia
Recurso Contenido Utilización del recurso
Guías de usuario del equipo y
los dispositivos
Guías del usuario
Sitio web de asistencia de Dell
• Asistencia técnica e
información
• Descargas para su equipo
• Estado del pedido o entrega
• Consejos y sugerencias,
documentos sobre
tecnología, información de
servicio
Sitio web de Asistencia Premier
de Dell
• Estado de llamadas de
servicio
• Aspectos técnicos
principales por producto
• Preguntas frecuentes según
número de producto
• Etiquetas de servicio
personalizadas
• detalles de la configuración
del sistema
(continuación)
Dependiendo de su sistema operativo, haga doble clic en
el icono User’s Guides (Guía del usuario) en el escritorio,
o haga clic en el botón Inicio y seleccione Ayuda y
asistencia para acceder a la documentación electrónica
almacenada en la unidad de disco duro.
Obtenga información sobre lo siguiente:
•Uso del equipo
• Configuración de los valores del sistema
• Desmontaje y instalación de piezas
• Instalación y configuración de software
• Diagnóstico de un problema
• Especificaciones técnicas
• Documentación de los dispositivos (en los sistemas
operativos seleccionados)
• Obtención de asistencia técnica
Vaya a http://support.dell.com y complete el registro.
• Obtenga ayuda mediante preguntas sobre uso,
instalación y solución de problemas
• Obtenga respuestas a preguntas sobre asistencia o
servicio técnico
• Obtenga las últimas versiones de los controladores del
equipo
• Acceda a la documentación sobre su equipo y
dispositivos
• Participe en discusiones en línea con otros clientes de
Dell y con profesionales técnicos de Dell
• Explore una lista de vínculos en línea a los principales
proveedores de Dell
Diríjase a http://premiersupport.dell.com:
El sitio web de Asistencia Premier de Dell está
personalizado para clientes corporativos, gubernamentales
y del ámbito educativo.
Puede que este sitio no esté disponible en todas las
regiones.
Guía de instalación y de referencia rápida 61
Page 64

Solución de problemas
Dell proporciona una serie de herramientas para ayudarlo si su sistema no
funciona como se espera. Para obtener la información más actualizada sobre
la solución de problemas disponible para su sistema, consulte la página web
de asistencia de Dell en http://support.dell.com. También puede encontrar
descripciones de las herramientas de solución de problemas Dell en la
sección titulada “Obtención de ayuda” en la Guía del usuario en línea.
Si el equipo tiene problemas que requieren la ayuda de Dell, escriba una
descripción detallada del error, códigos de sonido, o modelos de luz de
diagnósticos; introduzca su código de servicio rápido y número de etiqueta
www.dell.com | support.dell.com
de servicio debajo; y póngase en contacto con Dell en el mismo lugar donde
adquirió su equipo.
Consulte “Búsqueda de información y asistencia” on página 59 para obtener
un ejemplo del código de servicio rápido y números de etiqueta de servicio.
Código de servicio rápido:_______________________________
Número de etiqueta de servicio:___________________________
62 Guía de instalación y de referencia rápida
Page 65

Su equipo incluye las herramientas siguientes que le pueden ayudar a
solucionar un problema:
D
IAGNÓSTICOS DELL
:—Los Diagnósticos Dell, que ponen a prueba varios
componentes de su equipo y le ayudan a identificar la causa del problema en el
equipo. Para obtener más información, consulte "Ejecución de los Diagnósticos
Dell" on página 65.
L
UCES DEL SISTEMA
— Localizado en la parte anterior del equipo, estas luces
pueden indicar un problema del equipo. Para obtener más información, consulte
la Guía del usuario.
L
UCES DE DIAGNÓSTICO
— Ubicadas en la parte posterior del equipo, estas
luces pueden indicar un problema del equipo. Para obtener más información,
consulte la Guía del usuario.
M
ENSAJES DEL SISTEMA
— El equipo reporta estos mensajes para advertirle
de fallas actuales o potenciales. Para obtener más información, consulte la Guía
del usuario.
C
ÓDIGOS DE SONIDO
— Una serie de códigos de sonido emitidos por el equipo
que pueden ayudarle a identificar un problema. Para obtener más información,
consulte la Guía del usuario.
Guía de instalación y de referencia rápida 63
Page 66

Utilización del
ResourceCD Dell OptiPlex
Para usar el Dell ResourceCD OptiPlex desde el sistema operativo
Microsoft
1
2
®
Windows®, realice los pasos siguientes:
NOTA: Para acceder a los controladores de los dispositivos y a la
documentación del usuario, usted debe usar el
ResourceCD
desde Windows.
Encienda el equipo y permita que se inicie el escritorio de Windows.
Inserte el Dell ResourceCD OptiPlex en la unidad de CD.
Si va a utilizar el Dell ResourceCD OptiPlex por primera vez en este
equipo, se abre la ventana ResourceCD Installation (Instalación del
www.dell.com | support.dell.com
ResourceCD) para informarle que el ResourceCD está a punto de
iniciar la instalación.
Haga clic sobre OK (Aceptar) para continuar.
3
Para completar la instalación, responda a las peticiones que ofrece el
programa de instalación.
Haga clic en Next (Siguiente) en la pantalla Welcome Dell System
4
Owner (Bienvenida al propietario del sistema Dell).
Seleccione el System Model (Modelo del sistema), Operating System
5
(Sistema operativo), Device Type (Tipo de dispositivo) y To p ic
(Tema) correspondiente.
Controladores para su equipo
Para visualizar una lista de los controladores de los dispositivos del equipo,
siga los siguientes pasos:
Haga clic en My Drivers (Mis controladores) en el menú desplegable
1
Te ma .
ResourceCD busca el sistema operativo y el hardware del equipo, y en
la pantalla se muestra una lista de los controladores de los dispositivos
de la configuración del sistema.
Haga clic en el controlador adecuado y siga las instrucciones para
2
descargar el controlador en su equipo.
Para ver todos los controladores disponibles para su equipo, haga clic en
Controladores en el menú desplegable Te ma .
64 Guía de instalación y de referencia rápida
Page 67

Ejecución de los Diagnósticos Dell
Los Diagnósticos Dell es un programa que prueba varios componentes de su
equipo. Ejecute este programa cuando tenga un problema con su equipo
para ayudarle a identificar la fuente del problema. Puede ejecutar los
Diagnósticos Dell desde la unidad de disco duro o el ResourceCD.
AVISO: Si la unidad de disco duro falla, ejecute los Diagnósticos Dell desde el
ResourceCD
Encienda el equipo (si el equipo ya está encendido, reinícielo).
1
.
Cuando aparezca
2
F2 = Setup (F2 = Configuración)
en la
esquina superior derecha de la pantalla, oprima
<Ctrl><Alt><F10>.
El inicio de los diagnósticos empieza inmediatamente; luego aparece el
Diagnostics Menu (Menú de diagnósticos).
Seleccione la opción de diagnósticos apropiada para su equipo.
3
Para utilizar los diagnósticos, siga las instrucciones que aparecen en la
pantalla.
Cambio en la secuencia de inicio
Para ejecutar los Diagnósticos Dell desde el ResourceCD, siga los siguientes
pasos para permitir que el equipo se inicie desde el CD:
Inserte el ResourceCD Dell OptiPlex en la unidad de CD.
1
Encienda (o reinicie) el equipo.
2
Cuando aparezca
3
F2 = Setup (F2 = Configuración)
en la
esquina superior derecha de la pantalla, oprima <Ctrl><Alt><F8>.
NOTA: Esta característica cambia la secuencia de inicio sólo una vez. La
próxima vez, el equipo se inicia de acuerdo con los dispositivos especificados
en la configuración del sistema.
Aparece el Boot Device Menu (Menú del dispositivo de inicio).
Si espera un rato y aparece el logotipo de Windows, siga esperando
hasta que vea el escritorio de Windows. Finalmente, apague el equipo
y vuélvalo a intentar.
Seleccione la opción CD-ROM Device (Dispositivo de CD-ROM).
4
Guía de instalación y de referencia rápida 65
Page 68

Ejecución de los diagnósticos de la unidad de disco duro IDE de Dell.
Los diagnósticos de la unidad de disco duro IDE de Dell son una utilidad
que prueba la unidad de disco duro para solucionar problemas o confirmar
un fallo de la unidad.
Encienda el equipo (si el equipo ya está encendido, reinícielo).
1
Cuando aparezca
2
F2 = Setup (F2 = Configuración)
en la
esquina superior derecha de la pantalla, oprima <Ctrl><Alt><D>.
Siga las instrucciones en la pantalla.
3
www.dell.com | support.dell.com
Si se informa de un error, consulte “Problemas de la unidad de disco
duro” en la Guía del usuario.
Instrucciones de seguridad
Utilice las directrices de seguridad para ayudar a proteger su equipo de
posibles daños y garantizar su propia seguridad personal.
Al trabajar en el interior de su equipo
Antes de desmontar la cubierta de la PC, realice los pasos siguientes en la
secuencia indicada.
AVISO: No intente mantener o reparar el sistema usted mismo, excepto si lo
hace según se describe en esta documentación en línea de Dell o en otras guías
que le hayamos proporcionado. Siga siempre las instrucciones de instalación y
servicio al pie de la letra.
PRECAUTIÓN: Existe el peligro de que una nueva batería explote
si se instala incorrectamente. Reemplace la batería únicamente
con otra del mismo tipo o su equivalente recomendado por el
fabricante. Deseche las baterías agotadas de acuerdo con las
instrucciones del fabricante.
Apague el equipo y todos los periféricos.
1
Conéctese a tierra tocando una superficie metálica sin pintura en el
2
chasis, tal como el metal alrededor de aberturas de las ranuras para
tarjetas en la parte posterior del equipo, antes de tocar cualquier
objeto en el interior de su equipo.
66 Guía de instalación y de referencia rápida
Page 69

Conforme trabaje, toque periódicamente una superficie metálica sin
pintura en el chasis del equipo para disipar la electricidad estática que
podría dañar los componentes internos.
Desconecte el equipo y los periféricos de sus fuentes de energía.
3
Asimismo, desconecte las líneas de teléfono o de telecomunicaciones
conectadas al equipo.
Al hacerlo reduce la posibilidad de sufrir lesiones personales o
descargas eléctricas.
Además de lo anterior, tome nota de las pautas de seguridad siguientes
cuando sea pertinente:
• Para evitar que se produzca un cortocircuito en el equipo, desenchufe
primero el cable del controlador NIC (network interface controller
[controlador de interfaces de red]) situado en la parte trasera del
equipo, y luego el enchufe de red de la pared. Cuando vuelva a
conectar un cable de red al equipo, primero conecte el cable en el
enchufe de red y luego en el NIC.
• Cuando desconecte un cable, tire de su conector o de su lazo liberador
de tensión, y no del cable mismo. Algunos cables tienen un conector
con lengüetas de seguro. Si está desconectando este tipo de cable,
oprima las lengüetas hacia adentro antes de desconectarlo. Cuando
separe conectores, manténgalos alineados para evitar doblar las patas
de conexión. Asimismo, antes de conectar un cable, asegúrese de que
los conectores estén orientados y alineados correctamente.
• Maneje con cuidado los componentes y las tarjetas. No toque los
componentes ni los contactos de las tarjetas. Sujete las tarjetas por sus
bordes o por su soporte metálico de montaje. Sujete componentes
tales como un chip de microprocesador por sus bordes y no por sus
patas.
Guía de instalación y de referencia rápida 67
Page 70

Cuando utilice el sistema
Cuando utilice el equipo, respete las siguientes directrices de seguridad:
PRECAUTIÓN: No utilice el equipo con ninguna tapa sacada
(incluidas las cubiertas de la PC, los biseles, los soportes de
relleno y las carátulas del panel anterior).
• Con el fin de evitar daños en el equipo, asegúrese de que el interruptor
de selección de voltaje (si se dispone de él) situado en el suministro de
energía esté fijado para que coincida con la corriente alterna disponible
en su área:
– 115 voltios (V)/60 hertzios (Hz) en la mayoría de las regiones de
www.dell.com | support.dell.com
América del Norte y del Sur y en algunos países del Lejano
Oriente, tales como Corea del Sur y Taiwán
– 100 V/50 Hz en el este de Japón y 100 V/60 Hz en el oeste de Japón
NOTA: El interruptor de selección de voltaje debe estar en la posición
115V, aunque el suministro de corriente alterna en Japón es de 100 V.
– 230 V/50 Hz en la mayoría de las regiones de Europa, el Medio
Oriente y el Lejano Oriente
Asimismo, asegúrese de que el monitor y los periféricos conectados
estén clasificados eléctricamente para operar con la corriente alterna
disponible en su localidad.
NOTA: Los suministros de energía autoseleccionables no necesitan un
interruptor de selección de voltaje. Puede que su suministro de energía no
cuente con este interruptor.
• Con el fin de prevenir una descarga eléctrica, conecte el equipo y los
cables de alimentación de los periféricos a una fuente de energía
conectada apropiadamente a tierra. Estos cables están equipados con
enchufes de tres clavijas para asegurar una conexión adecuada a tierra.
No utilice enchufes adaptadores ni retire la clavija de conexión a tierra
de ningún cable. Si necesita utilizar un cable de extensión, utilice un
cable de tres líneas con enchufes adecuadamente conectados a tierra.
68 Guía de instalación y de referencia rápida
Page 71

• Antes de trabajar en el interior del equipo, desenchufe el sistema para
evitar una descarga eléctrica o daños en la placa base. Algunos
componentes de la placa base siguen recibiendo energía cuando el
equipo está conectado a la corriente alterna.
• Para evitar cualquier tipo de daño en la placa base, espere 15 segundos
después de desenchufar el sistema antes de desconectar un dispositivo
del equipo.
AVISO: Observe cuando se apaga el indicador del LED (light-emitting diode
[diodo emisor de luz]) de la energía auxiliar en la placa base para verificar que
el sistema está apagado (consulte la
ubicación de este diodo emisor de luz).
Guía del usuario
para conocer la
• Para proteger el equipo contra cambios repentinos en la alimentación
eléctrica, utilice un protector contra sobrevoltajes, un acondicionador
de línea o una UPS (Uninterruptible Power Supply [sistema de energía
ininterrumpida]).
• Asegúrese de que no haya ningún objeto encima de los cables del
equipo y que los cables no estén en un lugar donde uno pueda
tropezarse con ellos o pisarlos.
• No derrame comida o líquidos en su equipo. Si el equipo se moja,
consulte la Guía del usuario.
• No introduzca ningún objeto por las aberturas del equipo. Puede
ocasionar un incendio o sufrir un choque eléctrico al provocar un
cortocircuito entre los componentes internos.
• Mantenga su equipo alejado de radiadores y fuentes de calor.
Asimismo, no obstruya las rendijas de ventilación. Evite colocar hojas
sueltas debajo del equipo, no coloque el equipo cerca de una pared
cerrada, sobre una cama, un sofá o una alfombra.
Guía de instalación y de referencia rápida 69
Page 72

Hábitos de ergonomía con su equipo
PRECAUTIÓN: La utilización inapropiada o prolongada del teclado
puede ocasionarle una lesión.
PRECAUTIÓN: El mirar la pantalla del monitor durante períodos
prolongados puede causar fatiga ocular.
Para asegurar su comodidad y eficiencia, observe las pautas de ergonomía en
su Guía del usuario al instalar y utilizar su equipo.
Información sobre normas
www.dell.com | support.dell.com
La EMI (Electromagnetic Interference [interferencia electromagnética]) es
cualquier señal o emisión, irradiada en el espacio o conducida mediante
cables de alimentación o de señales, que pone en peligro el funcionamiento
de dispositivos de navegación por radio u otros dispositivos de seguridad o
que degrada seriamente, obstruye o interrumpe repetidamente un servicio
de radiocomunicaciones con licencia.
El sistema del equipo Dell está diseñado para que cumpla todas las
regulaciones aplicables sobre EMI. Los cambios o modificaciones no
aprobados expresamente por Dell podrían anular su autoridad para operar el
equipo.
NOTA: Puede encontrar información adicional sobre regulaciones en la
Guía del usuario
.
70 Guía de instalación y de referencia rápida
Page 73

Dell™ OptiPlex™ Sistemleri
Kurulum ve Hızlı Referans Kılavuzu
www.dell.com | support.dell.com
Page 74

Notlar, Bilgiler ve Dikkat
NOT, bilgisayarınızdan daha iyi şekilde yararlanabilmenizi sağlayan önemli bilgiler
NOT:
verir.
BİLGİ: BİLGİ, donanımda olası hasarı veya veri kaybını bildirir ve bu sorunun nasıl
önleneceğini anlatır.
DİKKAT: DİKKAT, önlenmediği takdirde küçük veya orta dereceli
yaralanmalarla sonuçlanabilecek potansiyel tehlike durumlarını belirtir.
____________________
Bu belgedeki bilgiler, önceden duyurulmaksızın değiştirilebilir.
© 2000–2001 Dell Computer Corporation. Tüm hakları saklıdır.
Bu belgenin Dell Computer Corporation'ın yazılı izni olmaksızın herhangi bir şekilde çoğaltılması kesinlikle
yasaktır.
Bu metinde kullanılan ticari markalar: Dell, OptiPlex, ve DELL logosu Dell Computer Corporation'ın ticari
markalarıdır; Microsoft, MS-DOS, Windows NT, ve Windows Microsoft Corporation'ın kayıtlı ticari markalarıdır.
Bu belgede, gerek marka ve ticari isim sahiplerine, gerekse bunların ürünlerine atıfta bulunmak üzere, yukarı da
adı geçenlerden başka ticari marka ve ticari isimler kullanılmış olabilir. DellComputer Corporation, kendisininkiler
haricindeki marka ve ticari isimlerle ilgili her tür mülkiyet iddiasını reddeder.
Temmuz 2001 P/N 51FMX Rev. A04
Page 75

Bu Kılavuz Hakkında
Bu belge, Dell™ OptiPlex™ sisteminizle ilgili problem çözme ve
güvenlik bilgileri ile düzenleyici bilgileri içerir.
Sabit diskinizdeki belgelerin son sürümlerini http://support.dell.com
adresindeki Dell destek web sitesinden elde edebilirsiniz.
Düzenleyici model numaraları bu belgede yer almaktadır, bunların kasa
tipi denkleri aşağıda gösterilmiştir:
Düzenleyici Model Numaraları ve Kasa
Tipleri
DHS=küçük masaüstü (SD) kasa:
DCP = küçük boy faktör (SF) kasa
DHM=mini-kule kasa (SMT)
Bilgi ve Yardım Bulma
Kaynaklar ve Destek Araçları
Kaynak İçindekiler: Kaynak Kullanma
Dell OptiPlex ResourceCD
•Dell Tanıları:
• Sürücüler
•Yardımcılar
• Bilgisayar ve aygıt
belgeleri
Bilgisayarınız ile birlikte gelen ResourceCD ana
menüsüne bakın Bilgisayarınız için uygun seçimi
yapmak için açılır menüleri kullanın. Aşağıdakileri
yapabilirsiniz:
• Sorunu tanımlama
• Sürücüleri yükleme veya yeniden yükleme
• Bilgisayarınız ve aygıtlarınız hakkında bilgi toplama
NOT: Kullanıcı belgeleri ve sürücüler bilgisayarınız
Dell'den gönderilirken zaten yüklenmiştir. Bu CD ile
belgelere erişebilir, sürücüleri yeniden yükleyebilir ya
da tanı araçlarını çalıştırabilirsiniz.
Kurulum ve Hı zlı Referans Kı lavuzu 73
Page 76
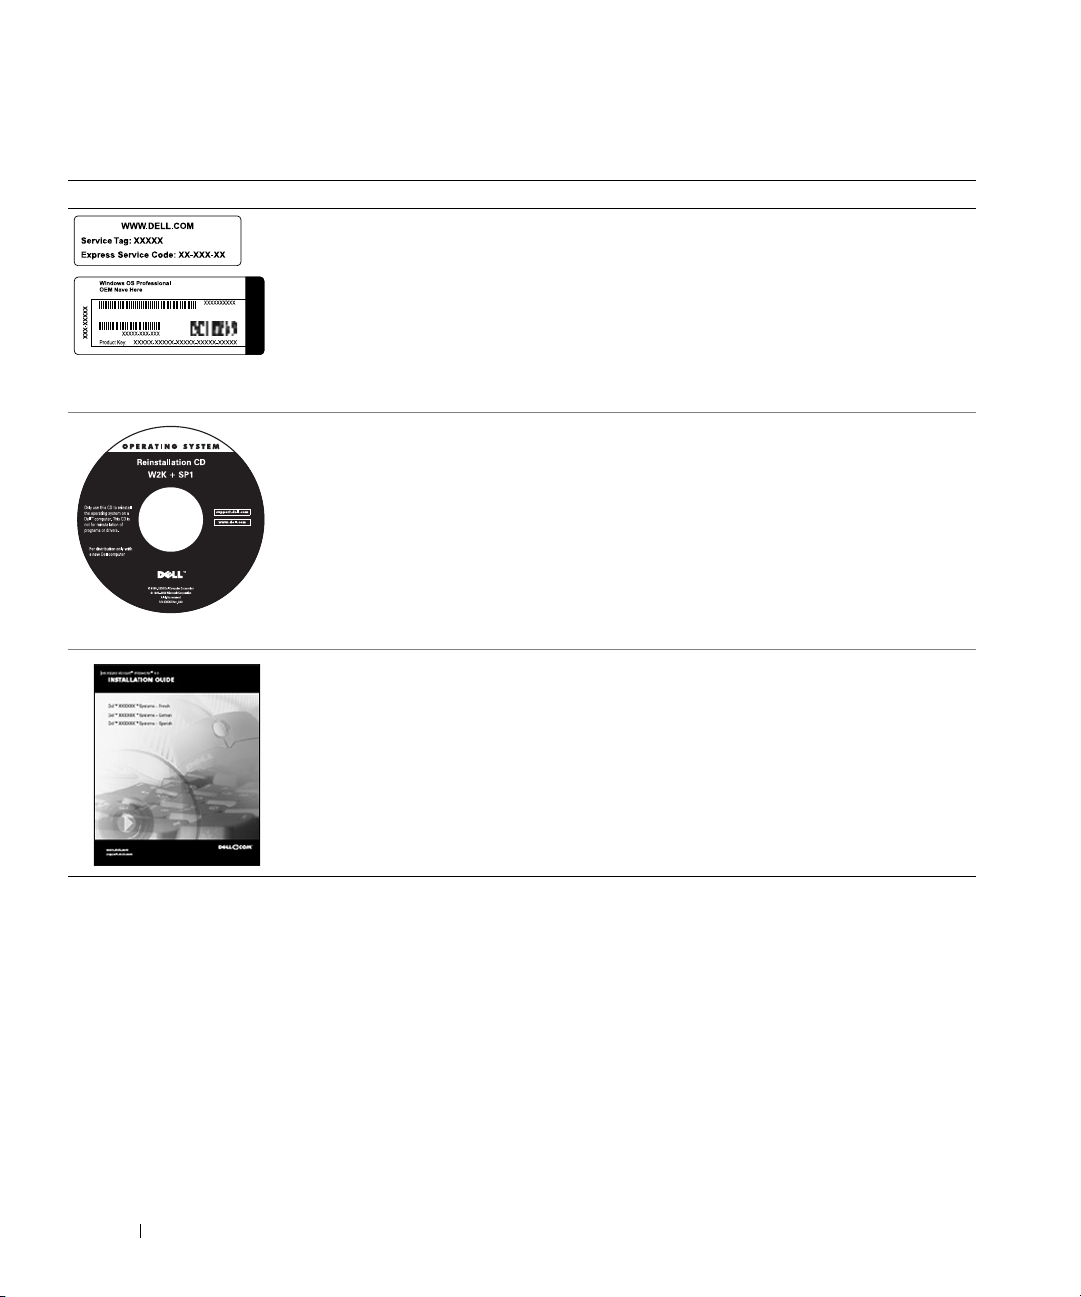
Kaynaklar ve Destek Araçları (devamı )
Kaynak İçindekiler: Kaynak Kullanma
Servis ve Kayıt Etiketleri—
Dell™ bilgisayarınızın
önünde veya yanında
bulunur.
• Acele Hizmet Kodu ve
Acele Hizmet Kodu ve Servis Künye Numarası Dell
bilgisayarınızın tanımlayıcılarıdır.
İşletim sistemi kurulumunu tamamlamak için Ürün
Anahtarına (veya Ürün Kimliği) ihtiyacınız olabilir.
Servis Künye Numarası
• Ürün Anahtarı (Ürün
Kimliği veya Sağlamlık
Belgesi [COA] denir)
İşletim Sistemi CD'si İşletim sistemi yeniden yüklemek için bilgisayarınızla
www.dell.com | support.dell.com
birlikte gelen işletim sistemi CD'sini kullanın.
NOT: İşletim sistemi CD'si bilgisayarınız için en son
sürücülerin tamamını içermeyebilir. Eğer işletim
sistemini yeniden yüklerseniz, bilgisayarınızla birlikte
gelen aygıtların sürücülerini kurmak için
ResourceCD'sini kullanın.
İşletim sisteminizi yeniden yüklemekle ilgili daha fazla
bilgi için, bilgisayarınızla birlikte gelen işletim sistemi
yükleme belgelerine bakın.
İşletim sistemi yükleme
kılavuzu
İşletim sisteminizi yeniden yükleme ve yapılandırma
için işletim sistemi yükleme kılavuzuna bakın.
İşletim sisteminizle ilgili daha fazla bilgi edinmek için,
Start (Başlat) düğmesine basın ve işletim sisteminize
bağlı olarak Help (Yardım) veya Help and Support
(Yardım ve Destek), seçin.
74 Kurulum ve Hı zlı Referans Kılavuzu
Page 77

Kaynaklar ve Destek Araçları (devamı )
Kaynak İçindekiler: Kaynak Kullanma
Bilgisayarınız ve aygıtlarınız
için kullanma kılavuzu
Kullanma Kýlavuzu
Dell destek websitesi
• Teknik destek ve bilgi
• Bilgisayarınız için
yüklenebilirler
•Sipariş veya teslim durumu
• İpuçları, teknoloji yazıları,
servis bilgileri
Dell Premier Destek
websitesi
• Servis çağrı durumu
• Ürüne göre teknik konular
• Ürün numarasına göre
sıkça sorulan sorular
• İhtiyaçlara uyarlanmış
servis etiketleri
•Sistem yapılandırma
detrayları
İşletim sistemine bağlı olarak, sabit diskinizde bulunan
elektronik belgelere erişmek için masaüstündeki
User’s Guides (Kullanım Kılavuzu) simgesine çift
tıklayın veya Başlat düğmesine tıklayıp sonra Yardım
ve Destek'i seçin.
Aşağıdakilerle ilgili bilgi edinin:
• Bilgisayar Sisteminizi Kullanma
• Sistem ayarlarını yapılandırma
•Parçaları çıkartma ve takma
•Yazılım Kurma ve Yapılandırma
• Sorun tanımlama
• Teknik Özellikler:
•Aygıt belgeleri (seçili işletim sistemlerinde)
• Teknik yardım alma
Git http://support.dell.com ve bir seferlik kayıtı
tamamla:
• Genel kullanımla, kurulumla, ve sorun giderme
soruları ile ilgili yardım alın.
• Teknik servis ve destek sorularına cevap alın
• Bilgisayarınız için en son sürücüleri edinin
• Bilgisayarınız ve aygıtlarınızla ilgili belgelere erişin
•Diğer Dell müşterileri ve Dell teknik uzmanları ile
çevrimiçi forumlara katılın
• Dell tedarikçilerinin çevrimiçi bağlantılarını araştırın
http://premiersupport.dell.com git:
Dell Premier Destek websitesi kurumsal, hükümet ve
eğitim müşterileri için ihtiyaçlara göre uyarlanmıştır.
Bu site tüm bölgelerde olmayabilir.
Kurulum ve Hı zlı Referans Kı lavuzu 75
Page 78

Problem Çözme:
Dell, sisteminiz umulduğu şekilde çalışmadığı takdirde size
yardımcı olacak çeşitli araçlar sunmaktadır. Sisteminiz için
mevcut olan sorun giderme bilgilerinin son sürümlerini
http://support.dell.comadresindeki Dell destek web sitesinden
elde edebilirsiniz. Ayrıca, Dell sorun giderme araçlarının tanımlarını
da, çevrimiçi Kullanma Kılavuzu'nun "Yardım Alma" başlıklı
bölümünde bulabilirsiniz.
Eğer bilgisayarınızda Dell'den yardım gerektiren bir sorun olursa,
hatanın detaylı bir tanımını, sesli uyarı kodlarını veya tanı ışık
www.dell.com | support.dell.com
desenlerini yazın; Acele Hizmet Kodunuzu ve Servis Künye
Numarasını aşağıya kaydedin ve sonra bilgisayarınızın bulunduğu
yerden Dell ile temasa geçin.
Acele Hizmet Kodu ve Servis Künye Numarası örneği için “Bilgi ve
Yardım Bulma” on sayfa 73 bakın.
Acele Hizmet Kodu: ____________________________
Servis Künye Numarası:___________________________
76 Kurulum ve Hı zlı Referans Kılavuzu
Page 79

Bilgisayarınızda problemleri çözmenizde yardımcı olacak aşağıdaki
araçlar bulunur:
D
ELL TANÝLARÝ
:—Dell Tanıları bilgisayarınızdaki çeşitli bileşenleri test
eder ve bilgisayar problemlerinin nedenini belirlemenize yardımcı olur. Daha
fazla bilgi için, "Dell Tanıları Çalıştırma" on sayfa 79 bakın.
S
ISTEM IÞÝKLARÝ
— Sistem Işıkları bilgisayarın önünde bulunur, bu ışıklar
bilgisayar problemini gösterebilir. Daha fazla bilgi için, Kullanma Kılavuzuna
bakın.
T
ANÝ IÞÝKLARÝ
— Bilgisayarın arkasında bulunur, bu ışıklar bilgisayar
problemini gösterebilir. Daha fazla bilgi için, Kullanma Kılavuzuna bakın.
S
ISTEM MESAJLARÝ
— Sistem mesajları Bilgisayar bu mesajları olası bir
sorun hakkında sizi uyarmak için verir. Daha fazla bilgi için, Kullanma
Kılavuzuna bakın.
S
ISTEM SESLI UYARÝ KODLARÝ
— Sesli Uyari Kodları Bilgisayarınızdan
çıkan sesli uyarı kodları problemi belirlemenizde yardımcı olabilir. Daha
fazla bilgi için, Kullanma Kılavuzuna bakın.
Kurulum ve Hı zlı Referans Kı lavuzu 77
Page 80

Dell OptiPlex ResourceCD'sini kullanma
Microsoft®Windows® işletim sisteminde Dell OptiPlex ResourceCD
kullanmak için aşağıdaki adımları uygulayın.
NOT: Aygıt sürücülerine ve kullanıcı belgelerine erişmek için
ResourceCD
Bilgisayarınızı açın ve Wİndows masaüstüne geçmesini bekleyin.
1
2 Dell OptiPlex ResourceCD'yi CD sürücüye takın.
Eğer Dell OptiPlex ResourceCD'sini ilk kez çalıştırıyorsanız,
ResourceCD Installation (ResourceCD Kurulum) penceresi
www.dell.com | support.dell.com
açılarak ResourceCD'sinin kuruluma başlamak üzere olduğunu
bildirir.
Devam etmek içinOK (Tamam)'ı tıklayın.
3
Kurulumu tamamlamak için, kurulum programının komut
istemlerini yanıtlayın.
Welcome Dell System Owner (Hoşgeldiniz Dell Sistem
4
Kullanıcısı) ekranında Next (Devam)tıklayın.
Uygun System Model (Sistem Modeli), Operating System
5
(İşletim Sistemi), Device Type (Aygıt Tipi), ve Topic (Başlık)
seçin.
Windows çalışırken kullanılmalıdır.
Bilgisayarınız için sürücüler
Bilgisayarınızdaki aygıt sürücülerin listesini görmek için, aşağıdaki
adımları uygulayın:
Başlık açılır menüsünden My Drivers (Sürücülerim) seçin.
1
ResourceCD
yapılandırmanız için aygıt sürücüleri listesi ekranda gösterilir.
Uygun sürücüye tıklayın ve sonra sürücüyü bilgisayarınıza
2
yüklemek için ekrandaki yönergeleri izleyin.
Bilgisayarınız için mevcut tüm sürücüleri görüntülemek isterseniz,
Başlıkaçılır menüsünden Sürücüler'e tıklayın.
78 Kurulum ve Hı zlı Referans Kılavuzu
bilgisayarınızın donanımızı tarar ve sonra sistem
Page 81

Dell Tanıları Çalıştırma
Dell Tanıları bilgisayarınızdaki çeşitli bileşenleri test eden bir
programdır. Bu programı ne zaman bilgisayarla ilgili bir probleminiz
olursa sorunun kaynağını belirlemek için çalıştırın.Dell Tanılarını sabit
diskinizden veya ResourceCD'sinden çalıştırabilirsiniz.
BILGI: Eğer sabit diskiniz çalıştırmazsa, Dell Tanılarını
ResourceCD'sinden çalıştırın.
Bilgisayarınızı açın (eğer bilgisayarınız açıksa yeniden başlatın).
1
Ekranın sağ üst köşesinde
2
F2 = Setup
belirdiğinde,
<Ctrl><Alt><F10> basın.
Ta nıları hazırlama hemen başlar, sonra Diagnostics Menu
(Tanılar Menüsü) belirir.
Bilgisayarınız için uygun tanı seçeneğini seçin.
3
Ta nıları kullanmak için ekrandaki yönergeleri izleyin.
Önyükleme Sırasını Değiştirme
Dell Tanıları ResourceCD'den çalıştırmak için, bilgisayarınızı CD'den
açmak amacıyla aşağıdaki adımları uygulayın:
1 Dell OptiPlex ResourceCD'yi CD sürücüye takın.
Bilgisayarınızı açın (veya yeniden başlatın).
2
Ekranın sağ üst köşesinde
3
F2 = Setup
belirdiğinde,
<Ctrl><Alt><F8> basın.
NOT: Bu özellik ön yükleme sırasını sadece bir seferlik değiştirir. Bir
sonraki başlatma da, bilgisayar sistem kurulumunda belirtilen aygıtlara
göre ön yükleme yapar.
Boot Device Menu (Ön Yükleme Aygıt Menüsü) belirir.
Eğer çok fazla beklerseniz ve Windows logosu belirirse, Windows
masaüstünü görene kadar bekleyin. Sonra bilgisayarınızı kapatın
ve tekrar deneyin.
CD-ROM Device (CD-ROM Aygıt) seçeneğini seçin.
4
Kurulum ve Hı zlı Referans Kı lavuzu 79
Page 82

Dell IDE Sabit Disk Tanıları'nı çalıştırma.
Dell IDE Sabit Disk Tanıları sabit diski sorun gidermek veya sabit disk
hatasını doğrulamak için test eden bir yardımcı programdır.
Bilgisayarınızı açın (eğer bilgisayarınız açıksa yeniden başlatın).
1
Ekranın sağ üst köşesinde
2
F2 = Setup
belirdiğinde,
<Ctrl><Alt><D>basın.
Ekrandaki yönergeleri izleyin.
3
Eğer bir hata bulunursa,
Kullanma Kılavuzunda
"Sabit Sürücü
Problemleri"ne bakın.
www.dell.com | support.dell.com
Güvenlik Yönergeleri
Bilgisayar sisteminizi olası hasarlardan korumak ve kendi kişisel
güvenliğinizi sağlamak için, aşağıdaki güvenlik kurallarını izleyin.
Bilgisayarınızın İçinde Çalışırken
Bilgisayar kapağını kaldırmadan önce, aşağıdaki adımları belirtilen sıra
ile uygulayın.
BILGI: Çevrimiçi Dell belgelerinizde açıklanan veya size ayrıca belirtilen
durumlar dışında, bilgisayarınızı kendi kendinize tamir etmeyi denemeyin.
Kurulum ve bakım yönergelerini daima yakından izleyin.
DIKKAT: Yanlı ş yerleştirildiği takdirde, yeni bir pilin patlama
tehlikesi vardı r. Pili yalnı zca üretici tarafından önerilen tiple
ya da dengi ile değiştirin. Kullanılmı ş piller konusunda
üreticinin talimatları doğrultusunda davranın.
Bilgisayarınızı ve tüm çevresel aygıtları kapatın.
1
Bilgisayarınızın içinde herhangi birşeye dokunmadan önce,
2
bilgisayarın arkasındaki kart yuvalarının çevresi gibi, boyasız
metal bir yüzeye dokunarak kendiniz topraklayın.
Çalıştığınız sürece, dahili bileşenlere zarar verebilecek statik
elektriği dağıtmak için, bilgisayar kasası üzerinde boyalı olmayan
metal bir yüzeye düzenli aralıklarla dokunun.
80 Kurulum ve Hı zlı Referans Kılavuzu
Page 83

Bilgisayarınızı ve çevresel aygıtları güç kaynaklarından ayırın.
3
Ayrıca, tüm telefon ve telekomünikasyon hatlarını da
bilgisayardan ayırın.
Bunu yapmak, yaralanma veya elektrik çarpması olasılığını azaltır.
Bunlara ek olarak, gerektiğinde aşağıdaki güvenlik önlemlerini
uygulayın:
•Ağ kablosunu ayırırken bilgisayarınızda kısa devreye sebep
olmamak için, kabloyu önce bilgisayarınızın arkasındaki ağ
arabirim denetleyiciden (NIC) çıkartın ve sonra duvardaki ağ
prizinden çıkartın. Bir ağ kablosunu bilgisayarınıza yeniden
takarken kabloyu önce ağ prizine sonra NIC'e takın.
• Bir kabloyu sökerken, kablonun kendisini değil, bağlayıcısını veya
gerilim gevşetme halkasını çekin. Bazı kabloların kilitleme tırnaklı
bağlayıcıları vardır; eğer bu tip bir kabloyu söküyorsanız, kabloyu
ayırmadan önce kilitleme tırnaklarına basın. Bağlayıcıları
sökerken pinlerinin eğilmesini önlemek için, bağlayıcıları dümdüz
girdikleri yönün aksine doğru çekin. Ayrıca, bir kabloyu
bağlamadan önce, her iki bağlayıcının doğru şekilde
hizalandığından emin olun.
•Bileşenleri ve kartları özenle kullanın. Bileşenlere veya kartların
üzerindeki temas noktalarına dokunmayın. Kartları kenarlarından
veya metal montaj desteklerinden tutun. Mikroişlemci
mikrodevresi gibi bileşenleri pinlerinden değil, kenarlarından tutun.
Bilgisayar Sisteminizi Kullanırken
Bilgisayarınızı kullanırken, aşağıdaki güvenlik önlemlerine dikkat edin.
DIKKAT: Bilgisayar sisteminizi herhangi bir kapağı (bilgisayar
kapağı , sürücü kapakları, yuva dolgu kapakları ve ön panel
kapağı dahil olmak üzere) açık olarak çalı ştı rmayın.
• Bilgisayarınıza zarar gelmesini engellemek için, güç kaynağının
üzerindeki voltaj seçim anahtarının, bulunduğunuz yerdeki AC
güce uygun olacak şekilde ayarlandığından emin olun:
– Birçok Güney ve Kuzey Amerika ülkesinde ve Güney Kore,
Tayvan gibi bazı Uzakdoğu ülkelerinde 115 volt (V)/60 hertz
(Hz)
Kurulum ve Hı zlı Referans Kı lavuzu 81
Page 84

– Japonya'nın doğusunda 100 V/50 Hz ve batısında
100 V/60 Hz
NOT: Japonya'da AC güç 100 V olmasına karşın, voltaj seçim
anahtarı 115 V olarak ayarlanmalıdır.
– Avrupa'nın büyük bölümünde, Ortadoğu'da ve Uzakdoğu'da
230 V/50 Hz
Ayrıca monitör ve diğer çevresel aygıtlarınızın da bulunduğunuz
yerdeki AC güce uygun olduğundan emin olun.
NOT: Otomatik seçimli güç kaynakları, voltaj seçim anahtarı
gerektirmez. Güç kaynağınızda bu anahtar olmayabilir.
www.dell.com | support.dell.com
• Elektrik şoklarını önlemek için, bilgisayar ve çevresel aygıtların
güç kablolarını, düzgün şekilde topraklanmış güç kaynaklarına
takın. Bu kablolar, doğru şekilde topraklamayı sağlamak için,
üç-uçlu fişlerle donanımlıdır. Adaptör fişler kullanmaktan veya
kablodaki topraklama ucunu çıkarmaktan kaçının. Eğer bir uzatma
kablosu kullanmanız gerekiyorsa, doğru şekilde topraklanmış bir
fişi olan üç telli bir kablo kullanın.
• Bilgisayarın içinde çalışmaya başlamadan önce, elektrik şoku
tehlikesini veya sistem kartına zarar verme olasılığını önlemek
için, sistemin fişini çekin. Bazı sistem kartı bileşenleri, bilgisayar
AC güce bağlı olduğu sürece elektrik almaya devam ederler.
•Sistem kartına zarar gelmesi olasılığını engellemek için, bir aygıtı
bilgisayardan ayırmadan önce, sistemi prizden çekip 15 saniye
bekleyin.
82 Kurulum ve Hı zlı Referans Kılavuzu
Page 85

BILGI: Sistem kartı üzerindeki yardımcı güç ışık yayan diyodun (LED)
sönmesini gözleyereksistemi gücünün kapalı olduğundan emin olun (bu
LED'in yeri için Kullanma Kılavuzuna bakın).
• Sisteminizi ani voltaj yükselmelerinden veya düşüşlerinden
korumak için, bir aşırı gerilim koruyucu, akım düzenleyici veya
kesintilenemeyen güç kaynağı (UPS) kullanın.
• Bilgisayar sisteminizin kabloları üzerinde duran hiçbir eşya
olmamasına ve kabloların, üzerlerine basılmayacak vaya ayak
takılmayacak şekilde yerleştirilmiş olmasına dikkat edin.
• Bilgisayarınızın üzerine yiyecek veya içecek dökmeyin. Eğer
bilgisayarınız ıslanırsa Kullanma Kılavuzu'nuza bakın.
• Bilgisayarınızın açıklıklarına herhangi bir cisim sokmayın. Bunu
yapmak, iç bileşenlerde kısa devre oluşturarak, yangın çıkmasına
veya elektrik şokuna yol açabilir.
• Bilgisayarınızı kaloriferlerden ve diğer ısı kaynaklarından uzak
tutun. Ayrıca, soğutma çıkışlarının önünü de kapatmayın.
Bilgisayarınızın altına kağıt parçaları koymaktan, bilgisayarı, etrafı
duvarla çevrili bir bölmenin içine veya yatak, sofa ya da kilim
üzerine yerleştirmekten kaçının.
Ergonomik Bilgisayar Alışkanlıkları
DIKKAT: Klavyenin uygunsuz şekilde veya çok uzun sürelerle
kullanımı , sakatlanmalara yol açabilir.
DIKKAT: Uzun sürelerle monitör ekranına bakmak, göz
yorgunluğuna yol açabilir.
Rahatınız ve verimliliğiniz için, bilgisayar sisteminizin kurulumu ve
kullanımı sırasında Kullanma Kılavuzu'ndaki ergonomi kurallarını
dikkate alın.
Düzenleyici Bilgiler
EMI (Elektromanyetik İnterferans) boşlukta yayılan veya güç ya da
sinyal hatları boyunca iletilen herhangi bir sinyal ya da emisyondur ve
bunlar, radyo navigasyonunu veyadiğer güvenlik hizmetlerinin
çalışmasını tehlikeye sokabilir veya lisanslı radyoiletişiminin kalitesini
düşürebilir, iletişimi engelleyebilir ya da kesintiye uğratabilir.
Kurulum ve Hı zlı Referans Kı lavuzu 83
Page 86

Dell bilgisayar sisteminiz, EMI ile ilgili yürürlükte olan düzenlemelere
uygun olarak tasarlanmıştır. Dell tarafından açıkça onaylanmayan
değişiklikler veya modifikasyonlar, kullanıcının cihazı kullanım yetkisini
geçersiz kılabilir.
NOT: Sisteminizle ilgili ilave düzenleyici bilgileri Kullanma Kılavuzu'nuzda
bulabilirsiniz.
www.dell.com | support.dell.com
84 Kurulum ve Hı zlı Referans Kılavuzu
 Loading...