

Dell Latitude 2100 Quick Start Manual
About Warnings
1
2
3
4
5
6
7
8
9
10
11
12
13
14
16
15
WARNING: A WARNING indicates a potential for property damage, personal injury,
or death.
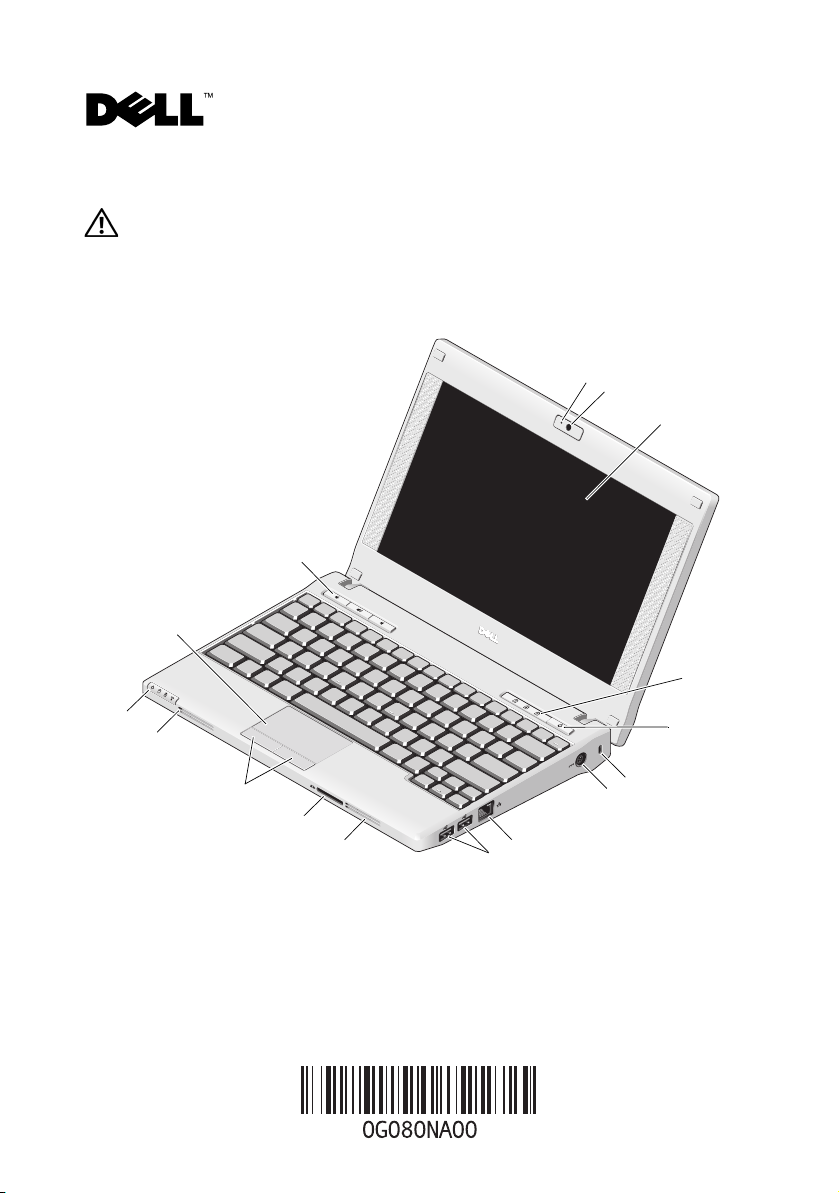
Dell™ Latitude™ 2100 Setup and Features Information
1 camera status light (optional) 2 camera (optional)
3 display (touch screen feature is optional) 4 keyboard status lights (3)
5 power button 6 security cable slot
7 AC adapter connector 8 network connector
March 2009
Model P02T series
9 USB connectors (2) 10 cooling vents
3
4
5
6
7
1
2
11 Secure Digital (SD) memory-card reader 12 touch pad buttons (2)
13 microphone connector 14 device status lights (4)
15 touch pad 16 media controls (3)
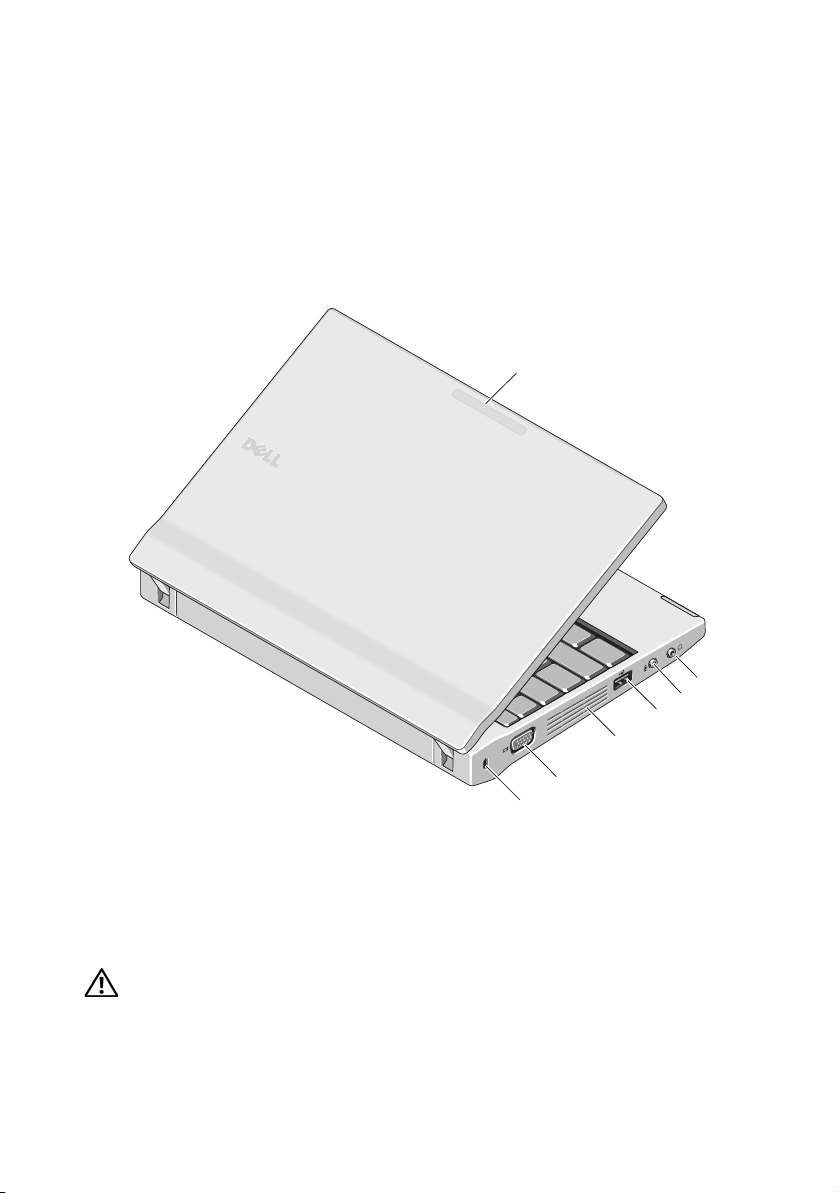
1 usage mode indicator 2 line-in connector (headphones connector)
3 line-out connector (microphone connector) 4 USB connector
5 cooling vents 6 video connector
7 security cable slot
WARNING: Do not block, push objects into, or allow dust to accumulate in the air vents.
Do not store your Dell™ computer in a low-airflow environment, such as a closed briefcase,
while it is running. Restricting the airflow can damage the computer or cause a fire.
The computer turns on the fan when the computer gets hot. Fan noise is normal and does not
indicate a problem with the fan or the computer.
Quick Setup
WARNING: Before you begin any of the procedures in this section, read the safety information
that shipped with your computer. For additional best practices information, see
www.dell.com/regulatory_compliance.
WARNING: The AC adapter works with electrical outlets worldwide. However, power
connectors and power strips vary among countries. Using an incompatible cable or improperly
connecting the cable to the power strip or electrical outlet may cause fire or equipment damage.
CAUTION: When you disconnect the AC adapter cable from the computer, grasp the connector,
not the cable itself, and pull firmly but gently to avoid damaging the cable. When you wrap the
AC adapter cable, ensure that you follow the angle of the connector on the AC adapter to avoid
damaging the cable.
NOTE: Some devices may not be included if you did not order them.
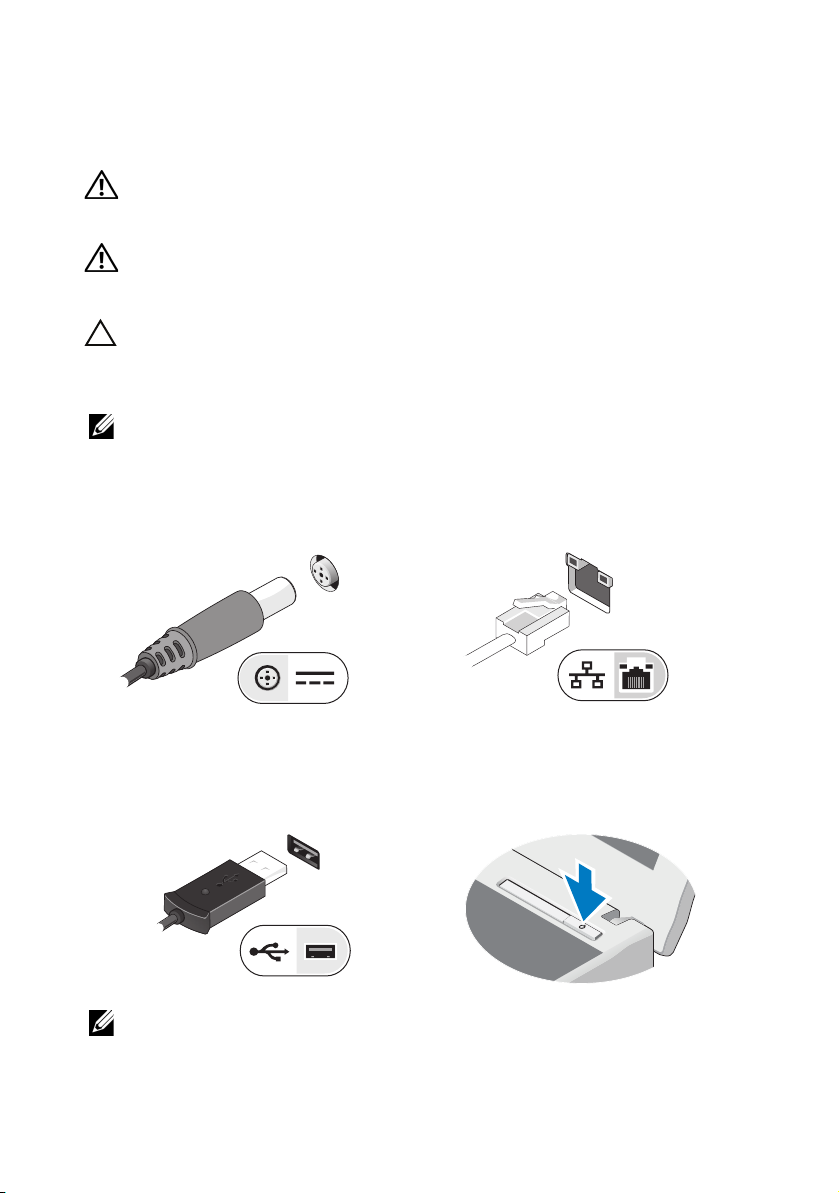
1
Connect the AC adapter to the
AC adapter connector on the portable
computer and to the electrical outlet.
2
Connect the network cable (optional).
3
Connect USB devices, such as a mouse
or keyboard (optional).
4
Open the computer display and
press the power button to turn on
the computer.
NOTE: It is recommended that you turn on and shut down your computer at least once before
you install any cards or connect the computer to a docking device or other external device,
such as a printer.
 Loading...