

Page 1
Dell™ Latitude™ D505 Series
System Information Guide
Guide des Informations Système
Guia de informações do sistema
Guía de información del sistema
Model PP10L
www.dell.com | support.dell.com
Page 2

Page 3

Dell™ Latitude™ D505 Series
System Information Guide
Model PP10L
www.dell.com | support.dell.com
Page 4

Notes, Notices, and Cautions
NOTE: A NOTE indicates important information that helps you make better use of your computer.
NOTICE: A NOTICE indicates either potential damage to hardware or loss of data and tells you how to
avoid the problem.
CAUTION: A CAUTION indicates a potential for property damage, personal injury, or death.
Abbreviations and Acronyms
For a complete list of abbreviations and acronyms, see the
operating system, double-click the
Help and Support Center
, and then click
User’s Guide
icon on your desktop, or click the
User and system guides
If you purchased a Dell™ n Series computer, any references in this document to Microsoft
User’s Guide
).
(depending on your
Start
button, click
®
Windows® operating systems are not applicable.
____________________
Information in this document is subject to change without notice.
© 2003 Dell Inc. All rights reserved.
Reproduction in any manner whatsoever without the written permission of Dell Inc. is strictly forbidden.
Trademarks used in this text: Dell, the DELL logo, TrueMobile, and Latitude are trademarks of Dell Inc.; Intel, Pentium, and
Celeron are registered trademarks of Intel Corporation; Microsoft and Windows are registered trademarks of Microsoft
Corporation; Bluetooth is a trademark owned by Bluetooth SIG, Inc. and is used by Dell Inc. under license.
Other trademarks and trade names may be used in this document to refer to either the entities claiming the marks and names or
their products. Dell Inc. disclaims any proprietary interest in trademarks and trade names other than its own.
Model PP10L
October 2003 P/N R1189 Rev. A01
Page 5

Contents
CAUTION: Safety Instructions . . . . . . . . . . . . . . . . . . . . . . . 5
SAFETY: General
SAFETY: Power
SAFETY: Battery
SAFETY: Air Travel
. . . . . . . . . . . . . . . . . . . . . . . . . . . 5
. . . . . . . . . . . . . . . . . . . . . . . . . . . . 6
. . . . . . . . . . . . . . . . . . . . . . . . . . . . 6
. . . . . . . . . . . . . . . . . . . . . . . . . . . 6
SAFETY: EMC Instructions
. . . . . . . . . . . . . . . . . . . . . . . 7
When Using Your Computer
SAFETY: Ergonomic Computing Habits
. . . . . . . . . . . . . . . . . . . . . . . . 7
. . . . . . . . . . . . . . . . . 8
SAFETY: When Working Inside Your Computer
SAFETY: Protecting Against Electrostatic Discharge
SAFETY: Battery Disposal
Finding Information for Your Computer
Setting Up Your Computer
About Your Computer
Front View
Left View
Right View
Back View
Bottom View
Removing a Battery
. . . . . . . . . . . . . . . . . . . . . . . . . . . . . . 15
. . . . . . . . . . . . . . . . . . . . . . . . . . . . . . . 16
. . . . . . . . . . . . . . . . . . . . . . . . . . . . . . 16
. . . . . . . . . . . . . . . . . . . . . . . . . . . . . . 17
. . . . . . . . . . . . . . . . . . . . . . . . . . . . . 17
. . . . . . . . . . . . . . . . . . . . . . . . . . . . 18
Removing and Installing a Reserve Battery
Installing a Battery
Dell Diagnostics
. . . . . . . . . . . . . . . . . . . . . . . . . . . . 20
. . . . . . . . . . . . . . . . . . . . . . . . . . . . . . 21
When to Use the Dell Diagnostics
Regulatory Notices
. . . . . . . . . . . . . . . . . . . . . . . . . . . . 24
NOM Information (Mexico Only)
. . . . . . . . . . . . . . . . . . . . . . . 9
. . . . . . . . . . . . . . . . . . . 10
. . . . . . . . . . . . . . . . . . . . . . . . . 13
. . . . . . . . . . . . . . . . . . . . . . . . . . . 15
. . . . . . . . . . . . . . . . . 19
. . . . . . . . . . . . . . . . . . . 21
. . . . . . . . . . . . . . . . . . . . 25
. . . . . . . . . . . . . 8
. . . . . . . . . . 8
Contents 3
Page 6

Limited Warranties and Return Policy . . . . . . . . . . . . . . . . . . . 25
Limited Warranty for Dell-Branded Hardware Products (U.S. Only)
"Total Satisfaction" Return Policy (U.S. Only)
. . . . . . . . . . . . . . 28
. . . . 25
Limited Warranty Terms for Dell-Branded Hardware Products
(Canada Only)
"Total Satisfaction" Return Policy (Canada Only)
Dell Software and Peripherals (Canada Only)
. . . . . . . . . . . . . . . . . . . . . . . . . . . . . 29
. . . . . . . . . . . . . 32
. . . . . . . . . . . . . . 32
1-Year End-User Manufacturer Guarantee (Latin America and the
Caribbean Only)
®
Warranty Statement for Pentium® and Celeron® Processors
Intel
Only (U.S. and Canada Only)
. . . . . . . . . . . . . . . . . . . . . . . . . . . . 33
. . . . . . . . . . . . . . . . . . . . . . 35
4 Contents
Page 7

CAUTION: Safety Instructions
Use the following safety guidelines to help ensure your own personal safety and to help protect your computer and
working environment from potential damage.
SAFETY: General
• Do not attempt to service the computer yourself unless you are a trained service technician. Always follow
installation instructions closely.
• If you use an extension power cable with your AC adapter, ensure that the total ampere rating of the products
plugged in to the extension power cable does not exceed the ampere rating of the extension cable.
• Do not push objects into air vents or openings of your computer. Doing so can cause fire or electric shock by
shorting out interior components.
• Do not store your computer in a low-airflow environment, such as a carrying case or a closed briefcase, while the
computer is turned on. Restricting airflow can damage the computer or cause a fire.
• Keep your computer away from radiators and heat sources. Also, do not block cooling vents. Avoid placing loose
papers underneath your computer; do not place your computer in a closed-in wall unit or on a bed, sofa, or rug.
• Place the AC adapter in a ventilated area, such as a desk top or on the floor, when you use it to run the computer
or to charge the battery. Do not cover the AC adapter with papers or other items that will reduce cooling; also, do
not use the AC adapter inside a carrying case.
• The AC adapter may become hot during normal operation of your computer. Use care when handling the adapter
during or immediately after operation.
• Do not allow your portable computer to operate with the base resting directly on exposed skin for extended
periods of time. The surface temperature of the base will rise during normal operation (particularly when AC
power is present). Allowing sustained contact with exposed skin can cause discomfort or, eventually, a burn.
• Do not use your computer in a wet environment, for example, near a bath tub, sink, or swimming pool or in a wet
basement.
• If your computer includes an integrated or optional (PC Card) modem, disconnect the modem cable if an
electrical storm is approaching to avoid the remote risk of electric shock from lightning via the telephone line.
• To help avoid the potential hazard of electric shock, do not connect or disconnect any cables or perform
maintenance or reconfiguration of this product during an electrical storm. Do not use your computer during an
electrical storm unless all cables have been disconnected and the computer is operating on battery power.
• If your computer includes a modem, the cable used with the modem should be manufactured with a minimum
wire size of 26 American wire gauge (AWG) and an FCC-compliant RJ-11 modular plug.
• Before you open the memory module cover or the Mini PCI card cover on the bottom of your computer,
disconnect all cables from their electrical outlets and disconnect the telephone cable.
• If your computer has both a modem RJ-11 connector and a network RJ-45 connector, which look alike, make sure
you insert the telephone cable into the RJ-11 connector, not the RJ-45 connector.
• PC Cards may become very warm during normal operation. Use care when removing PC Cards after their
continuous operation.
• Before you clean your computer, disconnect the computer from the electrical outlet. Clean your computer with a
soft cloth dampened with water. Do not use liquid or aerosol cleaners, which may contain flammable substances.
System Information Guide 5
Page 8

SAFETY: Power
• Use only the Dell-provided AC adapter approved for use with this computer. Use of another AC adapter may
cause a fire or explosion.
• Before you connect the computer to an electrical outlet, check the AC adapter voltage rating to ensure that the
required voltage and frequency match the available power source.
• To remove the computer from all power sources, turn the computer off, disconnect the AC adapter from the
electrical outlet, and remove any battery installed in the battery bay or module bay.
• To help prevent electric shock, plug the AC adapter and device power cables into properly grounded power
sources. These power cables may be equipped with 3-prong plugs to provide an earth grounding connection. Do
not use adapter plugs or remove the grounding prong from the power cable plug. If you use a power extension
cable, use the appropriate type, 2-prong or 3-prong, to mate with the AC adapter power cable.
• Be sure that nothing rests on your AC adapter’s power cable and that the cable is not located where it can be
www.dell.com | support.dell.com
tripped over or stepped on.
• If you are using a multiple-outlet power strip, use caution when plugging the AC adapter’s power cable into the
power strip. Some power strips may allow you to insert the plug incorrectly. Incorrect insertion of the power plug
could result in permanent damage to your computer, as well as risk of electric shock and/or fire. Ensure that the
ground prong of the power plug is inserted into the mating ground contact of the power strip.
SAFETY: Battery
• Use only Dell™ battery modules that are approved for use with this computer. Use of other types may increase the
risk of fire or explosion.
• Do not carry a battery pack in your pocket, purse, or other container where metal objects (such as car keys or
paper clips) could short-circuit the battery terminals. The resulting excessive current flow can cause extremely
high temperatures and may result in damage to the battery pack or cause fire or burns.
• The battery poses a burn hazard if you handle it improperly. Do not disassemble it. Handle a damaged or leaking
battery pack with extreme care. If the battery is damaged, electrolyte may leak from the cells and may cause
personal injury.
• Keep the battery away from children.
• Do not store or leave your computer or battery pack near a heat source such as a radiator, fireplace, stove, electric
heater, or other heat-generating appliance or otherwise expose it to temperatures in excess of 60ºC (140ºF).
When heated to excessive temperatures, battery cells could explode or vent, posing a risk of fire.
• Do not dispose of your computer’s battery in a fire or with normal household waste. Battery cells may explode.
Discard a used battery according to the manufacturer’s instructions or contact your local waste disposal agency
for disposal instructions. Dispose of a spent or damaged battery promptly.
SAFETY: Air Travel
• Certain Federal Aviation Administration regulations and/or airline-specific restrictions may apply to the operation
of your Dell computer while you are on board an aircraft. For example, such regulations/restrictions may prohibit
the use of any personal electronic device (PED) that has the capacity for intentional transmission of radio
frequency or other electromagnetic signals while on an aircraft.
– In order to best comply with all such restrictions, if your Dell portable computer is equipped with Dell
TrueMobile™ or some other wireless communication device, please disable this device before you board the
aircraft and follow all instructions provided by airline personnel with regard to such device.
6 System Information Guide
Page 9

– Additionally, the use of any PED, such as a portable computer, may be prohibited in aircraft during certain
critical phases of flight, for example, takeoff and landing. Some airlines may further define the critical flight
phase as any time the aircraft is below 3050 m (10,000 ft). Please follow the airline’s specific instructions as
to when the use of a PED is allowed.
SAFETY: EMC Instructions
Use shielded signal cables to ensure that you maintain the appropriate electromagnetic compatibility (EMC)
classification for the intended environment. For parallel printers, a cable is available from Dell. If you prefer, you can
order a cable from Dell at its worldwide website at
Static electricity can harm electronic components inside your computer. To prevent static damage, discharge static
electricity from your body before you touch any of your computer’s electronic components, such as a memory module.
You can do so by touching an unpainted metal surface on the computer’s input/output panel.
WARNING:
you to lead, a chemical known to the State of California to cause birth defects or other reproductive harm.
hands after handling the cord
Handling the cord on this product, or cords associated with accessories sold with this product, will expose
.
www.dell.com
.
Wash your
When Using Your Computer
Observe the following safe-handling guidelines to prevent damage to your computer:
• When setting up the computer for work, place it on a level surface.
• When traveling, do not check the computer as baggage. You can put your computer through an X-ray security
machine, but never put your computer through a metal detector. If you have the computer checked by hand, be
sure to have a charged battery available in case you are asked to turn on the computer.
• When traveling with the hard drive removed from the computer, wrap the drive in a nonconducting material,
such as cloth or paper. If you have the drive checked by hand, be ready to install the drive in the computer. You
can put the hard drive through an X-ray security machine, but never put the drive through a metal detector.
• When traveling, do not place the computer in overhead storage compartments where it could slide around. Do
not drop your computer or subject it to other mechanical shocks.
• Protect your computer, battery, and hard drive from environmental hazards such as dirt, dust, food, liquids,
temperature extremes, and overexposure to sunlight.
• When you move your computer between environments with very different temperature and/or humidity ranges,
condensation may form on or within the computer. To avoid damaging the computer, allow sufficient time for the
moisture to evaporate before using the computer.
NOTICE: When taking the computer from low-temperature conditions into a warmer environment or from high-
temperature conditions into a cooler environment, allow the computer to acclimate to room temperature before
turning on power.
• When you disconnect a cable, pull on its connector or on its strain-relief loop, not on the cable itself. As you pull
out the connector, keep it evenly aligned to avoid bending any connector pins. Also, before you connect a cable
make sure both connectors are correctly oriented and aligned.
• Handle components with care. Hold a component such as a memory module by its edges, not its pins.
• When preparing to remove a memory module from the system board or disconnect a device from the computer,
turn off the computer, disconnect the AC adapter cable, remove any battery installed in the battery bay or module
bay, and then wait 5 seconds before proceeding to help avoid possible damage to the system board.
System Information Guide 7
Page 10
• Clean the display with a soft, clean cloth and water. Apply the water to the cloth; then stroke the cloth across the
display in one direction, moving from the top of the display to the bottom. Remove moisture from the display
quickly and keep the display dry. Long-term exposure to moisture can damage the display. Do not use a
commercial window cleaner to clean your display.
• If your computer gets wet or is damaged, follow the procedures described in "Solving Problems" in your User’s
Guide. If, after following these procedures, you confirm that your computer is not operating properly, contact Dell
(see "Getting Help" in your User’s Guide for the appropriate contact information).
SAFETY: Ergonomic Computing Habits
CAUTION: Improper or prolonged keyboard use may result in injury.
CAUTION: Viewing the display or external monitor screen for extended periods of time may result in eye strain.
www.dell.com | support.dell.com
For comfort and efficiency, observe the ergonomic guidelines in the "Appendix" of your online User’s Guide when setting
up and using your computer.
This portable computer is not designed for continuous operation as office equipment. For extended use in an office, it is
recommended that you connect an external keyboard.
SAFETY: When Working Inside Your Computer
Before removing or installing memory modules, Mini PCI cards, or modems, perform the following steps in the
sequence indicated.
NOTICE: The only time you should ever access the inside of your computer is when you are installing memory
modules or a Mini PCI card, modem, Bluetooth™ card, or reserve battery.
NOTICE: Wait 5 seconds after turning off the computer before disconnecting a device or removing a memory module,
Mini PCI card, modem, Bluetooth card, or reserve battery to help prevent possible damage to the system board.
1
Shut down your computer and turn off any attached devices.
2
Disconnect your computer and devices from electrical outlets to reduce the potential for personal injury or shock.
Also, disconnect any telephone or telecommunication lines from the computer.
3
Remove the main battery from the battery bay and, if necessary, the second battery from the module bay.
4
Ground yourself by touching any unpainted metal surface on the back of the computer.
5
While you work, periodically touch the unpainted metal surface to dissipate any static electricity that might harm
internal components.
SAFETY: Protecting Against Electrostatic Discharge
Static electricity can harm electronic components inside your computer. To prevent static damage, discharge static
electricity from your body before you touch any of your computer’s electronic components, such as a memory module.
You can do so by touching any unpainted metal surface on the back of the computer.
As you continue to work inside the computer, periodically touch any unpainted metal surface on the back of the
computer to remove any static charge your body may have accumulated.
You can also take the following steps to prevent damage from electrostatic discharge (ESD):
• When unpacking a static-sensitive component from its shipping carton, do not remove the component from the
antistatic packing material until you are ready to install the component. Just before unwrapping the antistatic
packaging, be sure to discharge static electricity from your body.
8 System Information Guide
Page 11

• When transporting a sensitive component, first place it in an antistatic container or packaging.
• Handle all sensitive components in a static-safe area. If possible, use antistatic floor pads and workbench pads.
SAFETY: Battery Disposal
Your computer uses a lithium-ion battery and a lithium coin-cell battery. For instructions about replacing
the lithium-ion battery in your computer, see "Removing a Battery" on page 18. The lithium coin-cell
battery is a long-life battery, and it is very possible that you will never need to replace it. However, should
you need to replace it, see "Removing and Installing a Reserve Battery" on page 19.
Do not dispose of the battery along with household waste. Contact your local waste disposal agency for the
address of the nearest battery deposit site.
System Information Guide 9
Page 12
Finding Information for Your Computer
What are you looking for? Find It Here
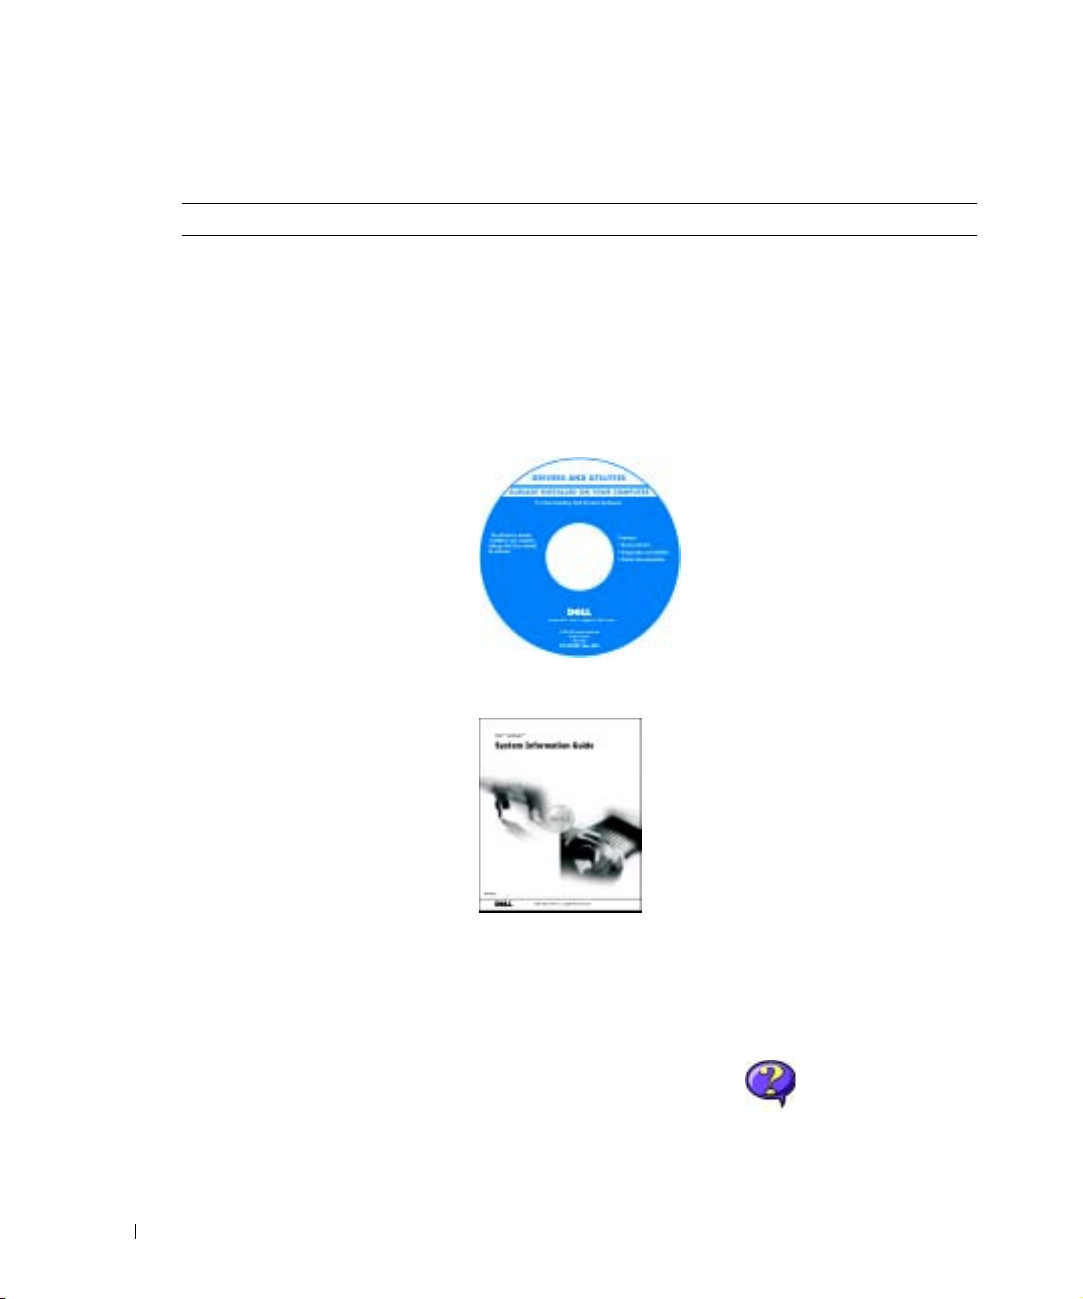
• A diagnostic program for my
computer
• Drivers for my computer
• My computer documentation
• My device documentation
www.dell.com | support.dell.com
Drivers and Utilities CD (also known as the
ResourceCD)
Documentation and drivers are already installed on your computer.
You can use the CD to reinstall drivers, run the Dell Diagnostics, or
access your documentation.
Readme files may be included on your CD to provide last-minute
updates about technical changes to your computer or advanced
technical-reference material for technicians or experienced users.
• How to set up my computer
• Warranty information
• Safety instructions
• How to remove and replace parts
• Technical specifications
• How to configure system settings
• How to troubleshoot and solve
problems
10 System Information Guide
Dell™ System Information Guide
NOTE: This document is available as a PDF at support.dell.com.
User’s Guide
Microsoft® Windows® XP Help and Support Center
1
Click the
2
Click
Windows 2000
Double-click the
Start
button and click
User’s and system guides
User’s Guides
icon on your desktop.
Help and Support.
and click
User’s guides
.
Page 13
What are you looking for? Find It Here
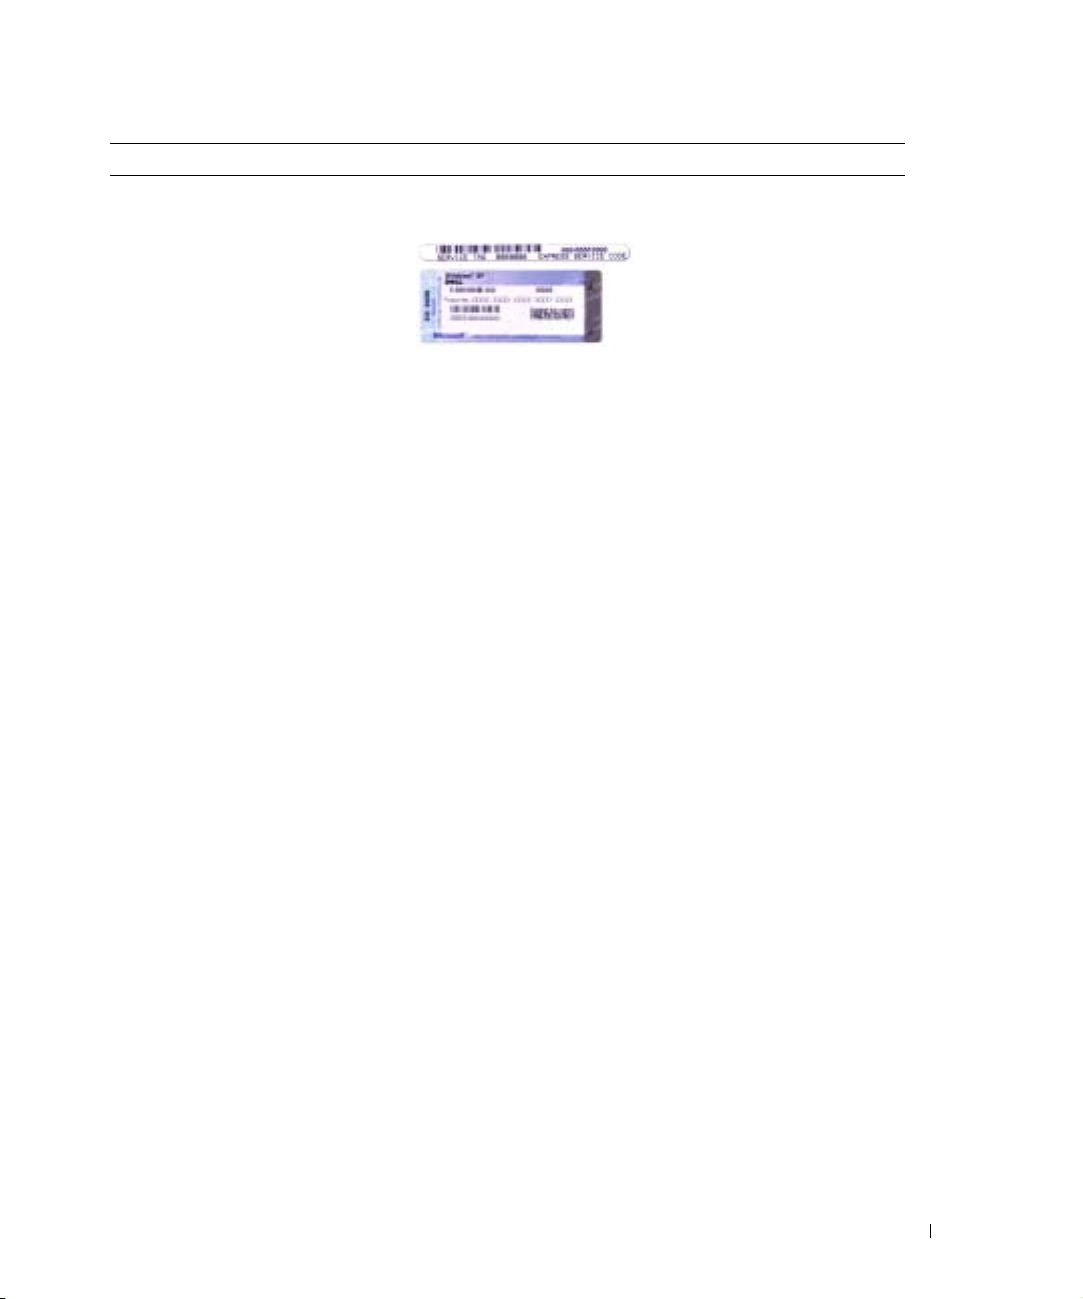
• Service Tag and Express Service
Code
Service Tag and Microsoft Windows License
These labels are located on your computer.
• Microsoft Windows License Label
contacting technical support. The Express Service Code is not
available in all countries.
• Use the number on the Microsoft Windows License Label if you
reinstall your operating system.
• Latest drivers for my computer
• Answers to technical service and
support questions
• Online discussions with other users
and technical support
• Documentation for my computer
Dell Support Website — support.dell.com
The Dell Support website provides several online tools, including:
• Solutions — Troubleshooting hints and tips, articles from
technicians, and online courses
• Community — Online discussion with other Dell customers
• Upgrades — Upgrade information for components, such as
memory, the hard drive, and the operating system
• Customer Care — Contact information, order status, warranty,
and repair information
• Downloads — Drivers, patches, and software updates
• Reference — Computer documentation, product specifications,
and white papers
• Service call status and support
history
• Top technical issues for my
computer
• Frequently asked questions
Dell Premier Support Website —
premiersupport.dell.com
The Dell Premier Support website is customized for corporate,
government, and education customers. This website may not be
available in all regions.
• File downloads
• Details on my computer
configuration
• Service contract for my computer
• How to use Windows XP
• Documentation for my computer
• Documentation for devices (such as
a modem)
Windows Help and Support Center
1
Click the
2
Type a word or phrase that describes your problem and click the
arrow icon.
3
Click the topic that describes your problem.
4
Follow the instructions on the screen.
Start
button and click
•Use the Service Tag to identify
your computer when you use
support.dell.com
or contact
technical support.
•Enter the Express Service Code
to direct your call when
Help and Support
.
System Information Guide 11
Page 14

What are you looking for? Find It Here
• How to reinstall my operating
system
www.dell.com | support.dell.com
Operating System CD
The operating system is already installed on your computer. To
reinstall your operating system, use the
User’s Guide
your
After you reinstall your operating system, use the
Utilities
CD to reinstall drivers for the devices that came with your
computer.
for operating-system reinstallation instructions.
Your operating system product key
label is located on your computer.
Operating System
CD. See
Drivers and
12 System Information Guide
Page 15
Setting Up Your Computer
CAUTION: Before you begin any of the procedures in this section, follow the safety instructions at the
beginning of this document.
1
Unpack the accessories box.
2
Set aside the contents of the accessories box, which you will need to complete the setup of
your computer.
The accessories box also contains user documentation and any software or additional
hardware (such as PC Cards, drives, or batteries) that you have ordered.
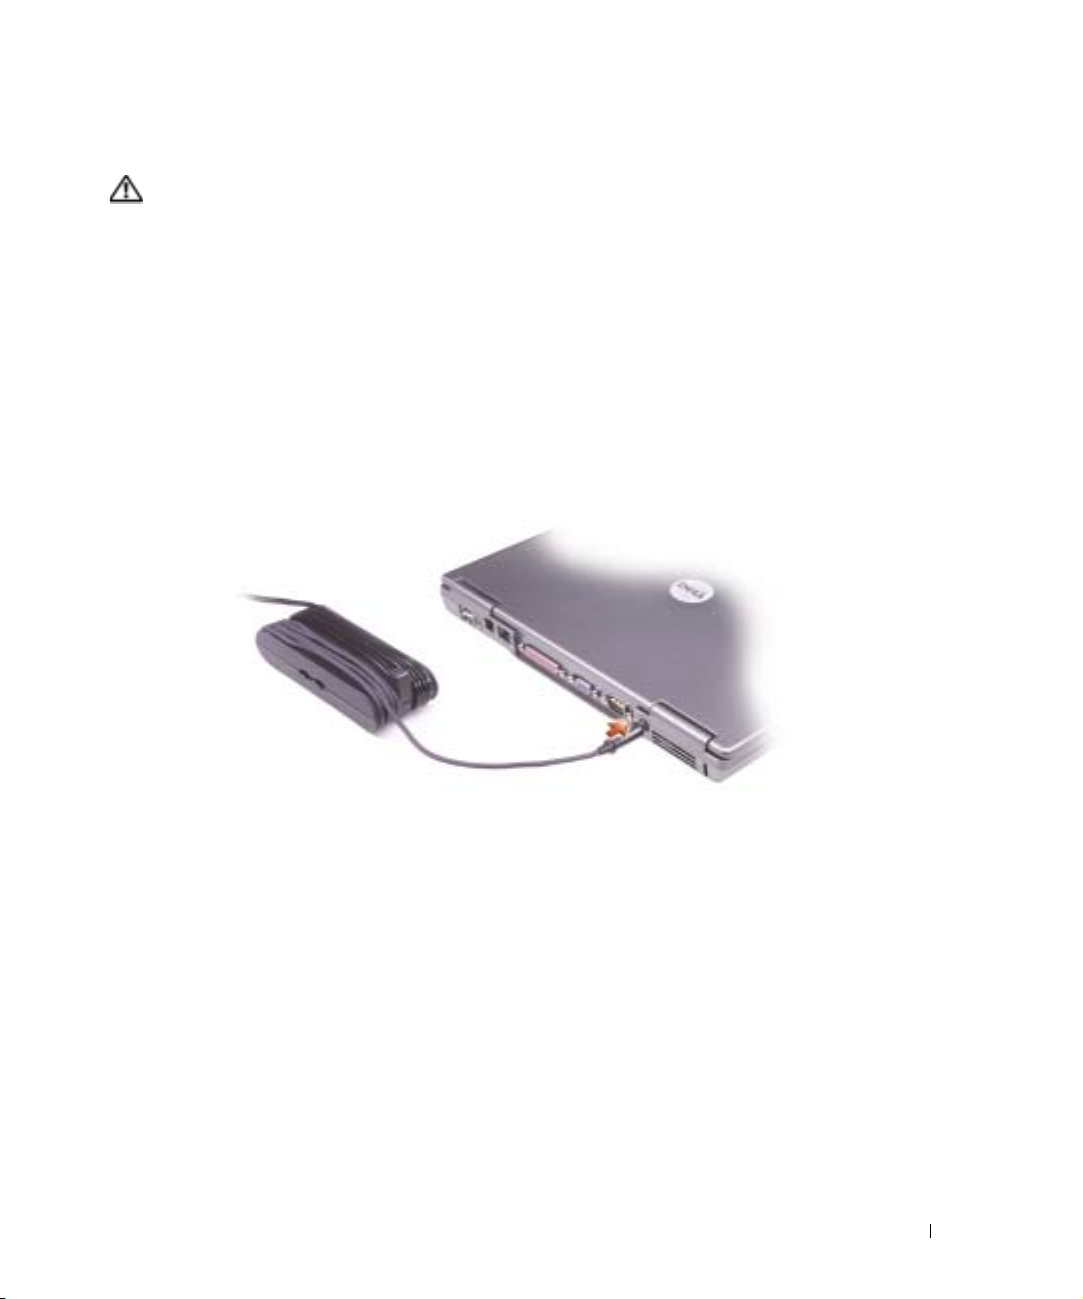
3
Connect the AC adapter to the AC adapter connector on the computer and to the electrical
outlet.
System Information Guide 13
Page 16
4
Open the computer display and press the power button to turn on the computer.
NOTE: Do not connect the computer to the docking device until the computer has been turned on and
shut down at least once.
www.dell.com | support.dell.com
power button
14 System Information Guide
Page 17
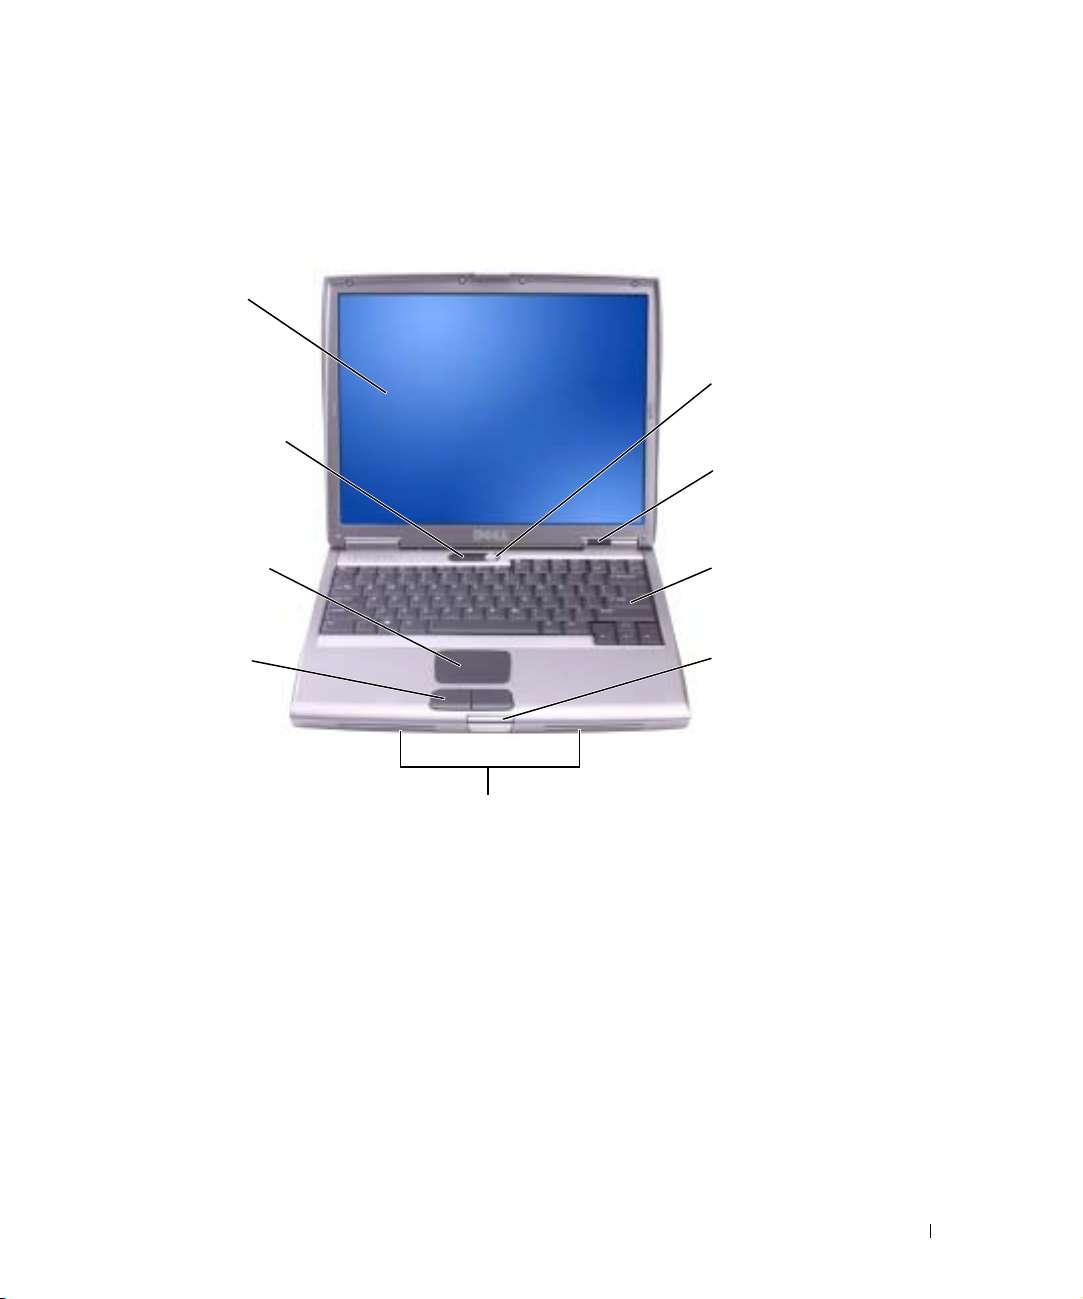
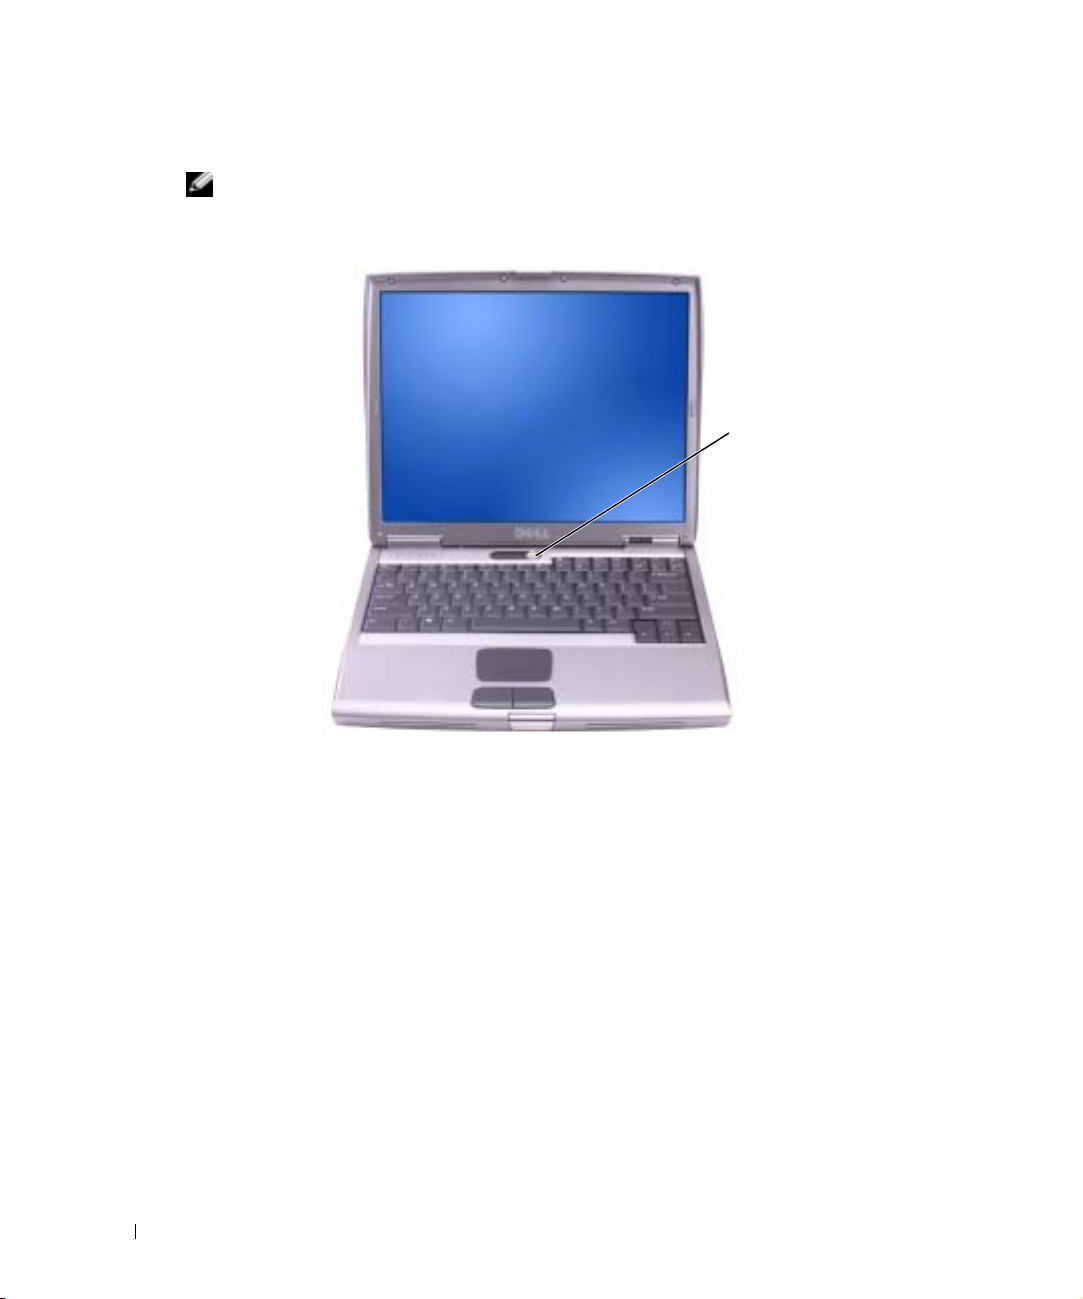
About Your Computer
Front View
display
keyboard
status lights
power button
device status
lights
touch pad
touch pad
buttons
keyboard
display latch
speakers
System Information Guide 15
Page 18
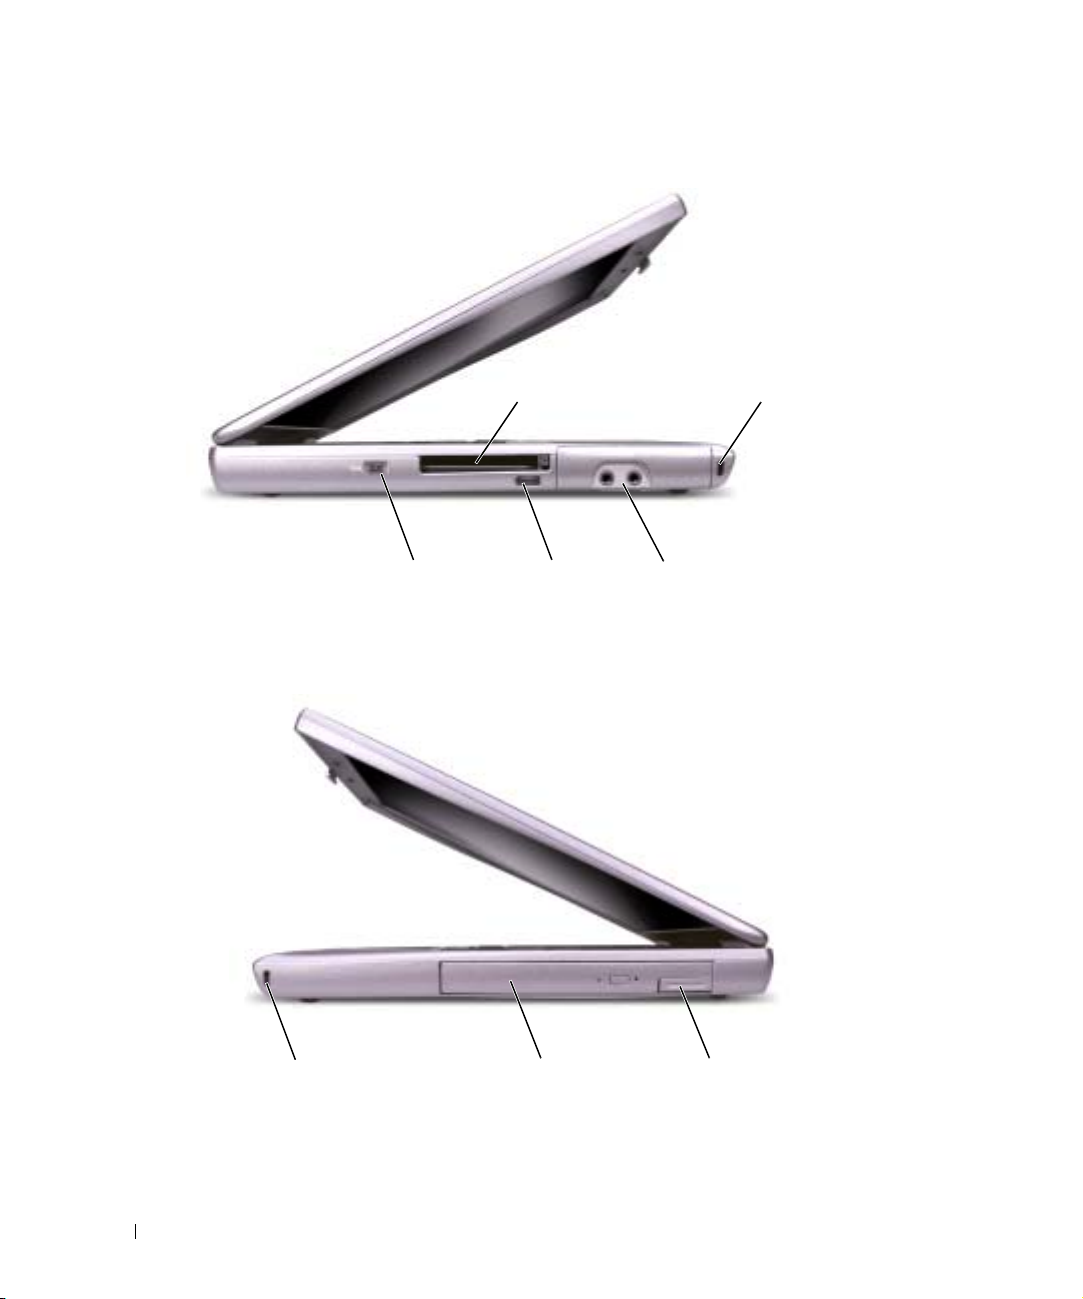
Left View
www.dell.com | support.dell.com
Right View
IEEE 1394
connector
PC Card slot
infrared
sensor
security
cable slot
audio
connectors (2)
security cable slot module bay device latch
16 System Information Guide
release
Page 19

Back View
CAUTION: Do not block, push objects into, or allow dust to accumulate in the air vents. Do not store
your computer in a low-airflow environment, such as a closed briefcase, while it is running. Restricting
the airflow can damage the computer or cause a fire.
parallel connector
network connector (RJ-45)
modem connector (RJ-11) (optional)
video connector
serial connector
USB connectors (2)
Bottom View
hard drive
Mini PCI
card cover
S-video TV-out connector
memory module cover
fan
AC adapter connector air vents
battery-bay latch release
battery charge gauge
battery
docking device slot
System Information Guide 17
Page 20
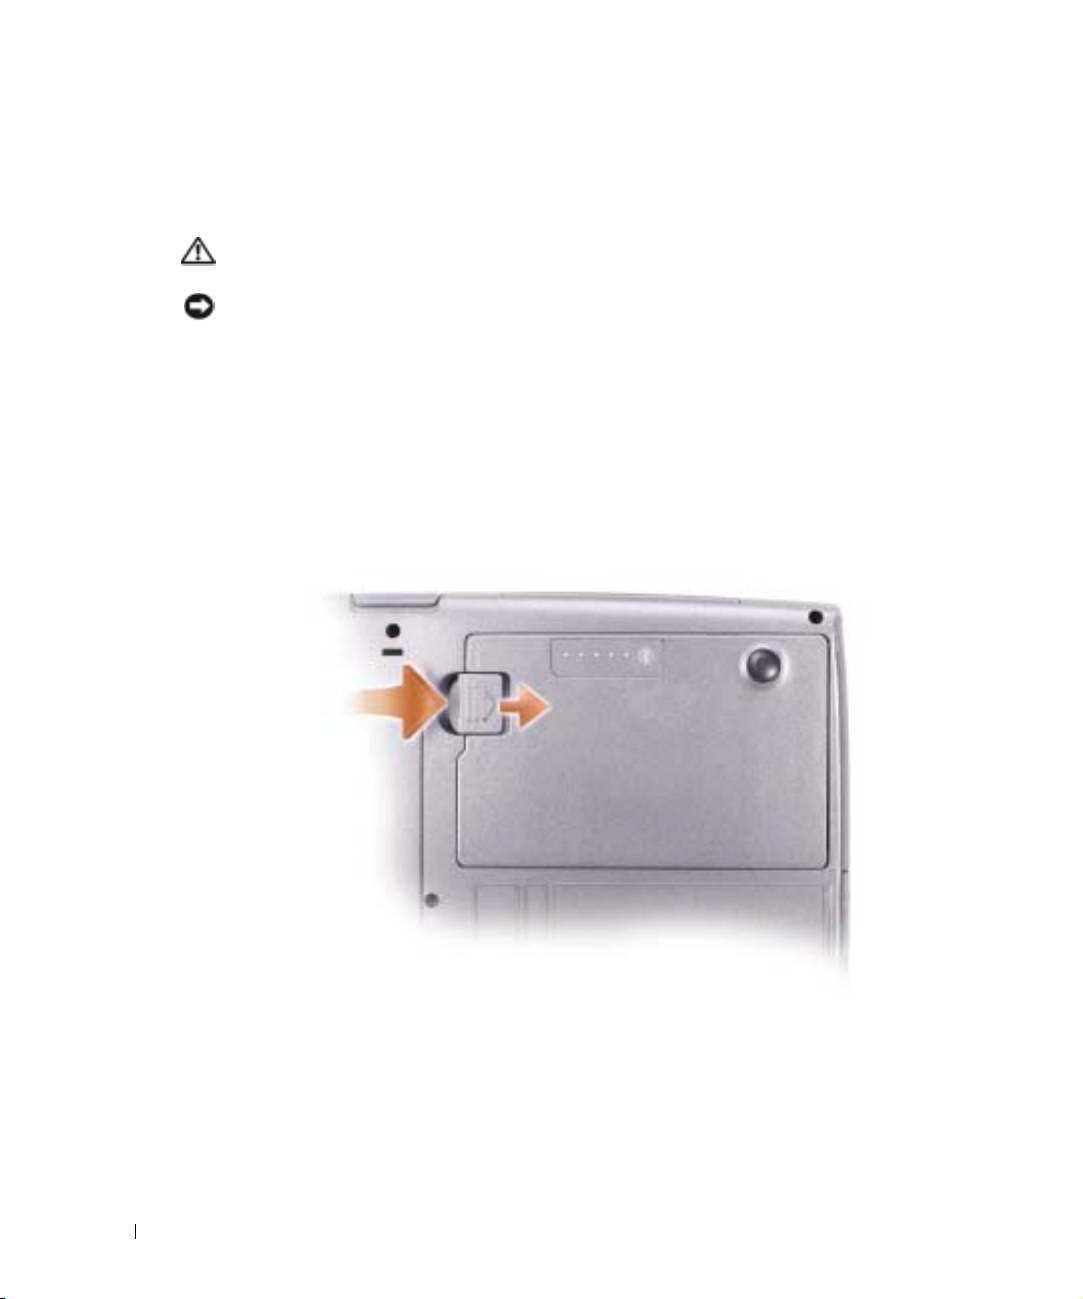
Removing a Battery
For more information about removing the second battery, see "Using the Module Bay" in your
online
User’s Guide.
CAUTION: Before performing these procedures, turn off the computer, disconnect it from the electrical
outlet, and disconnect the modem from the telephone wall jack.
NOTICE: If you choose to replace the battery with the computer in standby mode, you have up to
90 seconds to complete the battery replacement before the computer shuts down and loses any unsaved
data.
Ensure that the computer is turned off, disconnected from an electrical outlet, and
1
disconnected from the telephone wall jack.
www.dell.com | support.dell.com
2
If the computer is connected to a docking device (docked), undock it. See the documentation
that came with your docking device for instructions.
3
Slide and hold the battery-bay latch release on the bottom of the computer, and then remove
the battery from the bay.
18 System Information Guide
Page 21
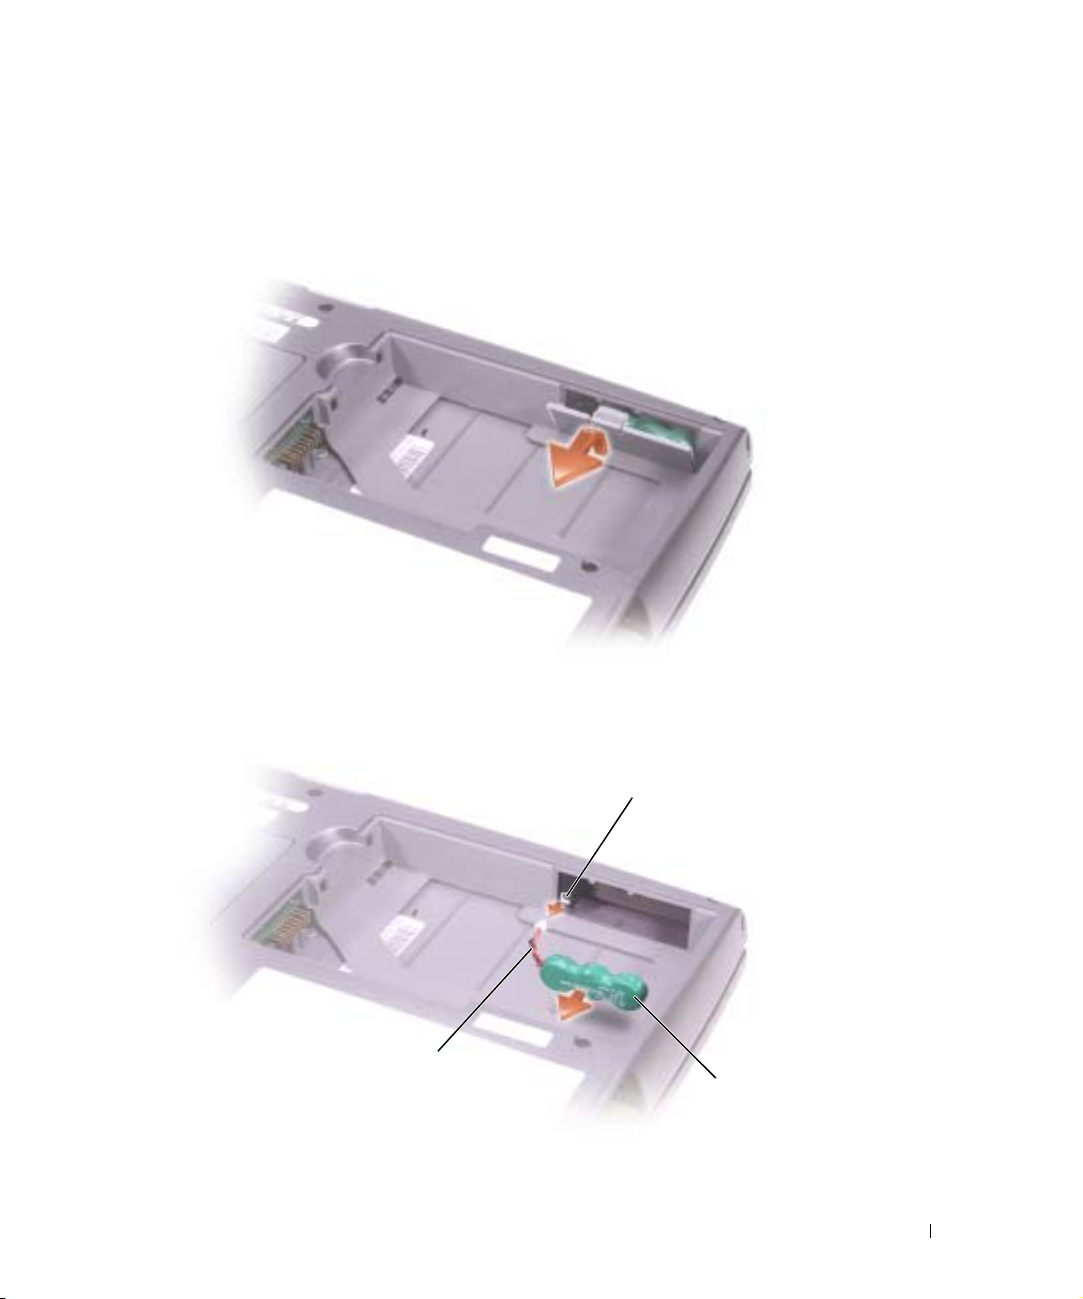
Removing and Installing a Reserve Battery
1
Remove the battery.
2
Remove the reserve battery cover.
3
Slide the reserve battery toward the connector, and pull the battery out of its compartment.
4
Disconnect the reserve battery cable from the connector.
connector
reserve battery cable
reserve battery
5
Connect the reserve battery cable to the connector in the reserve battery compartment.
System Information Guide 19
Page 22
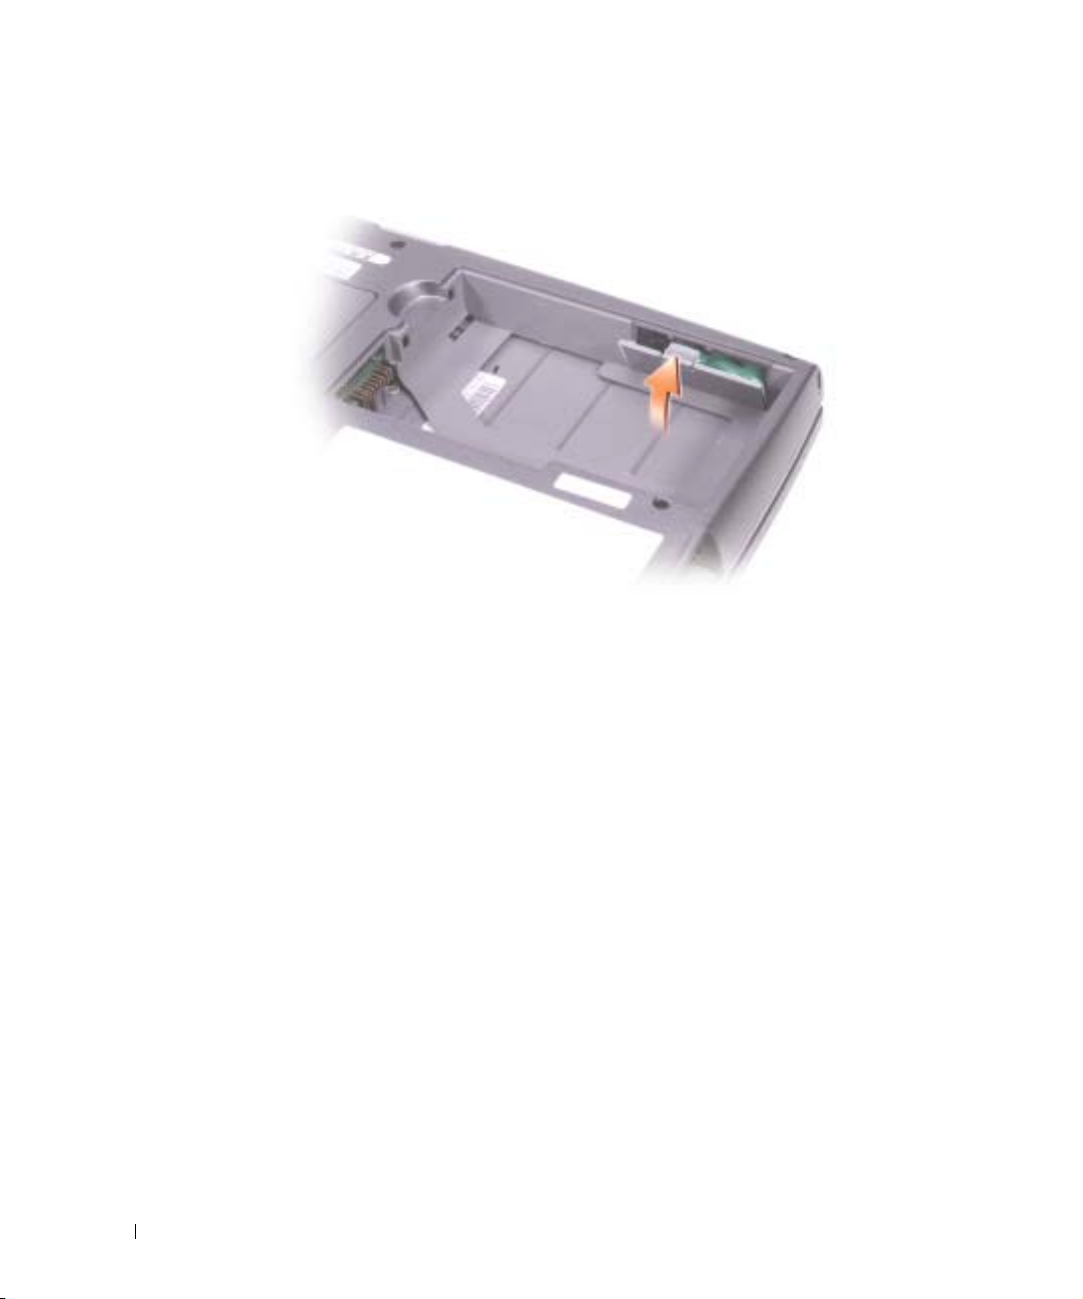
6
Place the reserve battery in the compartment, and replace the reserve battery cover.
www.dell.com | support.dell.com
Installing a Battery
Slide the battery into the bay until the latch release clicks.
For more information about installing the second battery, see "Using the Module Bay" in your
online
User’s Guide.
20 System Information Guide
Page 23

Dell Diagnostics
CAUTION: Before you begin any of the procedures in this section, follow the safety instructions at the
beginning of this document.
When to Use the Dell Diagnostics
If you experience a problem with your computer, perform the checks in "Solving Problems" in your
User’s Guide
It is recommended that you print these procedures before you begin.
NOTICE: The Dell Diagnostics works only on Dell™ computers.
The Dell Diagnostics is located on a hidden diagnostic utility partition on your hard drive.
NOTE: If your computer cannot display a screen image, contact Dell (see "Getting Help" in your User's
Guide for the appropriate contact information).
Shut down the computer.
1
2
If the computer is connected to a docking device (docked), undock it. See the documentation
that came with your docking device for instructions.
3
Connect the computer to an electrical outlet.
4
Turn on the computer. When the DELL™ logo appears, press <F12> immediately.
NOTE: If you cannot see anything on your display, press and hold <Fn> and the power button for about
5 seconds to start the Dell Diagnostics. The computer automatically runs the Pre-boot System
Assessment.
and run the Dell Diagnostics before you contact Dell for technical assistance.
NOTE: If you see a message stating that no diagnostics utility partition has been found, run the Dell
Diagnostics from your Drivers and Utilities CD.
If you wait too long and the Microsoft® Windows® logo appears, continue to wait until you
see the Windows desktop. Then shut down your computer through the
Start
menu and try
again.
5
When the boot device list appears, highlight
Diagnostics
and press <Enter>.
The computer runs the Pre-boot System Assessment, a series of initial tests of your system
board, keyboard, hard drive, and display.
• During the assessment, answer any questions that appear.
• If a failure is detected, the computer stops and beeps. To stop the assessment and restart
the computer, press <n>; to continue to the next test, press <y>; to retest the
component that failed, press <r>.
System Information Guide 21
Page 24

• If failures are detected during the Pre-boot System Assessment, write down the error
code(s) and contact Dell (see "Getting Help" in your
contact information) before continuing on to the Dell Diagnostics.
If the Pre-boot System Assessment completes successfully, you receive the message
Dell Diagnostic Utility Partition. Press any key to continue
6
Press any key to start the Dell Diagnostics from the diagnostics utility partition on your hard
drive.
7
When the Dell Diagnostics
Dell Diagnostics Main Menu
1
www.dell.com | support.dell.com
After the Dell Diagnostics loads and the
option you want.
Option Function
Express Test Performs a quick test of devices. This test typically takes 10
Extended Test Performs a thorough check of devices. This test typically
Custom Test Tests a specific device. You can customize the tests you
Symptom Tree Lists the most common symptoms encountered and allows
User's Guide
Main Menu
to 20 minutes and requires no interaction on your part.
Express Test
Run
the problem quickly.
takes an hour or more and requires you to answer questions
periodically.
want to run.
you to select a test based on the symptom of the problem
you are having.
appears, select the test you want to run.
Main Menu
first to increase the possibility of tracing
screen appears, click the button for the
for the appropriate
Booting
.
2
If a problem is encountered during a test, a message appears with an error code and a
description of the problem. Write down the error code and problem description and follow
the instructions on the screen.
If you cannot resolve the error condition, contact Dell (see "Getting Help" in your
Guide
for the appropriate contact information).
NOTE: The Service Tag for your computer is located at the top of each test screen. If you contact Dell,
technical support will ask for your Service Tag.
22 System Information Guide
User's
Page 25

3
If you run a test from the
Custom Test
or
Symptom Tree
option, click the applicable tab
described in the following table for more information.
Tab Function
Results Displays the results of the test and any error conditions
encountered.
Errors Displays error conditions encountered, error codes, and the
problem description.
Help Describes the test and may indicate requirements for
running the test.
Configuration Displays your hardware configuration for the selected
device.
The Dell Diagnostics obtains configuration information
for all devices from system setup, memory, and various
internal tests, and it displays the information in the device
list in the left pane of the screen. The device list may not
display the names of all the components installed on your
computer or all devices attached to your computer.
Parameters Allows you to customize the test by changing the test
settings.
4
When the tests are complete, close the test screen to return to the
the Dell Diagnostics and restart the computer, close the
Main Menu
Main Menu
screen.
screen. To exit
System Information Guide 23
Page 26

Regulatory Notices
Electromagnetic Interference (EMI) is any signal or emission, radiated in free space or conducted along power or signal
leads, that endangers the functioning of a radio navigation or other safety service or seriously degrades, obstructs, or
repeatedly interrupts a licensed radio communications service. Radio communications services include but are not
limited to AM/FM commercial broadcast, television, cellular services, radar, air-traffic control, pager, and Personal
Communication Services (PCS). These licensed services, along with unintentional radiators such as digital devices,
including computers, contribute to the electromagnetic environment.
Electromagnetic Compatibility (EMC) is the ability of items of electronic equipment to function properly together in
the electronic environment. While this computer has been designed and determined to be compliant with regulatory
agency limits for EMI, there is no guarantee that interference will not occur in a particular installation. If this
equipment does cause interference with radio communications services, which can be determined by turning the
equipment off and on, you are encouraged to try to correct the interference by one or more of the following measures:
www.dell.com | support.dell.com
• Reorient the receiving antenna.
• Relocate the computer with respect to the receiver.
• Move the computer away from the receiver.
• Plug the computer into a different outlet so that the computer and the receiver are on different branch circuits.
If necessary, consult a Dell Technical Support representative or an experienced radio/television technician for additional
suggestions.
For additional regulatory information, see the online User's Guide that accompanied your computer. To access the User's
Guide, see page 10.
24 System Information Guide
Page 27

NOM Information (Mexico Only)
The following information is provided on the device(s) described in this document in compliance
with the requirements of the official Mexican standards (NOM):
Exporter: Dell Inc.
One Dell Way
Round Rock, TX 78682
Importer: Dell Computer de México, S.A. de C.V.
Paseo de la Reforma 2620 - 11° Piso
Col. Lomas Altas
11950 México, D.F.
Ship to: Dell Computer de México, S.A. de C.V.
al Cuidado de Kuehne & Nagel de México S. de R.L.
Avenida Soles No. 55
Col. Peñon de los Baños
15520 México, D.F.
Model number: PP10L
Supply voltage: 100–240 VAC
Frequency: 50–60 Hz
Current Consumption: 1.5 A
Output voltage: 19.5 VDC
Output current: 4.62 A
Limited Warranties and Return Policy
Dell-branded hardware products purchased in the U.S. or Canada come with either a 90-day, 1-year, 2-year, 3-year, or
4-year limited warranty. To determine which warranty came with your hardware product(s), see your packing slip or
invoice. The following sections describe the limited warranties and return policy for the U.S., the limited warranties and
return policy for Canada, the manufacturer guarantee for Latin America and the Caribbean, and the Intel
and Celeron
®
warranty for the U.S. and Canada.
Limited Warranty for Dell-Branded Hardware Products (U.S. Only)
What is covered by this limited warranty?
This limited warranty covers defects in materials and workmanship in your—our end-user customer's—Dell-branded
hardware products, including Dell-branded peripheral products.
What is not covered by this limited warranty?
This limited warranty does not cover:
• Software, including the operating system and software added to the Dell-branded hardware products through our
factory-integration system, third-party software, or the reloading of software
• Non-Dell-branded and Solution Provider Direct products and accessories
System Information Guide 25
®
Pentium®
Page 28

• Problems that result from:
– External causes such as accident, abuse, misuse, or problems with electrical power
– Servicing not authorized by Dell
– Usage that is not in accordance with product instructions
– Failure to follow the product instructions or failure to perform preventive maintenance
– Problems caused by using accessories, parts, or components not supplied by Dell
• Products with missing or altered Service Tags or serial numbers
• Products for which Dell has not received payment
THIS WARRANTY GIVES YOU SPECIFIC LEGAL RIGHTS, AND YOU MAY ALSO HAVE OTHER RIGHTS
WHICH VARY FROM STATE TO STATE (OR JURISDICTION TO JURISDICTION). DELL'S
RESPONSIBILITY FOR MALFUNCTIONS AND DEFECTS IN HARDWARE IS LIMITED TO REPAIR AND
www.dell.com | support.dell.com
REPLACEMENT AS SET FORTH IN THIS WARRANTY STATEMENT. ALL EXPRESS AND IMPLIED
WARRANTIES FOR THE PRODUCT, INCLUDING BUT NOT LIMITED TO ANY IMPLIED WARRANTIES
AND CONDITIONS OF MERCHANTABILITY AND FITNESS FOR A PARTICULAR PURPOSE, ARE
LIMITED IN TIME TO THE TERM OF THE LIMITED WARRANTY PERIOD REFLECTED ON YOUR
PACKING SLIP OR INVOICE. NO WARRANTIES, WHETHER EXPRESS OR IMPLIED, WILL APPLY AFTER
THE LIMITED WARRANTY PERIOD HAS EXPIRED. SOME STATES DO NOT ALLOW LIMITATIONS ON
HOW LONG AN IMPLIED WARRANTY LASTS, SO THIS LIMITATION MAY NOT APPLY TO YOU.
WE DO NOT ACCEPT LIABILITY BEYOND THE REMEDIES PROVIDED FOR IN THIS LIMITED
WARRANTY OR FOR CONSEQUENTIAL OR INCIDENTAL DAMAGES, INCLUDING, WITHOUT
LIMITATION, ANY LIABILITY FOR THIRD-PARTY CLAIMS AGAINST YOU FOR DAMAGES, FOR
PRODUCTS NOT BEING AVAILABLE FOR USE, OR FOR LOST DATA OR LOST SOFTWARE. OUR
LIABILITY WILL BE NO MORE THAN THE AMOUNT YOU PAID FOR THE PRODUCT THAT IS THE
SUBJECT OF A CLAIM. THIS IS THE MAXIMUM AMOUNT FOR WHICH WE ARE RESPONSIBLE.
SOME STATES DO NOT ALLOW THE EXCLUSION OR LIMITATION OF INCIDENTAL OR
CONSEQUENTIAL DAMAGES, SO THE ABOVE LIMITATION OR EXCLUSION MAY NOT APPLY TO YOU.
How long does this limited warranty last?
This limited warranty lasts for the time period indicated on your packing slip or invoice, except that the limited warranty
on Dell-branded batteries lasts only 1 year and the limited warranty on the lamps for Dell-branded projectors lasts only
90 days. The limited warranty begins on the date of the packing slip or invoice. The warranty period is not extended if
we repair or replace a warranted product or any parts. Dell may change the availability of limited warranties, at its
discretion, but any changes will not be retroactive.
26 System Information Guide
Page 29

What do I do if I need warranty service?
Before the warranty expires, please call us at the relevant number listed in the following table. Please also have your Dell
Service Tag or order number available.
Individual Home Consumers: U.S. Only
Technical Support 1-800-624-9896
Customer Service 1-800-624-9897
Individual Home Consumers who purchased through
an Employee Purchase Program:
Technical Support and Customer Service 1-800-822-8965
Home and Small Business Commercial Customers:
Technical Support and Customer Service 1-800-456-3355
Medium, Large, or Global Commercial Customers,
Healthcare Customers, and Value-Added Resellers
(VARs):
Technical Support and Customer Service 1-800-822-8965
Government and Education Customers:
Technical Support and Customer Service 1-800-234-1490
Dell-Branded Memory
1-888-363-5150
What will Dell do?
During the 90 days of the 90-day limited warranty and the first year of all other limited warranties: During the 90 days
of the 90-day limited warranty and the first year of all other limited warranties, we will repair any Dell-branded hardware
products returned to us that prove to be defective in materials or workmanship. If we are not able to repair the product,
we will replace it with a comparable product that is new or refurbished.
When you contact us, we will issue a Return Material Authorization Number for you to include with your return. You
must return the products to us in their original or equivalent packaging, prepay shipping charges, and insure the
shipment or accept the risk if the product is lost or damaged in shipment. We will return the repaired or replacement
products to you. We will pay to ship the repaired or replaced products to you if you use an address in the United States
(excluding Puerto Rico and U.S. possessions and territories). Otherwise, we will ship the product to you freight collect.
If we determine that the product is not covered under this warranty, we will notify you and inform you of service
alternatives that are available to you on a fee basis.
NOTE: Before you ship the product(s) to us, make sure to back up the data on the hard drive(s) and any other storage
device(s) in the product(s). Remove any confidential, proprietary, or personal information and removable media such as
floppy disks, CDs, or PC Cards. We are not responsible for any of your confidential, proprietary, or personal information; lost
or corrupted data; or damaged or lost removable media.
During the remaining years: For the remaining period of the limited warranty, we will replace any defective part with
new or refurbished parts, if we agree that it needs to be replaced. When you contact us, we will require a valid credit card
number at the time you request a replacement part, but we will not charge you for the replacement part as long as you
return the original part to us within 30 days after we ship the replacement part to you. If we do not receive the original
part within 30 days, we will charge to your credit card the then-current standard price for that part.
System Information Guide 27
Page 30

We will pay to ship the part to you if you use an address in the United States (excluding Puerto Rico and U.S.
possessions and territories). Otherwise, we will ship the part freight collect. We will also include a prepaid shipping
container with each replacement part for your use in returning the replaced part to us.
NOTE: Before you replace parts, make sure to back up the data on the hard drive(s) and any other storage device(s) in the
product(s). We are not responsible for lost or corrupted data.
What if I purchased a service contract?
If your service contract is with Dell, service will be provided to you under the terms of the service agreement. Please refer
to that contract for details on how to obtain service.
If you purchased through us a service contract with one of our third-party service providers, please refer to that contract
for details on how to obtain service.
www.dell.com | support.dell.com
How will you fix my product?
We use new and refurbished parts made by various manufacturers in performing warranty repairs and in building
replacement parts and systems. Refurbished parts and systems are parts or systems that have been returned to Dell,
some of which were never used by a customer. All parts and systems are inspected and tested for quality. Replacement
parts and systems are covered for the remaining period of the limited warranty for the product you bought. Dell owns all
parts removed from repaired products.
May I transfer the limited warranty?
Limited warranties on systems may be transferred if the current owner transfers ownership of the system and records the
transfer with us. The limited warranty on Dell-branded memory may not be transferred. You may record your transfer by
going to Dell's website:
• If you are an Individual Home Consumer, go to www.dell.com/us/en/dhs/topics/sbtopic_015_ccare.htm
• If you are a Home Office, Small, Medium, Large, or Global Commercial Customer, go to
www.dell.com/us/en/biz/topics/sbtopic_ccare_nav_015_ccare.htm
• If you are a Government, Education, or Healthcare Customer, or an Individual Home Consumer who purchased
through an Employee Purchase Program, go to www.dell.com/us/en/pub/topics/sbtopic_015_ccare.htm
If you do not have Internet access, call your customer care representative or call 1-800-624-9897.
"Total Satisfaction" Return Policy (U.S. Only)
We value our relationship with you and want to make sure that you're satisfied with your purchases. That's why we offer
a "Total Satisfaction" return policy for most products that you—the end-user customer—purchase directly from Dell.
Under this policy, you may return to Dell products that you purchased directly from Dell for a credit or a refund of the
purchase price paid, less shipping and handling and applicable restocking fees as follows:
• New Hardware Products and Accessories — All new hardware, accessories, parts, and unopened software still in
its sealed package, excluding the products listed below, may be returned within 30 days from the date on the
packing slip or invoice. To return applications software or an operating system that has been installed by Dell, you
must return the entire computer. A different return policy applies to nondefective products purchased through
Dell's Software and Peripherals division by customers of our Small and Medium Business divisions. Those
products may be returned within 30 days from the date on the packing slip or invoice, but a fifteen percent (15%)
restocking fee will be deducted from any refund or credit. The "Total Satisfaction" Return Policy and Software and
Peripherals division return policy are not available for Dell | EMC storage products, EMC-branded products, or
enterprise software.
28 System Information Guide
Page 31

• Reconditioned or Refurbished Dell-Branded Hardware Products and Parts — All reconditioned or refurbished
Dell-branded server and storage products may be returned within 30 days from the date on the packing slip or
invoice. All other reconditioned or refurbished Dell-branded hardware products and parts may be returned within
14 days of the date on the packing slip or invoice.
To return products, e-mail or call Dell customer service to receive a Credit Return Authorization Number within the
return policy period applicable to the product you want to return. You must obtain a Credit Return Authorization
Number in order to return the product. See "Contacting Dell" or "Getting Help" in your customer documentation (or
www.dell.com/us/en/gen/contact.htm) to find the appropriate contact information for obtaining customer assistance.
You must ship the products to Dell within 5 days of the date that Dell issues the Credit Return Authorization Number.
You must also return the products to Dell in their original packaging, in as-new condition along with any media,
documentation, and all other items that were included in the original shipment, prepay shipping charges, and insure the
shipment or accept the risk of loss or damage during shipment.
Limited Warranty Terms for Dell-Branded Hardware Products (Canada Only)
What is covered by this limited warranty?
This limited warranty covers defects in materials and workmanship in your—our end-user customer's—Dell-branded
hardware products, including Dell-branded peripheral products.
What is not covered by this limited warranty?
This limited warranty does not cover:
• Software, including the operating system and software added to the Dell-branded hardware products through our
factory-integration system, or the reloading of the software
• Non-Dell branded and Solution Provider Direct products and accessories
• Problems that result from:
– External causes such as accident, abuse, misuse, or problems with electrical power
– Servicing not authorized by Dell
– Usage that is not in accordance with product instructions
– Failure to follow the product instructions or failure to perform preventive maintenance
– Problems caused by using accessories, parts, or components not supplied by Dell
• Products with missing or altered Service Tags or serial numbers
• Products for which Dell has not received payment
THIS WARRANTY GIVES YOU SPECIFIC LEGAL RIGHTS, AND YOU MAY ALSO HAVE OTHER RIGHTS
WHICH VARY FROM PROVINCE TO PROVINCE. DELL'S RESPONSIBILITY FOR MALFUNCTIONS AND
DEFECTS IN PRODUCT IS LIMITED TO REPAIR AND REPLACEMENT AS SET FORTH IN THIS WARRANTY
STATEMENT, FOR THE TERM OF THE WARRANTY PERIOD REFLECTED ON YOUR PACKING SLIP OR
INVOICE. EXCEPT FOR THE EXPRESS WARRANTIES CONTAINED IN THIS WARRANTY STATEMENT,
DELL DISCLAIMS ALL OTHER WARRANTIES AND CONDITIONS, EXPRESS OR IMPLIED, INCLUDING
WITHOUT LIMITATION IMPLIED WARRANTIES AND CONDITIONS OF MERCHANTABILITY AND
FITNESS FOR A PARTICULAR PURPOSE, STATUTORY OR OTHERWISE. SOME PROVINCES DO NOT
ALLOW THE EXCLUSION OF CERTAIN IMPLIED WARRANTIES OR CONDITIONS, OR LIMITATIONS ON
HOW LONG AN IMPLIED WARRANTY OR CONDITION LASTS. THEREFORE, THE FOREGOING
EXCLUSIONS AND LIMITATIONS MAY NOT APPLY TO YOU.
System Information Guide 29
Page 32

WE DO NOT ACCEPT LIABILITY BEYOND THE REMEDIES PROVIDED FOR IN THIS WARRANTY
STATEMENT OR FOR SPECIAL, INDIRECT, CONSEQUENTIAL, OR INCIDENTAL DAMAGES, INCLUDING,
WITHOUT LIMITATION, ANY LIABILITY FOR THIRD-PARTY CLAIMS AGAINST YOU FOR DAMAGES, FOR
PRODUCTS NOT BEING AVAILABLE FOR USE, OR FOR LOST DATA OR LOST SOFTWARE. OUR LIABILITY
WILL BE NO MORE THAN THE AMOUNT YOU PAID FOR THE PRODUCT THAT IS THE SUBJECT OF A
CLAIM. THIS IS THE MAXIMUM AMOUNT FOR WHICH WE ARE RESPONSIBLE.
SOME PROVINCES DO NOT ALLOW THE EXCLUSION OR LIMITATION OF SPECIAL, INDIRECT,
INCIDENTAL, OR CONSEQUENTIAL DAMAGES, SO THE ABOVE LIMITATION OR EXCLUSION MAY NOT
APPLY TO YOU.
How long does this limited warranty last?
This limited warranty lasts for the time period indicated on your packing slip or invoice, except that the limited warranty
on Dell-branded batteries lasts only 1 year and the limited warranty on the lamps for Dell-branded projectors lasts only
www.dell.com | support.dell.com
90 days. The limited warranty begins on the date of the packing slip or invoice. The warranty period is not extended if
we repair or replace a warranted product or any parts. Dell may change the terms and availability of limited warranties,
at its discretion, but any changes will not be retroactive (that is, the warranty terms in place at the time of purchase will
apply to your purchase).
What do I do if I need warranty service?
Before the warranty expires, please call us at the relevant number listed in the following table. Please also have your Dell
Service Tag or order number available.
Individual Home Consumers; Home Office and Small
Business Customers:
Technical Support and Customer Service 1-800-847-4096
Medium, Large, and Global Commercial Customers;
Government, Education, and Healthcare Customers;
and Value-Added Resellers (VARs):
Technical Support 1-800-387-5757
Customer Service 1-800-326-9463
Government or Education Customers, or Individual
Home Consumers who purchased through an
Employee Purchase Program:
Technical Support 1-800-387-5757
Customer Service 1-800-326-9463 (Extension 8221 for Individual
Dell-Branded Memory
Canada Only
Consumers)
1-888-363-5150
What will Dell do?
During the 90 days of the 90-day limited warranty and the first year of all other limited warranties: During the 90 days
of the 90-day limited warranty and the first year of all other limited warranties, we will repair any Dell-branded hardware
products returned to us that prove to be defective in materials or workmanship. If we are not able to repair the product,
we will replace it with a comparable product that is new or refurbished.
30 System Information Guide
Page 33

When you contact us, we will issue a Return Material Authorization Number for you to include with your return. You
must return the products to us in their original or equivalent packaging, prepay shipping charges, and insure the
shipment or accept the risk if the product is lost or damaged in shipment. We will return the repaired or replacement
products to you. We will pay to ship the repaired or replaced products to you if you use an address in Canada. Otherwise,
we will ship the product to you freight collect.
If we determine that the problem is not covered under this warranty, we will notify you and inform you of service
alternatives that are available to you on a fee basis.
NOTE: Before you ship the product(s) to us, make sure to back up the data on the hard drive(s) and any other storage
device(s) in the product(s). Remove any confidential, proprietary or personal information, removable media, such as floppy
disks, CDs, or PC Cards. We are not responsible for any of your confidential, proprietary or personal information; lost or
corrupted data; or damaged or lost removable media.
During the remaining years following the first year of all limited warranties: We will replace any defective part with
new or refurbished parts, if we agree that it needs to be replaced. When you contact us, we will require a valid credit card
number at the time you request a replacement part, but we will not charge you for the replacement part as long as you
return the original part to us within 30 days after we ship the replacement part to you. If we do not receive the original
part within 30 days, we will charge to your credit card the then-current standard price for that part.
We will pay to ship the part to you if you use an address in Canada. Otherwise, we will ship the part freight collect. We
will also include a prepaid shipping container with each replacement part for your use in returning the replaced part to
us.
NOTE: Before you replace parts, make sure to back up the data on the hard drive(s) and any other storage device(s) in the
product(s). We are not responsible for lost or corrupted data.
What if I purchased a service contract?
If your service contract is with Dell, service will be provided to you under the terms of the service contract. Please refer
to that contract for details on how to obtain service. Dell's service contracts can be found online at www.dell.ca or by
calling Customer Care at 1-800-847-4096. If you purchased through us a service contract with one of our third-party
service providers, please refer to that contract (mailed to you with your packing slip or invoice) for details on how to
obtain service.
How will you fix my product?
We use new and refurbished parts made by various manufacturers in performing warranty repairs and in building
replacement parts and systems. Refurbished parts and systems are parts or systems that have been returned to Dell,
some of which were never used by a customer. All parts and systems are inspected and tested for quality. Replacement
parts and systems are covered for the remaining period of the limited warranty for the product you bought. Dell owns all
parts removed from repaired products.
May I transfer the limited warranty?
Limited warranties on systems may be transferred if the current owner transfers ownership of the system and records the
transfer with us. The limited warranty on Dell-branded memory may not be transferred. You may record your transfer by
going to Dell’s website:
• For Canada-purchased computers (in-country transfers) and to transfer from one customer to another, go to
www.dell.ca/ca/en/gen/topics/segtopic_ccare_nav_013_ccare.htm
• For out-of-country transfers (outside of the original country of purchase), go to
www.dell.com/us/en/biz/topics/sbtopic_ccare_nav_016_ccare.htm
If you do not have Internet access, call Dell at 1-800-847-4096 (Home Consumer customers) or 1-800-326-9463
(Corporate Commercial or Government customers).
System Information Guide 31
Page 34

"Total Satisfaction" Return Policy (Canada Only)
If you are an end-user customer who bought new products directly from Dell, you may return them to Dell up to 30 days
after you receive them for a refund or credit of the product purchase price. If you are an end-user customer who bought
reconditioned or refurbished products from Dell, you may return them to Dell within 14 days after the date on the
packing slip or invoice for a refund or credit of the product purchase price. In either case, the refund or credit will not
include any shipping and handling charges shown on your packing slip or invoice and will be subject to a fifteen percent
(15%) restocking fee, unless otherwise prohibited by law. If you are an organization that bought the products under a
written agreement with Dell, the agreement may contain different terms for the return of products than specified by this
policy.
To return products, you must call Dell Customer Service at 1-800-847-4096 to receive a Credit Return Authorization
Number. To expedite the process of your refund or credit, Dell expects you to return the products to Dell in their
original packaging within 5 days of the date that Dell issues the Credit Return Authorization Number. You must also
prepay shipping charges and insure the shipment or accept the risk of loss or damage during shipment. You may return
www.dell.com | support.dell.com
software for a refund or credit only if the sealed package containing the floppy disk(s) or CD(s) is unopened. Returned
products must be in as-new condition, and all of the manuals, floppy disk(s), CD(s), power cables, and other items
included with a product must be returned with it. For customers who want to return, for refund or credit only, either
application or operating system software that has been installed by Dell, the whole system must be returned, along with
any media and documentation that may have been included in the original shipment.
The "Total Satisfaction" Return Policy does not apply to Dell | EMC storage products. It also does not apply to products
purchased through Dell's Software and Peripherals division. For those products, please instead refer to Dell's Software
and Peripheral's then-current return policy (see the following section, "Dell Software and Peripherals (Canada Only)").
Dell Software and Peripherals (Canada Only)
Third-Party Software and Peripherals Products
Similar to other resellers of software and peripherals, Dell does not warrant third-party products. Third-party software
and peripheral products are covered by the warranties provided by the original manufacturer or publisher only. Thirdparty manufacturer warranties vary from product to product. Consult your product documentation for specific warranty
information. More information may also be available from the manufacturer or publisher.
While Dell offers a wide selection of software and peripheral products, we do not specifically test or guarantee that all of
the products we offer work with any or all of the various models of Dell computers, nor do we test or guarantee all of the
products we sell on the hundreds of different brands of computers available today. If you have questions about
compatibility, we recommend and encourage you to contact the third-party software and peripheral product
manufacturer or publisher directly.
Dell-Branded Peripheral Products
Dell does provide a limited warranty for new Dell-branded peripheral products (products for which Dell is listed as the
manufacturer) such as monitors, batteries, memory, docking stations, and projectors. To determine which limited
warranty applies to the product you purchased, see the Dell packing slip or invoice and/or the product documentation
that accompanied your product. Descriptions of Dell's limited warranties are described in preceding sections.
Return Policy
If you are an end-user customer who bought Dell Software and Peripherals products directly from a Dell company, you
may return Dell Software and Peripherals products that are in as-new condition to Dell up to 30 days from the date on
the packing slip or invoice for a refund of the product purchase price if already paid. This refund will not include any
shipping and handling charges shown on your packing slip or invoice; you are responsible for those.
32 System Information Guide
Page 35

To return products, you must call Dell Customer Service at 1-800-387-5759 to receive a Credit Return Authorization
Number. You must ship the Dell Software and Peripherals products back to Dell in their original manufacturer's
packaging (which must be in as-new condition), prepay shipping charges, and insure the shipment or accept the risk of
loss or damage during shipment.
To qualify for refund or replacement, returned products must be in as-new condition, software products must be
unopened, and all of the manuals, floppy disk(s), CD(s), power cables, and other items included with a product must be
returned with it.
1-Year End-User Manufacturer Guarantee (Latin America and the Caribbean Only)
Guarantee
Dell Computer Corporation ("Dell") warrants to the end user in accordance with the following provisions that its
branded hardware products, purchased by the end user from a Dell company or an authorized Dell distributor in Latin
America or the Caribbean, will be free from defects in materials, workmanship, and design affecting normal use, for a
period of 1 year from the original purchase date. Products for which proper claims are made will, at Dell’s option, be
repaired or replaced at Dell’s expense. Dell owns all parts removed from repaired products. Dell uses new and
reconditioned parts made by various manufacturers in performing repairs and building replacement products.
Exclusions
This Guarantee does not apply to defects resulting from: improper or inadequate installation, use, or maintenance;
actions or modifications by unauthorized third parties or the end user; accidental or willful damage; or normal wear and
tear.
Making a Claim
Claims must be made in Latin America or the Caribbean by contacting the Dell point of sale within the guarantee
period. The end user must always supply proof of purchase, indicating name and address of the seller, date of purchase,
model and serial number, name and address of the customer, and details of symptoms and configuration at the time of
malfunction, including peripherals and software used. Otherwise, Dell may refuse the guarantee claim. Upon diagnosis
of a warranted defect, Dell will make arrangements and pay for ground freight and insurance to and from Dell’s
repair/replacement center. The end user must ensure that the defective product is available for collection properly
packed in original or equally protective packaging together with the details listed above and the return number provided
to the end user by Dell.
Limitation and Statutory Rights
Dell makes no other warranty, guarantee or like statement other than as explicitly stated above, and this Guarantee is
given in place of all other guarantees whatsoever, to the fullest extent permitted by law. In the absence of applicable
legislation, this Guarantee will be the end user’s sole and exclusive remedy against Dell or any of its affiliates, and
neither Dell nor any of its affiliates shall be liable for loss of profit or contracts, or any other indirect or consequential
loss arising from negligence, breach of contract, or howsoever.
This Guarantee does not impair or affect mandatory statutory rights of the end user against and/or any rights resulting
from other contracts concluded by the end user with Dell and/or any other seller.
Dell World Trade LP
One Dell Way, Round Rock, TX 78682, USA
Dell Computadores do Brasil Ltda (CNPJ No. 72.381.189/0001-10)/
Dell Commercial do Brasil Ltda (CNPJ No. 03 405 822/0001-40)
Avenida Industrial Belgraf, 400
92990-000 - Eldorado do Sul – RS - Brasil
System Information Guide 33
Page 36

Dell Computer de Chile Ltda
Coyancura 2283, Piso 3- Of.302,
Providencia, Santiago - Chile
Dell Computer de Colombia Corporation
Carrera 7 #115-33 Oficina 603
Bogota, Colombia
Dell Computer de Mexico SA de CV
Paseo de la Reforma 2620 - 11° Piso
Col. Lomas Altas
11950 México, D.F.
www.dell.com | support.dell.com
34 System Information Guide
Page 37

Intel® Warranty Statement for Pentium® and Celeron® Processors Only
(U.S. and Canada Only)
Limited Warranty
Intel warrants that its family of Pentium® and Celeron® processors, if properly used and installed, will be free from defects in materials and workmanship and will substantially
conform to Intel’s publicly available specifications for a period of three (3) years after the date the Pentium or Celeron processor was purchased (whether purchased separately
or as part of a computer system).
If the Pentium or Celeron processor, which is the subject of this Limited Warranty, fails during the warranty period for reasons covered by this Limited Warranty, Intel, at its option, will:
• REPAIR the Pentium or Celeron processor by means of hardware and/or software; OR
• REPLACE the Pentium or Celeron processor with another Pentium or Celeron processor; OR
if Intel is unable to repair or replace the particular Pentium or Celeron processor,
• REFUND the then-current value of the Pentium or Celeron processor.
THIS LIMITED WARRANTY, AND ANY IMPLIED WARRANTIES THAT MAY EXIST UNDER STATE LAW, APPLY ONLY TO THE ORIGINAL PURCHASER OF THE
PENTIUM OR CELERON PROCESSOR, OR PENTIUM OR CELERON PROCESSOR-BASED COMPUTER AND LAST ONLY FOR AS LONG AS SUCH PURCHASER
CONTINUES TO OWN THE PROCESSOR.
Extent of Limited Warranty
Intel does not warrant that your Pentium or Celeron processor will be free from design defects or errors known as "errata." Current characterized errata are available upon request.
This limited warranty is for purchasers in the United States and Canada only. The limited warranty does not cover any costs relating to removal or replacement of any Pentium or
Celeron processors that are soldered or otherwise permanently affixed to your system’s motherboard.
This limited warranty does not cover damages due to external causes, including accident, problems with electrical power, usage not in accordance with product instructions,
misuse, neglect, alteration, repair, improper installation, or improper testing.
How to Obtain Warranty Service
To obtain warranty service for your Pentium or Celeron processor, you may contact your computer system manufacturer in accordance with its instructions, or you may contact Intel.
To request warranty service from Intel, you should call Intel at 1-800-628-8686 during the warranty period during normal business hours (Pacific Time), excluding holidays. Please
be prepared to provide:
(1) your name, address, and telephone numbers;
(2) proof of purchase;
(3) this Intel warranty card;
(4) a description of the computer system including the brand and model; and
(5) an explanation of the problem.
[Note: The Customer Service Representative may need additional information from you depending on the nature of the problem.]
The replacement processor is warranted under this written warranty and is subject to the same limitations and exclusions for the remainder of the original warranty period or one
(1) year, whichever is longer.
WARRANTY LIMITATIONS AND EXCLUSIONS
THESE WARRANTIES REPLACE ALL OTHER WARRANTIES, EXPRESS OR IMPLIED INCLUDING, BUT NOT LIMITED TO, THE IMPLIED WARRANTIES OF
MERCHANTABILITY AND FITNESS FOR A PARTICULAR PURPOSE. INTEL MAKES NO EXPRESS WARRANTIES BEYOND THOSE STATED HERE. INTEL
DISCLAIMS ALL OTHER WARRANTIES, EXPRESS OR IMPLIED, INCLUDING, WITHOUT LIMITATION, IMPLIED WARRANTIES OF MERCHANTABILITY
AND FITNESS FOR A PARTICULAR PURPOSE.
SOME LAWS DO NOT ALLOW THE EXCLUSION OF IMPLIED WARRANTIES SO THIS LIMITATION MAY NOT APPLY TO YOU. IF THESE LAWS APPLY, THEN ALL
EXPRESS AND IMPLIED WARRANTIES ARE LIMITED IN DURATION TO THE LIMITED WARRANTY PERIOD. NO WARRANTIES APPLY AFTER THAT PERIOD.
SOME LAWS DO NOT ALLOW LIMITATIONS ON HOW LONG AN IMPLIED WARRANTY LASTS, SO THIS LIMITATION MAY NOT APPLY TO YOU.
LIMITATIONS OF LIABILITY
INTEL’S RESPONSIBILITY UNDER THIS, OR ANY OTHER WARRANTY, IMPLIED OR EXPRESS, IS LIMITED TO REPAIR, REPLACEMENT OR REFUND, AS SET
FORTH ABOVE. THESE REMEDIES ARE THE SOLE AND EXCLUSIVE REMEDIES FOR ANY BREACH OF WARRANTY. INTEL IS NOT RESPONSIBLE FOR INDIRECT,
SPECIAL, INCIDENTAL, OR CONSEQUENTIAL DAMAGES RESULTING FROM ANY BREACH OF WARRANTY OR UNDER ANY OTHER LEGAL THEORY
INCLUDING, BUT NOT LIMITED TO, LOST PROFITS, DOWNTIME, GOODWILL, DAMAGE TO OR REPLACEMENT OF EQUIPMENT AND PROPERTY, AND ANY
COSTS OF RECOVERING, REPROGRAMMING, OR REPRODUCING ANY PROGRAM OR DATA STORED IN OR USED WITH A SYSTEM CONTAINING YOUR
PENTIUM PROCESSOR. SOME JURISDICTIONS DO NOT ALLOW THE EXCLUSION OR LIMITATION OF INCIDENTAL OR CONSEQUENTIAL DAMAGES, SO THE
ABOVE LIMITATIONS OR EXCLUSIONS MAY NOT APPLY TO YOU.
THE LIMITED WARRANTY GIVES YOU SPECIFIC LEGAL RIGHTS, AND YOU MAY ALSO HAVE OTHER RIGHTS THAT VARY FROM JURISDICTION TO JURISDICTION.
Intel’s Three Year Limited Warranty
System Information Guide 35
Page 38

Intel Pentium® and Celeron® Processors are backed by a three-year limited warranty.
Please refer to the reverse side of this card for complete warranty details.
Intel’s Commitment to Quality
Intel is committed to producing the highest quality processors available. That’s why we have hundreds of people dedicated to continuously improve our design, manufacturing,
and testing technology.
We put every one of our Pentium® and Celeron® processors through a rigorous battery of tests during the design and manufacturing processes.
To verify that the new chip will correctly run the software written for Intel Architecture processors, a team of Intel engineers is dedicated to compatibility testing. In a state-of-art lab,
this group runs an extensive set of operating systems, applications, network tests and stress tests repeatedly to ensure that the processor is compatible with representative software.
Just as importantly, we work with hardware and software companies in the computer industry to ensure that our processors are compatible with their products.
Additionally, a sampling of Intel processors are subjected to a rigorous "burn-in" test whereby the chip is operated at higher-than-normal temperatures and voltages. During this
burn-in period, the processor experiences the equivalent of weeks of normal usage. These units are monitored for failures as part of our ongoing quality assurance process.
As a result, today’s microprocessors from Intel are among the most reliable components in computers.
What are "Errata"?
Exhaustive product testing can highlight differences between the actual behavior of the microprocessor and its specifications. Sometimes the discrepancies are caused by a design
www.dell.com | support.dell.com
defect or error, which we call errata. Rigorous validation identifies most errata during the development of the processor, but we do detect additional errata during the life cycle of
a microprocessor.
When an erratum is identified, our engineers work to characterize it and find a solution. We work with system designers and software developers to ensure that the discrepancy does
not affect their products. If necessary, special software or hardware solutions (sometimes known as "work arounds") are implemented in the system design to prevent computer
users from encountering the problem. Errata may then be corrected in future revisions of the microprocessor.
No microprocessor is perfect, and Intel recognizes that some consumers want to know about any errata, whether or not the errata affect them. Intel makes documentation of all
characterized Pentium and Celeron processor errata publicly available through our Technical Documentation Service.
At Intel, our goal is to make every computer user satisfied with his or her Pentium or Celeron processor. Should you have any questions, comments or concerns about your Intel
microprocessor, please call us at 1-800-628-8686.
©1997, 1998 Intel Corporation. All rights reserved.
36 System Information Guide
Page 39

Dell™ Latitude™ Série D505
Guide des Informations Système
Modèle PP10L
www.dell.com | support.dell.com
Page 40

Remarques, Avis et Précautions
REMARQUE : Une REMARQUE indique une information importante qui peut vous aider à mieux utiliser
votre ordinateur.
AVIS : Un AVIS vous avertit d’un risque de dommage matériel ou de perte de données et vous indique
comment éviter le problème.
PRÉCAUTION : Une PRÉCAUTION indique un risque potentiel d'endommagement du matériel, de
blessure corporelle ou de mort.
Abréviations et acronymes
Pour obtenir la liste complète des abréviations et des acronymes, reportez-vous au
(en fonction de votre système d’exploitation, double-cliquez sur l’icône
bureau ou cliquez sur
système)
.
Démarrer, Centre d’aide et de support
, puis sur
Guide d’utilisation
Guides d’utilisation du
Guide d’utilisation
sur votre
Si vous avez acheté un ordinateur Dell™ Série n, les références du présent document concernant les
systèmes d'exploitation Microsoft
®
Windows® ne sont pas applicables.
____________________
Les informations contenues dans ce document sont sujettes à modification sans préavis.
© 2003 Dell Inc. Tous droits réservés.
La reproduction sous quelque forme que ce soit sans l'autorisation écrite de Dell Inc. est strictement interdite.
Marques utilisées dans ce document : Dell, le logo DELL, TrueMobile et Latitude sont des marques de Dell Inc. ; Intel, Pentium
et Celeron sont des marques déposées de Intel Corporation ; Microsoft et Windows sont des marques déposées de Microsoft
Corporation ; Bluetooth est une marque de Bluetooth SIG, Inc. et est utilisée par Dell Inc. sous licence.
D'autres marques et noms commerciaux peuvent être utilisés dans ce document pour faire référence aux entités se réclamant de
ces marques et de ces noms ou à leurs produits. Dell Inc. rejette tout intérêt propriétaire dans les marques et les noms commerciaux
autres que les siens.
Modèle PP10L
Octobre 2003 Réf. R1189 Rév. A01
Page 41

Sommaire
PRÉCAUTION : Consignes de sécurité . . . . . . . . . . . . . . . . . . . 41
SÉCURITÉ : Généralités
SÉCURITÉ : Alimentation
SÉCURITÉ : Batterie
SÉCURITÉ : Voyage en avion
SÉCURITÉ : Instructions relatives à la compatibilité électromagnétique
(EMC, Electromagnetic Compatibility)
. . . . . . . . . . . . . . . . . . . . . . . . 41
. . . . . . . . . . . . . . . . . . . . . . . . 42
. . . . . . . . . . . . . . . . . . . . . . . . . . 42
. . . . . . . . . . . . . . . . . . . . . . 42
. . . . . . . . . . . . . . . . . 43
Lors de l'utilisation de votre ordinateur
SÉCURITÉ : Conseils en ergonomie
. . . . . . . . . . . . . . . . . . . 43
. . . . . . . . . . . . . . . . . . . 44
SÉCURITÉ : Intervention à l'intérieur de votre ordinateur
SÉCURITÉ : Protection contre les décharges électrostatiques
SÉCURITÉ : Retrait de la batterie
Recherche d'informations concernant l'ordinateur
Installation de votre ordinateur
À propos de votre ordinateur
Vue avant
Vue de gauche
Vue de droite
Vue arrière
Vue de dessous
Retrait de la batterie
. . . . . . . . . . . . . . . . . . . . . . . . . . . . . . . 51
. . . . . . . . . . . . . . . . . . . . . . . . . . . . 52
. . . . . . . . . . . . . . . . . . . . . . . . . . . . . 52
. . . . . . . . . . . . . . . . . . . . . . . . . . . . . . 53
. . . . . . . . . . . . . . . . . . . . . . . . . . . . 53
. . . . . . . . . . . . . . . . . . . . . . . . . . . . 54
Retrait et installation d'une batterie de réserve
Installation d'une batterie
Dell Diagnostics
. . . . . . . . . . . . . . . . . . . . . . . . . 56
. . . . . . . . . . . . . . . . . . . . . . . . . . . . . 57
Quand utiliser Dell Diagnostics
Réglementations
. . . . . . . . . . . . . . . . . . . . . . . . . . . . . . 60
. . . . . . . . . . . . . . . . . . . . 45
. . . . . . . . . . . . . 46
. . . . . . . . . . . . . . . . . . . . . . . 49
. . . . . . . . . . . . . . . . . . . . . . . . 51
. . . . . . . . . . . . . . . 55
. . . . . . . . . . . . . . . . . . . . . 57
. . . . . . . . 44
. . . . . . 44
Sommaire 39
Page 42

Garantie limitée et règle de retour . . . . . . . . . . . . . . . . . . . . . 61
Conditions de garantie limitée pour les produits matériels Dell
(Canada seulement)
Règle de retour «Satisfait ou remboursé» (Canada seulement)
Logiciels et périphériques Dell (Canada seulement)
Déclaration de garantie Intel
et Celeron
®
(États-Unis et Canada uniquement) . . . . . . . . . . . . 65
. . . . . . . . . . . . . . . . . . . . . . . . . . 61
. . . . . . 63
®
réservée aux processeurs Pentium®
. . . . . . . . . . . 64
40 Sommaire
Page 43

PRÉCAUTION : Consignes de sécurité
Pour votre sécurité et pour protéger votre ordinateur ainsi que votre environnement de travail contre d'éventuels
dommages, respectez les consignes de sécurité ci-dessous.
SÉCURITÉ : Généralités
• Ne tentez pas d'assurer vous-même l'entretien de votre ordinateur à moins que vous ne soyez un technicien de
maintenance qualifié. Suivez toujours scrupuleusement les instructions d'installation.
• Si vous raccordez une rallonge à votre adaptateur CA/CC, assurez-vous que l'intensité totale du courant drainé
par tous les appareils raccordés à cette rallonge ne dépasse pas la limite de cette dernière.
• N'introduisez pas d'objets dans les entrées d'air ou autres ouvertures de votre ordinateur. Cela risquerait de
provoquer un incendie ou un choc électrique dû à un court-circuit des composants internes.
• Ne placez pas l'ordinateur dans un environnement peu aéré, tel qu'une sacoche de transport ou une mallette
fermée, lorsque celui-ci fonctionne. Ceci risque d'endommager l'ordinateur ou de provoquer un incendie.
• Conservez votre ordinateur à distance des radiateurs et sources de chaleur. Veillez à ne pas bloquer les grilles de
refroidissement. Évitez de placer des papiers volants sous votre ordinateur ; ne placez pas votre ordinateur dans
une unité murale fermée ou sur un lit, un canapé ou un tapis.
• L'adaptateur secteur doit se trouver dans une zone aérée, par exemple sur un bureau ou sur le sol, lorsqu'il est
utilisé pour alimenter l'ordinateur ou pour charger la batterie. Ne recouvrez pas l'adaptateur CA/CC de papiers ou
d'autres objets susceptibles d'entraver le refroidissement. De même, n'utilisez pas l'adaptateur CA/CC dans une
mallette de transport.
• L'adaptateur CA/CC risque de chauffer lorsque vous utilisez votre ordinateur. Faites donc très attention lorsque
vous manipulez l'adaptateur pendant ou après son fonctionnement.
• Évitez de poser votre ordinateur portable en fonctionnement à même la peau pendant une période prolongée. La
température augmente sur la surface de la base pendant le fonctionnement normal de l'ordinateur (notamment
s'il est alimenté par le secteur). Le contact prolongé avec la peau peut provoquer inconfort ou brûlure.
• N'utilisez pas votre ordinateur dans un environnement humide, par exemple près d'une baignoire, d'un évier,
d'une piscine ou dans un sous-sol humide.
• Si votre ordinateur comprend un modem intégré ou optionnel (carte PC), débranchez le modem de la ligne
téléphonique à l'approche d'un orage électrique afin d'éviter le risque très faible de choc électrique causé par un
éclair et transmis par la ligne téléphonique.
• Pour réduire le danger lié à un choc électrique, n'effectuez aucun branchement ou débranchement pendant un
orage électrique, ni aucune opération de maintenance ou de reconfiguration de ce produit. N'utilisez jamais
l'ordinateur pendant un orage électrique, sauf si tous les câbles ont été déconnectés et si l'ordinateur est alimenté
par la batterie.
• Si votre ordinateur comprend un modem, le câble utilisé avec le modem doit avoir une taille minimale de 26
AWG (American Wire Gauge) et une fiche modulaire RJ-11 conforme à la norme FCC.
• Avant d'ouvrir le capot du module de mémoire ou de la carte Mini PCI de la face inférieure de l'ordinateur,
débranchez le câble du téléphone et tous les câbles d'alimentation des prises électriques.
• Si votre ordinateur dispose d'un connecteur modem RJ-11 et d'un connecteur réseau RJ-45 (ces deux connecteurs
se ressemblent), veillez à brancher le câble téléphonique dans le connecteur RJ-11 et non pas dans le connecteur
RJ-45.
• Les cartes PC peuvent beaucoup chauffer en fonctionnement normal. Faites donc très attention lorsque vous les
retirez après une utilisation prolongée.
• Débranchez l'ordinateur de la prise électrique avant de le nettoyer. Nettoyez votre ordinateur avec un tissu doux
et humidifié avec de l'eau. N'utilisez pas de liquide ni d'aérosol nettoyants, ceux-ci peuvent contenir des
substances inflammables.
Guide des Informations Système 41
Page 44

SÉCURITÉ : Alimentation
• Utilisez uniquement l'adaptateur CA/CC fourni par Dell et homologué pour cet ordinateur. L'utilisation d'un
autre adaptateur CA/CC peut provoquer un incendie ou une explosion.
• Avant de raccorder l'ordinateur à une prise électrique, assurez-vous que la tension du secteur est compatible avec
la tension d'entrée de l'adaptateur.
• Pour mettre l'ordinateur totalement hors tension, éteignez-le, débranchez l'adaptateur CA/CC de la prise
électrique et retirez toutes les batteries installées dans la baie des périphériques ou la baie modulaire.
• Pour éviter tout risque de décharge électrique, branchez les câbles de l'adaptateur CA/CC et des périphériques sur
des sources d'alimentation électriques correctement reliées à la terre. Il se peut que ces câbles d'alimentation
soient équipés de prises à trois broches afin de fournir une mise à la terre. N'utilisez pas de fiche intermédiaire et
ne retirez pas la broche de masse du câble d'alimentation. Si vous utilisez une rallonge, assurez-vous qu'il s'agit du
type approprié, 2 ou 3 broches, avant de la raccorder au câble de l'adaptateur CA/CC.
www.dell.com | support.dell.com
• Assurez-vous que rien ne repose sur le cordon d'alimentation de l'adaptateur CA/CC et que ce cordon n'est pas
placé dans un endroit où l'on pourrait marcher ou trébucher dessus.
• Si vous utilisez plusieurs rampes d'alimentation, soyez prudent lorsque vous raccordez le câble d'alimentation de
l'adaptateur CA/CC à la rampe d'alimentation. Certaines rampes d'alimentation peuvent ne pas empêcher
l'insertion d'une prise de façon incorrecte. L'insertion incorrecte de la prise de courant peut provoquer un
dommage irréparable sur votre ordinateur ainsi qu'un risque de choc électrique et/ou d'incendie. Assurez-vous
que le contact de mise à la terre de la prise de courant est inséré dans le contact de mise à la terre correspondant
de la rampe d'alimentation.
SÉCURITÉ : Batterie
• Utilisez uniquement les modules de batteries Dell™ homologués pour cet ordinateur. L'utilisation d'autres types
de modules peut présenter un risque d'incendie ou d'explosion.
• Ne transportez pas de batterie dans votre poche, sac à main ou autre conteneur où des objets métalliques (comme
des clés de voiture ou des trombones) pourraient court-circuiter les bornes de la batterie. L'excès de flux de
courant qui en résulterait pourrait entraîner des températures extrêmement élevées et, par conséquent, des
dommages sur la batterie, un incendie ou des brûlures.
• La batterie représente un danger de brûlure si vous la manipulez de façon incorrecte. Ne démontez pas la batterie.
Manipulez les batteries endommagées ou percées avec une extrême précaution. Lorsqu'une batterie est
endommagée, des électrolytes peuvent fuir des cellules et provoquer des dommages corporels.
• Conservez la batterie hors de portée des enfants.
• Ne rangez pas et ne laissez pas votre ordinateur ou votre batterie près d'une source de chaleur, telle qu'un
radiateur, une cheminée, un poêle, un chauffage électrique, ou tout autre appareil générateur de chaleur et ne
l'exposez pas à des températures supérieures à 60° C (140° F). Lorsque les batteries atteignent une température
excessive, les cellules de la batterie peuvent exploser ou imploser, représentant alors un risque d'incendie.
• Ne jetez pas la batterie de votre ordinateur au feu ni avec les ordures ménagères. Les cellules de la batterie
risquent d'exploser. Débarrassez-vous de la batterie usagée selon les instructions du fabricant ou contactez le
service municipal de traitement des déchets afin de connaître les instructions de mise au rebut. Débarrassez-vous
rapidement d'une batterie usagée ou endommagée.
SÉCURITÉ : Voyage en avion
• Les réglementations de certaines administrations fédérales d'aviation et/ou les restrictions propres à chaque
compagnie aérienne peuvent s'appliquer au fonctionnement de votre ordinateur Dell pendant que vous voyagez à
bord d'un avion. Par exemple, ces réglementations/restrictions peuvent interdire l'utilisation de tout appareil
électronique personnel ayant la capacité de transmettre intentionnellement des fréquences radio ou d'autres
signaux électromagnétiques au cours d'un vol aérien.
42 Guide des Informations Système
Page 45

– Afin de respecter au mieux ces instructions, si votre ordinateur portable Dell est équipé de Dell
TrueMobile™ ou d'autres dispositifs de communication sans fil, veuillez désactiver cet appareil avant de
monter à bord de l'avion et suivre les instructions fournies par le personnel à bord sur l'utilisation de ce type
d'appareils.
– En outre, l'utilisation d'appareils électroniques personnels, comme un ordinateur portable, peut être
interdite pendant certaines phases critiques du vol, par exemple pendant le décollage et l'atterrissage.
Certaines compagnies aériennes déterminent parfois la phase critique à n'importe quel moment du vol, dans
la mesure où l'avion vole au-dessous de 3050 m. Veuillez suivre les instructions propres à la compagnie
aérienne quant à l'autorisation d'utiliser un appareil électronique personnel.
SÉCURITÉ : Instructions relatives à la compatibilité électromagnétique (EMC,
Electromagnetic Compatibility)
Utilisez des câbles blindés afin de vous assurer de conserver la classification EMC adaptée à l'environnement donné.
Dell propose un câble pour les imprimantes utilisant le port parallèle. Si vous le souhaitez, vous pouvez commander un
câble sur le site Web de Dell, à l'adresse suivante :
L'électricité statique peut endommager les composants électroniques internes de votre ordinateur. Pour éviter de tels
dommages, déchargez l’électricité statique de votre corps avant de toucher tout composant électronique de votre
ordinateur, comme par exemple, un module de mémoire. Il vous suffit pour cela de toucher une surface métallique non
peinte sur le panneau d'entrée/sortie de l'ordinateur.
AVERTISSEMENT :
plomb, considéré par l'état de Californie comme un produit pouvant provoquer des malformations congénitales ou
autres anomalies de ce genre.
les cordons de ce produit et de ses accessoires contiennent des produits chimiques contenant du
Lavez-vous les mains après avoir manipulé les cordons
www.dell.com
.
.
Lors de l'utilisation de votre ordinateur
Suivez les consignes de sécurité suivantes afin d'éviter d'endommager votre ordinateur :
• Lorsque vous installez l'ordinateur pour travailler, placez-le sur une surface plane.
• Lors de vos déplacements, ne faites pas enregistrer votre ordinateur en tant que bagage. Vous pouvez faire passer
l'ordinateur dans un détecteur à rayons X, mais jamais dans un détecteur de métaux. Dans le cas d'une inspection
manuelle, assurez-vous d'avoir une batterie chargée à disposition si vous devez allumer l'ordinateur.
• Si vous êtes amené à voyager en ayant préalablement retiré l'unité de disque dur de l'ordinateur, veillez à
envelopper l'unité dans un matériau non-conducteur, tel que du tissu ou du papier. Dans le cas d'une inspection
manuelle, soyez prêt à installer l'unité de disque dur dans l'ordinateur. Vous pouvez faire passer l'unité de disque
dur dans un détecteur à rayons X, mais jamais dans un détecteur de métaux.
• Lorsque vous voyagez, ne placez jamais l'ordinateur dans un compartiment à bagages en hauteur, où il pourrait se
déplacer. Évitez de laisser tomber votre ordinateur et de le soumettre à tout autre choc mécanique.
• Protégez l'ordinateur, la batterie et l'unité de disque dur contre les risques liés à l'environnement, tels que les
températures extrêmes, la surexposition à la lumière, la saleté, la poussière, la nourriture et les liquides.
• Lorsque vous transportez votre ordinateur entre des environnements présentant d'importants écarts de
température ou de taux d'humidité, une condensation peut se former sur ou dans l'ordinateur. Pour ne pas
endommager l'ordinateur, patientez suffisamment pour que cette humidité s'évapore avant de l'utiliser.
AVIS : Lorsque vous faites passer votre ordinateur d'un environnement froid à un environnement plus chaud ou
inversement, laissez-lui le temps de s'acclimater à la température ambiante avant de l'allumer.
• Lorsque vous débranchez un câble, tirez sur le connecteur ou sur la boucle prévue à cet effet, mais jamais sur le
câble lui-même. Lorsque vous tirez sur le connecteur, maintenez-le correctement aligné afin d'éviter tout risque
de torsion des broches. Par ailleurs, lorsque vous connectez un câble, assurez-vous au préalable que les
connecteurs sont bien orientés et alignés.
Guide des Informations Système 43
Page 46

• Manipulez les composants avec précaution. Un composant, tel qu'un module de mémoire, doit être tenu par les
bords et non par les broches.
• Avant de retirer un module de mémoire de la carte système ou de débrancher un périphérique de l'ordinateur,
éteignez l'ordinateur, débranchez le câble de l'adaptateur CA/CC, retirez toutes les batteries installées dans la baie
de batterie ou la baie modulaire et attendez 5 secondes. Cette précaution permet d'éviter d'endommager la carte
système.
• Nettoyez l'écran avec un tissu propre et doux et de l'eau. Appliquez l'eau sur le chiffon, puis passez le chiffon sur
l'écran toujours dans le même sens, de haut en bas. Retirez rapidement l'humidité de l'écran et séchez-le. Une
exposition prolongée à l'humidité peut endommager l'écran. N'utilisez pas de nettoyant pour vitres sur l'écran.
• Si l'ordinateur est mouillé ou endommagé, suivez les procédures décrites dans la section «Résolution des
problèmes» du Guide d'utilisation. Si, après avoir effectué ces procédures, vous constatez que l'ordinateur ne
fonctionne pas correctement, contactez Dell (pour obtenir les coordonnées du contact approprié, reportez-vous à
la section «Obtention d'aide» du Guide d'utilisation).
www.dell.com | support.dell.com
SÉCURITÉ : Conseils en ergonomie
PRÉCAUTION : Une utilisation incorrecte ou prolongée du clavier peut provoquer des blessures.
PRÉCAUTION : Une exposition prolongée devant l'écran peut occasionner des troubles de la vue.
Pour un plus grand confort et une plus grande efficacité, observez les consignes ergonomiques de la section «Annexe» du
Guide d'utilisation en ligne lors de l'installation et de l'utilisation de votre système informatique.
Cet ordinateur portable n'a pas été conçu pour une utilisation prolongée au bureau. Pour une utilisation de ce type, il est
recommandé de connecter un clavier externe.
SÉCURITÉ : Intervention à l'intérieur de votre ordinateur
Avant de retirer ou d'installer des modules de mémoire, des cartes Mini PCI ou des modems, suivez les étapes ci-après
dans l'ordre indiqué.
AVIS : Vous ne devez intervenir à l'intérieur de l'ordinateur que pour installer des modules de mémoire, une carte
Mini PCI, un modem, une carte Bluetooth™ ou une batterie de réserve.
AVIS : Avant de déconnecter un périphérique ou de retirer un module de mémoire, une carte Mini PCI, un modem, une
carte Bluetooth ou une batterie de réserve, patientez 5 secondes après la mise hors tension de l'ordinateur, pour
éviter d'endommager la carte système.
1
Éteignez l'ordinateur ainsi que tous les périphériques connectés.
2
Débranchez l'ordinateur et les périphériques de leur prise électrique afin de réduire le risque de blessure ou de choc.
Déconnectez également les lignes téléphoniques ou de télécommunication de l'ordinateur.
3
Retirez la batterie principale de la baie de batterie et, si nécessaire, la batterie secondaire de la baie modulaire.
4
Raccordez-vous à la masse en touchant une surface métallique non peinte à l'arrière de l'ordinateur.
5
Pendant votre travail à l'intérieur de l'ordinateur, touchez régulièrement la surface métallique non peinte de
l'ordinateur pour dissiper toute électricité statique qui risquerait d'endommager les composants.
SÉCURITÉ : Protection contre les décharges électrostatiques
L'électricité statique peut endommager les composants électroniques internes de votre ordinateur. Pour éviter de tels
dommages, déchargez l’électricité statique de votre corps avant de toucher tout composant électronique de votre
ordinateur, comme par exemple, un module de mémoire. Pour ce faire, vous pouvez toucher une surface métallique non
peinte à l'arrière de l'ordinateur.
44 Guide des Informations Système
Page 47

Tandis que vous continuez à travailler à l'intérieur de l'ordinateur, pensez à toucher régulièrement une surface
métallique non peinte à l'arrière de l'ordinateur pour vous débarrasser de la charge statique accumulée par votre corps.
Vous pouvez également prendre les mesures suivantes pour éviter les dommages dus aux décharges électrostatiques :
• Lorsque vous déballez un composant sensible à l'électricité statique de son carton d'emballage, ne le retirez pas de
son emballage antistatique avant d'être prêt à l'installer sur votre ordinateur. Juste avant d'ôter l'emballage
antistatique, veillez à décharger votre corps de son électricité statique.
• Quand vous transportez un composant sensible, placez-le d'abord dans un emballage ou une boîte antistatique.
• Manipulez tous les composants sensibles dans une zone antistatique. Si possible, utilisez des tapis antistatiques
sur le sol et sur votre plan de travail.
SÉCURITÉ : Retrait de la batterie
L'ordinateur utilise une batterie au lithium-ion et une pile bouton au lithium. Pour obtenir des
instructions sur le remplacement de la batterie au lithium-ion de votre ordinateur, reportez-vous à la
section «Retrait d'une batterie» à la page 54. La pile bouton au lithium est une pile longue durée et il est
fort possible que vous n'ayez jamais besoin de la remplacer. Si vous êtes toutefois amené à la remplacer,
reportez-vous à la section «Retrait et installation d'une batterie de réserve» à la page 55.
Ne jetez pas la batterie avec les ordures ménagères. Contactez le service municipal de traitement des
déchets pour connaître l'adresse du site de dépôt de batteries le plus proche de votre domicile.
Guide des Informations Système 45
Page 48

Recherche d'informations concernant l'ordinateur
Que recherchez-vous ? Cherchez ici
• Un programme de diagnostic pour
mon ordinateur
• Pilotes pour mon ordinateur
• Documentation concernant mon
ordinateur
• Documentation concernant mon
appareil
www.dell.com | support.dell.com
CD Drivers and Utilities (Pilotes et utilitaires)
(également appelé ResourceCD)
La documentation et les pilotes sont déjà installés sur votre
ordinateur. Vous pouvez utiliser ce CD pour réinstaller les pilotes,
exécuter Dell Diagnostics, ou accéder à la documentation.
Des fichiers readme (lisez-moi) peuvent être inclus sur votre CDROM afin de fournir des mises à jour de dernière minute concernant
des modifications techniques apportées à votre système ou des
informations de référence destinées aux techniciens ou aux
utilisateurs expérimentés.
• Comment installer mon ordinateur
• Informations sur les garanties
• Consignes de sécurité
46 Guide des Informations Système
Guide des Informations Système Dell™
Site Web «Dell Premier Support» (Support Premier de Dell)
REMARQUE : Ce document est disponible sous forme de PDF à
l'adresse support.dell.com.
Page 49

Que recherchez-vous ? Cherchez ici
• Comment retirer et remplacer des
pièces
• Spécifications techniques
• Comment configurer les paramètres
du système
• Comment identifier et résoudre des
problèmes
Guide d'utilisation
Centre d'aide et de support Microsoft® Windows® XP
1
Cliquez sur le bouton
2
Cliquez sur
d'utilisation
Windows 2000
Double-cliquez sur l'icône
de votre ordinateur.
• Numéro de service et code de service
express
Numéro de service et licence Microsoft Windows
Ces étiquettes sont situées sur votre ordinateur.
• Étiquette de licence Microsoft
Windows
• Entrez le code de service express pour orienter votre appel lorsque
vous contactez le service de support technique. Le code de
service express n'est pas disponible dans tous les pays.
• Utilisez le numéro situé sur l'étiquette de licence Microsoft
Windows lorsque que vous réinstallez votre système
d'exploitation.
• Pilotes les plus récents pour mon
ordinateur
• Réponses aux questions concernant
le service et le support technique
• Discussions en ligne avec le support
technique et d'autres utilisateurs
• Documentation sur mon ordinateur
Site Web de support de Dell — support.dell.com
Le site Web de support technique de Dell fournit plusieurs outils en
ligne, notamment :
• Solutions — Conseils et astuces de dépannage, articles de
techniciens et formation en ligne
• Communauté — Discussion en ligne avec d'autres clients Dell
• Mises à niveau — Informations sur les mises à niveau des
composants, comme la mémoire, l'unité de disque dur et le
système d'exploitation
• Service clientèle — Contacts, commandes, garanties et
informations de réparation
• Téléchargements— Pilotes, correctifs et mises à jour logicielles
• Références — Documentation de l'ordinateur, caractéristiques
des produits et documents techniques
Démarrer
, puis sur
Aide et support.
Guides d'utilisation du système
.
Guide d'utilisation
•Utilisez le numéro de service
pour identifier votre ordinateur
lorsque vous accédez au site Web
support.dell.com
appelez le service de support
technique.
, puis sur
Guides
sur le bureau
ou lorsque vous
Guide des Informations Système 47
Page 50

Que recherchez-vous ? Cherchez ici
• Historique de l'état et du support de
l'appel de service
• Les principaux problèmes
techniques
• Les questions les plus fréquentes
• Les téléchargements de fichiers
• Informations détaillées sur la
configuration de l'ordinateur
• Contrat de service de l'ordinateur
• Comment utiliser Windows XP
www.dell.com | support.dell.com
• Documentation sur mon ordinateur
• Documentation pour les
périphériques (pour un modem, par
exemple)
• Comment réinstaller mon système
d'exploitation
Site Web Support Premier de Dell —
premiersupport.dell.com
Le site Web Dell Premier Support est conçu pour les grandes
entreprises, les gouvernements et les institutions éducatives. Ce site
Web n'est peut-être pas disponible dans toutes les régions.
Centre d'aide et de support de Windows
1
Cliquez sur le bouton
2
Tapez un mot ou une expression qui décrit votre problème, puis
Démarrer
, puis sur
Aide et support
.
cliquez sur l'icône en forme de flèche.
3
Cliquez sur la rubrique qui décrit votre problème.
4
Suivez les instructions qui s'affichent à l'écran.
CD du système d'exploitation
Le système d'exploitation est déjà installé sur votre ordinateur. Pour
réinstaller le système d'exploitation, utilisez le CD
d'exploitation
. Reportez-vous au
Guide d'utilisation
Système
pour connaître la
procédure de réinstallation du système d'exploitation.
Une fois le système d'exploitation réinstallé, utilisez le
Utilitaires
pour réinstaller les pilotes des périphériques
CD Pilotes et
accompagnant votre ordinateur.
48 Guide des Informations Système
L'étiquette de la clé du produit se
trouve sur l'ordinateur.
Page 51

Installation de votre ordinateur
PRÉCAUTION : Avant d'effectuer l'une des procédures de cette section, suivez les consignes de
sécurité indiquées au début de ce document.
1
Déballez la boîte d'accessoires.
2
Mettez de côté le contenu de la boîte d'accessoires ; vous en aurez besoin ultérieurement pour
réaliser l'installation.
Cette boîte contient également la documentation utilisateur et tout autre logiciel ou matériel
supplémentaire (cartes PC, lecteurs, batteries, etc.) que vous avez commandés.
3
Reliez l'adaptateur secteur au connecteur de l'adaptateur secteur de l'ordinateur et à la prise
secteur.
Guide des Informations Système 49
Page 52

4
Pour mettre l'ordinateur sous tension, ouvrez le moniteur et appuyez sur le bouton
d'alimentation.
REMARQUE : Ne raccordez pas l'ordinateur à la station d'accueil tant qu'il n'a pas été mis sous tension
et arrêté au moins une fois.
www.dell.com | support.dell.com
Bouton
d'alimentation
50 Guide des Informations Système
Page 53

À propos de votre ordinateur
Vue avant
Écran
Voyants d'état du
clavier
Bouton
d'alimentation
Voyants d'état du
périphérique
Tablette tactile
Boutons de la
tablette tactile
Clavier
Dispositif de
blocage de l'écran
Haut-parleurs
Guide des Informations Système 51
Page 54

Vue de gauche
www.dell.com | support.dell.com
Connecteur IEEE 1394
Vue de droite
Emplacement pour carte PC
Capteur infrarouge
Emplacement pour
câble de sécurité
Connecteurs audio (2)
Emplacement pour
câble de sécurité
52 Guide des Informations Système
Baie modulaire Dispositif de verrouillage
du périphérique
Page 55

Vue arrière
PRÉCAUTION : Ne bloquez pas et n'insérez pas d'objets dans les entrées d'air de l'ordinateur et évitez
toute accumulation de poussière. Ne placez pas l'ordinateur dans un environnement peu aéré, tel
qu'une mallette fermée, lorsque celui-ci fonctionne. Le manque de ventilation risquerait de provoquer
un incendie ou d'endommager l'ordinateur.
Connecteur réseau (RJ-45)
Connecteur modem (RJ-11) (en option)
Connecteurs USB (2)
Connecteur de sortie
Téléviseur S-vidéo
Vue de dessous
Dispositif d'extraction de la baie de batterie
Cache du module de mémoire
Unité de disque dur
Connecteur parallèle
Connecteur vidéo
Connecteur
d'adaptateur CA/CC
Connecteur série
Entrées d'air
Indicateur de charge
de la batterie
Batterie
Capot de carte
Mini PCI
Ventilateur
Connecteur de station d'accueil
Guide des Informations Système 53
Page 56

Retrait de la batterie
Pour en savoir plus sur le retrait de la batterie secondaire, reportez-vous à la section «Utilisation de
la baie modulaire» du
PRÉCAUTION : Avant d'effectuer ces procédures, éteignez votre ordinateur, débranchez-le de la prise
secteur et déconnectez le modem de la prise jack téléphonique murale.
AVIS : Si vous souhaitez remplacer la batterie alors que l'ordinateur est en mode Veille, vous disposez
de 90 secondes pour effectuer cette opération. Une fois ce délai écoulé, l'ordinateur s'arrête et toutes
les données non enregistrées sont définitivement perdues.
Assurez-vous que l'ordinateur est éteint, débranché de la prise secteur et de la prise jack
1
téléphonique murale.
www.dell.com | support.dell.com
2
Si l'ordinateur est connecté (amarré) à une station d'accueil, déconnectez-le. Pour obtenir des
instructions, reportez-vous à la documentation qui accompagne la station d'accueil.
3
Faites glisser et maintenez le dispositif d'extraction de la baie de batterie, situé en bas de
l'ordinateur, puis retirez la batterie de la baie.
Guide d'utilisation
en ligne.
54 Guide des Informations Système
Page 57

Retrait et installation d'une batterie de réserve
1
Retirez la batterie.
2
Retirez le capot du compartiment de la batterie de réserve.
3
Faites glisser la batterie de réserve vers le connecteur et retirez-la de son compartiment.
4
Débranchez le câble de batterie de réserve du connecteur.
Câble de batterie de réserve
Connecteur
Batterie de réserve
Guide des Informations Système 55
Page 58

5
Branchez le câble de la batterie de réserve au connecteur situé dans le compartiment de cette
batterie.
6
Placez la batterie de réserve dans le compartiment, puis remettez le capot du compartiment
en place.
www.dell.com | support.dell.com
Installation d'une batterie
Faites glisser la batterie dans la baie jusqu'à ce que le dispositif de verrouillage s'enclenche.
Pour en savoir plus sur l'installation de la batterie secondaire, reportez-vous à la section «Utilisation
de la baie modulaire» du
56 Guide des Informations Système
Guide d'utilisation
en ligne
.
Page 59

Dell Diagnostics
PRÉCAUTION : Avant d'effectuer l'une des procédures de cette section, suivez les consignes de
sécurité indiquées au début de ce document.
Quand utiliser Dell Diagnostics
Si vous rencontrez un problème avec l'ordinateur, effectuez les vérifications indiquées dans la
section «Résolution des problèmes» du
contacter Dell pour obtenir une assistance technique.
Nous vous recommandons d'imprimer ces procédures avant de commencer.
AVIS : Dell Diagnostics ne fonctionne que sur les ordinateurs Dell™.
Dell Diagnostics se trouve dans une partition cachée (utilitaire de diagnostics) de votre unité de
disque dur.
REMARQUE : Si aucune image ne s'affiche sur l'écran de l'ordinateur, contactez Dell (pour obtenir les
coordonnées du contact approprié, reportez-vous à la section «Obtention d'aide» du Guide d'utilisation).
Éteignez votre ordinateur.
1
2
Si l'ordinateur est connecté (amarré) à une station d'accueil, déconnectez-le. Pour obtenir des
instructions, reportez-vous à la documentation qui accompagne la station d'accueil.
3
Connectez l'ordinateur à une prise électrique.
4
Allumez l'ordinateur. Lorsque le logo DELL™ apparaît, appuyez immédiatement sur <F12>.
REMARQUE : Si rien ne s'affiche sur l'écran, maintenez le bouton <Fn> enfoncé et appuyez sur le
bouton d'alimentation de l'ordinateur pendant environ 5 secondes pour lancer Dell Diagnostics.
L'ordinateur lance automatiquement l'évaluation du système avant initialisation.
Guide d'utilisation
et exécutez Dell Diagnostics avant de
REMARQUE : Si un message, indiquant qu'aucune partition de l'utilitaire Diagnostics n'a été trouvée,
s'affiche, exécutez Dell Diagnostics à partir du CD Pilotes et Utilitaires.
Si vous attendez trop longtemps et que le logo Microsoft® Windows® apparaît, patientez
jusqu'à ce que le bureau de Windows s'affiche. Arrêtez ensuite l'ordinateur à l'aide du menu
Démarrer
5
Lorsque la liste des périphériques d'amorçage s'affiche, sélectionnez
et faites une autre tentative.
Diagnostics
et appuyez
sur <Entrée>.
L'ordinateur lance l'évaluation du système avant initialisation avec une série de diagnostics
intégrés qui effectue un test préalable de la carte mère, du clavier, du disque dur et de l'écran.
• Répondez à toutes les questions qui s'affichent pendant l'évaluation.
• Si une défaillance de composant est détectée, l'ordinateur s'interrompt et émet un signal
sonore. Pour arrêter l'évaluation et redémarrer le système d'exploitation, appuyez sur
<n> ; pour passer au test suivant, appuyez sur <y> ; pour retester le composant
défectueux, appuyez sur <r>.
Guide des Informations Système 57
Page 60

• Si des défaillances sont détectées pendant l'évaluation du système de préamorçage, notez
le(s) code(s) d'erreur et contactez Dell (pour obtenir les coordonnées du contact
approprié, reportez-vous à la section «Obtention d'aide» du
lancer Dell Diagnostics.
Si l'évaluation du système se déroule sans problème, le message
Utility Partition (Initialisation de la partition de l'utilitaire Dell
Diagnostics) s'affiche. Press any key to continue (Appuyez sur une
touche pour continuer)
6
Appuyez sur une touche pour démarrer Dell Diagnostics à partir de la partition Diagnostics
de votre disque dur.
7
www.dell.com | support.dell.com
Lorsque le
Menu principal de Dell Diagnostics
1
Une fois Dell Diagnostics chargé et l'écran du
correspondant à l'option souhaitée.
Option Fonction
Express Test
(Test rapide)
Extended Test
(Test approfondi)
Custom Test
(Test personnalisé)
Symptom Tree
(Arborescence des
symptômes)
menu principal
Exécute un test rapide des périphériques. Ce test dure
généralement entre 10 et 20 minutes et n'exige pas
d'action de votre part. Effectuez un
améliorer la capacité de suivi du problème.
Exécute un test approfondi des périphériques. Ce test dure
généralement une heure ou plus et vous demande de
répondre régulièrement à des questions.
Teste un périphérique spécifique. Vous pouvez
personnaliser les tests à effectuer.
Répertorie les symptômes les plus couramment rencontrés
et permet de sélectionner un test en fonction du
symptôme du problème rencontré.
Guide d'utilisation
Booting Dell Diagnostic
) avant de
.
de Dell Diagnostics apparaît, sélectionnez le test à effectuer.
menu principal
test rapide
affiché, cliquez sur le bouton
pour
2
Si un problème survient pendant un test, un message indiquant le code d'erreur et une
description du problème s'affiche. Notez le code d'erreur et la description du problème et
suivez les instructions à l'écran.
Si vous ne parvenez pas à résoudre le problème, contactez Dell (pour obtenir les coordonnées
du contact approprié, reportez-vous à la section «Obtention d'aide» du
REMARQUE : Le numéro de service de votre ordinateur s'affiche dans la partie supérieure de chaque
écran de test. Lorsque vous contacterez le service technique de Dell, votre numéro de service vous sera
demandé.
58 Guide des Informations Système
Guide d'utilisation
).
Page 61

3
Si vous effectuez un test à partir de l'option
symptômes
Onglet Fonction
Résultats Affiche les résultats du test et les conditions d'erreur
Erreurs Affiche les conditions d'erreur rencontrées, les codes
Aide Décrit le test et peut indiquer les conditions requises pour
Configuration Affiche la configuration matérielle du périphérique
Paramètres Vous permet de personnaliser le test en modifiant ses
4
Lorsque les tests sont terminés, fermez l'écran test pour revenir à l'écran du
, cliquez sur l'onglet approprié décrit dans le tableau suivant pour en savoir plus.
rencontrées.
d'erreur et la description du problème.
exécuter le test.
sélectionné.
Dell Diagnostics obtient les informations de configuration
de tous les périphériques à partir de l'installation du
système, de la mémoire et de divers tests internes, et les
affiche dans la liste des périphériques située dans le volet
gauche de l'écran. La liste des périphériques peut ne pas
afficher les noms de tous les composants installés sur votre
ordinateur ou de tous les périphériques reliés à celui-ci.
paramètres.
Test personnalisé
ou
Arborescence des
Pour quitter Dell Diagnostics et redémarrer l'ordinateur, fermez l'écran du
menu principal
menu principal
.
.
Guide des Informations Système 59
Page 62

Réglementations
Une interférence électromagnétique (EMI - Electromagnetic Interference) est un signal ou une émission, véhiculé(e)
dans l'espace libre ou par des conducteurs électriques ou de signaux, qui peut mettre en danger le fonctionnement d'une
radionavigation ou autre service de sécurité, ou sérieusement dégrader, obstruer ou interrompre à maintes reprises un
service de communications radio autorisé. Les services de communications radio incluent, de manière non limitative, les
services de radiodiffusion commerciale AM/FM, la télévision, les services de téléphonie cellulaire, la radiodétection, le
contrôle de la circulation aérienne, les récepteurs de radio messagerie et les systèmes GSM. Ces services autorisés, ainsi
que les éléments rayonnants parasites involontaires tels que les dispositifs numériques, y compris les ordinateurs,
contribuent à l'environnement électromagnétique.
La compatibilité électromagnétique (EMC) est la capacité des éléments d'un équipement électronique à interagir
correctement dans l'environnement électronique. Bien que cet ordinateur ait été conçu dans le respect de cette
compatibilité et soit conforme aux seuils fixés en matière d'interférences électromagnétiques par l'organisme de
www.dell.com | support.dell.com
réglementation, il n'y a aucune garantie concernant les interférences susceptibles de se produire sur une installation
particulière. Si l'équipement crée effectivement des interférences avec des services de communications radio (ce qui
peut être déterminé en l'éteignant et en l'allumant), l'utilisateur est encouragé à essayer de corriger ce phénomène en
prenant l'une ou l'ensemble des mesures suivantes :
• Changer l'orientation de l'antenne de réception.
• Repositionner l'ordinateur en fonction du récepteur.
• Éloigner l'ordinateur du récepteur.
• Brancher l'ordinateur sur une autre prise, pour faire en sorte que l'ordinateur et le récepteur se trouvent sur
différents circuits de dérivation.
Si nécessaire, consultez un membre de l'équipe du support technique de Dell ou un technicien radio/télévision
expérimenté pour des suggestions supplémentaires.
Pour plus d'informations sur la réglementation, reportez-vous au Guide d'utilisation en ligne fourni avec l'ordinateur.
Pour accéder au Guide d'utilisation, reportez-vous à la page 47.
60 Guide des Informations Système
Page 63

Garantie limitée et règle de retour
Les produits matériels de marque Dell achetés au Canada sont couverts par une garantie limitée de 90 jours (lampes
pour projecteurs Dell uniquement), d'un an, de deux ans, de trois ans ou de quatre ans. Pour savoir quelle garantie
s'applique aux produits que vous avez achetés, consultez la facture qui les accompagne. Les sections suivantes décrivent
la garantie limitée et la règle de retour en vigueur au Canada.
Conditions de garantie limitée pour les produits matériels Dell (Canada seulement)
Que couvre cette garantie limitée ?
Cette garantie limitée couvre les vices de matériel et de fabrication éventuels pouvant affecter les produits matériels de
marque Dell de —tout utilisateur final—, notamment les produits périphériques de marque Dell.
Qu'est-ce qui n'est pas couvert par cette garantie limitée ?
Cette garantie limitée ne couvre pas les éléments suivants :
• Les logiciels, y compris le système d'exploitation et les logiciels ajoutés aux produits matériels Dell par notre
système d'intégration d'entreprise ou le rechargement de logiciels.
• Les produits et accessoires d'une marque autre que Dell et Provider Direct.
• Les problèmes résultant de ce qui suit :
– Causes externes : accident, utilisation abusive ou impropre, problèmes liés à l'alimentation électrique
– Interventions non autorisées par Dell
– Utilisation non conforme aux instructions du produit
– Non-respect des instructions du produit ou non-exécution de l'entretien préventif exigé
– Problèmes dus à l'utilisation d'accessoires, de pièces et de composants non fournis par Dell
• Produits dont les numéros de service ou les numéros de série sont manquants ou incorrects
• Produits qui n'ont pas été payés
CETTE GARANTIE VOUS DONNE DES DROITS LÉGAUX SPÉCIFIQUES, AUXQUELS PEUVENT S'AJOUTER
D'AUTRES DROITS, QUI VARIENT AU CAS PAR CAS (OU SELON LA PROVINCE). LA RESPONSABILITÉ DE
DELL POUR LE FONCTIONNEMENT DÉFECTUEUX ET LES DÉFAUTS DU PRODUIT EST LIMITÉE À LA
RÉPARATION OU AU REMPLACEMENT COMME INDIQUÉ DANS CE CONTRAT DE GARANTIE, SELON LES
CONDITIONS DE LA PÉRIODE DE GARANTIE APPARAISSANT SUR VOTRE FICHE D'EXPÉDITION OU
FACTURE. À L'EXCEPTION DES GARANTIES EXPRESSES FIGURANT DANS LE PRÉSENT CONTRAT DE
GARANTIE, DELL REJETTE TOUTE AUTRE GARANTIE OU CONDITION EXPRESSE OU IMPLICITE,
INCLUANT SANS RESTRICTION LES GARANTIES ET CONDITIONS IMPLICITES DE QUALITÉ OU
D'ADAPTABILITÉ À UN USAGE PARTICULIER, STATUTAIRE OU AUTRE. CERTAINES PROVINCES NE
RECONNAISSENT PAS D'EXCLUSION SUR DES GARANTIES OU CONDITIONS IMPLICITES, OU DE
RESTRICTION EN CE QUI CONCERNE LA DURÉE D'UNE GARANTIE OU CONDITION IMPLICITE.
AUQUEL CAS, LES EXCLUSIONS ET RESTRICTIONS PRÉCÉDENTES PEUVENT NE PAS S'APPLIQUER.
NOUS DÉCLINONS TOUTE RESPONSABILITÉ, AU-DELÀ DES RECOURS INDIQUÉS DANS CETTE
GARANTIE LIMITÉE OU POUR LES DOMMAGES PARTICULIERS, INDIRECTS, ACCIDENTELS OU
INDUITS, Y COMPRIS POUR LA RESPONSABILITÉ DE RÉCLAMATIONS DE DOMMAGES D'UNE TIERCE
PARTIE À VOTRE ENCONTRE, POUR LA NON-DISPONIBILITÉ D'UN PRODUIT OU POUR LA PERTE DE
DONNÉES OU DE LOGICIEL, ET CE SANS RESTRICTION. NOTRE RESPONSABILITÉ SE LIMITE AU
MONTANT QUE VOUS AVEZ PAYÉ POUR LE PRODUIT FAISANT L'OBJET D'UNE RÉCLAMATION. IL S'AGIT
DU MONTANT MAXIMAL SOUMIS À LA RESPONSABILITÉ DE DELL.
CERTAINES PROVINCES NE RECONNAISSENT PAS D'EXCLUSION OU DE RESTRICTION SUR LES
DOMMAGES PARTICULIERS, INDIRECTS, SECONDAIRES OU INDUITS, AUQUEL CAS L'EXCLUSION OU
LA RESTRICTION PRÉCÉDENTE PEUT NE PAS S'APPLIQUER.
Guide des Informations Système 61
Page 64

Quelle est la durée de cette garantie limitée ?
Cette garantie limitée s'applique pendant la période indiquée sur votre fiche d'expédition ou facture, à l'exception de la
garantie limitée des batteries Dell qui est valable un an seulement et de la garantie limitée des lampes de projecteurs
Dell qui est réduite à 90 jours uniquement. La garantie limitée prend effet à la date inscrite sur la fiche d'expédition ou
la facture. La période de garantie n'est pas étendue en cas de réparation ou de remplacement d'un produit ou de
composants sous garantie. Dell peut modifier en toute discrétion les conditions et la disponibilité des garanties limitées,
mais ces changements ne sont pas rétroactifs (c'est-à-dire que les conditions de la garantie en vigueur au moment de
l'achat continueront de s'appliquer à votre achat).
Que dois-je faire si j'ai besoin d'un service de garantie ?
Avant que la garantie n'expire, appelez-nous au numéro correspondant à votre situation, comme indiqué dans le tableau
ci-dessous. En outre, ayez à portée de main votre numéro de service ou numéro de commande Dell.
www.dell.com | support.dell.com
Utilisateurs particuliers, utilisateurs travaillant à
domicile et petites entreprises :
Support technique et service clientèle 1-800-847-4096
Entreprises de taille moyenne, grands comptes,
gouvernement, domaines de l'éducation et de la
santé, et revendeurs à valeur ajoutée :
Support technique 1-800-387-5757
Service clientèle 1-800-326-9463
Gouvernement ou domaine de l'éducation, ou encore
particuliers ayant acheté ce produit par le biais d'un
programme d'achat par les employés :
Support technique 1-800-387-5757
Service clientèle 1-800-326-9463 (poste 8221 pour les
Mémoire Dell
Que fera Dell ?
Au cours des 90 premiers jours de la garantie limitée de 90 jours et la première année de toutes les autres garanties
limitées : Pour les 90 jours de la garantie limitée de 90 jours et la première année de toutes les autres garanties limitées,
Dell effectuera la réparation de tous les produits de marque Dell présentant des défauts matériels ou de fabrication, qui
lui seront renvoyés. Si nous ne parvenons pas à réparer le produit, nous le remplaçons par un produit comparable, neuf
ou recyclé.
Lorsque vous nous contactez, nous vous donnons un numéro d'autorisation de retour de matériel que vous devez joindre
à votre retour. Vous devez nous retourner les produits dans leur emballage d'origine ou un équivalent, payer d'avance les
frais d'expédition et assurer l'envoi des produits ou accepter les risques de perte ou de dommage pendant
l'acheminement. Nous nous chargeons de vous retourner les produits réparés ou remplacés. Nous prenons à notre charge
l'expédition des produits réparés ou remplacés si vous avez une adresse au Canada. Sinon, nous vous renverrons le
produit contre paiement à réception.
Si nous déterminons que le problème n'est pas couvert par la garantie, nous vous en avertissons et vous indiquons les
solutions alternatives de service qui vous sont proposées moyennant des frais.
REMARQUE : Avant de nous retourner le(s) produit(s), veillez à effectuer une sauvegarde des données présentes sur le(s)
disque(s) dur(s) et sur n'importe quel autre périphérique de stockage. Supprimez toutes les informations confidentielles,
propriétaires ou personnelles et retirez tous les supports amovibles, tels que les disquettes, CD-ROM ou cartes PC. Nous
déclinons toute responsabilité en ce qui concerne vos informations confidentielles, propriétaires ou personnelles, et en cas
de perte ou d'endommagement des données ou des supports amovibles.
Canada seulement
particuliers)
1-888-363-5150
62 Guide des Informations Système
Page 65

Au cours des années non écoulées suivant la première année de toutes les garanties limitées : Nous remplacerons toute
pièce défectueuse par une pièce neuve ou réusinée, si nous estimons qu'elle a besoin d'être remplacée. Lorsque vous
nous contactez, nous vous demandons de nous fournir un numéro de carte de crédit valide au moment où vous
demandez le remplacement d'un composant, mais nous ne vous facturons pas le remplacement si vous nous retournez le
composant d'origine dans les 30 jours qui suivent l'expédition. Si Dell ne reçoit pas la pièce originale dans les 30 jours, le
prix standard courant de la pièce remplacée sera prélevé sur votre carte de crédit.
Nous prenons à notre charge l'expédition du composant si vous avez une adresse au Canada. Sinon, nous vous
renverrons le composant contre paiement à réception. Dell inclut également un emballage d'expédition préaffranchi
avec chaque composant de rechange afin que vous renvoyiez le composant remplacé à Dell.
REMARQUE : Avant de remplacer des pièces, veillez à effectuer une sauvegarde des données présentes sur le(s)
disque(s) dur(s) et sur n'importe quel autre périphérique de stockage. Nous déclinons toute responsabilité en cas de perte
ou d'endommagement des données.
Que se passe-t-il si j'ai souscrit un contrat de service ?
Si votre contrat de service a été passé avec Dell, le service vous sera proposé selon les conditions du contrat de service.
Reportez-vous à ce contrat pour plus d'informations sur la façon de bénéficier du service. Les contrats de service Dell
sont disponibles en ligne sur le site www.dell.ca ou en appelant le service clientèle au 1-800-847-4096. Si vous avez
souscrit par notre intermédiaire un contrat de service avec l'un de nos fournisseurs de service tiers, reportez-vous à ce
contrat (qui vous a été envoyé avec votre fiche d'expédition ou facture) pour plus d'informations sur la façon de
bénéficier du service.
Comment allez-vous réparer mon produit ?
Dell utilise des composants neufs ou remis en état provenant de différents fabricants pour les réparations sous garantie
et pour la fabrication de composants et de systèmes de remplacement. Les composants et systèmes recyclés sont des
composants ou des systèmes qui ont été retournés à Dell et dont certains n'ont jamais été utilisés par le client. La qualité
de tous les composants et systèmes est contrôlée et testée. Les composants et systèmes de remplacement fournis sont
couverts par la garantie pour la période restante de la garantie limitée du produit que vous avez acheté. Dell est
propriétaire de tous les composants retirés des produits réparés.
Puis-je transférer la garantie limitée ?
La garantie limitée sur les systèmes peut être transférée si son propriétaire actuel transfère également la propriété du
système et enregistre le transfert auprès de Dell. La garantie limitée sur la mémoire Dell ne peut pas être transférée.
Vous pouvez enregistrer votre transfert depuis le site Web de Dell :
• Dans le cas d'ordinateurs achetés au Canada (transferts à l'intérieur du pays) et pour effectuer un transfert d'un
client à un autre, allez à l'adresse www.dell.ca/ca/en/gen/topics/segtopic_ccare_nav_013_ccare.htm
• Pour les transferts à l'étranger (en dehors du pays d'achat d'origine), allez à
l'adressewww.dell.com/us/en/biz/topics/sbtopic_ccare_nav_016_ccare.htm
Si vous ne disposez pas d'accès à Internet, appelez Dell au 1-800-847-4096 (pour les particuliers) ou au 1-800-326-9463
(pour les clients des entreprises et administrations).
Règle de retour «Satisfait ou remboursé» (Canada seulement)
En qualité de client et utilisateur final ayant acheté de nouveaux produits directement à Dell, vous êtes en droit de les
retourner à Dell dans un délai de 30 jours maximum après la date de réception des produits pour un remboursement ou
un avoir équivalent au prix d'achat. En qualité de client et utilisateur final ayant acheté des produits reconditionnés ou
recyclés à Dell, vous êtes en droit de les retourner dans un délai de 14 jours à compter de la date indiquée sur votre fiche
d'expédition ou facture pour un remboursement ou un avoir équivalent au prix d'achat. Dans les deux cas, un montant
de 15 %, pour restockage, sera déduit du montant du remboursement ou de l'avoir indiqué sur votre fiche d'expédition
ou facture, et les frais d'expédition et de manutention ne vous seront pas remboursés, sauf avis contraire légal Si vous
avez acheté nos produits en tant que société liée à Dell par un contrat écrit, les termes stipulés dans ce contrat au sujet
du retour des produits peuvent différer de ceux spécifiés par la règle de retour.
Guide des Informations Système 63
Page 66

Pour retourner les produits, vous devez appeler le Service Clientèle de Dell au 1-800-847-4096 qui vous fournira un
numéro d'autorisation de retour pour crédit. Afin d'accélérer la procédure de remboursement ou d'avoir, Dell attend que
vous lui renvoyiez les produits dans leur emballage d'origine dans les 5 jours suivant l'attribution d'un numéro
d'autorisation de retour pour crédit. Vous devez également payer d'avance les frais d'expédition et assurer l'envoi ou
accepter les risques de perte ou de dommage pendant l'acheminement. Vous ne pouvez renvoyer le logiciel pour un
remboursement ou un avoir que si l'emballage scellé contenant les disquettes ou les CD-ROM n'a pas été ouvert. Les
produits renvoyés doivent être comme neufs, et tous les guides, disquettes, CD-ROM, cordons d'alimentation et autres
accessoires compris avec le produit doivent être renvoyés avec celui-ci. Les clients désirant renvoyer pour
remboursement ou avoir, des logiciels ou un système d'exploitation installé par Dell, doivent retourner le système dans
son intégralité, avec tous les supports et la documentation inclus dans la livraison d'origine.
La règle de retour «Satisfait ou remboursé» ne s'applique pas aux produits de stockage de Dell | EMC. Elle ne s'applique
pas non plus aux produits achetés par l'intermédiaire du service de vente de logiciels et périphériques Dell. Pour ces
produits, reportez-vous plutôt à la règle de retour alors en vigueur des logiciels et périphériques Dell (consultez la
section suivante, «Logiciels et périphériques Dell (Canada seulement)»).
www.dell.com | support.dell.com
Logiciels et périphériques Dell (Canada seulement)
Produits logiciels et périphériques tiers
Tout comme les autres revendeurs de logiciels et périphériques, Dell ne garantit pas les produits tiers. Les produits
logiciels et périphériques tiers sont uniquement couverts par les garanties offertes par le fabricant ou le revendeur initial
de ces produits. Les garanties de fabricants tiers varient d'un produit à l'autre. Consultez la documentation de votre
produit pour obtenir des informations spécifiques à la garantie. Contactez également le fabricant ou le revendeur si vous
souhaitez des informations supplémentaires.
Comme Dell propose un grand choix de produits logiciels et périphériques, il nous est impossible de vérifier et de
garantir de manière spécifique que tous les produits que nous proposons fonctionnent avec tout ou partie des différents
modèles d'ordinateurs Dell, mais aussi de vérifier et de garantir que tous les produits que nous vendons fonctionnent
correctement sur les centaines de marques d'ordinateurs disponibles aujourd'hui. Si vous avez des questions relatives à la
compatibilité d'un produit, nous vous conseillons vivement de contacter directement le fabricant ou le revendeur à qui
vous avez acheté le produit logiciel ou périphérique tiers.
Périphériques de marque Dell
Dell offre une garantie limitée pour ses nouveaux produits périphériques (produits pour lesquels Dell est fabricant), tels
que les moniteurs, les batteries, la mémoire, les stations d'accueil et les projecteurs. Pour déterminer quelle garantie
limitée s'applique au produit que vous avez acheté, reportez-vous à la fiche d'expédition ou facture Dell et/ou à la
documentation qui accompagnait votre produit. Vous trouverez des descriptions des garanties limitées Dell dans les
sections précédentes.
Règle de retour
Si, en qualité de client et utilisateur final, vous avez acheté des produits logiciels et périphériques Dell directement à
une société Dell, vous êtes en droit de retourner à Dell ces produits, à l'état neuf, dans un délai de 30 jours à compter de
la date figurant sur la fiche d'expédition ou la facture pour un remboursement équivalent au prix d'achat des produits si
ceux-ci ont déjà été payés. Ce remboursement ne comprend aucun frais d'expédition et de gestion figurant sur votre
fiche d'expédition ou facture ; ces frais sont à votre charge.
Pour retourner les produits, vous devez appeler le Service Clientèle de Dell au 1-800-387-5759 qui vous fournira un
numéro d'autorisation de retour pour crédit. Vous devez renvoyer les produits logiciels et périphériques à Dell dans leur
emballage d'origine (qui doit être comme neuf), payer d'avance les frais d'expédition et assurer l'envoi ou accepter les
risques de perte ou de dommage pendant l'acheminement.
Pour qu'un remboursement ou un remplacement soit possible, les produits renvoyés doivent être comme neufs, les
logiciels ne doivent pas être ouverts et tous les guides, disquettes, CD-ROM, câbles d'alimentation et autres accessoires
compris avec le produit doivent être renvoyés avec lui.
64 Guide des Informations Système
Page 67

Déclaration de garantie Intel® réservée aux processeurs Pentium® et Celeron®
(États-Unis et Canada uniquement)
Limited Warranty
Intel warrants that its family of Pentium® and Celeron® processors, if properly used and installed, will be free from defects in materials and workmanship and will substantially
conform to Intel’s publicly available specifications for a period of three (3) years after the date the Pentium or Celeron processor was purchased (whether purchased separately
or as part of a computer system).
If the Pentium or Celeron processor, which is the subject of this Limited Warranty, fails during the warranty period for reasons covered by this Limited Warranty, Intel, at its option, will:
• REPAIR the Pentium or Celeron processor by means of hardware and/or software; OR
• REPLACE the Pentium or Celeron processor with another Pentium or Celeron processor; OR
if Intel is unable to repair or replace the particular Pentium or Celeron processor,
• REFUND the then-current value of the Pentium or Celeron processor.
THIS LIMITED WARRANTY, AND ANY IMPLIED WARRANTIES THAT MAY EXIST UNDER STATE LAW, APPLY ONLY TO THE ORIGINAL PURCHASER OF THE
PENTIUM OR CELERON PROCESSOR, OR PENTIUM OR CELERON PROCESSOR-BASED COMPUTER AND LAST ONLY FOR AS LONG AS SUCH PURCHASER
CONTINUES TO OWN THE PROCESSOR.
Extent of Limited Warranty
Intel does not warrant that your Pentium or Celeron processor will be free from design defects or errors known as "errata." Current characterized errata are available upon request.
This limited warranty is for purchasers in the United States and Canada only. The limited warranty does not cover any costs relating to removal or replacement of any Pentium or
Celeron processors that are soldered or otherwise permanently affixed to your system’s motherboard.
This limited warranty does not cover damages due to external causes, including accident, problems with electrical power, usage not in accordance with product instructions,
misuse, neglect, alteration, repair, improper installation, or improper testing.
How to Obtain Warranty Service
To obtain warranty service for your Pentium or Celeron processor, you may contact your computer system manufacturer in accordance with its instructions, or you may contact Intel.
To request warranty service from Intel, you should call Intel at 1-800-628-8686 during the warranty period during normal business hours (Pacific Time), excluding holidays. Please
be prepared to provide:
(1) your name, address, and telephone numbers;
(2) proof of purchase;
(3) this Intel warranty card;
(4) a description of the computer system including the brand and model; and
(5) an explanation of the problem.
[Note: The Customer Service Representative may need additional information from you depending on the nature of the problem.]
The replacement processor is warranted under this written warranty and is subject to the same limitations and exclusions for the remainder of the original warranty period or one
(1) year, whichever is longer.
WARRANTY LIMITATIONS AND EXCLUSIONS
THESE WARRANTIES REPLACE ALL OTHER WARRANTIES, EXPRESS OR IMPLIED INCLUDING, BUT NOT LIMITED TO, THE IMPLIED WARRANTIES OF
MERCHANTABILITY AND FITNESS FOR A PARTICULAR PURPOSE. INTEL MAKES NO EXPRESS WARRANTIES BEYOND THOSE STATED HERE. INTEL
DISCLAIMS ALL OTHER WARRANTIES, EXPRESS OR IMPLIED, INCLUDING, WITHOUT LIMITATION, IMPLIED WARRANTIES OF MERCHANTABILITY
AND FITNESS FOR A PARTICULAR PURPOSE.
SOME LAWS DO NOT ALLOW THE EXCLUSION OF IMPLIED WARRANTIES SO THIS LIMITATION MAY NOT APPLY TO YOU. IF THESE LAWS APPLY, THEN ALL
EXPRESS AND IMPLIED WARRANTIES ARE LIMITED IN DURATION TO THE LIMITED WARRANTY PERIOD. NO WARRANTIES APPLY AFTER THAT PERIOD.
SOME LAWS DO NOT ALLOW LIMITATIONS ON HOW LONG AN IMPLIED WARRANTY LASTS, SO THIS LIMITATION MAY NOT APPLY TO YOU.
LIMITATIONS OF LIABILITY
INTEL’S RESPONSIBILITY UNDER THIS, OR ANY OTHER WARRANTY, IMPLIED OR EXPRESS, IS LIMITED TO REPAIR, REPLACEMENT OR REFUND, AS SET
FORTH ABOVE. THESE REMEDIES ARE THE SOLE AND EXCLUSIVE REMEDIES FOR ANY BREACH OF WARRANTY. INTEL IS NOT RESPONSIBLE FOR INDIRECT,
SPECIAL, INCIDENTAL, OR CONSEQUENTIAL DAMAGES RESULTING FROM ANY BREACH OF WARRANTY OR UNDER ANY OTHER LEGAL THEORY
INCLUDING, BUT NOT LIMITED TO, LOST PROFITS, DOWNTIME, GOODWILL, DAMAGE TO OR REPLACEMENT OF EQUIPMENT AND PROPERTY, AND ANY
COSTS OF RECOVERING, REPROGRAMMING, OR REPRODUCING ANY PROGRAM OR DATA STORED IN OR USED WITH A SYSTEM CONTAINING YOUR
PENTIUM PROCESSOR. SOME JURISDICTIONS DO NOT ALLOW THE EXCLUSION OR LIMITATION OF INCIDENTAL OR CONSEQUENTIAL DAMAGES, SO THE
ABOVE LIMITATIONS OR EXCLUSIONS MAY NOT APPLY TO YOU.
THE LIMITED WARRANTY GIVES YOU SPECIFIC LEGAL RIGHTS, AND YOU MAY ALSO HAVE OTHER RIGHTS THAT VARY FROM JURISDICTION TO JURISDICTION.
Intel’s Three Year Limited Warranty
Guide des Informations Système 65
Page 68

Intel Pentium® and Celeron® Processors are backed by a three-year limited warranty.
Please refer to the reverse side of this card for complete warranty details.
Intel’s Commitment to Quality
Intel is committed to producing the highest quality processors available. That’s why we have hundreds of people dedicated to continuously improve our design, manufacturing,
and testing technology.
We put every one of our Pentium
To verify that the new chip will correctly run the software written for Intel Architecture processors, a team of Intel engineers is dedicated to compatibility testing. In a state-of-art lab,
this group runs an extensive set of operating systems, applications, network tests and stress tests repeatedly to ensure that the processor is compatible with representative software.
Just as importantly, we work with hardware and software companies in the computer industry to ensure that our processors are compatible with their products.
Additionally, a sampling of Intel processors are subjected to a rigorous "burn-in" test whereby the chip is operated at higher-than-normal temperatures and voltages. During this
burn-in period, the processor experiences the equivalent of weeks of normal usage. These units are monitored for failures as part of our ongoing quality assurance process.
As a result, today’s microprocessors from Intel are among the most reliable components in computers.
What are "Errata"?
Exhaustive product testing can highlight differences between the actual behavior of the microprocessor and its specifications. Sometimes the discrepancies are caused by a design
www.dell.com | support.dell.com
defect or error, which we call errata. Rigorous validation identifies most errata during the development of the processor, but we do detect additional errata during the life cycle of
a microprocessor.
When an erratum is identified, our engineers work to characterize it and find a solution. We work with system designers and software developers to ensure that the discrepancy does
not affect their products. If necessary, special software or hardware solutions (sometimes known as "work arounds") are implemented in the system design to prevent computer
users from encountering the problem. Errata may then be corrected in future revisions of the microprocessor.
No microprocessor is perfect, and Intel recognizes that some consumers want to know about any errata, whether or not the errata affect them. Intel makes documentation of all
characterized Pentium and Celeron processor errata publicly available through our Technical Documentation Service.
At Intel, our goal is to make every computer user satisfied with his or her Pentium or Celeron processor. Should you have any questions, comments or concerns about your Intel
microprocessor, please call us at 1-800-628-8686.
©1997, 1998 Intel Corporation. All rights reserved.
®
and Celeron® processors through a rigorous battery of tests during the design and manufacturing processes.
66 Guide des Informations Système
Page 69

Dell™ Latitude™ D505 Series
Guia de informações do sistema
Modelo PP10L
www.dell.com | support.dell.com
Page 70

Notas, avisos e advertências
NOTA: NOTA indica informações importantes para utilizar melhor o computador.
AVISO: AVISO indica riscos para o hardware ou riscos de perda de dados e fornece informações sobre
como evitar o problema.
ADVERTÊNCIA: ADVERTÊNCIA indica um potencial de danos ao equipamento, de lesões corporais ou de
morte.
Abreviações e acrônimos
Para obter uma lista completa de abreviações e acrônimos, consulte o
do sistema operacional, clique duas vezes no ícone do
no botão
Se você adquiriu o computador Dell™ série n, as referências deste documento a sistemas
operacionais Microsoft
Iniciar
, clique em
®
Windows® não são aplicáveis.
Centro de ajuda e suporte
Guia do usuário
e clique em
Guia do usuário
(dependendo
na área de trabalho, ou clique
Guias do usuário e do sistema
).
____________________
As informações contidas neste documento estão sujeitas a alterações sem aviso prévio.
© 2003 Dell Inc. Todos os direitos reservados.
Qualquer forma de reprodução deste produto sem a permissão por escrito da Dell Inc. é estritamente proibida.
Marcas comerciais utilizadas no texto: Dell, o logotipo da DELL, Truemobile e Latitude são marcas comerciais da Dell Inc.;
Intel, Pentium, e Celeron são marcas registradas da Intel Corporation; Microsoft e Windows são marcas registradas da Microsoft
Corporation; Bluetooth é marca comercial da Bluetooth SIG, Inc. e é utilizada pela Dell Inc., sob licença.
Outras marcas e nomes comerciais podem ser utilizados neste documento em referência às entidades que reivindicam a posse
dessas marcas e nomes ou seus produtos. A Dell Inc. declara que não tem interesse de propriedade sobre marcas e nomes de
terceiros.
Modelo PP10L
Outubro de 2003 N/P R1189 Rev. A01
Page 71

Índice
ADVERTÊNCIA: Instruções de segurança . . . . . . . . . . . . . . . . . . 71
SEGURANÇA: Geral
SEGURANÇA: Alimentação
SEGURANÇA: Bateria
SEGURANÇA: Viagem de avião
SEGURANÇA: Instruções de EMC
. . . . . . . . . . . . . . . . . . . . . . . . . . 71
. . . . . . . . . . . . . . . . . . . . . . 72
. . . . . . . . . . . . . . . . . . . . . . . . . 72
. . . . . . . . . . . . . . . . . . . . 72
. . . . . . . . . . . . . . . . . . . 73
Ao usar o computador
. . . . . . . . . . . . . . . . . . . . . . . . . . . 73
SEGURANÇA: Hábitos ergonômicos para o uso do computador
SEGURANÇA: Ao trabalhar dentro do computador
SEGURANÇA: Proteção contra descargas eletrostáticas
SEGURANÇA: Como descartar a bateria
Como encontrar informações para o computador
Como configurar o computador
Sobre o seu computador
Vista frontal
Vista esquerda
Vista direita
Vista traseira
Vista inferior
. . . . . . . . . . . . . . . . . . . . . . . . . . . . . . 81
. . . . . . . . . . . . . . . . . . . . . . . . . . . . 82
. . . . . . . . . . . . . . . . . . . . . . . . . . . . . . 82
. . . . . . . . . . . . . . . . . . . . . . . . . . . . . 83
. . . . . . . . . . . . . . . . . . . . . . . . . . . . . 83
Como remover a bateria
. . . . . . . . . . . . . . . . . . . . . . . 79
. . . . . . . . . . . . . . . . . . . . . . . . . . 81
. . . . . . . . . . . . . . . . . . . . . . . . . . 84
Como remover e instalar a bateria de reserva
Como instalar a bateria
Dell Diagnostics
. . . . . . . . . . . . . . . . . . . . . . . . . . 86
. . . . . . . . . . . . . . . . . . . . . . . . . . . . . . 87
Quando utilizar o Dell Diagnostics
Avisos de normalização
. . . . . . . . . . . . . . . . . . . . . . . . . . 90
. . . . . . . . . . . . . . . . 75
. . . . . . . . . . . . . . 76
. . . . . . . . . . . . . . . . 85
. . . . . . . . . . . . . . . . . . . 87
. . . . . 74
. . . . . . . . . . . 74
. . . . . . . . 74
Garantia limitada e política de devolução
. . . . . . . . . . . . . . . . . 91
Termo de Garantia Contratual – Brasil – Garantia Oferecida pela Dell
ao Usuário Final – 1º ano
. . . . . . . . . . . . . . . . . . . . . . . 91
Índice 69
Page 72

70 Índice
Page 73

ADVERTÊNCIA: Instruções de segurança
Use as diretrizes de segurança a seguir para ajudar a garantir sua própria segurança pessoal e para proteger o computador
e o ambiente de trabalho contra danos potenciais.
SEGURANÇA: Geral
• Não tente fazer manutenção no computador por sua própria conta, a menos que você seja um técnico qualificado.
Siga sempre as instruções de instalação.
• Se você usar uma extensão com o adaptador CA, verifique se a corrente total dos produtos conectados à extensão
não excede a corrente nominal da extensão (em Amperes).
• Não introduza objetos nas aberturas de ventilação ou em qualquer outra abertura do computador. Esse
procedimento pode provocar incêndio ou choque elétrico por curto-circuitos de componentes internos.
• Não armazene o computador ligado em ambientes com pouca ventilação, como a bolsa de transporte ou uma
pasta fechada. Isso pode danificar o computador ou causar incêndio.
• Mantenha o computador afastado de radiadores e fontes de calor. Não obstrua as passagens de ar. Não coloque
papéis soltos embaixo do computador; não coloque o computador em armários embutidos fechados, sobre camas,
sofás ou tapetes.
• Coloque o adaptador CA em uma área ventilada, como em cima de uma mesa ou no chão, quando for utilizá-lo
para operar o computador ou carregar a bateria. Não cubra o adaptador CA com papéis ou outros itens que
reduzam a ventilação. Além disso, não utilize o adaptador CA dentro da bolsa de transporte.
• O adaptador CA pode ficar quente durante a operação normal do computador. Tenha cuidado ao manusear o
adaptador durante ou imediatamente depois de sua operação.
• Não deixe o computador portátil funcionando com a base apoiada diretamente sobre a pele por longos períodos
de tempo. A temperatura superficial da base aumentará durante a operação normal (principalmente quando o
computador estiver sendo alimentado por CA). O contato contínuo com a pele exposta pode provocar
desconforto ou, eventualmente, queimaduras.
• Não utilize o computador em ambientes úmidos, como próximo a banheiras, pias ou piscinas, ou em salas
subterrâneas úmidas.
• Se o computador tiver um modem integrado ou opcional (placa de PC), desconecte o cabo do modem, se uma
tempestade com raios estiver se aproximando, para evitar o risco remoto de choque elétrico causado por raios
através da linha telefônica.
• Para evitar o risco potencial de choque elétrico, não conecte ou desconecte nenhum cabo nem execute a
manutenção ou a reconfiguração deste produto durante tempestades. Não utilize o computador durante
tempestades com raios, a menos que todos os cabos tenham sido desconectados e o computador esteja operando
com a bateria.
• Se o computador tiver um modem, o cabo deste modem deverá ser no mínimo 26 AWG e ter um plugue modular
RJ-11 em conformidade com a FCC.
• Antes de abrir a tampa do módulo de memória ou a tampa da placa Mini PCI na parte inferior do computador,
desconecte todos os cabos das tomadas elétricas e desconecte o cabo do telefone.
• Se o computador tiver tanto um conector RJ-11 de modem como um conector RJ-45 de rede, que são parecidos,
verifique se o cabo de telefone está no conector RJ-11, não no conector RJ-45.
• As placas de PC podem ficar muito quentes durante a operação normal. Tenha cuidado ao remover as placas de
PC depois de um período de operação contínua.
• Antes de limpar o computador, desconecte-o da tomada. Limpe o computador com um pano macio umedecido
em água. Não use limpadores líquidos ou em aerossol que possam conter substâncias inflamáveis.
Manual de informações do sistema 71
Page 74

SEGURANÇA: Alimentação
• Utilize somente o adaptador CA fornecido pela Dell e aprovado para ser utilizado com este computador. A
utilização de um outro tipo de adaptador CA pode provocar incêndio ou explosão.
• Antes de conectar o computador a uma tomada elétrica, verifique a tensão do adaptador CA para garantir que a
tensão e a freqüência necessárias correspondam à fonte de energia disponível.
• Para remover o computador de todas as fontes de energia, desligue o computador, desconecte o adaptador CA da
tomada elétrica e remova todas as baterias instaladas no compartimento de bateria ou no compartimento de
módulos.
• Para ajudar a evitar choque elétrico, conecte o adaptador CA e os cabos de alimentação do dispositivo a fontes de
alimentação adequadamente aterradas. Esses cabos de alimentação podem ser equipados com plugues de três
pinos para fornecer uma conexão aterrada. Não use plugues adaptadores nem remova o pino de aterramento do
cabo de alimentação. Se utilizar um cabo de alimentação de extensão, utilize o tipo adequado, ou seja o de dois
www.dell.com | support.dell.com
pinos ou o de três pinos, para que ele se adapte ao cabo de alimentação do adaptador CA.
• Verifique se não há nada em cima do cabo de alimentação do adaptador CA e se o cabo não se encontra em local
onde alguém possa tropeçar ou pisar sobre ele.
• Se você estiver utilizando uma régua de energia com várias tomadas, tenha cuidado ao conectar o cabo de
alimentação do adaptador CA à régua de energia. Algumas réguas de energia podem permitir a inserção incorreta
do plugue. A inserção incorreta do plugue de alimentação pode causar dano permanente ao computador e risco de
choque elétrico e/ou de incêndio. Verifique se o pino de aterramento do plugue de força está inserido no contato
de aterramento correspondente da régua de energia.
SEGURANÇA: Bateria
• Utilize somente módulos de bateria Dell™ que sejam aprovados para utilização com este computador. A
utilização de outros tipos pode aumentar o risco de incêndio ou explosão.
• Não carregue baterias no bolso ou na bolsa, ou em outro local onde objetos de metal (como chaves ou clipes de
papel) possam provocar curto-circuitos nos terminais da bateria. O fluxo de corrente excessiva pode provocar
temperaturas extremamente altas e pode resultar em danos às baterias ou provocar incêndios ou queimaduras.
• A bateria apresenta um risco de queimaduras, se for manuseada inadequadamente. Não a desmonte. Manuseie
uma bateria danificada ou com vazamento com o máximo cuidado. Se a bateria estiver danificada, pode haver
vazamento de eletrólito das células e isso pode causar ferimentos.
• Mantenha a bateria longe de crianças.
• Não armazene ou deixe o computador ou as baterias próximos a fontes de calor, como radiadores, lareiras, fogões,
aquecedores elétricos ou outros aparelhos geradores de calor. Não os exponha a temperaturas de mais de 60 ºC.
Quando aquecida a temperaturas excessivas, as células da bateria podem explodir ou vazar, com risco de incêndio.
• Não jogue a bateria do computador no fogo ou no lixo doméstico normal. As células da bateria podem explodir.
Descarte a bateria usada de acordo com as instruções do fabricante ou entre em contato com a agência de
descarte local para obter instruções de descarte. Descarte as baterias gastas ou danificadas imediatamente.
SEGURANÇA: Viagem de avião
• Certas regulamentações da Federal Aviation Administration (Administração federal da aviação) e/ou restrições
específicas de companhias aéreas podem se aplicar à operação do computador Dell a bordo de aeronaves. Por
exemplo, essas regulamentações/restrições podem proibir o uso de qualquer dispositivo eletrônico pessoal (PED)
que tenha a capacidade de transmissão intencional de freqüência de rádio ou de outros sinais eletromagnéticos a
bordo de aeronaves.
72 Manual de informações do sistema
Page 75

– Para melhor cumprir todas essas restrições, se o seu computador portátil Dell estiver equipado com Dell
TrueMobile™ ou com algum outro dispositivo de comunicação sem fio, desative esse dispositivo antes de
embarcar na aeronave e siga todas as instruções fornecidas pelo pessoal da companhia aérea com relação a
esse dispositivo.
– Além disso, o uso de qualquer PED, como computadores portáteis, pode ser proibido em aeronaves, durante
certas fases críticas do vôo, como a decolagem e a aterrisagem. Algumas empresas aéreas podem ainda definir
a fase crítica do vôo como qualquer momento em que a aeronave esteja abaixo dos 3.050 m. Siga as
instruções específicas da companhia aérea sobre os períodos em que o uso de PEDs é permitido.
SEGURANÇA: Instruções de EMC
O uso de cabos de sinais blindados garante que você atenderá os requisitos de classificação EMC (electromagnetic
compatibility, compatibilidade eletromagnética) adequados para o ambiente pretendido. Para impressoras paralelas, há
um cabo da Dell disponível. Se preferir, você poderá comprar um cabo da Dell no site
A eletricidade estática pode danificar componentes eletrônicos dentro do computador. Para evitar dano por estática,
descarregue a eletricidade estática de seu corpo antes de tocar em qualquer componente eletrônico do computador,
como os módulos de memória. Você pode fazer isso tocando uma superfície de metal não-pintada no painel de E/S do
computador.
ADVERTÊNCIA:
exporá ao chumbo, uma substância química conhecida pelo estado da Califórnia (EUA) por causar malformação ou
outros danos reprodutivos.
O manuseio do cabo deste produto, ou de cabos associados a acessórios vendidos com este produto, o
Lave as mãos depois de manusear o cabo
.
www.dell.com
.
Ao usar o computador
Observe as instruções de manuseio seguro a seguir, para evitar danos ao computador:
• Durante a configuração do computador, coloque-o em uma superfície nivelada.
• Ao viajar, não embarque o computador como bagagem. Você pode passar o computador por máquinas de raios-x,
mas nunca o passe por detectores de metal. Se o computador for verificado a mão, tenha uma bateria carregada
disponível, para o caso de lhe pedirem para ligar o computador.
• Ao viajar com o disco rígido removido do computador, envolva-o em um material não condutor, como tecido ou
papel. Se o disco rígido for verificado a mão, esteja pronto para instalá-lo no computador. Você pode passar o disco
rígido por máquinas de raios-x, mas nunca o passe por detectores de metal.
• Ao viajar, não coloque o computador nos compartimentos elevados, onde ele possa se arrastado de um lado para
outro. Não derrube o computador nem o submeta a qualquer outro choque mecânico.
• Proteja o computador, a bateria e o disco rígido contra riscos ambientais, como sujeira, poeira, alimentos, líquidos,
temperaturas extremas e exposição demasiada à luz do sol.
• Quando você passa de um ambiente para outro com temperatura e/ou umidade muito diferentes, pode-se formar
condensação dentro do computador. Para evitar danos ao computador, aguarde tempo suficiente para que a
umidade evapore antes de usá-lo.
AVISO: Ao retirar o computador de condições de baixa temperatura para um ambiente mais quente, ou de
condições de alta temperatura para um ambiente mais frio, deixe que o computador se aclimate à nova temperatura
ambiente antes de ligá-lo.
• Ao desconectar um cabo, puxe-o pelo conector ou pelo laço de alívio de tensão, não pelo cabo em si. Ao puxar o
conector, mantenha-o alinhado para evitar o entortamento dos pinos. Além disso, antes de conectar um cabo,
verifique se os dois conectores estão corretamente orientados e alinhados.
• Manipule cuidadosamente os componentes. Segure componentes, como módulos de memória, pelas bordas e não
pelos pinos.
Manual de informações do sistema 73
Page 76

• Antes de remover um módulo de memória da placa de sistema ou desconectar um dispositivo do computador,
desligue o computador, desconecte o cabo do adaptador CA, remova qualquer bateria instalada no
compartimento de bateria ou no compartimento de módulos e aguarde 5 segundos antes de prosseguir, para
ajudar a evitar danos possíveis à placa de sistema.
• Limpe o monitor com um pano macio umedecido em água. Umedeça o pano e passe-o pelo monitor em uma
única direção, de cima para baixo. Remova a umidade do monitor rapidamente e mantenha-o seco. Uma
exposição prolongada à umidade pode danificar o monitor. Não use limpa-vidros comerciais para limpar o
monitor.
• Se o computador for molhado ou danificado, siga os procedimentos descritos em “Solução de problemas” no Guia
do usuário. Se, depois de seguir esses procedimentos, você confirmar que o computador não está funcionando
adequadamente, entre em contato com a Dell (consulte “Como obter ajuda” no Guia do usuário para obter as
informações de contato).
www.dell.com | support.dell.com
SEGURANÇA: Hábitos ergonômicos para o uso do computador
ADVERTÊNCIA: O uso impróprio ou prolongado do teclado pode causar lesões.
ADVERTÊNCIA: Olhar para a tela ou para a tela externa do monitor por períodos de tempo extensos pode causar
fadiga visual.
Para conforto e eficiência, observe as regras ergonômicas no “Apêndice” do Guia do usuário on-line ao configurar e
utilizar o computador.
Este computador portátil não foi projetado para operação contínua como equipamento de escritório. Para uso intenso
em um escritório, recomendamos que você conecte um teclado externo.
SEGURANÇA: Ao trabalhar dentro do computador
Antes de remover ou instalar módulos de memória, placas mini PCI ou modems, execute o procedimento a seguir, na
seqüência indicada.
AVISO: A única vez em que você deverá acessar a parte interna do computador será quando estiver instalando
módulos de memória ou uma placa mini PCI, um modem, uma placa Bluetooth™ ou uma bateria de reserva.
AVISO: Aguarde 5 segundos, depois de desligar o computador, antes de desconectar um dispositivo ou remover um
módulo de memória, uma placa Mini PCI, um modem, uma placa Bluetooth ou uma bateria de reserva, para ajudar a
evitar possível dano na placa de sistema.
1
Desligue o computador e todos os dispositivos conectados.
2
Desconecte o computador e os dispositivos de tomadas elétricas para reduzir o potencial de lesões pessoais ou
choque. Desconecte também quaisquer linhas telefônicas ou de telecomunicação do computador.
3
Remova a bateria principal do compartimento de bateria e, se necessário, a segunda bateria, do compartimento de
módulos.
4
Aterre-se tocando em uma superfície de metal não-pintada na parte de trás do computador.
5
Durante o trabalho, toque periodicamente uma superfície de metal sem pintura para dissipar a eletricidade estática
que possa provocar danos aos componentes internos.
SEGURANÇA: Proteção contra descargas eletrostáticas
A eletricidade estática pode danificar componentes eletrônicos dentro do computador. Para evitar danos por estática,
descarregue a eletricidade estática de seu corpo antes de tocar em qualquer componente eletrônico do computador,
como os módulos de memória. Você pode fazer isso tocando uma superfície de metal não-pintada na parte de trás do
computador.
74 Manual de informações do sistema
Page 77

Durante o período em que você trabalhar na parte interna do computador, toque periodicamente uma superfície de
metal não-pintada na parte de trás do computador, para remover qualquer carga estática que o seu corpo possa ter
acumulado.
Você pode também tomar as medidas a seguir para evitar danos provocados por descargas eletrostáticas:
• Quando estiver retirando um componente sensível a estática de sua embalagem de envio, não o remova do
material de embalagem antiestático até que você esteja pronto para instalá-lo. Imediatamente antes de abrir a
embalagem antiestática, descarregue a eletricidade estática do seu corpo.
• Ao transportar um componente sensível, primeiro coloque-o em um recipiente ou embalagem antiestática.
• Manuseie todos os componentes sensíveis em um local à prova de estática. Se possível, use pisos antiestáticos e
esteiras antiestáticas na bancada.
SEGURANÇA: Como descartar a bateria
O computador utiliza uma bateria tipo moeda de célula de íons de lítio. Para obter instruções sobre como
substituir a bateria de íons de lítio do computador, consulte “Como remover a bateria” na página 84. Esta é
uma bateria de vida útil longa e é bem provável que você nunca precise substituí-la. No entanto, se você
precisar substituí-la, consulte “Como remover e instalar a bateria de reserva” na página 85.
Não descarte a bateria com o lixo doméstico. Entre em contato com a empresa de coleta de lixo de sua
região para obter o endereço do local mais próximo para depósito da bateria.
Manual de informações do sistema 75
Page 78

Como encontrar informações para o computador
O que você está procurando? Encontre aqui
• Um programa de diagnóstico para o
computador
• Drivers para o computador
• A documentação do computador
• Documentação do dispositivo
www.dell.com | support.dell.com
CD de drivers e utilitários (também chamado de
ResourceCD)
A documentação e os drivers já estão instalados no computador.
Você pode usar o CD para reinstalar drivers, executar o Dell
Diagnostics ou acessar a documentação.
Alguns arquivos Leia-me podem estar no CD para fornecer as
últimas atualizações sobre as alterações técnicas no computador ou
no material de referência técnica avançada para técnicos ou usuários
experientes.
• Como configurar o computador
• Informações sobre garantia
• Instruções de segurança
76 Manual de informações do sistema
Guia de informações do sistema da Dell™
NOTA: Este documento está disponível no formato PDF em
support.dell.com.
Page 79

O que você está procurando? Encontre aqui
• Como remover e substituir peças
• Especificações técnicas
• Como configurar os parâmetros do
sistema
• Como localizar defeitos e solucionar
problemas
Guia do usuário
Centro de ajuda e suporte do Microsoft® Windows® XP
1
Clique no botão
2
Clique em
.
usuário
Windows 2000
Clique duas vezes no ícone
trabalho.
• Código de serviço expresso e
etiqueta de serviço
• Etiqueta de licença do Microsoft
Etiqueta de serviço e licença do Microsoft
Windows
Essas etiquetas estão localizadas no computador.
Windows
• Digite o código de serviço expresso para direcionar sua chamada
ao entrar em contato com o suporte técnico. O Código de serviço
expresso não está disponível em todos os países.
• Use o número mostrado na Etiqueta de licença do Microsoft
Windows se precisar reinstalar o sistema operacional.
• Drivers mais recentes para o
computador
• Respostas para perguntas da
assistência técnica e de suporte
• Discussões on-line com outros
usuários e com o suporte técnico
• Documentação do computador
S i t e d e s u p o r t e d a D el l — support.dell.com
O site de suporte da Dell contém várias ferramentas on-line, como:
• Solutions — Dicas e sugestões para a solução de problemas,
artigos de técnicos e cursos on-line
• Community — Discussões on-line com outros clientes da Dell
• Upgrades — Informações sobre atualizações de componentes,
como memórias, discos rígidos e sistemas operacionais.
• Customer Care — Informações sobre contato, status de pedidos,
garantias e reparos.
• Downloads — Drivers, patches e atualizações de software.
• Reference — Documentação do computador, especificações do
produto e informes oficiais.
Iniciar
e em
Ajuda e suporte.
Guias do usuário e do sistema
Guias do usuário
•Use a etiqueta de serviço para
identificar o computador quando
acessar o site
quando entrar em contato com o
suporte técnico.
e clique em
na área de
support.dell.com
Guias do
ou
Manual de informações do sistema 77
Page 80

O que você está procurando? Encontre aqui
• Status do serviço de chamadas e
histórico de suporte
• Questões técnicas importantes do
computador
• Perguntas mais freqüentes
• Downloads de arquivos
• Detalhes sobre a configuração do
meu computador
• Contrato de serviço para o
computador
www.dell.com | support.dell.com
• Como usar o Windows® XP
• Documentação do computador
• Documentação sobre dispositivos
(como modems)
• Como reinstalar o sistema
operacional
Site do Dell Premier Support — premiersupport.dell.com
O site do Dell Premier Support é personalizado para clientes
corporativos, do governo e da educação. Esse site pode não estar
disponível em todas as regiões.
Centro de ajuda e suporte do Windows
1
Clique no botão
2
Digite uma palavra ou expressão que descreva o seu problema e
Iniciar
e em
Ajuda e suporte
.
clique no ícone de seta.
3
Clique no tópico que descreve o problema.
4
Siga as instruções da tela.
CD do Sistema operacional
O sistema operacional já está instalado no computador. Para
reinstalar o sistema operacional, utilize o CD do
operacional
. Consulte o
Guia do usuário
para obter instruções sobre
Sistema
a reinstalação do sistema operacional.
Depois de reinstalar o sistema operacional, utilize o
CD de
drivers e
utilitários para reinstalar drivers para os dispositivos que vieram com
o computador.
78 Manual de informações do sistema
A etiqueta da chave do sistema
operacional está localizada em seu
computador.
Page 81

Como configurar o computador
ADVERTÊNCIA: Antes de iniciar qualquer dos procedimentos desta seção, siga as instruções de
segurança do início deste documento.
1
Abra a caixa de acessórios.
2
Separe os itens da caixa de acessórios necessários para a configuração do computador.
A caixa de acessórios contém também a documentação do usuário e os softwares ou hardwares
adicionais (como placas de PC, drivers ou baterias) que você adquiriu.
3
Conecte o adaptador CA no respectivo conector do computador e na tomada elétrica.
Manual de informações do sistema 79
Page 82

4
Abra o monitor e pressione o botão liga/desliga para ligar o computador.
NOTA: Não conecte o computador ao dispositivo de acoplamento, até que o computador tenha sido
ligado e desligado pelo menos uma vez.
www.dell.com | support.dell.com
botão liga/desliga
80 Manual de informações do sistema
Page 83

Sobre o seu computador
Vista frontal
tela
luzes de status
do teclado
botão liga/desliga
luzes de status
do dispositivo
touch pad
botões do
touch pad
teclado
trava da tela
alto-falantes
Manual de informações do sistema 81
Page 84

Vista esquerda
www.dell.com | support.dell.com
Vista direita
slot da placa de PC
conector IEEE 1394
sensor de
infravermelho
encaixe do cabo
de segurança
conectores de áudio (2)
encaixe do cabo de segurança
82 Manual de informações do sistema
compartimento de
módulos
trava de liberação do
dispositivo
Page 85

Vista traseira
ADVERTÊNCIA: Não bloqueie, não introduza objetos e nem permita o acúmulo de poeira nas aberturas
de ventilação. Não coloque o computador ligado em ambientes com pouca ventilação (como pastas
fechadas). O bloqueio do fluxo de ar pode danificar o computador ou causar incêndio.
conector de rede (RJ-45)
conector de modem (RJ-11) (opcional)
conectores USB (2)
conector de saída de TV
S-vídeo
Vista inferior
trava de liberação do compartimento de bateria
tampa do módulo de memória
disco rígido
conector paralelo
conector do adaptador CA
conector de vídeo
conector serial
aberturas de
ventilação
indicador de carga da bateria
bateria
tampa da placa
Mini PCI
ventilador
slot do dispositivo de acoplamento
Manual de informações do sistema 83
Page 86

Como remover a bateria
Para obter mais informações sobre como remover a segunda bateria, consulte “Como usar o
compartimento de módulos” no Guia do usuário on-line.
ADVERTÊNCIA: Antes de executar estes procedimentos, desligue o computador, desconecte-o da
tomada elétrica e desconecte o modem da tomada de telefone.
AVISO: Se optar por substituir a bateria com o computador no modo de espera, você terá, no máximo, 90
segundos para fazer a substituição antes que o computador se desligue e os dados que não foram
salvos sejam perdidos.
Verifique se o computador está desligado e desconectado da tomada elétrica e da tomada de
1
telefone.
www.dell.com | support.dell.com
2
Se o computador estiver conectado a uma estação de acoplamento, desconecte-o. Consulte a
documentação fornecida com o dispositivo de acoplamento para obter instruções.
3
Deslize e segure a trava de liberação do compartimento da bateria na parte inferior do
computador e remova a bateria do compartimento.
84 Manual de informações do sistema
Page 87

Como remover e instalar a bateria de reserva
1
Remova a bateria.
2
Remova a tampa da bateria reserva.
3
Deslize a bateria de reserva na direção do conector e retire a bateria de seu compartimento.
4
Desconecte o cabo da bateria de reserva.
conector
cabo da bateria reserva
bateria reserva
5
Conecte o cabo da bateria reserva ao conector no compartimento correspondente.
Manual de informações do sistema 85
Page 88

6
Coloque a bateria de reserva no compartimento e recoloque a tampa da bateria.
www.dell.com | support.dell.com
Como instalar a bateria
Deslize a bateria para dentro do compartimento até ouvir um clique na trava de liberação.
Para obter mais informações sobre como instalar a segunda bateria, consulte “Como usar o
compartimento de módulos” no Guia do usuário on-line.
86 Manual de informações do sistema
Page 89

Dell Diagnostics
ADVERTÊNCIA: Antes de iniciar qualquer dos procedimentos desta seção, execute as instruções de
segurança no início deste documento.
Quando utilizar o Dell Diagnostics
Se o computador apresentar um problema, execute as verificações descritas em “Solução de
problemas” no Guia do usuário e execute o Dell Diagnostics, antes de entrar em contato com a
Dell para obter assistência técnica.
É recomendável que você imprima estes procedimentos antes de começar.
AVISO: O Dell Diagnostics só funciona em computadores Dell™.
O Dell Diagnostics está localizado em uma partição oculta do utilitário de diagnóstico no disco
rígido.
NOTA: Se o computador não mostrar nenhuma imagem na tela, entre em contato com a Dell (consulte
“Como obter ajuda” no Guia do usuário para obter as informações de contato).
Desligue o computador.
1
2
Se o computador estiver conectado a uma estação de acoplamento, desconecte-o. Consulte a
documentação fornecida com o dispositivo de acoplamento para obter instruções.
3
Conecte o computador a uma tomada elétrica.
4
Ligue o computador. Quando o logotipo DELL™ aparecer, pressione <F12> imediatamente.
NOTA: Se a tela permanecer vazia, pressione e mantenha pressionado <Fn> e o botão liga/desliga por
cerca de 5 segundos para iniciar o Dell Diagnostics. O computador executa automaticamente a
avaliação de pré-inicialização do sistema.
NOTA: Se aparecer uma mensagem informando que a partição do utilitário de diagnóstico não foi
encontrada, execute o Dell Diagnostics a partir do CD de drivers e utilitários.
Se você esperar demais e o logotipo do Microsoft® Windows® aparecer, continue esperando
até que a área de trabalho do Windows apareça. Então, desligue o computador usando o
menu
Iniciar
e tente novamente.
5
Quando a lista de dispositivos de inicialização aparecer, realce
Diagnostics
e pressione
<Enter>.
O computador executará a avaliação de pré-inicialização do sistema, que é uma série de testes
iniciais da placa de sistema, do teclado, do disco rígido e da tela.
• Durante a avaliação, responda a todas as perguntas que aparecerem.
• Se for detectada alguma falha, o computador interromperá o processo e emitirá um bipe.
Para interromper a avaliação e reinicializar o computador, pressione <n>; para passar
para o teste seguinte, pressione <y>; para testar novamente o componente que
apresentou defeito, pressione <r>.
Manual de informações do sistema 87
Page 90

• Se forem detectadas falhas durante a avaliação de pré-inicialização do sistema, anote o
código do erro e entre em contato com a Dell (consulte “Como obter ajuda” no
usuário
Se a avaliação de pré-inicialização do sistema tiver sido concluída com sucesso, você receberá
a mensagem
continue
qualquer tecla para continuar).
6
Pressione qualquer tecla para iniciar o Dell Diagnostics a partir da partição do utilitário de
diagnóstico no disco rígido.
7
Quando o menu principal do Dell Diagnostics aparecer, selecione o teste que você quer
www.dell.com | support.dell.com
executar.
Menu principal do Dell Diagnostics
1
Depois que o Dell Diagnostics for carregado e a tela
opção desejada.
Opção Função
Express Test
(Teste expresso)
Extended Test
(Teste completo)
Custom Test
(Teste personalizado)
Symptom Tree
(Árvore de sintomas)
Guia do
para obter as informações de contato) antes de executar o Dell Diagnostics.
Booting Dell Diagnostic Utility Partition. Press any key to
(Inicializando a partição do Dell Diagnostics. Pressione
Main Menu
Executa um teste rápido dos dispositivos. Esse teste
normalmente demora de 10 a 20 minutos e não exige
nenhuma ação do usuário. Aumente as possibilidades de
detectar o problema rapidamente executando primeiro o
Express Test
Executa uma verificação completa dos dispositivos. Esse
teste normalmente demora uma hora ou mais e exige que
você responda a perguntas periodicamente.
Testa um dispositivo específico. Você pode personalizar os
testes que quer executar.
Mostra uma lista dos sintomas mais comuns encontrados e
permite selecionar um teste com base no sintoma do
problema que está ocorrendo.
(Teste expresso).
aparecer, clique no botão da
2
Se for encontrado algum problema durante um teste, aparecerá uma mensagem mostrando o
código do erro e uma descrição do problema. Anote esse código e a descrição do problema e
siga as instruções da tela.
Se você não conseguir resolver o problema, entre em contato com a Dell (consulte “Como
obter ajuda” no
NOTA: A etiqueta de serviço do computador está localizada na parte superior de cada tela de teste. Se
você entrar em contato com a Dell, o suporte técnico solicitará o número da etiqueta de serviço.
Guia do usuário
88 Manual de informações do sistema
para obter as informações de contato).
Page 91

3
Se você executar um teste usando a opção
Custom Test
ou
Symptom Tree
apropriada descrita na tabela a seguir para obter mais informações.
Guia Função
Results (Resultados) Mostra os resultados do teste e as condições de erro
encontradas.
Errors (Erros) Mostra as condições de erro encontradas, os códigos de erro e
a descrição do problema.
Help (Ajuda) Descreve o teste e pode indicar os requisitos para a execução
desse teste.
Configuration
(Configuração)
Parameters (Parâmetros) Permite alterar as configurações de teste para personalizálo.
4
Quando os testes tiverem sido concluídos, feche a tela de teste para retornar à tela
Menu
(Menu principal). Para sair do Dell Diagnostics e reiniciar o computador, feche a tela
Main Menu
Mostra a configuração de hardware do dispositivo
selecionado.
O Dell Diagnostics obtém as informações sobre a
configuração de todos os dispositivos através do programa de
configuração do sistema, da memória e de vários testes
internos, e mostra essas informações na lista de dispositivos
no painel esquerdo da tela. A lista de dispositivos pode não
conter os nomes de todos os componentes instalados no
computador ou de todos os dispositivos conectados a ele.
.
, clique na guia
Main
Manual de informações do sistema 89
Page 92

Avisos de normalização
EMI (Electromagnetic Interference, Interferência eletromagnética) é qualquer sinal ou emissão irradiada no espaço livre
ou conduzida por fiação de potência ou de sinal, que compromete o serviço de rádio navegação ou outro serviço de
segurança, ou ainda, degrada seriamente, obstrui ou interrompe repetidamente um serviço licenciado de comunicação
por rádio. Os serviços de comunicação de rádio incluem (mas não se limitam a) transmissão comercial AM/FM,
televisão, serviços de celular, radar, controle de tráfego aéreo, pager e PCS (Personal Communication Services [serviços
de comunicações pessoais]). Esses serviços licenciados, juntamente com irradiadores involuntários como dispositivos
digitais, incluindo computadores, contribuem para o ambiente eletromagnético.
Compatibilidade eletromagnética é a capacidade que os itens de um equipamento eletrônico possuem de funcionar
corretamente em conjunto no ambiente eletrônico. Embora este computador tenha sido projetado para estar em
conformidade com os limites estabelecidos pelos órgãos de normalização sobre interferência eletromagnética, não há
garantias de que não ocorrerá interferência em uma instalação específica. Se o equipamento causar interferência nos
www.dell.com | support.dell.com
serviços de comunicação de rádio, o que pode ser determinado ligando-se e desligando-se o equipamento, experimente
corrigir a interferência através de uma ou mais das seguintes medidas:
• Mude a orientação da antena receptora.
• Mude o computador de lugar em relação ao receptor.
• Afaste o computador do receptor.
• Ligue o computador em outra tomada, de modo que o computador e o receptor fiquem em circuitos elétricos
diferentes.
Se necessário, consulte um representante do Suporte técnico da Dell ou um profissional técnico experiente de
rádio/televisão para obter outras sugestões.
Para obter informações adicionais sobre normalização, consulte o Guia do usuário on-line que acompanha o computador.
Para acessar o Guia do usuário, consulte a página 77.
90 Manual de informações do sistema
Page 93

Garantia limitada e política de devolução
Termo de Garantia Contratual – Brasil – Garantia Oferecida pela Dell ao Usuário Final –
1º ano
Garantia
A DELL* garante ao usuário final, em conformidade com as disposições abaixo, que os produtos de hardware com a sua
marca, adquiridos pelo usuário final de uma empresa do grupo DELL ou de um distribuidor autorizado DELL situado
na América Latina e Caribe, estão livres de defeitos em seus componentes eletrônicos, mecânicos e de montagem, pelo
prazo de 1 (um) ano contado da data de aquisição do Produto indicada na Nota Fiscal de Compra, uma vez respeitadas
as condições normais de instalação e uso, exceto no que tange aos itens relacionados dentre as excessões adiante
indicadas. Já se encontra incluso nesse prazo o período de garantia legal.
Produtos contra os quais sejam apresentadas reclamações justas serão, a critério da DELL, consertados ou substituídos
às expensas da DELL. Todas as peças removidas dos produtos consertados serão de propriedade da DELL. A DELL
utiliza peças novas e recondicionadas de vários fabricantes na execução dos serviços de reparo e na fabricação de
produtos de reposição, de qualidade e tecnologia equivalente ou superior, respeitadas as especificações originais dos
produtos.
Responsabilidades do Cliente
Notificar de imediato a Dell sobre o mau funcionamento de seus equipamentos (0-800-903355). Fornecer ao pessoal
técnico da Dell acesso total e incondicional à totalidade dos equipamentos e softwares. Caso existam restrições de
segurança que se apliquem a alguns ou a todos os sistemas do Cliente que necessitem receber assistência técnica em
virtude desta Garantia Contratual, é possível que seja solicitado ao Cliente que este assuma responsabilidades adicionais
para a manutenção do equipamento e/ou software. Notificar a Dell sobre qualquer perigo potencial quanto à segurança
ou à saúde que possa existir nas instalações do Cliente, assim como proporcionar e/ou recomendar os procedimentos de
segurança que devem ser seguidos, caso sejam aplicáveis.
Proporcionar, caso seja necessário e sem nenhum encargo para a Dell, um espaço de trabalho adequado e acesso a meios
de comunicação que se sejam requeridos à execução dos serviços.
Manter atualizada uma cópia de segurança do sistema operacional e de outros programas de software pertinentes, assim
como seus dados.
Garantir a presença de uma pessoa responsável ou de um funcionário durante a execução do serviço.
Fornecer, sem ônus para a Dell, meios de gravação e armazenamento, incluindo fitas e discos magnéticos necessários à
execução dos serviços, bem como aparelhos de comunicação de dados (modems) e linhas telefônicas e/ou conexões de
rede quando requeridos para execução de serviços à distância por via eletrônica (acessos eletrônicos remotos).
Exclusões
Os seguintes itens, entre outros compatíveis com o ora exposto, não estão cobertos pela garantia:
• Partes consumíveis, tais como baterias não-recarregáveis, bolsas, maletas, etc;
• Programas de computador, exceto no tocante a termos e prazos especificados na legislação brasileira aplicável;
• Limpeza, reparos cosméticos ou desgaste resultante do uso normal dos produtos;
• Danos causados por mau uso, abuso, queda, negligência, imprudência ou imperícia;
• Danos causados por armazenamento ou uso em condições fora das especificações;
• Danos causados por equipamentos que produzam ou induzam interferências eletromagnéticas ou ainda por
problemas de instalação elétrica em desacordo com as normas ABNT;
• Danos causados por programas de computador, acessórios ou produtos de terceiros adicionados a um produto
comercializado pela Dell após este ter sido enviado ao usuário final pela própria Dell;
Manual de informações do sistema 91
Page 94

• Danos causados por violação do produto, tentativa de reparo ou ajuste por terceiros não autorizados pela Dell;
• Danos causados por agentes da natureza como descargas elétricas (raios), inundações, incêndios, desabamentos,
terremotos, etc;
• Perdas e danos causados pelo produto ou por desempenho do produto, inclusive, mas não limitado a, lucros
cessantes, perdas financeiras e limitações de produtividade, resultantes dos atos relacionados a hipóteses de não
cobertura desta garantia; e,
• Perda total ou parcial de quaisquer programas de computador, dados ou meios magnéticos removíveis.
A garantia também não será válida caso a Nota Fiscal de Compra apresente rasuras e/ou alterações ou, ainda, campos
incompletos nos itens Data de Aquisição e Número de Série do produto, e/ou que não esteja em conformidade com a
legislação fiscal vigente no Brasil.
Atendimento ao Consumidor
Caso você tenha algum comentário ou sugestões, estas devem ser apresentadas na América Latina e Caribe por meio do
www.dell.com | support.dell.com
ponto de venda da DELL ou através de mensagem eletrônica via Internet (www.dell.com
poderá ser encaminhada durante o prazo de validade da garantia e o usuário final deverá fornecer sempre o comprovante
de compra, representado pela Nota Fiscal original, indicando o nome e endereço do vendedor, a data da compra, o
modelo e o número de série, o nome e o endereço do cliente e informações sobre os sintomas e configuração no
momento do defeito, incluindo periféricos e software utilizados. Na falta dessas informações a Dell poderá negar-se a
atender a solicitação. Uma vez diagnosticado o problema, a DELL tomará as devidas providências e pagará o frete e o
seguro de transporte para a central de conserto/reposição DELL, caso o defeito apresentado qualifique-se para
atendimento dentro da garantia. O usuário final deve garantir que o produto defeituoso estará disponível para ser
apanhado, devidamente embalado na embalagem original ou em embalagem que ofereça grau equivalente de proteção,
incluindo os dados acima e o número de devolução fornecido pela DELL ao usuário final.
Limitações e Direitos
A DELL não oferece nenhuma outra garantia, aval ou declaração similar, exceto conforme expressamente declarado
acima, e esta Garantia substitui quaisquer outras garantias, na extensão máxima permitida por lei. Esta Garantia será o
único e exclusivo recurso contra a DELL ou qualquer outra empresa do mesmo grupo econômico, não podendo estas
serem responsabilizadas por lucros cessantes ou perdas derivadas de contratos, ou qualquer outra perda indireta ou
imprevista decorrente de negligência, violação contratual ou outrosde
Esta Garantia não exclui ou afeta os direitos garantidos por lei ao usuário final contra a DELL e/ou quaisquer direitos
resultantes de outros contratos celebrados pelo usuário final com a DELL e/ou qualquer outro vendedor autorizado
pela Dell.
Dell World Trade LP
One Dell Way, Round Rock, TX 78682, USA
Dell Computadores do Brasil Ltda (CNPJ No. 72.381.189/0001-10)/
Dell Comercial do Brasil Ltda (CNPJ No. 03 405 822/0001-40)
Avenida Industrial Belgraf, 400
92990-000 - Eldorado do Sul – RS - Brasil
Dell Computer de Chile Ltda
Coyancura 2283, Piso 3- Of. 302,
Providencia, Santiago - Chile
Dell Computer de Colombia Corporation
Carrera 7 #115-33 Oficina 603
Bogota, Colombia
Dell Computer de Mexico SA de CV
Rio Lerma #302- 4 Piso
Col. Cuauhtemoc, Mexico, D.F. 06500
). No caso de reclamação, esta
92 Manual de informações do sistema
Page 95

Dell™ Latitude™ Serie D505
Guía de información del sistema
Modelo PP10L
www.dell.com | support.dell.com
Page 96

Notas, avisos y precauciones
NOTA: Una NOTA indica información importante que le ayuda a hacer un mejor uso del equipo.
AVISO: Un AVISO le indica la posibilidad de que el hardware sufra daños potenciales o de pérdida de
datos y le explica cómo evitar el problema.
PRECAUCIÓN: Un aviso de PRECAUCIÓN indica el riesgo de daños en la propiedad, lesiones personales
o incluso la muerte.
Abreviaturas y acrónimos
Para obtener una lista completa de abreviaturas y acrónimos, consulte la
sistema operativo, haga doble clic en el icono
botón
Inicio
, en
Centro de ayuda y soporte técnico
y del sistema
).
Si ha adquirido un equipo Dell™ Serie n, todas las referencias que aparecen en este documento
relativas a los sistemas operativos de Microsoft
Guía del usuario
del escritorio o bien haga clic en el
y, a continuación, haga clic en
®
Windows® no son aplicables.
Guía del usuario
Guías del usuario
(según su
____________________
La información contenida en este documento puede modificarse sin previo aviso.
© 2003 Dell Inc. Quedan reservados todos los derechos.
La reproducción de este documento de cualquier manera sin la autorización por escrito de Dell Inc. queda terminantemente
prohibida.
Marcas comerciales utilizadas en este texto: Dell, el logotipo de DELL, TrueMobile y Latitude son marcas comerciales de Dell
Inc.; Intel, Pentium y Celeron son marcas comerciales registradas de Intel Corporation; Microsoft y Windows son marcas
comerciales registradas de Microsoft Corporation; Bluetooth es una marca comercial propiedad de Bluetooth SIG, Inc. y Dell
Inc. la utiliza bajo licencia.
Este documento puede incluir otras marcas comerciales y nombres comerciales para referirse a las entidades que son propietarias
de los mismos o a sus productos. Dell Inc. renuncia a cualquier interés sobre la propiedad de marcas y nombres comerciales que
no sean los suyos.
Modelo PP10L
Octubre de 2003 N/P R1189 Rev. A01
Page 97

Contenido
PRECAUCIÓN: Instrucciones de seguridad . . . . . . . . . . . . . . . . . 97
SEGURIDAD: General
SEGURIDAD: Alimentación
SEGURIDAD: Batería
SEGURIDAD: Viajes en avión
SEGURIDAD: Instrucciones EMC
. . . . . . . . . . . . . . . . . . . . . . . . . 97
. . . . . . . . . . . . . . . . . . . . . . 98
. . . . . . . . . . . . . . . . . . . . . . . . . 98
. . . . . . . . . . . . . . . . . . . . . . 98
. . . . . . . . . . . . . . . . . . . . 99
Cuando utilice el equipo
. . . . . . . . . . . . . . . . . . . . . . . . . . 99
SEGURIDAD: Hábitos de ergonomía con su equipo
SEGURIDAD: Cuando trabaje en el interior del equipo
SEGURIDAD: Protección contra descargas electrostáticas
SEGURIDAD: Cómo desechar las baterías
Localización de información de su equipo
Configuración del equipo
Acerca de su equipo
Vista anterior
Vista izquierda
Vista derecha
Vista posterior
Vista inferior
Extracción de una batería
. . . . . . . . . . . . . . . . . . . . . . . . 105
. . . . . . . . . . . . . . . . . . . . . . . . . . . 107
. . . . . . . . . . . . . . . . . . . . . . . . . . . . 107
. . . . . . . . . . . . . . . . . . . . . . . . . . . 108
. . . . . . . . . . . . . . . . . . . . . . . . . . . . 108
. . . . . . . . . . . . . . . . . . . . . . . . . . . 109
. . . . . . . . . . . . . . . . . . . . . . . . . . . . 109
. . . . . . . . . . . . . . . . . . . . . . . . 110
. . . . . . . . . . . . . . 101
. . . . . . . . . . . . . . . . 102
Extracción e instalación de una batería de reserva
Instalación de una batería
Diagnósticos Dell
. . . . . . . . . . . . . . . . . . . . . . . . . . . . 113
Cuándo utilizar los Diagnósticos Dell
Avisos reglamentarios
. . . . . . . . . . . . . . . . . . . . . . . . 112
. . . . . . . . . . . . . . . . . 113
. . . . . . . . . . . . . . . . . . . . . . . . . . 116
Información para NOM (únicamente para México)
. . . . . . . . . . 100
. . . . . . . . . 100
. . . . . . 100
. . . . . . . . . . . . 111
. . . . . . . . . . 117
Contenido 95
Page 98

Política de devolución y garantía limitada . . . . . . . . . . . . . . . . 118
Términos contractuales - Argentina - Garantía ofrecida por DELL
al usuario final - 1º. Año
. . . . . . . . . . . . . . . . . . . . . . . 118
Garantía de 1 año del fabricante para el usuario final (sólo para
Latinoamérica y el área del Caribe)
Declaración de garantía Intel
®
Celeron
(sólo en EE.UU. y Canadá) . . . . . . . . . . . . . . . . . 121
. . . . . . . . . . . . . . . . . 119
®
sólo para procesadores Pentium® y
96 Contenido
Page 99

PRECAUCIÓN: Instrucciones de seguridad
Aplique las siguientes pautas de seguridad para garantizar su seguridad personal y proteger el equipo y el entorno de
trabajo frente a posibles daños.
SEGURIDAD: General
• No intente reparar el equipo usted mismo a menos que sea un técnico experto. Siga siempre las instrucciones de
instalación tal y como se indica.
• Si utiliza un alargador con el adaptador de CA, compruebe que el valor nominal en amperios de los productos
enchufados al alargador no sobrepase el valor nominal en amperios de éste.
• No introduzca ningún objeto en las aberturas o rejillas de ventilación del equipo. Si lo hace, podría ocasionar un
incendio o una descarga eléctrica producidos por un cortocircuito en los componentes internos.
• Mientras el equipo esté encendido, no lo guarde en un entorno con flujo de aire limitado, como por ejemplo, un
maletín de transporte o un maletín cerrado. La circulación restringida de aire podría dañar el equipo o provocar
un incendio.
• Mantenga alejado el equipo de los radiadores u otras fuentes de calor. Asimismo, no bloquee las rejillas de
ventilación. Evite colocar papeles bajo el equipo; no coloque el equipo en una unidad empotrada en la pared ni
sobre una cama, un sofá o una alfombra.
• Cuando utilice el adaptador de CA para suministrar alimentación al equipo o para cargar la batería, sitúelo en un
área ventilada, como un escritorio o en el suelo. No cubra el adaptador de CA con papeles u otros objetos que
reduzcan la ventilación; no utilice el adaptador de CA dentro de un maletín.
• Es posible que el adaptador de CA se caliente durante el funcionamiento normal del equipo. Tenga cuidado al
manipular el adaptador durante o inmediatamente después de su funcionamiento.
• No utilice el equipo portátil con la base en contacto directo con la piel durante periodos prolongados de tiempo.
La temperatura de la superficie de la base aumentará durante el funcionamiento normal (sobre todo si se utiliza
alimentación de CA). El contacto continuo con la piel puede provocar malestar o incluso quemaduras.
• No utilice el equipo en un entorno húmedo, por ejemplo, cerca de una bañera, un lavabo, un fregadero, una
piscina o en un sótano humedecido.
• Si el equipo incluye un módem integrado u opcional (tarjeta PC), desconecte el cable del módem cuando se
aproxime una tormenta eléctrica para evitar el riesgo potencial de descarga eléctrica producida por un rayo a
través de la línea telefónica.
• Para evitar el peligro potencial de una descarga eléctrica, no conecte o desconecte ningún cable ni lleve a cabo
ningún proceso de mantenimiento o reconfiguración de este producto durante una tormenta eléctrica. No utilice
el equipo durante una tormenta eléctrica a menos que previamente se hayan desconectado todos los cables y el
equipo funcione con la alimentación proporcionada por la batería.
• Si el equipo incluye un módem, el cable utilizado con el módem debe tener un tamaño mínimo de 26 AWG
(American wire gauge, calibre de alambre americano) y un enchufe modular RJ-11 que cumpla con el estándar de
la FCC (Federal Communications Commission, Comisión federal de comunicaciones).
• Antes de abrir la cubierta del módulo de memoria o de la minitarjeta PCI situada en la parte inferior del equipo,
desconecte todos los cables de los tomacorriente y desenchufe el cable telefónico.
• Si el equipo incluye un conector de módem RJ-11 y un conector de red RJ-45, que son bastante parecidos,
asegúrese de introducir el cable telefónico en el conector RJ-11 en lugar de hacerlo en el conector RJ-45.
• Las tarjetas PC pueden calentarse mucho durante el funcionamiento normal. Tenga cuidado al extraer las tarjetas
PC después de su uso prolongado.
• Antes de limpiar el equipo, desconéctelo del tomacorriente. Limpie el equipo con un paño suave humedecido con
agua. No utilice limpiadores en aerosol ni líquidos, que podrían contener sustancias inflamables.
Guía de información del sistema 97
Page 100

SEGURIDAD: Alimentación
• Utilice únicamente el adaptador de CA proporcionado por Dell que se ha aprobado para su uso con este equipo.
El uso de otro tipo de adaptador de CA puede implicar un riesgo de incendio o explosión.
• Antes de conectar el equipo a un tomacorriente, asegúrese de que el valor nominal de voltaje y la frecuencia del
adaptador de CA coincidan con los de la fuente de alimentación disponible.
• Para interrumpir la alimentación del equipo, apáguelo, desconecte el adaptador de CA del tomacorriente y
extraiga la batería del compartimento de la batería o del compartimento para módulos.
• Para evitar una descarga eléctrica, enchufe el adaptador de CA y los cables de alimentación de los dispositivos a
fuentes de alimentación con conexión a tierra. Estos cables pueden estar equipados con enchufes de tres clavijas
para garantizar la conexión a tierra. No utilice adaptadores ni retire la clavija de conexión a tierra del enchufe del
cable de alimentación. Si utiliza un alargador, use el tipo apropiado, de 2 clavijas o 3 clavijas, para que coincida
con el cable de alimentación del adaptador de CA.
www.dell.com | support.dell.com
• Asegúrese de que no haya nada sobre el cable de alimentación del adaptador de CA y de que éste no esté en un
sitio donde se pueda pisar o sea fácil tropezar con él.
• Si utiliza una regleta de enchufes, proceda con precaución a conectar el cable de alimentación de CA del
adaptador a la regleta. En algunas regletas es posible introducir incorrectamente el enchufe. La introducción
incorrecta del enchufe puede provocar daños irreparables en el equipo, además del riesgo de descarga eléctrica o
incendio. Asegúrese de que la clavija de conexión a tierra del enchufe de alimentación esté insertada en el
contacto de acople con conexión a tierra de la regleta.
SEGURIDAD: Batería
• Utilice sólo las baterías de Dell™ que se han aprobado para uso con este equipo. El uso de otro tipo de baterías
puede aumentar el riesgo de incendio o explosión.
• No lleve la batería en el bolsillo, bolso u otro contenedor en el que los objetos de metal (como las llaves del coche
o clips sujetapapeles) puedan producir un cortocircuito en las terminales de la batería. El flujo de corriente
excesivo resultante puede provocar temperaturas extremadamente altas y, como consecuencia, daños en la
batería, fuego y quemaduras.
• La batería presenta un riesgo de quemaduras si no se manipula correctamente. No la desmonte. Tenga mucho
cuidado al manipular baterías dañadas o que gotean. Si la batería está dañada, el electrolito de las celdas puede
gotear y causar lesiones corporales.
• Mantenga la batería fuera del alcance de los niños.
• No almacene ni deje el equipo ni la batería cerca de fuentes de calor, como un radiador, chimenea, estufa,
calentador eléctrico u otro tipo de generador de calor, ni los exponga en ningún caso a temperaturas superiores a
60º C (140º F). Si alcanzan una temperatura excesiva, las celdas de la batería pueden explotar.
• No arroje la batería del equipo al fuego ni la tire junto con los desperdicios de la casa. Las celdas de la batería
pueden explotar. Deseche la batería agotada de acuerdo con las instrucciones del fabricante o póngase en
contacto con el organismo local de eliminación de residuos. Deshágase de una batería agotada o dañada lo antes
posible.
SEGURIDAD: Viajes en avión
• Es posible que existan reglamentos de la FAA (Federal Aviation Administration, Administración federal de
aviación) o reglamentos específicos de las líneas aéreas que sean aplicables a la utilización del equipo Dell™
cuando se encuentre a bordo de un avión. Por ejemplo, dichos reglamentos y limitaciones pueden prohibir el uso
de dispositivos electrónicos personales que puedan realizar transmisiones internacionales mediante
radiofrecuencia u otro tipo de señales electromagnéticas desde el interior de la aeronave.
98 Guía de información del sistema
 Loading...