

Page 1
A
RKM-572 Holder
ccessories included:
• Screws (16 pcs)
• Nylon Washers (16 pcs)
• Nylock Nuts (8 pcs)
• Tinnerman Clips (8 pcs)
Instruction Manual
10-32 x 5/8”
Hex drive
10-32 thread insert size
10-32 thread insert size
www.datavideo.us
Tools required:
• Crescent wrench or 3/8 wrench
• 1/8 Hex Key (1 pc) (included)
Page 2
2
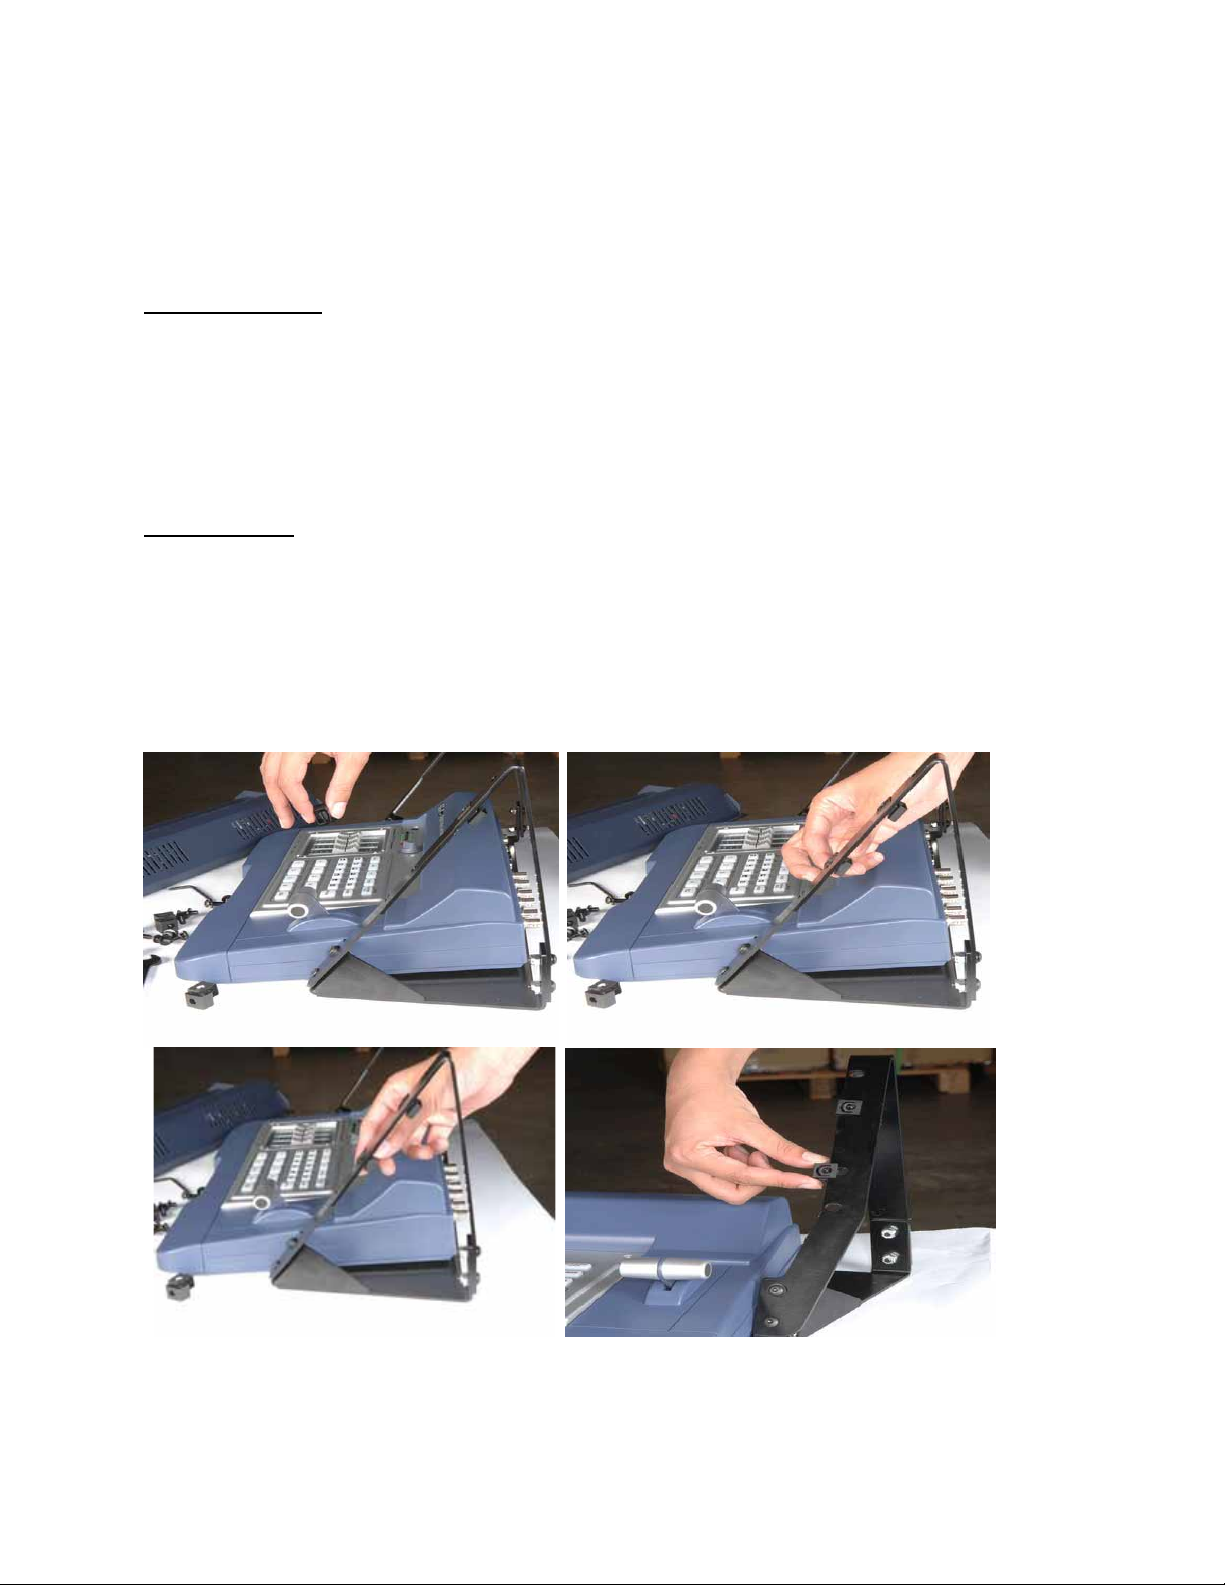
Holder Assembly
Step 1: Lay the base flat on a hard surface.
Step 2: Place the side bar vertically on top of the base (outer placement).
Step 3: Place the washer onto the screw, and insert the screw through all 8
bottom holes, securing the screws with nylock nuts.
Step 4: Repeat steps 2 and 3 for the second side bar.
Mounting Unit
Step 5: Slide the tinnerman clips onto the sidebar over the holes.
Step 6: Place the monitor on top of the tinnerman clips.
Step 7: Place the washer onto the screw and insert the screw into tinnerman clip,
securing the monitor in its place.
 Loading...