

Page 1
®
Recreational Vehicle/Marine
Water Filter System
Installation and
Operation Instructions
The RVF-10 system is designed to reduce foul tastes,
odors and sediment from potable drinking water.
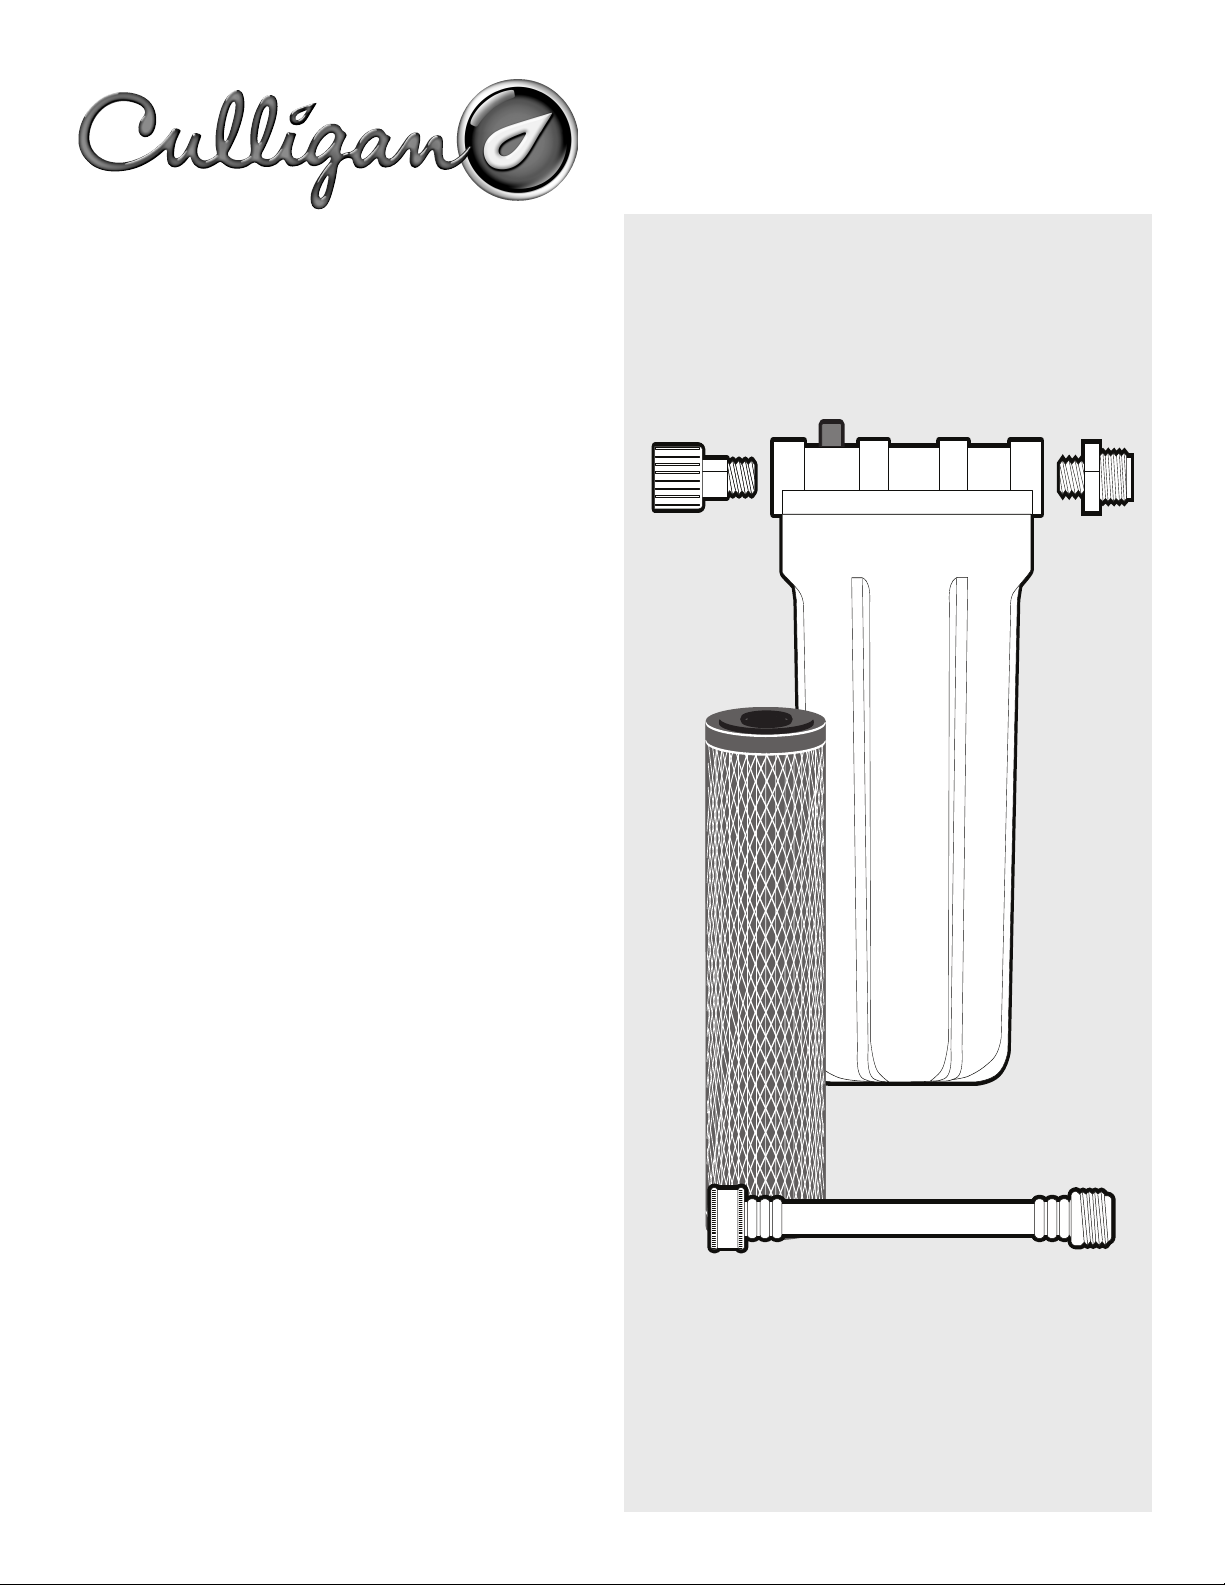
This system includes 3/4" flexible hose couplings, and the
NCP-10 replacement cartridge.
NOTE: This system may reduce water flow slightly.
RVF-10
INSTALLATION
1. Wrap the 3/8-inch fitting (on the 3/4-inch female hose
adapter) with Teflon
the INLET side of the filter system. Wrap the male
hose adapter with Teflon tape and screw into the
OUTLET side of the filter system. Use a wrench to
tighten firmly. DO NOT OVERTIGHTEN. About one
thread should remain visible when fittings are
tightened.
2. To protect the system from possible damage, install
the system between two hoses. The short hose
(included) should be used to connect the outlet side of
the filter system with the storage tank inlet. A sanitary
hose can be used to connect the water faucet to the
inlet side of the filter system.
3. Before running water through the RVF-10 system into
the storage tank, flush out an
be present in the carbon cartridge. Disconnect the
hose at the storage tank and turn the water supply on
for appro
and reconnect the hose to the storage tank.
ximately one minute.
®
tape (included), and screw into
y carbon fines that may
urn off water supply
T
Installation is now complete.
WARNING: Do not use with water that is microbiologically
unsafe or of unknown quality without adequate disinfection
before or after the system.
CAUTION:The RVF-10 system must be protected from
freezing. Failure to do so may result in cracking of the filter
and water leakage.
Page 2
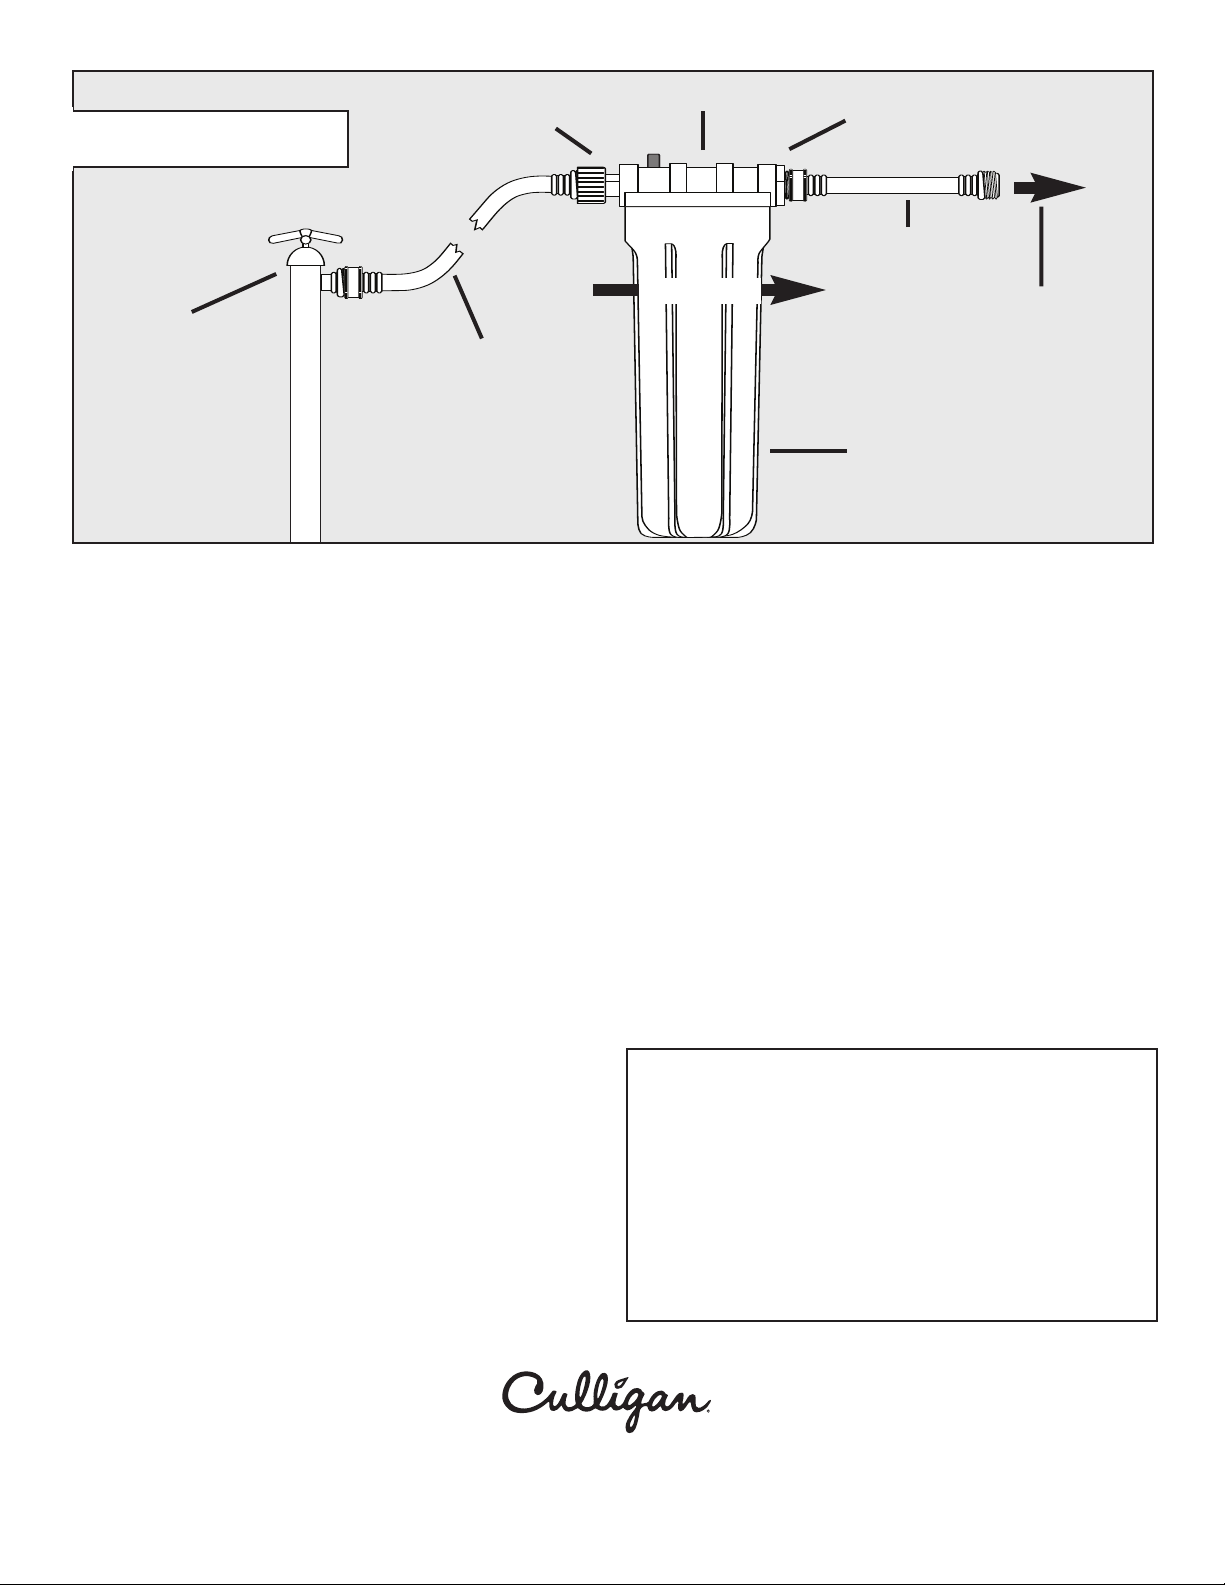
INSTALLATION
female hose
adapter
f
ilter cap
male hose
a
dapter
short hose
water supply
hose
(not included)
CARTRIDGE REPLACEMENT
1. To change the cartridge, turn off the water supply and
depress the red pressure relief button.
2. Unscrew the filter housing. Remove and discard the
existing cartridge.
3. Rinse out the filter housing and scrub the inside with
mild soap and warm water using a non-abrasive
sponge. Also scrub the inside areas of the filter cap.
Rinse thoroughly with clean water.
4. Remove O-ring from the groove in the housing and wipe
groove and O-ring clean. Lubricate O-ring with a coating
of clean petroleum jelly (Vaseline
the groove and wipe or press it down into the groove
using two fingers.
NOTE: The rubber O-ring provides a water-tight seal between
the cap and the bottom of the housing. It is important
that the O-ring be properly seated in the groove below
the threads of the housing or a water leak could occur.
5. Place the new cartridge into the filter housing and screw
back onto the filter cap. DO NOT OVERTIGHTEN.
6. Before running w
the storage tank, flush out an
present in the carbon car
the storage tank and turn the water supply on for
ximately one minute.
appro
reconnect the hose to the storage tank.
The replacement cartridge should be changed when the original foul tastes or odors appear or when there is a noticeable
drop in water pressure at the filter housing outlet.
ater through the R
tridge. Disconnect the hose at
®
). Place O-ring back in
0 system into
VF-1
y carbon fines that may be
ater supply and
f w
urn of
T
water flow
to storage tank
filter housing
When the RVF-10 system is not being used for a period of
time, the cartridge should be removed and drained of excess
water. The cartridge should be air dried. When the system is
to be used again, the flushing procedure should be followed.
(See step 6 of Cartridge Replacement instructions.)
TROUBLESHOOTING
Leaks between cap and bottom of housing:
1. Turn off water supply and remove bottom of
filter housing.
2. Clean O-ring and O-ring groove (located directly
beneath threads of housing). Lubricate O-ring with
petroleum jelly (Vaseline
groove. Screw bottom of housing onto cap and
hand-tighten.
Leaks on inlet/outlet connections
1. Turn off water supply.
2. Tighten fittings 1/2-turn. Do not overtighten.
If leaks per
sist, call Technical Support at 1-800-721-9243.
REPLACEMENT PARTS
filter cap . . . . . . . . . . . . . . . . . . . . . . . . . . . . . .154159
filter housing . . . . . . . . . . . . . . . . . . . . . . . . . .153049
OR-38 o-ring (not shown) . . . . . . . . . . . . . . . .01019186
. . . . . . . . . . . . . . . . . . . . . . . . . . . . . . . . . .1
hose
hose fitting kit
SW-1 spanner wrench (optional) . . . . . . . . . .01019190
. . . . . . . . . . . . . . . . . . . . . . . . . .
CARTRIDGES
NCP-10 (included) . . . . . . . . . . . . . . . . . . . . . .01019092
®
) and replace securely into
1
441
44364
1
4
Culligan International Company
One Culligan Parkway
Northbrook, Illinois 60062
www.culligan.com
©2006 Culligan International Company 11/06 145808 Rev D
Customer Service
Phone: 1-800-721-7360 F
International: Phone (920) 457-2726 • Fax (920) 457-7366
e-mail: customerservice@culligan.com
M-F 8:00 a.m – 4:30 p.m. CST
ax: 1-800-721-7390
Sales & Mark
P.O. Box 1086 • Sheboygan, WI 53082-1086
e-mail: sales-marketing@culligan.com
eting Correspondence
Fax (920) 457-7366
 Loading...