

Cornelius D100, D150 Installation Manual
Installation Manual
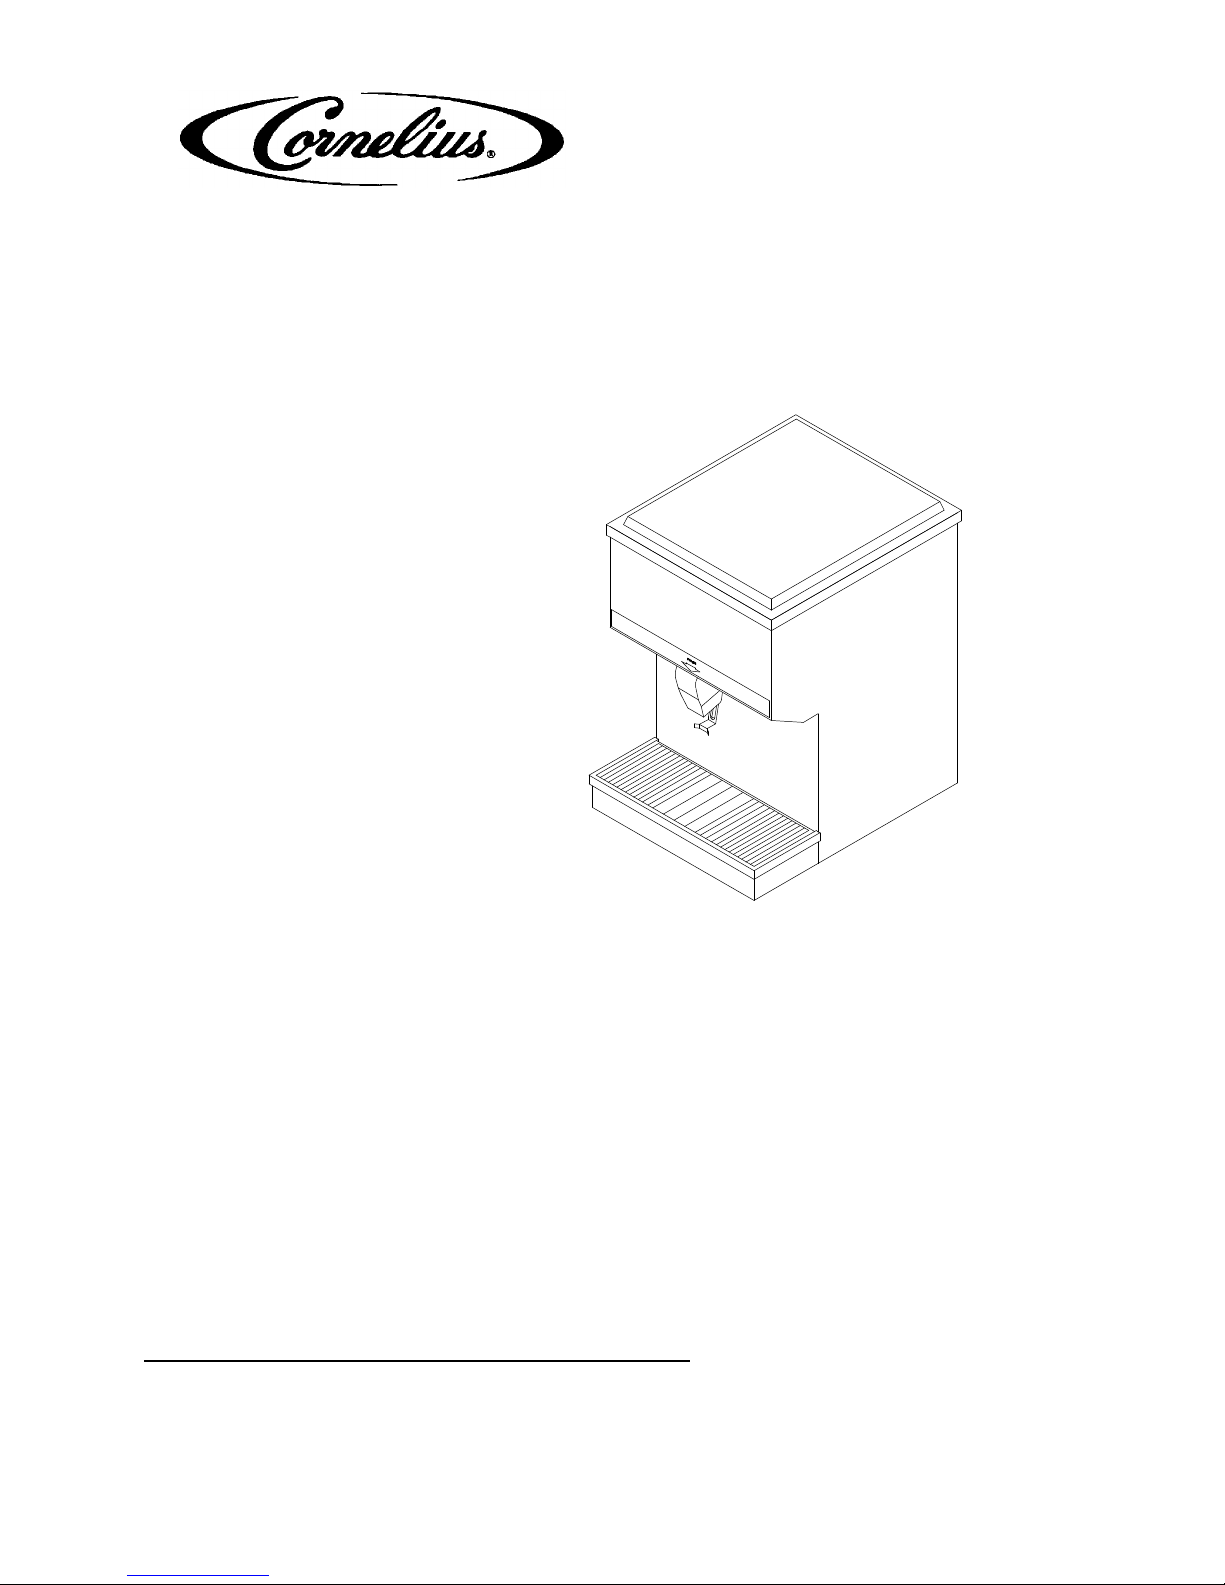
ICE DISPENSER
Model D100/D150
Publication Number: 91719
Release Date: April 01, 1994
Revision Date: May 09, 2014
Revision: B
THIS DOCUMENT CONTAINS IMPORTANT INFORMATION
This Manual must be read and understood before installing or operating this equipment
© CORNELIUS INC; 1989-2014
PRINTED IN U.S.A

TABLE OF CONTENTS
SAFETY PRECAUTIONS 1. . . . . . . . . . . . . . . . . . . . . . . . . . . . . . . . . . . . . . . . . . . . . . . . . . .
GENERAL DESCRIPTION 1. . . . . . . . . . . . . . . . . . . . . . . . . . . . . . . . . . . . . . . . . . . . . . . . . .
INSTALLA TION INSTRUCTIONS 2. . . . . . . . . . . . . . . . . . . . . . . . . . . . . . . . . . . . . . . . . . . .
CLEANING INSTRUCTIONS 2. . . . . . . . . . . . . . . . . . . . . . . . . . . . . . . . . . . . . . . . . . . . . . . .
DISPENSER 2. . . . . . . . . . . . . . . . . . . . . . . . . . . . . . . . . . . . . . . . . . . . . . . . . . . . . . . . . .
OPERA TING INSTRUCTIONS 3. . . . . . . . . . . . . . . . . . . . . . . . . . . . . . . . . . . . . . . . . . . . . . .
START-UP AND OPERATING INSTRUCTIONS 3. . . . . . . . . . . . . . . . . . . . . . . . . . .
MAINTENANCE 3. . . . . . . . . . . . . . . . . . . . . . . . . . . . . . . . . . . . . . . . . . . . . . . . . . . . . . . . . . .
PERIODIC CLEANING 3. . . . . . . . . . . . . . . . . . . . . . . . . . . . . . . . . . . . . . . . . . . . . . . . .
DAILY (OR AS REQUIRED) 3. . . . . . . . . . . . . . . . . . . . . . . . . . . . . . . . . . . . . . . . .
WEEKLY (OR AS REQUIRED) 3. . . . . . . . . . . . . . . . . . . . . . . . . . . . . . . . . . . . . .
MONTHLY 3. . . . . . . . . . . . . . . . . . . . . . . . . . . . . . . . . . . . . . . . . . . . . . . . . . . . . . . .
GATE RESTRICTOR PLATE 4. . . . . . . . . . . . . . . . . . . . . . . . . . . . . . . . . . . . . . . .
ADJUSTMENTS 4. . . . . . . . . . . . . . . . . . . . . . . . . . . . . . . . . . . . . . . . . . . . . . . . . . . . . . .
TROUBLESHOOTING GUIDE 5. . . . . . . . . . . . . . . . . . . . . . . . . . . . . . . . . . . . . . . . . . . . . . .
Page
BLOWN FUSE OR CIRCUIT BREAKER 5. . . . . . . . . . . . . . . . . . . . . . . . . . . . . .
GATE DOES NOT OPEN. AGITATOR DOES NOT TURN. 5. . . . . . . . . . . . . .
GATE DOES NOT OPEN OR IS SLUGGISH. AGITATOR TURNS. 5. . . . . . .
GATE OPENS. AGITATOR DOES NOT TURN. 5. . . . . . . . . . . . . . . . . . . . . . . .
ICE DISPENSES CONTINUOUSLY. 5. . . . . . . . . . . . . . . . . . . . . . . . . . . . . . . . .
SLUSHY ICE. WATER IN HOPPER. 5.................................
SOLENOID ASSEMBLY PARTS LIST 8. . . . . . . . . . . . . . . . . . . . . . . . . . . . . . . . . . . . . . . .
MODEL 3030 PARTS LIST 10. . . . . . . . . . . . . . . . . . . . . . . . . . . . . . . . . . . . . . . . . . . . . . . . . .
LIST OF FIGURES
FIGURE 1. GATE RESTRICTOR PLATE 4. . . . . . . . . . . . . . . . . . . . . . . . . . . . . . . . . .
FIGURE 2. MOUNTING TEMPLATE D150 6. . . . . . . . . . . . . . . . . . . . . . . . . . . . . . . .
FIGURE 3. WIRING DIAGRAM D150 DISPENSER 7. . . . . . . . . . . . . . . . . . . . . . . . .
FIGURE 4. SOLENOID ASSEMBLY 8. . . . . . . . . . . . . . . . . . . . . . . . . . . . . . . . . . . . . .
FIGURE 5. DISPENSING LEVERS AND SWITCHES 9. . . . . . . . . . . . . . . . . . . . . . .
LIST OF TABLES
TABLE 1. SPECIFICATIONS 1. . . . . . . . . . . . . . . . . . . . . . . . . . . . . . . . . . . . . . . . . . . .
SAFETY PRECAUTIONS
ALWAYS: Disconnect power to the dispenser before servicing or cleaning.
NEVER: Place hands inside of hopper or gate area without disconnecting power to the dispenser. Agitator
rotation occurs automatically when the dispenser is energized!
This ice dispenser has been specifically designed to provide protection against personal injury and eliminates
contamination of ice. To ensure continued protection and sanitation, observe the following:
ALWAYS: Be sure the removable lid is properly installed to prevent unauthorized access to the hopper interior and possible contamination of ice.
ALWAYS: Be sure the upper and lower front panels are securely fastened.
ALWAYS: Keep area around the dispenser clean of ice cubes.
CAUTION: Dispenser cannot be used with crushed or flaked ice.
Use of bagged ice, which has frozen into large chunks, can void warranty . The dispenser
agitator is not designed to be an ice crusher. Use of large chunks of ice which “jam up”
inside the hopper will cause failure of the agitator motor and damage to the hopper. If bagged ice
is used, it must be carefully and completely broken into small, cube-sized pieces before filling into
the dispenser hopper.
GENERAL DESCRIPTION
The D150 ice dispensers solve your ice and beverage service needs in sanitary , space saving, economical
ways. Designed to be manually filled with ice from any remote ice-making source, these dispensers will dispense cubes (up to 1-1/4? in size), cubelets and hard-chipped or cracked ice.
Table 1. Specifications
Model: D100 D150
Ice Storage: 100 lbs. 150 lbs.
Electrical: 120/1/60 3 Amp 120/1/60 3 Amp
Drain
Connection:
Electrical
Connection:
Dimensions: 22? W x 29-3/4? D x 30-1/2? H 22? W x 29-3/4? D x 32-3/4? H
3/4? FPT 3/4? FPT
6', 3-Wire Cord with 3-Prong Ground
Type Plug
6', 3-Wire Cord with 3-Prong Ground
Type Plug
1
INSTALLATION INSTRUCTIONS
1. *Locate the dispenser indoors on a level counter top. Unpack the four (4) legs and install them into the
threaded holes provided in the bottom of the unit.
2. Connect the 3/4? IPS (or equal) drain line to the 3/4? threaded drain connections at the lower rear of the
unit. This line must pitch downward to an open drain and must contain no traps or improper drainage
will result.
3. Clean the hopper interior. (see CLEANING INSTRUCTIONS).
4. Connect the power cord to a 120 volt, 60 hertz, 3-wire grounded receptacle. All electrical wiring must conform to national and local electrical codes.
*Figure 2 shows the mounting template for those who desire to mount dispensers on a counter.
CLEANING INSTRUCTIONS
WARNING: DISCONNECT POWER BEFORE CLEANING! Do not use metal scrapers, sharp
objects or abrasives on the ice storage hopper, top cover and the agitator disk, as damage
may result. Do not use solvents or other cleaning agents, as they may attack the plastic
material.
DISPENSER
1. Clean the ice dispenser interior at least once a month.
2. Lift off the agitator assembly. Wash and rinse them thoroughly .
3. Wash down the inside of the hopper and top cover with a mild detergent solution and rinse thoroughly to
remove all traces of detergent.
4. Replace the agitator.
5. Sanitize the inside of the hopper and agitator with a solution of 1 ounce of household bleach in 2 gallons
of water.
6. Remove ice chute cover as follows:
A. Flex sides outward to disengage lower pins.
B. Lift ice chute cover to disengage upper pins.
C. Lower ice chute cover down out of unit. NOTE: it may be helpful to twist cover slightly.
7. Clean the inside of the ice chute and ice chute cover with a mild detergent solution and rinse thoroughly to
remove all traces of detergent.
8. Reverse steps above to reassemble ice chute.
9. Sanitize as described in Step 5.
2
 Loading...