

Page 1

Copyright © 2001 COREL CORPORATION and COREL CORPORATION LIMITED. All rights reserved.
For complete copyright information, please refer to the About section in the Help menu of the software.
Page 2

Book contents
Section 1: Introduction .........5
Section 2: WordPerfect 10 ........29
Section 3: Quattro Pro 10 ........145
Section 4: Corel Presentations 10 ......251
Section 5: Paradox 10 .........339
Section 6: CorelCENTRAL 10 .......399
Page 3

Section 1
Introduction
Page 4

Page 5

Table of contents: Introduction
Welcome to WordPerfect Office 2002 ......5
What’s the purpose of this user guide .........5
About Corel Corporation ............7
WordPerfect Office 2002 applications .........7
What's new in WordPerfect Office 2002 .........9
Other WordPerfect Office 2002 applications and utilities .....10
Installing WordPerfect Office 2002 ......15
Setting up WordPerfect Office 2002 ..........16
Registering WordPerfect Office 2002 .........17
Adding, deleting, and updating WordPerfect Office 2002 components . . 17
Upgrading from Corel WordPerfect Suite.........18
Questions and answers about installing .........18
Starting and closing WordPerfect Office 2002 applications .....19
Network installations .............19
Learning how to use WordPerfect Office 2002 ....21
Using online Help .............21
PerfectExpert ..............22
We want your feedback ............23
Other sources for learning WordPerfect Office 2002 ......24
Corel support and services ........25
Registering Corel products............25
Technical support .............25
Self-serve technical support options .........25
Telephone technical support options .........26
Customer Service..............26
Table of contents: Introduction 3
Page 6

Welcome to
WordPerfect Office 2002
Welcome to WordPerfect® Office 2002 from Corel Corporation. WordPerfect Office 2002 is an
award-winning, integrated set of business-productivity applications for at work and at home.
With WordPerfect Office 2002, you can create annual reports, calculate your home budget,
produce mailing lists from databases, design brochures and menus, deliver business
presentations, and more.
1
What's the purpose of this user guide
WordPerfect Office 2002 User Guide explains the features of WordPerfect Office 2002 applications,
and provides step-by-step instructions for performing the most common tasks that users
perform with our applications. Because a single book cannot be an exhaustive reference for
every application in WordPerfect Office 2002, this user guide is designed to be a companion to
the WordPerfect Office 2002 online Help system. WordPerfect Office 2002 User Guide is designed to
get new and experienced business application users up and running with WordPerfect Office
2002 quickly.
If you're new to business applications, you can use this user guide as a foundation to your
learning. If you're familiar with business applications but new to WordPerfect Office 2002
applications, you can use this guide to learn about the tools available to you, and how to use
them. If you are an experienced WordPerfect Office 2002 application user, you can use this user
guide as a memory aid or as a refresher course. Each section includes information about what's
new in each WordPerfect Office 2002 application.
What’s in this user guide
This user guide is divided into six sections. The first section, which you are currently reading,
introduces WordPerfect Office 2002, and includes information about system requirements,
installation, learning WordPerfect Office 2002, and support options. The other five sections
document the major WordPerfect Office 2002 applications. The documentation for each major
application provides basic information about performing the most common tasks and describes
the application’s tools and functions. At the end of each chapter in each section, you'll find
directions to appropriate topics in the online Help documentation, where you can find answers
to questions not answered in this user guide.
What you need to know
This user guide assumes that you know how to perform basic operations in Windows 95,
Windows 98, Windows 2000, or Windows NT 4.0. If you haven't used these operating systems
before, you may want to read your Microsoft Windows manual before installing and using
WordPerfect Office 2002.
Welcome to WordPerfect Office 2002 5
Page 7

You can find more information about WordPerfect Office 2002 documentation and online Help in
Chapter 3 of this section.
Documentation conventions
Before you start using this user guide and the online Help, it's important to understand the
documentation conventions.
The following are conventions related to using the mouse.
When you see this …
Click File } New Click the File menu with the mouse, and click the
Click Edit }Select } Sentence Click the Edit menu, click Select, and click
Enable a check box Click the check box to place a check mark or an "X"
Disable a check box Click the check box to remove the check mark or
Select text Click and drag to highlight text.
Click a paragraph Click to plant the cursor in the paragraph.
Click a frame Click anywhere in a frame or click the border of
Right-click, and click Paste Click the right mouse button, and click the Paste
Do the following ...
word New in the menu.
Sentence from the submenu that appears.
in the box.
"X."
the frame.
command from the submenu that appears.
The following conventions are related to keyboard actions.
When you see this …
Do the following ...
Press ENTER Press the Enter key on your keyboard.
CTRL + SHIFT Press the Control key and the Shift key at the same
time.
6 Introduction
Page 8
The following conventions are used in this user guide.
When you see this …
This is...
A note.
A tip.
About Corel Corporation
Corel Corporation is an internationally recognized developer of award-winning business
productivity and graphics applications. Development of market-leading products, such as
WordPerfect Office 2002 and the CorelDRAW™ line of graphics applications, is continually
evolving to meet the demands of the corporate, retail, and academic users. Committed to value,
compatibility, choice, and open standards, Corel® develops products for the Windows,
Macintosh, UNIX, and Linux platforms. Corel's common stock trades on the NASDAQ Stock
Market under the symbol CORL and on the Toronto Stock Exchange under the symbol COR.
WordPerfect Office 2002 applications
This section describes the major applications included in WordPerfect Office 2002. Not all
WordPerfect Office 2002 editions include all the applications described in this section. For
example, WordPerfect Office 2002 Standard Edition does not include Paradox®, while the
Professional Edition does.
You can find more information about each of these applications in other sections of this user
guide and in the online Help files.
WordPerfect 10
WordPerfect 10 is a word-processing application that lets you produce professional-looking
documents, such as newsletters, articles, reports, books, proposals, legal pleadings, and
brochures. WordPerfect 10 makes it easy to add graphics, charts, and tables to any document.
WordPerfect 10 continues to support reveal codes, which lets you control every element of a
document. WordPerfect 10 also has enhanced publishing features, which let you create a
document and publish it to paper, electronic media, and the World Wide Web.
You can also use WordPerfect 10 to create, edit, retrieve, validate, and save documents created
with the Standard Generalized Markup Language (SGML) or eXtensible Markup Language (XML).
Although the user interface is XML oriented, all the SGML functionality that was available in
WordPerfect 8 and WordPerfect 9 is available in WordPerfect 10.
For more information about new features included in WordPerfect 10, refer to the “What’s new”
section of the online Help file.
Quattro Pro 10
Quattro® Pro 10 is a spreadsheet application that lets you manage, analyze, report, and share
data. Quattro Pro 10 helps you make informed business decisions by providing the tools you
need to produce tables, financial forms, lists, databases, charts, and reports. Quattro Pro 10 lets
you perform simple tasks, such as creating personal budgets, to more complex tasks, such as
Welcome to WordPerfect Office 2002 7
Page 9

preparing year-end financial statements, performing complex data analysis, and creating reports
from external databases. Like WordPerfect 10, Quattro Pro 10 lets you create a single file, then
publish it to paper, electronic media, and the World Wide Web.
As well as enhancements to existing features, the charting engine in Quattro Pro 10 has been
reengineered to give you more power, control, flexibility, and ease of use. You can now take
advantage of features like advanced rendering, riser transparency, and glow effects to produce
professional-looking results.
For more information about new features included in Quattro Pro 10, refer to the “What’s new”
section of the online Help file.
Corel Presentations 10
Corel® Presentations™ 10 lets you create high-quality slide shows and drawings. Corel
Presentations lets you produce project proposals, interactive reports and demonstrations,
multimedia presentations, flyers, signs, and banners. You can also create slide show
presentations for large monitors, portable presentations, the Internet or an intranet, overhead
transparencies, 35-mm slides, and printed color or black-and-white copies of a it. Corel
Presentations 10 is also a drawing application that lets you create drawings, edit and create
bitmap images, and convert vector images to bitmaps.
Corel Presentations 10 incorporates a number of new features, such as slide footers, font
embedding, support for Macromedia Flash, and support for animated GIFs. For more information
about new features included in Corel Presentations 10, refer to the “What’s new” section of the
online Help file.
CorelCENTRAL 10
CorelCENTRAL™ 10 is a personal information manager that helps you make the most of your
time. You can plan your daily schedule, write reminders, organize reference information, and
manage contact information. You can synchronize CorelCENTRAL with a 3Com Palm Pilot. In
addition, CorelCENTRAL is compatible with any Internet browser; when you click on a hyperlink
in a CorelCENTRAL component, it automatically opens your default Internet browser.
CorelCENTRAL includes the following components: CorelCENTRAL Day Planner, CorelCENTRAL
Calendar, CorelCENTRAL Memos, CorelCENTRAL Card File, and CorelCENTRAL Address Book.
Now CorelCENTRAL comes with its very own email client, CorelCENTRAL Mail, offering you
multiple mailboxes and email security that are integrated directly into CorelCENTRAL.
For more information about new features included in CorelCENTRAL 10, refer to the “What’s
new” section of the online Help file.
Paradox 10
Paradox 10 is a powerful and easy-to-use relational database program that helps you organize,
track, and retrieve data. You can also create sophisticated forms, charts, and reports to display
data. You can run Paradox as a standalone system on a single computer, or as a multiuser system
on a network.
Paradox contains Experts that guide you through the process of creating tables, forms, reports,
charts, mailing lists, and queries. If you prefer, you can create these objects on your own.
Enhanced table and report publishing capabilities make it easy for you to share your data over
the World Wide Web. Paradox 10 uses HTML and CSS when publishing reports to the World
8 Introduction
Page 10

Wide Web, ensuring more accurate reporting. In addition, Paradox 10 contains enhancements to
developer features, new graphics filters, and new document filters.
Paradox also features ObjectPAL®, an object-based, event-driven development language that you
can use to create customized database applications.
For more information about new features included in Paradox 10, refer to the “What’s new”
section of the online Help file.
What's new in WordPerfect Office 2002
WordPerfect Office 2002 provides enhancements in the area of choice, compatability and
performance. The following section outlines what's new overall in WordPerfect Office 2002. For
information about what's new in WordPerfect Office 2002 applications, see their respective
sections in this user guide or refer to the online Help file. Not all WordPerfect Office 2002
editions include all the applications, tools, and features described in this section.
Corel Application Recovery Manager
Corel Applicaton Recovery Manager (Corel A.R.M.) helps you recover from most application
failures without losing your work.
The Corel A.R.M. is an online wizard that opens automatically at program failure and then offers
three courses of action:
saving the document and closing the application
exiting the application without saving the document
continue working
If you chose to continue working there is no guarantee that you can recover any work in your
document since the last time you saved.
The Corel A.R.M. Provides a program log which contains the details of the applications failure.
You can initiate a report over the Internet to provide Corel with this important information. By
receiving reports that you encounter in day-to-day situations, Corel can take advantage of a
real-world testing opportunity.
Paradox 10 does not use the Corel A.R.M., as it already has built-in application
recovery features.
Location Manager
The Location Manager utility is a component of the Corel A.R.M. It makes sure the WordPerfect
Office 2002 applications can start without errors, even when files are missing or damaged. When
you start a WordPerfect Office 2002 application, the Location Manager ensures that all the
required files are present on the your computer. If the file is missing (due to being moved,
renamed, or deleted) or if it is damaged, the Location Manager will repair the problem by
replacing the file. This means that instead of receiving an error message and not being able to
start the application, the Location Manager will automatically repair the problem and the
application will start as expected. This greatly reduces downtime and virtually eliminates the
need to call technical support for errors caused by missing or damaged application files.
Welcome to WordPerfect Office 2002 9
Page 11

Corel Connector
If you have an Internet connection, you can connect to product-specific information,
newsgroups, updates, technical support, and more using the new Corel Connector included in
WordPerfect Office 2002. The Corel Connector is a thin Web client integrated into the
applications. You can use the Corel Connector, without leaving the WordPerfect Office 2002
applications, to
search for information on the World Wide Web using a search engine or portal
browse the various Corel Web sites, including http://www.corel.com/ and
http://www.officecommunity.com/, or any other Internet or Intranet site
post questions and find answers from newsgroups, including the Corel newsgroups
monitored by Corel staff and C_Tech volunteers
access technical support online, including through the Corel Knowledge Base at
http://kb.corel.com/
Pocket Oxford Dictionary
The Oxford English Dictionary has been the authoritative dictionary of the English language for
more than a century. The Pocket Oxford Dictionary provides the meaning, history, and
pronunciation of more than 30,000 words. It has been integrated into the existing writing tools
in WordPerfect Office 2002, giving you the ability to look up word definitions and phonetic
spellings. You can also upgrade to a larger version of the dictionary and purchase other services
offered by Oxford University Press.
Other WordPerfect Office 2002 applications and utilities
In addition to the major applications already discussed in this chapter, WordPerfect Office 2002
includes several other applications and utilities. This section describes some of these
applications and utilities. Not all editions of WordPerfect Office 2002 include the following
items.
Adobe Acrobat Reader
Adobe Acrobat Reader is included with WordPerfect Office 2002. This application lets you view,
navigate, and print PDF (Portable Document Format) files across multiple platforms. You can save
WordPerfect and Corel Presentations documents as PDF files.
Bitstream Font Navigator
Bitstream Font Navigator 4.0 is a font manager. It lets you find and install fonts, organize fonts
into manageable groups, and view and print font samples.
To start Bitstream Font Navigator
From the Windows taskbar, click Start } WordPerfect Office 2002 } Utilities } Bitstream Font
Navigator.
CorelMEMO
CorelMEMO™ is an electronic notepad that allows you to add comments to documents you
create with any program that supports Object Linking and Embedding (OLE). Use CorelMEMO
10 Introduction
Page 12

when you want to leave a reminder, note a change in a document, or make a remark about a
document.
Desktop Application Director
The Desktop Application Director™ (DAD) lets you access the major applications in WordPerfect
Office 2002 from the Windows taskbar, which eliminates the need to create shortcuts. You can
customize DAD to include any application or executable file, which reduces the need to navigate
through the Windows Start menu.
Dragon NaturallySpeaking
Dragon NaturallySpeaking 5.x is powerful voice dictation application software that lets you
create and format text by using a number of pre-defined commands, or by accessing various
menu and dialog options by voice. You can use the program to dictate into popular e-mail
applications and to browse the Web. Dragon NaturallySpeaking features a high level of speed
and accuracy, and because of its ability to learn, the speed and accuracy of the software increase
with each use. Dragon NaturallySpeaking is integrated in WordPerfect.
Not all WordPerfect Office 2002 editions include Dragon NaturallySpeaking.
Equation editor
Equation Editor lets you insert and format mathematical and scientific equations in a
WordPerfect document. To start the editor click Insert, Equation. For more information refer to
the online Help in the Equation Editor window.
Fonts, clipart, and photos
To help you enhance your documents, WordPerfect Office 2002 offers an extensive collection of
fonts, clipart, and photos. WordPerfect Office 2002 provides:
more than 1,000 TrueType fonts. When you install WordPerfect Office 2002 using Typical
Installation, a default set of fonts is installed automatically. Fonts are grouped by style and
appearance to help you find the font you need. Type 1 fonts may be downloaded from the
Web.
12,000 clipart images and symbols to help communicate your ideas and make your
documents more interesting. WordPerfect Office 2002 includes a full-color Libraries Catalog,
in PDF format, to help you find the clipart image or symbol you need. WordPerfect Office
2002 also lets you use the Scrapbook to search for clipart images or symbols by keyword or
file name.
more than 200 photos which you can add to your documents and presentations.
Fonts, clipart, and photos can be installed on a network to give multiple users access without
installing them on individual systems.
Welcome to WordPerfect Office 2002 11
Page 13

Install As You Go
Install As You Go™ lets you minimize the hard disk space required by WordPerfect Office 2002
applications. If you try to use an item that is not installed, Install As You Go asks if you would
like to install it. You can install only the applications and utilities you need, as you need them.
Macros and PerfectScript
Macros are time-saving programming scripts that automate routine tasks. Macros let you
reproduce the behavior of keyboard commands, some mouse actions, and menu commands. For
example, you can create a macro that retrieves a file, gives it a new name, and saves it in another
format. Then, at any time, you can play the macro to repeat the action.
PerfectScript™ is the macro language for WordPerfect, Quattro Pro, and Corel Presentations. It is
a command-based language that lets you record the results of keystrokes or mouse selections,
instead of recording the keystrokes themselves. For example, instead of recording each
keystroke involved in changing the top margin of a document to 2 inches, you can use
PerfectScript to record the command MarginTop (MarginWidth: 2.0”).
PerfectScript includes programming commands that direct the function of a macro. These
commands let you create macros that can prompt user input, make decisions, and access system
variables. By using programming commands with product commands, you can automate long or
complex tasks.
WordPerfect Office 2002 provides detailed online Help files for WordPerfect, Quattro Pro, Corel
Presentations, and PerfectScript macro commands. These files contain information about macro
commands and their syntax, and additional instructions, and examples.
Microsoft Visual Basic for Applications
More than three million software developers worldwide use Microsoft Visual Basic for
Applications (VBA) to create custom business solutions. VBA, integrated in WordPerfect, Quattro
Pro, Corel Presentations, and CorelCENTRAL, can be used by developers to build custom
solutions.
VBA integrates its development capabilities with host applications. When you use VBA to extend
WordPerfect Office 2002 applications you can benefit from the Visual Basic programming
language, an integrated Rapid Application Development (RAD) environment, and fast runtime
performance. You can also benefit from Microsoft Forms Package and support for ActiveX
controls to create custom user interfaces, provide access to the Windows API and the underlying
file system, add connectivity to corporate data, and integrate applications with other Component
Object Model-based applications.
Quick View Plus
Quick View Plus is an application designed to let you share files with ease. You can view, copy,
and print the contents of more than 200 Windows, MS-DOS, Macintosh, and Internet file
formats, even if you do not have the native application installed on your computer. Quick View
Plus can be integrated into email applications, including CorelCENTRAL Mail, Netscape
Messenger, Eudora, Microsoft Outlook, and Microsoft Exchange.
12 Introduction
Page 14

To install Quick View Plus
1 Insert the WordPerfect Office 2002 CD #1 into the CD-ROM drive.
If the WordPerfect Office 2002 Setup screen does not display, click the Start button on the
Windows taskbar, and click Run. Type D:\SETUP (where D is the letter corresponding to the
CD-ROM drive) in the Open box.
2 Click Quick View Plus Setup.
3 Follow the on screen prompts.
PerfectExpert
PerfectExpert™ includes the best features from QuickTask, templates, Coaches, and online Help.
PerfectExpert lets you create complex documents quickly, using professionally designed
templates that you can change to suit your needs. For example, PerfectExpert can guide you
through a detailed project, such as creating a resume, or it can guide you through a smaller task,
such as inserting a clipart image. WordPerfect Office 2002 includes a number of templates, and
new templates can be downloaded from the World Wide Web to give you more selection.
TextArt
TextArt® lets you transform words into designs. You can use multiple visual effects, such as font,
color, and rotation options, to create professional looking 2-D or 3-D images. You can create a
TextArt image yourself, or insert preset 2-D and 3-D images into documents. Saving an image as
a separate file lets you use the image in a variety of projects. You can also change the font of a
TextArt image by specifying the font type and style or insert iconic symbols and characters from
any fonts and alphabets available to you.
For more information refer to the TextArt online Help file. The help can be accessed when you
click Insert } Graphics } TextArt.
WordPerfect Office 2002 file filters
WordPerfect Office 2002 applications include file filters that let you open and edit documents
created using Microsoft Office and Lotus SmartSuite applications. For example, you can open a
Microsoft Word document in WordPerfect, or you can use Quattro Pro to open a Lotus 1-2-3
spreadsheet. You can also save WordPerfect Office 2002 documents in Microsoft Office and Lotus
SmartSuite formats. For example, you can save a Corel Presentations slide show as a Microsoft
PowerPoint presentation, or a WordPerfect document as a Microsoft Word document.
To maintain backward file compatibility, the file format for WordPerfect 10 remains
the same as for WordPerfect 6.1, 7, 8, and 9.
WordPerfect Office 2002 SDK and Corel Solution Partners
The WordPerfect Office 2002 Software Developer’s Kit (SDK) is a set of tools that lets software
developers customize WordPerfect Office 2002 applications for commercial or business use. The
SDK includes the following components:
online Help for the SDK
OLE automation samples
PerfectScript tools
Welcome to WordPerfect Office 2002 13
Page 15

tools and utilities, including code generation wizards for third-party add-ons to WordPerfect,
Quattro Pro, and Corel Presentations; utilities to monitor events in WordPerfect and Corel
Presentations; and a file format parsing tool
The SDK can be downloaded from www.corel.com.
The Corel Solution Partners program supports developers of complimentary products and
add-ons for selected Corel products, including WordPerfect Office 2002. The program is
designed to help accelerate the development of third-party products and promote these
products. For more information about Corel Solution Partners, see our World Wide Web site at
www.corel.com/partners_developers/csp.
14 Introduction
Page 16

Installing
WordPerfect Office 2002
You must install WordPerfect Office 2002 before you run it for the first time. The WordPerfect
Office 2002 Setup application makes it easy to install. You can also use the Setup application to
add components to your currently installed WordPerfect Office 2002
refresh files and configurations of your currently installed WordPerfect Office 2002
Before installing, you should do the following:
close any open applications
close any virus-detection application
make sure your computer meets the system requirements which are listed below
WordPerfect Office 2002 system requirements
The following are the minimum system requirements for WordPerfect Office 2002:
Windows 98, Windows 2000, Windows NT 4.0 with SP6 or higher, or Windows Me
Pentium 166 MHz processor
16 MB Ram (32 MB recommended)
150 MB hard disk space (280 MB typical install)
CD-ROM drive
VGA monitor
Mouse or tablet
The following are the minimum system requirements for WordPerfect Office 2002 — Professional
Edition with Dragon NaturallySpeaking:
Windows 98, Windows 2000, Windows NT 4.0 with SP6 or higher, or Windows Me
Pentium 266 MHz processor
64 MB Ram (32 MB recommended)
260 MB hard disk space (380 MB typical install)
CD-ROM drive
VGA monitor
Mouse or tablet
2
Installing WordPerfect Office 2002 15
Page 17

16-bit sound card or built-in audio input quality equal to or greater than Soundblaster 16.
Speaker required for sound output.
Additional hardware may be required for laptop installation.
Setting up WordPerfect Office 2002
The WordPerfect Office 2002 Setup application installs all the main applications and
components.
To Install WordPerfect Office 2002 applications
1 Insert the WordPerfect Office 2002 CD into the CD-ROM drive.
If the WordPerfect Office 2002 Setup screen does not display, click the Start button on the
Windows taskbar, and click Run. Type D:\SETUP (where D is the letter corresponding to the
CD-ROM drive) in the Open box.
2 Click WordPerfect Office 2002 Setup.
If you want to read the WordPerfect Office 2002 Release Notes, click the Release Notes
button. The Release Notes may contain installation tips that were not available at press time.
3 Click the Next button.
4 Read the WordPerfect Office 2002 license agreement, and click the Accept button.
If you don’t accept the licesnse agreement, the Setup application terminates.
5 Type your full name and company name (if it exists), and click the Next button.
6 Type your WordPerfect Office 2002 serial number, and click the Next button.
The serial number is on the WordPerfect Office 2002 registration card.
7 Enable one of the following options:
Typical Setup — installs the most commonly used applications, utilities, and files, and is
the recommended installation type for most users. Use this option if you're not sure which
WordPerfect Office 2002 components you want to install. You can add and remove
components afterwards.
Compact Setup — conserves hard drive space by installing the minimum number of
applications, utilities, and files needed to operate WordPerfect Office 2002. Enable this
option if you have little free disk space and require only the minimum components. This
installation is often used for laptop computers.
Custom Setup — lets you choose which WordPerfect Office 2002 components to install.
This option gives you the most control over the installation process. Choose this option if
you need to install specialized components that are not included in the Typical or
Compact installation setups.
8 Enable the CD-ROM Based check box if you want WordPerfect Office 2002 to read required
files from the CD-ROM drive when you use applications.
The CD-ROM Based option saves hard disk space but requires you to insert the WordPerfect
Office 2002 CD into the CD-ROM drive each time you want to run a WordPerfect Office 2002
application. Enabling this option also results in slower-than-normal performance.
9 Click the Next button, and follow the installation instructions in the Setup Wizard.
When the installationis completed, you will be prompted to register WordPerfect Office 2002
electronically using the Internet. For more information about registering, see “Registering
WordPerfect Office 2002” on page 17.
16 Introduction
Page 18

TI P
To change selections in the Setup Wizard, click the Back button.
Click the Help button for more information when you make selections in the Setup
Wizard.
Registering WordPerfect Office 2002
Registering WordPerfect Office 2002 provides you with timely access to the latest product
updates and to high-quality technical support.
The serial number on the registration card is proof that you own a legal copy of WordPerfect
Office 2002. You will need the serial number when you call Corel Technical Support, upgrade to a
new version of WordPerfect Office 2002, or order replacement discs.
You can register using any of the following methods:
While the Setup application is running, fill out the WordPerfect Office 2002 registration card
and return it to Corel.
Fill out the electronic form which displays when the WordPerfect Office 2002 installation is
completed. You will need access to the Internet to use this method.
Visit Corel on the World Wide Web, and complete the registration form at
www.corel.com/support/onlineregistration.htm.
Adding, deleting, and updating WordPerfect Office 2002
components
After installing WordPerfect Office 2002, you can add components to the installation. For
example, after using the Typical installation option, you may discover that you need additional
import file filters for Corel Presentations, or you want to use Data Maps with Quattro Pro, or
want access to detailed Macro Help for WordPerfect.
You can delete WordPerfect Office 2002 components to free up disk space. You can also update
components to refresh their configuration settings. Updating components also repairs
WordPerfect Office 2002 if you have accidentally deleted application files.
To add components to a WordPerfect Office 2002 installation
1 Close any open WordPerfect Office 2002 applications.
2 On the Windows taskbar, click Start } WordPerfect Office 2002 } Setup and notes }
WordPerfect Office 2002 Setup.
3 Enable the Add New Components button.
4 Click the Next button, and follow the installation instructions in the Setup Wizard.
To delete installed WordPerfect Office 2002 components
1 Close any open WordPerfect Office 2002 applications.
2 On the Windows taskbar, click Start } WordPerfect Office 2002 } Setup and notes } Corel
Remove Program.
3 Click the Next button, and follow the installation instructions in the Corel Uninstaller.
Welcome to WordPerfect Office 2002 17
Page 19

To update a WordPerfect Office 2002 installation
1 Close any open WordPerfect Office 2002 applications.
2 On the Windows taskbar, click Start } WordPerfect Office 2002 } Setup and notes }
WordPerfect Office 2002 Setup.
3 Enable the Update Current Installation button.
4 Click the Next button.
5 Click the Install button.
Upgrading from Corel WordPerfect Suite
WordPerfect Office 2002 can co-exist with earlier versions of WordPerfect Office applications
(for example, WordPerfect Office 2000 or Corel WordPerfect Suite 8) providing you have enough
disk space. The WordPerfect Office 2002 Setup application does not replace earlier versions of
these applications.
If you don’t plan to use earlier versions of the applications, you can remove them from your hard
drive to free up drive space.
To delete WordPerfect Office 2000
1 Close any open applications.
2 On the Windows taskbar, click Start } WordPerfect Office 2002 } Setup and notes } Corel
Remove Program.
3 Click the Next button.
4 Click the Select All button.
5 Enable the Remove Modified Files check box.
6 Click the Next button, and follow the installation instructions in the Corel Remove wizard.
Questions and answers about installing
The following list answers some common questions about installing WordPerfect Office 2002.
What should I do if I get a prompt telling me that I do not have enough
room to install all the files?
Exit the Setup application and delete unnecessary files from your hard disk to make more disk
space available.
You can also use the Custom, Compact, or Run from CD-ROM installation options. Several files,
such as the Clipart or data maps, are not required to run the applications. Use the Custom setup
installation to add these files later.
How can I conserve disk space during installation?
Choose Compact installation, which does not install all the components that come with
WordPerfect Office 2002. You can also choose Custom installation and install only the required
application files for each application, plus any other files you want.
18 Introduction
Page 20

I did a Compact installation. Why do Spell Check, Thesaurus, or Grammatik
not run?
A Compact installation installs only the files necessary to run WordPerfect Office 2002. If you
want to install writing tools, such as Spell Check, Thesaurus, or Grammatik®, run the Setup
application again, choose Custom installation, then install the files you want.
Can I reinstall specific files?
If you need a specific file, you can copy it from the CD, where all the decompressed WordPerfect
Office 2002 files are located. You can also reinstall an entire product or component.
If I install a mail system after installing WordPerfect Office 2002, do I need
to run the Setup application again?
No. WordPerfect Office 2002 detects your mail system when you start one of the applications,
not when you install, so the order in which you install the applications does not matter.
Starting and closing WordPerfect Office 2002 applications
After you have installed WordPerfect Office 2002, you’re ready to start using the applications and
utilities.
To start a WordPerfect Office 2002 application
From the Windows taskbar, click Start } WordPerfect Office 2002, and click the application
you want.
To start a WordPerfect Office 2002 utility
From the Windows taskbar, click Start } WordPerfect Office 2002 } Utilities, and click the
utility you want.
To close a WordPerfect Office 2002 application
Click File } Exit.
Network installations
WordPerfect Office 2002 includes the Network Administrator Setup wizard. Using this wizard,
Information Technology (IT) managers and system administrators can deploy WordPerfect Office
2002 to multiple workstations or set up WordPerfect Office 2002 so that it can run from a server.
The WordPerfect Office 2002 Network Administrator Guide is in PDF format on the CD. It can provide
more information about network installations.
To use the Network Administrator Setup wizard
1 Insert the WordPerfect Office 2002 CD into the CD-ROM drive.
If the WordPerfect Office 2002 Setup screen displays, click Exit.
Welcome to WordPerfect Office 2002 19
Page 21

2 From the Windows taskbar, click the Start button, and click Run. Type
D:\NETADMIN\NETSETUP.EXE (where D is the letter that corresponds to the CD-ROM drive) in
the Open box.
3 Click the Release Notes button if you want to read the WordPerfect Office 2002 Release
Notes.
The Release Notes may contain installation tips that were not available at press time.
4 Click the Next button, and follow the instructions in the Network Administrator Setup
wizard.
20 Introduction
Page 22
Learning how to use
WordPerfect Office 2002
In addition to the user guide you are reading, WordPerfect Office 2002 offers electronic
documentation to help you learn and use the applications efficiently, and the PerfectExpert, a
user assistance tool, to help you work more quickly while you become more familiar with
WordPerfect Office 2002 applications. WordPerfect Office 2002 electronic documentation is
available in two formats that offer different content and tools: online Help files and PDF manuals.
Using online Help
The online Help is your most comprehensive source of information for WordPerfect Office 2002
applications.
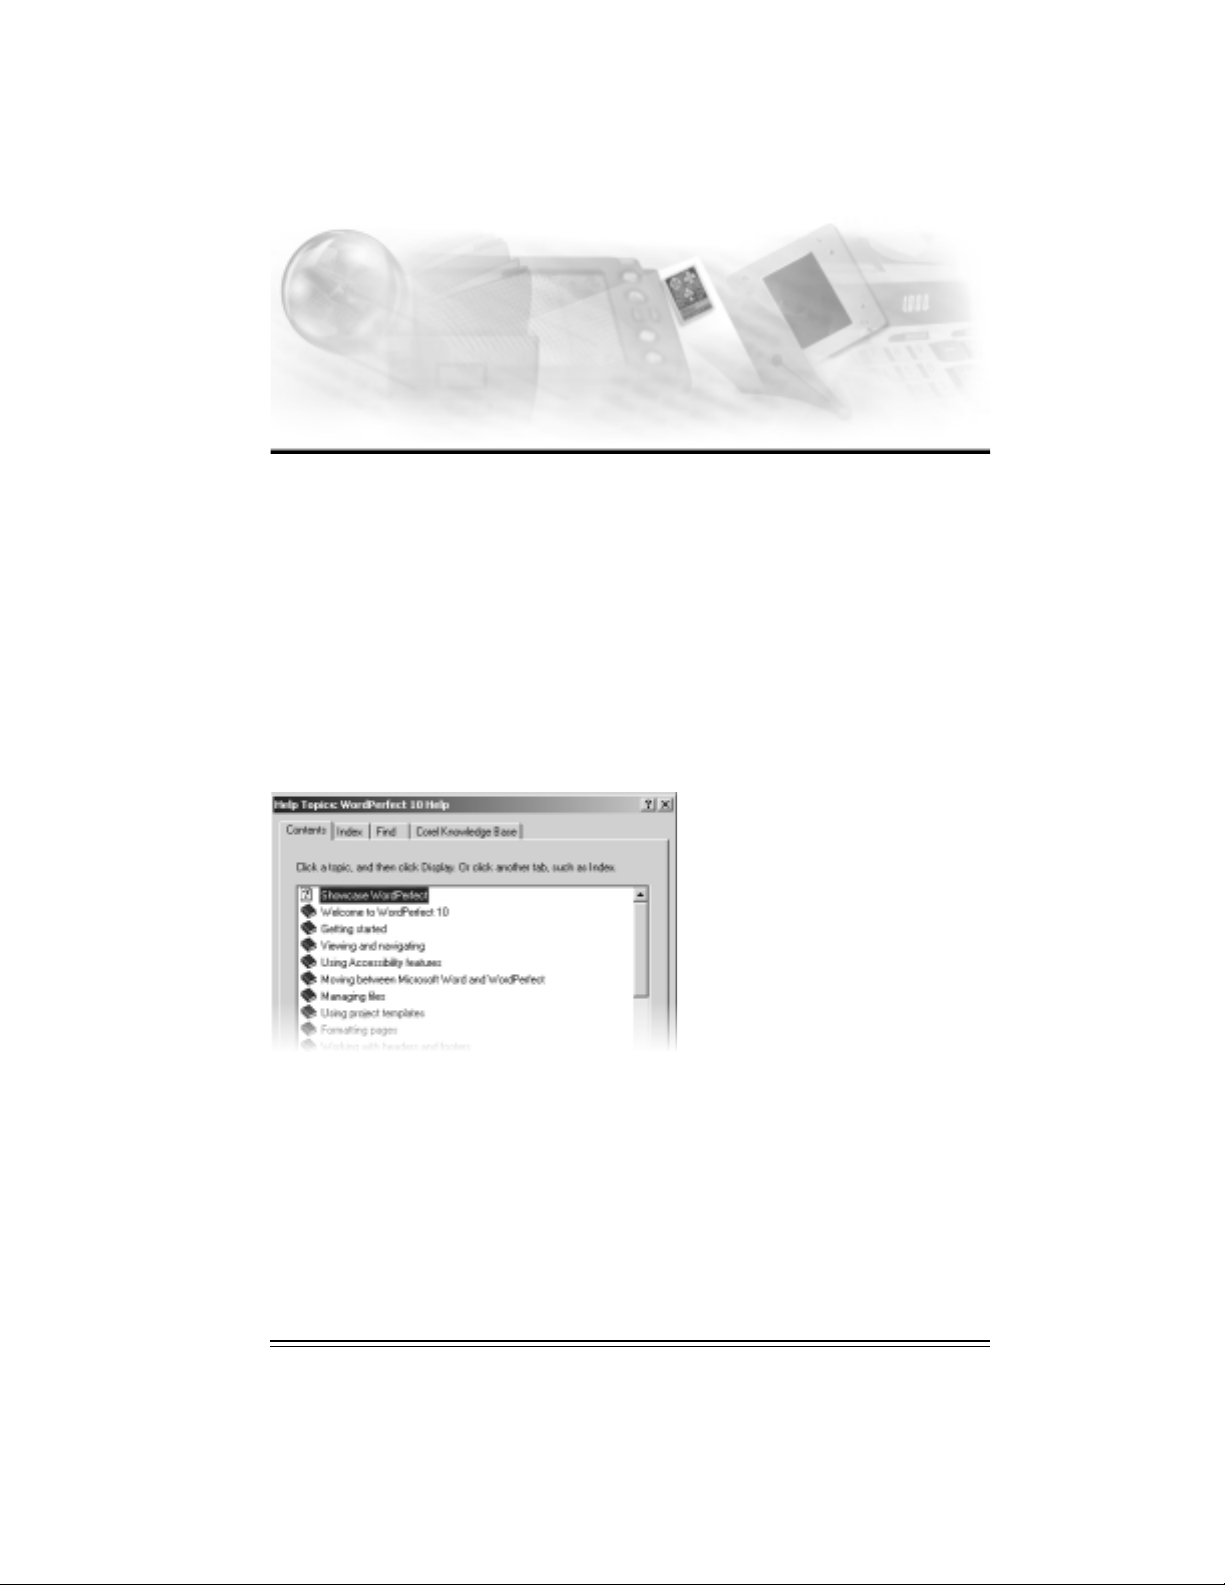
The Help Topics dialog box provides four ways to find information. You can choose a topic from
the Contents page, use the Indewwwx page to search for a topic, use the Find page to search for
specific words and phrases in Help topics. You can also print topics from the online Help.
3
To access online Help topics
1 From a WordPerfect Office 2002 application, click Help } Help Topics.
2 Click one of the following tabs:
Contents — to browse through topics by category
Index — to see a list of index entries
Find — to search for a particular word or phrase in the online Help
Learning how to use WordPerfect Office 2002 21
Page 23

To print an entire section in the online Help
1 On the Contents page, choose the section you want to print.
2 Click the Print button.
To print a selected topic in the online Help
Right-click the help topic window, and click Print Topic.
Context-sensitive Help
WordPerfect Office 2002 includes several forms of context-sensitive Help — help that provides
you with information about the application while you work. You can access context-sensitive
Help from the menus, dialog boxes, and toolbars. The most common ways to access
context-sensitive Help are as follows.
To get help on …
Menu commands Position the cursor on a command. A brief
Toolbar buttons Position the cursor on a button. A brief description
Dialog boxes
Dialog controls
Do the following ...
description appears, called a ToolTip.
appears, called a ToolTip.
Click the Help button in the dialog box or press F1.
Click the What's This Help button in a
dialog box, and click the dialog control for which
you want help.
To install Adobe Acrobat Reader
1 Insert the WordPerfect Office 2002 CD into the CD-ROM drive.
If the Setup Wizard does not start automatically, click the Start button on the Windows
taskbar, and click Run. Type D:\SETUP (where D is the letter that corresponds to the
CD-ROM drive) in the Open box.
2 Click Adobe Acrobat Reader Setup.
3 Follow the instructions in the Adobe Acrobat Reader setup application.
To view information about using Adobe Acrobat readers
In the Adobe Acrobat reader you are using, click Help } Acrobat Online Guide.
PerfectExpert
WordPerfect Office 2002 provides an Expert to help you with many common tasks. The
PerfectExpert™ includes the best features of QuickTasks, templates, and Coaches, which were
included in earlier versions of WordPerfect Office 2002 applications.
The PerfectExpert can guide you through a detailed project, such as creating a resume, or it can
guide you through a smaller task, such as inserting a clipart image. The PerfectExpert even
22 Introduction
Page 24
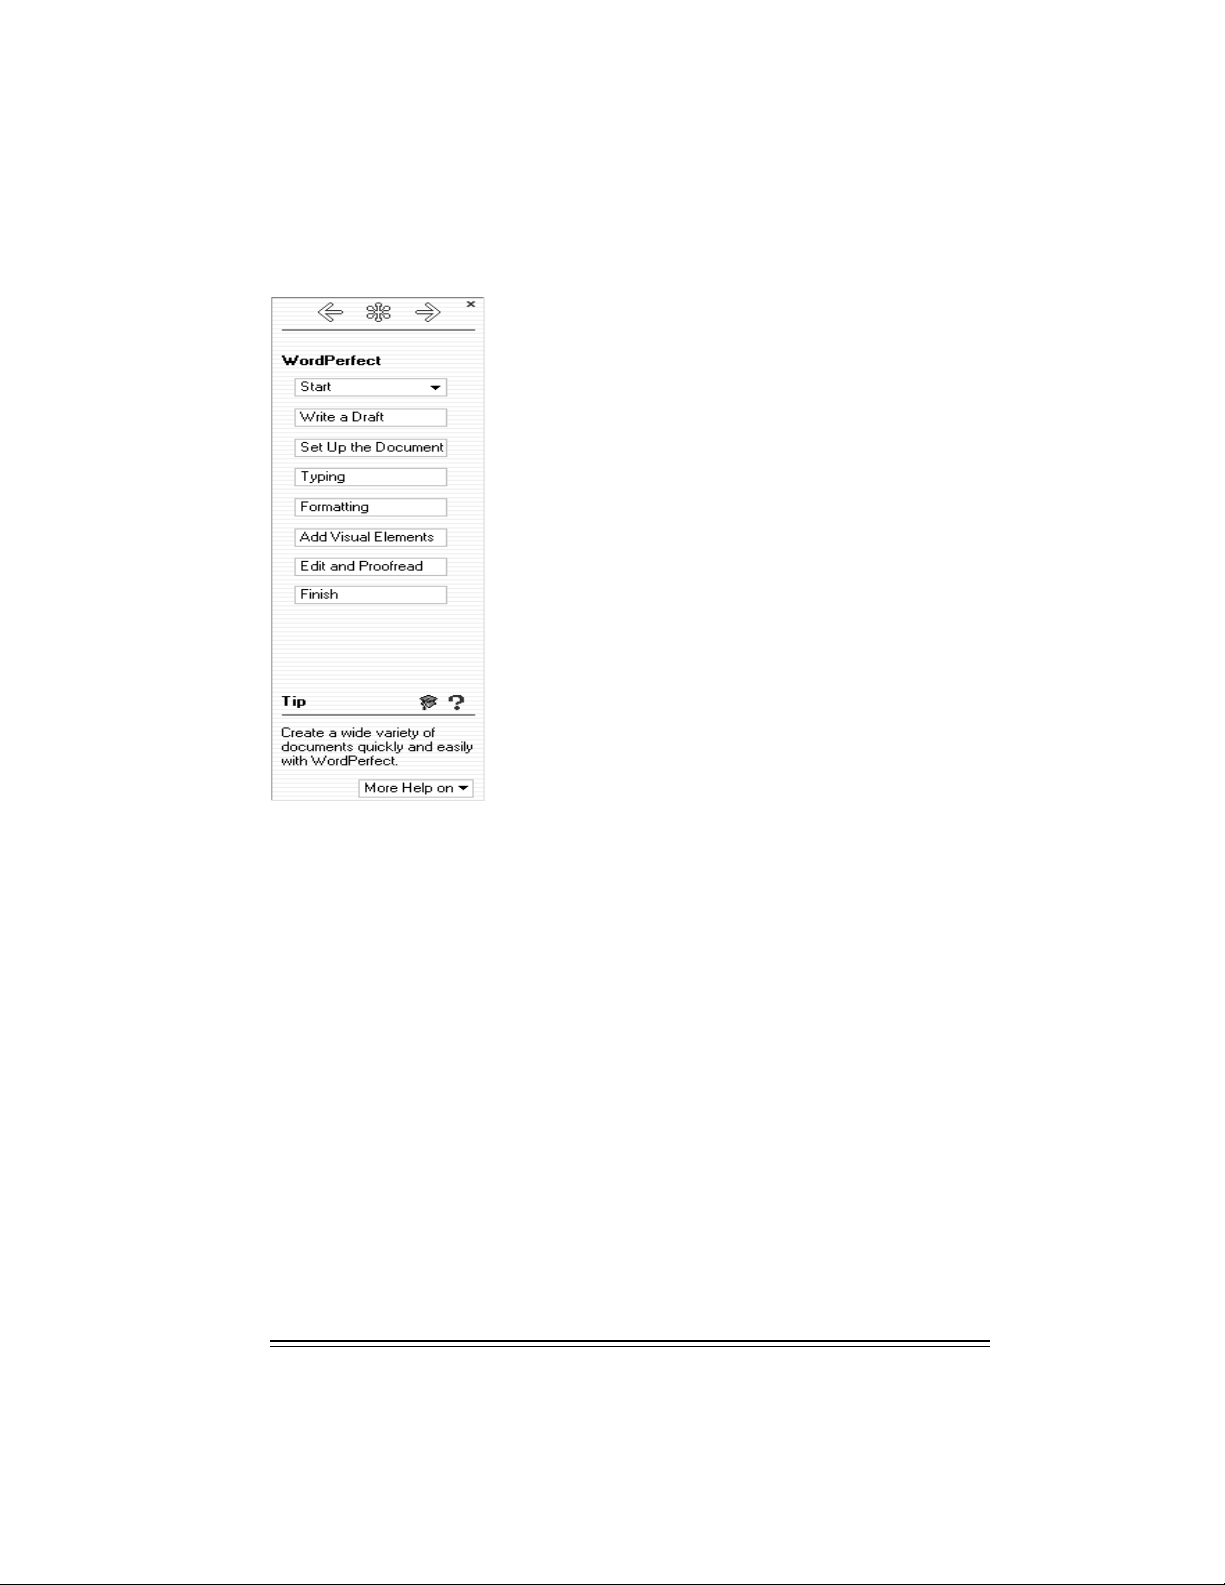
provides you with galleries of professionally designed documents to choose from, whose layout
and content you can change to match your needs.
To enable the PerfectExpert
From a WordPerfect Office 2002 application, click Help } PerfectExpert.
We want your feedback
If you have comments or suggestions about WordPerfect Office 2002 documentation, you can
email them to wpodocs@corel.ca or mail them to the address below. Unfortunately, we may not
be able to respond to your messages individually.
WordPerfect Office 2002 Documentation Manager
Corel Corporation
1600 Carling Avenue
Ottawa, Ontario
Canada
K1Z 8R7
All comments or suggestions communicated to Corel, shall be deemed non-confidential and
Corel shall be free to reproduce, use, disclose, publish, and transmit such information in any
matter whatsoever without limitation.
Welcome to WordPerfect Office 2002 23
Page 25

Other sources for learning WordPerfect Office 2002
Other sources for learning about using WordPerfect Office 2002 applications inlcude the
following:
World Wide Web
Corel’s site on the World Wide Web provides resources to help answer your questions about
WordPerfect Office 2002. For information about these resources, see “Technical support on the
World Wide Web” on page 25.
Corel eStore
If you want to learn about getting more out of WordPerfect Office 2002, visit Corel eStore™ on
the World Wide Web at www.corel.com/estore. This online shopping forum provides a listing of
books, tutorials, and training videos.
Corel Training Partners
Corel Training Partners provide courses to teach you how to get the most out of WordPerfect
Office 2002. Corel Approved Curriculum Vendors are independent organizations that carry
training curricula for WordPerfect Office 2002 products. Corel Training Partners are required to
use courseware from Corel Approved Curriculum Vendors, which ensures that course participants
receive quality training and learning materials. If you are looking for the closest Corel Training
Partner in your city, want to become Corel Certified for WordPerfect Office 2002, or want your
organization to be approved as a Corel Training Partner, visit our Web site at
www.corel.com/learning/training/index.htm.
Third-party manuals and magazines
Third-party manuals for WordPerfect Office 2002 applications are available at your local
computer store or bookstore. You can also find examples of specific tasks for WordPerfect Office
2002 applications in computer magazines.
24 Introduction
Page 26

Corel support and services 4
The Corel product you are using is supported by the Corel Client Services team. This team is
committed to providing quality customer service and support that is easy to access and
convenient to use, while fostering one-to-one customer relationships.
If you have a question about the features and functions of Corel applications or operating
systems, see the user guide or online Help for the product you are using. Updates and technical
information are also available in the Release Notes.
Registering Corel products
Registering Corel products is important. Registration provides you with timely access to the
latest product updates, valuable information about product releases and access to free
downloads, articles, tips and tricks, and special offers.
For more information about registering a Corel product see the online Help for the product or
see http://www.corel.com/support/register on the Internet.
Technical support
The Web address for Corel is http://www.corel.com on the Internet. A list of localized Corel Web
sites is available at http://www.corel.com/international/country.htm on the Internet. Corel
LINUX® information is available at http://linux.corel.com on the Internet.
Self-serve technical support options
Several self-serve tools are available to address technical questions 24 hours a day, seven days a
week.
Self-serve option
Support newsgroups
Knowledge Base
FAQs
AnswerPerfect™
File Transfer Protocol (FTP)
How to access
http://www.corel.com/support/newsgroup.htm
http://kb.corel.com
http://www.corel.com/support/faq
http://www.corel.com/support/answerperfect.htm
ftp://ftp.corel.com
Corel support and services 25
Page 27

Self-serve option
How to access
FTP information
Online Help
Interactive Voice Answering Network (IVAN)* 1-877-42-COREL
Automated Fax on Demand* 1-877-42-COREL
*IVAN and Fax on Demand are available only in North America.
http://www.corel.com/support/ftpsite/ftpindex.ht
m
Type keyword Technical Support
Telephone technical support options
Corel users can use complimentary and fee-based telephone technical support options. Three
levels of support are available.
Installation and Configuration Service
Installation and Configuration Service is a complimentary, 30-day service designed to address
installation, configuration, and new feature issues. This service begins on the day of your first
technical support call.
Installation and Configuration Service replaces Classic Service; however, Corel will honor
previously purchased Classic contracts. For more information, see
http://www.corel.com/support/options/telephone.htm on the Internet.
Installation and Configuration Service is not available for OEM, “White box,” Jewel Case (CD
only), trial, or Academic versions of Corel products.
Priority Service
Priority Service is a fee-based service for users who require the help of second-level technicians.
Priority Service may be purchased by the minute, by the incident, or on a term basis. Options
range from core-business-hour access for individual users to around-the-clock access for
multiuser environments.
Premium Service
Premium Service is Corel’s highest level of support. This service is designed for organizations
that want to establish a direct relationship with Corel and for organizations that employ
dedicated support professionals or have centralized technical management.
Customer Service
Corel Customer Service can provide you with prompt and accurate information about Corel
product features, specifications, pricing, availability, and services. Corel Customer Service does
not provide technical support. You can access Customer Service support through the following
avenues.
World Wide Web
You can access general customer service and product information at
http://www.corel.com/support on the Internet.
26 Introduction
Page 28

Mail, fax, email
You can send specific customer-service questions to Corel Customer Service representatives by
mail, fax, and email.
Corel Corporation
Corel Customer Service
1600 Carling Avenue
Ottawa, Ontario
Canada K1Z 8R7
Fax: 1-613-761-9176
Email: custserv2@corel.ca
Telephone
You can telephone Corel Customer Service centers with your questions.
In North America, you can reach Corel Customer Service by calling the 1-800-772-6735 toll-free
line. The hours of operation are 9:00
and 10:00
A.M. to 7:00 P.M. on Saturdays.
Corel customers residing outside North America can contact Corel Customer Service
representatives in Dublin, Ireland, by calling the 353-1-213-3912 toll line, or they can call a local
authorized Corel Customer Service Partner.
A.M. to 9:00 P.M., eastern time (ET), Monday through Friday,
Corel support and services 27
Page 29

Page 30

Section 2
WordPerfect 10
Page 31

Table of contents: WordPerfect 10
Welcome to WordPerfect 10 ........35
What’s new in WordPerfect 10 ...........35
What’s different in WordPerfect 10 ..........36
Working with documents ........39
Understanding the components of a document .......39
Creating documents .............40
Opening documents .............40
Adding the date and time to a document ........41
Saving a document .............42
Printing a document .............42
Closing documents and quitting WordPerfect........43
Formatting pages ..........45
Setting page margins .............45
Setting page size definitions and orientation ........47
Editing and deleting page size definitions ........47
Setting single-sided or double-sided pages for a document.....48
Choosing a document layout for binding ........48
Importing text and objects onto a page .........49
Creating and deleting columns ...........50
Working with headers and footers .......53
Inserting and viewing headers and footers ........53
Formatting headers and footers ..........54
Inserting items into headers and footers ........56
Formatting text ..........59
Modifying font settings ............59
Copying the format of text ...........61
Highlighting text ..............61
Working with drop caps ............62
Indenting text ..............64
Justifying text ..............65
Keeping text together.............66
Correcting capitalization ............67
Table of contents: WordPerfect 10 31
Page 32

Making text fit a specific number of pages ........68
Changing the spacing between lines and paragraphs ......69
Hyphenating text..............70
Setting hyphenation prompts and notifications .......71
Changing hyphen options and position .........71
Working with footnotes and endnotes ......73
Creating footnotes and endnotes ..........73
Editing footnotes and endnotes ..........74
Converting footnotes to endnotes or endnotes to footnotes ....74
Formatting footnotes and endnotes ..........74
Using lists and outlines .........77
Creating and applying bulleted lists ..........77
Numbering lists and outlines ...........79
Numbering ..........81
Numbering pages .............81
Setting page, chapter, and volume numbers ........82
Suppressing and discontinuing page numbers .......83
Editing documents .........85
Marking misspelled words and grammatical errors as you type ....85
Correcting misspelled words automatically ........87
Using graphics ..........89
Creating graphics..............89
Inserting graphics .............91
Working in the draw picture window .........92
Modifying shapes .............93
Manipulating graphics.............94
Arranging graphics .............94
Aligning and distributing objects ..........96
Working with color .............96
Changing the appearance of images..........97
Moving images ..............98
Using tables and charts ........101
Creating tables ..............101
32 Table of contents: WordPerfect 10
Page 33

Selecting and moving table components ........102
Setting and inserting rows and columns in tables ......104
Joining and splitting table cells ..........104
Deleting tables and table components .........105
Rotating table cell contents and skewing cells .......106
Adjusting table column widths ..........107
Creating table header rows and adjusting table rows ......107
Applying fills, lines, and color to tables ........108
Applying borders to tables ...........109
Entering formulas in tables ...........109
Calculating formulas in tables ...........110
Creating charts ..............111
Applying borders and fills ........115
Adding borders ..............115
Editing borders ..............116
Removing borders .............117
Applying fills ..............118
Merging documents .........121
Creating data for a merge ...........121
Working with form documents for a merge ........123
Associating merge files ............125
Performing a merge .............126
Sorting, viewing, and finding data in data files .......128
Selecting specific data for merges ..........128
Publishing Web documents ........131
Publishing to HTML .............131
Publishing to PDF .............132
Building XML documents ............133
Table of contents: WordPerfect 10 33
Page 34

Welcome to WordPerfect 10 1
WordPerfect 10 is a powerful word-processing application that helps you produce newsletters,
articles, reports, proposals, books, and other documents. WordPerfect lets you add graphics,
tables, and charts to documents. You can publish to paper, electronic media, and the World Wide
Web. WordPerfect allows you to format, structure, and edit documents at any time and gives you
complete control over their design.
In this section, you’ll learn about
what’s new in WordPerfect 10
what’s different in WordPerfect 10
What’s new in WordPerfect 10
WordPerfect 10 has new and enhanced features that let you create professional-looking
documents. The following table shows the new features and what they do.
Feature What it does
Align and distribute tool Lets you align and distribute objects in relation to
Auto-suggest filename When you save a document for the first time, or
Document review margin markers Lets you add an indicator in the margin of a
Enhanced HTML publishing with Cascading Style
Sheet (CSS) support
Printing keyboard lists Lets you print a copy of the keyboard shortcuts.
Selecting sections Lets you select pages, secondary pages, chapters,
Tables to text Lets you convert a table to delimited text.
themselves and the page.
save as a new file, WordPerfect automatically
inserts a suggested filename.
document to notify the author that the text has
changed.
Lets you convert WordPerfect documents for use
on the World Wide Web by using the increased
flexibility and advanced page layout and
formatting of CSS support.
You can export the list to a file, and you can also
customize the list.
and volumes.
Welcome to WordPerfect 10 35
Page 35

Feature What it does
Text to tables Lets you convert document text to a tabular
Toolbar and property bar pickers Lets you choose an option for underlining,
Two-page view Supports Reveal codes and writing tools.
Variables Lets you insert a variable placeholder into a
Zoom tool Lets you magnify certain areas of a document.
format, based on a user-specified delimiter.
undoing or redoing, adding drop caps, and other
formatting options.
document and change the contents later, updating
all instances of the variable.
What’s different in WordPerfect 10
With every new version of WordPerfect, certain items are enhanced, others are renamed, and
still others are found in a new location. The following table shows the items that have changed
in WordPerfect 10.
Feature What’s different
Application bar You can now add the current language to the
Comments The enhanced comment bubble is less intrusive,
application bar. You can also change the language
by accessing the application bar.
fitting the length of the text only, and leaving no
empty space in the bubble.
You can also apply formatting to text, as well as
insert a graphic, a table, and so on, within the
comment bubble.
Corel® RealTime Preview Has been extended to include QuickFonts™,
Merge
Navigation
Publish to PDF Supports hyperlinks and watermarks.
Ruler Elements (for example, left margin adjust) have
underline, drop caps, and other formatting
features.
The Merge feature now allows more fields for each
record and an improved keyboard merge dialog.
The Go to feature now includes bookmarks,
hyperlinks, redlined text, equations, graphics, and
other items.
The Browse by feature has been expanded, and a
flyout allows you to select a browse method more
quickly.
been redesigned and enlarged.
36 WordPerfect 10
Page 36

Feature What’s different
Tables A Table menu has been added to the menu bar.
Cells containing formulas are marked with a
colored indicator. You can also copy cell formulas
by dragging.
The QuickSplit columns and rows button on
the property bar lets you split a cell into four cells
(columns and rows).
The Shadow Cursor now works in table cells.
Text selection You have more flexibility in selecting text with
your mouse or keyboard.
From here
For more information about... In the online Help Index, type...
Corel Corporation Corel Corporation
Using WordPerfect documentation WordPerfect documentation
Documentation conventions documentation conventions
Online Help online Help
Printing online Help topics online Help topics
Corel Web site Corel Web site
PerfectExpert PerfectExpert
Application information application information
System information system information
Welcome to WordPerfect 10 37
Page 37

Working with documents 2
This chapter tells you how to perform basic operations in WordPerfect.
In this section, you’ll learn about
understanding the components of a document
creating documents
opening documents
adding the date and time to a document
saving a document
printing a document
closing documents and quitting WordPerfect
Understanding the components of a document
A WordPerfect document is a file with a filename extension. Each document consists of one or
more of the following components.
Text
Text can be typed directly into WordPerfect or imported from text editors or other
word-processing applications. For more information about adding text to a document, see
“Entering or inserting text” in the online Help.
Graphics
Graphics include shapes, drawings, pictures, and clipart. A shape is any object created using
WordPerfect drawing tools. A drawing is created using Corel Presentations menus and tools. A
picture is a bitmapped or graphic image that has been imported into a WordPerfect document.
Pictures can be imported using a scanner or CD or from paint programs, such as Corel
PHOTO-PAINT. Clipart images are images that can be brought into Corel applications and edited
or used as they are. Corel offers a large selection of clipart in many formats. You can purchase
additional images, including some in bitmap format, from commercial suppliers. For more
information about adding graphics to a document, see “Inserting graphics” in the online Help.
Styles
A style is a collection of formatting attributes applied to characters, paragraphs, or documents.
By formatting items with styles, you ensure consistent formatting throughout a document.
Whenever you change the formatting in a style, you change the appearance of all items that use
that style. For more information about formatting with styles, see “Creating and applying text
styles” in the online Help.
Working with documents 39
Page 38

Templates
A template is a preformatted document that can be used as a guide for creating a new
document. Every document created in WordPerfect is based on a template or a project template.
When you open WordPerfect, the blank document you see is based on the default template.
Project templates can include fax cover sheets, memos, newsletters, and brochures. For more
information about templates, see “Using project templates” in the online Help.
Macros
Macros are used to automate application tasks. For example, you can use WordPerfect macros to
set margins, select a font, or create a merge file. For more information about macros, see
“Recordings, macros, and automation features” in the online Help.
Creating documents
You can create a document in WordPerfect by opening a blank document window. Every
document you create is based on a template. Even a blank document is based on the default
template, which includes formatting elements such as the margins, tab settings, and toolbars.
WordPerfect also includes ready-made project templates that you can open and use to create a
wide range of documents, including letters, fax cover sheets, calendars, and business cards. For
more information about templates, see “Using project templates” in the online Help.
To create a document by using the default template
Click File } New.
To create a document by using the project template
1 Click File } New from project.
2 Choose the type of project you want to create from the Create new list box.
3 Click the Create button.
4 Click any of the appropriate buttons on the PerfectExpert panel.
You can also create a new document by clicking the New blank document button
on the toolbar.
Opening documents
You can open text files and other word-processing documents that were created in WordPerfect
or in another application. For example, you can open Microsoft Word and Rich Text Format (.rtf)
files in WordPerfect. For more information about opening Microsoft Word documents, see
“Opening Microsoft Word documents” in the online Help.
The advantage of opening a document created in another application (rather than importing
text) is that many of the formatting attributes in the original document, such as page size,
margins, font properties, bullets, and underlining, are preserved. Some of the features not
supported include embedded pictures, hidden text, interline spacing, kerning, macros, multiple
page layouts (the first one in the document is used throughout), and OLE objects.
For more information about importing files, see “Import and export file formats for WordPerfect
10" in the Reference Information section of the online Help.
40 WordPerfect 10
Page 39

To open a WordPerfect document
1 Click File } Open.
2 Choose the drive and folder where the document is stored.
3 Choose a file format from the File type list box.
Choosing the All files item displays files of all types.
4 Double-click the document file name.
You can also open a document by clicking the Open button on the toolbar.
If you know where a file is located, you can type the full path and filename in the File
name list box.
To open a document created in another application
1 Click File } Open.
2 Choose the drive where the document is stored from the Look in list box.
3 Double-click the folder in which the document is stored.
4 Choose the file format you want to open from the File type list box.
5 Double-click the document name.
Adding the date and time to a document
You can insert the date and time into a document. The format of the date and time text can be
edited.
To insert the date or time
1 Click where you want to add the date or time.
2 Click Insert } Date/time.
3 Choose a format from the Date/time formats list box.
If you want the date or time to be updated when you open or print the document, enable the
Keep the inserted date current check box.
4 Click Insert.
You can insert the date as text by pressing CTRL + D.
You can insert the date as a code that is updated when you open or print the
document by pressing CTRL + SHIFT + D.
To edit the date or time format
1 Select the date or time.
2 Click Insert } Date/time.
3 Choose a new format from the Date/time formats list box.
4 Click Apply format.
Working with documents 41
Page 40

To delete the date or time
1 Select the date or time in your document.
2 Press DELETE.
Saving a document
When you save a document for the first time, you assign it a name and choose a folder in which
to store it. Any changes you make to the document after that are saved to that location. You can
create a new copy of the document by saving it to a different folder or with a different filename.
If you are using an unusual font or if you want to ensure that the font you are using displays
properly, you can embed the font. Embedding ensures that the information for all of the fonts
used in a document is saved with the document.
To save a document for the first time
1 Click File } Save.
2 Choose the drive and folder where you want to store the document.
3 Type a name for the document in the File name box.
4 Click Save.
You can also save a document by pressing F3, which displays the Save dialog box.
To save changes to a document
Click File } Save.
You can also save a document by clicking the Save button on the toolbar.
To save a document to a new location or with a new name
1 Click File } Save as.
2 Choose the drive and folder where you want to store the document from the Save in list box.
3 Type a name for the document in the File name box.
4 Click Save.
Printing a document
You can print a document or part of a document. For more information about printing
documents, see “Printing” in the online Help.
To print a document
1 Click File } Print.
2 Choose a printer from the Current printer list box.
3 In the Print area, enable one of the following options:
Full document — prints the entire document
Current page — prints the page in which the cursor is positioned
Pages — prints a range of pages
Selected text — prints selected text
Document summary — prints a document summary
42 WordPerfect 10
Page 41

4 Specify any other print options.
5 Click Print.
You can also print a document by clicking the Print button on the toolbar.
Closing documents and quitting WordPerfect
You can close the active document or all documents and leave WordPerfect open. When you quit
WordPerfect, the application closes along with all of the documents you have open. You are
prompted to save any modified documents before closing or quitting.
To close and quit WordPerfect
To Do the following
Close a document
Close all open documents
Quit WordPerfect
Click File } Close.
Click Tools } Macro } Play. Choose closeall.wcm
from the Look in list box. Click Play.
Click File } Exit.
To close a document, you can also click the Close button in the menu bar.
From here
For more information about... In the online Help Index, type...
Exploring the work area work area, exploring
Using the property bar property bar
Using the application bar application bar
Entering text entering, text
Inserting text inserting, text
Selecting text selecting, text
Deselecting text deselecting, text
Inserting graphics inserting, graphics
Working with documents 43
Page 42

Formatting pages 3
When you change the format of a document, you change the physical arrangement of
information on a page and the general appearance of the finished document. WordPerfect 10 lets
you change the format for part of a page or for a whole page, and you can apply one format to
selected text and apply a different format to other text in the same document.
WordPerfect contains on-screen alignment tools, such as guidelines, rulers, and ruler guides, to
help you as you type. Guidelines are horizontal and vertical nonprinting lines that you can use to
align frames, graphic objects, and text on a page. They are used to show the margins or
measurements of elements in a document, such as page margins, tables, columns, headers, and
footers. Guidelines appear as gray dotted lines and can be viewed, hidden, and moved; they can
be displayed, but they do not print in the document. You can use guidelines to quickly change
margins, size tables or columns, or to change the look of headers and footers on a page.
In this section, you’ll learn about
setting page margins
setting page size definitions and orientation
editing and deleting page size definitions
setting single-sided or double-sided pages for a document
choosing a document layout for binding
changing the spacing between paragraphs or lines of text
importing text and objects onto a page
creating and deleting columns
Setting page margins
You can set margins for a document by using guidelines. Guidelines are vertical or horizontal
dotted lines that appear on pages, measurements, or margin markers found on the ruler. Margin
markers are the double vertical slashes (||) on the left and right ends of the ruler.
Margin settings affect the current page and subsequent pages until you change them. Left and
right margins are used to set the length of the lines in a document. You can set margins before
you enter text, or you can apply margins to the text you select.
WordPerfect lets you set page margins by using margin guidelines, exact measurements, or the
ruler. You can set the top, bottom, left, and right margins in a document. You can set margins for
the entire document or for a few paragraphs.
Formatting pages 45
Page 43

To set the page margins by using the margin guidelines
1 Click View } Guidelines.
2 Enable the Margins check box.
3 Point to one of the following guidelines:
left vertical dotted guideline
right vertical dotted guideline
upper horizontal dotted guideline
lower horizontal dotted guideline
The pointer changes to a double-sided arrow.
4 Drag the guideline to the position you want.
To set the page margins by using exact measurements
1 Click a page.
2 Click Format } Margins.
3 Click the Page setup tab.
4 In the Margins area, type values in any of the following boxes:
Left — lets you specify where the left margin starts
Right — lets you specify where the right margin starts
To p — lets you specify where the top margin starts
Bottom — lets you specify where the bottom margin starts
5 Click one of the following:
Equal — lets you set all four margin settings equal to the last margin size used
Minimum — lets you set all four margin settings to the minimum value the current
printer settings allow
To set the page margins by using the ruler
1 Point to the Margin marker to the left or right of the ruler.
The pointer changes to a double-sided arrow.
2 Drag the Margin marker to a new location on the ruler.
To set margins for a few paragraphs only
1 Click Format } Paragraph } Format.
2 Choose from the following:
First line indent — lets you choose the indentation of the first line
Left margin adjustment — lets you choose the spacing for the left margin
Right margin adjustment — lets you choose the spacing for the right margin
3 In the Spacing between paragraphs area, enable one of the following options:
Number of lines — lets you choose the number of lines between paragraphs
Distance in points — lets you choose the distance in points between paragraphs
46 WordPerfect 10
Page 44

Setting page size definitions and orientation
A page size definition determines how a printer formats and prints pages. For example, you can
create page size definitions for envelopes and nonstandard-sized pages. You can choose from
preset page size definitions, or you can create your own.
Page size definitions are matched to the printer you have selected. A definition may not be
available when you change to another printer or a different computer. If the same definition is
not available, WordPerfect finds the best match for a page definition, selecting from those
available with the other printer. If the match does not work, you may need to edit or re-create
the definition.
To select a preset page size definition
1 Click File } Page setup.
2 Click the Page setup tab.
3 Choose a page definition from the Page definition list box.
4 Enable one of the following options:
Portrait — prints text and graphics on a page whose height is greater than its width
Landscape — prints text and graphics on a page whose width is greater than its height
5 In the Apply to area, enable one of the following options:
Current and following pages — applies the page definitions to the current and following
pages
Current page only — applies the page definitions to the current page only
Entire document — applies the page definitions to the entire document
Editing and deleting page size definitions
WordPerfect uses a page size definition to format pages. Once you have created or selected a
page size definition, you can edit it or delete it.
To edit a page size definition
1 Click File } Page setup.
2 Click the Page setup tab.
3 Click the Edit form button .
4 In the Edit page definition dialog box, choose a paper source from the Source list box.
5 In the Printing adjustments area, choose an adjustment from any of the following list boxes,
and type a value in the box beside it:
Vertical
Horizontal
6 In the Show page size for area, enable one of the following options:
All printers — lets you display page size definitions for all installed printers
Current printer only — lets you display page size definitions for the selected printer
Formatting pages 47
Page 45

The default paper source is the source specified in the Windows printer properties
for the selected printer. Choose Manual feed from the Source list box in the Edit
page definition dialog box only if you put paper in the printer manually, one sheet at
a time.
To delete a page size definition
1 Click File } Page setup.
2 Click the Page setup tab.
3 Choose a page size from the Page definition list box.
4 Click the Delete form button .
When you delete a page size definition, you can no longer use that definition; a
document can print with a similar page definition, but it may not be an exact match.
All printers have a nonprintable zone. If information is formatted to print in this area,
it will not print. To shift information out of the nonprintable zone, you must specify
printing adjustments when you define the page size.
Setting single-sided or double-sided pages for a document
You can set either single- or double-sided pages for a document.
To set single-sided pages for a document
1 Click File } Page setup.
2 Click the Layout tab.
3 In the Two-sided printing area, enable the Off option.
To set double-sided pages for a document
1 Click File } Page setup.
2 Click the Layout tab.
3 In the Two-sided printing area, enable one of the following options:
Book (side to side) — lets you print the document for binding the long edge of a page
Tablet (top to bottom) — lets you print the document for binding the short edge of a
page
Choosing a document layout for binding
You can give a document extra space for binding by choosing a particular document layout. You
can also divide pages to create a book or tablet layout because a document contains physical and
logical pages.
A physical page displays on the screen; a logical page exists within the physical page. When you
modify a feature, such as margins for binding, you are modifying the logical page. You can also
divide the physical page into smaller logical pages to create small, foldable documents, such as
tickets or greeting cards. For information about printing folded and bound documents, see
“Printing booklets and defining binding offsets” in the online Help.
48 WordPerfect 10
Page 46

As you edit the document, each logical page is treated as a separate page. The document
window also changes to show the dimensions of the logical page. After you fill a logical page,
the text continues on the next logical page. All the formatting you can use in a regular document
applies to the logical pages you create.
To choose a document layout for binding
1 Click File } Page setup.
2 Click the Page setup tab.
3 In the Margins area, type margin values in the following boxes:
Left
Right
To p
Bottom
4 Click one of the following:
Equal — lets you set all four margin settings equal to the last margin size used
Minimum — lets you set all four margin settings to the minimum value the current
printer settings allow
5 Click the Layout tab.
6 In the Two-sided printing area, enable one of the following options:
Book (side to side) — lets you print the document for binding the long edge of a page
Tablet (top to bottom) — lets you print the document for binding the short edge of a
page
7 Enable one of the following options:
Inside — lets you change the amount of space for binding on the inside margin
Outside — lets you change the amount of space for binding on the outside margin
8 In the Binding area, type a value in the Increase margin for box.
Importing text and objects onto a page
WordPerfect lets you import an object. An object can be text, graphics, sound clips, media clips,
or spreadsheet cells — anything that you can copy from one application to another.
Pasting copies the object from one application to another with no connection. You can use this
method when you do not plan to make changes to the object. When you cut or copy an object, it
is stored in the Clipboard. You can then paste the object elsewhere in that same document or in
another Windows application. You can select a specific format when you paste information from
the Clipboard into WordPerfect. For information about cutting, copying, and pasting, see
“Cutting, copying, and pasting text and graphics” in the online Help. For more information about
different methods of importing text and objects, see “Linking and embedding” in the online
Help.
To import an object by copying and pasting
1 In any Windows application, select an object.
2 Click Edit } Copy.
3 Start WordPerfect.
4 Click Edit } Paste.
Formatting pages 49
Page 47

You can choose how an object is imported into a document by clicking Edit } Paste
special. For example, you can choose to paste it in an unformatted text format or in
Rich Text Format.
Creating and deleting columns
You can use columns to divide text vertically on a page. There are four types of columns for use
in documents such as newsletters, glossaries, scripts, or inventory lists: Newspaper, Balanced
newspaper, Parallel, and Parallel with block protect.
The following picture shows newspaper columns. Text in newspaper columns flows down the
column to the bottom of a page or column break and starts again at the top of the next column.
The following picture shows balanced newspaper columns. Balanced newspaper columns are
similar to regular newspaper columns, but each column is adjusted on the page so they are equal
in length.
The following picture shows parallel columns and illustrates that text in parallel columns is
50 WordPerfect 10
Page 48

grouped across the page in a row. The next row starts below the longest column of the previous
row. Parallel columns are useful for résumés, scripts, charts, or inventory lists.
The following picture shows parallel columns with block protect and illustrates that parallel
columns with block protect keep each row of columns together. If a column in one row becomes
so long that it moves across a page break, the entire row moves to the next page. You can also
use tables to create this type of column. For information about working with tables, see “Using
tables and charts” on page 101.
Any column can be deleted. You can use Reveal Codes to see column entries in your document,
and you can use shortcuts to make it easy to move around in columns. For more information
about Reveal Codes, see “Displaying Reveal Codes” in the online Help.
To apply a column to a page
1 Click a page.
2 Click Format } Columns.
3 Type a value in the Number of columns box.
4 In the Type of columns area, enable one of the following options:
Newspaper — makes text flow down a column to the bottom of a page or column break
and continues it at the top of the next column
Balance newspaper — adjusts newspaper columns so that columns are of equal length
Parallel — groups columns across the page in rows, and starts subsequent rows below the
longest column of the previous row
Formatting pages 51
Page 49

Parallel w/block protect — keeps all rows of the columns together across page breaks
You can also apply columns to a page by clicking the Columns button on the
toolbar to specify the number of columns and other options.
To delete a column
1 Click in a column.
2 Click Format } Columns.
3 Click Discontinue.
You can also delete columns by dragging the COL DEF code out of the Reveal Codes
window.
From here
For more information about... In the online Help Index, type...
Setting styles for binding binding, styles
Setting margins for binding binding, margins
Forcing a new page forcing, new page
Using hard returns hard returns
Using soft returns soft returns
Changing the line height line height, changing
Adding a vertical line to columns columns, adding vertical lines
Changing spacing in and between columns columns, changing spacing
Adding tab stops tab stops, adding
Changing the alignment of tab stops tab stops, alignment
Changing the position of tab stops tab stops, position
Removing tab stops tab stops, removing
Restoring tab stops tab stops, restoring
Inserting and changing leader characters leader characters
Inserting hard tabs using codes hard tabs, inserting
Formatting documents automatically documents, formatting automatically
Inserting and editing delay codes delay codes
52 WordPerfect 10
Page 50

Working
with headers and footers
You can use headers and footers to display information, such as numbering, a chapter heading, a
title, a date, a person’s name, or a company name, at the top or bottom of each page or on
alternating pages of a document.
In this section, you’ll learn about
inserting and viewing headers and footers
formatting headers and footers
inserting items into headers and footers
Inserting and viewing headers and footers
Headers and footers can contain text, numbering, date, time, and filenames.
The following image shows that 1) a header prints just below the top margin and 2) a footer
prints just below the bottom margin.
4
You can insert headers and footers in a document, and then you can view them in Page view.
Working with headers and footers 53
Page 51

To insert a header or footer
1 Click Insert } Header/footer.
2 Enable one of the following options:
Header A
Header B
Footer A
Footer B
3 Click Create.
4 Type the header or footer text.
5 Click File } Close.
You can use two different headers and two different footers at any place in a
document. You can have several headers and footers in a document, but only two
headers and two footers can be active on a page.
Only a header or footer of the same kind can replace an existing header or footer. For
example, only a new Header A can replace an existing Header A. Similarly, only a
Footer A can replace another Footer A.
To view a header or footer
Click View, and click one of the following:
Page
Two pages
Headers and footers do not display in Draft view.
Formatting headers and footers
You can edit the information contained in headers and footers, and you can adjust the distance
below a header or above a footer. As well, you can suppress headers and footers so that they do
not display on a page and do not print. Discontinuing a header or footer removes it from the
remainder of the document.
To edit a header or footer
1 Click Insert } Header/footer.
2 Enable one of the following options:
Header A
Header B
Footer A
Footer B
3 Click Edit.
4 Make any changes to the text.
5 Click File } Close.
54 WordPerfect 10
Page 52

If the Page view command or the Two pages view command is displayed, you can
also edit the header or footer by clicking anywhere inside the header or footer.
To adjust the distance below a header or above a footer
1 Click Insert } Header/footer.
2 Enable one of the following options:
Header A
Header B
Footer A
Footer B
3 Drag the header or footer guidelines up or down.
You can also adjust the distance above a footer or below a header by clicking the
Header/Footer distance button on the property bar, and typing a value in the
Distance between text and header/footer box.
To suppress a header or footer
1 Click Format } Page } Suppress.
2 Enable any of the following check boxes:
Header A
Header B
Footer A
Footer B
You can also use delay codes to keep headers or footers from displaying on a title
page, a copyright page, or any other single page in a document. For more
information about delay codes, see “Inserting and editing delay codes” in the online
Help.
To discontinue a header or footer
1 Click Insert } Header/footer.
2 Enable one of the following options:
Header A
Header B
Footer A
Footer B
3 Click Discontinue.
You can also remove a header or footer from the document by dragging the
associated code from the Reveal Codes window. For information about Reveal Codes,
see “Displaying Reveal Codes” in the online Help.
Working with headers and footers 55
Page 53

Inserting items into headers and footers
You can insert a horizontal line into a header or footer to, for example, create a separation
between the information in the header or footer and the document text. You can also insert the
filename (or the path and filename) of the active document into headers and footers. If the
document has never been saved, a code will be inserted, but the filename (or path and filename)
will not be displayed until you save the document. For information about saving files, see
“Saving files” in the online Help.
In addition, you can insert the date and time or numbering, such as page, chapter, volume,
secondary, or total pages, into a header or footer.
To insert a horizontal graphics line into a header or footer
1 Click Insert } Header/footer.
2 Enable one of the following options:
Header A
Header B
Footer A
Footer B
3 Click Insert } Line, and click one of the following:
Horizontal line
Vertical line
You can also add a graphics line to a header or footer by clicking the Horizontal line
button on the property bar.
To insert the filename of the active document into a header or footer
1 Click Insert } Header/footer.
2 Enable one of the following options:
Header A
Header B
Footer A
Footer B
3 Click Insert } Other } Filename.
If you rename the document, the filename within the header or footer updates
automatically.
If you want to insert the path and filename, click Insert } Other } Path and filename.
To insert the date and time into a header or footer
1 Click Insert } Header/footer.
2 Enable one of the following options:
Header A
Header B
56 WordPerfect 10
Page 54

Footer A
Footer B
3 Click Insert } Date/time.
4 Choose a date and time format from the Date/time formats list.
5 Click Insert.
To insert numbering into a header or footer
1 Click Insert } Header/footer.
2 Enable one of the following options:
Header A
Header B
Footer A
Footer B
3 Click Format } Page } Insert page number.
4 Choose a page numbering format from the Number list.
5 Click Insert.
You can also insert page numbers in headers or footers by clicking the Page
numbering button on the Page toolbar.
From here
For more information about... In the online Help Index, type...
Inserting delay codes delay codes, inserting
Editing delay codes delay codes, editing
Displaying Reveal Codes Reveal Codes, displaying
Working with headers and footers 57
Page 55

Formatting text 5
In WordPerfect, you can use a variety of formatting tools to control the design and arrangement
of text.
In this section, you’ll learn about
modifying font settings
copying the format of text
highlighting text
working with drop caps
indenting text
justifying text
keeping text together
correcting capitalization
making text fit a specific number of pages
hyphenating text
Modifying font settings
You can apply formatting to text to change the font and its attributes, such as style, size, and
color.
Using Corel RealTime Preview lets you view text fonts and sizes before you apply them. For
example, you can view text as it will display in various fonts before choosing which is the most
suitable. If you do not want to preview fonts and their sizes, you can disable Corel RealTime
Preview.
WordPerfect lets you format text using recent font settings, including the font and its size. You
can also change the default font and font size for the active document or for all documents.
Formatting text 59
Page 56

The following image displays examples of different fonts and font styles.
To change the font
1 Click in the document.
2 Click Format } Font.
3 Click the Font tab.
4 Choose a font from the Face list.
You can also
Change the font style
Change the font size
Change the relative font size
Change the font color
In the Appearance area, enable any of the check
boxes.
Choose a font size from the Size list box.
Click Relative size, and click a font size.
Open the Color picker, and click a color.
You can also change the font color by clicking the Font color button on the
property bar, and clicking a color.
You can also change the underline font style by opening the Underline picker
on the property bar and clicking an underline.
To change the font using Corel RealTime Preview
1 Click in a document.
2 Open the Font face list box on the property bar, and point to a font.
Changes to the font display in the font face preview window.
3 Choose a font from the Font face list box.
60 WordPerfect 10
Page 57

You can change the font size using Corel RealTime Preview by opening the Font size
list box on the property bar, viewing the font sizes in the font size preview window,
and choosing a font size.
To disable Corel RealTime Preview
1 Click Tools } Settings.
2 Click the Display icon.
3 Click the Document tab.
4 In the Show area, disable the RealTime Preview check box.
Corel RealTime Preview is enabled by default.
Copying the format of text
You can copy the format of text and apply it to other text in a document. If you want to copy
selected text, formatting attributes, such as font, font size, and font style, are all copied. If you
want to copy the heading in a paragraph, the paragraph style as well as the font and its
attributes are copied.
When you copy the format of text, you automatically create a text style. Changing text that has
been formatted using a text style also changes other text in the document that uses that style.
For information about text styles, see “Creating and applying text styles” in the online Help.
To copy the format of text
1 Click in the text whose format you want to copy.
2 Click Format } QuickFormat.
3 Enable one of the following options:
Selected characters — copies the format of the font and its attributes
Headings — copies the format of the paragraph and its styles, and the font and its
attributes
4 Click OK.
5 Drag the QuickFormat paintbrush pointer over the text to which you want to copy the
format.
6 Click Format } QuickFormat.
QuickFormat™ is disabled when no check mark displays beside the QuickFormat menu
command.
You can also enable or disable QuickFormat by clicking the QuickFormat
button .
Highlighting text
Highlighting text adds a bar of transparent color over text, which is useful for editing documents
or for distinguishing words and paragraphs. You can highlight and remove the highlighting from
part or all of a document, and you can change the highlight color. You can also hide highlighting
in a document.
Formatting text 61
Page 58

To highlight text
1 Click Tools } Highlight } On.
The cursor changes to a highlighting pen.
2 Select the text.
3 Click Tools } Highlight } On.
Highlighting is disabled when no check mark displays beside the On menu command.
You can also highlight text by selecting text and clicking the Highlight button .
To remove highlighting from text
1 Select the highlighted text.
2 Click Tools } Highlight } Remove.
You can also remove highlighting by clicking anywhere in the highlighted text and
clicking the Highlight button . Highlighting is removed from the entire
highlighted section.
To change the highlight color
1 Click Tools } Highlight } Color.
2 Open the Color picker, and click a color.
3 Type a value in the Shading box.
Higher values darken the highlight color. Lower values lighten it.
The color change does not apply to text that has already been highlighted. To change
the color of highlighted text, you must first select the text.
You can also change the highlight color by opening the Highlight picker and
clicking a color.
To hide highlighting
Click Tools } Highlight } Print/show.
No check mark beside the Print/show menu command indicates that highlighting is hidden.
Highlighting is displayed by default.
Working with drop caps
Drop caps are letters that you can use to decorate text at the beginning of a line or paragraph.
You can add and remove drop caps from a document, and you can edit their size, position, and
style.
62 WordPerfect 10
Page 59

The following image shows a paragraph without a drop cap (on the left) and a paragraph with a
drop cap (on the right).
To add or remove a drop cap
To Do the following
Add a drop cap to a blank line
Add a drop cap to an existing paragraph
Remove a drop cap
Click in a document. Click Format } Paragraph }
Drop cap. Type a letter.
Click at the beginning of a paragraph. Click Format
} Paragraph } Drop cap.
Click before a drop cap. Click the Drop cap style
button on the property bar. In the Style area,
click No drop cap .
You can also remove a drop cap by clicking the Drop cap style picker and
clicking the No drop cap style.
To change the size of a drop cap
1 Click before a drop cap.
2 Click the Drop cap size button on the property bar.
3 In the Height area, type a value in the Lines box.
You can also change the size of a drop cap by clicking the Drop cap size picker
on the property bar and clicking a drop cap size.
Formatting text 63
Page 60

To change the position of a drop cap
1 Click before a drop cap.
2 Click the Drop cap position button on the property bar.
3 In the Position area, type a value in the Position drop cap in margin box.
You can also specify the position of a drop cap by moving the slider in the Position
area.
You can also change the position of a drop cap by clicking the Drop cap position
picker on the property bar and clicking a drop cap position.
To change the style of a drop cap
1 Click before a drop cap.
2 Click the Drop cap style button on the property bar.
3 In the Style area, click one of the following:
No drop cap
Drop cap in margin
50% in margin
Drop cap in text
You can also
Change the font of a drop cap
Change the color of a drop cap
Click before a drop cap. Click the Drop cap font
button on the property bar. Choose a font
from the Face list. In the Appearance area, enable
any of the attribute check boxes.
Click before a drop cap. Click the Drop cap font
button on the property bar. Open the Color
picker, and click a color. Type a percentage in the
Shading box.
You can also change the style of a drop cap by clicking the Drop cap style picker
on the property bar and clicking a drop cap style.
Indenting text
Indenting arranges text on a page by moving one or more lines to the left or the right of the
paragraph margin. You can indent a line or paragraph manually or you can indent lines or
paragraphs automatically.
The following image shows the indent options that WordPerfect provides: 1) a paragraph that is
64 WordPerfect 10
Page 61

not indented, 2) an indented paragraph, 3) a paragraph to which a double indent has been
applied, and 4) a paragraph to which a hanging indent has been applied.
To apply a single indent to text
To indent
A line of text
A paragraph
The first line of every paragraph automatically
Do the following
Click at the beginning of a line of text. Press TAB .
Click at the beginning of a paragraph. Click Format
} Paragraph } Indent.
Click in a paragraph. Click Format } Paragraph }
Format.IntheFirst line indent box, type a value
to specify the distance to indent.
To apply a hanging or double indent
1 Click at the beginning of a paragraph.
2 Click Format } Paragraph, and click one of the following:
Hanging indent — indents all but the first line in the paragraph
Double indent — indents the paragraph equally from both margins
To remove an indent
1 Click at the beginning of a line of text.
2 Press SHIFT + TAB.
Justifying text
You can justify text in a document. Doing so aligns the text horizontally between the left and
right margins of the page.
Formatting text 65
Page 62

The following image shows the justification options that WordPerfect provides: 1) a left-justified
paragraph, 2) a right-justified paragraph, 3) a center-justified paragraph, 4) a fully justified
paragraph, and 5) a paragraph with all lines justified.
To justify text
1 Click in a paragraph.
2 Click Format } Justification, and click one of the following:
Left — aligns text evenly with the left margin
Right — aligns text evenly with the right margin
Center — centers text between the right and left margins
Full — aligns text, excluding the last line, along both the right and left margins
All — aligns text, including the last line, along both the right and left margins
Justification is applied to all text from the cursor location forward. If you want to
apply justification to a word, line, or paragraph, you must first select the text.
You can also justify text by clicking the Justification picker on the property bar
and clicking a justification.
Keeping text together
To keep words together, you can insert a hard space between them. You can also prevent the first
and last lines of a paragraph from being separated from the rest of the paragraph across a page
break.
66 WordPerfect 10
Page 63

To keep words together
1 Click between two words.
2 Click Format } Line } Other codes.
3 Enable the Hard space [HSpace] option.
4 Click Insert.
Before inserting a hard space between two words, you must remove any spaces
between them.
To keep a paragraph together
1 Click at the beginning of a paragraph.
2 Click Format } Keep text together.
3 In the Widow/orphan area, enable the Prevent the first and last lines of paragraphs from
being separated across pages check box.
You can also
Keep several lines of text together
Keep selected text from dividing between pages
In the Conditional end of page area, enable the
Number of lines to keep together check box, and
type the number of lines you want to keep
together, including any blank lines.
In the Block protect area, enable the Keep selected
text together on same page check box.
If you keep several consecutive paragraphs together, you must separate each
paragraph by at least one soft or hard return; otherwise, they are treated as one large
block of text.
Correcting capitalization
You can quickly change a word or selected text to all uppercase or lowercase letters, or to
lowercase letters with initial caps.
Lowercase and initial capitals exceptions are as follows:
Words beginning with “I”, such as, “I’m,” “I’d,” “I’ve,” and the first word in each sentence,
remain capitalized when you convert text to lowercase.
When you convert text to initial capitals, the first letter of each word is capitalized, except
for articles, prepositions, conjunctions, and some pronouns. If you want to specify additional
capitalization exceptions, you can edit the Wt9xx.icr file (where xx is a language code) in
Program files\Corel\Shared\Writing tools\9.0.
You can change capitalization after the end of a sentence. You can specify that, when you change
capitalization after the end of a sentence, the entry is automatically added as an exception item.
You can also remove exception items.
To change capitalization
1 Select the text for which you want to change capitalization.
2 Click Edit } Convert case, and click one of the following:
Formatting text 67
Page 64

Lowercase — changes all letters to lowercase
Uppercase — changes all letters to uppercase
Initial capitals — changes only the first letter of each word to uppercase
You can add buttons to the toolbar for capitalization. For information about toolbars,
see “Customizing toolbars” in the online Help.
You can also change the selected text to uppercase or lowercase by pressing CTRL +
K.
To automatically correct capitalization
1 Click Tools } QuickCorrect.
2 Click the Format-As-You-Go tab.
3 In the Sentence corrections area, enable the Capitalize next letter after end-of-sentence
punctuation check box.
You can also
Automatically correct two initial capital letters in a
sentence
Automatically correct Caps lock capitalization Enable the CapsFix check box.
Automatically correct capitalization after a period
Enable the Correct two irregular capitals (make a
second letter lowercase) check box.
Click Exceptions.IntheDo not capitalize next
letter after this word box, type a word. Click Add
entry. Click Close.
To add exceptions to capitalization exception list
1 Click Tools } QuickCorrect.
2 Click the Format-As-You-Go tab.
3 In the Sentence corrections area, click Exceptions.
4 In the Exceptions list dialog box, type a word in the Do not capitalize next letter after this
word box.
5 Click Add entry.
6 Click Close.
You can also
Automatically add exceptions to the exception list
Remove exceptions from the exception list
Enable the Add exceptions when you correct them
in document check box.
From the Exception list box, choose the word that
you want to delete. Click Delete entry.
Making text fit a specific number of pages
You can make selected text or all text in a document fit a specific number of pages.
68 WordPerfect 10
Page 65

To make text fit a specific number of pages
1 Click in a document.
2 Click Format } Make it fit.
3 Type a value in the Desired number of pages box.
The number of pages you set must be within 50 percent of the document’s current page
count.
4 In the Items to adjust area, enable any of the following check boxes:
Left margin
Right margin
Top margin
Bottom margin
Font size
Line spacing
5 Click Make it fit.
To make only a certain block of text fit, select the text.
Changing the spacing between lines and paragraphs
The space between lines, the amount of white space that appears between the bottom of one
line and the top of the next line, is referred to as leading. You can adjust the leading between
lines and between paragraphs. You can change the leading by changing the line spacing,
changing the line height to a fixed size, and changing the space between paragraphs.
To adjust the leading
1 Click in a paragraph.
2 Click Format } Typesetting } Word/letter spacing.
3 Enable the Adjust leading check box.
4 Type a value in the Between lines box.
A positive value increases the leading; a negative value decreases it.
To change the line spacing
1 Click in a paragraph.
2 Click Format } Line } Spacing.
3 Type a value in the Spacing box.
You can also change the line spacing of selected text.
Formatting text 69
Page 66

To change the line height to a fixed size
1 Click in a paragraph.
2 Click Format } Line } Height.
3 Enable the Fixed option, and type a value in the box.
Line height is determined by multiplying the current line height by the number you
specify.
You can also change the line height of selected text.
To change the space between paragraphs
1 Click in a paragraph.
2 Click Format } Paragraph } Format.
3 In the Spacing between paragraphs area, enable one of the following options:
Number of lines — inserts the number of lines you specify
Distance in points — inserts the spacing you specify measured in points
There are 72 points in 1 inch.
Hyphenating text
Hyphenation divides words that span the hyphenation zone. You can enable automatic
hyphenation. You can also change the width of the hyphenation zone, a narrow area that
surrounds the right margin of a document. Increasing the hyphenation zone hyphenates fewer
words, and decreasing the hyphenation zone hyphenates more words. As well, you can create a
nonbreaking hyphen.
To enable automatic hyphenation
1 Click in a document.
2 Click Tools } Language } Hyphenation.
3 Enable the Turn hyphenation on check box.
To change the width of the hyphenation zone
1 Click in a document.
2 Click Tools } Language } Hyphenation.
3 Type a value in the Percent left box.
4 Type a value in the Percent right box.
If hyphenation is enabled before you change the hyphenation zone percentages, you
may be prompted to rehyphenate some words in the active document.
To insert a nonbreaking hyphen
Press CTRL + hyphen (-).
70 WordPerfect 10
Page 67

Setting hyphenation prompts and notifications
Setting a prompt for hyphenation lets you choose whether to be prompted when a word needs
hyphenation. You can also set a notification sound when a word needs hyphenation.
To set a prompt for hyphenation
1 Click Tools } Settings.
2 Click the Environment icon.
3 In the Environment settings dialog box, click the Prompts tab.
4 In the Prompt area, choose one of the following settings from the On hyphenation list box:
Always — displays a prompt every time a word is hyphenated
Never — never displays a prompt when a word is hyphenated
When required — displays a prompt when a word must be hyphenated but is not found
in the main word list
5 Click OK.
6 Click Close.
Prompting when required is enabled by default.
Changing hyphen options and position
You can choose how words are hyphenated. Words can be separated with a hyphen, space, or
soft return. You can also ignore the hyphenation prompt and let the word wrap to the next line.
You can change the position of hyphens in words.
Hyphenation options are available only when automatic hyphenation is enabled and when the
document is set to prompt you when a word needs hyphenation. For information about enabling
hyphenation, see “Hyphenating text” on page 70.
To choose a hyphenation option
1 Type text in a document.
The Position hyphen dialog box displays when a hyphen is required.
2 Click one of the following:
Insert hyphen — inserts a hyphen, which displays and prints only when the word spans
the hyphenation zone
Insert space — divides the word by adding a space between the letters you specify
Hyphenation SRt — divides the word by putting a soft return between the letters you
specify when the word spans the hyphenation zone
Ignore word — prevents the word from being hyphenated
Suspend hyphenation — halts hyphenation temporarily
When the prompt for hyphenation is set to Never, the Position hyphen dialog box
does not display.
Formatting text 71
Page 68

To position the hyphen in a word
1 Type text in a document.
The Position hyphen dialog box displays when a hyphen is required.
2 Click in the Use mouse or arrow keys to position hyphen box, and press any of the following
keys:
LEFT ARROW — moves the hyphen to the left of the displayed word
RIGHT ARROW — moves the hyphen to the right of the displayed word
To reposition the hyphen, click where you want the hyphen to display in the word in
the Use mouse or arrow keys to position hyphen box.
From here
For more information about... In the online Help Index, type...
Using font mapping font mapping
Using character maps for non-Roman languages character maps
Creating subscript text subscript text
Creating superscript text superscript text
Using hidden text hidden text
Reversing the color of text reversing, text color
Reversing the color of the background reversing, background color
Importing objects objects, importing
Inserting characters and symbols characters
Editing quotation marks quotation marks, editing
Correcting the spacing between words and
sentences
Changing the spacing between letters and words changing, the space between letters
Changing the spacing between lines and
paragraphs
Advancing text to a different position advancing, text to different positions
Using baseline placement for typesetting baseline placement, typesetting
Setting hyphenation prompts and notifications hyphenating, setting notifications
Inserting and changing hyphens by using codes hyphenating, using codes
correcting, spacing between words and sentences
spacing, changing between lines
72 WordPerfect 10
Page 69

Working
with footnotes and endnotes
Footnotes and endnotes allow you to provide more information about a topic discussed in a
document.
In this section, you’ll learn about
creating footnotes and endnotes
editing footnotes and endnotes
converting footnotes to endnotes or endnotes to footnotes
formatting footnotes and endnotes
Creating footnotes and endnotes
A footnote provides more information about a topic and is found below text or at the bottom of
a page. An endnote refers to a reference at the end of a document. You can create footnotes and
endnotes by inserting a reference number in the text of a document. That number is linked to
the corresponding text in the endnote or footnote.
To create a footnote or endnote
1 Click in a document.
2 Click Insert } Footnote/endnote.
3 Enable one of the following options, and type a value in the box beside it:
Footnote number
Endnote number
4 Click Create.
5 Type footnote or endnote text.
6 Click File } Close.
6
While working with a footnote or an endnote, you cannot access all available
WordPerfect functions until you return to the body of the text.
You can also close the footnote or endnote and return to the document by clicking
the Close button .
If you delete a footnote or endnote number, you can restore it by clicking the Note
number button on the property bar.
Working with footnotes and endnotes 73
Page 70

Editing footnotes and endnotes
You can edit the text of footnotes or endnotes.
To edit a footnote or endnote
1 Click Insert } Footnote/endnote.
2 Enable one of the following options, and type a value in the box beside it:
Footnote number
Endnote number
3 Click Edit.
4 Edit the footnote or endnote text.
5 Click File } Close.
If you are using Page view, you can also edit the text of the footnote or endnote by
clicking in the text. For more information about Page view, see “Switching views” in
the online Help.
You can also close a footnote or endnote and return to the document by clicking the
Close button .
If you delete a footnote or endnote number, you can restore it by clicking the Note
number button on the property bar.
Converting footnotes to endnotes or endnotes to footnotes
Included with WordPerfect are macros that let you convert footnotes to endnotes and endnotes
to footnotes. The macros are typically installed to the default macros folder.
To convert footnotes to endnotes or endnotes to footnotes
1 Click Tools } Macro } Play.
2 Choose the drive and folder where one of the following files is stored:
footend.wcm — plays the footnote conversion macro
endfoot.wcm — plays the endnote conversion macro
3 Click Play.
You can also change footnotes to endnotes or endnotes to footnotes by clicking the
Convert end to foot button or the Convert foot to end button on the
Shipping macros toolbar. For information about customizing toolbars, see
“Customizing toolbars” in the online Help.
Formatting footnotes and endnotes
You can change the format of footnotes and endnotes, the location of footnotes on a page, and
the amount of space between footnotes or endnotes and text. As well, you can print
“continued...” messages for footnotes or endnotes that span a page break, and you can change
the numbering method for footnotes and endnotes.
74 WordPerfect 10
Page 71

Starting new numbers for footnotes and endnotes is another option, which is useful when you
want each chapter or section of a document to have its own footnotes or endnotes. In addition,
you can adjust the separator line that displays between document text and footnotes or
endnotes.
To change the format of a footnote or endnote number
1 Click Insert } Footnote/endnote.
2 Enable one of the following options:
Footnote number
Endnote number
3 Click Options, and click Advanced.
4 In the Edit numbering style area, click one of the following:
In text — lets you specify a format for all endnote or footnote numbers in the document
text
In note — lets you specify a format for endnote or footnote numbers in their sections
5 In the Styles editor dialog box, modify any attributes.
To change the location of footnotes on a page
1 Click Insert } Footnote/endnote.
2 Enable the Footnote number option.
3 Click Options, and click Advanced.
4 In the Position area, enable one of the following options:
Place notes below text
Place notes at bottom of page
To change the amount of space between footnotes or endnotes
1 Click Insert } Footnote/endnote.
2 Enable one of the following options:
Footnote number
Endnote number
3 Click Options, and click Advanced.
4 Type a value in the Space between notes box.
To continue footnotes or endnotes on another page
1 Click Insert } Footnote/endnote.
2 Enable one of the following options:
Footnote number
Endnote number
3 Click Options, and click Advanced.
4 In the Continued notes area, type a value in the Amount of note to keep together box.
This value specifies the minimum distance allowed for a footnote or endnote at the bottom
of a page before the note is moved to the next page.
5 Enable the Insert (continued...) message check box.
Working with footnotes and endnotes 75
Page 72

To change the numbering method of a footnote or endnote
1 Click Insert } Footnote/endnote.
2 Enable one of the following options:
Footnote number
Endnote number
3 Click Options, and click Advanced.
4 In the Numbering method area, choose a numbering method from the Numbering list box.
If you want to restart footnote numbering on every page, enable the Restart numbering on
each page check box.
To restart subsequent endnote numbers at 1
1 Click Insert } Footnote/endnote.
2 Enable the Endnote number option, and type a value in the box beside it.
3 Click Endnote placement.
4 Enable the Insert endnotes at insertion point and restart numbering option.
When you enable the Insert endnotes at insertion point and restart numbering
option, all endnotes up to the number specified display, and then a new page begins.
Note numbering starts over with 1 on the new page.
From here
For more information about... In the online Help Index, type...
Adjusting the separator line between document
text and footnotes
Formatting headers headers, formatting
Formatting footers footers, formatting
Formatting text text, formatting
separator line between text and footnotes,
adjusting
76 WordPerfect 10
Page 73

Using lists and outlines 7
You can organize text by using bullets, numbers, or outlines. Bullets help to differentiate items in
a list or add emphasis to selected paragraphs. You can use bullets to mark list items that have no
particular order. Numbered lists and outlines help you organize and display information and are
used to show the relationship between ideas.
Bulleted lists, numbered lists, and outlines can include several levels of numbering. For example,
you can number first-level items 1, 2, 3, and second-level items a, b, c. You can also use outline
or legal styles, such as 1, a, i, or 1, 1.1, or 1.1.1.
In this section, you’ll learn about
creating and applying bulleted lists
numbering lists and outlines
creating outlines with headings
Creating and applying bulleted lists
You can create bulleted lists by applying one of the preset formats provided with WordPerfect
10, or you can enable QuickBullets and use them to create lists as you type.
You can replace a bullet with a custom symbol, such as a heart, star, or check mark. You can also
apply a bullet format to existing text.
The following image shows examples of preset bullet formats.
Using lists and outlines 77
Page 74

To create a bulleted list
1 Click in a document.
2 Click Insert } Outline/bullets & numbering.
3 Click the Bullets tab.
4 Choose a bullet style from the Description list box.
5 Click OK.
6 Type the text, and press ENTER.
Perform this step for each entry in the list.
7 Press BACKSPACE to discontinue the list.
You can also create a bulleted list by clicking the Bullets picker on the toolbar.
To enable QuickBullets
1 Click Tools } QuickCorrect.
2 Click the Format-As-You-Go tab.
3 Enable the QuickBullets check box.
QuickBullets are disabled by default in WordPerfect 10.
To create a bulleted list by using QuickBullets
1 Click in a document.
2 Type a QuickBullet character.
3 Press TAB.
4 Type the text, and press ENTER.
Perform this step for each entry in the list.
5 Press BACKSPACE to discontinue the list.
If you do not want one of the characters in the QuickBullets list to begin a bulleted
list, add it to the QuickCorrect list. For information about QuickCorrect™, see
“Correcting misspelled words automatically” in the online Help.
To create a custom symbol bullet
1 Click in a document.
2 Click Insert } Outline/bullets & numbering.
3 Click the Bullets tab.
4 Click More bullets.
5 In the Symbols dialog box, choose a set of symbols from the Set list box.
6 Choose a symbol from the Symbols list box.
7 Click Insert and close.
You can also open the Symbols dialog box by pressing CTRL + W.
78 WordPerfect 10
Page 75

To apply a bullet format to existing text
1 Select the text to which you want to apply the bullet format.
2 Click Insert } Outline/bullets & numbering.
3 Click the Bullets tab.
4 Choose a bullet style from the Description list box.
You can also add a bullet to existing text by clicking at the beginning of a line and
clicking the Bullets button on the toolbar.
To type body text between list items, press ENTER twice, and press UP ARROW to
type on the line that begins without a bullet.
Numbering lists and outlines
You can create a numbered list or a numbered outline in a document, or you can use
QuickNumbers to create lists and outlines as you type.
The following image shows examples of preset number formats.
You can number existing text. You can also force a number by renumbering an existing numbered
list or numbered outline.
To create a numbered list or numbered outline
1 Click in a document.
2 Click Insert } Outline/bullets & numbering.
3 Click the Numbers tab.
4 Choose a number style from the Description list box.
5 Click OK.
6 Type the text, and press ENTER.
Perform this step for each entry in the list.
7 Press BACKSPACE to discontinue the list.
Using lists and outlines 79
Page 76

To create a numbered list by using QuickNumbers
1 Type a number followed by a period, closing parenthesis, or hyphen at the beginning of a
new line.
2 Press TAB.
3 Type the text for the first list item, and press ENTER.
For a paragraph, let the text wrap at the end of the line instead of inserting a hard return.
Perform this step for each entry in the list.
4 Press BACKSPACE.
To use QuickNumbers, QuickBullets must first be enabled. For information about
enabling QuickBullets, see “To enable QuickBullets” on page 78.
When you use QuickBullets or QuickNumbers, you create your own numbering style.
The most recently used numbering styles display in the Description area of the
Bullets and numbering dialog box.
To number existing text
1 Select the text you want to number
2 Click the Numbering button on the toolbar.
To renumber a numbered list or numbered outline
1 Click in a list or outline.
2 Click the Set paragraph number button on the property bar.
3 Type the new number in the Paragraph number box.
The number you change and all numbers following it are renumbered accordingly.
You can also renumber paragraphs by pressing CTRL + SHIFT + F5. For more
information, see “Numbering paragraphs in a document” in the online Help.
If the numbering you want to change is indented from the left margin, type “?” for
each indention level in the Outline level box before you type the new number. For
example, if the text is indented two levels from the margin, type “??” followed by the
new number.
From here
For more information about... In the online Help Index, type...
Creating outlines with headings outlines, creating
Editing lists and outlines editing
Arranging items in bulleted lists bulleted lists, arranging items
Arranging items in numbered lists numbered lists, arranging items
Arranging items in outlines outlines, arranging items
80 WordPerfect 10
Page 77

Numbering 8
WordPerfect 10 allows you to assign numbers to paragraphs and documents as well as insert and
customize numbers within documents.
In this section, you’ll learn about
numbering pages
setting page, chapter, and volume numbers
suppressing and discontinuing page numbers
Numbering pages
You can number the pages of a document, including information such as the number of pages,
chapters, volumes, or secondary pages. You can choose a position for the numbers and define
the numbering format you want to use.
The following image shows various page numbering positions: 1) no page number, 2) page
number in the bottom-right corner, 3) page number at the bottom center, and 4) page number in
the top-right corner.
Numbering 81
Page 78

You can choose from several common page numbering formats or create a custom format of your
own. For information about custom formats, see “Customizing page numbering formats” in the
online Help.
To insert page numbers
1 Click Format } Page } Numbering.
2 From the Position list box, choose a position for the page numbers.
3 From the Page numbering format list box, choose a format for the page numbers.
The sample facing pages in the Select page numbering format dialog box show
where the page numbers will be positioned and how they will look in print.
To insert page, chapter, or volume numbers in document text
1 Click in a document.
2 Click Format } Page } Insert page number.
3 From the list, choose one of the following:
Page — lets you define a custom numbering style for pages
Chapter — lets you define a custom numbering style for a chapter
Volume — lets you define a custom numbering style for a volume
Secondary page — lets you define a custom numbering style for secondary pages
Total pages — lets you define a custom numbering style for total pages (for example,
page 6 of 10)
4 Click Insert.
Setting page, chapter, and volume numbers
You can specify the current page, chapter, or volume number in a document. For example, when
you start a new chapter, you can set the chapter number to two and the first page of the new
chapter to one.
When you change the numbering for a page, chapter, or volume, numbering begins with the new
number from that point forward in the document.
To set a page number
1 Click Format } Page } Numbering.
2 Click Set value.
3 In the dialog box, click the Page tab.
4 Type a new page number in the Set page number box.
5 Enable one of the following options:
Always keep number the same — ensures that the number remains the same when the
document is edited
Let number change as pages are added or deleted — lets the number change as the
document is edited
82 WordPerfect 10
Page 79

When you merge a multiple-page form document, you can restart the page
numbering for each merged record by enabling the Always keep number the same
option.
To set a chapter number
1 Click Format } Page } Numbering.
2 Click Set value.
3 In the dialog box, click the Chapter tab.
4 Type a new chapter number in the Set chapter number box.
5 Enable one of the following options:
Always keep number the same — ensures that the number remains the same when the
document is edited
Let number change as chapters are added or deleted — lets the number change as the
document is edited
To set a volume number
1 Click Format } Page } Numbering.
2 Click the Set value button.
3 Click the Volume tab.
4 In the Set volume number box, type a new number.
5 Enable one of the following buttons:
Always keep number the same — ensures that the number remains the same when the
document is edited
Let number change as volumes are added or deleted — lets the number change as the
document is edited
Suppressing and discontinuing page numbers
You can remove page numbering from one page in your document. You can also discontinue the
page numbers so that they are removed from the entire document.
To suppress a page number
1 Click Format } Page } Suppress.
2 Enable the Page numbering check box.
To discontinue page numbers
1 Click Format } Page } Numbering.
2 From the Position list box, choose No page numbering.
From here
For more information about... In the online Help Index, type...
Numbering lines in a document numbering, lines
Numbering 83
Page 80

From here
For more information about... In the online Help Index, type...
Changing the appearance of line numbering line numbers, changing appearance
Changing the positions of line numbers line numbers, changing position
Numbering paragraphs in a document numbering, paragraphs
Changing the appearance of page numbers pages, changing number appearance
Inserting and resetting the total pages number
format
Customizing page numbering formats customizing, page number formats
Forcing page numbers forcing, page numbers
Using counters counters
inserting, total pages number format
84 WordPerfect 10
Page 81

Editing documents 9
WordPerfect 10 provides automatic editing features that help save you time when editing
documents.
In this section, you’ll learn about
marking misspelled words and grammatical errors as you type
correcting misspelled words automatically
Marking misspelled words and grammatical errors as you type
Correcting spelling
You can use Spell-As-You-Go™ to check and correct spelling. Spell-As-You-Go underlines
misspelled words in red so that you can spot them and decide whether to correct them. You can
enable and disable Spell-As-You-Go.
You can also correct spelling errors using the spelling checker, QuickCorrect, Grammatik, and
Prompt As-You-Go™. You can check for misspelled words in documents, check spelling for a
specified number of pages, and have WordPerfect skip words in the active document only. As you
type, WordPerfect underlines in red words that are not in WordPerfect dictionaries.
Correcting grammar
You can use Grammar As-You-Go™ to correct grammar errors. Grammar As-You-Go underlines, in
blue, words or phrases that might be incorrect. You can enable or disable Grammar As-You-Go.
Grammar As-You-Go is similar to Grammatik and includes the checking features of
Spell-As-You-Go.
Replacing incorrect words
Prompt As-You-Go can act as a spelling checker, a grammar checker, or a thesaurus, depending on
where the cursor is placed. The Prompt As-You-Go list box displays suggestions as you type. If
you place the cursor on a misspelled word or a possible grammar error, a list of corrections
displays in the Prompt As-You-Go list box on the property bar. If you place the cursor on a word
that is properly spelled and free of grammar errors, a list of possible synonyms displays in the
Prompt As-You-Go list box.
Prompt As-You-Go helps you identify errors as you create documents by using a color coding
system to identify the type of error it encounters. If the text in the Prompt As-You-Go box is red,
the word may be misspelled. If the text is blue, there may be a grammar or usage error. If the
text is black, you can choose a synonym to replace the word. If the box is blank, there are no
suggestions for the word.
Editing documents 85
Page 82

To enable or disable Spell-As-You-Go, Grammar As-You-Go, and Prompt
As-You-Go
To Do the following
Enable or disable Spell-As-You-Go Click Tools } Proofread } Spell-As-You-Go.
A bullet next to the Spell-As-You-Go command
indicates that Spell-As-You-Go is enabled. A bullet
next to the Off command indicates that
Spell-As-You-Go is disabled.
Enable Grammar As-You-Go Click Tools } Proofread } Grammar As-You-Go.
A bullet next to the Grammar As-You-Go command
indicates that Grammar As-You-Go is enabled.
Disable Grammar As-You-Go Click Tools } Proofread } Off.
A bullet next to the Off command indicates that
Spell-As-You-Go and Grammar As-You-Go are
disabled.
Enable or disable Prompt As-You-Go Click Tools } Proofread } Prompt As-You-Go.
A check mark next to the Prompt As-You-Go
command indicates that Prompt As-You-Go is
enabled.
If Grammar As-You-Go is enabled, Spell-As-You-Go is also enabled even though there
is no dot next to Spell-As-You-Go.
Enabling or disabling Grammar As-You-Go or Spell-As-You-Go does not affect Prompt
As-You-Go. By default, Spell-As-You-Go is enabled.
To use Spell-As-You-Go or Prompt As-You-Go
Right-click a word underlined in red or blue, and click a suggestion.
Words not included in any of the WordPerfect dictionaries are underlined in red only
if Spell-As-You-Go is enabled. Spell-As-You-Go is enabled by default.
To use Prompt As-You-Go
1 Click Tools } Proofread } Prompt As-You-Go.
2 Click an underlined word or phrase in your document.
3 Choose the replacement text from the Prompt As-You-Go list box on the property bar.
When you use Prompt As-You-Go, words are underlined only if Spell-As-You-Go and
Grammar As-You-Go are enabled. If Spell-As-You-Go and Grammar As-You-Go are
disabled, replacement words still display in the Prompt As-You-Go list box on the
property bar, but they are not underlined. The Prompt As-You-Go list box will be
empty if there are no spelling errors, grammar errors, or thesaurus synonyms.
You can also use the spelling checker and the thesaurus to check for spelling errors
and synonyms. For information, see “Using the spelling checker” and “Using the
thesaurus” in the online Help.
86 WordPerfect 10
Page 83

Correcting misspelled words automatically
You can enable QuickCorrect to automatically correct common typing mistakes. QuickCorrect
provides a list of commonly misspelled words and their correct spellings. For example,
QuickCorrect can automatically replace “adn” with “and.” You can add words to the QuickCorrect
list, including a pair of words. For example, you can replace “byt he” with “by the.” Words can
also be deleted from the QuickCorrect list.
To enable QuickCorrect
1 Click Tools } QuickCorrect.
2 Click the QuickCorrect tab.
3 Enable the Replace words as you type check box.
You can also
Disable QuickCorrect Disable the Replace words as you type check box.
Enable automatic correction
Disable automatic correction
Enable the Correct other mistyped words when
possible check box.
Disable the Correct other mistyped words when
possible check box.
When the Correct other mistyped words when possible check box is enabled,
WordPerfect replaces typographical errors that have only one possible correction
without notifying you of the change.
Use the Correct other mistyped words when possible check box only if you are
confident that a document uses words found in a standard word list. Unusual
spellings and proper nouns might be changed automatically when you enable this
option. QuickCorrect is automatically disabled when you edit a macro.
To add a word to the QuickCorrect list
1 Click Tools } QuickCorrect.
2 Click the QuickCorrect tab.
3 In the Replace box, type the misspelled word.
4 In the With box, type the correctly spelled word.
5 Click Add entry.
You can also add abbreviations to the QuickCorrect list. QuickCorrect abbreviations
are case-sensitive. For example, if you add “wm” for “William,” and then you type
“WM,” QuickCorrect inserts “WILLIAM” to the document.
To delete a word from the QuickCorrect list
1 Click Tools } QuickCorrect.
2 Choose a word from the Misspelled word list box.
3 Click Delete entry.
4 In the Delete selected QuickCorrect entry confirmation box, click Ye s .
Editing documents 87
Page 84

From here
For more information about... In the online Help Index, type...
Finding text finding, text
Replacing text replacing, text
Entering text automatically using QuickWords™ QuickWords, entering text automatically
Changing QuickWords QuickWords, changing
Renaming QuickWords QuickWords, renaming
Expanding QuickWords QuickWords, expanding
Deleting QuickWords QuickWords, deleting
Finding and replacing codes codes, replacing
Reviewing documents documents, reviewing
Comparing documents documents, comparing
Changing the settings for document review and
compare
Adding comments comments, adding
Deleting comments comments, deleting
Displaying comments comments, displaying
Hiding comments comments, hiding
Editing comments comments, editing
Converting text to comments and comments to
text
Cutting, copying, and pasting text and graphics cutting
Undoing, redoing and repeating actions actions
document review settings, changing
comments, converting
88 WordPerfect 10
Page 85

Using graphics 10
WordPerfect 10 lets you insert graphics, such as shapes, drawings, and clipart images, into
documents. You can size, move, and modify graphics to suit your needs.
In this section, you’ll learn about
creating graphics
inserting graphics
working in the draw picture window
modifying shapes
manipulating graphics
arranging graphics
aligning and distributing objects
working with color
changing the appearance of images
moving images
Creating graphics
You can create shapes in a WordPerfect document. A shape is any object created using
WordPerfect drawing tools
The following image is an example of a picture created using WordPerfect basic shapes.
You can create basic shapes, such as triangles, circles, or rectangles as well as lines, arrows, stars
and more. You can also create polylines.
Using graphics 89
Page 86

The following image shows examples of preset shapes 1) basic shapes and 2) flowchart shapes.
WordPerfect lets you save a graphic as a separate file which you can insert into other documents.
For information about exporting files, see “Import and export file formats for WordPerfect 10" in
the online Help.
You can delete graphics from a document. WordPerfect also allows you to hide or display
graphics.
To create a shape
1 Click Insert } Shapes.
2 Enable one of the following options:
Lines — lets you create shapes such as straight or curved lines
Basic — lets you create shapes such as circles, rectangles, or cubes
Arrows — lets you create various types of arrows
Flowchart — lets you create shapes used in a flowchart
Stars — lets you create various types of stars
Callout — lets you create callouts, which can be used to enclose text
Action — lets you create shapes used to denote action
3 Click a shape on the palette.
4 Click OK.
5 Point to where you want to create the shape.
6 Drag to draw the shape.
Enabling the lines option also allows you to create polylines For more information
about creating polylines, see “To create a polyline” in the online Help.
You can insert precise horizontal, vertical, and diagonal lines by holding down CTRL
while you draw a line.
You can create a square by holding down SHIFT while you draw a rectangle.
90 WordPerfect 10
Page 87

To save a graphic
1 Select a graphic.
2 Click File } Save as.
3 In the Save dialog box, click Selected image.
4 Click OK.
5 In the Save image as dialog box, choose the drive and folder where you want to save the
graphic.
6 Type a filename in the Filename box.
7 Choose a file type from the File type list box.
If you want to save fonts with a graphic, enable the Embed fonts check box.
8 Click Save.
To delete a graphic
1 Select a graphic.
2 Press DELETE.
To hide or display graphics
Click View } Graphics.
A check mark next to the Graphics command indicates that graphics are displayed.
By default, graphics are visible in the Document window.
Inserting graphics
You can insert clipart images into a WordPerfect document. You can use the clipart images
included with WordPerfect. Clipart images are images that can be brought into a WordPerfect
document and edited or used as is.
You can insert pictures from the WordPerfect Office 2002 CD. When you insert a picture from a
CD, you have the choice of linking the picture to its source or embedding it into a document. For
more information about linking and embedding images, see “Linking and embedding images on
disk and video” in the online Help.
You can link to an image on disk. When you link to an image on disk, the location of the image,
not the image itself, is inserted into the document. This way, you can considerably reduce the
size of the file, especially if the image is used in several places throughout the document.
Inserting Object Linking and Embedding (OLE) objects into a document lets Windows
applications exchange information with each other. You can link or embed a picture that was
created in another program in a WordPerfect document. If you link the picture, the same
information exists in two files: the application where the picture was created (the source
application) and the application where it was copied (the client application). When you change
the information in the source application, the information is updated in the client application as
well. When you embed a picture, the picture becomes part of the document. You can edit the
picture directly. For more information about Object Linking and Embedding, see “Linking and
embedding objects” in the online Help.
You can adjust the properties of your scanner. You can scan an image, such as a picture or
drawing, directly into WordPerfect as a bitmapped image.
Using graphics 91
Page 88

To insert a clipart image
1 Click where you want to insert an image.
2 Click Insert } Graphics } Clipart.
The Scrapbook™ opens.
3 Browse through the folders in the Scrapbook until you find the image you want to insert.
4 Select the clipart image.
5 Click Insert.
You can also insert a clipart image by dragging the image from the Scrapbook into a
document.
To insert a picture from the WordPerfect Office 2002 CD
1 Insert the WordPerfect Office 2002 CD into your CD drive.
2 Click where you want to insert a picture.
3 Click Insert } Graphics } From file.
4 Choose the drive and folder where the file is stored.
Pictures have a .jpg filename extension.
5 Double-click a filename.
The folder can be found on the CD drive at Corel\WPO2002\Graphics\Photos folder.
You can also insert a picture by dragging. Enable the Shadow cursor, drag across the
area of the document in which you want the picture, and click Image from file in the
QuickMenu. For information about dragging to create graphics, see “To enable the
drag-to-create option” in the online Help.
To preview a picture before you insert it, click Toggle preview , and click the
picture filename.
Working in the draw picture window
WordPerfect lets you create complex drawings. For more information about creating a drawing,
refer to the Corel Presentations online Help. You can open the draw picture window and modify
these drawings.
To open the draw picture window
1 Click Insert } Graphics } Draw picture.
Corel Presentations opens.
For more information about the draw picture window, refer to the Corel
Presentations online Help.
To modify a drawing
1 Right-click the graphic, and click Edit image.
Corel Presentations opens.
92 WordPerfect 10
Page 89

2 Modify the drawing.
3 Click File } Save.
You can also modify a drawing or clipart image by double-clicking it.
Modifying shapes
In WordPerfect, you can modify a shape in several ways. For example, you can add drop
shadows, and change the color of lines, shadows, and fills for shapes.
You can skew a shape, which means to distort it or make it not symmetrical. Some shapes can be
altered using glyphs. The following image demonstrates the different forms a shape can take
when altered using a glyph.
An ellipse can be altered using the mode toggle. The following image demonstrates the three
forms an ellipse can take when altered using the mode toggle.
Lines and polylines can also be modified.
To modify a shape
1 Double-click a shape.
2 Click one of the following tabs:
Fill — to change fill options
Line — to change line style options
Shadow — to change drop shadow options
Using graphics 93
Page 90

You can also modify a shape by using the property bar to change the attributes of a
shape.
To skew a shape
1 Right-click a shape, and click Skew shape.
Small, green, diamond-shaped skewing handles display.
2 Drag a skewing handle until the shape is the size you want.
To modify a shape by using a glyph
1 Select a shape.
2 Drag a glyph until you obtain the desired effect.
Manipulating graphics
WordPerfect 10 lets you manipulate a graphic in several ways. You can size a graphic, and you
can also stretch a graphic. Sizing a graphic makes it larger or smaller while keeping its original
proportions intact. Stretching a graphic extends it horizontally or vertically. You can also move a
graphic.
Graphics can be cut, copied, and pasted within a document or into other documents. For
information about cutting, copying, and pasting graphics, see “Cutting, copying, and pasting text
and graphics” in the online Help.
To size a graphic
1 Select a graphic.
2 Drag a corner handle until the graphic is the size you want.
You can also
Stretch a graphic Drag a side handle until you achieve the effect you
Size a graphic proportionally
want.
Hold down SHIFT, and drag a handle.
To move a graphic by using the keyboard
1 Select a graphic.
2 Press any of the ARROW keys to move the graphic in the direction you want.
Arranging graphics
When two or more graphics overlap in a document, you can arrange their order by moving their
graphics boxes in front of or behind the other boxes in the stack. You can also move graphics
behind text (like a watermark) or in front of text (like a sticky note). You can also select a graphic
that is over or under another graphic.
94 WordPerfect 10
Page 91

You can group graphics so that they remain together when they are moved, sized, and edited.
The following image is an example of grouped graphics.
To reorder overlapping graphics
1 Right-click a graphic.
2 Click Order, and click one of the following:
To front — moves a graphic in front of the overlapping graphics
To back — moves a graphic behind the overlapping graphics
Forward one — moves a graphic forward one layer
Back one — moves a graphic back one layer
You can also reorder overlapping graphics by clicking the Object(s) forward one
button or the Object(s) back one button on the property bar.
To move a graphic behind or in front of text
1 Select a graphic.
2 Click the Graphics button on the property bar, and click one of the following:
In front of text — moves the selected graphic in front of the text
Behind text — moves the selected graphic behind the text
To group graphics
1 Hold down SHIFT, and click the graphics you want to group.
2 Right-click one of the selected graphics, and click Group.
Grouping is useful when you want to keep an image and text together.
When you click one of the graphics, one set of sizing handles displays around the
grouped graphics. You can size, move, or edit the group of graphics. For information
about sizing graphics, see “Manipulating graphics” on page 94. For information
about moving graphics, see “Moving an image” in the online Help.
To separate graphics
Right-click one of the grouped graphics, and click Separate.
Using graphics 95
Page 92

Aligning and distributing objects
WordPerfect lets you align and distribute objects in relation to themselves and the page. You
can, for example, align a series of objects horizontally and vertically.
To align an object
1 Select an object.
2 Click Tools } Align and distribute.
3 Click the Align tab.
4 Enable any of the check boxes that correspond to the horizontal and vertical alignment you
want.
If you want to align an object vertically, enable the Left, Center,orRight check box.
5 In the Align area, enable one of the following check boxes:
Edge of page — aligns objects with the edge of the page
Center of page — centers objects on the page
Edge of column — aligns objects with the edge of the column
Center of column — centers objects in the column
WordPerfect displays a warning explaining that the object’s anchor position may be changed.
If you wish to skip this warning, enable the Do not show this warning again check box.
You can also align a series of objects by selecting the objects.
To distribute objects
1 Select the objects you want to distribute.
2 Click Tools } Align and distribute.
3 Click the Distribute tab.
4 Enable any of the check boxes that correspond to the horizontal and vertical distribution you
want.
5 In the Distribute to area, enable an option that corresponds to the distribution area you
want.
Working with color
You can create colors to use when working with fonts, highlighting, and graphics in WordPerfect.
You can also use color models to create colors. Three color models are available: RGB, HLS, and
CMYK. WordPerfect lets you view color changes to a selection before the changes actually take
place. You can apply the colors you created to graphics.
To create a color
1 Click Format } Font.
2 Click the Font tab.
3 Open the Color picker , and click More.
4 Drag the pointer on the color wheel until the color you want displays in the Current color
box.
5 Drag the pointer on the luminosity bar until the shade you want displays in the Current color
box.
96 WordPerfect 10
Page 93

To create a color by using color models
1 Click Format } Font.
2 Click the Font tab.
3 Open the Color picker , and click More.
4 Choose a color model from the Color model list box.
5 In the Color values area, type values in the boxes until the color you want displays in the
Current color box.
The color model you select determines the options available in the Color values
boxes.
You can open the Select color dialog box from any color palette in WordPerfect.
To preview color changes
1 Select a graphic.
2 On the property bar, click one of the following buttons:
Foreground color — lets you change the foreground color of a shape
Background color — lets you change the background color of a shape
Shadow color — lets you change the color of a drop shadow
Line color — lets you change the color of a graphics line
3 Point to a color on the color palette.
When you pause on a color, a preview of the graphic in that color displays on the page.
If you want to apply the color to the graphic, click the color.
Corel RealTime Preview is enabled by default. For more information about Corel
RealTime Preview see, “Modifying font settings” on page 59.
Changing the appearance of images
WordPerfect 10 includes tools that let you change the way an image looks. You can enlarge or
reduce an image. You can crop an image. You can adjust the color attributes for an image and
you can change the fill for an image. You can also reset an image to its original appearance.
To enlarge or reduce an image
1 Right-click an image, and click Image tools.
2 Open the Zoom flyout, and click the Zoom in/zoom out tool .
A scroll bar displays at the right side of the image.
3 Click the arrows at the top or bottom of the scroll bar to enlarge or reduce the image.
You can click the Zoom actual size tool in the Zoom flyout to restore the image
to its original size.
To use precise values to change the image size, click Edit attributes } Scale image,
and specify a value for X (width) and Y (height).
Using graphics 97
Page 94

To crop an image
1 Right-click an image, and click Image tools.
2 Open the Zoom flyout, and click the Crop image tool .
3 Point to the image until the pointer changes to a magnifying glass.
4 Using the magnifying glass pointer, marquee select the part of the image that you want to
crop.
The area you select fills the graphics box.
Click the Zoom actual size tool in the Zoom flyout to restore the image to its
original size.
To adjust color attributes for an image
To Do the following
Adjust the contrast
Adjust the brightness
Invert colors
Right-click an image, and click Image tools. Open
the Contrast picker, and select a contrast level.
Right-click an image, and click Image tools. Open
the Brightness picker, and select a brightness level.
Right-click an image, and click Image tools. Click
the Invert colors button.
To specify a precise value for brightness or contrast, click Edit attributes } Color
attributes, and specify a value between -1 and 1 for each.
Click Invert colors again to return the colors to their original values.
To restore an image to its original appearance
1 Right-click an image, and click Image tools.
2 Click Reset attributes.
Moving images
WordPerfect allows you to move an image inside a graphics box. You can flip an image, so that it
displays its mirror image, or you can rotate an image. You can also change the center of rotation
for an image.
To move an image inside a graphics box
1 Right-click an image, and click Image tools.
2 Click Move.
3 Drag the image to move it inside the graphics box.
To specify a precise horizontal and vertical position for the image, click Edit
attributes in the Image tools dialog box, and type a value in the Horizontal or
Vertical box.
98 WordPerfect 10
Page 95

To flip an image
1 Right-click an image, and click Image tools.
2 Click one of the following:
Vertical flip — flips or reverses the image on its vertical axis
Horizontal flip — flips or reverses the image on its horizontal axis
You can also flip an image by clicking the Horizontal flip button or the Vertical
flip button on the property bar.
To rotate an image
1 Right-click an image, and click Image tools.
2 Click Rotate.
Rotation handles display at each corner of the graphics box.
3 Drag a corner rotation handle in the direction you want to rotate the image.
From here
For more information about... In the online Help Index, type...
Modifying shapes using the mode toggle mode toggle, modif ying shapes
Modifying lines using editing points editing points, modifying lines
Changing the fill of an image fills, changing in images
Converting a color image to black and white converting, images to black and white
Changing the center of rotation for an image rotating, changing center
Rotating an image using exact measurements images, rotating using exact measurements
Linking objects objects, linking
Embedding objects objects, embedding
Scanning images images, scanning
Using graphics 99
Page 96

Using tables and charts 11
WordPerfect 10 lets you create tables and charts. Tables let you organize data in rows and
columns of cells. Tables can contain text or graphics and can be formatted. You can use tables to
present lists, schedules, financial data, comparisons, and summaries.
Charts can enhance the presentation of data in a document. You can use data charts to display
comparisons, trends, and statistics, or you can use organization charts to display an
organization’s structure.
In this section, you’ll learn about
creating tables
selecting and moving table components
setting and inserting rows and columns in tables
joining and splitting table cells
deleting tables and table components
rotating table cell contents and skewing cells
adjusting table column widths
creating table header rows and adjusting table rows
applying fills, lines, and color to tables
applying borders to tables
entering formulas in tables
calculating formulas in tables
creating charts
Creating tables
A table consists of rows, which run horizontally, and columns, which run vertically. Rows and
columns intersect to create cells. A cell is like a small editing window in which you can insert
text, graphics, numbers, or formulas. The cells in a table are labeled alphabetically from left to
right and numerically from top to bottom.
Using tables and charts 101
Page 97

The following image shows a table with 1) rows and 2) columns.
To create a table
1 Click Table } Create.
2 Type values in the following boxes:
Columns
Rows
3 Click Create.
You can also
Create a table in a graphics box
Create a floating cell
You can also create a table by clicking the Table QuickCreate button on the
toolbar and dragging to specify the number of rows and columns for the table.
If the Shadow Cursor is enabled, you can create a table by dragging a rectangle and
clicking Table in the QuickMenu that displays.
Enable the Drag to create a new table check box,
click Create, and drag a rectangle anywhere in a
document.
Enable the Floating cell option in the Create area.
Selecting and moving table components
You must select a table or table component before you can perform a procedure, such as
changing the number of rows or columns in the table or copying the format of one table cell to
another. You can also select table components by using QuickSelect™ or Row/column indicators.
You can copy, cut, and paste table components. You can copy the format of a table cell and apply
the formatting to another cell or group of cells. Formatting includes attributes, such as line style,
line color, or fill, but does not include cell contents, such as text or formulas.
To select a table
1 Click anywhere in a table.
2 Click Edit } Select } Select table.
102 WordPerfect 10
Page 98

To select a table or table components by using QuickSelect
To select Do the following
A cell In the table, move the pointer until it changes to
A row In the table, move the pointer until it changes to
A column In the table, move the pointer until it changes to
The entire table In the table, move the pointer until it changes to
an arrow pointing upward or to the left, and click.
an arrow pointing to the left, and double-click.
an arrow pointing upward, and double-click.
an arrow pointing upward or to the left, and
triple-click.
You can also select a cell by clicking in a cell and pressing SHIFT + F8.
To select rows, columns, or tables by using Row/column indicators
To select Do the following
Arow
A column
The entire table
Right-click in a table, and click Row/column
indicators. Click the row indicator next to the row
(for example, 1, 2, and so on).
Right-click in a table, and click Row/column
indicators. Click the column indicator above the
column (for example, A, B, and so on).
Right-click in a table, and click Row/column
indicators. Click the rectangle in the top-left
corner of the row and column indicators (the
cursor becomes a double-headed corner arrow).
You can also select rows, columns, and tables by clicking Table } Row/col indicators.
To copy table components
1 Select a range of cells, a row, or a column.
2 Click Edit } Copy.
3 Enable one of the following options:
Selection — copies only the selected cells
Row — copies the selected row
Column — copies the selected column
Cell — copies the selected cell to the Clipboard, or down, or to the right a specified
number of times
4 Click where you want to paste the cells, row, or column.
5 Click Edit } Paste.
Using tables and charts 103
Page 99

If you want to move a selected range of cells, a row, or a column, click Edit } Cut.
You can also copy table components by selecting a range of cells, a row, or a column,
right-clicking, and clicking Copy.
Setting and inserting rows and columns in tables
You can set the number of rows and columns in a table. You can also insert columns or rows in a
table. New columns or rows have the same formatting as the column or row in which the cursor
is positioned.
To set the number of rows and columns in a table
1 Select a table.
2 Click Table } Format.
3 Click the Table tab.
4 In the Table size area, type values in the following boxes:
Columns
Rows
If you add columns and you want all the columns to be the same width, select a row
and click Table } Equal column widths.
To insert a column or row in a table
1 Right-click where you want to insert the column or row, and click Insert.
2 Enable one of the following options:
Columns — lets you specify the number of columns you want to insert
Rows — lets you specify the number of rows you want to insert
3 Enable one of the following options:
Before — inserts new columns or rows before the row in which the cursor is positioned
After — inserts new columns or rows after the row in which the cursor is positioned
If you insert a column, enable the Keep column widths the same check box to
prevent the existing columns from changing width when the new column is added.
You can also insert a row by clicking the Insert row button on the property bar.
Joining and splitting table cells
You can join or split tables and table cells. Except for individually formatted cells, the second
table acquires the formatting of the first table. When you join selected cells, the formatting of
the top left cell is used for all the joined cells. You can also split any table horizontally into two
tables. When you split table cells, each selected cell divides in two. The new cells have the same
format as the original cell.
To join table cells
1 Select the cells you want to join.
2 Click Table } Join } Cell.
104 WordPerfect 10
Page 100

You can also join table cells by clicking Table } Join } QuickJoin and selecting the
cells you want to join.
To join two tables
1 Click View } Reveal Codes.
2 In the Reveal Codes window, delete all hard return codes and any other codes or text
between the [Tbl Off] code of the first table and the [Tbl Def] code of the second table.
3 Click in the first table.
4 Click Table } Join } Table.
To split a table cell
1 Click in a cell.
2 Click Table } Split } Cell.
3 Enable one of the following options and type a value:
Columns — splits a table cell into columns
Rows — splits a table cell into rows
You can also split table cells by clicking the QuickSplit row button , the
QuickSplit column button , or the QuickSplit columns and rows button on
the property bar, and clicking in a table cell. When the QuickSplit row button, the
QuickSplit column button, or the QuickSplit columns and rows button appears
pressed, you can also hold down SHIFT to toggle to the QuickJoin tool.
You can toggle back and forth between splitting cells and rows by clicking the
QuickSplit row button or the QuickSplit column button , and holding
down ALT.
To split a table
1 Click where you want to divide a table.
2 Click Table } Split } Table.
3 Click View } Reveal Codes.
4 In the Reveal Codes window, place the cursor between the [Tbl Off] code of the first table
and the [Tbl Def] code of the second table, and press ENTER a few times to separate the two
tables.
Deleting tables and table components
You can delete a row, column, or an entire table. If you want to maintain the table structure, you
can delete the contents only or formulas only. When you delete a row, column, or an entire table,
you can delete the data, the structure, or only the formulas.
To delete a table row or column
1 Select a row or column, and click Table } Delete.
2 Enable one of the following options:
Rows — lets you specify the number of rows to delete
Using tables and charts 105
 Loading...