

Page 1
Page 2

CorelDRAW® Graphics Suite 12 Programming Guide for VBA
The contents of this programming guide and the associated CorelDRAW software are the property of Corel Corporation
and its respective licensors, and are protected by copyright. For more complete copyright information about
CorelDRAW, please refer to the About CorelDRAW section in the Help menu of the software.
Copyright 2002–2003 Corel Corporation. All rights reserved.
Corel, the Corel logo, CorelDRAW, Corel PHOTO-PAINT, Corel SCRIPT, and WordPerfect are trademarks or registered
trademarks of Corel Corporation and/or its subsidiaries in Canada, the U.S., and/or other countries. Microsoft, Visual
Basic, Visual Studio, ActiveX, and Windows are registered trademarks of Microsoft Corporation in the United States
and/or other countries. AutoCAD is a registered trademark of Autodesk, Inc. Borland and Delphi are trademarks or
registered trademarks of Borland Software Corporation. IntelliCAD is a registered trademark of IntelliCAD Technology
Consortium. Java is a trademark of Sun Microsystems, Inc. JavaScript is a registered trademark of Sun Microsystems,
Inc. in the U.S. and other countries. PostScript is a registered trademark of Adobe Systems Incorporated in the United
States and/or other countries. Other product, font, and company names and logos may be trademarks or registered
trademarks of their respective companies.
Page 3

Table of Contents
Introduction ......................1
What's the purpose of this guide? .......................1
Who should use this guide? .........................1
How to use this guide ...........................1
About CorelDRAW ............................1
About VBA in CorelDRAW .........................1
About Corel Corporation ..........................2
Writing and running macros in CorelDRAW . . . . . .........3
Installing VBA for CorelDRAW ........................3
The VBA toolbar in CorelDRAW .......................3
Writing a macro .............................3
Writing macros in the VB Editor .......................4
Recording macros ............................4
Running a macro .............................5
Introducing automation and VBA ................6
What is automation? ............................6
VBA for non-programmers .........................6
VBA for programmers ...........................7
The main features of VBA structure and syntax ...................7
Comparing VBA to other programming languages .................12
Visual Basic Editor ....................14
Starting the Visual Basic Editor from CorelDRAW .................14
CorelDRAW Graphics Suite 12 Programming Guide for VBA i
Page 4

Visual Basic Editor user interface .......................14
Project Explorer ............................15
Project ...............................16
Properties Window ...........................17
Code window .............................17
Form Designer window ..........................21
Object Browser window..........................26
Debugging..............................31
About objects and object models ................35
Understanding objects, properties, methods, and events ...............35
The purpose and benefits of using an object model .................35
Object hierarchy .............................36
Dot notation .............................36
Creating references to objects using "Set" ....................36
Collections of objects...........................37
Using objects in CorelDRAW .................39
Working with basic objects .........................39
Application Object ...........................39
Document Structure ...........................39
Document objects ...........................39
Creating documents ...........................41
The ActiveDocument property........................41
Switching between documents ........................42
Changing content in active and inactive documents .................42
Closing documents ...........................43
Setting the undo string ..........................43
CorelDRAW Graphics Suite 12 Programming Guide for VBA ii
Page 5

Page objects ..............................43
The ActivePage property .........................43
Creating pages ............................44
Deleting pages ............................45
Switching between pages .........................45
Reordering pages ............................45
Resizing pages.............................46
Layer objects ..............................47
Creating layers ............................47
Moving and renaming layers ........................47
Deleting layers ............................48
Setting a layer as active ..........................48
Disabling and hiding layers.........................48
Shape objects ..............................48
Selections and selecting shapes........................49
Creating shapes ............................49
Text objects .............................52
Changing the properties of shapes.......................54
Shortcuts to frequently used objects ......................62
Document operations ...........................65
Opening and closing documents .......................65
Printing ..............................65
Importing and exporting files ........................66
Publishing to PDF ...........................67
Windows and views ...........................68
Windows ..............................68
Views and ActiveView ..........................69
CorelDRAW events ............................70
Responding to events ..........................70
CorelDRAW Graphics Suite 12 Programming Guide for VBA iii
Page 6

Creating user interfaces for macros................72
Working with dialog boxes .........................72
Creating modal or modeless dialog boxes ....................72
Common dialog box features ........................73
Working with toolbars and buttons ......................73
Creating toolbars ............................73
Creating new buttons ..........................74
Adding a caption and a tooltip to macros ....................74
Adding an image or an icon to a command ....................75
Interacting with the user ..........................75
Document.GetUserClick .........................75
Document.GetUserArea .........................76
Window.ScreenToDocument and Window.DocumentToScreen ..............76
Shape.IsOnShape ............................77
Providing help to the user .........................77
Organizing, grouping, & deploying CorelDRAW macros . . .........79
Organizing and grouping macros .......................79
Advantage of distributing macros using a GMS file .................79
Deploying and installing project files ......................79
Distributing workspace features .......................79
Distributing menus, toolbars, and shortcut keys ..................79
Where to get more information.................81
Corel Solution Developers Program ......................81
Corel Corporate Professional Services......................81
Corel Customized Training .........................81
Other documentation ...........................81
Web sites ...............................81
Newsgroups ..............................82
Other support .............................82
Index .................................................83
CorelDRAW Graphics Suite 12 Programming Guide for VBA iv
Page 7

Introduction 1
Welcome to the CorelDRAW® Graphics Suite 12 Programming Guide for VBA.
What's the purpose of this guide?
This document describes how to develop and distribute Mircosoft® Visual Basic® for Applications (VBA) solutions in
CorelDRAW 12. It introduces the VBA integrated development environment (IDE) and many of its advanced features.
It also describes the most important CorelDRAW functions and how to use them. Finally, this guide describes how to
package and deploy VBA solutions developed for CorelDRAW.
This guide should be read in conjunction with the CorelDRAW object model reference document available in the
CorelDRAW application Help.
Who should use this guide?
This guide should be used by anyone who is interested in automating simple and complex tasks in CorelDRAW or who
is developing commercial solutions that integrate with CorelDRAW.
It is assumed that the reader already has experience with at least one other procedural programming language, such as
BASIC, Visual Basic, C, C++, Javaä, Pascal, Cobol, or Fortran. This guide does not describe the basics of procedural
programming, such as functions, conditional branching, and looping. Non-programmers should first learn the basics of
programming in a language such as Visual Basic or VBA before using this document to develop CorelDRAW solutions.
How to use this guide
This guide is organized into chapters that deal with specific aspects of automating tasks and building solutions in
CorelDRAW.
About CorelDRAW
CorelDRAW is a comprehensive vector-based drawing program that makes it easy to create professional artwork, from
simple logos to technical illustrations. The tools in CorelDRAW are designed to meet the demands of the graphic
designer.
About VBA in CorelDRAW
In 1995, Corel incorporated automation into CorelDRAW 6 by including its Corel SCRIPTä language. This enabled
solution developers to create intelligent mini-applications within CorelDRAW, such as ones that draw shapes, reposition
and resize shapes, open and close documents, set styles, and so on.
Corel SCRIPT was included with CorelDRAW versions 6 through 9. Although the Corel SCRIPT editor is not included
with CorelDRAW in versions after 9, the run-time engine is included, so scripts written for earlier versions of
CorelDRAW can easily be migrated to the latest versions.
In 1998, Corel took the strategic decision to augment the Corel SCRIPT functionality of CorelDRAW 9 by licensing the
Microsoft Visual Basic for Applications engine to handle its behind-the-scenes automation. The addition of VBA made
CorelDRAW immediately accessible to millions of VBA developers and Visual Basic developers around the world.
VBA in CorelDRAW can be used as a platform for developing powerful corporate graphical solutions, such as automated
ticket generators, customized calendars, and batch processing of files. VBA can also be used to enhance and optimize the
CorelDRAW Graphics Suite 12 Programming Guide for VBA 1
Page 8

Introduction Chapter 1
workflow within CorelDRAW. For example, you can improve and customize some of the built-in functionality of
CorelDRAW (alignments, transformations, object creation) or add page layouts on-the-fly (company letterheads).
VBA comes with a fully integrated development environment that provides contextual pop-up lists, syntax highlighting,
line-by-line debugging, and visual designer windows. These helpful prompts and aids create a particularly friendly
environment for inexperienced developers to learn in.
About Corel Corporation
Founded in 1985, Corel Corporation (www.corel.com) is a leading technology company specializing in content creation
tools, business process management and XML-enabled enterprise solutions. The company's goal is to give consumers
and enterprise customers the ability to create, exchange and instantly interact with visual content that is always relevant,
accurate and available. Corel Corporation has its headquarters in Ottawa, Canada.
CorelDRAW Graphics Suite 12 Programming Guide for VBA 2
Page 9

Writing and running macros in CorelDRAW 2
Before you can develop and run macros in CorelDRAW, it may be necessary to install the VBA component.
Installing VBA for CorelDRAW
With CorelDRAW 11 and 12, VBA is installed as part of the typical install. In CorelDRAW 10, VBA must be custom
installed.
To custom install VBA:
1 Insert Disc 1 of the installation CD into your computer's CD drive. If the installer does not autostart, double-click on
the file D:\setup.exe, where D: is the letter of your computer's CD drive.
2 If the installer starts automatically, click Install CorelDRAW Graphics Suite 12.
3 Now navigate down the tree to Corel Graphics Suite 12\Utilities\, and ensure that Visual Basic for Applications 6.3 is
set to be installed (the default).
4 Disable any components you don't want.
5 Click Next. Any components whose check boxes you disabled will be removed.
The VBA toolbar in CorelDRAW
CorelDRAW has a toolbar that provides easy access to several VBA features and to the VB Editor.
The VBA toolbar in CorelDRAW
The toolbar buttons provide the following functions:
playing macros
opening the VB Editor
switching the VB Editor between design and run modes
recording macros
pausing the recording of macros
stopping the recording of macros
These features are described in subsequent sections.
To display the VBA toolbar, right-click anywhere on an empty toolbar area and choose Visual Basic for Applications
from the pop-up menu. Alternatively, choose Tools } Toolbars } Visual Basic for Applications.
Writing a macro
Macros can only be written inside the VB Editor. However, you can save time by recording actions within CorelDRAW.
Recording creates a new VBA macro in the chosen project, which can then be edited and customized in theVB Editor.
CorelDRAW Graphics Suite 12 Programming Guide for VBA 3
Page 10
Writing and running macros in CorelDRAW Chapter 2
Writing macros in the VB Editor
Macros that are developed in the VB Editor can take advantage of full programmating control, including conditional
execution, looping, and branching. Macros that include this extra functionality are not just mere macros, but are
programs in their own right. However, for the purpose of this guide, all VBA code is referred to as a macro, although in
some contexts a macro is just those parts of that code that can be launched by CorelDRAW.
Using the VB Editor to develop macros is described in detail in Chapter 4, "Visual Basic Editor".
Recording macros
It is often useful to record macros, particularly when you are not familiar with the CorelDRAW object model, or when
you are not sure which objects and methods to use. For many simple and repetitive tasks, recorded macros are a quick,
efficient solution. Recorded macros are macros in the truest sense of the word: strictly speaking, a macro is a recorded set
of actions within the application that can be repeatedly invoked. This is exactly what is created when you record a macro
– a true copy of your actions within CorelDRAW, although this is limited to CorelDRAW actions and does not simply
record keystrokes and mouse moves.
To record a new macro:
1 Click Tools } Visual Basic } Record, or click the Record button on the VBA toolbar.
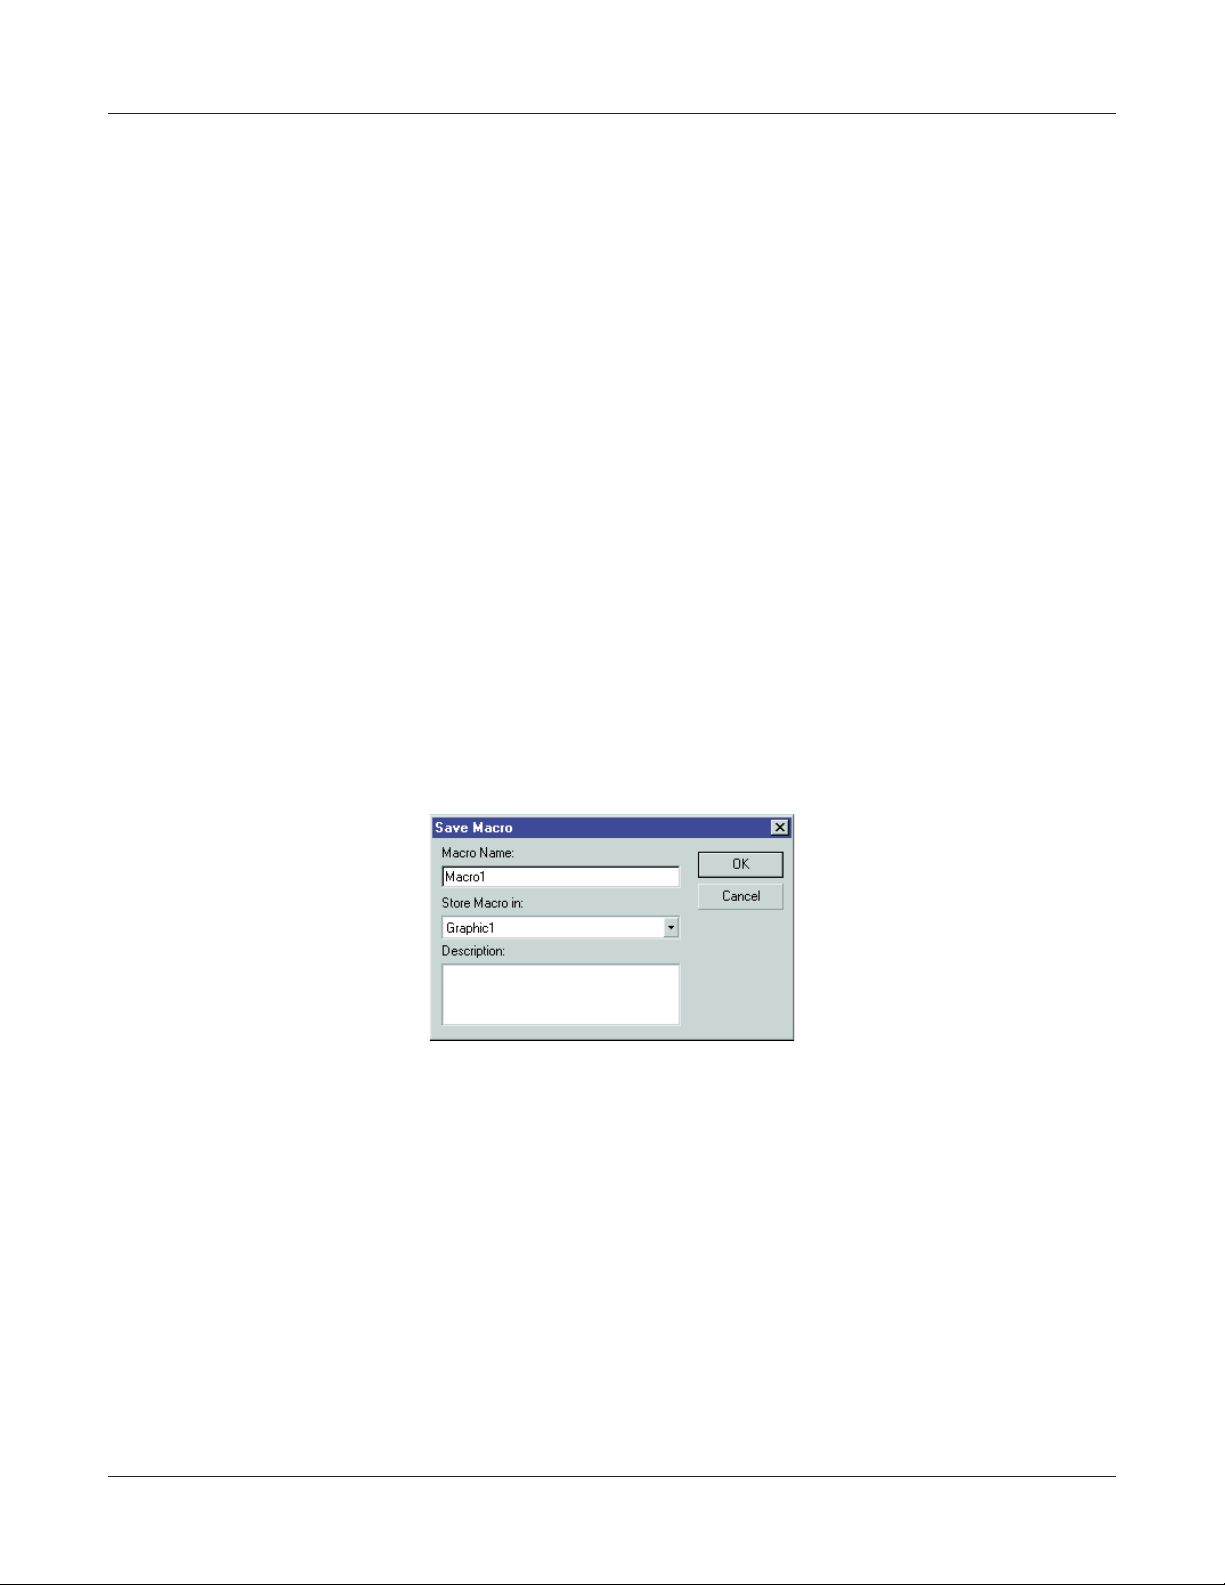
2 Type a name in the Macro Name box. Macro names must follow VBA's naming rules, which are:
They must start with a letter.
They can contain numbers, but not as the first character.
They cannot contain spaces or any non-alphanumeric characters, apart from the underscore (_).
They must be unique within the chosen project.
The Save Macro dialog box when recording
3 Choose a VBA project (GMS) file or CorelDRAW (CDR) file from the Store macro in list. You can type an optional
comment in the Description box. The benefits of selecting a GMS or CDR file are discussed in a later section.
4 Click OK.
CorelDRAW is now recording every action – each creation of a shape, each movement of an object, and each
change to a property.
To stop recording a macro, click Tools } Visual Basic } Stop. The macro will now be saved.
To pause while recording a macro, click Tools } Visual Basic } Pause.
CorelDRAW Graphics Suite 12 Programming Guide for VBA 4
Page 11

Writing and running macros in CorelDRAW Chapter 2
Not all actions in CorelDRAW can be recorded. Some cannot be recorded because of their complexity,
although they can usually be hand-coded in the VB Editor. When something cannot be recorded, the
following comment is placed in the code: "The recording of this command is not supported".
The record, pause, stop, and play controls are also available from the Visual Basic for Applications toolbar in
CorelDRAW.
Running a macro
You can run a macro from a CorelDRAW menu, or directly from the VB Editor.
To run a macro from a CorelDRAW menu:
1 Click Tools } Visual Basic } Play….
The Macros dialog box
Clicking the Run button on the VBA toolbar will also bring up the Macros dialog box.
2 From the Macros in list box, select the project (GMS) file that contains the macro you want to run. This will
populate the Macro name list.
3 Choose a macro from the Macro name list.
4 Click Run.
To run a macro from inside the VB Editor:
Click anywhere inside the subroutine that forms the macro, and click Run } Run Macro.
CorelDRAW Graphics Suite 12 Programming Guide for VBA 5
Page 12

Introducing automation and VBA 3
Visual Basic for Applications, more commonly known as VBA, is a built-in programming language that can automate
repetitive functions and create intelligent solutions in CorelDRAW. Corel Graphics Suite 12 includes VBA version 6.3.
VBA is both a language and an editor. It is not possible to have the language without the editor, nor is it possible to edit
VBA in anything but the VB Editor. And the VB Editor is also needed to run VBA programs.
VBA is developed by Microsoft and is built into almost all of its desktop applications, including Microsoft® Office. VBA
is licensed by Microsoft to other companies, including Corel Corporation (in CorelDRAW, Corel PHOTO-PAINTâ, and
WordPerfectâ), Autodesk, Inc. (in AutoCADâ), IntelliCAD Technology Consortium (IntelliCAD®), and many others.
This enables CorelDRAW to communicate with a wide array of applications that support VBA. A complete list of
applications that support VBA can be viewed on the Microsoft Web site at
www.msdn.microsoft.com/vba/companies/company.asp.
It is not necessary for an application to support VBA for the VBA engine in CorelDRAW to control that application.
That means you can build solutions in CorelDRAW that access databases, word processors, specialized content editors,
XML documents, and more.
What is automation?
Most actions that you can do in CorelDRAW can be done programmatically through VBA. This programmability of
CorelDRAW is called automation. Automating repetitive tasks can save time and reduce effort, while automating
complex tasks can make possible the otherwise impossible.
In its simplest form, automation is simply recording a sequence of actions (a macro) in CorelDRAW, which can be played
back time and again. The term "macro" has come to include any code accessible to VBA running within the process,
even though some of that code might be far more advanced than a mere set of recorded actions. Thus wherever "macro"
is used in this guide, it refers to VBA functions and subroutines.
While it is possible to record a sequence of actions in CorelDRAW, the real power of automation and VBA is that these
recordings can be edited to provide conditional and looping execution. For example, a simple macro may set the selected
shape's fill color to red and apply a one-point outline. But, by adding a condition and looping to the VBA code, the
macro could, for example, be made to seek out each selected shape and apply only the fill to text shapes and the outline
to all other shape types.
VBA for non-programmers
Visual Basic for Applications (VBA) is based on Microsoft's successful Visual Basic (VB) programming language. The
main difference between VBA and VB is that you cannot create stand-alone executable (EXE) files using VBA, which
you can with full VB; you can only create programs in VBA that run inside the host application, in this case
CorelDRAW. In all other respects VBA and VB are the same.
Visual Basic is, as the name describes, a "visual" version of the BASIC language. This means that it is a very easy
language to learn, and it is helped in this by providing visual cues within the editor. Microsoft has added a great deal to
the original BASIC language, and it is now a powerful and fast language, although not as powerful as Java or C++, or
as quick as C.
The aim of this guide is not to teach you how to become a programmer –– you must do that on your own. The aim of
this guide is to teach experienced programmers how to apply their skills to developing useful solutions within
CorelDRAW. Before continuing reading this guide, you may find it useful to refer to the many books that have been
written about VBA and Visual Basic.
CorelDRAW Graphics Suite 12 Programming Guide for VBA 6
Page 13

Introducing automation and VBA Chapter 3
VBA for programmers
VBA is an in-process automation controller; in other words, it can be used to control the functionality of CorelDRAW
that can be automated. And, since it runs "in-process", it bypasses the interprocess synchronization mechanisms. This
makes it run much more efficiently.
All of the automation that is available to the in-process VBA is also available to external out-of-process automation
controllers, or OLE clients. This includes applications developed in programming languages that can be used to develop
OLE clients, including:
Microsoft Visual Basic, Visual C++, and Windowsâ Scripting Host
Borlandâ Delphiä and C++
Other applications' VBA engines
The rest of this chapter and the next are intended to familiarize you with the VBA language and the VB Editor.
The main features of VBA structure and syntax
This section describes the main features of the structure and syntax of VBA code. This is intended to give experienced
developers a quick grounding in VBA syntax and structure. Since VBA is a procedural language that shares much in
common with all procedural languages, your current knowledge should help you get off to a quick start using VBA.
This section is by no means exhaustive, but it does cover the most common syntactical nuances in which VBA differs
from its peers.
The following language topics are covered:
variables, structures, enumerated types, arrays, and strings
functions and subroutines
line endings
comments
memory pointers and allocation
passing values by reference and by value
code formatting
scope
classes
Declaring variables
In VBA, the construct for declaring variables is:
Dim foobar As Integer
The built-in data types are: Byte, Boolean, Integer, Long, Single, Double, String, Variant, and several other less-used
types including Date, Decimal, and Object.
Variables can be declared anywhere within the body of a function, or at the top of the current module. If the option
"Require Variable Declaration" is set in VBA's options dialog, all variables must be declared before they are used. This is
generally good practice, since it enables the compiler to use an explicit type efficiently; if variables are simply used
without being declared as a particular type, the compiler will create them as variants, which are less efficient at run time.
Booleans take False to be zero and True to be any other value, although converting from a Boolean to a Long
will result in True being converted to -1.
CorelDRAW Graphics Suite 12 Programming Guide for VBA 7
Page 14

Introducing automation and VBA Chapter 3
To get more information about one of the built-in data types, type it into the code window, select it, and press
F1.
Data structures
Data structures can be constructed using the following syntax:
Public Type fooType
item1 As Integer
item2 As String
End Type
Dim myTypedItem As fooType
The items within a variable declared as type fooType are accessed using dot notation:
myTypedItem.item1 = 5
Enumerated types
Enumerated types use the following construction:
Public Enum fooEnum
ItemOne
ItemTwo
ItemThree
End Enum
The first item in an enumerated type is assigned a value of zero by default.
Arrays
Arrays are declared using parentheses, not brackets:
Dim barArray (4) As Integer
The value defines the index of the last item in the array. Since array indexes are zero-based by default, this means that
there are five elements in the above array (zero thru four inclusive).
Arrays can be resized using
ReDim, for example, the following code adds an extra element to barArray, but preserves
the existing contents of the original five elements:
ReDim Preserve barArray (6)
Array upper and lower bounds can be determined at run time with the functions UBound() and LBound().
Multi-dimensional arrays can be declared by separating the dimension indexes with commas:
Dim barArray (4, 3)
CorelDRAW Graphics Suite 12 Programming Guide for VBA 8
Page 15

Introducing automation and VBA Chapter 3
Strings
Strings are simple to use in VBA. Strings can be added together, truncated, searched forwards and backwards, and
passed as simple arguments to functions. Strings in VBA are much simpler than strings in C.
To add two strings together, simply use the concatenation operator, which is ampersand(&),ortheaddition operator
(+):
Dim string1 As String, string2 As String
string2 = string1 & " more text" + " even more text"
In VBA, there are many functions for manipulating strings, including InStr(), Left(), Mid(), Right(), Len(),
and
Trim().
Functions and subroutines
VBA uses both functions and subroutines (subs) – the difference between the two is that functions can return a value,
whereas subs must not return a value. Typical functions in a language such as Java or C++ may look like the following:
void foo( string stringItem ) {
// The body of the function goes here
}
double bar( int numItem ) { return 23.2; }
In VBA these functions look like the following:
Public Sub foo (stringItem As String)
' The body of the subroutine goes here
End Sub
Public Function bar (numItem As Integer) As Double
bar = 23.2
End Function
To force a sub or function to exit immediately, use "Exit Sub"or "Exit Function", respectively.
Declaring functions
VBA functions and subs do not need to be declared before they are used, or before they are defined. Functions and subs
only need to be declared if they actually exist in external, system dynamic-linked libraries (DLLs).
Line endings
VBA does not use a line-ending character. Many languages use the semicolon to separate individual statements; in VBA
each statement must exist on its own line.
To break a long VBA statement over two or more lines, each of the lines, apart from the last line, must end in an
underscore character with at least one space in front of it:
newString = fooFunction ("This is a string", _
5, 10, 2)
It is also possible to put several statements onto a single line by separating them with colons:
a=1:b=2:c=a+b
A line cannot end with a colon. Lines that end with a colon are labels used by the Goto statement.
CorelDRAW Graphics Suite 12 Programming Guide for VBA 9
Page 16

Introducing automation and VBA Chapter 3
Comments in the code
Comments in VBA can only be created at the end of a line, similar to ANSI C++ and Java (but unlike C). Comments
are started with an apostrophe and terminate at the line ending. Comments can occupy complete lines on their own,
although each line of a multi-line comment must begin with its own apostrophe:
a=b'This is a really interesting piece of code that
' needs so much explanation that I have had to break
' the comment over multiple lines.
To comment out large sections of code, use the following code, similar to C or C++:
#If 0 Then ' That's a zero, not the letter 'oh'.
' All this code will be ignored by
' the compiler at run time!
#End If
Memory pointers and memory allocation
VBA does not support C-style memory pointers. Memory allocation and garbage collection are automatic and
transparent, just as in Java and JavaScript®, and some C++ code.
Passing values "by reference" and "by value"
Most languages, including C/C++ and Java, pass arguments to functions as a copy of the original. If the original needs
to be passed, either a memory pointer is passed that points to the original in memory, or a reference to the original is passed.
The same is true in Visual Basic, except that passing a copy of the original is called "passing by value" and passing a
reference to the original is called "passing by reference".
By default, function and subroutine parameters are passed "by reference". This means that a reference to the original
variable is passed in the function's argument, and changing that argument's value within the procedure will, in effect,
change the original variable's value as well. This is a great way of returning more than one value from a function or sub.
To explicitly annotate the code to indicate that an argument is being passed by reference, prefix the argument with
"
ByRef".
It is possible to force an argument to be copied instead of a reference passed, which prevents the function from changing
the original variable's value. To do this, prefix the argument with "
ByVal", as given below. This ByRef/ByVal
functionality is similar to C and C++'s ability to pass a copy of a variable, or to pass a pointer to the original variable.
Private Sub fooFunc (ByVal int1 As Integer, _
ByRef long1 As Long, _
long2 As Long) ' Passed ByRef by default
In the preceding example, both arguments long1 and long2 are passed ByRef, which is the default. Modifying either argument within the body of the function will modify the original variable; however, modifying
int1 will not affect the
original, since it is a copy of the original.
Code formatting
The VB Editor formats all of the code for you. The only custom formatting that you can do is to change the size of
indentations.
Public and private scope
Functions, subs, and types (and members of classes) that are declared as "Private" are only visible within that module
(file). Functions that are declared as "Public" are visible throughout all the modules. However, you may have to use fully
qualified referencing if the modules are almost out of scope, for example, referencing a function in a different Project.
CorelDRAW Graphics Suite 12 Programming Guide for VBA 10
Page 17

Introducing automation and VBA Chapter 3
Local scope
Unlike C, VBA does not use braces ( "{" and "}" ) to define local scope. Local scope in VBA is defined by an opening
function or sub definition statement and a matching
End statement (End Function, End Sub). Any variables
declared within the function are only available within the scope of the function itself.
Object-oriented classes
VBA can create object-oriented classes, although these are a feature of the language and are not discussed in detail in
this guide.
Boolean comparison and assignment using "="
In Visual Basic, both Boolean comparison and assignment are done using a single equals sign:
Ifa=bThenc=d
This is in contrast to many other languages that use a double equals sign for a Boolean comparison and a single equals
sign for assignment:
if(a==b)c=d;
The following code, which is valid in C, C++, Java, and JavaScript, is invalid in VBA:
if( ( result = fooBar())==true )
This would have to be written in VBA as the following:
result = fooBar( )
If result = True Then
Other Boolean comparisons
VBA uses the same operators as other languages do for other Boolean comparisons. The only operators that are different
are "is equal to" and "is not equal to". All the Boolean-comparison operators are given in the following table:
Comparison VBA operator C-style operator
Is equal to ===
Is not equal to <> !=
Is greater than >>
Is less than <<
Is greater than or equal to >= >=
Is less than or equal to <= <=
The result of using one of the Boolean operators is always either True or False.
CorelDRAW Graphics Suite 12 Programming Guide for VBA 11
Page 18

Introducing automation and VBA Chapter 3
Logical and bitwise operators
In VBA, logical operations are performed using the keywords And, Not, Or, Xor, Imp, and Eqv, which perform the
logical operations AND, NOT, OR, Exclusive-OR, logical implication, and logical equivalence, respectively. These
operators also perform Boolean comparisons. The following code shows a comparison written in C or a similar language:
if((a&&b)||(c&&d))
This would be written as follows in VBA:
If(aAndb)Or(cAndd)Then
Or the above could be written in the full long-hand form of:
If ( a And b = True ) Or ( c And d = True ) = True Then
The following table gives a comparison of the four common VBA logical and bitwise operators, and the C-style logical
and bitwise operators used by C, C++, Java, and JavaScript:
VBA operator C-style bitwise operator C-style Boolean operator
And & &&
Not ~ !
Or | ||
Xor ^
Message boxes and input boxes
You can present simple messages to the user with VBA's MsgBox function:
Dim retval As Long
retval = MsgBox("Click OK if you agree.", _
vbOKCancel, "Easy Message")
If retval = vbOK Then
MsgBox "You clicked OK.", vbOK, "Affirmative"
End If
You can also get strings from the user with VBA's InputBox function:
Dim inText As String
inText = InputBox("Input some text:", "type here")
If Len(inText) > 0 Then
MsgBox "You typed the following: " & inText & "."
End If
If the user clicks Cancel, the length of the string returned in inText is zero.
Comparing VBA to other programming languages
VBA has many similarities with most modern, procedural programming languages, including Java, JavaScript, C, and
C++. However, VBA runs as an in-process automation controller, whereas the other languages are used to compile
stand-alone applications (apart from JavaScript).
CorelDRAW Graphics Suite 12 Programming Guide for VBA 12
Page 19

Introducing automation and VBA Chapter 3
VBA compared to Java and JavaScript
VBA is similar to Java and JavaScript in that it is a high-level, procedural programming language that has full garbage
collection and very little memory-pointer support. They are also similar because code developed in VBA supports
on-demand compilation. In other words code can be executed without being compiled.
VBA has another similarity with JavaScript in that it cannot be executed as a standalone application: JavaScript is
almost always embedded within Web pages, and the JavaScript is a mechanism that manipulates the Web browser's
document object model or DOM. VBA is exactly the same: VBA programs are always executed inside a host
environment, in this case CorelDRAW, and the programs manipulate the CorelDRAW "DOM" – although in VBA's case
this is simply called an "object model".
VBA applications can usually be compiled to P-code to make them run quicker, although given today's level of computer
hardware, the difference is hardly noticeable. This is similar to Java, but JavaScript cannot be compiled.
VBA uses a single equals sign, "=", for both comparison and assignment, whereas Java and JavaScript both use "=" for
assignment and "==" for a Boolean comparison.
VBA compared to C and C++
VBA has quite a few similarities with C, C++, and similar languages, but it also has some differences. Visual Basic uses
functions and subroutines, whereas C and C++ use just functions. The difference is that C/C++ functions do not have to
return a value, but they can, whereas VBA functions can return a value and VBA subs must never return a value.
Also, VBA allocates and frees memory transparently, whereas in C and C++, the developer is responsible for most
memory management. This makes strings in VBA even simpler than using the
CString class in C++.
VBA uses a single equals sign, "=", for both comparison and assignment, whereas C and C++ both use "=" for
assignment and "==" for a Boolean comparison.
VBA compared to Windows Scripting Host
Windows Scripting Host is a useful addition to Windows for doing occasional scripting and automation of Windows
tasks –– "WSH" is an out-of-process automation controller that can be used to control CorelDRAW. The scripts cannot
be compiled; they must be interpreted as they are executed, which is slower. As well, the automation is being run out of
process, which adds to the slowness.
WSH is a host for a number of scripting languages, each of which has its own syntax. However, the standard language
used by WSH is a Visual Basic–like macro language; so for standard scripts, the syntax is the same as VBA.
CorelDRAW Graphics Suite 12 Programming Guide for VBA 13
Page 20
Visual Basic Editor 4
The editor that is included with VBA is similar to the editor included with full Visual Basic. The main differences
between VB and VBA are that the VB Editor (for VBA) cannot compile executable (EXE) program files, and some of
the implementations of forms and controls are different.
This chapter describes many of the features of the Visual Basic Editor and how to make best use of them.
Starting the Visual Basic Editor from CorelDRAW
To invoke the Visual Basic Editor from inside CorelDRAW, click Tools } Visual Basic } Visual Basic Editor, or press
Alt+F11 (this is the standard keystroke for most VBA-enabled applications, including WordPerfect Office 2002). This
starts VBA as a new application in Windows (although it is running within the CorelDRAW process).
To switch between CorelDRAW and the VB Editor without closing the editor, either use the Windows taskbar
(the "Start-button bar"), or press Alt+F11,orAlt+Tab.
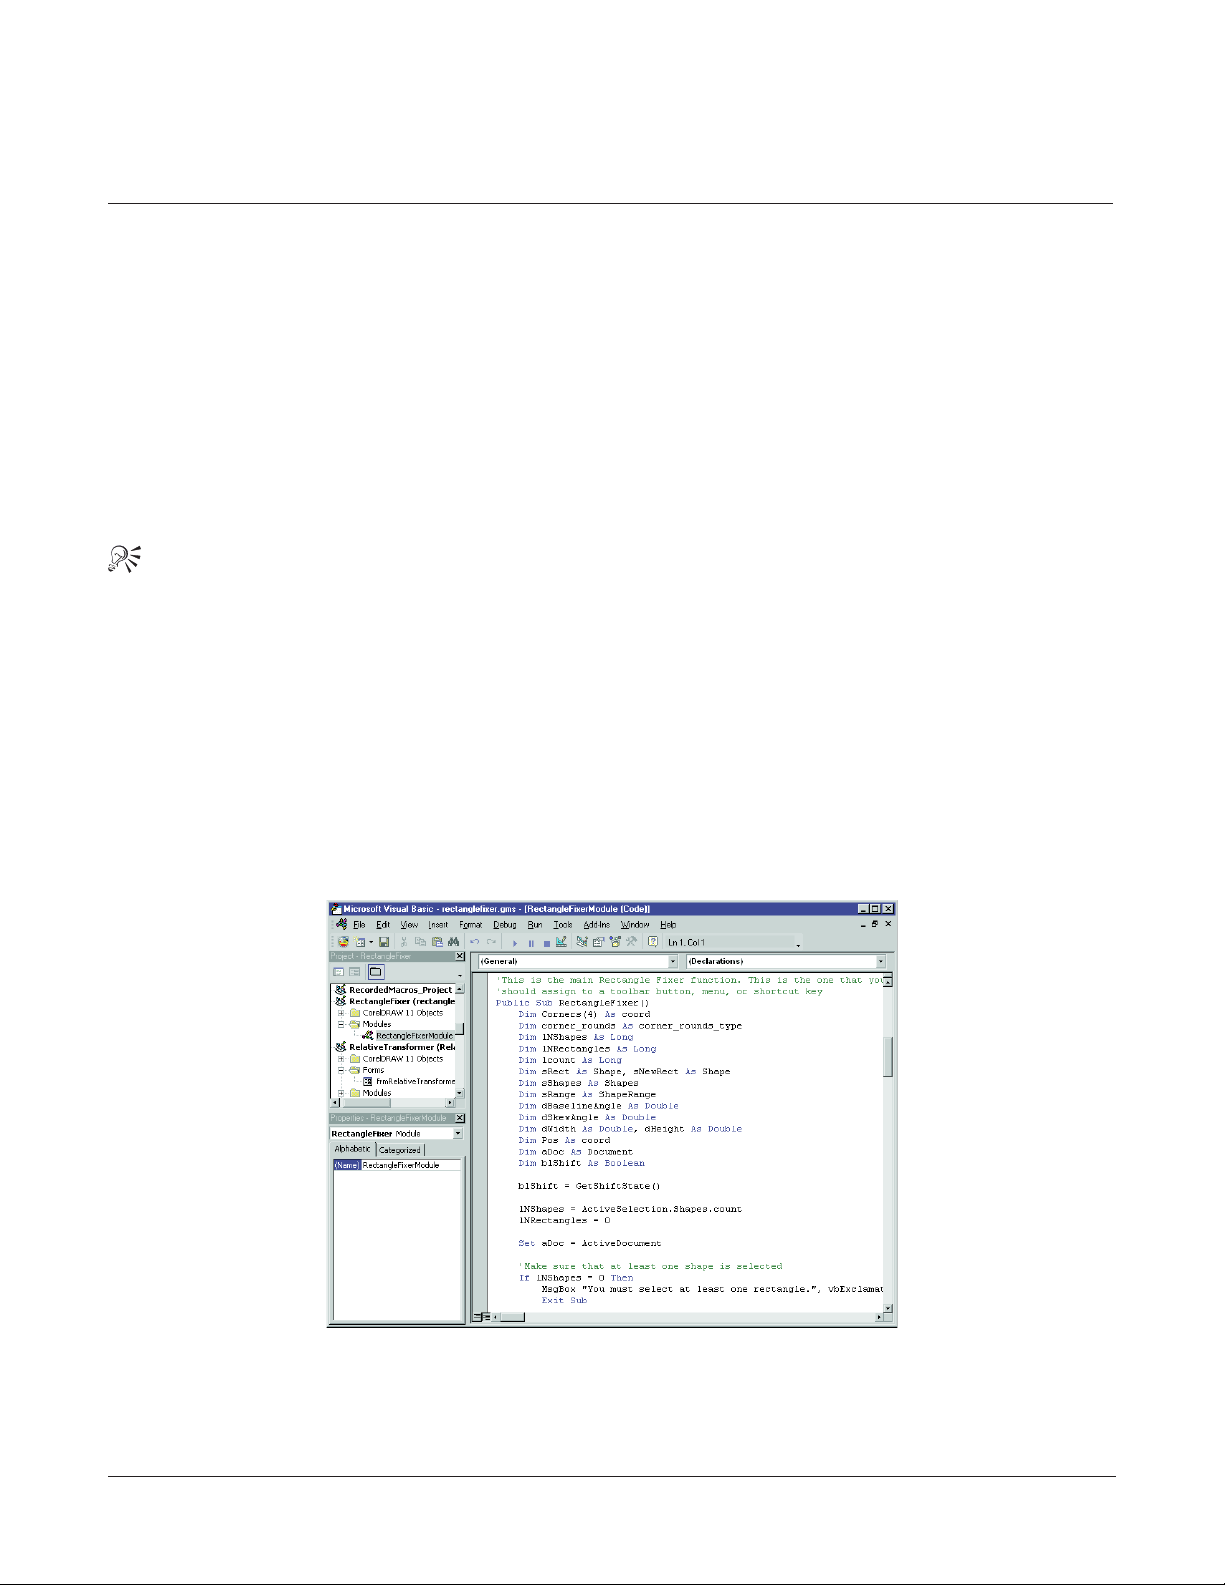
Visual Basic Editor user interface
There are many aspects to the VB Editor's user interface. There are several windows for developing code and dialog
boxes, and for browsing the object tree. There are also quite a few ancillary windows for browsing the modules within
each project, windows for setting individual properties of objects, and windows for debugging.
The VB Editor has several child windows and several toolbars. The child windows that are normally visible are the main
Code window, and to the left of that the Project Explorer (upper-left window), and the Properties window (lower-left
window). There are four toolbars available, of which you will use the Standard and Debug toolbars the most often.
The VB Editor
CorelDRAW Graphics Suite 12 Programming Guide for VBA 14
Page 21
Visual Basic Editor Chapter 4
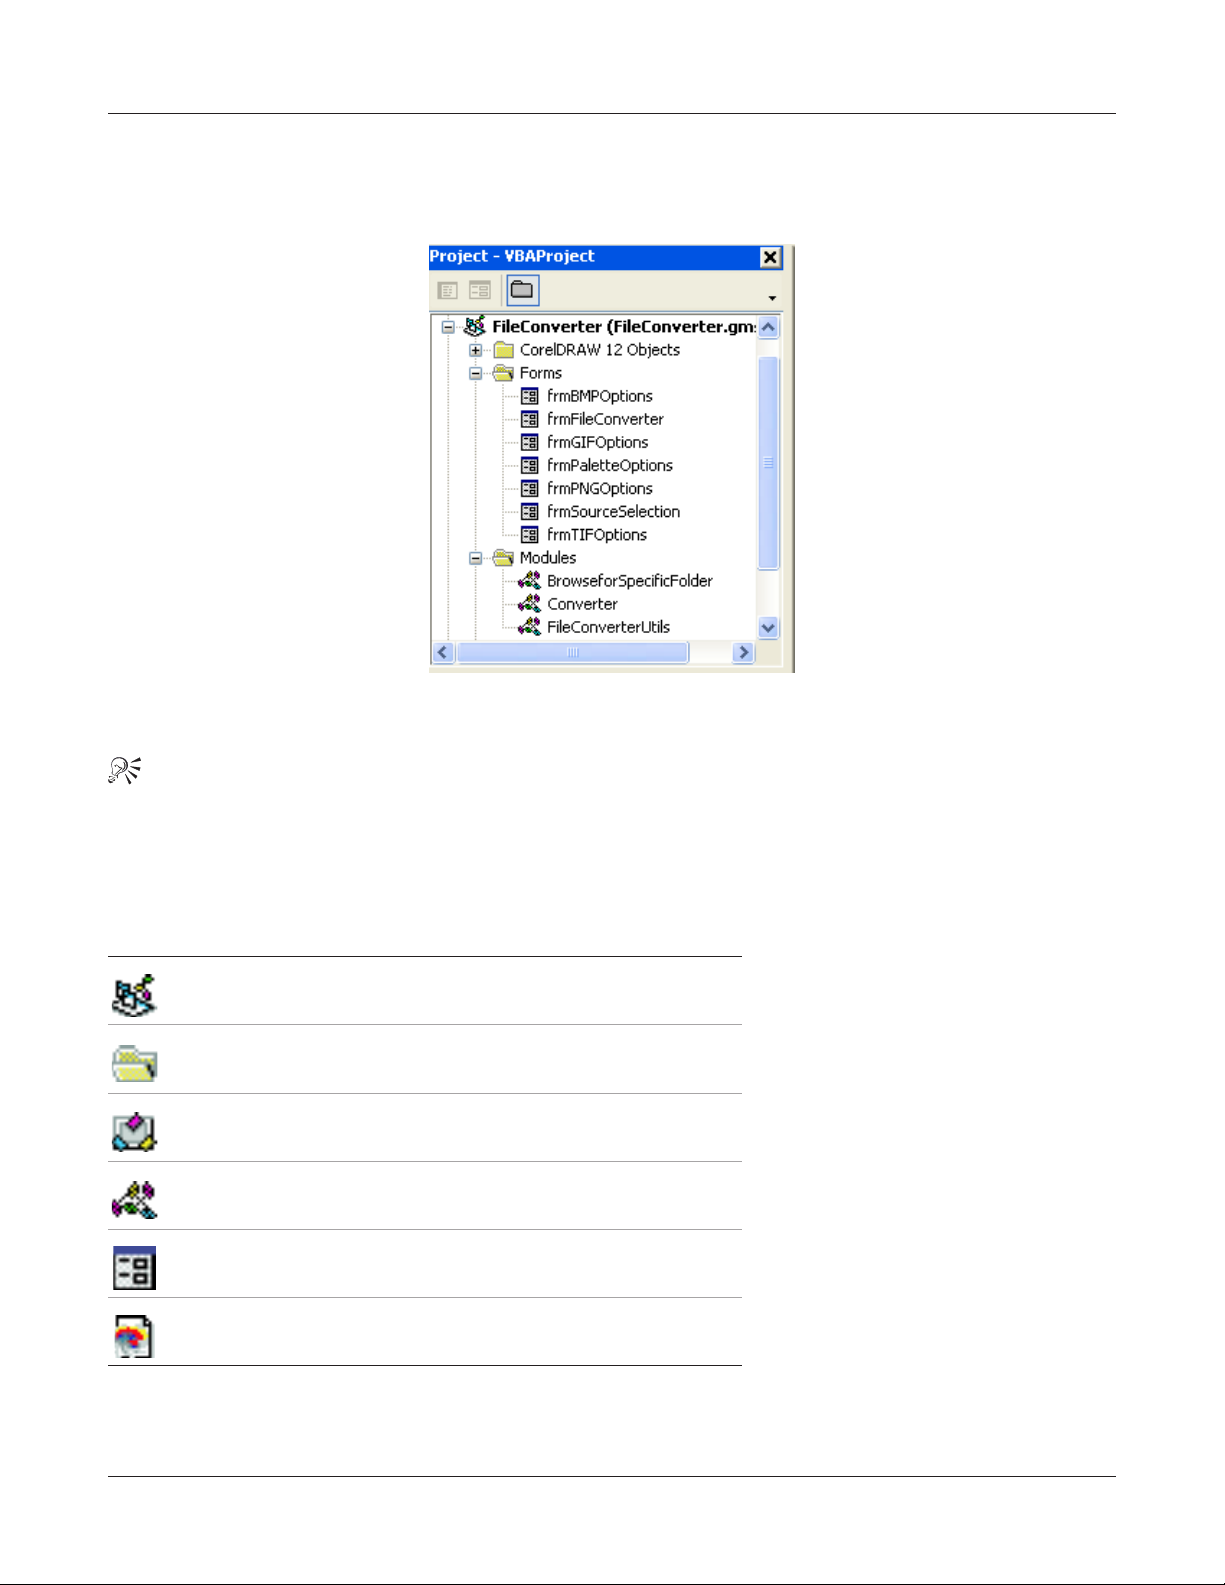
Project Explorer
The Project Explorer is essential for navigating around VBA projects and their constituent modules.
The Project Explorer window with an open module list and one of the modules selected.
To show the Project Explorer window, click View } Project Explorer, or press Ctrl+R.
Each item in the Project Explorer window is given an icon.
Icon Meaning
project
folder
class module
module
form
document
CorelDRAW Graphics Suite 12 Programming Guide for VBA 15
Page 22

Visual Basic Editor Chapter 4
Project
A Global Macro Storage (GMS) file, also known as a project file, exists in the \Corel\Corel Graphics 12\Draw\GMS\
folder which is typically under C:\Program Files\. The VB Editor stores all of the modules for that project in the
project's GMS file; one GMS file may contain dozens of modules. The default GlobalMacros.gms file is stored in the
folder \Corel\Corel Graphics 12\Draw\.
Different localized versions of Windows use different names for the Program Files folder.
Each project that you create can have many modules within it. There are three types of modules:
Modules for general code and macros
Forms for custom dialog boxes and user interfaces, including the code to control them
Class Modules for object-oriented Visual Basic classes (which are not discussed in this guide)
There is also a fourth item "CorelDRAW 12 Objects", which contains a single item, ThisDocument. This is
used mostly for event handling and is discussed in Chapter 6, "Using objects in CorelDRAW".
The Project Explorer presents each module type in its own folder. It is not possible to move a module from one folder to
another within the same project; you can drag a module to another project, which makes a copy of it there.
Creating a new, empty project
Creating a new project (GMS) file is done in Windows Explorer.
To create a new project
1 In Windows Explorer, navigate to the GMS folder inside the CorelDRAW programs folder.
2 Click File } New } Text Document to create a new, empty text document in this folder.
3 Rename the file to your-name.gms where "your-name" can be any valid Windows file name.
4 Restart CorelDRAW.
When you launch the VB Editor, your new GMS file will be listed in the Project Explorer window as Global Macros
(your-name.gms).
To change the internal name – Global Macros – of the project
1 Click the project you want to rename in the Project Explorer window.
2 In the Properties window edit the "(name)" value to what you want it to be. Names must follow normal
variable-naming conventions: no spaces, must start with a letter, cannot contain punctuation (except underscore), etc.
3 Press Enter to confirm.
Creating a new module or form
Every new GMS project file contains a single module inside the modules folder called "CorelDRAW 12 Objects". This
default module is called "ThisMacroStorage". This module has a special purpose and should not be used for normal code.
Instead, code should be developed in a module, class module, or form.
CorelDRAW Graphics Suite 12 Programming Guide for VBA 16
Page 23
Visual Basic Editor Chapter 4
To create a new module
1 In the Project Explorer window, right-click anywhere on the project to which you want to add a module.
2 Click one of the following
Insert } Module - inserts a normal code module;
Insert } UserForm - inserts a new form (dialog);
Insert } Class Module - inserts a new class code module.
The new module will be placed in the project's folder for that type of module.
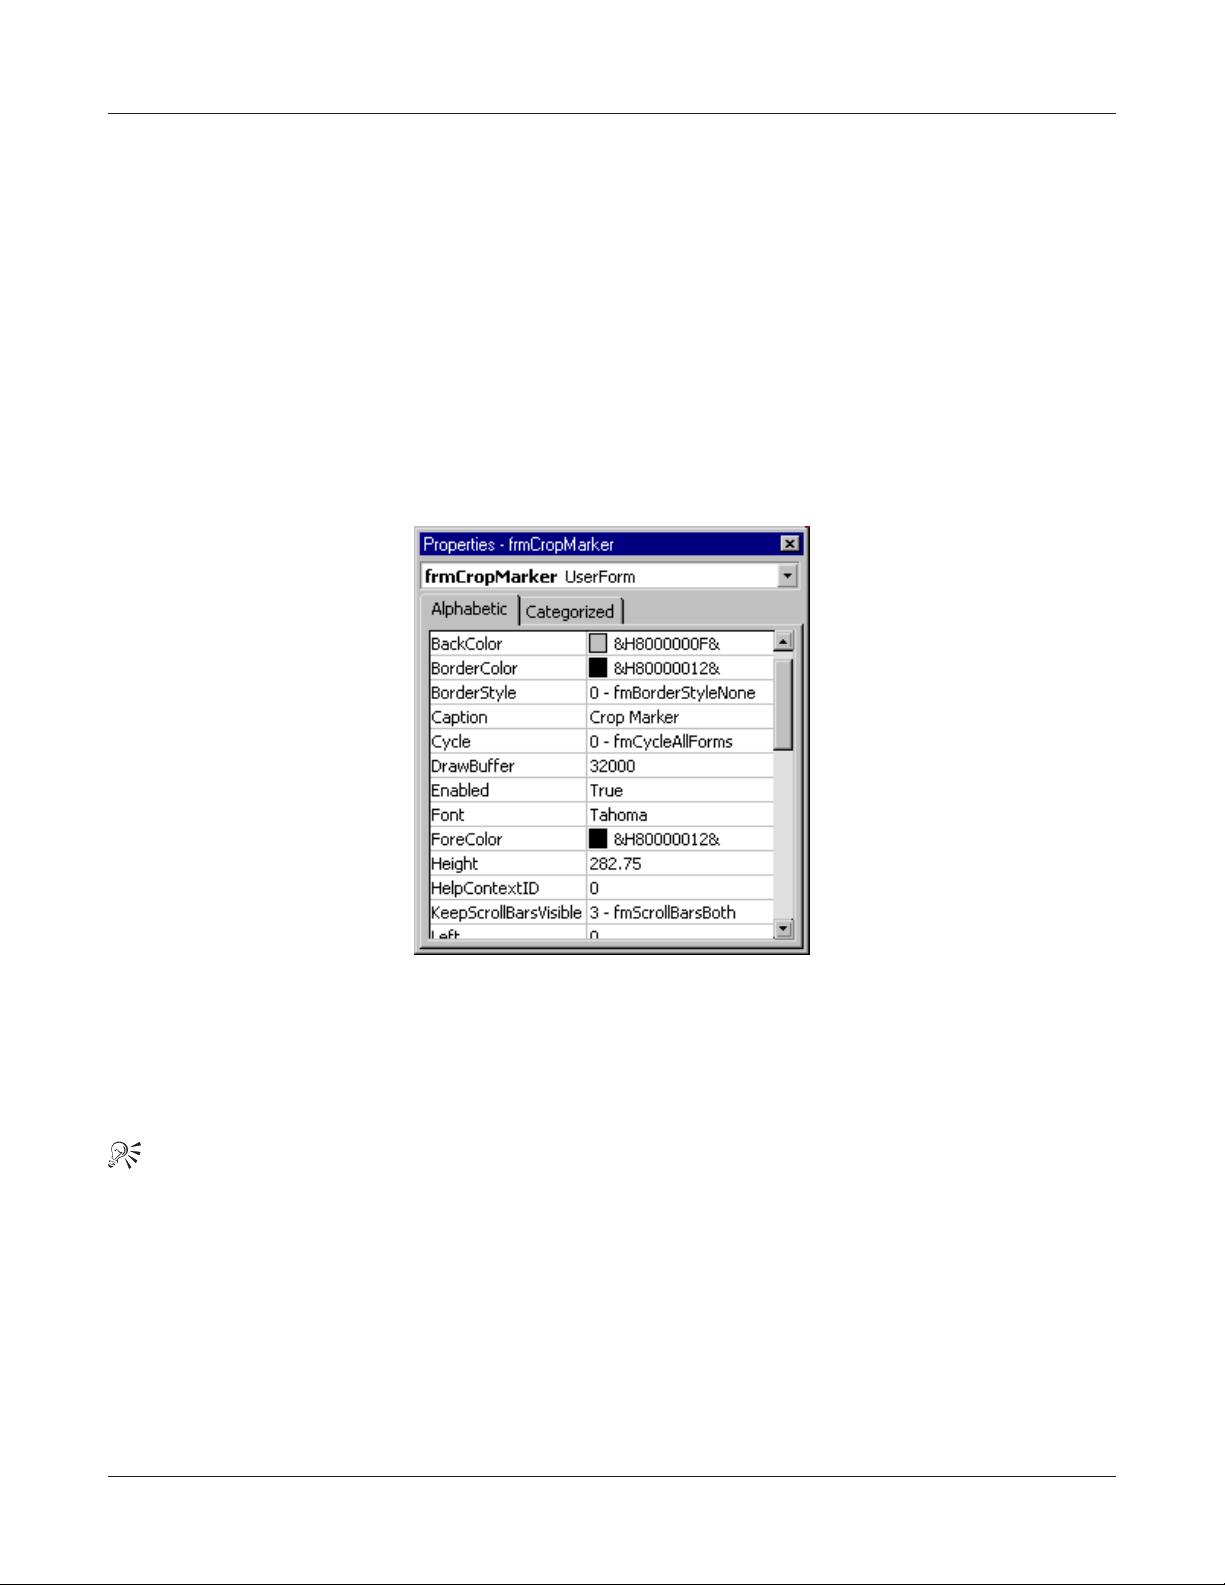
Properties Window
The Properties window lists all of the editable properties for the currently selected object. Many objects in VBA have
property sheets that can be modified, including projects, modules, and forms and their controls.
The Properties window, showing the properties of a form object
The Properties window updates itself automatically when you change which object is selected. The window is updated
automatically when you change properties of the selected object using other methods, for example, by using the mouse
to move and resize form controls.
To show the Properties window, click View } Properties Window, or press F4.
Code window
The Code window is where most of the work takes place. This is a standard code editor, in the style of Microsoft® Visual
Studioâ, which includes automatic formatting, syntax highlighting, automatic syntax checking, automatic completion,
CorelDRAW Graphics Suite 12 Programming Guide for VBA 17
Page 24

Visual Basic Editor Chapter 4
and more. If you are already familiar with any of the Microsoft Visual Studio editors, the VBA Code window will be
entirely familiar.
The VBA Code window
Automatic code formatting
The VB Editor does not allow code to be custom-formatted. Even the capitalization of keywords, functions, subroutines,
and variables is taken care of by the editor, irrespective of what you type.
The most formatting you can do is to decide how much indentation each line has, and where custom line breaks are
placed.
The one formatting issue that catches many developers off guard is calling functions and subs. The rules are:
If you are calling a function and you are using the returned value, the parentheses around the parameters are
mandatory, just as in most modern programming languages. For example:
a = fooFunc (b, c)
However, if the returned value from a function call is being thrown away, or if you are calling a sub, the parentheses
must be left out, unlike most other languages:
barFunc d, e
fooBarSub f
If you prefer to see the parentheses every time, use the Call keyword before the function or sub call:
Call barFunc (d, e)
Call fooBarSub (f)
Syntax highlighting
When you develop code in the Code window, the editor colorizes each word according to its classification: VBA
CorelDRAW Graphics Suite 12 Programming Guide for VBA 18
Page 25
Visual Basic Editor Chapter 4
keywords and programming statements are usually blue, comments are green, and all other text is black. This
colorization makes the code much easier to read.
Syntax highlighting and coloring
Lines of code containing errors are shown in red, selected text is white on blue, and the line where execution is paused for
debugging is shown as a yellow highlight.
If you set a breakpoint on a line of code for debugging purposes, a red dot is shown in the left margin with the code in
white on a red background. If you set bookmarks in the code so that you can find your place when you have to navigate
away from it, a blue dot will be placed in the left margin.
Both breakpoints and bookmarks are lost when you exit CorelDRAW.
You can modify the syntax highlighting colors by clicking Tools } Options, clicking the Editor Format tab,
and making your changes.
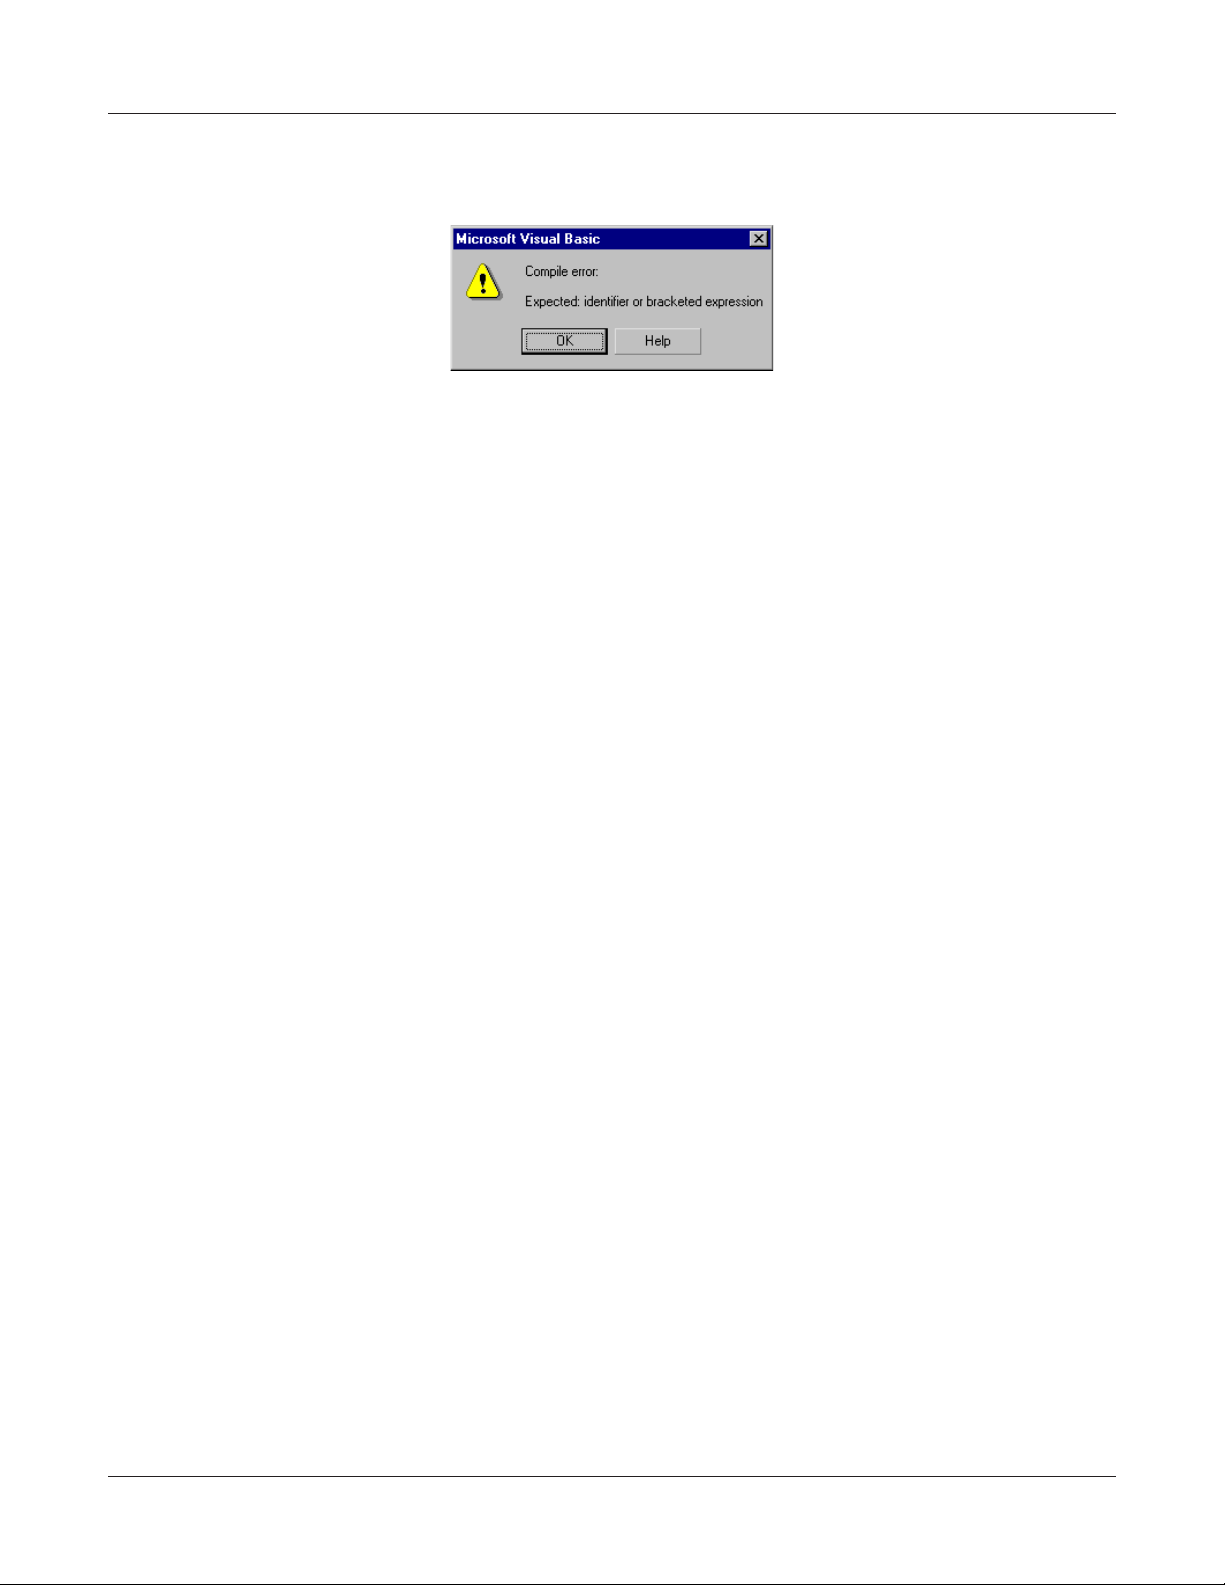
Automatic syntax checking
Every time you move the cursor out of a line of code, the editor checks the syntax of the code in the line you just left. If
there are any syntax errors, the editor changes the color of the text of that line to red and pops up a warning. This
CorelDRAW Graphics Suite 12 Programming Guide for VBA 19
Page 26
Visual Basic Editor Chapter 4
real-time checking can be very useful, particularly when you are learning VBA, since it indicates many possible errors in
the code without having to run the code.
A typical syntax error warning
However, the warning dialog can be quite intrusive for the more experiencedVBA developer. It is, therefore, nice to
know that this message can be suppressed by clicking Tools } Options, selecting the Editor tab, and clearing the Auto
Syntax Check check box.
The editor will still check the syntax and highlight erroneous lines in red, but it will stop popping up an intrusive dialog
each time you go to paste text from another line of code.
Jumping to variable, function, and object definitions
You can jump directly to the definition of a variable, function, or object merely by right-clicking on it in the Code
window and choosing Definition from the pop-up menu. This will either take you to the definition of the variable or
function in the code, or it will take you to the object's definition in the Object Browser window.
To return to the place where you requested the definition, right-click again, and click Last Position in the Code window.
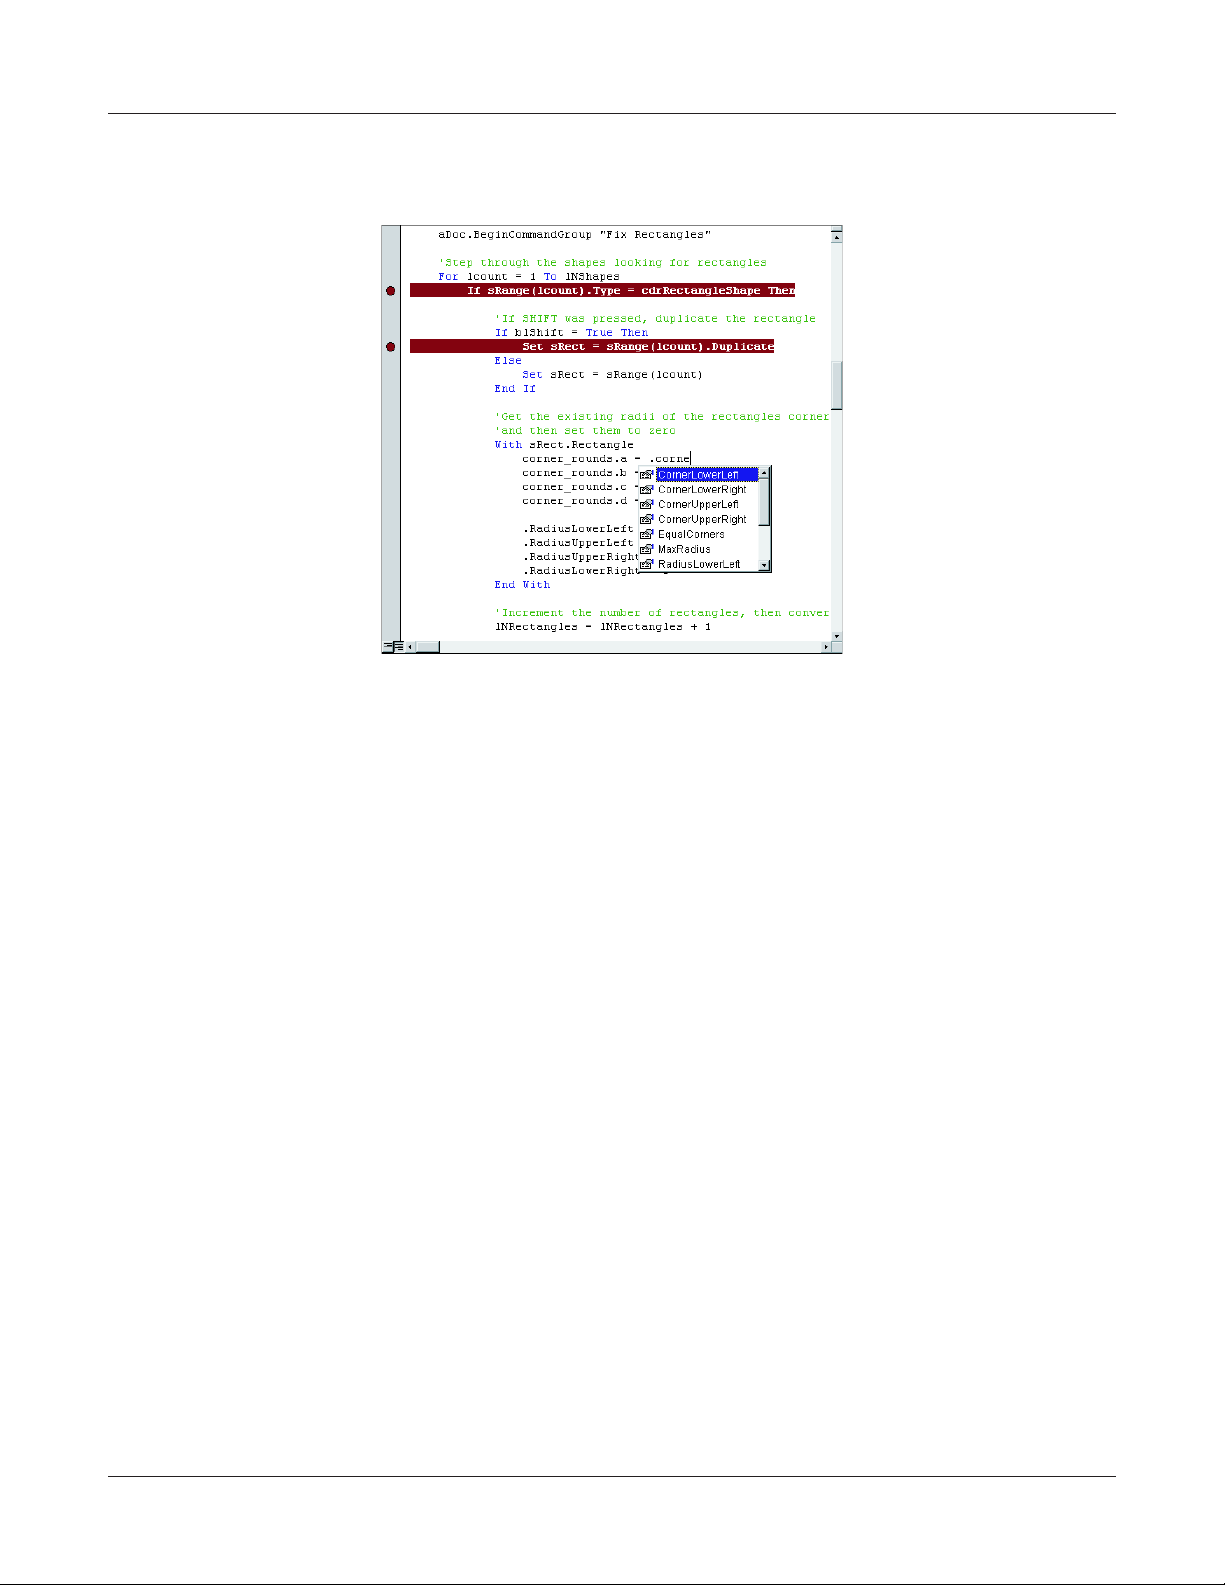
Contextual pop-up lists and automatic completion
As you write more functions and create more variables, the VB Editor adds these items to an internal list that already
contains all of its built-in keywords and enumerated values. Then, as you are typing, the editor often presents you with a
CorelDRAW Graphics Suite 12 Programming Guide for VBA 20
Page 27
Visual Basic Editor Chapter 4
list of candidate words that you may want to insert at the current position. This list is contextual, so the editor will
usually present only the words that are valid for this position.
Auto-completion pop-up menu
This list makes code development quicker and more convenient, particularly since you do not have to remember every
function and variable name, but can choose one from the list when you cannot remember it. You can help the menu find
the word you want by entering the first few characters of the word; the list will scroll to the nearest candidate that
matches the first few characters you entered.
Choose an item from the list and enter the character that will follow the word – typically a space, line feed, parenthesis,
period, or comma. The word is inserted with the character following. To insert without any additional characters, press
Ta b ,orCtrl+Enter, or click the word with the mouse.
To force this menu to pop up when occasionally it does not do so automatically, press Ctrl+Spacebar. The menu will
scroll to the word that most closely matches the characters that you have typed so far. This is also useful for filling
parameter lists when calling a function or subroutine. If there is only one exact match, the editor will insert the word
without popping up the list. To pop up the list at any time for the selected keyword without auto-filling it, press
Ctrl+J.
Form Designer window
The Form Designer window enables you to create custom dialog boxes for use in your solutions. Dialog boxes can be
modal, in which case the user must dismiss the dialog box before doing anything else in CorelDRAW, or they can be
modeless, in which case they are similar to the CorelDRAW docker.
CorelDRAW Graphics Suite 12 Programming Guide for VBA 21
Page 28

Visual Basic Editor Chapter 4
To create a new form, right-click within the project in the Project window, and click Insert } UserForm. This creates a
new, blank form.
A blank form in the Form Designer window
The form can be immediately tested by pressing F5 to run it – it's not very interesting, since the only control on the
form is the Close button in the upper-right corner of the title bar. Click the Close button to dismiss the form.
To change the title of the form, click the form to select it, and then in the Properties window, change the Caption
property. While you are there, it is a good idea to give the Form a unique, descriptive name, but remember that this
must follow the rules for naming variables in VBA.
Most forms have at least one button – an OK button – plus a Cancel button. To add buttons – or any other controls to
a form – drag the appropriate control from the toolbox to the form.
Form Designer toolbox
To add a button, use the CommandButton control. Click the form to add a default-sized button, or drag to create one
to your own specifications. Click the caption to edit it, or select the button and edit the Caption property in the
CorelDRAW Graphics Suite 12 Programming Guide for VBA 22
Page 29

Visual Basic Editor Chapter 4
Properties window. Also, change the name of the button to something more descriptive, like buttonOK or
buttonCancel.
Buttons in a Form Designer window
VBA form controls
The standard Toolbox controls include:
Static text – for captions and instructions
TextBox – for the user to type text into
ComboBox – a list box which the user can also type text into, although this can be disabled to provide a plain list box
ListBox – an open list in which multiple items may be selected, although the user cannot type into it
Checkbox – can be checked, unchecked, or grayed
OptionButton – several of these with the same GroupName property work, so that only one can be selected at a time
ToggleButton – a button that's either in or out
Frame – groups items together: items drawn on the frame move with the frame
CommandButton – the button is the most used of all the controls
TabStrip, MultiPage – useful for creating pages of options, or wizards
ScrollBar – provides immediate access to a range of values
SpinButton – works with another control, such as a TextBox, to provide immediate and fast control of the other
control's value
Image – add images to the form
Now, start the form by pressing F5. Try clicking the OK and Cancel buttons – nothing happens! This is because the
form does not have any code for handling the buttons' click events.
OK and Cancel buttons
VBA forms are event-driven. This means that they respond to events. Before they respond, you must write some
event-handling code. So, the Cancel button is the simplest control: it must just dismiss the form without doing anything
CorelDRAW Graphics Suite 12 Programming Guide for VBA 23
Page 30

Visual Basic Editor Chapter 4
else. Dismiss the dialog, if it is still running, with the Close button. Then double-click the Cancel button. This displays
the form's code in the Code window and creates a new Sub called
buttonCancel_Click:
The Code window with code for a Cancel button
Add the following code to the Sub:
Private Sub buttonCancel_Click()
Unload Me
End Sub
Re-run the form and click the Cancel button – the form is dismissed. While you are setting up the Cancel button, select
it in the Form and then set its Cancel property to
buttonCancel_Click event will be triggered and the above code will unload the Form.
True. Now, when the user presses Escape, the
Similarly, select the OK button and set its Default property to True – when the user presses Enter to activate the form,
the OK button's event handler will be called. The OK button's Click-event handler performs the form's functionality
and then it must unload the form. If the form is used to set the size of the selected shapes by setting their width and
height, the OK button's click-event handler may look as shown below. This code sample assumes you have already
created two text boxes called txtWidth and txtHeight.
Private Sub buttonOK_Click()
Me.Hide
Call SetSize(txtWidth.Text, txtHeight.Text)
Unload Me
End Sub
And the size-setting Sub might look like:
Private Sub SetSize(width As String, height As String)
ActiveDocument.Unit = cdrInch
ActiveSelection.SetSize CDbl(width), CDbl(height)
End Sub
From inside the Form's own code module, the Form object is implicit and so all the controls can be simply accessed by
name. From other modules, the controls must be accessed via their full name, which would be
UserForm1.buttonOK.
CorelDRAW Graphics Suite 12 Programming Guide for VBA 24
Page 31

Visual Basic Editor Chapter 4
When the form loads
The code to load a form is given in Chapter 7, "Creating user interfaces for macros". However, as the form is loading, it
triggers its own
UserForm_Initialize event. You should initialize all the controls on the form that need to be
initialized from this event handler.
TextBoxes
TextBoxes are the mainstay of user input. They are simple to use, quick to program, and very flexible.
To set the text in a TextBox when initializing it, set the TextBox's Text property, which is its default or implicit property:
txtWidth.Text = "3"
txtHeight = "1"
To get the value of the TextBox, get its Text property:
Call SetSize(txtWidth.Text, txtHeight.Text)
Combos and lists
In a ComboBox, the user can either choose an item from the list or type something into the textbox. The editing
functionality can be disabled by setting the ComboBox's
Style property to fmStyleDropDownList. List boxes, on
the other hand, are always open, typically displaying between three and ten items at once.
To populate a list of any type, you must call the list's member function
AddItem. This function takes two parameters,
the string or numerical value, and the position in the list. The position parameter is optional; leaving it off inserts the
item at the last position in the list. For example, the following code populates the list
ComboBox1.AddItem 1
ComboBox1.AddItem 2
ComboBox1.AddItem 3
ComboBox1.AddItem 0, 0
ComboBox1 with four items:
To test which item is selected when the OK button is clicked, test the list's ListIndex property. To get the value of a
selected item's caption, test the ComboBox or Listbox's
Dim retList As String
retList = ComboBox1.Text
Text property:
Using images
The Image control is used to place graphics on the form. The image, a bitmap, is contained in the Picture property –
you can either load an RGB image from a file, such as a GIF, JPEG, or Windows Bitmap BMP file, or you can paste one
into the property.
At run-time, new images can be loaded into the Image control by changing the
function
LoadPicture and providing a path to the new image file:
Image1.Picture = LoadPicture("C:\Images\NewImage.gif")
Picture property using the VBA
Other controls
To find out about the above controls in more detail, or about the other controls supported by VBA, draw one in a form
and then press F1 for the VBA Help.
Launching a form from a form
It is possible to launch other forms from the current form simply by using the form's Show member function:
CorelDRAW Graphics Suite 12 Programming Guide for VBA 25
Page 32

Visual Basic Editor Chapter 4
UserForm2.Show vbModal
You should note, though, that VBA will not return control until all open forms have been unloaded.
Object Browser window
The Object Browser is one of the most useful tools provided by the VB Editor. The Object Browser displays the entire
object model of all referenced components (all ActiveXâ or OLE objects that are used by the project) – most importantly,
it displays the object model of CorelDRAW in an easy-to-use, structured format.
To open the Object Browser window, click View } Object Browser.
The Object Browser window
CorelDRAW Graphics Suite 12 Programming Guide for VBA 26
Page 33

Visual Basic Editor Chapter 4
Back/Forward
Project/Library list
Search controls
Copy to Clipboard
View definition
Help on selected object
Object’s class list Class’s member list
Information window
The parts of the Object Browser window
To reference other applications' object models, click Tools } References. Referenced components can be ac
-
cessed by the VBA code.
Browsing an object model
All of the referenced objects – plus the current module – are listed in the Project/Library list box in the upper-left
corner of the Object Browser window. By default, all of the referenced objects' member classes are listed in the Class list.
It is easier to use the Object Browser when only one project or library is selected. Open the Project/Library list
and select "CorelDRAW". Only CorelDRAW classes will be listed.
CorelDRAW Graphics Suite 12 Programming Guide for VBA 27
Page 34

Visual Basic Editor Chapter 4
The Class and Member lists
The Class list shows all of the classes in the current project or library. The Member list shows all of the members of the
selected class.
When you select a class in the Class list, the members of that class are shown in the Member list.
The Class list
Every project or library – "object model" – has a number of member classes. The Class list gives an icon next to each
item in the list according to what type of class it is.
Class icon Type
Global values
Class
Enumerated types
Type
Module
Global values are values that are global within the selected project, and these include individual members from
enumerated types. Member classes of an object have their own members. Enumerated types define the global
enumerated types, such as text paragraph alignments, CorelDRAW shape types, and import/export filters.
The Member list
The Member list shows all of the properties, methods, and events that are members of the current class. Each member is
given an icon according to its type.
Member icon Type
Property, Implied/Default Property
Method
Event
Constant
CorelDRAW Graphics Suite 12 Programming Guide for VBA 28
Page 35

Visual Basic Editor Chapter 4
Properties and default properties
Property members may be simple types, such as Booleans, integers, or strings, or they may be a class or enumerated type
from the Class list. A property that is based on a class from the Class list then, obviously, inherits all the members of that
class.
Many classes have a "default" property; this property is indicated with a blue dot in its icon. The default property is
implied if no property name is given when getting or setting the value of the parent object. For example, collection types
have the default property "
Item", which can be indexed like an array. However, since "Item" is usually the default
property, in such instances it is not necessary to specify the item property. Here,
ActiveSelection.Shapes.Item(1).Selected = False
is the same as the shorter
ActiveSelection.Shapes(1).Selected = False
since "Item" is the default or implied property of a collection of shapes.
Methods and member functions
Methods are commonly known as "member functions" – these are the functions that the class can perform on itself. A
good example is the
Move method of the Shape class, which is used to move a CorelDRAW shape using an [x, y]
vector. The following code moves the currently selected shapes two measurement units to the right and three
measurement units upwards:
ActiveSelection.Move 2, 3
If the return value of a function is not used, the function call does not take parentheses around the argument
list, unless the
More information about
Call keyword is used.
ActiveSelection is provided in Chapter 6, "Using objects in CorelDRAW".
Events
Some classes have various events associated with them. By setting up an event handler for a class's event, when that
event occurs in CorelDRAW, the event's handler is called. This functionality enables sophisticated applications to be
developed that actually respond automatically to what is happening within CorelDRAW.
Commonly handled events include:
and
SelectionChange of the Document class.
Only the
AddinHook class is not discussed in this guide.
Document, GlobalMacroStorage, and AddinHook classes have events in CorelDRAW. The
BeforeClose, BeforePrint, BeforeSave, ShapeMove, PageActivate,
Constants
The only constants listed in the Member list are members of enumerated types and those defined as
Public in a
module. Enumerated types are used to group related items from a closed list, such as CorelDRAW shape types,
import/export filters, and alignments. These constants can be used anywhere an integer value is required.
CorelDRAW Graphics Suite 12 Programming Guide for VBA 29
Page 36

Visual Basic Editor Chapter 4
Most CorelDRAW constants begin with "cdr"; for example, cdrLeftAlignment, cdrEPS,
cdrOutlineBevelLineJoin, cdrCurveShape, cdrSymmetricalNode. Some constants may begin with
"prn" and "pdf". Visual Basic also has its own constants, including constants for keystrokes, such asvbKeyEnter,
and constants for dialog box buttons, such as vbOK.
The Information window
The Information window gives information about the selected class or class member. This information includes a
"prototype" of the member, its parent (i.e. "is a member of parent"), and a short description of the member. If the
member is a read-only property, the phrase "read-only" is given on the status line; otherwise, this line is not included.
The Information window
The types of any function parameters and properties are given as hyperlinks to the type definition or class itself, if the
type is defined within the current object model. For example, the
the CorelDRAW
Shape class; however, Outline is also the property's type, and it is a CorelDRAW class – to view the
Outline property in the preceding figure belongs to
class and its members, click the green word "Outline".
To get more detailed information about the selected class or member, click the Object Browser's Help button.
Sometimes the height of the Information window is not enough to see all of its contents. Drag the top border
of the window upwards to reveal its contents, or scroll down using the scrolls bars on the right.
Searching the object model
It is possible to search the object model for a matching string. This is useful for finding a class or member whose name
CorelDRAW Graphics Suite 12 Programming Guide for VBA 30
Page 37

Visual Basic Editor Chapter 4
you can only partly remember, or for finding classes and members that have similar names, such as names based on, or
containing, the word "open".
Searching an object model
To search an object model's classes and members, type a string into the search field and click the Search button. This will
open the Search results list, which displays all of the found matches, in alphabetical order. Clicking on one of the found
matches will cause the class and member lists to move to the item that was clicked, and the Information window will be
updated with this item's information.
To hide the search-results window, click the hide/show button.
Any matches of class names will have a blank member column in the Search results window.
Debugging
The VB Editor provides strong debugging facilities that are common across language editors. It is possible to set
breakpoints, to step through code, to make changes to the code while it is running, and to watch and change variables.
Some of these are advanced techniques that are not discussed in this guide.
Setting breakpoints
A breakpoint is a marker in the code that causes execution to pause at the line with the breakpoint until you either tell
the editor to continue execution, or step through the subsequent lines of code.
To set or clear a breakpoint on a line of code, put the cursor into the line and click Debug } Toggle Breakpoint.By
default, the line is highlighted in dark red and a red dot is placed in the margin. To clear all breakpoints, click Debug }
Clear All Breakpoints.
To restart the code when it pauses at a breakpoint, click Run } Continue. To pause execution of the code, immediately
exiting from all functions and discarding all return values, click Run } Reset.
It is also possible to "run to cursor"; that is, to execute the code until it reaches the line that the cursor is on, and then
pause at that line. To do this, place the cursor on the line where you want execution to pause, and click Debug } Run
To Cursor.
CorelDRAW Graphics Suite 12 Programming Guide for VBA 31
Page 38

Visual Basic Editor Chapter 4
If the line with the breakpoint (or cursor for Run To Cursor) is not executed because it is in a conditional
block (if-then-else block), the code will not stop at that line.
Breakpoints are not saved and are lost when you close the VB Editor.
Stepping through the code
When execution pauses at a breakpoint, it is possible to continue through the code one line at a time. This enables you
to examine the values of individual variables after each line and determine how the code affects the values and vice versa.
This is called "stepping through the code".
To step through the code, one line at a time, click Debug } Step Into. The execution will visit every line in all called
functions and subs.
To step through each line of the current sub or function, but not step through the lines of each called sub or function,
click Debug } Step Over. The called subs and functions are executed, but not line-by-line.
To execute the rest of the current sub or function, but pause when the sub or function returns to the point where it was
called, click Debug } Step Out. This is a quick way of returning to the point of entry of a function in order to continue
stepping through the calling function's code.
Debugging windows
There are several additional windows that are used while debugging code. These are the Call Stack window, the
Immediate window, the Locals window, and the Watches window. All of these windows provide important information
about the state of functions and variables while an application is running.
Call Stack window
The Call Stack window is a modal dialog box that lists which function called which function. This can be very useful in
long, complicated applications for tracing the steps to a particular function getting called. To visit a function listed in the
window, select the function name and click Show, or else click Close to close the window.
To display the Call Stack window, click View } Call Stack….
The Call Stack window
CorelDRAW Graphics Suite 12 Programming Guide for VBA 32
Page 39

Visual Basic Editor Chapter 4
Immediate window
The Immediate window allows you to type in and run arbitrary lines of code while a macro is paused. This is useful for
getting or setting the property of an object in the document, or for setting the value of a variable in the code. To run a
piece of code, type it into the Immediate window and press Enter. The code is executed immediately.
To display the Immediate window, click View } Immediate Window.
The Immediate window
Locals window
The Locals window displays all of the variables and objects that exist within the current scope. Each variable's type and
value are listed in the columns next to the variable's name. Some variables and objects may have several children, which
can be displayed by clicking the expand tree button next to the parent. The value of many variables can be changed by
clicking the value and editing it.
To display the Locals window, click View } Locals Window.
The Locals window
CorelDRAW Graphics Suite 12 Programming Guide for VBA 33
Page 40

Visual Basic Editor Chapter 4
Watches window
The Watches window is used to watch specific variables or object properties. This is very useful for selecting just one or
two values to watch as opposed to having to find the value you want in all the values in the Locals window.
The Watches window
To add a value to the Watches window, select the variable or object and its property and drag the selection onto the
Watches window, or click the item and choose Debug } Quick Watch… to add it straight into the Watches window.
The Add Watch dialog box
Select the item you want to watch, select any conditions for this watch, and click OK. If the condition becomes true, the
application will pause to allow you to examine the code.
CorelDRAW Graphics Suite 12 Programming Guide for VBA 34
Page 41

About objects and object models 5
VBA relies on an application's object model (OM) in order to communicate with that application and modify its
documents. HTML developers who use JavaScript will be familiar with a browser's "document object model", known as
the DOM. Without the DOM, it is impossible to access any part of the document and test it or change it using
JavaScript. It is exactly the same with VBA and CorelDRAW –– without the CorelDRAW OM, it is impossible for VBA
to query the document or to change it.
Understanding objects, properties, methods, and events
Anyone who is used to developing object-oriented code in C++, Borland Delphi, or Java will be immediately familiar
with the concept of an "object" (instance of a class), which has "properties" and "methods", and other objects that are its
"members". But for those who are not familiar with these concepts, here is a summary:
Objects –– An object is an instance of a class. A class is a description of something –– for example, the class "car" is a
small vehicle with an engine and four wheels. This simple description is the class. However, you still have to go out
and spend money to get an actual object in the class car; in other words, the car that you can drive is an instance of
the class car. In the context of CorelDRAW, each open document is an instance of the Document class, each page in
the document is an instance of the Page class, and each layer, and each shape on that layer, are more instances of more
classes.
Properties –– Most classes have properties. For example, the car class has the properties that it is small, it has an
engine, and it has four wheels. An instance of the class will also have properties such as color, speed, and number of
seats. Some properties are fixed by the design of the class; for example, the number of wheels and seats does not
(usually) change. These fixed properties are said to be read-only. However, other properties can be changed after the
object has been created –– the speed can go up and down, and, with a bit of help, the color can be changed. In the
context of CorelDRAW, Document objects have a name, a resolution, horizontal and vertical ruler units; individual
shapes have outline and fill properties, as well as position and rotation; and text objects have text properties, which
may include the text itself.
Methods –– A method is an operation that the object can perform on itself. For the example of the car class, the car
can make itself go faster and slower, so the methods would be "accelerate" and "decelerate". In the context of
CorelDRAW, documents have methods for creating new pages, layers have methods for creating new shapes, and
shapes have methods for applying transformations and effects.
But that's not all. It should also be obvious that one large object is often made from many smaller objects. A car contains
four objects of the class "wheel", two lights of the class "headlight", and so on. Each of these child objects has the same
properties and methods of its class-type –– a document object contains page objects, which contain layer objects, which
contain shape objects, some of which may contain other objects. This parent/child relationship of objects is important,
particularly when referencing an individual object, as will become clear later in this chapter.
Some classes may also "inherit" features from their parents –– for example, the Shape type has many subtypes, or
inherited types, including Rectangle, Ellipse, Curve, and Text. All of these subtypes can make use of the basic members
of the Shape type, including methods for moving and transforming the shape, and for setting its color. However, the
subtypes also have their own specialist members, such as a Rectangle can have corner radii, whereas Text has an
associated Font property.
The purpose and benefits of using an object model
Object models in software provide a high level of structure to the relationship between objects and their children. They
also allow object types or classes to be used repeatedly in different ways –– for example, a Shape object may be of type
group and may contain other Shape objects, some of which may also be of type group, or rectangle, or curve, or text.
This high level of organization and re-use makes the OM simple to use yet powerful. It is also easy to navigate around
the OM using VBA's Object Browser, which has already been described.
CorelDRAW Graphics Suite 12 Programming Guide for VBA 35
Page 42

About objects and object models Chapter 5
Remember, though, that the OM is the map that the VBA language uses to access the different members – objects,
methods, and properties – of a document, and to make changes to those members. It is not just a convenience, it is a
necessity! Without the object model, it is simply impossible to gain access to the objects in the document.
Object hierarchy
In any object model, each object is a child of another object, which is a child of another object. Also, each object has
child members of its own – properties, objects, and methods. All of this comprises an object hierarchy that is the object
model. In Web browsers, the root object of all the objects is the
Application object. In CorelDRAW, all objects are children or grandchildren of the application.
Navigator object; in CorelDRAW it is the
Dot notation
In order to "drill down" through the layers of hierarchy to get to the object or member that you want, it is necessary to
use a standard notation. In VBA, as in many object-oriented languages, this is a notation that uses the period,
"full-stop", or dot (".") to indicate that the object on the right is a member (or child) of the object on the left:
Application.Documents(1).Pages(1).Layers(1).Shapes(1).Name = "Bob"
It is not usually necessary to use the full hierarchical, or fully qualified, reference to an object or its properties. There are
several "shortcuts" that are described later in this chapter.
Creating references to objects using "Set"
If you want to create a reference to an object so that you can treat that reference as if it was any normal variable, use the
Set keyword:
Dim sh As Shape
Set sh = ActiveSelection.Shapes.Item(1)
After creating this reference, it can be treated as if it is the object itself:
sh.Outline.Color.GrayAssign 35
If the selection is changed while sh is still in scope, sh will reference the original shape from the old selection and is
unaffected by the new selection. Simply assigning the object to the variable is not good enough – the following code will
not work:
Dim sh As Shape
sh = ActiveSelection.Shapes.Item(1)
To release an object, set its reference value to Nothing:
Set sh = Nothing
It is also possible to test whether a variable references a valid object by using the Nothing keyword:
If sh Is Nothing Then MsgBox "sh is de-referenced."
Objects do not have to be explicitly released. In most cases, Visual Basic will release the object when it
disposes of the variable as you exit the Sub or Function.
CorelDRAW Graphics Suite 12 Programming Guide for VBA 36
Page 43

About objects and object models Chapter 5
Collections of objects
Many objects are members of collections of objects. A collection is similar to an array, except that it contains objects, not
values. Despite this, members of collections can be accessed in the same way as arrays. For example, a collection that is
used frequently in CorelDRAW is the collection of shapes on a layer: the object
current layer or the layer that is selected in the CorelDRAW Object Manager docker.
CorelDRAW contains many collections: a document contains pages, a page contains layers, a layer contains shapes, a
curve contains subpaths, a subpath contains segments and nodes, a text range contains lines and words, a group contains
shapes, the application contains windows. All of these collections are handled in the same way by VBA.
Item property
To reference the shapes on that layer, the layer's collection of shapes is used: ActiveLayer.Shapes. To reference the
individual shapes in the collection, the
Dim sh As Shape
Set sh = ActiveLayer.Shapes.Item(1)
Item() property is used:
Most elements of a collection start at 1 and increase. For the collection ActiveLayer.Shapes, Item(1) is the item
at the "top" or "front" of the layer; in other words, the one that is in front of all the other shapes.
ActiveLayer references either the
Each item in the above collection is an object of type
Shape, which means that you can reference the item's members
merely by appending the appropriate dot-notated member:
ActiveLayer.Shapes.Item(1).Outline.ConvertToObject
Sometimes individual items have names. If the item you are looking for has an associated name, and you know what the
name is and which collection the item is in, you can reference the item directly using its name:
Dim sh1 As Shape, sh2 As Shape
Set sh1 = ActiveLayer.CreateRectangle(0, 5, 7, 0)
sh1.Name = "myShape"
Set sh2 = ActiveLayer.Shapes.Item("myShape")
Also, since Item is usually the implied or default member of a collection, it is not strictly required, and the last line of the
above code can be rewritten as:
Set sh2 = ActiveLayer.Shapes("myShape")
Count property
All collections have a property called Count. This read-only property gives the number of members in the collection:
Dim count As Long
count = ActiveLayer.Shapes.Count
The returned value is not only the number of items in the collection, but since the collection starts from 1, it is also the
index of the last item.
Parsing members of a collection
It is often necessary to parse through the members of a collection to check or change the items' properties.
Using the
Item() and Count members, it is straightforward to step through a collection of items. With each iteration
it is possible to test the current item's properties, or call its methods. The following code restricts all shapes on the layer
to no wider than ten units.
CorelDRAW Graphics Suite 12 Programming Guide for VBA 37
Page 44

About objects and object models Chapter 5
Dim i As Long, count As Long
count = ActiveLayer.Shapes.Count
Fori=1tocount
If ActiveLayer.Shapes.Item(i).SizeWidth > 10 Then
ActiveLayer.Shapes.Item(i).SizeWidth = 10
End If
Next i
There is, though, a more convenient way of parsing a collection in VBA. Instead of using the Count property and a
For-Next loop, this technique uses a For-Each-In loop. The above code can be rewritten as:
Dim sh As Shape
For Each sh In ActiveLayer.Shapes
If sh.SizeWidth > 10 Then
sh.SizeWidth = 10
End If
Next sh
If you want to copy the selection and then parse it later when it is no longer selected, copy the selection into a
ShapeRange object:
Dim sr As ShapeRange
Dim sh As Shape
Set sr = ActiveSelectionRange
For Each sh In sr
' Do something with each shape
Next sh
Required and implicit objects
When referencing objects, some of the object-syntax in the fully qualified reference is mandatory or required. Other
syntax is optional and can either be included for clarity, or omitted for brevity – either by using a "shortcut", or because
the syntax is implicit, or implied. You have already been introduced to several CorelDRAW shortcut objects –
ActiveLayer, ActiveSelection – as well as to one of the most common implicit properties – Item.
A shortcut object is merely a syntactical replacement for the long-hand version. For example, the shortcut object
"ActiveLayer" replaces the long-hand version
"
Application.ActiveDocument.ActivePage.ActiveLayer"; the object shortcut "ActiveSelection"
replaces the long-hand version "
Application.ActiveDocument.Selection".
CorelDRAW Graphics Suite 12 Programming Guide for VBA 38
Page 45

Using objects in CorelDRAW 6
The VBA object model in CorelDRAW is in its third evolution since it first appeared in CorelDRAW 9. It grew
enormously from CorelDRAW 9 to CorelDRAW 10, and with the changes between 10 to 12, the object model is now
very mature and fully featured.
This chapter describes many ways of using the large number of objects in the CorelDRAW object model.
Working with basic objects
In CorelDRAW, the root object is the Application object and all objects stem from this one. There are, though,
several key, basic objects that encapsulate most of the other objects in the object model.
Application Object
The CorelDRAW Application object is the root object for all other objects. To reference the CorelDRAW object
model from an out-of-process controller, use its Application object. For example, in Visual Basic you would use:
Dim cdr As CorelDRAW.Application
Set cdr = CreateObject("CorelDRAW.Application.12")
Although you can use the above code inside VBA, there is no point in doing so within the VBA for CorelDRAW, since
the
Application object is used by default if no other root object is specified.
Application object contains all of the open Document objects, as well as all Window objects.
The
Document Structure
The Application object contains all the Document objects that are created when documents are opened in its
property
objects contain Layers collections containing all their Layer objects. Layer objects contain Shapes collections of all
their Shape objects. This is the basic structure of documents.
However,
these are discussed throughout the rest of this chapter.
Documents. Each Document object contains a collection, Pages, of all its Page objects. Individual Page
Document objects have many more features than just the shapes that you see in the editing window, and
The object model hierarchy
To view the CorelDRAW object model hierarchy, refer to the Object Model Diagram, which is installed at
Corel/CorelGraphics 12/Programs/CorelDRAW VBA Object Model.pdf.
Document objects
Whenever a CorelDRAW (CDR) file is opened, a new Document object is created in the Application object for that
document.
order of the documents in the collection is set to the order that the documents were created and opened.
Document objects have many member properties and methods, including methods for saving, closing, adding pages,
printing, exporting, and getting the selection. There are also properties that can be used to get or set the drawing
measurement units, rulers, reference point, the document's windows and views (including zoom factors), filename, grid,
and so on.
Application contains a collection, Documents, that provides access to all of the open documents. The
CorelDRAW Graphics Suite 12 Programming Guide for VBA 39
Page 46

Using objects in CorelDRAW Chapter 6
Useful document members
Document objects have many members – the full list of which can be browsed in the Object Browser. The most useful
ones are listed in the following table:
Document Member Description
Activate
ActiveLayer
ActivePage
AddPages
AddPagesEx
InsertPages
InsertPagesEx
Pages
BeginCommandGroup
EndCommandGroup
ClearSelection
Selection
SelectionRange
Close
Activates the given document, which brings it to the front of the pile in
CorelDRAW. ActiveDocument is set to reference it.
Represents the layer that is set as active in the CorelDRAW Object
Manager.
Represents the active page in the document; in other words, the one that
is being edited in CorelDRAW 12.
Adds pages to the end of a document.
Inserts pages in the document at a specified location.
Provides access to the pages collection.
Creates a "command group" – a series of actions which appear as a single
item on the Undo list.
Clears the document's selection; in other words, deselects all shapes in
the document.
Gets the selection as a Shape.
Gets the selection as a ShapeRange.
Closes the document.
Export
ExportEx
ExportBitmap
FileName
FilePath
FullFileName
GetUserArea
GetUserClick
PrintOut
PrintSettings
PublishToPDF
PDFSettings
Performs a simple export from the document.
Performs a highly configurable export from the document.
Performs an export to a bitmap with full control.
Gets the filename.
Gets the path to the file.
Gets the full path and filename of the document.
Allows the user to drag an area, or to give a single-click back to the
macro. Very useful for highly interactive macros.
Prints the document using the document's print settings.
Publishes the document to PDF format.
CorelDRAW Graphics Suite 12 Programming Guide for VBA 40
Page 47

Using objects in CorelDRAW Chapter 6
Document Member Description
ReferencePoint
Save
SaveAs
Unit
WorldScale
Gets/sets the reference point used by many shape functions, including
ones that transform the shape, functions for getting the shape's position,
and so on.
Saves the document using the current filename.
Saves the document to a new filename or with new settings.
Sets the document units used by functions that take a measurement
value, such as size- and position-related functions; this is independent of
the units that the rulers are set to use. Also gets/sets the drawing scale.
This changes the value in the document; however, it must be explicitly
calculated into functions that take a measurement value, which use 1:1
by default.
Some of these members are discussed in the following subsections and chapters.
Creating documents
The Application object has two methods for creating new documents:
Application.CreateDocument() As Document
Application.CreateDocumentFromTemplate(Template As String, _
[IncludeGraphics As Boolean = True])As Document
The first function creates a new, empty document based on the CorelDRAW default page size, orientation, and styles.
The second function creates a new, untitled document from a specified CorelDRAW .CDT template. The new document
becomes active immediately and
ActiveDocument will reference the new document, not the old one.
Both of these functions return a reference to the new document, and so are typically used in the following manner:
Dim newDoc as Document
Set newDoc = CreateDocument
The Document class does not have a method for creating an instance (object) of itself; only the
Application object can create documents.
The ActiveDocument property
The property ActiveDocument provides direct access to the document that is in front of all the other documents in
the CorelDRAW window.
members – properties, objects, and methods – as the
If there are no open documents,
If Documents.Count = 0 Then
MsgBox "There aren't any open documents.", vbOK, "No Docs"
Exit Sub
End If
ActiveDocument is an object of type Document and, therefore, has all of the same
Document class.
ActiveDocument returns Nothing. You should test for this with the following code:
CorelDRAW Graphics Suite 12 Programming Guide for VBA 41
Page 48

Using objects in CorelDRAW Chapter 6
Switching between documents
The Document class has a method, Activate, which activates the document and brings it to the front of all the open
documents in CorelDRAW. ActiveDocument will now reference the document that was activated. The following code
sample will activate the third open document, providing that three or more documents are open in CorelDRAW.
Documents(3).Activate
Using the Activate method on the ActiveDocument has no effect.
You can test the
FilePath – just the path of the file, for example C:\My Documents\.
FileName – just the name of the file, for example Graphic1.cdr.
FullFileName – the full path and name, C:\My Documents\Graphic1.cdr.
FilePath, FileName, and FullFileName properties of the document to activate the correct one:
You can test the name using the following code:
Public Function findDocument(filename As String) As Document
Dim doc As Document
For Each doc In Documents
If doc.FileName = filename Then Exit For
Set doc = Nothing
Next doc
Set findDocument = doc
End Function
You can then call the returned document's Activate method.
The documents in the
Documents collection are in the order that they were created and opened; the order
does not reflect the current stacking order of the documents within CorelDRAW. You must use Windows
collection to achieve this.
Changing content in active and inactive documents
You can modify content in inactive documents as easily as in the active document. For example, if you have a reference to
a document, you can add a new layer called "fooLayer" with the following code:
Dim doc As Document
Set doc = Documents(3)
doc.ActivePage.CreateLayer "fooLayer"
If you want to create the new layer in an inactive document whose name you know (in the following example it is
barDoc.cdr), you might use the following code, which calls the function
Dim doc As Document
Set doc = findDocument("barDoc.cdr")
If Not doc Is Nothing Then doc.ActivePage.CreateLayer "fooLayer"
Modifying content in an inactive document does not make that document active. To make the document
active, call its
Activate method.
CorelDRAW Graphics Suite 12 Programming Guide for VBA 42
findDocument() from the previous section:
Page 49

Using objects in CorelDRAW Chapter 6
Closing documents
To close a document, call its Close method:
ActiveDocument.Close
In the above code, the active document is closed and the document that was behind it in CorelDRAW becomes the new
active document. If the code closes a document that is not the active document, the document referenced by
ActiveDocument does not change.
In CorelDRAW 10, if the document was "dirty" and needed to be saved, invoking the
Close method
displayed the standard CorelDRAW message "Save changes to filename.cdr?" and execution paused until the
user selected an option. In CorelDRAW 11 and later, the document is closed without prompting the user to
save changes. In CorelDRAW 11 and later, you must explicitly test the document's
Dirty property and
take appropriate action if the document has changed.
Setting the undo string
Two very useful member functions of the Document object allow any number of programmed CorelDRAW actions to
appear as a single action on the undo list. These methods are
Dim sh As Shape
ActiveDocument.BeginCommandGroup "CreateCurveEllipse"
Set sh = ActiveLayer.CreateEllipse(0, 1, 1, 0)
sh.ConvertToCurves
ActiveDocument.EndCommandGroup
After running this code, the undo string on the Edit menu will say "Undo CreateCurveEllipse", and selecting undo will
not only undo the
ConvertToCurves operation, but also the CreateEllipse operation.
A command group can contain many hundreds of commands, if required. They make your macros appear as if they are
truly integrated into CorelDRAW.
BeginCommandGroup() and EndCommandGroup():
Page objects
All the pages in a document are members of the Document object's Pages collection. All of the layers within the
document are contained by the document's
document's
Layer objects.
The pages are given in the same order in the
Page objects. All of the shapes in the document are contained by the
Pages collection as they exist in the document, so that page number 5 in
the document is the same page as ActiveDocument.Pages.Item(5). If the pages are re-ordered in the Page Sorter
view, or if pages are added or deleted, the
Pages collection is immediately updated to reflect the new order of pages in
the document.
This section describes how to perform the most common actions with pages.
The ActivePage property
To access the active page of the active document, use Application.ActivePage,
ActiveDocument.ActivePage, or simply ActivePage. This returns a reference to the active page in the active
document, of type
CorelDRAW Graphics Suite 12 Programming Guide for VBA 43
Page:
Page 50

Using objects in CorelDRAW Chapter 6
Dim pg As Page
Set pg = ActivePage
To access the active page of any document, active or not, use the property Document.ActivePage of the given
document:
Public Function getDocsActivePage(doc As Document) As Page
Set getDocsActivePage = doc.ActivePage
End Function
Creating pages
The member function for creating pages is actually a member of the Document class, not of the Page class.
Document Member Description
Document.AddPages() Adds a given number of pages at the default size to the end of the
document.
Document.AddPagesEx() Adds a given number of pages at the given size to the end of the
document.
Document.InsertPages() Inserts pages at the default size at a given position within the
document.
Document.InsertPagesEx() Inserts pages at the given size at a given position within the
document.
Examples of the first two functions are given below: the first function adds three default-sized pages to the end of the
document, the second function adds three US-letter-sized pages to the end of the document:
Public Function AddSomeSimplePages() as Page
Set AddSomeSimplePages = ActiveDocument.AddPages(3)
End Function
Public Function AddSomeSpecifiedPages() as Page
Dim doc as Document
Set doc = ActiveDocument
doc.Unit = cdrInch
Set AddSomeSpecifiedPages = doc.AddPagesEx(3, 8.5, 11)
End Function
Both member functions return the first page that was added: since you know the first page and the number of pages
created, it is possible to access all the created pages, since all of the other created pages will be the pages after the
returned page in the document's
You can use the returned page's
Pages collection.
Index property to find the right place in the Pages collection, and then you can
increment that to visit the subsequent pages that were added:
Dim firstNewPage As Page, secondNewPage As Page
Set firstNewPage = AddSomeSimplePages
Set secondNewPage = ActiveDocument.Pages(firstNewPage.Index + 1)
CorelDRAW Graphics Suite 12 Programming Guide for VBA 44
Page 51

Using objects in CorelDRAW Chapter 6
If you want to use one of the standard page sizes, see the section "Resizing Pages", later in this chapter.
Deleting pages
Pages can be deleted by calling each page's Delete member function:
ActivePage.Delete
This will delete all of the shapes that exist on that page and will delete the page from the document's Pages collection.
The collection will be immediately updated to reflect the change.
Delete must be called individually for each page you
wish to delete.
You cannot delete all of the pages in a document. An error will occur if you try to delete the last remaining page from
the document. To test for this condition, use the following code:
If ActiveDocument.Pages.Count > 1 Then ActivePage.Delete
Switching between pages
To switch between pages, find the page you want to make visible or active and then invoke its Activate member
function. The following code activates the third page in a CorelDRAW document:
ActiveDocument.Pages(3).Activate
It is not necessary to activate a page to make changes to it. By explicitly referencing the page you want to make changes
to, you can make those changes without having the page active. The following code deletes all of the shapes on page
three of the active document without activating that page:
Public Sub DeleteShapesFromPage3()
Dim doc As Document
Set doc = ActiveDocument
doc.Pages(3).Shapes.All.Delete
End Sub
Activating a page in an inactive document does not activate that document. Use the
Document.Activate method to activate the document.
Reordering pages
Individual pages can be moved around within the document using the MoveTo member function of each of the pages.
The following code moves page two to the position of page four:
ActiveDocument.Pages(2).MoveTo 4
Activating a page in an inactive document does not activate that document. Use the
Document.Activate method to activate the document.
CorelDRAW Graphics Suite 12 Programming Guide for VBA 45
Page 52

Using objects in CorelDRAW Chapter 6
Resizing pages
This section describes how to resize pages, and how to set the orientation. It also describes how to use the built-in page
sizes.
Resizing pages and setting their orientation
Pages can be individually resized using the SetSize member function of the Page class. This function takes two size
values, width and height, and applies them to the page. The following code changes the size of the active page in the
active document to A4:
ActiveDocument.Unit = cdrMillimeter
ActivePage.SetSize 210, 297
ActivePage.Orientation = cdrLandscape
For the SetSize method, the first number is always the page width and the second number is always the
page height. Reversing the two numbers will cause CorelDRAW to switch the page's orientation.
Setting the default page size
To set the default page size for the document, set the value of the item in the document's Pages collection with index
zero:
Dim doc As Document
Set doc = ActiveDocument
doc.Unit = cdrMillimeter
doc.Pages(0).SetSize 297, 210
Or you may use a shortcut property MasterPage of the Document object:
Dim doc As Document
Set doc = ActiveDocument
doc.Unit = cdrMillimeter
doc.MasterPage.SetSize 297, 210
Using the defined page sizes
All of the page sizes that are defined by CorelDRAW, or custom defined by users, are stored in the PageSizes
collection of the Application class. You can get all of the names of the page sizes by parsing this collection and
getting each
PageSize object's Name property:
Dim pageSizeName As String
pageSizeName = Application.PageSizes(3).Name
Page sizes can be specified using their name; for example, the following code gets thePageSize called "Business Card":
Dim thisSize As PageSize
Set thisSize = Application.PageSizes("Business Card")
You can get the actual dimensions of each PageSize object using the Width and Height properties. The following
code retrieves the third
PageSize's width and height in millimeters:
CorelDRAW Graphics Suite 12 Programming Guide for VBA 46
Page 53

Using objects in CorelDRAW Chapter 6
Dim pageWidth As Double, pageHeight As Double
Application.Unit = cdrMillimeter
pageWidth = Application.PageSizes(3).Width
pageHeight = Application.PageSizes(3).Height
PageSize
PageSize is user-defined or not, test its BuiltIn Boolean property:
objects have a Delete member function; this can only be used on user-defined page sizes. To test whether a
Public Sub deletePageSize(thisSize As PageSize)
If Not thisSize.BuiltIn Then thisSize.Delete
End Sub
If you need the page size in a particular unit of measurement, always set the document's units before getting
the width and height.
Layer objects
In CorelDRAW, all visible shapes are held on layers within each page. Although one layer can have different properties
on each page, all pages have the same layers and all those layers have the same names on each page.
If you want to create new shapes in CorelDRAW using VBA, you must use the shape-creation member functions of the
Layer class; these functions are described in the next section, "Shape Objects".
This section describes how to manipulate layers in CorelDRAW using VBA.
Creating layers
To create a new layer, use the Page class's CreateLayer member function. The following code creates a new layer
called "My New Layer":
ActivePage.CreateLayer "My New Layer"
The new layer is always created at the top of the list of non-master layers.
Moving and renaming layers
Layers can be re-ordered with VBA. The Layer class has two member functions: MoveAbove and MoveBelow. Both
methods take a
moves the layer called "Layer 1" to below the layer "Guides":
Dim pageLayers As Layers
Set pageLayers = ActivePage.Layers
pageLayers("Layer 1").MoveBelow pageLayers("Guides")
The change is immediately reflected in the Object Manager in CorelDRAW (sometimes the effects are only apparent
when in Layer Manager view). The layer "Layer 1" is moved so that it is immediately below or behind the layer "Guides".
Layers can be renamed by editing the
ActivePage.Layers("Layer 1").Name = "Layer with a New Name"
Layer object as the only parameter – the layer is moved above or below this layer. The following code
Name property of the layer. The following code renames "Layer 1":
CorelDRAW Graphics Suite 12 Programming Guide for VBA 47
Page 54

Using objects in CorelDRAW Chapter 6
Deleting layers
Layers can be deleted by calling the Layer class's Delete function. The Layers collection can only be accessed from
the
Page object.
Calling the
Delete function removes the layer completely from the document, deleting all of the shapes on that layer
on all of the pages in the document. The following code removes the layer called "Layer 1":
ActivePage.Layers("Layer 1").Delete
Setting a layer as active
To set a layer as active, call that layer's Activate member function:
ActivePage.Layers("Layer 1").Activate
This makes the layer active, but does not enable the layer or make it visible if it is already disabled or hidden.
Disabling and hiding layers
Layer objects have the properties Enabled and Visible that control whether you can edit the layer and whether its
contents (shapes) are visible in CorelDRAW. Both properties are Boolean. By setting them to True, the layers become
visible and can be edited. By setting either to False, the layer cannot be edited. For example, the following code disables
the layer on the active page, but makes its contents visible:
ActivePage.Layers("Layer 1").Visible = True
ActivePage.Layers("Layer 1").Editable = False
The result of any changes to these properties are immediately displayed in the Object Manager docker in CorelDRAW.
Layers can have different settings on different pages by specifying a page from the
the
ActivePage. The above code affects only the active page. To make the changes to all of the pages in the
document, use the property
MasterPage of the Document:
Pages collection, or by referencing
ActiveDocument.MasterPage.Layers("Layer 1").Visible = True
Shape objects
Objects of type Shape are the actual shapes that exist in the CorelDRAW document. If you change a shape's properties
in the document, such as by moving the shape, changing its size, or giving it a new fill, these changes are immediately
visible to the VBA Object Model.
Shape objects exist as members of Layer objects. Each Layer object contains a collection, Shapes, which contains all
of the shapes on the layer. The first item of this collection is the shape at the top of the layer (in other words, the one
that is above all the others), and the last item is the shape at the bottom; if you reorder the shapes on the page, the
collection is updated to reflect the change.
Each
Page object in the document also has a collection, Shapes, which is the total collection of all the Shapes
collections on all the layers on the page (including any master layers). The first shape in the collection is the shape at the
very top of the page, and the last shape is the shape at the bottom.
Shape object has a property Type that returns the shape's subtype or, in other words, what type of shape it is
Each
(rectangle, ellipse, curve, text, group, and so on). This is a read-only property. Since some types of shapes have member
functions and properties that others do not, it is often necessary to have to test the shape's type before calling a method
that might not be there. To test for a shape's type, use the following code:
CorelDRAW Graphics Suite 12 Programming Guide for VBA 48
Page 55

Using objects in CorelDRAW Chapter 6
Dim sh As Shape
Set sh = ActiveShape
If sh.Type = cdrTextShape Then
If sh.Text.IsArtisticText = True Then
sh.Rotate 10
End If
End If
The above code tests the shape's type. If it is text, it tests whether it is artistic or paragraph text. If it is artistic text, it
rotates it through 10°.
Selections and selecting shapes
To see if a Shape is selected or not, test its Selected Boolean property:
Dim sh As Shape
Set sh = ActivePage.Shapes(1)
If sh.Selected = False Then sh.CreateSelection
You can add a Shape to the selection simply by setting its Selected property to True – this selects the shape without
deselecting all the other shapes. To select just one shape without any other shapes, use the
as in the above code.
CreateSelection method,
To deselect all the shapes, call the document's
ActiveDocument.ClearSelection
ClearSelection method:
To select all the shapes on the page or layer, use the following code:
ActivePage.Shapes.All.CreateSelection
This calls the CreateSelection of the ShapeRange object, which is returned by the All member function of the
Shapes collection on the active page. Only those shapes on locked or hidden layers will not be selected.
Creating shapes
Shape objects represent the actual shapes in the CorelDRAW document that you create using the CorelDRAW drawing
tools. There are quite a few different shapes that can be created, the most common being rectangles, ellipses, curves, text
(artistic and paragraph), and groups.
Since each
Page, the methods for creating new shapes belong to the Layer class, and they all begin with "Create…".
Creating rectangles
There are two functions for creating new rectangle shapes: CreateRectangle and CreateRectangle2; both
functions return a reference to the new
For example, the following code creates a simple two-by-one-inch rectangle positioned six inches up from the bottom
and three inches in from the left of the page:
Shape object is a member of the Shapes collection, which is a member of one of the Layer objects on the
Shape object. The two functions differ only in the parameters that they take.
Dim sh As Shape
ActiveDocument.Unit = cdrInch
Set sh = ActiveLayer.CreateRectangle(3, 7, 6, 5)
The parameters are given as top, left, bottom, right. Each one is in the document's units, so it is prudent to explicitly set
this before creating the rectangle.
CorelDRAW Graphics Suite 12 Programming Guide for VBA 49
Page 56

Using objects in CorelDRAW Chapter 6
The alternative method, CreateRectangle2, creates the rectangle by specifying the coordinates of its lower-left
corner and its width and height. The following code creates the same rectangle as above:
Dim sh As Shape
ActiveDocument.Unit = cdrInch
Set sh = ActiveLayer.CreateRectangle2(3, 6, 2, 1)
The alternative methods are provided to make it simpler to develop solutions; they both provide identical functionality.
Rounding the corners of rectangles
Round-cornered rectangles can also be created using the
CreateRectangle and CreateRectangle2 methods:
both functions have four optional parameters that set the roundness of the corners when the rectangle is created.
However, these values have slightly different meanings for the two functions.
The four optional parameters of the method
CreateRectangle take integer values in the range 0 to 100 (zero being
the default). These values define the radius of the four corners as a whole-number percentage of half the shortest side
length. The following code re-creates the two-by-one-inch rectangle from earlier, but the four corner radii are set to
100%, 75%, 50%, and 0% of half the shortest side; in other words, the radii will be 0.5 inches, 0.375 inches, 0.25
inches, and a cusp:
Dim sh As Shape
ActiveDocument.Unit = cdrInch
Set sh = ActiveLayer.CreateRectangle(3, 7, 6, 5, 100, 75, 50, 0)
The four parameters define the radii of the corners in the order upper-left, upper-right, lower-left, lower-right.
The method
CreateRectangle2 defines the corner radii in exactly the same order, except that it takes double
(floating-point) values that are the radius measurements in the document's units. The following code creates the same
rectangle with the same corners as above:
Dim sh As Shape
ActiveDocument.Unit = cdrInch
ActiveDocument.ReferencePoint = cdrBottomLeft
Set sh = ActiveLayer.CreateRectangle2(3, 6, 2, 1, _
0.5, 0.375, 0.25, 0)
You must limit the radii passed to the method CreateRectangle2 to less than half the shorter dimension
of the rectangle; otherwise an error will occur.
Creating ellipses
There are two methods for creating ellipses: CreateEllipse and CreateEllipse2. They differ in the parameters
that they take, making it simpler to create ellipses, whether you want to create one based on its bounding box, or on its
center point and radius. Both functions also create arcs or partial ellipses, or segments or pie slices.
CreateEllipse method
CreateEllipse method takes four parameters that define its bounding box in the same way as for
The
CreateRectangle, in other words, left, top, right, bottom, in the document's units. The following code creates a
50millimeter circle:
CorelDRAW Graphics Suite 12 Programming Guide for VBA 50
Page 57

Using objects in CorelDRAW Chapter 6
Dim sh As Shape
ActiveDocument.Unit = cdrMillimeter
Set sh = ActiveLayer.CreateEllipse(75, 150, 125, 100)
To create an arc or a segment, three additional parameters are required – start angle, end angle, and a Boolean value that
defines whether it is an arc (False) or a segment (True). Angles are measured with zero being horizontally right on the
page and positive values being degrees from zero moving counterclockwise. The arc or pie is drawn from the start angle
to the end angle. The following code creates a letter "C" shape:
Dim sh As Shape
ActiveDocument.Unit = cdrMillimeter
Set sh = ActiveLayer.CreateEllipse(75, 150, 125, 100, _
60, 290, False)
CreateEllipse2 method
The CreateEllipse2 method creates ellipses based on their center points, and horizontal and vertical radii (if only one
radius is given, a circle is created). The following code creates the same 50 millimeter circle as in the preceding section:
Dim sh As Shape
ActiveDocument.Unit = cdrMillimeter
Set sh = ActiveLayer.CreateEllipse2(100, 125, 25)
To create an ellipse, give a second radius (the first radius is the horizontal radius, the second is the vertical radius):
Dim sh As Shape
ActiveDocument.Unit = cdrMillimeter
Set sh = ActiveLayer.CreateEllipse2(100, 125, 50, 25)
To create an arc or a segment, use the same additional parameters as for the CreateEllipse method.
Creating curves
Curves are made from several other objects: each Curve has one or more SubPath member objects; each SubPath has
one or more
Segment objects; each Segment has two Node objects as well as two control-point position/angle
properties.
To create a curve shape in CorelDRAW:
1 Create a new curve object using the
2 Create a new
Node of the curve.
SubPath inside the Curve object using the CreateSubPath member function – this creates the first
3 Append a new line- or curve-type
AppendCurveSegment member functions – this adds another Node as well as setting the positions of the control
handles for that
Segment. Repeat this as often as required to build up the Curve.
4 Create the curve shape on the
You can add additional
SubPaths to the Curve and build those up with their own Nodes. You can also close a Curve
CreateCurve method of the Application object.
Segment to the SubPath using the AppendLineSegment and
Layer using the CreateCurve member function.
by setting its Closed property to True.
The following code creates a D-shaped closed curve:
CorelDRAW Graphics Suite 12 Programming Guide for VBA 51
Page 58

Using objects in CorelDRAW Chapter 6
Dim sh As Shape, spath As SubPath, crv As Curve
ActiveDocument.Unit = cdrCentimeter
Set crv = Application.CreateCurve(ActiveDocument) 'Create Curve object
Set spath = crv.CreateSubPath(6, 6) ' Create a SubPath
spath.AppendLineSegment 6, 3 ' Add the short vertical segment
spath.AppendCurveSegment 3, 0, 2, 270, 2, 0 ' Lower curve
spath.AppendLineSegment 0, 0 ' Bottom straight edge
spath.AppendLineSegment 0, 9 ' Left straight edge
spath.AppendLineSegment 3, 9 ' Top straight edge
spath.AppendCurveSegment 6, 6, 2, 0, 2, 90 ' Upper curve
spath.Closed = True ' Close the curve
Set sh = ActiveLayer.CreateCurve(crv) ' Create curve shape
The AppendLineSegment method requires only a single node position for the end of the segment. However, the
AppendCurveSegment method requires one Cartesian coordinate and two polar coordinates: the Cartesian coordinate
is for the end node; the polar coordinates are for the two control handles where the first parameter is the length of the
handle and the second parameter is the control handle's angle. Alternatively, you can use the
AppendCurveSegment2
method which allows you to specify the coordinates of both control handles.
Layer class has three additional member functions for creating curve objects: CreateLineSegment,
The
CreateCurveSegment, and CreateCurveSegment2. These functions are shortcuts for creating a Curve shape
along with its first
Segment on the first SubPath, all in a single function.
The new
causes the
Segments are appended to the last Node of the SubPath. There is an optional parameter that
Segment to be appended to the first Node of the SubPath.
Text objects
Text objects are another type of Shape object. However, handling text is more complicated than handling other shapes.
In CorelDRAW 12, text is manipulated as a
of
Shape.Text:
Frames collection –– each TextFrame's default member is a TextRange which is the text within the frame
Story –– this is a TextRange containing all the text in all of the frames linked to the current Shape on all pages
in the document
The text in a
TextRange can be manipulated as a single block of text, and its properties, such as font, size, and style,
can be set for all the text in one go. Alternatively, the
text ranges:
Columns, Paragraphs, Lines, Words, and Characters.
Creating artistic text
To create a new artistic text shape, use the member function CreateArtisticText of the Layer object. The
following code creates an artistic text shape, with the left end of the line at one inch and the baseline at four inches from
the origin, with the words "Hello World":
Dim sh As Shape
ActiveDocument.Unit = cdrInch
Set sh = ActiveLayer.CreateArtisticText(1, 4, "Hello World")
TextRange. Text ranges can be accessed via any of the following properties
TextRange has several properties that are collections of smaller
There are many optional parameters to this function for setting italic, bold, size, alignment, and so on.
CorelDRAW Graphics Suite 12 Programming Guide for VBA 52
Page 59

Using objects in CorelDRAW Chapter 6
Creating paragraph text
To create a new paragraph text shape, use the member function CreateParagraphText of the Layer object.
Paragraph text differs from artistic text in that it flows within a rectangular container, rather than being as wide as it
needs to be before reaching a line feed. The first four parameters of the function are left, top, right, bottom:
Dim sh As Shape
ActiveDocument.Unit = cdrInch
Set sh = ActiveLayer.CreateParagraphText(1, 4, 5, 2, "Hi There", _
Alignment := cdrCenterAlignment)
Formatting text
To format text, first get a reference to a TextRange and then apply the formatting. Frames, columns, paragraphs, lines,
and the story can all be used to get a reference to a
TextRange. The following code formats the first paragraph of the
story into a heading style and the second and third paragraphs into a body-text style:
Dim txt As TextRange
' Format the first paragraph
Set txt = ActiveShape.Text.Story.Paragraphs(1)
txt.ChangeCase cdrTextUpperCase
txt.Font = "Verdana"
txt.Size = 18
txt.Bold = True
' Format the second and third paragraphs
Set txt = ActiveShape.Text.Story.Paragraphs(2, 2)
txt.Font = "Times New Roman"
txt.Size = 12
txt.Style = cdrNormalFontStyle
All of the formatting options from the Format Text dialog box in CorelDRAW can be applied programmatically with
VBA. See the
Text object in VBA's Object Browser for more information.
Fitting text to a path
The Text object has a member function FitTextToPath, which simply attaches a text object to the outline of a
shape, so that the text flows along the path. The following code creates a new text object and attaches it to the selected
shape:
Dim sh As Shape, sPath As Shape
ActiveDocument.Unit = cdrInch
Set sPath = ActiveShape
Set sh = ActiveLayer.CreateArtisticText(1, 4, "Hello World")
sh.Text.FitTextToPath sPath
Fitting text to a shape
Paragraph text shapes can be flowed inside closed shapes to form non-rectangular frames. This is done by placing the
Text object inside the Shape object using the member function PlaceTextInside of the Shape object. Given that
a text shape – artistic or paragraph – is selected in CorelDRAW, the following code creates a 5×2-inch ellipse and places
the selected text inside it:
Dim txt As Shape, sh As Shape
ActiveDocument.Unit = cdrInch
Set txt = ActiveShape
Set sh = ActiveLayer.CreateEllipse(0, 2, 5, 0)
sh.PlaceTextInside txt
CorelDRAW Graphics Suite 12 Programming Guide for VBA 53
Page 60

Using objects in CorelDRAW Chapter 6
Changing the properties of shapes
Now that you have created new shapes with VBA, you will want to modify those shapes by changing the size, position,
rotation, and colors of the shapes.
Size
To get the width or height of a Shape, test its SizeWidth or SizeHeight properties:
Dim width As Double, height As Double
ActiveDocument.Unit = cdrMillimeter
width = ActiveShape.SizeWidth
height = ActiveShape.SizeHeight
The returned Double value depends on the setting of ActiveDocument.Unit, so if you need the size in a specific
unit, set it first. The same applies for all of the size properties and methods in the object model.
To get the width and height in a single command, use the member function
Dim width As Double, height As Double
ActiveDocument.Unit = cdrMillimeter
ActiveShape.GetSize width, height
GetSize:
To set the size of a Shape, set its SizeWidth or SizeHeight properties to the new values. The following code sets
the size of the active shape to 50 × 70mm:
ActiveDocument.Unit = cdrMillimeter
ActiveShape.SizeWidth = 50
ActiveShape.SizeHeight = 70
Alternatively, use the SetSize method, which sets both in one call:
ActiveDocument.Unit = cdrMillimeter
ActiveShape.SetSize 50, 70
There is an additional method for setting the shape size, which is SetSizeEx. This method takes a center point in
addition to the width and height – the resize operation will be done relative to this point, as opposed to using the shape's
own center point. For example, the following code resizes the selection to 10 × 8 inches about the point (6, 5) in the
document:
ActiveDocument.Unit = cdrInch
ActiveSelection.SetSizeEx 6, 5, 10, 8
The object ActiveSelection refers to a Shape object that contains all of the selected shapes in the
document.
All of the preceding code refers to the object's size in terms of its vector curves and ignores the fact that any shape with
an outline may actually extend beyond the rectangle containing the curves. There is one method that can be used to get
the size of the bounding box of the shape, with the option of including the widths of any outlines. This method is
GetBoundingBox:
CorelDRAW Graphics Suite 12 Programming Guide for VBA 54
Page 61

Using objects in CorelDRAW Chapter 6
Dim width As Double, height As Double
Dim posX As Double, posY As Double
ActiveDocument.Unit = cdrInch
ActiveDocument.ReferencePoint = cdrBottomLeft
ActiveShape.GetBoundingBox posX, posY, width, height, True
The method's main use is to get the shape's bounding box, including the position of its lower-left corner. The final
parameter is a Boolean value that indicates whether to return the bounding box of the shape including its outline (
or not including its outline (
parameter for doing so in relation to its bounding box, although by using
False). The method for setting the shape's bounding box does not include the necessary
GetBoundingBox twice (once including the
True),
outline and a second time excluding the outline) it is possible to calculate the size and position of the bounding box of
the vector, not including the outline:
Public Sub SetBoundingBoxEx(X As Double, Y As Double, _
Width As Double, Height As Double)
Dim sh As Shape
Dim nowX As Double, nowY As Double
Dim nowWidth As Double, nowHeight As Double
Dim nowXol As Double, nowYol As Double
Dim nowWidthol As Double, nowHeightol As Double
Dim newX As Double, newY As Double
Dim newWidth As Double, newHeight As Double
Dim ratioWidth As Double, ratioHeight As Double
Set sh = ActiveSelection
sh.GetBoundingBox nowX, nowY, nowWidth, nowHeight, False
sh.GetBoundingBox nowXol, nowYol, nowWidthol, _
nowHeightol, True
ratioWidth = Width / nowWidthol
ratioHeight = Height / nowHeightol
newWidth = nowWidth * ratioWidth
newHeight = nowHeight * ratioHeight
newX=X+(nowX - nowXol)
newY=Y+(nowY - nowYol)
sh.SetBoundingBox newX, newY, newWidth, newHeight, _
False, cdrBottomLeft
End Sub
Stretch or scale
As well as setting specific sizes, shapes can also be scaled by a proportional amount. The Shape object has two member
functions,
Stretch and StretchEx, that perform this operation. Both functions take a decimal value for horizontal
and vertical stretching, where 1 is 100% (or no change). Zero is not allowed –– a very small value must be used instead.
The following code stretches the selection to half its current height, but twice its width, about the midpoint of the
bottom edge of its bounding box:
ActiveDocument.ReferencePoint = cdrBottomMiddle
ActiveSelection.Stretch 2, 0.5
The stretch can also be performed about any point on the page using the StretchEx member function. The following
code performs the same stretch as above, but about the point (4, 5) on the page in inches:
ActiveDocument.Unit = cdrInch
ActiveSelection.StretchEx 4, 5, 2, 0.5
CorelDRAW Graphics Suite 12 Programming Guide for VBA 55
Page 62

Using objects in CorelDRAW Chapter 6
Both of the above functions have an optional Boolean parameter that, when True, stretches paragraph text characters
by the given amount. When it is
False, only the bounding box of the text is stretched and the text is reflowed within
the box.
Position
The position of a Shape can be determined with the properties PositionX and PositionY, and with the methods
GetPosition and GetBoundingBox. The position of a Shape can be set by setting the properties PositionX and
PositionY, or using the methods SetPosition, SetSizeEx, and SetBoundingBox. See the "Size" section on
page 54 for
SetSizeEx, GetBoundingBox, and SetBoundingBox.
The following code gets the position of the
ActiveSelection shape relative to the current ReferencePoint
property of ActiveDocument, which the code explicitly sets to the lower-left corner:
Dim posX As Double, posY As Double
ActiveDocument.ReferencePoint = cdrBottomLeft
ActiveSelection.GetPosition posX, posY
The above code returns the position of the reference point of the selection without accounting for the widths
of any of the selected shapes' outlines. To account for the widths of the outlines, use the function
GetBoundingBox, as described in the "Size" section on page 54.
The following code sets the position of the lower-right corner of each selected shape in the active document to (3, 2) in
inches:
Dim sh As Shape
ActiveDocument.Unit = cdrInch
ActiveDocument.ReferencePoint = cdrBottomRight
For Each sh In ActiveSelection.Shapes
sh.SetPosition 3, 2
Next sh
Rotate
Shapes can be rotated using the member functions Rotate and RotateEx of the Shape object.
Rotate member function simply rotates the shape by the given angle (in degrees) about the shape's rotation center.
The
The following code rotates the selection by 30° about its center of rotation:
ActiveSelection.Rotate 30
Positive rotation angles are always degrees counterclockwise.
To find the center of rotation, get the values of the shape's properties
RotationCenterX and RotationCenterY.
Changing the values of these properties moves the center of rotation for the next call to this function.
The function
method than setting each of
RotateEx takes additional parameters that specify the center of rotation. This is a quicker, simpler
RotationCenterX and RotationCenterY and then calling Rotate. The following
code rotates each of the selected shapes by 15° clockwise about each shape's lower-right corner:
CorelDRAW Graphics Suite 12 Programming Guide for VBA 56
Page 63

Using objects in CorelDRAW Chapter 6
Dim sh As Shape
ActiveDocument.ReferencePoint = cdrBottomRight
For Each sh In ActiveSelection.Shapes
sh.RotateEx -15, sh.PositionX, sh.PositionY
Next sh
Skew
Shapes can be skewed using the member functions Skew and SkewEx of the Shape object. These two functions are
similar to the
Rotate and RotateEx member functions, except that they take two angle parameters: the first is
horizontal skew (positive values move the top edge to the left and the bottom edge to the right), and the second is
vertical skew (positive values move the right edge upwards and the left edge downwards). The horizontal skew is applied
before the vertical skew.
The following code skews the selection by 30° horizontally, and by 15° vertically:
ActiveSelection.Skew 30, 15
Skews of angles close to or greater than 90° are not allowed and will produce an error.
Color
Color can be applied to both the fill and the outline of an object, as well as to page backgrounds, lenses, and gradient
fills.
You can copy one color to another using the method
Dim sh As Shape
Set sh = ActiveShape
sh.Outline.Color.CopyAssign sh.Fill.UniformColor
CopyAssign:
You can get the color model of a color object by getting its Type property:
Dim colType As cdrColorType
colType = ActiveShape.Outline.Color.Type
When you have the type of the color, usually one of cdrColorRGB, cdrColorCMYK,orcdrColorGray (but not
limited to those), you can get the components of the color, which are:
CMYKCyan, CMYKYellow, CMYKMagenta, and CMYKBlack for CMYK color;
RGBRed, RGBGreen, and RGBBlue for RGB color;
and Gray for grayscale.
To convert a Color object's color to a different color model, use the member functions
ConvertToRGB, ConvertToGray, and so on. The color is converted using the CorelDRAW color management
ConvertToCMYK,
settings. For example, the following code converts the fill to RGB:
ActiveShape.Fill.UniformColor.ConvertToRGB
To set a new color, use the methods CMYKAssign, RGBAssign, GrayAssign, and so on. These methods take
different numbers of parameters depending on how many color components are required for that color model. For
example, the following code assigns a deep-blue RGB color to the active shape's outline:
ActiveShape.Outline.Color.RGBAssign 0, 0, 102
CorelDRAW Graphics Suite 12 Programming Guide for VBA 57
Page 64

Using objects in CorelDRAW Chapter 6
Each component's value range depends on the color model.
Some functions in the CorelDRAW Object Model take a
use the VBA keyword
Dim col As New Color
col.RGBAssign 0, 255, 102
ActiveShape.Outline.Color.CopyAssign col
New, as in the following example:
Color object as a parameter. To create a new Color object,
The color "none" does not exist. To set the color "none" to an outline or fill, you must actually set the
outline- or fill-type to "none".
Outline
Every Shape object has a property Outline, which refers to an Outline object. Outline objects have the properties
Type, Width, Color, and Style, as well as many other properties.
Outline type
The property
outline, and if it is set to
Type sets whether the shape has an outline: if it is set to cdrOutline, then the shape will have an
cdrNoOutline, the shape will not have an outline. Setting this property to cdrOutline for
a shape that does not have an outline will give the shape the document's default outline. Setting this property to
cdrNoOutline will remove the outline from the shape. This is the same as setting Width to zero.
Outline width
The property
first set the document's
Width sets the width of the outline in the units of the document; to set the width in points, for example,
Unit property to cdrPoint. For example, the following code sets the outline of the selected
shapes to one millimeter:
ActiveDocument.Unit = cdrMillimeter
ActiveSelection.Outline.Width = 1
Any shapes whose Type property is cdrNoOutline will have that property changed to cdrOutline when the
outline color or width is set.
Outline color
The property
Color is a color object that defines the color of the outline. For more information about using Color
objects, see page 57. Setting the color of the outline automatically sets the Type property of the outline to
cdrOutline and gives the outline the default width:
ActiveSelection.Outline.Color.GrayAssign 0 ' Set to black
Outline style
Style property of Outline sets the dash properties of the outline. It has four properties, of which only three can
The
be set:
DashCount sets the number of dashes in the style.
DashLength is an array of values that give the length of each dash – this array is the same size as the value of
DashCount.
GapLength is an array of values that give the length of each gap following each dash – as for DashLength, this
array is the same size as the value of
DashCount.
CorelDRAW Graphics Suite 12 Programming Guide for VBA 58
Page 65

Using objects in CorelDRAW Chapter 6
Index is a read-only property that gives the index of the outline style in the document's OutlineStyles
collection, which is presented to the user in the Outline dialog box.
The values in the arrays
DashLength(1) is 5 and the line is 0.2 inches in width, the dash's length will be 1 inch; if the line's width is changed
DashLength and DashGap are drawn as multiples of the width of the line; therefore, if
to 0.1 inches, the dash's length will become 0.5 inches.
To use one of the application's outline styles, you must reference the style from the
OutlineStyles collection by
giving an index of the style you want to use. The problem with this is that each user's installation of CorelDRAW can
have a different collection of outline styles, if the user has modified them, so it is not guaranteed that a given indexed
style will be the same for all users. To use one of the styles, assign it to the outline:
ActiveShape.Outline.Style = Application.OutlineStyles(3)
OutlineStyles.Item(0)
is always a solid line; to set an outline to solid, set it equal to this style.
Other properties
Outline objects have many other properties, including:
StartArrow, EndArrow – sets the arrowhead to use on each end of an open Curve
LineCaps, LineJoin – sets the type of line caps (butt, round, or square) and joins (bevel, miter, or round)
NibAngle, NibStretch – sets the shape of the nib used to draw the line
BehindFill, ScaleWithShape – draws the outline behind the fill, and scales the outline with the shape
Outline objects also have two methods:
ConvertToObject – converts the outline to an object
SetProperties – a single method that can be used to set most of the outline's properties in a single call, which is
much more efficient and quicker than setting each property individually when setting the properties of hundreds or
thousands of outlines at the same time
Fill
There are many types of fills in CorelDRAW, including uniform fills, fountain fills, PostScriptâ fills, pattern fills, and
texture fills. Each type needs to be handled differently. Only uniform and fountain fills are discussed here.
Fill types
The read-only
Type property of a Fill object gives the type of the fill, or whether there is no fill. The following code
gets the fill type:
Dim fillType As cdrFillType
fillType = ActiveShape.Fill.Type
The fill type cannot be set with this property. The fill type is set when the fill is created and applied.
To remove any type of fill, use the member function
ApplyNoFill of the Fill object.
Uniform fills
Uniform fills consist of a single, solid color. This color is represented by the fill's property
Color object. For more information on using Color objects, see page 57.
UniformColor, which is a
CorelDRAW Graphics Suite 12 Programming Guide for VBA 59
Page 66

Using objects in CorelDRAW Chapter 6
To apply a uniform fill to a shape, use the ApplyUniformFill member function of the shape's Fill property:
ActiveShape.Fill.ApplyUniformFill CreateRGBColor(255, 0, 0)
Unless you are copying the color from an existing Color object, you have to create a new Color object first and then
apply the color to the shape's
Fill property.
To change the color of a uniform fill, change the
ActiveShape.Fill.UniformColor.RGBAssign 0, 0, 102
UniformColor property of the Fill object:
Uniform fills have a Type property of cdrUniformFill.
Fountain fills
Fountain fills are defined by the property
Fountain, which is a FountainFill object. FountainFill objects have
many properties, including type, angle, and blend type. The most important property, though, is the collection of colors
that comprise the fountain fill.
To create a new fountain fill, use the
ApplyFountainFill member function of the Fill object. This creates a simple
two-color fountain with basic properties. The following code creates a simple linear fountain fill, from red to yellow, at
30° to the horizontal:
Dim startCol As New Color, endCol As New Color
startCol.RGBAssign 255, 0, 0
endCol.RGBAssign 255, 255, 0
ActiveShape.Fill.ApplyFountainFill startCol, endCol, _
cdrLinearFountainFill, 30
All of the parameters to the ApplyFountainFill member function are optional and not all have been used in the
preceding code. It is possible to set the midpoint, the number of steps, and the color-blend type in the same function
call.
After the fountain fill has been created, you can add more colors to the blend by adding new
FountainColor items to
the Colors collection, which is a property of Fill.Fountain. For example, the following code adds a yellow color to
the
Colors collection at a position about a third of the way from the red:
Dim fFill As FountainFill
Set fFill = ActiveShape.Fill.Fountain
fFill.Colors.Add CreateRGBColor(0, 102, 0), 33
Individual colors in the fountain can be moved using the FountainColor.Move member function. The following
code moves the yellow color from the previous code to a position that is 60% from the red towards the green:
ActiveShape.Fill.Fountain.Colors(1).Move 60
Color positions are integer values in percent, where 0% is the start-color position and 100% is the end-color
position.
The number of colors reported by the
and end colors. So for the fountain fill created above, the value of the
Colors collection is item 0 and is the start color; it cannot be moved, but its color can be changed. The last color in the
Colors collection is item (Count + 1) and is the end color; it also cannot be moved, but its color can be changed.
Count property of the Colors collection is the number of colors between the start
Count property is 1. The first color in the
The following code changes the color of the end color from green to blue:
CorelDRAW Graphics Suite 12 Programming Guide for VBA 60
Page 67

Using objects in CorelDRAW Chapter 6
Dim cols As FountainColors
Set cols = ActiveShape.Fill.Fountain.Colors
cols(cols.Count + 1).Color.RGBAssign 0, 0, 102
There are additional properties not described here, that define edge padding, center position (for conical, radial, and
rectangular fountains), and the number of steps used to draw the fill, which are
Fountain fills have a
Type property value of cdrFountainFill.
Duplicating shapes
To duplicate shapes, use the Duplicate member function of the Shape object:
ActiveSelection.Duplicate
This function takes two option values that set the offset for the duplicate from the original. The following code positions
the duplicate two inches to the right and one inch above the original:
ActiveDocument.Unit = cdrInch
ActiveSelection.Duplicate 2, 1
Applying effects
Effects can be applied directly to shapes using the appropriate Create… member function of the Shape object.
Creating blends
CreateBlend member function of the Shape object creates a blend between the current Shape and the Shape
The
in the parameter list. The following code creates a ten-step blend:
Dim sh As Shapes, eff As Effect
Set sh = ActiveSelection.Shapes
Set eff = sh(1).CreateBlend(sh(2), 10)
The number of shapes in the blend is 12 – the start and end shapes, plus the ten steps created.
There are several optional parameters to the
CreateBlend method, which are not shown, that control the acceleration
of the blend, as well as setting the path along which the blend is created.
Effect object returned by the above code is a reference to the blend. By setting the properties of the Blend
The
property of the Effect object, the blend can be fine-tuned. The Effect object itself has a member function
Separate for separating the Blend effect, as well as Clear for removing it.
Creating contours
Contours can be created with the
CreateContour member function of the Shape object. The following code creates a
three-step contour at a five millimeter spacing:
Dim eff As Effect
ActiveDocument.Unit = cdrMillimeter
Set eff = ActiveShape.CreateContour(cdrContourOutside, 5, 3)
There are several optional parameters of the CreateContour method, which are not shown, that control the colors
and acceleration of the contour shapes.
CorelDRAW Graphics Suite 12 Programming Guide for VBA 61
Page 68

Using objects in CorelDRAW Chapter 6
Creating other effects
Shape object has several other functions for creating effects: CreateDropShadow, CreateEnvelope,
The
CreateExtrude, CreateLens, CreatePerspective, CreatePushPullDistortion,
CreateTwisterDistortion, and CreateZipperDistortion.
Shortcuts to frequently used objects
CorelDRAW provides several "shortcuts" to frequently accessed objects. These shortcuts are easier to use than their
longhand versions simply because they require less typing. Also, since the compiler does not have to determine every
object in a long dot-separated reference, they may be slightly quicker at run-time.
The following table gives the shortcuts, their long forms, and a description of each:
Shortcut Long form Description
ActiveWindow ActiveDocument.ActiveWindow
ActiveView ActiveWindow.ActiveView
ActivePage ActiveDocument.ActivePage
ActiveLayer ActivePage.ActiveLayer
ActiveSelection ActiveDocument.Selection
ActiveSelectionRange ActiveDocument.SelectionRange
ActiveShape ActiveDocument.Selection.Shapes(1)
Gets the active window, which
the active document is
displayed in
Gets the active view of the
document, which is the
representation of the document
within the ActiveWindow
Gets the current page of the
active document
Gets the current layer being
edited in the current page of
the document
Gets the selection in the active
document, in other words, the
shape that represents the
shapes that are selected
Gets the selection range in the
active document
Gets the last-selected shape in
the active document
Each of the shortcuts can be used on its own as a property of the CorelDRAW Application object. Several of them
can also be used as members of a given
ActiveWindow. The Document object also has the specific properties Selection and SelectionRange for
Document object: ActiveLayer, ActivePage, ActiveShape, and
getting either of these for a specific document, whether that document is active or not, rather than using
ActiveSelection or ActiveSelectionRange.
ActiveSelection and ActiveSelectionRange
To get the selection, in other words, to access the shapes that are selected in the document, you have a choice: get a
reference to a document's
Selection object or get a copy of the document's SelectionRange property. The
CorelDRAW Graphics Suite 12 Programming Guide for VBA 62
Page 69

Using objects in CorelDRAW Chapter 6
difference between these two selection-type objects is that Selection gets updated whenever the selection changes in
the document, and
SelectionRange is a copy of the selection state at the time and does not get updated.
ActiveSelection
The shortcut for
reference to the document's
changed, either by the user or programmatically, the shapes that this
ActiveDocument.Selection is ActiveSelection. This returns a Shape object, which is a
Selection object. Because this is a reference, whenever the selection in the document is
Selection object contains will reflect the
change.
Dim sel As Shape
Set sel = ActiveDocument.Selection
ActiveSelection
collection called
ActiveSelection.Shapes collection can be accessed in the normal manner:
Dim sh As Shape, shs As Shapes
Set shs = ActiveSelection.Shapes
For Each sh In shs
sh.Rotate 15 'Rotate each shape thru 15° counterclockwise
Next sh
returns a Shape object of subtype cdrSelectionShape. This Shape subtype has a member
Shapes, which is a collection of all of the selected shapes in the document. The items in the
You cannot directly remember and recall the objects that are selected using ActiveSelection. In order to copy the
references to the selected objects, you would have to populate an array of
ShapeRange.
Shape, a collection of type Shapes, or use a
ActiveSelectionRange
ActiveSelectionRange is the shortcut for ActiveDocument.SelectionRange. This is a property of the
document of type
ShapeRange:
Dim selRange As ShapeRange
Set selRange = ActiveDocument.SelectionRange
The ShapeRange object returned by ActiveSelectionRange contains a collection of references to the shapes that
were selected at the moment when the property was read. Since these references are to the shapes themselves, and not to
the selection, if you change the selection, the
The shapes referenced by
ActiveSelectionRange are held in a ShapeRange object. This collection can be parsed
ShapeRange is not updated.
in the usual way:
Dim sh As Shape, shRange As ShapeRange
Set shRange = ActiveSelectionRange
For Each sh In shRange
sh.Skew 15 ' Rotate each shape thru 15° counterclockwise
Next sh
Since the SelectionRange is a static copy of references to the objects selected at the time, it is an ideal way of
remembering and recalling the selection. Also, shapes can be added to and removed from a
ShapeRange object, so it is
an ideal way of manipulating the selection.
Comparison of ActiveSelection and ActiveSelectionRange
To get the selection, you have a choice: get a reference to a document's
updated if the selection changes, or get a reference to a new
ShapeRange object, which is like a collection of references
Selection object (of type Shape), which gets
to the objects in the selection at that moment in time and does not get updated.
CorelDRAW Graphics Suite 12 Programming Guide for VBA 63
Page 70

Using objects in CorelDRAW Chapter 6
The big advantage of ActiveSelectionRange over ActiveSelection is that, even when the selection changes,
the
ShapeRange content does not change; whereas the ActiveSelection Shapes collection does change,
although
ActiveSelection is generally easier to use. Also, ShapeRange can be duplicated, shapes can be added
and removed, transformations can be applied, all without the ShapeRange being active at the time.
The individual shapes in a
Dim shRange As ShapeRange
Set shRange = ActiveSelectionRange
shRange.Remove 1
shRange.Remove 2
shRange.CreateSelection
ShapeRange can be selected by calling the range's CreateSelection member function:
The above code creates a ShapeRange from the selection, then removes the first and second (actually the third shape of
the original range, since it becomes the second shape when you remove the first) shapes from the range, and then creates
a new selection from those shapes left in the range (in other words, all the shapes of the original selection, minus the two
shapes that were removed from the collection).
If you want to add a
AddToSelection member function of ShapeRange.
ShapeRange to the current selection rather than replace the selection, use the
Parsing selected shapes
Parsing through the selected shapes is done in the same way for both selections:
Dim shs As Shapes, sh As Shape
Set shs = ActiveSelection.Shapes
For Each sh In shs
' Do something with the shape, sh
Next sh
And selection ranges:
Dim sRange As ShapeRange, sh As Shape
Set sRange = ActiveSelectionRange
For Each sh In sRange
' Do something with the shape, sh
Next sh
However, selection ranges have the advantage that even if the selection subsequently changes, the range is not updated
and so the "memory" of the selection is not lost. However, getting a reference to the
create a copy of the references to the shapes in the selection, but creates a reference to the intrinsic
ActiveSelection does not
ActiveSelection
object. This means that if the selection changes, all references to the ActiveSelection are also updated, and so the
"memory" of the selection is lost.
Order of selected shapes in a collection
The order of the Shape objects in both the ActiveSelection.Shapes and ActiveSelectionRange collections
is in the reverse order of the order that the shapes were selected by the user. So, the first shape in both collections is the
last shape that the user selected, and the last shape in both collections is the first shape that the user selected. This
property of these collections is useful for macros that need to know which shape was selected first or last.
CorelDRAW Graphics Suite 12 Programming Guide for VBA 64
Page 71

Using objects in CorelDRAW Chapter 6
Document operations
This section describes how to do various document-related operations from VBA, including opening and closing
documents, printing documents, and importing into and exporting from documents.
Opening and closing documents
To open a document, use the OpenDocument member function of the global Application object:
Dim doc As Document
Set doc = OpenDocument("C:\graphic1.cdr")
To close a document, use the Close member function of the Document object itself:
doc.Close
Printing
Printing documents is straightforward with VBA: almost all of the settings that are available in the CorelDRAW Print
dialog box are available as properties of the
properties are set, to actually print the document is simply a case of calling the document's PrintOut member function.
For example, the following code prints three copies of pages one, three, and four, to a level-3 PostScript printer:
Document object's PrintSettings member. And then, when the
With ActiveDocument.PrintSettings
.Copies = 3
.PrintRange = prnPageRange
.PageRange = "1, 3-4"
.Options.PrintJobInfo = True
With .PostScript
.DownloadType1 = True
.Level = prnPSLevel3
End With
End With
ActiveDocument.PrintOut
For each of the pages of the Print dialog box in CorelDRAW, there is a corresponding object in the object model. The
following table gives the objects that correspond to each page in the Print dialog:
Options page in dialog box Member of PrintSettings object
General Properties of PrintSettings
Layout Not supported by object model
Separations Separations and Trapping
Prepress Prepress
PostScript PostScript
Misc Options
CorelDRAW Graphics Suite 12 Programming Guide for VBA 65
Page 72

Using objects in CorelDRAW Chapter 6
Each object contains all of the properties from the corresponding page of the Print dialog box. The only print options
that cannot be set in VBA are the layout options. However, if it is necessary, it is possible to launch the Print dialog box
with the
PrintSettings object's ShowDialog member function.
To reset the print settings, call the
ActiveDocument.PrintSettings.Reset
PrintSettings object's Reset member function:
Your code can also access any printing profiles that have been saved by the user from the Print dialog box using the
PrintSettings object's Load member function:
ActiveDocument.PrintSettings.Load "C:\CorelDRAW Defaults.prs"
This function takes a full path to the printing profile, so you have to know that path beforehand. It is also possible to
save printing profiles using the
To just print the selected shapes, set
specific printer, set
Application.Printers.
Document.PrintSettings.Printer to refer to the appropriate printer in the collection
Save member function.
Document.PrintSettings.PrintRange to prnSelection. To select a
Importing and exporting files
Files of all supported formats can be imported into and exported from CorelDRAW.
Importing files
Files are imported onto layers; therefore, the
following code imports a file onto the active layer:
ActiveLayer.Import "C:\logotype.gif"
Import and ImportEx functions are members of the Layer object. The
The file is imported onto the active layer at the center of the page. Any shapes that were previously selected are
deselected, and the contents of the imported file are selected. To reposition or resize the imported shapes, get the
document's selection:
ActiveDocument.Unit = cdrInch
ActiveSelection.SetSize 3, 2
Some file formats – notably EPS and PDF – can be imported with one of two filters. In the case of EPS, it is possible to
import the EPS file as a placeable object that will be printed, but cannot be modified; it is also possible to interpret the
PS part of the EPS file, importing the actual artwork from within the EPS, rather than just the low-resolution TIFF or
WMF placeable header, which can be subsequently edited by the user. To specify which filter to use, include the optional
parameter
Filter:
ActiveLayer.Import "C:\map.eps", cdrPSInterpreted
The ImportEx function provides much better control over the import filter through its optional use of a
StructImportOptions object. The following code imports the file as a linked file:
Dim iFilt As ImportFilter
Dim importProps As New StructImportOptions
importProps.LinkBitmapExternally = True
Set iFilt = ActiveLayer.ImportEx("C:\world-map.tiff", _
cdrAutoSense, importProps)
iFilt.Finish
CorelDRAW Graphics Suite 12 Programming Guide for VBA 66
Page 73

Using objects in CorelDRAW Chapter 6
Exporting files
Files are exported from the
multiple layers, and even over multiple pages. The
ExportBitmap, and ExportEx. All three methods can be used to export to both bitmap and vector formats.
Document not Layer objects, since the range of shapes exported often extends over
Document object has three export functions: Export,
A simple export of a page requires only a filename and a filter type. The following code exports the current page to a
TIFF bitmap file:
ActiveDocument.Export "C:\ThisPage.tif", cdrTIFF
However, this gives little control over the output of the image. More control is obtained by including a
StructExportOptions object, as in the following code:
Dim expOpts As New StructExportOptions
expOpts.ImageType = cdrCMYKColorImage
expOpts.AntiAliasingType = cdrNormalAntiAliasing
expOpts.ResolutionX = 72
expOpts.ResolutionY = 72
expOpts.SizeX = 210
expOpts.SizeY = 297
ActiveDocument.Export "C:\ThisPage.tif", cdrTIFF, _
cdrCurrentPage, expOpts
A StructPaletteOptions object, which gives the settings for auto-generating the palette, can also be included in
the function call for palette-based image formats.
The function
ExportEx is the same as Export, except that it can pop up the filter's dialog box, retrieve the settings,
and then export the file:
Dim eFilt As ExportFilter
Set eFilt = ActiveDocument.ExportEx("C:\ThisPage.eps", cdrEPS)
If eFilt.HasDialog = True Then
If eFilt.ShowDialog = True Then
eFilt.Finish
End If
Else
eFilt.Finish
End If
The third function, ExportBitmap, is similar to ExportEx in that it returns an ExportFilter object that can be
used to show the Export dialog box to the user. However, this function takes the individual members of the
StructExportOptions object as parameters, thereby simplifying using the function:
Dim eFilt As ExportFilter
Set eFilt = ActiveDocument.ExportBitmap("C:\Selection.tif", _
cdrTIFF, cdrSelection, cdrCMYKColorImage, _
210, 297, 72, 72, cdrNormalAntiAliasing, _
False, True, False, cdrCompressionLZW)
eFilt.Finish
Publishing to PDF
Publishing to PDF is a two-stage process. The first part is to set the PDF settings. If the user has already set the settings
in CorelDRAW for the document, or chooses to use the default settings, this stage does not need to be done. The second
part is to export the file.
CorelDRAW Graphics Suite 12 Programming Guide for VBA 67
Page 74

Using objects in CorelDRAW Chapter 6
To set the PDF settings, modify the properties of the Document member PDFSettings. This member is an object of
type
PDFVBASettings and has properties for all the PDF settings that can be set in the CorelDRAW PublishToPDF
dialog box. The following code exports pages 2, 3, and 5 to a PDF file called MyPDF.pdf:
Dim doc As Document
Set doc = ActiveDocument
With doc.PDFSettings
.Author = "Corel Corporation"
.Bookmarks = True
.ColorMode = pdfRGB
.ComplexFillsAsBitmaps = False
.CompressText = True
.CropMarks = False
.DownsampleGray = True
.EmbedBaseFonts = True
.EmbedFonts = True
.FileInformation = True
.Hyperlinks = True
.Keywords = "Test, Example, Corel, CorelDRAW, PublishToPDF"
.Linearize = True
.PageRange = "2-3, 5"
.pdfVersion = pdfVersion13
.PublishRange = pdfPageRange
.TrueTypeToType1 = True
End With
doc.PublishToPDF "C:\MyPDF.pdf"
You can give more control to the user by popping up the PDF Settings dialog box with the following code:
Dim doc As Document
Set doc = ActiveDocument
If doc.PDFSettings.ShowDialog = True Then
doc.PublishToPDF "C:\MyPDF.pdf"
End If
PDF settings profiles can be saved and loaded using the Save and Load member functions of the PDFSettings
object.
Windows and views
In CorelDRAW the user can have several windows simultaneously displaying the same document. For a large document,
one view might be zoomed in to the upper-right corner, and another zoomed in to the lower-right corner. The individual
windows can be zoomed and panned independently, although turning the page in one turns the page in them all.
The user can also save individual zoom settings, including which page, using the View Manager. Selecting a view
re-zooms CorelDRAW to that location on that page.
In VBA, the main differences between the
access to the windows that contain each
View is the rectangular view of the document just inside the chrome.
Window object and the View object is that the Window object provides
View of the document. The Window is the chrome, title bar, and so on; the
Windows
Each Document object has a collection Windows for viewing the document. To switch between windows, use a window's
Activate method:
ActiveDocument.Windows(2).Activate
CorelDRAW Graphics Suite 12 Programming Guide for VBA 68
Page 75

Using objects in CorelDRAW Chapter 6
The next and previous windows for the current document are referenced in a window's Next and Previous properties:
ActiveWindow.Next.Activate
To create a new window, call the NewWindow member function of a Window object:
ActiveWindow.NewWindow
To close a window, call its Close member function. If it is the document's last window, the document will be closed as
well:
ActiveWindow.Close
Views and ActiveView
Views and ActiveViews are, literally, views onto the document. The difference between an ActiveView and a
View is that each Window object has just one ActiveView, and that is the current view onto the document; whereas a
View is just the recorded memory of one particular ActiveView, such that re-activating that View will zoom and pan
the
Window object's ActiveView to the location and zoom setting that is stored in the properties of the View object.
Window object has an ActiveView member. Each Document object has a collection of View objects in its
Each
Views member.
The only way to access an
ActiveView is from a Window object's ActiveView property.
Zooming with the ActiveView
To zoom in to a set amount, set the Zoom property of the ActiveView. The zoom is set as a double value in percent.
For example, the following code sets the zoom to 200%:
ActiveWindow.ActiveView.Zoom = 200
You can also zoom the ActiveView with various member functions: ToFitAllObjects, ToFitArea,
ToFitPage, ToFitPageHeight, ToFitPageWidth, ToFitSelection, ToFitShape, ToFitShapeRange,
and
SetActualSize.
Panning with the ActiveView
To pan the ActiveView, move its origin. This can easily be done by modifying the OriginX and OriginY properties
of the
ActiveView. The following code pans the document five inches left and three inches upwards:
Dim av As ActiveView
ActiveDocument.Unit = cdrInch
Set av = ActiveWindow.ActiveView
av.OriginX = av.OriginX - 5
av.OriginY = av.OriginY + 3
You can also use the member function SetViewPoint:
Dim av As ActiveView
ActiveDocument.Unit = cdrInch
Set av = ActiveWindow.ActiveView
av.SetViewPoint av.OriginX - 5, av.OriginY + 3
CorelDRAW Graphics Suite 12 Programming Guide for VBA 69
Page 76

Using objects in CorelDRAW Chapter 6
Working with views
You can create a new View object and add it to the Document's Views collection from the collection itself. The
following code adds the current
ActiveDocument.Views.AddActiveView "New View"
ActiveView settings to the Views collection:
You can also create a new view with specific settings using the CreateView member function of the Document object.
The following code creates a new
View whose view point is at the position (3, 4) in inches, zoom is 95%, and is on page
6:
ActiveDocument.Unit = cdrInch
ActiveDocument.CreateView "New View 2", 3, 4, 95, 6
To restore a view, call that view's Activate member function. The document's active window will be set to that view:
ActiveDocument.Views("New View").Activate
CorelDRAW events
CorelDRAW raises various events while it is running, to which VBA can respond through the use of "event handlers".
Event handlers are Subs with specific, defined names within a ThisMacroStorage module. Every VBA Project (GMS) file
has one ThisMacroStorage module within its CorelDRAW 12 Objects subfolder within the project.
The
GlobalMacroStorage object is a virtual object that represents each and all open CorelDRAW VBA projects.
The
GlobalMacroStorage has several events that are raised at the time of any event, such as opening, printing,
saving, or closing a CorelDRAW document – the range of events is actually greater than this, since each one has a
"before" and "after" event.
Responding to events
To respond to an event, you must provide an event handler. An event handler is simply a Sub in any ThisMacroStorage
module with a specific name – CorelDRAW looks only for known event-handler names in ThisMacroStorage modules.
However, CorelDRAW does check all ThisMacroStorage modules in all installed projects, so you can create an
event-driven solution and distribute it as a single Project (GMS) file just as you would provide any other form of
solution. Each project can have only one ThisMacroStorage module, which is created automatically when the project is
first created.
For example, a solution may need to respond to a document closing by logging the closure in a file as part of a
workflow-management and recording system. To respond to a document opening, you must respond to the
GlobalMacroStorage’s
Editor. In the Object list box at the top of the code window, select GlobalMacroStorage and in the Procedure list box,
select
DocumentOpen –– the VB Editor creates a new, empty Sub called
GlobalMacroStorage_DocumentOpen() or, if it exists already, places the cursor into it. Now all you need to do is
to write some code that adds the name of the opened file to the log. The tidiest way to do this is to create a Public Sub in
a different module that actually does the work, and the event handler simply calls that Sub when it has to –– this keeps
the size of the ThisMacroStorage module as small as possible, so the run-time interpreter does not have to spend as much
time parsing all the ThisMacroStorage modules each time an event is raised:
DocumentOpen event. To do this, open a ThisMacroStorage module for editing in the VB
Private Sub GlobalMacroStorage_OpenDocument( ByVal Doc As Document, _
ByVal FileName As String)
Call LogFileOpen(FileName)
End Sub
Some of the CorelDRAW 12 events are given in the following table:
CorelDRAW Graphics Suite 12 Programming Guide for VBA 70
Page 77

Using objects in CorelDRAW Chapter 6
Event Description
Start
Quit
DocumentNew
DocumentOpen
DocumentBeforePrint
DocumentAfterPrint
DocumentBeforeSave
DocumentAfterSave
DocumentClose
SelectionChange
Any event handlers for frequent events, such as Shape-related events, should be as efficient as possible;
otherwise CorelDRAW will run very slowly because VBA will have to run the handler so often.
These two events are raised whenever the user starts CorelDRAW 12 or quits from it.
These events are raised whenever a document is created or opened; both events pass a
reference to the document.
These events are raised after the Print dialog box is displayed and after the document is
printed.
These events are raised before the document is saved and after the document is saved;
the file name of the document being saved is passed as a parameter.
This event is raised before the document is closed.
This event is raised whenever the selection changes.
CorelDRAW Graphics Suite 12 Programming Guide for VBA 71
Page 78

Creating user interfaces for macros 7
An important part of many VBA solutions is the user interface. A well-designed user interface will make the solution so
easy to use – or so powerful – that the user will not think twice about using your macros.
Most user interfaces for complex solutions will be based on a dialog box or form of some description. Some simpler user
interfaces can be created using toolbars and buttons. Other user interfaces rely on getting a click or drag from the user.
And providing the user with some sort of help always makes a solution easier to deploy and support.
This chapter describes all of these aspects of user interfaces.
Working with dialog boxes
There are two forms of dialog boxes –– modal and modeless:
Modal dialog boxes must be acted upon before continuing with the rest of the macro –– the application is locked
until the dialog box is dismissed, either by submitting it, or by cancelling it
Modeless dialog boxes do not lock the application, and it can be kept open while the user continues working in
CorelDRAW –– although they are not dockers, they do behave like dockers in that they are visible without locking
the application
Both forms of dialog boxes have their uses when creating solutions and exactly which type you use depends on what you
are trying to achieve. For example, if you are creating a solution that enables an effect or action to be applied to one or
more shapes, and the user may want to subsequently apply the same effect or action to a different selection of shapes,
then the modeless dialog box may be better. The user then only has to "create" the effect in the dialog box once and then
apply it many times.
On the other hand, if you are creating a solution that is a one-shot, end-to-end solution, such as a replacement Print or
Save dialog box, then a modal dialog box would be more appropriate: the user must enter a filename, or set the number
of copies, before continuing, and the user is unlikely to want to do it repeatedly. Opening the dialog box again will be
less convenient than always having to manually dismiss the dialog box.
Creating modal or modeless dialog boxes
All dialog boxes are either built-in dialog boxes or instances of a form designed with the Forms Editor. Built-in dialog
boxes that you can control with VBA are almost always modal. However, custom dialog boxes can be either modal or
modeless, and this is determined by the optional Modal parameter of the form's Show method. For example, the form
frmFooForm can be displayed with the following code:
frmFooForm.Show
By default, the optional parameter Modal has the value vbModal (or 1), which causes the above form to be a modal dialog box. By setting this parameter to
frmFooForm.Show vbModeless
To open a dialog box from a macro that is available from within CorelDRAW itself, you must create a public sub within
a VBA module – if the sub exists within a form’s code, or within a class module, it will not be available from within
CorelDRAW. The sub cannot take any parameters. For example, the following sub would launch frmFooForm as a
modeless form:
Public Sub showFooForm()
frmFooForm.Show vbModeless
End Sub
vbModeless (or 0), the form will be modeless, as in the following example:
CorelDRAW Graphics Suite 12 Programming Guide for VBA 72
Page 79

Creating user interfaces for macros Chapter 7
Common dialog box features
Modal and modeless dialog boxes have some features in common, while other features are more appropriate for one
method over the other.
Modal dialog common features
Modal dialog boxes usually have the following features:
An OK button (the default button) performs the dialog box's ultimate action and then hides the dialog box.
A Cancel button dismisses the dialog box without performing the dialog box's action. The Close button in the
upper-right corner of the dialog box also dismisses the dialog box.
Some dialog boxes have an Apply button that performs the dialog box's action without making it permanent ––
subsequently cancelling the dialog box undoes the action.
If the dialog box is a wizard-style dialog box, it should have a Next and a Previous button, as well as a Cancel button.
On the last page of the wizard, the Next button should become the Finish button to indicate that the final page has
been reached, and on the first page the Previous button should be disabled (its Enabled property set to False).
Modeless dialog box common features
Modeless dialog boxes usually have the following features:
an Apply or Create button, or any other title that describes the dialog box's action; this button should be the default
a Close button –– the user is not cancelling the dialog box, but closing it after having applied its action
Features common to all dialog boxes
All dialog boxes should have the following features:
Controls may have a ControlTipText string – this tells the user what the control does when the user hovers the
mouse over it.
The form should have a meaningful title.
The form should have an obvious method to cancel or close itself.
The form should be either obvious in the way it is laid out, or it should have a Help button that activates some help.
Working with toolbars and buttons
Toolbars are the most persistently visible parts of the user interface for any VBA solution, since they are often always
visible. Toolbars are useful because the graphical icons are memorable, yet occupy only a small area. Also, buttons can
have meaningful titles that are displayed as part of the face. Buttons can also have helpful tooltips that pop up when the
mouse is passed over the buttons.
Creating toolbars
When creating toolbars, you should be organized: it is better to have lots of small toolbars with a few related buttons
than one big toolbar containing all of the buttons for all of your macros. By breaking your buttons into small groups, it
is much easier later to distribute these groups with the projects that they work with.
To create a new toolbar in CorelDRAW
1 Click Tools } Options.
2 Click Workspace } Customization } Command Bars.
3 Click New.
4 Type a new name for the toolbar.
5 Enable the check box next to the toolbar’s name.
CorelDRAW Graphics Suite 12 Programming Guide for VBA 73
Page 80

Creating user interfaces for macros Chapter 7
Next, you will add some buttons to the toolbar.
Creating new buttons
To add new buttons to a toolbar
1 Click Workspace } Customization } Commands.
2 Choose Macros from the Commands list box. The list below now displays the fully qualified names of all of the
public, parameter-free subs from all of the installed project (GMS) files.
3 Drag a macro from the list and drop it on the toolbar. It will appear on the toolbar with the default macro icon.
If the names of the macros are too long to fit in the list box, select a macro and review its name in the edit boxes
to the right of the list.
Adding a caption and a tooltip to macros
Each command in the macros list can have both a caption and a tooltip. The caption is displayed whenever the
command is used on a menu and can be made visible as part of the button face. The tooltip appears only when the
pointer is over the menu item or button.
To change the default caption for a macro
1 Click Workspace } Customization } Commands.
2 Choose Macros from the Commands list box. The list below now displays the fully qualified names of all of the
public, parameter-free subs from all of the installed project (GMS) files.
3 Choose a macro from the Command list.
4 Click the Appearance tab.
5 Type a string in the Caption box.
To associate an accelerator key with a command, which can be activated in combination with the Alt key, place
an ampersand (&) in front of the letter in the caption that will be the accelerator character. This will display as
an underline under the character in the caption. This accelerator key applies only to commands on menus.
To change the default tooltip
1 Click Workspace } Customization } Commands.
2 Choose Macros from the Commands list box. The list below now displays the fully qualified names of all of the
public, parameter-free subs from all of the installed project (GMS) files.
3 Choose a macro from the Command list.
4 Click the General tab.
5 Type a string in the Tooltip help box.
CorelDRAW Graphics Suite 12 Programming Guide for VBA 74
Page 81

Creating user interfaces for macros Chapter 7
Adding an image or an icon to a command
Commands can have a small image or icon associated with them. This icon can be visible or hidden for both toolbars and
menus. The icon size can be small (16 × 16 pixels), medium (32 × 32 pixels), or large (48 × 48 pixels).
To change the default icon for a command
1 Click Workspace } Customization } Commands.
2 Choose Macros from the Commands list box. The list below now displays the fully qualified names of all of the
public, parameter-free subs from all of the installed project (GMS) files.
3 Choose a macro from the Command list.
4 Click the Appearance tab.
5 Edit the icon in the icon editor.
Alternatively, you can import a Windows bitmap (BMP) file. The image’s colors will be mapped to the closest color in
the color list for icons.
Interacting with the user
One aspect of user interfaces that is a bit harder to achieve is that of actually getting some interactive input from the
user within the CorelDRAW document. The CorelDRAW Object Model provides two functions for getting the positions
of either a click or a drag. These two member functions are
Document.GetUserArea.
Document.GetUserClick and
The Object Model also provides methods both for converting between screen and document coordinates, and for
determining if a set of coordinates is on a shape. These three methods are
Window.DocumentToScreen, and Shape.IsOnShape.
Window.ScreenToDocument,
Document.GetUserClick
To get the position of a single click from the user, use the GetUserClick member function of the Document object.
This function pauses the macro for a specified period of time, or until the user clicks somewhere in the document or
presses Escape. An example of using this function is given below:
Dim doc As Document, retval As Long
Dim x As Double, y As Double, shift As Long
Set doc = ActiveDocument
doc.Unit = cdrCentimeter
retval = doc.GetUserClick(x, y, shift, 10, True, cdrCursorPick)
The above code gives the user just 10 seconds to click somewhere in the document. The position of the click is returned
in the variables x and y. The combination of Shift, Ctrl, and Alt that was selected when the click took place is returned
in shift: Shift is 1, Ctrl is 2, and Alt is 4, and the values are added together before being returned. In the above example,
SnapToObjects is enabled, in other words, True. The cursor icon to use is defined by the last parameter, in this case the
Pick tool's icon; you cannot use custom icons.
The returned value is 0, 1, or 2, depending on whether the user completed the click successfully, the user cancelled by
pressing Escape, or the operation timed out, respectively.
The returned coordinates of the click are relative to the origin of the page and are in the document's VBA units, so it is
often necessary to explicitly set the units in which you want the value returned.
To get the shapes that are underneath the returned click point, use the function
member of
Page:
SelectShapesAtPoint, which is a
CorelDRAW Graphics Suite 12 Programming Guide for VBA 75
Page 82

Creating user interfaces for macros Chapter 7
doc.ActivePage.SelectShapesAtPoint x, y, True
The value indicates whether to select unfilled objects (True), or not (False).
Document.GetUserArea
To get the position of a drag, or an area or rectangle, from the user, use the GetUserArea member function of the
Document object. This function pauses the macro for a specified period of time or until the user clicks, drags, and
releases the mouse somewhere in the document, or until the user presses Escape. An example of using this function is
given below:
Dim doc As Document, retval As Long, shift As Long
Dim x1 As Double, y1 As Double, x2 As Double, y2 As Double
Set doc = ActiveDocument
doc.Unit = cdrCentimeter
retval = doc.GetUserArea(x1, y1, x2, y2, shift, 10, True,
cdrCursorExtPick)
ActivePage.SelectShapesFromRectangle x1, y1, x2, y2, False
The above code gives the user just 10 seconds to select an area somewhere in the document. The position of the area is
returned as two opposite corners of a rectangle in the variables
and ALT that was selected when the select took place is returned in
the values are added together before being returned. In the above example, SnapToObjects is enabled (that is, True). The
cursor icon to use is defined by the last parameter.
x1, y1, x2, and y2. The combination of SHIFT, CTRL,
shift: SHIFT is 1, CTRL is 2, and ALT is 4, and
The returned value is
0, 1,or2, depending on whether the user completed the select area successfully, the user cancelled
by pressing Escape, or the operation timed out, respectively.
The returned coordinates of the area are relative to the origin of the page and are in the document’s VBA units, so it is
often necessary to explicitly set the units you want the value returned in.
The above code finally selects the shapes that lie completely within the area with the
SelectShapesFromRectangle method.
Page object’s
This method returns two points that are interpreted as the corners of a rectangle. However, the two points can
also be used as the start and end points of a drag operation by the user.
Window.ScreenToDocument and Window.DocumentToScreen
When using the above "click" and "area" methods, or when developing an exotic solution, it is sometimes useful to be
able to convert between screen coordinates and document coordinates. This is done with the member functions
ScreenToDocument and DocumentToScreen of the Window object.
The following code takes a coordinate from the screen and converts it into a point in the document that is visible in the
active window:
Dim docX As Double, docY As Double
ActiveDocument.Unit = cdrMillimeter
ActiveWindow.ScreenToDocument 440, 500, docX, docY
The following code returns the screen coordinate of a point in the document on the screen:
CorelDRAW Graphics Suite 12 Programming Guide for VBA 76
Page 83

Creating user interfaces for macros Chapter 7
Dim screenX As Long, screenY As Long
ActiveDocument.Unit = cdrMillimeter
ActiveWindow.DocumentToScreen 40, 60, screenX, screenY
In each case, the converted coordinates are returned in the last two parameters.
Screen coordinates start from the upper-left corner of the screen, so positive Y values are down the screen,
whereas negative Y values in the document are up the screen.
Shape.IsOnShape
You can test whether a point is inside, outside, or on the outline of a curve using the shape’s IsOnShape member
function. This function takes a document coordinate and returns
coordinate is inside or outside the shape, or it returns
cdrOnMarginOfShape if the coordinate is on or near the outline
of the shape.
cdrInsideShape or cdrOutsideShape if the
For example, the following code tests where the point (4, 6) is in relation to the
Dim onShape As Long
ActiveDocument.Unit = cdrInch
onShape = ActiveShape.IsOnShape(4, 6)
ActiveShape:
Providing help to the user
One of the most useful aids you can give the user is some form of help documentation. This may take the form of a
ReadMe.txt file, or a printed manual. However, neither of these solutions is immediate. An alternative is to have all of the
instructions built into the dialog box, but this uses valuable screen real estate. Yet another alternative is to build proper
Windows WinHelp or HTMLHelp help files, but both types require tools and a lot of work.
Possibly the most accessible solution is to provide help in the form of plain text, such as a help.txt file. Given that you
know where the text file is stored – and you can do this by creating a known Registry value when the project is installed
that points to the location of the file – you can use the following function to open it:
Public Sub launchNotepad(file As String)
Shell "Notepad.exe"&""&file, vbNormalFocus
End Sub
Pass the full path to the text file in the parameter file, such as C:\ReadMe.txt.
A much more powerful, but still easily created, solution to the problem of help is to use HTML. If you know where the
HTML file is installed, you can use the following function to open it:
' Put this Declare statement before all Subs and Functions!
Declare Function ShellExecute Lib "shell32.dll" _
Alias "ShellExecuteA" (ByVal hwnd As Long, _
ByVal lpOperation As String, ByVal lpFile As String, _
ByVal lpParameters As String, ByVal lpDirectory As String, _
ByVal nShowCmd As Long) As Long
Public Sub launchBrowser(url As String)
ShellExecute 0, vbNullString, url, vbNullString, vbNullString, 5
End Sub
CorelDRAW Graphics Suite 12 Programming Guide for VBA 77
Page 84

Creating user interfaces for macros Chapter 7
HTML is more powerful, since you can include graphics as well as direct the user to a specific location on the page using
"hash" references, such as index.html#middle. Simply pass the file name or URL in the parameter
url; for example,
C:\Program Files\ReadMe.htm,orwww.designer.com.
CorelDRAW Graphics Suite 12 Programming Guide for VBA 78
Page 85

Organizing, grouping, & deploying CorelDRAW macros 8
Now that you have created your macro masterpiece, it’s time to start distributing it.
Organizing and grouping macros
The best way to organize your macros is to use a separate module for each macro –– it’s not absolutely necessary, but it
does help when trying to maintain them. Since it is possible to have many modules in a single project (GMS) file, this
makes it simple to group related macros together into a single project.
To make it easier for the user to find the entry point to your macros, it is useful to place all of the public Subs into a
single module and then instruct the user how to find them –– these are the subs that the user calls from within
CorelDRAW.
Advantage of distributing macros using a GMS file
Every CorelDRAW document has an intrinsic GMS file. This makes it possible to explicitly distribute macros as part of a
document so that, when the user opens the document, they immediately have access to the macros, even if they have not
installed them. A macro can, for example, be used to track how much time has been spent editing the document
perhaps.
Deploying and installing project files
You must devise a mechanism for deploying and installing your project (GMS) files. It is possible to distribute modules
on their own, but, since this requires the users to manually integrate the module into their existing project file, it is
much simpler for the user if you distribute project files instead.
To install a project file, simply save it to the user’s GMS folder. This folder is typically C:\Program Files\Corel\Corel
Graphics 12\Draw\GMS, although different language versions of Windows use different names for the programs folder.
Distributing workspace features
When you have developed a custom workspace that contains custom toolbars, menus, and shortcut keys, these
customizations can form an intrinsic part of your solution. You can distribute the entire workspace, which the user can
install and use or, from CorelDRAW 12, it is possible to export some features of your workspace so the user can import
those features into their own workspace.
Distributing menus, toolbars, and shortcut keys
From CorelDRAW 12 you can distribute components of the user interface without having to distribute complete
workspaces. It is possible to distribute individual toolbars and menus, as well as complete sets of shortcut keys.
To export workspace features
1 Right-click anywhere on the toolbars and select Customize } Workspace } Export workspaces…
2 In the tree list, enable the check boxes next to those items you want to export.
3 Click Save, select a directory, and enter a file name. The selected workspace items will be saved into a single XSLT
file.
4 Click Close.
CorelDRAW Graphics Suite 12 Programming Guide for VBA 79
Page 86

Organizing, grouping, & deploying CorelDRAW macros Chapter 8
To save each item to a separate file, repeat this operation for each item in turn, except do not click Close, just change the
selected items and then click Save, again, for each one.
When exporting shortcut keys, all of the shortcut keys are exported. To distribute just a few keys, create a new
workspace and remove all the shortcut keys from it; then create just the keys you want to export.
The status bar and the sizes and positions of dockers can also be exported.
Importing workspace features
To import a workspace, you can use the Application.ImportWorkspace method or the user can import the Corel
Workspace file manually.
To import a Corel Workspace file manually
1 Right-click anywhere on a toolbar and click Customize } Workspace } Import workspaces.
2 Choose a Corel Workspace (XSLT) file.
3 Choose which items to import from the file.
4 Choose which workspace to import the items into. If you are creating a new workspace, enter details about the
workspace.
5 Confirm the details and click Finish.
The items will be imported into your workspace. If there are any clashes of names of toolbars, the incoming toolbar will
be renamed. If the VBA macros are not installed, commands that call those macros will not work.
CorelDRAW Graphics Suite 12 Programming Guide for VBA 80
Page 87

Where to get more information 9
This document is only meant to be a starting point. This chapter gives information about, and links to, additional
solutions development resources that will be useful to you.
Corel Solution Developers Program
The Corel Solution Developers (CSD) program is a comprehensive resource for developers and consultants interested in
providing products, solutions or services to their end users. The CSD program provides the necessary components to
successfully design, develop, test, and market custom solutions. The solutions can be related to any of Corel’s products,
including the creative, business application, technical illustration, and XML products.
Membership in the program includes technical documentation, developer/technical support, developer tools, developer
newsletter, complementary software licenses, and marketing opportunities.
For more information, visit us online at www.corel.com or email csd@corel.com.
Corel Corporate Professional Services
Corel Corporate Professional Services is a group of highly skilled experts from across the company who are dedicated to
providing top-notch solutions. They can assist you with your project by providing personalized end-to-end solutions and
support throughout all stages of your project. Our wide range of services include: application development and support,
software systems integration, and training.
For more information, visit us online at www.corel.com, or email proservices@corel.com.
Corel Customized Training
Do you need high-end technical training, conveniently delivered on-site at your organization? Corel will customize and
build a training program for you and your colleagues, based on your learning needs and tailored to your work
environment.
For more information, visit us online at www.corel.com/customizedtraining, or email training@corel.com.
Other documentation
Apart from this document, the online Help files that are accessed through the VB Editor are a great reference. In the
editor, type a keyword, class name, or member, select it, and press F1 for information about that keyword. You can also
select an item in the Object Browser, and press F1 to access Help.
Web sites
Various enthusiasts around the world have set up Web sites to provide VBA solutions for CorelDRAW. To locate them,
enter "CorelDRAW + VBA" into most Internet search engines.
A good place to start for links to Web sites related to CorelDRAW is at Corel's own Web site, www.designer.com,inthe
links section.
CorelDRAW Graphics Suite 12 Programming Guide for VBA 81
Page 88

Where to get more information Chapter 9
Newsgroups
Corel runs a number of newsgroups in support of its products and solutions developers for those products. Corel’s news
server is at cnews.corel.com. For a list of all Corel support newgroups, visit www.corel.com/newsgroups. Any standard
news reader can be used to access the groups and access is free.
The newsgroups are frequented by thousands of CorelDRAW users around the world who help each other with their
problems. There are also about one hundred "CTech" volunteers – volunteers recognized by Corel as experts – who are
nominated to provide the communication link with Corel within the newsgroups. These people are knowledgeable,
helpful, and friendly, and usually the first to respond to questions. They also act as group moderators and maintainers.
The rules of the group are posted on the newsgroups page of the support area on Corel’s Web site at
www.corel.com/support.
Other support
Information about all of Corel’s support programs and services can be found at www.corel.com/support.
CorelDRAW Graphics Suite 12 Programming Guide for VBA 82
Page 89

Index
Index
A
arrays ·················8
assigning
variables ··············11
automation···············6
B
BASIC ·················6
blends
creating···············61
Borland Delphi ············7
breaking
lines ·················9
breakpoints ··············31
buttons ················73
adding to a toolbar ·········74
adding to forms···········22
ByRef·················10
ByVal·················10
C
C·················12-13
C++ ··············12-13
calling
functions ············18,36
macros from CorelDRAW ·····72
subroutines ·············18
classes ·············16,28,35
creating object-oriented ······11
collections ·············37,39
color
applying to shapes ·········57
combo boxes
adding to forms···········25
comments ··············10
comparing
variables ··············11
constants ···············29
contours
creating···············61
controls
accessing from other modules····24
adding to forms···········22
converting
coordinates between the screen and
document ·············76
copying
VBA modules ···········16
Corel SCRIPT ·············1
Corel Solution Developers Program· · 81
curves
creating···············51
D
data structures
constructing ·············8
debugging ··············31
Call Stack window ·········32
Immediate window ·········33
Locals window ···········33
Watches window ··········34
declaring functions ···········9
definitions
jumping to ·············20
developers' program ·········81
dialog boxes ·············72
closing ···············24
creating ·············21,72
launching from other ········25
modal ···············72
modeless ··············72
distributing
GMS················79
macros ···············79
workspace features ·········79
workspaces ·············79
document
structure ··············39
Document ··············39
documentation
providing for macros ········77
VBA for CorelDRAW ·······81
documents
activating··············42
changing content of inactive ····42
closing ·············43,65
creating···············41
opening···············65
printing ··············65
E
editor
Visual Basic (VB) ··········14
effects·················61
ellipses
creating···············50
enumerated types ···········8
enumerations ·············29
event-handling ··········23,70
events ···············29,70
exporting
files ·················67
workspace features ·········79
F
files
exporting ··············67
importing··············66
fills ··················59
formatting code ··········10,18
automatic completion ·······20
syntax highlighting·········18
forms ···············16,72
closing ···············24
creating ···········16,21,72
launching from other forms·····25
functions ················9
calling ···············18
declaring···············9
member functions ·········29
G
global values ·············28
GlobalMacroStrorage ·········70
GMS·················16
CorelDRAW Graphics Suite 12 Programming Guide for VBA 83
Page 90

Index
changing the internal name·····16
creating···············16
installing ··············79
organizing macros ·········79
H
HTML files
opening in a browser from a macro · 77
I
images
adding to a command ·······75
adding to forms···········25
importing
files ·················66
workspace features ·········80
initializing
controls on forms ··········25
in-process ···············7
InputBox ···············12
installing
GMS················79
VBA for CorelDRAW ········3
items
accessing in a class ·········37
J
Java ···············12-13
JavaScript ············12-13
L
layers ·················47
activating··············48
creating···············47
deleting···············48
disabling ··············48
hiding ···············48
moving ···············47
renaming ··············47
line endings ··············9
list boxes
adding to forms···········25
loading
user forms ·············72
M
memory
allocation ··············10
pointers···············10
methods ··············29,35
modules ···············16
copying···············16
creating···············16
MsgBox················12
N
naming
macros ················4
variables ··············16
newsgroups ··············82
notation ···············36
O
Object Browser
displaying ·············26
object model ·············35
object hierarchy···········36
searching ··············30
viewing ···············26
objects ················35
Application ·············39
collections ·············37
Document ·············39
implicit ···············38
Layer ················47
Page················43
releasing ··············36
Shape ················48
Text·················52
operators
bitwise ···············12
Boolean···············11
logical ···············12
outlines ················58
P
pages ·················43
creating···············44
deleting···············45
referencing ·············45
referencing by name ········46
reordering ·············45
resizing ···············46
setting default size ·········46
parentheses
code formatting ··········18
parsing
collections ·············37
selected shapes ···········64
passing values·············10
P-code ················13
PDF
publishing to ············67
position
get for a marquee selection ·····76
get for a mouse click ········75
point on a shape ··········77
printing
documents ·············65
private scope ·············10
Project Explorer ···········15
project files ··············16
changing the internal name·····16
creating···············16
installing ··············79
properties ·············29,35
Count················37
Item ················37
public scope··············10
R
recording macros············4
rectangles
creating···············49
rounding corners ··········50
running VBA macros
from a CorelDRAW menu ······5
CorelDRAW Graphics Suite 12 Programming Guide for VBA 84
Page 91

Index
from the toolbar ···········3
from the VB Editor ·········5
S
saving macros ·············4
scope ·················10
local ················11
private ···············10
public················10
selections
referencing ·············62
Set··················36
shapes ················48
applying color ···········57
changing positions ·········56
changing sizes ···········54
creating···············49
creating blends ···········61
creating contours ··········61
creating curves ···········51
creating ellipses···········50
creating rectangles ·········49
duplicating ·············61
effects ···············61
fills ·················59
order of selected shapes in a collection64
outlines ···············58
rotating···············56
scaling ···············55
selecting ··············49
skewing···············57
stretching··············55
shortcuts
to frequently used objects······62
solutions
Corel Corporate Services ······81
starting
Visual Basic editor ·········14
stepping through code ········32
storing
macros ···············16
strings ·················9
structure of VBA code ·········7
subroutines···············9
calling ···············18
syntax
checking ··············19
dot notation ············36
highlighting ············18
syntax of VBA code ··········7
T
text ··················52
creating artistic ···········52
creating paragraph ·········53
fitting to a path···········53
fitting to a shape ··········53
formatting ·············53
text boxes
adding to forms···········25
ThisDocument ············16
ThisMacroStorage ··········70
toolbar
VBA·················3
toolbars ················73
creating···············73
Visual Basic editor ·········14
tooltips ················73
changing default ··········74
creating···············74
training ················81
U
undo
setting an action ··········43
user action
get position of a marquee selection · 76
get position of a mouse click ····75
user input
getting ···············12
user interface ·············72
user messages
sending ···············12
V
values
passing by reference ········10
passing by value ··········10
variables
assigning ··············11
comparing ·············11
declaring···············7
referencing ·············36
VBA
installing···············3
views···············68-69
creating···············70
panning ··············69
restoring ··············70
zooming ··············69
Visual Basic editor ··········14
checking syntax ··········19
Code window ············17
Form Designer window·······21
Object Browser ···········26
Project Explorer ··········15
Properties window ·········17
starting ···············14
toolbars···············14
W
windows ···············68
closing ···············69
creating···············69
switching ··············68
Windows Script Host (WSH)·····13
writing macros ·············3
Z
zooming
views ················69
CorelDRAW Graphics Suite 12 Programming Guide for VBA 85
 Loading...