

Page 1

PART I
CorelDRAW 10 QuickCorelDRAW 10 Quick
Start GuideStart Guide
1
Page 2

CHAPTER 1
Installing CorelDRAW andInstalling CorelDRAW and
Finding HelpFinding Help
3
Page 3

4 CorelDRAW 10: The Official Guide
hether you’re a new CorelDRAW user or a longtime fan, you’re likely to
W
term graphics suite has become somewhat overused in the graphics industry; but
in the case of CorelDRAW, the term fits perfectly. In addition to the legendary
vector editor and page layout program, the CorelDRAW 10 suite also includes
Corel PHOTO-PAINT, Corel R.A.V.E., Corel CAPTURE, Corel TEXTURE,
Corel TEXTURE BATCHER, Corel TRACE, Corel BARCODE WIZARD,
Microsoft Visual Basic for Applications 6.2 (an optional programming tool used
to extend and automate features in CorelDRAW), Bitstream Font Navigator 4.0,
and Canto Cumulus LE 5.0.
As you proceed through the installation process, you may install the entire suite of
programs, or conserve disk space by installing only those programs and features
that you require. Should you ever need to update your installation in the future,
insert the CD-ROM, and the Setup Wizard will walk you through the process of
adding or removing programs and features to suit your individual needs.
find CorelDRAW 10 to be a powerful, feature-packed graphics suite. The
Before You Install
If you’re new to CorelDRAW, you may find the installation procedure to be a
refreshing change from that of typical new programs. Corel’s Setup Wizard
enables you to have complete control over the entire installation process. You
choose which programs you want to install and which features of those programs
you want to install, while the Setup Wizard keeps you constantly updated on the
amount of disk space that your options will require.
The most important things to consider before you install are whether you’d
like to go with a full installation of all programs (definitely the best option if
you have the disk space) and whether your system has sufficient resources for
a complete installation.
Windows Requirements
Corel recommends the bulleted items in the following list as minimum
requirements for installing CorelDRAW 10.
■
Windows 98, Windows Me, Windows NT 4.0, or Windows 2000
CorelDRAW 10 is also available for the Macintosh OS. The Windows
and Macintosh versions are sold in separate packaging.
Page 4

CHAPTER 1: Installing CorelDRAW and Finding Help 5
64MB RAM (128MB recommended) This may be a somewhat
■
conservative estimate as to the amount of RAM you’ll need, depending
upon how you plan to use CorelDRAW. If you’re going to be making Web
graphics in CorelDRAW, or scanning and retouching photographs in Corel
PHOTO-PAINT, 64MB of RAM may be fine. As you probably already
know, if you plan to do high-resolution print work in CorelDRAW or video
editing in Corel PHOTO-PAINT, you’ll need 128MB or more RAM.
Pentium 200 processor When dealing with processors and graphics, the
■
more processor speed you have, the smoother things will run. AMD and
Cyrix chip users will be happy to know that there are no known issues of
CorelDRAW 10 running improperly on non-Pentium systems.
2X CD-ROM drive Actually, a 1X CD-ROM drive would probably still
■
work, but the installation process would be slowed down. In general, a
16X (or faster) CD-ROM will make for a smoother installation.
■ Mouse or tablet Of course, a drawing tablet is not required, but it can
make a nice option.
■ SVGA display Although it’s not a requirement, a video card with 8MB
or more video RAM is always a plus when working with graphics.
1
■ Minimum 128MB hard disk space The hard disk space needed can vary
widely, depending upon which programs you plan to install. A typical
installation takes up about 300 MB of disk space. If you’re installing the
entire CorelDRAW suite with all options, you’ll need 400MB of disk
space. The amount of additional space that you’ll need for the Windows
swap file will vary depending on how you use CorelDRAW. In general,
you’ll want at least 64MB to 128MB of free space available after
installation. The need for additional free space will be lowest for Web
imaging and typical desktop publishing, and much higher for highresolution printing and for video editing.
■
Optional 28.8 or higher modem Although a modem isn’t an official option,
it’s one you may want to consider.With the release of CorelDRAW 10, and
in particular with the introduction of Corel R.A.V.E. to the CorelDRAW
suite, Corel has leapt ahead of the competition in terms of providing a fully
Web-capable graphics creation and editing environment.
Page 5

6 CorelDRAW 10: The Official Guide
Registering Your Software
Registering your software is an essential step for receiving technical support and
for being kept advised of program upgrades. Should patches or bug fixes be
required, Corel will notify you of their availability and make them available via
free downloads from the Internet and nominally priced CD-ROMs.
You’ll be prompted near the end of the installation process to register your
new software. Online registration via the registration Web site is the fastest and
easiest registration method. However, if you’d prefer to mail in your registration,
you may use the postcard included with CorelDRAW. You may also print your
registration form and fax it to Corel.
Slipping in the Disc
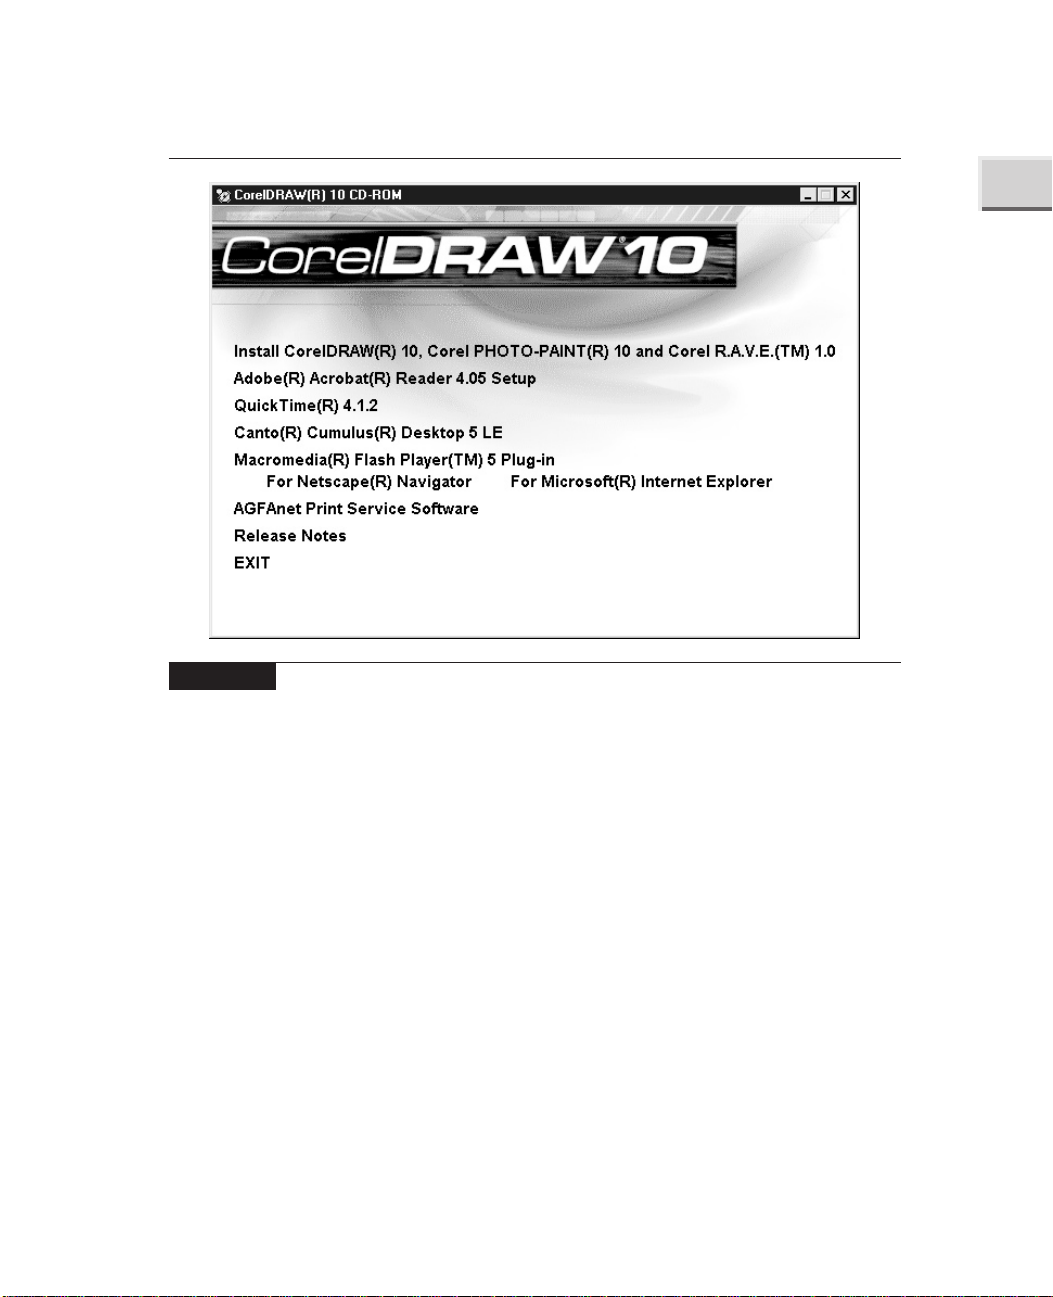
To begin installing CorelDRAW 10, just place the CD in your CD-ROM drive. On
most systems, the CD will begin running the Setup Wizard automatically. You’ll
have eight options when the wizard begins (see Figure 1-1).
■ Install CorelDRAW 10, Corel PHOTO-PAINT 10, and Corel R.A.V.E 1.0
The way this is worded implies that it can only be used to install the three
listed programs. Actually, this option is the correct one to choose to install
CorelDRAW, and any or all of the other Corel programs on the CD. Unless
you want to install one of the non-Corel programs (such as the Acrobat
reader), this is the option you should select.
■
Adobe Acrobat Reader 4.05 Setup This option installs Acrobat, an
optional program used to view items such as tutorials or manuals that may
be found on the CorelDRAW CDs. Adobe Acrobat files may be identified
by the .PDF file extension.
■
Quicktime 4.1.2 This option installs Apple’s Quicktime software for
Windows. By default, Corel R.A.V.E. exports animation in the Flash, GIF,
and AVI formats; and Corel PHOTO-PAINT exports in the GIF and AVI
formats. Installing Quicktime enables the additional option of exporting
Quicktime movies from both Corel R.A.V.E. and Corel PHOTO-PAINT.
■
Canto Cumulus Desktop 5 LE This option installs Canto Cumulus, an
optional program used to catalog your digital media (such as images, page
layouts, and videos) into a convenient searchable database.
■
Macromedia Flash Player 5 Plug-in for Netscape Navigator and Microsoft
Internet Explorer If you use a Web browser, it’s very likely that you
Page 6
CHAPTER 1: Installing CorelDRAW and Finding Help 7
1
FIGURE 1-1 Main installation screen for CorelDRAW 10
already have the Macromedia Flash plug-in installed. (It’s currently
installed on over 90 percent of all Web browsers.) If you’d like to ensure
that you have the latest version of the Flash plug-in installed, you may
select this option. The Flash plug-in may be installed for Microsoft Internet
Explorer and Netscape Navigator.
■
AGFAnet Print Service Software You may find this option to be
particularly useful if you own a digital camera. The AGFAnet software
uses your Internet connection to locate a nearby photo processing bureau,
transfer your images to the bureau, arrange payment, and have finished
prints delivered to your door.
■
Release Notes This option opens CorelDRAW’s release notes in your
default Web browser. Since the release notes file is stored on the CD, you
do not have to be connected to the Internet to view the release notes.
■
EXIT This option exits the Setup Wizard.
Page 7

8 CorelDRAW 10: The Official Guide
Installation for the Typical User
For a typical installation, begin by selecting the first option. The other options may
be installed at any time. Note that if the Setup Wizard does not start automatically,
you may use My Computer or Windows Explorer to open the CD-ROM drive and
double-click the Intro.EXE file. Alternatively, if you know you only want to install
the Corel programs, you may click the Setup32.EXE file. Depending upon how
your system is configured, the .EXE portion of the filename may not be visible.
Navigating a Custom Installation
After you accept the Corel licensing agreement, the Setup Wizard will take you to
the CorelDRAW 10 Setup Options screen. You’ll have three installation options:
Typical, Compact, and Custom (see Figure 1-2).
FIGURE 1-2 The CorelDRAW 10 Setup Options screen
Page 8

CHAPTER 1: Installing CorelDRAW and Finding Help 9
The Typical selection is the default selection and is the best choice for most
users. This option installs CorelDRAW; Corel PHOTO-PAINT; Corel R.A.V.E.;
Corel CAPTURE; Corel TRACE; and commonly used bitmap filters, file import
and export filters, writing tools, and fonts.
If you plan to use only CorelDRAW, you may select the Compact option. Expert
users may prefer to use the Custom option, since this selection may be used to install
additional options, such as device profiles, non-English-language writing tools, and
the Microsoft VBA (Visual Basic for Applications) programming interface.
Choosing Utilities
When choosing a custom installation, you’ll have complete control over which Corel
programs are installed and which are not installed. Since you may not be familiar
with every application in the CorelDRAW suite, here are their brief descriptions:
■ CorelDRAW is Corel’s legendary vector editing and page layout program.
■ Corel PHOTO-PAINT is an award-winning bitmap creation and
photo-editing program.
■ Corel R.A.V.E. is a new and very welcome addition to the CorelDRAW
suite. It’s used to create vector animation, which may then be exported as
Flash movies. It is used to create vector animation, which may then be
exported as Flash movies.
1
■
Corel CAPTURE is an advanced screen shot capturing utility.
■
Corel TEXTURE is used to create natural-looking bitmap textures such
as marble and wood.
■
Corel TRACE is a powerful utility for converting bitmap images into
vector images.
Installing Bitmap Filter Plug-Ins
Four sets of bitmap filter plug-ins are available for installation. These plug-ins
are available in addition to over 80 plug-ins that are installed with CorelDRAW
and Corel PHOTO-PAINT by default.
Page 9

10 CorelDRAW 10: The Official Guide
Plug-ins are essentially miniature programs that work within larger programs
such as CorelDRAW and Corel PHOTO-PAINT. The following selections
are available:
DigiMarc This plug-in is used to apply a watermark to bitmap images.
■
Watermarks are small, invisible digital signatures that can help identify
your images if they’re stolen and used without your permission.
Corel Fancy Plug-Ins This is a set of two plug-ins, the Julia Set
■
Explorer and Terrazzo. The Julia Set Explorer creates fascinating color
patterns using fractal geometry, a math process based on naturally
occurring energy patterns. Terrazzo is another program based on fractal
geometry. It’s used to create kaleidoscope-styled patterns and tiles from
bitmap images.
■ Squizz This plug-in is used for applying effects with a paintbrush tool,
and for warping color patterns with a mesh warp.
■ Kai’s Power Tools This option installs three filters from Kai’s Power
Tools version 5: Shape Shifter, Smoothie, and FraxFlame. Shape Shifter is
used for applying various bevel and bump map effects to images, Smoothie
is used for smoothing out rough edges, and FraxFlame is used for creating
and exploring mathematically created fractal patterns.
Choosing Fonts
If you’d like to select which fonts to install with CorelDRAW 10, use the custom
install option. This will enable access to a font selection dialog during the
installation. You may preview the appearance of any font by clicking the font’s
name. Checking the box to the left of a font’s name will tell the Setup Wizard that
you want the font installed.
Choosing Additional Features
The CorelDRAW installation program will also enable you to select device profiles,
which help match the colors in CorelDRAW and Corel PHOTO-PAINT to the
colors available in your hardware devices. By default, generic monitor, scanner,
printer, and digital camera profiles will be installed. You may select additional
profiles to match your particular hardware by clicking the category name (such as
monitor profiles), and then clicking the name and model number of your device.
Don’t be concerned if your devices aren’t listed; the generic profiles are supplied just
in case this happens.
Page 10

CHAPTER 1: Installing CorelDRAW and Finding Help 11
Adding and Removing Components
You may use the CorelDRAW installation CD to add components at any time.
Place the CD in your CD-ROM drive to start the Setup Wizard, or open the drive
via My Computer or Windows Explorer and click Intro.EXE.
Select Install CorelDRAW 10, Corel PHOTO-PAINT 10, and Corel R.A.V.E.
to add any Corel component. The Setup dialog will open with several selections
(see Figure 1-3). Choose the Add New Components option, and click Next. This will
take you to the Components dialog, where you may select the components that you’d
like to install. Note that a grayed selection box means that only parts of a selected
component will be installed. For example, a grayed check box next to Productivity
Tools means that at least one tool (such as Visual Basic for Applications) is being
installed, while another tool (such as the Barcode Wizard) is not being installed.
You may click the grayed check mark to select the component and all of its options,
and click the check mark again to deselect the component and all of its options.
To remove components, click Start | Programs | CorelDRAW 10 | Setup and
Notes | Corel Uninstaller. Place a check next to any component that you’d like to
remove. Please note that you should never attempt to remove a component
1
FIGURE 1-3 Adding new components to your CorelDRAW 10 installation
Page 11

12 CorelDRAW 10: The Official Guide
simply by deleting what appears to be its program folder. In order to cut down as
much as possible on the amount of disk space needed to install the CorelDRAW
suite, many Corel programs share files with other programs. If you accidentally
remove one of these shared files, other programs that use the shared file will not
work correctly, and may not be able to work at all.
Refreshing Your CorelDRAW 10 Installation
Once you install CorelDRAW 10, you may occasionally need to refresh the
installation. Accidentally deleting a CorelDRAW 10 file, problems with the
Windows registry, and adding new software that erroneously changes CorelDRAW
10 settings, can all cause CorelDRAW 10 to operate incorrectly (or not at all).
If you need to refresh your current installation (without making any changes
such as adding or removing components), select Update Current Installation
from the Setup dialog (see Figure 1-3). Your installation will be updated using
the same options you selected the last time you installed CorelDRAW.
Using CorelTUTOR
CorelTUTOR contains a series of lessons on learning CorelDRAW. You may
follow the lessons from beginning to end, or just select a particular lesson that
interests you. The lessons provide hands-on training by both supplying sample
images for you to work with and providing instructions to walk you through the
entire learning process.
Opening CorelTUTOR
There are two ways to access the CorelTUTOR: When first opening CorelDRAW,
select CorelTUTOR from the splash screen; or, once in CorelDRAW, click Help |
CorelTUTOR.
Helping Yourself to Help
CorelDRAW ships with several features designed to make learning the application
and finding Help a comfortable process. Unlike some competing applications,
you’ll find Corel’s Help tools to be extremely well written, with access to Help
only a mouse click away.
Page 12

CHAPTER 1: Installing CorelDRAW and Finding Help 13
Activating ToolTips
ToolTips are brief descriptions of the various parts of the CorelDRAW interface.
ToolTips are available for virtually any icon and control in every toolbar, dialog,
and docker window. To activate a ToolTip, place your cursor over the item you’d
like to find out more about, and hold it there for a second or two. A ToolTip
describing the item will automatically be displayed. If you find that ToolTips are
not being displayed, click Tools | Options | Display, and make sure that Show
ToolTips is checked.
What’s This?
Right-clicking virtually anywhere in the CorelDRAW interface will open a pop-up
menu with a list of options, including What’s This? Help. Clicking on What’s This
in the pop-up menu opens a small pop-up window that explains the item.
One of the truly unique features of Corel’s What’s This Help is that you can
use it to learn more about how any image you open in CorelDRAW was created.
You can try this feature by opening a clip art image from the CorelDRAW clip
art CD. Right-click the image and click What’s This, as shown here:
1
CorelDRAW will take a moment to analyze the image to see which features
were used to create it, and then provide a pop-up menu with selections for learning
Page 13

14 CorelDRAW 10: The Official Guide
more about the features. You may click any of the menu items to learn more
about the tool(s) used to create the image, as shown here:
Using Context-Sensitive Help
Context-sensitive Help is available from the main CorelDRAW screen and for most
dialogs as well. To access context-sensitive Help from the main CorelDRAW screen,
click the question mark on the right side of the main toolbar, and then click the item
in question. To access context-sensitive Help from a dialog, click the question mark
icon in the upper-right corner of the dialog, and then click the item in question.
Corel’s context-sensitive Help then displays an explanation of the item.
Using CorelDRAW Help
Clicking Help and then clicking Help Topics opens the Corel help system (see
Figure 1-4). The help system is divided into three categories: Contents, Index, and
Find. The Contents menu works like a book’s table of contents in that it displays
broad subject matter topics that then contain subheadings with more detailed
information. The Index tab works like an index at the back of a book, displaying
individual words and phrases instead of the broad subject matter that you’ll find in
the Contents menu. To search for help on a topic, click the Find tab, and enter one
or more search words. Results will appear as soon as the search is complete.
You may bookmark items that you’ve found helpful in order to find them
quickly in the future. To bookmark an item, click Bookmark | Define. A default title
will be given to the topic, but you may change this title to anything that you feel will
assist you in locating the item in the future. When you’re comfortable with the title,
click OK. The item will then be added to the Bookmark menu, in much the same
way that an item is added to the Favorites menu in your Web browser.
Page 14

CHAPTER 1: Installing CorelDRAW and Finding Help 15
1
FIGURE 1-4 The CorelDRAW 10 main Help window
To access a previously bookmarked item, click Bookmark, and then click the
topic you’d like to view. To delete a bookmarked item, click Bookmark | Define,
select the item you’d like to delete (from the lower portion of the dialog), and
click Delete. When you’re done, click Cancel to close the Bookmark dialog. The
help topic itself will not be deleted, only your bookmark will be removed.
Getting Technical Support
Corel provides complimentary and fee-based telephone technical support for
the CorelDRAW suite. Classic technical support (free except for long distance
charges) is available in the United States and Canada by calling (613) 274-0500,
Monday through Friday, from 8:30
is available for 30 days from the time you first call for assistance.
Priority support is available on a “pay per incident” basis at (877) 662-6735
and on a “pay as you go” basis at (900) 733-8780. However, in addition to
A.M. to 7:30 P.M., Eastern Time. This service
Page 15

16 CorelDRAW 10: The Official Guide
offering Classic technical support, Corel offers a wealth of other free support
options, making it unlikely that you’d ever need to use fee-based support.
Using Corel’s IVAN Faxback Service
Corel’s Interactive Voice Answering Network (IVAN) consists of answers to
common support questions that you may listen to on your telephone or have sent
to you via fax. The IVAN service is free for U.S. and Canadian users, and is
available 24 hours a day, every day of the year, by calling (877) 42-COREL.
Using About CorelDRAW
When contacting technical support, you’ll need to provide your CorelDRAW
version/build number, serial number, and possibly some additional information
regarding your system’s resources. To access this information, click Help, and
then click About CorelDRAW. The version/build number is located just under the
main window, as is your serial number and your PIN number (if one has
previously been issued to you by Customer Service).
You may access information regarding your system setup—such as processor
type, RAM, and video data—by clicking the System Info button to the right of
the main window (see Figure 1-5).
FIGURE 1-5 Accessing your system information from Help | About CorelDRAW
Page 16

CHAPTER 1: Installing CorelDRAW and Finding Help 17
Using Hints
Hints that describe the tools in CorelDRAW are provided on the status bar (located
on the bottom of your screen). The left side of the status bar contains information
on your cursor’s current position in your document and information about the tool
you’re currently using. You’ll also find your current fill and outline colors on the
right side of the status bar. An X means that no fill or outline is currently selected.
Getting Help on the Web
You’ll find a great deal of information about CorelDRAW—including articles,
tutorials, patches, and special offers—on Corel’s World Wide Web sites.
Web-based technical support and FTP file downloads are also available.
Surfing Corel’s Various Web Sites
Corel currently has three Web sites that can assist you in answering specific
questions and finding general information on just about any CorelDRAW topic.
Designer.com
Designer.com is Corel’s community site, where you’ll find tips, secrets, articles,
tutorials, and free downloads. The authors of CorelDRAW 10: The Official Guide
are regular contributors to Corel’s Designer.com.
1
CorelCity.com
CorelCity.com is a portal site that provides access to online services such as
e-mail and instant messaging, along with world news and technology news.
Corel.com
This is Corel’s home page. Corel.com provides access to Corel news, product
information, support, events, and free downloads.
Getting Web-Based Technical Support
You may access Corel Web-based technical support, including the Corel
Knowledge Base and Corel e-mail support, via http://www.corel.com/
support/options/onlineserv.htm. Corel also has a learning center located
at http://www.corel.com/learning/index.htm.
Page 17

18 CorelDRAW 10: The Official Guide
About Corel’s FTP site
Corel’s FTP site provides printer drivers, free patches, and other files via
anonymous FTP logon. The address is ftp.corel.com. If you don’t have an FTP
(File Transfer Protocol) program, use your Web browser to access Corel’s
FTP site by typing the URL ftp://ftp.corel.com/pub.
Corel Newsgroups
Newsgroups provide an interactive support environment where you may
post questions for Corel’s C-Tech volunteers and product users. The Corel
newsgroup server is located at cnews.corel.ca. Many ISP news servers also
carry some Corel newsgroups, such as comp.graphics.apps.corel, and groups
in the “corelsupport.” hierarchy.
Netscape’s and Microsoft’s e-mail programs both support newsgroup
access. If you’re not familiar with how to access newsgroups, try going to
http://www.corel.com/support/options/online_newsgroups.htm and clicking
one of the newsgroup names. After taking a moment to download the
information needed to access the news server, the newsgroup should open in
your default e-mail viewer. The exact procedure for accessing newsgroups
varies from program to program, but you can find the information you need
by looking up “usenet” or “news server” in your e-mail program’s Help file,
or by contacting your Internet Service Provider.
 Loading...