


 Loading...

ENGLISH
CONGRATULATIONS
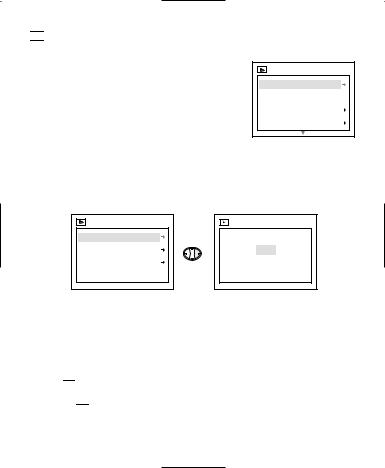
Congratulations on the purchase of your new camera. Your camera has been carefully engineered and manufactured to give you dependable operation. Read this manual before operating the camera to become more familiar with it.
This manual has been written and formatted with depth and detail so that you can easily follow the instructions to maximize the features of your camera.
1

Table of Contents |
|
|
|
Important Information ...................................................................................... |
4 |
|
Camera Features .............................................................................................. |
6 |
|
System Requirements ...................................................................................... |
6 |
1. |
The Camera |
|
|
Overview of your Concord Eye-Q Go LCD Camera .......................................... |
7 |
|
Loading the Battery ........................................................................................ |
8 |
|
Turning the Camera On and Off ...................................................................... |
9 |
|
LCD Menus Screens ........................................................................................ |
10 |
|
LCD Messages ................................................................................................ |
12 |
|
Turning the LCD On and Off .......................................................................... |
13 |
|
Camera Ready LED Status .............................................................................. |
13 |
|
Camera Memory .............................................................................................. |
14 |
|
Using the Memory Card .................................................................................. |
15 |
2. |
Camera Mode |
|
|
Taking Pictures................................................................................................ |
16 |
|
Main Menu ...................................................................................................... |
16 |
|
Mode Select .............................................................................................. |
17 |
|
Video Clips Mode ................................................................................ |
17 |
|
Self-timer .............................................................................................. |
18 |
|
Image Quality ............................................................................................ |
19 |
|
Slide Switch .............................................................................................. |
20 |
|
Flash .......................................................................................................... |
21 |
|
White Balance .......................................................................................... |
22 |
|
LCD Brightness .......................................................................................... |
23 |
|
Setup ........................................................................................................ |
24 |
|
2X Digital Zoom ............................................................................................ |
27 |
3. |
Review Mode |
|
|
2X Enlargement .............................................................................................. |
28 |
|
Video Clip Playback ...................................................................................... |
28 |
|
Main Menu .................................................................................................... |
29 |
|
Delete ........................................................................................................ |
29 |
|
Thumbnail .................................................................................................. |
31 |
|
Brightness .................................................................................................. |
31 |
2

4. |
Transferring Files to the Computer |
|
|
Installing the Software .................................................................................. |
32 |
|
Connecting the Camera to the Computer ...................................................... |
33 |
|
Disconnecting the Camera from the Computer ............................................ |
33 |
|
Viewing files on your computer .................................................................... |
34 |
|
TWAIN/WDM Drivers .................................................................................. |
35 |
|
Mass Storage ............................................................................................ |
36 |
|
For Windows ........................................................................................ |
36 |
|
For Macintosh ...................................................................................... |
37 |
|
Using PhotoImpression Software .................................................................. |
38 |
5. |
Special Features |
|
|
PC Video Clips................................................................................................ |
39 |
|
Web Camera .................................................................................................. |
40 |
|
TV Mode ........................................................................................................ |
41 |
6. |
Camera Maintenance |
|
|
Cleaning the Eye-Q Go LCD............................................................................ |
43 |
7. |
Tips and Troubleshooting .............................................................................. |
44 |
8. |
Getting Help .................................................................................................. |
48 |
9. |
Camera Specifications .................................................................................... |
49 |
10. |
Warranty Information .................................................................................... |
52 |
3

IMPORTANT INFORMATION
FCC INFORMATION
FCC WARNING: This equipment meets the limits for a Class B digital device, pursuant to Part 15 of FCC rules. Only the cables supplied with the camera should be used. Operation with other cables is likely to result in interference to radio and TV reception and could void the user’s authorization to operate this equipment. This device complies with Part 15 of the FCC Rules. Operation is subject to the following two conditions:
•This device may not cause harmful interference.
•This device must accept any interference received, including interference that may cause undesired operation.
Tested To Comply
With FCC Standards for HOME OR OFFICE USE
Changes or modifications not expressly approved by the manufacturer may void the user’s authority to operate this equipment.
USER INFORMATION
NOTE: This equipment has been tested and found to comply with the limits for a Class B digital device, pursuant to Part 15 of the FCC Rules. These limits are designed to provide reasonable protection against harmful interference in a residential installation. This equipment generates, uses and can radiate radio frequency energy and if not installed and used in accordance with the instructions, may cause harmful interference to radio communications. However, there is no guarantee that interference will not occur in a particular installation. If this equipment does cause harmful interference to radio or television reception, which can be determined by turning the equipment on and off, the user is encouraged to try to correct the interference by one or more of the following measures:
•Reorient or relocate the receiving antenna.
•Increase the separation between the equipment and receiver.
•Connect the equipment into an outlet on a circuit different from that to which the receiver is connected.
•Consult the dealer or an experienced radio/TV technician for help.
4

VCCI INFORMATION
This is a Class B product, to be used in a domestic environment, based on the Technical Requirements of the Voluntary Control Council for Interference from Information Technology Equipment (VCCI). If this is used near a radio or television receiver in a domestic environment, it may cause radio interference. Please install and use the equipment according to the instruction manual.
PRECAUTIONS
Be sure to observe the following precautions when using the camera:
•Do not open the case of the camera or attempt your own repairs. Always leave this service to authorized repair facilities.
•Keep the camera away from water and other liquids, and never let it get wet. Never use outdoors when it is raining or snowing.
•Should foreign matter or water get into the unit, immediately turn the power off and contact your local authorized service center.
•Physical damage and malfunction of this unit can cause the image data stored in its memory to be deleted. Be sure to always keep backup copies of data by transferring them to a personal computer.
•Under the environment with electrostatic discharge, the camera may malfunction and require the user to reset the camera.
•Do not leave the camera in places subject to extremely high temperatures, such as in a closed vehicle or in direct sunlight.
•Remove the battery when camera is not used for long periods of time.
•Use CR123 lithium batteries only.
•Dispose of the battery in a manner that complies with applicable laws.
•Do not place the camera in unstable locations where the camera may fall and be damaged.
•Do not touch or press on the lens.
•Do not unplug the camera from the TV or computer while the camera is in operation, otherwise the memory may be corrupted.
•Do not turn the power off or open the battery compartment when the camera ready LED is on or blinking, otherwise the image or video clip may not get stored.
5

Camera Features
•Stores approximately 14 Fine, 33 Normal or 54 Economy mode images with 7MB internal memory
•Virtually unlimited storage using the removable MultiMediaCard (MMC) or Secure Digital (SD). MMC/SD memory cards can be purchased separately at most computer or electronic retailers.
•1.6" Color LCD
•1280 x 960 pixel resolution (1.3 Mega Pixels)
•Focus free from 0.65m to infinity
•2X Digital Zoom
•Slide switch with Macro (Close-up photography), Indoor (Auto Flash) and Outdoor (No Flash) modes
•Video Clip Mode
•Self-timer
•PC Video Clips (Windows only)
•Web Camera (Windows only)
•TV On Screen Display (OSD) menu
•TV connection (NTSC and PAL)
•USB connection and cable
•Tripod socket
•Multi-language menu
System Requirements
PC:
•Microsoft Windows 98SE/ME/2000 and XP
•IBM PC/AT or compatible, 200 Mhz or higher
•Minimum 32MB RAM (64MB recommended)
•USB Port
•640 x 480 monitor, minimum 16 bit color (1024 x 768 24 bit color recommended)
•175MB free hard disk space
•56K or faster modem, ISDN, or LAN connection (for the Web Camera feature only)
•CD-ROM drive
Macintosh:
•Mac OS 9 or higher
•Macintosh Power PC or higher, Minimum 64MB of RAM
•USB Port
•100MB of available Hard Disk Space
6

1. The Camera
Overview of Your Concord Eye-Q Go LCD Camera
FRONT/TOP
1 |
4 |
2 |
|
|
5 |
|
6 |
3 |
7 |
|
|
|
8 |
1.Shutter Button
2.Rotary Switch
3.Neck/Wrist Strap Mount
4.Viewfinder
5.Flash
6.Self-timer LED
7.Lens
8.Slide Switch
9. |
Camera Ready LED |
BACK/BOTTOM |
|
|
|
|
|||
10. |
LCD |
|
|
|
11. |
USB/TV Out/Phone Ports |
|
13 |
|
|
|
|||
|
(Optional) |
|
|
|
12. |
Tripod Socket |
9 |
14 |
|
13. |
Viewfinder |
|
||
|
|
|||
14. |
Navigation Button |
|
15 |
|
15. |
Power Button |
10 |
16 |
|
17 |
||||
16. |
LCD On/Off Button |
|
||
|
18 |
|||
17. |
OK Button |
11 |
||
|
||||
18. |
Menu Button |
12 |
19 |
|
19. |
Battery Door |
|||
|
|
7
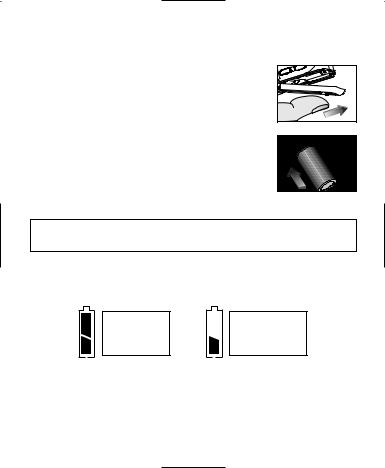
Loading the Battery
The Concord Eye-Q Go LCD uses one 3V (CR123) lithium battery.
Loading the Battery:
1.Locate the battery door on the bottom of the camera.
2. |
Slide the battery door outwards, as indicated by |
|
|
the arrow and lift the battery door to open. |
|
|
(fig.1.1) |
fig.1.1 |
3. |
Insert the 3V (CR123) lithium battery with the |
|
|
positive terminal (+) toward the inside of the |
|
|
battery compartment. |
|
4. |
Close the battery door, press down on it and slide |
|
|
it towards the center of the camera until it snaps |
|
|
into place. |
fig.1.2 |
Note: Take extra care in opening or closing the battery door so as to prevent the battery from falling out.
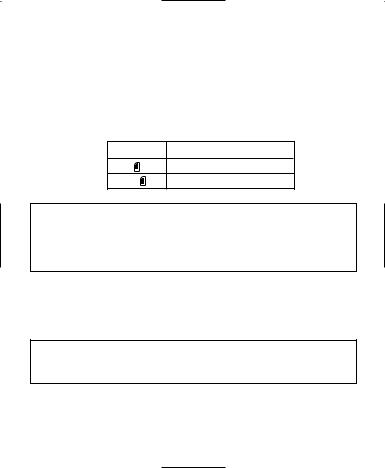
Checking the Battery
The camera has a battery indicator that shows the current battery level.
FULL
Battery is full and ready for use.
LOW
Battery is low in power and it needs to be replaced soon.
8

Turning the Camera on and off
To turn the camera on and off:
1.Press the On/Off button  for a few seconds. The camera will beep when it is turned on.
2.To turn the camera off, press the On/Off button
 for a few seconds.
 3
3
fig.1.4 |
Note: Please peel off the thin protective plastic film on the LCD before use.
9
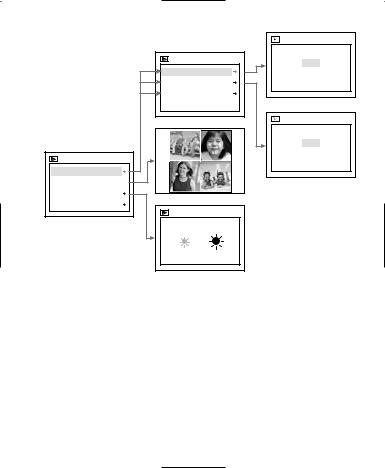
LCD MENU SCREENS
MAIN MENU |
Mode |
Quality |
Flash |
WB |
MAIN MENU |
Brightness |
Setup |
Exit |
MODE |
|
Video Clip |
|
Self - timer |
Off |
Main Menu |
|
|
QUALITY |
|
Fine |
|
Normal |
|
Economy |
|
Main Menu |
FLASH |
|
A u t o |
|
F l a s h |
|
Flash Off |
|
Main Menu |
WB |
|
|
|
AW B |
|
S u n n y |
|
F l u o r e s e n t |
|
Tu n g s t e n |
BRIGHTNESS |
|
B r i g h t n e s s |
|
|
1 5 S |
|
3 0 S |
|
6 0 S |
|
9 0 S |
SETUP |
Non |
|
|
|
|
|
|
|
P C |
Timeout |
15S |
|
|
|
|
|
|
|
|
|
H D D |
||
Driver |
PC |
|
|
|
|
|
|
|
|
|
|||
|
|
|
|
|
||
TV |
NTSC |
|
|
|
|
|
|
|
|
|
N T S C |
||
Language |
|
|
|
|
|
PA L |
|
|
|
|
|
||
|
|
|
|
|
|
|
|
|
|
|
|
|
|
|
|
|
|
|
|
|
|
English |
|
SETUP |
Français |
|
Español |
||
|
||
Default |
Deutsch |
|
Format |
Italiano |
|
|
||
Main Menu |
|
|
10 |
|
MAIN MENU |
Delete |
Thumbnail |
Brightness |
Exit |
|
DELETE ONE |
|
DELETE |
THIS FILE |
|
No |
||
|
||
Delete One |
Yes |
|
|
||
Delete All |
|
|
Main Menu |
|
|
|
DELETE ALL |
|
|
No |
|
|
Yes |
BRIGHTNESS |
Brightness |
11
LCD Messages
Message(s) will be prompted on the LCD screen when the memory is full or if there is a problem with the memory.
1.MMC MEMORY IS INSUFFICIENT:
If the file in the internal memory is larger than the available memory space in the MMC/SD memory card, the file will not be transferred and this message will appear. Please insert a MMC/SD memory card with sufficient memory or delete files.
2.MMC/SD IS FULL:
The MMC/SD memory card is full. Please insert a new MMC/SD memory card or delete files.
3.INTERNAL MEMORY IS FULL:
The internal memory is full. Please insert an MMC/SD memory card or delete files.
4.ERROR:
The camera’s internal memory or the MMC/SD memory card memory may be corrupted. Delete all files or format the memory to continue.
MMC MEMORY IS INSUFFICIENT
MMC FULL!
INTERNAL MEMORY
FULL
ERROR!
12
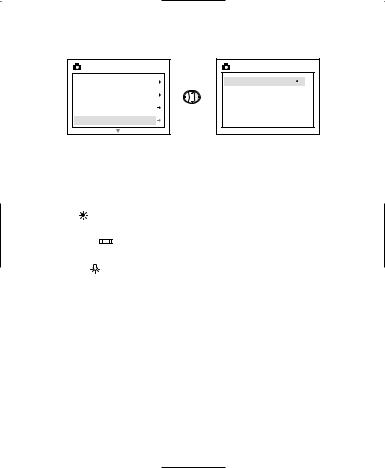
Turning the LCD On and Off
The LCD automatically turns on when the camera is powered on. Press the LCD On/Off button 
 to turn the LCD on or off.
Using the 
 Display ON/OFF Button:
1.Press once to turn the LCD icons off.
2.Press 
 to turn the LCD off.
3.Press 
 to turn the LCD on.
Camera Ready LED Status
FINE
A
005/080
When the Camera Ready LED is:
1. Steady
The camera is in capture mode. Please hold the camera steadily during this time, otherwise the image may come out blurry. (fig.1.5)
fig.1.5 |
2. Blinking
The flash is recharging or the camera is in background storage mode. You may move the camera. (fig.1.5)
Note: Do not open the battery door or turn the power off while the Camera Ready LED is steady or blinking, otherwise the images or video clips in the camera may be damaged.
13
Camera Memory
The Concord Eye-Q Go LCD can store images in one of two ways using either the camera’s 7MB internal memory or the removable MultiMediaCard or Secure Digital memory card (MMC/SD).
•When the MMC/SD memory card is inserted, the images and video clips in the internal memory will be transferred automatically onto the memory card.
LCD |
Default Memory |
|
MMC/SD |
No |
Internal Memory (7MB) |
Note: If a MMC/SD memory card with insufficient memory is inserted, there will only be a partial transfer and the memory card will be filled. The files that were not transferred will remain in the internal memory. Please insert a memory card with sufficient memory or delete files. Please refer to the Deleting Files section for instruction.
When the camera’s internal memory or the MMC/SD is full, you will need to delete files to continue to take images. Please refer to the Deleting Images section for instructions, or use a new MMC/SD with free space.
Note: There may be available storage space by using a lower image quality setting. Refer to the Quality Images section to change the image quality settings.
14
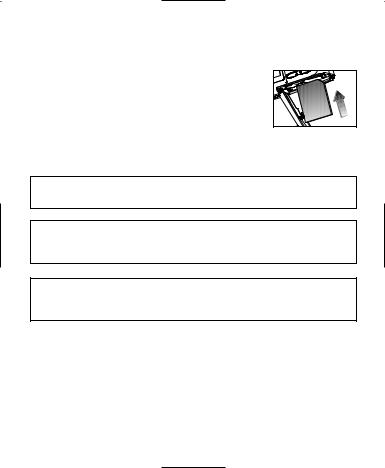
Using the MultiMediaCard or the Secure Digital Memory Card
Inserting the memory card:
1.Locate the battery cover on the bottom of the camera.
2.Slide the battery door away from the camera body and lift the battery door to open.
3.Insert the MMC or SD memory card as indicated by the arrow. (fig.1.6)
fig.1.6 |
4.Close the battery door. Press down on it and
slide it towards the center of the camera until it snaps into place.
Note: Please use MMC/SD memory cards with 16 MB of storage or higher.
Note: If the internal memory or the MMC/SD is corrupted, the LCD will display Error! The memory needs to be formatted. Please format all files to continue. (P.25)
Note: MMC/SD memory cards are sold separately and can be purchased from major electronic or computer retailers. The cost will vary depending on the size of the memory card.
15
2.  Camera Mode
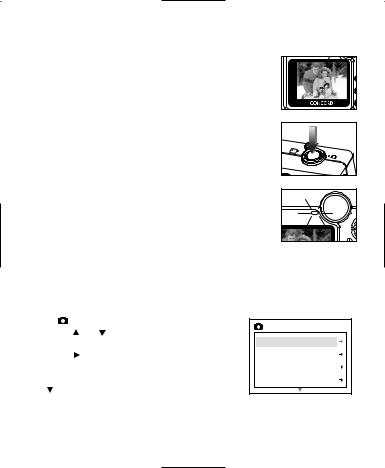
The default mode for taking images is the fine quality setting. Please refer to the Image Quality section to learn how to change the settings of your camera. (fig.2.1)
Taking Still Images:
1.Set the Mode switch to  .
.
2.Position the subject in the LCD or the viewfinder.
3.Gently press the Shutter button (fig.2.2) and keep the camera still when the camera ready LED next to the viewfinder is lit. This indicates that the image is being captured. (fig.2.3)
4.When the image has been captured, the camera ready LED next to the viewfinder will blink. This indicates that the image is being stored in the memory. You may move the camera at this time.
5.A preview of the image will be displayed on the LCD for 1 second and the file counter number displayed in the LCD will be updated.
fig.2.1 |
fig.2.2 |
fig.2.3 |
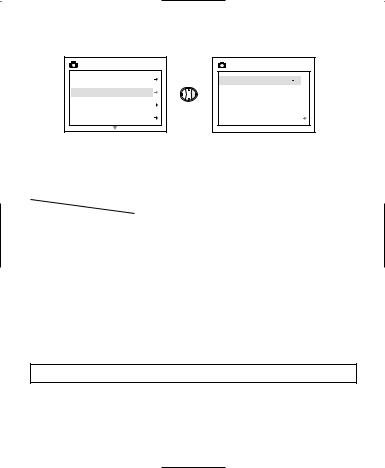
 MAIN MENU
1. |
In |
Mode, press MENU. |
MAIN MENU |
||
2. |
Press |
or |
to toggle between the |
||
|
|||||
|
options. |
|
M o d e |
||
|
|
|
|||
3. |
Press |
to view the sub-menu of the |
Q u a l i t y |
||
|
|||||
|
selected option. |
F l a s h |
|||
4. |
If you would like to exit any menu, press |
W B |
|||
|
until Main Menu is highlighted and |
|
|||
|
press OK to return to the Main Menu. |
|
|||
OR
5. Press MENU to exit.
16

MODE MENU
MAIN MENU |
M o d e |
Q u a l i t y |
F l a s h |
W B |
MODE |
|
Video Clip |
|
Self - timer |
Off |
Main Menu |
|
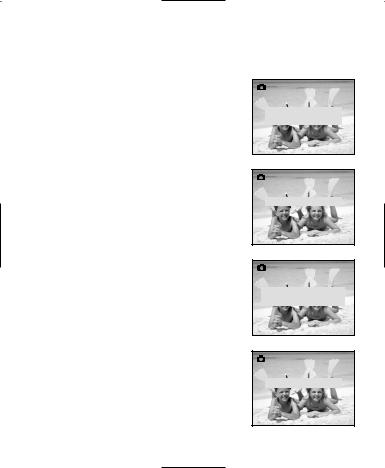
Taking Video Clips
1.When Video Clip is highlighted in the MODE menu, press  .
.
2.Press the Shutter button to begin recording
a continuous video clip. (fig.2.4)
3. Press the Shutter button again to stop recording. (fig.2.5)
OR |
|
|
|
4. |
The camera will continue recording until the |
fig.2.4 |
|
|
memory is almost full. |
|
|
|
|
|
|
5. |
When the recording is completed, the |
|
|
|
camera will return to still image taking |
|
|
|
mode. |
|
|
PRESS SHUTTER TO STOP
fig.2.5
Note: To exit video clip mode before recording, press MENU to return to still image taking mode.
17

MAIN MENU |
|
Mode |
|
Quality |
+ |
|
|
Flash |
|
WB |
|
MODE |
|
Video Clip |
|
Self - timer |
Off |
Main Menu |
|
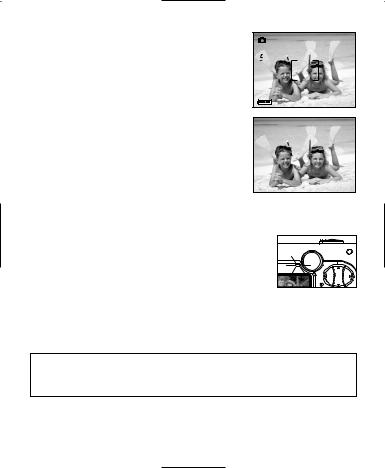
To use the Self-timer:
1.Highlight Self-timer in the MODE menu, press
 to switch to On. (fig.2.6)
2.Press MENU to return to Still Image Capture Mode.
3.Position the subject in the camera.
4.Press the Shutter button.
5.The self-timer LED will blink for 10 seconds and then the image will be captured.
MODE |
|
Video Clip |
|
Self - timer |
On |
Main Menu |
|
fig.2.6 |
|
Note: The self-timer is automatically deactivated once the image is taken.
To cancel the Self-timer:
1.Highlight Self-timer in the MODE menu, press  to switch to Off. (fig.2.7)
2.Press MENU to return to still image capture mode.
FINE
A
005/080
fig.2.7
18
QUALITY |
MAIN MENU |
M o d e |
Q u a l i t y |
F l a s h |
W B |
QUALITY |
F i n e |
N o r m a l |
E c o n o m y |
Main Menu |
Images can be captured in one of three quality modes: fine, normal or economy. These modes differ in image file size and different image (JPEG) compression ratios.
|
FINE |
NORMAL |
ECONOMY |
|
|
|
|
JPEG ratio |
5.5:1 |
12:1 |
24:1 |
|
|
|
|
Images taken |
|
|
|
with 7MB of |
14 |
33 |
54 |
Memory (approx.) |
|
|
|
|
|
|
|
Setting the Image Quality Mode:
1.In the QUALITY menu, press  or
or  to toggle between Fine, Normal and Economy.
2.Press OK to select the quality mode and press MENU to return to Still image taking mode.
Note: The selected option will be marked by ( • ).
19
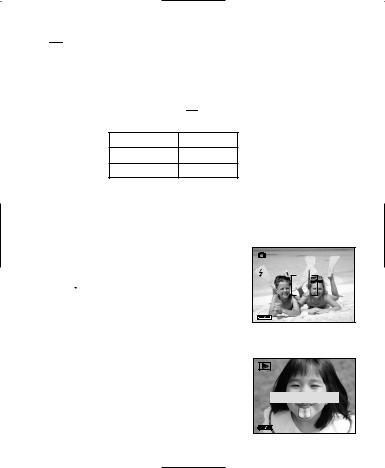
SLIDE SWITCH
The camera has a Slide Switch that has 3 image taking modes:
macro (  ), portrait (
  ) and distant (
  ). The current flash setting is displayed in the upper left corner of the LCD.
Slide Switch |
Flash Status |
|
Conditions |
Distance from |
|
Position |
|
|
|
|
subject |
Macro ( |
) |
Auto Flash ( A ) |
Use this option to |
0.65m to 1.4m |
|
|
|
|
|
take close |
|
|
|
|
|
photography. |
|
Portrait ( |
) |
Auto Flash ( |
A ) |
Use this option in |
1.4m to 3.2m |
|
|
|
|
variable lighting |
|
|
|
|
|
conditions. The |
|
|
|
|
|
camera will |
|
|
|
|
|
automatically detect |
|
|
|
|
|
when the flash is |
|
|
|
|
|
needed. |
|
Distant ( |
) |
No Flash ( |
) |
Use this option in |
1.4m to infinity |
|
|
|
|
outdoor or bright |
|
|
|
|
|
light conditions. |
|
Using the slide switch: |
|
|
||
1. |
Position the Slide switch towards the macro ( |
), |
||
|
portrait ( |
) or distant ( |
) icon until the switch |
|
|
clicks into place. (fig.2.8) |
|
|
|
2. |
To ensure accurate focus, refer to the chart above to |
|||
|
make sure that the subject is within the distance |
|||
|
range in the mode that you selected. |
fig.2.8 |
||
|
|
|||
Note: The default flash mode is set by the Slide Switch. To manually override the slide switch flash mode, the setting must be changed on the Flash menu on the LCD. Please refer to p. 21 for further information.
20

FLASH
This feature enables the camera to override the flash mode that is set by the Slide Switch.
In the flash mode, there are 3 flash options: Auto ( A ), Flash (  ) or Flash Off (
  ).
).
Flash Option |
Distance from |
Lighting Condition |
|
subject |
|
|
|
|
Auto ( A ) |
8.5ft (2.5m) and |
Use this option in variable lighting |
|
3.9ft (1.2m). |
conditions. The camera will automatically |
|
|
detect when the flash is needed. |
Flash ( ) |
8.5ft (2.5m) and |
Use this option in backlight or low light |
|
3.9ft (1.2m). |
conditions. The flash will work in bright |
|
|
and dark conditions. |
|
|
|
Flash Off ( ) |
3.9ft (1.2m) to |
Use this option in outdoor or bright |
|
infinity |
light conditions. |
|
|
|
1.In the FLASH menu, press  or
or  to choose between Auto ( A ), Flash (
  ), and Flash Off (
  ).
).
2.Press OK to select the flash mode and press MENU to exit.
3.Position the subject in the camera.
4.Take the image.
5.The flash mode will return to the default setting on the Slide Switch.
Note: The selected option will be marked by ( • ).
Note: The flash may need time to recharge between photos. While it is charging the Camera Ready LED blinks. When it stops blinking the camera is ready to take another image. If the batteries are low, the flash will not work. Please insert fresh batteries.
21
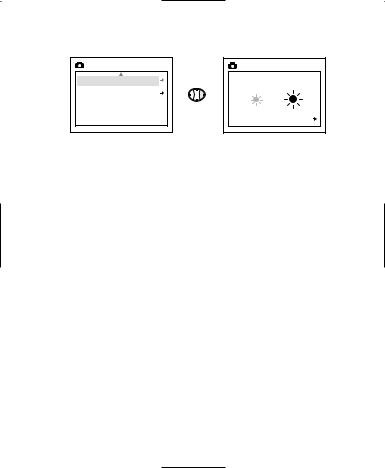
WHITE BALANCE
MAIN MENU |
M o d e |
Q u a l i t y |
F l a s h |
W B |
WB
AW B
S u n n y
F l u o r e s e n t
Tu n g s t e n
White Balance Option |
Explanation |
|
|
|
|
Auto White Balance (AWB) |
The camera will automatically |
|
|
|
choose the white balance setting. |
Sunny ( ) |
|
To be used outdoors with sufficient |
|
|
sunlight. |
Fluorescent ( |
) |
To be used indoors with fluorescent |
|
|
light conditions. |
|
|
|
Tungsten ( |
) |
To be used indoors with tungsten |
|
|
light conditions. |
|
|
|
1.In the WB (WHITE BALANCE) menu, press  or
or  to choose between AWB, Sunny, Fluorescent or Tungsten.
2.Press OK to select the white balance mode and press MENU to exit.
22
LCD BRIGHTNESS
MAIN MENU |
B r i g h t n e s s |
S e t u p |
BRIGHTNESS |
B r i g h t n e s s |
Main Menu |
Use this option to change the LCD brightness.
1.In the BRIGHTNESS menu, press  or
or  to toggle between both options.
2.Press MENU to exit.
23

SETUP
Setup Option |
Selection Options |
Explanation |
|
|
|
Timeout |
15, 30, 60, 90 |
Sets the automatic power off option. |
|
|
|
|
None |
Deactivates the automatic power off |
|
|
option. |
|
|
|
Driver |
PC |
(Windows only) Use this mode to |
|
|
view your images and video clips |
|
|
using the WDM/TWAIN drivers. (p.35) |
|
HDD |
(Windows and Macintosh) Mass |
|
|
Storage mode. Use this mode to view |
|
|
your images and video clips using the |
|
|
Mass Storage driver. (p.36) |
|
|
|
TV |
NTSC |
Sets the mode to adapt with your TV. |
|
|
|
|
PAL |
|
Language |
English, |
Sets the language in your camera. |
|
Français, |
|
|
Español, |
|
|
Deutsch, |
|
|
Italiano |
|
Format |
|
Formats the internal memory or the |
|
|
MMC/SD memory card by deleting all |
|
|
files. |
|
|
|
Default |
|
Sets all camera settings to the factory |
|
|
default. |
|
|
|
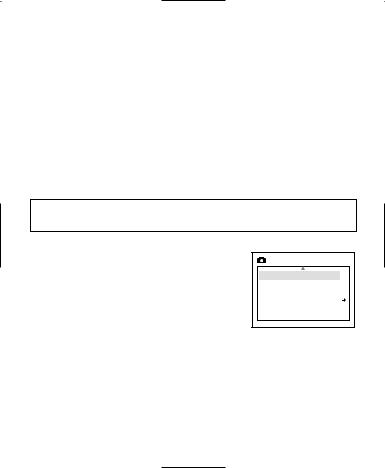
Using the SETUP menu:
1.Use  or
or  to toggle between the options.
2.When the option is highlighted, use  to change the setting.
3.Press  to select and scroll to the next option or press MENU to exit.
24

TIME-OUT
To extend battery life, the camera will automatically power off after 30 seconds of inactivity. Use this option to change the default setting.
SETUP |
|
Time - out |
30S |
Driver |
PC |
TV |
NTSC |
Language |
|
DRIVER
Please refer to the Transferring Files to the Computer section on P. 31 for further information.
TV
Please refer to the TV Mode section on P. 38 for further information.
LANGUAGE
Use this option to change the language setting in your camera. All menus and messages will be displayed in the selected language.
FORMAT
Formatting deletes all files. Use this option to format the internal memory or the MMC/SD memory card.
To format the:
•Internal memory – The MMC/SD card must not be in the camera.
•MMC/SD card – Insert the memory card into the camera.
Note: If ERROR! is displayed on the LCD screen, this means that the internal memory or the memory in the MMC/SD is corrupted. Please format the memory to continue.
25
DEFAULT
Mode |
Default Setting |
Flash |
Auto ( A ) |
White Balance |
AWB |
Quality |
Fine |
Timeout |
30 |
Driver |
PC |
TV |
NTSC |
Language |
English |
Note: The default version for TV mode will vary depending on the country where the camera was purchased.
To set your camera to its default settings:
1.When the Default option is highlighted, press OK.
2.The camera will reset to the factory defaults.
3.Press MENU to exit.
SETUP |
D e f a u l t |
F o r m a t |
Main Menu |
26

2X Digital Zoom
The Concord Eye-Q Go LCD can use 2X Digital Zoom to take images.
Setting the 2X Digital Zoom Mode:
1.In still image mode, press (T) to zoom into the subject.
2.Press (W) to zoom out and to return to normal mode.
27
3.  REVIEW MODE
In review mode, you can review your captured images and video clips through the LCD.
Using REVIEW mode:
1.Slide the Rotary switch towards 

 .
.
2.Press  or
or  to scroll through each file.
File Type |
Format |
Image |
JPG |
Video Clip |
AVI |
2X Enlargement (JPEG only)
When viewing images, you may use 2X enlargement to zoom into the stored image.
To use 2X Enlargement:
1.While viewing a JPEG file, press OK to enter 2X Enlargement Mode.
2.Press 
 to navigate in the image.
3.Press OK to exit 2X Enlargement mode and to return to the original image.
Viewing Video Clips (AVI)
To view video clips:
1. Press OK to play the video clip.
FINE
A
005/080
AVI
Press OK to Play AVI
008/080
28


 MAIN MENU
To use the MAIN MENU in Review Mode:
1.Press MENU to enter the MAIN MENU.
2.Use  or
or  to toggle between the options.
3.When the option is highlighted, press  to enter its submenu.
4.If you would like to exit any menu, press  until Exit is highlighted and then press OK to return to the previous menu.
OR
5. Press MENU to exit.
MAIN MENU |
D e l e t e |
T h u m b n a i l |
B r i g h t n e s s |
S e t u p |
DELETE
DELETE |
DELETE ONE |
Delete One |
THIS FILE? |
Delete All |
No |
Main Menu |
Yes |
To delete ONE file from the internal memory:
1.When Delete One is highlighted in the DELETE menu, press  .
.
2.The next screen will read "This File?", press  or
or  to highlight No or Yes.
3.Press OK to select.
4.If Yes is selected, the file will be deleted and the camera will return to the  Main Menu.
5.If No is selected, no change will be made, and the camera will return to the  Main Menu.
29
Loading...