

Page 1
f
2
.
D
8
C
C
7
.
Y
N
O
S
1
m
m
User's Guide
2100
Visit Concord on the Internet
www.concordcam.com
Concord Eye-Q2100 User's Guide
Copyright 2002 Concord Camera Corp.
Visit Concord on the Internet at www.concordcam.com
R4040143
Page 2
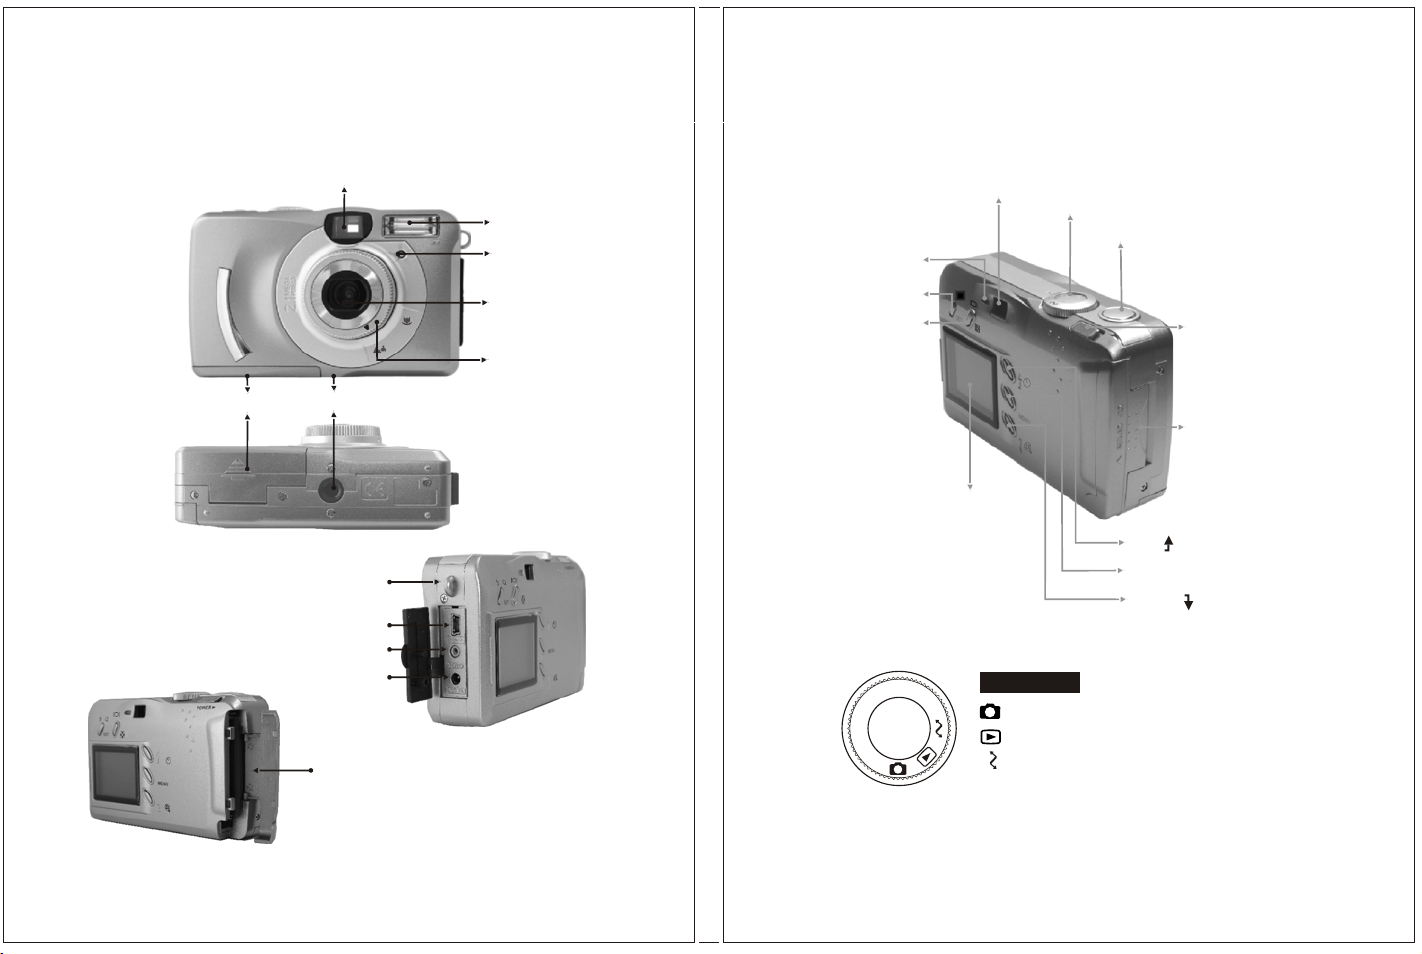
Product Overview
Product Overview
Battery Cover
Viewfinder
f
2
.
D
8
C
C
7
.
1
Y
m
N
O
S
m
Tripod Socket
Strap Eyelet
USB Terminal
TV out Terminal
DC Power
Terminal
Memory Card Slot Cover
Flash
Self-timer
Indicator LED
Lens
Focus Ring
Ready LED
Set Button
Disp Button
TFT LCD Monitor
Viewfinder
Mode Dial
Camera
Review
PC Connection
Mode Dial
Shutter Button
Power Switch
Memory Card
Slot Cover
Up ( ) Direction Button
Menu Button
Down ( ) Direction Button
2
3
Page 3
4 5
Page 4
Getting Started
Loading the Camera Batteries
Congratulations on the purchase of your new camera. Your camera has
been carefully engineered and manufactured to give you dependable
operation. Read this manual before operating the camera to become
more familiar with it.
Package Contents
Concord Eye-Q 2100 Digital Camera
CD ROM with Camera Drivers for Windows
98/98SE/2000/ME/XP and Mac OS 9.X only
4 AAA Batteries
Camera Pouch
MGI Software CD ROM
User's Manual
Quick Start Guide
USB Cable
Video Cable
Wrist Strap
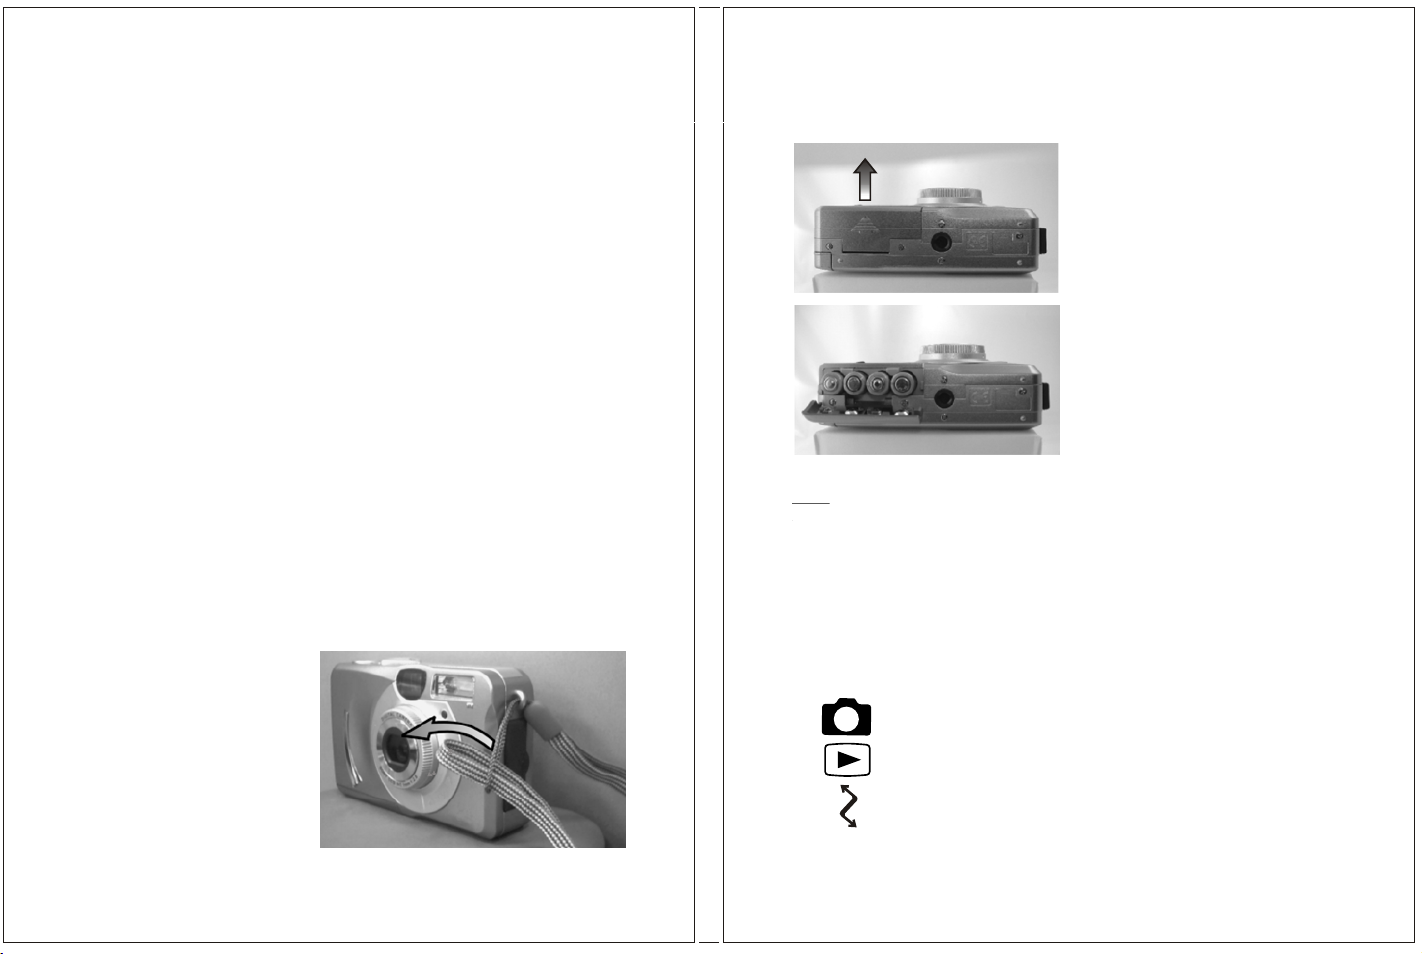
Attaching the Wrist Strap
To help ensure the camera is
not dropped, place the wrist
strap on the camera.
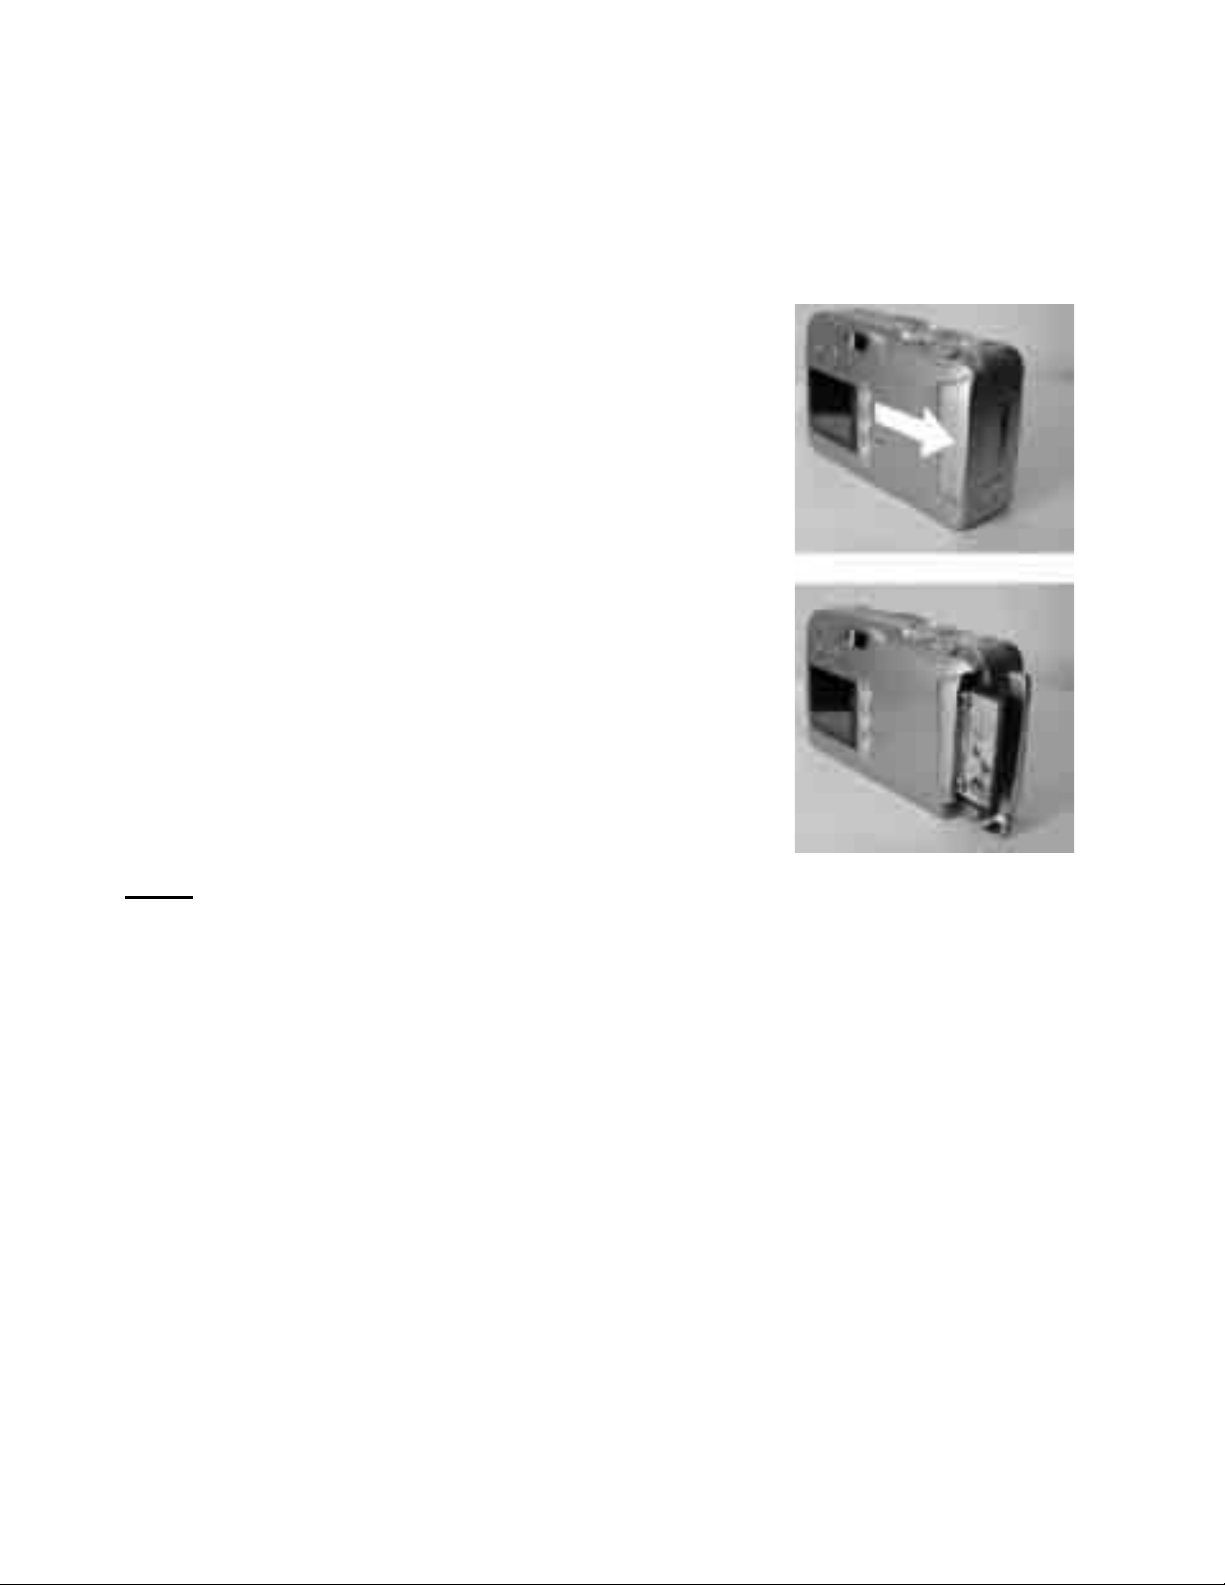
1.Open the Battery Cover, by
pushing and sliding it towards
the front of the cover.
2. Load the batteries into the
battery chamber following the
Polarity indicators (+ -)
3. Close the Battery Cover until
you hear it click closed.
Note:
The use of an AC Adapter is recommended if you expect to use the camera
for a long period. Make sure the AC adapter meets the specification
requirement of 5V/2.0A maximum. The positive terminal of the AC
Adapter inserts into the cameras DC power terminal.
Mode Dial Settings
Located on the top of the camera, the Mode Dial moves the camera to
different operational modes.
Camera Mode - For picture taking. You can take photographs
from 15cm (6 inches) to infinity.
Review Mode -Review your pictures from the CF memory or
internal memory on the TFT or on an external monitor with the
video cable.
PC Connect Mode - Connect your camera to a computer, and
download the images.
6 7
Page 5
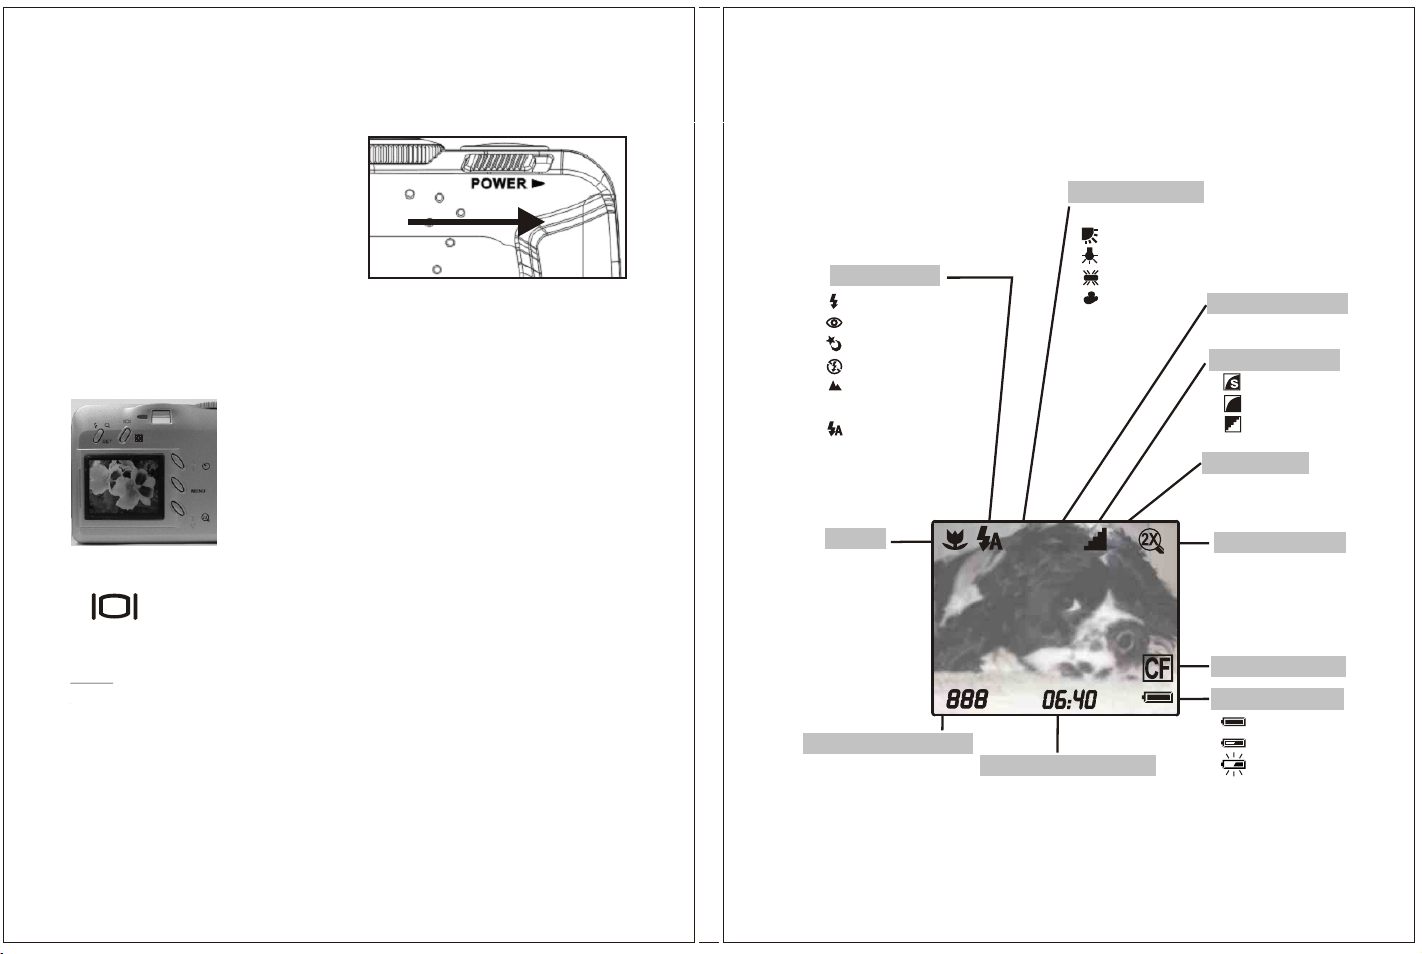
Turning the Camera On and Off
Slide the Power switch to the right.
You will hear a beep; the ready light will
flash then remain steady. The camera is
then powered on.
To power the camera Off, slide the power switch to the right.
Turning the TFT Display On and Off
Yourcamera comes with a protective film over the
TFT display during shipping.
Remove the covering to have a clear view of the
display.
To turn the TFT On and Off, Press the button just above the
TFT display.
TFT Icons
Flash Mode
Fill-in Flash
Red-eye Reduction
Night
Flash Off
Depth Of Field
Enhancement
Auto Flash
Macro
AWB
White Balance
AWB
AWB
Daylight
Tungsten
Fluorescent
Cloudy
BW
BW
+
0
-
L
EV Adjustment
+
2.0EV
-
Image Quality
Super Fine
Fine
Normal
Resolution
800x600
S
1600x1200
L
Digital Zoom
Note:
The icons on the TFT display the status of the current camera settings
and conditions.
See Page 9 for more information on your TFT icons.
8 9
CF Card Inside
Battery Power
Number of Images
Date/Time Indicator
Page 6

Checking the Battery level
Before using the camera, turn it on and check the battery status. The
lower right corner of the TFT display has the following battery level
indicators.
Full - Battery is fully charged
Low - replace soon
Depleted - replace with new batteries.
Suggested Battery Brands
To ensure optimal performance of your camera, the use of internationally
known brands of extended life alkaline batteries is recommended.
Extended use of these features can reduce battery life:
Using the TFT as a viewfinder
Reviewing pictures on the TFT
Using the flash
Note:
* See Pg. 40 Tips Safety and Maintenance for more information on
batteries.
10
Page 7
1
Choosing Internal Memory or CF card
The Concord Eye-Q 2100 camera is equipped with 8MB of internal
memory. The camera supports CompactFlash™ Type I cards for
additional picture storage capabilities.
Inserting a CF card
1. Open the Memory Card Slot Cover.
2. Insert the CompactFlash™ Card
3. Close the Memory Card Slot cover. You will
hear the cover snap when it is closed.
Note:
If a new CompactFlash™ card is used the card needs to be formatted.
Please see Pg. 25 for instructions on formatting your CompactFlash™
card.
Internationally recognized brands of CompactFlash™ Cards greater than
8MB are recommended for the Eye -Q 2100 digital camera.
When the Memory Slot door is opened the camera automatically powers
off.
1
Page 8
2
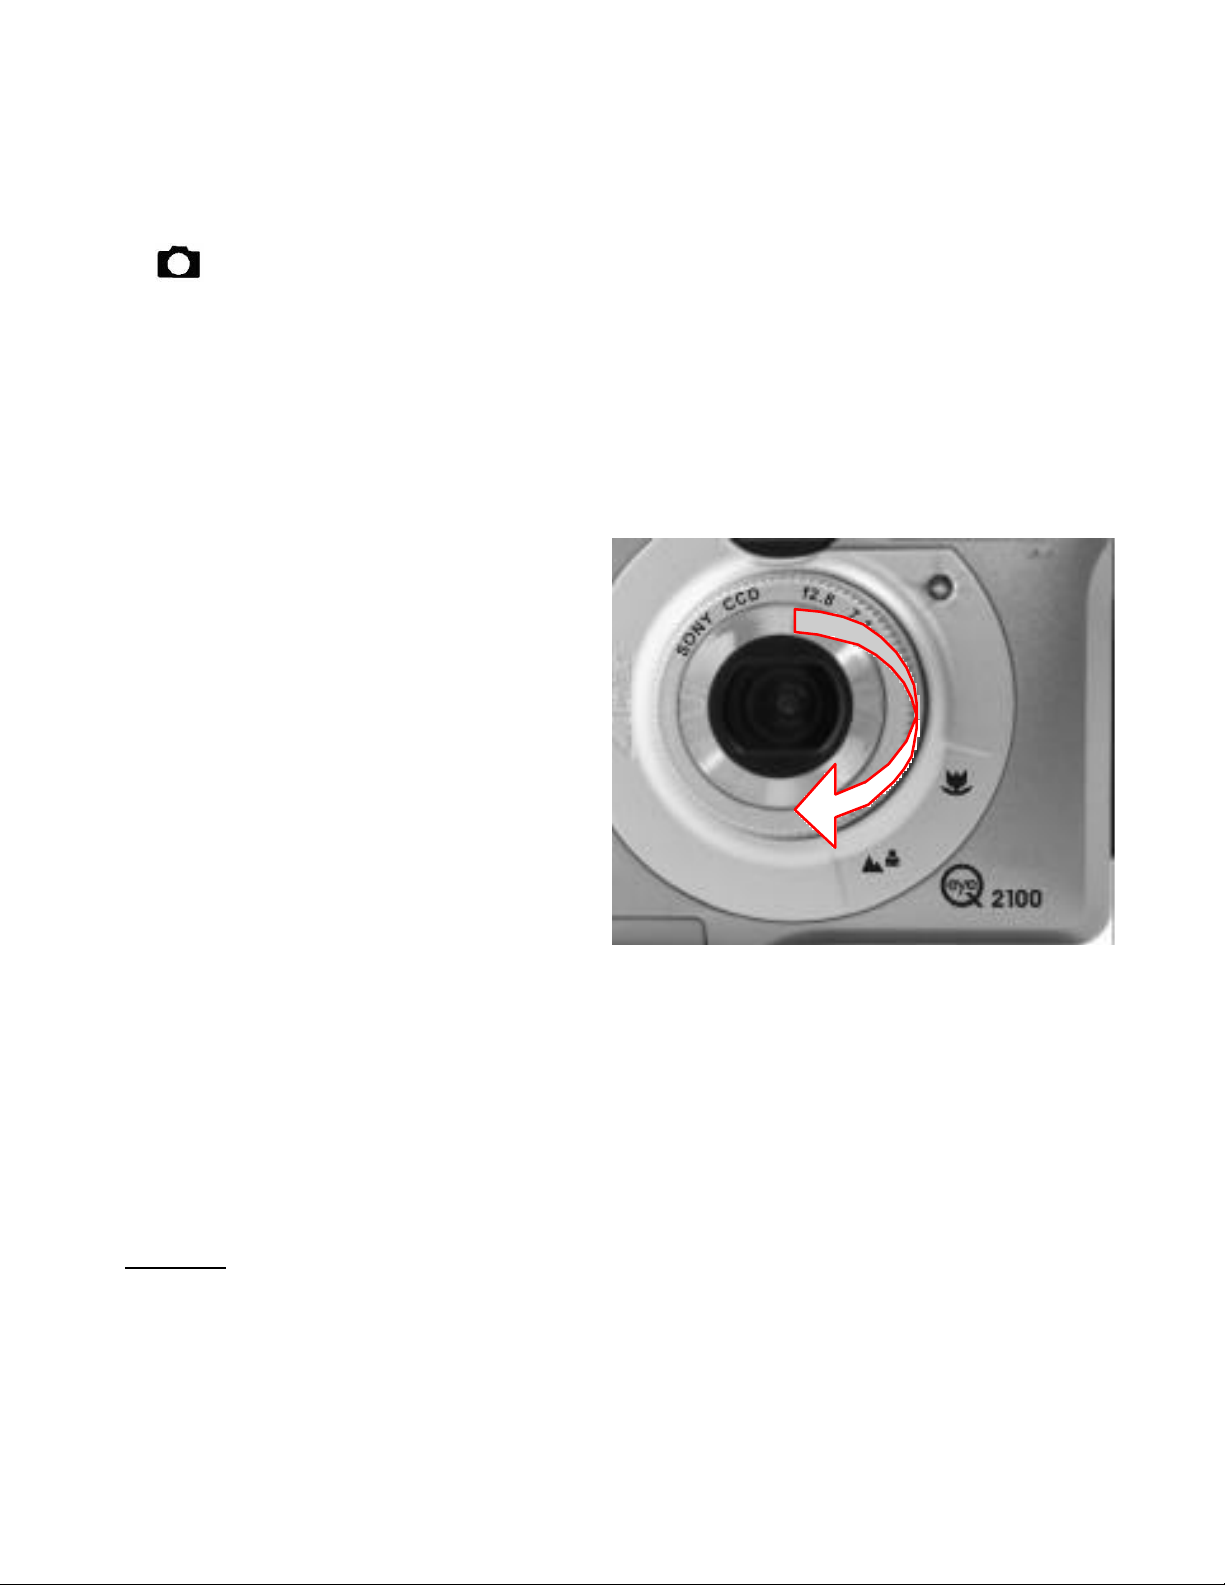
Taking a Picture
Use the Camera Mode setting to take pictures or to customize your
cameras settings for picture taking.
1. Turn Dial Mode to Camera Mode.
2. Use the TFT to frame your subject.
If you wish to conserve battery power, use the viewfinder to frame your
subject.
3. Check the focus ring on the
front of the camera for correct
setting
4. Press shutter button half
way down to set the exposure,
then completely down to take
the picture.
The TFT will show a quick preview of the image and then return to live
mode for more picture taking.
The preview can be turned off, see Customizing Your Camera on Page 23.
** Note:
Focus Ring must be set correctly or pictures will be out of focus.
See Next Page.
1
Page 9
3
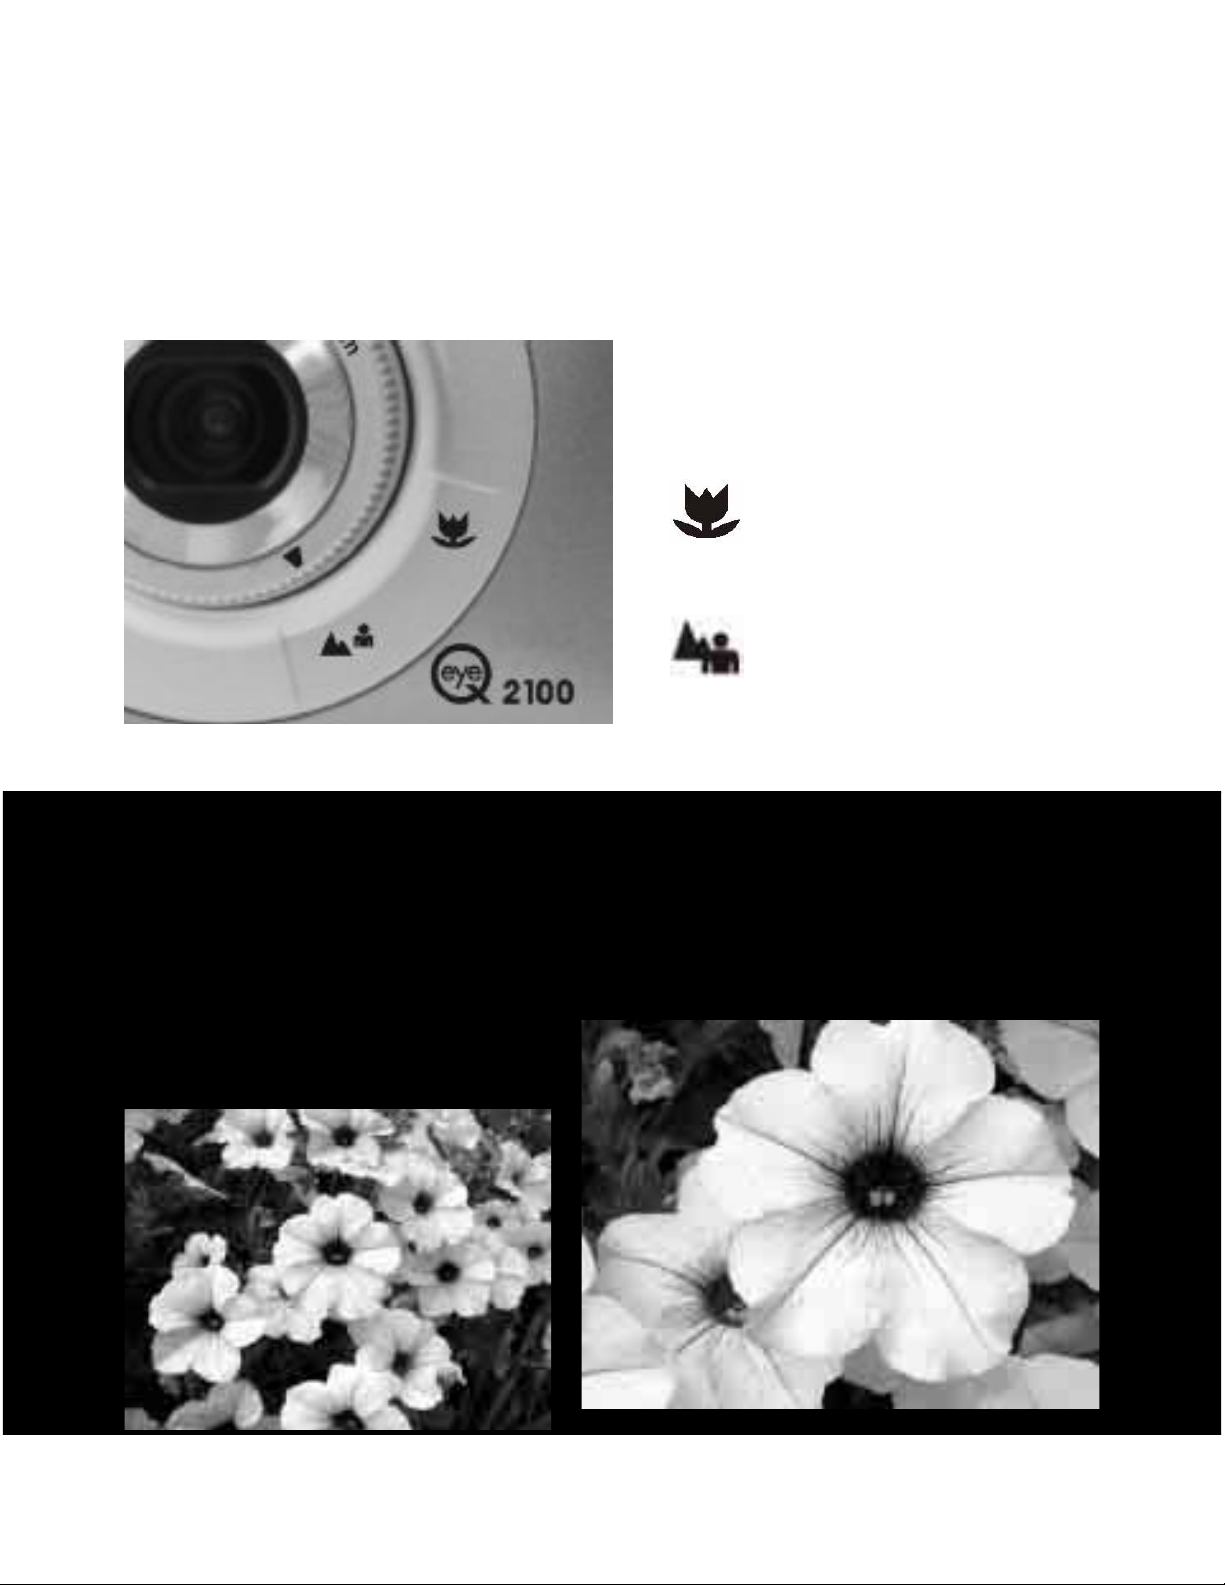
Setting the Focus Range
The Concord Eye-Q 2100 camera can focus on subjects as close as 15cm
(6 in) to infinity. If the Focus ring is not set correctly the images will be
out of focus.
Macro Mode-
15cm – 40cm
(6 in- 15in)
Photography Tips
Macro Mode allows you get close to
your subject.
Photography Tips
Macro Mode allows you get close to your subject.
Frame the subject in the TFT display, and not the viewfinder.
Take a test picture, to see if the flash is required or not. You can review
the picture in the TFT and then
delete.
Normal Mode50cm (20 in)-infinity
1
Page 10

4
Using the Flash
When taking pictures at night, indoors or outdoors in shadows, use the
flash on your camera. The camera flash is effective when you are
0.75cm to 3 m (2.5 ft. to 9 ft.) from the subject.
When in Camera Mode, Press the Set button to choose the flash setting.
The flash status icon displayed on the TFT will change as you press the
Set button.
Auto – The camera judges if a flash is required. If the
environment is too dark, the flash will fire.
Fill in Flash – Flash will fire in any lighting conditions
Red-Eye-Reduction – flash will fire to help eliminate Red
Eye, flash resets to Auto
Night Mode-decreasing the shutter speed to capture more
light, the camera needs to be placed on a tripod when used
in Night Mode
Flash Off- Flash will not fire under any lighting conditions.
Depth of Field Enhancement – Under cloudy or low light
conditions for subjects that are at a distance or
landscapes.
1
Page 11
5
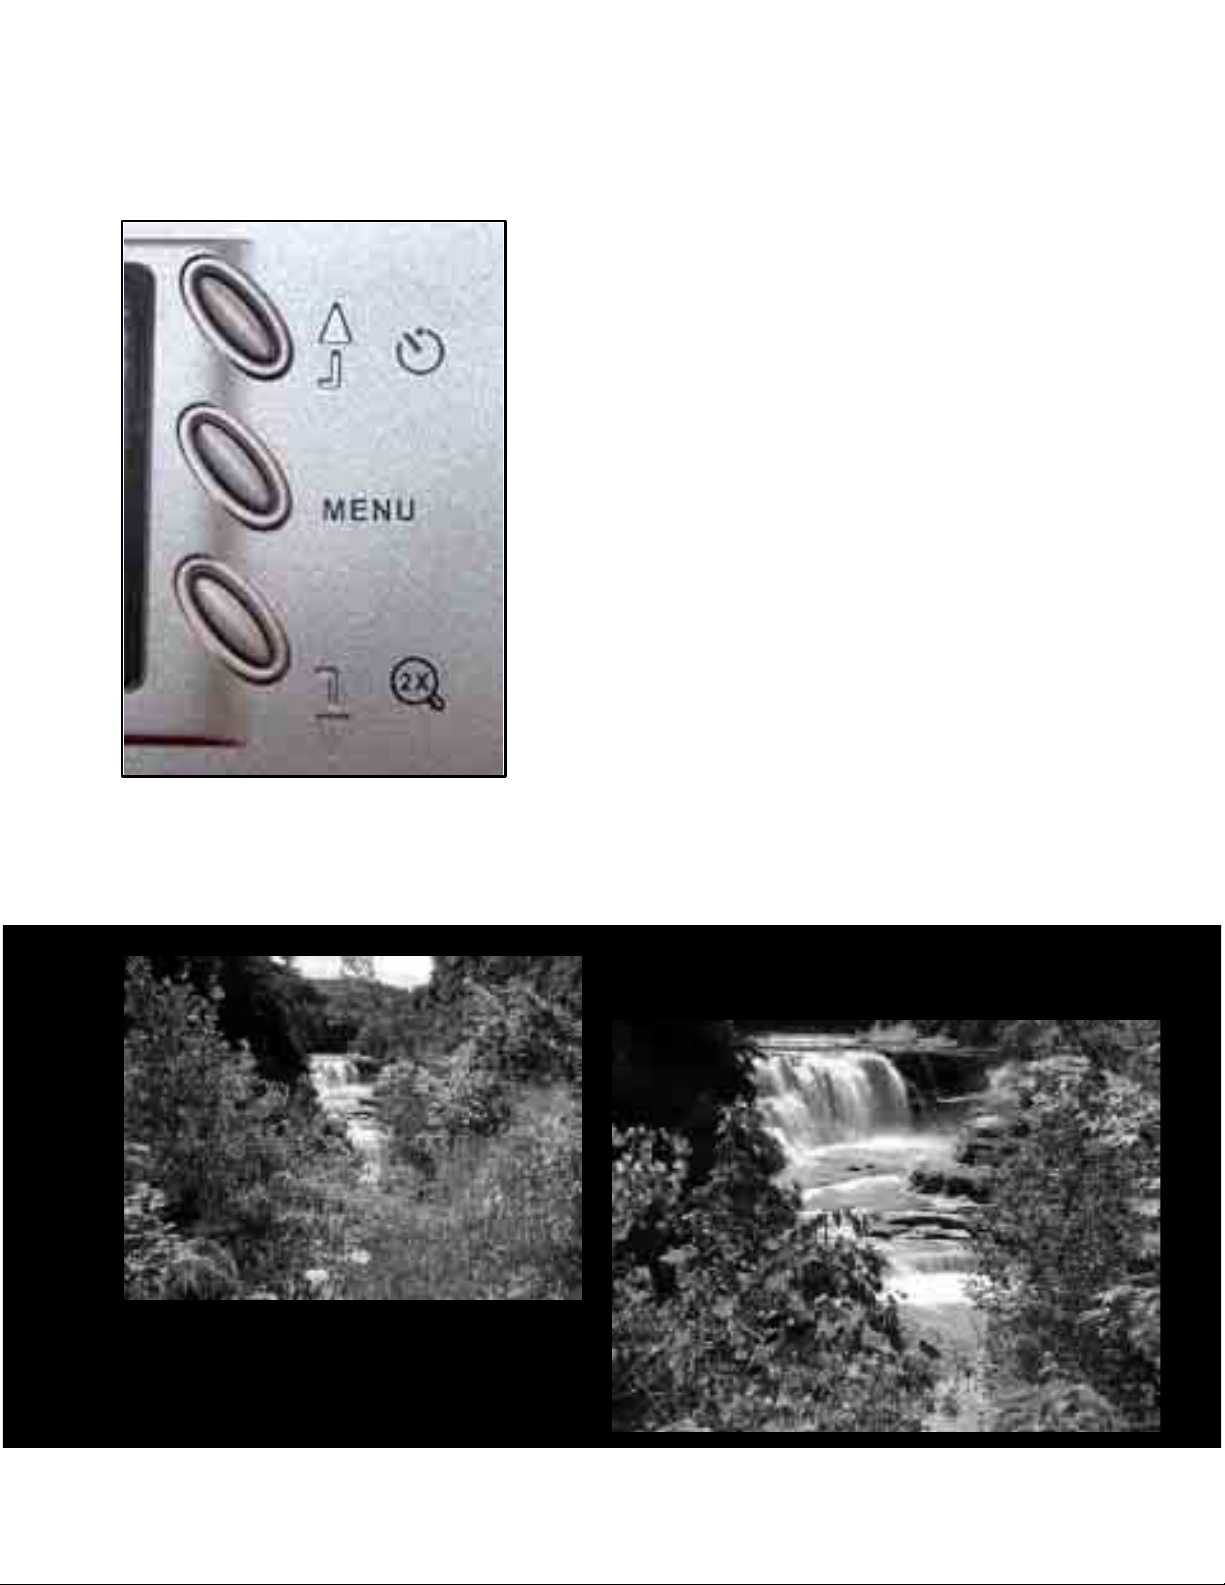
Using the Digital Zoom
The Digital Zoom gives a 2X magnification to your pictures.
1. In Camera Mode, press the Down arrow
button to activate the 2x zoom.
2. The 2x icon appears on the upper right
corner your TFT screen.
3. The TFT screen will have a digital zoom
frame appear, allowing for accurate
framing of your photograph.
4. To cancel the digital zoom feature press
the Down Arrow button.
The resolution of the digital image taken with 2X zoom is 800 x 600.
1
Page 12

6
Using the White Balance Feature
White Balance eliminates colorcasts that are created by the different
color temperatures of light sources. Our eyes naturally compensate for
white balance, and see objects that are white as white. There are six
adjustments for white balance. To provide optimal performance, under
changing conditions set the camera to Auto White Balance.
1. In Camera Mode, press the Menu button.
2. In the Set up screen, use the Up-Down arrows to scroll to the WB
setting, press the SET button, then use the up down arrows to select the
white balance setting.
Auto White Balance – Camera will adjust the white balance
automatically
Daylight – Outdoors under bright sunny conditions
Tungsten-Indoors under tungsten lighting
Fluorescent- Indoors under fluorescent lighting.
Cloudy – Outdoors, under cloudy or overcast conditions
Black and White– The picture will be in black and white,
best used for taking pictures of black and white
documents.
1
Page 13
7
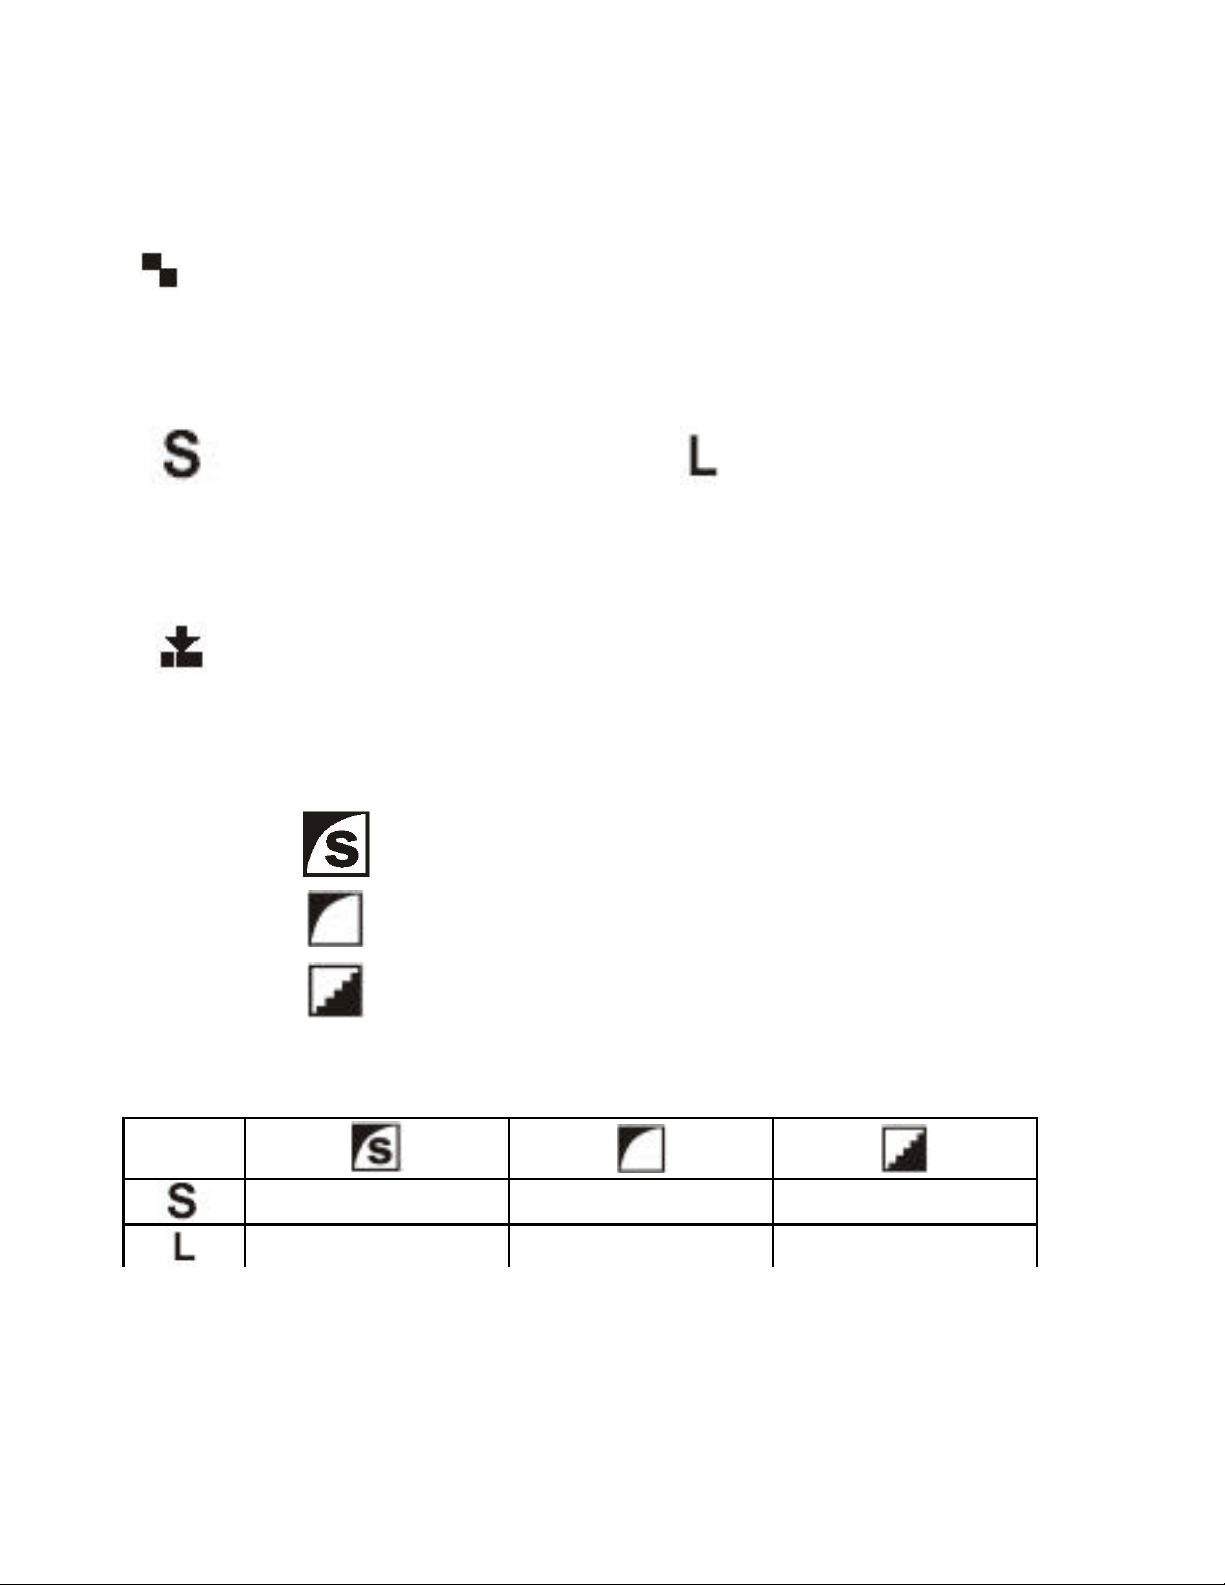
Setting Picture Quality and Resolution
Resolution
1. In Camera Mode, press the Menu button.
2. In the Recording Menu, use the Up-Down arrows to scroll to
the Resolution setting.
3. Press the SET button, and then use the Up-Down arrows to select the
Resolution.
Small 800 x 600 Large 1600 x 1200
Image Quality
1. In Camera Mode, press the Menu button.
2. In the Recording Menu, use the Up-Down arrows to scroll to
the Quality setting.
3. Press the SET button, and then use the Up-Down arrows to select the
Quality.
Super Fine – Low Compression Rating
Fine – Normal Compression Rating
Normal – High Compression Rating
Image Quality vs. Resolution
26 +/- 2 63 +/- 3 99 +/- 4
6 +/- 1 15 +/- 1 24 +/- 2
Based on the 8MB of Internal Memory, this chart provides a reference
guide to the number of pictures the camera will store depending upon
the selected resolution and quality settings.
1
Page 14

8
Using the Self Timer
After pressing the shutter button there is a 10 second delay until the
photograph is taken.
1. In Camera Mode, press the Up arrow button to
select the self-timer mode.
2. Pressing the shutter button activates the self-timer.
3. The camera will beep and the red Led indicator
light on the front of the camera will flash.
The self-timer is automatically cancelled after the
photograph is taken.
Photography Tips
Place the camera on a flat surface or a tripod.
Use the TFT to compose the picture, and then press the shutter button to
activate the self-timer.
Since the red LED indicator on the front of the camera flashes you have
time to join in the photograph and know the camera is finished when the
red light stops blinking.
1
Page 15

9
Reviewing your pictures
Use the Review Mode setting to review the photographs in your camera.
1. Set the Mode Dial to Review Mode. The images stored on your
camera will be displayed on the TFT.
2. Use the Up-Down Direction Buttons to scroll through your images.
To view the images enlarged
1.While in Review mode,
2. Press the Set Button to see a portion of the image.
3. Use the Up-Down direction buttons to select a
section of the image to view.
4. Select the DISP button to change from moving up
and down to left and right across the picture.
Thumbnail view
1. While in Review Mode, press the DISP button to have nine thumbnail
images appear at once on the TFT display.
2. Use the Up-Down direction buttons to choose an image.
3. Press the SET button to view the enlarged picture.
1
Page 16

0
Running a Slide Show
1. While in Review Mode, Press the MENU button to view the Playback
Menu
2. Select “Auto Play” from the P layback Menu
Auto Play – automatically plays your images back as a
slide show.
3. Press the SET button
4. Choose either YES or NO with the Up-Down arrow buttons.
If YES was selected, the auto play feature will begin
automatically.
Note:
Using the Video Out feature and Cables, you can auto play your images on
an external monitor, like a television.
Plug the cable into the “Video Out” on the television, and into the TV Out
terminal on the camera.
2
Page 17

1
Deleting pictures
1. Set the Mode Dial to Review Mode. The images stored on your
camera will be displayed on the TFT.
2. Use the Up-Down direction buttons to scroll through your images.
3. Press the MENU button to view the Playback Menu
4. Select the type of Deletion by scrolling with the Up-Down arrow
buttons.
One Erase – deletes just the image selected
All Erase –deletes all the images
5. Press the SET button
6. Choose either YES or NO with the Up- Down arrow buttons.
If YES was selected, the image will be erased
If NO was selected, the image will not be erased
7. Press SET to return to the Playback Menu or Press the MENU button
to exit the Playback Menu and return the Playback Mode.
2
Page 18

2
Protecting your Pictures from Deletion
Use the Protect Feature to prevent specific pictures from being deleted.
1. Set the Mode Dial to Review Mode. The images stored on your
camera will be displayed on the TFT.
2. Use the Up-Down direction buttons to scroll through your images.
3. Press the MENU button to view the Playback Menu
4. Select “Protect” from the Playback Menu
Protect – protects and image from accidental deletion
5. Press the SET button
6. Choose either YES or NO with the Up-Down arrow buttons.
If YES was selected, the image will be protected.
Note:
Formatting the Internal Memory or CF card deletes all, including protected
pictures.
Protected images have the Key shaped icon appear on the top of the TFT
display during review.
To Unprotect a picture that has the KEY icon. Do the same steps as listed
for protection, and the picture will be unprotected.
2
Page 19
3
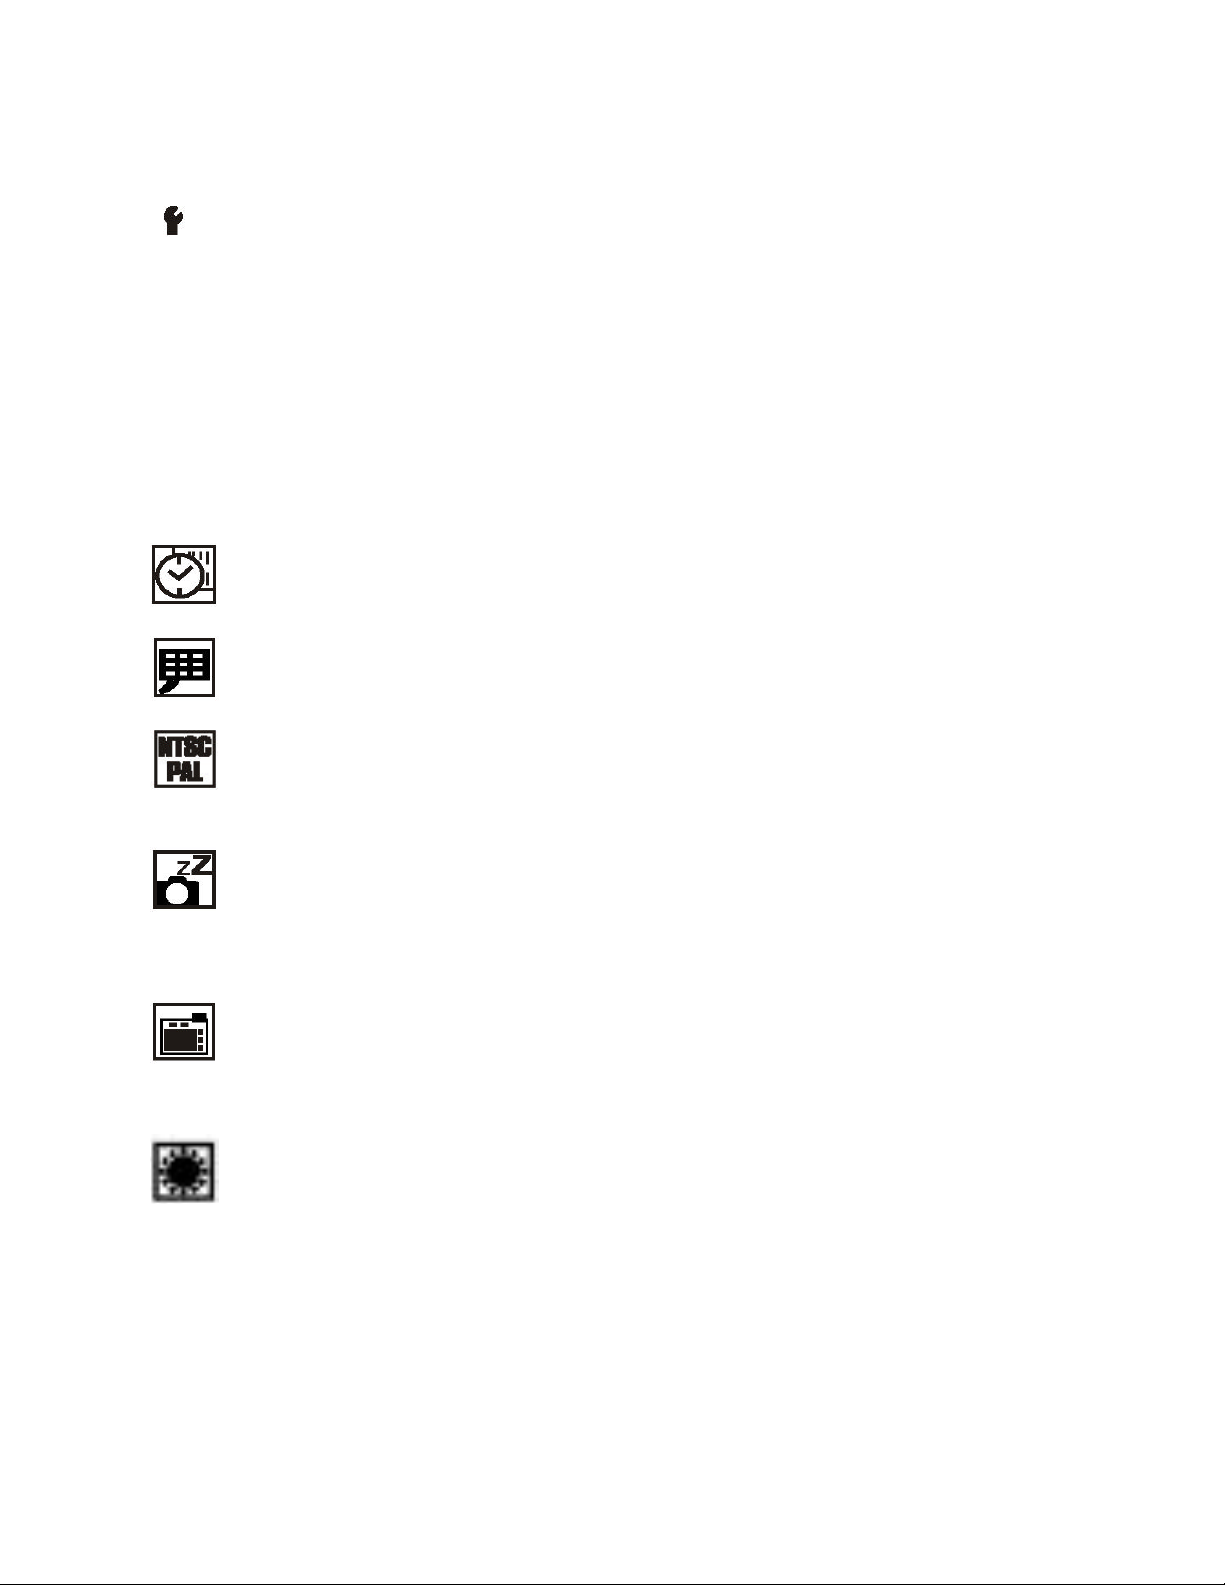
Customizing Your Camera Settings
1. In Camera Mode, press the Menu button.
2. In the Recording Menu, use the Up-Down arrows to scroll to
SetUp setting you wish to customize.
3. Press the SET button, and then use the Up-Down arrows to select the
settings.
4. Select the feature you which to customize, then press the SET button
and use the Up-Down arrow buttons to adjust the settings.
5. Use the SET button to confirm and the DISP button to cancel
Date/Time –
The formats are YY/MM/DD and HH:MM
Language – English, Traditional Chinese, French, German and Spanish.
Video Output – NTSC or PAL
Auto Off –
The camera can be set to turn off automatically after the
camera is idle.
30 sec, 60 sec, 3 min.
Quick View-
The TFT will display a picture for 3 seconds after the image is
captured.
ON or OFF
Brightness-
You can adjust the TFT display brightness to make the
display easier to see.
2
Page 20
4
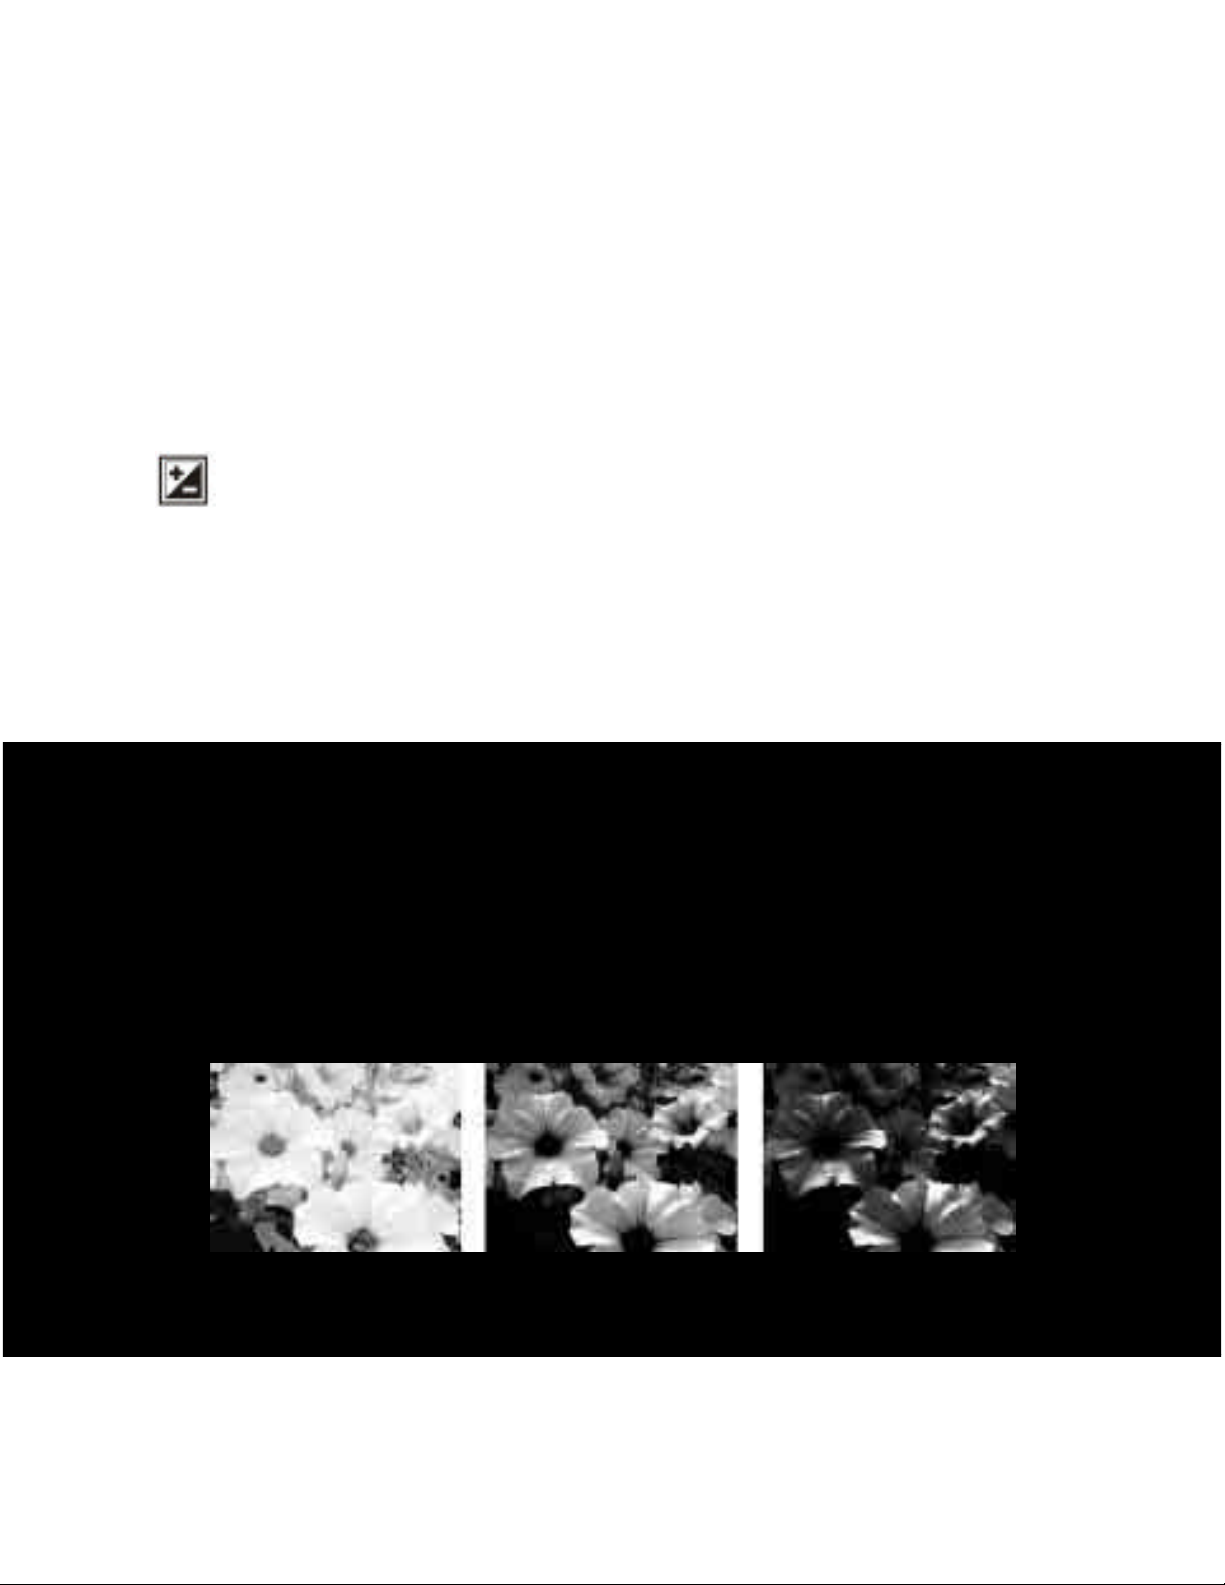
Exposure Compensation
When certain subjects or scenes are very dark or bright, you can set the
EV compensation setting to get the desired results.
The Exposure compensation can be set between the values of EV+2 and
EV-2, in 0.5EV increments.
1. Set the Mode Dial to Camera Mode, press the Menu button.
2. In the Recording Menu, use the Up-Down arrows to scroll to
the EV Compensation setting.
3. Press the SET button, and then use the Up-Down arrows to select the
EV Compensation level.
Photography Tip:
Increasing the EV settings in scenes that are dark, will give more light to
the picture
Decreasing the EV settings in scenes that are light will make the picture
darker.
+Plus EV Normal - Minus EV
2
Page 21
5
Formatting Memory or CompactFlash
1. Formatting deletes all pictures and files from the
card
CAUTION:
1. Set the Mode Dial to Review Mode, press the Menu Button
2. In the Playback Menu, use the Up-Down arrows to scroll to the
Format setting.
3. Choose ON
4. Press the Set button.
CompactFlash Card.
2. Removing a card during formatting may damage
the card.
3. Selecting the formatting feature while there is no
CompactFlash™ card in the camera, cause the
internal memory to format. All images on the internal
memory will be lost.
Note:
If the camera fails to format the CompactFlash™ , please do the following
steps:
1. Turn the Mode Dial to PC Connect
2. Press and hold the UP button, while powering on the camera
3. Continue to press the UP button, while the Ready LED blinks.
4. The camera will emit a beeping sound while the
CompactFlash card is formatting.
5. Release the UP button when the Ready LED light stops blinking.
6. Remove and Reload batteries to stop beeping.
2
Page 22

6
Using DPOF
Use the Digital Print Order Format (DPOF) Feature to select the number
of prints for chosen images.
1. Set the Mode Dial to Review Mode. The images stored on your
camera will be displayed on the TFT.
2. Use the Up-Down direction buttons to scroll through your images.
3. Press the MENU button to view the Playback Menu
4. Select “Print Set” from the Playback Menu
Print Set – select the number of prints for chosen images
5. Press the SET button
6. Choose either YES or NO with the Up-Down arrow buttons.
7. Press the SET button
8. Use the Up-Down arrow keys to select the number of prints for the
image.
9. Press the SET button
10. Power Off your camera
11. Remove the CompactFlash™ card from the camera and place in the
slot reader for the printer.
12. Set the printer to DPOF Print and the printer will printout the
selected image(s) according to the number set.
Note:
The Print Set (DPOF) function will only work when a CompactFlash™ card
is used. It will not work on the built in memory in the camera.
The printer must have DPOF capabilities; check your printer user’ s manual
for the specifications.
2
Page 23

7
Installing Software and Drivers
Install the camera driver and software prior to connecting the camera to
the computer. Failure to do so may cause the software and drivers to load
incorrectly.
Computer System Requirements
For satisfactory transfer and editing, we recommend these minimum
computer system requirements.
Windows Based System Requirements
PC with processor better than MMX Pentium 233MHz
Windows 98/98SE/2000/ME/XP
Minimum 64MB RAM
100MB of available hard disk space
USB Support
CD-ROM Drive
800 x 600 pixels, 16-bit color display compatible monitor,
(24-Bit color display recommended)
Macintosh Based System Requirements
Mac OS 9.X only
Macintosh Power PC or higher, minimum 64MB of RAM
USB port
100MB of available hard disk space
Software included with your camera
The MGI Photo suite III SE Software allows you to access, transfer, and
edit your digital images. For details on using the Image Editing Software,
please refer to the HELP supplied with the program.
2
Page 24

8
Installing the Camera Driver – Windows Based Systems
Install the camera driver and software prior to connecting the camera to
the computer. Failure to do so may cause the software and drivers to load
incorrectly.
Step 1. Turn on the PC
Step 2. Place the CD ROM labeled Camera Driver into the CD ROM drive.
Step 3. Click on Install Driver when the above window appears.
If the Install Driver Window does not appear do the following:
1. Go to the Start Menu
2. Click Run
3. Type in CDROM Drive Letter:\install.exe
4 Click OK
2
Page 25
9
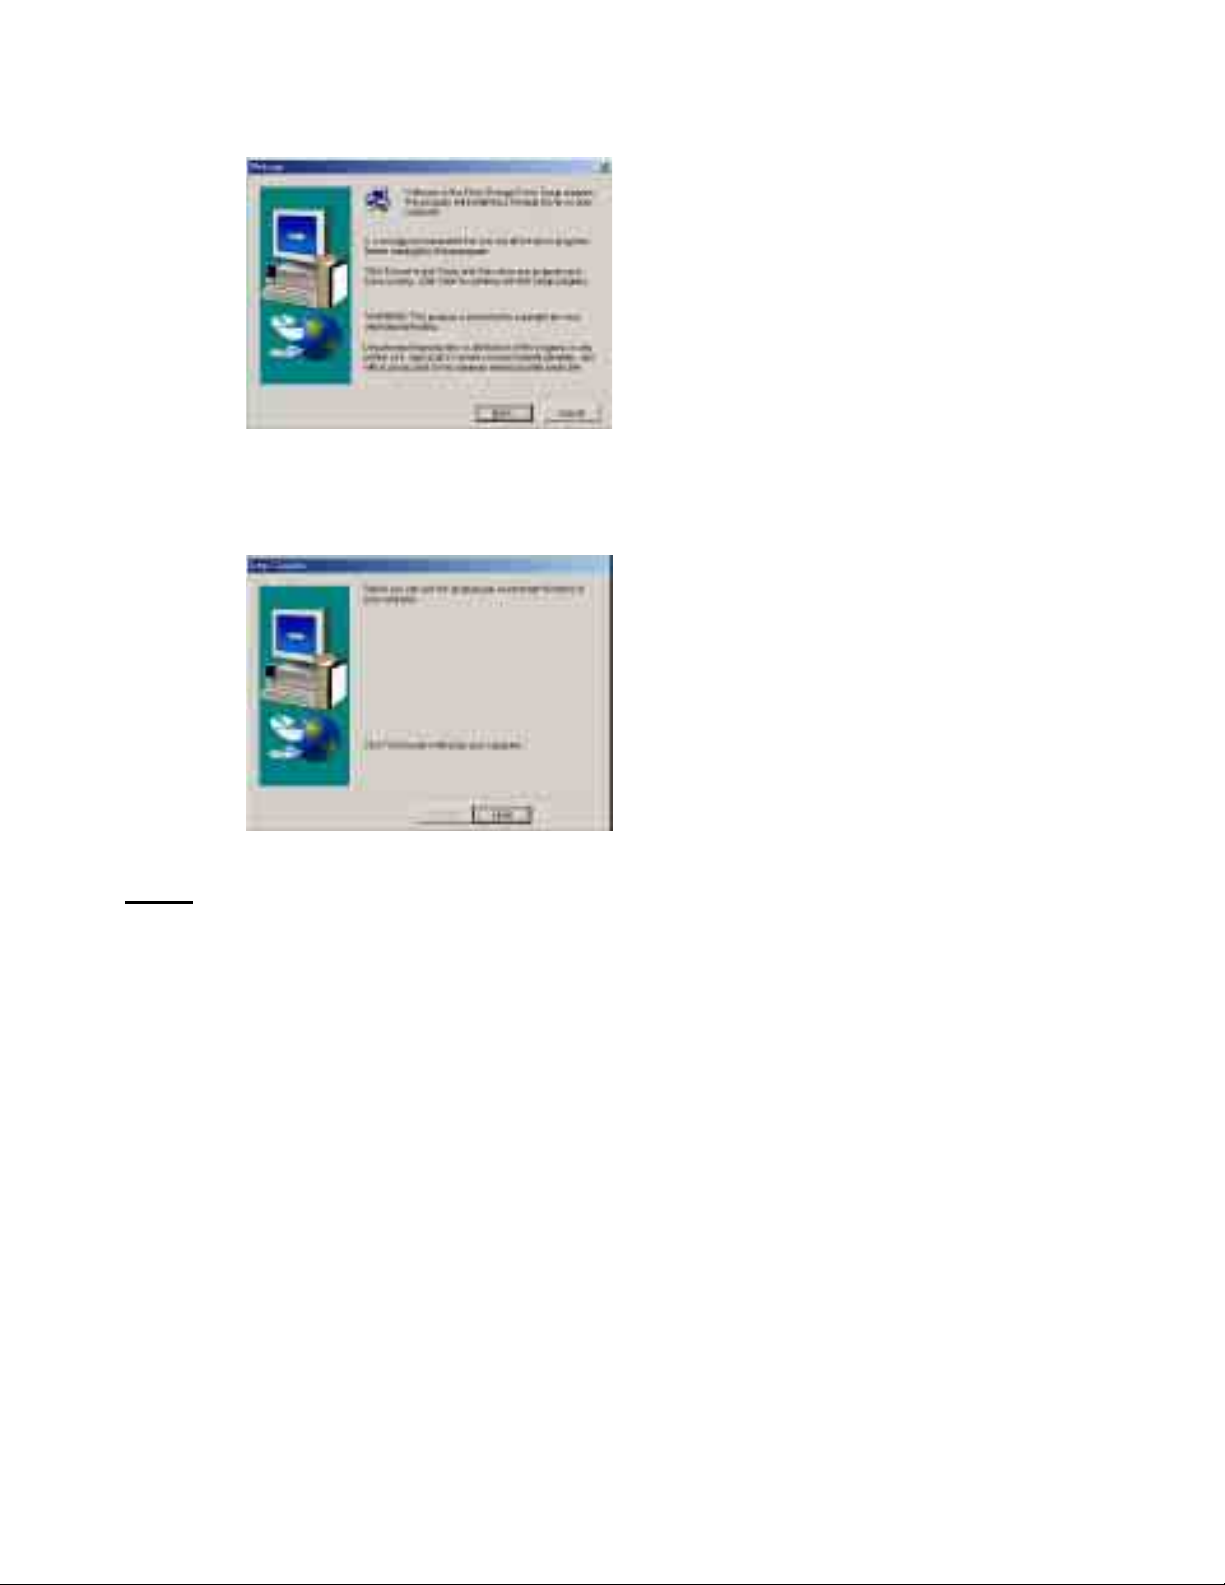
Step 4. A Welcome Window is displayed
Click Next to proceed to the Next Step
Step 5. Setup Complete window is displayed
Click FINISH and the computer will re-start automatically.
Note:
You must restart your computer to have the installation finalize. Failing to
due so can cause the camera to not operate correctly when attached to the
PC.
2
Page 26

0
Step 10.
A camera icon will appear on the lower right of your computer screen in
the task bar once the camera drivers are installed.
When you attach your camera to the computer via the USB port the
camera driver will case Windows Explorer to Automatically launch. See
Downloading Your Images on Pg. 34 for more information.
Special Note for Windows XP Users:
After the installation of Driver and the computer has been restarted a
pop-up window will appear.
Please select “Open folder to view files” to open the camera files.
If you click “ Always do the selected action” , then each time you connect
the camera to the PC via the USB cable, it will automatically call the
Windows Explorer to Open.
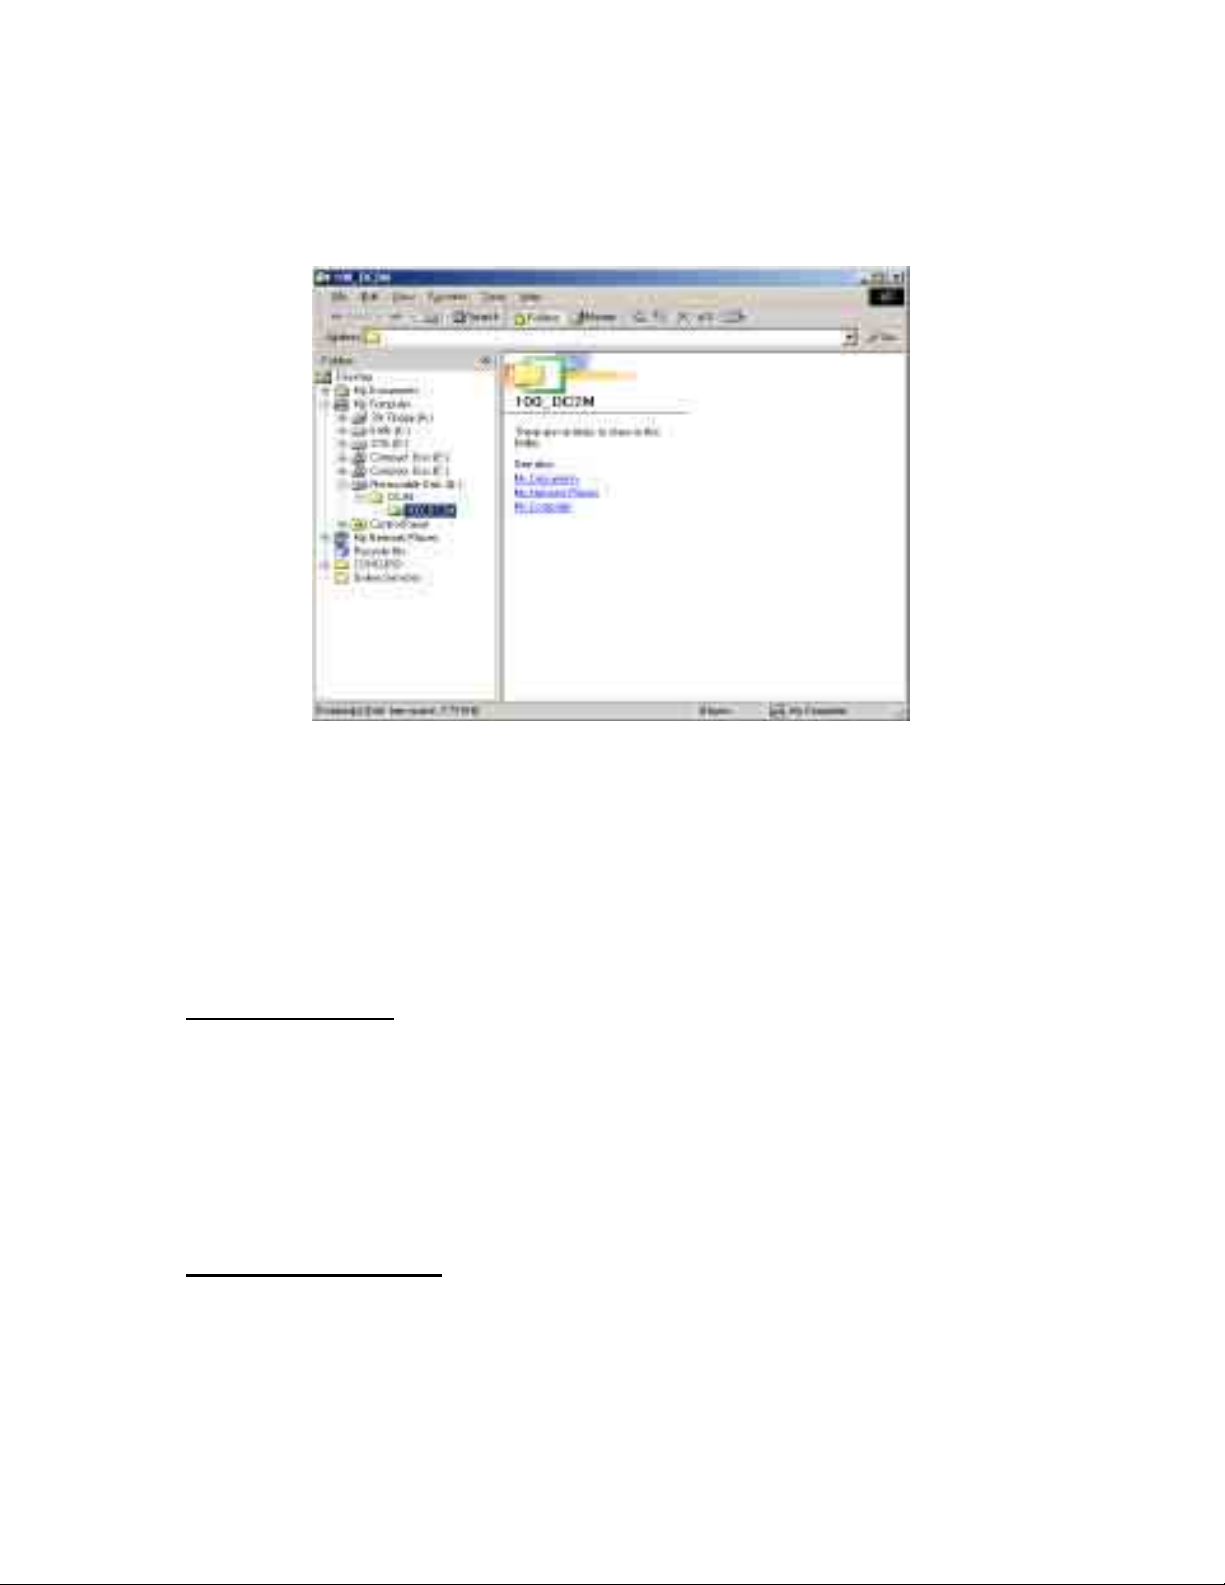
Once “Open folder to view files” has been selected, Windows Explorer
opens with a view of a folder labeled “DCIM”.
Open the folder, and the subfolder “100 DC2M”.
Retrieve your images by selecting them, copying and pasting to a location
on your hard drive.
3
Page 27

1
Installing the Camera Driver – Macintosh Based Systems
Install the camera driver and software prior to connecting the camera to
the computer. Failure to do so may cause the software and drivers to load
incorrectly.
Step 1. Turn on the Computer
Step 2. Place the CD ROM labeled Camera Driver into the CD ROM
drive.
Step 3. Click on Install Driver when the above window appears.
*If the Install Driver Window does not appear; Double click the icon
“DRIVERCD” on desktop
Step 4. Double click on the Install Icon
Step 5. Click “Continue” button
3
Page 28

2
Step 6. Click “Restart” to restart the computer.
Step 6A. If the driver was previously installed, you will see the below
window.
Step 7. Connect the camera to the PC via USB cabl e. On the desktop a
new ICON labeled: DC2MEGAPIXE will appear.
Step 8. All the images in the camera can be viewed in the folder named
“ 100_DC2M” , the sequence of route is:
DC2MEGAPIXE / DCIM / 100_DC2M
Step 9. Select the images you would like to transfer to the computer.
Copy and then Paste into the location of your choice on the
computers hard drive.
Step 10. Power off the camera, disconnect from the computer.
Note:
Disconnect and turn off your camera after the images are transferred to
conserve battery power.
3
Page 29

3
Installing the Photo Editing Software
The MGI Photo suite III SE Software allows you to access, transfer, and
edit your digital images.
1. Place the CD ROM labeled MGI Photo Suite III SE into the CD ROM
drive.
2. The Software application will auto run, follow the instructional
windows, as they appear to complete the installation.
3. Restart your computer
Note:
MGI Photo Suite does not automatically retrieve your images when the
camera is connected to the computer. Please see “Downloading Your
Images” on the Next Page.
MGI PhotoSuite III SE is not Macintosh compatible.
3
Page 30
4
Downloading Your Images
1. Set the Mode Dial to PC Connect Mode.
2. Connect the Camera to the PC with the USB cable.
3. Windows Explorer will automatically open with a view of your images.
When the camera is connected to the PC, it will automatically create a
new disk called “Removable Disk”. Please note the removable disk only
appears when your camera is connected to the computer.
4. You can retrieve your images by Copying the images shown in the
Popup window, then Pasting them to a location of your choice on your
computer hard drive.
4a. You can also retrieve your images in the following two methods.
I. My Computer
Click on My Computer Icon on your desktop, and Open
Click on Removable Disk
Click on the DCIM folder
Click on the folder called: 100_dc2m
Select all the .JPG files listed in the folder
Move the files to a location on your hard drive.
II. MGI PhotoSuite.
Open the MGI Software application
Click on FILE
Click on OPEN
Browse for the Removable Disk, or location on your hard drive
where the images were moved.
3
Page 31

5
Disconnecting Your Camera from the PC.
After your images are transferred to the PC, you need to disconnect the
camera from the PC correctly. Failure to due this can cause damage to
your camera.
1. Go to MY COMPUTER
2. Right Click on Removable Disk, and choose EJECT.
3. Once the Ready LED light on the front of the camera illuminates,
you can turn your camera off and disconnect the USB cable.
Note:
To conserve battery life, it is suggested that you move the images to your
computer hard drive by using My Computer, Turn the camera OFF and
Disconnect from the USB cord. Open the MGI Photo Editing Software and
then review and edit your images.
3
Page 32

6
Troubleshooting
Problem Cause Solution
Cable is not properly
connected
Camera is Off Turn on the power.
The Camera cannot
Doenload images to the
PC.
The flash will not fire The flash is turned off.
There are no batteries or
the adapter is not well
connected.
The Mode Dial is set to PC
Connect.
Operating System is not
compatible with camera.
USB Driver is not
installed.
The camera is not set to
Camera Mode.
CompactFlash Card is not
correctly inserted.
Check the cable connection.
Load new batteries or check
the AC Adapter connection.
Set the Mode dial to PC
Connect Mode.
Install the camera drivers
and software on a PC that is
compatible with the camera.
Install the USB driver.
Set the flash mode to Auto
Flash or Fill-In flash Mode.
Check the Mode Dial,
and that it is in Camera
Mode.
After turning the camera off,
insert the CompactFlash™
Card.
The camera does not take
pictures when the shutter
button is pressed.
Incorrect time-date is
displayed.
The TFT monitor is not
clear
In review mode camera
Says “no image” ,
switching
To camera mode, says
“memory full”
The CompactFlash™ card
has not been formatted.
The CompactFlash™ card
is damaged.
The batteries are weak.
The CompactFlash™ door
is open
The power has not been
switched on.
The TFT monitor is dirty Clean the TFT monitor.
Camera was disconnected
From USB improperly.
Format the CompactFlash
Card.
Replace CompactFlash™
with a new one.
Replace with New batteries.
Close the CompactFlash™
door.
Switch the power on.
Reset the Time-Date
Format Memory or Format
CF card.
3
Page 33

7
Problem Causes Solution
The image is not displayed
on the External Monitor
The camera powers off for
no reason.
There is something wrong
with the color of the
captured image.
The picture is too bright
or too dark.
Picture is out of focus
The video cable is not
connected to the display
of the external monitor
The Auto Off feature
maybe set at a time that
is too short for your
preferences.
White Balance is not set
properly.
There is excessive
exposure.
The Focus Ring is not set
correctly.
Check the cable
connection.
Check the Auto Off
feature and increase the
time interval the camera
runs in an idle state
before power off.
Reset the White Balance
Reset the Exposure
Compensation.
Review the User Manual
on the Focus Ring settings
and set for the correct
distances while
photographing.
The power will not turn on
The power turns off
during use.
The batteries are drained
of power
The AC power adapter is
not connected or
damaged.
The batteries are out of
power.
Auto Power Off
The CompactFlash™ card
was removed during
processing.
The AC adapter has not
been connected properly
The external temperature
is too cold.
Replace the batteries with
new ones.
Make sure the AC power
adapter is connected and
is not damaged.
Replace the batteries with
new ones.
Switch on the Power, and
reset the Auto Power off
setting.
Do Not remove the
CompactFlash™ card
while the image is
processing.
Connect the AC Adapter
correctly.
Keep the camera away
from extreme
temperatures
The battery power is
draining too quickly.
The camera is using both
old and new batteries.
Editing images with the
camera turned on and
connected to the PC via
the USB.
Replace all the batteries
with new ones.
Move pictures from the
camera to the hard drive
of the PC, power camera
off and then edit images
on the PC.
3
Page 34

8
Getting Help
If you need help with your camera, refer to the troubleshooting section of
this manual. If you still cannot find the solution, visit our Website at
www.support.concordcam.com The most important issues are
answered in the Frequently Asked Questions (FAQ) section.
Customer Support
During the 1 year Limited Warranty period:
FAQ's (Frequently Asked Questions) and E-mail support via our Website
at www.support.concordcam.com
TOLL FREE IN THE US AND CANADA
• (866) 522-6372
TOLL FREE IN EUROPE
UK: 0800-1696482 •
Spain: 900-973195
Germany: 0800-1800563 •
Italy: 800-781883
France: 0800-917599
TOLL IN EUROPE
• 31-53-4829779
3
Page 35

9
Camera Specifications
Feature Specification
Aperture F=2.8/8.0
Color Depth 24 bits true color
Dimensions(WxHxD)mm 65x103x30(40mm with lens)
DPOF YES
Exposure Auto-Manual
File Format JPEG (EXIF 2.1)
Auto, Fill-in, Red-Eye Reduction, Night
Flash
Scene, Flash Off, Depth of Field
Enhancement
Appendix
Focus Range
LCD Display 1.5” TFT (resolution 521x218)
Lens F=7mm
Optical Viewfinder Yes
PC Interface USB
Power Source 4 AAA Alkaline batteries
Recording Media
Resolution 1600 x 1200, 800 x 600
Self Timer 10 seconds
Sensor 2.1MP Sony CCD
Shutter Speed Electronic: 1/8 – 1/2000 sec.
Support OS
Macro: 15cm – 40cm (6 in- 15in)
Normal: 50cm (20 in)-infinity
Built in 8MB internal Memory, and
CompactFlash Type I support.
Windows 98/98SE/2000/ME/XP, Mac OS
9.x
Video Out NTSC-PAL
Weight 148g (without battery)
White Balance
Auto, Daylight, Tungsten, Fluorescent,
Cloudy, Black White.
3
Page 36

0
Original Factory Settings
Setting Default Setting
Beep Sound On
EV Adjustment +- 2EV
Flash Auto
Image Quality Fine
Language English
Power Saving 60 seconds
Quick View ON
Resolution 1600 x 1200
Video Output NTSC
White Balance Auto
4
Page 37

1
Tips Safety and Maintenance
• Do not attempt to modify this camera in any way. This may cause a fire or
electric shock or severe damage to the camera.
• Do not use the flash in close proximity to people or animals. Positioning the
flash too close to your subject's eyes may cause eyesight damage. Do not
attempt to photograph children using flash, closer than One-meter proximity.
• When taking photographs, never point the lens of the camera directly into very
strong light. This may result in permanent damage to the camera or your
eyesight.
• Please do not use this product in close proximity to flammable or explosive
gases as this could increase the risk of explosion.
• For safety reasons keep this product and accessories out of reach of children
or animals to prevent accidents.
• In case of accidents, please consult a doctor immediately.
• Do not swallow batteries or small camera accessories.
• Should any form of liquid enter the camera, do not use it. Switch the camera
off, and then disconnect the power source (batteries or AC Power Adapter). Do
not continue to use the camera as this may cause a fire or electric shock.
• Do not insert or drop metallic or inflammable foreign objects into the camera
through access points e.g. card slot and battery chamber. This may cause a
fire or electric shock.
• Do not operate this camera with wet hands. This could pose a risk of electric
shock.
• Do not leave this camera in places subject to extremely high temperatures
such as in a sealed vehicle, direct sunlight or other places with extreme
variances in temperature. Exposure to extreme temperatures may adversely
affect the camera's internal components and could cause a fire.
• Always use the camera and its accessories in a well-ventilated area.
• Leakage, overheating, or burst batteries could result in fire or injury.
• Do not short circuit, heat or dispose of batteries in fire.
• Do not use old batteries with new ones, or mix brands of batteries.
• Ensure the batteries are positioned correctly with regard to polarity (+/-).
4
Page 38

2
• When the camera is not in use for long periods, always unplug the camera
from its power source (batteries or AC Power Adapter) for safety purposes.
Leaking batteries can cause fire and pollution to the environment.
• Allowing dust to accumulate in the camera over a long period is hazardous as
extreme circumstances may cause a fire. It is best to clean your camera prior
to seasonal periods of high humidity.
• Do not move the camera while it is switched on if you are using the AC Power
Adapter. After use, always switch off the camera before unplugging the
adapter from the DC Power Terminal. Then make sure that any connector
cords or cables to other devices are disconnected before moving the camera.
Failure to do so may damage the cords or cables and cause a fire or electric
shock.
• Batteries may lose power if kept inside the camera for a long time without
using. Please remove the batteries while the camera is not in use.
• Do not use manganese batteries as they cannot supply sufficient power to
support the camera's operations. Batteries may not work normally under 0º C.
• It is normal that the temperature of the camera body rises after being in use
for a long period.
• It is suggested to use an AC adapter if you expect to use the camera for a long
period.
• Make sure the AC adapter meets the specification requirement that is 5V/2.0A.
• Images stored in the CompactFlash™ card may be ruined or damaged if you
turn off the camera while it is in process of reading, writing or formatting...etc.
• CompactFlash™ cards are delicate electronic devices. Please do not bend or
drop them
• Please do not place the CompactFlash™ card in or near to an environment of
strong electronic or magnetic fields such as loud speakers or TV receivers.
• Please avoid using the camera in high or low temperature (Operation
temperature range 0º C~40º C).
• Please keep the CompactFlash™ card in its bag or cas e when not in use.
• It's normal that the CompactFlash™ card gets warm after use.
• Please make sure you switch off the power before you remove the
CompactFlash™ card.
4
Page 39

3
FCC Compliance
This device has been tested in accordance with the limits of a class B
digital device under item 15 of FCC rules. These limits are designed to
provide protection against harmful interference in commercial
installation. This equipment generates, absorbs and can emit radio
frequency energy. lf it is not installed and used in accordance with the
instructions, it may cause harmful interference to radio communication
situations. Should any interference occur when this device is in
operation, please try one or more of the following measures.
- Change the location and direction of any aerial.
- Increase distance between camera and affected device.
- Use a different socket away from the affected device.
Warranty
The manufacturer warrants your Concord Eye-Q camera for a period of 1 year
from the date of purchase to be free from defects in material and
workmanship. The warranty period shall be extended accordingly if applicable
mandatory legislation in effect on the date of purchase requires a longer
warranty period. The manufacturer, at its option, will repair or replace or have
repaired or replaced, at a location selected by the manufacturer, each product
which is proven to the satisfaction of the manufacturer to be defective in
material or workmanship. This warranty shall be limited to the camera for
defects that were not caused by misuse, abuse, improper handling, tampering
or attempts to repair by the owner or any unauthorized repair service or
repair man. This warranty is limited solely to the above and applies only for
the period set forth. We will not be liable for any loss or damage, incidental or
consequential of any kind, whether based on warranty, contract or negligence
arising in connection with the sale, use or repair of the product. Our
maximum liability shall not in any case exceed the sale price. This warranty is
for the benefit of the original purchaser only. This warranty gives you specific
legal rights and may vary from jurisdiction to jurisdiction. The manufacturer
makes no representation or warranties with regard to the contents of the
User’ s Guide and Quick Start Guide. Non-Concord brand equipment and
software and the Concord Eye-Q TWAIN driver distributed with your Concord
Eye-Q camera are sold “as is” and without warranty of any kind from the
manufacturer, including any implied warranty regarding merchantability,
fitness for a particular purpose, and non-infringement of third party rights,
and all such warranties are disclaimed. The sole warranty, if any, for nonConcord branded items, if any, is given by the manufacturer or producer
thereof.
4
Page 40
4
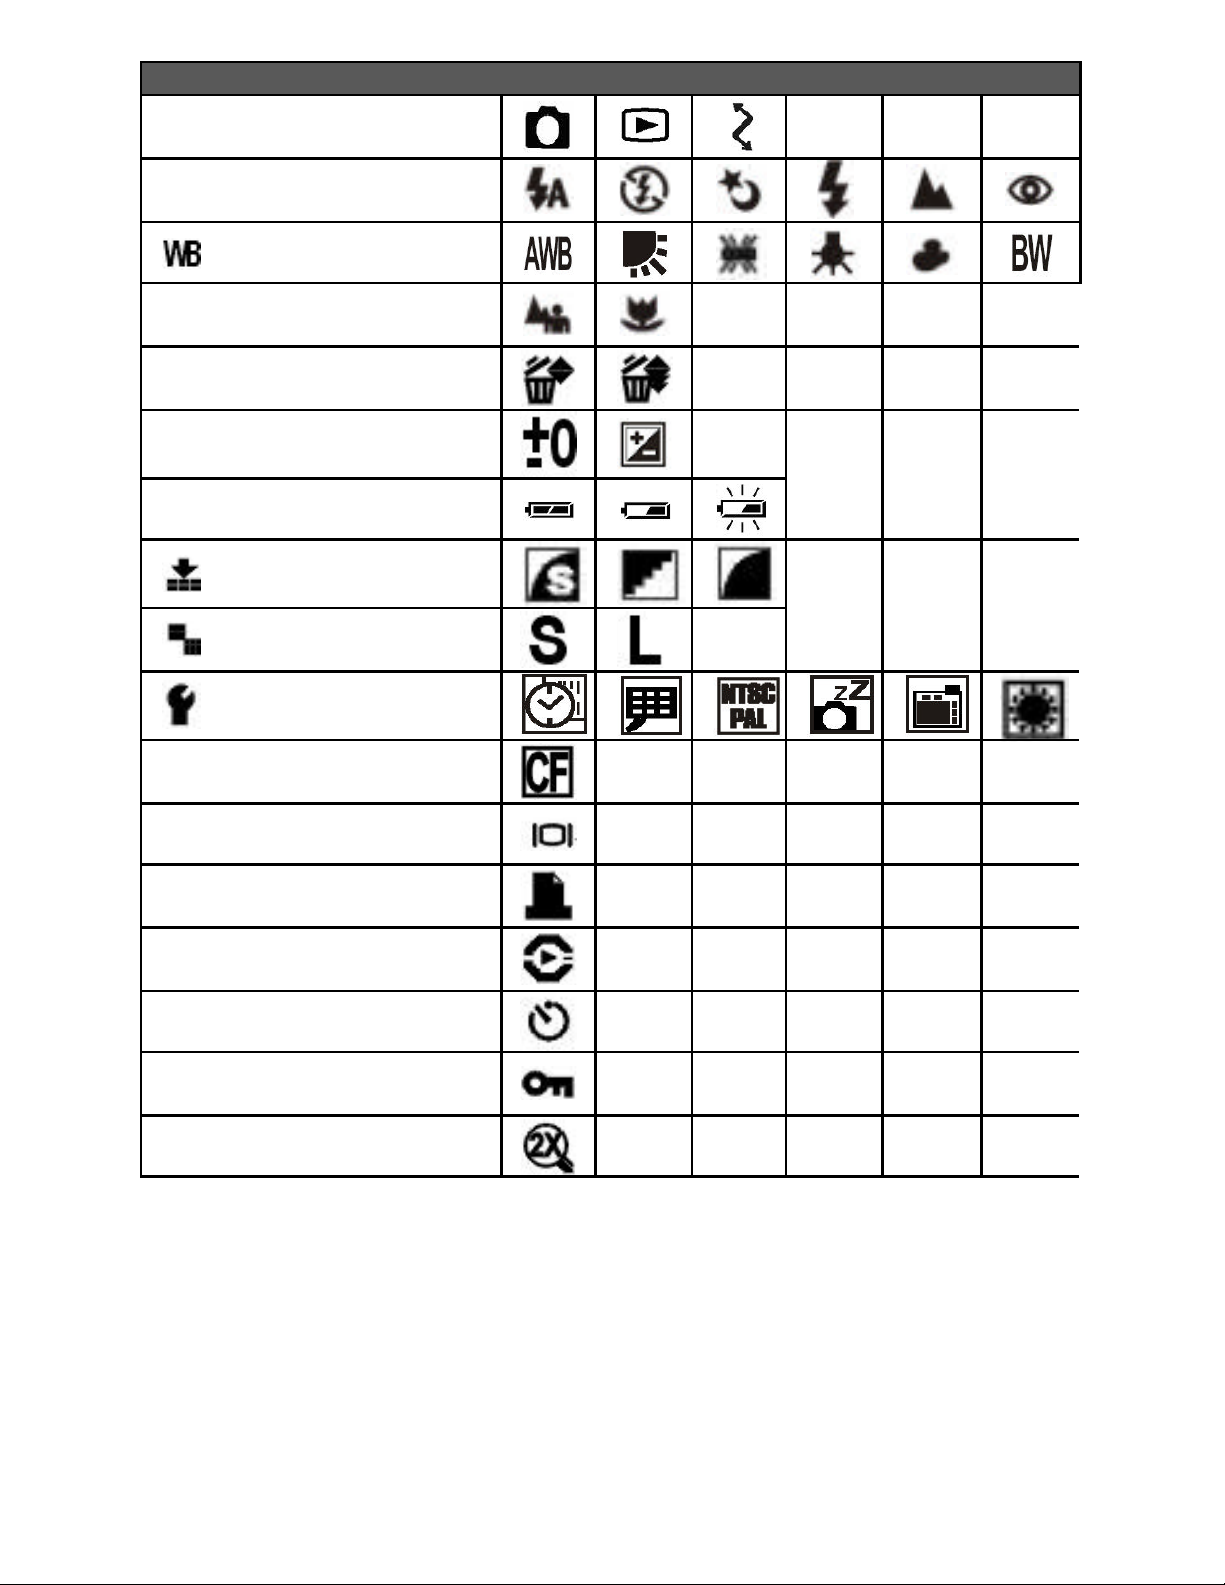
Camera Operation Modes
Flash-Pg.14
White Balance- Pg.16
Focus Settings- Pg.13
Deleting Pcitures-Pg.21
Exposure Compensation-
Pg.24
Batteries- Pg.10
Image Quality- Pg.17
Resolution- Pg.17
Icon Quick Index
Setup Features- Pg.23
CompactFlash™ Pg.11, 25
TFT Display / On-Off –
Pg.8
DPOF-Pg.26
Auto Play- Pg.20
Self Timer- Pg.18
Protecting Images- Pg.22
Digital Zoom- Pg.15
4
Page 41

Technical Support Hot Line:
Toll Free In the USA & Canada
1-866-522-6372
Toll Free In Europe
UK: 0800-169-6482
BELGIUM: 0800-787-57
FRANCE: 0800-917-599
GERMANY: 0800-1800-563
SPAIN: 900-973-195
ITALY: 800-781-883
All Other Countries - Toll
31-53-482-9779
 Loading...