

Page 1
IT - EN - FR - NL
Page 2
INTRODUZIONE
√ AVVERTENZE
√ DESCRIZIONE MONITOR
√ FUNZIONE TASTI
√ MENU PLANUX MEMO VIDEO
√ GUIDA CROMATICA
Page 3

INTRODUZIONE
AVVERTENZE
Comelit Group S.p.A. declina ogni responsabilità per un utilizzo improprio degli apparecchi, per modifi che
effettuate da altri a qualunque titolo e scopo, per l'uso di accessori e materiali non originali. Attenzione! Al fi ne di
ridurre il rischio di guasti e scosse elettriche:
• Non aprire l'apparecchio o effettuare personalmente riparazioni. In caso di necessità richiedere l'intervento di
personale qualifi cato.
• Non inserire oggetti nè versare liquidi all'interno del dispositivo.
• Pulire con un panno inumidito con acqua. Evitare Alcool e altri prodotti aggressivi.
Fonts are (c) Bitstream (see below). DejaVu changes are in public domain.
Glyphs imported from Arev fonts are (c) Tavmjong Bah (see below)
Bitstream Vera Fonts Copyright
------------------------------
Copyright (c) 2003 by Bitstream, Inc. All Rights Reserved. Bitstream Vera is a trademark of Bitstream, Inc.
Permission is hereby granted, free of charge, to any person obtaining a copy of the fonts accompanying
this license ("Fonts") and associated documentation fi les (the "Font Software"), to reproduce and distribute
theFont Software, including without limitation the rights to use, copy, merge, publish, distribute, and/or sell
copies of the Font Software, and to permit persons to whom the Font Software is furnished to do so, subject
to the following conditions:
The above copyright and trademark notices and this permission notice shall be included in all copies of one
or more of the Font Software typefaces.
The Font Software may be modifi ed, altered, or added to, and in particular the designs of glyphs or
characters in the Fonts may be modifi ed and additional glyphs or characters may be added to the Fonts, only
if the fonts are renamed to names not containing either the words "Bitstream" or the word "Vera".
This License becomes null and void to the extent applicable to Fonts or Font Software that has been modifi ed
and is distributed under the "Bitstream Vera" names.
The Font Software may be sold as part of a larger software package but no copy of one or more of the Font
Software typefaces may be sold by itself.
THE FONT SOFTWARE IS PROVIDED "AS IS", WITHOUT WARRANTY OF ANY KIND, EXPRESS OR
IMPLIED, INCLUDING BUT NOT LIMITED TO ANY WARRANTIES OF MERCHANTABILITY, FITNESS
FOR A PARTICULAR PURPOSE AND NONINFRINGEMENT OF COPYRIGHT, PATENT, TRADEMARK,
OR OTHER RIGHT. IN NO EVENT SHALL BITSTREAM OR THE GNOME FOUNDATION BE LIABLE
FOR ANY CLAIM, DAMAGES OR OTHER LIABILITY, INCLUDING ANY GENERAL, SPECIAL, INDIRECT,
INCIDENTAL, OR CONSEQUENTIAL DAMAGES, WHETHER IN AN ACTION OF CONTRACT, TORT OR
OTHERWISE, ARISING FROM, OUT OF THE USE OR INABILITY TO USE THE FONT SOFTWARE OR
FROM OTHER DEALINGS IN THE FONT SOFTWARE.
Except as contained in this notice, the names of Gnome, the Gnome Foundation, and Bitstream Inc., shall not
be used in advertising or otherwise to promote the sale, use or other dealings in this Font Software without
prior written authorization from the Gnome Foundation or Bitstream Inc., respectively. For further information,
contact: fonts at gnome dot org.
Arev Fonts Copyright
-----------------------------Copyright (c) 2006 by Tavmjong Bah. All Rights Reserved.
Permission is hereby granted, free of charge, to any person obtaining a copy of the fonts accompanying this
license ("Fonts") and associated documentation fi les (the "Font Software"), to reproduce and distribute the
modifi cations to the Bitstream Vera Font Software, including without limitation the rights to use, copy, merge,
publish, distribute, and/or sell copies of the Font Software, and to permit persons to whom the Font Software
is furnished to do so, subject to the following conditions:
The above copyright and trademark notices and this permission notice shall be included in all copies of one
or more of the Font Software typefaces.
The Font Software may be modifi ed, altered, or added to, and in particular the designs of glyphs or
characters in the Fonts may be modifi ed and additional glyphs or characters may be added to the Fonts,
only if the fonts are renamed to names not containing either the words "Tavmjong Bah" or the word "Arev".
This License becomes null and void to the extent applicable to Fonts or Font Software that has been modifi ed
and is distributed under the "Tavmjong Bah Arev" names.
The Font Software may be sold as part of a larger software package but no copy of one or more of the Font
Software typefaces may be sold by itself.
THE FONT SOFTWARE IS PROVIDED "AS IS", WITHOUT WARRANTY OF ANY KIND, EXPRESS OR
IMPLIED, INCLUDING BUT NOT LIMITED TO ANY WARRANTIES OF MERCHANTABILITY, FITNESS
FOR A PARTICULAR PURPOSE AND NONINFRINGEMENT OF COPYRIGHT, PATENT, TRADEMARK,
OR OTHER RIGHT. IN NO EVENT SHALL TAVMJONG BAH BE LIABLE FOR ANY CLAIM, DAMAGES
OR OTHER LIABILITY, INCLUDING ANY GENERAL, SPECIAL, INDIRECT, INCIDENTAL, OR
CONSEQUENTIAL DAMAGES, WHETHER IN AN ACTION OF CONTRACT, TORT OR OTHERWISE,
ARISING FROM, OUT OF THE USE OR INABILITY TO USE THE FONT SOFTWARE OR FROM OTHER
DEALINGS IN THE FONT SOFTWARE.
Except as contained in this notice, the name of Tavmjong Bah shall not be used in advertising or otherwise
to promote the sale, use or other dealings in this Font Software without prior written authorization from
Tavmjong Bah. For further information, contact: tavmjong @ free. fr.
Page 4
INTRODUZIONE
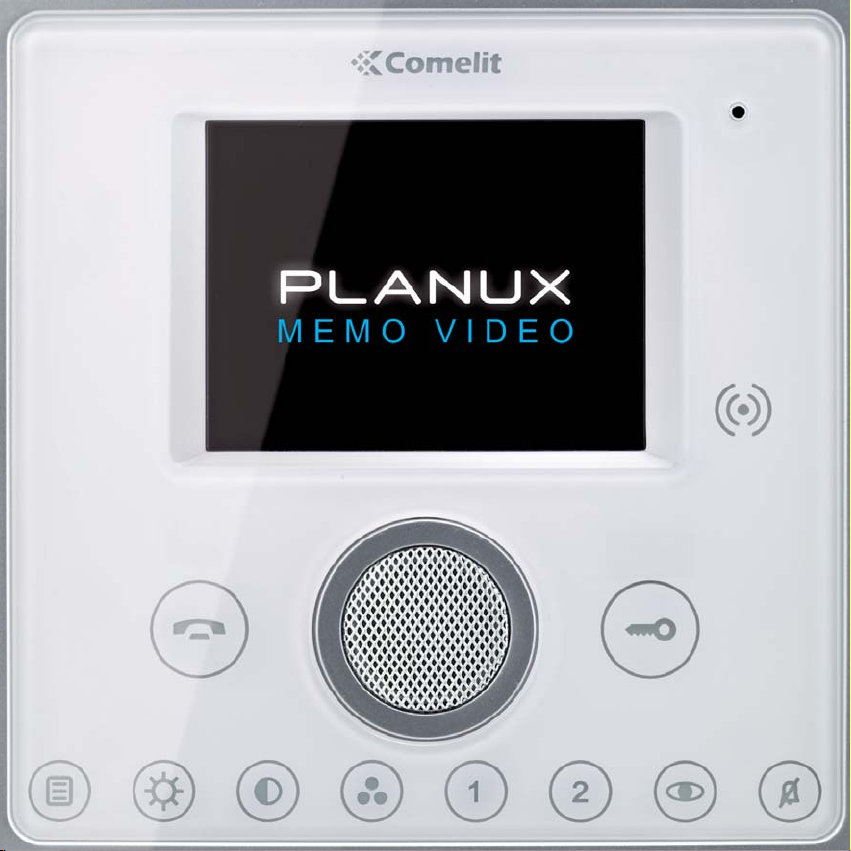
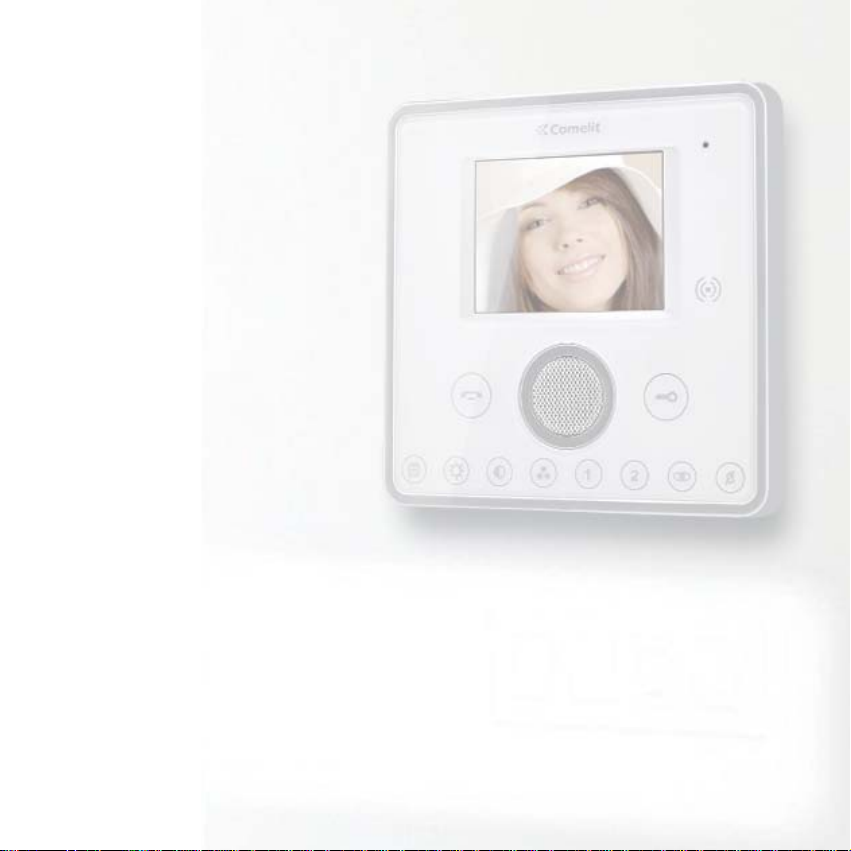
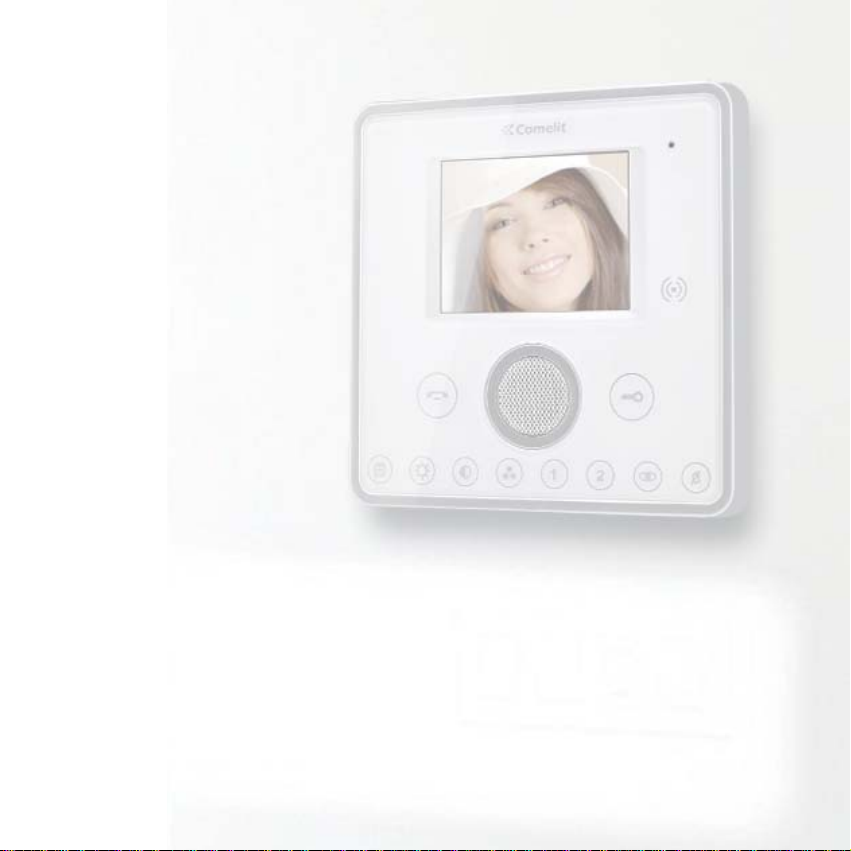
DESCRIZIONE MONITOR
Sab 05/09/09 16:07
VIDEOFONIA
1
34
5
1 Tasto fonica
2 Tasto serratura
3 Tasto menu
4 Tasto luminosità
5 Tasto contrasto
6 Tasto colore
7 Tasto programmabile 1
8 Tasto programmabile 2
9 Tasto autoaccensione (programmabile)
10 Tasto privacy / dottore
11 Touch screen
12 Sensore chiavetta
SETUP
IA
67
8910
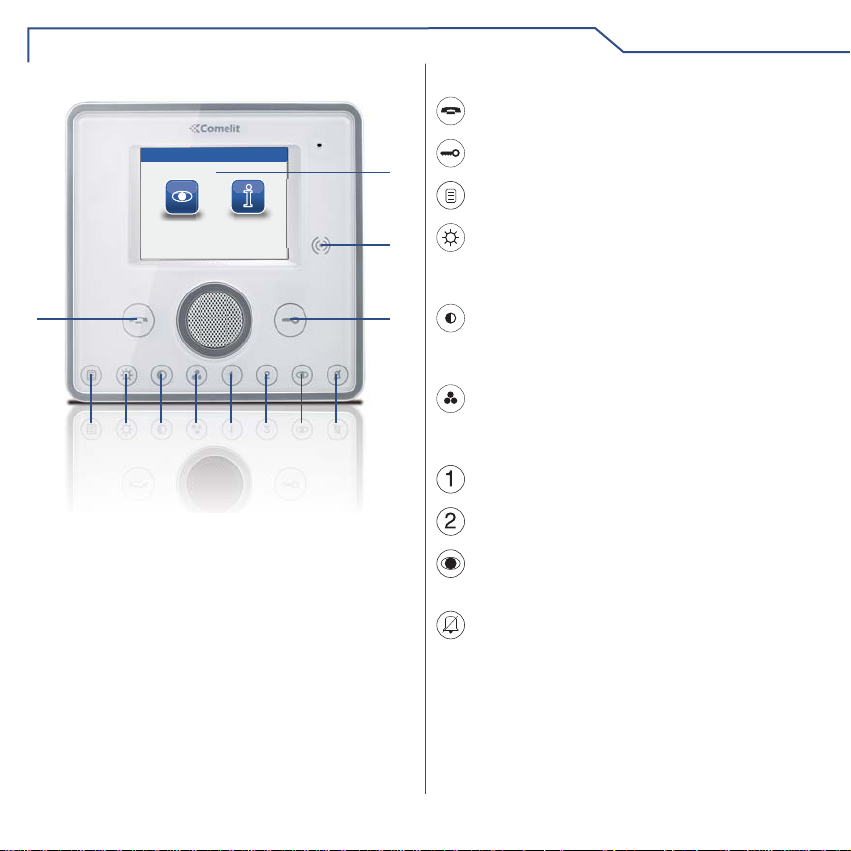
FUNZIONE TASTI
Tasto fonica: permette di attivare o disattivare
la conversazione con il posto esterno.
Tasto serratura: permette l’apertura della
11
12
2
serratura associata.
Tasto menu: permette di accedere o uscire dal
menu del monitor Planux Memo Video.
Tasto luminosità: permette la regolazione
della luminosità dell'immagine sul monitor. Per
modifi carne il valore, premere il tasto mentre è
in corso una comunicazione video.
Tasto contrasto: permette la regolazione
del contrasto dell'immagine sul monitor. Per
modifi carne il valore, premere il tasto mentre è
in corso una comunicazione video.
Tasto colore: permette la regolazione del colore
dell'immagine sul monitor. Per modifi carne il
valore, premere il tasto mentre è in corso una
comunicazione video.
Tasto programmabile 1: di fabbrica impostato
come attuatore generico (programmabile).
Tasto programmabile 2: di fabbrica impostato
come chiamata a centralino (programmabile).
Tasto autoaccensione: Permette l’accensione
del monitor e la visione del posto esterno video
(programmabile).
Tasto funzione Privacy / Dottore (programmabile):
• La funzione Privacy permette l'esclusione della
chiamata dal posto esterno e dal centralino.
• La funzione Dottore permette l’azionamento
automatico dell’apriporta su chiamata da posto
esterno.
• La funzione Privacy + Dottore oltre a disattivare
la suoneria del citofono come nella funzione
Privacy, permette l’azionamento automatico
dell’apriporta su chiamata da posto esterno.
Il led rosso indica che la funzione scelta è
4
attivata.
Page 5

INTRODUZIONE
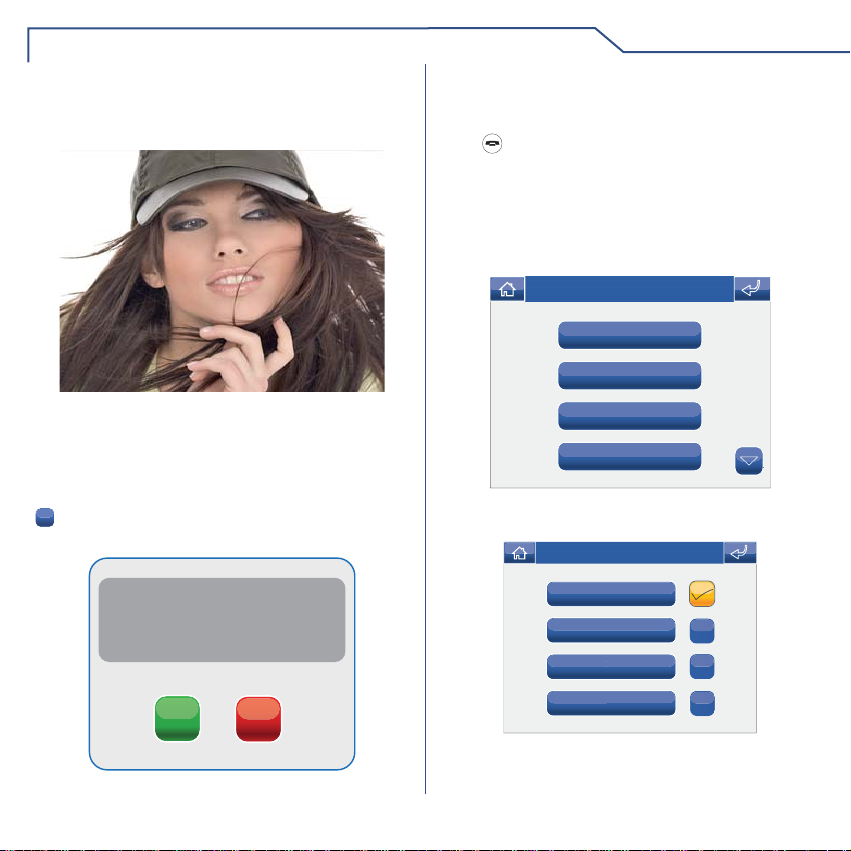
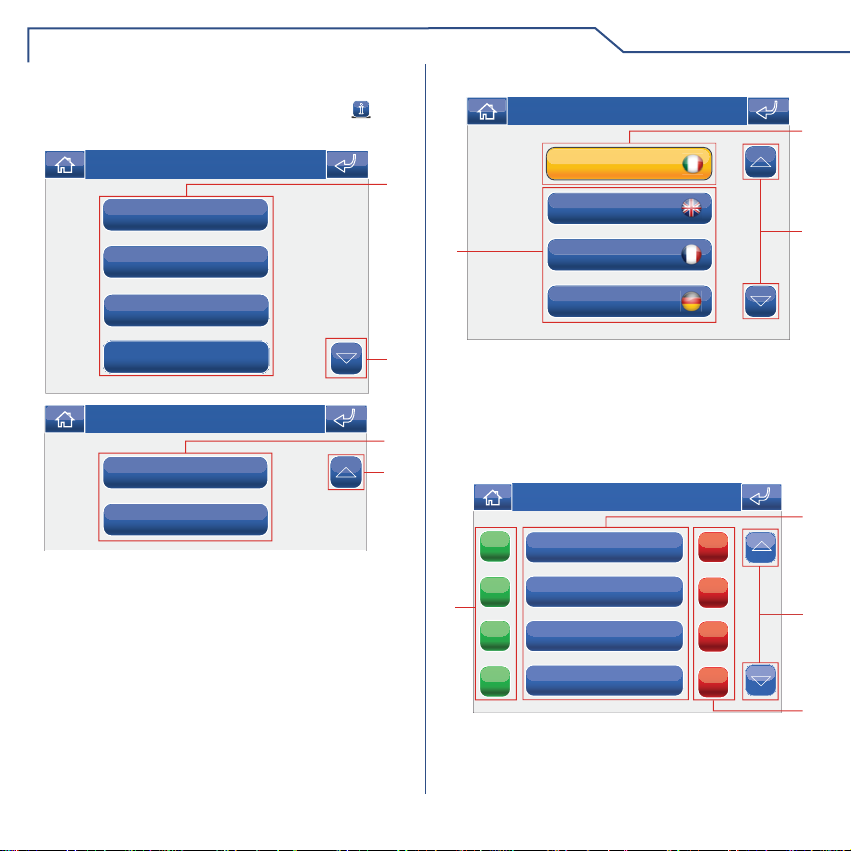
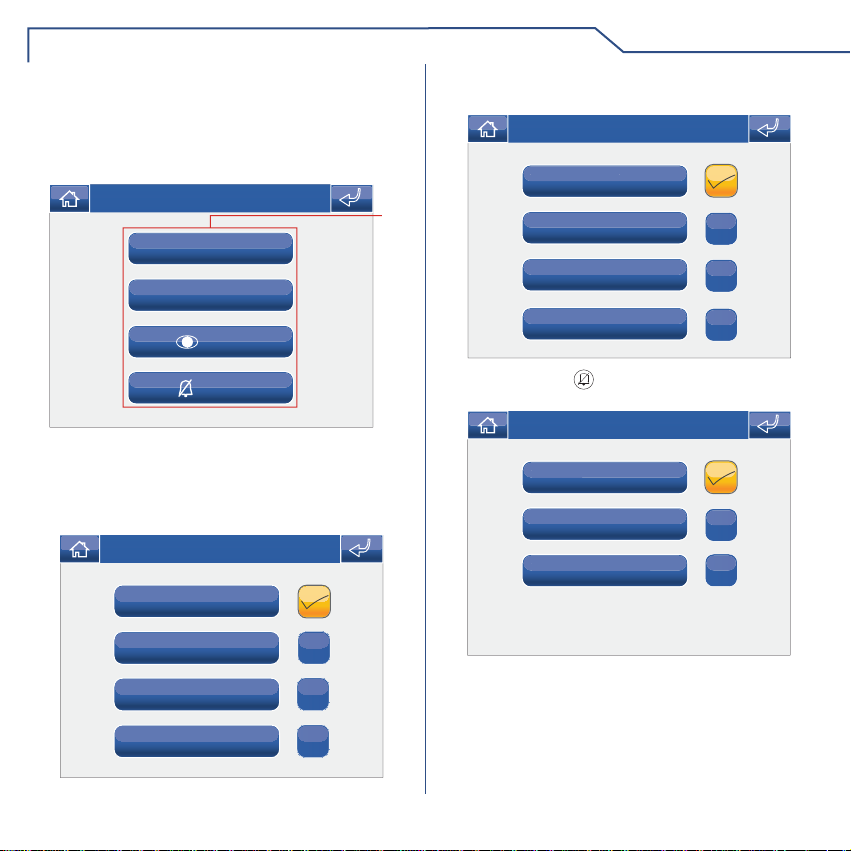
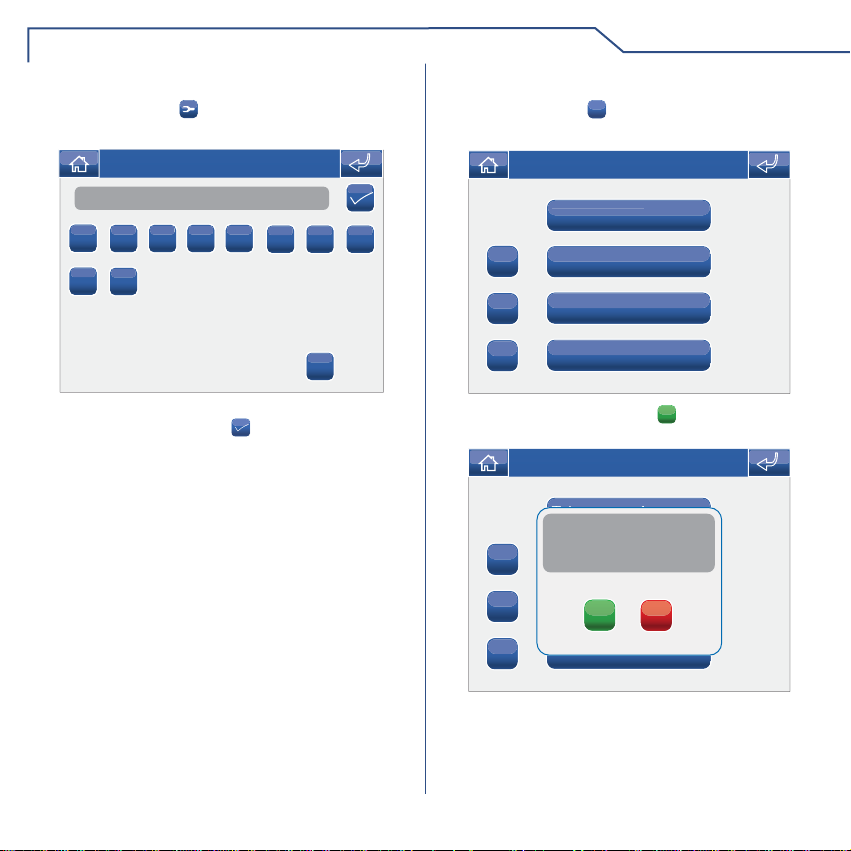
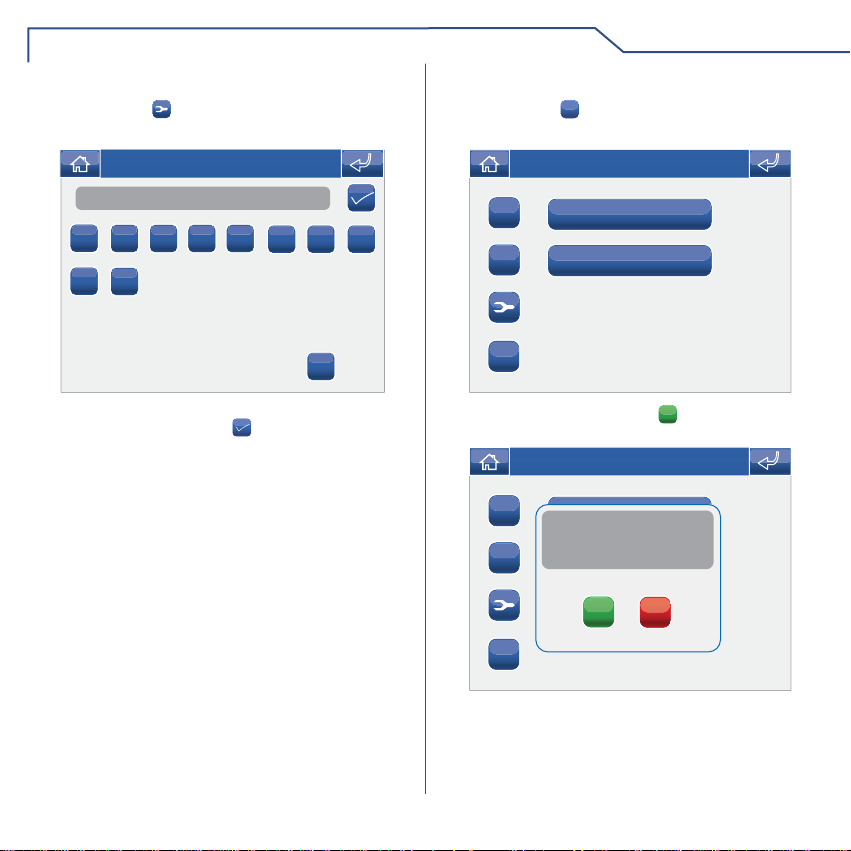
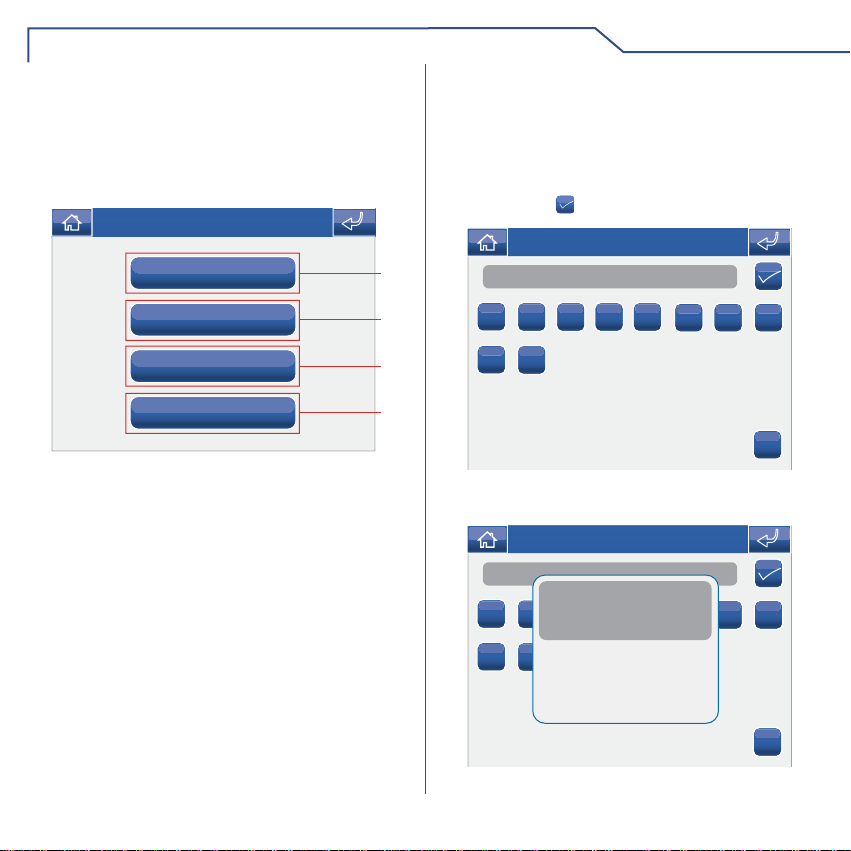
MENU PLANUX MEMO VIDEO
Per navigare attraverso il menu è suffi ciente toccare
con un dito l'icona della funzione desiderata.
Per accedere al menu principale premere il tasto
Sab 05/09/09 16:07
VIDEOFONIA
L'icona
menu principale.
L'icona
precedente.
permette di tornare immediatamente al
permette di tornare alla schermata
Sab 05/09/09 16:07
SETUP
GUIDA CROMATICA
Le icone dei menu cambiano colore a secondo del
loro stato e della loro funzione :
: indica che la funzione non è attiva.
GIALLO: indica che la funzione è attiva.
VERDE: premendo l'icona si attiverà la funzione
ON
associata.
ROSSO: premendo l'icona si disattiverà la
OFF
funzione associata.
5
Page 6

VIDEOFONIA
√ RISPONDERE AD UNA CHIAMATA
√ DESCRIZIONE MENU VIDEOFONIA
√ VIDEO SEGRETERIA
√ VISUALIZZARE UNA REGISTRAZIONE
√ ELIMINARE UNA REGISTRAZIONE
√ MANI LIBERE
√ IMPOSTA MELODIE
√ REGOLAZIONE VOLUMI
√ ATTUATORI
√ RINOMINARE ATTUATORI
√ TELECAMERE
√ RINOMINARE TELECAMERE
√ INTERCOMUNICANTI
√ RINOMINARE INTERCOMUNICANTI
Page 7

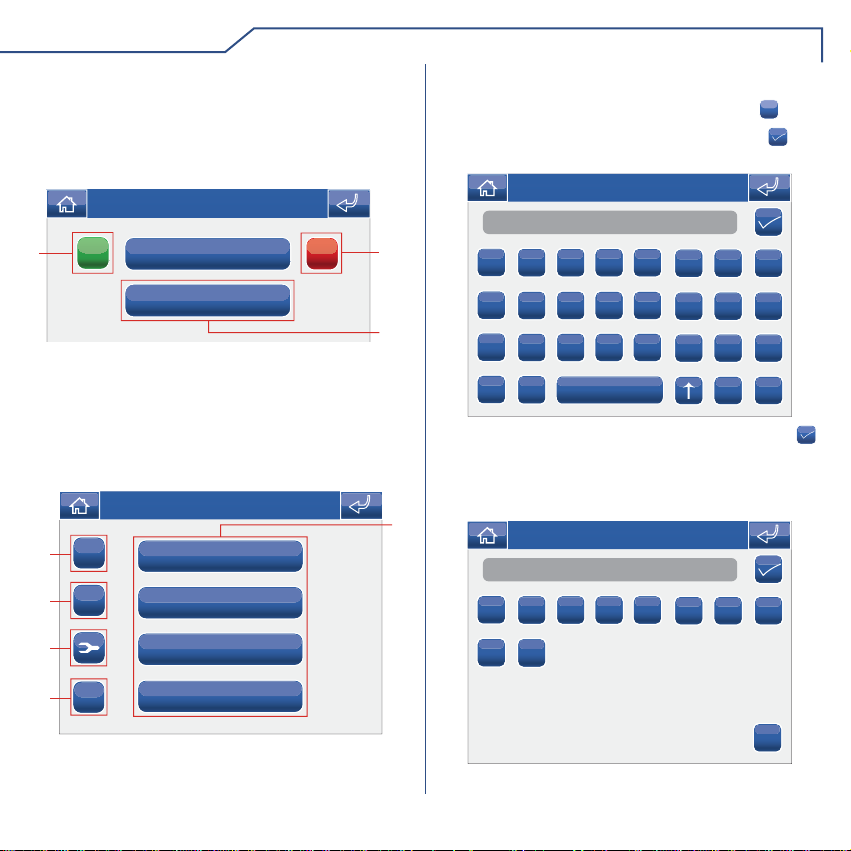
VIDEOFONIA
RISPONDERE AD UNA CHIAMATA
I LED dei tasti di fonica e serratura lampeggiano a
seguito di una chiamata.
Premere il tasto
per attivare la fonica con il posto
esterno chiamante.
Premere il tasto
per attivare la serratura
associata.
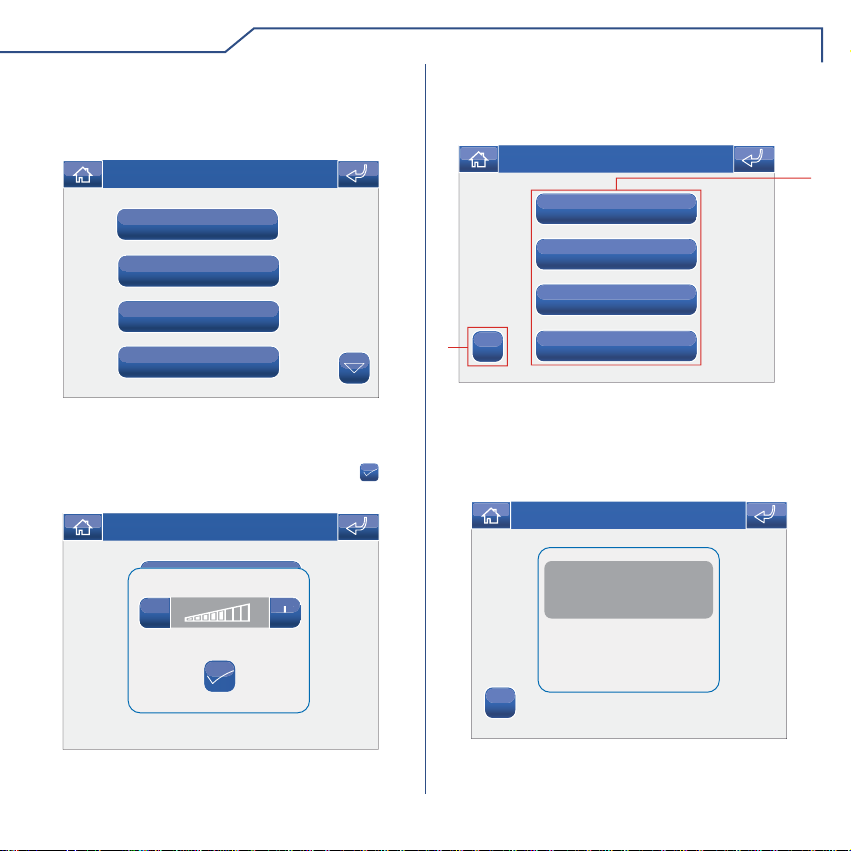
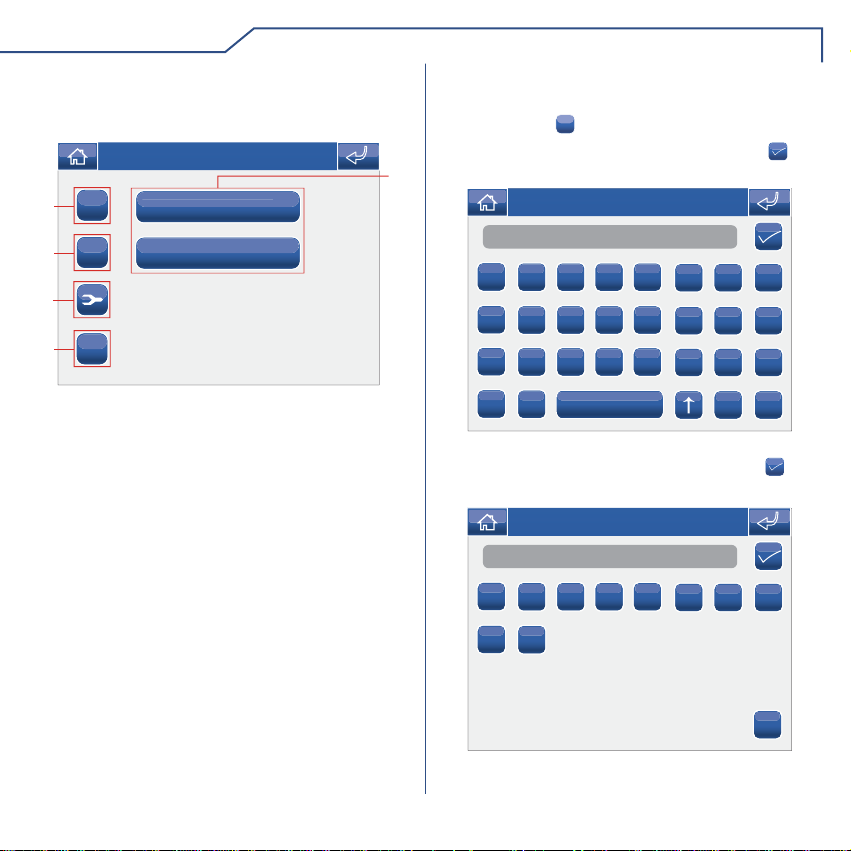
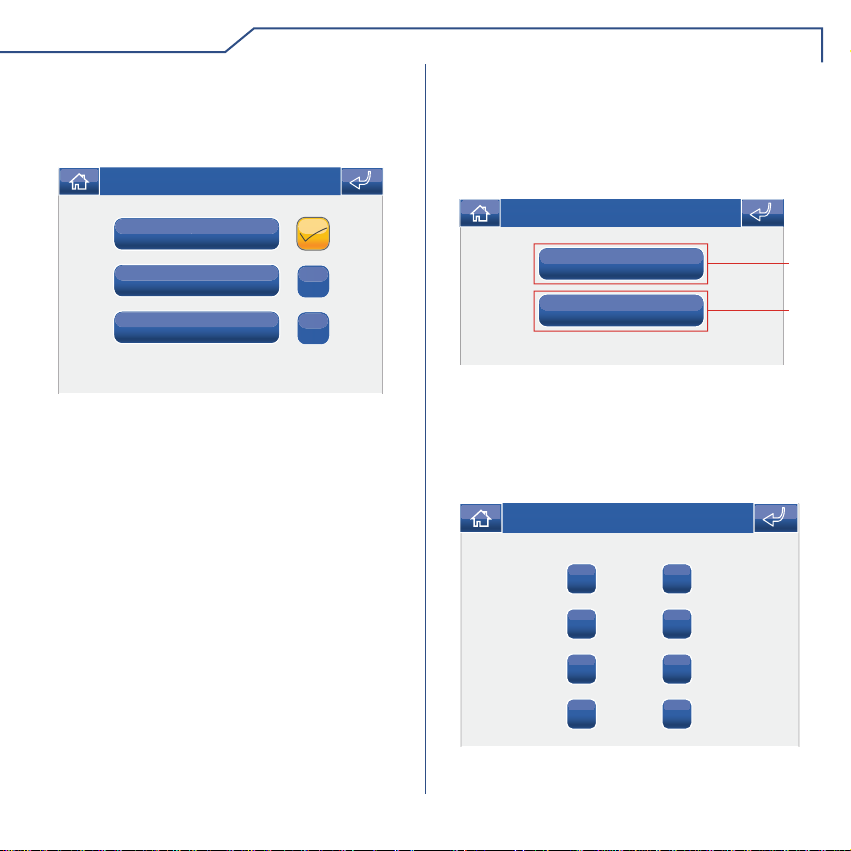
DESCRIZIONE MENU VIDEOFONIA
Per accedere al menu videofonia, premere l'icona
dal menu principale.
Gio 21/06/12 - 16:07 0W
Video segreteria
ON
4
ON
Mani libere
Imposta melodie
Regolazione volumi
Gio 21/06/12 - 16:07 0W
Attuatori
Telecamere
Intercomunicanti
Centralino principale
OFF
OFF
1 Funzioni disponibili nel menu videocitofonia.
2 Disattivazione della funzione associata.
3 Scorrimento della pagina.
4 Attivazione della funzione associata.
VIDEO SEGRETERIA
La funzione Video Segreteria, se attivata, permette
di registrare l'immagine dalla telecamera del posto
esterno quando viene inviata una chiamata per un
massimo di 100 registrazioni da 10 Max secondi
ciascuna.
Per visualizzare l'elenco delle registrazioni presenti
accedere al menu Videofonia > Video segreteria.
1
2
3
C
3
1
1 Registrazioni non visualizzate (cornice blu).
2 Registrazioni già visualizzate (cornice gialla).
3
3 Elimina registrazione.
Le registrazioni vengono salvate in formato .avi, nella
scheda SD sotto la cartella "Video" e possono essere
visualizzate anche su pc con Windows Media Player.
In assenza della scheda SD le registrazioni vengono
salvate nella memoria del Planux Manager (MAX 2
registrazioni).
3
Gio 05/09/09 - 16:07 0W
11/01/2001 10:21 09/01/2001 8:22
07/01/2001 18:50
05/01/2001 9:48
1
2
7
Page 8
VIDEOFONIA
VISUALIZZARE UNA REGISTRAZIONE
Per visualizzare una delle registrazioni, premere la
relativa icona.
Al termine della riproduzione (MAX 10 secondi), il
sistema tornerà automaticamente alla schermata
precedente.
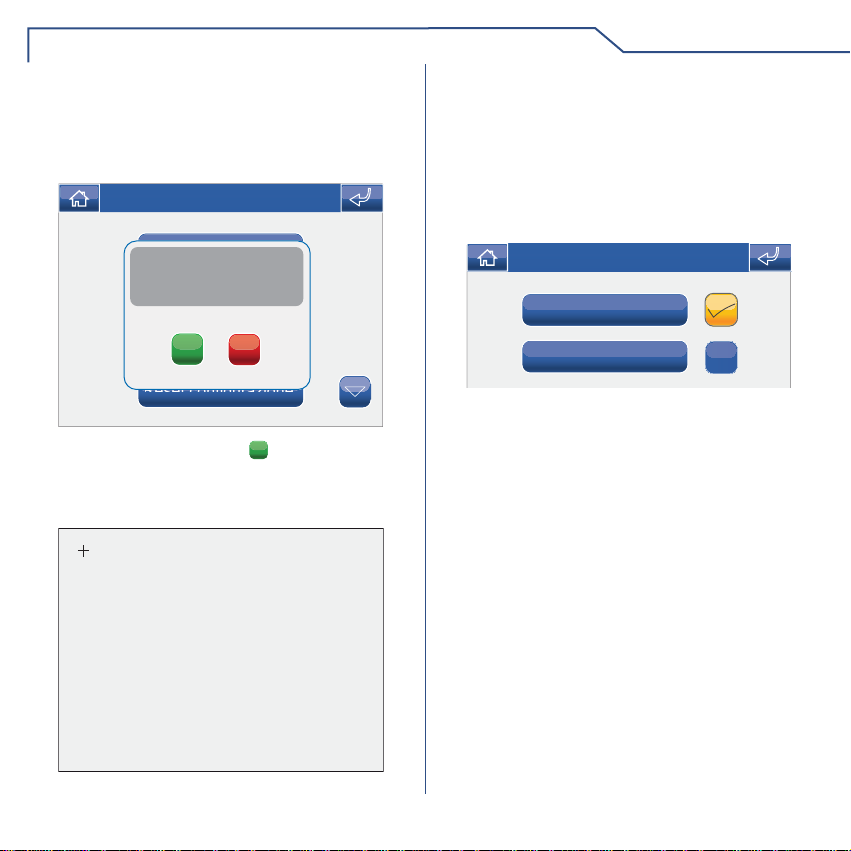
ELIMINARE UNA REGISTRAZIONE
Per eliminare una delle registrazioni, premere l'icona
C
, successivamente l'icona della registrazione che
si desidera eliminare, quindi confermare.
confermare eliminazione
messaggio video?
MANI LIBERE
La funzione Mani Libere permette di attivare la fonica,
dopo una chiamata ricevuta, senza dover premere il
.
tasto
IMPOSTA MELODIE
Per gestire le melodie del Planux Manager, accedere
al menu Videofonia > Imposta melodie .
Selezionare il tipo di chiamata per cui si vuole
modifi care la melodia premendo l'icona desiderata.
Gio 21/06/12 - 16:07 0W
Chiamata esterna
Chiamata centralino
Chiamata fuori porta
Chiamata ind. multiplo
Per ascoltare la melodia premere il nome desiderato
e successivamente l'icona a destra per memorizzare.
Gio 05/09/09 - 16:07 0W
Melodia 1
Melodia 2
SI NO
Melodia 3
Melodia 4
È possibile aggiungere delle suonerie personalizzate.
I fi le devo essere in formato .wav da 8Khz mono 16
bit. Inserire le melodie nella cartella "Wav" della
scheda SD per visualizzarle nell'apposito menu.
8
Page 9
VIDEOFONIA
REGOLAZIONE VOLUMI
Per regolare il volume della suoneria, dell'audio, dei
tasti o dei toni d'allarme accedere al menu Videofonia
> Regolazione volumi.
Gio 21/06/12 - 16:07 0W
Suoneria
Audio
Audio intercom.
Tasti
Selezionare la funzione per cui si intende variare il
volume premendo l'apposita icona. Alla comparsa
della schermata di regolazione, utilizzare le icone
+ e - per variare il volume e premere l'icona
confermare.
Gio 05/09/09 - 16:07 0W
B
Suoneria
B
-
Audio
+
per
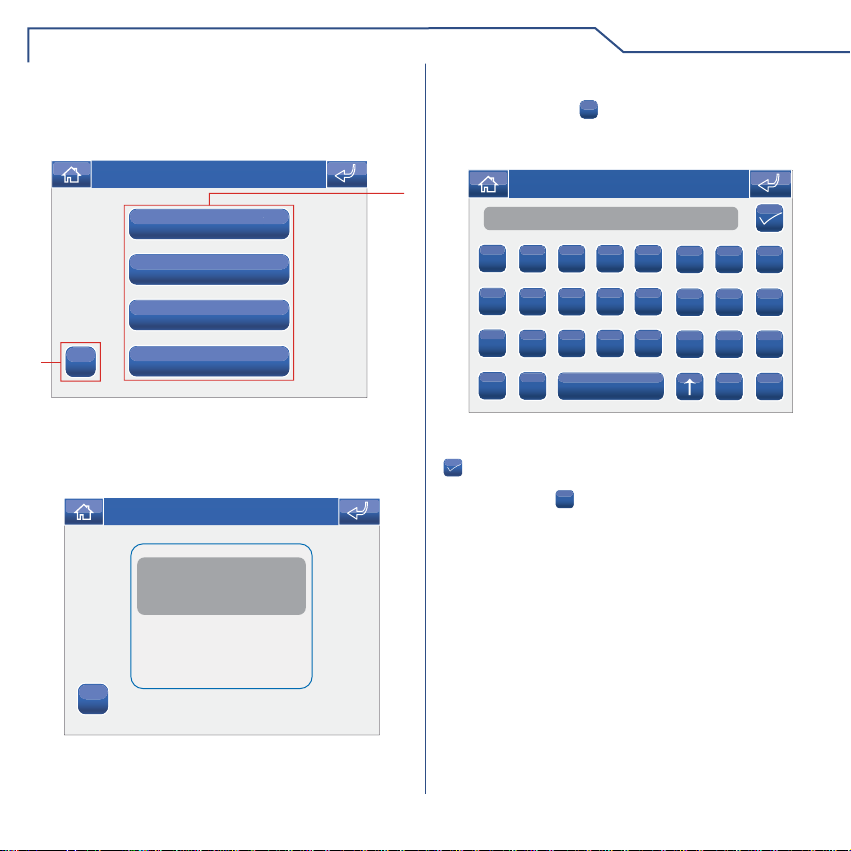
ATTUATORI
Per visualizzare l'elenco degli attuatori presenti,
accedere al menu Videofonia > Attuatori.
Gio 05/09/09 - 16:07 0W
Attuatore 1
Attuatore 2
Attuatore 3
2
ABC
1 Attuatori disponibili. Altri dispositivi possono essere
aggiunti a cura dell'installatore
2 Rinomina attuatori.
Per comandare un attuatore tra quelli della lista è
suffi ciente premere la relativa icona.
Attuatore 4
Gio 05/09/09 - 16:07 0W
Attuatore Generico
Comando attuatore effettuato
1
ABC
In caso non ci sia alcun attuatore, compare la scritta
"DISPOSITIVO NON PRESENTE".
9
Page 10
VIDEOFONIA
Gio 05/09/09 - 16:07 0W
Attuatore Generico
Dispositivo non presente
ABC
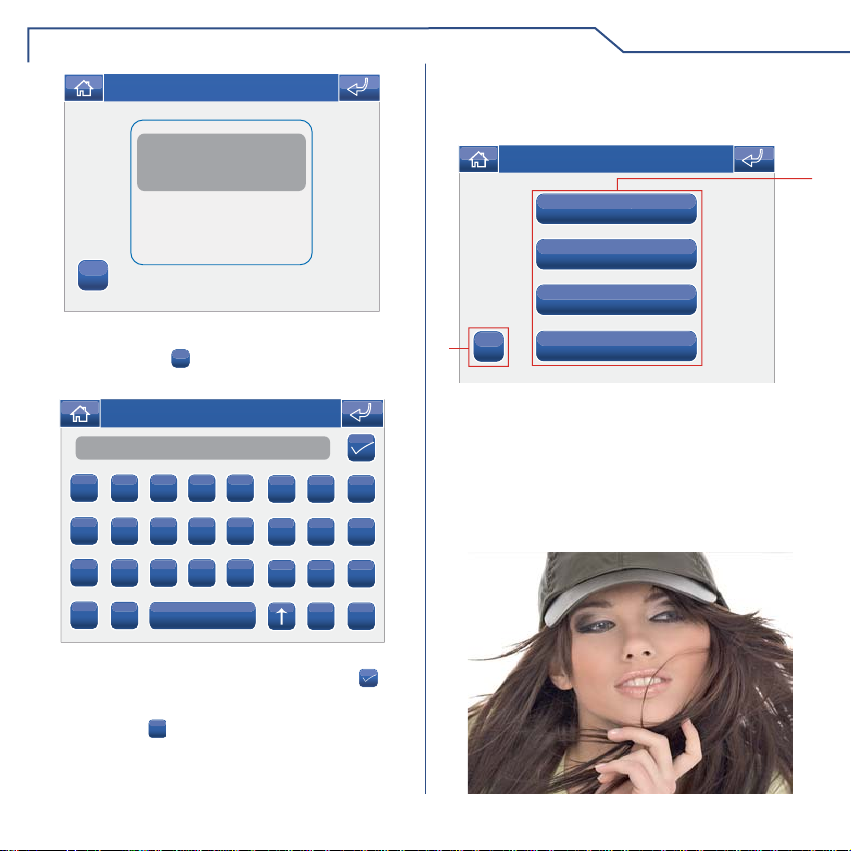
RINOMINARE ATTUATORI
Premere l'icona
dell'attuatore che si desidera rinominare.
Nome
A
I
Q
Y
Digitare il nome e/o il numero desiderato per la
descrizione dell'attuatore e premere l'icona
confermare.
Premere l'icona
ABC
e successivamente quella
Gio 05/09/09 - 16:07 0W
B C D E
J K L M
R S T U
F G H
N O P
V W X
Z
123
per passare alla tastiera numerica.
C
123
per
TELECAMERE
Per visualizzare l'elenco delle telecamere presenti,
accedere al menu Videfonia > Telecamere.
Gio 05/09/09 - 16:07 0W
Telecamera 1
Telecamera 2
Telecamera 3
ABC
2
1 Telecamere disponibili. Ad ogni icona possono
essere associate fi no a 3 telecamere che possono
essere viste in sequenza insieme a quella del
posto esterno.
2 Rinomina Telecamere.
Per visualizzare l'immagine di una telecamera tra
quelle della lista è suffi ciente premere la relativa
icona.
Telecamera 4
1
10
Page 11
VIDEOFONIA
Con l'immagine a video, per tornare al menu toccare
lo schermo; per visualizzare altre telecamere premere
nuovamente un'icona.
In caso non ci sia alcuna telecamera, compare la
scritta "DISPOSITIVO NON PRESENTE".
Gio 05/09/09 - 16:07 0W
Attuatore Generico
Dispositivo non presente
ABC
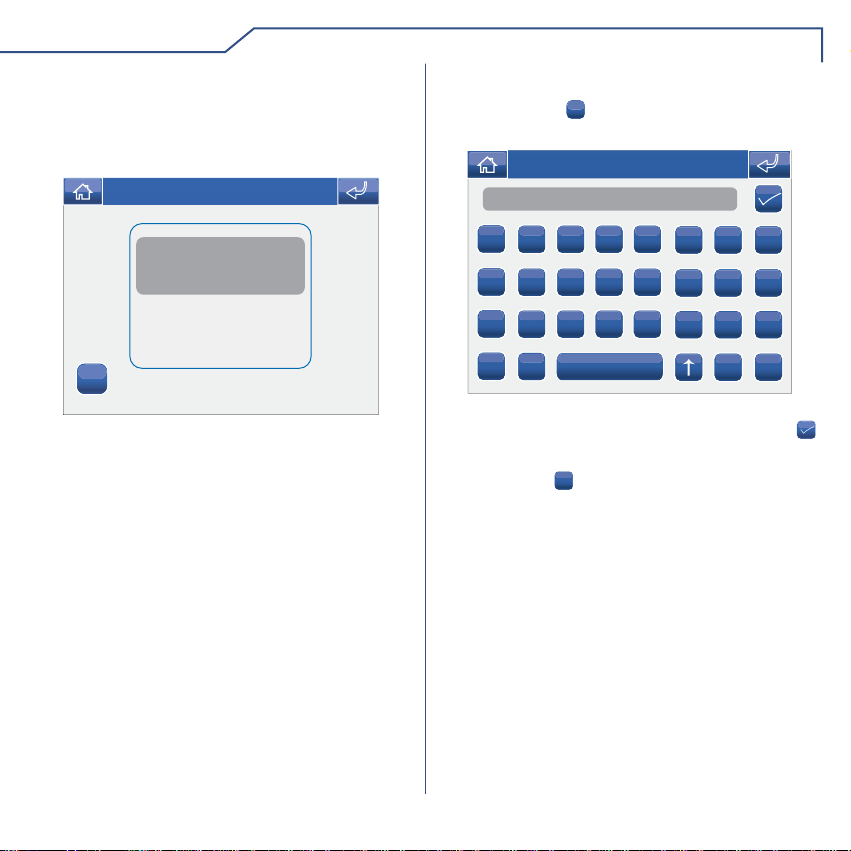
RINOMINARE TELECAMERE
Premere l'icona
gruppo di telecamere che si desidera rinominare.
Nome
A
I
Q
Y
Digitare il nome e/o il numero desiderato per la
descrizione della telecamera e premere l'icona
per confermare.
Premere l'icona
ABC
e successivamente quella del
Gio 05/09/09 - 16:07 0W
B C D E
J K L M
R S T U
F G H
N O P
V W X
Z
123
per passare alla tastiera numerica.
C
123
11
Page 12
VIDEOFONIA
INTERCOMUNICANTI
Per visualizzare l'elenco delle chiamate
intercomunicanti presenti, accedere al menu
Videofonia > Intercomunicanti.
Gio 05/09/09 - 16:07 0W
Intercomunicante 1
Intercomunicante 2
Intercomunicante 3
2
ABC
Intercomunicante 4
1 Chiamate intercomunicanti disponibili
2 Rinomina chiamata intercomunicante.
Per effettuare una chiamata intercomunicante è
suffi ciente premere l'icona.
Gio 05/09/09 - 16:07 0W
Attuatore Generico
Intercomunicante effettuato
1
RINOMINARE INTERCOMUNICANTI
Premere l'icona
della chiamata intercomunicante che si desidera
rinominare.
Nome
A
I
Q
Y
Digitare il nome e/o il numero desiderato per la
descrizione dell'intercomunicante e premere l'icona
per confermare.
Premere l'icona
ABC
e successivamente quella
Gio 05/09/09 - 16:07 0W
B C D E
J K L M
R S T U
F G H
N O P
V W X
Z
123
per passare alla tastiera numerica.
C
123
ABC
12
Page 13
SETUP
√ DESCRIZIONE MENU SETUP
√ LINGUA
√ CONDIZIONAMENTI
√ BLOCCO TASTI E TOUCH
√ IMPOSTA DATA E ORA
√ INFORMAZIONI
Page 14
SETUP
DESCRIZIONE MENU SETUP
Per accedere al menu setup, premere l'icona
menu principale.
Gio 21/06/12 - 16:07 0W
Lingua
Blocco tasti e touch
Imposta data e ora
Informazioni
Gio 21/06/12 - 16:07 0W
Condizionamenti
Avanzate
1 Funzioni disponibili nel menu setup.
2 Scorrimento della pagina.
dal
1
2
1
2
LINGUA
È possibile modifi care la lingua dei menu del Planux
Manager, scegliendo tra quelle installate. Accedere al
menu Setup > Lingua.
Per selezionare la lingua, premere la relativa icona.
Gio 05/09/09 - 16:07 0W
Italiano
English
Pioggia
3
Français
Deutsch
1 Lingua in uso.
2 Scorrimento della pagina.
3 Lingue disponibili.
CONDIZIONAMENTI
Questo menu è disponibile solo se il sistema prevede
delle uscite condizionate e se il monitor è impostato
come Master.
Gio 21/06/12 - 16:07 0W
ON
Uscita condizionata 1
ON
4
Uscita condizionata 2
ON
Uscita condizionata 3
Uscita condizionata 4
ON
1 Uscite disponibili.
2 Scorrimento della pagina.
3 Disattivazione uscita associata.
4 Attivazione uscita associata.
14
OFF
OFF
OFF
OFF
1
2
1
2
3
Page 15
SETUP
BLOCCO TASTI E TOUCH
La funzione Blocco tasti e touch disattiva
temporaneamente i tasti e il touch screen del Planux
Manager. Le funzioni vengono riattivate dopo 60
secondi oppure a seguito di una chiamata ricevuta.
Per attivare la funzione premere l'icona "Blocco tasti
e touch".
Gio 05/09/09 - 16:07 0W
Blocco tasti e touch
Conferma blocco tasti e
touch screen per 60 secondi?
Lingua
Imposta data e ora
Informazioni
Confermare premendo l'icona SI.
Blocco tasti e touch
Lingua
Imposta data e ora
Informazioni
SI
NO
Gio 05/09/09 - 16:07 0W
Blocco tasti attivato
IMPOSTA DATA E ORA
Per impostare la data e l'ora accedere al menu
Setup > Imposta data e ora.
Agire sulle icone + e - per impostare i vari campi. Al
termine premere l'icona
Gio 05/09/09 - 16:07 0W
1
05
+
-
-
1 Giorno.
2 Mese.
3 Anno.
4 Orario.
per confermare.
-
05
16:07
+
+
2
3
09
+
4
-
INFORMAZIONI
Per visualizzare la versione del software installato
accedere al menu informazioni.
Gio 21/06/12 - 16:07 0W
Regola volumi
VERS. SW: 1.5
VERS. EE: 1.3.2 6214C
Imposta melodie
SB CODE: 5P RANGE: 0 - 0
Indirizzo intercom. : 5
Prog. tasti
SLAVE
B
15
Informazioni
Page 16

AVANZATE
√ ACCESSO MENU AVANZATE
√ DESCRIZIONE MENU AVANZATE
√ PROGRAMMAZIONE TASTI
√ CONFIGURAZIONE VIDEO SEGRETERIA
√ ATTUATORI
√ AGGIUNGERE ATTUATORI
√ MODIFICA CODICE ATTUATORE
√ ELIMINARE ATTUATORI
√ TELECAMERE
√ AGGIUNGERE TELECAMERE
√ MODIFICA CODICE TELECAMERA
√ ELIMINARE TELECAMERE
√ INTERCOMUNICANTI
√ AGGIUNGERE INTERCOMUNICANTE
√ MODIFICA INDIRIZZO INTERCOMUNICANTE
√ ELIMINARE INTERCOMUNICANTE
√ GRUPPO INTERCOM
√ AGGIUNGERE GRUPPO INTERCOM
√ ELIMINARE / MODIFICARE GRUPPO INTERCOM
√ DESCRIZIONE MENU INDIRIZZI
√ IMPOSTAZIONE CODICE STAFFA
√ IMPOSTAZIONE MONITOR PRINCIPALE / SECONDARIO
√ IMPOSTAZIONE INDIRIZZO MULTIPLO
√ IMPOSTAZIONE INDIRIZZO INTERCOM
√ CALIBRAZIONE TOUCH
√ IMPOSTA INGRESSO
√ RESET TOTALE
√ RESET CONFIGURAZIONE
√ AGGIORNAMENTO CONFIGURAZIONI
√ TEMPO TRASMISSIONE
√ AGGIORNAMENTO PRODOTTO
Page 17
AVANZATE
ACCESSO MENU AVANZATE
Accedere al menu Setup > Avanzate.
Inserire la password installatore che di default è 1961.
Gio 05/09/09 - 16:07 0W
23
1
56
INSERIRE
PASSWORD
4
7
C
89
0
DESCRIZIONE MENU AVANZATE
Gio 21/06/12 - 16:07 0W
Prog. Tasti
Conf. video segreteria
Attuatori
Telecamere
Gio 21/06/12 - 16:07 0W
Intercomunicanti
Gruppo intercom.
Indirizzi
Calibrazione touch
Gio 21/06/12 - 16:07 0W
Imposta ingresso
1
2
1
2
1
Reset totale
1 Funzioni disponibili nel menu Avanzate.
2 Scorrimento della pagina.
17
2
Page 18
AVANZATE
PROGRAMMAZIONE TASTI
Per programmare i tasti del Planux Manager accedere
al menu Setup > Avanzate > Prog. Tasti.
Selezionare il tasto che si vuole programmare ( Es.
Tasto 1).
Gio 05/09/09 - 16:07 0W
1
Tasto 1
Tasto 2
Tasto
Tasto
1 Tasti programmabili.
Premere l'icona della funzione desiderata per
accedere al sottomenu e visualizzare i moduli
disponibili.
Gio 21/06/12 - 16:07 0W
Attuatori
Telecamere
Intercomunicanti
Selezionare la funzione desiderata premendo l'icona
a destra della stessa.
Gio 05/09/09 - 16:07 0W
Att. generico
Attuatore 1
Attuatore 2
Attuatore 3
Nel caso del tasto le funzioni disponibili sono:
Gio 05/09/09 - 16:07 0W
Dottore
Privacy
Privacy + dottore
Se durante la programmazione viene tolto il fl ag
da tutte le funzioni, il tasto viene disabilitato.
Centralino principale
18
Page 19
AVANZATE
CONFIGURAZIONE VIDEO SEGRETERIA
È possibile confi gurare la fuzione video segreteria
in modo che vengano registrate tutte le chiamate
videocitofoniche.
accedere al menu Setup > Avanzate > Conf. video
segreteria.
Gio 21/06/12 - 16:07 0W
ON
1
Registra sempre
OFF
2
Durata registrazione
3
1 Attivare la modalità “Registra sempre”.
2 Disattivare la modalità “Registra sempre”.
3 Variare la durata della registrazione (5 o 10
secondi).
ATTUATORI
Per gestire gli attuatori accedere al menu Setup >
Avanzate > Attuatori.
Gio 05/09/09 - 16:07 0W
2
+
3
C
4
Att. generico
Attuatore 1
Attuatore 2
AGGIUNGERE ATTUATORI
Per aggiungere un attuatore premere l'icona
Inserire il nome desiderato e premere l'icona per
confermare.
Gio 05/09/09 - 16:07 0W
Nome
A
B C D E
I
J K L M
Q
R S T U
Y
Z
Inserire il codice dell'attuatore e premere l'icona
per confermare.
Per maggiori informazioni su Art. 1256 vedi FT/
SB2/02 o MT/SBC/01.
1
Gio 05/09/09 - 16:07 0W
Numero
1
2 3 4 5
9
0
F G H
N O P
V W X
6 7 8
+
.
C
123
ABC
5
Attuatore 3
1 Attuatori disponibili.
2 Aggiungi attuatore.
3 Elimina attuatore.
4 Modifi ca codice attuatore.
5 Rinomina attuatore (vedi pag. 35).
C
19
Page 20
AVANZATE
MODIFICA CODICE ATTUATORE
Per modifi care il codice di un attuatore premere
l'icona
Inserire il codice desiderato usando la tastiera
numerica e premere l'icona
seguito dall'icona dell'attuatore.
Gio 05/09/09 - 16:07 0W
255
1
2 3 4 5
9
0
per salvare.
6 7 8
C
ELIMINARE ATTUATORI
Per eliminare un attuatore premere l'icona
dall'icona dell'attuatore.
Gio 05/09/09 - 16:07 0W
Att. generico
+
C
ABC
Confermare premendo l'icona SI.
+
C
ABC
Attuatore 1
Attuatore 2
Attuatore 3
Gio 05/09/09 - 16:07 0W
Attuatore 1
Conferma eliminazione
attuatore?
Attuatore 2
Attuatore 3
SI
NO
C
seguito
20
Page 21
AVANZATE
TELECAMERE
Per gestire le telecamere accedere al menu Setup >
Avanzate > Telecamere.
Gio 05/09/09 - 16:07 0W
1
2
3
4
ABC
5
1 Telecamere disponibili.
2 Aggiungi telecamera.
3 Elimina telecamera.
4 Modifi ca codice telecamera.
5 Rinomina telecamera (vedi pag. 36).
+
C
Telecamera 1
Telecamera 2
Telecamera 3
Telecamera 4
AGGIUNGERE TELECAMERE
Per aggiungere una telacamera premere l'icona +.
Inserire il nome desiderato e premere l'icona per
confermare.
Gio 05/09/09 - 16:07 0W
Nome
A
B C D E
I
J K L M
Q
R S T U
Y
Z
Inserire il codice della telecamera e premere l'icona
per confermare.
Per maggiori informazioni su Art. 1259C (modulo
telecamera scorporata vedi FT/SBC/05 o MT/
SBC/01.
Gio 05/09/09 - 16:07 0W
Numero
1
2 3 4 5
F G H
N O P
V W X
C
123
6 7 8
21
9
0
C
Page 22
AVANZATE
MODIFICA CODICE TELECAMERA
Premere l'icona seguito dall'icona della
telecamera.
Gio 05/09/09 - 16:07 0W
220
1
2 3 4 5
9
0
Inserire il codice desiderato usando la tastiera
numerica e premere l'icona
6 7 8
C
per salvare.
ELIMINARE TELECAMERE
Premere l'icona C seguito dall'icona della
telecamera.
Gio 05/09/09 - 16:07 0W
Telecamera 1
Telecamera 2
+
Telecamera 3
C
+
C
Telecamera 4
Gio 05/09/09 - 16:07 0W
Telecamera 1
Conferma eliminazione
telecamera?
Telecamera 2
Telecamera 3
SI
NO
Telecamera 4
ABC
Confermare premendo l'icona SI.
ABC
22
Page 23
AVANZATE
INTERCOMUNICANTI
Per gestire gli intercomunicanti accedere al menu
Setup > Avanzate > Intercomunicanti.
Gio 05/09/09 - 16:07 0W
1
2
3
4
ABC
5
1 Chiamate intercomuncianti disponibili.
2 Aggiungi chiamata intercomunicante.
3 Elimina chiamata intercomunicante.
4 Modifi ca indirizzo intercomunicante.
5 Rinomina chiamata intercomunicante (vedi pag.
37).
Intercomunicante 1
+
Intercomunicante 2
C
AGGIUNGERE INTERCOMUNICANTE
Per aggiungere una chiamata intercomunicante
premere l'icona
Inserire il nome desiderato e premere l'icona per
confermare.
Nome
A
I
Q
Y
Inserire l'indirizzo del posto interno che si desidera
associare alla chiamata e premere l'icona
confermare.
Numero
1
9
+
.
Gio 05/09/09 - 16:07 0W
B C D E
J K L M
R S T U
Z
Gio 05/09/09 - 16:07 0W
2 3 4 5
0
F G H
N O P
V W X
C
123
6 7 8
per
23
C
Page 24
AVANZATE
MODIFICA INDIRIZZO INTERCOMUNICANTE
Premere l'icona seguito dall'icona della chiamata
intercomunicante.
Gio 05/09/09 - 16:07 0W
2
1
2 3 4 5
9
0
Inserire l'indirizzo desiderato usando la tastiera
numerica e premere l'icona
6 7 8
C
per salvare.
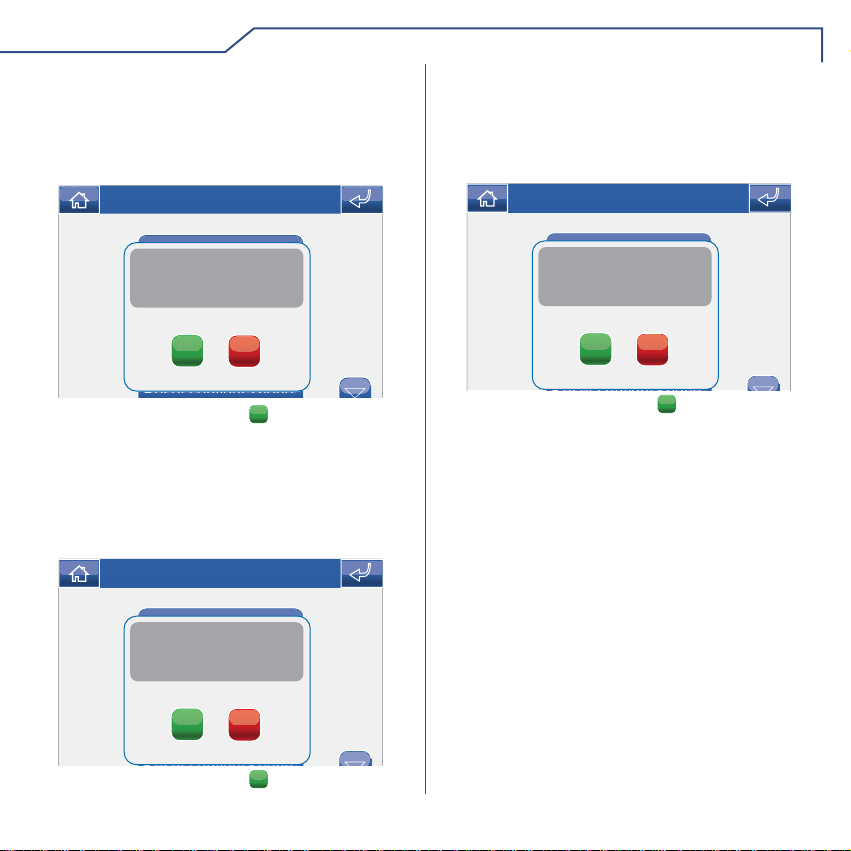
ELIMINARE INTERCOMUNICANTE
Premere l'icona
intercomunicante.
+
C
ABC
Confermare premendo l'icona SI.
+
C
ABC
C
seguito dall'icona della chiamata
Gio 05/09/09 - 16:07 0W
Intercomunicante 1
Intercomunicante 2
Gio 05/09/09 - 16:07 0W
Intercomunicante 1
Conferma eliminazione
intercomunicante?
Intercomunicante 2
SI
NO
24
Page 25
AVANZATE
GRUPPO INTERCOM
Una volta create, le chiamate di gruppo
intercom potranno essere trovate sotto il menu
“Intercomunicanti” (vedi pagina 37).
Per gestire i gruppi di chiamata intercomunicanti
accedere al menu Setup > Avanzate > Gruppo
intercom.
Inserire il nome desiderato e premere l'icona per
confermare.
Gio 21/06/12 - 16:07 0W
1
2
3
4
ABC
5
1 Chiamate di gruppo disponibili.
2 Aggiungi gruppo intercomunicante.
3 Elimina gruppo intercomunicante.
4 Modifi ca gruppo intercomunicante.
5 Rinomina gruppo intercomunicante.
Gruppo intercom 1
+
Gruppo intercom 2
C
AGGIUNGERE GRUPPO INTERCOM
Per aggiungere una chiamata di gruppo
intercomunicante premere l'icona
Inserire il nome desiderato e premere l'icona per
confermare.
Gio 21/0612 - 16:07 0W
Nome
A
B C D E
I
J K L M
Q
R S T U
Y
Z
Selezionare gli indirizzi intercom dei posti interni che
si desidera associare alla chiamata e premere l'icona
per confermare.
Gio 21/06/12 - 16:07 0W
1
2
+
.
F G H
N O P
V W X
C
5
6
123
25
3
4
7
8
Page 26
AVANZATE
ELIMINARE / MODIFICARE
GRUPPO INTERCOM
Per eliminare o modifi care una chiamata di gruppo
intercomunicante seguire le istruzioni a pag 49
DESCRIZIONE MENU INDIRIZZI
Gio 21/06/12 - 16:07 0W
Codice simplebus
Monitor
Indirizzo multiplo
Indirizzo intercom
1 Menu impostazione codice staffa.
2 Menu impostazione monitor principale / secondario.
1
2
3
4
IMPOSTAZIONE CODICE STAFFA
Ogni staffa del sistema viene identifi cata mediante il
proprio codice; tale codice deve essere un numero
compreso tra 1 e 240.
Accedere al menu Setup > Avanzate > Indirizzi >
Codice simplebus. Inserire il codice della staffa e
premere l'icona
Numero
1
9
In caso non fosse inserita la scheda SD compare il
seguente messaggio:
1
9
per confermare.
Gio 05/09/09 - 16:07 0W
2 3 4 5
0
Gio 05/09/09 - 16:07 0W
1
Errore scheda SD
parametro salvato in flash
2 3 4 5
0
6 7 8
C
6 7 8
26
C
Page 27
AVANZATE
IMPOSTAZIONE MONITOR
PRINCIPALE / SECONDARIO
Accedere al menu Setup > Avanzate > Indirizzi >
Monitor.
Sab 05/09/09 16:07
Principale
Principale multiplo
Secondario
Selezionare l'impostazione premendo l'icona a destra
della stessa.
Rispettare i limiti descritti negli schemi di installazione
del foglio tecnico FT/SBC/22
IMPOSTAZIONE INDIRIZZO MULTIPLO
Attivando la funzione “Indirizzo multiplo” il monitor
suonerà ogni volta volta che verrà chiamato un
indirizzo simplebus compreso nel range impostato.
Accedere al menu Setup > Avanzate > Indirizzi >
Indirizzo multiplo.
Gio 21/06/12 - 16:07 0W
Indirizzo minimo
Indirizzo massimo
1 Imposta indirizzo di partenza del range.
2 Imposta indirizzo fi nale del range.
1
2
IMPOSTAZIONE INDIRIZZO INTERCOM
Accedere al menu Setup > Avanzate > Indirizzi >
Indirizzo intercom.
Gio 21/06/12 - 16:07 0W
1
2
5
6
3
4
Selezionare l’indirizzo intercom che si desidera
assegnare al monitor.
27
7
8
Page 28
AVANZATE
CALIBRAZIONE TOUCH
Nel caso in cui il touch screen non dovesse rispondere
correttamente al tocco è possibile c\alibrarlo.
Accedere al menu Setup > Avanzate > Calibrazione
touch.
Gio 05/09/09 - 16:07 0W
B
Lingua
CONFERMARE
LA CALIBRAZIONE
B
Imposta data e ora
B
Comandi condizionati
SI
NO
Reset configurazione
Confermare premendo l'icona SI.
Per calibrare il touch screen è suffi ciente tenere
premuto per 2 secondi la croce che comparirà in 3
posizioni diverse.
Tenere premuto 2 secondi
IMPOSTA INGRESSO
È possibile assegnare 2 diverse funzioni all’ingresso
CFP-CFP presente sulla morsettiera della staffa:
• Chiamata fuori porta (CFP)
• Funzione allarme (viene inviato un segnale di
allarme simplebus al centralino).
Accedere al menu Setup > Avanzate > Imposta
ingresso.
Gio 21/06/12 - 16:07 0W
Funzione CFP
Funzione allarme
Selezionare la funzione premendo l'icona a destra
della stessa.
28
Page 29
AVANZATE
RESET TOTALE
La funzione elimina ogni impostazione fatta
dall'utente, le impostazioni videocitofoniche,
domotiche e dell'impianto d'allarme, riportando il
sistema allo stato originale di fabbrica.
Accedere al menu Setup > Avanzate > Reset totale.
Gio 05/09/09 - 16:07 0W
B
Lingua
Confermare reset configurazione
utente ed impianto?
B
Imposta data e ora
B
Comandi condizionati
SI
NO
Confermare premendo l'icona SI.
RESET CONFIGURAZIONI
La funzione elimina tutte le impostazioni
videocitofoniche, domotiche e dell'impianto d'allarme.
Accedere al menu Setup > Avanzate > Reset
confi gurazione.
Gio 21/06/12 - 16:07 0W
B
Lingua
Confermare reset configurazione
B
B
Confermare premendo l'icona SI.
impianto?
Imposta data e ora
Comandi condizionati
SI
NO
29
AGGIORNAMENTO CONFIGURAZIONI
La funzione aggiorna tutte le impostazioni
videocitofoniche, domotiche e dell'impianto d'allarme.
Accedere al menu Setup > Avanzate > Aggiorna
confi gurazioni.
Gio 21/06/12 - 16:07 0W
B
Lingua
Confermare
aggiornamento configurazione ?
B
Imposta data e ora
B
Comandi condizionati
SI
NO
Confermare premendo l'icona SI.
TEMPO TRASMISSIONE
Il tempo di trasmissione determina la velocità con cui
vengono inviati i comandi sulla linea dati.
Più alto è il valore, maggiore sarà il tempo tra l’invio di
un comando e l’altro.
Es: Poniamo di avere 5 luci in un area e di inviare il
comando di accesione di tutte quante.
• Se il valore è impostato a 1, passerà 1 decimo di
secondo tra l’accensione di una luce e l’altra.
• Se il valore è impostato a 5, passeranno 5 decimi di
secondo tra l’accensione di una luce e l’altra.
AGGIORNAMENTO PRODOTTO
Per un aggiornamento software del prodotto,
rivolgersi al proprio installatore o direttamente al
centro assistenza Comelit Group S.p.A..
Page 30
INTRODUCTION
√ WARNINGS
√ DESCRIPTION OF THE MONITOR
√ KEY FUNCTIONS
√ PLANUX MEMO VIDEO MENU
√ GUIDE TO COLOURS
Page 31

INTRODUCTION
WARNINGS
Comelit Group S.p.A. declines any responsibility for improper use of the apparatus, for modifi cations made by third
parties for any reason or purpose, and for the use of accessories and materials which are not originals. Caution! In order
to reduce the risk of faults and electric shocks:
• Do not open the apparatus or carry out any repairs yourself. If necessary, request the services of qualifi ed personnel.
• Do not insert objects or pour liquids into the device.
• Clean using a damp cloth. Do not use alcohol or other aggressive products.
Fonts are (c) Bitstream (see below). DejaVu changes are in public domain.
Glyphs imported from Arev fonts are (c) Tavmjong Bah (see below)
Bitstream Vera Fonts Copyright
-----------------------------Copyright (c) 2003 by Bitstream, Inc. All Rights Reserved. Bitstream Vera is a trademark of Bitstream, Inc.
Permission is hereby granted, free of charge, to any person obtaining a copy of the fonts accompanying
this license ("Fonts") and associated documentation fi les (the "Font Software"), to reproduce and distribute
theFont Software, including without limitation the rights to use, copy, merge, publish, distribute, and/or sell
copies of the Font Software, and to permit persons to whom the Font Software is furnished to do so, subject
to the following conditions:
The above copyright and trademark notices and this permission notice shall be included in all copies of one
or more of the Font Software typefaces.
The Font Software may be modifi ed, altered, or added to, and in particular the designs of glyphs or
characters in the Fonts may be modifi ed and additional glyphs or characters may be added to the Fonts, only
if the fonts are renamed to names not containing either the words "Bitstream" or the word "Vera".
This License becomes null and void to the extent applicable to Fonts or Font Software that has been modifi ed
and is distributed under the "Bitstream Vera" names.
The Font Software may be sold as part of a larger software package but no copy of one or more of the Font
Software typefaces may be sold by itself.
THE FONT SOFTWARE IS PROVIDED "AS IS", WITHOUT WARRANTY OF ANY KIND, EXPRESS OR
IMPLIED, INCLUDING BUT NOT LIMITED TO ANY WARRANTIES OF MERCHANTABILITY, FITNESS
FOR A PARTICULAR PURPOSE AND NONINFRINGEMENT OF COPYRIGHT, PATENT, TRADEMARK,
OR OTHER RIGHT. IN NO EVENT SHALL BITSTREAM OR THE GNOME FOUNDATION BE LIABLE
FOR ANY CLAIM, DAMAGES OR OTHER LIABILITY, INCLUDING ANY GENERAL, SPECIAL, INDIRECT,
INCIDENTAL, OR CONSEQUENTIAL DAMAGES, WHETHER IN AN ACTION OF CONTRACT, TORT OR
OTHERWISE, ARISING FROM, OUT OF THE USE OR INABILITY TO USE THE FONT SOFTWARE OR
FROM OTHER DEALINGS IN THE FONT SOFTWARE.
Except as contained in this notice, the names of Gnome, the Gnome Foundation, and Bitstream Inc., shall not
be used in advertising or otherwise to promote the sale, use or other dealings in this Font Software without
prior written authorization from the Gnome Foundation or Bitstream Inc., respectively. For further information,
contact: fonts at gnome dot org.
Arev Fonts Copyright
-----------------------------Copyright (c) 2006 by Tavmjong Bah. All Rights Reserved.
Permission is hereby granted, free of charge, to any person obtaining a copy of the fonts accompanying this
license ("Fonts") and associated documentation fi les (the "Font Software"), to reproduce and distribute the
modifi cations to the Bitstream Vera Font Software, including without limitation the rights to use, copy, merge,
publish, distribute, and/or sell copies of the Font Software, and to permit persons to whom the Font Software
is furnished to do so, subject to the following conditions:
The above copyright and trademark notices and this permission notice shall be included in all copies of one
or more of the Font Software typefaces.
The Font Software may be modifi ed, altered, or added to, and in particular the designs of glyphs or
characters in the Fonts may be modifi ed and additional glyphs or characters may be added to the Fonts,
only if the fonts are renamed to names not containing either the words "Tavmjong Bah" or the word "Arev".
This License becomes null and void to the extent applicable to Fonts or Font Software that has been modifi ed
and is distributed under the "Tavmjong Bah Arev" names.
The Font Software may be sold as part of a larger software package but no copy of one or more of the Font
Software typefaces may be sold by itself.
THE FONT SOFTWARE IS PROVIDED "AS IS", WITHOUT WARRANTY OF ANY KIND, EXPRESS OR
IMPLIED, INCLUDING BUT NOT LIMITED TO ANY WARRANTIES OF MERCHANTABILITY, FITNESS
FOR A PARTICULAR PURPOSE AND NONINFRINGEMENT OF COPYRIGHT, PATENT, TRADEMARK,
OR OTHER RIGHT. IN NO EVENT SHALL TAVMJONG BAH BE LIABLE FOR ANY CLAIM, DAMAGES
OR OTHER LIABILITY, INCLUDING ANY GENERAL, SPECIAL, INDIRECT, INCIDENTAL, OR
CONSEQUENTIAL DAMAGES, WHETHER IN AN ACTION OF CONTRACT, TORT OR OTHERWISE,
ARISING FROM, OUT OF THE USE OR INABILITY TO USE THE FONT SOFTWARE OR FROM OTHER
DEALINGS IN THE FONT SOFTWARE.
Except as contained in this notice, the name of Tavmjong Bah shall not be used in advertising or otherwise
to promote the sale, use or other dealings in this Font Software without prior written authorization from
Tavmjong Bah. For further information, contact: tavmjong @ free. fr.
31
Page 32

INTRODUCTION
DESCRIPTION OF THE MONITOR
Sab 05/09/09 16:07
VIDEOFONIA
1
34
5
1 Audio key
2 Door lock key
3 Menu key
4 Brightness key
5 Contrast key
6 Colour key
7 Programmable key 1
8 Programmable key 2
9 Self-ignition key (programmable)
10 Privacy / Doctor key
11 Touch-screen
12 Key sensor
SETUP
IA
67
8910
KEY FUNCTIONS
Audio key: Activates or de-activates conversation
with the external unit.
Door lock key: Use this key to open the
11
12
2
corresponding door lock.
Menu key: Used to access or exit the Planux Memo
Video monitor menu.
Brightness key: Used to adjust the brightness of
the image displayed on the monitor. To change the
setting, press the key while video communication is
in progress.
Contrast key: Used to adjust the contrast of the
image displayed on the monitor. To change the
setting, press the key while video communication is
in progress.
Colour key: Used to adjust the colour of the image
displayed on the monitor. To change the setting, press
the key while video communication is in progress.
Programmable key 1: Factory-set as generic
actuator (programmable).
Programmable key 2: Factory-set as switchboard
call (programmable).
Self-ignition key: Used to switch on the monitor
and display the video feed from the external unit
(programmable).
Privacy/Doctor function key (programmable):
• The Privacy function disables calls from the
• The Doctor function enables automatic activation of the
• The Privacy + Doctor function, as well as disabling
The red LED indicates that the selected function is
32
external unit and switchboard.
lock-release in response to a call from the external unit.
the door-entry phone ringtone in the same way as the
Privacy function, also enables automatic activation of the
lock-release in response to a call from the external unit.
active.
Page 33

INTRODUCTION
PLANUX MEMO VIDEO MENU
T o navigate the menu, simply use your fi nger to touch the
icon corresponding to the desired function.
To access the main menu, press the key.
Sat 05/09/09 16:07
VIDEOFONIA
Sab 05/09/09 16:07
The
icon can be used to return to the main menu
immediately.
The
screen.
icon can be used to return to the previous
SETUP
GUIDE TO COLOURS
The menu icons change colour depending on their status
and function:
: indicates that the function is not active.
YELLOW: indicates that the function is active.
GREEN: press the icon to activate the corresponding
ON
function.
RED: press the icon to deactivate the corresponding
OFF
function.
33
Page 34

DOOR ENTRY MONITORS
√ ANSWERING A CALL
√ DOOR ENTRY MONITORS MENU DESCRIPTION
√ VIDEO MEMORY
√ VIEWING A RECORDING
√ DELETING A RECORDING
√ HANDS-FREE
√ SETTING MELODIES
√ ADJUSTING THE VOLUME
√ ACTUATORS
√ RENAMING ACTUATORS
√ CAMERAS
√ RENAMING CAMERAS
√ INTERCOMS
√ RENAMING INTERCOMS
Page 35

DOOR ENTRY MONITORS
ANSWERING A CALL
The LEDs corresponding to the audio and door lock keys
fl ash on receipt of a call.
Press the
key to activate the audio line with the
external unit from which the call originated.
Press
to activate the corresponding door lock.
DOOR ENTRY MONITORS MENU DESCRIPTION
To access the Door entry monitors menu, press the
icon on the main menu screen.
Thu 21/06/12 - 16:07 0W
1
Video memory
ON
4
ON
Hands-free
Set melodies
Volume adjustment
Thu 21/06/12 - 16:07 0W
Actuators
Cameras
Intercoms
Main switchboard
OFF
2
OFF
3
1
3
3
1 Functions available in the Door entry monitors menu.
2 Deactivation of the corresponding function.
3 Scroll through the screen.
4 Activation of the corresponding function.
VIDEO MEMORY
The Video memory function, if activated, can be used to
record the image from the external unit camera when a
call is made, for a maximum of 100 recordings of max.
10 seconds each.
To view the list of recordings present, access the Door
entry monitors > Video memory menu.
Thu 05/09/09 - 16:07 0W
3
C
Garage Upstairs area
External
1 Recordings not yet viewed (blue frame).
2 Recordings already viewed (yellow frame).
3 Delete recording.
Recordings are saved in .avi format on the SD card,
in the "Video" folder, and may also be viewed on a PC
using Windows Media Player. If there is no SD card, the
recordings will be saved in the Planux Manager device
memory (MAX. 2 recordings).
Downstairs area
1
2
35
Page 36

DOOR ENTRY MONITORS
VIEWING A RECORDING
To view one of the recordings, press the corresponding
icon.
When it has fi nished replaying (MAX. 10 seconds), the
system will automatically return to the previous screen.
DELETING A RECORDING
To delete one of the recordings, press the C icon
followed by the icon corresponding to the recording you
wish to delete, then confi rm.
confirm deletion of
video message?
HANDS-FREE
The Hands-free function activates the audio line in
response to a call, without having to press the
key.
SETTING MELODIES
To manage the Planux Manager melodies, access the
Door entry monitors > Set melody menu.
Select the type of call for which you wish to modify the
melody by pressing the relevant icon.
Thu 21/06/12 - 16:07 0W
External call
Switchboard call
Floor door call
Multi add. call
T o listen to the melody, press the desired name, followed
by the icon to the right of it if you wish to save the setting.
Thu 05/09/09 - 16:07 0W
Melody 1
Melody 2
YES NO
Melody 3
Melody 4
Customised ringtones may be added. Files must be 8
Khz mono 16 bit, in .wav format. Place the melodies in
the “Wav” folder on the SD card to display them in the
relevant menu.
36
Page 37

DOOR ENTRY MONITORS
ADJUSTING THE VOLUME
To adjust the ringtone, audio, key tone or alarm tone
volume, access the Door entry monitors > Volume
adjustment menu.
Thu 21/06/12 - 16:07 0W
Ringtone
Audio
Intercom audio
Keys
Select the function for which you intend to adjust the
volume by pressing the corresponding icon. When the
adjustment screen appears, use the + and – icons to
adjust the volume and press the
Thu 05/09/09 - 16:07 0W
B
Ringtone
-
B
Audio
icon to confi rm.
+
ACTUATORS
To view the list of actuators present, access the menu
Door entry monitors > Actuators.
Thu 05/09/09 - 16:07 0W
Actuator 1
Actuator 2
Actuator 3
2
ABC
1 Actuators available. Other devices may be added by
the installer.
2 Rename actuators.
To control an actuator which is already on the list, simply
press the corresponding icon.
Actuator 4
Thu 05/09/09 - 16:07 0W
Generic Actuator
Actuator command sent
1
If no actuator is connected, the message “DEVICE NOT
PRESENT” will appear on the display.
37
Page 38

DOOR ENTRY MONITORS
Thu 05/09/09 - 16:07 0W
Generic Actuator
Device not present
RENAMING ACTUATORS
Press the
the actuator you wish to rename.
Enter the desired actuator name and/or number and
press the
ABC
icon followed by the icon corresponding to
Thu 05/09/09 - 16:07 0W
Name
icon to confi rm.
CAMERAS
To view the list of cameras present, access the menu
Door entry monitors > Cameras.
Thu 05/09/09 - 16:07 0W
Camera 1
Camera 2
Camera 3
ABC
2
1 Cameras available. Each icon may be associated with
up to 3 cameras which can be viewed in sequence, in
addition to the camera monitoring the external unit.
2 Rename cameras.
T o display the image from one of the cameras on the list,
simply press the corresponding icon.
Camera 4
1
Press the
123
icon to switch to the numerical keypad.
38
Page 39

DOOR ENTRY MONITORS
When a video image is displayed, to return to the menu
simply touch the screen; to view other camera images
press an icon again.
If no camera is connected, the message “DEVICE NOT
PRESENT” will appear on the display.
Thu 05/09/09 - 16:07 0W
Generic Actuator
Device not present
RENAMING CAMERAS
Press the
the group of cameras you wish to rename.
Enter the desired camera name and/or number and
press the
Press the
ABC
icon followed by the icon corresponding to
Thu 05/09/09 - 16:07 0W
Name
icon to confi rm.
123
icon to switch to the numerical keypad.
39
Page 40

DOOR ENTRY MONITORS
INTERCOMS
T o view the list of intercom calls present, access the Door
entry monitors > Intercoms menu.
Thu 05/09/09 - 16:07 0W
Intercom 1
Intercom 2
Intercom 3
2
ABC
1 Intercom calls available.
2 Rename intercom call.
To make an intercom call, simply press the icon.
Intercom 4
Thu 05/09/09 - 16:07 0W
Generic Actuator
Intercom executed
RENAMING INTERCOMS
Press the
the intercom call you wish to rename.
1
Enter the desired intercom name and/or number and
press the
Press the
ABC
icon followed by the icon corresponding to
Thu 05/09/09 - 16:07 0W
Name
icon to confi rm.
123
icon to switch to the numerical keypad.
40
Page 41

SETUP
√ SETUP MENU DESCRIPTION
√ LANGUAGE
√ CONDITIONS
√ LOCKING THE KEYPAD AND TOUCH-SCREEN
√ SETTING THE DATE AND TIME
√ INFORMATION
Page 42

SETUP
SETUP MENU DESCRIPTION
To access the Setup menu, press the
main menu screen.
Thu 21/06/12 - 16:07 0W
Language
Lock keypad and touch-screen
Set date and time
Information
Thu 21/06/12 - 16:07 0W
Conditions
Advanced
1 Functions available in the Setup menu.
2 Scroll through the screen.
icon on the
1
2
1
2
LANGUAGE
The Planux Manager menu display language can be
changed by selecting one of the options on the list.
Access the menu Setup > Language.
To select the language, press the corresponding icon.
Thu 05/09/09 - 16:07 0W
Italiano
English
Rain
3
Français
Deutsch
1 Language in use.
2 Scroll through the screen.
3 Languages available.
CONDITIONS
This menu is only available if the system has conditioned
outputs and if the monitor is set as a Master.
Thu 21/06/12 - 16:07 0W
ON
Conditioned output 1
ON
4
Conditioned output 2
ON
Conditioned output 3
Conditioned output 4
ON
1 Available outputs.
2 Scroll through the screen.
3 Deactivate corresponding output.
4 Activate corresponding output.
42
OFF
OFF
OFF
OFF
1
2
1
2
3
Page 43

SETUP
LOCKING THE KEYPAD AND TOUCH-SCREEN
The Lock keypad and touch-screen function temporarily
deactivates the Planux Manager keys and touch-screen.
The functions are reactivated after 60 seconds, or on
receipt of a call.
To activate the function, press the “Lock keypad and
touch-screen” icon.
Thu 05/09/09 - 16:07 0W
Lock keypad and touch-screen
Confirm lock keypad and
touch-screen for 60 seconds?
Language
Set date and time
YES
Information
Confi rm by pressing the
Thu 05/09/09 - 16:07 0W
Language
Set date and time
Information
NO
YES
icon.
Keypad locked
SETTING THE DATE & TIME
To set the date and time, access the menu Setup > Set
date and time.
Use the + and – icons to set the various fi elds. When you
-
-
16:07
icon to confi rm.
+
05
+
2
3
09
+
4
-
have fi nished, press the
Thu 05/09/09 - 16:07 0W
1
05
+
-
1 Day.
2 Month.
3 Year.
4 Time.
INFORMATION
To view the software version installed, access the
Information menu.
Thu 21/06/12 - 16:07 0W
Adjust volumes
VERS. SW: 1.5
VERS. EE: 1.3.2 6214C
Set melodies
SB CODE: 5P RANGE: 0 - 0
Intercom add. : 5
B
SLAVE
Prog. keys
43
Information
Page 44

ADVANCED
√ ACCESSING ADVANCED MENUS
√ ADVANCED MENUS DESCRIPTION
√ KEY PROGRAMMING
√ VIDEO MEMORY SETUP
√ ACTUATORS
√ ADDING ACTUATORS
√ MODIFYING AN ACTUATOR CODE
√ DELETING ACTUATORS
√ CAMERAS
√ ADDING CAMERAS
√ MODIFYING A CAMERA CODE
√ DELETING CAMERAS
√ INTERCOMS
√ ADDING AN INTERCOM
√ MODIFYING AN INTERCOM ADDRESS
√ DELETING AN INTERCOM
√ INTERCOM GROUP
√ ADDING AN INTERCOM GROUP
√ DELETING / MODIFYING AN INTERCOM GROUP
√ ADDRESSES MENU DESCRIPTION
√ SETTING THE BRACKET CODE
√ SETTING A MONITOR AS MAIN / SECONDARY
√ SETTING A MULTIPLE ADDRESS
√ SETTING THE INTERCOM ADDRESS
√ CALIBRATING THE TOUCH-SCREEN
√ SETTING THE INPUT
√ TOTAL RESET
√ RESET CONFIGURATION
√ CONFIGURATION UPDATE
√ TRANSMISSION TIME
√ PRODUCT UPDATE
Page 45

ADVANCED
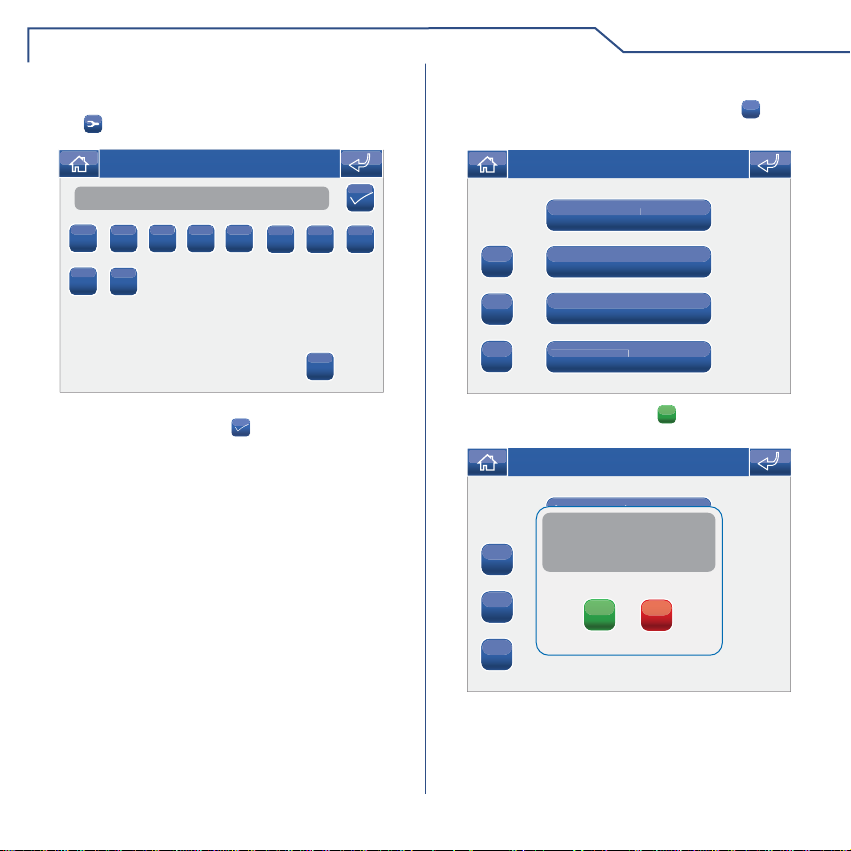
ACCESSING ADVANCED MENUS
Access the menu Setup > Advanced.
Enter the installer password (set by default to 1961).
Thu 05/09/09 - 16:07 0W
ENTER PASSWORD
ADVANCED MENUS DESCRIPTION
Thu 21/06/12 - 16:07 0W
Prog. Keys
Conf. video memory
Actuators
Cameras
Thu 21/06/12 - 16:07 0W
Intercoms
Intercom Group.
Addresses
Calibrate touch-screen
Thu 21/06/12 - 16:07 0W
Set input
1
2
1
2
1
Total reset
1 Functions available in the Advanced menu.
2 Scroll through the screen.
45
2
Page 46

ADVANCED
KEY PROGRAMMING
To program the Planux Manager keys, access the menu
Setup > Advanced > Prog. keys menu.
Select the key you want to program (e.g. Key 1).
Thu 05/09/09 - 16:07 0W
1
Key 1
Key 2
Key
Key
1 Programmable keys.
Press the icon corresponding to the desired function to
access the submenu and view the available modules.
Thu 21/06/12 - 16:07 0W
Actuators
Cameras
Intercoms
Select the desired function by pressing the icon to the
right of it.
Thu 05/09/09 - 16:07 0W
Generic act.
Actuator 1
Actuator 2
Actuator 3
In the case of the key, the available functions are:
Thu 05/09/09 - 16:07 0W
Doctor
Privacy
Privacy + doctor
If the fl ag is removed from all functions during
programming, the key will be disabled.
Main switchboard
46
Page 47

ADVANCED
VIDEO MEMORY SETUP
The video memory function can be set up so that all
video entry phone calls are recorded.
Access the menu Setup > Advanced > Video memory
setup.
Thu 21/06/12 - 16:07 0W
ON
1
Always record
OFF
2
Recording duration
3
1 Activate "Always Record" mode.
2 Deactivate "Always Record" mode.
3 Adjust the recording duration (5 or 10 seconds).
ACTUATORS
To manage the actuators, access the menu Setup >
Advanced > Actuators.
Thu 05/09/09 - 16:07 0W
2
+
3
C
4
Generic act.
Actuator 1
Actuator 2
ADDING ACTUATORS
To add an actuator, press the
Enter the desired name and press the icon to confi rm.
Thu 05/09/09 - 16:07 0W
Name
Enter the actuator code and press the
For further information about Art. 1256 , see FT/SB2/02
or MT/SBC/01.
1
Thu 05/09/09 - 16:07 0W
Number
+
icon.
icon to confi rm.
ABC
5
Actuator 3
1 Actuators available.
2 Add actuator.
3 Delete actuator.
4 Modify actuator code.
5 Rename actuator (see page 115).
C
47
Page 48

ADVANCED
MODIFYING AN ACTUATOR CODE
To modify the code of an actuator, press the icon
followed by the actuator icon.
Thu 05/09/09 - 16:07 0W
Enter the desired code using the numerical keypad and
press the
icon to save the information.
DELETING ACTUATORS
To delete an actuator, press the
actuator icon.
Thu 05/09/09 - 16:07 0W
Generic act.
+
C
ABC
Confi rm by pressing the
+
C
ABC
Actuator 1
Actuator 2
Actuator 3
YES
icon.
Thu 05/09/09 - 16:07 0W
Actuator 1
Confirm removal of actuator?
Actuator 2
Actuator 3
YES
C
icon followed by the
NO
48
Page 49

ADVANCED
CAMERAS
To manage the cameras, access the menu Setup >
Advanced > Cameras.
Thu 05/09/09 - 16:07 0W
1
2
3
4
ABC
5
1 Cameras available.
2 Add camera.
3 Delete camera.
4 Modify camera code.
5 Rename camera (see page 116).
+
C
Camera 1
Camera 2
Camera 3
Camera 4
ADDING CAMERAS
To add a camera, press the + icon.
Enter the desired name and press the icon to confi rm.
Thu 05/09/09 - 16:07 0W
Name
Enter the camera code and press the
For further information about Art. 1259C (remote camera
module), see FT/SBC/05 or MT/SBC/01.
Thu 05/09/09 - 16:07 0W
Number
icon to confi rm.
49
C
Page 50

ADVANCED
MODIFYING A CAMERA CODE
Press the icon followed by the camera icon.
Thu 05/09/09 - 16:07 0W
Enter the desired code using the numerical keypad and
press the
icon to save the information.
DELETING CAMERAS
Press the C icon followed by the camera icon.
Thu 05/09/09 - 16:07 0W
Camera 1
Camera 2
+
Camera 3
C
+
C
Camera 4
YES
icon.
Thu 05/09/09 - 16:07 0W
Camera 1
Confirm removal of camera?
Camera 2
Camera 3
YES
NO
Camera 4
ABC
Confi rm by pressing the
ABC
50
Page 51

ADVANCED
INTERCOMS
T o manage the intercoms, access the Setup > Advanced
> Intercoms menu.
Thu 05/09/09 - 16:07 0W
1
2
3
4
ABC
5
1 Intercom calls available.
2 Add intercom call.
3 Delete intercom call.
4 Modify intercom address.
5 Rename intercom call (see page 117).
+
C
Intercom 1
Intercom 2
ADDING AN INTERCOM
To add an intercom call, press the + icon.
Enter the desired name and press the icon to confi rm.
Thu 05/09/09 - 16:07 0W
Name
Enter the address of the internal unit to be associated
with the call and press the
Thu 05/09/09 - 16:07 0W
Number
icon to confi rm.
51
C
Page 52

ADVANCED
MODIFYING AN INTERCOM ADDRESS
Press the icon followed by the intercom call icon.
Thu 05/09/09 - 16:07 0W
Enter the desired address using the numerical keypad
and press the
icon to save the information.
DELETING AN INTERCOM
Press the
Confi rm by pressing the
C
icon followed by the intercom call icon.
Thu 05/09/09 - 16:07 0W
Intercom 1
+
Intercom 2
C
ABC
YES
icon.
Thu 05/09/09 - 16:07 0W
Intercom 1
+
C
ABC
Confirm removal of intercom?
Intercom 2
YES
NO
52
Page 53

ADVANCED
INTERCOM GROUP
Once created, intercom group calls can be found under
the "Intercoms" menu (see page 117).
T o manage intercom group calls, access the menu Setup
> Advanced > Intercom group.
Enter the desired name and press the icon to confi rm.
Thu 21/06/12 - 16:07 0W
1
2
3
4
ABC
5
1 Group calls available.
2 Add intercom group.
3 Delete intercom group.
4 Modify intercom group.
5 Rename intercom group.
+
C
Intercom group 1
Intercom group 2
ADDING AN INTERCOM GROUP
+
To add an intercom group call, press the
Enter the desired name and press the icon to confi rm.
Thu 21/0612 - 16:07 0W
Name
Select the intercom addresses for the internal units to be
associated with the call and press the
Thu 21/06/12 - 16:07 0W
icon.
icon to confi rm.
53
Page 54

ADVANCED
DELETING / MODIFYING AN INTERCOM
GROUP
To delete or modify an intercom group call, follow the
instructions on page 129.
ADDRESSES MENU DESCRIPTION
Thu 21/06/12 - 16:07 0W
Simplebus code
Monitor
Multiple address
Intercom add.
1 Menu for setting the bracket code.
2 Menu for setting a monitor as main / secondary.
1
2
3
4
SETTING THE BRACKET CODE
Each bracket in the system is identifi ed by its own code;
this code should be a number between 1 and 240.
Access the menu Setup > Advanced > Addresses >
Simplebus code. Enter the bracket code and press the
icon to confi rm.
Thu 05/09/09 - 16:07 0W
Number
C
If the SD card is not inserted, the following message will
appear:
Thu 05/09/09 - 16:07 0W
SD card error parameter saved in flash
54
C
Page 55

ADVANCED
SETTING A MONITOR AS MAIN /
SECONDARY
Access the menu Setup > Advanced > Addresses >
Monitor.
Sat 05/09/09 16:07
Main
Multiple main
Secondary
Select the setting by pressing the icon to the right of it.
Observe the limits specifi ed in the installation diagrams
on the technical sheet FT/SBC/22.
SETTING A MULTIPLE ADDRESS
When the "Multiple address" function is activated, the
monitor will ring every time a Simplebus address within
the set range is called.
Access the menu Setup > Advanced > Addresses >
Multiple address.
Thu 21/06/12 - 16:07 0W
Minimum address
Maximum address
1 Set the range start address.
2 Set the range end address.
1
2
SETTING THE INTERCOM ADDRESS
Access the menu Setup > Advanced > Addresses >
Intercom address.
Thu 21/06/12 - 16:07 0W
Select the intercom address you wish to assign to the
monitor.
55
Page 56

ADVANCED
CALIBRATING THE TOUCH-SCREEN
If the touch-screen does not respond correctly to touch
commands, it can be calibrated.
Access the menu Setup > Advanced > Calibrate touchscreen.
Thu 05/09/09 - 16:07 0W
B
Language
CONFIRM CALIBRATION
B
Set date and time
B
Conditional commands
YES
Reset configuration
Confi rm by pressing the
To calibrate the touch-screen, simply press and hold
the cross which appears in 3 different positions for 2
seconds.
Hold down for 2 seconds
YES
NO
icon.
SET INPUT
2 different functions can be assigned to the CFP-CFP
input on the bracket terminal board:
• Floor door call (CFP)
• Alarm function (a Simplebus alarm signal is sent to the
switchboard).
Access the menu Setup > Advanced > Set input.
Thu 21/06/12 - 16:07 0W
CFP function
Alarm function
Select the function by pressing the icon to the right of it.
56
Page 57

ADVANCED
TOTAL RESET
The function deletes all door entry monitor, home
automation and alarm system settings implemented by
the user, restoring the system to its original default status.
Access the menu Setup > Advanced > Total reset.
Thu 05/09/09 - 16:07 0W
B
Language
Confirm user and system
configuration reset?
B
Set date and time
B
Conditional commands
YES
Confi rm by pressing the
YES
NO
icon.
RESET CONFIGURATIONS
The function deletes all door entry monitor, home
automation and alarm system settings.
Access the menu Setup > Advanced > Reset
confi guration.
Thu 21/06/12 - 16:07 0W
B
Language
Confirm system
configuration reset?
B
Set date and time
B
Conditional commands
YES
Confi rm by pressing the
YES
NO
icon.
CONFIGURATION UPDATE
The function updates all door entry monitor, home
automation and alarm system settings.
Access the menu Setup > Advanced > Update
confi gurations.
Thu 21/06/12 - 16:07 0W
B
Language
Confirm configuration update?
B
Set date and time
B
Conditional commands
YES
Confi rm by pressing the
YES
NO
icon.
TRANSMISSION TIME
The transmission time determines the speed with which
the commands are sent over the data line.
The higher the value, the greater the time between
sending one command and the next.
E.g.: Supposing we have 5 lights in one area and we
send the switch-on command to all of them.
• If the value is set to 1, 1 tenth of a second will pass
between one light switching on and the next.
• If the value is set to 5, 5 tenths of a second will pass
between one light switching on and the next.
PRODUCT UPDATE
Please contact your installer or the Comelit Group S.p.A.
service centre for product software updates.
57
Page 58

INTRODUCTION
√ AVERTISSEMENTS
√ DESCRIPTION MONITEUR
√ FONCTION TOUCHES
√ MENU PLANUX MEMO VIDEO
√ GUIDE CHROMATIQUE
Page 59

INTRODUCTION
AVERTISSEMENTS
La société Comelit Group S.p.A. décline toute responsabilité en cas de mauvais usage des appareils, pour des
modifi cations effectuées par d'autres personnes pour n'importe quelle raison et pour l'utilisation d'accessoires et matériaux
non d'origine. Attention ! Afi n de réduire le risque de pannes et les électrocutions :
• ne pas ouvrir l'appareil ni effectuer personnellement les réparations. En cas de nécessité, demander l'intervention de
techniciens spécialisés.
• Ne jamais introduire d'objets, ni verser des liquides, à l'intérieur du dispositif.
• Nettoyer avec un chiffon humidifi é avec de l'eau. Éviter d'utiliser de l'alcool ou d'autres produits agressifs.
Fonts are (c) Bitstream (see below). DejaVu changes are in public domain.
Glyphs imported from Arev fonts are (c) Tavmjong Bah (see below)
Bitstream Vera Fonts Copyright
------------------------------
Copyright (c) 2003 by Bitstream, Inc. All Rights Reserved. Bitstream Vera is a trademark of Bitstream, Inc.
Permission is hereby granted, free of charge, to any person obtaining a copy of the fonts accompanying
this license ("Fonts") and associated documentation fi les (the "Font Software"), to reproduce and distribute
theFont Software, including without limitation the rights to use, copy, merge, publish, distribute, and/or sell
copies of the Font Software, and to permit persons to whom the Font Software is furnished to do so, subject
to the following conditions:
The above copyright and trademark notices and this permission notice shall be included in all copies of one
or more of the Font Software typefaces.
The Font Software may be modifi ed, altered, or added to, and in particular the designs of glyphs or
characters in the Fonts may be modifi ed and additional glyphs or characters may be added to the Fonts, only
if the fonts are renamed to names not containing either the words "Bitstream" or the word "Vera".
This License becomes null and void to the extent applicable to Fonts or Font Software that has been modifi ed
and is distributed under the "Bitstream Vera" names.
The Font Software may be sold as part of a larger software package but no copy of one or more of the Font
Software typefaces may be sold by itself.
THE FONT SOFTWARE IS PROVIDED "AS IS", WITHOUT WARRANTY OF ANY KIND, EXPRESS OR
IMPLIED, INCLUDING BUT NOT LIMITED TO ANY WARRANTIES OF MERCHANTABILITY, FITNESS
FOR A PARTICULAR PURPOSE AND NONINFRINGEMENT OF COPYRIGHT, PATENT, TRADEMARK,
OR OTHER RIGHT. IN NO EVENT SHALL BITSTREAM OR THE GNOME FOUNDATION BE LIABLE
FOR ANY CLAIM, DAMAGES OR OTHER LIABILITY, INCLUDING ANY GENERAL, SPECIAL, INDIRECT,
INCIDENTAL, OR CONSEQUENTIAL DAMAGES, WHETHER IN AN ACTION OF CONTRACT, TORT OR
OTHERWISE, ARISING FROM, OUT OF THE USE OR INABILITY TO USE THE FONT SOFTWARE OR
FROM OTHER DEALINGS IN THE FONT SOFTWARE.
Except as contained in this notice, the names of Gnome, the Gnome Foundation, and Bitstream Inc., shall not
be used in advertising or otherwise to promote the sale, use or other dealings in this Font Software without
prior written authorization from the Gnome Foundation or Bitstream Inc., respectively. For further information,
contact: fonts at gnome dot org.
Arev Fonts Copyright
-----------------------------Copyright (c) 2006 by Tavmjong Bah. All Rights Reserved.
Permission is hereby granted, free of charge, to any person obtaining a copy of the fonts accompanying this
license ("Fonts") and associated documentation fi les (the "Font Software"), to reproduce and distribute the
modifi cations to the Bitstream Vera Font Software, including without limitation the rights to use, copy, merge,
publish, distribute, and/or sell copies of the Font Software, and to permit persons to whom the Font Software
is furnished to do so, subject to the following conditions:
The above copyright and trademark notices and this permission notice shall be included in all copies of one
or more of the Font Software typefaces.
The Font Software may be modifi ed, altered, or added to, and in particular the designs of glyphs or
characters in the Fonts may be modifi ed and additional glyphs or characters may be added to the Fonts,
only if the fonts are renamed to names not containing either the words "Tavmjong Bah" or the word "Arev".
This License becomes null and void to the extent applicable to Fonts or Font Software that has been modifi ed
and is distributed under the "Tavmjong Bah Arev" names.
The Font Software may be sold as part of a larger software package but no copy of one or more of the Font
Software typefaces may be sold by itself.
THE FONT SOFTWARE IS PROVIDED "AS IS", WITHOUT WARRANTY OF ANY KIND, EXPRESS OR
IMPLIED, INCLUDING BUT NOT LIMITED TO ANY WARRANTIES OF MERCHANTABILITY, FITNESS
FOR A PARTICULAR PURPOSE AND NONINFRINGEMENT OF COPYRIGHT, PATENT, TRADEMARK,
OR OTHER RIGHT. IN NO EVENT SHALL TAVMJONG BAH BE LIABLE FOR ANY CLAIM, DAMAGES
OR OTHER LIABILITY, INCLUDING ANY GENERAL, SPECIAL, INDIRECT, INCIDENTAL, OR
CONSEQUENTIAL DAMAGES, WHETHER IN AN ACTION OF CONTRACT, TORT OR OTHERWISE,
ARISING FROM, OUT OF THE USE OR INABILITY TO USE THE FONT SOFTWARE OR FROM OTHER
DEALINGS IN THE FONT SOFTWARE.
Except as contained in this notice, the name of Tavmjong Bah shall not be used in advertising or otherwise
to promote the sale, use or other dealings in this Font Software without prior written authorization from
Tavmjong Bah. For further information, contact: tavmjong @ free. fr.
Page 60

INTRODUCTION
DESCRIPTION MONITEUR
Sab 05/09/09 16:07
VIDEOFONIA
1
34
5
1 Touche phonie
2 Touche gâche
3 Touche menu
4 Touche luminosité
5 Touche contraste
6 Touche couleur
7 Touche programmable1
8 Touche programmable2
9 Touche auto-allumage (programmable)
10 Touche privacy / docteur
11 Écran tactile
12 Capteur clé
SETUP
IA
67
8910
FONCTION TOUCHES
Touche phonie : permet d'activer ou de désactiver
la conversation avec le poste extérieur.
Touche gâche : permet l'ouverture de la gâche y
11
12
2
étant associée.
Touche menu : permet d'accéder et de quitter le
menu du moniteur Planux Memo Video.
Touche luminosité : permet de régler la luminosité
de l'image sur le moniteur. Pour en modifi er la
valeur, appuyer sur la touche pendant qu'une
communication vidéo est en cours.
Touche contraste : permet de régler le contraste
de l'image sur le moniteur. Pour en modifi er la
valeur, appuyer sur la touche pendant qu'une
communication vidéo est en cours.
Touche couleur : permet de régler la couleur
de l'image sur le moniteur. Pour en modifi er la
valeur, appuyer sur la touche pendant qu'une
communication vidéo est en cours.
Touche programmable 1 : programmée en usine
comme actionneur générique (programmable).
Touche programmable 2 : programmée en usine
comme appel au standard (programmable).
Touche auto-allumage : permet l'allumage du moniteur
et la vision du poste extérieur vidéo (programmable).
Touche fonction Privacy / Docteur
• La fonction Privacy permet d'exclure l'appel depuis
le poste extérieur et depuis le standard.
• La fonction Docteur permet l'activation automatique
de l'ouvre-porte sur appel depuis le poste extérieur.
• La fonction Privacy + Docteur non seulement permet
de désactiver la sonnerie du combiné parlophonique
comme dans la fonction Privacy, mais en plus elle
permet l'actionnement automatique de l'ouvre-porte
sur appel depuis le poste extérieur.
La led rouge indique que la fonction choisie est
60
activée.
(programmable)
:
Page 61

INTRODUCTION
MENU PLANUX MEMO VIDEO
Pour naviguer dans le menu, il suffi t de toucher d'un doigt
l'icône de la fonction désirée.
Pour accéder au menu principal, appuyer sur la touche
Sam 05/09/09 16:07
VISIOPHONIE
Sab 05/09/09 16:07
L'icône permet de retourner immédiatement au menu
principal.
L'icône
permet de retourner à la page précédente.
SETUP
GUIDE CHROMATIQUE
Les icônes des menus changent de couleur selon leur état
et leur fonction :
: indique que la fonction n'est pas active.
JAUNE : indique que la fonction est active.
VERT : en appuyant sur l'icône, la fonction associée
ON
sera activée.
ROUGE : en appuyant sur l'icône, la fonction
OFF
associée sera désactivée.
61
Page 62

VISIOPHONIE
√ RÉPONDRE À UN APPEL
√ DESCRIPTION MENU VISIOPHONIE
√ VIDÉO RÉPONDEUR
√ VISUALISER UN ENREGISTREMENT
√ ÉLIMINER UN ENREGISTREMENT
√ MAINS LIBRES
√ PROGRAMMER MÉLODIES
√ RÉGLAGE VOLUMES
√ ACTIONNEURS
√ RENOMMER ACTIONNEURS
√ CAMÉRAS
√ RENOMMER CAMÉRAS
√ INTERCOMMUNICANTS
√ RENOMMER INTERCOMMUNICANTS
Page 63

VISIOPHONIE
RÉPONDRE À UN APPEL
Les Leds des touches de phonie et de gâche clignotent à
la suite d'un appel.
Appuyer sur la touche
pour activer la phonie avec le
poste extérieur appelant.
Appuyer sur la touche
pour activer la gâche associée.
DESCRIPTION MENU VISIOPHONIE
Pour accéder au menu visiophonie, appuyer sur l'icône
dans le menu principal.
Jeu 21/06/12 - 16:07 0W
Mémoire vidéo
ON
4
ON
Mains libres
Configurer mélodies
Réglage volumes
Jeu 21/06/12 - 16:07 0W
Actionneurs
Caméras
Intercommunicants
Standard principal
OFF
OFF
1 Fonctions disponibles dans le menu visiophonie.
2 Désactivation de la fonction associée.
3 Défi lement de la page.
4 Activation de la fonction associée.
VIDÉO RÉPONDEUR
Quand elle est activée, la fonction Vidéo Répondeur permet
d'enregistrer l'image depuis la caméra du poste extérieur
lorsqu'un appel est envoyé, avec un maximum de 100
enregistrements de 10 secondes chacun.
Pour affi cher la liste des enregistrements présents, accéder
au menu Visiophonie > Vidéo répondeur .
1
2
3
C
3
1
1 Enregistrements non affi chés (cadre bleu).
2 Enregistrements déjà affi chés (cadre jaune).
3
3 Éliminer enregistrement.
Les enregistrements sont sauvegardés au format .avi, dans
la carte SD du dossier « Vidéo » et peuvent être également
affi chés sur pc avec Windows Media Player. À défaut de
la carte SD, les enregistrements sont sauvegardés dans
la mémoire du Planux Manager (max. 2 enregistrements).
3
Jeu 05/09/09 - 16:07 0W
11/01/2001 10:21 09/01/2001 8:22
07/01/2001 18:50
05/01/2001 9:48
1
2
63
Page 64

VISIOPHONIE
VISUALISER UN ENREGISTREMENT
Pour visualiser l'un des enregistrements, appuyer sur
l'icône correspondante.
À la fi n de la reproduction (MAXI. 10 secondes), le système
retournera automatiquement à la page précédente.
ÉLIMINER UN ENREGISTREMENT
Pour éliminer l'un des enregistrements, appuyer sur l'icône
C
, puis sur l'icône de l'enregistrement que l'on désire
éliminer, puis confi rmer.
confirmer élimination
message vidéo ?
MAINS LIBRES
La fonction Mains Libres permet d'activer la phonie, après
un appel reçu, sans avoir besoin d'appuyer sur la touche
.
PROGRAMMER MÉLODIES
Pour gérer les mélodies du Planux Manager, accéder au
menu Visiophonie > Programmer mélodies.
Sélectionner le type d'appel pour lequel on désire modifi er
la mélodie en appuyant sur l'icône désirée.
Jeu 21/06/12 - 16:07 0W
Appel du poste extérieur
Appel standard
Appel palier
Appel adr. multiple
Pour écouter la mélodie, appuyer sur le nom désiré puis sur
l'icône à droite pour mémoriser.
Jeu 05/09/09 - 16:07 0W
Melodie 1
Melodie 2
OUI NON
Melodie 3
Melodie 4
Il est possible d'ajouter des sonneries personnalisées. Les
fi chiers doivent être en format .wav de 8Khz mono 16 bit.
Saisir les mélodies dans le dossier "Wav" de la carte SD
pour les affi cher dans le menu spécial.
64
Page 65

VISIOPHONIE
RÉGLAGE VOLUMES
Pour régler le volume de la sonnerie, du son, des touches
et des tonalités d'alarme, accéder au menu Visiophonie >
Réglage volumes.
Jeu 21/06/12 - 16:07 0W
Sonnerie
Son
Son intercom.
Touches
Sélectionner la fonction pour laquelle on désire changer le
volume en appuyant sur l'icône spéciale. À l'apparition de
la page de réglage, utiliser les icônes + et - pour changer le
volume et appuyer sur l'icône
Jeu 05/09/09 - 16:07 0W
B
Sonnerie
-
B
Son
pour confi rmer.
+
ACTIONNEURS
Pour affi cher la liste des actionneurs présents, accéder au
menu Visiophonie > Actionneurs.
Jeu 05/09/09 - 16:07 0W
Actionn. 1
Actionn. 2
Actionn. 3
2
ABC
1 Actionneurs disponibles. L'installateur peut ajouter
d'autres dispositifs
2 Renommer actionneurs.
Pour commander un actionneur parmi ceux de la liste, il
suffi t d'appuyer sur l'icône correspondante.
Actionn. 4
Jeu 05/09/09 - 16:07 0W
Actionneur Générique
Commande actionneur
effectuée
1
S'il n'y a aucun actionneur, le message « DISPOSITIF PAS
PRÉSENT » apparaît.
65
Page 66

VISIOPHONIE
Jeu 05/09/09 - 16:07 0W
Actionneur Générique
Dispositif pas présent
RENOMMER ACTIONNEURS
Appuyer sur l'icône
l'on désire renommer.
Nom
Saisir le nom et/ou le numéro désiré pour la description de
l'actionneur et appuyer sur l'icône
ABC
puis sur celle de l'actionneur que
Jeu 05/09/09 - 16:07 0W
pour confi rmer.
CAMÉRAS
Pour affi cher la liste des caméras présentes, accéder au
menu Visiophonie > Caméras.
Jeu 05/09/09 - 16:07 0W
Caméra 1
Caméra 2
Caméra 3
ABC
2
1 Caméras disponibles. On peut associer à chaque icône
jusqu'à 3 caméras qui peuvent être vues en séquence
avec celle du poste extérieur.
2 Renommer Caméras.
Pour visualiser l'image d'une caméra parmi celles de la
liste, il suffi t d'appuyer sur l'icône correspondante.
Caméra 4
1
Appuyer sur l'icône
123
pour passer au clavier numérique.
66
Page 67

VISIOPHONIE
Toucher l'écran pour revenir au menu lorsque l'image est
affi chée ; pour visualiser d'autres caméras, appuyer de
nouveau sur une icône.
Si aucune caméra n'est présente, le message «
DISPOSITIF PAS PRÉSENT » apparaît.
Jeu 05/09/09 - 16:07 0W
Actionneur Générique
Dispositif pas présent
RENOMMER CAMÉRAS
Appuyer sur l'icône
que l'on désire renommer.
Nom
Saisir le nom et/ou le numéro désiré pour la description de
la caméra et appuyer sur l'icône
Appuyer sur l'icône
ABC
puis sur celle du groupe de caméras
Jeu 05/09/09 - 16:07 0W
pour confi rmer.
123
pour passer au clavier numérique.
67
Page 68

VISIOPHONIE
INTERCOMMUNICANTS
Pour affi cher la liste des appels intercommunicants présents,
accéder au menu Visiophonie > Intercommunicants.
Jeu 05/09/09 - 16:07 0W
Intercommunicant 1
Intercommunicant 2
Intercommunicant 3
2
ABC
1 Appels intercommunicants disponibles
2 Renommer appel intercommunicant.
Pour effectuer un appel intercommunicant, il suffi t d'appuyer
sur l'icône.
Intercommunicant 4
Jeu 05/09/09 - 16:07 0W
Actionneur Générique
Intercommunicant effectué
RENOMMER INTERCOMMUNICANTS
Appuyer sur l'icône
intercommunicant que l'on désire renommer.
1
Nom
Saisir le nom et/ou le numéro désiré pour la description de
l'appel intercommunicant et appuyer sur l'icône
confi rmer.
Appuyer sur l'icône
ABC
puis sur celle de l'appel
Jeu 05/09/09 - 16:07 0W
123
pour passer au clavier numérique.
pour
68
Page 69

SETUP
√ DESCRIPTION MENU SETUP
√ LANGUE
√ CONDITIONNEMENTS
√ BLOC. TOUCHES+TACT
√ CONFIGURER DATE ET HEURE
√ INFORMATIONS
Page 70

SETUP
DESCRIPTION MENU SETUP
Pour accéder au menu setup, appuyer sur l'icône
dans le menu principal.
Jeu 21/06/12 - 16:07 0W
Langue
Blocage touches et écran tactile
Régler date et heure
Informations
Jeu 21/06/12 - 16:07 0W
Conditionnements
Avancées
1 Fonctions disponibles dans le menu setup.
2 Déroulement de la page.
1
2
1
2
LANGUE
Il est possible de modifi er la langue des menus du Planux
Manager en choisissant parmi celles installées. Accéder au
menu Setup > Langue.
Pour sélectionner la langue, appuyer sur l'icône
correspondante.
Jeu 05/09/09 - 16:07 0W
Italiano
English
Pluie
3
Français
Deutsch
1 Langue utilisée.
2 Déroulement de la page.
3 Langues disponibles.
CONDITIONNEMENTS
Ce menu est disponible uniquement en cas de système
prévoyant des sorties conditionnées et en cas de moniteur
confi guré comme Maître.
Jeu 21/06/12 - 16:07 0W
ON
Sortie conditionnée 1
ON
4
Sortie conditionnée 2
ON
Sortie conditionnée 3
Sortie conditionnée 4
ON
OFF
OFF
OFF
OFF
1 Sorties disponibles.
2 Défi lement de la page.
3 Désactivation sortie associée.
4 Activation sortie associée.
70
1
2
1
2
3
Page 71

SETUP
BLOC. TOUCHES+TACT
La fonction de Blocage touches et écran tactile désactive
temporairement les touches et l'écran tactile du Planux
Manager. Les fonctions sont réactivées après 60 secondes
ou bien à la suite d'un appel reçu.
Pour activer la fonction, appuyer sur l'icône "Bloc.
touches+tact.".
Jeu 05/09/09 - 16:07 0W
Confirmer blocage touches
et écran tactile pendant
Langue
60 secondes ?
Régler date et heure
Informations
Confi rmer en appuyant sur l'icône
Jeu 05/09/09 - 16:07 0W
Langue
Régler date et heure
Informations
OUI
NON
Blocage touches activé
OUI
.
CONFIGURER DATE ET HEURE
Pour confi gurer la date de l'heure, accéder au menu Setup
> Régler date et heure.
Agir sur les icônes + et - pour programmer les différents
+
+
pour confi rmer.
09
+
-
champs. À la fi n, appuyer sur l'icône
Jeu 05/09/09 - 16:07 0W
1
05
+
-
-
05
16:07
-
1 Jour.
2 Mois.
3 Année.
4 Horaire.
INFORMATIONS
Pour affi cher la version du logiciel installé, accéder au
menu informations.
Jeu 21/06/12 - 16:07 0W
Régler volumes
VERS. SW : 1.5
VERS. EE : 1.3.2 6214C
Configurer mélodies
SB CODE : 5P RANGE : 0 - 0
Adresse Intercom. : 5
B
SLAVE
Prog. touches
2
3
4
71
Informations
Page 72

AVANCÉES
√ ACCÈS MENU AVANCÉES
√ DESCRIPTION MENU AVANCÉES
√ PROGRAMMATION TOUCHES
√ CONFIGURATION VIDÉO RÉPONDEUR
√ ACTIONNEURS
√ AJOUTER ACTIONNEURS
√ MODIFICATION CODE ACTIONNEUR
√ ÉLIMINER ACTIONNEURS
√ CAMÉRAS
√ AJOUTER CAMÉRAS
√ MODIFIER CODE CAMÉRA
√ ÉLIMINER CAMÉRAS
√ INTERCOMMUNICANTS
√ AJOUTER INTERCOMMUNICANT
√ MODIFIER ADRESSE INTERCOMMUNICANT
√ ÉLIMINER INTERCOMMUNICANT
√ GROUPE INTERCOM
√ AJOUTER GROUPE INTERCOM
√ ÉLIMINER / MODIFIER GROUPE INTERCOM
√ DESCRIPTION MENU ADRESSES
√ CONFIGURATION CODE ÉTRIER
√ CONFIGURATION MONITEUR PRINCIPAL / SECONDAIRE
√ CONFIGURATION ADRESSE MULTIPLE
√ CONFIGURATION ADRESSE INTERCOM
√ CALIBRAGE ÉCRAN TACTILE
√ PROGRAMMER ENTRÉE
√ RESET TOTAL
√ RESET CONFIGURATION
√ MISE À JOUR CONFIGURATIONS
√ TEMPS DE TRANSMISSION
√ MISE À JOUR PRODUIT
Page 73

AVANCÉES
ACCÈS MENU AVANCÉES
Accéder au menu Setup > Avancées.
Saisir le mot de passe installateur qui par défaut est 1961.
Jeu 05/09/09 - 16:07 0W
SAISIR MOT DE PASSE
DESCRIPTION MENU AVANCÉES
Jeu 21/06/12 - 16:07 0W
Prog. Touches
Conf. vidéo répondeur
Actionneurs
Caméras
Jeu 21/06/12 - 16:07 0W
Intercommunicants
Groupe intercom.
Adresses
Calibrage écran tactile
Jeu 21/06/12 - 16:07 0W
Programmer entrée
1
2
1
2
1
Reset total
1 Fonctions disponibles dans le menu Avancées.
2 Défi lement de la page.
73
2
Page 74

AVANCÉES
PROGRAMMATION TOUCHES
Pour programmer les touches du Planux Manager, accéder
au menu Setup > Avancées > Prog. Touches.
Sélectionner la touche que l'on veut programmer (ex.
Touche 1).
Jeu 05/09/09 - 16:07 0W
1
Touche 1
Touche 2
To uc h e
To uc h e
1 Touches programmables.
Appuyer sur l'icône de la fonction désirée pour accéder au
sous-menu et visualiser les modules disponibles.
Jeu 21/06/12 - 16:07 0W
Actionneurs
Caméras
Intercommunicants
Sélectionner la fonction désirée en appuyant sur l'icône
située à droite.
Jeu 05/09/09 - 16:07 0W
Actionn. générique
Actionn. 1
Actionn. 2
Actionn. 3
Dans le cas de la touche
, les fonctions disponibles
sont :
Jeu 05/09/09 - 16:07 0W
Docteur
Privé
Privé + Docteur
Si, durant la programmation, le fl ag est ôté de toutes
les fonctions, la touche est invalidée.
Standard principal
74
Page 75

AVANCÉES
CONFIGURATION VIDÉO RÉPONDEUR
Il est possible de confi gurer la fonction vidéo répondeur de
manière à enregistrer tous les appels visiophoniques.
Accéder au menu Setup > Avancées > Conf. vidéo
répondeur.
Jeu 21/06/12 - 16:07 0W
ON
1
Toujours enregistrer
OFF
2
Durée enregistrement
3
1 Activer la modalité « Toujours enregistrer ».
2 Désactiver la modalité « Toujours enregistrer ».
3 Modifi er la durée de l'enregistrement (5 ou 10 secondes).
ACTIONNEURS
Pour gérer les actionneurs, accéder au menu Setup >
Avancées > Actionneurs.
Jeu 05/09/09 - 16:07 0W
2
+
3
C
4
Actionn. générique
Actionneur 1
Actionneur 2
1
AJOUTER ACTIONNEURS
Pour ajouter un actionneur, appuyer sur l'icône
Saisir le nom désiré et appuyer sur l'icône pour
confi rmer.
Jeu 05/09/09 - 16:07 0W
Nom
Saisir le code de l'actionneur et appuyer sur l'icône
confi rmer.
Pour plus d'informations sur l'Art. 1256 voir FT/SB2/02 ou
MT/SBC/01
Jeu 05/09/09 - 16:07 0W
Numéro
+
.
pour
ABC
5
Actionneur 3
1 Actionneurs disponibles.
2 Ajouter actionneur.
3 Éliminer actionneur.
4 Modifi er code actionneur.
5 Renommer actionneur (voir page 195).
C
75
Page 76

AVANCÉES
MODIFICATION CODE ACTIONNEUR
Pour modifi er le code d'un actionneur, appuyer sur l'icône
puis sur l'icône de l'actionneur.
Jeu 05/09/09 - 16:07 0W
Saisir le code désiré en utilisant le clavier numérique et
appuyer sur l'icône
pour sauvegarder.
ÉLIMINER ACTIONNEURS
Pour éliminer un actionneur, appuyer sur l'icône
l'icône de l'actionneur.
Jeu 05/09/09 - 16:07 0W
Actionn. générique
+
C
ABC
Confi rmer en appuyant sur l'icône
+
C
ABC
Actionneur 1
Actionneur 2
Actionneur 3
OUI
.
Jeu 05/09/09 - 16:07 0W
Actionneur 1
Confirmer élimination actionneur ?
Actionneur 2
Actionneur 3
OUI
NON
C
puis sur
76
Page 77

AVANCÉES
CAMÉRAS
Pour gérer les caméras, accéder au menu Setup >
Avancées > Caméras.
Jeu 05/09/09 - 16:07 0W
1
2
3
4
ABC
5
1 Caméras disponibles.
2 Ajouter caméra.
3 Éliminer caméra.
4 Modifi er code caméra.
5 Renommer caméra (voir page 196).
+
C
Caméra 1
Caméra 2
Caméra 3
Caméra 4
AJOUTER CAMÉRAS
Pour ajouter une caméra, appuyer sur l'icône +.
Saisir le nom désiré et appuyer sur l'icône pour
confi rmer.
Jeu 05/09/09 - 16:07 0W
Nom
Saisir le code de la caméra et appuyer sur l'icône
confi rmer.
Pour plus d'informations sur l'Art. 1259C (module caméra
déportée), voir FT/SBC/05 ou MT/SBC/01.
Jeu 05/09/09 - 16:07 0W
Numéro
pour
77
C
Page 78

AVANCÉES
MODIFIER CODE CAMÉRA
Appuyer sur l'icône puis sur l'icône de la caméra.
Jeu 05/09/09 - 16:07 0W
Saisir le code désiré en utilisant le clavier numérique et
appuyer sur l'icône
pour sauvegarder.
ÉLIMINER CAMÉRAS
Appuyer sur l'icône C puis sur l'icône de la caméra.
Jeu 05/09/09 - 16:07 0W
Caméra 1
Caméra 2
+
Caméra 3
C
+
C
Caméra 4
OUI
.
Jeu 05/09/09 - 16:07 0W
Caméra 1
Confirmer élimination caméra ?
Caméra 2
Caméra 3
OUI
NON
Caméra 4
ABC
Confi rmer en appuyant sur l'icône
ABC
78
Page 79

AVANCÉES
INTERCOMMUNICANTS
Pour gérer les intercommunicants, accéder au menu Setup
> Avancées > Intercommunicants.
Jeu 05/09/09 - 16:07 0W
1
2
3
4
ABC
5
1 Appels intercommunicants disponibles.
2 Ajouter appel intercommunicant.
3 Éliminer appel intercommunicant.
4 Modifi er adresse intercommunicant.
5 Renommer appel intercommunicant (voir page 197).
Intercommunicant 1
+
Intercommunicant 2
C
AJOUTER INTERCOMMUNICANT
Pour ajouter un appel intercommunicant, appuyer sur
+
l'icône
Saisir le nom désiré et appuyer sur l'icône pour
confi rmer.
Saisir l'adresse du poste intérieur que l'on désire associer à
l'appel et appuyer sur l'icône
.
Jeu 05/09/09 - 16:07 0W
Nom
pour confi rmer.
Jeu 05/09/09 - 16:07 0W
Numéro
79
C
Page 80

AVANCÉES
MODIFIER ADRESSE INTERCOMMUNICANT
Appuyer sur l'icône suivie de l'icône de l'appel
intercommunicant.
Jeu 05/09/09 - 16:07 0W
Saisir l'adresse désirée en utilisant le clavier numérique et
appuyer sur l'icône
pour sauvegarder.
ÉLIMINER INTERCOMMUNICANT
Appuyer sur l'icône
intercommunicant.
+
C
ABC
Confi rmer en appuyant sur l'icône
+
C
ABC
C
suivie de l'icône de l'appel
Jeu 05/09/09 - 16:07 0W
Intercommunicant 1
Intercommunicant 2
OUI
.
Jeu 05/09/09 - 16:07 0W
Intercommunicant 1
Confirmer élimination intercommunicant ?
Intercommunicant 2
OUI
NON
80
Page 81

AVANCÉES
GROUPE INTERCOM
Une fois créés, les appels de groupe intercom seront dans
le menu « intercommunicants » (voir page 197).
Pour gérer les groupes d'appel intercommunicants, accéder
au menu Setup > Avancées > Groupe intercom.
Saisir le nom désiré et appuyer sur l'icône pour
confi rmer.
Jeu 21/06/12 - 16:07 0W
1
2
3
4
ABC
5
1 Appels de groupe disponibles.
2 Ajouter groupe intercommunicant.
3 Éliminer groupe intercommunicant.
4 Modifi er groupe intercommunicant.
5 Renommer groupe intercommunicant.
Groupe Intercom 1
+
Groupe Intercom 2
C
AJOUTER GROUPE INTERCOM
Pour ajouter un appel de groupe intercommunicant,
appuyer sur l'icône
Saisir le nom désiré et appuyer sur l'icône pour
confi rmer.
Nom
Saisir les adresses intercom des postes intérieurs à
associer à l'appel et appuyer sur l'icône
+
.
Jeu 21/0612 - 16:07 0W
Jeu 21/06/12 - 16:07 0W
pour confi rmer.
81
Page 82

AVANCÉES
ÉLIMINER / MODIFIER GROUPE INTERCOM
Pour éliminer ou modifi er un appel de groupe
intercommunicant, suivre les instructions fournies à la
page 209
DESCRIPTION MENU ADRESSES
Jeu 21/06/12 - 16:07 0W
Code simplebus
Moniteur
Adresse multiple
Adresse intercom
1 Menu confi guration code étrier.
2 Menu confi guration moniteur principal / secondaire.
1
2
3
4
RÉGLAGE CODE ÉTRIER
Chaque étrier du système est identifi é par un code
spécifi que composé d'un numéro entre 1 et 240.
Accéder au menu Setup > Avancées > Adresses > Code
simplebus. Insérer le code de l'étrier et appuyer sur l'icône
pour confi rmer.
Jeu 05/09/09 - 16:07 0W
Numéro
C
Si la carte SD est absente, le message suivant apparaît :
Jeu 05/09/09 - 16:07 0W
Erreur carte SD paramètre sauvegardé
dans la mémoire flash
82
C
Page 83

AVANCÉES
CONFIGURATION MONITEUR PRINCIPAL /
SECONDAIRE
Accéder au menu Setup > Avancées > Adresses >
Moniteur.
Sam 05/09/09 16:07
Principal
Principal multiple
Secondaire
Sélectionner le réglage en appuyant sur l'icône située à
droite.
Respecter les limites décrites dans les schémas
d'installation de la feuille technique FT/SBC/22
CONFIGURATION ADRESSE MULTIPLE
À l'activation de la fonction « Adresse multiple », le moniteur
sonne à chaque appel d'une adresse simplebus comprise
dans la plage confi gurée.
Accéder au menu Setup > Avancées > Adresses > Adresse
multiple.
Jeu 21/06/12 - 16:07 0W
Adresse minimum
Adresse maximum
1 Confi gurer adresse initiale de la plage.
2 Confi gurer adresse fi nale de la plage.
1
2
CONFIGURATION ADRESSE INTERCOM
Accéder au menu Setup > Avancées > Adresses > Adresse
intercom.
Jeu 21/06/12 - 16:07 0W
Sélectionner l'adresse intercom à attribuer au moniteur.
83
Page 84

AVANCÉES
CALIBRAGE ÉCRAN TACTILE
Si l'écran tactile ne répond pas correctement au toucher, il
est possible de le calibrer.
Accéder au menu Setup > Avancées > Calibrage Touch.
Jeu 05/09/09 - 16:07 0W
B
Langue
CONFIRMER
LE CALIBRAGE ?
B
Régler date et heure
B
OUI
NON
Reset configuration
Confi rmer en appuyant sur l'icône
Pour calibrer l'écran tactile, il suffi t d'appuyer sans relâcher
pendant 2 secondes sur la croix qui apparaîtra en 3
positions différentes.
Garder le doigt dessus 2 secondes
OUI
.
PROGRAMMER ENTRÉE
Il est possible d'attribuer 2 différentes fonctions à l'entrée
CFP-CFP présente sur la barrette de connexion de l'étrier :
• Appel palier (CFP)
• Fonction alarme (envoi d'un signal d'alarme simplebus au
standard).
Accéder au menu Setup > Avancées > Confi gurer entrée.
Jeu 21/06/12 - 16:07 0W
Fonction CFP
Fonction alarme
Sélectionner la fonction en appuyant sur l'icône située à
droite.
84
Page 85

AVANCÉES
RESET TOTAL
La fonction élimine toutes les programmations faites par
l'usager, les réglages visiophoniques, domotiques et du
système d'alarme, en remettant le système à l'état d'origine
réglé en usine.
Accéder au menu Setup > Avancées > Reset total.
Jeu 05/09/09 - 16:07 0W
B
Langue
Confirmer reset configuration
usager et installation ?
B
Régler date et heure
B
OUI
NON
Confi rmer en appuyant sur l'icône
OUI
.
RÀZ CONFIGURATIONS
La fonction élimine toutes les programmations
visiophoniques, domotiques et du système d'alarme.
Accéder au menu Setup > Avancées > Reset confi guration.
Jeu 21/06/12 - 16:07 0W
B
Langue
Confirmer reset
configuration installation ?
B
Régler date et heure
B
OUI
NON
Confi rmer en appuyant sur l'icône
OUI
.
MISE À JOUR CONFIGURATIONS
La fonction met à jour toutes les programmations
visiophoniques, domotiques et du système d'alarme.
Accéder au menu Setup > Avancées > Mise à jour
confi guration.
Jeu 21/06/12 - 16:07 0W
B
Langue
Confirmer mise
à jour configuration ?
B
Régler date et heure
B
OUI
NON
Confi rmer en appuyant sur l'icône
OUI
.
TEMPS DE TRANSMISSION
Le temps de transmission détermine la vitesse à laquelle
les commandes sont envoyées sur la ligne des données.
Plus la valeur est élevée, plus le temps entre l'envoi d'une
commande et l'autre sera long.
Ex. Supposons d'avoir 5 lumières sur une surface et
d'envoyer la commande d'allumage à chacune.
• Si la valeur est confi gurée sur 1, 1 dixième de seconde
s'écoulera entre l’allumage d'une lumière et l'autre.
• Si la valeur est confi gurée sur 5, 5 dixièmes de seconde
s'écouleront entre l’allumage d'une lumière et l'autre.
MISE À JOUR PRODUIT
Pour une mise à jour logicielle du produit, s'adresser au
propre installateur ou directement au service après-vente
Comelit Group S.p.A..
85
Page 86

INLEIDING
√ WAARSCHUWINGEN
√ BESCHRIJVING VAN DE MONITOR
√ FUNCTIE VAN DE TOETSEN
√ MENU PLANUX MEMO VIDEO
√ UITLEG VAN DE KLEUREN
Page 87

INLEIDING
WAARSCHUWINGEN
Comelit Group S.p.A. is niet verantwoordelijk voor oneigenlijk gebruik van de apparatuur, voor wijzigingen die om
welke reden dan ook door derden zijn aangebracht, en voor het gebruik van accessoires en materialen die niet door de
fabrikant zijn aangeleverd. Let op! Neem het volgende in acht om het risico van storingen en elektrische schokken tot
een minimum te beperken:
• Maak het toestel niet open en voer niet zelf reparaties uit. Schakel indien nodig gekwalifi ceerd personeel in.
• Voorkom het binnendringen van vreemde voorwerpen of vloeistoffen in de toestellen.
• Reinigen met een met water bevochtigde doek. Vermijd het gebruik van alcohol en andere agressieve producten.
Fonts are (c) Bitstream (see below). DejaVu changes are in public domain.
Glyphs imported from Arev fonts are (c) Tavmjong Bah (see below)
Bitstream Vera Fonts Copyright
-----------------------------Copyright (c) 2003 by Bitstream, Inc. All Rights Reserved. Bitstream Vera is a trademark of Bitstream, Inc.
Permission is hereby granted, free of charge, to any person obtaining a copy of the fonts accompanying
this license ("Fonts") and associated documentation fi les (the "Font Software"), to reproduce and distribute
theFont Software, including without limitation the rights to use, copy, merge, publish, distribute, and/or sell
copies of the Font Software, and to permit persons to whom the Font Software is furnished to do so, subject
to the following conditions:
The above copyright and trademark notices and this permission notice shall be included in all copies of one
or more of the Font Software typefaces.
The Font Software may be modifi ed, altered, or added to, and in particular the designs of glyphs or
characters in the Fonts may be modifi ed and additional glyphs or characters may be added to the Fonts, only
if the fonts are renamed to names not containing either the words "Bitstream" or the word "Vera".
This License becomes null and void to the extent applicable to Fonts or Font Software that has been modifi ed
and is distributed under the "Bitstream Vera" names.
The Font Software may be sold as part of a larger software package but no copy of one or more of the Font
Software typefaces may be sold by itself.
THE FONT SOFTWARE IS PROVIDED "AS IS", WITHOUT WARRANTY OF ANY KIND, EXPRESS OR
IMPLIED, INCLUDING BUT NOT LIMITED TO ANY WARRANTIES OF MERCHANTABILITY, FITNESS
FOR A PARTICULAR PURPOSE AND NONINFRINGEMENT OF COPYRIGHT, PATENT, TRADEMARK,
OR OTHER RIGHT. IN NO EVENT SHALL BITSTREAM OR THE GNOME FOUNDATION BE LIABLE
FOR ANY CLAIM, DAMAGES OR OTHER LIABILITY, INCLUDING ANY GENERAL, SPECIAL, INDIRECT,
INCIDENTAL, OR CONSEQUENTIAL DAMAGES, WHETHER IN AN ACTION OF CONTRACT, TORT OR
OTHERWISE, ARISING FROM, OUT OF THE USE OR INABILITY TO USE THE FONT SOFTWARE OR
FROM OTHER DEALINGS IN THE FONT SOFTWARE.
Except as contained in this notice, the names of Gnome, the Gnome Foundation, and Bitstream Inc., shall not
be used in advertising or otherwise to promote the sale, use or other dealings in this Font Software without
prior written authorization from the Gnome Foundation or Bitstream Inc., respectively. For further information,
contact: fonts at gnome dot org.
Arev Fonts Copyright
-----------------------------Copyright (c) 2006 by Tavmjong Bah. All Rights Reserved.
Permission is hereby granted, free of charge, to any person obtaining a copy of the fonts accompanying this
license ("Fonts") and associated documentation fi les (the "Font Software"), to reproduce and distribute the
modifi cations to the Bitstream Vera Font Software, including without limitation the rights to use, copy, merge,
publish, distribute, and/or sell copies of the Font Software, and to permit persons to whom the Font Software
is furnished to do so, subject to the following conditions:
The above copyright and trademark notices and this permission notice shall be included in all copies of one
or more of the Font Software typefaces.
The Font Software may be modifi ed, altered, or added to, and in particular the designs of glyphs or
characters in the Fonts may be modifi ed and additional glyphs or characters may be added to the Fonts,
only if the fonts are renamed to names not containing either the words "Tavmjong Bah" or the word "Arev".
This License becomes null and void to the extent applicable to Fonts or Font Software that has been modifi ed
and is distributed under the "Tavmjong Bah Arev" names.
The Font Software may be sold as part of a larger software package but no copy of one or more of the Font
Software typefaces may be sold by itself.
THE FONT SOFTWARE IS PROVIDED "AS IS", WITHOUT WARRANTY OF ANY KIND, EXPRESS OR
IMPLIED, INCLUDING BUT NOT LIMITED TO ANY WARRANTIES OF MERCHANTABILITY, FITNESS
FOR A PARTICULAR PURPOSE AND NONINFRINGEMENT OF COPYRIGHT, PATENT, TRADEMARK,
OR OTHER RIGHT. IN NO EVENT SHALL TAVMJONG BAH BE LIABLE FOR ANY CLAIM, DAMAGES
OR OTHER LIABILITY, INCLUDING ANY GENERAL, SPECIAL, INDIRECT, INCIDENTAL, OR
CONSEQUENTIAL DAMAGES, WHETHER IN AN ACTION OF CONTRACT, TORT OR OTHERWISE,
ARISING FROM, OUT OF THE USE OR INABILITY TO USE THE FONT SOFTWARE OR FROM OTHER
DEALINGS IN THE FONT SOFTWARE.
Except as contained in this notice, the name of Tavmjong Bah shall not be used in advertising or otherwise
to promote the sale, use or other dealings in this Font Software without prior written authorization from
Tavmjong Bah. For further information, contact: tavmjong @ free. fr.
87
Page 88

INLEIDING
BESCHRIJVING VAN DE MONITOR
Sab 05/09/09 16:07
VIDEOFONIA
1
34
5
1 Spreektoets
2 Deuropenertoets
3 Menutoets
4 Toets helderheid
5 Toets contrast
6 Toets kleur
7 Programmeerbare toets 1
8 Programmeerbare toets 2
9 Toets beeldoproep (programmeerbaar)
10 Toets privacy / arts
11 Touchscreen
12 Sensor sleutel
SETUP
IA
67
8910
FUNCTIE VAN DE TOETSEN
Spreektoets: hiermee kan het gesprek met het
entreepaneel worden in- of uitgeschakeld.
Deuropenertoets: hiermee kan het eraan
11
12
2
gekoppelde slot worden geopend.
Menutoets: hiermee kunt u het menu van de
monitor Planux Memo Video openen of afsluiten.
Toets helderheid: hiermee kan de helderheid van
het beeld op de monitor worden ingesteld. Om er de
waarde van te wijzigen, drukt u op de toets terwijl
een videogesprek aan de gang is.
Toets contrast: hiermee kan het contrast van het
beeld op de monitor worden ingesteld. Om er de
waarde van te wijzigen, drukt u op de toets terwijl
een videogesprek aan de gang is.
Toets kleur: hiermee kan de kleur van het beeld
op de monitor worden geregeld. Om er de waarde
van te wijzigen, drukt u op de toets terwijl een
videogesprek aan de gang is.
Programmeerbare toets 1: af fabriek ingesteld als
'algemene relaissturing' (programmeerbaar).
Programmeerbare toets 2: af fabriek ingesteld als
'bellen naar portierscentrale' (programmeerbaar).
Toets beeldoproep: hiermee kan de monitor worden
ingeschakeld en kan de video van het entreepaneel
worden weergegeven (programmeerbaar).
Toets privacy-/artsfunctie
• Met de privacyfuncie kan de oproep vanaf het
entreepaneel en vanaf de centrale worden
uitgeschakeld.
• Met de artsfunctie kan de deuropener automatisch in
werking treden bij een oproep vanaf het entreepaneel.
• Met de privacy- en artsfunctie kan, naast de
uitschakeling van de deurtelefoon zoals bij de
privacyfunctie, de deuropener automatisch in werking
treden bij een oproep vanaf het entreepaneel.
De rode led geeft aan dat de gekozen functie
88
geactiveerd is.
(programmeerbaar)
:
Page 89

INLEIDING
MENU PLANUX MEMO VIDEO
Om door het menu te lopen raakt u met een vinger het
symbool van de gewenste functie aan.
Druk op de toets om naar het hoofdmenu te gaan
Sab 05/09/09 16:07
VIDEOFONIE
Met het symbool
het hoofdmenu.
Met het symbool
scherm.
Sab 05/09/09 16:07
kunt u onmiddellijk terugkeren naar
keert u terug naar het vorige
SET-UP
UITLEG VAN DE KLEUREN
De symbolen van de menu's veranderen van kleur op
basis van hun status en van hun functie:
: geeft aan dat de functie niet ingeschakeld is.
GEEL: geeft aan dat de functie ingeschakeld is.
GROEN: door op het symbool te drukken wordt de
ON
eraan gekoppelde functie ingeschakeld.
ROOD: door op het symbool te drukken wordt de
OFF
eraan gekoppelde functie uitgeschakeld.
89
Page 90

VIDEOFONIE
√ EEN OPROEP BEANTWOORDEN
√ BESCHRIJVING VAN HET MENU VIDEOFONIE
√ VIDEOGEHEUGEN
√ EEN OPNAME WEERGEGEVEN
√ EEN OPNAME VERWIJDEREN
√ HANDSFREEFUNCTIE
√ BELTOON INSTELLEN
√ VOLUMEREGELING
√ RELAIS
√ NAAM VAN DE RELAIS WIJZIGEN
√ CAMERA'S
√ NAAM VAN DE CAMERA'S WIJZIGEN
√ INTERCOMOPROEPEN
√ NAAM VAN DE INTERCOMOPROEPEN WIJZIGEN
Page 91

VIDEOFONIE
EEN OPROEP BEANTWOORDEN
De leds van de spreek- en deuropenertoetsen knipperen
na een oproep.
Druk op de toets
om de audioverbinding met het
oproepende entreepaneel in te schakelen.
Druk op de toets
om het bijbehorende slot te activeren.
BESCHRIJVING VAN HET MENU VIDEOFONIE
Druk in het hoofdmenu op het symbool om naar het
menu videofonie te gaan.
Do 21/06/12 - 16:07 0W
1
Videogeheugen
ON
4
ON
Handsfree
Beltonen instellen
Volumeregeling
Do 21/06/12 - 16:07 0W
Relais
Camera's
Intercomoproepen
Hoofdcentrale
OFF
2
OFF
3
1
3
3
1 Beschikbare functies in het menu videofonie.
2 De gekoppelde functie uitschakelen.
3 Scrollen door de pagina.
4 De gekoppelde functie inschakelen.
VIDEOGEHEUGEN
Als de functie Videogeheugen ingeschakeld is, kan bij het
verzenden van een oproep het beeld door de camera van
het entreepaneel worden opgenomen. Maximaal kunnen
100 opnames van elk max. 10 seconden worden gemaakt.
Ga naar het menu Videofonie > Videogeheugen om de lijst
met aanwezige opnames weer te geven.
Do 05/09/09 - 16:07 0W
3
C
11/01/2001 10:21 09/01/2001 8:22
07/01/2001 18:50
1 Niet-bekeken opnames (blauwe rand).
2 Reeds bekeken opnames (gele rand).
3 Opname verwijderen.
De opnames worden in .avi-formaat op de SD-kaart
opgeslagen in de map ‘Video’ en kunnen ook op een pc met
Windows Media Player worden afgespeeld. Als er geen SDkaart geplaatst is, worden de opnames in het geheugen van
de Planux Manager opgeslagen (max. 2 opnames).
05/01/2001 9:48
1
2
91
Page 92

VIDEOFONIE
EEN OPNAME WEERGEVEN
Druk op een symbool om de bijbehorende opname weer te
geven.
Na het afspelen (max. 10 seconden) keert het systeem
automatisch terug naar het vorige scherm.
EEN OPNAME VERWIJDEREN
Als u een van de opnames wilt verwijderen, drukt u op het
symbool C en vervolgens op het symbool van de opname
die u wilt verwijderen. Bevestig daarna uw keuze.
Wilt u het videobericht
verwijderen?
HANDSFREEFUNCTIE
Met de handsfreefunctie kan de audioverbinding na een
ontvangen oproep worden ingeschakeld zonder dat de toets
hoeft te worden ingedrukt.
BELTOON INSTELLEN
Ga naar het menu Videofonie > Beltoon instellen om de
beltonen van de Planux Manager te beheren.
Selecteer het type oproep waarvan u de beltoon wilt wijzigen
door op het gewenste symbool te drukken.
Do 21/06/12 - 16:07 0W
Externe oproep
Oproep centrale
Oproep etagebel
Oproep meerv. adres
Druk op de gewenste naam om de beltoon te beluisteren en druk
daarna op het symbool aan de rechterkant om de beltoon op te slaan.
Do 05/09/09 - 16:07 0W
Beltoon 1
Beltoon 2
JA NEE
Beltoon 3
Beltoon 4
Er kunnen aangepaste beltonen worden toegevoegd. De
bestanden moeten in .wav-formaat, 8Khz, mono, 16 bit, zijn.
Plaats de melodieën in de map ‘Wav’ van de SD-kaart om ze
in het speciale menu weer te geven.
92
Page 93

VIDEOFONIE
VOLUMEREGELING
Ga naar het menu Videofonie > Volumeregeling om
het volume van de beltoon, de audio, de toetsen of de
alarmtonen te regelen.
Do 21/06/12 - 16:07 0W
Beltoon
Audio
Audio intercom
Toetsen
Selecteer de functie waarvan u het volume wilt wijzigen
door op het bijbehorende symbool te drukken. Zodra het
instellingsscherm verschijnt, gebruikt u de symbolen + en om het volume te wijzigen. Druk vervolgens ter bevestiging
op het symbool
.
Do 05/09/09 - 16:07 0W
B
Beltoon
-
B
Audio
+
RELAIS
Ga naar het menu Videofonie > Relais om de lijst met
aanwezige relais weer te geven.
Do 05/09/09 - 16:07 0W
Relais 1
Relais 2
Relais 3
2
ABC
1 Beschikbare relais. Andere toestellen kunnen door de
installateur worden toegevoegd.
2 Naam relais wijzigen.
Als u een relais uit de lijst wilt bedienen, drukt u op het
bijbehorende symbool.
Relais 4
Do 05/09/09 - 16:07 0W
Algemene relaissturing
Relaissturing uitgevoerd
1
Als er geen relais is, verschijnt de melding "APPARAA T NIET
AANWEZIG".
93
Page 94

VIDEOFONIE
Do 05/09/09 - 16:07 0W
Algemene relaissturing
Apparaat niet aanwezig
NAAM VAN DE RELAIS WIJZIGEN
Druk op het symbool
het relais waarvan u de naam wilt wijzigen.
Naam
Typ de naam en/of het gewenste nummer voor de
beschrijving van het relais en druk ter bevestiging op het
symbool
.
Druk op het symbool
numerieke toetsenbord.
ABC
en vervolgens op het symbool van
Do 05/09/09 - 16:07 0W
123
om over te schakelen naar het
CAMERA'S
Ga naar het menu Videofonie > Camera's om de lijst met
aanwezige camera's weer te geven.
Do 05/09/09 - 16:07 0W
Camera 1
Camera 2
Camera 3
ABC
2
1 Beschikbare camera's. Aan elk symbool kunnen maximaal
3 camera's gekoppeld worden, die samen met de camera
van het entreepaneel na elkaar kunnen worden bekeken.
2 Naam camera's wijzigen.
Als u het beeld van een camera uit de lijst wilt weergeven,
drukt u op het bijbehorende symbool.
Camera 4
1
94
Page 95

VIDEOFONIE
Raak terwijl het beeld op het scherm wordt weergegeven
het scherm aan om naar het menu terug te keren. Druk
nogmaals op een symbool om andere camera's weer te
geven.
Als er geen camera is, verschijnt de melding "APPARAAT
NIET AANWEZIG".
Do 05/09/09 - 16:07 0W
Algemene relaissturing
Apparaat niet aanwezig
NAAM VAN DE CAMERA'S WIJZIGEN
Druk op het symbool
de groep camera's waarvan u de naam wilt wijzigen.
Naam
Typ de naam en/of het gewenste nummer voor de
beschrijving van de camera en druk ter bevestiging op het
symbool
Druk op het symbool
numerieke toetsenbord.
ABC
en vervolgens op het symbool van
Do 05/09/09 - 16:07 0W
.
123
om over te schakelen naar het
95
Page 96

VIDEOFONIE
INTERCOMOPROEPEN
Ga naar het menu Videofonie > Intercomoproepen om de
lijst met aanwezige intercomoproepen weer te geven.
Do 05/09/09 - 16:07 0W
Intercomoproep 1
Intercomoproep 2
Intercomoproep 3
2
ABC
1 Beschikbare intercomoproepen.
2 Naam van de intercomoproep wijzigen.
Druk op het symbool om een intercomoproep uit te voeren.
Intercomoproep 4
Do 05/09/09 - 16:07 0W
Algemene relaissturing
Intercomoproep uitgevoerd
NAAM VAN DE INTERCOMOPROEPEN WIJZIGEN
Druk op het symbool
de intercomoproep waarvan u de naam wilt wijzigen.
1
Naam
Typ de naam en/of het gewenste nummer voor de
beschrijving van de intercomoproep en druk ter bevestiging
op het symbool
Druk op het symbool
numerieke toetsenbord.
ABC
en vervolgens op het symbool van
Do 05/09/09 - 16:07 0W
.
123
om over te schakelen naar het
96
Page 97

SET-UP
√ BESCHRIJVING VAN HET MENU SET-UP
√ TAAL
√ CONDITIONERINGEN
√ TOETSENBORD- EN TOUCHSCREENVERGRENDELING
√ DATUM EN TIJD INSTELLEN
√ INFORMATIE
Page 98

SET-UP
BESCHRIJVING VAN HET MENU SET-UP
Druk in het hoofdmenu op het symbool
menu set-up te gaan.
Do 21/06/12 - 16:07 0W
Taal
Toetsen en touchscr. vergr.
Datum en tijd instellen
Informatie
Do 21/06/12 - 16:07 0W
Conditioneringen
Geavanceerd
1 Beschikbare functies in het menu set-up.
2 Scrollen door de pagina.
om naar het
1
2
1
2
TAAL
De taal van de menu's van de Planux Manager kan worden
gewijzigd door een van de geïnstalleerde talen te kiezen. Ga
naar het menu Set-up > Taal.
Druk op een symbool om de betreffende taal te kiezen.
Do 05/09/09 - 16:07 0W
Italiano
English
Regen
3
Français
Deutsch
1 T aal in gebruik.
2 Scrollen door de pagina.
3 Beschikbare talen.
CONDITIONERINGEN
Dit menu is alleen beschikbaar als het systeem is uitgerust
met geconditioneerde uitgangen en als de monitor is
ingesteld als Master.
Do 21/06/12 - 16:07 0W
ON
Geconditioneerde uitgang 1
ON
4
Geconditioneerde uitgang 2
ON
Geconditioneerde uitgang 3
Geconditioneerde uitgang 4
ON
1 Beschikbare uitgangen.
2 Scrollen door de pagina.
3 Bijbehorende uitgang uitschakelen.
4 Bijbehorende uitgang inschakelen.
98
OFF
OFF
OFF
OFF
1
2
1
2
3
Page 99

SET-UP
TOETSENBORD- EN
TOUCHSCREENVERGRENDELING
De functie toetsenbord- en touchscreenvergrendeling
schakelt de toetsen en het touchscreen van de Planux
Manager tijdelijk uit. Na 60 seconden of na een ontvangen
oproep worden de functies opnieuw geactiveerd.
Druk op het symbool van de toetsenbord- en
touchscreenvergrendeling om de functie in te schakelen.
Do 05/09/09 - 16:07 0W
Wilt u het toetsenbord en
touchscreen gedurende 60 seconden
Ta al
seconden vergrendelen?
Datum en tijd instellen
Informatie
Bevestig uw keuze met het symbool JA.
Do 05/09/09 - 16:07 0W
Toetsenbordvergrendeling
Ta al
Datum en tijd instellen
Informatie
JA
geactiveerd
NEE
DATUM EN TIJD INSTELLEN
Ga voor het instellen van de datum en de tijd naar het menu
Set-up > Datum en tijd instellen.
Stel de verschillende velden in met behulp van de symbolen
+ en - . Druk daarna op het symbool
Do 05/09/09 - 16:07 0W
1
05
+
-
-
05
16:07
-
1 Dag.
2 Maand.
3 Jaar.
4 Tijd.
om te bevestigen.
+
-
09
+
+
2
3
4
INFORMATIE
Ga naar het menu informatie om de geïnstalleerde
softwareversie weer te geven.
Do 21/06/12 - 16:07 0W
Volume instellen
VERS. SW: 1.5
VERS. EE: 1.3.2 6214C
Beltonen instellen
SB CODE: 5P RANGE: 0 - 0
Intercomadres : 5
B
SLAVE
Toetsen prog.
99
Informatie
Page 100

GEAVANCEERD
√ MENU GEAVANCEERD OPENEN
√ BESCHRIJVING VAN HET MENU GEAVANCEERD
√ TOETSEN PROGRAMMEREN
√ VIDEOGEHEUGEN CONFIGUREREN
√ RELAIS
√ RELAIS TOEVOEGEN
√ RELAISCODE WIJZIGEN
√ RELAIS VERWIJDEREN
√ CAMERA'S
√ CAMERA'S TOEVOEGEN
√ CAMERACODE WIJZIGEN
√ CAMERA'S VERWIJDEREN
√ INTERCOMOPROEPEN
√ INTERCOMOPROEPEN TOEVOEGEN
√ INTERCOMADRES WIJZIGEN
√ INTERCOMOPROEP VERWIJDEREN
√ INTERCOMGROEP
√ INTERCOMGROEP TOEVOEGEN
√ INTERCOMGROEP VERWIJDEREN/WIJZIGEN
√ BESCHRIJVING VAN HET MENU ADRESSEN
√ GRONDPLAATCODE INSTELLEN
√ HOOFDMONITOR / SECUNDAIRE MONITOR INSTELLEN
√ MEERVOUDIG ADRES INSTELLEN
√ INTERCOMADRES INSTELLEN
√ TOUCHSCREEN KALIBREREN
√ INGANG INSTELLEN
√ TOTALE RESET
√ CONFIGURATIE RESETTEN
√ CONFIGURATIES BIJWERKEN
√ OVERDRACHTTIJD
√ PRODUCT BIJWERKEN
 Loading...