


MT 3451
IT
MANUALE
TECNICO
EN
TECHNICAL
MANUAL
FR
MANUEL
TECHNIQUE
NL
TECHNISCHE
HANDLEIDING
DE
TECHNISCHES
HANDBUCH
ES
MANUAL
TÉCNICO
Manuale tecnico programmazione posto esterno Art. 3451/FR
Technical manual for programming external unit Art. 3451/FR
Manuel technique programmation poste extérieur Art. 3451/FR
Technische handleiding programmering deurstation art. 3451/FR
Technisches Handbuch Programmierung der Außenstelle Art. 3451/FR
Manual técnico de programación de la placa externa art. 3451/FR
www.comelitgroup.com

Avvertenze
IT
IT
• Effettuare l’installazione seguendo scrupolosamente le istruzioni fornite dal costruttore ed in conformità alle norme vigenti.
• Tutti gli apparecchi devono essere destinati esclusivamente all’uso per cui sono stati concepiti. Comelit Group S.p.A. declina ogni responsabilità per un
utilizzo improprio degli apparecchi, per modifi che effettuate da altri a qualunque titolo e scopo, per l’uso di accessori e materiali non originali.
• Tutti i prodotti sono conformi alle prescrizioni delle direttive 2006/95/CE (che sostituisce la direttiva 73/23/CEE e successivi emendamenti) e ciò è attestato
dalla presenza della marcatura CE sugli stessi.
• Non inserire oggetti nè versare liquidi all’interno del dispositivo.
• Evitare di porre i fi li di montante in prossimità di cavi di alimentazione (230/400V).
• Gli interventi di installazione, montaggio e assistenza agli apparecchi elettrici devono essere eseguiti esclusivamente da elettricisti specializzati.
• Togliere l’alimentazione prima di effettuare qualsiasi manutenzione.
Sommario
Descrizione generica................................3
PRINCIPALI CARATTERISTICHE .................................................. 3
GESTIONE ESTERNA DEI DATI .................................................... 3
Utilizzo .......................................................3
MODALITÀ DI NAVIGAZIONE ........................................................ 3
INSERIMENTO CARATTERI SPECIALI ......................................... 3
FEEDBACK .................................................................................... 3
Auto diagnosi ............................................4
Impostare lingua ........................................................ 4
Impostare il tipo di download ................................... 4
Menu programmazione ............................4
Accedere al menu programmazione ........................ 4
1. Gestione dati .........................................4
1.1. Nomi ..................................................................... 4
1.1.1 INSERIMENTO NOMI ............................................................ 4
1.1.2 MODIFICA NOMI ................................................................... 5
1.1.3 CANCELLAZIONE NOMI ...................................................... 5
1.1.3 AZZERA TUTTI NOMI ............................................................ 6
1.2. Password ............................................................. 6
1.2.1 INSERISCI PASSWORD ....................................................... 6
1.2.2 MODIFICA PASSWORD ........................................................ 6
1.2.3 CANCELLA PASSWORD ...................................................... 6
1.2.3 AZZERA PASSWORD ...........................................................6
1.3. Chiavi digitali ....................................................... 7
1.3.1 INSERISCI CHIAVE ............................................................... 7
1.3.2 MODIFICA CHIAVE ............................................................... 7
1.3.3 CANCELLA CHIAVE .............................................................. 7
1.2.3 AZZERA CHIAVI .................................................................... 7
1.4. Supercodice ........................................................ 7
1.4.1 INSERISCI NUOVO ............................................................... 7
1.4.1 RIPRISTINA DEFAULT .......................................................... 7
2.3. Scegli lingua ........................................................ 10
2.4. Seconda Lingua .................................................. 10
2.5. Gestione chiamata .............................................. 10
STANDARD - SIMPLEBUS (default) .................................. 10
STANDARD - SIMPLEBUS TOP ........................................ 10
CODICE INDIRETTO - SIMPLEBUS o SIMPLEBUS TOP 10
IMMOTEC STANDARD ....................................................... 11
IMMOTEC INDIRETTO ....................................................... 11
2.6. Controllo accessi ................................................ 11
2.7. Solo nome ............................................................ 12
2.8. Messaggio iniziale .............................................. 12
2.8.1 MODIFICA .............................................................................12
2.8.2 ATTIVA ...................................................................................12
2.8.3 MESS. STATICO .................................................................... 12
2.9 Screensaver .......................................................... 12
2.10 Sensibilità tastiera ............................................. 12
2.11 Tono tastiera ....................................................... 13
2.12 Sensore proxy .................................................... 13
2.13 Luminosità .......................................................... 13
2.14 Ripristina default ................................................ 13
3. Info .........................................................14
Gestione esterna dei dati .........................14
Software 1249B (IR 003 - SW rev. 2.3 o superiori) ..........14
INSTALLAZIONE DRIVER USB PER COLLEGAMENTO ART.
3451/FR AL PC ...............................................................................14
UTILIZZO DELLA RUBRICA TRAMITE IL SOFTWARE ART.
1249B ............................................................................................. 14
MULTIDOWNLOAD ........................................................................ 14
Collegamento a computer tramite Art. MOXA TCC-
80 20022618 ................................................................ 80
Collegamento all'Art. SK9030 ................................... 80
2. Impostazioni ..........................................7
2.1. Tipo di download ................................................ 7
2.2. Parametri impianto ............................................. 7
2.2.1 PARAMETRI PORTER .......................................................... 7
2.2.1.1 INSERISCI TEMPO FONICA .................................. 7
2.2.1.2 INSERISCI TEMPO APRIPORTA ........................... 8
2.2.1.3 INSERISCI TEMPO RESET .................................... 8
2.2.1.4 VISUALIZZA ............................................................ 8
2.2.1.5 OPZIONI AVANZATE .............................................. 8
2.2.1.5.1 SERRATURA SU SE ..................................... 8
2.2.1.5.2 RELÈ MODULO PORTER ............................. 8
2.2.1.5.3 SERIALE S ..................................................... 9
2.2.1.5.4 MESSAGGI VOCALI ...................................... 9
2.2.1.5.5 CHIAMATA...................................................... 9
2.2.1.5.6 AUTO ACCENSIONE ..................................... 9
2.2.1.5.7 RIPRISTINA DEFAULT................................... 9
2.2.2 INDIRIZZO RS485 ................................................................. 10
2.2.2.1 INDIRIZZO RS485 ..................................................10
2
Descrizione generica
PRINCIPALI CARATTERISTICHE
• Memoria rubrica: 4000 nomi (da 20 caratteri), 4000 password,
4000 chiavi.
• 16 lingue disponibili con possibilità di impostare una seconda
lingua.
• 2 modalità di funzionamento
• Controllo accessi disattivo
• Controllo accessi attivo
• 4 modalità di gestione chiamata Simplebus o Simplebus Top
• Standard
• Codice indiretto
• Immotec standard (per usi futuri)
• Immotec indiretto (per usi futuri)
• Visualizzazione sul display del solo nome senza codice
• Attivazione screensaver
• Possibilità di personalizzare:
• Sensibilità tastiera
• Tono tastiera
• Messaggio iniziale di benvenuto (su 4 righe da 10 caratteri
l'una)
• Messaggi video a riposo della rubrica portanomi
GESTIONE ESTERNA DEI DATI
• Il software Art. 1249B (IR 003 - SW rev. 2.3 o superiori) permette
(solo con controllo accessi disattivo) di: inserire (upload) e leggere
(download) nomi e password tramite connessione a pc via USB o
su linea RS485.
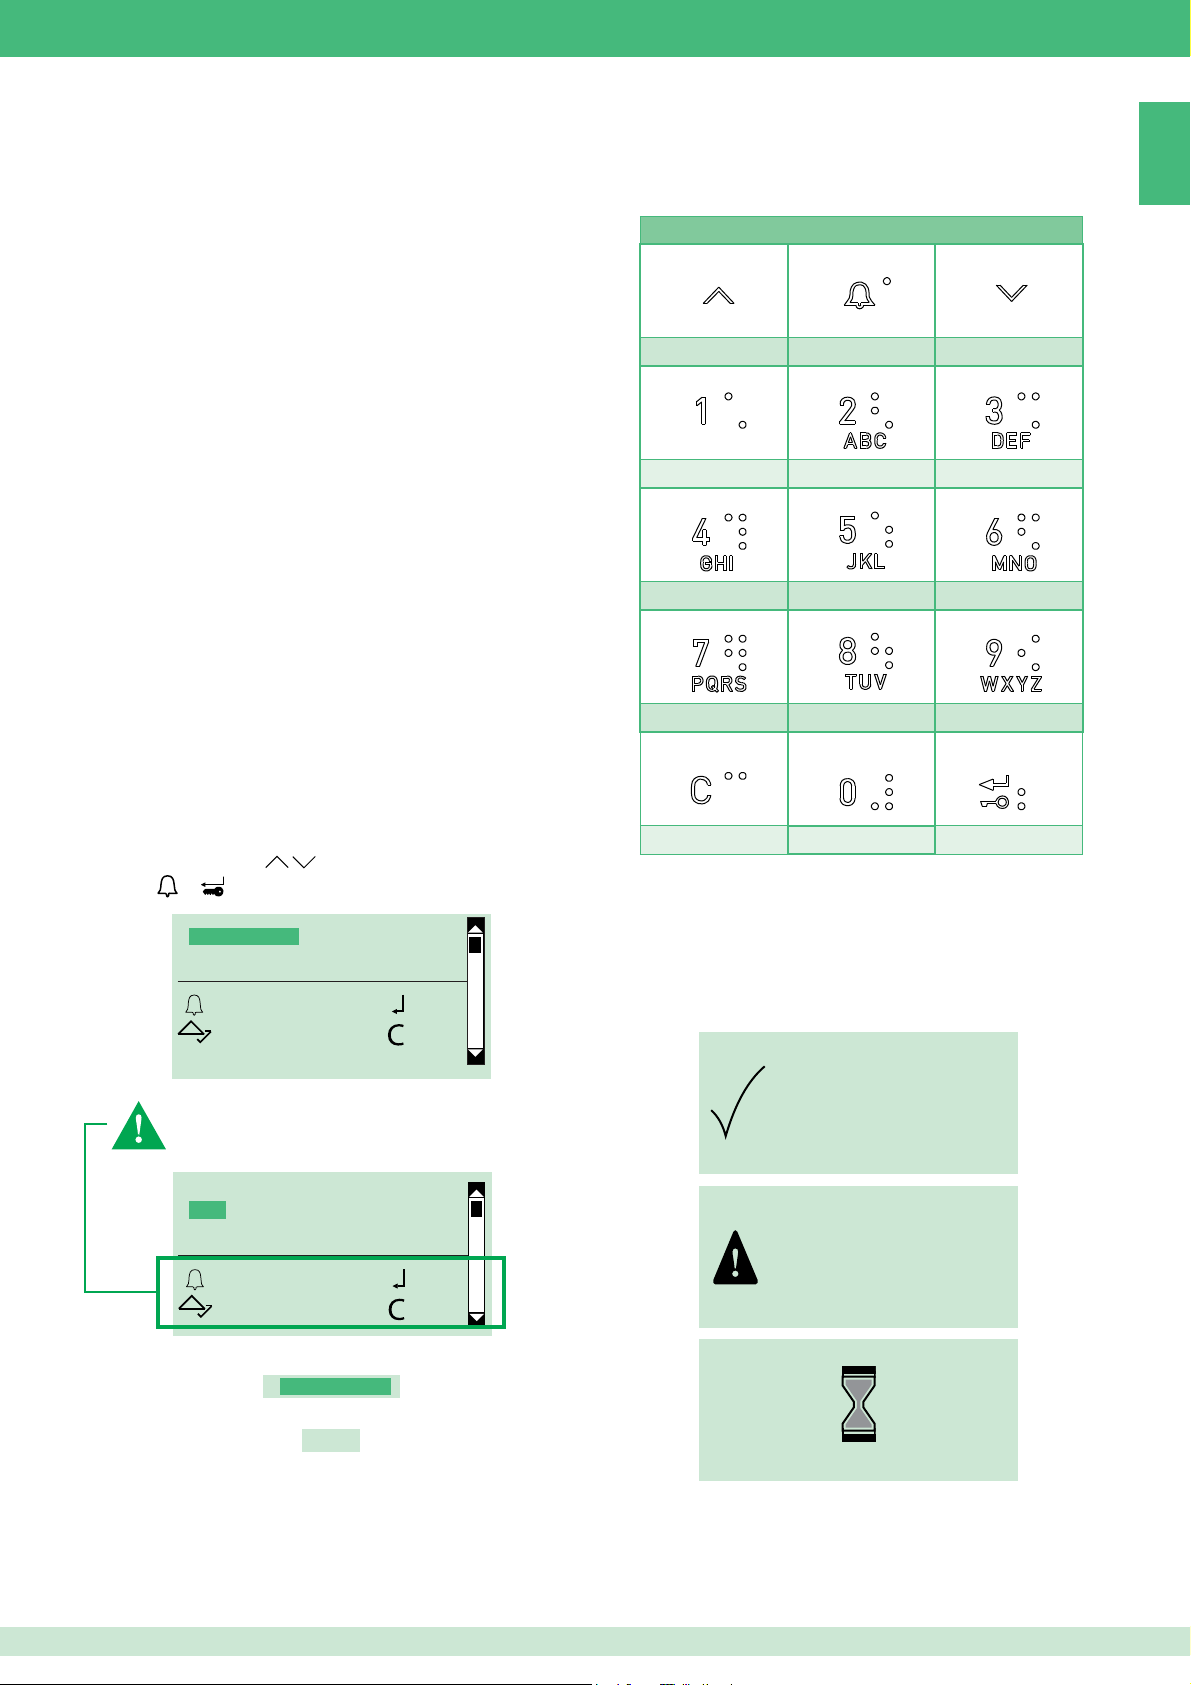
INSERIMENTO CARATTERI SPECIALI
In contesti in cui è consentito immettere caratteri alfanumerici
(ad esempio in gestione dati/nomi/inserimento nomi) digitare
ripetutamente il tasto corrispondente per inserire i caratteri speciali.
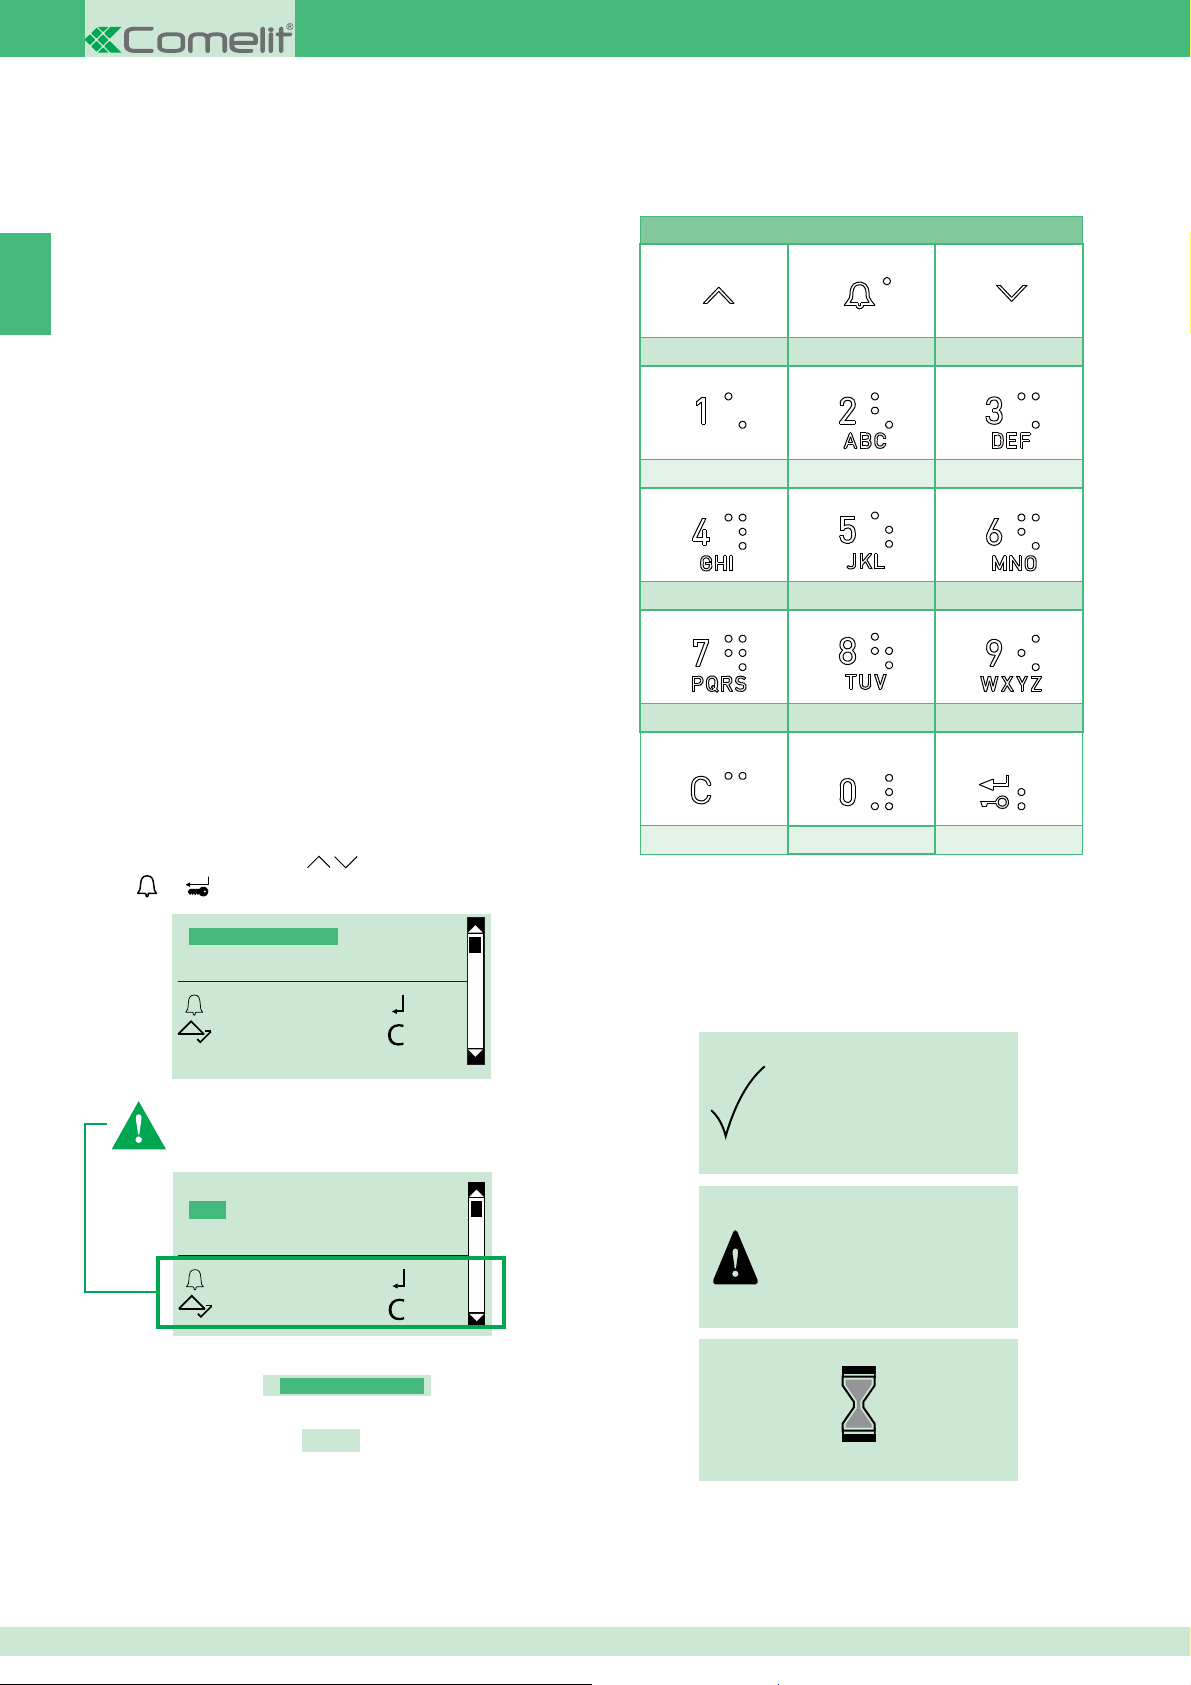
TASTIERA: Caratteri speciali
,;:._-#*"1 ABCÅÄĄÆßČĆ2 DEFÉĘĚ3
GHI4 JKLŁ5 MNOŃÖØÓ6
PQRS7 TUVÜ8 WXYZ9
IT
Utilizzo
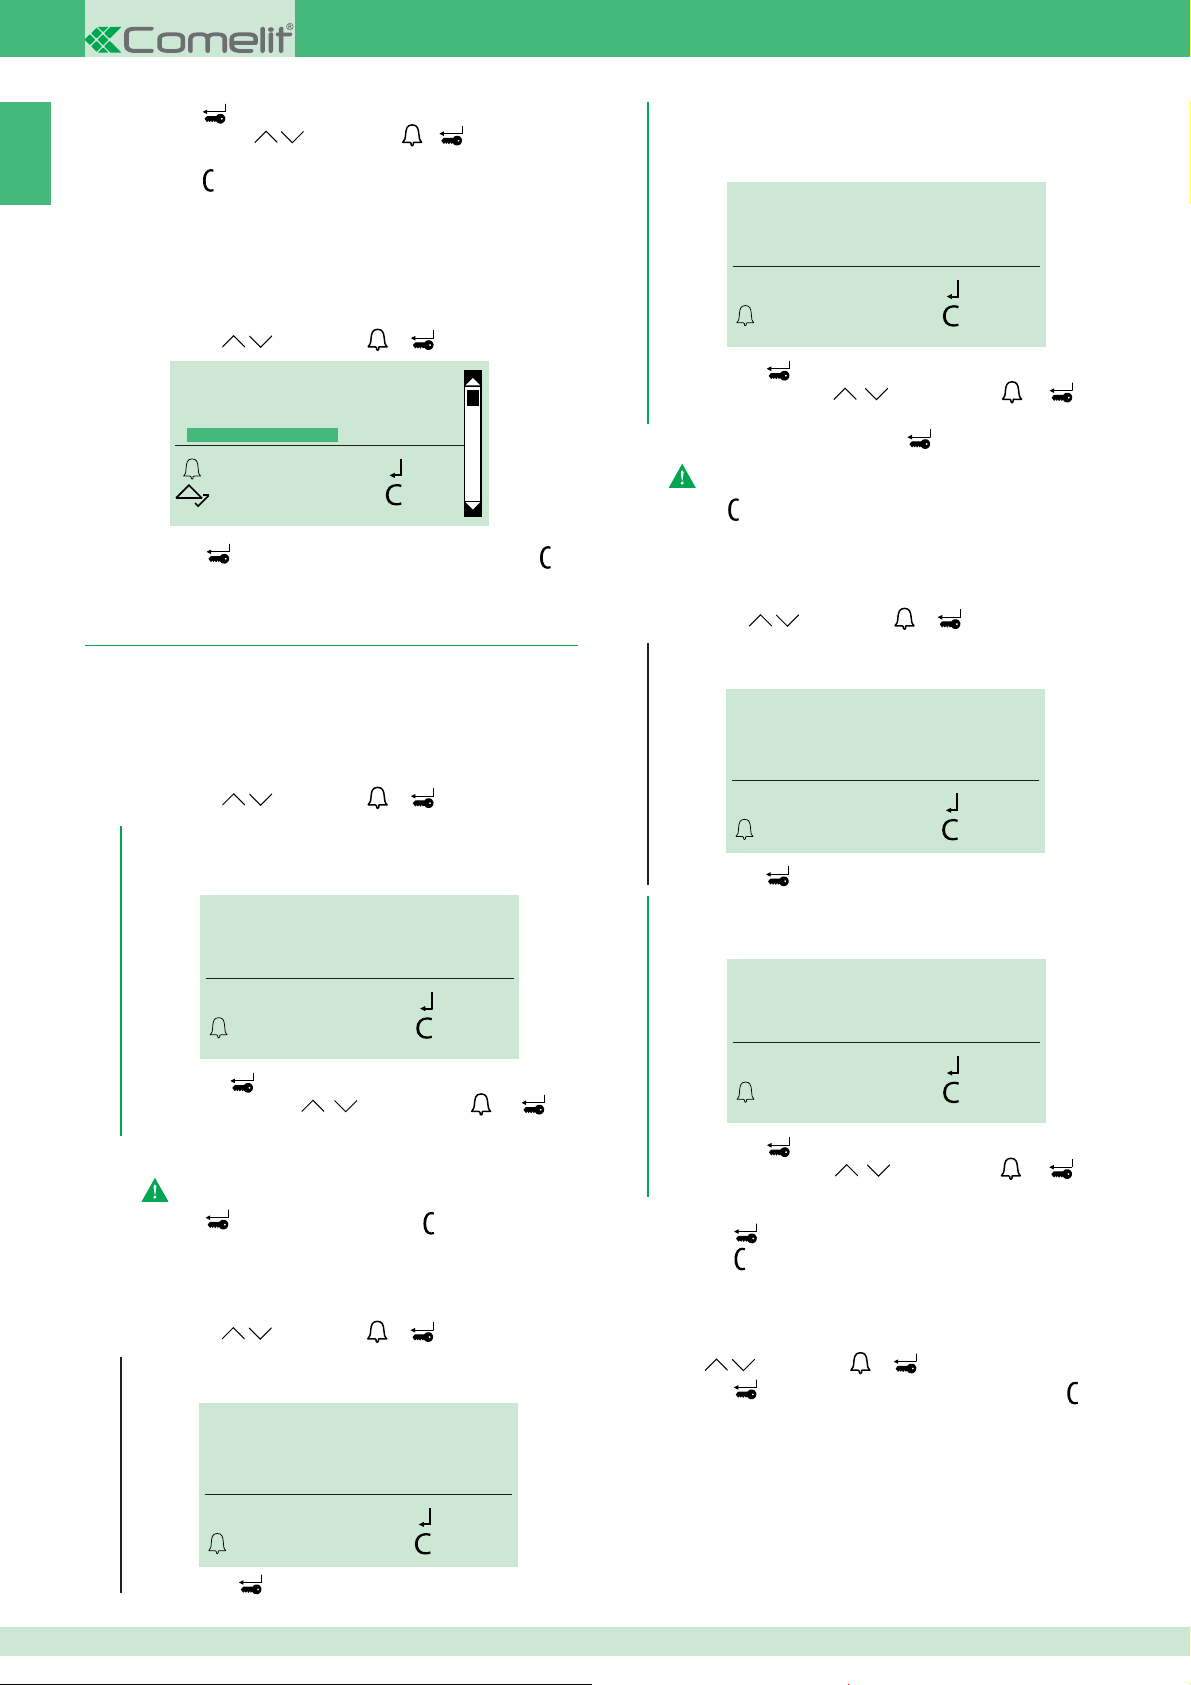
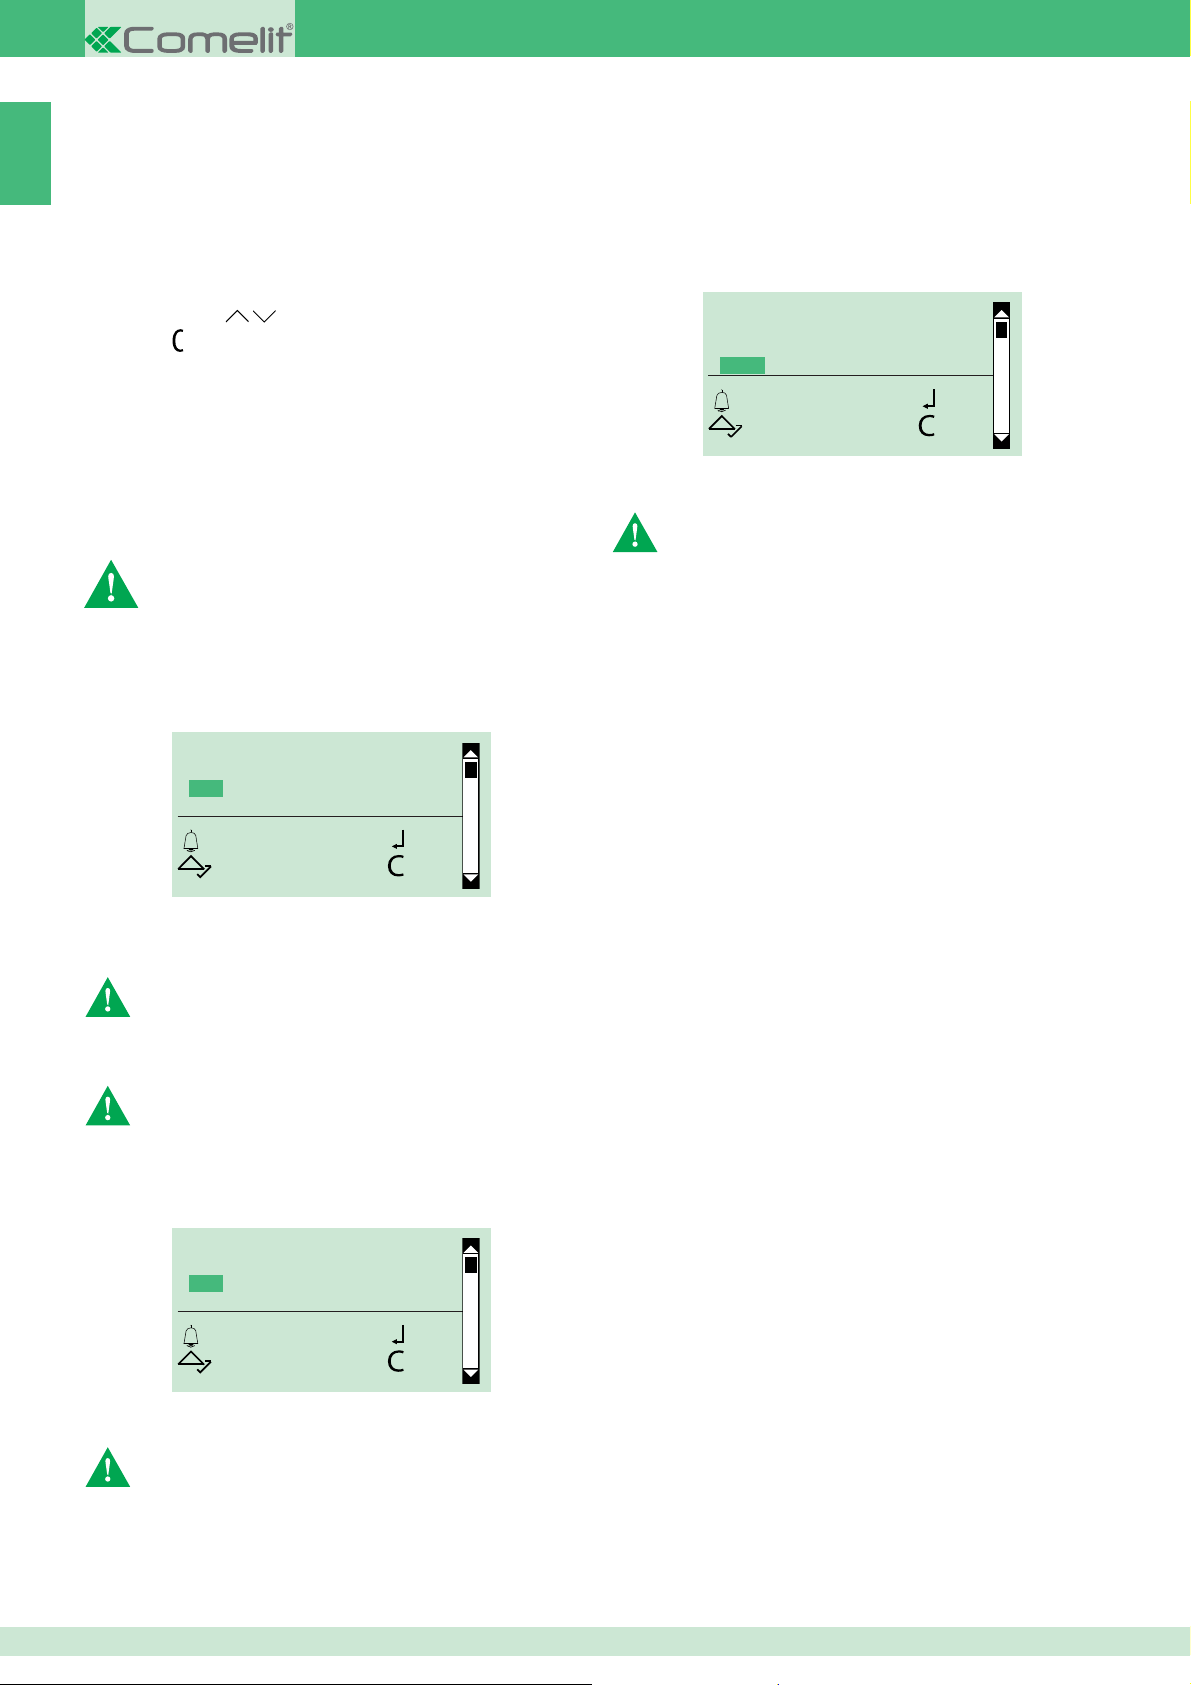
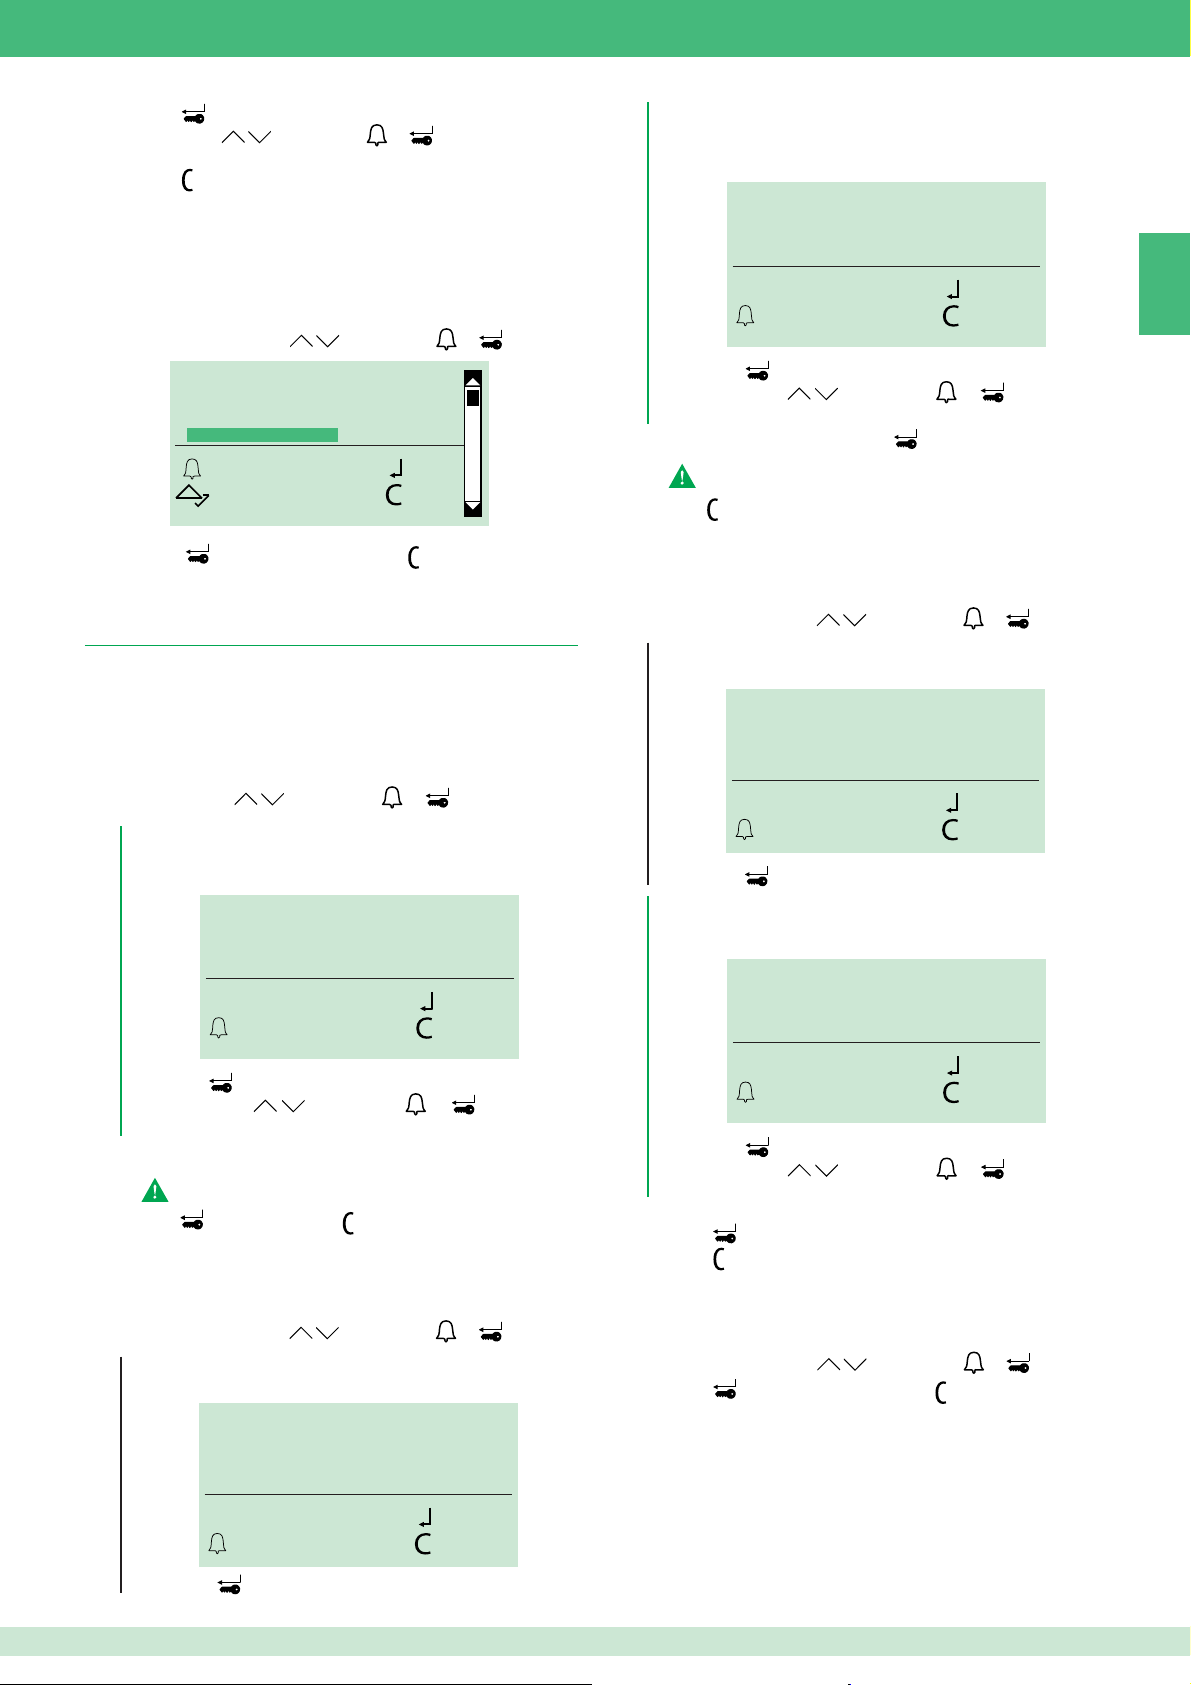
MODALITÀ DI NAVIGAZIONE
Scorrere il menu tramite
Premere
L'evidenziazione indica che l'elemento è selezionato:
Il segno * indica che l'opzione è attiva:
o per confermare.
GESTIONE DATI
IMPOSTAZIONI
INFO
OK OK
SCORRI ESCI
Alcuni tasti eseguono azioni diverse a seconda del contesto:
per un corretto utilizzo del dispositivo è necessario seguire i
suggerimenti all'interno delle schermate.
TIPO DOWNLOAD
*OFF
USB
RS485
OK OK
SCORRI ESCI
GESTIONE DATI
*OFF
space 0
FEEDBACK
Il sistema restituisce messaggi di:
• conferma: ad operazione avenuta con successo
• errore: quando l'operazione non è permessa o non è andata a
buon fi ne.
• di attesa: quando è in corso un'operazione
MESSAGGIO DI
CONFERMA
MESSAGGIO DI
ERRORE
ATTENDERE
3
Auto diagnosi
IT
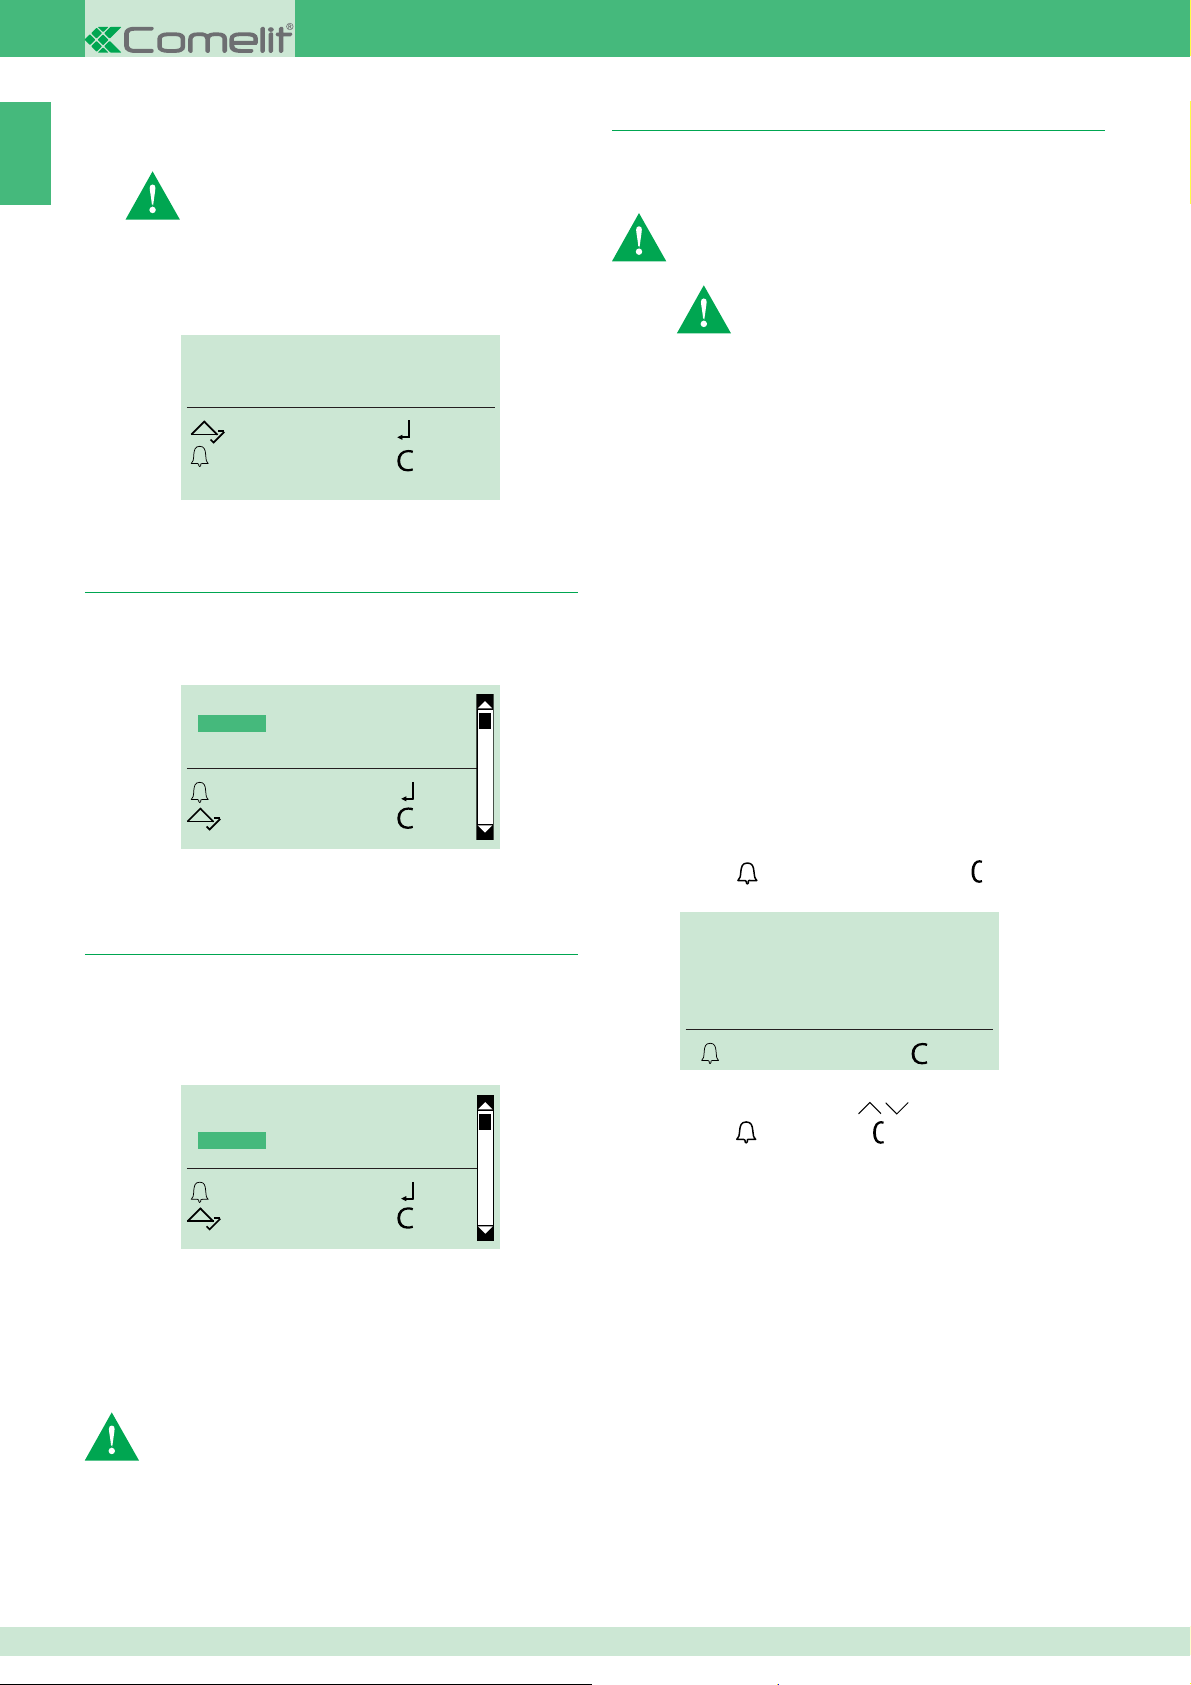
All'accensione l'apparecchiatura esegue una diagnosi delle
connessioni per verifi care la corretta comunicazione e confi gurazione
del modulo porter.
La scritta ATTENDERE indica l'auto diagnosi in corso. Alla fi ne della
fase di auto diagnosi premere il tasto
di riposo.
Accanto alle voci del menu deve comparire la scritta OK e sotto
SIMPLEBUS o SIMPLEBUS TOP in base alla confi gurazione del
porter e del modulo rubrica.
INIZIALIZZAZIONE OK
NOMI IN RUBRICA OK
PASSWORD OK
CHIAVI OK
SERIALE PORT. OK
SIMPLEBUS
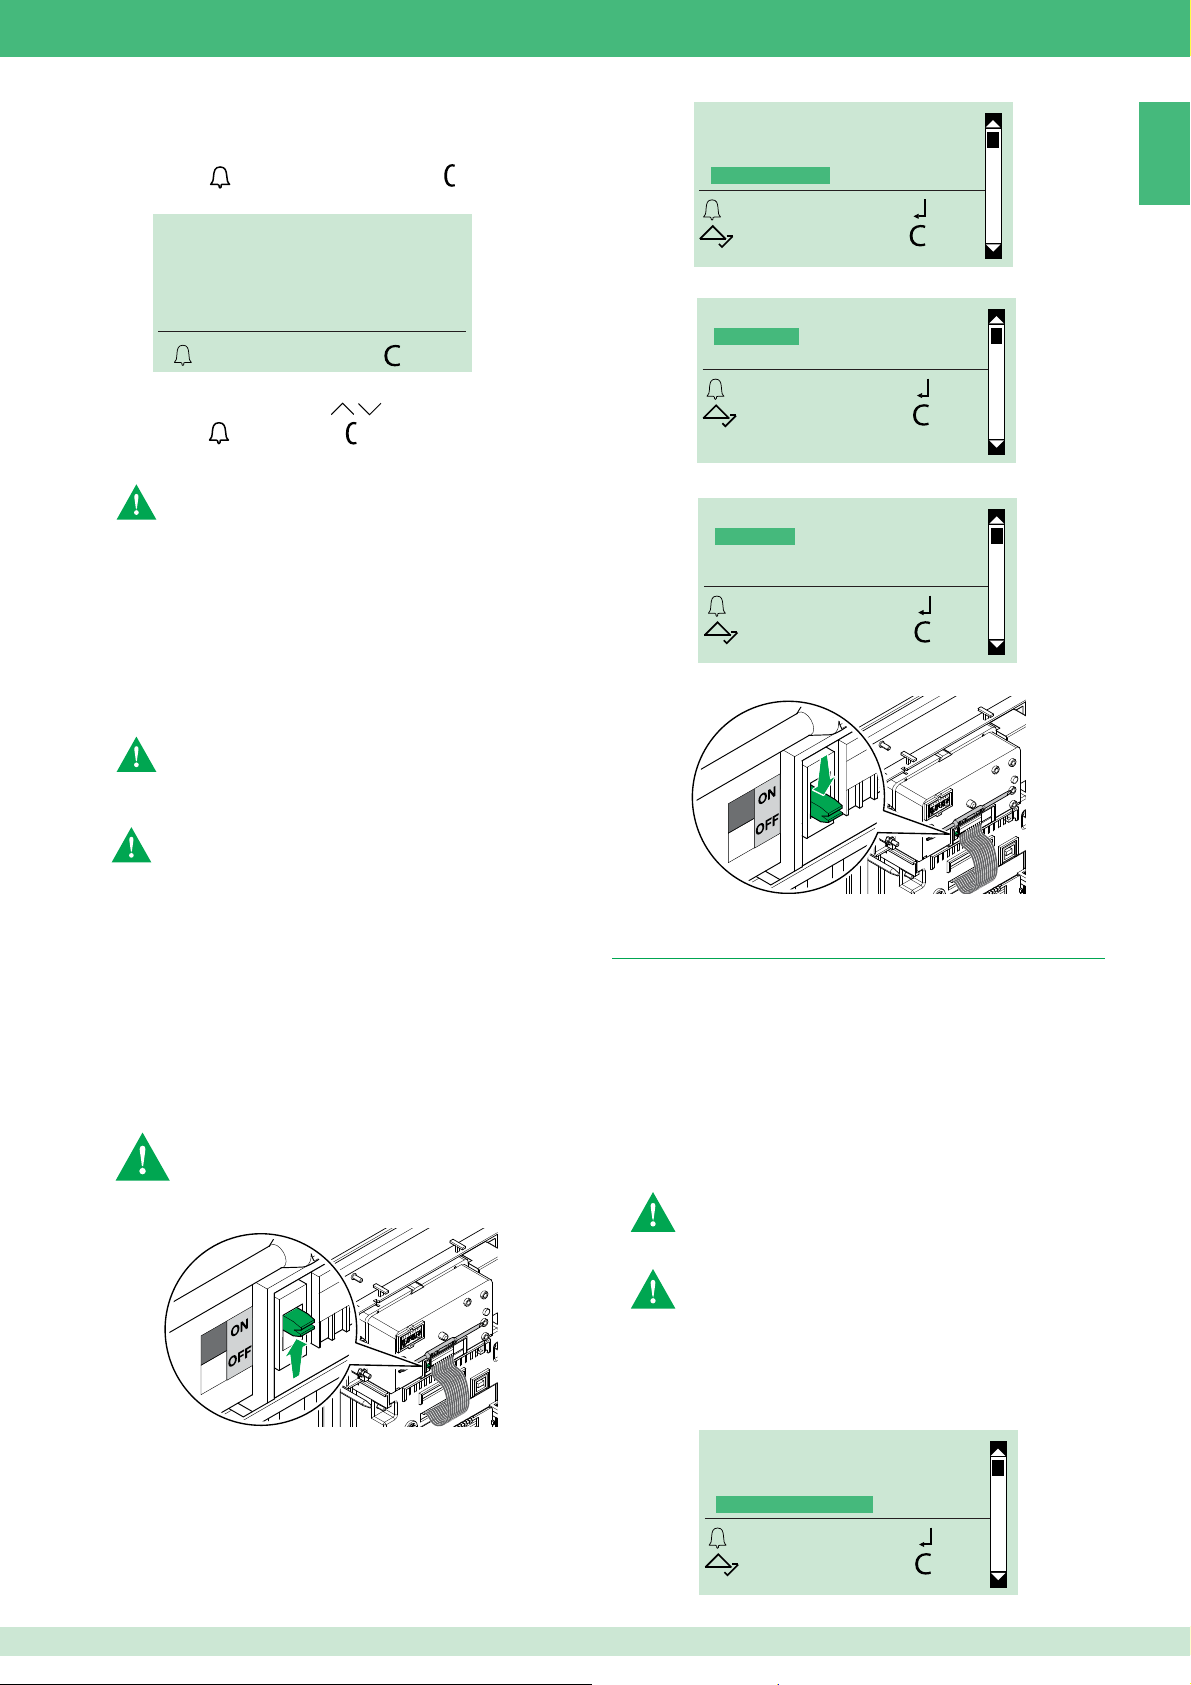
Impostare lingua
In fase di accensione è richiesto di selezionare la lingua di utilizzo
(default=italiano).
1. Scorrere la lista tramite
2. Premere
o .per confermare.
SCEGLI LINGUA
*ITALIANO
ENGLISH
FRANCAIS
OK OK
SCORRI ESCI
per portare il modulo allo stato
.
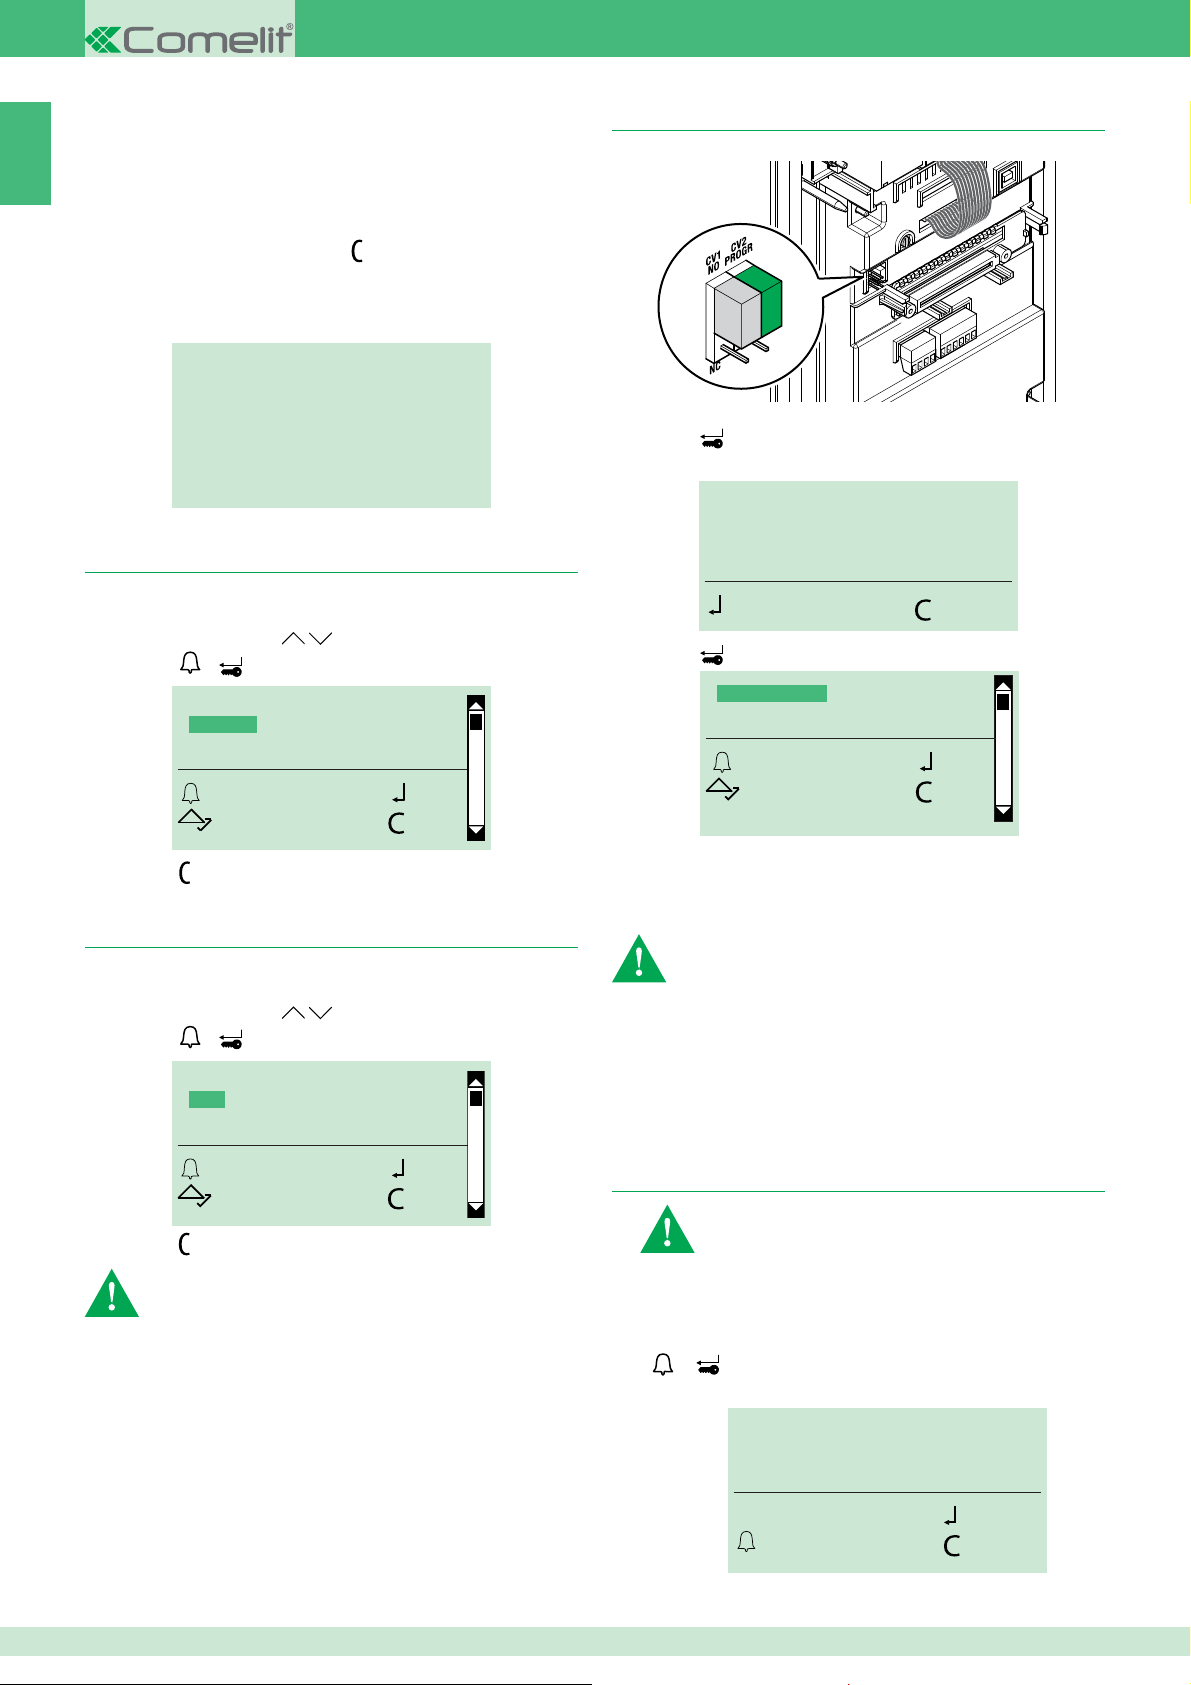
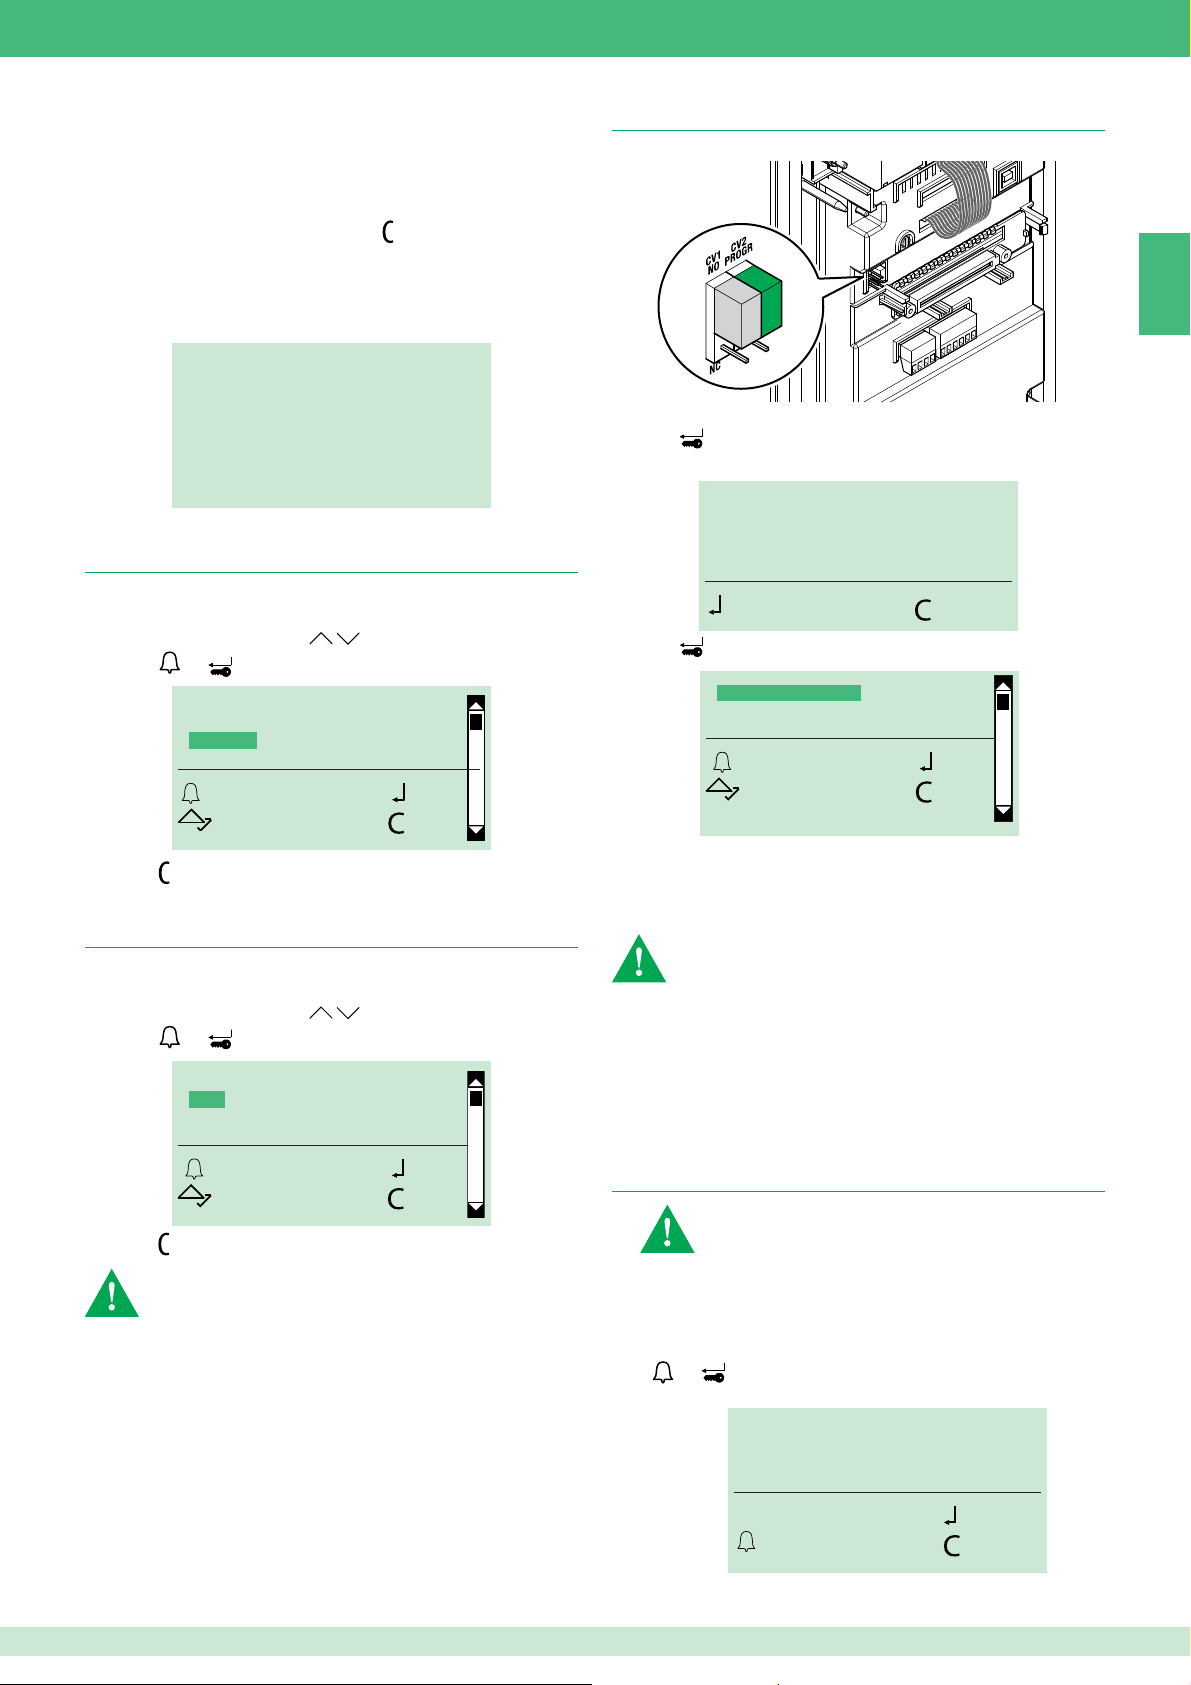
Accedere al menu programmazione
Spostare CV2 e alimentare il modulo
oppure:
1. Premere
2. Inserire il supercodice (di default 778899).
3. Premere
INSERISCI PASSWORD:
9
*****
OK CANC
per confermare.
GESTIONE DATI
IMPOSTAZIONI
INFO
OK OK
SCORRI ESCI
3. Premere
per uscire.
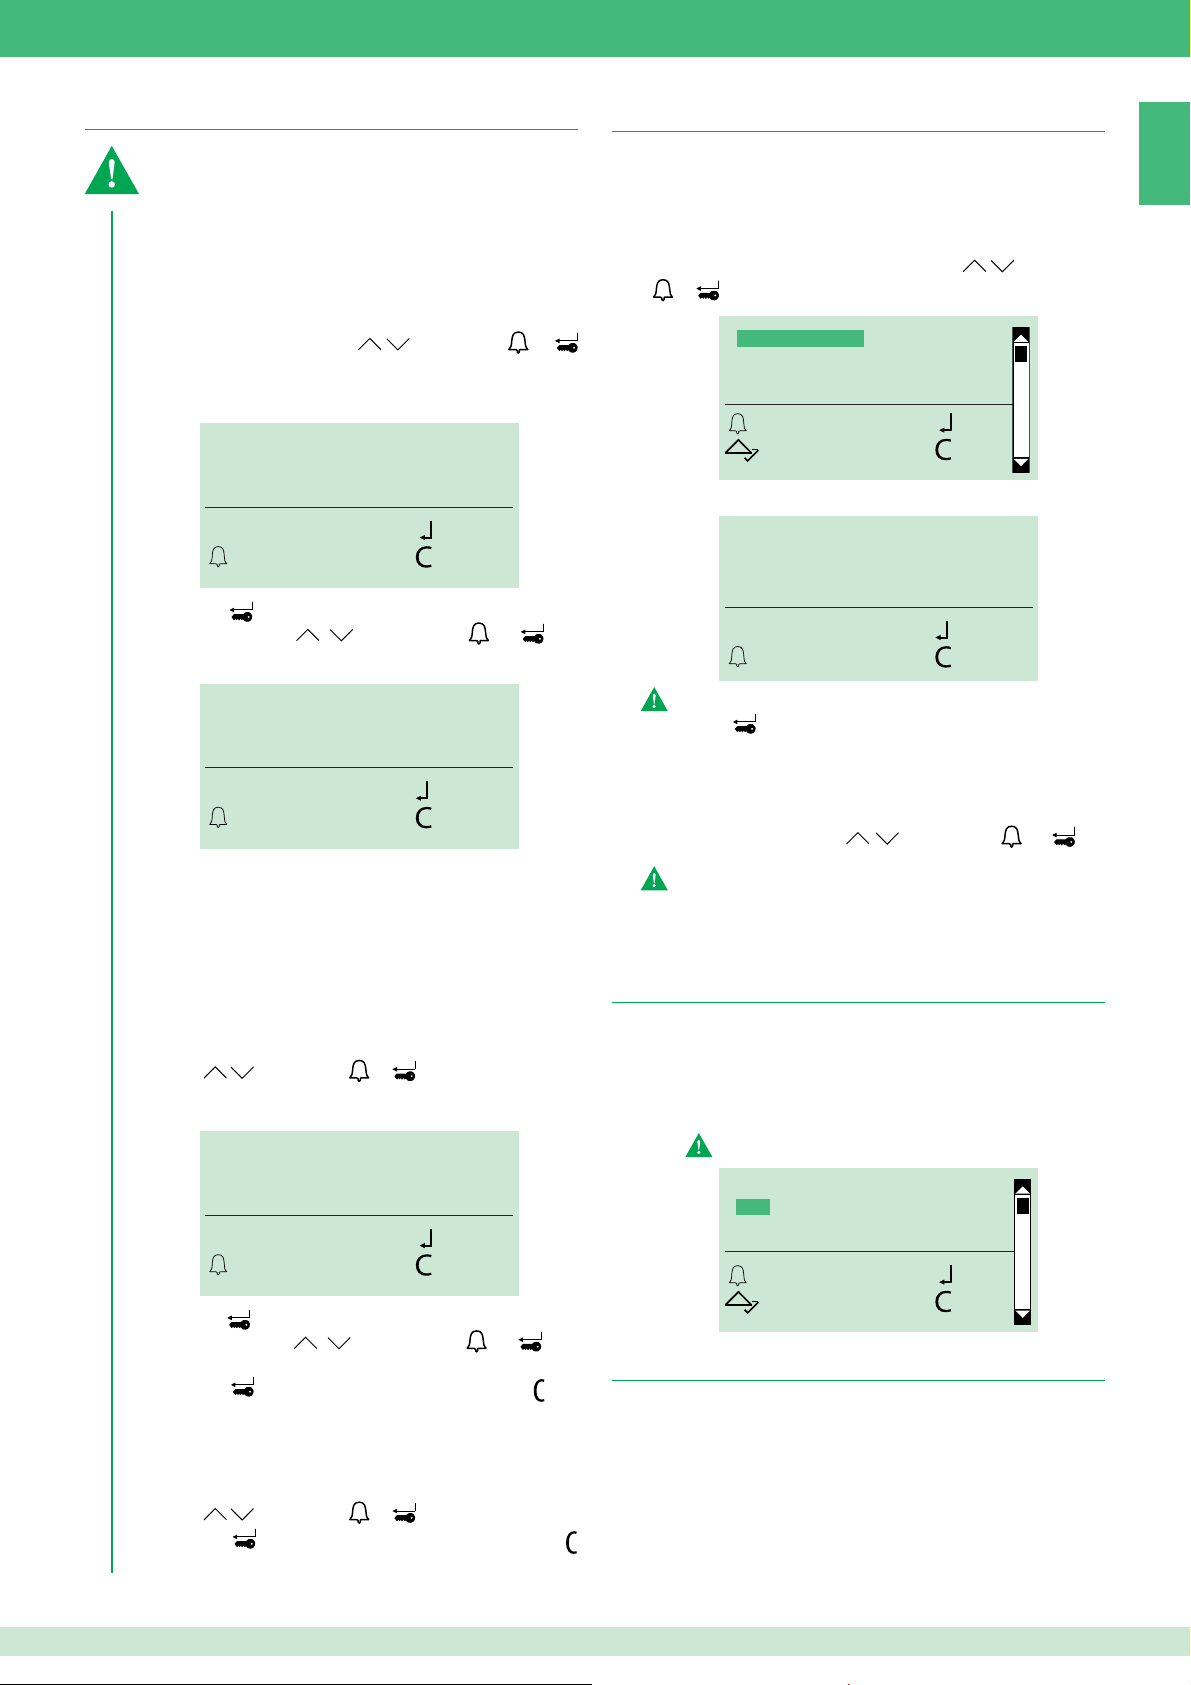
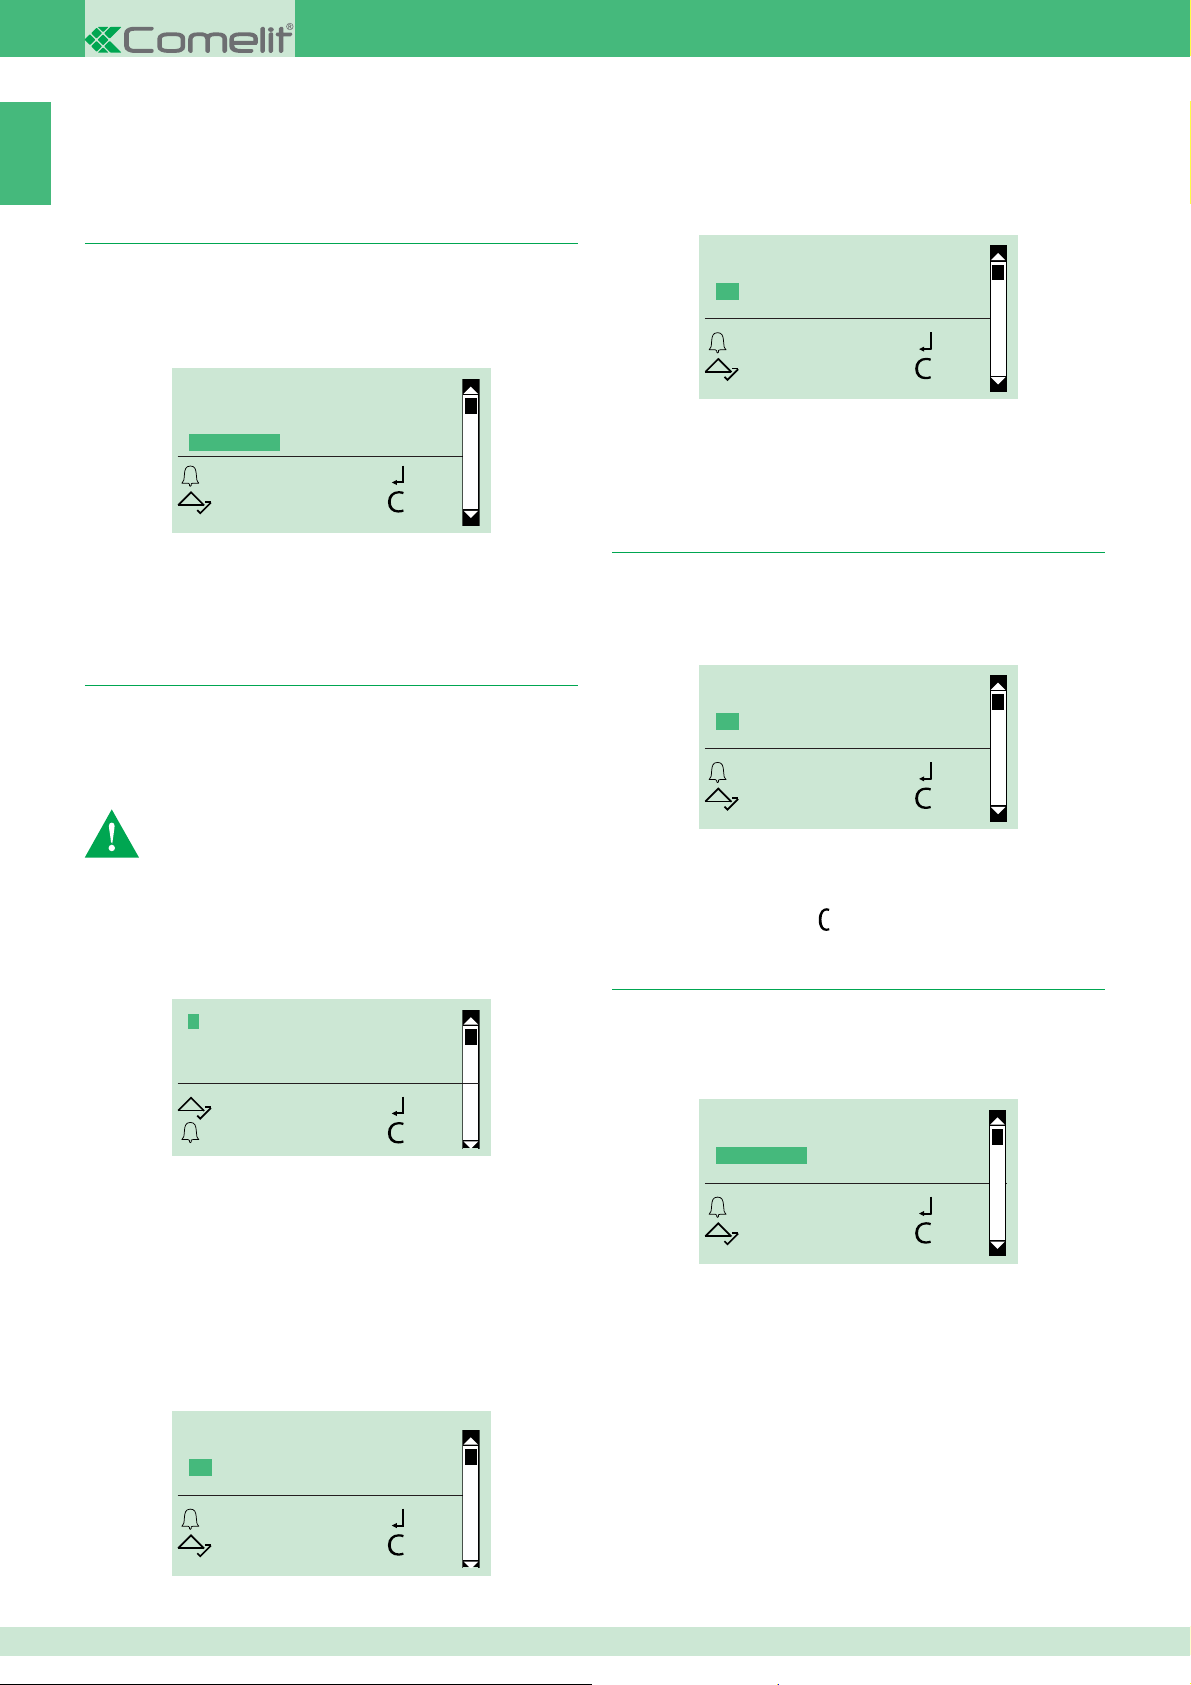
Impostare il tipo di download
In modalità SIMPLEBUS/SIMPLEBUS TOP e con usb connessa: in
fase di accensione è richiesto di selezionare il tipo di download.
1. Scorrere la lista tramite
2. Premere
3. Premere
o .per confermare.
TIPO DOWNLOAD
*OFF
USB
RS485
OK OK
SCROLL ESC
per uscire.
Per il download in modalità RS485, vedi schema pag. 80.
Per evitare malfunzionamenti: durante il download in modalità
USB la pulsantiera non deve essere alimentata esternamente.
.
Menu programmazione
Dal menu programmazione è possibile:
• gestire l'inserimento, la cancellazione e la modifi ca di nomi, codici,
password, chiavi e supercodice;
• modifi care le impostazioni (tipo di download, parametri impianto,
lingua, seconda lingua, gestione chiamata…);
• visualizzare le informazioni sul dispositivo.
1. Gestione dati
Prima di memorizzare dati all'interno della rubrica è
consigliabile scegliere:
• la modalità di gestione chiamata, vedi "2.5 Gestione
chiamata"
• la modalità di controllo accessi che si desidera adottare,
vedi "2.6. Controllo accessi".
È possibile gestire l’inserimento e la modifi ca dei dati
esternamente usando il software 1249B (IR 003 - SW rev. 2.3
o superiori).
1.1. Nomi
1.1.1 INSERIMENTO NOMI
non disponibile se la modalità di chiamata è IMMOTEC
STANDARD o IMMOTEC INDIRETTO, (vedi cap.2.5)
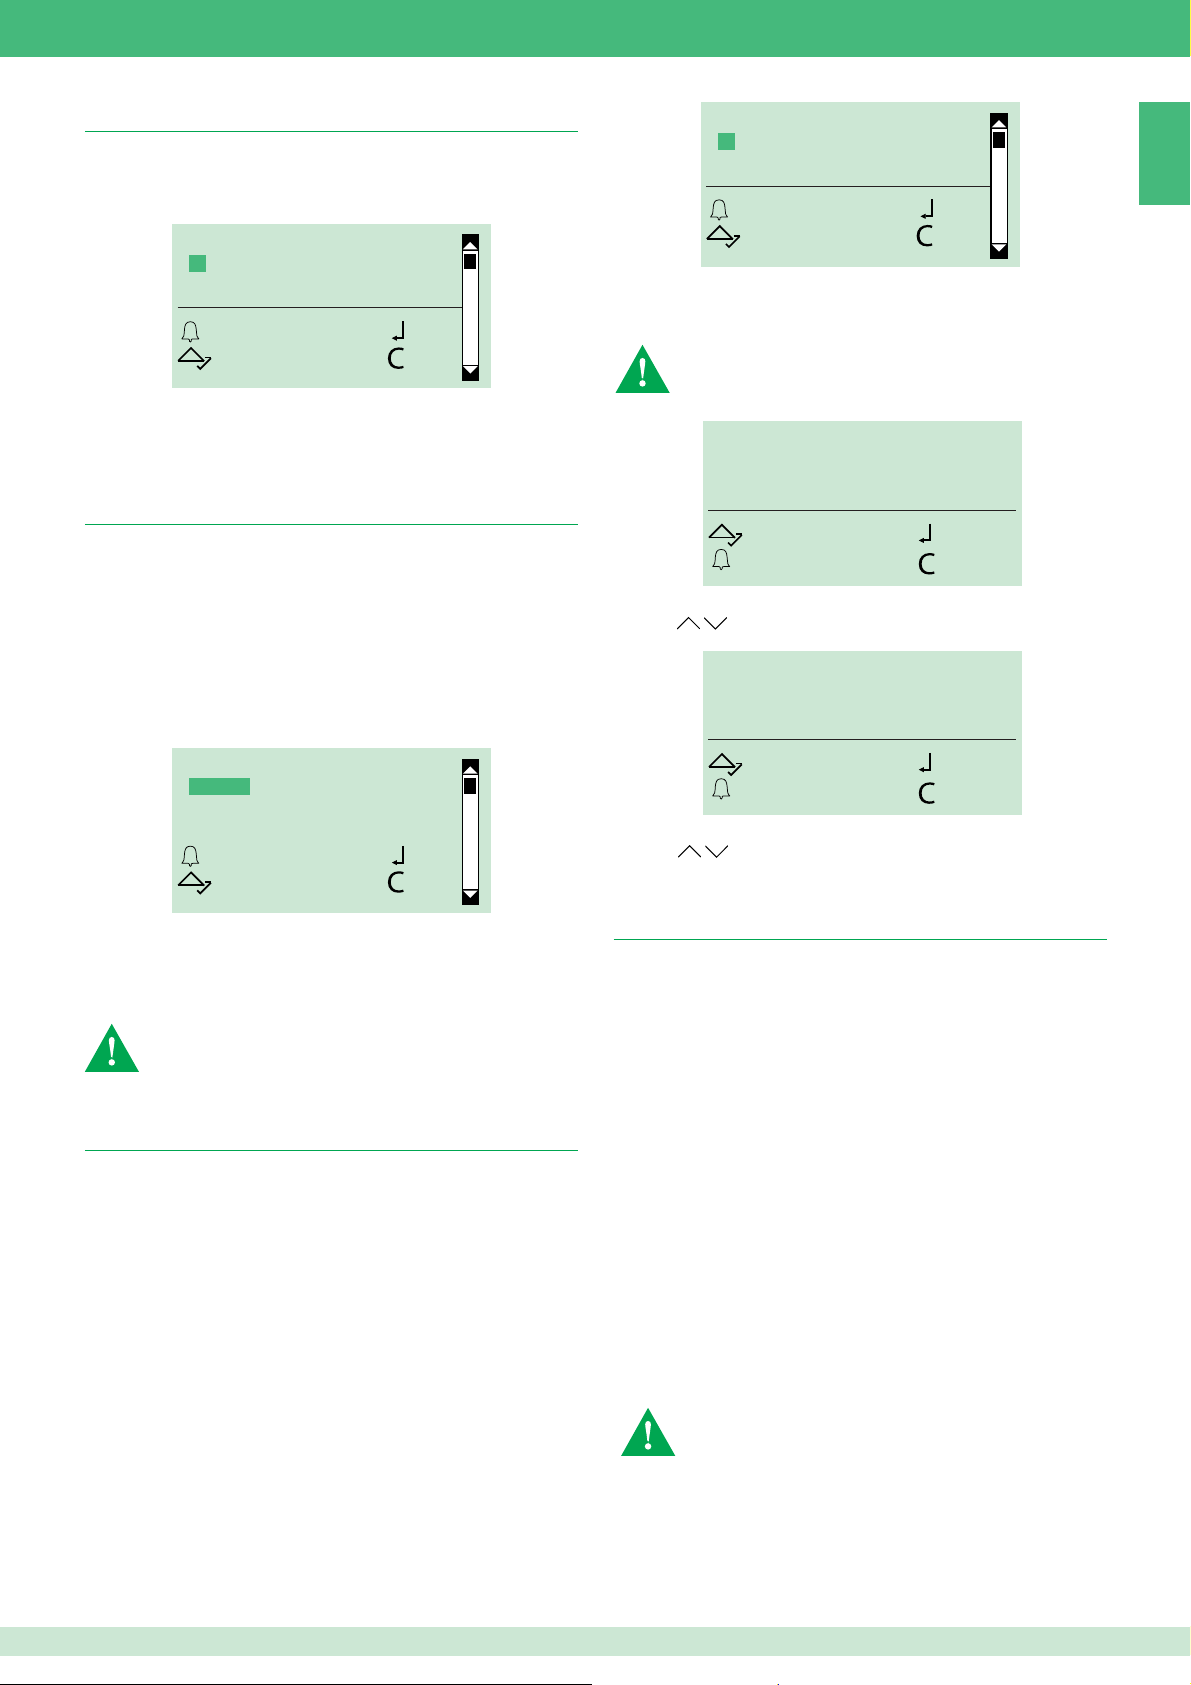
Da “inserimento nomi” è possibile inserire i nomi e tutti i dati
ad esso associati (codice chiamata, codice indiretto, password,
chiave RFID)
1. Accedere alla fase di programmazione, vedi pag. 4
2. Scegliere gestione dati/nomi/inserimento nomi premendo
o per confermare.
3. Digitare il nome.
MARIO ROSS_
ESCI CANC
OK
4
4. Premere
5. Digitare il "codice chiamata" e premere
per confermare.
per confermare.
IN MODALITÀ SIMPLEBUS
CODICE:
_ _ 2
SALTA OK
ESCI CANC
IN MODALITÀ SIMPLEBUS TOP ("vedi 2.5 Gestione chiamata")
CODICE:
SALTA OK
ESCI CANC
_ _ _ _ _ 2
oppure:
premere
per saltare l'inserimento.
SOLO CON "CODICE INDIRETTO" ATTIVO (vedi cap. 2.5)
6. Digitare il "codice indiretto" e premere
CODICE INDIRETTO:
_ _ _ _ _ 2
per confermare.
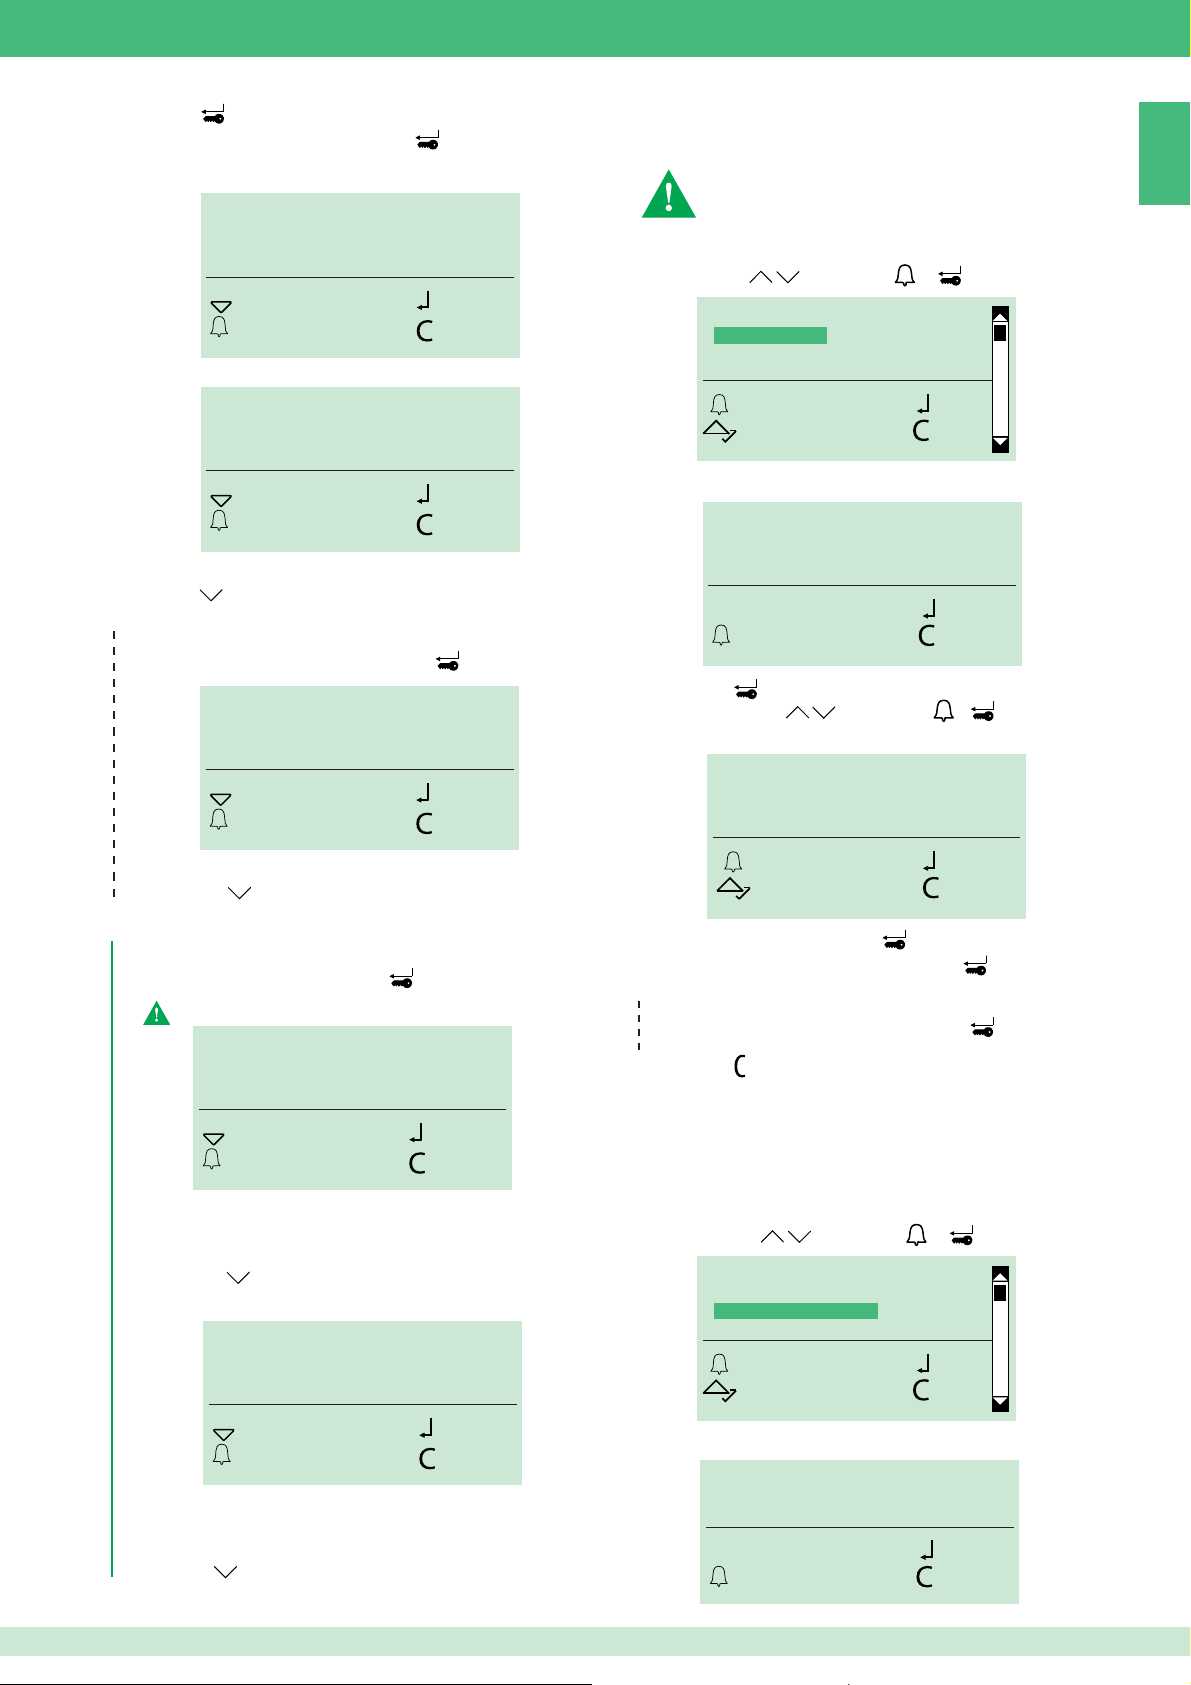
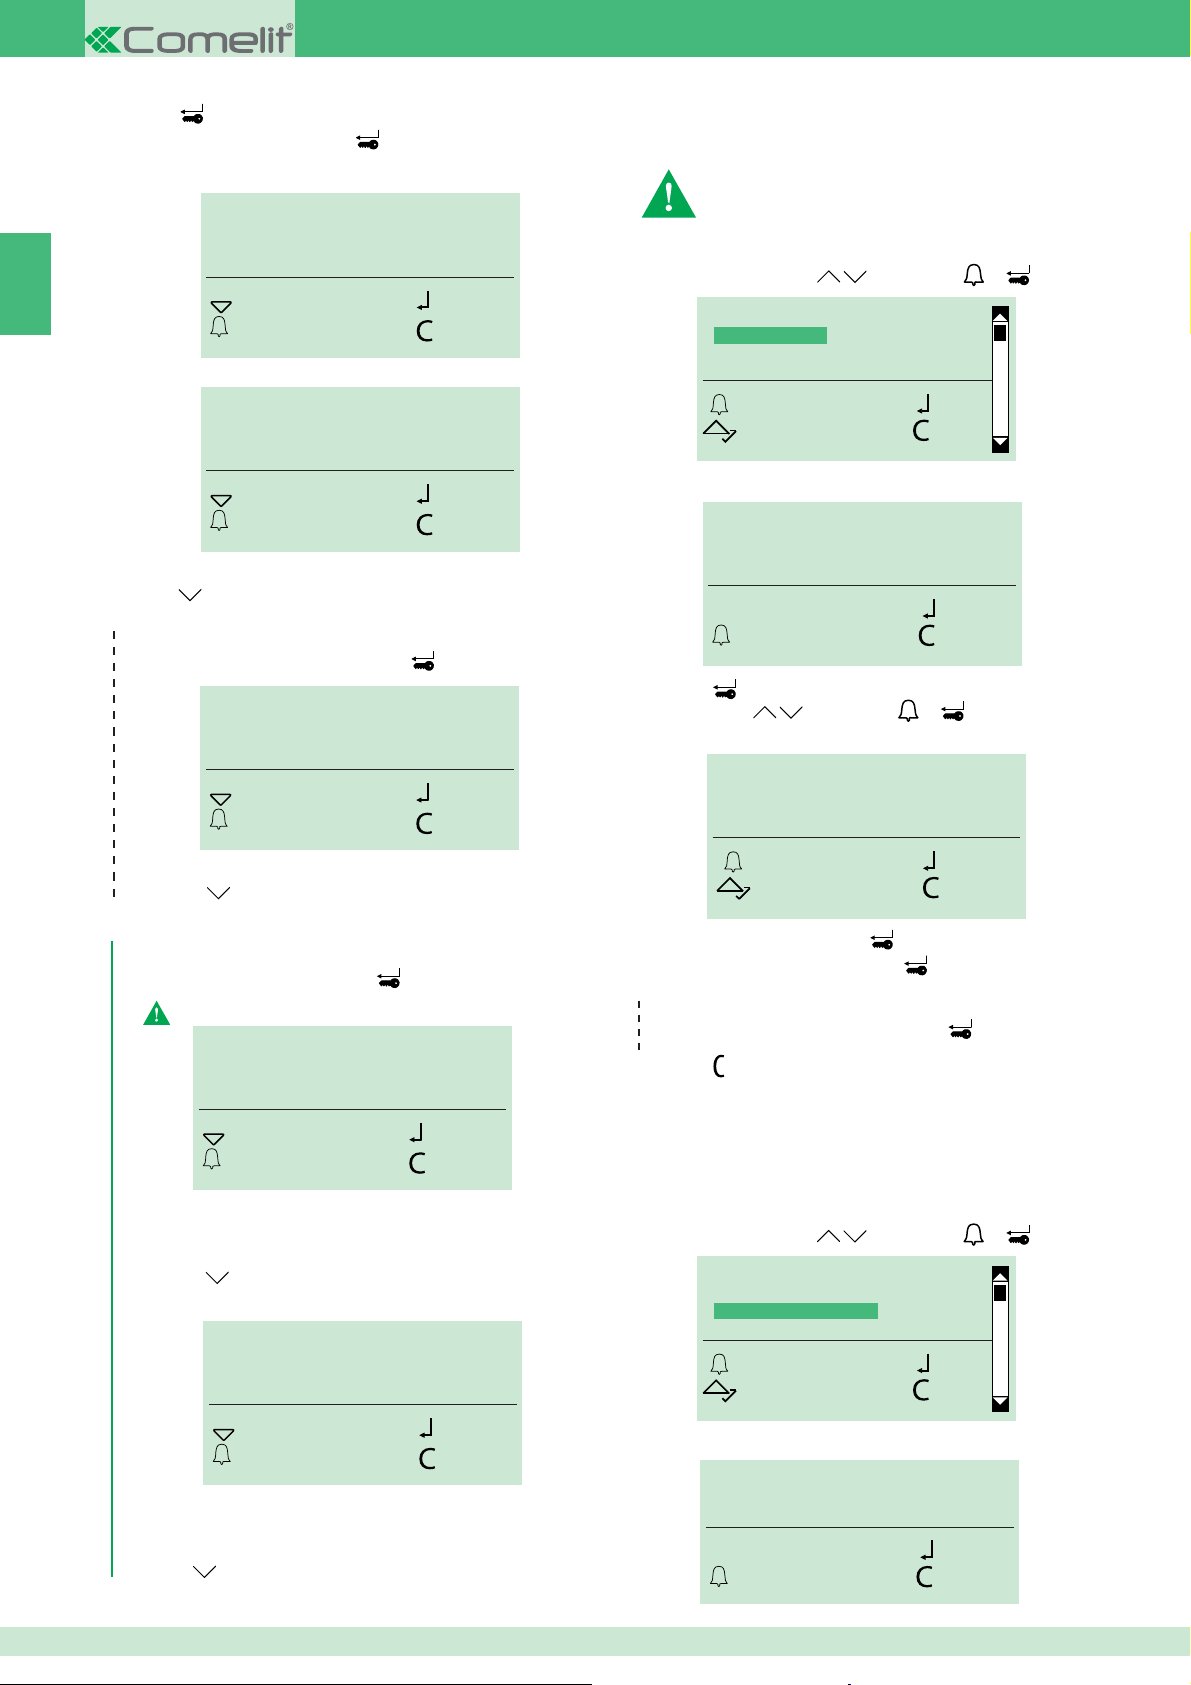
1.1.2 MODIFICA NOMI
Da “modifi ca nomi” è possibile modifi care un nome e il codice
chiamata e il codice indiretto ad esso associati.
non disponibile se la modalità di chiamata è IMMOTEC
STANDARD o IMMOTEC INDIRETTO, (vedi cap. 2.5)
1. Accedere alla fase di programmazione, vedi pag. 4.
2. Scegliere gestione dati/nomi/modifi ca nomi scorrendo il
menu tramite
3. Digitare il nome (per intero o anche solo la lettera iniziale).
4. Premere
5. Scorrere tramite
la scelta del nome da modifi care.
e premendo o per confermare.
INSERIMENTO NOMI
MODIFICA NOMI
CANCELLAZIONE NOMI
AZZERA TUTTI I NOMI
OK OK
SCORRI CANC
M_
OK
ESCI CANC
per avviare la ricerca
. e/o premere o per confermare
IT
SALTA OK
ESCI CANC
oppure:
premere
per saltare l'inserimento.
SOLO CON "CONTROLLO ACCESSI" ATTIVO (vedi cap.2.6)
7. Digitare la password e premere
La password deve essere di almeno 4 caratteri
INSERISCI PASSWORD:
_ _ _ 3416
SALTA OK
ESCI CANC
per confermare
» I led rosso e verdi lampeggiano alternativamente ad indicare
che il dispositivo è in attesa di una chiave da registrare
oppure:
premere
per saltare l'inserimento.
8. Passare la chiave in prossimità del sensore RFID
PASSA LA CHIAVE
MARIO ROSSI_
OK OK
SCORRI CANC
6. Modifi care il nome e premere
7. Modifi care il "codice chiamata" e premere
SOLO CON "CODICE INDIRETTO"
8. Modifi care il codice indiretto e premere
9. Premere
per uscire.
per confermare.
per confermare.
ATTIVO (vedi cap.2.5)
per confermare
1.1.3 CANCELLAZIONE NOMI
Da “cancellazione nomi” è possibile rimuovere un nome e i dati
ad esso associati.
1. Accedere alla fase di programmazione, vedi pag. 4.
2. Scegliere gestione dati/nomi/cancellazione nomi scorrendo
il menu tramite
INSERIMENTO NOMI
MODIFICA NOMI
CANCELLAZIONE NOMI
AZZERA TUTTI I NOMI
e premendo o per confermare.
OK OK
SCORRI CANC
SALTA OK
ESCI CANC
» Sul display apparirà un messaggio di conferma “CHIAVE
RILEVATA” "COLORE ..."
oppure:
premere
per saltare l'inserimento.
3. Digitare il nome (per intero o anche solo la lettera iniziale).
M_
ESCI CANC
OK
5
4. Premere
per avviare la ricerca.
5. Scorrere tramite
IT
la scelta del nome da rimuovere.
6. Premere
per uscire.
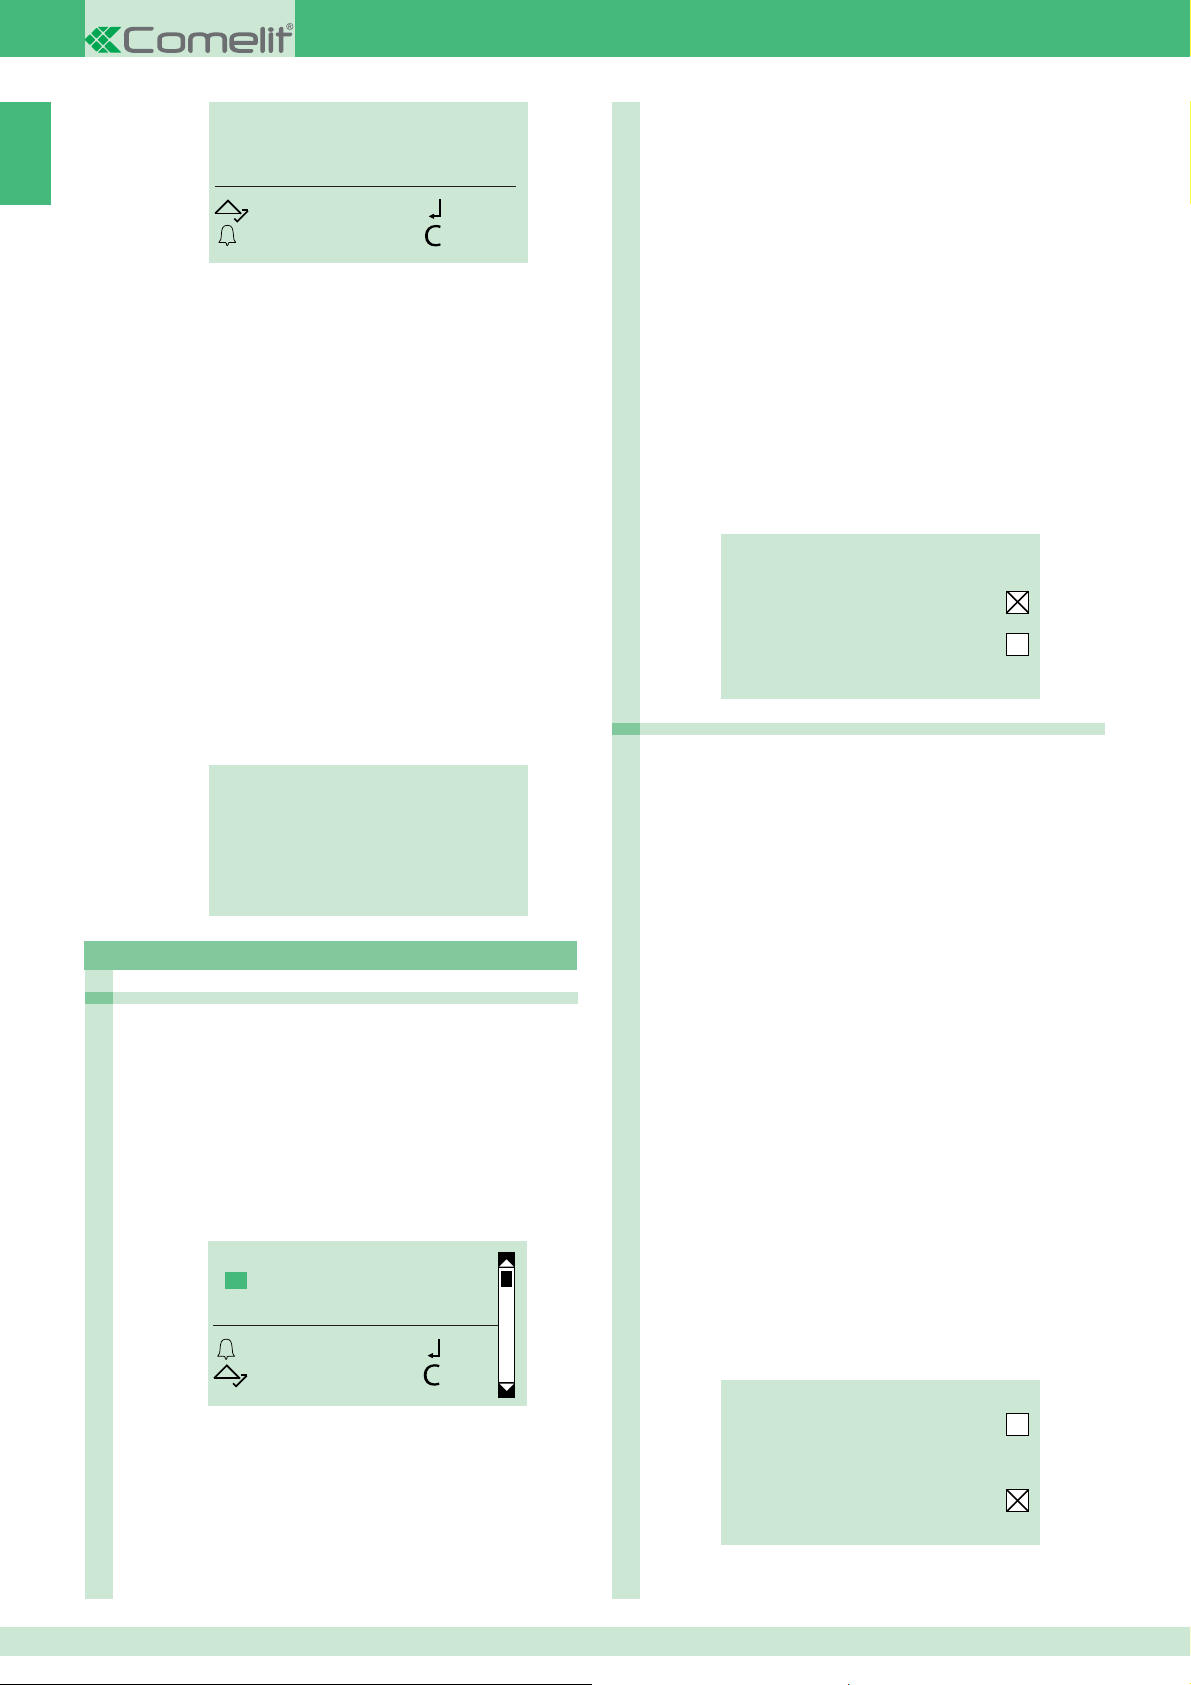
1.1.3 AZZERA TUTTI NOMI
Da “azzera tutti i nomi” è possibile rimuovere tutti i nomi e i dati
ad essi associati.
1. Accedere alla fase di programmazione, vedi pag. 4.
2. Scegliere gestione dati/nomi/azzera tutti nomi scorrendo il
menu tramite
e premendo o per confermare.
INSERIMENTO NOMI
MODIFICA NOMI
CANCELLAZIONE NOMI
AZZERA TUTTI I NOMI
OK OK
SCORRI CANC
. e/o premere o per confermare
SOLO CON "CONTROLLO ACCESSI" ATTIVO
(vedi cap. 2.6)
3b. Digitare il nome a cui è associata la password da
modifi care (per intero o anche solo la lettera iniziale).
M_
ESCI CANC
4b. Premere
per avviare la ricerca.
5b. Scorrere tramite
. e/o premere o per
OK
confermare la scelta del nome.
6. Modifi care la password e premere
La password deve essere di almeno 4 caratteri.
7. Premere
per uscire.
per confermare.
3. Premere
per confermare la cancellazione o premere per
uscire.
1.2. Password
Attraverso l'inserimento della password è possibile attivare il relè
apriporta.
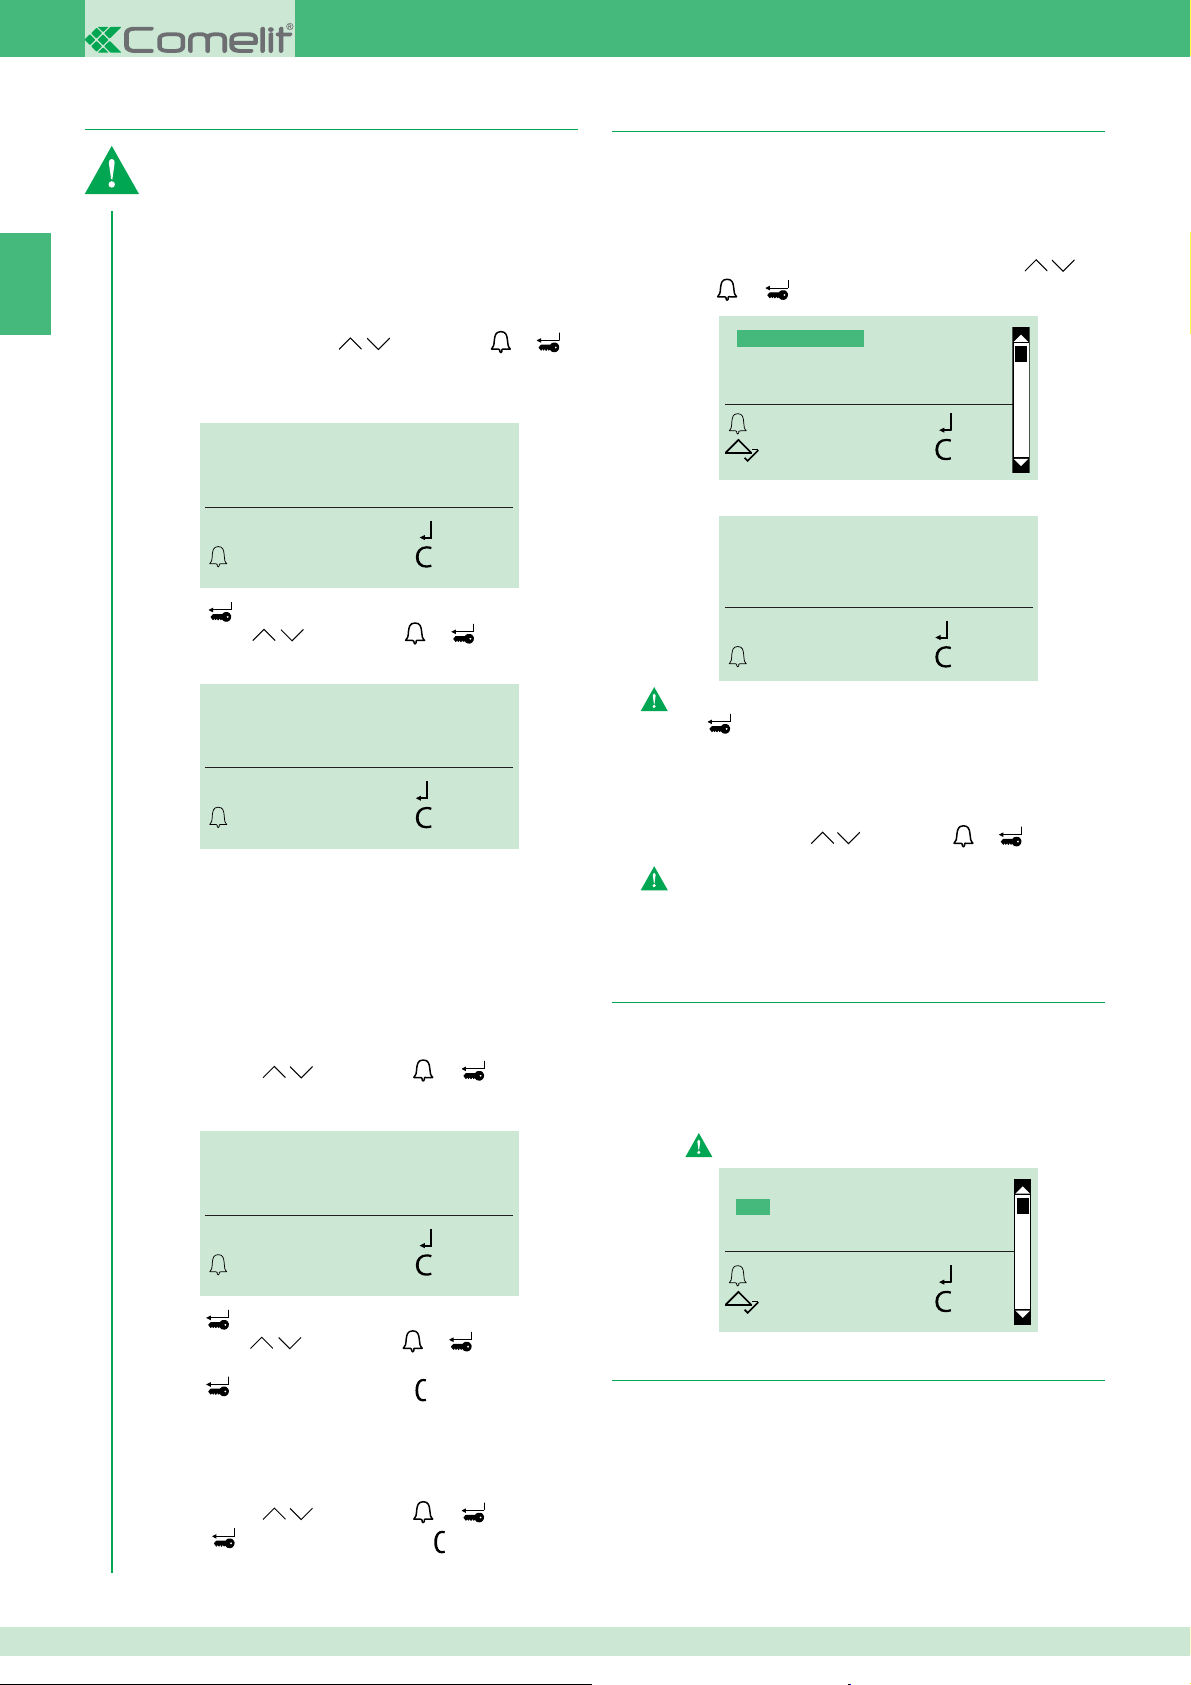
1.2.1 INSERISCI PASSWORD
1. Accedere alla fase di programmazione, vedi pag. 4.
2. Scegliere gestione dati/password/inserisci scorrendo il
menu tramite
SOLO CON "CONTROLLO ACCESSI" ATTIVO
3. Digitare il nome a cui si desidera associare la password
(per intero o anche solo la lettera iniziale).
4. Premere
5. Scorrere tramite
confermare la scelta del nome.
6. Digitare la password (6 caratteri max).
La password deve essere di almeno 4 caratteri
7. Premere
1.2.2 MODIFICA PASSWORD
1. Accedere alla fase di programmazione, vedi pag. 4.
2. Scegliere gestione dati/password/modifi ca scorrendo il
menu tramite
SOLO CON "CONTROLLO ACCESSI" DISATTIVO (vedi cap.2.6)
3a. Inserire la password da modifi care
e premendo o per confermare.
M_
ESCI CANC
OK
per avviare la ricerca.
e/o premere o per
per confermare o premere per uscire.
e premendo o per confermare.
TROVA PASSWORD:
TROVA PASSWORD:
883466
_ _ _ _ _ _
(vedi cap. 2.6)
1.2.3 CANCELLA PASSWORD
1. Accedere alla fase di programmazione, vedi pag. 4.
2. Scegliere gestione dati/password/cancella scorrendo il
menu tramite
e premendo o per confermare.
SOLO CON "CONTROLLO ACCESSI" DISATTIVO (vedi cap. 2.6)
3a. Inserire la password da cancellare.
TROVA PASSWORD:
TROVA PASSWORD:
883466
_ _ _ _ _ _
OK CANC
ESCI CANC
4a. Premere
per avviare la ricerca.
SOLO CON "CONTROLLO ACCESSI" ATTIVO
OK
(vedi cap. 2.6)
3b. Digitare il nome a cui è associata la password da
cancellare (per intero o anche solo la lettera iniziale).
M_
ESCI CANC
4b. Premere
per avviare la ricerca.
5b. Scorrere tramite
e/o premere o per
OK
confermare la scelta del nome.
6. Premere per cancellare la password.
7. Premere
per uscire.
1.2.3 AZZERA PASSWORD
1. Accedere alla fase di programmazione, vedi pag. 4.
2. Scegliere gestione dati/password/azzera scorrendo il menu
tramite
3. Premere
e premendo o per confermare.
per confermare la cancellazione o premere per
uscire.
4a. Premere
6
OK CANC
ESCI CANC
per avviare la ricerca.
OK
1.3. Chiavi digitali
1.4. Supercodice
È possibile gestire l’uso di chiavi RFID solo con la modalità
"controllo accessi" attiva.
SOLO CON "CONTROLLO ACCESSI" ATTIVO
(vedi cap. 2.6)
1.3.1 INSERISCI CHIAVE
1.3.2 MODIFICA CHIAVE
1. Accedere alla fase di programmazione, vedi pag. 4.
2. Scegliere gestione dati/chiavi/(inserisci/modifi ca)
scorrendo il menu tramite
per confermare.
3. Digitare il nome a cui si desidera associare/modifi care la
chiave (nome intero o anche solo la lettera iniziale).
M_
ESCI CANC
4. Premere per avviare la ricerca.
5. Scorrere tramite
confermare la scelta del nome.
ESCI CANC
» I led rosso e verdi lampeggiano alternativamente ad
indicare che il dispositivo è in attesa di una chiave da
registrare.
6. Passare la chiave in prossimità del sensore RFID.
» Sul display apparirà un messaggio di conferma “CHIAVE
RILEVATA COLORE ..." .
e/o premere o per
PASSA LA CHIAVE
e premendo o
OK
OK
1.3.3 CANCELLA CHIAVE
1. Accedere alla fase di programmazione, vedi pag. 4.
2. Scegliere gestione dati/chiavi/cancella scorrendo il menu
tramite
3. Digitare il nome a cui si desidera cancellare la chiave
associata (nome intero o anche solo la lettera iniziale).
e premendo o per confermare.
M_
1.4.1 INSERISCI NUOVO
Il supercodice (di default 778899) permette di accedere ai menu
di programmazione.
1. Accedere alla fase di programmazione, vedi pag. 4.
2. Selezionare le voci di menu: gestione dati/supercodice/
inserisci nuovo scorrendo il menu tramite
o per confermare.
INSERISCI NUOVO
RIPRISTINA DEFAULT
OK OK
SCORRI ESCI
3. Modifi care il supercodice (6 cifre max).
NUOVO SUPERCODICE:
724584
ESCI CANC
Il supercodice deve essere di almeno 4 cifre.
4. Premere
per confermare.
e premendo
OK
1.4.1 RIPRISTINA DEFAULT
1. Accedere alla fase di programmazione, vedi pag. 4.
2. Selezionare gestione dati/supercodice/ripristina default
scorrendo il menu tramite
confermare.
Il comando non può essere annullato
e premendo o per
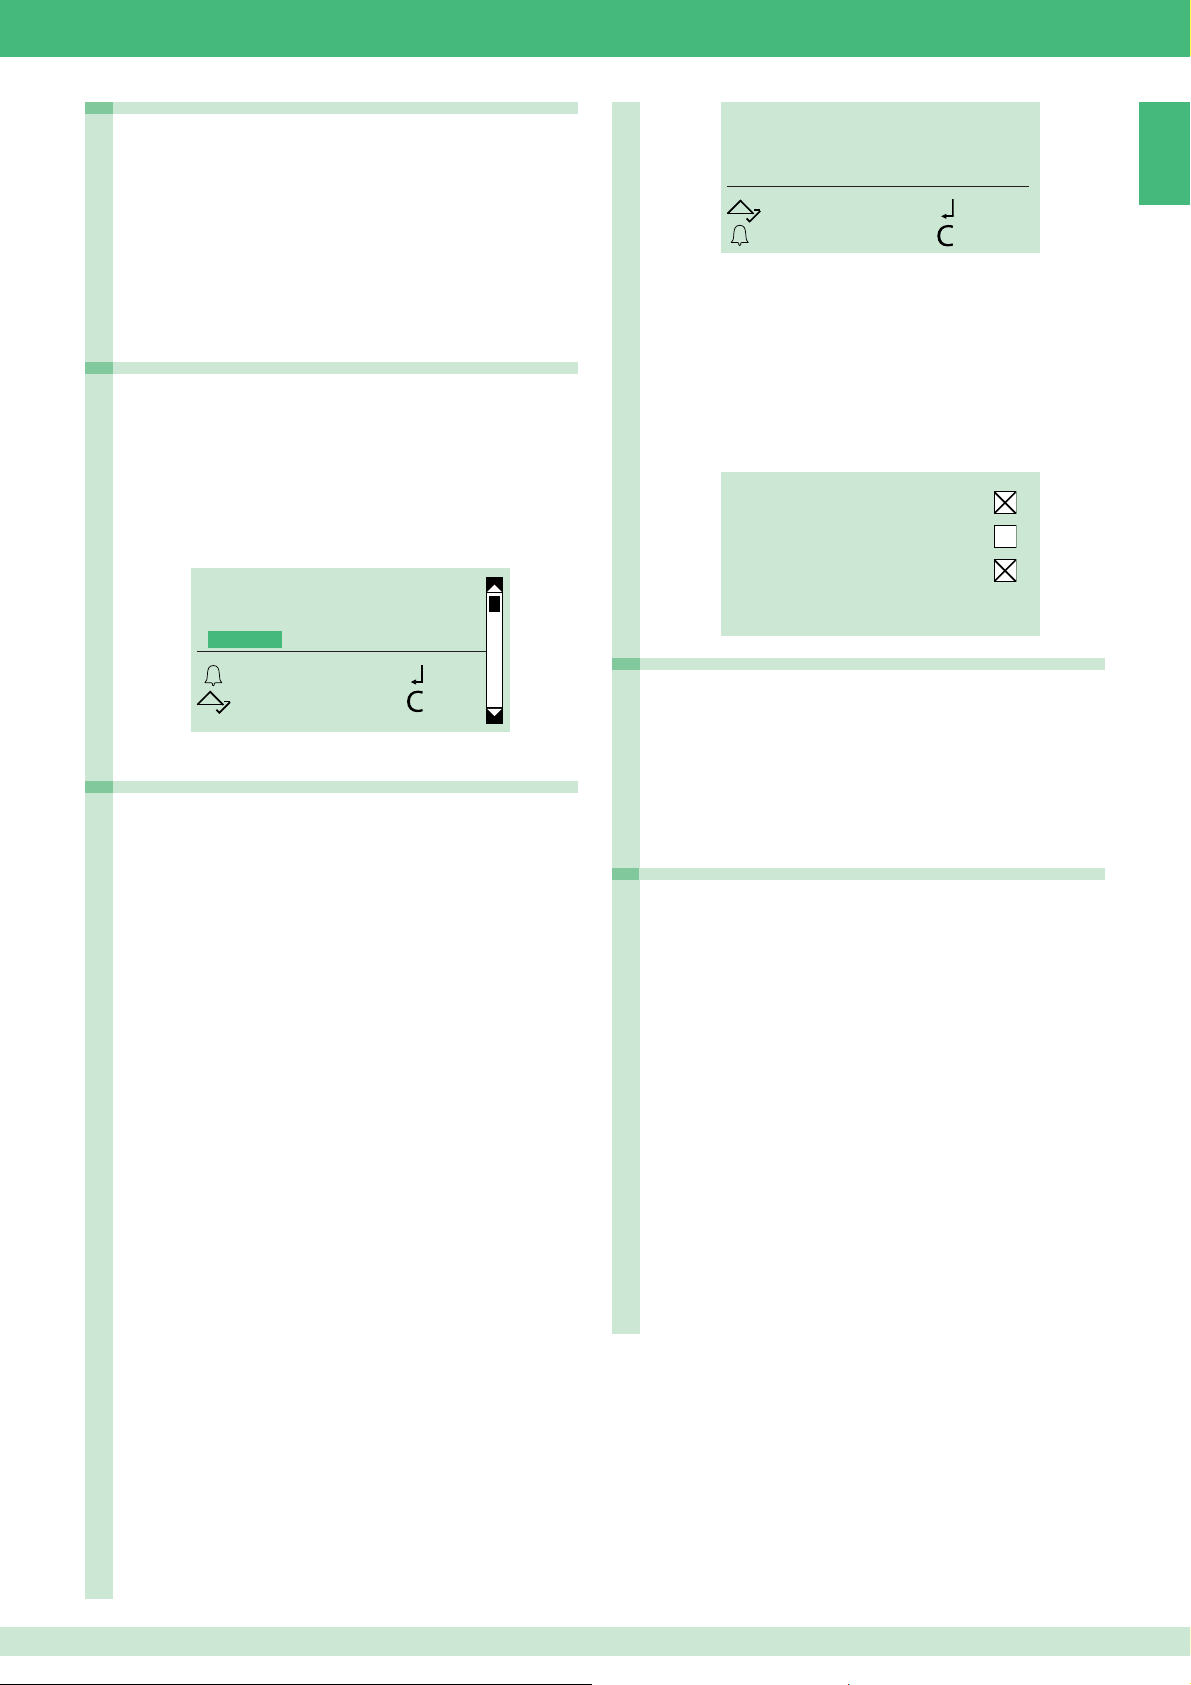
2. Impostazioni
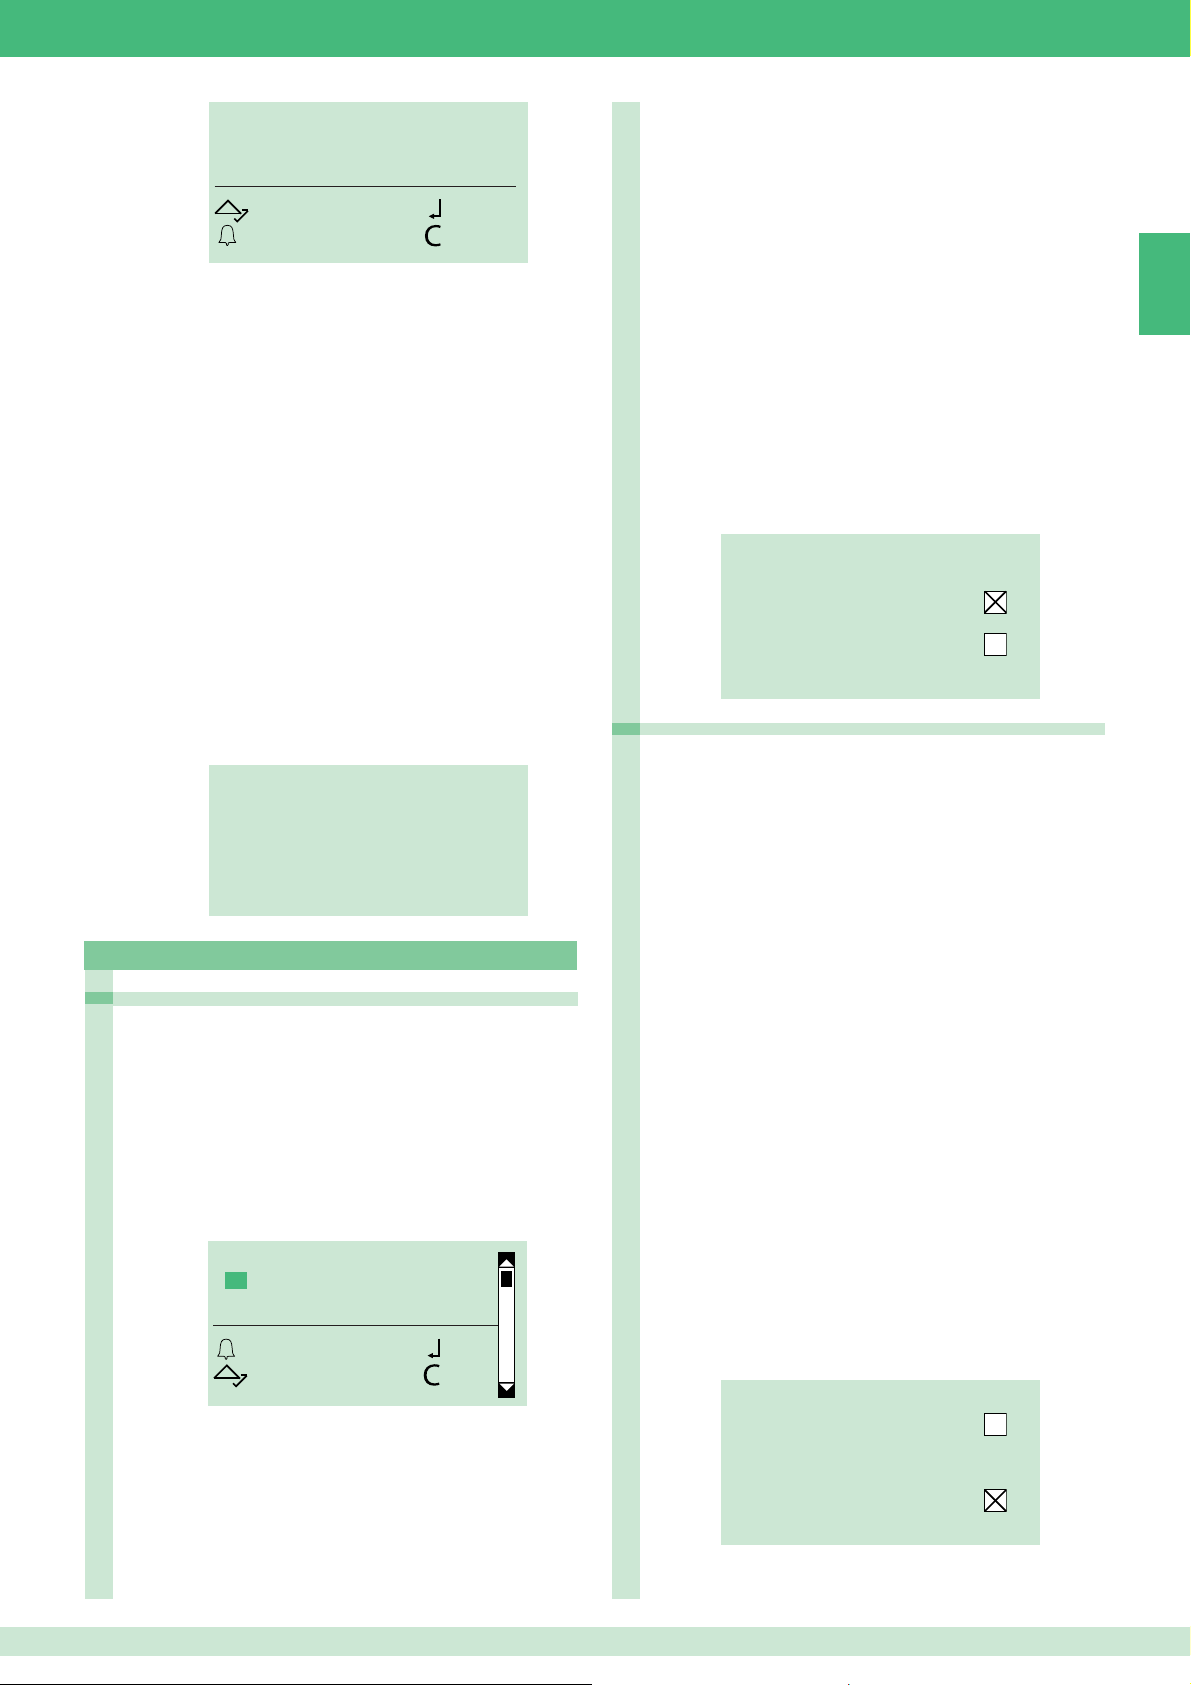
2.1. Tipo di download
1. Accedere alla fase di programmazione, vedi pag. 4.
2. Selezionare: impostazioni/tipo download
2. scegliere tra:
OFF
USB
RS485
Per il download in modalità RS485, vedi schema pag. 80.
IT
ESCI CANC
4. Premere
5. Scorrere tramite
confermare la scelta del nome.
6. Premere
uscire.
per avviare la ricerca.
e/o premere o per
per cancellare la chiave o premere per
OK
1.2.3 AZZERA CHIAVI
1. Accedere alla fase di programmazione, vedi pag. 4.
2. Scegliere gestione dati/chiavi/azzera scorrendo il menu
tramite
3. Premere
e premendo o per confermare.
per confermare la cancellazione o premere per
uscire.
TIPO DOWNLOAD
*OFF
USB
RS485
OK OK
SCORRI ESCI
2.2. Parametri impianto
2.2.1 PARAMETRI PORTER
2.2.1.1 INSERISCI TEMPO FONICA
1. Accedere alla fase di programmazione, vedi pag. 4.
2. Selezionare: impostazioni/paramentri impianto/
parametri porter/tempo fonica
3. Inserire il valore desiderato:
RANGE = 10 - 180 sec.
7
IT
VALORE IN SEC
10
SCORRI OK
ESCI CANC
4. Confermare.
2.2.1.2 INSERISCI TEMPO APRIPORTA
1. Accedere alla fase di programmazione, vedi pag. 4.
2. Selezionare: impostazioni/paramentri impianto/
parametri porter/tempo apriporta
3. Inserire il valore desiderato:
RANGE = 1- 8 sec.
4. Confermare.
2.2.1.3 INSERISCI TEMPO RESET
1. Accedere alla fase di programmazione, vedi pag. 4.
2. Selezionare: impostazioni/paramentri impianto/
parametri porter/tempo reset
3. Inserire il valore desiderato.
RANGE = 1- 10 sec.
4. Confermare.
4. Confermare.
C) APRIPORTA A RIPOSO
Consente di abilitare/disabilitare l’apriporta a riposo
della serratura del modulo porter
1. Accedere alla fase di programmazione, vedi pag. 4.
2. Selezionare: impostazioni/paramentri impianto/parametri
porter/opzioni avanzate/serratura SE/apriporta a riposo
3. Scegliere tra:
SI (default)
NO
4. Confermare.
D) VISUALIZZA
Consente di visualizzare i parametri della serratura
sull’uscita SE del modulo porter
1. Accedere alla fase di programmazione, vedi pag. 4.
2. Selezionare: impostazioni/paramentri impianto/parametri
porter/opzioni avanzate/serratura SE/visualizza
» Restituisce i valori dei parametri: tipo, tono conferma,
apriporta a riposo.
TIPO AC PLUS
TONO CONFERMA
2.2.1.4 VISUALIZZA
1. Accedere alla fase di programmazione, vedi pag. 4.
2. Selezionare: impostazioni/paramentri impianto/
parametri porter/visualizza
» Restituisce i valori dei parametri tempo di fonica,
tempo di apriporta e tempo di reset.
TEMPO FONICA 010
TEMPO APRIPORTA 02
TEMPO ATT. RESET 10
SIMPLEBUS
2.2.1.5 OPZIONI AVANZATE
2.2.1.5.1 SERRATURA SU SE
A) TIP0
Consente di impostare il tipo di serratura sull’uscita SE
del modulo porter
1. Accedere alla fase di programmazione, vedi pag. 4.
2. Selezionare: impostazioni/paramentri impianto/parametri
porter/opzioni avanzate/serratura SE/tipo
3. Scegliere tra:
AC (default)
AC PLUS
DC
4. Confermare.
TIPO
*AC
AC PLUS
DC
OK OK
SCORRI ESCI
APRIPORTA A RIPOSO
2.2.1.5.2 RELÈ MODULO PORTER
A) COMANDO ATTUATORE
Consente di abilitare/disabilitare il comando attuatore
sul relè del modulo porter
1. Accedere alla fase di programmazione, vedi pag. 4.
2. Selezionare: impostazioni/paramentri impianto/parametri
porter/opzioni avanzate/relè modulo porter/comando
attuatore
3. Scegliere tra:
SI
NO
4. Confermare.
B) IN PARLLELO A SE
Consente di abilitare/disabilitare il relè del modulo
porter in parallelo all’uscita SE del modulo porter
1. Accedere alla fase di programmazione, vedi pag. 4.
2.
Selezionare: impostazioni/paramentri impianto/parametri
porter/opzioni avanzate/relè modulo porter/in parallelo a se
3. Scegliere tra:
SI
NO
4. Confermare.
C) VISUALIZZA
Consente di visualizzare i parametri del relè modulo
porter
1. Accedere alla fase di programmazione, vedi pag. 4.
2. Selezionare: impostazioni/paramentri impianto/parametri
porter/opzioni avanzate/relè modulo porter/visualizza
» Restituisce i valori dei parametri del modulo relè porter.
B) TONO CONFERMA
Consente di abilitare/disabilitare il tono conferma della
serratura del modulo porter
1. Accedere alla fase di programmazione, vedi pag. 4.
2. Selezionare: impostazioni/paramentri impianto/parametri
porter/opzioni avanzate/serratura SE/tono conferma
3. Scegliere tra:
SI
NO
8
COMANDO ATTUATORE
TEMPO ATTIVAZIONE 03
IN PARALLELO A SE
2.2.1.5.3 SERIALE S
A) COMANDO ATTUATORE
Consente di abilitare/disabilitare il comando attuatore
sulla seriale S
1. Accedere alla fase di programmazione, vedi pag. 4.
2. Selezionare: impostazioni/paramentri impianto/parametri
porter/opzioni avanzate/seriale s/comando attuatore
3. Scegliere tra:
SI
NO
4. Confermare.
2.2.1.5.4 MESSAGGI VOCALI
Consente di abilitare/disabilitare i messaggi vocali e
visivi del modulo porter
1. Accedere alla fase di programmazione, vedi pag. 4.
2. Selezionare: impostazioni/paramentri impianto/parametri
porter/opzioni avanzate/messaggi vocali
3. Scegliere una lingua per abilitare i messaggi vocali e visivi
del modulo porter, oppure scegliere OFF per disabilitare i
messaggi vocali e visivi del modulo porter.
SCEGLI LINGUA
*OFF
ITALIANO
FRANCAIS
OK OK
SCORRI ESCI
4. Confermare.
2.2.1.5.5 CHIAMATA
A) CHIAMATA TRIPLA
Consente di abilitare/disabilitare la chiamata tripla
1. Accedere alla fase di programmazione, vedi pag. 4.
2. Selezionare: impostazioni/paramentri impianto/parametri
porter/opzioni avanzate/chiamata/chiamata tripla
3. Scegliere tra:
SI
NO (default)
4. Confermare.
B) TONO DI CONFERMA
Consente di abilitare/disabilitare il tono conferma della
chiamata
1. Accedere alla fase di programmazione, vedi pag. 4.
2. Selezionare: impostazioni/paramentri impianto/parametri
porter/opzioni avanzate/chiamata/tono di conferma
3. Scegliere tra:
SI (default)
NO
4. Confermare.
C) AIUTO CODICI
Consente di abilitare/disabilitare l’aiuto codici della
chiamata
1. Accedere alla fase di programmazione, vedi pag. 4.
2. Selezionare: impostazioni/paramentri impianto/parametri
porter/opzioni avanzate/chiamata/aiuto codici
3. Scegliere tra:
SI
NO (default)
4. Confermare.
VALORE IN SEC
10
SCORRI OK
ESCI CANC
4. Confermare.
D) VISUALIZZA
Consente di visualizzare i parametri della chiamata del
modulo porter
1. Accedere alla fase di programmazione, vedi pag. 4.
2. Selezionare: impostazioni/paramentri impianto/parametri
porter/opzioni avanzate/chiamata/visualizza
» Restituisce i valori dei parametri della chiamata del modulo
porter.
CHIAMATA TRIPLA
TONO CONFERMA
AIUTO CODICI
ATTESA RISPOSTA 60
2.2.1.5.6 AUTO ACCENSIONE
Consente di abilitare/disabilitare l’autoaccensione
1. Accedere alla fase di programmazione, vedi pag. 4.
2. Selezionare: impostazioni/paramentri impianto/parametri
porter/opzioni avanzate/chiamata/auto accensione
3. Scegliere tra:
SI (default)
NO
4. Confermare.
2.2.1.5.7 RIPRISTINA DEFAULT
Consente il ripristino delle impostazioni di default:
Resistenza di antiappannamento = disattiva
Messaggi audio-visivi = disattivi
Comando serratura su SE in AC
Tempo serratura = 2 sec + tono disattivo
Relè C.NC.NO in parallelo a SE
Apriporta sempre attivo
Comando attuatore su linea seriale S = disattivo
Tempo di attesa risposta = 60 sec
Tempo di conversazione = 90 sec
Autoaccensione = attiva
Tono conferma su chiamata utente = attivo
Tempo di attesa reset = 10 sec
Invio chiamata = singola
Gestione posti interni collegati al modulo porter fi no a 70
Modalità di impianto = Simplebus
1. Accedere alla fase di programmazione, vedi pag. 4.
2. Selezionare: impostazioni/paramentri impianto/parametri
porter/opzioni avanzate/ripristina default
3. Scegliere tra:
SI
NO
4. Confermare.
IT
C) ATTESA RISPOSTA
Consente di impostare il tempo di attesa di risposta
della chiamata
1. Accedere alla fase di programmazione, vedi pag. 4.
2. Selezionare: impostazioni/paramentri impianto/parametri
porter/opzioni avanzate/chiamata/attesa risposta
3. Inserire il valore in secondi.
9
2.2.2 INDIRIZZO RS485
2.5. Gestione chiamata
IT
2.2.2.1 INDIRIZZO RS485
Per lo scaricamento dei dati tramite RS485 vedi schema di
collegamento pag. 80.
Per il collegamento al modulo SK9020 vedi schema di
collegamento pag. 80.
1. Accedere alla fase di programmazione, vedi pag. 4.
2. Selezionare: impostazioni/paramentri impianto/
indirizzo RS485/indirizzo RS485
3. Inserire l'indirizzo di RS485 (max 3 cifre).
INDIRIZZO RS485
000
SCORRI OK
ESCI CANC
4. Confermare.
2.3. Scegli lingua
Da questo menu è possibile impostare la lingua principale.
1. Accedere alla fase di programmazione, vedi pag. 4.
2. Selezionare: impostazioni/scegli lingua
SCEGLI LINGUA
*ITALIANO
ENGLISH
FRANCAIS
OK OK
SCORRI ESCI
3. Scegliere la lingua desiderata.
4. Confermare.
Consente di impostare il tipo i impianto (Simplebus o Simplebus
Top) e la modalità di chiamata (Standard, codice indiretto,
Immotec, Immotec indiretto)
ATTENZIONE: impostare la tipologia di impianto (Simplebus
o Simplebus Top) e, solo successivamente, la modalità di
chiamata (Standard, Codice indiretto, Immotec standard o
Immotec indiretto).
Per modifi care la tipologia di impianto e la modalità
di chiamata è necessario cancellare l'intera rubrica,
vedi "1.1.3 AZZERA TUTTI NOMI
SIMPLEBUS (default) per impianti senza scambi Art. 1424 in
"
modalità Top 1, 2, 3 (vedi FT SB 21) che defi niscono le zone
di impianto.
SIMPLEBUS TOP per impianti con scambi Art. 1424 in
modalità Top 1, 2, 3 (vedi FT SB 21) che defi niscono le zone
di impianto.
STANDARD - SIMPLEBUS (default)
In questa modalità l'utente è identifi cato da un campo nome e da
un campo codice di 3 cifre al massimo (compreso tra 1 e 240).
Esempio:
Nome utente= Mario Rossi
Codice= 2
STANDARD - SIMPLEBUS TOP
In questa modalità l'utente è identifi cato da un campo nome e da
un campo codice composto da 2 parti:
campo zona di 3 cifre massimo (compreso tra 1 e 500)
campo utente tassativamente di 3 cifre (compreso tra 1 e 240).
Esempio:
Nome utente= Mario Rossi
Codice= 25 015
La chiamata può avvenire nei seguenti modi:
√ in condizione di riposo
1. Digitare il codice utente (es. 25 015)
2. Premere
per effettuare la chiamata o per cancellare e
uscire.
2.4. Seconda Lingua
Consente di commutare i messaggi a riposo della rubrica portanomi
alternativamente dalla lingua principale alla seconda lingua.
1. Accedere alla fase di programmazione, vedi pag. 4.
2. Selezionare: impostazioni/seconda lingua
3. Scegliere la seconda lingua desiderata e confermare.
SELECT LANGUAGE
ITALIANO
*ENGLISH
FRANCAIS
OK OK
SCROLL ESC
DEFAULT = Seconda lingua disattiva.
Per disabilitare la seconda lingua:
1. Accedere alla fase di programmazione, vedi pag. 4.
2. Selezionare: impostazioni/seconda lingua.
3. scegliere DEFAULT e confermare.
oppure:
reimpostare la lingua principale (vedi "2.3 Lingua").
ATTENZIONE: Il messaggio iniziale di benvenuto (vedi cap. “2.8
Messaggio iniziale”) se inserito, non verrà commutato nella
seconda lingua.
L’impostazione della seconda lingua deve essere fatta
successivamente alla scelta della lingua principale.
CHIAMA UTENTE
_25 015
CHIAMA CANC
oppure:
1. Scorrere la rubrica tramite
2. Premere per chiamare o per uscire
CODICE INDIRETTO - SIMPLEBUS o SIMPLEBUS TOP
In questa modalità l'utente è identifi cato da un campo nome, un
campo codice (diverso per Simplebus e Simplebus Top) e da un
codice indiretto di max 6 caratteri.
Esempio:
Nome utente= Mario Rossi
Codice= 2 (per Simplebus) o 25 015 (per Simplebus top)
Codice indiretto= 100
10
La chiamata può avvenire nei seguenti modi:
√ in condizione di riposo
1. Digitare il codice indiretto (es. 100)
2. Premere
per effettuare la chiamata o per cancellare e
uscire.
CHIAMA UTENTE
_ _ _ 100
CHIAMA CANC
oppure:
1. Scorrere la rubrica tramite
2. Premere per chiamare o per uscire
PARAMETRI IMPIANTO
SCEGLI LINGUA
SECONDA LINGUA
GEST. CHIAMATA
OK OK
SCORRI ESCI
5. Scegliere la tipologia di impianto e confermare.
GEST. CHIAMATA
*SIMPLEBUS
SIMPLEBUS TOP
OK OK
SCORRI ESCI
IT
IMMOTEC STANDARD
Questa modalità di chiamata è disponibile solo con
"controllo accessi" disattivo.
L'articolo 3451/FR può essere utilizzato in abbinamento con il modulo
Simplekey Art. SK9020 collegando i 2 prodotti via RS485 (vedi
schema pag. 80).
In questa confi gurazione, l'utilizzo delle chiavi di accesso Simplekey
(badge) consente in automatico l'inserimento del relativo codice/
nome (nuova chiave) o l'aggiornamento del solo nome (se il codice
è già presente) nella rubrica dell'articolo 3451/FR. Poiché per un
medesimo codice utente (appartamento) è possibile avere fi no a 2
chiavi di accesso associate a nominativi diversi, in fase di chiamata
tramite codice numerico dal modulo digitale verrà visualizzato il primo
nominativo in ordine alfabetico tra i 2 inseriti.
N.B.: l'inserimento e la modifi ca dei nomi non può essere
eseguito manualmente. L'acquisizione del badge avviene solo
con modalità digitale in standby
IMMOTEC INDIRETTO
Questa modalità di chiamata è disponibile solo con
"controllo accessi" disattivo.
L'articolo 3451/FR può essere utilizzato in abbinamento con il
modulo Simplekey Art. SK9020 collegando i 2 prodotti via RS485
(vedi schema pag. 80).
In questa confi gurazione, l'utilizzo delle chiavi di accesso consente
in automatico l'aggiornamento del solo nome della chiave di
accesso Simplekey (badge) nella rubrica dell'articolo 3451/FR.
I codici indiretti immotec e relativi nomi possono essere inseriti
esclusivamente da pc mediante il software Art. 1249B (IR 003 SW rev. 2.3 o superiori). Poiché per un medesimo codice utente
(appartamento) è possibile avere fi no a 2 chiavi di accesso
associate a nominativi diversi, in fase di chiamata tramite codice
numerico dal modulo digitale verrà visualizzato il primo nominativo
in ordine alfabetico tra i 2 inseriti.
N.B.: l'inserimento e la modifi ca dei nomi non può
essere eseguito manualmente. L'acquisizione del
badge avviene solo con modalità digitale in standby.
1. Posizionare il selettore del porter su ON vedi Fig.
6. Scegliere la modalità di chiamata e confermare.
GEST. CHIAMATA
*STANDARD
CODICE INDIRETTO
IMMOTEC STANDARD
OK OK
SCORRI ESCI
7. Riportare il selettore del porter su OFF.
2.6. Controllo accessi
L'Art. 3451/FR può funzionare in due modalità:
• "controllo accessi" disattivo: in questa modalità per ciascun
nome è possibile memorizzare in rubrica un codice chiamata ad
esso associato. Le password di ingresso devono essere inserite
separatamente e non sono associate a nessun nome.
• "controllo accessi" attivo: in questa modalità, per ciascun nome
presente in rubrica, è possibile memorizzare un codice chiamata,
un codice indiretto (solo in caso di chiamata di tipo indiretto), una
password e una chiava RFID. La possibilità di associare un nome
ad una password o chiave consente l'identifi cazione degli accessi.
Con il controllo accessi attivo non è possibile utilizzare:
• la modalità di chiamata Immotec
• il caricamento dati da 1249B (IR 003 - SW rev. 2.3 o superiori).
2. Collegare la morsettiera
3. Accedere alla fase di programmazione, vedi pag. 4
4. Scegliere impostazioni/gest. chiamata
Per passare da "controllo accessi" disattivo a "controllo
accessi" attivo è necessario eliminare tutte le password
memorizzate.
Per passare da "controllo accessi" attivo a "controllo accessi"
disattivo è necessario eliminare tutte le password e le chiavi
memorizzate.
1. Accedere alla fase di programmazione, vedi pag. 4
2. Scegliere impostazioni/controllo accessi
SCEGLI LINGUA
SECONDA LINGUA
GEST. CHIAMATA
CONTROLLO ACCESSI
OK OK
SCORRI ESCI
11
3. Scegliere:
SI
IT
NO (default)
4. Confermare
2.7. Solo nome
Consente di visualizzare il solo nome senza il codice utente
durante lo scorrimento della rubrica e la chiamata di un utente.
Questa funzione di default non è attiva.
1. Accedere alla fase di programmazione, vedi pag. 4
2. Scegliere impostazioni/solo nome
SECONDA LINGUA
GEST. CHIAMATA
CONTROLLO ACCESSI
SOLO NOME
OK OK
SCORRI ESCI
3. Scegliere:
SI
NO (default)
4. Confermare
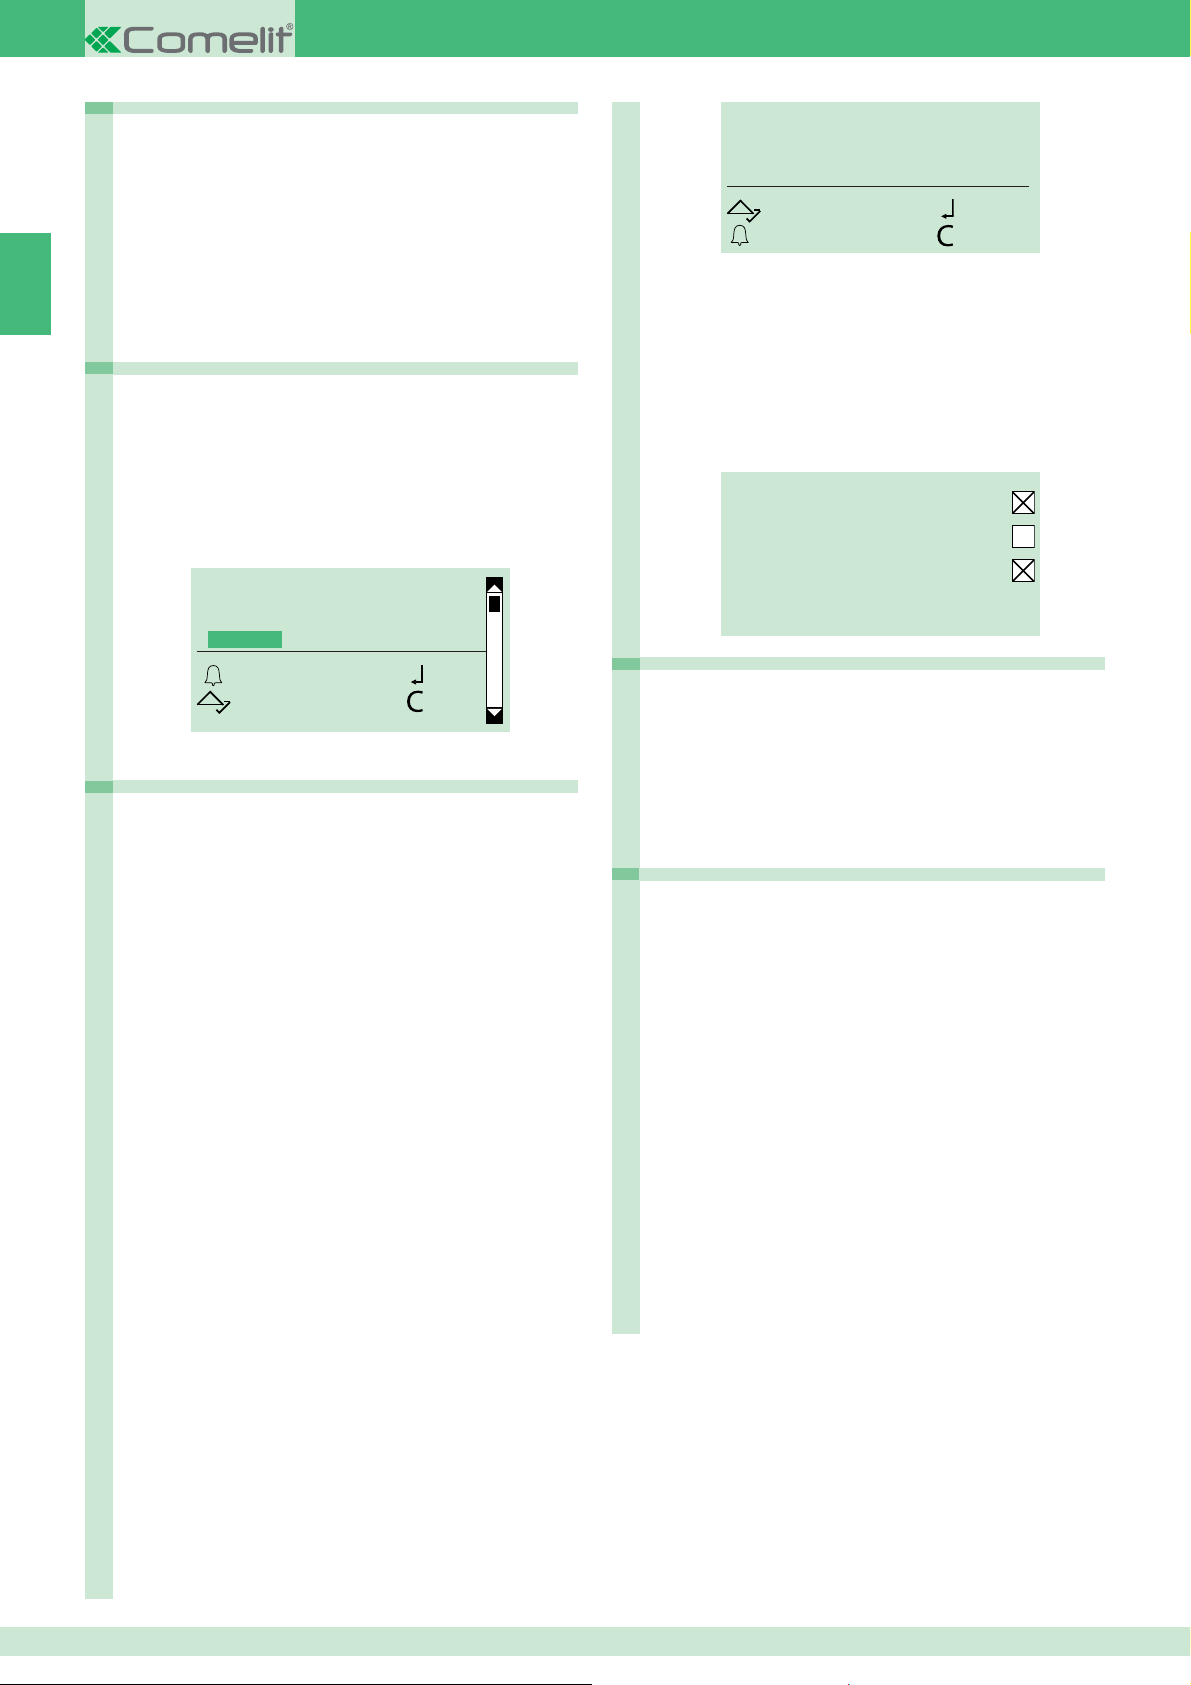
2.8. Messaggio iniziale
Questa funzione (di default non attiva) permette di inserire un
messaggio di benvenuto (MAX 40 caratteri su 4 righe in stampatello
maiuscolo).
Il messaggio di benvenuto si alterna alle normali schermate
informative ogni 4 secondi.
N.B.: il messaggio non può essere commutato nella
seconda lingua quando è attiva la funzione "SECONDA
LINGUA" (vedi cap. "2.4 Seconda lingua”).
2.8.1 MODIFICA
È possibile inserire il messaggio iniziale tramite il software Art. 1249B.
1. Accedere alla fase di programmazione, vedi pag. 4
2. Selezionare le voci di menu: impostazioni/messaggio iniziale/
modifi ca
2.8.3 MESS. STATICO
La funzione "messaggio iniziale" di default non è attiva.
Se attivata determina la visualizzazione fi ssa del messaggio iniziale
dopo 30 sec. di inattività.
1. Accedere alla fase di programmazione, vedi pag. 4
2. Selezionare: impostazioni/messaggio iniziale/mess statico
MESS. STATICO
SI
*NO
OK OK
SCORRI ESCI
3. Scegliere:
SI
NO (default)
4. Confermare
2.9 Screensaver
Questa funzione (di default non attiva) se attivata determina
l’accensione dello screensaver dopo 30 sec. di inattività.
1. Accedere alla fase di programmazione, vedi pag. 4
2. Selezionare: impostazioni/screensever
SCREEN SAVER
SI
*NO
OK OK
SCORRI ESCI
3. Scegliere:
SI per abilitare la funzione
NO per disabilitare la funzione
4. Confermare e/o premere
per uscire.
2.10 Sensibilità tastiera
BENVENUTO
SCORRI OK
ESCI CANC
3. Inserire il messaggio di benvenuto
oppure:
Cancellare il messagio esistente e inserire un nuovo messaggio.
4. Confermare.
2.8.2 ATTIVA
La funzione "messaggio iniziale" di default non è attiva.
Se attivata determina la visualizzazione fi ssa del messaggio iniziale
dopo 30 sec. di inattività.
1. Accedere alla fase di programmazione, vedi pag. 4
2. Selezionare: impostazioni/messaggio iniziale/attiva
MESSAGGIO INIZIALE
SI
*NO
OK OK
SCORRI ESCI
3. Conferma per attivare l'abilitazione del messaggio.
Questo parametro consente di impostare il grado di sensibilità della
tastiera al tocco.
1. Accedere alla fase di programmazione, vedi pag. 4
2. Selezionare: impostazioni/sens. tastiera
SENS. TASTIERA
BASSA
*INTERMEDIA
ALTA
OK OK
SCORRI ESCI
3. Scegliere tra:
bassa
intermedia (default)
alta
4. Confermare.
12
2.11 Tono tastiera
Questa funzione consente di abilitare/disabilitare i toni della tastiera.
1. Accedere alla fase di programmazione, vedi pag. 4
2. Selezionare: impostazioni/tono. tastiera
TONO TASTIERA
*SI
NO
OK OK
SCORRI ESCI
3. Scegliere tra:
SI per abilitare la funzione (default)
NO per disabilitare la funzione.
4. Confermare.
2.12 Sensore proxy
L’illuminazione della pulsantiera 3451/FR avviene tramite l’accessorio
“tettuccio led” Art. 3459. La funzione "sensore proxy" favorisce il
risparmio energetico attivando l’illuminazione solo quando l’utente si
trova in prossimità della pulsantiera.
È possibile settare il sensore su ”spento” oppure scegliere tra tre livelli
di sensibilità che rilevano la presenza dell’utente a diverse distanze
(sensibilità bassa> utente più vicino, sensibilità alta > utente più
lontano)
1. Accedere alla fase di programmazione, vedi pag. 4
2. Selezionare: impostazioni/sensore proxy
LUM. AUTOMATICA
*SI
NO
OK OK
SCORRI ESCI
3a. Scegliere SI per abilitare la luminosità automatica
Oppure:
3b. Scegliere NO (default) per abilitare la luminosità manuale
Quando è in funzione la telecamera del porter (durante chiamata
o durante autoaccensione) l’illuminazione del tettuccio led
(Art.3459) viene disattivata, per impedire che interferisca con la
ripresa
INTENS. STANDBY
020
SCORRI OK
ESCI CANC
4b. Regolare l'intensità luminosa (
tramite
e confermare.
default 20%
INTENS. ATTIVO
) per lo stato "standby"
100
IT
SENSORE PROXY
*SPENTO
BASSA
INTERMEDIA
OK OK
SCORRI ESCI
3. Scegliere tra:
spento (default)
bassa
intermedia
alta
Quando è in funzione la telecamera del porter (durante chiamata
o durante autoaccensione) l’illuminazione del tettuccio led
(Art.3459) viene disattivata, per impedire che interferisca con la
ripresa
2.13 Luminosità
L’illuminazione della pulsantiera 3451/FR avviene tramite l’accessorio
“tettuccio led” Art. 3459.
Il tettuccio led è formato da un led di cortesia laterale sempre acceso
e da più led controllabili in intensità.
È possibile controllare la luminosità dei led in modo automatico o
manualmente:
• Luminosità automatica attiva in questa modalità un sensore
rileva la quantità di luce presente nell’ambiente e il dispositivo
fornisce la quantità di luce adeguata. Con dispositivo in standby
la luce si spegne.
• Luminosità automatica disattiva in questa modalità è necessario
impostare manualmente l’intensità luminosa (da 0 a 100%) per lo
stato attivo e per lo stato di standby.
1. Accedere alla fase di programmazione, vedi pag. 4
2. Selezionare: impostazioni/luminosità
SCORRI OK
ESCI CANC
5b. Regolare l'intensità luminosa (default 100%) per lo stato "attivo"
tramite
e confermare.
2.14 Ripristina default
Questa funzione permette il ripristino delle impostazioni di default:
Lingua = Italiano
Seconda lingua = disattiva
Tipologia di impianto = Simplebus
Modalità di chiamata = chiamata standard
Controllo accessi= disattivo
Messaggio iniziale = disattivo
Sceen saver = disattivo
Tipo download = disattivo
Parametri impianto/indirizzo RS485 =0
Sensibilità tastiera = intermedia
Tono tastiera = attivo
Sensore proxy = spento
Luminosità automatica = NO
intensità standby = 20
intensità attivo = 100
1. Accedere alla fase di programmazione, vedi pag. 4
2. Selezionare: impostazioni/ripristina default
3. Scegliere tra:
SI
NO
4. Confermare.
Questa operazione azzera il database della rubrica, delle password
e delle chiavi.
13
3. Info
IT
Da questo menu è possibile visualizzare:
• il numero dei nomi presenti in rubrica,
• il numero delle password inserite
• il numero delle chiavi inserite
• l'indirizzo RS485
• la versione del software.
1. Accedere alla fase di programmazione, vedi pag. 4
2. Selezionare: info
3. Scorrere tramite
4. Premere per uscire
Gestione esterna dei dati
MULTIDOWNLOAD
È possibile utilizzare una rete RS485 per gestire il collegamento di più
moduli Art. 3451/FR allo stesso pc con installato il software Art. 1249B.
In questa modalità ogni modulo dovrà avere un CODICE ID (indirizzo
RS485) differente, vedi cap "2.2.2 indirizzo RS485"
1. Collegare i cavi della seriale RS485 ai morsetti 485D+/485Ddell'Art.3451/FR (vedi schema pag. 80).
2. Accedere alla fase di programmazione, vedi pag. 4
3. Selezionare: Impostazioni/Tipo download/RS485
TIPO DOWNLOAD
OFF
USB
*RS485
OK OK
SCORRI ESCI
Software 1249B (IR 003 - SW rev. 2.3 o superiori)
4. Avviare il software Art. 1249B
5. Avviare la procedura di download e attendere il completamento
INSTALLAZIONE DRIVER USB PER
COLLEGAMENTO ART. 3451/FR AL PC
È possibile utilizzare questo software solo con controllo accessi
disattivo (vedi "2.6 controllo accessi")
Accertarsi che sia abilitata la possibilità di installare driver privi
di fi rma Windows Logo.
1. Collegare il cavo abbinato all'Art. 1249B al connettore USB posto
sul retro del modulo rubrica
2. Accedere alla fase di programmazione, vedi pag. 4.
3. Selezionare: Impostazioni/Tipo download/USB
TIPO DOWNLOAD
OFF
*USB
RS485
OK OK
SCORRI ESCI
4. Sul PC compare "Trovato nuovo hardware Art. 3451/FR" e
"Installazione guidata nuovo hardware". Seguire le istruzioni
dell'installazione guidata fi no al completamento
ATTENZIONE: selezionare la cartella Drivers inclusa nella cartella
di installazione Art. 1249B.
UTILIZZO DELLA RUBRICA TRAMITE IL SOFTWARE
ART. 1249B
ATTENZIONE: il collegamento al pc avviene tramite USB;
assicurarsi che i drivers siano stati installati, vedi cap.
"Installazione driver USB per collegamento Art. 3451/FR al PC"
1. Collegare il cavo abbinato all'Art. 1249B al connettore USB posto
sul retro del modulo rubrica.
2. Accedere alla fase di programmazione, vedi pag. 4.
3. Selezionare: Impostazioni / Tipo download / USB
Il tipo di impianto e la modalità di chiamata selezionata devono
corrispondere a quelli impostati sul modulo Art. 3451/FR (vedi cap
"2.5. Gestione chiamata").
Accertarsi che nella "Confi gurazione parametri" dell'Art. 1249B
sia selezionata la porta di comunicazione corretta.
TIPO DOWNLOAD
OFF
*USB
RS485
OK OK
SCORRI ESCI
4. Avviare il software Art. 1249B
5. Avviare la procedura di download e attendere il completamento
Il tipo di impianto e la modalità di chiamata selezionata devono
corrispondere a quelli impostati sul modulo Art. 3451/FR, vedi cap
"2.5. Gestione chiamata".
Accertarsi che nella "Confi gurazione parametri" dell'Art. 1249B
sia selezionata la porta di comunicazione corretta.
In caso di mancata alimentazione durante la fase di memorizzazione
dei dati scaricati da usb, al successivo avvio viene mostrato
su LCD la possibilità di riprendere la memorizzazione oppure
cancellarla.
14

Warning
EN
• Install the equipment by carefully following the instructions given by the manufacturer and in compliance with the standards in force.
• All the equipment must only be used for the purpose it was designed for. Comelit Group S.p.A. declines any responsibility for improper use of the apparatus,
for any alterations made by others for any reason or for the use of non-original accessories or materials.
• All the products comply with the requirements of Directive 2006/95/EC (which replaces Directive 73/23/EEC and subsequent amendments), as certifi ed by
the CE mark they carry.
• Do not insert objects or pour liquids into the device.
• Do not route the riser wires in proximity to power supply cables (230/400V).
• Installation, mounting and assistance procedures for electrical devices must only be performed by specialised electricians.
• Cut off the power supply before carrying out any maintenance work.
Table of contents
EN
General description ..................................16
MAIN FEATURES ........................................................................... 16
EXTERNAL DATA MANAGEMENT ................................................ 16
Use .............................................................16
NAVIGATION MODE ...................................................................... 16
ENTERING SPECIAL CHARACTERS ...........................................16
FEEDBACK .................................................................................... 16
Self-testing ................................................17
Setting the language .................................................. 17
Setting the type of download .................................... 17
Programming menu ..................................17
Accessing the programming menu .......................... 17
1. Data management.................................17
1.1. Names .................................................................. 17
1.1.1 ENTER NAMES ..................................................................... 17
1.1.2 CHANGE NAMES .................................................................. 18
1.1.3 DELETE NAMES ................................................................... 18
1.1.3 CLEAR ALL NAMES .............................................................. 19
1.2. Password ............................................................. 19
1.2.1 ENTER PASSWORD ............................................................. 19
1.2.2 CHANGE PASSWORD .......................................................... 19
1.2.3 DELETE PASSWORD ........................................................... 19
1.2.3 CLEAR ALL PASSWORDS .................................................... 19
1.3. Digital keys .......................................................... 20
1.3.1 ENTER KEY........................................................................... 20
1.3.2 CHANGE KEY .......................................................................20
1.3.3 DELETE KEY ......................................................................... 20
1.2.3 CLEAR ALL KEYS ................................................................. 20
1.4. Supercode ........................................................... 20
1.4.1 ENTER NEW CODE .............................................................. 20
1.4.1 DEFAULT SETTINGS ............................................................ 20
2.5. Call management ................................................ 23
STANDARD - SIMPLEBUS (default) .................................. 23
STANDARD - SIMPLEBUS TOP ........................................ 23
INDIRECT CODE - SIMPLEBUS or SIMPLEBUS TOP ..... 23
IMMOTEC STANDARD ....................................................... 24
IMMOTEC INDIRECT .........................................................24
2.6. Access control .................................................... 24
2.7. Name only ............................................................ 25
2.8. Welcome message .............................................. 25
2.8.1 CHANGE ............................................................................... 25
2.8.2 ENABLE ................................................................................. 25
2.8.3 STATIC MESSAGE ................................................................ 25
2.9 Screensaver .......................................................... 25
2.10 Keypad sensitivity ............................................. 25
2.11 Keypad tone ........................................................ 26
2.12 Proximity sensor ................................................ 26
2.13 Brightness .......................................................... 26
2.14 Default settings .................................................. 26
3. Info .........................................................27
External data management ......................27
Software 1249B (R.I. 003 - SW rev. 2.3 or higher) ............27
INSTALLING THE USB DRIVER FOR CONNECTING
ART. 3451/FR TO A PC .................................................................. 27
USING THE DIRECTORY VIA SOFTWARE ART. 1249B............... 27
MULTIDOWNLOAD ........................................................................ 27
Connection to a computer via
Art. MOXA TCC-80 20022618..................................... 80
Connection to Art. SK9030 ........................................ 80
2. Settings .................................................20
2.1. Type of download ................................................ 20
2.2. System parameters ............................................. 20
2.2.1 SPEAKER PARAMETERS .................................................... 20
2.2.1.1 ENTER AUDIO TIME .............................................. 20
2.2.1.2 ENTER DOOR LOCK TIME .................................... 21
2.2.1.3 ENTER RESET TIME .............................................. 21
2.2.1.4 VIEW ....................................................................... 21
2.2.1.5 ADVANCED OPTIONS ........................................... 21
2.2.1.5.1 LOCK ON SE ................................................ 21
2.2.1.5.2 RELAY CONTACT .......................................... 21
2.2.1.5.3 S SERIAL ....................................................... 22
2.2.1.5.4 VOICE MESSAGES ....................................... 22
2.2.1.5.5 CALL............................................................... 22
2.2.1.5.6 SELF IGNITION ............................................. 22
2.2.1.5.7 DEFAULT SETTINGS..................................... 22
2.3. Select language ................................................... 23
2.4. Second language ................................................ 23
15
General description
MAIN FEATURES
• Directory memory: 4000 names (of 20 characters), 4000
passwords, 4000 keys.
• 16 languages available with the option of setting a second
language.
• 2 operating modes:
EN
• Access control disabled
• Access control enabled
• 4 Simplebus or Simplebus Top call management modes:
• Standard
• Indirect code
• Immotec standard (for future uses).
• Immotec indirect (for future uses).
• Display of name only without code.
• Screensaver activation.
• Option of customising:
• Keypad sensitivity
• Keypad tone
• Initial welcome message (on 4 lines of 10 characters each)
• Name directory standby messages
EXTERNAL DATA MANAGEMENT
• Software Art. 1249B (R.I. 003 - SW rev. 2.3 or higher) can be used
(only while access control is disabled) to: enter (upload) and read
(download) names and passwords by means of a PC connection
via USB or over an RS485 line.
ENTERING SPECIAL CHARACTERS
If alphanumeric characters are permitted (for example in data
management/names/enter names), press the corresponding key
repeatedly to enter the special characters.
KEYPAD: Special characters
,;:._-#*"1 ABCÅÄĄÆßČĆ2 DEFÉĘĚ3
GHI4 JKLŁ5 MNOŃÖØÓ6
PQRS7 TUVÜ8 WXYZ9
Use
NAVIGATION MODE
Scroll through the menu using .
Press
Highlighting indicates that the element is selected:
* indicates that the option is enabled:
or to confi rm.
DATA MANAGEMENT
SETTINGS
INFO
OK OK
SCROLL ESC
Certain buttons perform different functions depending on
the context: to use the device correctly you must follow the
on-screen suggestions
TYPE OF DOWNLOAD
*OFF
USB
RS485
OK OK
SCROLL ESC
DATA MANAGEMENT
*OFF
space 0
FEEDBACK
The system provides the following messages:
• confi rmation: when a procedure is completed successfully
• error: when a procedure is not permitted or has not been
successful
• please wait: when a procedure is in progress
CONFIRMATION
MESSAGE
ERROR MESSAGE
PLEASE WAIT
16
Self-testing
On power-up, the device runs a diagnostic test of the connections to
check for correct speaker module communication and confi guration.
The message PLEASE WAIT indicates self-testing in progress.
On completion of self-testing, press the
standby.
The word OK should appear next to the menu items with the name
SIMPLEBUS or SIMPLEBUS TOP at the bottom of the screen
depending on the confi guration of the speaker module and the
directory module.
INITIALIZING OK
NAMES STORED OK
PASSWORD OK
KEYS OK
SPEAK. SERIAL OK
SIMPLEBUS
Setting the language
When you switch the system on, you will be asked to select the
desired language (default = Italian).
1. Scroll through the list using
2. Press
or to confi rm.
SELECT LANGUAGE
ITALIANO
*ENGLISH
FRANCAIS
OK OK
SCROLL ESC
.
key to put the module in
Accessing the programming menu
Move CV2 and power up the module.
or:
1. Press
2. Enter the supercode (default 778899).
3. Press
.
ENTER PASSWORD:
9
*****
OK CANC
to confi rm.
DATA MANAGEMENT
SETTINGS
INFO
OK OK
SCROLL ESC
EN
3. Press
to exit.
Setting the type of download
In SIMPLEBUS/SIMPLEBUS TOP mode and with USB connected: when
you switch the system on, you will be asked to select the type of download.
1. Scroll through the list using
2. Press
3. Press
or to confi rm.
TYPE OF DOWNLOAD
*OFF
USB
RS485
OK OK
SCROLL ESC
to exit.
For downloading in RS485 mode, see diagram on page 80.
To avoid malfunctions: during download in USB mode, the
keypad must not be powered by an external source
.
Programming menu
From the programming menu you can:
• manage the entry, editing and deletion of names, codes,
passwords, keys and supercodes;
• change the settings (type of download, system parameters,
language, second language, call management...);
• view information on the device.
1. Data management
Before storing data in the directory, we recommend selecting:
• the call management mode, see "2.5 Call management"
• the access control mode you wish to adopt, see "2.6 Access
control".
Data entry and changes can be managed externally using
software 1249B (R.I. 003 - SW rev. 2.3 or higher).
1.1. Names
1.1.1 ENTER NAMES
not available if the call mode is IMMOTEC STANDARD or
IMMOTEC INDIRECT (see section 2.5)
"Enter names" can be used to enter names and all the data
associated with them (call code, indirect code, password, RFID
key).
1. Access programming mode, see page 17.
2. Select data management/names/enter names by pressing
or to confi rm.
3. Enter the name.
MARIO ROSS_
ESC CANC
OK
17
EN
4. Press to confi rm.
5. Enter the "call code" and press to confi rm.
IN SIMPLEBUS MODE
CODE:
_ _ 2
SKIP OK
ESC CANC
IN SIMPLEBUS TOP MODE (see "2.5 Call management")
CODE:
SKIP OK
ESC CANC
_ _ _ _ _ 2
or:
press
to skip entry.
ONLY WITH "INDIRECT CODE" ENABLED (see section 2.5)
6. Enter the "indirect code" and press to confi rm.
INDIRECT CODE:
_ _ _ _ _ 2
1.1.2 CHANGE NAMES
"Change names" can be used to change a name and call code,
plus the indirect code associated with it.
not available if the call mode is IMMOTEC STANDARD or
IMMOTEC INDIRECT (see section 2.5)
1. Access programming mode, see page 17.
2. Select data management/names/change names by scrolling
through the menu using
ENTER NAMES
CHANGE NAMES
DELETE NAMES
CLEAR ALL NAMES
OK OK
SCROLL CANC
3. Enter the name (full name or just the fi rst letter).
M_
ESC CANC
4. Press to start searching.
5. Scroll using and/or press or to confi rm the name
you wish to change.
and pressing or to confi rm.
OK
SKIP OK
ESC CANC
or:
press
to skip entry.
ONLY WITH "ACCESS CONTROL" ENABLED (see section
7. Enter the password and press to confi rm.
The password must be at least 4 characters long
ENTER PASSWORD:
_ _ _ 3416
SKIP OK
ESC CANC
» The red and green LEDs fl ash alternately to indicate that the
device is waiting for a key to be registered.
or:
press
to skip entry.
8. Move the key over the RFID sensor.
PASS KEY
2.6)
MARIO ROSSI_
OK OK
SCROLL CANC
6. Change the name and press to confi rm.
7. Change the "call code" and press to confi rm.
ONLY WITH "INDIRECT CODE" ENABLED (see section 2.5)
8. Change the indirect code and press to confi rm.
9. Press to exit.
1.1.3 DELETE NAMES
"Delete names" can be used to remove a name and the data
associated with it.
1. Access programming mode, see page 17.
2. Select data management/names/delete names by scrolling
through the menu using
ENTER NAMES
CHANGE NAMES
DELETE NAMES
CLEAR ALL NAMES
OK OK
SCROLL CANC
and pressing or to confi rm.
SKIP OK
ESC CANC
» The confi rmation message "KEY DETECTED" "COLOUR"
will appear on the display.
or:
press
to skip entry.
18
3. Enter the name (full name or just the fi rst letter).
M_
ESC CANC
OK
4. Press to start searching.
5. Scroll using and/or press or to confi rm the name
you wish to remove.
6. Press to exit.
1.1.3 CLEAR ALL NAMES
"Clear all names" can be used to remove all names and the data
associated with them.
1. Access programming mode, see page 17.
2. Select data management/names/clear all names by scrolling
through the menu using
ENTER NAMES
CHANGE NAMES
DELETE NAMES
CLEAR ALL NAMES
OK OK
SCROLL CANC
and pressing or to confi rm.
ONLY WITH "ACCESS CONTROL" ENABLED (see section 2.6)
3b. Enter the name to which the password you wish to change
is assigned (in full or just the fi rst letter).
M_
ESC CANC
4b. Press
5b. Scroll using
to start searching.
and/or press or to confi rm the
OK
selected name.
6. Change the password and press to confi rm.
The password must be at least 4 characters long
7. Press to exit.
EN
3. Press to confi rm deletion or press to exit.
1.2. Password
Password entry makes it possible to activate the door lock relay.
1.2.1 ENTER PASSWORD
1. Access programming mode, see page 17.
2. Select data management/passwords/enter by scrolling through
the menu using
ONLY WITH "ACCESS CONTROL" ENABLED
3. Enter the name to which you wish to assign the password
(in full or just the fi rst letter).
4. Press
5. Scroll using
selected name.
6. Enter the password (max. 6 characters).
The password must be at least 4 characters long
7. Press to confi rm or press to exit.
1.2.2 CHANGE PASSWORD
1. Access programming mode, see page 17.
2. Select data management/passwords/change by scrolling
through the menu using
ONLY WITH "ACCESS CONTROL" DISABLED (see section 2.6)
3a. Enter the password you want to change.
and pressing or to confi rm.
M_
ESC CANC
to start searching.
and/or press or to confi rm the
and pressing or to confi rm.
(see section 2.6)
OK
1.2.3 DELETE PASSWORD
1. Access programming mode, see page 17.
2. Select data management/passwords/delete by scrolling
through the menu using
and pressing or to confi rm.
ONLY WITH "ACCESS CONTROL" DISABLED (see section 2.6)
3a. Enter the password you want to delete.
TROVA PASSWORD:
SEARCH PASSWORD:
883466
_ _ _ _ _ _
OK CANC
ESC CANC
4a. Press
to start searching.
OK
ONLY WITH "ACCESS CONTROL" ENABLED (see section 2.6)
3b. Enter the name to which the password you wish to delete
is assigned (in full or just the fi rst letter).
M_
ESC CANC
4b. Press
5b. Scroll using
to start searching.
and/or press or to confi rm the
OK
selected name.
6. Press to delete the password.
7. Press to exit.
1.2.3 CLEAR ALL PASSWORDS
1. Access programming mode, see page 17.
2. Select data management/passwords/clear all by scrolling
through the menu using
3. Press to confi rm deletion or press to exit.
and pressing or to confi rm.
SEARCH PASSWORD:
OK CANC
ESC CANC
4a. Press
to start searching.
TROVA PASSWORD:
883466
_ _ _ _ _ _
OK
19
1.3. Digital keys
1.4. Supercode
EN
The use of RFID keys can only be managed when "access
control" mode is enabled
ONLY WITH "ACCESS CONTROL" ENABLED (see section 2.6)
1.3.1 ENTER KEY
1.3.2 CHANGE KEY
1. Access programming mode, see page 17.
2. Select data management/keys/(enter/change) by scrolling
through the menu using
confi rm.
3. Enter the name for which you wish to assign/change the key
(in full or just the fi rst letter).
M_
ESC CANC
4. Press to start searching.
5. Scroll using and/or press or to confi rm the
selected name.
ESC CANC
» The red and green LEDs fl ash alternately to indicate that the
device is waiting for a key to be registered.
and pressing or to
OK
PASS KEY
OK
1.4.1 ENTER NEW CODE
The supercode (default 778899) is used to access the
programming menus.
1. Access programming mode, see page 17.
2. Select the menu entries: Select data management/supercode/
enter new code by scrolling through the menu using
pressing
3. Change the supercode (max. 6 digits).
The supercode must be at least 4 digits long
4. Press to confi rm.
or to confi rm.
ENTER NEW CODE
DEFAULT SETTINGS
OK OK
SCROLL ESC
NEW SUPERCODE:
724584
ESC CANC
OK
1.4.1 DEFAULT SETTINGS
1. Access programming mode, see page 17.
2. Select data management/supercode/default settings by scrolling
through the menu using
The command cannot be cancelled
and pressing or to confi rm.
and
6. Move the key over the RFID sensor.
» The confi rmation message "KEY DETECTED COLOUR ..."
will appear on the display.
1.3.3 DELETE KEY
1. Access programming mode, see page 17.
2. Select data management/keys/delete by scrolling through
the menu using
3. Enter the name for which you wish to delete the key (in full
or just the fi rst letter).
M_
4. Press to start searching.
5. Scroll using and/or press or to confi rm the
selected name.
6. Press to delete the key or press to exit.
and pressing or to confi rm.
OK
ESC CANC
1.2.3 CLEAR ALL KEYS
1. Access programming mode, see page 17.
2. Select data management/keys/clear all by scrolling through
the menu using
3. Press to confi rm deletion or press to exit.
and pressing or to confi rm.
2. Settings
2.1. Type of download
1. Access programming mode, see page 17.
2. Select: settings/type of download.
2. Choose between:
OFF
USB
RS485
For downloading in RS485 mode, see diagram on page 80
TYPE OF DOWNLOAD
*OFF
USB
RS485
OK OK
SCROLL ESC
2.2. System parameters
2.2.1 SPEAKER PARAMETERS
2.2.1.1 ENTER AUDIO TIME
1. Access programming mode, see page 17.
2. Select: settings/system parameters/speaker
parameters/audio time.
3. Enter the desired value:
RANGE = 10 - 180 sec.
20
VALUE IN SECS
10
SCROLL OK
ESC CANC
4. Confi rm.
2.2.1.2 ENTER DOOR LOCK TIME
1. Access programming mode, see page 17.
2. Select: settings/system parameters/speaker
parameters/door lock time.
3. Enter the desired value:
RANGE = 1 - 8 sec.
4. Confi rm.
2.2.1.3 ENTER RESET TIME
1. Access programming mode, see page 17.
2. Select: settings/system parameters/speaker
parameters/reset time.
3. Enter the desired value.
RANGE = 1 - 10 sec.
4. Confi rm.
4. Confi rm.
C) STANDBY LOCK REL.
Allows enabling/disabling of the standby lock release on
the speaker module
1. Access programming mode, see page 17.
2. Select: settings/system parameters/speaker parameters/
advanced options/lock on SE/standby lock rel.
3. Choose between:
YES (default)
NO
4. Confi rm.
D) VIEW
Allows viewing of the door lock parameters on the SE
output of the speaker module
1. Access programming mode, see page 17.
2. Select: settings/system parameters/speaker parameters/
advanced options/lock on SE/view.
» Reproduces the parameter values: type, confi rmation tone,
standby lock release.
TYPE AC PLUS
CONFIRMATION TONE
EN
2.2.1.4 VIEW
1. Access programming mode, see page 17.
2. Select: settings/system parameters/speaker
parameters/view.
» Reproduces the parameter values: audio time, door
lock time and reset time.
AUDIO TIME 010
DOOR LOCK TIME 02
RESET WAIT TIME 10
SIMPLEBUS
2.2.1.5 ADVANCED OPTIONS
2.2.1.5.1 LOCK ON SE
A) TYPE
Allows setting of the door lock type on the SE output of
the speaker module
1. Access programming mode, see page 17.
2. Select: settings/system parameters/speaker parameters/
advanced options/lock on SE/type.
3. Choose between:
AC (default)
AC PLUS
DC
4. Confi rm.
TYPE
*AC
AC PLUS
DC
OK OK
SCROLL ESC
STANDBY LOCK REL.
2.2.1.5.2 RELAY CONTACT
A) ACTUATOR FUNCTION
Allows enabling/disabling of the actuator function on the
relay contact
1. Access programming mode, see page 17.
2. Select: settings/system parameters/speaker parameters/
advanced options/relay contact/actuator function.
3. Choose between:
YES
NO
4. Confi rm.
B) IN PARALLEL TO SE
Allows enabling/disabling of the relay contact in parallel
to the speaker module SE output
1. Access programming mode, see page 17.
2.
Select: settings/system parameters/speaker parameters/
advanced options/relay contact/in parallel to SE.
3. Choose between:
YES
NO
4. Confi rm.
C) VIEW
Allows viewing of the relay contact parameters
1. Access programming mode, see page 17.
2. Select: settings/system parameters/speaker parameters/
advanced options/relay contact/view.
» Reproduces the relay contact parameters.
B) CONFIRMATION TONE
Allows enabling/disabling of the door lock confi rmation
tone on the speaker module
1. Access programming mode, see page 17.
2. Select: settings/system parameters/speaker parameters/
advanced options/lock on SE/confi rmation tone.
3. Choose between:
YES
NO
ACTUATOR FUNCTION
ACTIVATION TIME 03
IN PARALLEL TO SE
21
EN
2.2.1.5.3 S SERIAL
A) ACTUATOR FUNCTION
Allows enabling/disabling of the actuator function on the
S serial line
1. Access programming mode, see page 17.
2. Select: settings/system parameters/speaker parameters/
advanced options/S serial/actuator function.
3. Choose between:
YES
NO
4. Confi rm.
2.2.1.5.4 VOICE MESSAGES
Allows enabling/disabling of voice and visual messages
on the speaker module
1. Access programming mode, see page 17.
2. Select: settings/system parameters/speaker parameters/
advanced options/voice messages.
3. Select a language to enable voice and visual messages on
the speaker module, or select OFF to disable voice and visual
messages on the speaker module.
SELECT LANGUAGE
*OFF
ITALIANO
FRANCAIS
OK OK
SCROLL ESC
4. Confi rm.
2.2.1.5.5 CALL
A) TRIPLE CALL
Allows enabling/disabling of the triple call function
1. Access programming mode, see page 17.
2. Select: settings/system parameters/speaker parameters/
advanced options/call/triple call.
3. Choose between:
YES
NO (default)
4. Confi rm.
B) CONFIRMATION TONE
Allows enabling/disabling of the the call confi rmation
tone
1. Access programming mode, see page 17.
2. Select: settings/system parameters/speaker parameters/
advanced options/call/confi rmation tone.
3. Choose between:
YES (default)
NO
4. Confi rm.
C) CODES BOOSTER
Allows enabling/disabling of the call codes booster
1. Access programming mode, see page 17.
2. Select: settings/system parameters/speaker parameters/
advanced options/call/codes booster.
3. Choose between:
YES
NO (default)
4. Confi rm.
VALUE IN SECS
10
SCROLL OK
ESC CANC
4. Confi rm.
D) VIEW
Allows viewing of the speaker module call parameters
1. Access programming mode, see page 17.
2. Select: settings/system parameters/speaker parameters/
advanced options/call/view.
» Reproduces the speaker module call parameters
TRIPLE CALL
CONFIRMATION TONE
CODES BOOSTER
ANSWER WAIT TIME 60
2.2.1.5.6 SELF IGNITION
Allows enabling/disabling of self-ignition
1. Access programming mode, see page 17.
2. Select: settings/system parameters/speaker parameters/
advanced options/call/self ignition.
3. Choose between:
YES (default)
NO
4. Confi rm.
2.2.1.5.7 DEFAULT SETTINGS
Used to restore the default settings:
De-misting heating element = disabled
Audio-visual messages = disabled
Door lock command on SE in AC
Door lock time = 2 sec + tone disabled
C.NC.NO relay in parallel with SE
Door lock-release always enabled
Actuator function on S serial line = disabled
Answer wait time = 60 sec
Conversation time = 90 sec
Self-ignition = enabled
Confi rmation tone on user call = enabled
Reset wait time = 10 sec
Send call = single
Control of internal units connected to speaker module = up to 70
System mode = Simplebus
1. Access programming mode, see page 17.
2. Select: settings/system parameters/speaker parameters/
advanced options/default settings.
3. Choose between:
YES
NO
4. Confi rm.
C) ANSWER WAIT TIME
Allows setting of the call answer wait time
1. Access programming mode, see page 17.
2. Select: settings/system parameters/speaker parameters/
advanced options/call/answer wait time.
3. Enter the value in seconds.
22
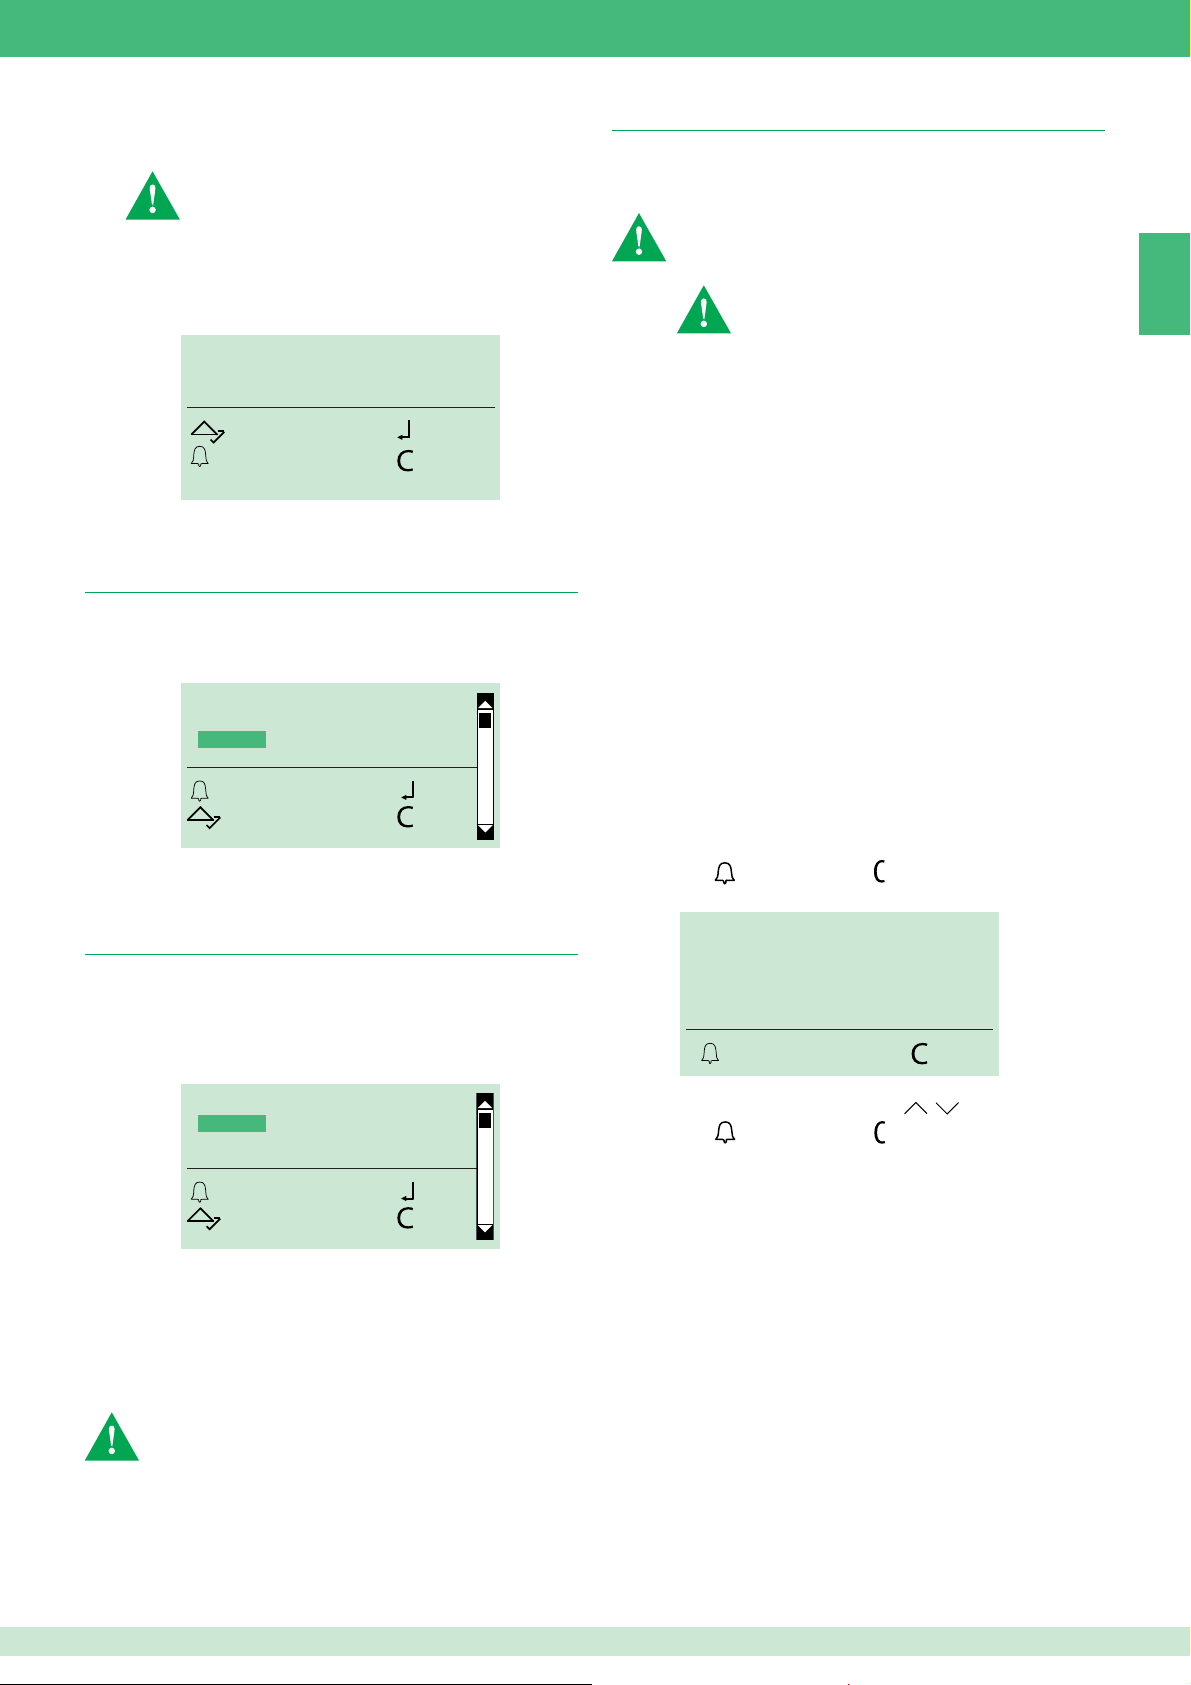
2.2.2 RS485 ADDRESS
2.5. Call management
2.2.2.1 RS485 ADDRESS
For data downloading via RS485, please refer to the wiring
diagram on page 80
For connection to module SK9020, please refer to the
wiring diagram on page 80
1. Access programming mode, see page 17.
2. Select: settings/system parameters/RS485
address/RS485 address.
3. Enter the RS485 address (max. 3 digits).
RS485 ADDRESS
000
SCROLL OK
ESC CANC
4. Confi rm.
2.3. Select language
This menu can be used to set the main language.
1. Access programming mode, see page 17.
2. Select: settings/select language.
SELECT LANGUAGE
ITALIANO
*ENGLISH
FRANCAIS
OK OK
SCROLL ESC
3. Select the desired language.
4. Confi rm.
Allows setting of the system type (Simplebus or Simplebus Top)
and call mode (Standard, indirect code, Immotec or Immotec
indirect).
CAUTION: set the system type (Simplebus or Simplebus Top)
and only afterwards the call mode (Standard, Indirect code,
Immotec standard or Immotec indirect)
To change the system type and call mode it
is necessary to erase the entire directory, see
"1.1.3 CLEAR ALL NAMES"
SIMPLEBUS (default) for systems without switching devices
Art. 1424 in Top 1, 2, 3 mode (see FT SB 21) which defi ne
the system zones.
SIMPLEBUS TOP for systems with switching devices Art. 1424
in Top 1, 2, 3 mode (see FT SB 21) which defi ne the system
zones.
STANDARD - SIMPLEBUS (default)
In this mode, the user is identifi ed by a name fi eld and a code fi eld
no longer than 3 digits (between 1 and 240).
Example:
User name= Mario Rossi
Code= 2
STANDARD - SIMPLEBUS TOP
In this mode, the user is identifi ed by the name fi eld (optional) and
a code fi eld consisting of two parts:
zone fi eld with no more than 3 digits (between 1 and 500);
user fi eld which must have 3 digits (between 1 and 240).
Example:
User name= Mario Rossi
Code= 25 015
The call can be made in the following ways:
√ During normal operation
1. Enter the user code (e.g. 25 015).
2. Press to make the call or to cancel and exit.
EN
2.4. Second language
Allows the alternate switching of name directory standby messages
from the main language to the second language.
1. Access programming mode, see page 17.
2. Select: settings/second language.
3. Select the desired second language and confi rm.
SCEGLI LINGUA
*ITALIANO
ENGLISH
FRANCAIS
OK OK
SCORRI ESCI
DEFAULT = Second language disabled.
To disable the second language:
1. Access programming mode, see page 17.
2. Select: settings/second language.
3. Select DEFAULT and confi rm.
or:
Re-set the main language (see "2.3 Language").
IMPORTANT: If entered, the initial welcome message (see
section “2.8 Initial message”) will not be switched to the second
language
The second language must be set after the main language has
been selected
CALL USER
_25 015
CALL CANC
or:
1. Scroll through the directory using .
2. Press to make the call or to exit.
INDIRECT CODE - SIMPLEBUS or SIMPLEBUS TOP
In this mode the user is identifi ed by a name fi eld (optional), a code
fi eld (different for Simplebus and Simplebus Top) and an indirect
code with no more than 6 characters.
Example:
User name= Mario Rossi
Code= 2 (for Simplebus) or 25 015 (for Simplebus top)
Indirect code= 100
23
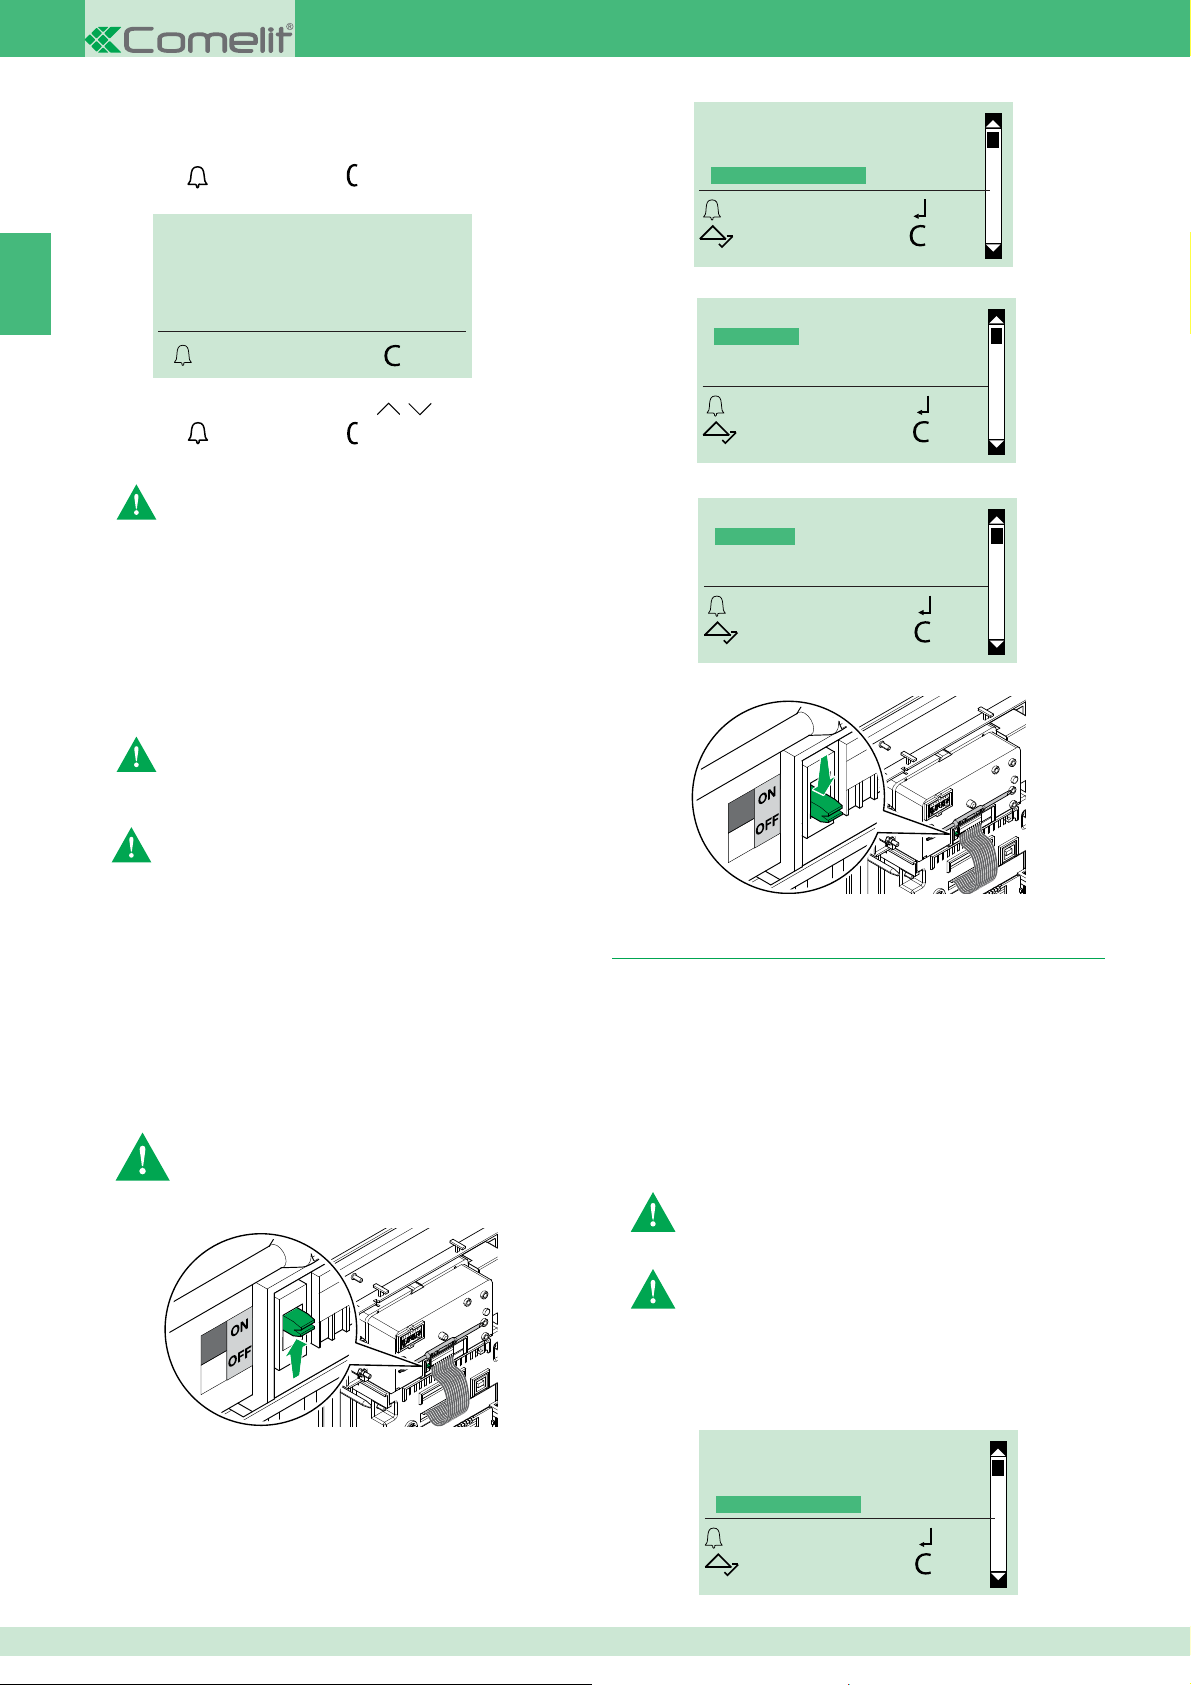
The call can be made in the following ways:
√ During normal operation
1. Enter the indirect code (e.g. 100).
2. Press to make the call or to cancel and exit.
EN
or:
1. Scroll through the directory using .
2. Press to make the call or to exit.
IMMOTEC STANDARD
Art. 3451/FR can be used in conjunction with the Simplekey module
Art. SK9020 by connecting the two products via RS485 (see
diagram on page 80).
In this confi guration, the use of Simplekey access keys (badges)
automatically allows entry of the corresponding code/name (new
key) or updating of the name only (if the code already exists) in the
directory of Art. 3451/FR. Since a single user code (apartment) can
have up to 2 access keys associated with it under different names,
during a numeric code call from the digital module the fi rst name of
the 2 in alphabetical order will be displayed.
CALL USER
_ _ _ 100
CALL CANC
This call mode is only available when "access control" is
disabled
SYSTEM PARAMETERS
SELECT LANGUAGE
SECOND LANGUAGE
CALL MANAGEMENT
OK OK
SCROLL ESC
5. Select the system type and confi rm.
CALL MANAGEMENT
*SIMPLEBUS
SIMPLEBUS TOP
OK OK
SCROLL ESC
6. Select the call mode and confi rm.
CALL MANAGEMENT
*STANDARD
INDIRECT CODE
IMMOTEC STAND.
OK OK
SCROLL ESC
7. Set the speaker module selector to OFF.
N.B.: names cannot be entered and changed manually.
Badge acquisition only takes place when digital mode is in
standby
IMMOTEC INDIRECT
This call mode is only available when "access control" is
disabled
Art. 3451/FR can be used in conjunction with the Simplekey module
Art. SK9020 by connecting the two products via RS485 (see
diagram on page 80).
In this confi guration the use of access keys allows automatic
updating of the Simplekey access key (badge) name only, as
it appears in the directory of Art. 3451/FR. The Immotec indirect
codes and corresponding names can only be entered from a PC
using software Art. 1249B (R.I. 003 - SW rev. 2.3 or higher). Since
a single user code (apartment) can have up to 2 access keys
associated with it under different names, during a numeric code call
from the digital module the fi rst name of the 2 in alphabetical order
will be displayed.
N.B.: names cannot be entered and modifi ed manually.
Badge acquisition only takes place when digital mode is
in standby
1. Set the speaker unit selector to ON, see Fig.
2.6. Access control
Art. 3451/FR can operate in two modes:
• "access control" disabled: in this mode, every name can be
assigned a call code, which is saved in the directory. The entry
passwords must be entered separately and are not assigned to
any name.
• "access control" enabled: in this mode, a call code, an indirect
code (only in case of indirect call), a password and an RFID key
can be saved for every name listed in the directory. The option of
assigning a password or key to a name allows access identifi cation.
When access control is enabled, the following cannot be used:
• Immotec call mode
• data loading from 1249B (R.I. 003 - SW rev. 2.3 or higher)
To switch from "access control" disabled to "access control"
enabled, all saved passwords must be deleted
2. Connect the terminal block.
3. Access programming mode, see page 17.
4. Select settings/call management.
24
To switch from "access control" enabled to "access control"
disabled, all saved passwords and keys must be deleted
1. Access programming mode, see page 17.
2. Select settings/access control.
SELECT LANGUAGE
SECOND LANGUAGE
CALL MANAGEMENT
ACCESS CONTROL
OK OK
SCROLL ESC
 Loading...