

Clear-Com LQ Series, LQ-2W2, LQ-4W2, LQ-4WG2, LQ-R2W4 Quick Start Manual
...
Page 1 PN: 399G228 Rev A 29 August, 2017
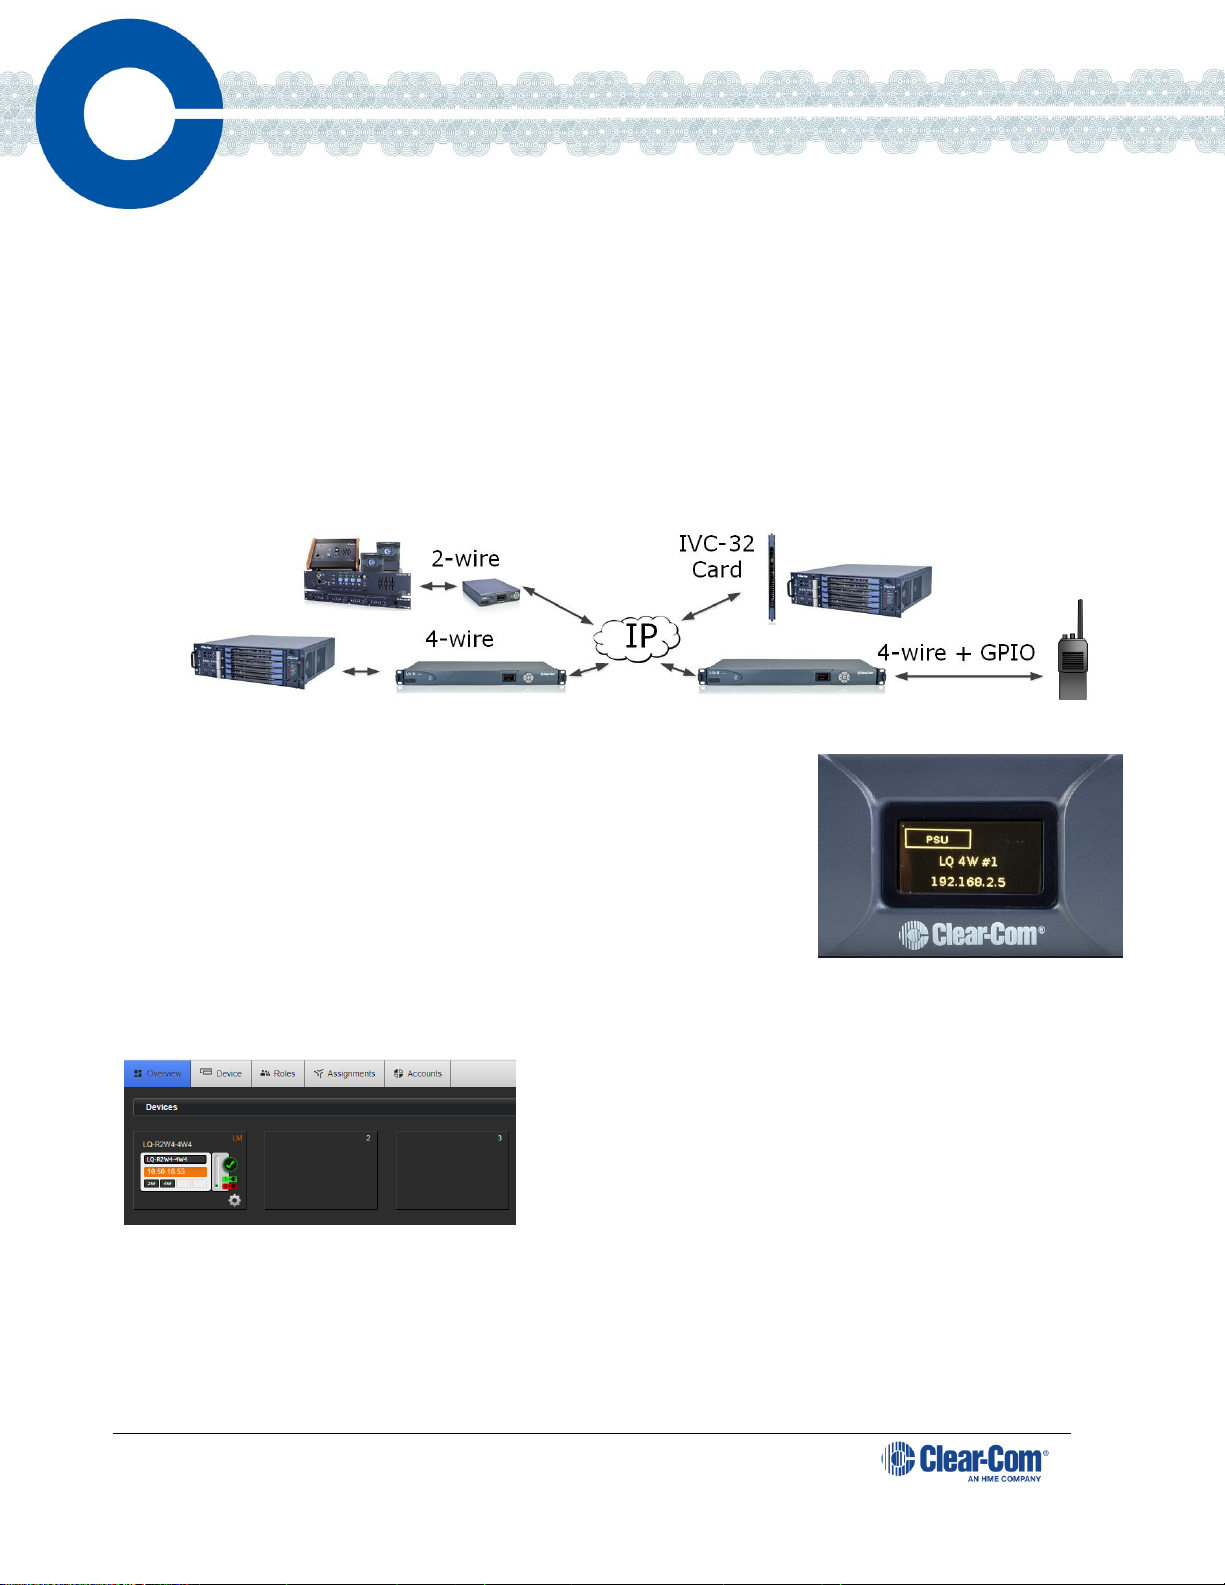
The following Quick Start Guide provides basic installation and configuration instructions for your LQ
system. LQ is a new IP interface for Clear-Com audio products. It offers LAN, WAN and Internet
connectivity for the distribution of audio and data.
• LQ-2W2 provides two channels of 2-wire analog partyline (2x XLR)
• LQ-4W2 provides two 4-wire analog interface ports (4x RJ45 etherCON)
• LQ-4WG2 provides two 4-wire + GPIO analog interface ports (4x DB-9)
• LQ-R2W4 provides four channels of 2-wire analog partyline with pass-through (8 XLRs)
• LQ-R4W8 provides eight 4-wire analog interface ports (8x RJ45 etherCON)
• LQ-R4WG8 provides eight 4-wire + GPIO analog interface ports (8x DB-9)
• LQ-R2W4-4W4 provides four channels of 2-wire (4x XLR) and four ports of 4-wire (4x RJ45 etherCON)
• LQ-2W4+4WG4 provides four channels of 2-wire (4x XLR) and four ports of 4-wire + GPIO (4x DB-9)
Powering and connecting the LQ units
1) Connect the LQ unit to a network using standard Ethernet cable and
apply power (use either the DC power supply cable provided or PoE).
The LQ-R variants have redundant power supplies.
2) Within a web browser's address field, enter the IP address displayed
on the front panel of the LQ.
3) Enter the default login credentials: Username – admin, Password –
admin.
Core Configuration Manager (CCM)
The CCM has five primary views.
• Overview – Status and state information for all devices and
endpoints in the Link-Group.
• Device – Configuration options associated with a specific device.
• Roles – Admin-defined configurations that Agent-IC can select.
• Assignments – Configuration of audio and data routes between
LQ interfaces.
• Accounts – Interconnectivity to other interfaces such as a SIP
server, Eclipse-HX IVC-32 card or hosting of Agent-IC clients.
Note: If your network does not support
DHCP you must assign a static IP
address to the LQ device:
1) Press the center button on the
LQ front panel keypad for 3-4
seconds.
2) Navigate to Networking >
Edit > DHCP and select
Disabled.
3) Backup one menu and select IP
Address.
4) Using the keypad, press the
center button to enable/disable
editing and the up/down arrow
buttons to
increment/decrement the IP
address values.
5) Select Save.
LQ™ Series 4.0 Quick Start
LQTM
Quick Start Guide | LQ™ Series
Page 2 PN: 399G228 Rev A 29 August, 2017
Copyright © 2017 HME Clear-Com Ltd. All rights reserved.
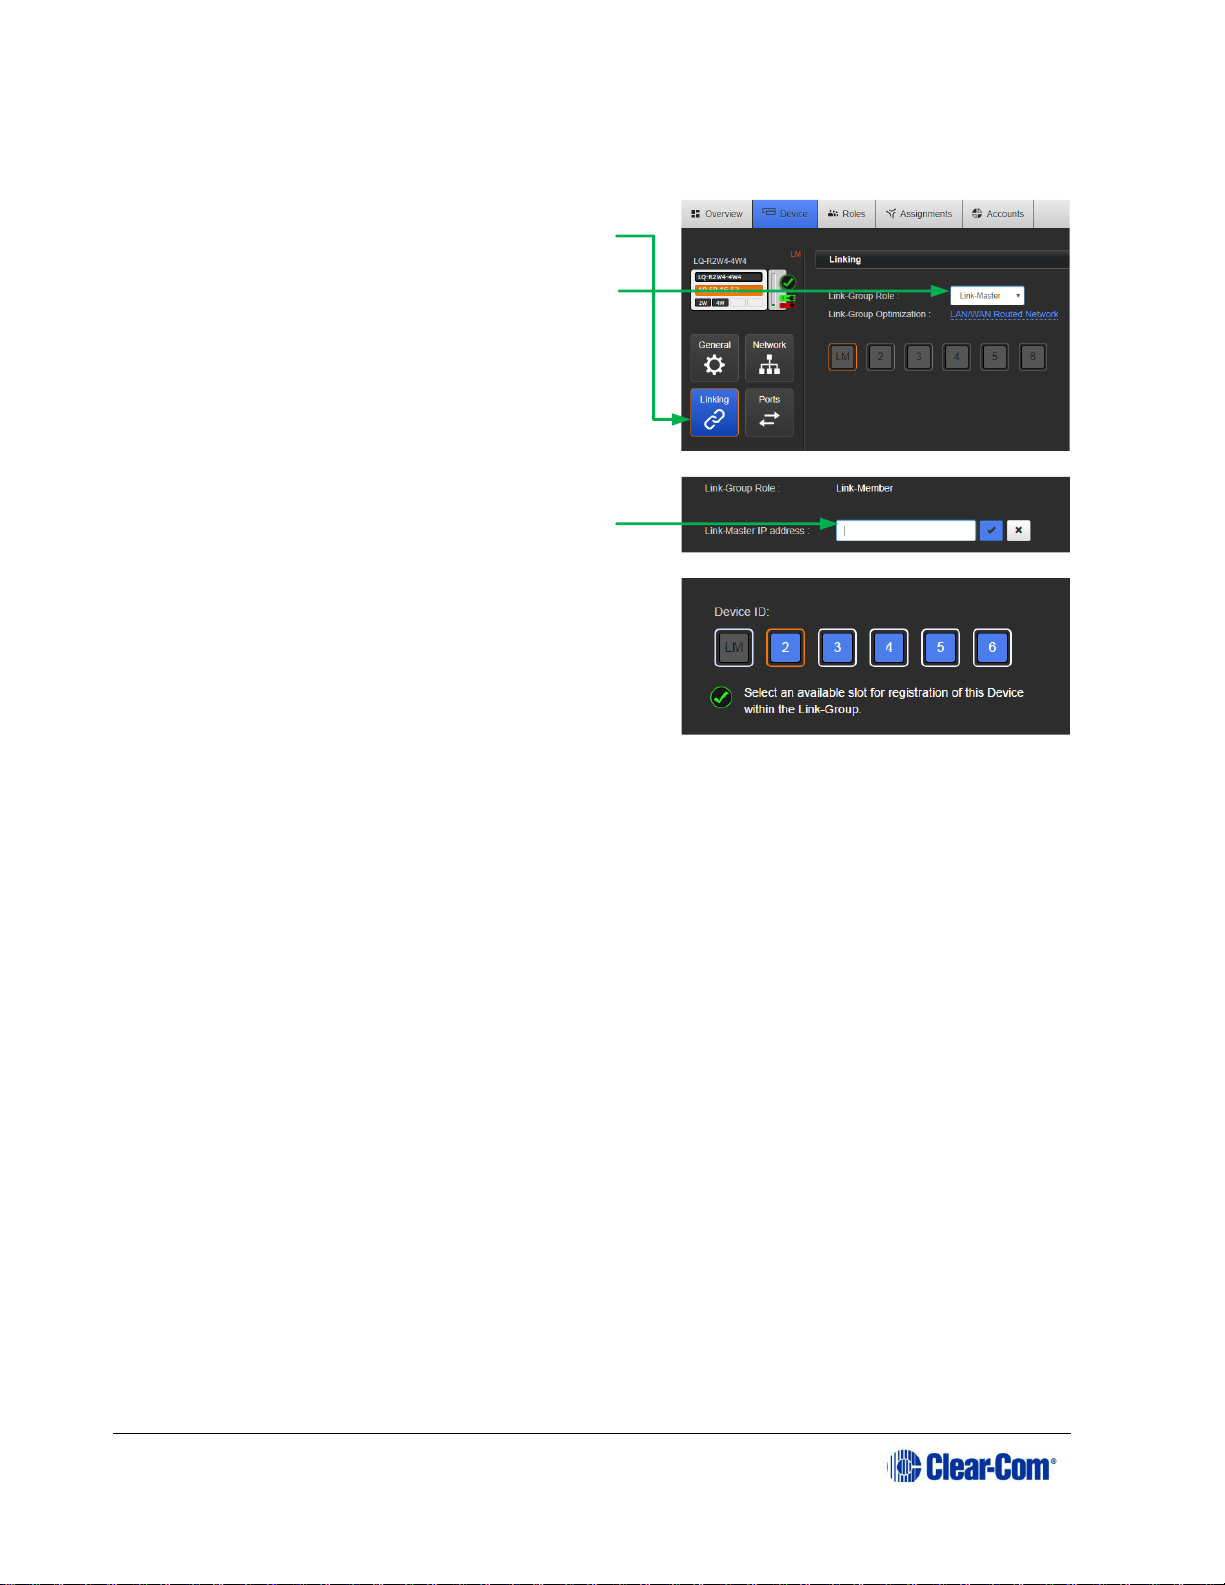
Linking the devices
1) Designate a single LQ as
the Link-Master and
physically connect it to
the network. Note the IP
address displayed on
the front panel
2) Now physically connect
another LQ to the IP
network and browse to
the IP address displayed
on the front panel using
any major web browser
3) Click Device > Linking.
4) Select Link-Member
option from the LinkGroup Role drop-down
5) Click on Link-Master
IP address and enter
the IP address displayed
on the Front Panel of
the LQ designated in
step 1. Click on the blue
check box or press
<ENTER> to submit.
6) Select a device ID
(highlighted in blue).
7) Repeat steps 2-5 for
each remaining LQ in
the Link-Group.
Note: For Link-Groups that include HelixNet, you must designate the HelixNet Main Station as
the Link-Master, and link LQs to it as described above.
Audio port settings
Navigate to the Overview page and click on the gear icon for the LQ device to configure. Click Ports.
This page displays settings for both physical interfaces present on the LQ such as 2-wire, 4-wire or 4wire+GPIO as well as interfaces dynamically assigned to the unit within the Accounts page such as SIP
and IVC.
Creating and configuring audio routes
Within the Assignments page, click on the navigation tab representing the connection type that is most
appropriate. Channels provide a Partyline multipoint-to-multipoint workflow while Directs facilitate a
point-to-point workflow.
To create either a Channel or Direct connection object, click on the green plus icon and name the new
entity as appropriate. To add participants to a labeled connection, click on the blue plus icon next to the
ports listed within the left margin of the page. Both Channel and Direct connections require two
participants to be added before audio routing is enabled. While a Direct is limited to two participants, a
Channel may contain any number of participants.
By default, a port may be associated to only one connection at a time but enablement of multi-channel
assignment can be performed within the Port Configuration page of the LQ in which the port is present.
Network Quality settings for audio transport may be modified independently within each connection
object.
For information about SIP and Agent-IC configuration, see the LQ User Guide on the Clear-Com website.
Navigate to
Device >
Linking.
Click LinkMember
option from
drop-down.
Enter IP
address of
Link-Master.
(Optional) select an
available device ID
(highlighted in blue).
 Loading...