

Page 1

Cisco Unity 3.1(6) Installation Guide: Installing a
Windows 2000 Server for Component System
Document ID: 44332
Introduction
Prerequisites
Requirements
Components Used
Conventions
Task 1: Start the Windows 2000 Server Initial Installation
Task 2: Complete the Windows 2000 Server Initial Installation
Task 3: Complete the Message Queing Configuration
Task 4: Install Additional Windows 2000 Languages (Optional)
Task 5: Install Internet Explorer 5.5 with Service Pack 2
Task 6: Install MSXML3 and MSXML3 Service Pack 1
Task 7: Install Windows 2000 Server Service Pack 3
Task 8: Install the MS03−007 Hot Fix
Task 9: Change Windows Explorer Settings (Optional)
Task 10: Attach the Network Cable to the Server
Task 11: Verify IP Connectivity
Task 12: Configure Internet Explorer for the First Time
Appendix A: Create Bootable Installation Floppy Disks (Optional)
Appendix B: Configure the Most Common TCP/IP Parameters
Appendix C: Change the Name of the Computer Name (Optional)
NetPro Discussion Forums − Featured Conversations
Related Information
Introduction
Note: This document is part of a set of documents that explain how to determine which Cisco Unity
installation option is correct for your network. These documents also explain how to install the correct Cisco
Unity option in your network. These documents are intended to be used for new Cisco Unity installations
only. If you are upgrading or otherwise changing an existing Cisco Unity configuration please refer to the
correct online product documentation for Cisco Unity.
Note: These documents do not explain how to integrate your Cisco Unity server with your phone system or
how to configure your Cisco Unity server. Once you have completed the initial Cisco Unity installation, you
will be referred to the online product documentation for further instructions. Refer to the Next Steps section
on the Index page.
Note: This document set is written for networks that run a Windows 2000 server.
Note: Return to the Index page for this documentation set.
There are two types of systems that Cisco Unity can be installed on:
Base Line System (BL): A baseline system is a server that is purchased from Cisco or a Cisco
•
reseller and that is shipped with a Platform Configuration CD. These systems include a copy of
Windows 2000 Server.
Component System (CS): Purchased as separate pieces (software and hardware), and all software•
Page 2

and hardware components must be installed by the installer of the Cisco Unity system. The Cisco
Unity software package is purchased from Cisco or from a Cisco reseller. The package includes all
required software except Windows 2000 Server.
This document explains how to install a Windows 2000 Server for the most common Cisco Unity Component
System configurations. If you have a Base Line system, the tasks explained in this document are performed by
the installation CD that came with your system.
This document does not include tasks such as installing and configuring Active Directory, SQL, Exchange,
and so forth because these tasks are dependent on how the Cisco Unity is integrated into the network. Refer to
Cisco Unity 3.1(6) Installation Guide: Selecting the Correct Installation Options for more information on
which Cisco Unity option is correct for your network.
Installing Windows 2000 Server for a Cisco Unity Component System involves doing an initial installation
from the Windows 2000 Server CD followed by a series of installation tasks using different CDs to install
Service Packs, Hot Fixes, and other required components. The resulting server configuration will be ready to
host any of the six possible Cisco Unity server configurations as explained in Cisco Unity 3.1(6) Installation
Guide: Selecting the Correct Installation Options.
There are three appendices included at the end of this document. Two of them cover the optional tasks of
changing the computer's name and creating bootable installation floppy disks if your CD−ROM drive is not a
bootable device. If you plan to change the name of your computer, do it as soon as possible. There are a few
applications such as SQL that do not work properly if you change the computer's name after you have
installed them. The third appendix explains how to configure the minimum TCP/IP parameters that are
required for most Cisco Unity servers. Cisco Technical Support recommends that you do not use Dynamic
Host Configuration Protocol (DHCP) in order to configure the TCP/IP parameters for Cisco Unity servers.
Prerequisites
You should assemble all of the CDs that you require before you begin. This includes these CDs:
Windows 2000 Server Disk (Provided by customer, not included with a Cisco Unity Component
•
System).
The Cisco Unity CDs: CD 1; Service Packs CD; Additional Localizations CD (if you want to install
•
additional languages).
Internet Explorer 5.5 CD that shipped with Cisco Unity.•
Any additional drivers that you might require. For instance, if you use a Dell Server with a Dell PERC
•
2 Redundant Array of Independent Disks (RAID) controller, the driver diskette B3070 is required
because the Windows 2000 Server installation program does not contain these drivers. This disk is
available from Dell's web site .
Note: If the Windows installation fails because Windows cannot detect your hard disks and you do
not have the correct third party disk drivers available, you need to contact the manufacturer of your
server to obtain the necessary drivers. Please do not contact Cisco Technical Support for assistance in
obtaining drivers for your server.
You should have a plan for how the hard disk or disks on your server will be partitioned. If you are using
RAID you should configure the compartments before you start the Windows 2000 Server installation.
An explanation of disk partitioning and RAID configuration is beyond the scope of this document.
Page 3

Requirements
Before you attempt this configuration, ensure that you meet these requirements:
Windows 2000 Server Administration.•
IP Addressing and related TCP/IP configuration options such as DNS, gateways, and so forth.•
Components Used
The information in this document is based on these software and hardware versions:
Cisco Unity 3.1(6) and later•
Windows 2000 Server•
The information in this document was created from the devices in a specific lab environment. All of the
devices used in this document started with a cleared (default) configuration. If your network is live, make sure
that you understand the potential impact of any command.
Conventions
For more information on document conventions, refer to the Cisco Technical Tips Conventions.
Task 1: Start the Windows 2000 Server Initial Installation
Complete this procedure in order to start the Windows 2000 server initial installation.
Note: If the server is already connected to the LAN and you are concerned about security vulnerabilities that
will exist until you have installed all of the security patches, you should CDonnect it before you begin this
task. You are instructed to re−connect it later in this document.
If the Cisco Unity system key is a USB key, make sure that it is not inserted.
1.
If it is inserted you must remove it before you start the Windows 2000 Server installation. Failure to
do this causes Windows to install its driver for this key and Cisco Unity does not recognize it. If this
happens, you need to de−install the Windows key driver and install the Cisco Unity driver before you
start the Cisco Unity installation. This procedure is explained in each of the six configuration guides
at the beginning of the section on installing Cisco Unity.
Insert Windows 2000 Server Disk1 in the CD−ROM drive or, if the CD−ROM drive in the server is
2.
not bootable, insert Windows 2000 Setup Disk 1 created in Appendix A in drive A.
Restart the server.3.
If you need to load a third party disk driver, continue with this step.
4.
Otherwise proceed to step 9 and press F6 as soon as this message appears at the bottom of the screen:
"Press F6 if you need to install a third−party SCSI or RAID controller."
Note: If you are not certain that you pressed F6 before the message cleared, restart the server and try
again. This is the only opportunity you have to indicate to the installation program that you are
installing a RAID driver.
When the text "Setup could not determine..." appears, press S to specify an additional device.5.
When prompted, insert your floppy disk with your driver in drive A, and press Enter.6.
If you are using a Dell server, the correct Windows 2000 Server driver is usually DELL PERC 2 2,
7.
2/Si, 3/Si, 3/Di Raid Controllers. Select your driver and press Enter.
Page 4

When the text "Setup will load support..." appears, press Enter.
8.
Note: If you see a message that indicates the installation cannot continue because a hard disk could
not be detected, it is possible that you have not used the correct third party Windows 2000 Server
driver. It is also possible that the hard disk drives or the hard disk controller in your server is faulty.
Contact the manufacturer of your server to obtain support for this issue.
Follow the on−screen prompts until you are prompted to specify the partition on which to install
9.
Windows 2000.
Note: If you see a message that indicates the installation cannot continue because a hard disk could
not be detected, it is possible that you require a third party Windows 2000 Server driver. It is also
possible that the hard disk drives or the hard disk controller in your server is faulty. Contact the
manufacturer of your server to obtain support for this issue.
If no operating system is installed on the server, skip to step 11.
10.
If you are installing Windows 2000 on the same partition where an operating system is already
installed, select and delete that partition. If there are other partitions on the same disk drive, you might
want to delete them as well. However see the caution below before you do this.
Caution: If your server uses a disk partition to store files required to manage its hardware
configuration, do not delete this partition.
If you already have your hard disks partitioned the way that you want, select the partition on which to
11.
install Windows 2000 and proceed to step 12.
Otherwise, you need to create the partition first by selecting the hard disk and then selecting the
Create Partition option. If you do not want to allocate the entire disk to the Windows 2000 Server,
enter the appropriate partition size. Make certain that the partition that you create is large enough for
the Windows 2000 Server and any other applications such as MSDE, SQL, Exchange, and so forth,
that you want to install on the same partition. 10 GB is usually sufficient for a Windows 2000 Server
partition.
Note: If your have RAID configured, you can only install a Windows 2000 Server on a RAID type 0
compartment.
Note: If you have other disks, you can either configure them now or after you have completed the
Windows 2000 Server installation by using the Hard Disk Manager tool in the Computer Management
Management Console (MMC). See your Windows 2000 Server documentation or the online help for
more information on this subject.
If the partition you selected in step 11 is unformatted, select Format the Partition Using the NTFS
12.
File System, and press Enter.
Task 2: Complete the Windows 2000 Server Initial
Installation
Caution: You will be asked to provide a password for the Administrator account. Do not lose this
password. It cannot be recovered. If you forget the Administrator account password and you do not have an
alternative administrative account configured so that you can reset the Administrator account password, you
will have to re−install the operating system and all of the applications.
This task provides the responses that are applicable in most Cisco Unity installations. If you are certain that
your configuration requires an option that is listed as [No] below, you can override this suggestion.
Page 5

Caution: If you elect to install an option that is listed as [No] below and it causes a conflict with Cisco
Unity, you need to unconfigure it. It might not be supported on a server that runs Cisco Unity.
License Mode [Seats]1.
Accessories and Utilities [See below]
2.
Accessibility Wizard [No]♦
Accessories [Optional]♦
Communications [No]♦
Games [No]♦
Multimedia [No]♦
Certificate Services [No]3.
Indexing Service [No]4.
IIS [See below]
5.
Common files [Yes]♦
Documents [Optional]♦
FTP [Optional − has security implications]♦
FrontPage 2000 Server Extensions [No]♦
IIS Snap−In [Yes]♦
Internet Services Manager [Yes]♦
NNTP [If installing Exchange 2000 on this server − Yes otherwise No]♦
SMTP [If installing Exchange 2000 on this server − Yes otherwise No]♦
Visual Interdev RAD Remote Deployment Support [No]♦
WWW Server [Yes]♦
Management and Monitoring Tools [See below]
6.
Connection Manager Components [No]♦
Network Monitor Tools [Optional]♦
SNMP [Optional]♦
Message Queueing Service [Yes]7.
Networking Services [See below]
8.
Com Internet Services Proxy [No]♦
DNS [Optional, might be installed later if server will be running Active Directory]♦
DHCP [Optional]♦
Internet Authentication Services [No]♦
QOS [No]♦
Simple TCP/IP [No]♦
Site Server ILS [No]♦
WINS [No]♦
Other network file and print services [No]9.
Remote Installation services [No]10.
Remote Storage [No]11.
Script Debugger [No]12.
Terminal Services [Yes, Administration only]13.
Terminal Services Licensing [No]14.
Windows Media Services [No]15.
Network Configuration [See below]
16.
Cisco Technical Support recommends that you do not use DHCP to configure the TCP/IP
♦
settings for your server. Manually configure the IP address, gateway, DNS servers, and other
options.
Page 6
If the server that you are configuring is going to run Active Directory, you must enable File
♦
and Print Sharing For Microsoft Networks. This is required because Active Directory uses
Networking in order to share the Active Directory files. This applies even when the server is
the only one in the entire network that runs Active Directory because the server accesses the
files locally via the share path \\server_name\directory_name\file_name.
At the end of the installation, click Finish, and the server automatically restarts.17.
Log onto Windows 2000 as Administrator.18.
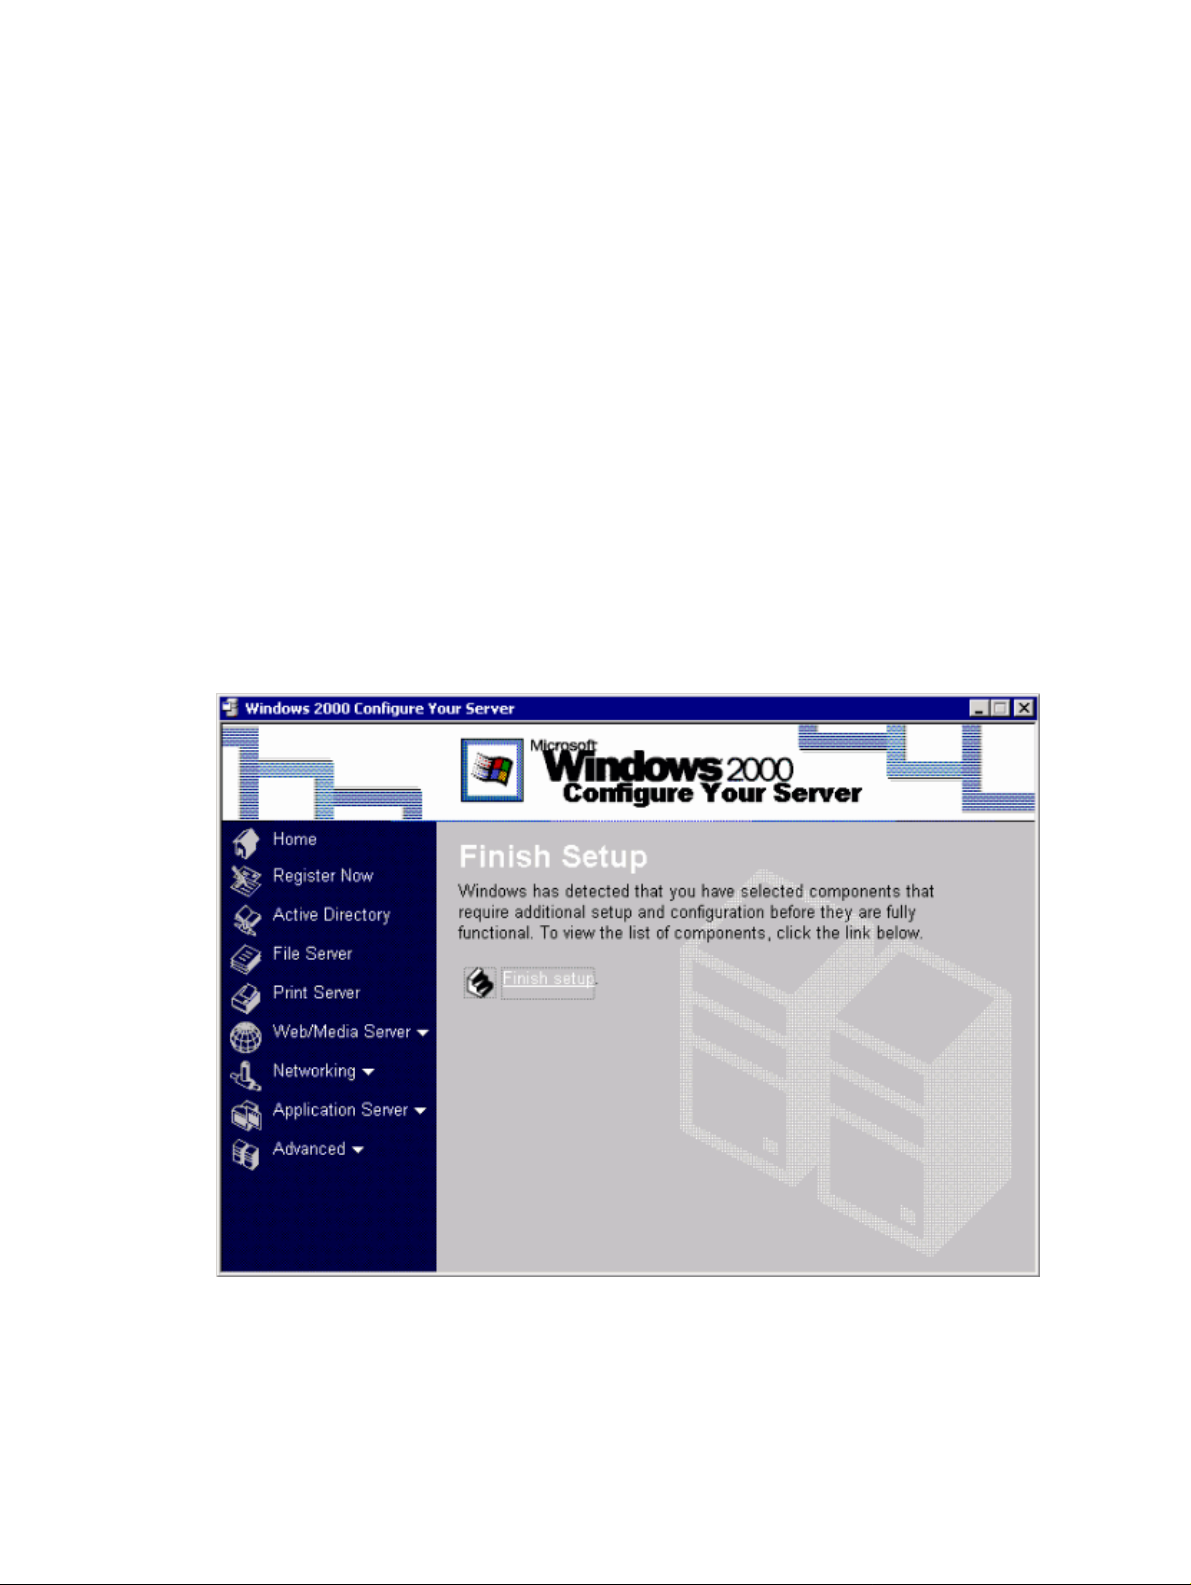
When the login process is complete you might see the Windows 2000 Configure Your Server menu
19.
screen which indicates you need to Finish Setup.
If you do leave it open, it is used in the next task. If you do not complete Finish Setup, the next task
explains how to finish the process manually.
Task 3: Complete the Message Queing Configuration
You installed Message Queueing in Task 2. It requires a few final configuration tasks before the installation is
complete.
If you see the Windows 2000 Configure Your Server menu screen similar to this image, select Finish
1.
Setup.
Then proceed to step 3. If you do not see this screen, proceed to step 2.
If you do not have the Windows 2000 Configure Your Server menu screen open, start the process for
2.
completing the Message Queueing feature manually. Select Settings > Controls Panel >
Add/Remove Programs.
A menu screen similar to this image appears.
Page 7

Select the Add/Remove Windows Components option.
3.
A menu screen similar to this image appears.
Select the Configure Message Queueing Services (Configure) option.
4.
Follow the prompts in order to complete the installation of Message Queueing Services. There are no
user configurable options for this task.
Page 8

Select Finish when the installation is completed. Close all of the Windows that are currently open.5.
Log off the current session and log back on again.
6.
The Windows 2000 Configure Your Server menu screen similar to this image appears.
Select the I will configure this server later option and select Next.
7.
Note: If you do not see this menu screen, proceed to Task 4.
The Windows 2000 Configure Your Server menu screen similar to this image appears.
Page 9

Un−select the Show this screen at startup option. Then close this window.8.
Task 4: Install Additional Windows 2000 Languages
(Optional)
If you want to view the Windows user interface in languages other than English, install the applicable
languages.
Log onto Windows.1.
Based on the language(s) you want to install, insert the applicable Additional Localizations CD in the
2.
CD−ROM drive.
Cisco Unity Operating
System 2000 −
Additional
Localizations CD 1
Cisco Unity Operating
System 2000 −
Additional
Localizations CD 2
If the CD does not run automatically, browse to the root directory, and double−click Muisetup.exe.
Check the check boxes for the languages you want to install and click OK.3.
Click OK.4.
For Chinese (simplified), Chinese
(traditional), Dutch, French,
German, Italian, Japanese,
Korean, Spanish, or Swedish.
For Arabic, Czech, Danish,
Finnish, Greek, Hebrew,
Hungarian, Norwegian, Polish,
Portuguese (Brazil), Portuguese
(Portugal), Russian, or Turkish.
Task 5: Install Internet Explorer 5.5 with Service Pack 2
Note: The Internet Explorer 5.5 CD that is shipped with Cisco Unity includes Internet Explorer 5.5 Service
Page 10

Pack 2.
Caution: When you install Internet Explorer, the file WScript.exe is installed automatically. Do not
remove WScript.exe, or the Cisco Unity Setup program fails.
Insert the Internet Explorer 5.5 CD that came with your Cisco Unity CD set in the CD−ROM drive.
1.
If the installation starts automatically, select Install Internet Explorer 5.5 and Internet tools. Then
proceed to step 4.
If the installation program did not start automatically, continue with step 2.
Browse to the I386 directory on the CD. It is usually under the folder named IE55.2.
Double−click IE5Setup.
3.
Note: This might appear as IE5Setup.exe if you have enabled the option of showing file name
extensions for known file types in the Windows Explorer options.
Select I Accept the agreement and click Next.4.
Follow the on−screen prompts to complete the installation. Select Finish to complete the installation
5.
and restart the server.
Note: There are a few final tasks that the installation routine completes the next time that you log into
the server.
Task 6: Install MSXML3 and MSXML3 Service Pack 1
Complete this procedure in order to install MSXML3 and MSXML3 Service Pack 1.
Insert Cisco Unity CD 1 in the CD−ROM drive.1.
Browse to the MsXml directory and double−click Msxml3sp1.exe.2.
Follow the on−screen prompts.3.
Task 7: Install Windows 2000 Server Service Pack 3
Complete this procedure in order to install the 2000 Server Service Pack 3.
Insert Cisco Unity 3.1(6) Service Packs CD 1 in the CD−ROM drive.1.
Browse to the folder Windows 2000 SP3\.2.
Double−click on the file named ENU_w2ksp3.exe.3.
Follow the on−screen prompts until the installation is complete.4.
Task 8: Install the MS03−007 Hot Fix
Complete this procedure in order to install IIS Hotfix MS03−007.
Insert Cisco Unity 3.1(6) Service Packs CD 1 in the CD−ROM drive.1.
Browse to the root folder.2.
Double−click on the file named Q815021_W2K_sp4_x86_EN.EXE.3.
Follow the on−screen prompts until the installation is complete.4.
Page 11

Task 9: Change Windows Explorer Settings (Optional)
This procedure ensures that all system files and folders are visible in Windows Explorer. This facilitates
troubleshooting system problems in the future.
From the Windows desktop, double−click My Computer.1.
Select Tools > Folder Options.2.
Click the View tab.3.
Click Show Hidden Files and Folders.4.
Uncheck the Hide File Extensions for Known File Types check box.5.
Uncheck the Hide Protected Operating System Files check box and click Yes to confirm.6.
Click Apply.7.
Click Like Current Folder and click Yes to confirm.8.
Click OK.9.
Task 10: Attach the Network Cable to the Server
If you have not already connected the server to the LAN, do it now.
Task 11: Verify IP Connectivity
You should have already configured your system with static IP configuration information as directed in Task
2, step 16. If you have not done this step yet, you can do it now and then proceed with this task. If you need
assistance in configuring the TCP/IP information, refer to Appendix B: Configure the Most Common TCP/IP
Parameters.
Note: Cisco Technical Support recommends that you do not use DHCP to assign TCP/IP parameters to your
Cisco Unity server.
Open up a command prompt window. Enter the command:
1.
C:\>ipconfig /all
Make a note of the IP address of a different device such as the Default Gateway or a DNS Server.
If you do not see the IP address of the server, its gateway, or its DNS servers, and you believe that
2.
you have configured them properly, it is possible that your network interface card (NIC) is faulty or
the server has not installed the correct driver for it. Use Device Manager. In order to access the
Device Manager, select Settings > Control Panel > System > Hardware > Device Manager to
determine the status of your NIC.
If the NIC does not work properly, you must resolve the problem before you continue with any
installation tasks.
Ping the address using the ping ip_address command.
3.
C:\>ping ip_address
If you do not receive a reply, try a different destination IP address if you have one.
4.
If you are unable to receive a reply to any of the destination IP addresses, it might be because you
made a mistake when you entered the IP address and mask of the server or the IP address of the
default gateway. Verify this information.
If you are certain that the information is correct, the reason that you might not be receiving replies is
that a network administrator has established filters that block the ICMP (ping) packets. Try using the
Page 12

tracert command instead.
c:\>tracert ip_address
You should see a response something like this:
Tracing route to [x.x.x.x]
over a maximum of 30 hops:
1 <10ms <10ms <10ms [y.y.y.y]
Where y.y.y.y is the IP address of the first gateway between your server and the IP address that you
used. If you used the gateway's IP address then they should be the same.
If you are unable to successfully ping or tracert to another device, you need to resolve this problem
5.
before you can deploy this system.
Note: Do not ping the IP address of the server itself. In most cases, Windows indicates that the pings
were successful even if there is a cabling problem. You can prove this by connecting the LAN cable
from the server and then pinging its IP address. This test proves that the TCP/IP protocol has been
bound to your LAN card. It does not prove that you have connectivity to a network.
This completes the installation and configuration for Windows 2000 Server required for most Cisco Unity
component system servers. The remaining tasks for installing Cisco Unity are explained in configuration
documents 1−6.
Return to the Index page for this documentation set to select the appropriate configuration document.
Task 12: Configure Internet Explorer for the First Time
The first time you start Internet Explorer you are presented with the Internet Explorer Internet Connection
Wizard. This task guides you through creating a configuration that is suitable for a Cisco Unity server. In most
cases the default security settings are applied. The exception is that the proxy server feature is not used.
Start Internet Explorer.1.
Select I want to setup my internet manually or I want to connect through a Local Area Network
2.
(LAN) and select Next.
Select I connect through a Local Area Network (LAN) and click Next.3.
Unselect Automatic detection of proxy server (recommended) and click Next.4.
Answer No when prompted to setup an email account now and click Next.5.
Click Finish.6.
Select Tools > Internet Options.7.
Set your home page as required and click OK.8.
Return to the Index page for this documentation set to select the appropriate Cisco Unity
9.
configuration document and continue with you installation.
Appendix A: Create Bootable Installation Floppy Disks
(Optional)
Complete this procedure in order to create bootable installation floppy disks.
Take the Windows 2000 Server CD 1 and four blank, formatted, high−density disks to a computer
1.
that has a CD−ROM drive and is running Windows 9x or Windows 2000.
Insert Windows 2000 Server CD 1 in the CD−ROM drive.2.
Page 13

Browse to the Bootdisk directory.3.
Double−click Makebt32.exe.4.
Follow the on−screen prompts.5.
Go to step 1 in Task 1.6.
Appendix B: Configure the Most Common TCP/IP
Parameters
Complete this procedure in order to configure the most common TCP/IP parameters.
Note: Cisco Technical Support recommends that you do not use DHCP to assign TCP/IP parameters to your
Cisco Unity server.
Open the TCP/IP Properties window for your NIC by selecting Settings > Control Panel > Network
1.
and Dial−up Connections > Local Area Connection > Properties.
A menu window similar to this image appears.
Note: This server has the optional Network Monitor utility installed.
Note: Client for Microsoft Networks is not required.
Caution: If the server that you are configuring is going to run Active Directory, you must
enable File and Print Sharing For Microsoft Networks. This is required because Active Directory
uses Networking to share the Active Directory files. This applies even when the server is the only one
in the entire network running Active Directory because the server accesses the files locally via the
share path \\server_name\directory_name\file_name.
Double−click on the Internet Protocol (TCP/IP) option.2.
Page 14

A menu window similar to this image appears.
Configure the IP options as appropriate. If you will be running Active Directory and DNS on this
server, it should have itself as the first DNS Server.
Select the Advanced option.
3.
A menu window similar to this image appears.
Page 15

Click the DNS tab.
4.
A menu window similar to this image appears.
Page 16

These settings are correct for most systems. Consult your Windows 2000 Server documentation if you
need more information on the configuration of TCP/IP options.
Appendix C: Change the Name of the Computer Name
(Optional)
If you plan to change the name of your computer, do it as soon as possible. There are a few applications such
as SQL that do not work properly if you change the computer's name after you have installed them.
Right−click on the My Computer icon on your desktop.1.
Select Properties.2.
Click the Network Identification tab.3.
Select Properties.4.
Enter only the hostname of the computer, not the Fully Qualified Domain Name. For example,
5.
marvin, not marvin.hhgttg.com.
Note: You should not add the computer to a domain at this time unless you know for certain that this
needs to be done. Not all Cisco Unity server configurations require that the server is added to a
domain. Each of the Cisco Unity configuration documents included in this documentation set explains
how to determine if your server needs to be added to a domain. The configurations documents for
servers that do require that a server is added to a domain contain the instruction for performing this
step.
Return to the Index page for this documentation set.
Page 17

NetPro Discussion Forums − Featured Conversations
Networking Professionals Connection is a forum for networking professionals to share questions, suggestions,
and information about networking solutions, products, and technologies. The featured links are some of the
most recent conversations available in this technology.
NetPro Discussion Forums − Featured Conversations for Voice
Service Providers: Voice over IP
Voice & Video: Voice over IP
Voice & Video: IP Telephony
Voice & Video: IP Phone Services for End Users
Voice & Video: Unified Communications
Voice & Video: IP Phone Services for Developers
Voice & Video: General
Related Information
Voice Technology Support•
Voice and Unified Communications Product Support•
Recommended Reading: Troubleshooting Cisco IP Telephony•
Technical Support − Cisco Systems•
All contents are Copyright © 2006−2007 Cisco Systems, Inc. All rights reserved. Important Notices and Privacy Statement.
Updated: Feb 02, 2006 Document ID: 44332
 Loading...