

Page 1
QT-2100
Versatile Intelligent Terminal
————————————————————————
Programming Manual
Version 1.0 February 2002
Key Assign
000.NOP 001.CASH 002.CHARGE
003.CHECK 004.CREDIT 006.NB
008.PRCINQ 009.STKINQ 010.CHAR
011.PRT 012.CHKP 013.CLK TRAN
014.TBL TRAN 015.TIP 016.NRMRCT
019.LOAN 020.RC 021.PD
REG C01 10-10-01 12:34 001234
1 Spagetti $20.00 T1
1 Spagetti $20.00 T1
7.5%
Date 01-10-10
Time 12:34 00
%- -1.50
ID Character MC #01
1 Coffee $8.00
Check System Master
KP System Master
R/J/Order Printer SA-3015
Slip Printer SA-3015
Rear Display No
Remote Display No
OK? YES
No. Descriptor Qty Price
1 Hamburger $2.00 T1
1 PLU0001 @1,234.00
PLU0001 12.26 @1.00
15%
2 PLU0002 @20.00
PLU0002 0.00 @2.00
%- -0.30
3 PLU0003 @30.00
PLU0003 0.50 @3.00
1 Milk $2.00
4 PLU0004 @40.00
PLU0004 1.75 @4.00
2 Apple Juice $5.00
5 PLU0005 @50.00
PLU0005 2.80 @5.00
1 Coffee $8.00
6 PLU0006 @60.00v
Coffee $8.00
Record No. 1
X YES
X/For YES
X/XX YES
X/XXX YES
Ketten Bon YES
Selective Item ST YES
New Check YES
Old Check YES
New/Old Check YES
Add Check YES
nd
Separate Check YES
2
R
@
1
Table Range
0.00
Enter Start range 1
End range 123
A
12 ST $76.50
OK? YES
022.P.UP. 023.COUPON 025.DEPOSIT
027.- 028.%- 029.+
030.%+ 033.RF 034.VOID
036.CPN2 037.VLD 038.RCT
039.CK.E 040.# 041.#/NS v
0.00
0.00
0.00
c
Page 2

Preface
Document warranty
The information contained in this document is subject to change without notice.
CASIO Computer Co., Ltd. makes no warranty of any kind with regard to this material,
including, but not limited to the implied warranties of marketability and fitness for a
particular purpose. CASIO Computer Co., Ltd. shall not be liable for errors contained
herein or for incidental or consequential damages in connection with the furnishing,
performance, or use of this manual.
Printing history
Manual version Software version
Version 1.0: February, 2002 First Edition: February, 2002 Version 1.0
Revised points
Preconditions for reading this manual
We suggest two preconditions for reading this manual.
1. A basic understanding of how the QT-2100 series devices must be configured/installed.
2. An understanding of the operational needs of restaurant, bar, and/or fast food outlets.
How to use this manual
This manual is designed to help make your programming chores simpler and easier.
Programming procedures in this manual are represented using graphics that show you the
keys you have to press or the data you need to input. Worksheets help you determine the
programming codes you need to input to program the terminal. We recommend that you
use the general procedure described below for programming.
General programming procedure
1. Determine the features and functions that you want to program to the terminal and use
the worksheets to determine the programming codes. It might be a good idea to make
copies of the worksheets you need before you fill them out.
2. Initialize the terminal.
3. Allocate memory in accordance with the features and functions you are about to
program.
4. Perform the programming procedures you need, inputting the programming code from
the worksheets.
P-2
Page 3

Preface
QT-2100 Programming Manual
P-3
Page 4

Contents
1. Machine Initialization................................................................ P-8
1-1. How to initialize QT-2100 terminal ............................................................. P-8
1-2. How to initialize QT-2100 terminal (add/replace one QT-2100) ...............P-11
1-3. How to flag clear QT-2100 terminal (or INIT2).........................................P-14
2. Program 5 ................................................................................ P-16
2-1. Programming memory allocation (daily & program).................................P-16
2-2. Programming memory allocation (periodic & work) .................................P-17
2-3. Programming memory allocation file by file .............................................P-18
3. Program 4 ................................................................................ P-24
3-1. Programming key allocation.....................................................................P-24
3-2. Programming key allocation (key location change) .................................P-26
3-3. Programming key allocation.....................................................................P-28
4. Program 3 ................................................................................ P-34
4-1. Programming machine features...............................................................P-34
4-1-1 Programming pulldown group (adding/modifying/deleting group item) ......P-34
4-1-2 Programming set menu table .....................................................................P-36
4-1-3 Programming arrangement ........................................................................P-38
4-1-4 Programming batch X/Z report ...................................................................P-39
4-1-5 Programming the general feature...............................................................P-41
4-1-6 Programming scheduler .............................................................................P-58
4-1-7 Programming check print ...........................................................................P-60
4-1-8 Programming table analysis .......................................................................P-61
4-1-9 Programming tax table ...............................................................................P-62
4-1-10Programming void table .............................................................................P-65
4-1-11 Programming system connection ...............................................................P-66
4-1-12Programming I/O parameter.......................................................................P-67
4-1-13Programming printer connection ................................................................P-70
4-1-14Programming time zone .............................................................................P-71
4-1-15Programming time & attendance................................................................P-72
4-1-16Programming hourly item link.....................................................................P-76
4-1-17Programming IDC link ................................................................................P-77
4-1-18Programming Euro .....................................................................................P-78
4-1-19Programming auto program control............................................................P-79
4-2. Programming clerks .................................................................................P-80
4-2-1 Programming clerk features .......................................................................P-80
4-2-2 Programming operation..............................................................................P-82
4-2-3 Programming commission rate...................................................................P-92
4-2-4 Programming table range...........................................................................P-93
4-2-5 Programming clerk by range ......................................................................P-94
4-2-6 Programming clerk detail..........................................................................P-106
4-2-7 Programming clerk key ID ........................................................................P-107
P-4
Page 5

Contents
4-3. Programming key features.....................................................................P-108
4-3-1 Programming PLU features......................................................................P-108
4-3-2 Programming PLU 2nd@ features ...........................................................P-110
4-3-3 Programming subdepartment features..................................................... P-111
4-3-4 Programming department features...........................................................P-112
4-3-5 Programming by range.............................................................................P-113
4-3-6 Programming individual program .............................................................P-116
4-3-7 Programming key function program .........................................................P-117
4-3-8 Programming shift PLU program..............................................................P-135
4-3-9 Programming scanning PLU link program................................................P-136
5. Program 2 .............................................................................. P-140
5-1. Character programming .........................................................................P-140
5-1-1 Character programming keyboard............................................................P-140
5-1-2 Inputting characters by code ....................................................................P-142
5-1-3 After completing to input characters.........................................................P-142
5-2. Programming item descriptors ...............................................................P-143
5-2-1 Programming PLU item descriptors .........................................................P-143
5-2-2 Programming PLU 2nd unit price descriptors...........................................P-144
5-2-3 Programming subdepartment descriptors ................................................P-144
5-2-4 Programming department descriptors ......................................................P-145
5-2-5 Programming PLU/subdepartment/department descriptors by range ......P-146
5-2-6 Copying PLU descriptors to PLU 2nd unit price .......................................P-147
5-2-7 Programming function key descriptors .....................................................P-148
5-3. Programming characters and messages ...............................................P-149
5-3-1 Programming receipt message, slip message and guest receipt messageP-149
5-3-2 Programming text recall message............................................................P-150
5-3-3 Programming order character link ............................................................P-150
5-3-4 Programming fixed totalizer descriptors ...................................................P-151
5-3-5 Programming group character..................................................................P-152
5-3-6 Programming special characters..............................................................P-152
5-3-7 Programming report headers ...................................................................P-154
5-3-8 Programming endorsement message ......................................................P-155
5-3-9 Programming GT character......................................................................P-155
6. Program 1 .............................................................................. P-158
6-1. Presetting date and time ........................................................................P-158
6-2. Programming unit price and rate............................................................P-159
6-2-1 Programming PLU unit price ....................................................................P-159
6-2-2 Programming PLU 2nd unit price .............................................................P-160
6-2-3 Programming PLU unit price and PLU 2nd unit price...............................P-161
6-2-4 Programming subdepartment unit price ...................................................P-162
6-2-5 Programming department unit price .........................................................P-162
6-2-6 Programming PLU/PLU 2nd@/subdepartment/
department unit price by range................................................................P-163
6-2-7 Copying PLU unit price to PLU 2nd unit price ..........................................P-165
6-2-8 Programming amount or rate to keys .......................................................P-166
6-2-9 Programming unit price of shift PLU.........................................................P-167
QT-2100 Programming Manual
P-5
Page 6

Contents
7. Program 6 .............................................................................. P-170
7-1. Program read general procedure...........................................................P-170
7-2. Program read report sample ..................................................................P-171
7-2-1 Unit Price/Qty ...........................................................................................P-171
7-2-2 Item Descriptor .........................................................................................P-172
7-2-3 Character and Message ...........................................................................P-172
7-2-4 Machine feature........................................................................................P-176
7-2-5 Clerk .......................................................................................................P-208
7-2-6 Key feature ...............................................................................................P-220
7-2-7 Keyboard ..................................................................................................P-242
7-2-8 Memory allocation ....................................................................................P-242
Index.............................................................................................. P-244
Program 3 mode Hierarchy .................................................................................P-247
Program 1 mode Hierarchy .................................................................................P-248
Program 2 mode Hierarchy .................................................................................P-248
Program 6 mode Hierarchy .................................................................................P-248
P-6
Page 7

1. Machine Initialization.................................................................P-8
1-1. How to initialize QT-2100 terminal ............................................................. P-8
1-2. How to initialize QT-2100 terminal (add/replace one QT-2100) ................P-11
1-3. How to flag clear QT-2100 terminal (or INIT2) ......................................... P-14
QT-2100 Programming Manual
P-7
Page 8
Initialization
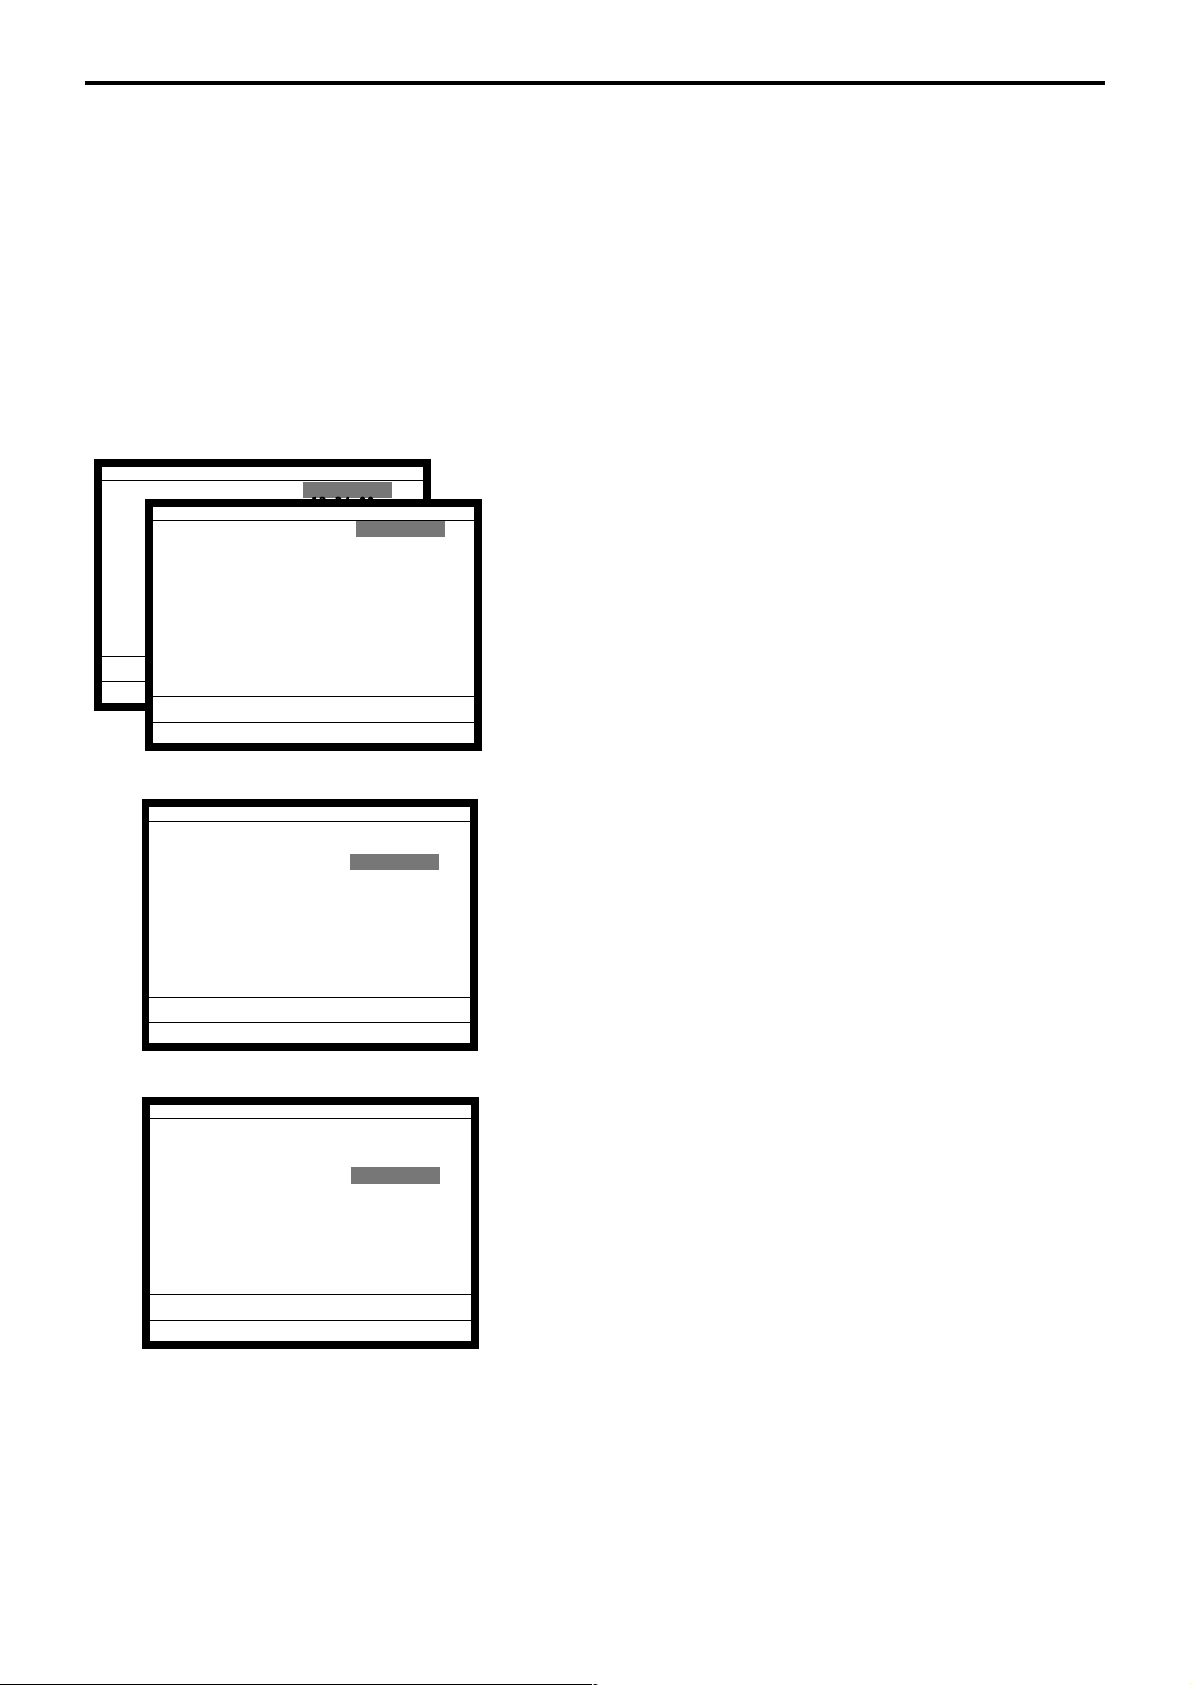
1. Machine Initialization
1-1. How to initialize QT-2100 terminal
Preparation:
1. All peripheral devices and QT-2100 terminals of this cluster
should be turned off.
2. Connect all of the peripheral devices (such as printer, display
etc.) to QT-2100 terminal.
3. Connect all QT-2100 terminals by inline.
Operation:
4. Turn on all peripheral devices of a QT-2100 terminal.
Date 00-00-00
Time 12:34 00
ID Character MC #01
Date 01-10-10
Check cluster ID 0
Time 12:34 00
Check System Master
ID Character MC #01
R/J/Order Printer(1) UP-350
Check System Master
R/J/Order Printer(2) UP-350
Check cluster ID 0
R/J/Order Printer(3) UP-350
R/J/Order Printer(1) UP-350
Slip Printer SP-1300
R/J/Order Printer(2) UP-350
R/J/Order Printer(3) UP-350
OK? YES
Slip Printer SP-1300
OK? YES
5. Turn on this QT-2100 terminal with pressing the left-most
key of the top row and release the key after buzzer sounds.
6. After releasing the key, enter “2000” (U.S.)/“1000” (other
area) and press the <ST> key.
Date 01-10-10
Time 12:34 00
ID Character MC #01
Check cluster ID 0
Check System Master
R/J/Order Printer(1) UP-350
R/J/Order Printer(2) UP-350
R/J/Order Printer(3) UP-350
Slip Printer SP-1300
OK? YES
Date 01-10-10
Time 12:34 00
ID Character MC #01
Check cluster ID 0
Check System Master
R/J/Order Printer(1) UP-350
R/J/Order Printer(2) UP-350
R/J/Order Printer(3) UP-350
Slip Printer SP-1300
OK? YES
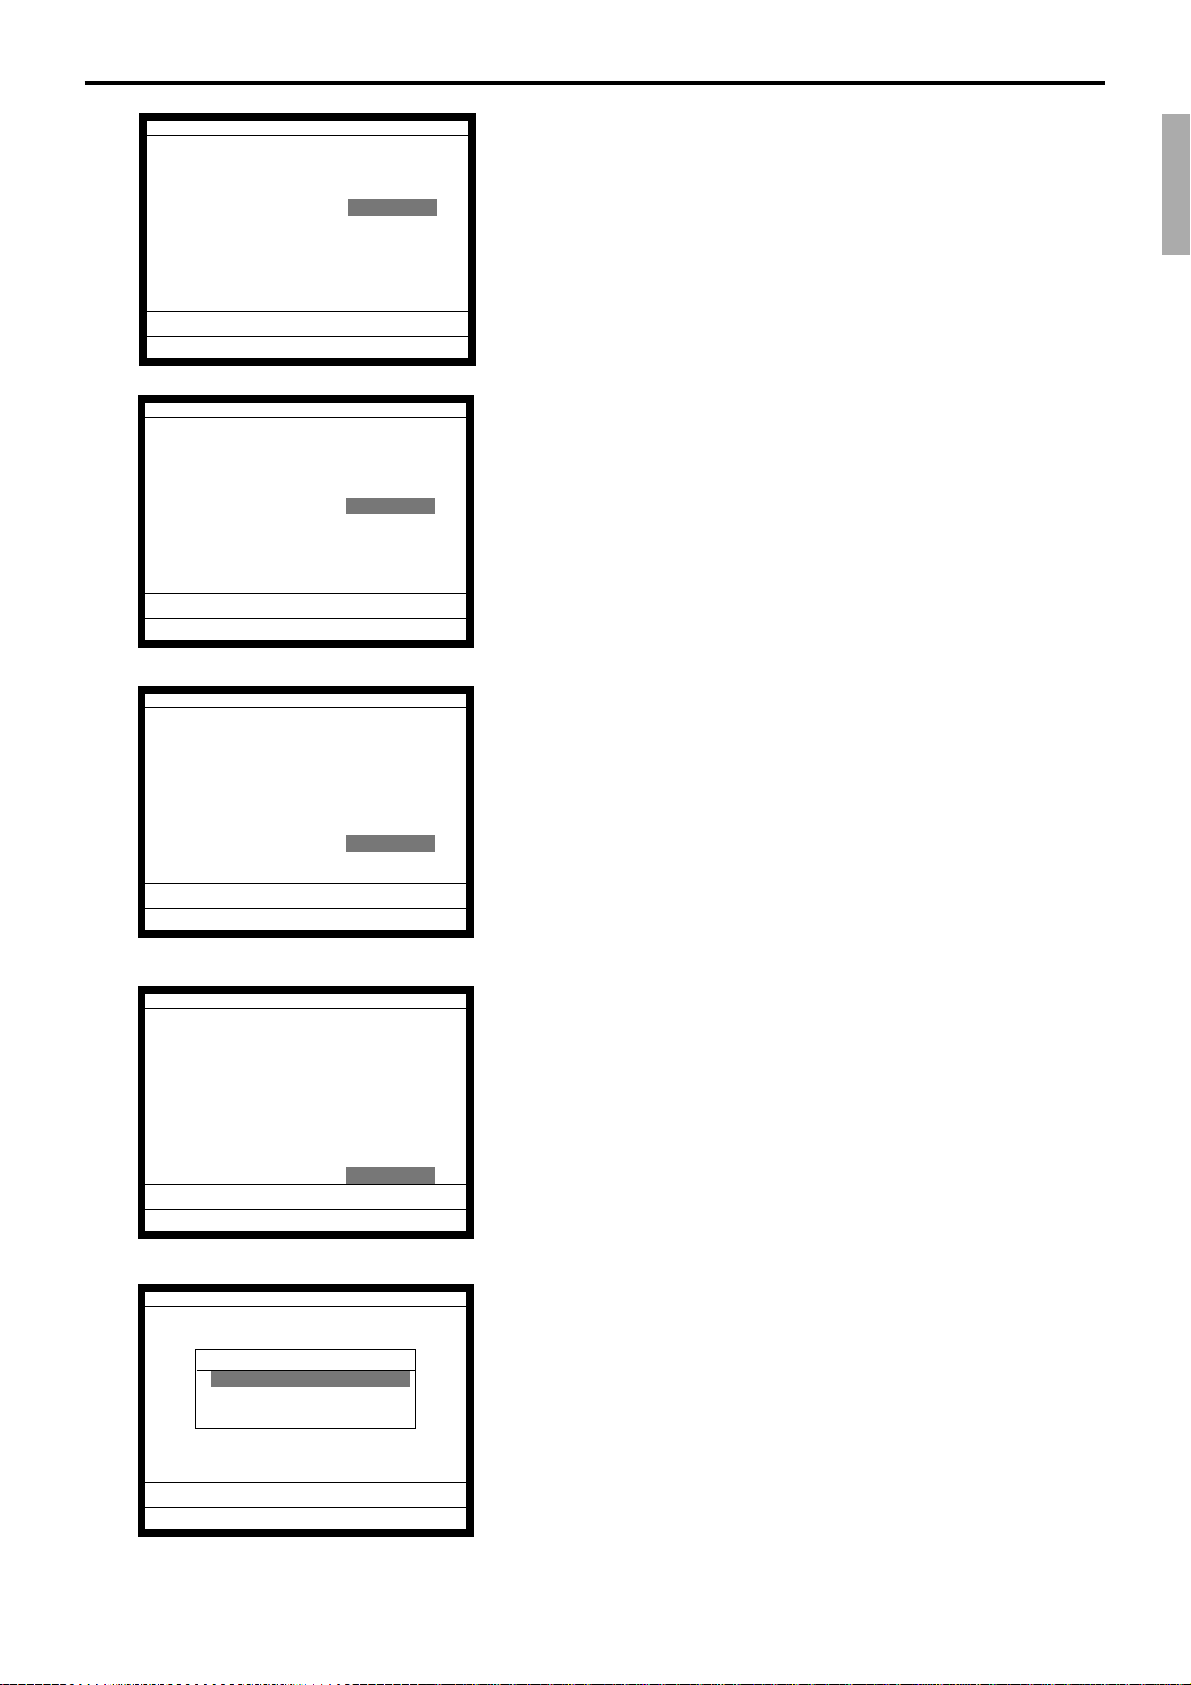
7. Enter the current date (YY/MM/DD order) and time and
press the <YES> key.
8. In ID character field, the auto-defined ID No. is shown.
We recommend that you should not change the value.
9. In this field, the check cluster No, should be set, if your check
tracking system are divided in some clusters.
(Enter cluster No. “1” ~ “9”, if you use check cluster system.)
P-8
Page 9
Date 01-10-10
Time 12:34 00
ID Character MC #01
Check cluster ID 0
Check System Master
R/J/Order Printer(1) UP-350
R/J/Order Printer(2) UP-350
R/J/Order Printer(3) UP-350
Slip Printer SP-1300
OK? YES
Date 01-10-10
Time 12:34 00
ID Character MC #01
Check cluster ID 0
Check System Master
R/J/Order Printer(1) UP-350
R/J/Order Printer(2) UP-350
R/J/Order Printer(3) UP-350
Slip Printer SP-1300
OK? YES
Date 01-10-10
Time 12:34 00
Check cluster ID 0
ID Character MC #01
Check System Master
R/J/Order Printer(1) UP-350
R/J/Order Printer(2) UP-350
R/J/Order Printer(3) UP-350
Slip Printer SP-1300
OK? YES
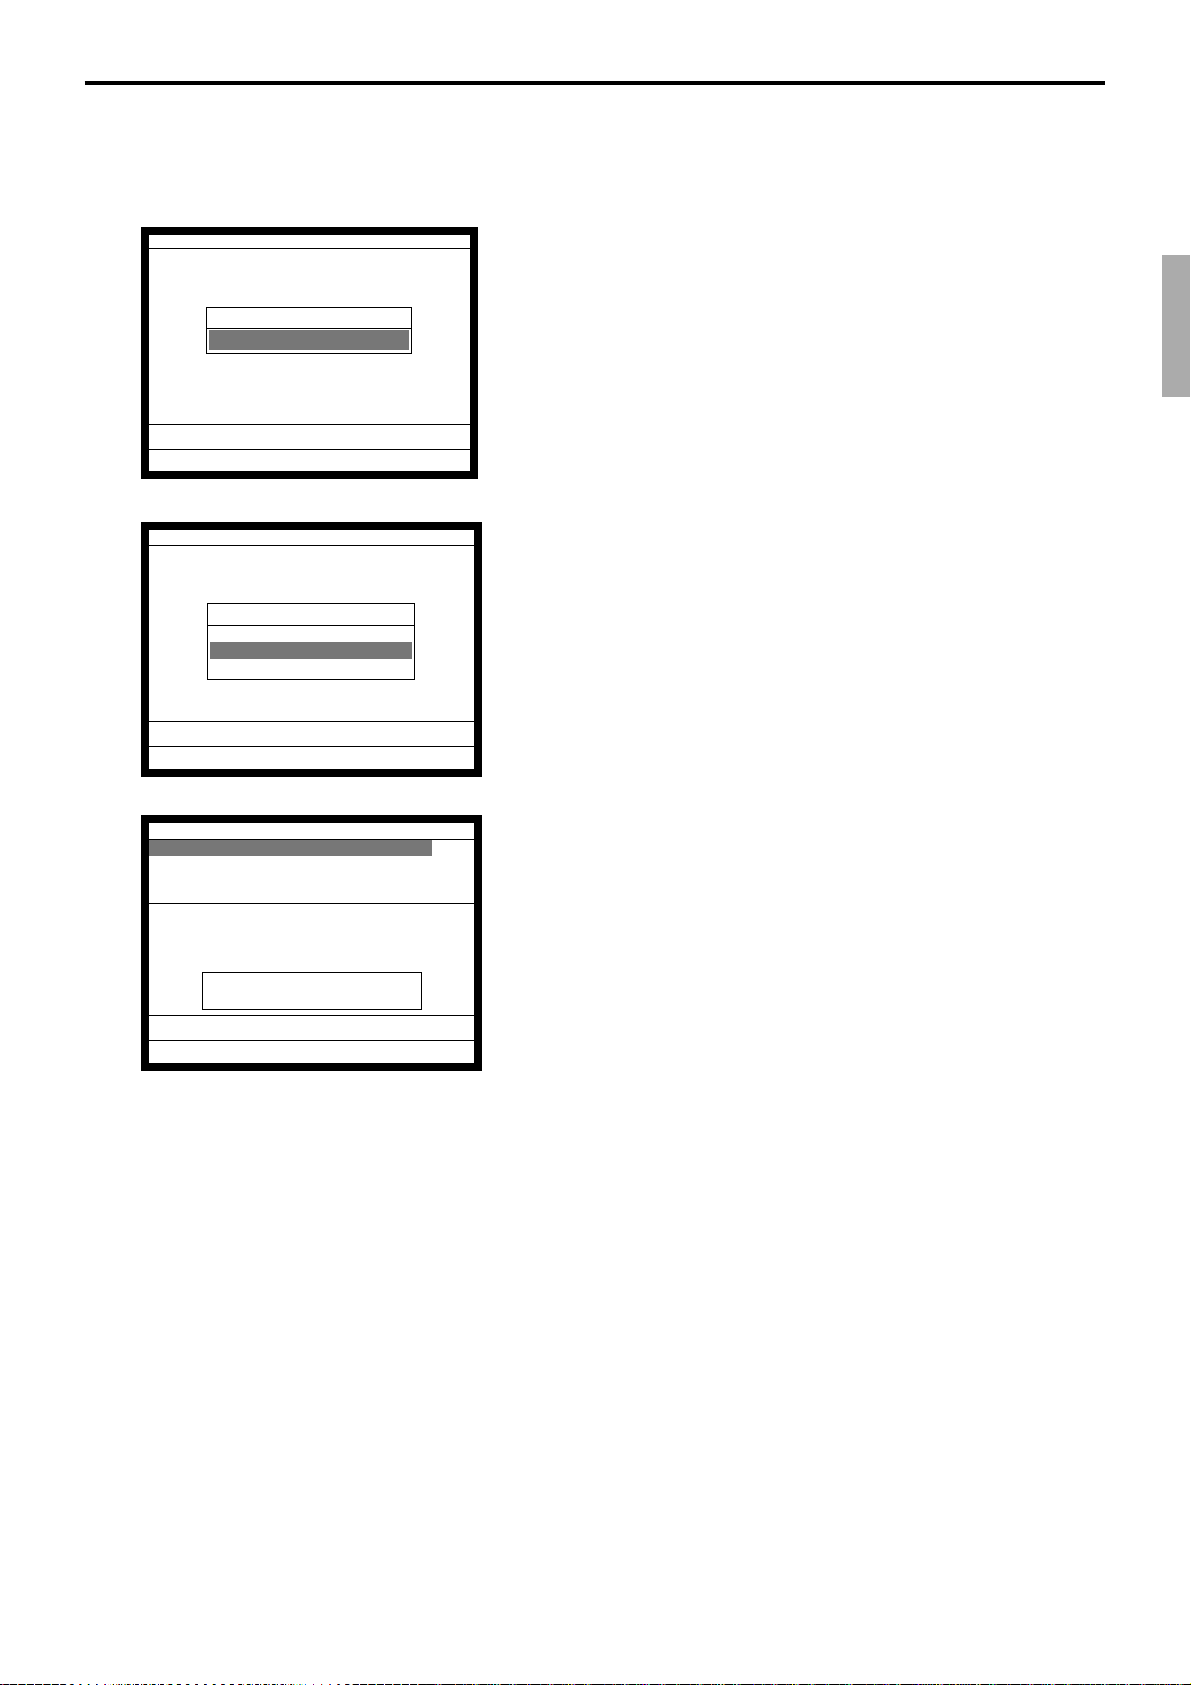
10. In this field, you can select “1. Master/2. Backup Master/3.
Satellite/4.Selfmaster.”
Please select one of these options and press the <YES> key.
11. In these fields, you can select, “1. No/2. UP-350/3. SA-3015/
4. UP-250” for R/J/Order printer.
Please select one of these options and press the <YES> key.
12. In this field, you can select, “1. No/2. SA-3015/3. SP-1300”
for slip printer.
Please select one of these options and press the <YES> key.
Date 01-10-10
Time 12:34 00
Check cluster ID 0
ID Character MC #01
Check System Master
R/J/Order Printer(1) UP-350
R/J/Order Printer(2) UP-350
R/J/Order Printer(3) UP-350
Slip Printer SP-1300
OK? YES
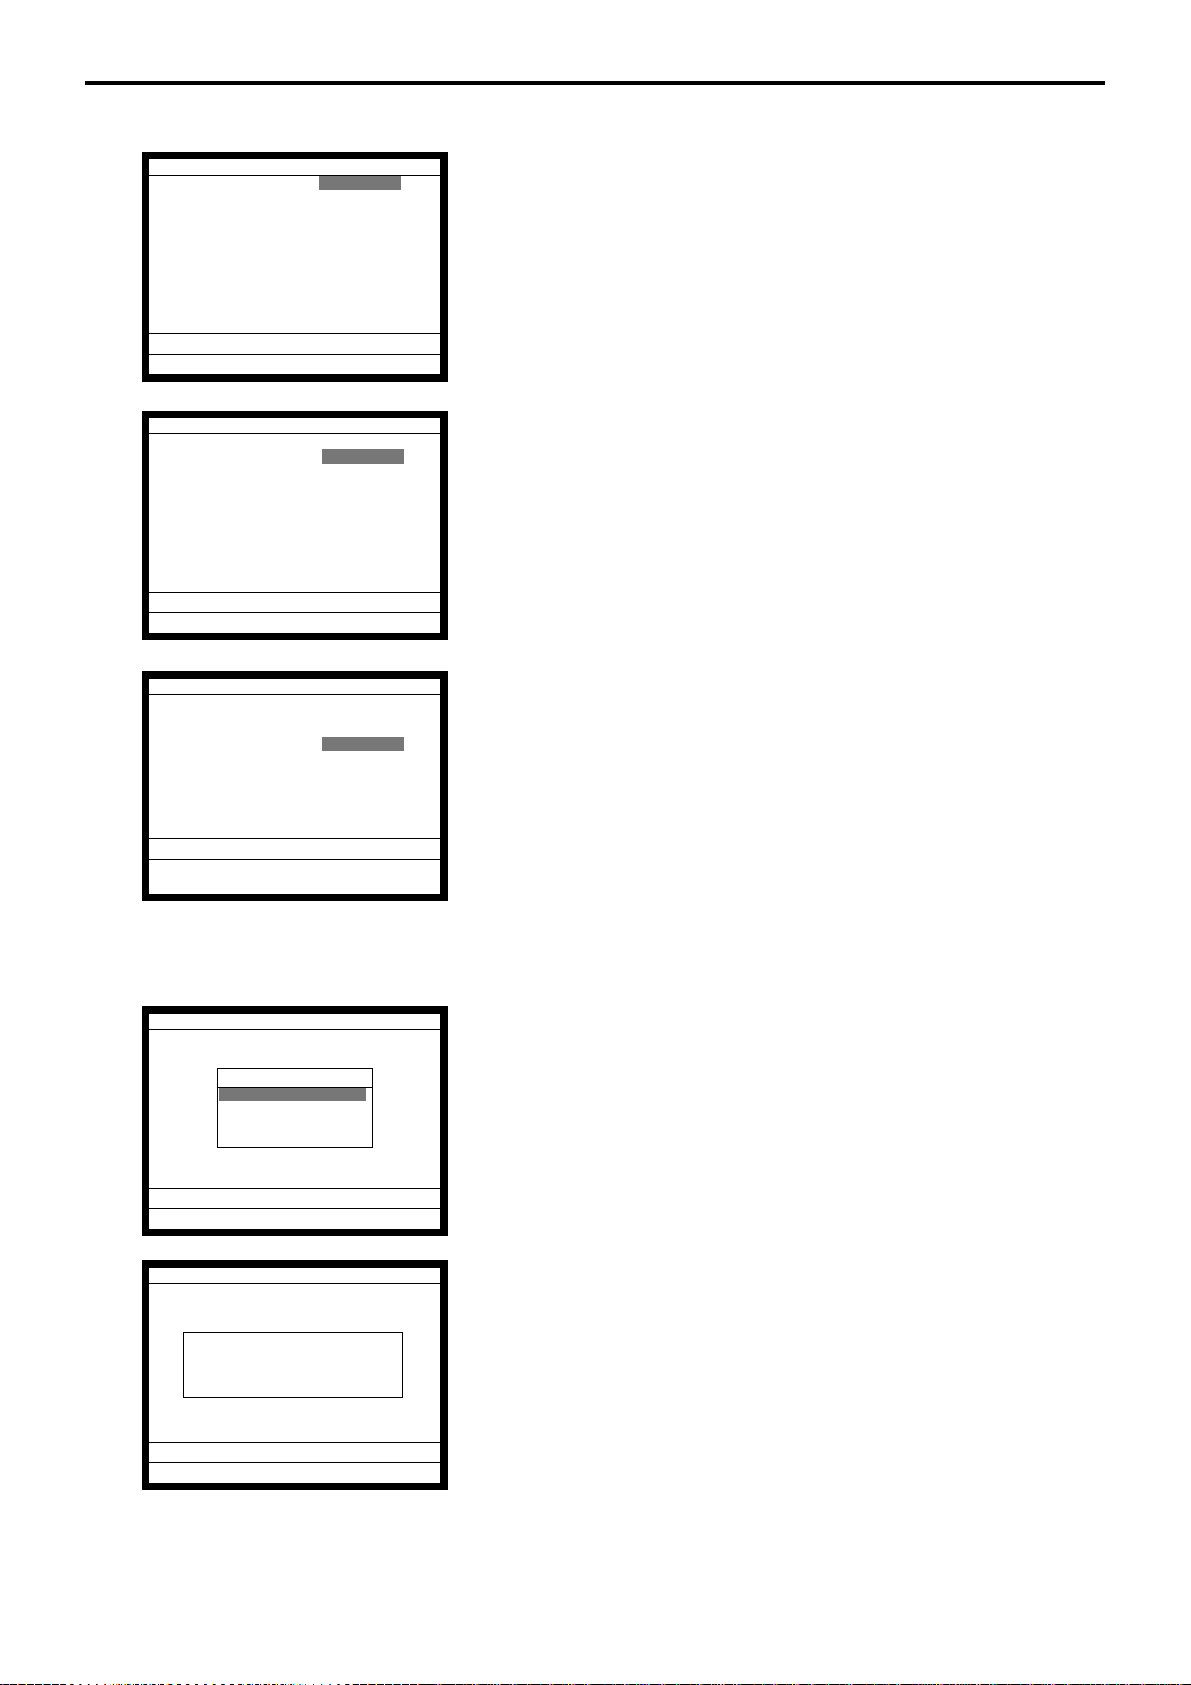
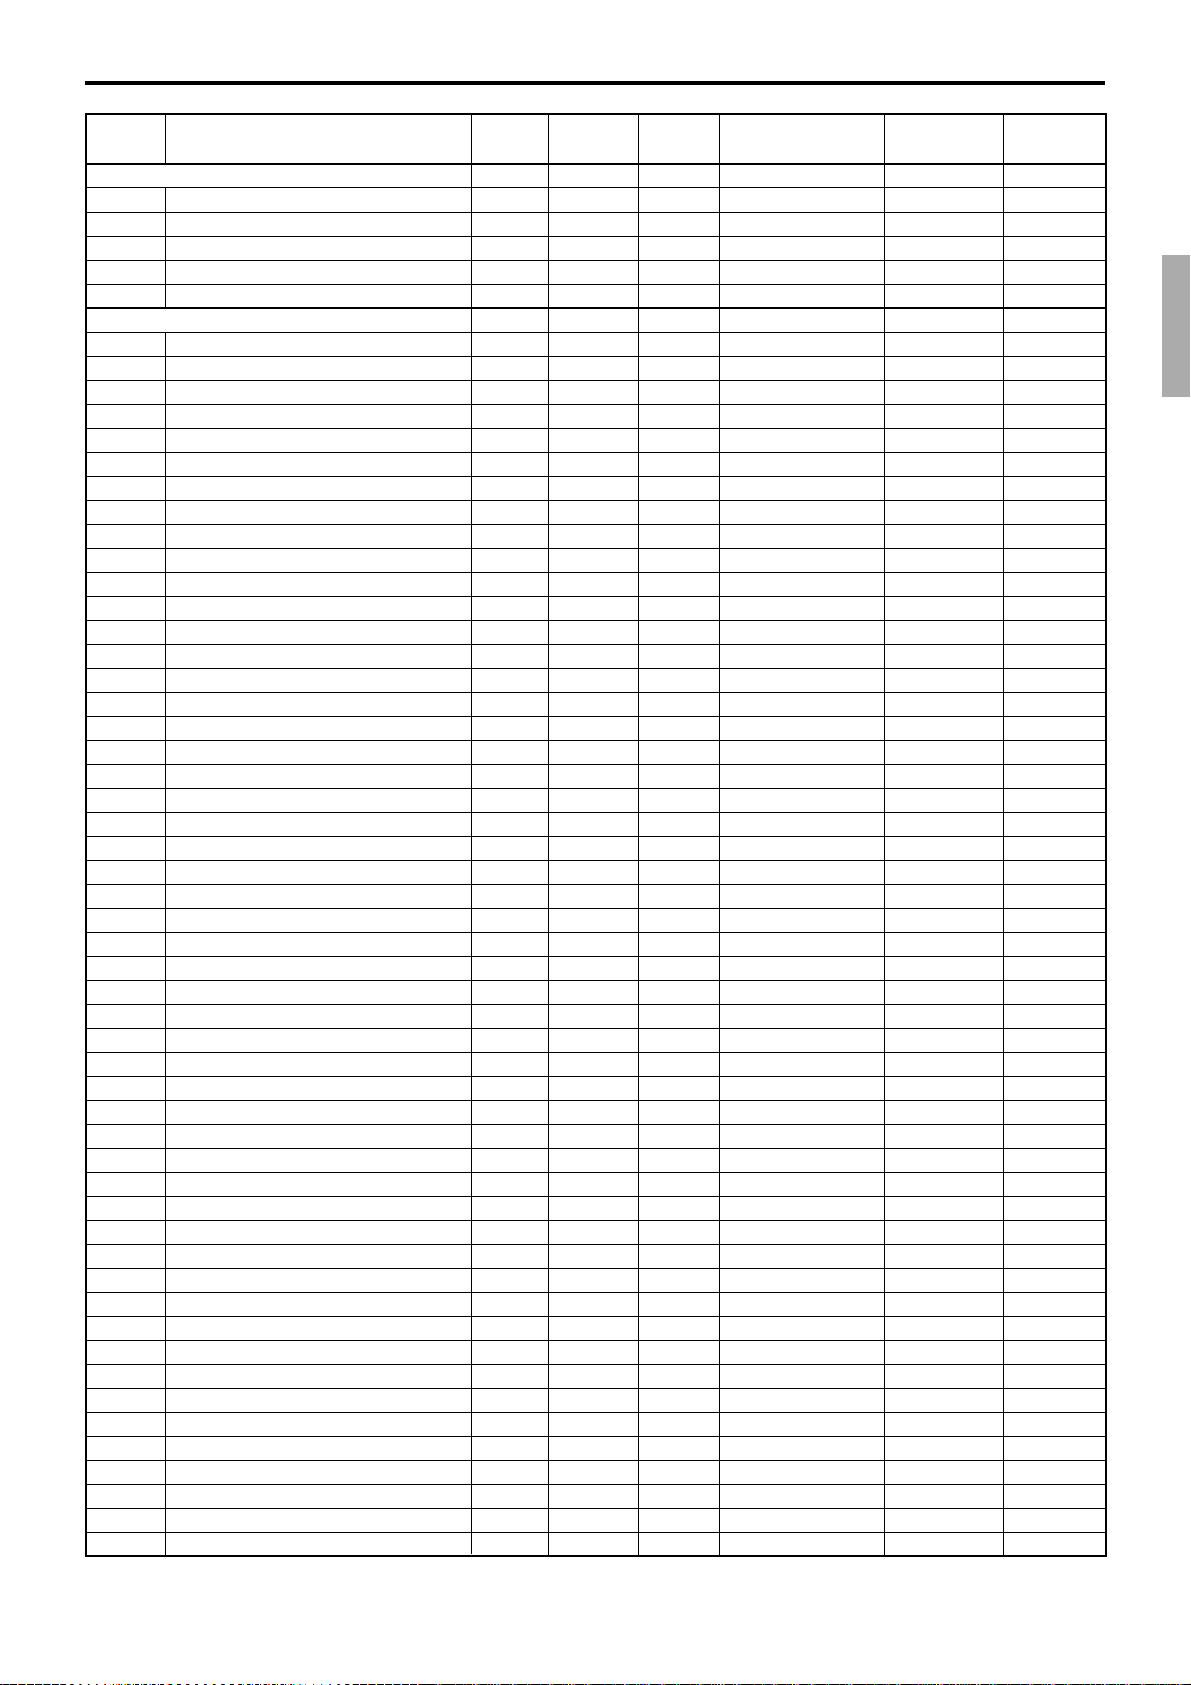
13. Please confirm all of the field and if they are all right, press
INIT 10-10-01 12:34 000000
AUTO PGM YES
1.No Restore/Receive
2.PGM Restore (CF Card)
3.PGM Receive (Inline)
14. If you want to download program data from other terminal or
the <YES> key to proceed the next step.
CF card, select the appropriate menu and press the <YES>
key and proceed the next step.
If you don't need to download any program data, just select
“1. No Restore/Receive” and press the <YES> key.
If you have another machine to initialize, return to step 4.
QT-2100 Programming Manual
P-9
Page 10
Initialization
Program copy from other terminal.
INIT 10-10-01 12:34 000000
Received Data All PGM
PGM Receive from MC #05
OK? YES
0.00
INIT 10-10-01 12:34 000000
Received Data All PGM
PGM Receive from MC #05
OK? YES
0.00
INIT 10-10-01 12:34 000000
Received Data All PGM
PGM Receive from MC #05
OK? YES
0.00
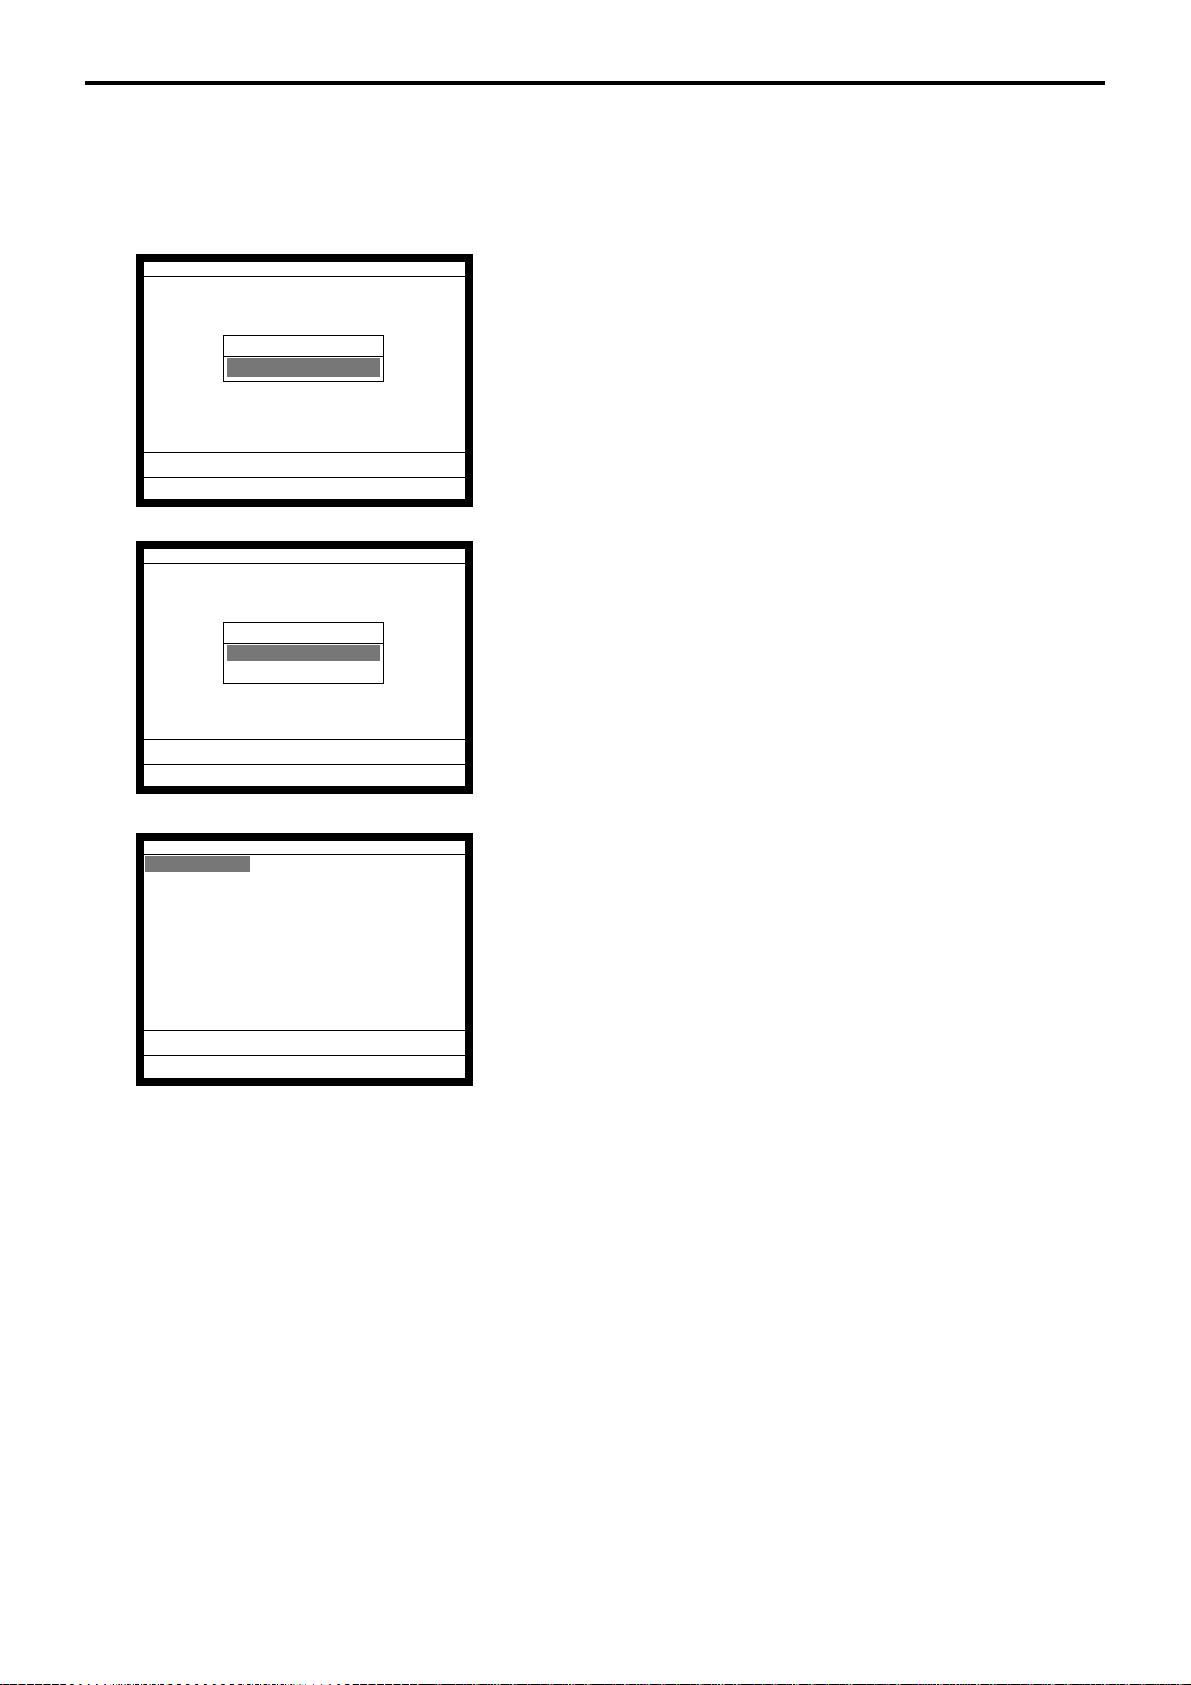
15. In this field, you can select the receiving contents as “1. All
Data (including totalizer)/2. All PGM (program only).”
16. In this field, you should enter the source ID number of the data
and press the <YES> key.
17. Please confirm all of the fields and if they are all right, press
the <YES> key to proceed downloading.
After completion of downloading, return to step 4 to initialize
other terminals.
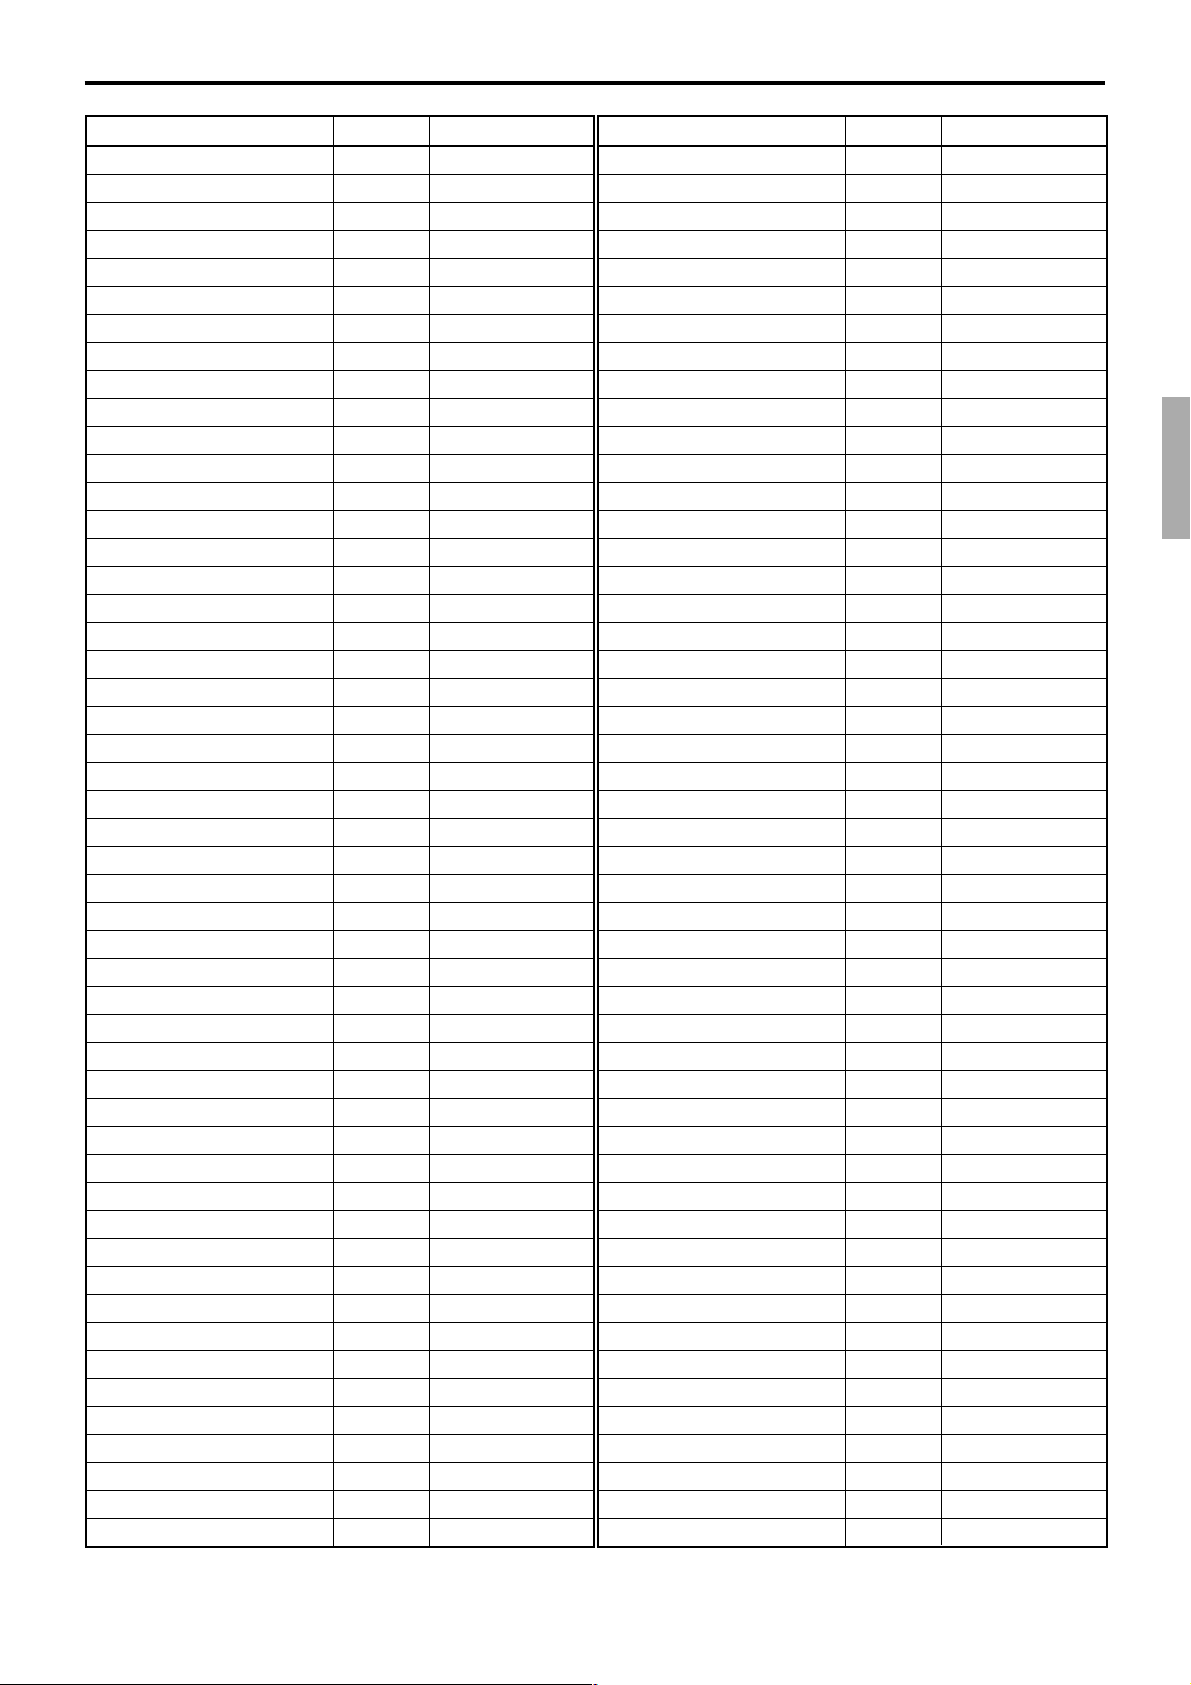
Restore from CF card.
INIT 10-10-01 12:34 000000
Data Restore
1.PLUPGM1 .004
2.PLUPGM2 .004
3.STORE-AA.090
4.STORE-BB.090
0.00
STORE-AAA.090
Are you sure to restore?
0.00
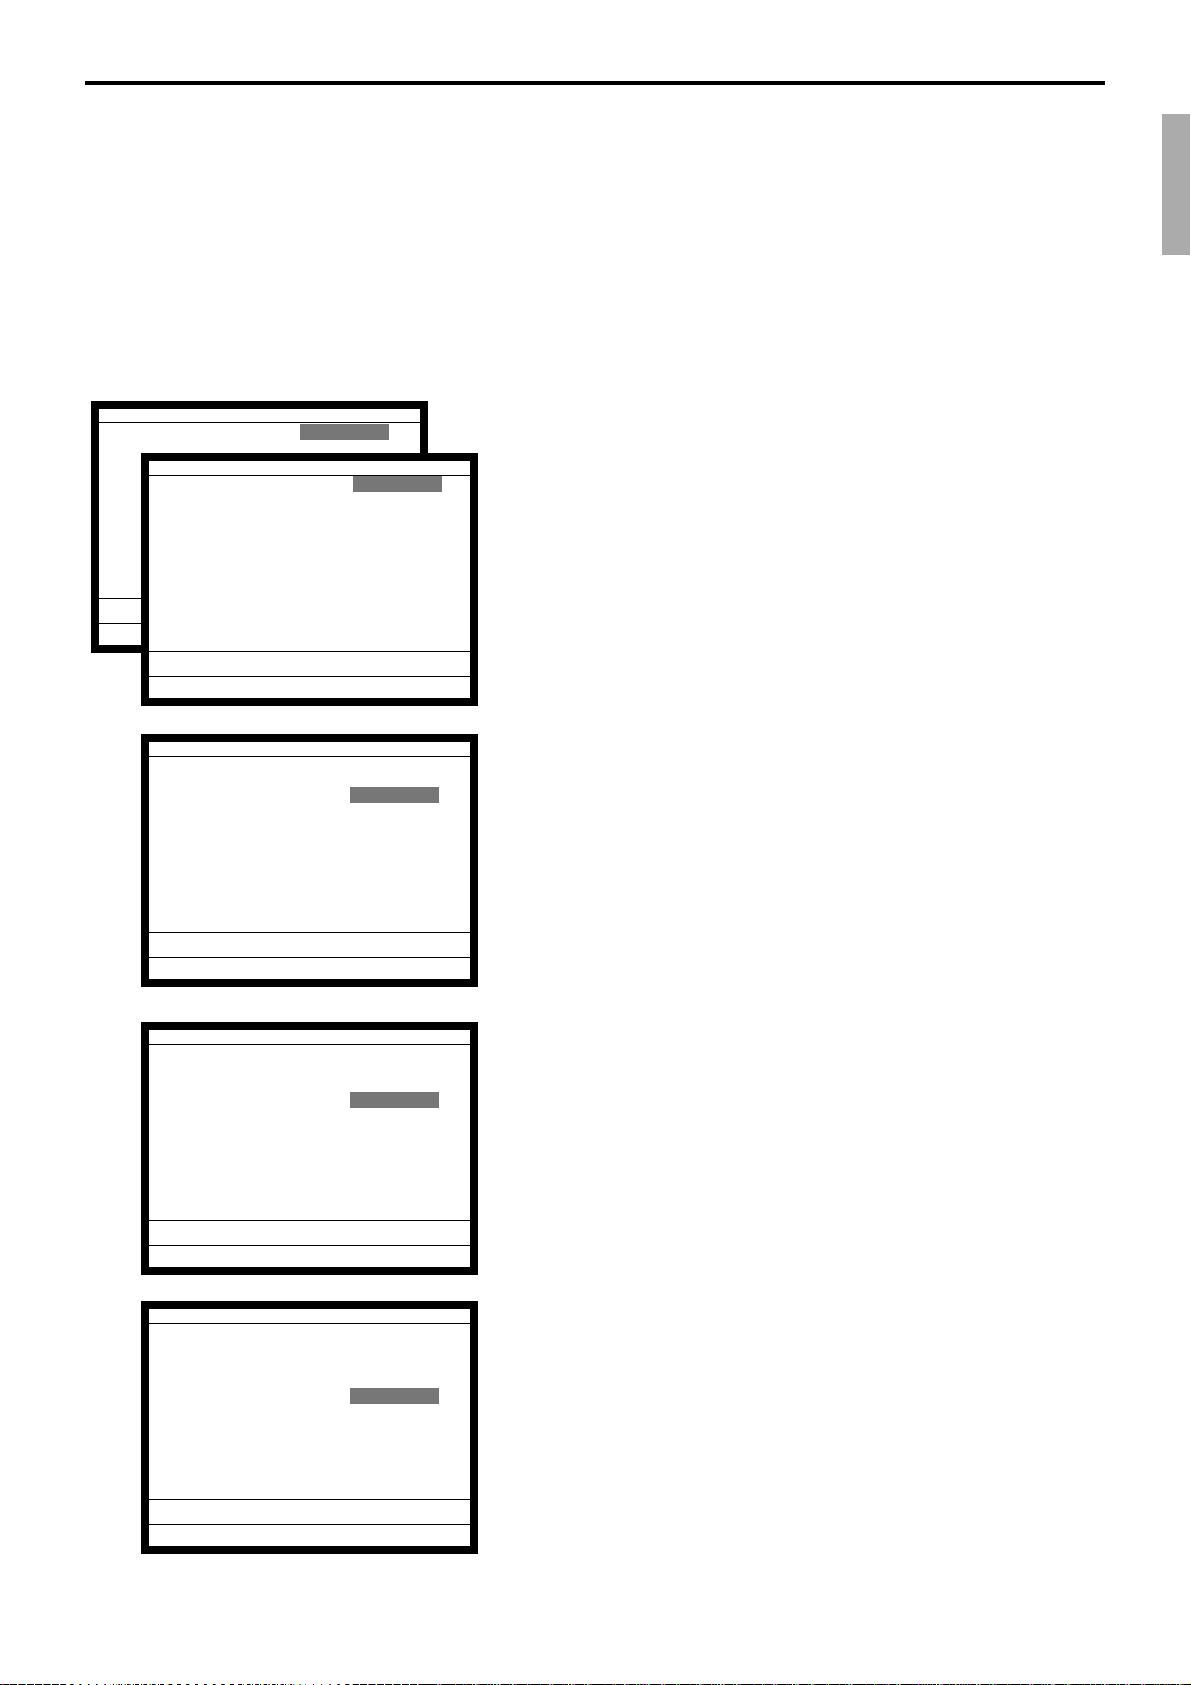
15. Insert the CF card into the slot and select the appropriate file
and press the <YES> key.
16. After the confirmation window is shown, press the <YES>
key to proceed restoring.
After completion of downloading, return to step 4 to initialize
other terminals.
P-10
Page 11
1-2. How to initialize QT-2100 terminal (add/replace one QT-2100)
Preparation:
1. All peripheral devices and QT-2100 terminals of this cluster
should be turned off.
2. Connect all of the peripheral devices (such as printer, display
etc.) to this QT-2100 terminal.
3. Connect this QT-2100 terminal to inline.
Operation:
4. Turn on all peripheral devices of this QT-2100 terminal.
Date 00-00-00
Time 12:34 00
ID Character MC #01
Check System Master
Date 01-10-10
Check cluster ID 0
Time 12:34 00
R/J/Order Printer(1) UP-350
ID Character MC #01
R/J/Order Printer(2) UP-350
Check System Master
R/J/Order Printer(3) UP-350
Check cluster ID 0
Slip Printer SP-1300
R/J/Order Printer(1) UP-350
R/J/Order Printer(2) UP-350
OK? YES
R/J/Order Printer(3) UP-350
Slip Printer SP-1300
OK? YES
And turn on all QT-2100 except this terminal of the cluster.
5. Turn on this QT-2100 terminal with pressing the left-most
key of the top row and release the key after buzzer sounds.
6. After releasing the key, enter “2000” (U.S.)/“1000” (other
area) and press the <ST> key.
7. Enter the current date (YY/MM/DD order) and time and
press the <YES> key.
Date 01-10-10
Time 12:34 00
ID Character MC #01
Check cluster ID 0
Check System Master
R/J/Order Printer(1) UP-350
R/J/Order Printer(2) UP-350
R/J/Order Printer(3) UP-350
Slip Printer SP-1300
OK? YES
Date 01-10-10
Time 12:34 00
ID Character MC #01
Check System Master
Check cluster ID 0
R/J/Order Printer(1) UP-350
R/J/Order Printer(2) UP-350
R/J/Order Printer(3) UP-350
Slip Printer SP-1300
OK? YES
Date 01-10-10
Time 12:34 00
ID Character MC #01
Check System Master
Check cluster ID 0
R/J/Order Printer(1) UP-350
R/J/Order Printer(2) UP-350
R/J/Order Printer(3) UP-350
Slip Printer SP-1300
OK? YES
8. In ID character field, the auto-defined ID No. is shown.
Please check if the same value is set in this field.
We recommend that you should not change the value.
9. In this field, you can select “1. Master/2. Backup Master/3.
Satellite/4.Selfmaster.”
Please choose former options and press the <YES> key.
10. In this field, the check cluster No, should be set, if your check
tracking system are divided in some clusters.
(Enter cluster No. “1” ~ “9”, if you use check cluster system.)
QT-2100 Programming Manual
P-11
Page 12
Initialization
Date 01-10-10
Time 12:34 00
ID Character MC #01
Check System Master
Check cluster ID 0
R/J/Order Printer(1) UP-350
R/J/Order Printer(2) UP-350
R/J/Order Printer(3) UP-350
Slip Printer SA-1300
OK? YES
Date 01-10-10
Time 12:34 00
ID Character MC #01
Check System Master
Check cluster ID 0
R/J/Order Printer(1) UP-350
R/J/Order Printer(2) UP-350
R/J/Order Printer(3) UP-350
Slip Printer SP-1300
OK? YES
11. In these fields, you can select, “1. No/2. UP-350/3. SA-3015/
4. UP-250” for R/J/Order printer.
Please choose former option and press the <YES> key.
12. In this field, you can select, “1. No/2. SA-3015/3. SP-1300”
for slip printer.
Please choose former options and press the <YES> key.
Date 01-10-10
Time 12:34 00
ID Character MC #01
Check System Master
Check cluster ID 0
R/J/Order Printer(1) UP-350
R/J/Order Printer(2) UP-350
R/J/Order Printer(3) UP-350
Slip Printer SP-1300
OK? YES
INIT 10-10-01 12:34 000000
AUTO PGM YES
1.No Restore/Receive
2.PGM Restore (CF Card)
3.PGM Receive (Inline)
13.Please confirm all of the field and if they are all right, press the
<YES> key to proceed the next step.
14. If you want to download program data from other terminal or
CF card, select the appropriate menu and press the <YES>
key and proceed the next step.
If you don't need to download any program data, just select
“1. No Restore/Receive” and press the <YES> key. (The
initialization is completed.)
P-12
Page 13
Program copy from other terminal.
INIT 10-10-01 12:34 000000
Received Data All PGM
PGM Receive from MC #05
OK? YES
0.00
INIT 10-10-01 12:34 000000
Received Data All PGM
PGM Receive from MC #05
OK? YES
0.00
INIT 10-10-01 12:34 000000
Received Data All PGM
PGM Receive from MC #05
OK? YES
0.00
15. In this field, you can select the receiving contents as “1. All
Data (including totalizer)/2. All PGM (program only).”
16. In this field, you should enter the source ID number of the data
and press the <YES> key.
17. Please confirm all of the fields and if they are all right, press
the <YES> key to proceed downloading. (The initialization
is completed.)
Restore from CF card.
INIT 10-10-01 12:34 000000
Data Restore
1.PLUPGM1 .004
2.PLUPGM2 .004
3.STORE-AA.090
4.STORE-BB.090
0.00
STORE-AAA.090
Are you sure to restore?
0.00
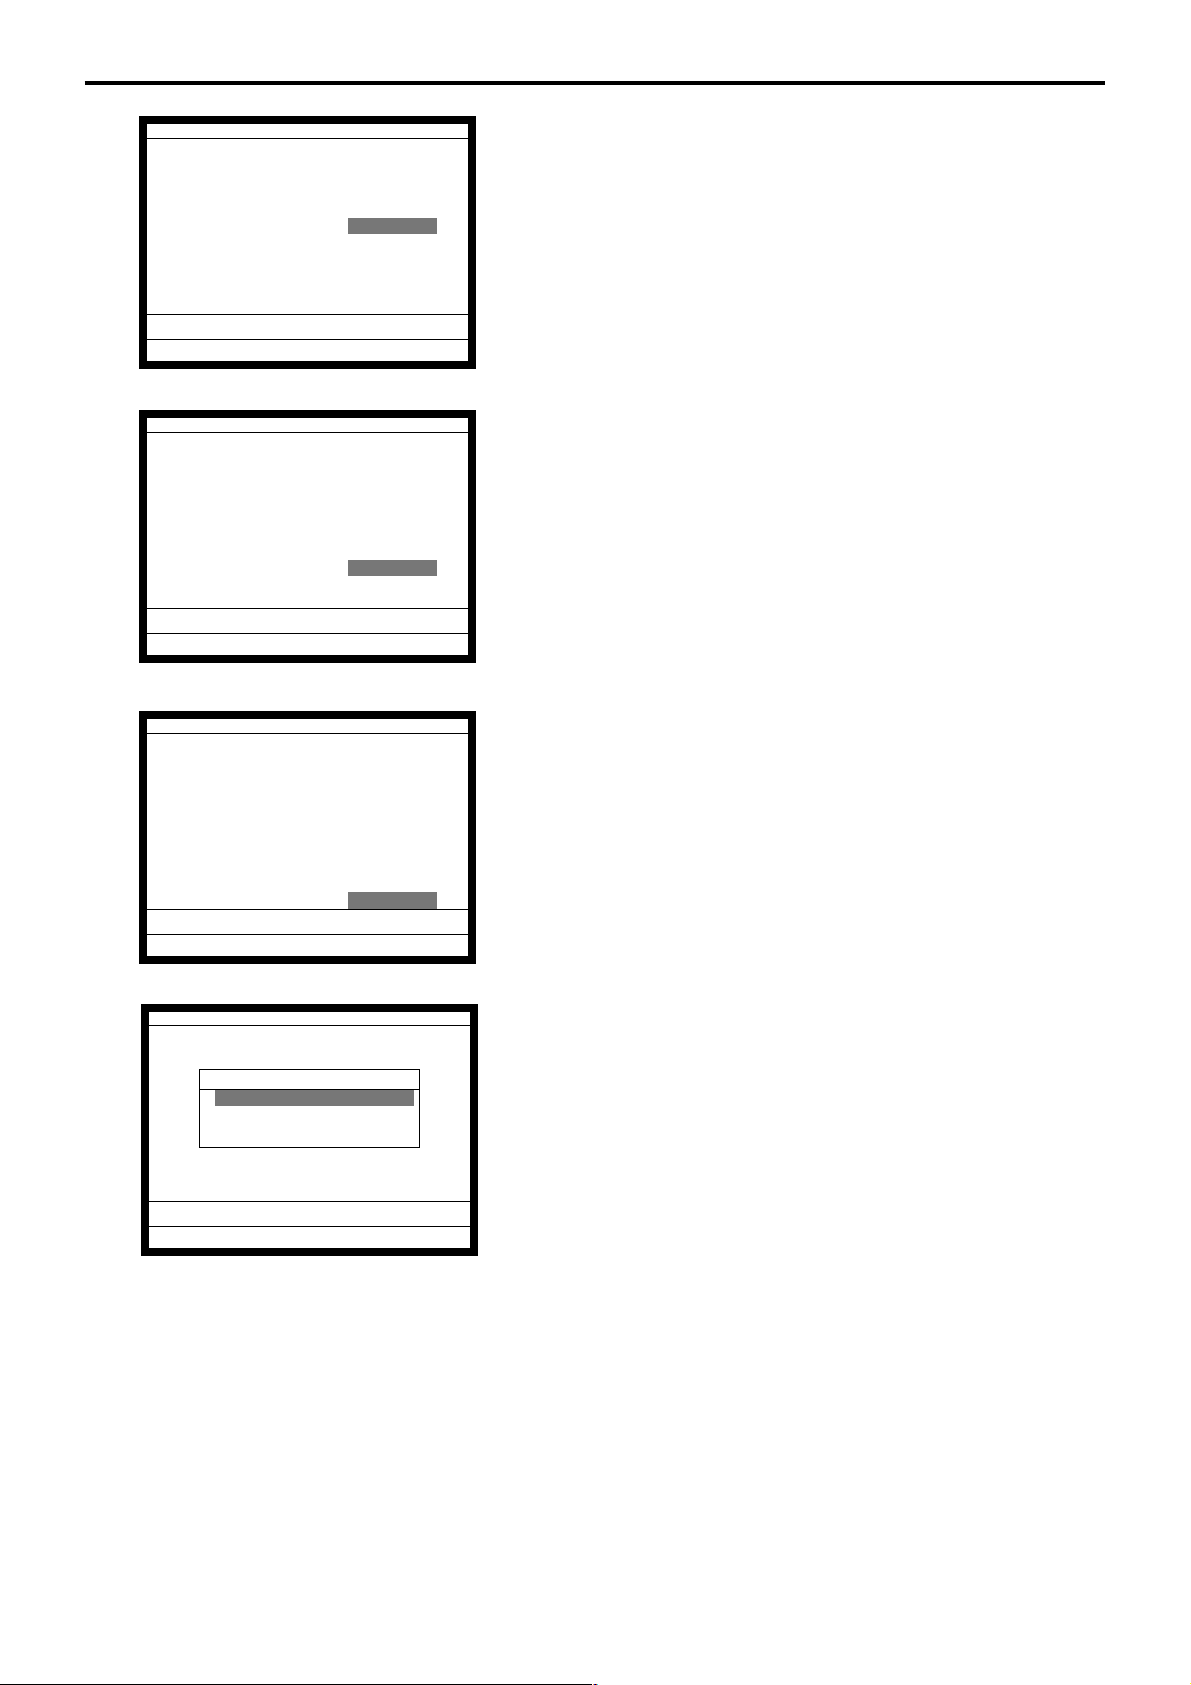
15. Insert the CF card into the slot and select the appropriate file
and press the <YES> key.
16. After the confirmation window is shown, press the <YES>
key to proceed restoring. (The initialization is completed.)
QT-2100 Programming Manual
P-13
Page 14

Initialization
1-3. How to flag clear QT-2100 terminal (or INIT2)
Preparation:
1. All peripheral devices and this QT-2100 terminal should be
turned off.
2. Check the connection of all peripheral devices (such as
printer, display etc.) of this QT-2100 terminal.
3. Check the connection of this QT-2100 terminal to inline.
Operation:
10-10-01 12:34
INIT
1.Flag Clear
2.INIT2
0.00
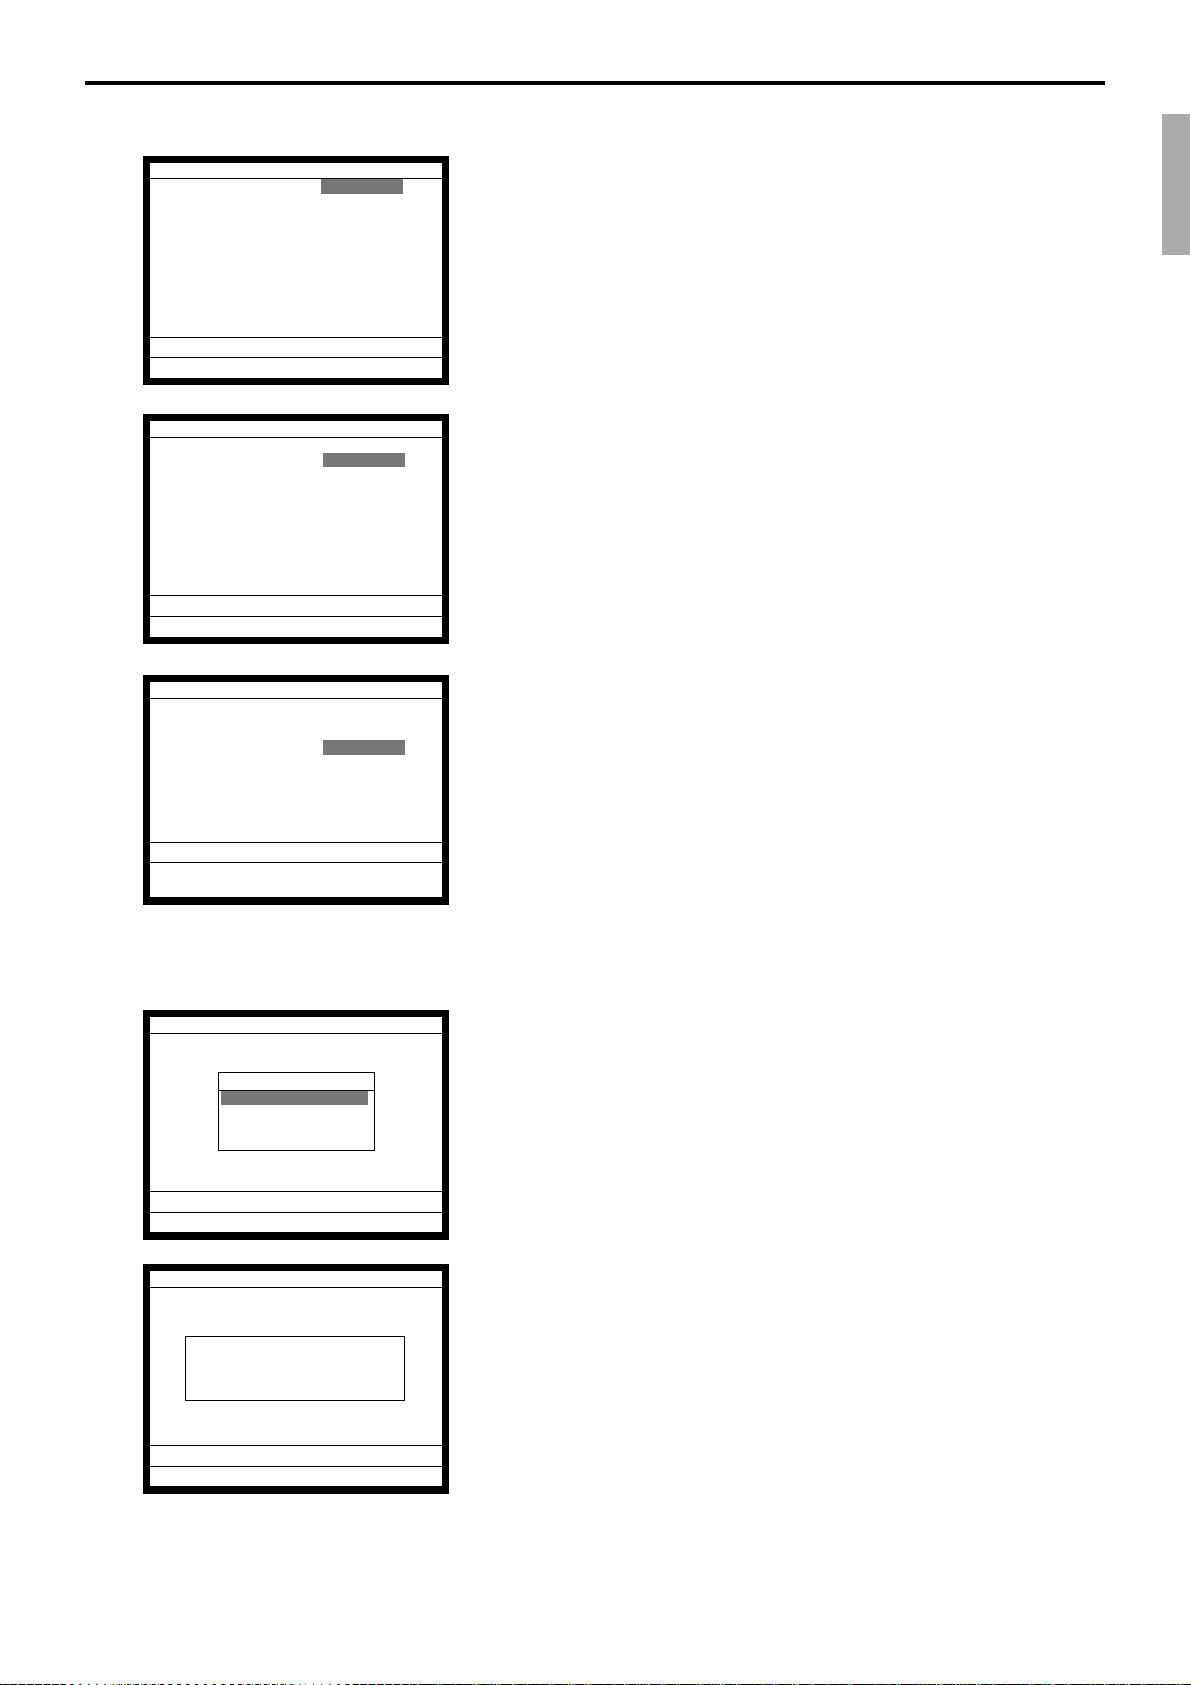
4. Turn on all peripheral devices of this QT-2100 terminal.
5. Turn on this QT-2100 terminal with pressing the right-most
key of the top row and release the key after buzzer sounds.
6. After releasing the key, press the <ST> key.
7. Select “1. Flag Clear” and press the <YES> key.
The flag clear operation is finished.
Note:
Performing “Init 2” requires password “8888888888” .
P-14
Page 15

2. Program 5 .................................................................................P-16
2-1. Programming memory allocation (daily & program)................................. P-16
2-2. Programming memory allocation (periodic & work) ................................. P-17
2-3. Programming memory allocation file by file ............................................. P-18
QT-2100 Programming Manual
P-15
Page 16
Program 5
2. Program 5
2-1. Programming memory allocation (daily & program)
Operation:
P5 C
01 10-10-01 12:34 000000
PGM-5
1.Memory Alloc
0.00
Memory Alloc
1. Sign on a clerk (if necessary).
2. Press <PGM MODE> repeatedly to assign Program 5 mode.
Memory Alloc
1.Daily & PGM
2.Periodic & Work
3.Individual File
0.00
Daily & PGM
Cashier/Clerk 15
Check Tracking Tables 3
Items/Table 60
Item Blocks 1
Table Analysis 10
PLU 324
PLU 2nd@ 324
Shift PLU 108v
RAM 22688
0.00
The remainder of memory
Daily & PGM
Hourly Production 0^
Hourly Labor 0
Employee 0
Job Code 0
IDC Link 0
IDC(1) 0
IDC(2) 0
IDC(3) 0
RAM 22688
Daily & PGM
Scanning PLU link 100^
Pulldown Group 20
Set Menu Table 30
Sub-Department 0
Department 4
Group 20
Receipt/SLIP Msg 12
Text Recall 99v
RAM 22688
3. Select “1. Daily & PGM” and press the <YES> key.
Daily & PGM
Order Chara Link 10^
Void File 10
Free Function 100
Time Zone 0
Hourly Production 0
Hourly Labor 0
Employee 0
Job Code 0v
RAM 22688
0.00
0.00
4. Select an appropriate file, enter the record numbers you want
to allocate and press the <YES> key.
The lowest row shows the remaining memory.
5. Press the <ESC> key to return to the previous menu.
P-16
0.00
Page 17
2-2. Programming memory allocation (periodic & work)
Operation:
P5 C
01 10-10-01 12:34 000000
PGM-5
1.Memory Alloc
0.00
Memory Alloc
Memory Alloc
1.Daily & PGM
2.Periodic & Work
3.Individual File
0.00
1. Sign on a clerk (if necessary).
2. Press <PGM MODE> repeatedly to assign Program 5 mode.
3. Select “2. Periodic & Work” and press the <YES> key.
Periodic & Work
PLU
Periodic(1) Totalizer Yes
Periodic(2) Totalizer No
Consolidation & Work Yes
Except PLU
Periodic(1) Totalizer Yes
Periodic(2) Totalizer No
Consolidation & Work Yes
RAM 22688
0.00
4. Select an appropriate record and press the <YES> (allocate)
5. Press the <ESC> key to return to the previous menu.
Note:
The Flag Clear operation resets “YES” status. However it does not reallocate the files that
were already allocated on this screen.
or <NO> (not allocate) key.
QT-2100 Programming Manual
P-17
Page 18

Program 5
2-3. Programming memory allocation file by file
If you want to allocate files file by file, follow the procedures below.
Operation:
P5 C
01 10-10-01 12:34 000000
PGM-5
1.Memory Alloc
0.00
Memory Alloc
Memory Alloc
1.Daily & PGM
2.Periodic & Work
3.Individual File
0.00
1. Sign on a clerk (if necessary).
2. Press <PGM MODE> repeatedly to assign Program 5 mode.
3. Select “3. Individual File” and press the <YES> key.
Individual File
File001 78
File101 78
File201 0
File301 78
File401 78
File501 0
File601 78
File002 70
RAM 612
0.00
4. Select the file number you want to change and enter record
5. Press the <ESC> key to return to the previous menu.
number you want to allocate (“0” means file deletion).
P-18
Page 19
File
No. length
System files
901 System connection table 18 33 75 Program No
902 I/O parameter 5 15 69 Program No
903 Printer connection 27 99 81 Program No
904 Consecutive number 6 5 69 Buffer No
999 System error log 11 20 75 Buffer No
Function and total files
001 Fixed totalizer 26 78 81 Pgm/Sales No
101 (periodic total 1) 10 78 75 Sales Yes
201 (periodic total 2) 10 78 75 Sales Yes
301 (daily consolidation) 10 78 75 for master Sales Yes
401 (periodic 1 consolidation) 10 78 75 for master Sales Yes
501 (periodic 2 consolidation) 10 78 75 for master Sales Yes
601 (consolidation work) 10 78 75 for master Buffer Yes
002 Free function 38 999 99 Pgm/Sales Yes
102 (periodic total 1) 10 999 75 Sales Yes
202 (periodic total 2) 10 999 75 Sales Yes
302 (daily consolidation) 10 999 75 for master Sales Yes
402 (periodic 1 consolidation) 10 999 75 for master Sales Yes
502 (periodic 2 consolidation) 10 999 75 for master Sales Yes
602 (consolidation work) 10 999 75 for master Buffer Yes
003 Subdepaprtment 54 99 135 Pgm/Sales Yes
103 (periodic total 1) 15 99 81 Sales Yes
203 (periodic total 2) 15 99 81 Sales Yes
303 (daily consolidation) 15 99 81 for master Sales Yes
403 (periodic 1 consolidation) 15 99 81 for master Sales Yes
503 (periodic 2 consolidation) 15 99 81 for master Sales Yes
603 (consolidation work) 15 99 81 for master Buffer Yes
004 PLU 92 9999 177 Pgm/Sales Yes
104 (periodic total 1) 30 9999 99 Sales Yes
204 (periodic total 2) 30 9999 99 Sales Yes
304 (daily consolidation) 30 9999 99 for master Sales Yes
404 (periodic 1 consolidation) 30 9999 99 for master Sales Yes
504 (periodic 2 consolidation) 30 9999 99 for master Sales Yes
604 (consolidation work) 30 9999 99 for master Buffer Yes
005 Department 54 99 135 Pgm/Sales Yes
105 (periodic total 1) 15 99 81 Sales Yes
205 (periodic total 2) 15 99 81 Sales Yes
305 (daily consolidation) 15 99 81 for master Sales Yes
405 (periodic 1 consolidation) 15 99 81 for master Sales Yes
505 (periodic 2 consolidation) 15 99 81 for master Sales Yes
605 (consolidation work) 15 99 81 for master Buffer Yes
006 Group 26 99 81 Pgm/Sales Yes
106 (periodic total 1) 10 99 75 Sales Yes
206 (periodic total 2) 10 99 75 Sales Yes
306 (daily consolidation) 10 99 75 for master Sales Yes
406 (periodic 1 consolidation) 10 99 75 for master Sales Yes
506 (periodic 2 consolidation) 10 99 75 for master Sales Yes
606 (consolidation work) 10 99 75 for master Buffer Yes
009 Hourly sales 20 96 87 Sales Yes
109 (periodic total 1) 20 96 87 Sales Yes
209 (periodic total 2) 20 96 87 Sales Yes
309 (daily consolidation) 20 96 87 for master Sales Yes
409 (periodic 1 consolidation) 20 96 87 for master Sales Yes
509 (periodic 2 consolidation) 20 96 87 for master Sales Yes
609 (consolidation work) 20 96 87 for master Buffer Yes
010 Monthly sales 20 32 87 Sales Yes
110 (periodic total 1) 20 32 87 Sales Yes
File description
Record Max. No. Work
of records
size tion able
Description
Attribu- Allocat-
QT-2100 Programming Manual
P-19
Page 20

Program 5
File
No. length
210 (periodic total 2) 20 32 87 Sales Yes
310 (daily consolidation) 20 32 87 for master Sales Yes
410 (periodic 1 consolidation) 20 32 87 for master Sales Yes
510 (periodic 2 consolidation) 20 32 87 for master Sales Yes
610 (consolidation work) 20 32 87 for master Buffer Yes
012 Void reason 29 99 87 Pgm/Sale Yes
112 (periodic total 1) 10 99 75 Sales Yes
212 (periodic total 2) 10 99 75 Sales Yes
312 (daily consolidation) 10 99 75 for master Sales Yes
412 (periodic 1 consolidation) 10 99 75 for master Sales Yes
512 (periodic 2 consolidation) 10 99 75 for master Sales Yes
612 (consolidation work) 10 99 75 for master Buffer Yes
018 Table analysis 32 99 93 Pgm/Sale Yes
118 (periodic total 1) 10 99 75 Sales Yes
218 (periodic total 2) 10 99 75 Sales Yes
318 (daily consolidation) 10 99 75 for master Sales Yes
418 (periodic 1 consolidation) 10 99 75 for master Sales Yes
518 (periodic 2 consolidation) 10 99 75 for master Sales Yes
618 (consolidation work) 10 99 75 for master Buffer Yes
020 Grand total 24 3 75 Pgm/Sale No
120 (periodic total 1) 8 3 69 Sales Yes
220 (periodic total 2) 8 3 69 Sales Yes
320 (daily consolidation) 8 3 69 for master Sales Yes
420 (periodic 1 consolidation) 8 3 69 for master Sales Yes
520 (periodic 2 consolidation) 8 3 69 for master Sales Yes
620 (consolidation work) 8 3 69 for master Buffer Yes
055 Shift PLU 91 9999 189 Sales Yes
155 (periodic total 1) 70 9999 147 Sales Yes
255 (periodic total 2) 70 9999 147 Sales Yes
355 (daily consolidation) 70 9999 147 for master Sales Yes
455 (periodic 1 consolidation) 70 9999 147 for master Sales Yes
555 (periodic 2 consolidation) 70 9999 147 for master Sales Yes
655 (consolidation work) 70 9999 147 for master Buffer Yes
Clerk
007 Clerk 95 99 165 Program Yes
030 Clerk detail link 4 99 75 Program Yes
027 Clerk (Dallas) key ID 14 200 75 Program Yes
011 Clerk detail 10 9801 75 Sales Yes
111 (periodic total 1) 10 9801 75 Sales Yes
211 (periodic total 2) 10 9801 75 Sales Yes
311 (daily consolidation) 10 9801 75 for master Sales Yes
411 (periodic 1 consolidation) 10 9801 75 for master Sales Yes
511 (periodic 2 consolidation) 10 9801 75 for master Sales Yes
611 (consolidation work) 10 9801 75 for master Buffer Yes
Time & Attendance
014 Hourly / Labor 26 96 99 Sales Yes
114 (periodic total 1) 26 96 99 Sales Yes
214 (periodic total 2) 26 96 99 Sales Yes
314 (daily consolidation) 26 96 99 for master Sales Yes
414 (periodic 1 consolidation) 26 96 99 for master Sales Yes
514 (periodic 2 consolidation) 26 96 99 for master Sales Yes
614 (consolidation work) 26 96 99 for master Buffer Yes
019 Work time 18 4158 111 Sales Yes
319 (daily consolidation) 18 4158 75 for master Sales Yes
800 Time zone 6 24 81 Program Yes
801 Employee 36 99 135 Program Yes
802 Job code 22 50 87 Program Yes
File description
Record Max. No. Work
of records
size tion able
Description
Attribu- Allocat-
Note: Never allocate “Shift PLU” files, if you use “Accumulation for menu totaling specification”.
P-20
Page 21

File
No. length
803 Schedule 11 2079 111 Program Yes
806 Time & Attendance work 99 1 657 Buffer Yes
Check
015 Check Index 300 200 69 Buffer Yes
060 Check detail 80 9999 69 Buffer Yes
066 Check detail work 80 2000 69 Buffer Yes
Hourly item
021 Hourly item 10 1920 75 Sales Yes
121 (periodic total 1) 10 1920 75 Sales Yes
221 (periodic total 2) 10 1920 75 Sales Yes
321 (daily consolidation) 10 1920 75 for master Sales Yes
421 (periodic 1 consolidation) 10 1920 75 for master Sales Yes
521 (periodic 2 consolidation) 10 1920 75 for master Sales Yes
621 (consolidation work) 10 1920 75 for master Buffer Yes
031 Hourly item link 4 480 75 Program Yes
IDC
057 IDC (1) 50 9999 69 Sales Yes
357 (consolidation file) 50 9999 69 for master Sales Yes
657 (consolidation work) 50 9999 69 for master Sales Yes
058 IDC (2) 50 9999 69 Sales Yes
358 (consolidation file) 50 9999 69 for master Sales Yes
658 (consolidation work) 50 9999 69 for master Sales Yes
059 IDC (3) 50 9999 69 Sales Yes
359 (consolidation file) 50 9999 69 for master Sales Yes
659 (consolidation work) 50 9999 69 for master Sales Yes
063 IDC buffer 50 9999 69 Buffer Yes
804 IDC link 6 999 81 Program Yes
Program / message / buffer
016 Scanning PLU link 9 300 75 Program Yes
022 General control 6 37 69 Program No
023 Special character 16 58 69 Program No
024 Report header 16 31 69 Program No
025 Tax table 74 10 93 Program Yes
026 Pulldown group 103 999 189 Program Yes
028 Set menu table 80 999 183 Program Yes
029 Batch X/Z 9 10 69 Program Yes
032 Receipt/slip message 40 48 69 Program Yes
033 Endorse message 40 4 69 Program Yes
035 Print buffer 80 999 69 Buffer Yes
036 Registration buffer 80 2000 69 Buffer Yes
039 Character recall 40 9999 69 Program Yes
041 Check print 3 9 69 Program Yes
044 Display buffer 40 1000 69 Buffer Yes
047 Graphic logo 13 432/864 69 Program Yes
048 Electronic journal memory 41 1000 69 Buffer Yes
648 Electronic journal (collection) 41 12336 69 for master Buffer Yes
054 PLU 2nd @ 46 9999 99 Program Yes
062 Scheduler 14 99 75 Program Yes
065 Order character 16 99 69 Program Yes
074 Key table 36 192 171 Program No
099 Euro program 4 3 69 Program Yes
905 Auto program control 3 20 75 Program Yes
Arrangement
038 Arrange group (1) 24 9999 69 Program Yes
138 Arrange group (2) 24 9999 69 Program Yes
238 Arrange group (3) 24 9999 69 Program Yes
338 Arrange group (4) 24 9999 69 Program Yes
438 Arrange group (5) 24 9999 69 Program Yes
File description
Record Max. No. Work
of records
size tion able
Description
Attribu- Allocat-
QT-2100 Programming Manual
P-21
Page 22

Program 5
P-22
Page 23

3. Program 4 ................................................................................. P-24
3-1. Programming key allocation..................................................................... P-24
3-2. Programming key allocation (key location change).................................. P-26
3-3. Programming key allocation..................................................................... P-28
QT-2100 Programming Manual
P-23
Page 24
Program 4
3. Program 4
3-1. Programming key allocation
Operation:
P4 C
01 10-10-01 12:34 000000
PGM-4
1.Keyboard
1. Sign on a clerk (if necessary).
0.00
2. Put the first level menu sheet on the keyboard.
3. Press <PGM MODE> repeatedly to assign Program 4 mode.
Keyboard
Keyboard
1.Key Assign
2.Key Move
0.00
4. Select “1. Key Assign” and press the <YES> key.
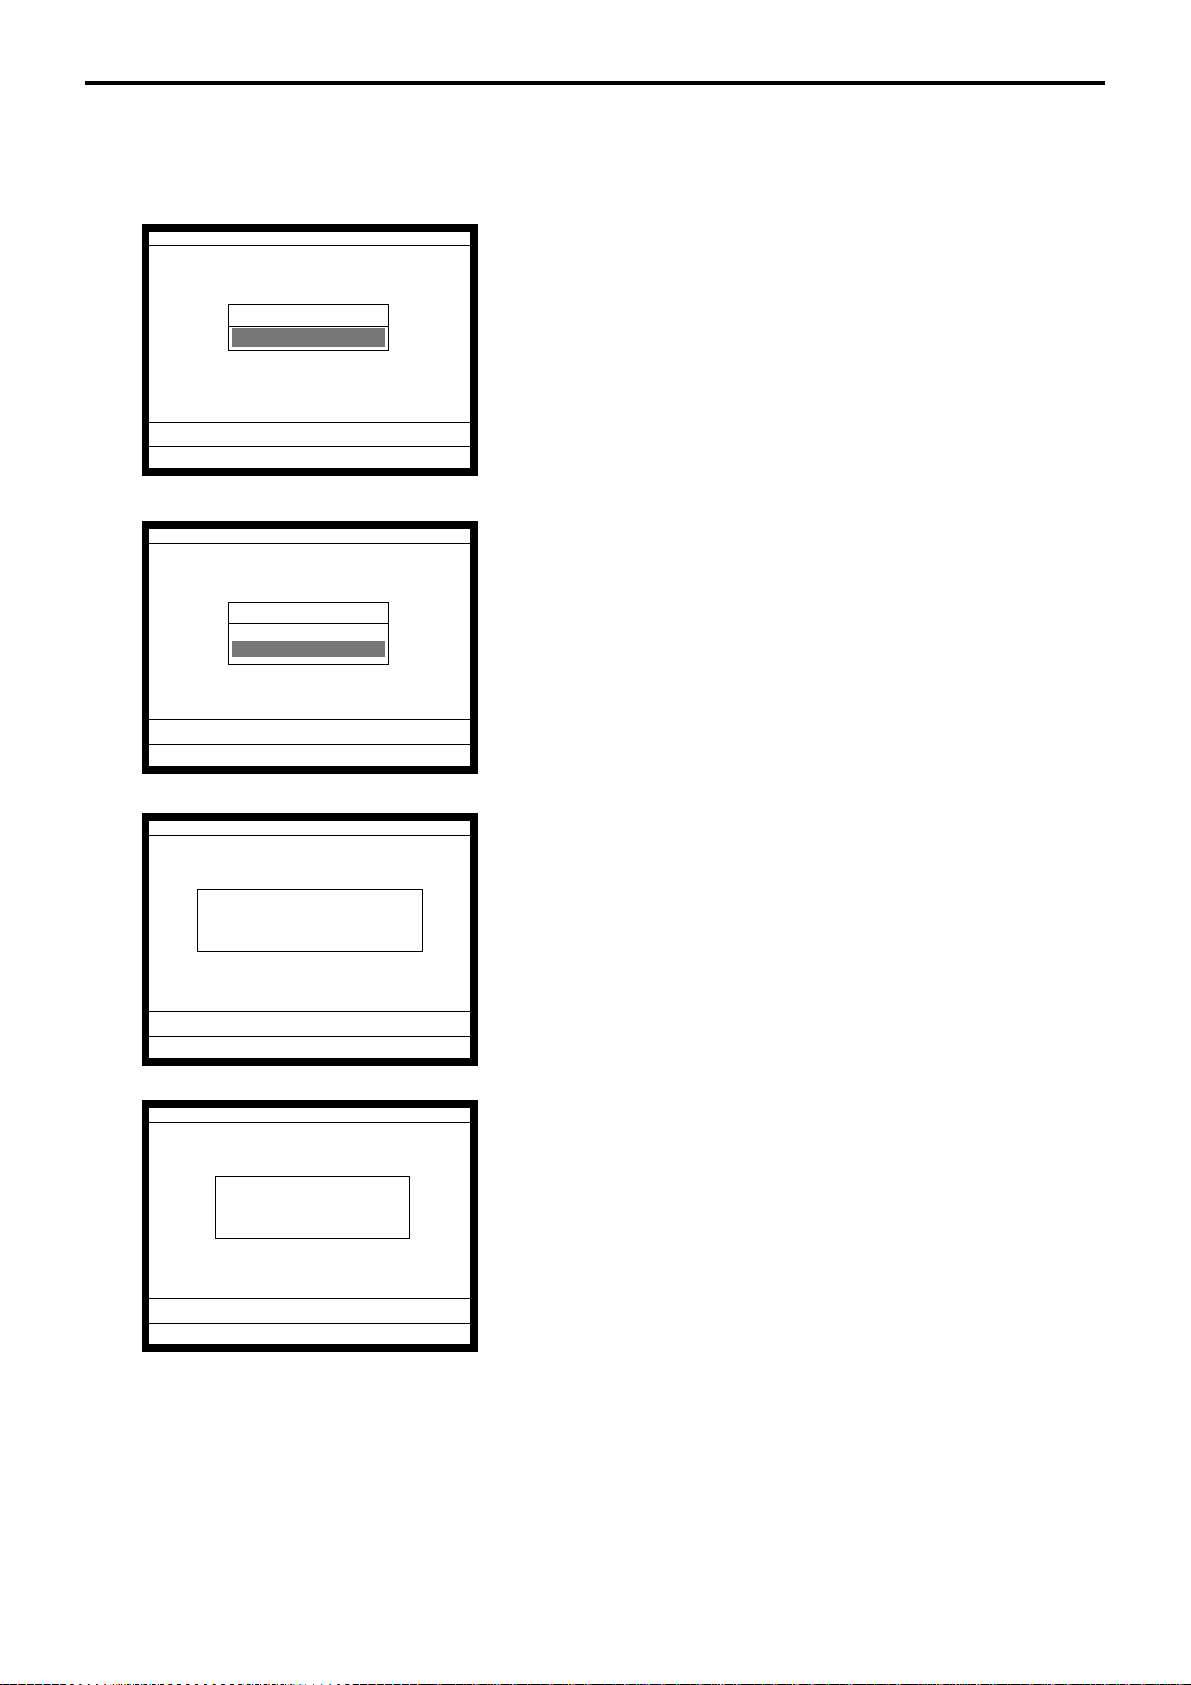
Key Assign
000.NOP 001.CASH 002.CHARGE
003.CHECK 004.CREDIT 006.NB
008.PRCINQ 009.STKINQ 010.CHAR
011.PRT 012.CHKP 013.CLK TRAN
014.TBL TRAN 015.TIP 016.NRMRCT
019.LOAN 020.RC 021.PD
022.P.UP. 023.COUPON 025.DEPOSIT
027.- 028.%- 029.+
030.%+ 033.RF 034.VOID
036.CPN2 037.VLD 038.RCT
039.CK.E 040.# 041.#/NS v
0.00
5. Select an appropriate function and press the <YES> key.
Then press the corresponding key.
Or select an appropriate function by the function code list (see
the next page) and press the corresponding key.
P-24
6. Press the <ESC> key to return to the previous menu.
Page 25
Function Code Initial character
Add check 094
Arrangement 044
Bill copy 047
Break-in/out 109
Cancel 236
Cash amount tendered 001
Charge 002
Check endorsement 039
Check print 012
Check tender 003
Clerk number 072
Clerk transfer 013
Clock-in/out 108
Coupon 023
Coupon 2 036
Credit 004
Cube 090
Currency exchange 045
Customer number 043
Department 051
Department number 135
Deposit 025
Discount 028
Display mode 219
Dutch account 140
Eat-in 128
Electronic journal Disp 207
Error correct/Void 034
First unit price 069
Flat PLU 063
House Bon 11 4
Ketten Bon 113
List 136
List number 137
Loan 019
Lock out unused key 000
Media change 118
Menu shift 064
Merchandise subtotal 080
Minus 027
Multiplication 082
New balance 006
New check 091
New/Old check 093
Normal receipt 016
No sale 042
Non-add 040
Non-add/No sale 041
OBR 103
Old check 092
ADD CHK
ARG
BILL
BREAK-IN/OUT
CANCEL
CASH
CHARGE
CK.E
CHKP
CHECK
CLK#
CLK TRANS
CLOCK-IN/OUT
COUPON
CPN2
CREDIT
XXX
CE
CT
DEPT nn
DEPT#
DEPOSIT
%–
DISP MODE
DUTCH
EAT-IN
EJ DISP
VOID
1st@
PLU nnnn
HOUSE BON
X/KETTEN
LIST
LIST#
LOAN
NOP
MEDIA CHG
MENU
MDST
–
X
NB
NEW CHK
NEW/OLD
NRMRCT
NS
#
#/NS
OBR
OLD CHK
Function Code Initial character
Open 067
Open2 068
Open Check 117
Operator number 078
Operator read/reset 073
Paid out 021
Pick up 022
Plus 029
PLU 048
Post Entry 115
Premium 030
Price inquiry 008
Price 049
Quantity/For 083
Recall 131
Receipt 038
Receipt On/OFF 076
Received on account 020
Refund 033
Reverse Display 206
Round Repeat 116
Seat number 119
Second unit price 070
Selective item subtotal 085
Separate check 095
Shift PLU 065
Slip back feed/Release 054
Slip feed/Release 056
Slip print 055
Square 084
Stock inquiry 009
Store 130
Subdepartment 133
Subdepartment number 134
Substitution 111
Subtotal 075
Table number 058
Table transfer 014
Take-out 129
Tax status shift 057
Taxable amount subtotal 077
Tax exempt 062
Text print 011
Text recall 010
Tray total 074
Tip 015
Validation 037
VAT 046
X/Z mode 122
OPEN
OPEN2
OPEN CHK
OPE#
OPE X/Z
PD
P.UP
+
PLU#
POST ENTRY
%+
PRCINQ
PRC
QT
RECALL
RCT
RCT ON/OFF
RC
RF
REVERSE
R REPEAT
SEAT#
2nd@
SIST
SEP CHK
SFT PLU
SB/R
SF/R
SLIP
XX
STKINQ
STORE
SUBDEPT nn
SDPT#
SUBST.
SUBTOTAL
TBL#
TABLE TRANS
TAKE-OUT
T/S
TAST
EXEMPT
PRT
CHAR
TRAY TTL
TIP
VLD
VAT
X/Z MODE
QT-2100 Programming Manual
P-25
Page 26
Program 4
3-2. Programming key allocation (key location change)
Operation:
P4 C
01 10-10-01 12:34 000000
PGM-4
1.Keyboard
0.00
Keyboard
Keyboard
1.Key Assign
2.Key Move
1. Sign on a clerk (if necessary).
2. Press <PGM MODE> repeatedly to assign Program 4 mode.
0.00
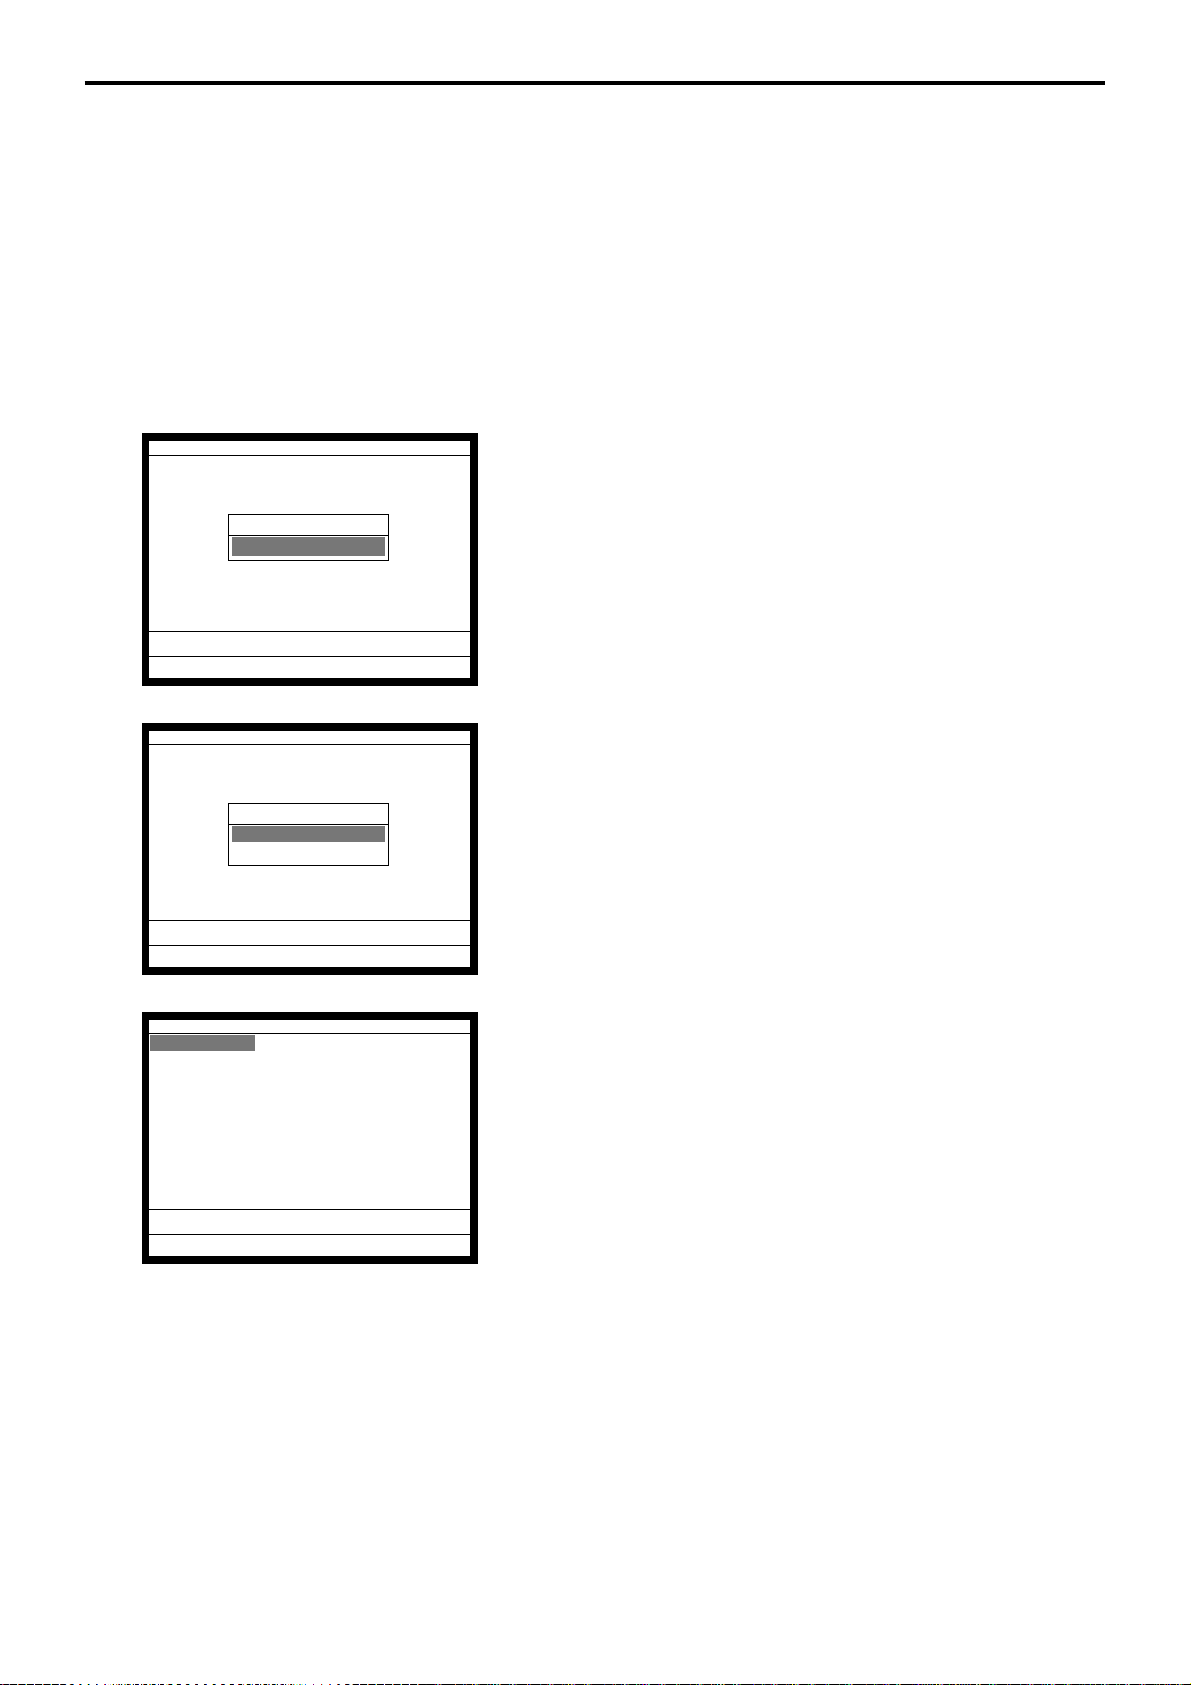
Key Move
Please Press the key which
you want to move.
0.00
Key Move
Press the new position
of the key.
0.00
3. Select “2. Key Move” and press the <YES> key.
4. Press the first key you want to change.
P-26
5. Press the second key you want to change.
Page 27
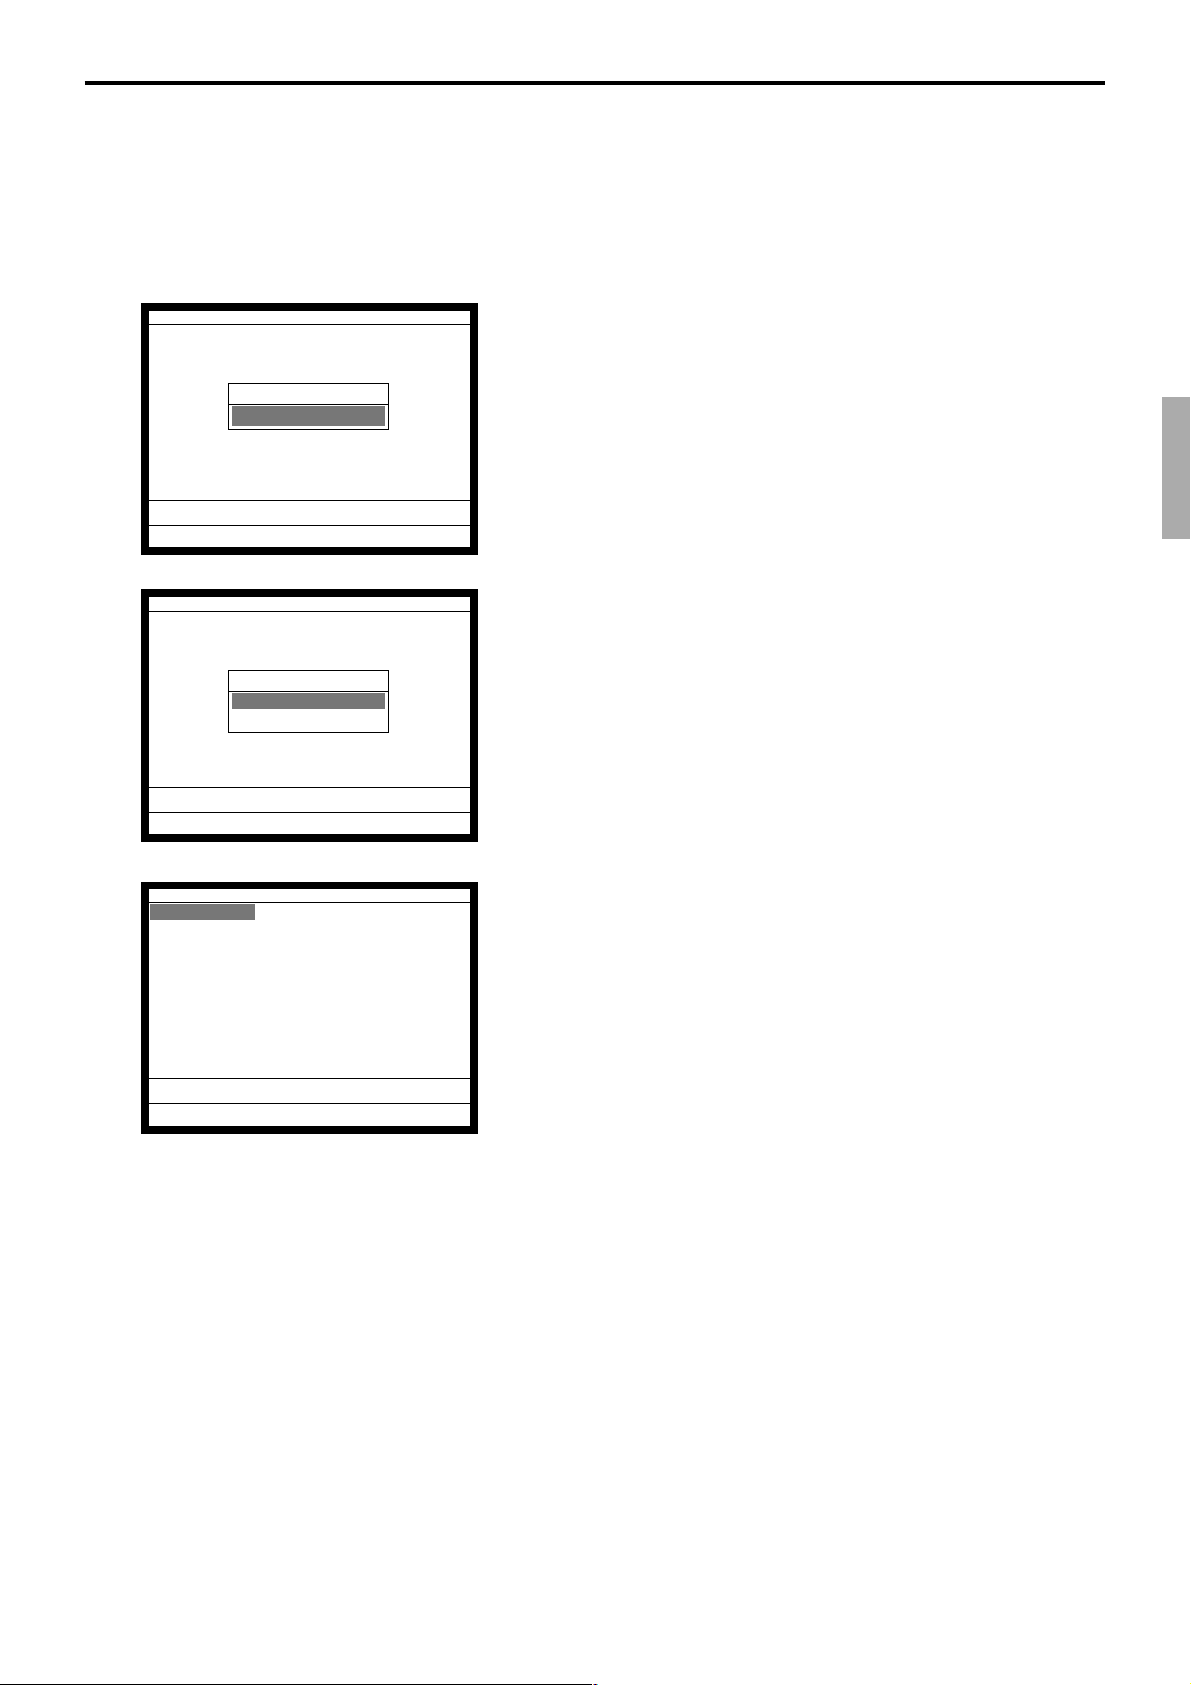
Key Move
CASH <-> CHARGE
Move OK? (YES/NO)
0.00
6. Press the <YES> key after confirmation.
7. Press <ESC> key to return to the previous menu.
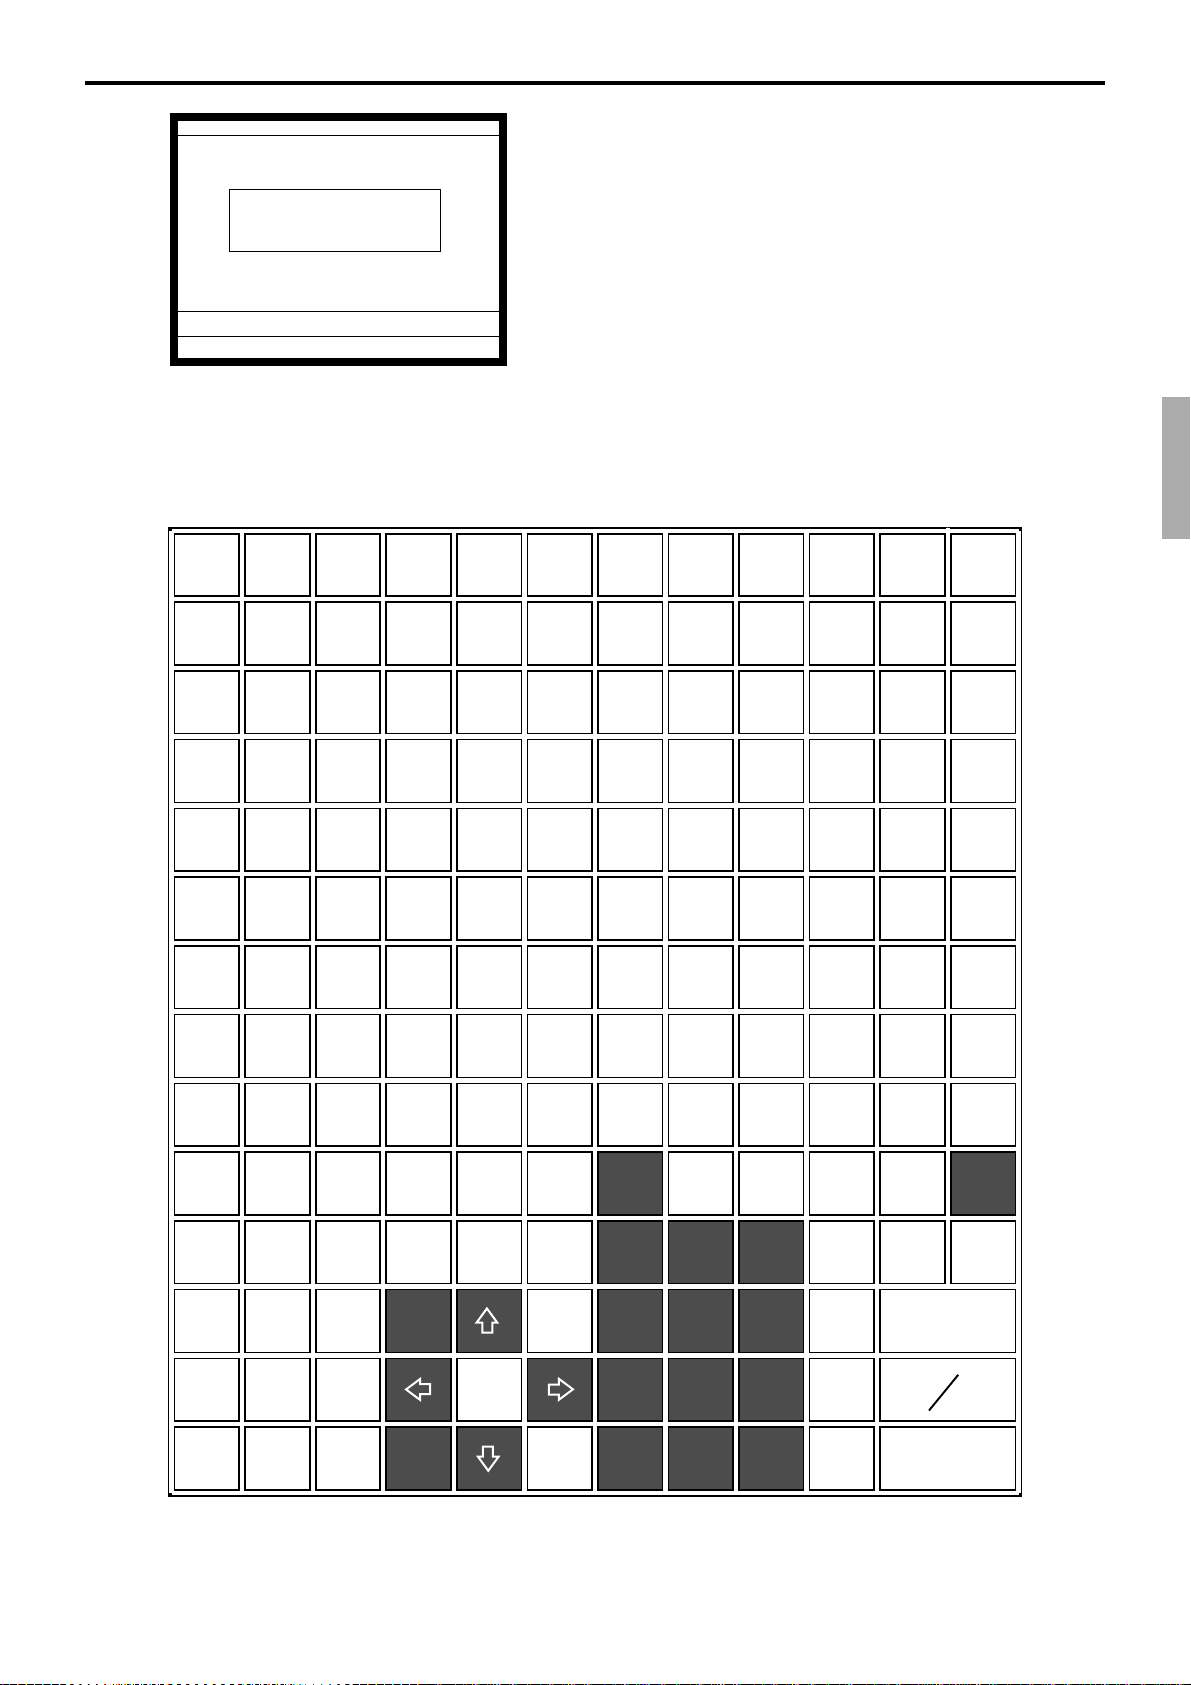
Keyboard layout
The shadowed key cannot be programmed with any other functions.
918273645546372819099108
817263544536271808998107
716253443526170798897106
615243342516069788796105
514233241505968778685104
413223140495867768594103
312213039485766758493102
211202938475665748392101
110192837465564738291100
CLK5
CLK4
REG
MODE
X/Z
MODE
#/NS
ADD
CHK
MENU
SHIFT
HOUSE
BON
TABLE
TRANS
SEAT
No.
NEW/OLD
CHK
COVERS
c x VOID
789
CANCEL
CH
VAT
RC
ESC/
SKIP
PD
CLK3
CLK2
CLK1
PGM
MODE
DISP
ON/OFF
—
SEP
CHK
SUBST.
%–
NO
HOME
YES
QT-2100 Programming Manual
PAGE
UP
PAGE
DOWN
456
123
000•
CR
CHK
GUEST
RECEIPT
SUBTOTAL
CASH AMT
TEND
NB
P-27
Page 28
Program 4
3-3. Programming key allocation
Programming different function on the same location of the different menu sheet level.
Method 1
Operation:
First of all, programming one function on one menu sheet by the method of Section 3-1.
Next, issue “5. Function Key” report in the “5. Key Feature” of the “PGM Read Report”
in PGM 6 mode.
And open the function key allocation screen.
P4 C
01 10-10-01 12:34 000000
PGM-4
1.Keyboard
0.00
Keyboard
Keyboard
1.Key Assign
2.Key Move
0.00
1. Sign on a clerk (if necessary).
2. Press <PGM MODE> repeatedly to assign Program 4 mode.
3. Select “1. Key Assign” and press the <YES> key.
P-28
Key Assign
000.NOP 001.CASH 002.CHARGE
003.CHECK 004.CREDIT 006.NB
008.PRCINQ 009.STKINQ 010.CHAR
011.PRT 012.CHKP 013.CLK TRAN
014.TBL TRAN 015.TIP 016.NRMRCT
019.LOAN 020.RC 021.PD
022.P.UP. 023.COUPON 025.DEPOSIT
027.- 028.%- 029.+
030.%+ 033.RF 034.VOID
036.CPN2 037.VLD 038.RCT
039.CK.E 040.# 041.#/NS v
4. Enter the appropriate record number (in 4-digits) and func-
0.00
5. Press the <ESC> key to return to the previous menu.
tion code (in 3-digits) and press the corresponding key on the
appropriate menu sheet.
Page 29
Method 2
Operation:
In case of allocating different functions from the functions of the same location on the first
level menu sheet, turn the menu sheet or press the <MENU> key and allocate the function
on the menu sheet which you want to put.
P4 C
01 10-10-01 12:34 000000
PGM-4
1.Keyboard
0.00
1. Sign on a clerk (if necessary).
2. Put on the menu sheet you want to program.
3. Press <PGM MODE> repeatedly to assign Program 4 mode.
Keyboard
Keyboard
1.Key Assign
2.Key Move
0.00
4. Select “1. Key Assign” and press the <YES> key.
Key Assign
000.NOP 001.CASH 002.CHARGE
003.CHECK 004.CREDIT 006.NB
008.PRCINQ 009.STKINQ 010.CHAR
011.PRT 012.CHKP 013.CLK TRAN
014.TBL TRAN 015.TIP 016.NRMRCT
019.LOAN 020.RC 021.PD
022.P.UP. 023.COUPON 025.DEPOSIT
027.- 028.%- 029.+
030.%+ 033.RF 034.VOID
036.CPN2 037.VLD 038.RCT
039.CK.E 040.# 041.#/NS v
0.00
5. Select an appropriate function and press the <YES> key.
Then press the corresponding key.
Or select an appropriate function by the function code list (see
the previous page) and press the corresponding key.
QT-2100 Programming Manual
6. Press the <ESC> key to return to the previous menu.
P-29
Page 30

Program 4
P-30
Page 31

4. Program 3 ................................................................................. P-34
4-1. Programming machine features............................................................... P-34
4-1-1 Programming pulldown group (adding/modifying/deleting group item)......... P-34
4-1-2 Programming set menu table........................................................................ P-36
4-1-3 Programming arrangement ........................................................................... P-38
4-1-4 Programming batch X/Z report...................................................................... P-39
4-1-5 Programming the general feature ................................................................. P-41
4-1-5-1 Programming the machine control 1............................................................. P-41
4-1-5-2 Programming the machine control 2............................................................. P-42
4-1-5-3 Programming the machine control 3............................................................. P-44
4-1-5-4 Programming the machine control 4............................................................. P-45
4-1-5-5 Programming the print control....................................................................... P-46
4-1-5-6 Programming the report control 1 ................................................................. P-47
4-1-5-7 Programming the report control 2 ................................................................. P-48
4-1-5-8 Programming the communication ................................................................. P-49
4-1-5-9 Programming the hourly sales ...................................................................... P-50
4-1-5-10 Programming the slip/guest .......................................................................... P-50
4-1-5-11 Programming the journal control................................................................... P-51
4-1-5-12 Programming the message control ............................................................... P-52
4-1-5-13 Programming the order control ..................................................................... P-52
4-1-5-14 Programming the set menu/condiment ......................................................... P-53
4-1-5-15 Programming the check tracking .................................................................. P-54
4-1-5-16 Programming the clerk interrupt.................................................................... P-54
4-1-5-17 Programming the display control .................................................................. P-55
4-1-5-18 Programming the menu shift 1...................................................................... P-56
4-1-5-19 Programming the menu shift 2...................................................................... P-57
4-1-6 Programming scheduler................................................................................ P-58
4-1-7 Programming check print .............................................................................. P-60
4-1-8 Programming table analysis.......................................................................... P-61
4-1-9 Programming tax table.................................................................................. P-62
4-1-10 Programming void table ................................................................................ P-65
4-1-11 Programming system connection.................................................................. P-66
4-1-12 Programming I/O parameter ......................................................................... P-67
4-1-13 Programming printer connection................................................................... P-70
4-1-14 Programming time zone................................................................................ P-71
4-1-15 Programming time & attendance .................................................................. P-72
4-1-15-1 Programming time & attendance (general) .................................................. P-72
4-1-15-2 Programming time & attendance (job code) ................................................. P-73
4-1-15-3 Programming time & attendance (employee & schedule)............................. P-74
4-1-16 Programming hourly item link ....................................................................... P-76
4-1-17 Programming IDC link................................................................................... P-77
4-1-18 Programming Euro........................................................................................ P-78
4-1-19 Programming auto program control .............................................................. P-79
4-2. Programming clerks ................................................................................. P-80
4-2-1 Programming clerk features.......................................................................... P-80
4-2-2 Programming operation ................................................................................ P-82
4-2-2-1 Programming clerk control............................................................................ P-82
4-2-2-2 Programming menu shift/2nd@ .................................................................... P-83
4-2-2-3 Programming mode control........................................................................... P-84
QT-2100 Programming Manual
P-31
Page 32

Program 3
4-2-2-4 Programming function control 1.................................................................... P-85
4-2-2-5 Programming function control 2.................................................................... P-86
4-2-2-6 Programming function control 3.................................................................... P-87
4-2-2-7 Programming function control 4.................................................................... P-88
4-2-2-8 Programming function control 5.................................................................... P-89
4-2-2-9 Programming arrangement control ............................................................... P-90
4-2-2-10 Programming X/Z report control.................................................................... P-91
4-2-3 Programming commission rate ..................................................................... P-92
4-2-4 Programming table range ............................................................................. P-93
4-2-5 Programming clerk by range......................................................................... P-94
4-2-5-1 Programming clerk control by range............................................................. P-94
4-2-5-2 Programming menu shift/2nd@ by range ..................................................... P-95
4-2-5-3 Programming mode control by range............................................................ P-96
4-2-5-4 Programming function control 1 by range..................................................... P-97
4-2-5-5 Programming function control 2 by range..................................................... P-98
4-2-5-6 Programming function control 3 by range..................................................... P-99
4-2-5-7 Programming function control 4 by range................................................... P-100
4-2-5-8 Programming function control 5 by range................................................... P-101
4-2-5-9 Programming arrangement control by range .............................................. P-102
4-2-5-10 Programming X/Z report control by range................................................... P-103
4-2-5-11 Programming commission rate by range .................................................... P-104
4-2-5-12 Programming table range by range ............................................................ P-105
4-2-6 Programming clerk detail ............................................................................ P-106
4-2-7 Programming clerk key ID........................................................................... P-107
4-3. Programming key features..................................................................... P-108
4-3-1 Programming PLU features ........................................................................ P-108
4-3-2 Programming PLU 2nd@ features...............................................................P-110
4-3-3 Programming subdepartment features ........................................................P-111
4-3-4 Programming department features ..............................................................P-112
4-3-5 Programming by range ................................................................................P-113
4-3-5-1 General procedure of PLU, PLU 2nd@, subdepartment,
department by range...................................................................................P-114
4-3-5-2 Programming hierarchy of programming title...............................................P-115
4-3-6 Programming individual program .................................................................P-116
4-3-7 Programming key function program.............................................................P-117
4-3-7-1 Worksheet for cash, charge, credit and check.............................................P-118
4-3-7-2 Worksheet for new balance .........................................................................P-119
4-3-7-3 Worksheet for text print, text recall ............................................................. P-120
4-3-7-4 Worksheet for check pr int ........................................................................... P-121
4-3-7-5 Worksheet for clerk transfer ........................................................................ P-121
4-3-7-6 Worksheet for table transfer........................................................................ P-121
4-3-7-7 Worksheet for tip......................................................................................... P-121
4-3-7-8 Worksheet for loan, pick up ........................................................................ P-122
4-3-7-9 Worksheet for received on account, paid out.............................................. P-122
4-3-7-10 Worksheet for plus, minus, coupon............................................................. P-123
4-3-7-11 Worksheet for deposit+, deposit– ............................................................... P-124
4-3-7-12 Worksheet for void...................................................................................... P-124
4-3-7-13 Worksheet for check endorsement ............................................................. P-124
4-3-7-14 Worksheet for discount, premium ............................................................... P-125
4-3-7-15 Worksheet for receipt.................................................................................. P-126
P-32
Page 33

4-3-7-16 Worksheet for non-add, non-add/NS .......................................................... P-126
4-3-7-17 Worksheet for customer.............................................................................. P-127
4-3-7-18 Worksheet for arrangement ........................................................................ P-127
4-3-7-19 Worksheet for currency exchange .............................................................. P-128
4-3-7-20 Worksheet for slip ....................................................................................... P-128
4-3-7-21 Worksheet for T/S, TAST ............................................................................ P-128
4-3-7-22 Worksheet for open..................................................................................... P-129
4-3-7-23 Worksheet for open 2.................................................................................. P-129
4-3-7-24 Worksheet for clerk number........................................................................ P-130
4-3-7-25 Worksheet for operator X/Z......................................................................... P-130
4-3-7-26 Worksheet for subtotal, merchandise subtotal............................................ P-130
4-3-7-27 Worksheet for cancel .................................................................................. P-131
4-3-7-28 Worksheet for multiplication, quantity/for, square, cube, Ketten Bon.......... P-131
4-3-7-29 Worksheet for selective item subtotal ......................................................... P-131
4-3-7-30 Worksheet for open check .......................................................................... P-131
4-3-7-31 Worksheet for list ........................................................................................ P-131
4-3-7-32 Worksheet for tax exempt........................................................................... P-132
4-3-7-33 Worksheet for clock-in/clock-out................................................................. P-132
4-3-7-34 Worksheet for break-in/break-out ............................................................... P-132
4-3-7-38 Worksheet for round repeat ........................................................................ P-133
4-3-7-35 Worksheet for eat-in/take-out...................................................................... P-133
4-3-7-36 Worksheet for store..................................................................................... P-133
4-3-7-37 Worksheet for new check, new/old check................................................... P-133
4-3-7-39 Worksheet for shift PLU .............................................................................. P-134
4-3-7-40 Worksheet for receipt on/off........................................................................ P-134
4-3-7-41 Worksheet for old check ............................................................................. P-134
4-3-7-42 Worksheet for Dutch account...................................................................... P-134
4-3-7-43 Worksheet for tray total............................................................................... P-134
4-3-7-44 Worksheet for recall .................................................................................... P-134
4-3-8 Programming shift PLU program ................................................................ P-135
4-3-9 Programming scanning PLU link program .................................................. P-136
QT-2100 Programming Manual
P-33
Page 34

Program 3
4. Program 3
4-1. Programming machine features
Preparation:
P3 C
01 10-10-01 12:34 000000
1. Sign on a clerk (if necessary).
2. Press <PGM MODE> repeatedly to assign Program 3 mode.
PGM-3
1.Machine Feature
2.Clerk
3.Key Feature
0.00
3. Select “1. Machine Feature” and press the <YES> key.
4-1-1 Programming pulldown group (adding/modifying/deleting group item)
Operation
Machine Feature
Machine Feature
1.Pulldown Group
2.Set Menu Table
3.Arrangement
4.Batch X/Z
5.General Feature
6.Scheduler
7.Check Print
8.Table Analysis v
Pulldown Group
Pulldown Group
1.LIST01
2.LIST02
3.LIST03
4.LIST04
5.LIST05
6.LIST06
7.LIST07
8.LIST08 v
0.00
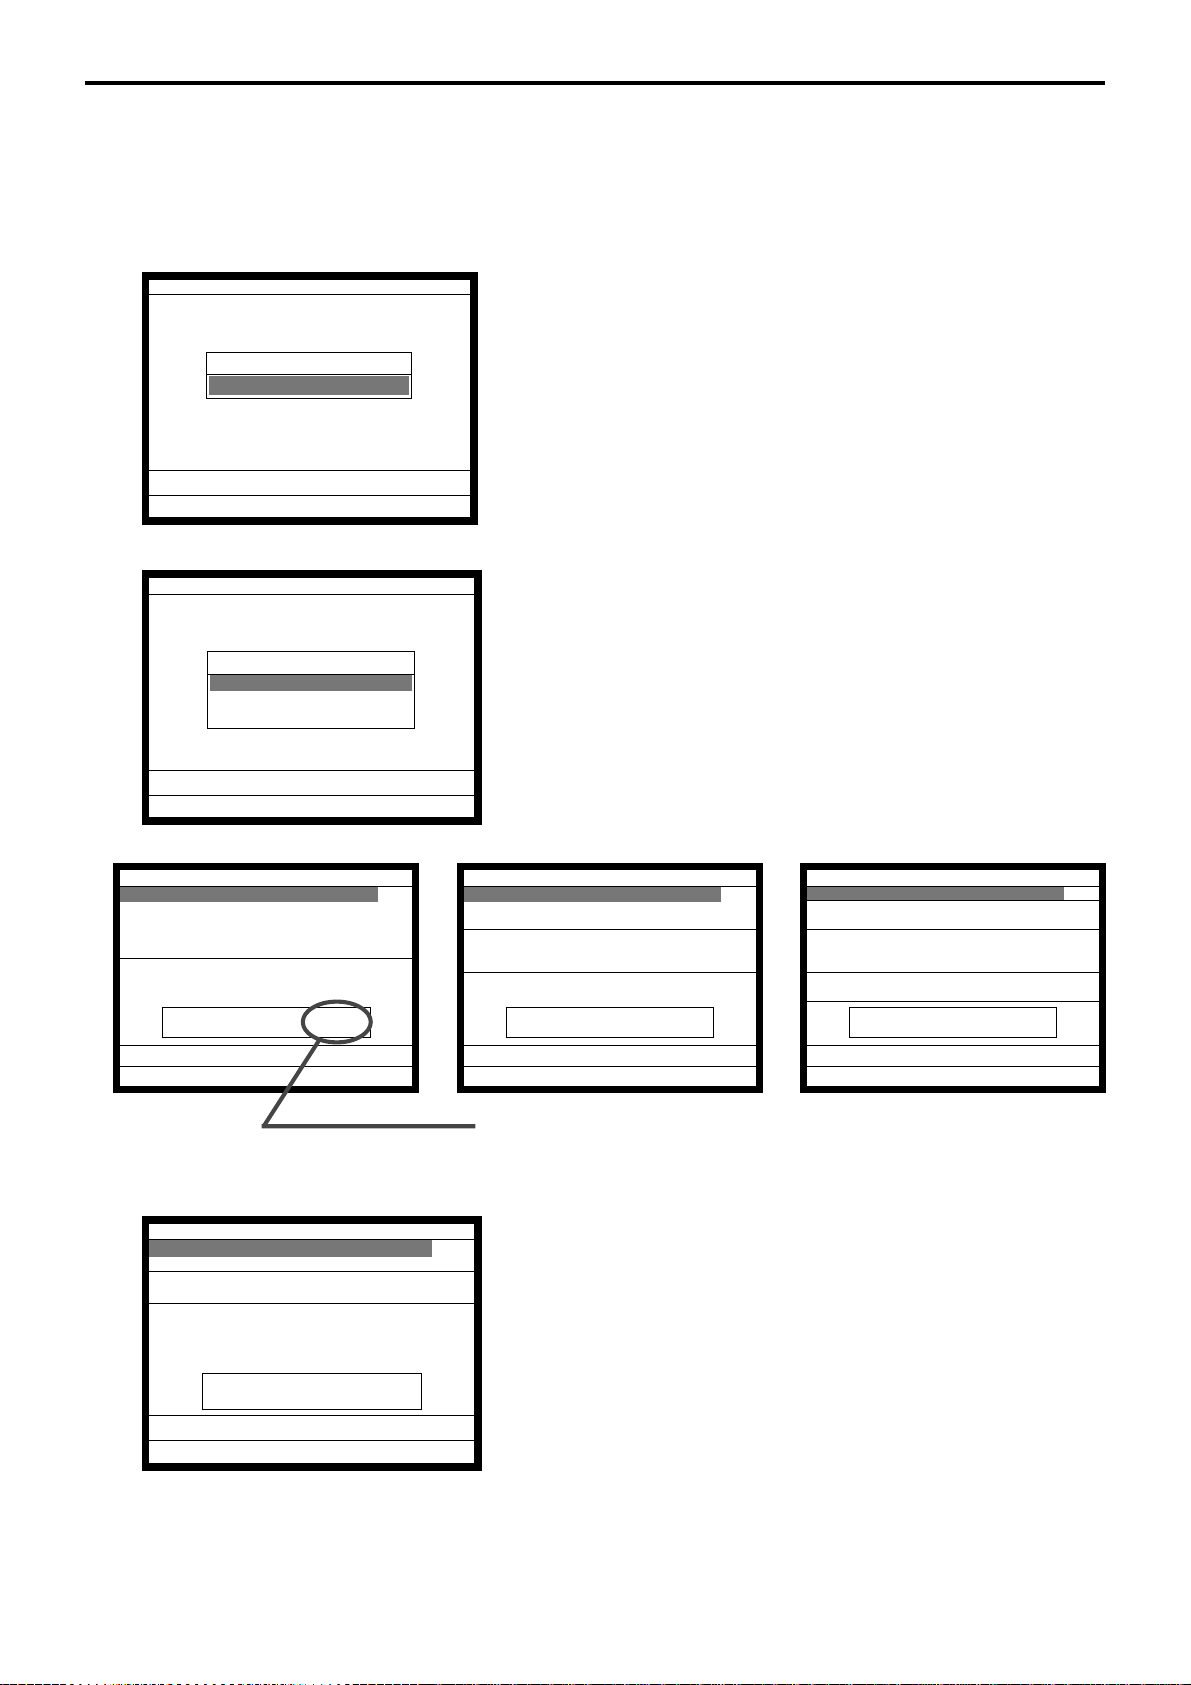
4. Select “1.Pulldown Group” and press the <YES> key.
Pulldown Group
List Title : LIST01 0001-026
Number of Stay down (Max) 0
Number of Stay down (Min) 0
OK? YES
5. Select an appropriate pulldown group and press the <YES>
6. If it is necessary to modify the message, press the <YES> key
0.00
Field meaning
1. Number of stay down (Min):
0 = Status, 1 ~ 8 = The number of times for stay down, 9 = No limit
2. Number of stay down (Max):
0 = Status, 1 ~ 8 = The number of times for stay down, 9 = No limit
0.00
key.
first to enter the characters, and then press the <YES> key.
P-34
Page 35

Addition/Modification
LIST01
1.PLU0001
2.PLU0002
3.
4.
5.
6.
7.
8.
9.
10.
11. v
0.00
LIST01
Item
1.PLU
2.Pulldown Group
7. Select a record you want to add an item or modify the item and
press the <YES> key.
0.00
LIST01
PLU
1.PLU0001
2.PLU0002
3.PLU0003
4.PLU0004
5.PLU0005
6.PLU0006
7.PLU0007
8.PLU0008 v
0.00
LIST01
Use LIST Key (if “NO” LIST#)
OK? YES
0.00
LIST01
This Key is Already Used.
Overwrite OK? (YES/NO)
8. Select “1. PLU” or “2. Pull Down Group” you want to
program.
LIST01
Pulldown Group
1.LIST01
2.LIST02
3.LIST03
4.LIST04
5.LIST05
6.LIST06
7.LIST07
8.LIST08 v
0.00
9. To select an appropriate PLU as an item, select a PLU
directly, enter PLU No. and press the <PLU> key or press the
appropriate <FLAT PLU> key.
10. Repeat step 7 to 9, until completing this pulldown group item
program.
11. Press the <ESC> key to terminate the program and proceed
the next step.
12. If you want to use the <LIST> key, press the <YES> key.
After that, select a <LIST> key by pressing the appropriate
key. When the key you pressed is already used, choose YES
to overwrite.
13. If you do not want to use <LIST> key, press the <NO> key.
14. Press the <ESC> key to return to the previous menu.
0.00
QT-2100 Programming Manual
P-35
Page 36

Program 3
Deletion
LIST01
1.PLU0001
2.PLU0002
3.
4.
5.
6.
7.
8.
9.
10.
11. v
LIST01
Item 01-02 Delete OK? YES
0.00
7. Select the first record of items you want to delete and press the
<NO> key.
0.00
4-1-2 Programming set menu table
Operation
Machine Feature
Machine Feature
1.Pulldown Group
2.Set Menu Table
3.Arrangement
4.Batch X/Z
5.General Feature
6.Scheduler
7.Check Print
8.Table Analysis v
0.00
Set Menu Table
Set Menu Table
1.Set Menu (0001)
2.Set Menu (0002)
3.Set Menu (0003)
4.Set Menu (0004)
5.Set Menu (0005)
6.Set Menu (0006)
7.Set Menu (0007)
8.Set Menu (0008) v
8. Press the <YES> key.
The selected item and followings are deleted.
9. Press the <ESC> key to return to the previous menu.
4. Select “2. Set Menu Table” and press the <YES> key.
P-36
0.00
5. Select an appropriate set menu item and press the <YES>
key.
Page 37

Addition/Modification
Set Menu Table (0001)
1.PLU0001
2.PLU0002
3.
4.
5.
6.
7.
8.
9.
10.
11. v
0.00
Set Menu Table (0001)
Item
1.PLU
2.PLU 2nd@
3.List
6. Select an item record you want to add or modify and
press the <YES> key.
0.00
Set Menu Table (0001)
PLU
1.PLU0001
2.PLU0002
3.PLU0003
4.PLU0004
5.PLU0005
6.PLU0006
7.PLU0007
8.PLU0008 v
0.00
Set Menu Table (0001)
Link:PLU0001 0001-04
OK: YES
0.00
7. Select “1. PLU”, “2. PLU 2nd@” or “3. List” you want to
program.
Set Menu Table (0001)
LIST
1.LIST01
2.LIST02
3.LIST03
4.LIST04
5.LIST05
6.LIST06
7.LIST07
8.LIST08 v
0.00
8. To select an appropriate PLU or PLU 2md@ as an item, select
a PLU directly, enter PLU No. and press the <PLU> key or
press the appropriate <Touch PLU> key.
To select a list as an item, press the <LIST> key or enter the
significant list number, then press the <LIST #> key.
9. Repeat step 6 to 8, until completing this set menu item
program.
10. Press the <ESC> key to terminate the program and proceed
the next step.
11. If you want to change the main PLU, press the <YES> key.
Set Menu Table (0001)
PLU
1.PLU0001
2.PLU0002
3.PLU0003
4.PLU0004
5.PLU0005
6.PLU0006
7.PLU0007
8.PLU0008 v
0.00
QT-2100 Programming Manual
12. Select the main PLU and press the <YES> key.
P-37
Page 38

Program 3
Deletion
Set Menu Table (0001)
1.PLU0001
2.PLU0002
3.
4.
5.
6.
7.
8.
9.
10.
11. v
Set Menu Table (0001)
Item 01-02 Delete OK? YES
0.00
6. Select the smallest record you want to delete the item(s) and
press the <NO> key.
0.00
4-1-3 Programming arrangement
Operation
Machine Feature
Machine Feature
1.Pulldown Group
2.Set Menu Table
3.Arrangement
4.Batch X/Z
5.General Feature
6.Scheduler
7.Check Print
8.Table Analysis v
0.00
Arrangement
Arrangement
1.ARG GP1
2.ARG GP2
3.ARG GP3
4.ARG GP4
5.ARG GP5
7. Press the <YES> key.
8. Press the <ESC> key to return to the previous menu.
4. Select “3. Arrangement” and press the <YES> key.
P-38
0.00
5. Select an appropriate record and press the <YES> key.
Page 39

ARG GP1
0001-038
0002-038
0003-038
0004-038
0005-038
0006-038
0007-038
0008-038
0009-038
0010-038
0011-038 v
0.00
4-1-4 Programming batch X/Z report
Operation
Machine Feature
Machine Feature
1.Pulldown Group
2.Set Menu Table
3.Arrangement
4.Batch X/Z
5.General Feature
6.Scheduler
7.Check Print
8.Table Analysis v
6. Press the <YES> key, enter arrangement commands by
character and press the <YES> key.
7. Press the <ESC> key to return to the previous menu.
0.00
4. Select “4. Batch X/Z” and press the <YES> key.
Batch X/Z
0001-029 001112151700000000
0002-029 101112151700000000
0003-029 011112151700000000
0004-029 111112151700000000
0.00
5. Select an appropriate record, enter the report code (refer to
6. Press the <ESC> key to return to the previous menu.
the next page) and press the <YES> key.
QT-2100 Programming Manual
P-39
Page 40

Program 3
Description Choice Program code
Allow to issue read report.
a
Yes = 0
No = 1
Allow to issue reset report.
Read/Reset selection (direct issuance)
Reported area:
Daily area = 0, Periodic 1 area = 1,
Periodic 2 area = 2, Consolidation area = 3
Report code 1
Report code 2
Report code 3
Report code 4
Report code 5
Report code 6
Report code 7
Report code 8
b
c
Yes = 0
No = 2
Read = 0
Reset = 4
Significant
number
Significant
numbers
Significant
numbers
Significant
numbers
Significant
numbers
Significant
numbers
Significant
numbers
Significant
numbers
Significant
numbers
:
(a+b+c)
D
18
:
D
17
::
D
16 D15
::
D
14 D13
::
D12 D
11
::
D
10 D9
::
D
8 D7
::
D
6 D5
::
D
4 D3
::
D
2 D1
P-40
Report Report code
Fixed totalizer report 11
Function key report 12
Subdepartment report 13
PLU report 14
PLU stock report 64
Department report 15
Group report 16
Cashier/clerk report 17
Hourly sales report 19
Monthly sales report 20
Void reason report 22
Table analysis report 28
Electronic journal report 58
Employee (all) report 29
Hourly/labor report 24
Hourly item report 31
Page 41

4-1-5 Programming the general feature
Operation
Machine Feature
Machine Feature
1.Pulldown Group
2.Set Menu Table
3.Arrangement
4.Batch X/Z
5.General Feature
6.Scheduler
7.Check Print
8.Table Analysis v
0.00
4. Select “5. General Feature” and press the <YES> key.
4-1-5-1 Programming the machine control 1
General Feature
General Feature
1.Machine Control1
2.Machine Control2
3.Machine Control3
4.Machine Control4
5.Print Control
6.Report Control1
7.Report Control2
8.Communiction v
0.00
Machine Control1
Machine No. 0
Order of Date DD/MM/YY
Add Mode Add2
Reset consecutive number to
initial value after taking
daily fixed totallizer report No
Initial value for consecutive
number 0
Country Rounding None
Tax System VAT
Disable to amount tender in RF v
0.00
Field meaning
1. Machine number: (0 - 9999)
Not the ID code but the printing machine number.
2. Add mode:
You can choose Add 2 (ex. dollar and cent), Add 0 (ex. Japanese yen) or Add 1.
3. Reset the consecutive No. to initial value after taking daily fixed totalizer report:
Consecutive No. starts preset value +1. (Initial consecutive number: 1 - 999999.)
4. Country Rounding:
You can choose None, IF1, IF2, Danish, Norwegian/Swedish, Singapore.
5. Tax systems:
You can choose VAT/US/Canada/Singapore tax system.
6. VLD compulsory and drawer open:
You can choose “At once” and “After compulsory.”
7. Money-in-drawer limit alarm:
You can enter “Maximum value of left-most digit” and “ The number of zeros.”
5. Select “1. Machine Control1” and press the <YES> key.
Machine Control1
Country Rounding None
Tax System VAT
Disable to amount tender in RF
/REG- mode YES
VLD compulsory & Drawer Open
At Once
Money-in-drawer limit alarm
Maximum value of left most
digit (0 to 9) 0
Money-in-drawer limit alarm
Number of Zeros (0 to 9) 0
0.00
6. Select the field you want to change and press the <YES>/
<NO> key or enter the numeric value and press the <YES>
key.
7. After programming, you should press the <ESC> key to
return to the previous menu.
QT-2100 Programming Manual
P-41
Page 42

Program 3
4-1-5-2 Programming the machine control 2
Operation
General Feature
General Feature
1.Machine Control1
2.Machine Control2
3.Machine Control3
4.Machine Control4
5.Print Control
6.Report Control1
7.Report Control2
8.Communication v
0.00
5. Select “2. Machine Control2” and press the <YES> key.
Machine Control2
Display Operator Guidance YES
Sequencial / Ramdom PLU number
Use memory number
Net total Includes Tax Include
Net total Includes Commission Include
+,- Follows Tax Status of item YES
+,-,%+&%- amount in item net
totalizer NO
Limit of number +,-,%+&%- key
operations per transaction NO
Round of %+ or %- operation
v
0.00
Machine Control2
Allow numeric entry when com- ^
pulsory drawer is open YES
Error when actual stock less
than zero NO
Alarm when actual stock less
than minimum stock level NO
Perform stock QTY calculation
during RF mode or RF key NO
Delete RF items from guest
receipt when item
consolidation is on YESv
0.00
Field meaning
1. Sequencial/Random PLU number:
You can choose “Use memory number” or “Use Random code.”
2. Net total includes tax:
Net total includes add-on tax amount.
If select “No”, add-in tax amount is also excluded.
3. Net total includes commission:
Net total includes clerk commission.
4. Plus/minus follows tax status of item:
The tax status and commission status of plus/minus after item registration follows the
last item.
5. Plus, minus, premium, discount amount in item net totalizer:
Affect premium, discount, plus, minus result to the original item.
6. Limit of number plus, minus, premium, discount key operations per transaction:
Only one premium, discount, plus or minus registration is permitted during one
receipt.
Machine Control2
result NO^
Restriction(0 or 5)on the last
digit for amount entry NO
Money Declaration Compulsory NO
ST Compulsory NO
Allow Finalization operation
when subtotal is zero or less YES
Allow more than one transaction in RF mode N Repeat
Issue post receipt
when normal receipt is issued NOv
0.00
Machine Control2
Perform stock QTY calculation ^
during RF mode or RF key NO
Delete RF items from guest
receipt when item
consolidation is on YES
Key Confirmation Tone On YES
Allow Slit Drawer connection NO
Add No. of operation of clear
key into Fixed TTL NO
Use YES key to select item YES
Inline Money Declaration NO
0.00
6. Select the field you want to change and press the <YES>/
<NO> key or enter the numeric value and press the <YES>
key.
7. After programming, you should press the <ESC> key to
return to the previous menu.
P-42
Page 43

7. Round of Premium or Discount operation:
Rounding on the least significant digit of Premium or Discount registration.
8. Restrict (0 or 5) on the last digit for amount entry:
The least significant digit for monetary amount entries is restricted to 0 or 5.
9. Money declaration compulsory:
Money declaration before daily read/reset operation or colection/consolidation opera-
tion (inline money declaration) is mandatory or not.
10. ST compulsory:
ST key operation before finalization is mandatory or not.
11. Allow finalization operation when subtotal is zero or less:
Allow/prohibit finalization operation when the subtotal amount is zero or less.
12. Allow more than one transaction in RF mode:
Prohibit/allow multiple refund operations after entering the RF mode.
13. Issue Post receipt when normal receipt is issued:
Allow/prohibit post receipt after a normal receipt issuance.
14. Allow numeric entries when compulsory drawer is open:
Allow/prohibit numeric entries when drawer (compulsory drawer only) is opened.
15. Alarm when actual stock less than zero:
Error occurs when actual stock for a registered item becomes negative.
16. Error when actual stock less than minimum stock level:
Error occurs when actual stock for a registered item drops below its programmed
optimum stock value.
17. Perform stock QTY calculation during RF mode or RF key:
Affect to stock value during RF key and the RF mode operation.
18. Delete RF items from guest receipt when its consolidation is on:
Merge the same department/PLU registration of a guest receipt.
19. Use YES key to select item:
Pressing the <YES> key is required when you select an item. If “No” is selected,
<YES> key is not necessary to press.
QT-2100 Programming Manual
P-43
Page 44

Program 3
4-1-5-3 Programming the machine control 3
Operation
General Feature
General Feature
1.Machine Control1
2.Machine Control2
3.Machine Control3
4.Machine Control4
5.Print Control
6.Report Control1
7.Report Control2
8.Communiction v
0.00
5. Select “3. Machine Control3” and press the <YES> key.
Machine Control3
Cash Declaration Compulsory NO
Charge Declaration Compulsory NO
Check Declaration Compulsory NO
Credit Declaration Compulsory NO
Receipt:Item consolidation NO
Receipt:Sort by group NO
Receipt:Sort by department NO
Receipt:Sort by group/dept
with detail Total only
PRT RCT sort detail w/o TTL NO
Commission total includes VAT NO
Machine Control3
Rounding for commission calcu- ^
lation Round off
Move two decimal place to
right for unit prices NO
Print consecutive No.
on the receipt Print
Print consecutive NO.
on journal Print
Print date on the receipt Print
Print date on the journal Print
Print time on the receipt Printv
0.00
Field meaning
1. Cash Declaration Compulsory: (not used)
2. Charge Declaration Compulsory: (not used)
3. Check Declaration Compulsory: (not used)
4. Credit Declaration Compulsory: (not used)
5. Receipt: Item Consolidation:
Merge the same department/PLU registration on receipt.
6. Receipt: Sort by group:
Classify the registered items per group on receipt.
7. Receipt: Sort by department:
Classify the registered items per department on receipt.
8. Receipt: Sort by group/dept with detail:
You can choose “Total only” or “With detail.”
Machine Control3
on the receipt Print^
Print consecutive No.
on the receipt Print
Print date on the receipt Print
Print date on the journal Print
Print time on the receipt Print
Print time on the journal Print
Vertical double size character
for UP-350 NO
Receipt auto cut YES
E-Journal copy receipt NO
0.00
0.00
6. Select the field you want to change and press the <YES>/
<NO> key or enter the numeric value and press the <YES>
key.
7. After programming, you should press the <ESC> key to
return to the previous menu.
P-44
Page 45

4-1-5-4 Programming the machine control 4
Operation
General Feature
General Feature
1.Machine Control1
2.Machine Control2
3.Machine Control3
4.Machine Control4
5.Print Control
6.Report Control1
7.Report Control2
8.Communiction v
0.00
5. Select “4. Machine Control4” and press the <YES> key.
Machine Control 4
Drawer open alarm Min. 00-59 0
Drawer open alarm Sec. 00-59 0
Compulsory drawer control for
multi drawers All drawers
Update periodic at daily Z YES
Scan link start record No. 217
Field meaning
0.00
6. Select the field you want to change and press the <YES>/
<NO> key or enter the numeric value and press the <YES>
key.
7. After programming, you should press the <ESC> key to
return to the previous menu.
1. Compulsory drawer control for multi drawers:
You can choose “All drawers”/“Drawers assigned to clerk”.
2. Scan link start record No.: The PLU items that are set after this record number are
treated as scanning PLU items.
QT-2100 Programming Manual
P-45
Page 46

Program 3
4-1-5-5 Programming the print control
Operation
General Feature
General Feature
1.Machine Control1
2.Machine Control2
3.Machine Control3
4.Machine Control4
5.Print Control
6.Report Control1
7.Report Control2
8.Communiction v
0.00
5. Select “5. Print Control” and press the <YES> key.
Print Control
Set Menu Detail on Guest/Slip No Print
Print PLU Number No Print
Print Finalized Total Print
Print Taxable Amount1 Print
Print Taxable Amount2 Print
Print Taxable Amount3 Print
Print Taxable Amount4 Print
Print Taxable Amount5 Print
Print Taxable Amount6 Print
Print Taxable Amount7 Print
Print Taxable Amount8 Printv
Print Control
Print Taxable Amount 9 Print^
Print Taxable Amount10 Print
Print Taxable Status No Print
Printing of total number of
items sold on the receipt No Print
Print number of covers in
header No Print
Cover print double size NO
Print unit price on receipt No Print
One line feeded after
finalization for receipt NOv
0.00
Print Control
Printing of total number of
items sold on the receipt No Print
Print number of covers in
header No Print
Cover print double size NO
Print unit price on receipt No Print
One line feeded after
finalization for receipt NO
Time format 24/12Hour 24 Hour
Single item without fin rct NO
Always issue a receipt NO
0.00
0.00
6. Select the field you want to change and press the <YES>/
<NO> key or enter the numeric value and press the <YES>
key.
7. After programming, you should press the <ESC> key to
return to the previous menu.
P-46
Page 47

4-1-5-6 Programming the report control 1
Operation
General Feature
General Feature
1.Machine Control1
2.Machine Control2
3.Machine Control3
4.Machine Control4
5.Print Control
6.Report Control1
7.Report Control2
8.Communiction v
0.00
5. Select “6. Report Control1” and press the <YES> key.
Report Control1
Gross Print
Net Print
Cash In Drawer Print
Cash Declaration short/over No Print
Charge In Drawer No Print
Charge Declaration short/over No Print
Cheque In Drawer Print
Cheque Declaration short/over No Print
Credit In Drawer Print
Credit Declaration short/over No Print
RF Mode total Printv
0.00
Report Control1
VOID key operation totals No Print^
Number of C key operations No Print
Rounding total No Print
TA1 Print
TAX1 Print
TAXEX1 No Print
TA2 Print
TAX2 Print
TAXEX2 No Print
TA3 Print
TAX3 Printv
0.00
Report Control1
TAX7 No Print^
TAXEX7 No Print
TA8 No Print
TAX8 No Print
TAXEX8 No Print
TA9 No Print
TAX9 No Print
TAXEX9 No Print
TA10 No Print
TAX10 No Print
TAXEX10 No Print
0.00
Report Control1
Number of covers No Print^
The average spend per cover No Print
Commission for Cashing A Check No Print
Total Service charge No Print
Commission 1 No Print
Commission 2 No Print
Foreign currency cash and
Cheque in drawer totals No Print
Accumulate total of - key and
%- key operation totals No Print
Accumulate total of RF key and v
0.00
Report Control1
TAXEX3 No Print^
TA4 No Print
TAX4 No Print
TAXEX4 No Print
TA5 No Print
TAX5 No Print
TAXEX5 No Print
TA6 No Print
TAX6 No Print
TAXEX6 No Print
TA7 No Printv
0.00
Field meaning
These items are included in the fixed totalizer report.
QT-2100 Programming Manual
6. Select the field you want to change and press the <YES>/
<NO> key or enter the numeric value and press the <YES>
key.
7. After programming, you should press the <ESC> key to
return to the previous menu.
P-47
Page 48

Program 3
4-1-5-7 Programming the report control 2
Operation
General Feature
General Feature
1.Machine Control1
2.Machine Control2
3.Machine Control3
4.Machine Control4
5.Print Control
6.Report Control1
7.Report Control2
8.Communiction v
0.00
5. Select “7. Report Control2” and press the <YES> key.
Report Control2
Dept/Sub Dept Zero-Skip YES
Cashier/Clerk Zero-Skip YES
Function Zero-Skip YES
PLU/Stock Zero-Skip YES
Shift PLU Zero-Skip YES
Hourly Sales Zero-Skip YES
Group Zero-Skip YES
Monthly Sales Zero-Skip YES
Table Analysis Zero-Skip YES
Hourly Production Zero-Skip YES
Hourly Labor Zero-Skip YESv
Report Control2
Printing of average spend per ^
item on monthly report Print
PLU Random Code Order Mem Number
PLU No. on X/Z Report No Print
Sales Ratio on X/Z Report No Print
Z Counter Print
ITEM Discount Totalizer No Print
Double Z Report NO
VAT Recalculation on X/Z Report NO
Stock Clear at Batch Z NO
Print Consecutive No. range on v
0.00
Report Control2
Display Cashier/Clerk X NO^
Display Function X NO
Display PLU/Stock X NO
Display Hourly/Monthly X NO
Display Group X NO
Display Open Check X NO
Display Table Analysis X NO
Display E-Journal X NO
Display Hourly Product X NO
Display Employee X NO
Display Hourly Labor X NO
Report Control2
Display Fixed Totalizer Z NO^
Display Dept/Sub Dept Z NO
Display Cashier/Clerk Z NO
Display Function Z NO
Display PLU/Stock Z NO
Display Hourly/Monthly Z NO
Display Group Z NO
Display Open Check Z NO
Display Table Analysis Z NO
Display E-Journal Z NO
Display Hourly Product Z NOv
0.00
Report Control2
daily Fixed TTL report No Print^
GT1(Daily) Print
GT2(Daily) Print
GT3(Daily) Print
GT1(Periodic1&2) No Print
GT2(Periodic1&2) No Print
GT3(Periodic1&2) No Print
Display Flash X NO
Display Employee Activity X NO
Display Fixed Totalizer X NO
Display Dept/Sub Dept X NO
0.00
0.00
Report Control2
Display Cashier/Clerk Z NO^
Display Function Z NO
Display PLU/Stock Z NO
Display Hourly/Monthly Z NO
Display Group Z NO
Display Open Check Z NO
Display Table Analysis Z NO
Display E-Journal Z NO
Display Hourly Product Z NO
Display Employee Z NO
Display Hourly Labor Z NO
0.00
0.00
6. Select the field you want to change and press the <YES>/
<NO> key or enter the numeric value and press the <YES>
key.
7. After programming, you should press the <ESC> key to
return to the previous menu.
P-48
Field meaning
1. Zero-Skip on Report:
Skip zero total item.
2. Print Monthly Sales Average:
Print monthly sales average on monthly sales report.
3. PLU random code order:
You can choose “Mem Number (by memory number)” or “Random Code.”
4. VAT recaluculate on X/Z report:
Calculate VAT amount at report issuance temporarily.
5. Display Report:
Show report on the LCD screen.
Page 49

4-1-5-8 Programming the communication
Operation
General Feature
General Feature
1.Machine Control1
2.Machine Control2
3.Machine Control3
4.Machine Control4
5.Print Control
6.Report Control1
7.Report Control2
8.Communiction v
0.00
5. Select “8. Communication” and press the <YES> key.
Communication
Copy program change to other
terminals NO
Retry INLINE X/Z Polling YES
Allow to operate communication
function YES
Origin of reset data to be
sent to the master Own data file
Reset&Printing of consolidation file before reset report Print
Master printing of consolidation reset report Printv
0.00
Field meaning
1. Copy program change to other terminals:
Broadcast the programmed data in PGM 1 ~ 4 mode after completion of a program.
2. Origin of reset data to be sent to the master:
You can choose “Own data file” or “Consolidation file.”
3. Stock result copy:
Copy stock quantity to master daily file after Z consolidation.
Communication
sent to the master Own data file^
Reset&Printing of consolidation file before reset report Print
Master printing of consolidation reset report Print
Reset consolidation total
after inline consolidation YES
Stock Result Copy NO
Accumulation of data in consolidation area following RESET
operation YES
0.00
6. Select the field you want to change and press the <YES>/
<NO> key or enter the numeric value and press the <YES>
key.
7. After programming, you should press the <ESC> key to
return to the previous menu.
QT-2100 Programming Manual
P-49
Page 50

Program 3
4-1-5-9 Programming the hourly sales
Operation
General Feature
General Feature
9.Hourly Sales ^
10.SLIP / Guest
11.Journal Control
12.Message Control
13.Order Control
14.Set Menu/Condiment
15.CHK Tracking
16.Clerk Interrupt v
0.00
Hourly Sales
Interval(Hours) 1
Interval(Minutes) 0
Start Time(Hour) 0
Start Time(Minute) 0
0.00
Field meaning
1. Hour (00 ~ 23)
2. Minute (00 ~ 59)
5. Select “9. Hourly Sales” and press the <YES> key.
6. Select the field you want to change and press the <YES>/
<NO> key or enter the numeric value and press the <YES>
key.
7. After programming, you should press the <ESC> key to
return to the previous menu.
4-1-5-10 Programming the slip/guest
Operation
General Feature
General Feature
9.Hourly Sales ^
10.SLIP / Guest
11.Journal Control
12.Message Control
13.Order Control
14.Set Menu/Condiment
15.CHK Tracking
16.Clerk Interrupt v
0.00
SLIP / Guest
Print additional items only
Entire memory
Slip Auto Line Find NO
Slip Maximum Lines 0
Maximum number of automatic
line feed 0
Item consolidation on slip/
Guest receipt NO
Printing only Group TTL on slip/
Guest receipt NO
Print only Dept TTL on Slip/ v
0.00
SLIP / Guest
Guest receipt NO^
Print detail in order of Dept/
Group on slip/Guest receipt
Total only
PRT GUEST sort detail w/o TTL NO
Consecutive No. on slip/Guest
receipt Print
Print Date on slip/Guest RCT Print
Print Time on slip/Guest RCT Print
Back feed after slip Print NO
Back feed after VLD Print NOv
5. Select “10. SLIP/Guest” and press the <YES> key.
SLIP / Guest
Print detail in order of Dept/ ^
Group on slip/Guest receipt
Total only
PRT GUEST sort detail w/o TTL NO
Consecutive No. on slip/Guest
receipt Print
Print Date on slip/Guest RCT Print
Print Time on slip/Guest RCT Print
Back feed after slip Print NO
Back feed after VLD Print NO
Back feed after CHK-END/PRT NO
0.00
0.00
P-50
6. Select the field you want to change and press the <YES>/
<NO> key or enter the numeric value and press the <YES>
key.
7. After programming, you should press the <ESC> key to
return to the previous menu.
Page 51

Field meaning
1. Print additional items only:
Slip printing begins with “At the top of the transaction (Entire memory)/At the top of
this receipt (Additional only).”
2. Slip Maximum Line (00 ~ 99)
Note: This line should be set.
3. Back feed after slip Print/Back feed after VLD Print/Back feed after CHK-END/PRT:
These lines are only effective for SP-1300.
4-1-5-11 Programming the journal control
Operation
General Feature
General Feature
9.Hourly Sales ^
10.SLIP / Guest
11.Journal Control
12.Message Control
13.Order Control
14.Set Menu/Condiment
15.CHK Tracking
16.Clerk Interrupt v
0.00
5. Select “11. Journal Control” and press the <YES> key.
Journal Control
Storage of TRG Operation into
E-Journal YES
Generate E-Journal full error NO
0.00
6. Select the field you want to change and press the <YES>/
7. After programming, you should press the <ESC> key to
Field meaning
1. Storage of TRG operation into electronic journal memory:
Put training clerk registration data into electronic journal memory.
2. Generate E-Journal full error:
Alert when the electronic journal memory becomes full/Not alert even if the electronic
journal memory becomes full..
<NO> key or enter the numeric value and press the <YES>
key.
return to the previous menu.
QT-2100 Programming Manual
P-51
Page 52

Program 3
4-1-5-12 Programming the message control
Operation
General Feature
General Feature
9.Hourly Sales ^
10.SLIP / Guest
11.Journal Control
12.Message Control
13.Order Control
14.Set Menu/Condiment
15.CHK Tracking
16.Clerk Interrupt v
0.00
5. Select “12. Message Control” and press the <YES> key.
Message Control
Receipt Logo Message Print
Receipt Commercial Message No Print
Receipt Bottom Message No Print
Slip Commercial Message No Print
Slip Bottom Message No Print
Slip Intermediate Message No Print
Bill Top Message No Print
Bill Copy Message No Print
Bill Bottom Message No Print
Receipt Logo either Graphic or
Text Textv
0.00
Field meaning
1. Receipt Logo either graphic or text:
Select Text Logo/Graphic Logo.
4-1-5-13 Programming the order control
Operation
General Feature
General Feature
9.Hourly Sales ^
10.SLIP / Guest
11.Journal Control
12.Message Control
13.Order Control
14.Set Menu/Condiment
15.CHK Tracking
16.Clerk Interrupt v
Message Control
Receipt Commercial Message No Print^
Receipt Bottom Message No Print
Slip Commercial Message No Print
Slip Bottom Message No Print
Slip Intermediate Message No Print
Bill Top Message No Print
Bill Copy Message No Print
Bill Bottom Message No Print
Receipt Logo either Graphic or
Text Text
Report Header Print No Print
0.00
6. Select the field you want to change and press the <YES>/
<NO> key or enter the numeric value and press the <YES>
key.
7. After programming, you should press the <ESC> key to
return to the previous menu.
P-52
0.00
Order Control
Print location character No Print
Print Item Price No Print
Stop printing message on
double BON No Print
Print Detail of Set Menu No Print
Auto cutting every KP order NO
Print dashed line NO
Print items on KP training
operator NO
Perform item consolidation on
KP NOv
0.00
5. Select “13. Order Control” and press the <YES> key.
Order Control
Print dashed line NO^
Print items on KP training
operator NO
Perform item consolidation on
KP NO
Number of line feed before
print dashed line or auto cut 0
Number of line feed after
print dashed line or auto cut 4
Error generate Printer goes
down YES
0.00
Page 53

6. Select the field you want to change and press the <YES>/
<NO> key or enter the numeric value and press the <YES>
key.
7. After programming, you should press the <ESC> key to
return to the previous menu.
4-1-5-14 Programming the set menu/condiment
Operation
General Feature
General Feature
9.Hourly Sales ^
10.SLIP / Guest
11.Journal Control
12.Message Control
13.Order Control
14.Set Menu/Condiment
15.CHK Tracking
16.Clerk Interrupt v
0.00
5. Select “14. Set Menu/Condiment” and press the <YES> key.
Set Menu/Condiment
Calculate Price for detail YES
Follow the same QTY as main
item Fine Dining
No. of Detail for Post Entry 0
Field meaning
6. Select the field you want to change and press the <YES>/
0.00
<NO> key or enter the numeric value and press the <YES>
key.
7. After programming, you should press the <ESC> key to
return to the previous menu.
1. Calculate Price for detail:
Calculate/Not calculate detail item prices in set menu.
2. Follow the same QTY as main item:
Fine Dining: Not allow to enter the number of the condiment, and follow the
quantities of main PLU.
Fast food: Allow to enter the number of the condiment, and not follow the
quantities of main PLU.
Fine Dining QTY: Not allow to enter the number of the condiment but allow to
select the condiment by LIST staydown within the quantities of main
PLU.
3. No. of detail for Post Entry:
The value of reserved record for post entry function in detail file.
QT-2100 Programming Manual
P-53
Page 54

Program 3
4-1-5-15 Programming the check tracking
Operation
General Feature
General Feature
9.Hourly Sales ^
10.SLIP / Guest
11.Journal Control
12.Message Control
13.Order Control
14.Set Menu/Condiment
15.CHK Tracking
16.Clerk Interrupt v
0.00
5. Select “15. CHK Tracking” and press the <YES> key.
CHK tracking
Clearing CHK/TBL No. by using
the same number again CHK Number
CHK# 12 Digits(if No,6Digits) NO
Tax Claculation print by after
NB key NO
Print previous balance when
CHK is opened by OLD CHK key Print
Perform item consolidation
when CHK is opened by OLD CHK NO
STORE/RECALL Start Range 0
STORE/RECALL End Range 0v
0.00
6. Select the field you want to change and press the <YES>/
7. After programming, you should press the <ESC> key to
Field meaning
1. Clearing CHK/TBL No. by using the same number again:
You can choose “Check Number” or “Table Number”.
4-1-5-16 Programming the clerk interrupt
Operation
CHK tracking
CHK is opened by OLD CHK key Print^
Perform item consolidation
when CHK is opened by OLD CHK NO
STORE/RECALL Start Range 0
STORE/RECALL End Range 0
Auto Check Start Range 0
Auto Check End Range 0
Reset STORE/RECALL No. after
taking OPEN CHK Z report NO
Suppress detail display NO
SEP CHK Consolidation NO
0.00
<NO> key or enter the numeric value and press the <YES>
key.
return to the previous menu.
General Feature
General Feature
9.Hourly Sales ^
10.SLIP / Guest
11.Journal Control
12.Message Control
13.Order Control
14.Set Menu/Condiment
15.CHK Tracking
16.Clerk Interrupt v
P-54
0.00
5. Select “16. Clerk Interrupt” and press the <YES> key.
Page 55

Clerk Interrupt
Allow Clerk Interrupt NO
Allow operation to clerks who
are not allocated clerk
interrupt detailed memory NO
Auto Sign Off Timer for clerk
interrupt (In seconds) 0
6. Select the field you want to change and press the <YES>/
0.00
7. After programming, you should press the <ESC> key to
Field meaning
1. Clerk sign off timer: 0 - 99. (Sec.) This program is also effective for non-clerk interrupt
system.
4-1-5-17 Programming the display control
Operation
General Feature
General Feature
12.Message Control ^
13.Order Control
14.Set Menu/Condiment
15.CHK Tracking
16.Clerk Interrupt
17.Display Control
18.Menu Shift 1
19.Menu Shift 2
<NO> key or enter the numeric value and press the <YES>
key.
return to the previous menu.
0.00
Display Control
Backlight Off Timer(Min) 1
0.00
Field meaning
1. Backlight Off Timer: 0 - 59. (Minute)
5. Select “17. Display Control” and press the <YES> key.
6. Select the field you want to change and press the <YES>/
<NO> key or enter the numeric value and press the <YES>
key.
7. After programming, you should press the <ESC> key to
return to the previous menu.
QT-2100 Programming Manual
P-55
Page 56

Program 3
4-1-5-18 Programming the menu shift 1
Operation
General Feature
General Feature
12.Message Control ^
13.Order Control
14.Set Menu/Condiment
15.CHK Tracking
16.Clerk Interrupt
17.Display Control
18.Menu Shift 1
19.Menu Shift 2
0.00
5. Select “18. Menu Shift 1” and press the <YES> key.
Menu Shift 1
PLU Quantity Extension NO
DEPT Quantity Extension YES
SUB DEPT Quantity Extension YES
Accumulate touch PLU menus NO
Follow menu total reset operation to the destination NO
Destination(1) of accumulation
for menu totalizing 0
Accumulate 1st menu to (1) NO
Accumulate 2nd menu to (1) NO
Accumulate 3rd menu to (1) NOv
Menu Shift 1
Accumulate 4th menu to (1) NO^
Accumulate 5th menu to (1) NO
Accumulate 6th menu to (1) NO
Accumulate 7th menu to (1) NO
Accumulate 8th menu to (1) NO
Destination(2) of accumulation
for menu totalizing 0
Accumulate 1st menu to (2) NO
Accumulate 2nd menu to (2) NO
Accumulate 3rd menu to (2) NO
Accumulate 4th menu to (2) NOv
0.00
Field meaning
1. Accumulate touch PLU menus:
Enable/Disable to sum up PLUs to one Menu sheet.
2. Follow memu total reset operation to the destination:
Reset child menu sheets with parent menu sheet together/Reset menu sheet independently.
3. Destination of accumulation for menu totalizing:
Define the sheet No. of parent menu sheet. (1 ~ 8)
Menu Shift 1
Accumulate 8th menu to (1) NO^
Destination(2) of accumulation
for menu totalizing 0
Accumulate 1st menu to (2) NO
Accumulate 2nd menu to (2) NO
Accumulate 3rd menu to (2) NO
Accumulate 4th menu to (2) NO
Accumulate 5th menu to (2) NO
Accumulate 6th menu to (2) NO
Accumulate 7th menu to (2) NO
Accumulate 8th menu to (2) NO
0.00
0.00
6. Select the field you want to change and press the <YES>/
<NO> key or enter the numeric value and press the <YES>
key.
7. After programming, you should press the <ESC> key to
return to the previous menu.
P-56
Note: Never use these functions with “Shift PLU”.
Page 57

4-1-5-19 Programming the menu shift 2
Operation
General Feature
General Feature
12.Message Control ^
13.Order Control
14.Set Menu/Condiment
15.CHK Tracking
16.Clerk Interrupt
17.Display Control
18.Menu Shift 1
19.Menu Shift 2
0.00
Menu Shift 2
Start PLU Number of 1st menu 1
Start PLU Number of 2nd menu 109
Start PLU Number of 3rd menu 217
Start PLU Number of 4th menu 325
Start PLU Number of 5th menu 433
Start PLU Number of 6th menu 541
Start PLU Number of 7th menu 649
Start PLU Number of 8th menu 757
5. Select “19. Menu Shift 2” and press the <YES> key.
Field meaning
0.00
<NO> key or enter the numeric value and press the <YES>
key.
7. After programming, you should press the <ESC> key to
return to the previous menu.
Define start PLU No. of each menu sheet.
6. Select the field you want to change and press the <YES>/
QT-2100 Programming Manual
P-57
Page 58

Program 3
4-1-6 Programming scheduler
Operation
Machine Feature
Machine Feature
1.Pulldown Group
2.Set Menu Table
3.Arrangement
4.Batch X/Z
5.General Feature
6.Scheduler
7.Check Print
8.Table Analysis v
0.00
Scheduler D28 - D13 D12 - D1
0001-062 0000000000000000 000000000000
0002-062 0000000000000000 000000000000
0003-062 0000000000000000 000000000000
0004-062 0000000000000000 000000000000
4. Select “6. Scheduler” and press the <YES> key.
0.00
5. Enter schedule (refer to the next page) and press the <YES>
key.
6. Press the <ESC> key to return to the previous menu.
P-58
Page 59

Description Choice Program code
Scheduler start time (00:00 ~ 23:59)
Scheduler end time (00:00 ~ 23:59)
Always “0”
Interval control 1:
Daily = 0, Weekly = 1, Monthly = 2
Interval control 2:
Daily; No meaning
W eekly; Define day of a week
00; Sunday, 01; Monday, 02; Tuesday, 03; Wednesday,
04; Thursday , 05; Friday, 06; Saturday
Monthly; Define date, 01 ~ 31, 99 means the end of the month
Significant
numbers
Significant
numbers
Significant
number
Significant
numbers
::::
D
28 D27 D26 D25
::::
D
24 D23 D22 D21
;
D
20
:
D
19
::
D
18 D17
Interval time (00:00 ~ 23:59)
Always “0”
Arrangement table No.
Arrangement file No.
Always “0000”
Significant
numbers
Significant
numbers
Significant
numbers
::::
D
16 D15 D14 D13
;
D
12
::::
D
11 D10 D9 D8
:::
D
7 D6 D5
;;;;
D
D
4
3 D2
D
1
QT-2100 Programming Manual
P-59
Page 60

Program 3
4-1-7 Programming check print
Operation
Machine Feature
Machine Feature
1.Pulldown Group
2.Set Menu Table
3.Arrangement
4.Batch X/Z
5.General Feature
6.Scheduler
7.Check Print
8.Table Analysis v
0.00
Check Print
0001-041 000000
0002-041 000000
0003-041 000000
0004-041 000000
0005-041 000000
0006-041 000000
0007-041 000000
0008-041 000000
0009-041 000000
4. Select “7. Check Print” and press the <YES> key.
0.00
5. Enter value (below) and press the <YES> key.
6. Press the <ESC> key to return to the previous menu.
Description Choice Program code
Define printing data:
1; Printing amount 2; Printing amount (double size)
3; Printing date 4; Printing date (double size)
5; Check endorsement message 1st line
6; Check endorsement message 2nd line
7; Check endorsement message 3rd line
8; Check endorsement message 4th line
Feed before printing.
Feed direction
Feed 1 line after printing.
No. of feed lines before printing (0 ~ 9)
Printing offset digits (00 ~ 49)
a
b
c
Significant
number
No = 0
Yes = 1
Normal = 0
Reverse = 2
No = 0
Yes = 4
Significant
number
Significant
numbers
:
D
5
:
(a+b+c)
D
4
:
D
3
::
D
D
2
1
P-60
Page 61

4-1-8 Programming table analysis
Operation
Machine Feature
Machine Feature
1.Pulldown Group
2.Set Menu Table
3.Arrangement
4.Batch X/Z
5.General Feature
6.Scheduler
7.Check Print
8.Table Analysis v
0.00
Table Analysis
TBL01 000000000000
TBL02 000000000000
TBL03 000000000000
TBL04 000000000000
TBL05 000000000000
TBL06 000000000000
TBL07 000000000000
TBL08 000000000000
TBL09 000000000000
TBL10 000000000000
0.00
4. Select “8. Table Analysis” and press the <YES> key.
5. Select an appropriate record and press the <YES> key.
6. Enter characters for table analysis and press the <YES> key.
7. Enter value (below) and press the <YES> key.
8. Press the <ESC> key to return to the previous menu.
Note:
This programming is only effective, if the check-# is 6-digit long
Minimum check No. of the group
(“0” means “1.”)
Maximum check No. of the group
(“000000” means no programming.)
Description Choice Program code
Significant
numbers
Significant
numbers
::::::
D
12 D11 D10 D9 D8 D7
::::::
D
6 D5 D4 D3 D2 D1
QT-2100 Programming Manual
P-61
Page 62

Program 3
4-1-9 Programming tax table
Operation
Machine Feature
Machine Feature
6.Scheduler ^
7.Check Print
8.Table Analysis
9.Tax Table
10.Void Table
11.System Connection
12.I/O Parameter
13.Printer Connection v
0.00
Tax Table
Tax Table
1.Tax Table (1)
2.Tax Table (2)
3.Tax Table (3)
4.Tax Table (4)
5.Tax Table (5)
4. Select “9. Tax Table” and press the <YES> key.
0.00
5. Select an appropriate table and press the <YES> key.
Tax Table (1)
Tax Rate(%) 8.125
Maximum Table Amount 0.00
Rounding Round Off
Singapore Rounding Yes
Calculation Type Add in(VAT)
Sum of Cyclic Patterns 0
No. of Cyclic Values 0
Sum of Non-Cyclic Values 0
Actual Values(01) 0
Actual Values(02) 0
Actual Values(03) 0v
0.00
Field meaning
1. Tax Rate(%): (VAT & VAT: Sharing rate for the primary taxable amount)
Rate; 0.0001 ~ 9999.9999 % (Use Decimal point key)
2. Maximum Table Amount:
Maximum value; 0.00 ~ 9999.99
3. Rounding:
Selection; Cut off/Round off/Round up/Round up to two dp
4. Singapore Rounding:
Selection; Yes/No
5. Calculation type:
Selection;
Not calculate/Table/Table & Add on/Add in (VAT)/Tax on Tax/VAT and VAT
6. Sum of Cyclic Patterns, No. of Cyclic Values, Sum of Cyclic Values, Actual Values
See the following pages.
cf. VAT & VAT:
1. Sharing rate of the primary taxable amount → enter “Tax rate” field.
2. Actual tax table for primary tax table code → enter “Actual value (1)” field.
3. Actual tax table for secondary tax table code → enter “Actual value (2)” field.
6. Select an appropriate record and press the <YES> key.
7. Enter value (below) and press the <YES> key.
8. Press the <ESC> key to return to the previous menu.
P-62
Page 63

Explanation of U.S. tax table examples
Tax table without a tax rate
Tax
(6%)
Min. break point Max. break point
$.00
.01
.02
.03
.04
.05
.06
.07
Price Range
$ .01
.11
.25
.42
.59
.75
.82
1.09
• Sum of a single cyclic pattern: 17 + 17 + 16 = 50
• Number of values in each cyclic pattern: 3
• Sum of values in the non-cyclic pattern: 10 + 14 = 24
• Non-cyclic values and one set of cyclic values (actual values): 10, 14, 17, 17, 16
• Tax system: Tax table without rate
Tax table with a tax rate
Tax
(6%)
Min. break point Max. break point
$.00
.01
.02
.03
.04
.05
.06
.07
.08
.09
.10
.11
.12
.13
.14
Price Range
$ .01
.08
.22
.36
.50
.65
.79
.93
1.08
1.22
1.36
1.50
1.65
1.79
1.93
$ .10
.24
.41
.58
.74
.81
1.08
1.24
$ .07
1.07
1.21
1.35
1.49
1.64
1.78
1.92
2.07
.21
.35
.49
.64
.78
.92
Max. break points
Upper
108
124
141
Max. break points
Upper
10
24
41
58
74
91
107
121
135
149
164
178
192
207
21
35
49
64
78
92
Lower
0
–
10
–
24
–
41
–
58
–
74
–
91
–
108
–
124
–
Lower
7
–
–
21
–
35
–
49
–
64
–
78
–
92
–
107
–
121
–
135
–
149
–
164
–
178
–
192
–
Differ-
ence
=
10
=
14
=
17
=
17
=
16
=
17
=
17
=
16
=
17
Differ-
ence
0
=
7
=
=
=
=
=
=
=
=
=
=
=
=
=
=
Pattern
Non-cyclic data
Cyclic data
Cyclic data
Non-cyclic data
7
14
14
14
15
Cyclic data
14
14
15
14
14
14
Cyclic data
15
14
14
15
Pattern
1.40
On all sales above $20.07, compute the
tax at a rate of 7%
19.93
20.07
• Sum of a single cyclic pattern: 14 + 14 + 14 + 15 + 14 + 14 + 15 = 100
• Number of values in each cyclic pattern: 7
• Sum of values in non-cyclic pattern: 7
• Sum of values in the non-cyclic pattern: 7
• Non-cyclic values and one set of cyclic values (actual values): 7, 14, 14, 14, 15, 14, 14, 15
• Maximum taxable amount in table calculation: $20.07
• Tax system: Tax table with rate
• Tax rate: 7.000%
• Rounding method: Cut off to two decimal places
QT-2100 Programming Manual
P-63
Page 64

Program 3
Explanation of VAT & VAT
Example 1: Share the amount
Tax table programming
Table 1 10.0000% VAT
Table 2 20.0000% VAT
:
Table 4 33.3333% VAT & VAT 1 2
Table 5 25.0000% VAT & VAT 1 2
Item programming & registration result
Item 1 $10.00 1 $10.00
Item 2 $20.00 2 $20.00
:
Item 4 $30.00 4
Item 5 $40.00 5
Tax rate Calculation Primary Secondary
(Share rate) type tax status tax status
→ 33.3333% for taxable 1
→ 66.6667% for taxable 2
→ 25.0000% for taxable 1
→ 75.0000% for taxable 2
Program Registration result
Unit price Tax status Taxable 1 Taxable 2
$10.00 $20.00
($30.00 × 33.3333%) ($30.00 × 66.6667%)
$10.00 $30.00
($40.00 × 25.0000%) ($40.00 × 75.0000%)
Example 2: The alternative of taxable 1 or 2
Tax table programming
Tax rate Calculation Primary Secondary
(Share rate) type tax status tax status
Table 1 10.0000% VAT
Table 2 20.0000% VAT
:
Table 4 VAT & VAT 1 2 → Select tax status by <TAX EXEMPT>.
Item programming & registration result
Program Registration result
Unit price Tax status Taxable 1 Taxable 2
Item 1 $10.00 4 $10.00 $10.00
Tax 1 Exempt
$10.00
Tax 2 Exempt
$10.00
P-64
Page 65

4-1-10 Programming void table
Operation
Machine Feature
Machine Feature
6.Scheduler ^
7.Check Print
8.Table Analysis
9.Tax Table
10.Void Table
11.System Connection
12.I/O Parameter
13.Printer Connection v
0.00
Void Table
Use Void Table YES
4. Select “10. Void Table” and press the <YES> key.
0.00
Void Table
000000
000000
000000
000000
000000
000000
0.00
Description Choice Program code
Return stock value.
5. Press the <YES> key.
6. Select an appropriate record and press the <YES> key.
7. Enter void character and press the <YES> key.
8. Enter value (below) and press the <YES> key.
9. Press the <ESC> key to return to the previous menu.
Yes = 0
No = 1
:
D
1
QT-2100 Programming Manual
P-65
Page 66

Program 3
4-1-11 Programming system connection
Operation
Machine Feature
Machine Feature
6.Scheduler ^
7.Check Print
8.Table Analysis
9.Tax Table
10.Void Table
11.System Connection
12.I/O Parameter
13.Printer Connection v
0.00
System Connection
* 1 MC #01 02010100000
2 00000000000
3 00000000000
4 00000000000
5 00000000000
6 00000000000
7 00000000000
8 00000000000
9 00000000000
10 00000000000
11 00000000000v
0.00
10. This program should be made to all terminals in the cluster.
4. Select “11. System Connection” and press the <YES> key.
5. Select the record with “*” and press the <YES> key.
6. Enter the logical ID character and press the <YES> key.
8. Press the <Right arrow> key, enter value (below; D
12,D11
and
D10 ~ D1 ) and press the <YES> key.
9. Press the <ESC> key to return to the previous menu.
Description Choice Program code
Logical ID characters (within 12 characters)
Terminal:
Oneself = 02, Others = 01
Check tracking master/backup master (program value):
Master = 01, Backup master = 02, Self master = 03, Satellite = 00
Check tracking master/backup master (current value):
Master = 01, Backup master = 02, Self master = 03, Satellite = 00
Always “00000”
Check tracking cluster No. (0 ~ 9)
(“0” means no designation.)
Significant
characters
Significant
numbers
Significant
numbers
Significant
numbers
Significant
number
::::::
D
24 D23 D22 D21 D20 D19
::::::
D
18 D17 D16 D15 D14 D13
::
D12 D
11
::
D
D
10
9
::
D
D
8
7
;;;;;
D
6 D5 D4 D3 D2
:
D
1
P-66
Page 67

4-1-12 Programming I/O parameter
Operation
Machine Feature
Machine Feature
6.Scheduler ^
7.Check Print
8.Table Analysis
9.Tax Table
10.Void Table
11.System Connection
12.I/O Parameter
13.Printer Connection v
0.00
I/O Parameter
0001-902 0000000000
0002-902 0000000000
0003-902 0000000000
0004-902 0000000000
0005-902 0000000000
0006-902 0000000000
0007-902 0000000000
0008-902 0000000000
0009-902 0000000000
0010-902 0000000000
0011-902 0000000000
0.00
First record
Description Choice Program code
Inline baud rate:
312kbps = 0*, 156kbps = 1
*
For INLINE 2 (CAT5) cable, select 312kbps only.
Note: Please perform the flag clear opera-
tion of the terminal after changing the
I/O parameter table.
4. Select “12. I/O Parameter” and press the <YES> key.
5. Select an appropriate record, enter appropriate value (below)
and press the <YES> key.
6. Press the <ESC> key to return to the previous menu.
Significant
number
:
D
1
Second record
Description Choice Program code
Online baud rate: 115200bps = 0,1 57600bps = 2,
38400bps = 3, 19200bps = 4, 9600bps = 5,
4800bps = 6, 2400bps = 7
Activation signal (trigger):
DR = 0, CI = 1
Third record
Description Choice Program code
Always “0”
Significant
number
Significant
number
:
D
:
D
;
D
2
1
1
QT-2100 Programming Manual
P-67
Page 68

Program 3
Fourth record
Note: Besides flag clear, please turn off and on
the printer.
Description Choice Program code
No. of offset digits of slip/validation printing by SA-3015 (00 ~ 24)
Always “000”
Use SA-3015 printer for slip printing:
Using RS-232C port for printer:
COM4 = 0, COM5 = 5, COM6 = 6
Baud rate of the RS-232C port for printer:
19200bps = 0, 9600bps = 1
Using printer connected to RS-232C port: No printer = 99
• UP-350 = 00
• SA-3015 = 01
• UP-250 = 02
Fifth record
Note: Besides flag clear, please turn off and on
the printer.
Significant
numbers
No = 0
Yes = 1
Significant
number
Significant
number
Significant
numbers
::
D10D
9
;;;
D
D
8
7 D6
:
D
5
:
D
4
:
D
3
::
D
2 D1
Description Choice Program code
No. of offset digits of slip/validation printing by SA-3015 (00 ~ 24)
Always “000”
Use SA-3015 printer for slip printing:
Using RS-232C port for printer:
COM5 = 0, COM4 = 4, COM6 = 6
Baud rate of the RS-232C port for printer:
19200bps = 0, 9600bps = 1
Using printer connected to RS-232C port: No printer = 99
• UP-350 = 00
• SA-3015 = 01
• UP-250 = 02
Sixth record
Description Choice Program code
Rear display:
Connected * = 1, Not connected = 0
Remote display:
Connected * = 1, Not connected = 0
* You can connect either rear or remote display.
Significant
numbers
No = 0
Yes = 1
Significant
number
Significant
number
Significant
numbers
Significant
number
Significant
number
::
D10D
9
;;;
D
D
8
7 D6
:
D
5
:
D
4
:
D
3
::
D
2 D1
:
D
2
:
D
1
P-68
Seventh record
Description Choice Program code
Display color:
White line/black ground = 0, Black line/white ground = 1
Significant
number
:
D
1
Page 69

Eighth record
Description Choice Program code
Always “0”
Nineth record
Description Choice Program code
Parity:
Even = 0, Non = 1, Odd = 2
Bit:
7 bit = 0, 8 bit = 1
Scanner:
Connect = 2, No = 0
Baud rate:
2400 bps = 0, 9600 bps = 1, 4800 bps = 2
Significant
number
Significant
number
Significant
number
Significant
number
;
D
:
D
:
D
:
D
:
D
1
4
3
2
1
Tenth record
Note: Besides flag clear, please turn off and on
the printer.
Description Choice Program code
Using RS-232C port for printer:
No printer = 0, COM2 = 2 (COM4 = 4, COM 5 = 5, COM 6 = 6)
Baud rate of the RS-232C port for slip printer:
No printer = 0, 9600bps = 1
SP-1300:
Connect = 70, No = 00
If you use COM 4 ~ 6, the automatic detection during INIT does not performed. Assign it manually.
Eleventh record
Note: Besides flag clear, please turn off and on
Significant
number
Significant
number
Significant
number
:
D
:
D
::
D
2 D1
the printer.
Description Choice Program code
No. of offset digits of slip/validation printing by SA-3015 (00 ~ 24)
Always “000”
Use SA-3015 printer for slip printing:
Using RS-232C port for printer:
COM6 = 0, COM4 = 4, COM5 = 5
Baud rate of the RS-232C port for printer:
19200bps = 0, 9600bps = 1
Using printer connected to RS-232C port: No printer = 99
• UP-350 = 00
• SA-3015 = 01
• UP-250 = 02
Significant
numbers
No = 0
Yes = 1
Significant
number
Significant
number
Significant
numbers
::
D10D
;;;
D
D
8
:
D
:
D
:
D
::
D
2 D1
4
3
9
7 D6
5
4
3
QT-2100 Programming Manual
P-69
Page 70

Program 3
4-1-13 Programming printer connection
Operation
Machine Feature
Machine Feature
6.Scheduler ^
7.Check Print
8.Table Analysis
9.Tax Table
10.Void Table
11.System Connection
12.I/O Parameter
13.Printer Connection v
0.00
Printer Connection
1 R/J MC #01 /1 MC #01 /2
2 Report MC #02 /2 MC #01 /1
3 Order1 MC #03 /1 MC #03 /2
4 Order2 MC #01 /1 MC #03 /1
5 Order3
6 Order4
7 Order5
8 Order6
9 Order7
10 No
11 No v
0.00
4. Select “13. Printer Connection” and press the <YES> key.
Backup printer definition field
Main printer definition field
Printer Connection
Print
1.No
2.R/J
3.Report
4.Order1
5.Order2
6.Order3
7.Order4
8.Order5 v
0.00
Printer Connection
R/J
1.My printer /1
2.My printer /2
3.My printer /3
4.RS-232C Printer
5.No
5. Select an appropriate record of the main printer field and
press the <YES> key.
6. Select these options, “1.My Printer #1/2.My Printer #2/3.My
Printer #3/4.RS-232C Printer” and press the <YES> key.
7. If you select “4.RS-232C Printer”, select the terminal ID /1,
/2 or /3.
• /1 stands for the specified printer which is programmed
in the forth record. (page 68)
• /2 stands for the specified printer which is programmed
in the fifth record. (page 68)
• /3 stands for the specified printer which is programmed
in the eleventh record. (page 69)
8. If you want to allocate backup printer, set the backup printer
in the backup printer field.
9. Press the <ESC> key to return to the previous menu.
Printer Connection
RS-232C Printer
1.MC #01 /1
2.MC #01 /2
3.MC #01 /3
4.MC #02 /1
5.MC #02 /2
6.MC #02 /3
7.
8. v
P-70
Note:
0.00
0.00
The 10-th through 16-th record of this file are used for the printer definition of order ID
change of the Manager function.
The 17-th through 24-th record are not used.
Page 71

4-1-14 Programming time zone
Operation
Machine Feature
Machine Feature
9.Tax Table ^
10.Void Table
11.System Connection
12.I/O Parameter
13.Printer Connection
14.Time Zone
15.Time & Attendance
16.Hourly/Item Link v
0.00
Time Zone Start End Cycle
0001-800 09:00 10:00 00:15
0002-800 10:00 12:00 00:30
0003-800 15:00 17:00 01:00
0004-800 00:00 00:00 00:00
0005-800 00:00 00:00 00:00
0006-800 00:00 00:00 00:00
.
.
.
4. Select “14. Time Zone” and press the <YES> key.
End Time field
Start Time field
Rec-No. File No.
Worksheet for time zone
Zone Start Time (Hour)
Zone Start Time (Minute) (00~59)
Zone End Time (Hour) (00~23)
Zone End Time (Minute) (00~59)
Zone Cycle (Hour) (00~23)
Zone Cycle (Minute) (00, 15, 30, 45)
0.00
5. Select an appropriate record, and enter the start time, end
time, and cycle time.
Cycle Time field
Description Choice Program code
6. Press the <ESC> key to return to the previous menu.
00 ~23
00 ~ 59
00 ~ 23
00 ~ 59
00 ~ 23
00, 15, 30, 45
::
D
12 D11
::
D
10 D9
::
D
8 D7
::
D
6 D5
::
D
4 D3
::
D
2 D1
QT-2100 Programming Manual
P-71
Page 72

Program 3
4-1-15 Programming time & attendance
Preparation
Machine Feature
Machine Feature
9.Tax Table ^
10.Void Table
11.System Connection
12.I/O Parameter
13.Printer Connection
14.Time Zone
15.Time & Attendance
16.Hourly/Item Link v
0.00
4. Select “15. Time & Attendance” and press the <YES> key.
4-1-15-1 Programming time & attendance (general)
Operation
Time & Attendance
Time & Attendance
1.General
2.Job Code
3.Employee&Scedule
0.00
5. Select “1. General” and press the <YES> key.
General
Time & Attendance control Weekly
Weekly work time 40:00
Weekly work time for minor 25:00
Work time includes break hours NO
Rounding minute of work time Non
Allow employee report Z with
employees clocked-in NO
Enable clerk to sign on after
clock-in YES
P-72
0.00
6. Select an appropriate record and choose options.
7. Press the <ESC> key to return to the previous menu.
Field Meanings:
1. Time&Attendance control:
Weekly, Bi-weekly
2. Rounding minute of work time:
Non, 10 min., 15 min., 20 min., 30 min.
Page 73

4-1-15-2 Programming time & attendance (job code)
Operation
Time & Attendance
Time & Attendance
1.General
2.Job Code
3.Employee&Scedule
0.00
5. Select “2. Job Code” and press the <YES> key.
Time & Attendance
Job Code
1.Cook
2.Cashier
3.Dish wash
4.Floor cleaning
5.JOB#05
6.JOB#06
7.JOB#07
8.JOB#08 v
0.00
6. Select an appropriate job code and press the <YES> key.
Memory No 1
Descriptor Cook
Pay Rate 9999.99
Over Time Pay Ratio 99.99
Tip Declaration Compulsory NO
0.00
7. Select an appropriate record to enter the character or number
and press the <YES> key, or choose option.
QT-2100 Programming Manual
P-73
Page 74

Program 3
4-1-15-3 Programming time & attendance (employee & schedule)
Operation
Time & Attendance
Time & Attendance
1.General
2.Job Code
3.Employee&Scedule
0.00
5. Select “3. Employee&Schedule” and press the <YES> key.
Time & Attendance
Employee&Schedule
1.Sean Harrison
2.Oliver Clapton
3.Richard Baker
4.Geia Peabody
5.Tyler Johnson
6.EMP#06
7.EMP#07
8.EMP#08 v
0.00
Memory No 1
Employee No. 123456
Descriptor Sean Harrioson
Social Security No. 1234567890
Job Code(1) Cook
Job Code(2) Casier
Job Code(3) Dish wash
Job Code(4) -------Allow to Specify Job Code
when Clocking-in NO
Allow to Clock-in with NonPreset Job Code NOv
6. Select an appropriate employee file, and press the <YES>
0.00
7. Select an appropriate record to enter the character or choose
8. Press the <ESC> key to assign schedule mode.
Field Meanings:
Employee No.: Put in the numeric number (0 ~ 999999). When you put “0” at the
beginning of the number, these numbers are not recognized.
Descriptor: Put the specific character within 16-digits from the leftmost side.
Social Security No.: Put in the numeric number (0 ~ 9999999999). When you put “0”
at the beginning of the number, these numbers are recognized.
Job Code (1)~(4): Choose an item from the pulldown menu.
Cashier/Clerk Name: Choose an employee from the character pulldow menu.
key.
Memory No 1
Job Code(3) Dish wash ^
Job Code(4) -------Allow to Specify Job Code
when Clocking-in NO
Allow to Clock-in with NonPreset Job Code NO
Display Job Code Window
when Clocking-in NO
Minor Employee YES
Ignore schedule setting NO
Cashier/Clerk Name Harrison
0.00
options.
P-74
Page 75

Time & Attendance
Schedule
1.Monday
2.Tuesday
3.Wednesday
4.Thursday
5.Friday
6.Saturday
7.Sunday
0.00
9. Select an appropriate day, and press the <YES> key.
Sean Harrison Monday
Shift(1) Cook
Start Time 08:00
End Time 10:00
Break Time 00:15
Grace Before Start 10
Grace After Start 00
Grace Before End 00
Grace After End 15
Shift(2) Waiter
Start Time 14:30
End Time 17:00 v
0.00
10. Select an appropriate record to enter the appropriate job and
time.
QT-2100 Programming Manual
P-75
Page 76

Program 3
4-1-16 Programming hourly item link
Operation
Machine Feature
Machine Feature
9.Tax Table ^
10.Void Table
11.System Connection
12.I/O Parameter
13.Printer Connection
14.Time Zone
15.Time & Attendance
16.Hourly/Item Link v
0.00
Hourly/Item Link
Hourly/Item Link
1.Time Zone (1)
2.Time Zone (2)
3.Time Zone (3)
4.Time Zone (4)
5.Time Zone (5)
6.Time Zone (6)
7.Time Zone (7)
8.Time Zone (8) v
4. Select “16. Hourly/Item Link” and press the <YES> key.
0.00
Time Zone (1)
0001-031 0001-001 GROSS
0002-031 0002-001 NET
0003-031 0003-001 CAID
0004-031 0007-001 CHID
0005-031 0011-001 CKID
0006-031 0015-001 CRID
0007-031
0008-031
0009-031
0010-031
0011-031
0.00
5. Select an appropriate record, and press the <YES> key.
6. Select an appropriate record, and choose the items from PLU,
subdepartment, department, function, fixed totalizer, group,
and void reason.
• You can input the items directly from PLU, subdepartment,
department and free function. The PLU#, S-DEPT#, DEPT#,
and LIST# keys are possible to use.
• If you want to delete the item, move the cursor on an
appropriate item, and then press the <NO> key. All items
below the cursor will be deleted. If you press <YES>, the
pulldown menu will appear to select an item.
7. Press the <ESC> key to go to the next menu.
P-76
Page 77

4-1-17 Programming IDC link
Operation
Machine Feature
Machine Feature
10.Void Table ^
11.System Connection
12.I/O Parameter
13.Printer Connection
14.Time Zone
15.Time & Attendance
16.Hourly/Item Link
17.IDC Link
0.00
IDC Link
IDC Link
1.IDC Link (0001)
2.IDC Link (0002)
3.IDC Link (0003)
4.IDC Link (0004)
5.IDC Link (0005)
6.IDC Link (0006)
7.IDC Link (0007)
8.IDC Link (0008) v
4. Select “17. IDC Link” and press the <YES> key.
0.00
5. Select an appropriate record, and press the <YES> key.
IDC Link (0001)
0001-804 0001-004 PLU0001
Store File IDC(1)
Store Data Whole Transaction
6. Select an appropriate item and press the <YES> key to choose
0.00
7. Press the <ESC> key to return to the previous menu.
Field Meanings:
1. Item code:
• Choose an item from the pulldown menu of each file as below.
PLU, Sub-Department, Department, Free Function, Pull Down Group
Clerk
If you choose Clerk, then whole transaction is stored regardless “Store Data”
option.
• You can input the items directly from PLU, Subdepartment, Department and Free
Function. The PLU#, S-DEPT#, DEPT#, and LIST# keys are possible to use.
• To clear the record, enter “0” and then press the <YES> key.
an option.
2. Store File:
Specify the option for the Store File.
No., IDC(1), IDC(2), IDC(3)
3. Store Data:
Specify the option for the store file.
Item only, Whole Transaction
QT-2100 Programming Manual
P-77
Page 78

Program 3
4-1-18 Programming Euro
Operation
Machine Feature
Machine Feature
11.System Connection ^
12.I/O Parameter
13.Printer Connection
14.Time Zone
15.Time & Attendance
16.Hourly/Item Link
17.IDC Link
18.EURO (Sub Currency v
0.00
4. Select “18. EURO (sub currency ” and press the <YES> key.
EURO (Sub Currency) Preset
EURO (sub) addmode 0
Quit this menu if changed.
LOCAL(main) > EURO(sub) Rate 0.01
EURO(sub) Rate Rounding Round off
EURO(sub) > LOCAL(main) Rate 100
LOCAL(main) Rate Rounding Round off
Print receipt EURO(sub) TL NO
Print receipt EURO(sub) TAX NO
Print receipt EURO(sub) Fin NO
Print receipt EURO(sub) CG NO
Print report EURO(sub) Amount NOv
0.00
5. Select the field you want to change and press the <YES>/
<NO> key or enter the numeric value and press the <YES>
key.
6. After programming, you should press the <ESC> key to
return to the previous menu.
Field Meanings:
1. EURO (sub) add mode:
Monetary mode of the currency (0 ~ 3)
Note: If you changed this value, just terminate this program and re-enter, in case of
modifying some values in this menu.
2. Rate: 6 digits, 0.00001 ~ 999999
3. Rate rounding: Round off/Cut off/Round up
4. Drawer number: Main = 0, 1/Sub (option) = 2
EURO (Sub Currency) Preset
EURO(sub) Rate Rounding Round off^
EURO(sub) > LOCAL(main) Rate 100
LOCAL(main) Rate Rounding Round off
Print receipt EURO(sub) TL NO
Print receipt EURO(sub) TAX NO
Print receipt EURO(sub) Fin NO
Print receipt EURO(sub) CG NO
Print report EURO(sub) Amount NO
EURO(sub) Drawer number 0
Open drawer immediately NO
Change is EURO(sub)
0.00
P-78
Page 79

4-1-19 Programming auto program control
This program restricts the broadcasting feature after programming.
Operation
Machine Feature
Machine Feature
12.I/O Parameter ^
13.Printer Connection
14.Time Zone
15.Time & Attendance
16.Hourly/Item Link
17.IDC Link
18.EURO (Sub Currency
19.Auto Pgm Control
0.00
4. Select “19. Auto Pgm control” and press the <YES> key.
Auto Pgm control
0001-905 0902 01
0002-905 0999 01
0003-905 0000 00
0004-905 0000 00
0.00
Worksheet for Auto program control
Description Choice Program code
File No.
Broadcast this file (designated by D6 ~ D3) only.
Ignore to receive this file (designated by D6 ~ D3).
5. Select an appropriate record, and enter the program code.
6. Press the <ESC> key to return to the previous menu.
Significant
numbers
No = 0
Yes = 1
No = 0
Yes = 1
::::
D
6 D5 D4 D3
:
D
2
:
D
1
QT-2100 Programming Manual
P-79
Page 80

Program 3
4-2. Programming clerks
Preparation:
P3 C
01 10-10-01 12:34 000000
PGM-3
1.Machine Feature
2.Clerk
3.Key Feature
0.00
4-2-1 Programming clerk features
Operation
Clerk
Clerk
1.Clerk Feature
2.Operation
3.Commission Rate
4.Table Range
5.Range
6.Clerk Detail
7.Clerk Key ID
1. Sign on a clerk (if necessary).
2. Press <PGM MODE> to assign Program 3 mode.
3. Select “2. Clerk” and press the <YES> key.
0.00
Clerk Feature
Clerk Feature
1.
2.C02
3.
4.
5.C05
6.
7.
8.C08 v
C
01
C
03
C
04
C
06
C
07
0.00
4. Select “1. Clerk Feature” and press the <YES> key.
5. Select an appropriate clerk and press the <YES> key.
P-80
Page 81

Memory No. 1
Descriptor
Secret number 1
Check No. for Clerk Interrupt 1
Drawer number 0
Type of operator Cashier
Treat as trainee NO
Allow clerk to open check No.
belonging to another clerks NO
Prohibit clerk to sign on NO
Clerk sign off when receipt is
issued YESv
C
01
0.00
6. Select an appropriate record and choose options.
7. After programming, press the <ESC> key to return to the
previous menu.
Field meaning
1. Type of operator:
Choose “Cashier/Clerk/Manager.”
2. Void operation:
Choose “Current only/Complete void/Not allowed.”
3. Descriptor (16 digits)
4. Secret code (1 ~ 9999)
5. Check number for clerk interrupt (1 ~ 999999)
6. Drawer number (1 ~ 2)
Memory No. 1
Secret number 1^
Check No for Clerk Interrupt 0
Drawer number 0
Type of operator Cashier
Treat as Trainee NO
Allow clerk to open check No.
belonging to another clerks NO
Prohibit clerk to sign on NO
Clerk sign off when receipt is
issued YES
Void operation Current only
0.00
QT-2100 Programming Manual
P-81
Page 82

Program 3
4-2-2 Programming operation
Preparation
Clerk
Clerk
1.Clerk Feature
2.Operation
3.Commission Rate
4.Table Range
5.Range
6.Cashier Detail
7.Clerk Key ID
0.00
4-2-2-1 Programming clerk control
Operation
4. Select “2. Operation” and press the <YES> key.
Operation
Operation
1.Clerk Control
2.Menu Shift / 2nd@
3.Mode Control
4.Allowed function 1
5.Allowed function 2
6.Allowed function 3
7.Allowed function 4
8.Allowed function 5v
0.00
Clerk Control
Clerk Feature
1.
2.
3.C03
4.
5.
6.C06
7.
8.
C
01
C
02
C
04
C
05
C
07
C
08 v
0.00
5. Select “1. Clerk Control” and press the <YES> key.
6. Select an appropriate clerk and press the <YES> key.
P-82
Memory No. 1
Check No. Compulsory NO
Table No. Compulsory NO
No. of Covers Compulsory NO
GST RCT Compulsory(Finalize) NO
GST RCT Compulsory(NB) NO
Slip Automatic Batch Print
Compulsory(Finalize) NO
SLIP Automatic Batch Print
Compulsory(NB) NO
Seat Number Compulsory NO
Eat-in/Take-out Compulsory NO
0.00
7. Select an appropriate record and choose options.
8. After programming, press the <ESC> key to return to the
previous menu.
Page 83

4-2-2-2 Programming menu shift/2nd@
Operation
Operation
Operation
1.Clerk Control
2.Menu Shift/2nd@
3.Mode Control
4.Allowed function 1
5.Allowed function 2
6.Allowed function 3
7.Allowed function 4
8.Allowed function 5v
0.00
Menu Shift / 2nd@
Clerk Feature
1.
2.C02
3.
4.
5.C05
6.
7.
8.C08 v
C
01
C
03
C
04
C
06
C
07
0.00
5. Select “2. Menu Shift/2nd@” and press the <YES> key.
6. Select an appropriate clerk and press the <YES> key.
Memory No. 1
Allow to operate 1st Menu YES
Allow to operate 2nd Menu YES
Allow to operate 3rd Menu YES
Allow to operate 4th Menu YES
Allow to operate 5th Menu YES
Allow to operate 6th Menu YES
Allow to operate 7th Menu YES
Allow to operate 8th Menu YES
Shift PLU after sign on 0
Menu shift after sign on 0
Price shift after sign on 0v
0.00
7. Select an appropriate record and choose options.
8. After programming, press the <ESC> key to return to the
previous menu.
Field meaning
1. Allow to operate 1st ~ 8th Menu:
Allow/Prohibit to register by n-th (n = 1 ~ 8) Menu.
2. Shift PLU after sign on: (1 ~ 8)
Menu shift after sign on: (1 ~ 8)
Price shift after sign on: (1 ~ 2)
Default menu sheet No. or @ menu sheet No. after signing on.
3. Menu shift status/stay down:
Price shift status/stay down:
Not maintain/Maintain menu sheet No./@ menu sheet No. after item registration.
Memory No. 1
Allow to operate 3rd Menu YES^
Allow to operate 4th Menu YES
Allow to operate 5th Menu YES
Allow to operate 6th Menu YES
Allow to operate 7th Menu YES
Allow to operate 8th Menu YES
Shift PLU after sign on 0
Menu shift after sign on 0
Price shift after sign on 0
Menu shift Status
Price shift Status
0.00
QT-2100 Programming Manual
P-83
Page 84

Program 3
4-2-2-3 Programming mode control
Operation
Operation
Operation
1.Clerk Control
2.Menu Shift/2nd@
3.Mode Control
4.Allowed function 1
5.Allowed function 2
6.Allowed function 3
7.Allowed function 4
8.Allowed function 5v
0.00
Mode Control
Clerk Feature
1.C01
2.
3.
4.C04
5.
6.
7.C07
8.
C
02
C
03
C
05
C
06
C
08 v
5. Select “3. Mode Control” and press the <YES> key.
0.00
Memory No. 1
Allow to operate REG Mode YES
Allow to operate RF Mode YES
Allow to operate REG- Mode YES
Allow to operate PGM1 Mode YES
Allow to operate PGM2 Mode YES
Allow to operate PGM3 Mode YES
Allow to operate PGM4 Mode YES
Allow to operate PGM5 Mode YES
Allow to operate PGM6 Mode YES
Allow to operate X/Z Mode YES
Allow to operate Manager Mode YESv
0.00
Field meaning
1. Allow to operate Auto PGM (inline):
Allow to download/upload program.
6. Select an appropriate clerk and press the <YES> key.
Memory No. 1
Allow to operate PGM2 Mode YES^
Allow to operate PGM3 Mode YES
Allow to operate PGM4 Mode YES
Allow to operate PGM5 Mode YES
Allow to operate PGM6 Mode YES
Allow to operate X/Z Mode YES
Allow to operate Manager Mode YES
Allow to operate Inline Mode YES
Allow to operate AutoPGM YES
Allow to operate CF C0ard YES
Default mode after sign on REG
0.00
7. Select an appropriate record and choose options.
8. After programming, press the <ESC> key to return to the
previous menu.
P-84
Page 85

4-2-2-4 Programming function control 1
Operation
Operation
Operation
1.Clerk Control
2.Menu Shift/2nd@
3.Mode Control
4.Allowed function 1
5.Allowed function 2
6.Allowed function 3
7.Allowed function 4
8.Allowed function 5v
0.00
Allowed Function 1
Clerk Feature
1.C01
2.
3.
4.C04
5.
6.
7.C07
8.
C
02
C
03
C
05
C
06
C
08 v
0.00
5. Select “4. Allowed function 1” and press the <YES> key.
Memory No. 1
Cash YES
Charge YES
Check YES
Credit YES
New Balance YES
Price Inquiry YES
Stock Inquiry YES
Operate Character Recall YES
Character Print YES
Check Print YES
Clerk Transfer YESv
Memory No. 1
Table Transfer YES^
Tip YES
Normal Receipt YES
Loan YES
Received on Account YES
Paid Out YES
Pick Up YES
Coupon YES
Deposit YES
Minus YES
% Minus YESv
0.00
6. Select an appropriate clerk and press the <YES> key.
Memory No. 1
Received on Account YES^
Paid Out YES
Pick Up YES
Coupon YES
Deposit YES
Minus YES
% Minus YES
Plus YES
% Plus YES
Refund YES
Coupon2 YES
0.00
0.00
7. Select an appropriate record and press the <YES>/<NO>
key.
8. After programming, press the <ESC> key to return to the
previous menu.
QT-2100 Programming Manual
P-85
Page 86

Program 3
4-2-2-5 Programming function control 2
Operation
Operation
Operation
1.Clerk Control
2.Menu Shift/2nd@
3.Mode Control
4.Allowed function 1
5.Allowed function 2
6.Allowed function 3
7.Allowed function 4
8.Allowed function 5v
0.00
Allowed Function 2
Clerk Feature
1.
2.C02
3.
4.
5.C05
6.
7.
8.C08 v
C
01
C
03
C
04
C
06
C
07
5. Select “5. Allowed function 2” and press the <YES> key.
0.00
Memory No. 1
Validation YES
Receipt YES
Check Endorsement YES
# YES
#/Non Sales YES
Non Sales YES
Number of Covers YES
Arrangement YES
Currency Exchange YES
VAT YES
Bill Copy YESv
0.00
Memory No. 1
SLIP Back Feed/Release YES^
SLIP Print YES
SLIP Feed/Release YES
T/S YES
Table Number YES
Money Declaration YES
Tax Exempt YES
Menu Shift YES
Shift PLU YES
LC Open YES
Preset Open YESv
6. Select an appropriate clerk and press the <YES> key.
Memory No. 1
SLIP Feed/Release YES^
T/S YES
Table Number YES
Money Declaration YES
(not used)
0.00
Tax Exempt YES
Menu Shift YES
Shift PLU YES
LC Open YES
Preset Open YES
1st unit price shift YES
2nd unit price shift YES
0.00
7. Select an appropriate record and press the <YES>/<NO>
key.
8. After programming, press the <ESC> key to return to the
previous menu.
P-86
Page 87

4-2-2-6 Programming function control 3
Operation
Operation
Operation
1.Clerk Control
2.Menu Shift/2nd@
3.Mode Control
4.Allowed function 1
5.Allowed function 2
6.Allowed function 3
7.Allowed function 4
8.Allowed function 5v
0.00
Allowed Function 3
Clerk Feature
1.
2.C02
3.
4.
5.C05
6.
7.
8.C08 v
C
01
C
03
C
04
C
06
C
07
0.00
5. Select “6. Allowed function 3” and press the <YES> key.
Memory No. 1
Operator X/Z YES
Tray Total YES
Subtotal YES
Receipt on/off YES
TAST YES
Operator Number YES
MDST YES
X YES
X/For YES
X/XX YES
X/XXX YESv
0.00
6. Select an appropriate clerk and press the <YES> key.
Memory No. 1
X YES^
X/For YES
X/XX YES
X/XXX YES
Ketten Bon YES
Selective Item ST YES
New Check YES
Old Check YES
New/Old Check YES
Add Check YES
Separate Check YES
0.00
7. Select an appropriate record and press the <YES>/<NO>
key.
8. After programming, press the <ESC> key to return to the
previous menu.
QT-2100 Programming Manual
P-87
Page 88

Program 3
4-2-2-7 Programming function control 4
Operation
Operation
Operation
1.Clerk Control
2.Menu Shift/2nd@
3.Mode Control
4.Allowed function 1
5.Allowed function 2
6.Allowed function 3
7.Allowed function 4
8.Allowed function 5v
0.00
Allowed Function 4
Clerk Feature
1.
2.C02
3.
4.
5.C05
6.
7.
8.C08 v
C
01
C
03
C
04
C
06
C
07
5. Select “7. Allowed function 4” and press the <YES> key.
0.00
Memory No. 1
Substitution YES
House Bon YES
Operator Open Check YES
Media Change YES
Seat Number YES
Display On/Off YES
REG Mode YES
X/Z Mode YES
PGM Mode YES
Post Entry YES
Round Repeat YESv
0.00
Memory No. 1
Eat-in YES^
Take-out YES
Store YES
Recall YES
Dutch Account YES
Reverse Display YES
E-Journal Display YES
Home Position YES
Display Mode Change YES
All Void (Current only) YES
All Void (Complete Void) YES
6. Select an appropriate clerk and press the <YES> key.
0.00
7. Select an appropriate record and press the <YES>/<NO>
key.
8. After programming, press the <ESC> key to return to the
previous menu.
P-88
Page 89

4-2-2-8 Programming function control 5
Operation
Operation
Operation
1.Clerk Control
2.Menu Shift/2nd@
3.Mode Control
4.Allowed function 1
5.Allowed function 2
6.Allowed function 3
7.Allowed function 4
8.Allowed function 5v
0.00
Allowed Function 5
Clerk Feature
1.C01
2.C02
3.C03
4.C04
5.C05
6.C06
7.C07
8.C08 v
0.00
5. Select “8. Allowed function 5” and press the <YES> key.
6. Select an appropriate clerk and press the <YES> key.
Record No. 1
Price YES
PLU Number YES
Sub Department Number YES
Department Number YES
List Number YES
Touch PLU YES
Touch Department YES
Touch Sub Department YES
Touch List YES
0.00
7. Select an appropriate record and press the <YES>/<NO>
8. After programming, press the <ESC> key to return to the
key.
previous menu.
QT-2100 Programming Manual
P-89
Page 90

Program 3
4-2-2-9 Programming arrangement control
Operation
Operation
Operation
3.Mode Control ^
4.Allowed function 1
5.Allowed function 2
6.Allowed function 3
7.Allowed function 4
8.Allowed function 5
9.Arrangement
10.Report
0.00
5. Select “9. Arrangement” and press the <YES> key.
Arrangement
Clerk Feature
1.
2.C02
3.
4.
5.C05
6.
7.
8.C08 v
C
01
C
03
C
04
C
06
C
07
0.00
6. Select an appropriate clerk and press the <YES> key.
Memory No. 1
ARG GP(1) Opration YES
ARG GP(2) Opration YES
ARG GP(3) Opration YES
ARG GP(4) Opration YES
ARG GP(5) Opration YES
0.00
7. Select an appropriate record and press the <YES>/<NO>
8. After programming, press the <ESC> key to return to the
key.
previous menu.
P-90
Page 91

4-2-2-10 Programming X/Z report control
Operation
Operation
Operation
3.Mode Control ^
4.Allowed function 1
5.Allowed function 2
6.Allowed function 3
7.Allowed function 4
8.Allowed function 5
9.Arrangement
10.Report
0.00
5. Select “10. Report” and press the <YES> key.
Report
Clerk Feature
1.
2.C02
3.
4.
5.C05
6.
7.
8.C08 v
C
01
C
03
C
04
C
06
C
07
0.00
Memory No. 1
Daily X YES
Daily Z YES
Periodic(1) X YES
Periodic(1) Z YES
Periodic(2) X YES
Periodic(2) Z YES
Batch X/Z(1) YES
Batch X/Z(2) YES
Batch X/Z(3) YES
Batch X/Z(4) YES
Batch X/Z(5) YESv
Memory No. 1
Batch X/Z(6) YES^
Batch X/Z(7) YES
Batch X/Z(8) YES
Batch X/Z(9) YES
Batch X/Z(10) YES
Operator X YES
Operator Z YES
Individual totalizer X/Z YES
Individual X/Z (Key direct) YES
Individual X/Z (Others) YES
Employee X/Z YESv
0.00
6. Select an appropriate clerk and press the <YES> key.
Memory No. 1
Batch X/Z(7) YES^
Batch X/Z(8) YES
Batch X/Z(9) YES
Batch X/Z(10) YES
Operator X YES
Operator Z YES
Individual totalizer X/Z YES
Individual X/Z (Key direct) YES
Individual X/Z (Others) YES
Employee X/Z YES
0.00
Employee Edit YES
0.00
7. Select an appropriate record and press the <YES>/<NO>
key.
8. After programming, press the <ESC> key to return to the
previous menu.
QT-2100 Programming Manual
P-91
Page 92

Program 3
4-2-3 Programming commission rate
Operation
Clerk
Clerk
1.Clerk Feature
2.Operation
3.Commission Rate
4.Table Range
5.Range
6.Cashier Detail
7.Clerk Key ID
0.00
Commission Rate
Clerk Feature
1.
2.C02
3.
4.
5.C05
6.
7.
8.C08 v
C
01
C
03
C
04
C
06
C
07
4. Select “3. Commission Rate” and press the <YES> key.
0.00
5. Select an appropriate clerk and press the <YES> key.
Memory No. 1
Commission Rate(1) 0.00
Commission Rate(2) 0.00
0.00
7. Select an appropriate record and enter value (0 ~ 99.99), and
8. After programming, press the <ESC> key to return to the
then press the <YES> key.
previous menu.
P-92
Page 93

4-2-4 Programming table range
Operation
Clerk
Clerk
1.Clerk Feature
2.Operation
3.Commission Rate
4.Table Range
5.Range
6.Cashier Detail
7.Clerk Key ID
0.00
Table Range
Clerk Feature
1.
2.C02
3.
4.
5.C05
6.
7.
8.C08 v
C
01
C
03
C
04
C
06
C
07
4. Select “4. Table Range” and press the <YES> key.
0.00
Memory No. 1
Start Table Range 0
End Table Range 0
0.00
5. Select an appropriate clerk and press the <YES> key.
7. Select an appropriate record and enter values (0 ~ 999999),
and then press the <YES> key.
8. After programming, press the <ESC> key to return to the
previous menu.
QT-2100 Programming Manual
P-93
Page 94

Program 3
4-2-5 Programming clerk by range
Preparation
Clerk
Clerk
1.Clerk Feature
2.Operation
3.Commission Rate
4.Table Range
5.Range
6.Cashier Detail
7.Clerk Key ID
0.00
4. Select “5. Range” and press the <YES> key.
4-2-5-1 Programming clerk control by range
Operation
Range
Operation
1.Clerk Control
2.Menu Shift / 2nd@
3.Mode Control
4.Allowed function 1
5.Allowed function 2
6.Allowed function 3
7.Allowed function 4
8.Allowed function 5 v
0.00
5. Select “1. Clerk Control” and press the <YES> key.
Clerk Control
Check No. Compulsory NO
Table No. Compulsory NO
No. of Covers Compulsory NO
GST RCT Compulsory(Finalize) NO
GST RCT Compulsory(NB) NO
Slip Automatic Batch Print
Compulsory(Finalize) NO
SLIP Automatic Batch Print
Compulsory(NB) NO
Seat Number Compulsory NO
Eat-in/Take-out NO
0.00
Clerk Control
Enter Start range 0
End range 0
OK? YES
0.00
6. Select an appropriate record and choose options.
7. After programming, press the <ESC> key to proceed to the
next step.
Clerk Control
Enter Start range 1
End range 123
OK? YES
0.00
P-94
8. Enter the start range No. and press the <YES> key.
(It starts “0001” if you skip to enter the start range.)
Then enter the end range No. and press the <YES> key.
(It ends the last record if you skip to enter the end range.)
9. Press the <YES> key.
10. Press the <ESC> key to return to the previous menu.
Page 95

4-2-5-2 Programming menu shift/2nd@ by range
Operation
Range
Operation
1.Clerk Control
2.Menu Shift/2nd@
3.Mode Control
4.Allowed function 1
5.Allowed function 2
6.Allowed function 3
7.Allowed function 4
8.Allowed function 5 v
0.00
5. Select “2. Menu Shift / 2nd@” and press the <YES> key.
Menu Shift / 2nd@
Allow to operate 1st Menu YES
Allow to operate 2nd Menu YES
Allow to operate 3rd Menu YES
Allow to operate 4th Menu YES
Allow to operate 5th Menu YES
Allow to operate 6th Menu YES
Allow to operate 7th Menu YES
Allow to operate 8th Menu YES
Shift PLU after sign on 0
Menu shift after sign on 0
Price shift after sign on 0v
0.00
Menu Shift / 2nd@
Enter Start range 0
End range 0
OK? YES
0.00
Menu Shift / 2nd@
Allow to operate 3rd Menu YES^
Allow to operate 4th Menu YES
Allow to operate 5th Menu YES
Allow to operate 6th Menu YES
Allow to operate 7th Menu YES
Allow to operate 8th Menu YES
Shift PLU after sign on 0
Menu shift after sign on 0
Price shift after sign on 0
Menu shift Status
Price shift Status
0.00
6. Select an appropriate record and choose options.
7. After programming, press the <ESC> key to proceed to the
next step.
Menu Shift / 2nd@
Enter Start range 1
End range 99
OK? YES
0.00
QT-2100 Programming Manual
8. Enter the start range No. and press the <YES> key.
(It starts “0001” if you skip to enter the start range.)
Then enter the end range No. and press the <YES> key.
(It ends the last record if you skip to enter the end range.)
9. Press the <YES> key.
10. Press the <ESC> key to return to the previous menu.
P-95
Page 96

Program 3
4-2-5-3 Programming mode control by range
Operation
Range
Operation
1.Clerk Control
2.Menu Shift/2nd@
3.Mode Control
4.Allowed function 1
5.Allowed function 2
6.Allowed function 3
7.Allowed function 4
8.Allowed function 5 v
0.00
5. Select “3. Mode Control” and press the <YES> key.
Mode Control
Allow to operate REG Mode YES
Allow to operate RF Mode YES
Allow to operate REG- Mode YES
Allow to operate PGM1 Mode YES
Allow to operate PGM2 Mode YES
Allow to operate PGM3 Mode YES
Allow to operate PGM4 Mode YES
Allow to operate PGM5 Mode YES
Allow to operate PGM6 Mode YES
Allow to operate X/Z Mode YES
Allow to operate Manager Mode YESv
0.00
Mode Control
Enter Start range 0
End range 0
OK? YES
0.00
Mode Control
Allow to operate PGM2 Mode YES^
Allow to operate PGM3 Mode YES
Allow to operate PGM4 Mode YES
Allow to operate PGM5 Mode YES
Allow to operate PGM6 Mode YES
Allow to operate X/Z Mode YES
Allow to operate Manager Mode YES
Allow to operate Inline Mode YES
Allow to operate AutoPGM YES
Allow to operate CF Card YES
Default mode after sign on REG
0.00
6. Select an appropriate record and choose options.
7. After programming, press the <ESC> key to proceed to the
next step.
Mode Control
Enter Start range 1
End range 99
OK? YES
0.00
P-96
8. Enter the start range No. and press the <YES> key.
(It starts “0001” if you skip to enter the start range.)
Then enter the end range No. and press the <YES> key.
(It ends the last record if you skip to enter the end range.)
9. Press the <YES> key.
10. Press the <ESC> key to return to the previous menu.
Page 97

4-2-5-4 Programming function control 1 by range
Operation
Range
Operation
1.Clerk Control
2.Menu Shift/2nd@
3.Mode Control
4.Allowed function 1
5.Allowed function 2
6.Allowed function 3
7.Allowed function 4
8.Allowed function 5 v
0.00
5. Select “4. Allowed function 1” and press the <YES> key.
Allowed function 1
Cash YES
Charge YES
Check YES
Credit YES
New Balance YES
Price Inquiry YES
Stock Inquiry YES
Operate Character Recall YES
Character Print YES
Check Print YES
Clerk Transfer YESv
Allowed function 1
Table Transfer YES^
Tip YES
Normal Receipt YES
Loan YES
Received on Account YES
Paid Out YES
Pick Up YES
Coupon YES
Deposit YES
Minus YES
% Minus YESv
0.00
Allowed function 1
Enter Start range 0
End range 0
OK? YES
0.00
Allowed function 1
Received on Account YES^
Paid Out YES
Pick Up YES
Coupon YES
Deposit YES
Minus YES
% Minus YES
Plus YES
% Plus YES
Refund YES
Coupon2 YES
0.00
0.00
6. Select an appropriate record and press the <YES>/<NO>
key.
7. After programming, press the <ESC> key to proceed to the
next step.
Allowed function 1
Enter Start range 1
End range 99
OK? YES
0.00
QT-2100 Programming Manual
8. Enter the start range No. and press the <YES> key.
(It starts “0001” if you skip to enter the start range.)
Then enter the end range No. and press the <YES> key.
(It ends the last record if you skip to enter the end range.)
9. Press the <YES> key.
10. Press the <ESC> key to return to the previous menu.
P-97
Page 98

Program 3
4-2-5-5 Programming function control 2 by range
Operation
Range
Operation
1.Clerk Control
2.Menu Shift/2nd@
3.Mode Control
4.Allowed function 1
5.Allowed function 2
6.Allowed function 3
7.Allowed function 4
8.Allowed function 5 v
0.00
5. Select “5. Allowed function 2” and press the <YES> key.
Allowed function 2
Validation YES
Receipt YES
Check Endorsement YES
# YES
#/Non Sales YES
Non Sales YES
Number of Covers YES
Arrangement YES
Currency Exchange YES
VAT YES
Bill Copy YESv
Allowed function 2
SLIP Back Feed/Release YES^
SLIP Print YES
SLIP Feed/Release YES
T/S YES
Table Number YES
Money Declaration YES
Tax Exempt YES
Menu Shift YES
Shift PLU YES
LC Open YES
Preset Open YESv
0.00
Allowed function 2
Enter Start range 0
End range 0
OK? YES
0.00
Allowed function 2
T/S YES^
Table Number YES
Money Declaration YES
Tax Exempt YES
Menu Shift YES
Shift PLU YES
LC Open YES
Preset Open YES
1st unit price shift YES
2nd unit price shift YES
Clerk Number YES
0.00
0.00
6. Select an appropriate record and press the <YES>/<NO>
key.
7. After programming, press the <ESC> key to proceed to the
next step.
Allowed function 2
Enter Start range 1
End range 123
OK? YES
0.00
P-98
8. Enter the start range No. and press the <YES> key.
(It starts “0001” if you skip to enter the start range.)
Then enter the end range No. and press the <YES> key.
(It ends the last record if you skip to enter the end range.)
9. Press the <YES> key.
10. Press the <ESC> key to return to the previous menu.
Page 99

4-2-5-6 Programming function control 3 by range
Operation
Range
Operation
1.Clerk Control
2.Menu Shift/2nd@
3.Mode Control
4.Allowed function 1
5.Allowed function 2
6.Allowed function 3
7.Allowed function 4
8.Allowed function 5 v
0.00
5. Select “6. Allowed function 3” and press the <YES> key.
Allowed function 3
Operator X/Z YES
Tray Total YES
Subtotal YES
Receipt on/off YES
TAST YES
Operator Number YES
MDST YES
X YES
X/For YES
X/XX YES
X/XXX YESv
0.00
Allowed function 3
Enter Start range 0
End range 0
OK? YES
0.00
Allowed function 3
X/XX YES^
X/XXX YES
Ketten Bon YES
Selective Item ST YES
New Check YES
Old Check YES
New/Old Check YES
Add Check YES
Separate Check YES
Clock-in/out YES
Break-in/out YES
0.00
6. Select an appropriate record and press the <YES>/<NO>
key.
7. After programming, press the <ESC> key to proceed to the
next step.
Allowed function 3
Enter Start range 1
End range 123
OK? YES
0.00
QT-2100 Programming Manual
8. Enter the start range No. and press the <YES> key.
(It starts “0001” if you skip to enter the start range.)
Then enter the end range No. and press the <YES> key.
(It ends the last record if you skip to enter the end range.)
9. Press the <YES> key.
10. Press the <ESC> key to return to the previous menu.
P-99
Page 100

Program 3
4-2-5-7 Programming function control 4 by range
Operation
Range
Operation
1.Clerk Control
2.Menu Shift/2nd@
3.Mode Control
4.Allowed function 1
5.Allowed function 2
6.Allowed function 3
7.Allowed function 4
8.Allowed function 5 v
0.00
5. Select “7. Allowed function 4” and press the <YES> key.
Allowed function 4
Substitution YES
House Bon YES
Operator Open Check YES
Media Change YES
Seat Number YES
Display On/Off YES
REG Mode YES
X/Z Mode YES
PGM Mode YES
Post Entry YES
Round Repeat YESv
0.00
Allowed function 4
Enter Start range 0
End range 0
OK? YES
0.00
Allowed function 4
Eat-in YES^
Take-out YES
Store YES
Recall YES
Dutch Account YES
Reverse Display YES
E-Journal Display YES
Home Position YES
Display Mode Change YES
All Void (Current only) YES
All Void (Complete Void) YES
0.00
6. Select an appropriate record and press the <YES>/<NO>
key.
7. After programming, press the <ESC> key to proceed to the
next step.
Allowed function 4
Enter Start range 1
End range 123
OK? YES
0.00
P-100
8. Enter the start range No. and press the <YES> key.
(It starts “0001” if you skip to enter the start range.)
Then enter the end range No. and press the <YES> key.
(It ends the last record if you skip to enter the end range.)
9. Press the <YES> key.
10. Press the <ESC> key to return to the previous menu.
 Loading...