

Page 1
Page 2

0
Ot¯
imageCLASS 2300
Basic Guide
Page 3
CD-ROM
CD-ROM
CD-ROM
CD-ROM
CD-ROM
Manuals for the Machine
The manuals for this machine are divided as follows. Please refer to them for detailed information.
Some of the manuals listed below are only supplied with the Network Model of this machine.
Guides with this symbol are printed manuals.
Installing and Setting Up the Machine
Network and Printer Settings
Basic Operations
Machine Settings
Troubleshooting
Copying Instructions
Fax Instructions
Sending Instructions
Remote User Interface Instructions
Guides with this symbol are PDF manuals included on the
CD-ROM
accompanying CD-ROM.
Set-Up Sheet
for the Machine
Set-Up Sheet
for Networking and Printing
Basic Guide
(This Document)
Reference Guide
Copying Guide
Facsimile Guide
Sending Guide
Remote UI Guide
Network Connectivity and Setup Instructions
PCL Printer Instructions
PCL Printer Driver Installation and
Instructions
Fax Driver and Cover Sheet Editor
Installation and Instructions
The machine illustration on the cover may differ slightly from your machine.
Network Guide
PCL Printer Guide
PCL Driver Guide
Fax Driver Guide
with Cover Sheet Editor
Page 4

How This Manual Is Organized
Chapter 1 Introduction
Chapter 2 Documents
Chapter 3 Print Media
Chapter 4 Copying - Basic Operations
Chapter 5 Faxing - Basic Operations
Chapter 6 Printer/Fax Driver Software
Chapter 7 I-Fax - Basic Operations
Chapter 8 Printing - Basic Operations
Chapter 9
Maintenance
Chapter 10 Troubleshooting
Chapter 11 Appendix
Includes the specifications and index.
Considerable effort has been made to ensure that this manual is free of inaccuracies and omissions. However, as we are constantly improving our
products, if you need an exact specification, please contact Canon.
Page 5

Contents
Preface . . . . . . . . . . . . . . . . . . . . . . . . . . . . . . . . . . . . . . . . . . . . . . . . . . . . . . . . .viii
How to Use This Manual . . . . . . . . . . . . . . . . . . . . . . . . . . . . . . . . . . . . . . . . . . .viii
Symbols Used in This Manual . . . . . . . . . . . . . . . . . . . . . . . . . . . . . . . . . . . . . viii
Keys Used in This Manual . . . . . . . . . . . . . . . . . . . . . . . . . . . . . . . . . . . . . . . . viii
Operations and Terms Used in This Manual . . . . . . . . . . . . . . . . . . . . . . . . . . . .ix
Legal Notices . . . . . . . . . . . . . . . . . . . . . . . . . . . . . . . . . . . . . . . . . . . . . . . . . . . . .xi
Laser Safety . . . . . . . . . . . . . . . . . . . . . . . . . . . . . . . . . . . . . . . . . . . . . . . . . . . . xi
CDRH Regulations. . . . . . . . . . . . . . . . . . . . . . . . . . . . . . . . . . . . . . . . . . . . . . xii
International Energy Star Program. . . . . . . . . . . . . . . . . . . . . . . . . . . . . . . . . . xiii
Trademarks. . . . . . . . . . . . . . . . . . . . . . . . . . . . . . . . . . . . . . . . . . . . . . . . . . . . xiii
Copyright . . . . . . . . . . . . . . . . . . . . . . . . . . . . . . . . . . . . . . . . . . . . . . . . . . . . . xiii
Disclaimers. . . . . . . . . . . . . . . . . . . . . . . . . . . . . . . . . . . . . . . . . . . . . . . . . . . . xiv
Legal Limitations on the Usage of Your Product and the Use of Images . . . . . xiv
Important Safety Instructions . . . . . . . . . . . . . . . . . . . . . . . . . . . . . . . . . . . . . . . xv
Installation . . . . . . . . . . . . . . . . . . . . . . . . . . . . . . . . . . . . . . . . . . . . . . . . . . . . xv
Power Supply . . . . . . . . . . . . . . . . . . . . . . . . . . . . . . . . . . . . . . . . . . . . . . . . . . xvi
Handling . . . . . . . . . . . . . . . . . . . . . . . . . . . . . . . . . . . . . . . . . . . . . . . . . . . . . xvii
Maintenance and Inspections . . . . . . . . . . . . . . . . . . . . . . . . . . . . . . . . . . . . xviii
Consumables . . . . . . . . . . . . . . . . . . . . . . . . . . . . . . . . . . . . . . . . . . . . . . . . . . xix
Other Warnings . . . . . . . . . . . . . . . . . . . . . . . . . . . . . . . . . . . . . . . . . . . . . . . . xx
Set-Up Help & Product Registration (USA) . . . . . . . . . . . . . . . . . . . . . . . . . . . xx
Canon Canada Information/Service Center . . . . . . . . . . . . . . . . . . . . . . . . . . . xx
Supplies & Accessories . . . . . . . . . . . . . . . . . . . . . . . . . . . . . . . . . . . . . . . . . . xx
Chapter 1 Introduction
Where to Find Help . . . . . . . . . . . . . . . . . . . . . . . . . . . . . . . . . . . . . . . . . . . . . . 1-2
Set-Up Sheets . . . . . . . . . . . . . . . . . . . . . . . . . . . . . . . . . . . . . . . . . . . . . . . . 1-2
Book Manuals. . . . . . . . . . . . . . . . . . . . . . . . . . . . . . . . . . . . . . . . . . . . . . . . . 1-3
PDF Manuals and Software (CD-ROMs) . . . . . . . . . . . . . . . . . . . . . . . . . . . . 1-4
Features of the imageCLASS 2300. . . . . . . . . . . . . . . . . . . . . . . . . . . . . . . . . . 1-5
Model Configurations . . . . . . . . . . . . . . . . . . . . . . . . . . . . . . . . . . . . . . . . . . . 1-5
Setting Up Machine Functions . . . . . . . . . . . . . . . . . . . . . . . . . . . . . . . . . . . . . 1-6
Parts and Their Functions. . . . . . . . . . . . . . . . . . . . . . . . . . . . . . . . . . . . . . . . . 1-7
External View . . . . . . . . . . . . . . . . . . . . . . . . . . . . . . . . . . . . . . . . . . . . . . . . . 1-7
Internal View. . . . . . . . . . . . . . . . . . . . . . . . . . . . . . . . . . . . . . . . . . . . . . . . . . 1-8
iv
Page 6

Control Panel Parts and Functions . . . . . . . . . . . . . . . . . . . . . . . . . . . . . . . . .1-9
Chapter 2 Documents
Placing Originals (For Copying, Faxing, Scanning) . . . . . . . . . . . . . . . . . . . . . 2-2
Orientation . . . . . . . . . . . . . . . . . . . . . . . . . . . . . . . . . . . . . . . . . . . . . . . . . . . .2-3
Platen Glass. . . . . . . . . . . . . . . . . . . . . . . . . . . . . . . . . . . . . . . . . . . . . . . . . . .2-4
Feeder . . . . . . . . . . . . . . . . . . . . . . . . . . . . . . . . . . . . . . . . . . . . . . . . . . . . . . .2-6
Chapter 3 Print Media
Paper Type . . . . . . . . . . . . . . . . . . . . . . . . . . . . . . . . . . . . . . . . . . . . . . . . . . . . . .3-2
Loading Paper . . . . . . . . . . . . . . . . . . . . . . . . . . . . . . . . . . . . . . . . . . . . . . . . . . . 3-4
Adjusting the Paper Drawer Guides. . . . . . . . . . . . . . . . . . . . . . . . . . . . . . . . .3-8
Chapter 4 Copying - Basic Operations
Overview of Copying Operations. . . . . . . . . . . . . . . . . . . . . . . . . . . . . . . . . . . .4-2
Copy Operations . . . . . . . . . . . . . . . . . . . . . . . . . . . . . . . . . . . . . . . . . . . . . . . . . 4-4
More Information . . . . . . . . . . . . . . . . . . . . . . . . . . . . . . . . . . . . . . . . . . . . . . . 4-9
v
Chapter 5 Faxing - Basic Operations
Overview of Fax Operations . . . . . . . . . . . . . . . . . . . . . . . . . . . . . . . . . . . . . . . .5-2
Setting Up the Machine for FAX Operations . . . . . . . . . . . . . . . . . . . . . . . . . . . 5-4
Connecting the Telephone Line . . . . . . . . . . . . . . . . . . . . . . . . . . . . . . . . . . . .5-4
Setting the Current Date and Time . . . . . . . . . . . . . . . . . . . . . . . . . . . . . . . . .5-5
Registering the Required Sender Information . . . . . . . . . . . . . . . . . . . . . . . . .5-7
Registering the Machine's Fax Number. . . . . . . . . . . . . . . . . . . . . . . . . . . . . .5-8
Registering the Unit's Name . . . . . . . . . . . . . . . . . . . . . . . . . . . . . . . . . . . . .5-10
Registering the Sender Information (TX Terminal ID) . . . . . . . . . . . . . . . . . . 5-12
Fax Sending Operations . . . . . . . . . . . . . . . . . . . . . . . . . . . . . . . . . . . . . . . . . . 5-15
More Information . . . . . . . . . . . . . . . . . . . . . . . . . . . . . . . . . . . . . . . . . . . . . . 5-18
Page 7

Chapter 6 Printer/Fax Driver Software
Introduction . . . . . . . . . . . . . . . . . . . . . . . . . . . . . . . . . . . . . . . . . . . . . . . . . . . . 6-2
System Requirements . . . . . . . . . . . . . . . . . . . . . . . . . . . . . . . . . . . . . . . . . . . . 6-3
Installing the Software. . . . . . . . . . . . . . . . . . . . . . . . . . . . . . . . . . . . . . . . . . . . 6-4
More Infomation . . . . . . . . . . . . . . . . . . . . . . . . . . . . . . . . . . . . . . . . . . . . . . . 6-4
Chapter 7 I-Fax - Basic Operations
Overview of the I-Fax Functions. . . . . . . . . . . . . . . . . . . . . . . . . . . . . . . . . . . . 7-2
Setting Up the Machine for Using I-Fax . . . . . . . . . . . . . . . . . . . . . . . . . . . . . . 7-3
Sendig and Receiving I-Fax . . . . . . . . . . . . . . . . . . . . . . . . . . . . . . . . . . . . . . . 7-4
Sending I-Fax by One-Touch Speed Dialing, Coded Speed Dialing,
or Access Code . . . . . . . . . . . . . . . . . . . . . . . . . . . . . . . . . . . . . . . . . . . . . . . 7-4
Manual I-Fax Sending . . . . . . . . . . . . . . . . . . . . . . . . . . . . . . . . . . . . . . . . . . 7-6
Receiving I-Fax . . . . . . . . . . . . . . . . . . . . . . . . . . . . . . . . . . . . . . . . . . . . . . . 7-8
More Information . . . . . . . . . . . . . . . . . . . . . . . . . . . . . . . . . . . . . . . . . . . . . . 7-9
Chapter 8 Printing - Basic Operations
Features of the Printer. . . . . . . . . . . . . . . . . . . . . . . . . . . . . . . . . . . . . . . . . . . . 8-2
Connecting to a Computer . . . . . . . . . . . . . . . . . . . . . . . . . . . . . . . . . . . . . . . . 8-4
Connecting to a Network . . . . . . . . . . . . . . . . . . . . . . . . . . . . . . . . . . . . . . . . 8-4
Connecting through a Parallel Interface . . . . . . . . . . . . . . . . . . . . . . . . . . . . . 8-5
Connecting through a USB Interface . . . . . . . . . . . . . . . . . . . . . . . . . . . . . . . 8-5
Printing a Document . . . . . . . . . . . . . . . . . . . . . . . . . . . . . . . . . . . . . . . . . . . . . 8-6
Canceling a Print Job . . . . . . . . . . . . . . . . . . . . . . . . . . . . . . . . . . . . . . . . . . . . 8-7
Chapter 9 Maintenance
Replacing the Toner Cartridge . . . . . . . . . . . . . . . . . . . . . . . . . . . . . . . . . . . . . 9-2
Routine Cleaning . . . . . . . . . . . . . . . . . . . . . . . . . . . . . . . . . . . . . . . . . . . . . . . 9-10
Platen Glass and Cover . . . . . . . . . . . . . . . . . . . . . . . . . . . . . . . . . . . . . . . . 9-10
Feeder Cleaning. . . . . . . . . . . . . . . . . . . . . . . . . . . . . . . . . . . . . . . . . . . . . . 9-11
Roller Cleaning. . . . . . . . . . . . . . . . . . . . . . . . . . . . . . . . . . . . . . . . . . . . . . . 9-15
More Information . . . . . . . . . . . . . . . . . . . . . . . . . . . . . . . . . . . . . . . . . . . . . 9-17
vi
Page 8

Chapter 10 Troubleshooting
List of Error Messages . . . . . . . . . . . . . . . . . . . . . . . . . . . . . . . . . . . . . . . . . . .10-2
Self-Diagnostic Display . . . . . . . . . . . . . . . . . . . . . . . . . . . . . . . . . . . . . . . . .10-2
When Problems Occur during Fax Operations. . . . . . . . . . . . . . . . . . . . . . . . 10-8
Sending Documents. . . . . . . . . . . . . . . . . . . . . . . . . . . . . . . . . . . . . . . . . . . .10-8
Receiving Documents . . . . . . . . . . . . . . . . . . . . . . . . . . . . . . . . . . . . . . . . .10-11
Other Problems . . . . . . . . . . . . . . . . . . . . . . . . . . . . . . . . . . . . . . . . . . . . . . 10-13
When You Have Trouble Printing . . . . . . . . . . . . . . . . . . . . . . . . . . . . . . . . . . 10-14
Service Call Message . . . . . . . . . . . . . . . . . . . . . . . . . . . . . . . . . . . . . . . . . . .10-16
If You Cannot Solve the Problem . . . . . . . . . . . . . . . . . . . . . . . . . . . . . . . . . . 10-17
Chapter 11 Appendix
Machine Specifications. . . . . . . . . . . . . . . . . . . . . . . . . . . . . . . . . . . . . . . . . . .11-2
Main Unit . . . . . . . . . . . . . . . . . . . . . . . . . . . . . . . . . . . . . . . . . . . . . . . . . . . . 11-2
Feeder . . . . . . . . . . . . . . . . . . . . . . . . . . . . . . . . . . . . . . . . . . . . . . . . . . . . . .11-4
Fax Specifications . . . . . . . . . . . . . . . . . . . . . . . . . . . . . . . . . . . . . . . . . . . . . . .11-5
Printer Specifications . . . . . . . . . . . . . . . . . . . . . . . . . . . . . . . . . . . . . . . . . . . . 11-6
Control Specifications . . . . . . . . . . . . . . . . . . . . . . . . . . . . . . . . . . . . . . . . . .11-6
Software Specifications . . . . . . . . . . . . . . . . . . . . . . . . . . . . . . . . . . . . . . . . .11-6
Interface Specifications . . . . . . . . . . . . . . . . . . . . . . . . . . . . . . . . . . . . . . . . . . 11-7
Parallel Interface (Centronics Compliant) . . . . . . . . . . . . . . . . . . . . . . . . . . .11-7
Index . . . . . . . . . . . . . . . . . . . . . . . . . . . . . . . . . . . . . . . . . . . . . . . . . . . . . . . . . . 11-8
vii
Page 9

Preface
Thank you for purchasing the Canon imageCLASS 2300. Please read this manual to
familiarize yourself with the basic operation of all functions of your machine. After reading
this manual, keep it handy for easy reference.
How to Use This Manual
Symbols Used in This Manual
The following symbols are used in this manual to explain procedures, restrictions,
handling precautions, and instructions that should be observed for safety.
.
WARNING
CAUTION
IMPORTANT
NOTE
Indicates a warning concerning operations that may lead to death or
injury to persons if not performed correctly. In order to use the machine
safely, always pay attention to these warnings.
.
Indicates a caution concerning operations that may lead to injury to
persons, or damage to property if not performed correctly. In order to
use the machine safely, always pay attention to these cautions.
.
Indicates operational requirements and restrictions. Be sure to read
these items carefully in order to operate the machine correctly, and to
avoid damage to the machine.
.
Indicates a clarification of an operation, or contains additional
explanations for a procedure. Reading these notes is highly
recommended.
Keys Used in This Manual
The following symbols and key names are a few examples of how keys to be
pressed are expressed in this manual:
Control Panel Keys: <Key icon> + (Key Name)
Example:
Function Keys: <Key icon> + (Key Function)
Example:
viii
(Start)
(Stop)
F3
Press [F3] (DENSITY)
F4
Press [F4] ( ▲ )
Page 10
Operations and Terms Used in This Manual
This machine makes effective use of memory in order to perform print operations
efficiently. For example, as soon as the machine has scanned the original that you
want to copy, it can immediately scan the next person's original. You can also print
from this machine, using a function other than the Copy function. In this machine,
these operations take place in a complex way, so that not only copies, but also
various kinds of prints may sometimes have to wait their turn before they can be
output.
To avoid confusion when reading this manual, the terms "scanning", "printing", and
"copying" used throughout this manual are defined as set out below. There are
some cases in which the scanning of an original when making a copy, and the
process of making a print, are described separately.
Scanning
Printing
Outputting a copy, or outputting data sent
from a personal computer to the machine.
Scanning an original to be copied,
or scanning an original to be
stored as data in a mailbox.
ix
Page 11
Copying
Scanning of an original,
printing through finishing.
x
Page 12

Legal Notices
Laser Safety
This product complies with 21 CFR Chapter 1 Subchapter J as a Class 1 laser
product under the U.S. Department of Health and Human Services (DHHS)
Radiation Performance Standard according to the Radiation Control for Health and
Safety Act of 1968. Class 1 levels of laser radiation are not considered to be
hazardous.
Since radiation emitted inside the product is completely confined within protective
housings and external covers, the laser beam cannot escape from the machine
during any phase of user operation. Do not remove protective housings or external
covers, except as directed by the equipment's Reference Guide.
xi
Page 13
CDRH Regulations
The Center for Devices and Radiological Health (CDRH) of the U.S. Food and Drug
Administration implemented regulations for laser products on August 2, 1976.
These regulations apply to laser products manufactured since August 1, 1976.
Compliance is mandatory for products marketed in the United States. The label
shown below indicates compliance with the CDRH regulations and must be
attached to laser products marketed in the United States.
CANON INC.
3-30-2 SHIMOMARUKO, OHTA-KU, TOKYO, JAPAN
CANON U.S.A., INC.
ONE CANON PLAZA, LAKE SUCCESS, N.Y. 11042, U.S.A.
CANON CANADA INC.
3128 ORLANDO DRIVE, UNIT#1, BUILDING F, MISSISSAUGA, ONTARIO,
L4V1R5, CANADA
MANUFACTURED:
THIS PRODUCT CONFORMS WITH DHHS RADIATION PERFORMANCE
STANDARD, 21 CFR CHAPTER 1 SUBCHAPTER J.
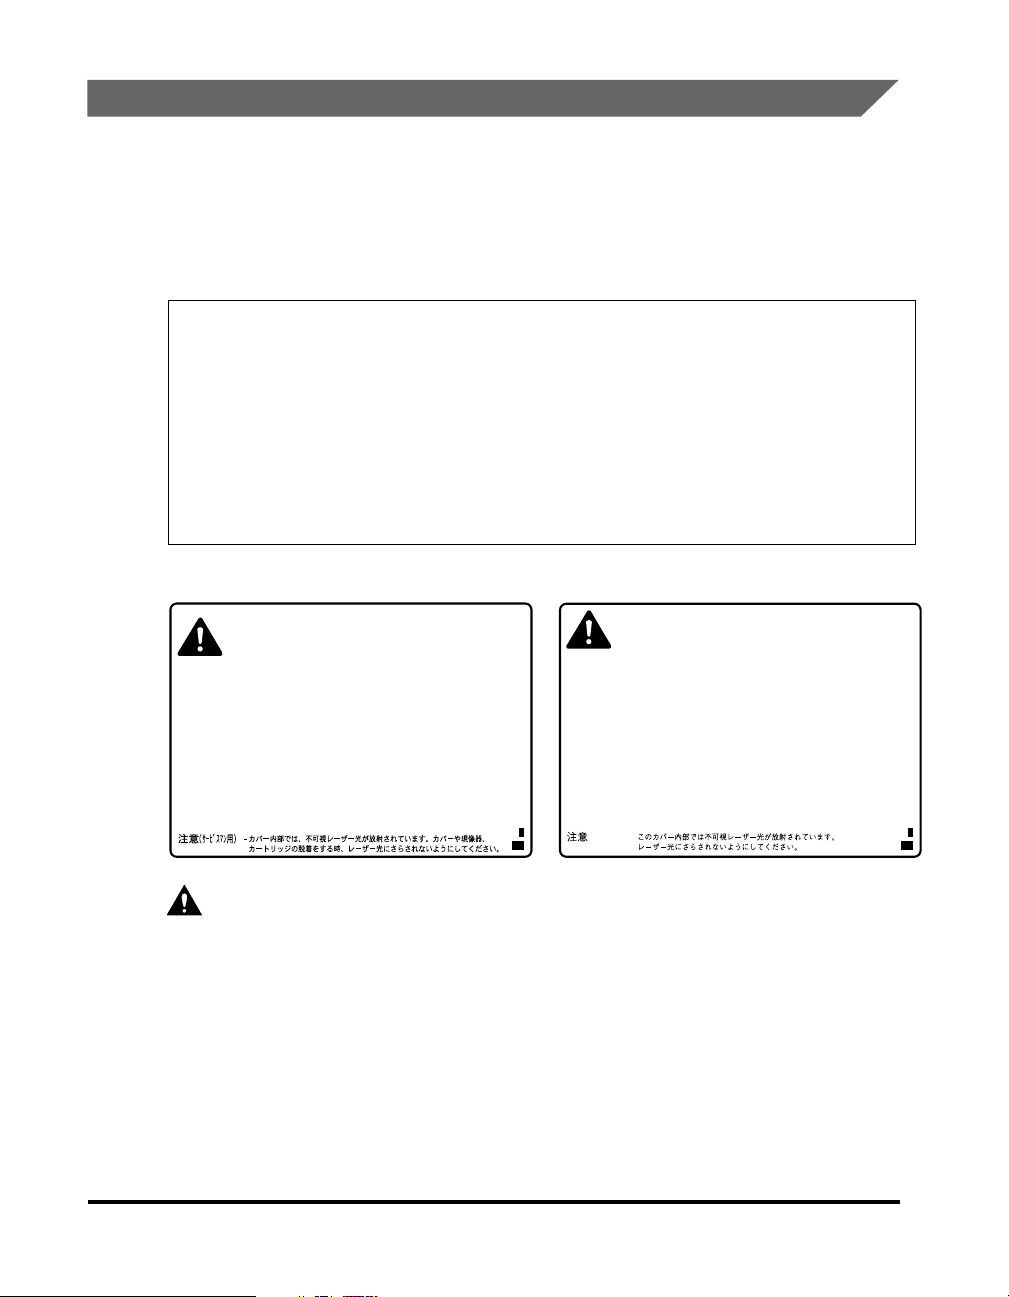
The label shown below is attached to the laser scanner unit inside the machine.
Invisible laser radiation when opening the cover,
DANGER-
removing developing assembly, or cartridges.
AVOID DIRECT EXPOSURE TO BEAM.
INVISIBLE LASER RADIATION WHEN OPENING
CAUTION-
THE COVER, REMOVING DEVELOPING ASSEMBLY.
AVOID EXPOSURE TO BEAM.
ATTENTION
VORSICHT ATTENZIONE
PRECAUCIÓN
VARO! VARNING! ADVARSEL! ADVARSEL -
RAYONNEMENT LASER INVISIBLE EN CAS D’OUVERTURE DU COUVERCLE.
-
DU DÉMONTAGE DE L’ENSEMBLE DE DÉVELOPPEMENT.
EVITER TOUTE EXPOSITION DIRECTE AVEC LE FAISCEAU.
UNSICHTBARE LASERSTRAHLUNG, WENN ABDECKUNG GEÖFFNET.
NICHT DEM STRAHL AUSSETZEN.
EMISSIONE DI UN RAGGIO LASER INVISIBILE A SEGUITO DELL’ APERTURA
-
DELLA COPERTURA O DELLA RIMOZIONE DEL GRUPPO DI SVILUPPO.
EVITARE L’ESPOSIZIONE DIRETTA AL RAGGIO LASER.
RADIACIÓN LÁSER INVISIBLE EN CASO DE ABRIR LA CUBIERTA Y RETIRAR
-
LA UNIDAD REVELADORA. EVITE LA EXPOSICIÓN AL HAZ LÁSER.
AVATTAESSA KEHITYSYKSIKÖN POISSAOLLESSA OLET ALTTINA
NÄKYMÄTTÖMÄLLE LASERSÄTEILYLLE. ÄLÄ KATSO SÄTEESEEN.
OSYNLIG LASERSTRÄLNING NÄR DENNA DELÄR ÖPPNAD OCH.
FRAMKALLAREN ÄRURTAGEN. BETRAKTA EJ STRÄLEN.
USYNLIG LASER STRÅLING, NÅR DÆKSLET ÅBNES FOR AT FJERNE
FRAMKALLALDEREN. UNDGÅAT BLIVE RAMT AFSTRÅLEN.
USYNLIG LASERSTRÅLING NÅR DEKSELEÍ ÅPNES OG.
LASERENHETEN TASUT. IKKE SE DIREKTE PÅ STRÅLEN.
DANGERCAUTION-
ATTENTION
VORSICHT -
ATTENZIONE
PRECAUCION
VARO! -
VARNING! -
ADVARSEL! -
ADVARSEL -
Invisible laser radiation when open.
AVOID DIRECT EXPOSURE TO BEAM.
INVISIBLE LASER RADIATION WHEN OPEN.
AVOID EXPOSURE TO BEAM.
RAYONNEMENT LASER INVISIBLE EN CAS D’OUVERTURE. EXPOSITION
-
DANGEREUSE AU FAISCEAU.
UNSICHTBARE LASERSTRAHLUNG, WENN ABDECKUNG GEÖFFNET. NICHT
DEM STRAHL AUSSETZEN.
RADIAZIONE LASER INVISIBLE IN CASO DI APERTURA. EVITARE
-
L’ESPOSIZIONE AL FASCIO.
RADIACION LASER INVISIBLE CUANDO SE ABRE. EVITAR EXPONERSE AL
-
RAYO.
AVATTAESSA OLET ALTTIINA NÄKYMÄTTÖMÄLLE LASERSÄTEILYLLE.
ÄLÄ KATSO SÄTEESEEN.
OSYNLIG LASERSTRÄLNING NAR DENNA DELÄR ÖPPNAD.
BETRAKTA EJ STRÄLEN.
USYNLIG LASER STRÅLING, NÅR DENNE ER ÅBEN.
UNDGÅ BESTRÅLING.
USYNLIG LASERSTRÅLING NÅR DEKSEL ÅPNES.
UNNGÅ EKSPONERING FOR STRÅLEN.
xii
CAUTION
Use of controls, adjustments, or performance of procedures other than those
specified in this manual may result in hazardous radiation exposure.
Page 14

International Energy Star Program
Trademarks
Canon, the Canon logo, and imageCLASS are trademarks of Canon Inc.
Other product and company names herein may be the trademarks of their
respective owners.
Copyright
Copyright 2003 by Canon Inc. All rights reserved.
No part of this publication may be reproduced or transmitted in any form or by any
means, electronic or mechanical, including photocopying and recording, or by any
information storage or retrieval system without the prior written permission of
Canon Inc.
As an ENERGY STAR® Partner, Canon USA, Inc. has determined that
this copier model meets the ENERGY STAR
efficiency.
The International ENERGY STAR
international program that promotes energy saving through the use of
computers and other office equipment. The program backs the
development and dissemination of products with functions that effectively
reduce energy consumption. It is an open system in which business
proprietors can participate voluntarily. The targeted products are office
equipment, such as computers, displays, printers, facsimiles, and copiers.
The standards and logos are uniform among participating nations.
®
Office Equipment Program is an
®
Program for energy
xiii
Page 15

Disclaimers
The information in this document is subject to change without notice.
CANON INC. MAKES NO WARRANTY OF ANY KIND WITH REGARD TO THIS
MATERIAL, EITHER EXPRESS OR IMPLIED, EXCEPT AS PROVIDED HEREIN,
INCLUDING WITHOUT LIMITATION, THEREOF, WARRANTIES AS TO
MARKETABILITY, MERCHANTABILITY, FITNESS FOR A PARTICULAR
PURPOSE OF USE OR AGAINST INFRINGEMENT OF ANY PATENT. CANON
INC. SHALL NOT BE LIABLE FOR ANY DIRECT, INCIDENTAL, OR
CONSEQUENTIAL DAMAGES OF ANY NATURE, OR LOSSES OR EXPENSES
RESULTING FROM THE USE OF THIS MATERIAL.
Legal Limitations on the Usage of Your Product and the Use of Images
Using your product to scan, print or otherwise reproduce certain documents, and
the use of such images as scanned, printed or otherwise reproduced by your
product, may be prohibited by law and may result in criminal and/or civil liability. A
non-exhaustive list of these documents is set forth below. This list is intended to be
a guide only. If you are uncertain about the legality of using your product to scan,
print or otherwise reproduce any particular document, and/or of the use of the
images scanned, printed or otherwise reproduced, you should consult in advance
with your legal advisor for guidance.
xiv
Paper Money Traveles Checks
Money Orders Food Stamps
Certificates of Deposit Passports
Postage Stamps
(canceled or uncanceled)
Identifying Badges or Insignias Internal Revenue Stamps
Selective Service or Draft
Papers
Checks or Drafts Issued by
Governmental Agencies
Motor Vehicle Licenses and
Certificates of Title
Immigration Papers
(canceled or uncanceled)
Bonds or Other Certificates of Indebtedness
Stock Certificates
Copyrighted Works/Works of Art without
Permission of Copyright Owner
Page 16
Important Safety Instructions
Please read these "Important Safety Instructions" thoroughly before operating the
machine. As these instructions are intended to prevent injury to the user or other
persons or destruction of property, always pay attention to these instructions. Also,
since it may result in unexpected accidents or injuries, do not perform any operation
unless otherwise specified in the manual. Improper operation or use of this
machine could result in personal injury and/or damage requiring extensive repair
that may not be covered under your Limited Warranty.
Installation
WARNING
Do not install the machine near alcohol, paint thinner or other flammable substances.
If flammable substances come into contact with electrical parts inside the machine, it
may result in a fire or electrical shock.
Do not place the following items on the machine. If these items come into contact
with a high-voltage area inside the machine, it may result in a fire or electrical shock.
If these items are dropped or spilled inside the machine, immediately turn OFF the
main power switch, and disconnect the power cord from the power outlet. Then,
contact your service representative.
- Necklaces and other metal objects
- Cups, vases, flowerpots, and other containers filled with water or liquids
CAUTION
Do not install the machine in unstable locations, such as unsteady platforms or
inclined floors, or in locations subject to excessive vibrations, as this may cause the
machine to fall or tip over, resulting in personal injury.
Never block the ventilation slots and louvers on the machine. These openings are
provided for proper ventilation of working parts inside the machine. Blocking these
openings can cause the machine to overheat. Never place the machine on a soft
surface, such as a sofa or rug.
xv
Page 17

Do not install the machine in the following locations:
- A damp or dusty location
- A location near water faucets or water
- A location exposed to direct sunlight
- A location subject to high temperatures
- A location near open flames
Power Supply
WARNING
Do not damage or modify the power cord. Also, do not place heavy objects on the
power cord, or pull on or excessively bend it, as this could cause electrical damage
and result in a fire or electrical shock.
Keep the power cord away from a heat source; failure to do this may cause the power
cord coating to melt, resulting in a fire or electrical shock.
Do not connect or disconnect the power cord with wet hands, as this may result in
electrical shock.
Do not connect the power cord to a multiplug power strip, as this may cause a fire or
electrical shock.
Do not bundle up or tie the power cord in a knot, as this may result in a fire or
electrical shock.
Insert the power plug completely into the power outlet, as failure to do so may result
in a fire or electrical shock.
Do not use power cords other than the power cord provided, as this may result in a
fire or electrical shock.
As a general rule, do not use extension cords. Using an extension cord may result in
a fire or electrical shock. If an extension cord must be used, however, use one rated
for voltages of 120 V AC and over, untie the cord binding, and insert the power plug
completely into the extension cord outlet to ensure a firm connection between the
power cord and the extension cord.
xvi
CAUTION
Do not use power supplies with voltages other than those specified herein, as this
may result in a fire or electrical shock.
Always grasp the power plug when disconnecting the power cord. Pulling on the
power cord may expose or snap the core wire, or otherwise damage the power cord.
If the power cord is damaged, this could cause current to leak, resulting in a fire or
electrical shock.
Leave sufficient space around the power plug so that it can be unplugged easily. If
objects are placed around the power plug, you will be unable to unplug it in an
emergency.
Page 18
Handling
WARNING
Do not attempt to disassemble or modify the machine. There are high-temperature
and high-voltage components inside the machine which may result in a fire or
electrical shock.
If the machine makes strange noises, or gives off smoke, heat, or strange smells,
immediately turn OFF the main power switch, and disconnect the power cord from
the power outlet. Then, contact your service representative. Continued use of the
machine in this condition may result in a fire or electrical shock.
Do not use highly flammable sprays near the machine. If gas from these sprays
comes into contact with the electrical components inside the machine, it may result
in a fire or electrical shock.
To avoid damage to the power cord and creating a fire hazard, always turn OFF the
main power switch, and unplug the interface cable when moving the machine.
Otherwise, the power cord or interface cable may be damaged, resulting in a fire or
electrical shock.
Do not drop paper clips, staples, or other metal objects inside the machine. Also, do
not spill water, liquids, or flammable substances (alcohol, benzene, paint thinner,
etc.) inside the machine. If these items come into contact with a high-voltage area
inside the machine, it may result in a fire or electrical shock. If these items are
dropped or spilled inside the machine, immediately turn OFF the main power switch,
and disconnect the power cord from the power outlet. Then, contact your service
representative.
CAUTION
Do not place heavy objects on the machine, as they may tip over or fall resulting in
personal injury.
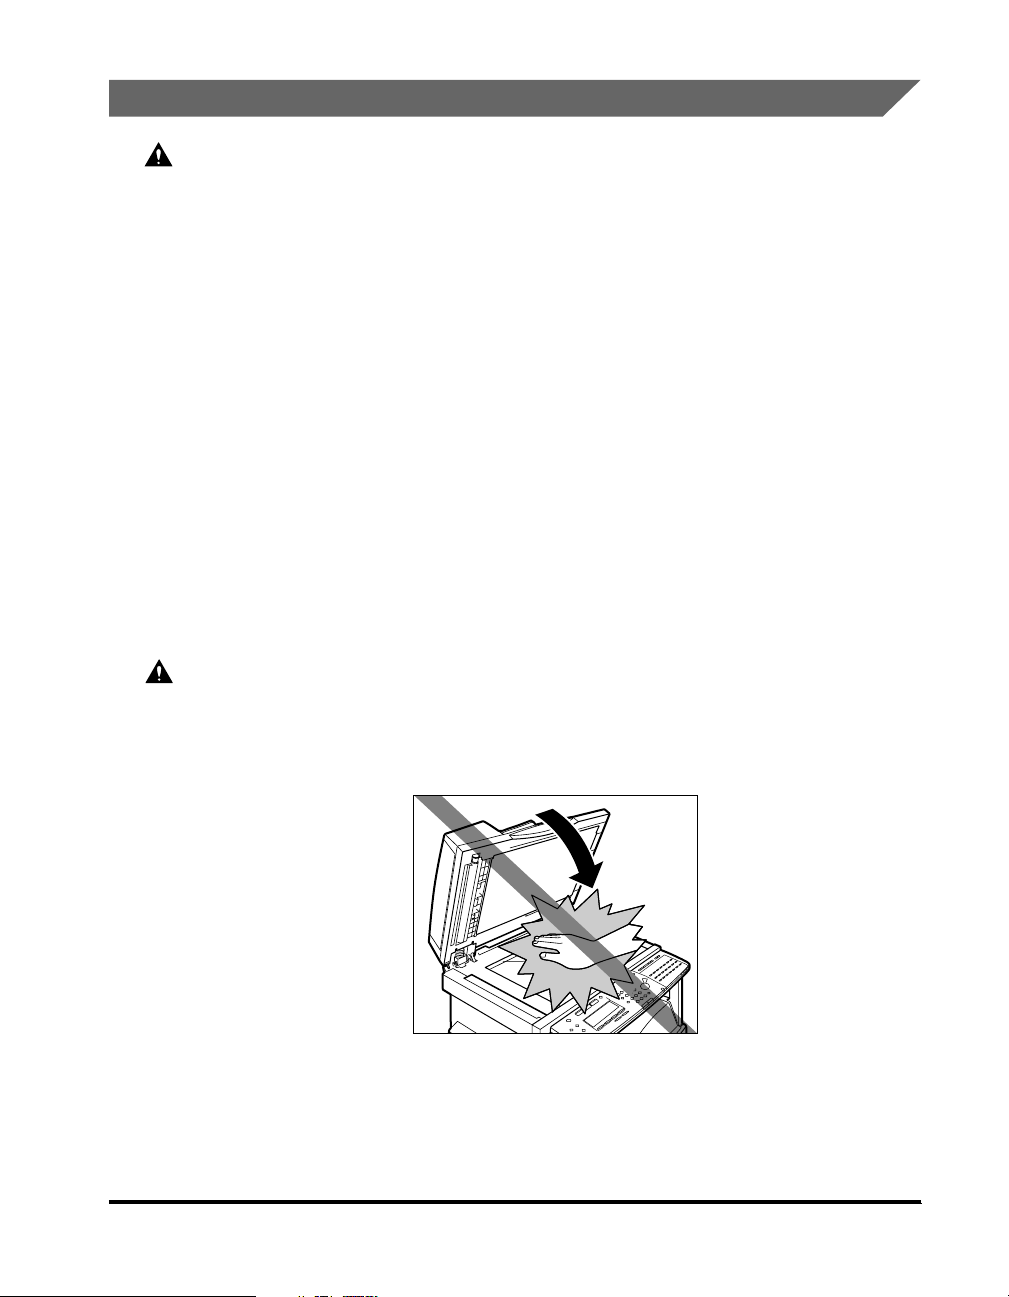
Close the feeder/platen glass cover gently to avoid catching your hands, as this may
result in personal injury.
Do not press down hard on the feeder/platen glass cover when using the platen glass
to make copies of thick books, etc. Doing so may damage the platen glass and result
in personal injury.
Do not touch the paper output area while the machine is copying or printing, as this
may result in personal injury.
xvii
Page 19

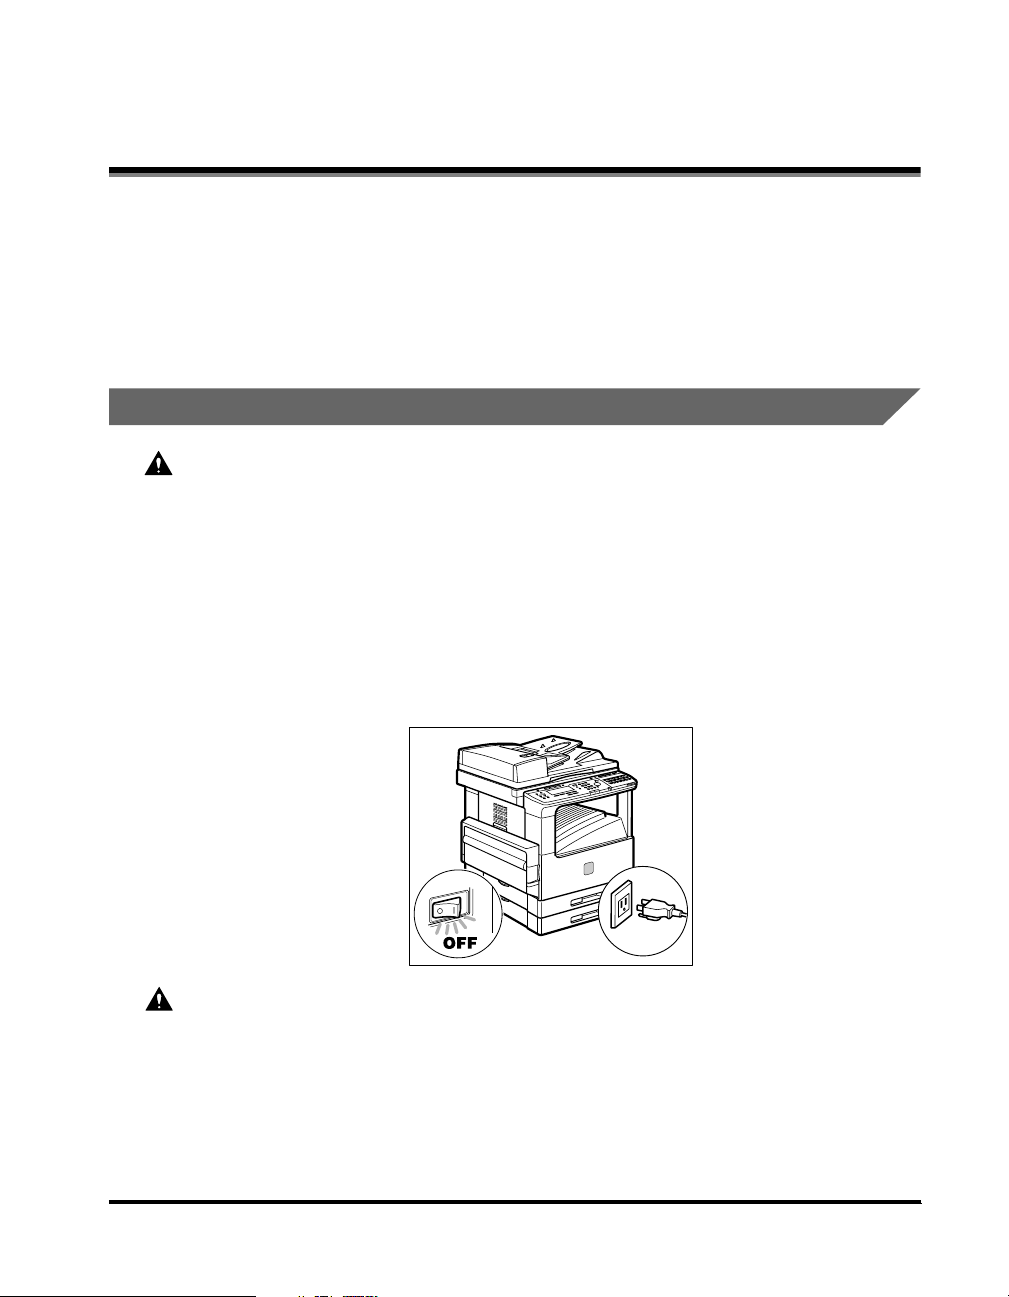
Turn OFF the main power switch for safety when the machine will not be used for a
long period of time, such as overnight. Also, disconnect the power cord for safety
when the machine will not be used for an extended period of time, such as during
consecutive holidays.
The laser beam can be harmful to human bodies. Since radiation emitted inside the
product is completely confined within protective housings and external covers, the
laser beam cannot escape from the machine during any phase of user operation.
Read the following remarks and instructions for safety.
Never open covers other than those instructed in this manual.
Do not remove the caution label attached to the cover of the laser scanner unit.
If the laser beam escapes from the machine, exposure may cause serious damage to
your eyes.
Maintenance and Inspections
WARNING
When cleaning the machine, first turn OFF the main power switch, then disconnect
the power cord. Failure to observe these steps may result in a fire or electrical shock.
Disconnect the power cord from the power outlet regularly, and clean the area around
the base of the power plug's metal pins and the power outlet with a dry cloth to
ensure that all dust and grime is removed. If the power cord is connected for a long
period of time in a damp, dusty, or smoky location, dust can build up around the
power plug and become damp. This may cause a short circuit and result in a fire.
Clean the machine using a slightly dampened cloth with a mild detergent mixed with
water. Do not use alcohol, benzene, paint thinner, or other flammable substances.
Check detergent for flammability prior to use. If flammable substances come into
contact with a high-voltage area inside the machine, it may result in a fire or electrical
shock.
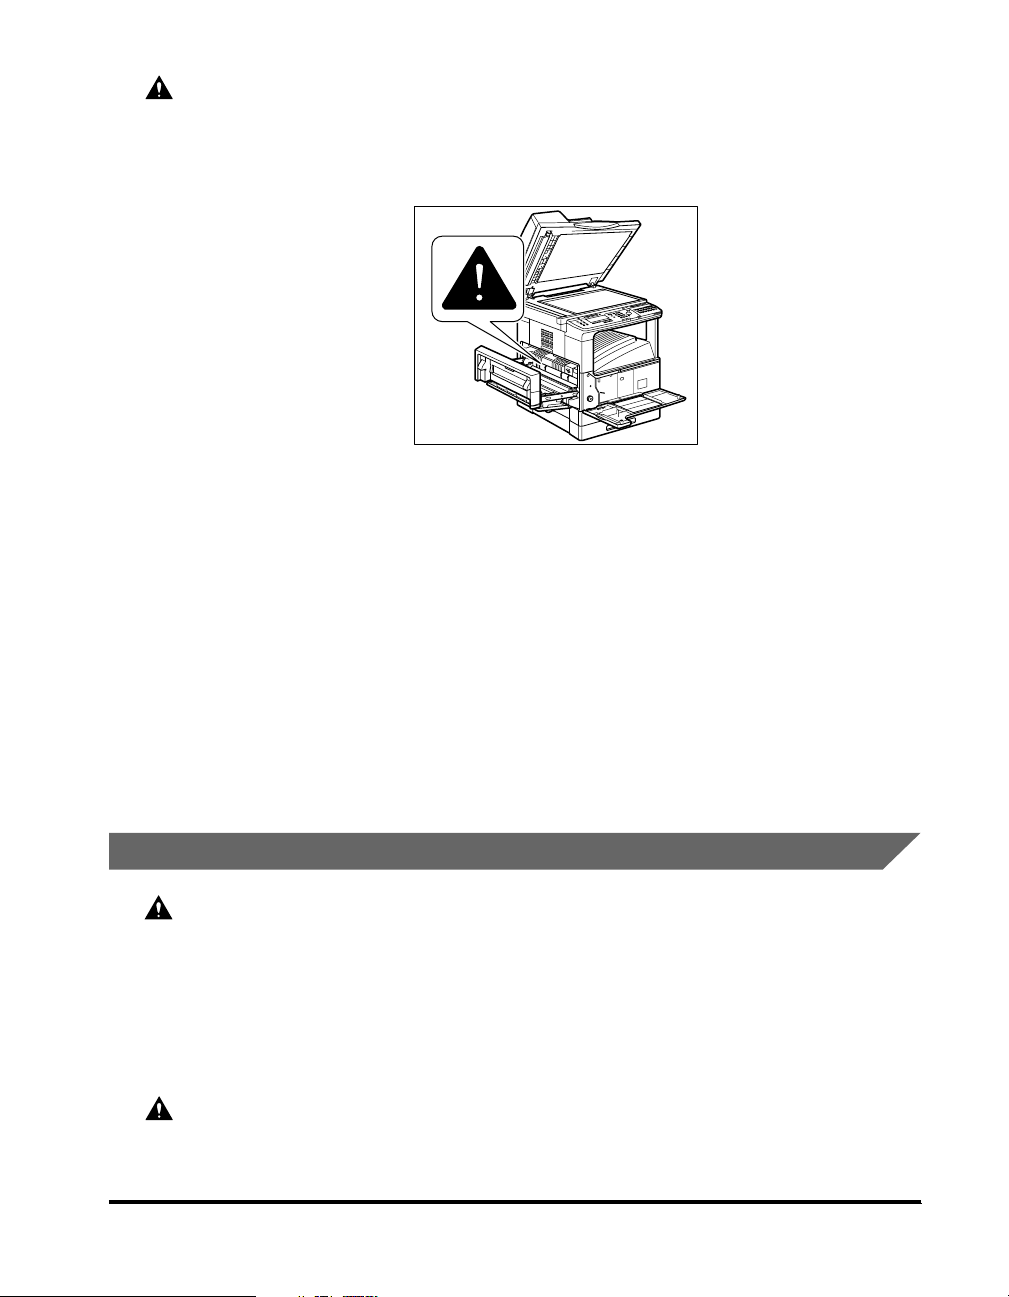
There are some areas inside the machine which are subject to high-voltages. When
removing jammed paper or when inspecting the inside of the machine, do not allow
necklaces, bracelets, or other metal objects to touch the inside of the machine, as
this may result in burns or electrical shock.
Do not burn or throw used toner cartridges into open flames, as this may cause the
toner remaining inside the cartridge to ignite, resulting in burns or a fire.
xviii
Page 20
CAUTION
The fixing unit and its surroundings inside the machine may become hot during use.
When removing jammed paper or when inspecting the inside of the machine, do not
touch the fixing unit and its surroundings, as doing so may result in burns or
electrical shock.
When removing jammed paper or replacing the toner cartridge, take care not to allow
the toner to come into contact with your hands or clothing, as this will dirty your
hands or clothing. If they become dirty, wash them immediately with cold water.
Washing them with warm water will set the toner, and make it impossible to remove
the toner stains.
When removing paper which has become jammed inside the machine, remove the
jammed paper gently to prevent the toner on the paper from scattering and getting
into your eyes or mouth. If the toner gets into your eyes or mouth, wash them
immediately with cold water and immediately consult a physician.
When loading paper or removing jammed originals or paper, take care not to cut your
hands on the edges of the originals or paper.
When removing a used toner cartridge, remove the cartridge carefully to prevent the
toner from scattering and getting into your eyes or mouth. If the toner gets into your
eyes or mouth, wash them immediately with cold water and immediately consult a
physician.
Consumables
WARNING
Do not burn or throw used toner cartridges into open flames, as this may cause the
toner remaining inside the cartridges to ignite, resulting in burns or a fire.
Do not store toner cartridges or copy paper in places exposed to open flames, as this
may cause the toner or paper to ignite, resulting in burns or a fire.
When discarding used toner cartridges, put the cartridges in a bag to prevent the
toner remaining inside the cartridges from scattering, and dispose of them in a
location away from open flames.
CAUTION
Keep toner and other consumables out of the reach of small children. If these items
are ingested, consult a physician immediately.
xix
Page 21

Other Warnings
WARNING
For cardiac pacemaker users:
This product generates a low level magnetic field. If you use a cardiac pacemaker and
feel abnormalities, please move away from the product and consult your doctor.
Set-Up Help & Product Registration (USA)
Before you unpack your new machine, CALL 1-800-828-4040 for help with set-up
and operation. You can also register your machine with us. Call the Canon USA
Consumer Products Information Center between 8 a.m. and 8 p.m. EST, Monday
through Friday, except holidays.
Machine Model: imageCLASS 2300
Serial Number: (located on the label at the back of the machine)
If you have any problems with your machine, DO NOT return it to your retailer.
Call 1-800-828-4040.
Canon Canada Information/Service Center
Should service be necessary please call the following number for information
regarding Personal Copier Authorized Service Facilities.
Canon Canada, Inc. 6390 Dixie Road, Mississauga, Ontario L5T 1P7
Call 1-800-263-1121.
Supplies & Accessories
Call or visit your local retailer/dealer for genuine Canon supplies. You can also order
genuine supplies and accessories for your machine from Canon. Call us at:
1-800-828-4040 Canon USA Consumer Products Information Center
1-800-OK-CANON Canon Canada Information/Service Center
Please have your credit card ready. Local sales tax, shipping and handling charges
are added to each other. Express shipments are available.
Cartridges
Canon Cartridge P
xx
Page 22

Transparencies
Canon Type E
Power Cord
NOTE
All items are subject to availability. Accessories are also available for other Canon
consumer products.
xxi
Page 23

xxii
Page 24

Introduction
This chapter describes the features of the machine, and the parts and their functions.
Where to Find Help. . . . . . . . . . . . . . . . . . . . . . . . . . . . . . . . . . . . . . . . . . . . . . . . . . . . . . 1-2
Set-Up Sheets . . . . . . . . . . . . . . . . . . . . . . . . . . . . . . . . . . . . . . . . . . . . . . . . . . . . . . . . . . . . . . .1-2
Book Manuals. . . . . . . . . . . . . . . . . . . . . . . . . . . . . . . . . . . . . . . . . . . . . . . . . . . . . . . . . . . . . . . .1-3
PDF Manuals and Software (CD-ROMs) . . . . . . . . . . . . . . . . . . . . . . . . . . . . . . . . . . . . . . . . . . .1-4
Features of the imageCLASS 2300 . . . . . . . . . . . . . . . . . . . . . . . . . . . . . . . . . . . . . . . . .1-5
Model Configurations . . . . . . . . . . . . . . . . . . . . . . . . . . . . . . . . . . . . . . . . . . . . . . . . . . . . . . . . . .1-5
Settint Up Machine Functions. . . . . . . . . . . . . . . . . . . . . . . . . . . . . . . . . . . . . . . . . . . . . . 1-6
Parts and Their Functions. . . . . . . . . . . . . . . . . . . . . . . . . . . . . . . . . . . . . . . . . . . . . . . . .1-7
External View . . . . . . . . . . . . . . . . . . . . . . . . . . . . . . . . . . . . . . . . . . . . . . . . . . . . . . . . . . . . . . . .1-7
Internal View . . . . . . . . . . . . . . . . . . . . . . . . . . . . . . . . . . . . . . . . . . . . . . . . . . . . . . . . . . . . . . . . .1-8
Control Panel Parts and Functions . . . . . . . . . . . . . . . . . . . . . . . . . . . . . . . . . . . . . . . . . . . . . . . .1-9
1
CHAPTER
1-1
Page 25

Introduction
1
Where to Find Help
The documentations for the imageCLASS 2300 are provided in the following forms:
Set-Up Sheets
Book Manuals
PDF Manuals and Software (CD-ROMs)
NOTE
The PDF manuals and software are only provided with the Network Model of this
machine.
Set-Up Sheets
The Set-Up Sheets are only used once at the very beginning to install and set up
the machine.
■ Set-Up Sheet for the Machine
This is the first documentation you should refer to for installing and setting up the
machine. It is located on the feeder cover on top of the machine.
■ Set-Up Sheet for Networking and Printing
Refer to this documentation to connect and set up the imageCLASS 2300 Network Model
for networking and printing functions.
NOTE
Set-Up Sheet for Networking and Printing is only provided with the Network Model of this
machine.
1-2
Where to Find Help
Page 26

Book Manuals
The following book manuals are provided with the machine:
■ Basic Guide (This Document)
Explains the basic operations of the machine's major functions. Keep this manual handy
for easy reference.
■ Reference Guide
Explains the machine operations common to all functions (i.e., entering characters). Also
covers the machine settings, maintenance, and troubleshooting.
■ Copying Guide
Covers the copying function of the machine in detail.
■ Facsimile Guide
Covers the fax function of the machine in detail.
■ Sending Guide
Explains how to set up the machine to send and receive Internet Fax (I-Fax).
NOTE
The Sending Guide is only provided with the Network Model of this machine.
1
Introduction
Where to Find Help
1-3
Page 27

Introduction
1
PDF Manuals and Software (CD-ROMs)
The imageCLASS 2300 Network Model comes with two CD-ROMs: Driver Software
CD-ROM and Network User Software CD-ROM.
■ Driver Software CD-ROM
The Driver Software CD-ROM contains the following manuals and software:
PCL Printer Guide
PCL Driver Guide
Fax Driver Guide with Cover Sheet Editor
Adobe Acrobat Reader
CD-ROM Menu
Printer Drivers
Fax Driver
Fonts
■ Network User Software CD-ROM
The Network User Software CD-ROM contains the following manuals and software:
Network Guide
Remote UI Guide
Adobe Acrobat Reader
Utility Software
NOTE
For details on the software listed above, refer to the PDF manuals and readme.txt files in
each program folder on the CD-ROM.
1-4
Where to Find Help
Page 28

Features of the imageCLASS 2300
Model Configurations
The imageCLASS 2300 comes in two configurations: the standard imageCLASS
2300 and the imageCLASS 2300 Network Model.
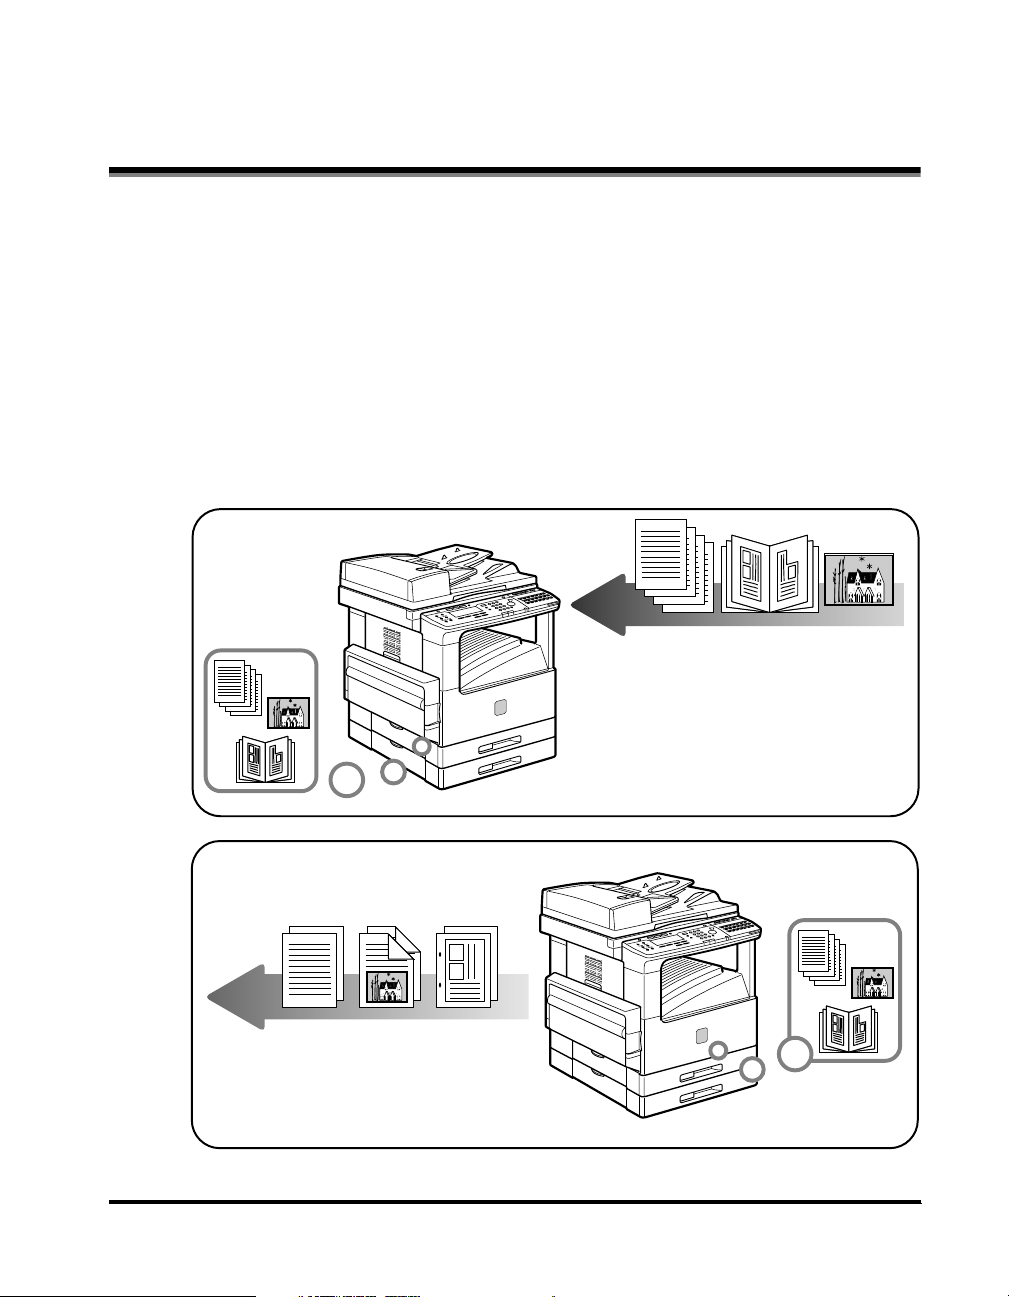
■ imageCLASS 2300
The standard imageCLASS 2300 lets you copy and fax documents placed on the
machine. It can perform multiple jobs without waiting for the current job to be finished. For
example, you can copy a document while the machine is sending a fax document
scanned into the memory.
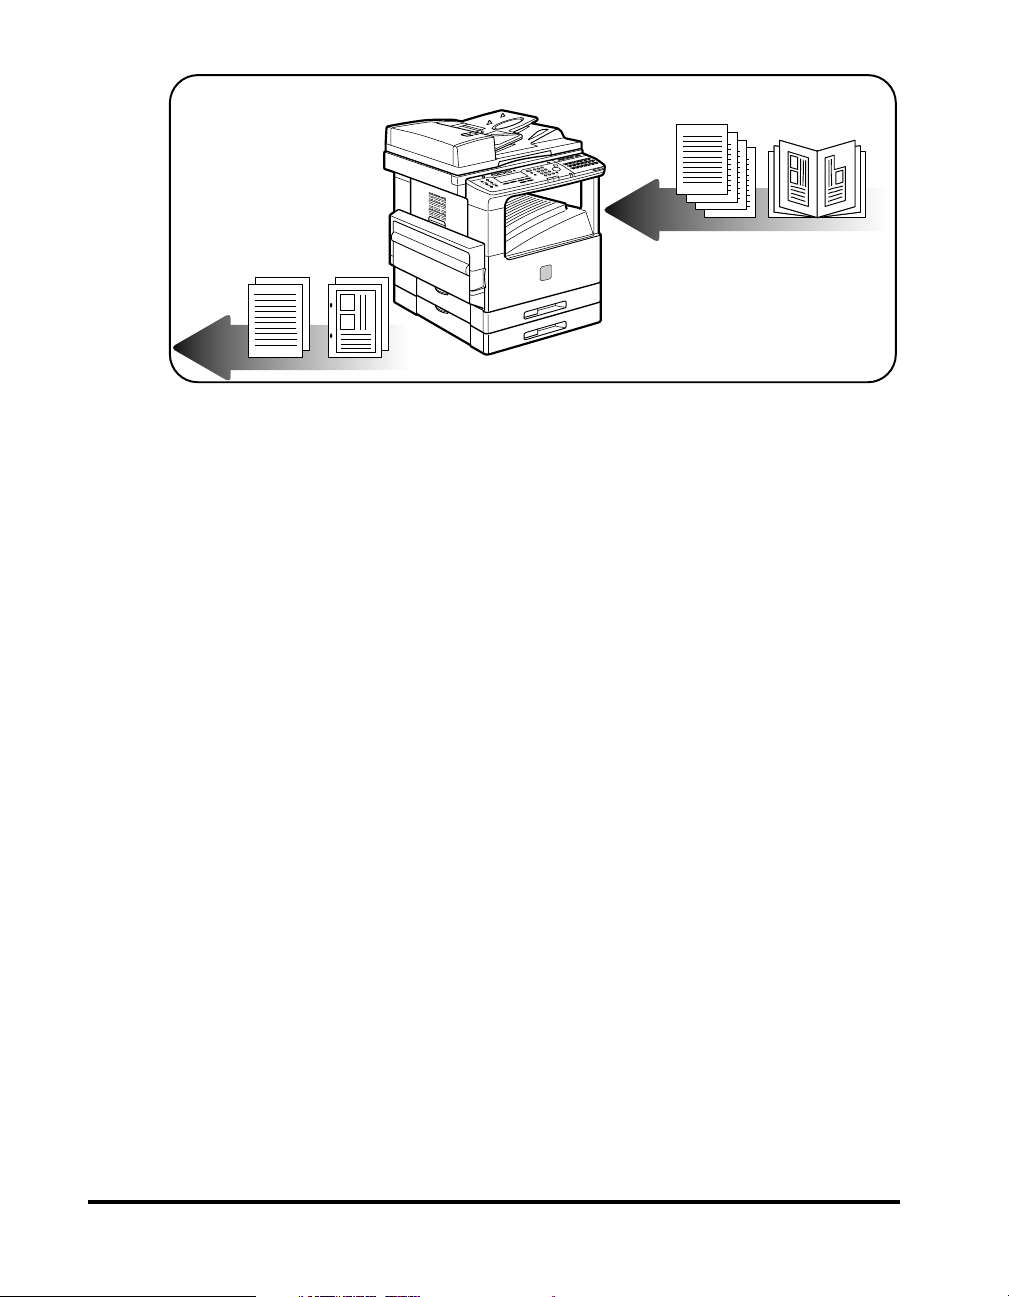
■ imageCLASS 2300 Network Model
In addition to what the standard imageCLASS 2300 offers, the Network Model also
features:
Sending and receiving Internet Fax (I-Fax)
Printing directly from a computer and through a network
Setting and monitoring the network status of the machine from the Remote User
Interface (Remote UI)
1
Introduction
Features of the imageCLASS 2300
1-5
Page 29

Introduction
1
Setting Up Machine Functions
It is necessary to set up certain functions before using it on a network, as a printer,
and with the Fax and I-Fax function.
To set up the functions, refer to the following instructions:
■ Setting Up and Connecting to the Network
See the Network Guide.
■ Installing the Printer Driver
See the PCL Driver Guide.
■ Installing the Fax Driver
See the Fax Driver Guide with Cover Sheet Editor.
■ Date and Time Settings
See "Setting the Current Date and Time," on p. 5-5.
■ System Manager Settings
See Chapter 5, "System Manager Settings," in the Reference Guide.
1-6
Setting Up Machine Functions
Page 30
Parts and Their Functions
This section provides you with the names and functions of all the parts on the
outside and inside of the main unit, and the control panel.
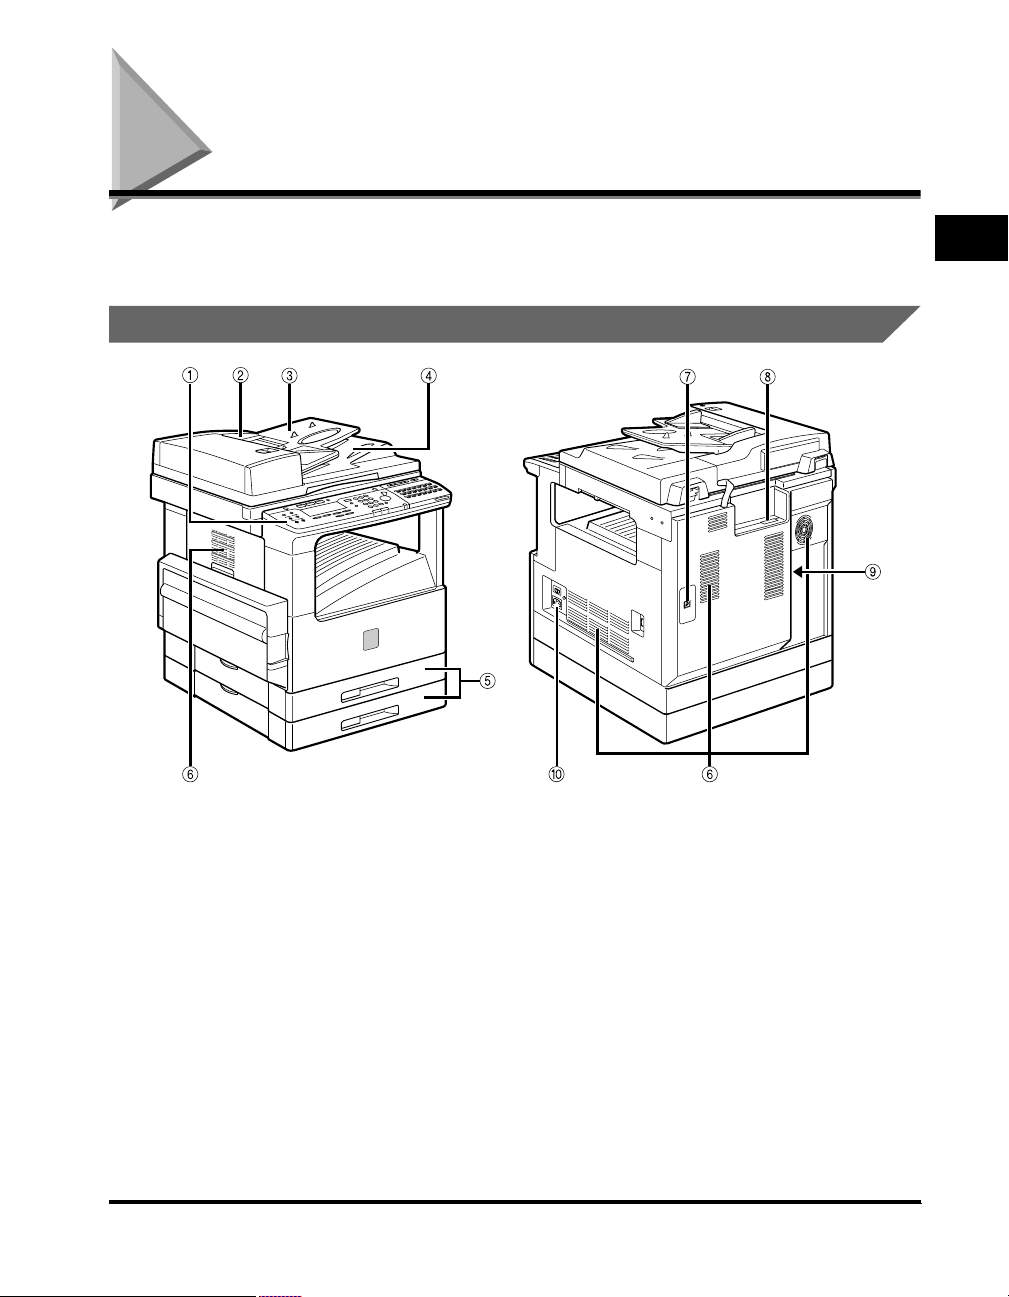
External View
Front View Rear View
1
Introduction
aaaaControl Panel
Includes the keys, LCD display, and indicators
required for operating the machine. (See
"Control Panel Parts and Functions," on p. 1-9.)
bbbbFeeder
You can place a stack of originals in the original
supply tray, and they are automatically fed to the
platen glass for copying.
ccccOriginal Supply Tray
Originals can be automatically sent to the platen
glass by placing them in the original supply tray.
ddddOriginal Output Area
Originals scanned from the original supply tray
are output to the original output area.
eeeePaper Drawers
Each paper drawer holds up 250 sheets of paper
(20 lb bond (80 g/m2))
ffffVentilation Slot
Heat produced in the machine escapes from
here.
ggggTelephone Line Jack
Connect the telephone line to this jack for fax
operations.
hhhh10Base-T/100Base-TX Port
Connect the LAN cable to this port for network
printing and I-Fax operations. Available in the
Network Model only.
Parts and Their Functions
1-7
Page 31

Introduction
1
iiiiPrinter Ports
Connect the printer cable (USB or parallel) to the
matching port. Available in the Network Model
only.
jjjjMain Power Switch
Internal View
aaaaUnderside of the Feeder
This holds originals in place on the platen glass.
bbbbPlaten Glass
Place originals here when scanning books, thick
originals, thin originals, etc.
ccccFront Cover
You can open this cover to clear paper jams and
replace the toner cartridge.
ddddPaper Feeding Dial
Turn this dial counterclockwise to remove
jammed paper.
eeeeLower Left Cover
1
2
0
9
8
7
3456
ffffStack Bypass
Feeds transparencies and nonstandard or
alternate paper stock.
ggggLeft Cover
Open this cover to remove jammed paper and to
replace the toner cartridge.
hhhhToner Cartridge
Pull out the handle of this cartridge when
replacing the toner.
iiiiUpper Left Cover
Open this cover to remove jammed paper.
jjjjScanning Area
Originals placed in the feeder are scanned here.
1-8
Parts and Their Functions
Page 32

Control Panel Parts and Functions
One-Touch Speed Dialing Panels Closed
Display Contrast
Special Features
Collate
Reduce
Enlarge
Two Page Separation
Frame Erase
COPY FAX
21
43
PRINT
F4F1 F2 F3
OKBACK
Monitor
Reset
Additional Functions
Interrupt
In Use Memory
ABC
DEF
@.
123
GHI
JKL
MNO
456
PRS
TUV
WXY
789
SYMBOLSOPER
0
Alarm
1
Energy Saver
Clear
C
Stop
Start
ID
Power
Directory
Coded
Dial
Pause/
Redial
Hook Tone Line/Mail Direct TX
201918171615
~
43
07060504030201
14131211100908
21
~
42
22
63
Introduction
aaaaDisplay Contrast dial
Rotate to adjust the contrast of the LCD display.
bbbbLCD display
Displays messages and prompts during
operation. Displays selections, text, numbers,
and names when registering information.
ccccCOPY, FAX, PRINT keys
Press to switch the machine to the Copy, Fax or
Printer functions. The PRINT key only functions
in the Network Model.
ddddMonitor key
Press to check the transaction or copying status.
eeeeReset key
Press to return to the Basic Features screen, or
to stop scanning or sending documents.
ffffNumeric keys
Press to enter the numbers or letters.
ggggClear key
Press to delete the numbers or letters entered.
hhhhEnergy Saver key
Press to enter or cancel the Energy Saver mode.
When the machine is in the Energy Saver mode,
only the Energy Saver indicator and the main
power indicator light and the other keys and
indicators are turned OFF.
iiiiDirectory key
Press to search for fax/telephone numbers by
the name under which they are registered for
speed dialing and then use the number for
dialing.
jjjjCoded Dial key
Press this key and a three-digit code to dial a
fax/telephone number that you have registered
for coded speed dialing.
kkkkHook key
Press to activate or deactivate the telephone
line.
llllPause/Redial key
Press to redial the last number dialed when the
display shows the Basic Features screen or to
enter a pause between or after dialing or
registering the telephone/fax numbers.
mmmmTone key
Switches to tone dialing temporarily when your
machine is connected to a pulse line.
nnnnLine/Mail key
Press to select the telephone line or send an
I-fax. Only functions in the Network Model.
ooooDirect TX indicator
Lights when Direct Sending is selected as the
sending method.
Parts and Their Functions
1-9
Page 33

Introduction
1
ppppDirect TX key
Press to use the Direct Sending method, which
enables you to send a document ahead of other
documents stored in memory.
qqqqOne-touch speed dialing panels
The first panel displays keys 01 to 21. Open the
first panel to access keys 22 to 42. Open the
second panel to access keys 43 to 63. Open the
third panel to access the Fax function keys.
rrrrOne-touch speed dialing keys
Press to dial numbers registered under
one-touch speed dialing keys or access the Fax
functions when registered as program-one-touch
keys.
ssssMain Power indicator
Lights when the main power is turned ON.
ttttStop key
Press to return to the Basic Features screen, or
to stop scanning, printing copies or sending a
fax.
uuuuStart key
Press to start an operation.
vvvvID key
Press in order to use the Department ID
Management function.
wwwwAlarm lamp
Lights or blinks red when an error occurs. If the
alarm lamp blinks, solve the problem by following
the instructions on the LCD display. If the alarm
lamp maintains a steady red light, contact your
service representative.
xxxxIn Use Memory lamp
A light that blinks red or maintains a steady
green light when the machine is copying or there
are documents stored in memory.
yyyyInterrupt key
Press to interrupt a continuous copy job when
you need to make priority copies.
zzzzAdditional Functions key
Press to enter the Additional Functions menu.
AAAAOK key
Press to set a mode or function.
BBBBBACK key
Press to go back to the previous screen when
adjusting settings in a menu.
CCCCFunction keys (F1 to F4)
Select options that appear on the LCD display.
DDDDSpecial Features key
Press to set special copying features, such as
Two-Page Separation, Image Combination,
Margin, and Frame Erase.
EEEECopy shortcut keys (1 to 4)
Press to use registered special copying features.
The default settings are as follows:
1: Reduce
2: Enlarge
3: Two-Page Separation
4: Frame Erase
You can change the Copy Shortcut keys settings
in the Copy Settings menu from the Additional
Functions menu.
FFFFCollate key
Press to turn ON/OFF the finishing functions,
such as Collate or Rotate.
1-10
Parts and Their Functions
Page 34

One-Touch Speed Dialing Panels Opened
14
Delayed
Transmission
Memory
Reference
Stack Bypass
Settings
2
Advanced
Communication
Report
Stamp Pin Code
EGF
D
aaaaDelayed Transmission key
Press to set a time for delayed sending.
bbbbAdvanced Communication key
Press to set a document for advanced
communications such as polling sending/
receiving, confidential mailbox, relay broadcast,
and subaddress/password transmission.
ccccTransfer key
Press to use the transfer mode, or to cancel it.
ddddMemory Reception key
Press to turn ON/OFF the memory reception
function.
eeeeSpace key
Enters a space between letters and numbers
when registering information.
ffffSpeaker volume switch
Adjusts the speaker Volume in four levels.
ggggDelete key
During a step when you are registering a name,
press this key to delete the character you
entered last.
hhhhOK key
Press to set a mode or function.
iiii, , ▲, ▼ Cursor keys
Press to scroll through options and selections in
the menus on the display during data
registration, or to move the cursor left or right
during data registration.
3
TTI Selector
C
5
Memory
Transfer
Reception
+
A
0
jjjjClear key
Clears an entire entry during information
registration.
kkkk+ key
Press this key to enter a plus sign in a fax
number.
llllPin Code key
Displays the PIN code message so you can
enter a PIN code when dialing through a PBX
(Public Branch Exchange).
mmmmTTI Selector key
Enters a registered sender's name which is
printed at the top of the document you are
sending.
nnnnStamp key
Switches the machine in and out of the Stamp
mode.
ooooReport key
Prints reports about information registered in the
machine.
ppppStack Bypass Settings key
Press to set the paper size for the stack bypass.
qqqqMemory Reference key
Performs operations with documents currently
stored in memory, including printing a list of
documents, printing documents, sending
documents to another destination, or deleting
documents.
Space
9B
6
7
Delete
1
OKClear
Introduction
8
Parts and Their Functions
1-11
Page 35

Introduction
1
1-12
Parts and Their Functions
Page 36

Documents
CHAPTER
This chapter describes how to place original documents, and the types of documents you can
load on the machine.
Placing Originals (For Copying, Faxing, Scanning) . . . . . . . . . . . . . . . . . . . . . . . . . . . . .2-2
Orientation . . . . . . . . . . . . . . . . . . . . . . . . . . . . . . . . . . . . . . . . . . . . . . . . . . . . . . . . . . . . . . . . . .2-3
Platen Glass . . . . . . . . . . . . . . . . . . . . . . . . . . . . . . . . . . . . . . . . . . . . . . . . . . . . . . . . . . . . . . . . .2-4
Feeder . . . . . . . . . . . . . . . . . . . . . . . . . . . . . . . . . . . . . . . . . . . . . . . . . . . . . . . . . . . . . . . . . . . . .2-6
2
2-1
Page 37

Documents
2
Placing Originals (For Copying, Faxing, Scanning)
You can place originals on the platen glass or in the feeder, depending on the size
and type of paper that you are using, and the settings that you have specified.
■ Platen Glass
Place originals on the platen glass when scanning bound originals (such as books and
magazines), originals on heavy or lightweight paper, and transparencies.
■ Feeder
Place a stack of originals in the feeder ➞ press [Start]. The machine automatically scans
them into memory.
2-2
Placing Originals (For Copying, Faxing, Scanning)
Page 38

Orientation
You can place an original either vertically or horizontally. Always align the top edge
of your original with the back edge of the platen glass (by the arrow in the top left
corner), or with the back edge of the feeder.
Place the
original
face down.
Platen Glass
Place the original face down.
2
Documents
Vertical Placement
Horizontal Placement
Feeder
ABC
Place the
original
face up.
Vertical Placement
ABC
Place the
original
face up.
Horizontal Placement
NOTE
If the top edge of the original is not aligned with the back edge of the platen glass (by the
arrow in the top left corner), prints may not be made correctly, depending on the mode
you have set.
LTR originals can be placed either vertically or horizontally. However, the scanning speed
for horizontally placed originals is somewhat slower than for vertically placed originals.
You can place originals horizontally when scanning with a Preset Zoom, such as when
enlarging LTR to 11" x 17" .
Horizontally placed LTR originals are referred to as LTR .
11" x 17" and LGL originals must be placed horizontally.
To get the same output result when you are using the feeder as when the original is
placed on the platen glass, place the original upside-down and face up in the feeder.
Placing Originals (For Copying, Faxing, Scanning)
2-3
Page 39

Documents
2
Platen Glass
You should use the platen glass when scanning bound originals (such as books
and magazines), originals on heavy or lightweight paper, and transparencies.
1
Lift up the feeder.
IMPORTANT
This machine is equipped with an open/close sensor on the underside of the feeder
(see circled area in the above illustration). When placing originals on the platen
glass, lift the feeder about 11 7/8" (30 cm) so that the sensor detaches from the
underside of the feeder. If the sensor does not detach from the underside of the
feeder, the size of originals may not be detected correctly.
2-4
2
Place your original face down.
The surface that you want to scan into memory must be placed face down. Align
the top edge of your original with the back edge of the platen glass (by the arrow
in the top left corner).
Place books and other bound originals on the platen glass in the same way.
Placing Originals (For Copying, Faxing, Scanning)
Page 40

If you are enlarging an STMT or LTR original to 11" x 17" or LGL paper, place the
original horizontally on the platen glass, and align it with the STMT or LTR
marks.
3
Gently lower the feeder.
CAUTION
Close the feeder gently, to avoid catching your hand, as this may result in
personal injury.
Do not press down hard on the feeder when using the platen glass to make
copies of thick books. Doing so may damage the platen glass and result in
personal injury.
IMPORTANT
If you are placing originals on the platen glass, the size of the original is detected
after the feeder has been lowered. Be sure to lower the feeder before copying.
STMT originals and postcards cannot be detected. Follow the instructions on the
display and specify the original size or select the paper size.
NOTE
Remove the original from the platen glass when scanning is complete.
2
Documents
Placing Originals (For Copying, Faxing, Scanning)
2-5
Page 41

Documents
2
Feeder
Place a stack of originals in the feeder, and press [Start]. The machine
automatically scans them.
You can place the following originals in the original supply tray:
Item Specifications
Weight
Size
Tray Capacity 50 sheets (LTR or smaller)
IMPORTANT
Do not place the following types of originals in the feeder:
- Originals with tears or large binding holes
- Severely curled originals or originals with sharp folds
- Clipped or stapled originals
- Carbon backed paper or other originals that might not feed smoothly
- Transparencies and other highly transparent originals
Avoid scanning the same original using the feeder more than approximately 30 times.
Scanning the same original repeatedly may result in the original becoming folded or torn,
which in turn could cause a paper jam.
If the feeder rollers are dirty from scanning an original written in pencil, perform the
feeder cleaning procedure. (See Chapter 6, "Routine Maintenance," in the Reference
Guide.)
10 to 32 lb bond (37 to 128 g/m2)
Place very thin originals 10 to 14 lb bond (37 to 51 g/m
originals 28 to 32 lb bond (105 to 128 g/m
11" x 17" , LGL , LTR , LTR , or STMT .
25 sheets (LGL or larger)
2
) into the feeder one at a time.
2
), or very thick
2-6
1
Neatly place your originals face up in the original supply tray.
If you are enlarging LTR originals to 11" x 17" or LGL paper, place your
originals horizontally.
Placing Originals (For Copying, Faxing, Scanning)
Page 42

Place your originals as far into the feeder as they will go.
F
F
D
isplay Co
ntrast
C
o
l
l
a
t
e
S
p
e
c
i
a
l
F
e
a
t
u
r
C
e
s
O
P
Y
A beep sounds when the originals are set correctly.
2
Adjust the slide guides to fit the size of your originals.
D
isp
lay C
o
ntrast
C
o
lla
t
e
S
p
e
c
i
a
l
F
e
a
t
u
r
C
e
s
O
P
Y
IMPORTANT
Do not add or remove originals while they are being scanned.
Do not place objects in the original output area. Blocking the paper delivery slot
may damage the originals.
When scanning is complete, remove the originals from the original output tray to
avoid paper jams.
2
Documents
Original Output Tray
D
isp
lay Con
trast
C
o
l
la
t
e
S
p
e
c
i
a
l
F
e
a
t
u
r
C
e
s
O
P
Y
Placing Originals (For Copying, Faxing, Scanning)
2-7
Page 43

Documents
2
NOTE
The scanned originals are output face down to the original output tray.
You can place different size originals (i.e., LTR and 11" x 17" , STMT and
LTR ) together in one group in the feeder when you set the Different Size
Originals mode. (See Chapter 3, "Special Copying Features," in the Copying
Guide.)
2-8
Placing Originals (For Copying, Faxing, Scanning)
Page 44

Print Media
CHAPTER
This chapter describes the types of paper you can use with the machine and how to load them.
Paper Type . . . . . . . . . . . . . . . . . . . . . . . . . . . . . . . . . . . . . . . . . . . . . . . . . . . . . . . . . . . . 3-2
Loading Paper . . . . . . . . . . . . . . . . . . . . . . . . . . . . . . . . . . . . . . . . . . . . . . . . . . . . . . . . .3-4
Adjusting the Paper Drawer Guides. . . . . . . . . . . . . . . . . . . . . . . . . . . . . . . . . . . . . . . . . . . . . . .3-8
3
3-1
Page 45

Print Media
3
Paper Type
Paper types which can be used with this machine are shown in the following table.
Paper Type
Location
Paper Drawer Stack Bypass
1
Plain *
Heavy *
Recycled *
2
1
Transparency -
Labels *
3
Envelope -
*1 16 to 24 lb bond (60 to 90 g/m2)
*2 24 to 32 lb bond (90 to 128 g/m
*3 Only one sheet at the same time.
: Available
- : Unavailable
2
)
-
3-2
Paper Type
Page 46

Paper Size Length x Width
Location
Paper Drawer
1 and 2
Stack
Bypass
11" x 17"
LGL
LTR
LTR
STMT
STMT
11" x 17" (279 mm x 432 mm)
8 1/2" x 14" (216 mm x 356 mm)
11" x 8 1/2" (279 mm x 216 mm)
8 1/2" x 11" (216 mm x 279 mm)
8 1/2" x 5 1/2" (216 mm x 140 mm)
5 1/2" x 8 1/2" (140 mm x 216 mm) -
COM10 4 1/8" x 9 1/2" (104.7 mm x 241.3 mm) -
Envelope
DL 4 1/4" x 8 5/8" (110 mm x 220 mm) -
Monarch 3 7/8" x 7 1/2" (98.4 mm x 190.5 mm) -
Free Size
4" x 5 3/4" to 11 5/8" x 17"
(100 mm x 148 mm to 297 mm x 432
-
mm)
: Available
- : Unavailable
IMPORTANT
It is recommended not to use the back side of preprinted paper. It may cause a paper
jam.
NOTE
For instructions on how to load paper, see the following pages:
- Paper drawer: "Loading Paper," on p. 3-4.
- Stack bypass: Chapter 2, "Basic Operations," in the Reference Guide.
3
Print Media
Paper Type
3-3
Page 47

Print Media
3
Loading Paper
This section describes how to load paper into the paper drawers.
CAUTION
When loading paper, take care not to cut your hands on the edges of the paper.
NOTE
The following paper sizes can be loaded into the paper drawers: 11" x 17" , LGL , LTR
, LTR , and STMT .
For details of available paper stock which can be loaded into the paper drawers, see
"Paper Type," on p. 3-2.
1
Grip the handle of the paper drawer, and pull out the paper
drawer until it stops.
3-4
Loading Paper
Page 48

2
Open a paper package, and remove the paper stack.
IMPORTANT
Rewrap any remaining paper in its original package, and store it in a dry place
away from direct sunlight.
Do not load the following types of paper in the paper drawer. Doing so may cause a
paper jam.
- Severely curled or wrinkled paper
- Heavyweight paper
- Transparencies
- Paper on which color images have been copied (do not copy on the reverse side
either)
- Paper which has been printed on using a thermal transfer printer (do not copy on
the reverse side either)
- Back side of printed paper
NOTE
For high-quality print output, use paper recommended by Canon.
3
Print Media
3
Push down the metal plate until it locks in place.
Loading Paper
3-5
Page 49

Print Media
3
4
Load the paper into the paper drawer.
Even out the edges of the paper stack. Load the paper stack against the right wall
of the paper drawer.
When loading paper in the paper drawer for the first time, set the size plate to
match the paper size being loaded.
When loading paper in the paper drawer, make sure that the paper size setting of
the paper drawer matches the size of the paper.
3-6
IMPORTANT
Paper which has been rolled or curled must be straightened out prior to use.
Make sure that the height of the paper stack does not exceed the limit mark .
Make sure that the corners of the stack are held under the guiding tabs.
NOTE
Each paper drawer holds about 250 sheets of paper (20 lb bond (80 g/m2)).
If there are instructions on the paper package about which side of the paper to
load, follow those instructions. When the paper is loaded into the paper drawer, the
side facing down is the one printed on.
If problems, such as poor print quality or paper jams occur, try turning the paper
stack over and reload it.
For details of the print direction of paper already printed with logos or patterns, see
Chapter 1, "Introduction to Copying," in the Copying Guide.
Loading Paper
Page 50

5
Gently push the paper drawer back into the machine until it
clicks into place in the closed position.
CAUTION
When returning the paper drawer to its closed position, be careful not to get
your fingers caught, as this may result in personal injury.
IMPORTANT
Never place paper or any other items in the open part of the paper drawer next to
the paper stack. Doing so may cause paper jams.
3
Print Media
Loading Paper
3-7
Page 51

Print Media
3
Adjusting the Paper Drawer Guides
If you want to load a new paper size in a paper drawer, follow the procedure described
below to adjust the paper drawer guides.
NOTE
The following paper sizes can be loaded into the paper drawers: 11" x 17" , LGL , LTR
, LTR , and STMT .
Please contact your service representative about the settings for U1, U2, and U3 paper.
1
Pull out the paper drawer, and remove all the loaded paper.
2
Push down the metal plate until it locks in place.
3-8
Loading Paper
Page 52

3
Detach the paper end guide by pushing it to the left and pulling
up, and attach it again aligning it with the mark for the desired
paper size.
NOTE
Attach the end guide while pressing down the point indicated with "A".
If you are setting for 11" x 17" paper, attach the end guide to the 11" x 17" indicator
on the right rear side of the paper drawer.
4
Lift the lock lever vertically, and slide the side guide to align it
with the mark for the size of the paper you are loading.
3
Print Media
Loading Paper
3-9
Page 53

Print Media
3
U2
U
LGL
U1
LTR
S
T
M
T
B5
11X17
LTR
5
Lower the lock lever to the left to lock the side guide.
IMPORTANT
Be sure to set the lock lever correctly. If the lock lever is set to the wrong position,
paper jams or dirty prints may occur, or the inside of the machine may get dirty.
6
Set the paper size detector lever, located on the left side of the
paper drawer, to match the size of the paper being loaded.
3-10
IMPORTANT
Be sure to set the paper size detector lever correctly. If the lever is set to the wrong
position, paper jams or dirty prints may occur, or the inside of the machine may get
dirty.
Loading Paper
Page 54

7
Attach the appropriate paper size label onto the paper size plate.
Remove the protecting plastic sheet and attach the label for the paper size you are
loading.
LTR
8
Change the paper size plate, so that it matches the new paper
size being loaded.
3
Print Media
9
Gently push the paper drawer back into the machine until it
clicks into place in the closed position.
Loading Paper
3-11
Page 55

Print Media
3
CAUTION
When returning the paper drawer to its closed position, be careful not to get
your fingers caught, as this may result in personal injury.
3-12
Loading Paper
Page 56

Copying - Basic Operations
This chapter describes the overview and flow of copying operations.
Overview of Copying Operations . . . . . . . . . . . . . . . . . . . . . . . . . . . . . . . . . . . . . . . . . . .4-2
Copy Operations. . . . . . . . . . . . . . . . . . . . . . . . . . . . . . . . . . . . . . . . . . . . . . . . . . . . . . . . 4-4
More Information . . . . . . . . . . . . . . . . . . . . . . . . . . . . . . . . . . . . . . . . . . . . . . . . . . . . . . . . . . . . .4-9
4
CHAPTER
4-1
Page 57

Copying - Basic Operations
4
Overview of Copying Operations
Copying operations of this machine are done from the control panel with the Copy
Basic Features screen, Special Features screen, and Additional Functions menu.
Press the appropriate keys on the control panel in accordance with the selections
on the LCD display.
This section provides an overview of the copying functions of this machine.
The screen below appears when the machine is ready to make copies (Copy Basic
Features screen). You can set the following basic copy features from this screen:
Select the paper size automatically, or specify the paper size manually for a copy job.
(See Chapter 2, "Basic Copying Features," in the Copying Guide.)
Adjust the copy exposure and image quality automatically or manually. (See Chapter 2,
"Basic Copying Features," in the Copying Guide.)
Adjust the copy ratio automatically or manually. (See Chapter 2, "Basic Copying
Features," in the Copying Guide.)
Collate the copies in page order. (See Chapter 2, "Basic Copying Features," in the
Copying Guide.)
Scan another original while the machine is printing a previous job. (See Chapter 1,
"Introduction to Copying," in the Copying Guide.)
Interrupt a reserved or current job in order to make higher priority copies. (See Chapter
1, "Introduction to Copying," in the Copying Guide.)
■ Special Features Screen
The screen below appears when you press [Special Features] on the control panel
(Special Features screen). You can set the following copy modes from this screen:
■ Copy Basic Features Screen
4-2
Overview of Copying Operations
Page 58

[Two-Page Separation]: This mode enables you to copy facing pages of an opened book
onto separate copy sheets. (See Chapter 3, "Special Copying Features," in the Copying
Guide.)
[Margin]: Select to create margins along the sides of a copy sheet. (See Chapter 3,
"Special Copying Features," in the Copying Guide.)
[Frame Erase]: Eliminates dark border areas and lines that appear around original
images or shadows from punched holes. (See Chapter 3, "Special Copying Features," in
the Copying Guide.)
[Image Combination]: Automatically reduce two or four originals to fit onto a single copy
sheet. (See Chapter 3, "Special Copying Features," in the Copying Guide.)
[Different Size Originals]: Make copies by feeding different size originals together in one
group, by placing them in the feeder. (See Chapter 3, "Special Copying Features," in the
Copying Guide.)
■ Additional Functions Menu
The screen below appears when you press [Additional Functions] (Additional Functions
menu). You can customize the following settings from this menu:
Store settings, such as image quality and copy ratio as the Standard Settings. (See
Chapter 4, "Customizing Settings," in the Copying Guide.)
Make copies of original images reproduced with a sharper or softer contrast. (See
Chapter 4, "Customizing Settings," in the Copying Guide.)
Assign the most frequently used copy functions to Shortcut keys. (See Chapter 4,
"Customizing Settings," in the Copying Guide.)
4
Copying - Basic Operations
Overview of Copying Operations
4-3
Page 59

Copying - Basic Operations
4
Copy Operations
This section describes the flow of basic copy operations. Understanding the flow of
copy operations is useful to learn the machine's basic features, and how to find
more information in the
NOTE
For the following items:
- Main power and the Energy Saver mode, see Chapter 1, "Before You Start Using This
Machine," in the Reference Guide.
- Routine maintenance, see Chapter 6, "Routine Maintenance," in the Reference Guide.
If the platen glass is dirty, the output quality may deteriorate. Always keep the platen
glass clean. (See Chapter 6, "Routine Maintenance," in the Reference Guide.)
Do not touch the platen glass cover while copying. Moving the cover can distort the
image being copied.
If large amounts of documents are stored in memory, you may not be able to make a
copy. If the message <MEMORY FULL> appears on the LCD display while making a
copy, print the received documents that are stored in memory, or wait until the current
document transmission completes, and try copying again.
Copying Guide.
COPY
1
Press [COPY] to display the Copy Basic Features screen.
● If the message <ENTER DEPARTMENT ID AND PASSWORD>
appears:
❑ Enter the Department ID and password ➞ press [ID].
The Copy Basic Features screen appears.
4-4
ID
Copy Operations
Page 60

F
NOTE
For instructions on using Department ID Management, see Chapter 5, "System
Manager Settings," in the Reference Guide.
2
Place your original.
You can place your original both vertically and horizontally in the feeder or on the
platen glass.
For instructions on placing your original, see "Placing Originals," on p. 2-2.
D
ispla
y C
o
ntrast
C
o
l
l
a
t
e
S
p
e
c
i
a
l
F
e
a
t
u
r
C
e
s
O
P
Y
NOTE
LTR originals can be placed either vertically or horizontally. However, the scanning
speed for horizontally placed originals is somewhat slower than for vertically placed
originals. You can place originals horizontally when scanning with a Preset Zoom,
such as when enlarging LTR to 11" x 17" .
Horizontally placed LTR originals are referred to as LTR .
11" x 17" and LGL originals must be placed horizontally.
If AUTO SORT is set to '1 ON' from the Additional Functions menu, the Collate
mode is automatically set when the original is placed in the feeder. (See Chapter 4,
"Customizing Settings," in the
Copying Guide
.)
4
Copying - Basic Operations
Copy Operations
4-5
Page 61

Copying - Basic Operations
4
3
Special Features
4
Set the desired copy mode on the Copy Basic Features
screen.
NOTE
On the Copy Basic Features screen, you can select the copy ratio, paper size, and
copy exposure and image quality settings.
Set the desired copy modes on the Special Features screen.
❑ Press [Special Features].
❑ Press the function keys under the modes that appear on the LCD display, and
which correspond to the copy modes you want to set.
NOTE
On the Special Features screen, you can select the following copy modes:
Two-Page Separation, Margin, Frame Erase, and Image Combination.
For instructions on setting each copy mode from the Special Features screen, see
Chapter 3, "Special Copying Features," in the
Copying Guide.
4-6
5
Enter the copy quantity.
For instructions on setting the number of copies, see Chapter 2, "Basic Copying
Features," in the Copying Guide.
Copy Operations
Page 62

Start
6
Press [Start].
If the following screen is displayed, follow the instructions that appear on the
LCD display ➞ press (Start) once for each original. When scanning is
complete, press (OK).
Copying starts.
IMPORTANT
While copying, you cannot change copy mode settings, such as the copy quantity,
paper size, and copy ratio.
NOTE
If there is a current job, the machine scans the original, and waits to print it. Printing
starts when the current job is complete.
7
If you want to stop, interrupt, or copy another original during
a copy job, follow the instruction below.
4
Stop
● If you want to stop a copy job while scanning:
Copying - Basic Operations
❑ Press [Stop].
The display for selecting whether to cancel copying or not appears.
F3
❑ Press [F3] (YES).
Scanning is canceled.
Copy Operations
4-7
Page 63

Copying - Basic Operations
4
● If you want to cancel a copy job in the standby mode:
Stop
F2
F3
F4
● If you want to interrupt a copy job:
Interrupt
❑ Press [Stop].
The display for selecting a copy job to cancel appears.
❑ Press [F2] (▼) or [F3] (▲) to select the copy job you want to cancel ➞ press
[F4] (CANCEL).
The selected job is canceled.
NOTE
After pressing (Stop), several copies may continue to print out.
You can also cancel a copy job from the System Monitor screen. (See Chapter 1,
"Introduction to Copying," in the Copying Guide.)
❑ To interrupt a copy job when you need to make priority copies, press [Interrupt].
For instructions on interrupting a copy job, see Chapter 1, "Introduction to
Copying," in the Copying Guide.
The message <ABLE TO PERFORM INTERRUPT JOB> appears on the LCD
display.
Start
4-8
ID
Copy Operations
● If you want to reserve a copy job and scan an original while the
machine is printing:
❑
Place your original ➞ press [Start].
For instructions on reserving a copy job, see Chapter 1, "Introduction to
Copying," in the Copying Guide.
8
When scanning is complete, remove your original.
9
If you have set Department ID Management, press [ID].
For instructions on using Department ID Management, see Chapter 5, "System
Manager Settings," in the Reference Guide.
Page 64

More Information
For detailed information on all copying functions, see the Copying Guide.
4
Copy Operations
Copying - Basic Operations
4-9
Page 65

Copying - Basic Operations
4
4-10
Copy Operations
Page 66

Faxing - Basic Operations
CHAPTER
This chapter describes the overview of the fax functions, how to set up the machine, and the
flow of fax operations.
Overview of Fax Operations . . . . . . . . . . . . . . . . . . . . . . . . . . . . . . . . . . . . . . . . . . . . . . .5-2
Setting Up the Machine for Fax Operation . . . . . . . . . . . . . . . . . . . . . . . . . . . . . . . . . . . . 5-4
Connecting the Telephone Line . . . . . . . . . . . . . . . . . . . . . . . . . . . . . . . . . . . . . . . . . . . . . . . . . .5-4
Setting the Current Date and Time. . . . . . . . . . . . . . . . . . . . . . . . . . . . . . . . . . . . . . . . . . . . . . . .5-5
Registering the Required Sender Information . . . . . . . . . . . . . . . . . . . . . . . . . . . . . . . . .5-7
Registering The Machine's Fax Number . . . . . . . . . . . . . . . . . . . . . . . . . . . . . . . . . . . . . . . . . . .5-8
Registering the Unit's Name. . . . . . . . . . . . . . . . . . . . . . . . . . . . . . . . . . . . . . . . . . . . . . . . . . . .5-10
Registering the Sender Information (TX Terminal ID). . . . . . . . . . . . . . . . . . . . . . . . . . . . . . . . .5-12
Fax Sending Operations. . . . . . . . . . . . . . . . . . . . . . . . . . . . . . . . . . . . . . . . . . . . . . . . .5-15
More Information . . . . . . . . . . . . . . . . . . . . . . . . . . . . . . . . . . . . . . . . . . . . . . . . . . . . . . . . . . . .5-18
5
5-1
Page 67

Faxing - Basic Operations
5
Overview of Fax Operations
This section provides an overview of the fax functions of this machine.
■ Various Fax Features
When sending, you can set the document resolution, image quality and contrast suitable
to the original. (See Chapter 3, "Basic Sending," in the Facsimile Guide.)
You can select from Book, Memory, or Direct Sending.
(See Chapter 3, "Basic Sending," in the Facsimile Guide.)
You can set the timer to automatically send a fax at a specified time. (See Chapter 4,
"Additional Sending Features," in the Facsimile Guide.)
You can perform several jobs without waiting for the current job to be finished. For
example, you can print a received document while sending a document stored in the
memory.
■ Easy to Use
You can store up to 63 numbers for one-touch speed dialing, enabling you to send a fax
by pressing a single key. You can also store 137 numbers for coded speed dialing, by
designating a three-digit code for each of them. Multiple one-touch and coded speed
dialing entries can be registered in a group. Additionally, you can quickly find a fax
number by entering the destination's name you have registered. (See Chapter 2, "Speed
Dialing," in the Facsimile Guide.)
You can register an access code from two to five digits to represent a fax number. (See
Chapter 2, "Speed Dialing," in the Facsimile Guide.)
You can register a frequently used setting to a program one-touch key so you can
automatically perform a routine procedure with the press of a single key. (See Chapter
10, "Special Fax Features," in the Facsimile Guide.)
5-2
■ Fax/Telephone Information Services
A range of fax/telephone information services, including business and tourism related
services, can be easily accessed. (See Chapter 10, "Special Fax Features," in the
Facsimile Guide.)
■ Efficient and Confidential Transactions
Memory Box features (confidential, relay, polling and transfer boxes) enable you to make
efficient and confidential transactions. (See Chapter 6, "Memory Features," in the
Facsimile Guide.)
By specifying the ITU-T subaddress and password, you can perform a highly confidential
transaction. (See Chapter 4, "Additional Sending Features," in the Facsimile Guide.)
Overview of Fax Operations
Page 68

■ Monitoring Transactions and Checking Settings
You can check a list of documents being sent or waiting to be sent by simply pressing
[Monitor]. (See Chapter 3, "Basic Sending," in the Facsimile Guide.)
You can print various kinds of reports. (See Chapter 11, "Printing Reports and Lists," in
the Facsimile Guide.)
■ Fax Transmissions over Internet (Network Model Only)
If you have the Network Model, you can send and receive documents to/from an e-mail
address. Sent documents are attached to the e-mail as image files. This enables the
receiving party to view the contents of the documents on their computer monitor. (See the
Sending Guide.)
5
Overview of Fax Operations
Faxing - Basic Operations
5-3
Page 69

Faxing - Basic Operations
5
Setting Up the Machine for Fax Operations
After installation, you need to set up the machine to use the fax function. If the
connection or registered information is not correct, the machine will not function
properly.
Connecting the Telephone Line
Before turning the power ON, connect the telephone line to the machine.
1
2
Connect one end of the telephone line to the line jack marked
.
Line Jack
Connect the other end of the telephone line to your wall
telephone jack.
5-4
Setting Up the Machine for Fax Operations
Page 70

Setting the Current Date and Time
You must set the current date and time. The date and time is printed on the top of
every document you send. It is also used as required for functions that have timer
settings.
Additional Functions
F3
F4
OK
F3
F4
OK
1
Press [Additional Functions].
The Additional Functions menu appears, and the indicator light blinks.
2
Press [F3] (▼) or [F4] (▲) to highlight <05 TIMER SETTINGS>
➞ press [OK].
Each time you press (▼) or (▲), the next or previous menu
option becomes highlighted.
The TIMER SETTINGS menu appears.
3
Press [F3] (▼) or [F4] (▲) to highlight <01 DATE/TIME
F3 F4
SETTING> ➞ press [OK].
5
Faxing - Basic Operations
The DATE/TIME SETTING menu appears.
Setting Up the Machine for Fax Operations
5-5
Page 71

Faxing - Basic Operations
5
F2
F3
@.
ABC
DEF
123
GHI
JKL
MNO
456
PRS
TUV
WXY
789
OPER
SYMBOLS
0
4
Press [F2] ( ) or [F3] ( ) to select the month, day, year, and
time ➞ enter the current date and time using the numeric
keys.
Enter the date, and time in 24-hour notation, with four digits and no space.
Enter two digits for the year.
Examples:
May 6 ➞ 0506
7:05 a.m. ➞ 0705
11:18 p.m. ➞ 2318
OK
Reset
5
6
NOTE
If you make a mistake when entering values, press (Clear) ➞ enter the correct
C
values.
Press [OK].
The date and time is set, and the TIMER SETTINGS menu returns.
Press [Reset] to return to the Basic Features screen.
5-6
Setting Up the Machine for Fax Operations
Page 72

Registering the Required Sender Information
According to recent amendments to the FCC (Federal Communications
Commission) rules governing the use of facsimile equipment in the United States,
the following sender information must be printed on every facsimile transmission.
Your fax number
Your personal name or company's name
Date and time of transmission
The sender information you register is printed as shown below.
After your fax is received, the other party knows immediately where it came from
because your sender information is printed at the top of every page you send.
If the TX TERMINAL ID is set to 'OUTSIDE IMAGE':
5
Unit's Name or
Date and Time Fax Number
02/03/2003 10:07 FAX 111 2222 JOHN 001/001
Sender's Name
Page Number/ Total
Number of Pages
If the TX TERMINAL ID is set to 'INSIDE IMAGE':
Unit's Name or
Date and Time Fax Number
02/03/2003 10:07 FAX 111 2222 JOHN 001/001
NOTE
If there are unregistered items, only the registered items and the page number are
printed on the documents.
Sender's Name
Page Number/ Total
Number of Pages
Faxing - Basic Operations
Registering the Required Sender Information
5-7
Page 73

Faxing - Basic Operations
5
■ Date and Time
Date and time of the transmission.
■ Fax Number
Your fax number.
■ Unit's Name or Sender's Name
Select a unit's name or a sender's name by pressing [TTI Selector] before scanning a
document for sending.
■ Page Number/Total Number of Pages
The page number of the document out of the total number of pages.
Registering the Machine's Fax Number
Follow the procedure below to register the number of your machine.
Additional Functions
1
Press [Additional Functions].
The ADDITIONAL FUNCTIONS menu appears.
F3
F4
OK
2
Press [F3] (▼) or [F4] (▲) to highlight <03 FAX SETTINGS> ➞
press [OK].
Each time you press (▼) or (▲), the next or previous menu
option becomes highlighted.
The FAX SETTINGS menu appears.
F3 F4
5-8
Registering the Required Sender Information
Page 74

F3
F4
OK
3
Press [F3] (▼) or [F4] (▲) to highlight <01 USER SETTINGS>
➞ press [OK].
The USER SETTINGS menu appears.
F3
F4
OK
F3
F3
F4
F4
OK
OK
ABC
DEF
@.
123
GHI
JKL
MNO
456
PRS
TUV
WXY
789
OPER
SYMBOLS
0
OK
4
Press [F3] (▼) or [F4] (▲) to highlight <01 TEL LINE
SETTINGS> ➞ press [OK].
The TEL LINE SETTINGS menu appears.
5
Press [F3] (▼) or [F4] (▲) to highlight <01 USER TEL NO.> ➞
press [OK].
The display for entering your fax number appears.
6
Enter your fax number using the numeric keys ➞ press [OK].
5
Faxing - Basic Operations
Your fax number is registered, and the TEL LINE SETTINGS menu returns.
NOTE
If you entered a wrong number, use the cursor keys to go back to the position you
want to correct ➞ press [Delete] ➞ enter the correct number.
Registering the Required Sender Information
5-9
Page 75

Faxing - Basic Operations
5
To delete the entire entry, press [Clear].
Reset
7
Press [Reset] to return to the Basic Features screen.
Registering the Unit's Name
Follow the procedure below to register the unit's name. The unit's name can be the
name of the company or department, or a personal name.
The unit's name you register is printed as the TX Terminal ID on the document the
other party receives.
NOTE
For details about entering letters, see Chapter 2, "Basic Operations," in the Reference
Guide.
Additional Functions
F3
F4
OK
1
Press [Additional Functions] ➞ press [F3] (▼) or [F4] (▲) to
highlight <03 FAX SETTINGS> ➞ press [OK].
The FAX SETTINGS menu appears.
F3
F4
OK
5-10
2
Press [F3] (▼) or [F4] (▲) to highlight <01 USER SETTINGS>
➞ press [OK].
Each time you press (▼) or (▲), the next or previous menu
option becomes highlighted.
The USER SETTINGS menu appears.
Registering the Required Sender Information
F3 F4
Page 76

F3
F4
OK
ABC
DEF
@.
123
GHI
JKL
MNO
456
PRS
TUV
WXY
789
OPER
SYMBOLS
0
OK
3
Press [F3] (▼) or [F4] (▲) to highlight <02 UNIT NAME> ➞
press [OK].
The display for entering the unit's name appears.
4
Enter the unit's name using the numeric keys ➞ press [OK].
The unit's name is registered, and the USER SETTINGS menu returns.
NOTE
The unit's name can be up to 24 characters long.
If you entered a wrong letter, use the cursor keys to go back to the position you
want to correct ➞ press [Delete] ➞ enter the correct letter.
To delete the entire entry, press [Clear].
5
Reset
5
Press [Reset] to return to the Basic Features screen.
Registering the Required Sender Information
Faxing - Basic Operations
5-11
Page 77

Faxing - Basic Operations
5
Registering the Sender Information (TX Terminal ID)
The TX Terminal ID tells the recipient the sender's name and fax number.
Follow the procedure below to select the position where the TX Terminal ID appears
on the recording paper, and to select a Telephone Number Mark.
IMPORTANT
• In the United States, the TX Terminal ID must be printed on the top of every page the
other party receives. Please see "Registering the Required Sender Information" on p.
5-7 for details on FCC rules governing the use of facsimile equipment in the United
States.
• If you do not specify these settings, you cannot send a fax.
NOTE
The default settings are as follows:
- TX Terminal ID position: '01 OUTSIDE IMAGE'
- Telephone Number Mark: '01 FAX'
Additional Functions
1
Press [Additional Functions] ➞ press [F3] (▼) or [F4] (▲) to
highlight <03 FAX SETTINGS> ➞ press [OK].
F3
F4
OK
F3
F4
OK
The FAX SETTINGS menu appears.
2
Press [F3] (▼) or [F4] (▲) to highlight <01 USER SETTINGS>
➞ press [OK].
Each time you press (▼) or (▲), the next or previous menu
option becomes highlighted.
The USER SETTINGS menu appears.
F3 F4
5-12
Registering the Required Sender Information
Page 78

F3
F4
OK
3
Press [F3] (▼) or [F4] (▲) to highlight <04 TX TERMINAL ID> ➞
press [OK].
The TX TERMINAL ID menu appears.
F3
F4
OK
F3
F4
4
Press [F3] (▼) or [F4] (▲) to highlight the transmission type ➞
press [OK].
The transmission type settings menu appears.
NOTE
The I-Fax function is only available in the Network Model of this machine.
5
Press [F3] (▼) or [F4] (▲) to highlight <01 TTI POSITON> or
<02 TEL NUMBER MARK>.
5
Faxing - Basic Operations
Registering the Required Sender Information
5-13
Page 79

Faxing - Basic Operations
5
● If you selected <01 TTI POSITION>:
OK
F3
F4
OK
❑ Press [OK] ➞ press [F3] (▼) or [F4] (▲) to highlight <01 OUTSIDE IMAGE> or
<02 INSIDE IMAGE> ➞ press [OK].
<01 OUTSIDE IMAGE>: This prints the TX Terminal ID outside the image area
on the output fax.
<02 INSIDE IMAGE>: This prints the TX Terminal ID inside the image area on
the output fax.
The TX TERMINAL ID menu returns.
● If you selected <02 TEL NUMBER MARK>:
OK
F3
F4
OK
❑ Press [OK] ➞ press [F3] (▼) or [F4] (▲) to highlight <01 FAX> or <02 TEL> ➞
press [OK].
<01 FAX>: This prints the letters <FAX> before the telephone number.
<02 TEL>: This prints the letters <TEL> before the telephone number.
NOTE
Reset
5-14
6
Press [Reset] to return to the Basic Features screen.
Registering the Required Sender Information
The TX TERMINAL ID menu returns.
If you selected <02 I-FAX> in step 4, the display for selecting the TTI POSITION
appears. You also cannot select <TEL NUMBER MARK>.
Page 80

Fax Sending Operations
This section describes the flow of basic fax sending operations.
NOTE
For the following items:
- Main power and the Energy Saver mode, see Chapter 1, "Before You Start Using this
Machine," in the Reference Guide.
- Routine maintenance, see Chapter 9, "Maintenance," in this manual, or Chapter 6,
"Routine Maintenance," in the Reference Guide.
FAX
ID
1
Press [FAX] to enter the Fax Basic Features screen.
● If the message <ENTER DEPARTMENT ID AND PASSWORD>
appears:
❑ Enter the Department ID and password ➞ press [ID].
The Fax Basic Features screen appears.
NOTE
For instructions on using Department ID Management, see Chapter 5, "System
Manager Settings," in the Reference Guide.
5
Faxing - Basic Operations
Fax Sending Operations
5-15
Page 81

2
FAX
Faxing - Basic Operations
5
Place your documents on the machine.
You can place your original either vertically or horizontally in the feeder or on the
platen glass.
For instructions on placing your original, see "Placing Originals," on p. 2-2.
DisplayContrast
Collate
SpecialFeatures
COPY
3
Select the desired fax settings on the Fax Basic Features
screen.
NOTE
4
Select the desired fax sending modes.
❑ Open all three one-touch speed dialing panels.
❑ Press a Fax function key ➞ select their settings ➞ press [OK].
NOTE
5-16
Fax Sending Operations
On the Fax Basic Features screen, you can adjust the scan settings, such as the
Resolution, Density, and Image Quality. You can also select the sheet size for Book
Sending.
To adjust the resolution, density, and image quality, see Chapter 3, "Basic
Sending," in the Facsimile Guide.
You can preset the fax functions to program one-touch keys. (See Chapter 10,
"Special Fax Features," in the Facsimile Guide.
Page 82

5
Specify the destination.
For instructions on how to specify a destination, see Chapter 2, "Speed Dialing,"
and Chapter 3, "Basic Sending," in the Facsimile Guide.
If you want to set other sending conditions, set them before you specify the
destination. (See Chapter 4, "Additional Sending Features," in the Facsimile
Guide.)
Start
6
Press [Start].
Scanning starts.
IMPORTANT
The size of the original is detected automatically. However, if the output paper in
the machine at the receiving end does not match the size of your scanned
document, the machine reduces the size of your document, or separates it into
several pages to match the paper size loaded in the recipient's fax machine. For
details, see Chapter 5, "Receiving Documents," in the Facsimile Guide.
NOTE
If prior jobs are being processed, the machine returns to the Fax Basic Features
screen, and your document will be sent once the jobs are complete.
The machine usually sends documents through memory transmission (sends an
image after storing it in memory). You can also send documents one by one, by
pressing (Direct TX). (See Chapter 3, "Basic Sending," in the Facsimile Guide.)
The machine has enough memory (16 MB) to store up to 100 pages* of sent and
received documents (fewer if the document contains many graphics or particularly
dense text). *Based on the use of ITU-T No.1 chart, using the standard settings.
If the memory becomes full while you are scanning a document for sending, the
message <MEMORY FULL> appears on the LCD display. Press (OK) so
that the paper remaining in the feeder can be put out. All the pages you were
scanning will be cancelled.
The number of pages you can store into memory differs depending on the amount
of free memory remaining in the machine and the type of document you are
scanning.
Press [Monitor] to check the transmission result, or cancel sending the documents
stored in memory. (See Chapter 3, "Basic Sending," in the Facsimile Guide.)
5
Faxing - Basic Operations
Stop
7
If you want to cancel sending the document, press [Stop].
Fax Sending Operations
5-17
Page 83

8
Faxing - Basic Operations
5
When scanning is complete, remove your document.
9
ID
If you have set Department ID Management, press [ID].
For instructions on using Department ID Management, see Chapter 5, "System
Manager Settings," in the Reference Guide.
More Information
For detailed information on all fax functions, see the Facsimile Guide.
5-18
Fax Sending Operations
Page 84

Printer/Fax Driver Software
This chapter briefly describes the PCL printer driver and fax driver software.
Introduction. . . . . . . . . . . . . . . . . . . . . . . . . . . . . . . . . . . . . . . . . . . . . . . . . . . . . . . . . . . .6-2
System Requirements . . . . . . . . . . . . . . . . . . . . . . . . . . . . . . . . . . . . . . . . . . . . . . . . . . .6-3
Installing the Software . . . . . . . . . . . . . . . . . . . . . . . . . . . . . . . . . . . . . . . . . . . . . . . . . . .6-4
More Infomation . . . . . . . . . . . . . . . . . . . . . . . . . . . . . . . . . . . . . . . . . . . . . . . . . . . . . . . . . . . . . .6-4
6
CHAPTER
6-1
Page 85

Printer/Fax Driver Software
6
Introduction
The Canon PCL5e and PCL6 printer drivers and fax driver give users of Microsoft
Windows 95, Windows 98, Windows Millennium Edition, Windows NT Version 4.0,
Windows 2000, or Windows XP (hereafter called Windows 95/98/Me/NT 4.0/2000/
XP) operating systems the ability to make full use of the printer. The printer drivers
enable you to print documents from any Windows application to your printer using
Hewlett-Packard's PCL5e or PCL6 data format.
In Windows 95/98/Me/NT 4.0/2000/XP environments, you can use both printer
drivers. The PCL6 printer driver is recommended for printing image data. The
PCL5e printer driver is recommended for printing text data.
NOTE
The printer function is only available in the Network Model of this machine.
6-2
Introduction
Page 86

System Requirements
The printer and fax drivers for Windows 95/98/Me/NT 4.0/2000/XP can be used in
the following system environments.
■ Software
Microsoft Windows 95, Microsoft Windows 98, Microsoft Windows Me, Microsoft Windows
NT 4.0, Microsoft Windows 2000, or Microsoft Windows XP.
■ Computer
Any computer on which Microsoft Windows 95, Microsoft Windows 98, Microsoft Windows
Me, Microsoft Windows NT 4.0, Microsoft Windows 2000, or Microsoft Windows XP runs
properly.
6
System Requirements
Printer/Fax Driver Software
6-3
Page 87

Printer/Fax Driver Software
6
Installing the Software
The Set-Up Sheet for Networking and Printing explains the standard installation procedures
for the printer and fax drivers. For detailed information on different installation procedures,
see the PCL Driver Guide and/or Fax Driver Guide.
More Infomation
For detailed information on all features of the printer driver and fax driver software, see
the PCL Driver Guide and Fax Driver Guide with Cover Sheet Editor, respectively.
6-4
Installing the Software
Page 88

I-Fax - Basic Operations
This chapter describes the overview of the I-Fax functions, setting up the machine, and
sending and receiving I-Fax.
Overview of the I-Fax Functions. . . . . . . . . . . . . . . . . . . . . . . . . . . . . . . . . . . . . . . . . . . .7-2
Setting Up the Machine for Using I-Fax . . . . . . . . . . . . . . . . . . . . . . . . . . . . . . . . . . . . . . 7-3
Sendig and Receiving I-Fax . . . . . . . . . . . . . . . . . . . . . . . . . . . . . . . . . . . . . . . . . . . . . . .7-4
Sending I-Fax by One-Touch Speed Dialing, Coded Speed Dialing, or Access Code . . . . . . . .7-4
Manual I-Fax Sending . . . . . . . . . . . . . . . . . . . . . . . . . . . . . . . . . . . . . . . . . . . . . . . . . . . . . . . . .7-6
Receiving I-Fax. . . . . . . . . . . . . . . . . . . . . . . . . . . . . . . . . . . . . . . . . . . . . . . . . . . . . . . . . . . . . . .7-8
More Information . . . . . . . . . . . . . . . . . . . . . . . . . . . . . . . . . . . . . . . . . . . . . . . . . . . . . . . . . . . . .7-9
7
CHAPTER
7-1
Page 89

I-Fax - Basic Operations
7
Overview of the I-Fax Functions
I-Fax (Internet Facsimile) enables you to transmit and receive a scanned original
document converted to TIFF (Tag Image File Format) image data or PDF (Portable
Document Format) as an attachment of an e-mail, to/from any facsimile with I-Fax
capability or any personal computer with e-mail through the Internet. I-Fax has two
transmission modes: the Simple Mode and the E-Mail Mode.
■ Simple Mode
In the Simple Mode, a scanned original document is converted to TIFF (MH) image data.
Size of the converted image data is limited to LTR, and its resolution is fixed to 200 x 200
dpi or 100 x 200 dpi, adhering to the common I-Fax standard. The image format, image
size, and resolution are restricted in the Simple Mode.
To exchange image data with other facsimiles with I-Fax capability, select the <SIMPLE
MODE> when specifying the transmission mode. (In case it is between imageCLASS
2300 with I-Fax, you can exchange image data, except for PDF in the 'E-Mail Mode'). You
can also exchange image data with personal computers with e-mail.
■ E-Mail Mode
In the E-Mail Mode, a scanned original document is converted to PDF, TIFF (MMR
(Modified Modified Read)), TIFF (MR (Modified Read)) or TIFF (MH (Modified Huffman))
image data. To select an image data format, see Chapter 4, "Checking Settings and
Registering Destinations," in the Sending Guide.
7-2
If you select 'E-Mail Mode' as the transmission mode, you can exchange image data with
personal computers with e-mail.
To specify a transmission mode, see Chapter 3, "Setting Up a Mail Account," and Chapter
4, "Checking Settings and Registering Destinations," in the Sending Guide. You can
specify a transmission mode in two ways: by registering one-touch speed dialing/coded
speed dialing, or specifying the mail user settings. The transmission mode specified by
registering one-touch speed dialing/coded speed dialing has higher priority.
Furthermore, I-Fax enables you to:
Select POP3 or SMTP as a reception protocol.
Set the machine to check mail periodically.
Set the timer to transmit I-Fax, up to five times a day for time setting. Settings for the
same day every week is also possible.
Upload image data to an FTP server.
NOTE
The I-Fax function is only available in the Network Model of this machine.
Overview of the I-Fax Functions
Page 90

Setting Up the Machine for Using I-Fax
Before using I-Fax, it is necessary to specify the following settings from the
machine's control panel.
1. Network Settings
2. Mail Transmission/Reception Settings
3. Registering mail addresses in one-touch speed dialing and coded speed dialing.
■ Network Settings
Specify the machine's parameters in the network. To transmit/receive data using I-Fax on
the network, specify settings for the TCP/IP communication protocol. (See Chapter 2,
"Setting the Network,"in the Sending Guide.)
■ Mail Transmission/Reception Settings
Specify settings of a subject, message text, signature, etc. for each registered mail
address. Also, specify items related to e-mail transmission and reception. (See Chapter 3,
"Setting Up a Mail Account," in the Sending Guide.) For values of the network settings,
contact a network administrator.
■ Registering Mail Addresses in the One-Touch/Coded Speed Dialing
Register mail addresses, so that you can transmit mail with I-Fax by specifying the
destinations with one-touch/coded speed dialing or access code. You can also register the
transmission start time, transmission mode, etc., as well as the mail addresses in each
one-touch or coded speed dial address. (See Chapter 4, "Checking Settings and
Registering Destinations," in the Sending Guide.)
7
Setting Up the Machine for Using I-Fax
I-Fax - Basic Operations
7-3
Page 91

I-Fax - Basic Operations
7
Sendig and Receiving I-Fax
This section describes how to transmit and receive mail with the I-Fax functions of
the machine.
Sending I-Fax by One-Touch Speed Dialing, Coded Speed Dialing, or Access Code
This section describes the basic procedure to transmit mail by one-touch speed
dialing, coded speed dialing, or access code.
For sequential broadcasting, specify mail addresses to register in a mailing list
using one-touch speed dialing keys, coded speed dialing codes, or access codes.
Mail will be sequentially transmitted to the mail addresses registered in the mailing
list. You can also broadcast mail by specifying multiple mail addresses using
one-touch speed dialing keys or coded speed dialing codes, instead of using a
mailing list.
NOTE
If a transmission start time is set in one-touch speed dialing or coded speed dialing with
the destination specified, the mail will be transmitted at that preset time. For details on
setting a delayed transmission start time for one-touch speed dialing or coded speed
dialing, see Chapter 4, "Checking Settings and Registering Destinations," in the Sending
Guide.
7-4
1
FAX
Sendig and Receiving I-Fax
Press [FAX].
The fax indicator lights up, and the Fax Basic Features screen appears.
Page 92

Line/Mail
2
Press [Line/Mail] to display <I-FAX>.
The machine is ready to transmit.
3
Place a document.
NOTE
For details on how to place a document, see Chapter 3, "Basic Sending," in the
Facsimile Guide.
01
63
OK
Coded
Dial
4
Specify the transmitting conditions ➞ press [OK].
NOTE
To specify a sender name, open all three one-touch speed dialing panels, then
press [TTI Selector] and select a sender name. When you do not specify a sender
name, the mail will be sent under the name registered in '01'.
5
Specify a destination by one-touch speed dialing, coded
speed dialing, or access code.
NOTE
For details on how to specify a destination, see Chapter 2, "Speed Dialing," and
Chapter 3, "Basic Sending," in the Facsimile Guide.
7
I-Fax - Basic Operations
Sendig and Receiving I-Fax
7-5
Page 93

I-Fax - Basic Operations
7
Start
6
Press [Start].
The machine scans the document.
NOTE
To cancel transmitting, press (Stop) while scanning the document or while on
standby for transmitting. You cannot cancel while transmitting, even if you press
(Stop).
If the machine fails to transmit due to transmitting error, etc., it will retransmit for the
number of times specified in RETRY of the MAIL USER SETTING menu. In this
case, the retry interval will be as specified in RETRY INTERVAL of the MAIL USER
SETTING menu. For specification details of Retry and Retry Interval, see Chapter
3, "Setting Up a Mail Account," in the Sendig Guide.
Manual I-Fax Sending
This section describes the basic procedure to transmit mail manually by using the
numeric keys.
For sequential broadcasting, specify mail addresses to register in a mailing list
using the numeric keys. Mail will be sequentially transmitted to the mail addresses
registered in the mailing list. You can also broadcast mail by specifying multiple mail
addresses using the numeric keys, instead of using a mailing list.
Line/Mail
7-6
1
FAX
Sendig and Receiving I-Fax
Press [FAX].
The fax indicator lights, and the Fax Basic Features screen appears.
2
Press [Line/Mail] to display <I-FAX>.
The machine is ready to transmit.
Page 94

3
Place a document.
NOTE
For details on how to place a document, see Chapter 3, "Basic Sending," in the
Facsimile Guide.
OK
ABC
DEF
@.
123
GHI
JKL
MNO
456
PRS
TUV
WXY
789
OPER
SYMBOLS
0
OK
Start
4
Specify the transmitting conditions ➞ press [OK].
NOTE
To specify a sender name, open all three one-touch speed dialing panels, then
press [TTI Selector] and select a sender name. When you do not specify a sender
name, the mail will be sent under the name registered in '01'.
5
Specify a destination using the numeric keys ➞ press [OK].
NOTE
For details on how to specify a destination, see Chapter 2, "Speed Dialing," and
Chapter 3, "Basic Sending," in the Facsimile Guide.
6
Press [Start].
The machine scans the document.
NOTE
To cancel transmitting, press (Stop) while scanning the document or while on
standby for transmitting. You cannot cancel while transmitting, even if you press
(Stop).
If the machine fails to transmit due to transmitting error, etc., it will retransmit for the
number of times specified in RETRY of the MAIL USER SETTING menu. In this
case, the retry interval will be as specified in RETRY INTERVAL of the MAIL USER
SETTING menu. For specification details of Retry and Retry Interval, see Chapter
3, "Setting Up a Mail Account," in the Sending Guide.
7
I-Fax - Basic Operations
Sendig and Receiving I-Fax
7-7
Page 95

I-Fax - Basic Operations
7
Receiving I-Fax
If you set EMAIL RX PROTOCOL to SMTP on the MAIL USER SETTING menu, or
set EMAIL RX PROTOCOL to POP3 and specify an interval in the CHECK
INTERVAL menu, the machine will automatically receive mail. (See Chapter 3,
"Setting Up a Mail Account," in the Sending Guide.)
If you set EMAIL RX PROTOCOL to POP3 in the MAIL USER SETTING menu, you
can also receive mail manually. (See Chapter 3, "Setting Up a Mail Account," in the
Sending Guide.)
This section describes the procedure to manually receive mail.
1
FAX
Press [FAX].
The fax indicator lights up, and the Fax Basic Features screen appears.
Line/Mail
TTI Selector
OK
7-8
2
Press [Line/Mail] to display <I-FAX>.
The machine is ready to receive mail.
3
Open all three one-touch speed dialing panels ➞ press [TTI
Selector] ➞ highlight a sender name ➞ press [OK].
Sendig and Receiving I-Fax
Page 96

NOTE
If you do not specify a sender name, the machine will receive mail transmitted to
the mail address of the sender registered in '01'.
4
Press [Start].
The machine receives mail.
NOTE
To cancel receiving mail, press (Stop). When "CANCEL DURING TX/RX?" is
displayed, press (OK).
If data size of the transmitted mail is larger than that specified at MAX. RX DATA
SIZE of the MAIL USER SETTING menu, the machine will not receive that mail,
and skips to the next mail. (See Chapter 3, "Setting Up a Mail Account," in the
Sending Guide.)
More Information
For detailed information on all I-Fax functions, see the Sending Guide.
7
Sendig and Receiving I-Fax
I-Fax - Basic Operations
7-9
Page 97

I-Fax - Basic Operations
7
7-10
Sendig and Receiving I-Fax
Page 98

Printing - Basic Operations
This chapter describes the features and basic operations of the printer.
Features of the Printer . . . . . . . . . . . . . . . . . . . . . . . . . . . . . . . . . . . . . . . . . . . . . . . . . . .8-2
Connecting to a Computer . . . . . . . . . . . . . . . . . . . . . . . . . . . . . . . . . . . . . . . . . . . . . . . . 8-4
Connecting to a Network . . . . . . . . . . . . . . . . . . . . . . . . . . . . . . . . . . . . . . . . . . . . . . . . . . . . . . .8-4
Connecting through a Parallel Interface. . . . . . . . . . . . . . . . . . . . . . . . . . . . . . . . . . . . . . . . . . . .8-5
Connecting through a USB Interface . . . . . . . . . . . . . . . . . . . . . . . . . . . . . . . . . . . . . . . . . . . . . .8-5
Printing a Document . . . . . . . . . . . . . . . . . . . . . . . . . . . . . . . . . . . . . . . . . . . . . . . . . . . . . 8-6
Canceling a Print Job . . . . . . . . . . . . . . . . . . . . . . . . . . . . . . . . . . . . . . . . . . . . . . . . . . . .8-7
8
CHAPTER
8-1
Page 99

Printing-Basic Operations
8
Features of the Printer
Your printer offers fast printing speed, superior print quality, sophisticated paper
handling, and ecology and energy sensitive features. The printer also supports
network printing. The printer function is only available in the Network Model of this
machine.
■ Superior Print Quality
High resolution printing at 600 dpi (dots per inch) is further enhanced by Automatic Image
Refinement to smooth jagged edges along with the use of super fine toner. Combined,
these will ensure superior reproduction quality of text and graphics.
■ Software Compatibility
The printer supports Hewlett-Packard's PCL 5e and PCL6 printer languages, which
enables the printer to work with a wide variety of software applications supporting PCL.
■ Memory Saving Technology
Memory Reduction Technology accomplishes 600 dpi printing with only 8 MB of memory
for letter printing. Complex page data is compressed to optimize available resources.
■ Paper Handling
Each paper drawer holds 250 sheets of paper while the Stack Bypass holds about 100
sheets of standard paper. The Stack Bypass can hold a variety of media for automatic
feeding and operate as a manual feed station.
■ Energy Saving
The on-demand fusing technology of the printer provides improved energy efficiency.
Because of this power saving feature, the printer meets the guidelines for the International
Energy Star Program.
■ Interface Features
The printer has a standard IEEE-1284 compatible parallel interface, which supports ECP
and Compatible/Nibble protocols. It also supports Microsoft's Plug & Play technology. The
printer also has a USB port for easy connection to a personal computer or other USB
devices. This printer also features a 10Base-T/100Base-TX port to enable network
printing.
8-2
Features of the Printer
Page 100

■ Typefaces
The printer comes with 45 scalable typefaces in 14 typeface families (Agfa 45 MicroType
fonts) and 32 additional TrueType fonts (barcode and OCR fonts), all compatible with
application software supporting Microsoft Windows. In addition, 9 bitmapped typefaces of
the Line Printer family are also included. The printer uses the Universal Font Scaling
Technology (UFST) for outline fonts, provided under license from Agfa-Gevaert Japan,
Ltd. Also supplied with the printer are the TrueType screen fonts for 96 font solution and
Canon Font Manager for easy management of installed fonts in Microsoft
98/Me/2000/XP and Windows NT version 4.0. A list of typeface samples is provided in
Chapter 5, "Apendix," in the PCL Printer Guide.
®
Windows® 95/
■ Printer drivers and Utilities
The printer comes with PCL printer drivers for Microsoft Windows 95/98/Me, Windows
2000/XP, and Windows NT 4.0. This allows you to control most printer settings from the
Windows driver screens.
■ Remote UI Support
The printer supports a Remote UI (User Interface) function that allows you to monitor the
status of the printer or change the printer settings from a personal computer. (See
Chapter 1, "Using the Remote UI," in the Remote UI Guide.)
Printing-Basic Operations
Features of the Printer
8
8-3
 Loading...