How it Works
Log In / Sign Up
Buy Points
How it Works
FAQ
Contact Us
Questions and Suggestions
Users
CANON
Loading...
P
POWERSHOT A80
10
PowerShot A800
9
PowerShot A810
13
POWERSHOT A85
10
PowerShot A95
9
POWERSHOT D10
31
PowerShot D20
9
PowerShot D20 HS
PowerShot D30
5
PowerShot D30 HS
PowerShot Digital ELPH SD500
PowerShot Digital IXUS V3
POWERSHOT E1
21
PowerShot ELPH 100 HS
6
POWERSHOT ELPH 110
POWERSHOT ELPH 110HS
5
POWERSHOT ELPH 115 IS
3
PowerShot ELPH 120 IS
3
PowerShot ELPH 120 IS IXUS 135
PowerShot ELPH 130 IS
6
PowerShot ELPH 135
4
PowerShot ELPH 140 IS
4
POWERSHOT ELPH 150 IS
5
PowerShot ELPH 160
4
PowerShot ELPH 170 IS
3
PowerShot ELPH 180
2
PowerShot ELPH 190 IS
PowerShot ELPH 300 HS
4
PowerShot ELPH 300 HS Silver
3
PowerShot ELPH 310 HS
3
POWERSHOT ELPH 320HS
6
POWERSHOT ELPH 330 HS
2
PowerShot ELPH 340 HS
4
PowerShot ELPH 350 HS
PowerShot ELPH 360 HS
PowerShot ELPH 500 HS
5
PowerShot ELPH 510 HS
POWERSHOT ELPH 520
POWERSHOT ELPH 520 HS
7
POWERSHOT ELPH 530HS
6
POWERSHOT G1
6
PowerShot G10
34
Powershot G10 IS
POWERSHOT G11
12
PowerShot G12
12
Powershot G15
8
PowerShot G16
4
Powershot G1 X
8
PowerShot G1X Mark II
15
PowerShot G1X MARK III
3
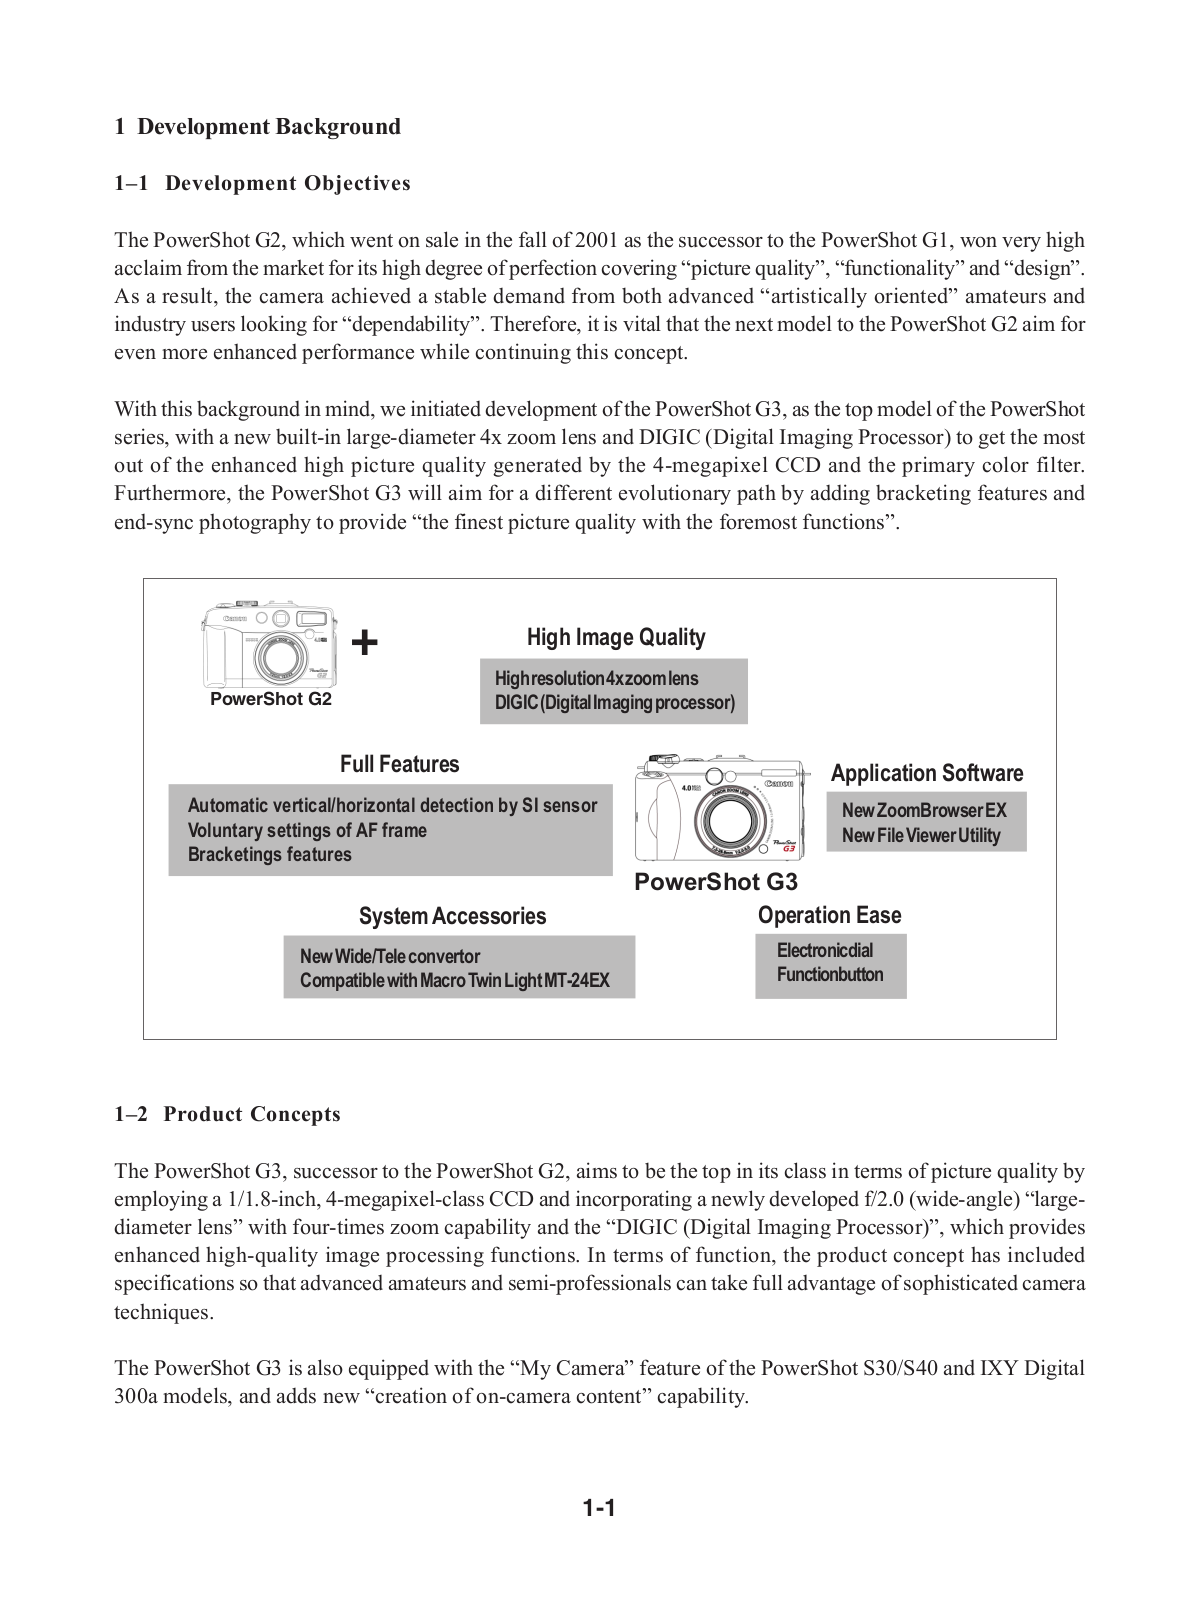
PowerShot G3
9
POWERSHOT G5
18
PowerShot G5 X
6
PowerShot G5 X Mark II
5
POWERSHOT G6
10
PowerShot G7
7
PowerShot G7 X
22
PowerShot G7X Mark II
7
PowerShot G7 X Mark III
5
PowerShot G7X Mark II Vlogger Kit
2
POWERSHOT G9
13
PowerShot G9 X
6
PowerShot G9 X Mark II
3
POWERSHOT IXUS 460
POWERSHOT IXUS 550
POWERSHOT IXUS A310
POWERSHOT IXUS II S
PowerShot N
7
PowerShot N100
5
PowerShot N2
6
PowerShot N Black
3
PowerShot N Facebook Ready
5
PowerShot Pro 1
25
PowerShot PRO70
2
POWERSHOT PRO90
PowerShot Pro 90 IS
6
POWERSHOT S1
3
PowerShot S10
4
PowerShot S100
10
Powershot S100 2MP Digital Elph
2
Powershot S100 Digital Elph
5
PowerShot S110
6
PowerShot S110 Digital ELPH
4
PowerShot S120
4
PowerShot S1 IS
18
PowerShot S1OO
POWERSHOT S2
4
PowerShot S20
5
PowerShot S200
8
POWERSHOT S230
7
PowerShot S230 DIGITAL ELPH
PowerShot S230 Digital IXUS V3
2
POWERSHOT S2 IS
13
Powershot S2 IS - Powershot S2 IS 5MP Digital
2
Powershot S2 IS - Powershot S2 IS 5MP Digital Camera
POWERSHOT S3
5
PowerShot S30
9
PowerShot S300
5
PowerShot S300 Digital Elph
POWERSHOT S3 IS
14
Loading...
Loading...
Nothing found
PowerShot G3
Service Manual
185 pgs
20.95 Mb
0
User Guide
212 pgs
2.91 Mb
0
User Manual
123 pgs
2.81 Mb
0
User Manual
2 pgs
381.52 Kb
0
Parts Catalog
23 pgs
458.95 Kb
0
Quick Start Manual
32 pgs
737.23 Kb
0
User Manual
2 pgs
49.42 Kb
0
User Manual [ru]
209 pgs
5.33 Mb
0
User Manual [zh]
211 pgs
7.03 Mb
0
Table of contents
Loading...
CANON POWERSHOT G3 Service Manual
...
CANON Service Manual
Download
Specifications and Main Features
Frequently Asked Questions
User Manual
Download
Loading...
+
155
hidden pages
Unhide
You need points to download manuals.
1 point = 1 manual.
You can buy points or you can get point for every manual you upload.
Buy points
Upload your manuals
 Loading...