

Canon PIXMA MX452, PIXMA MX392, PIXMA MX459 Setup Manual
1
2
11
11
22
33
44
22
ENGLISH
11
22
33
44
11
22
ESPAÑOL
Notes for Fax Setting Using Easy setup
Notas para usar la Conguración fax Conguración fácil (Easy setup)
Connect to a Telephone Jack / Connect to a Telephone
Setup for Fax Reception
Conguración del equipo para la recepción de fax
Read this manual after nishing the operation of Getting Started.
To use the fax features of the machine, you can enter the fax settings through the Easy setup.
Lea este manual después de terminar las operaciones de la Guía de inicio.
Para utilizar las funciones del equipo, puede introducir la conguración del fax mediante Conguración fácil (Easy setup).
Using Easy setup
Uso de Conguración fácil (Easy setup)
Conecte una clavija de línea telefónica / Conecte un teléfono
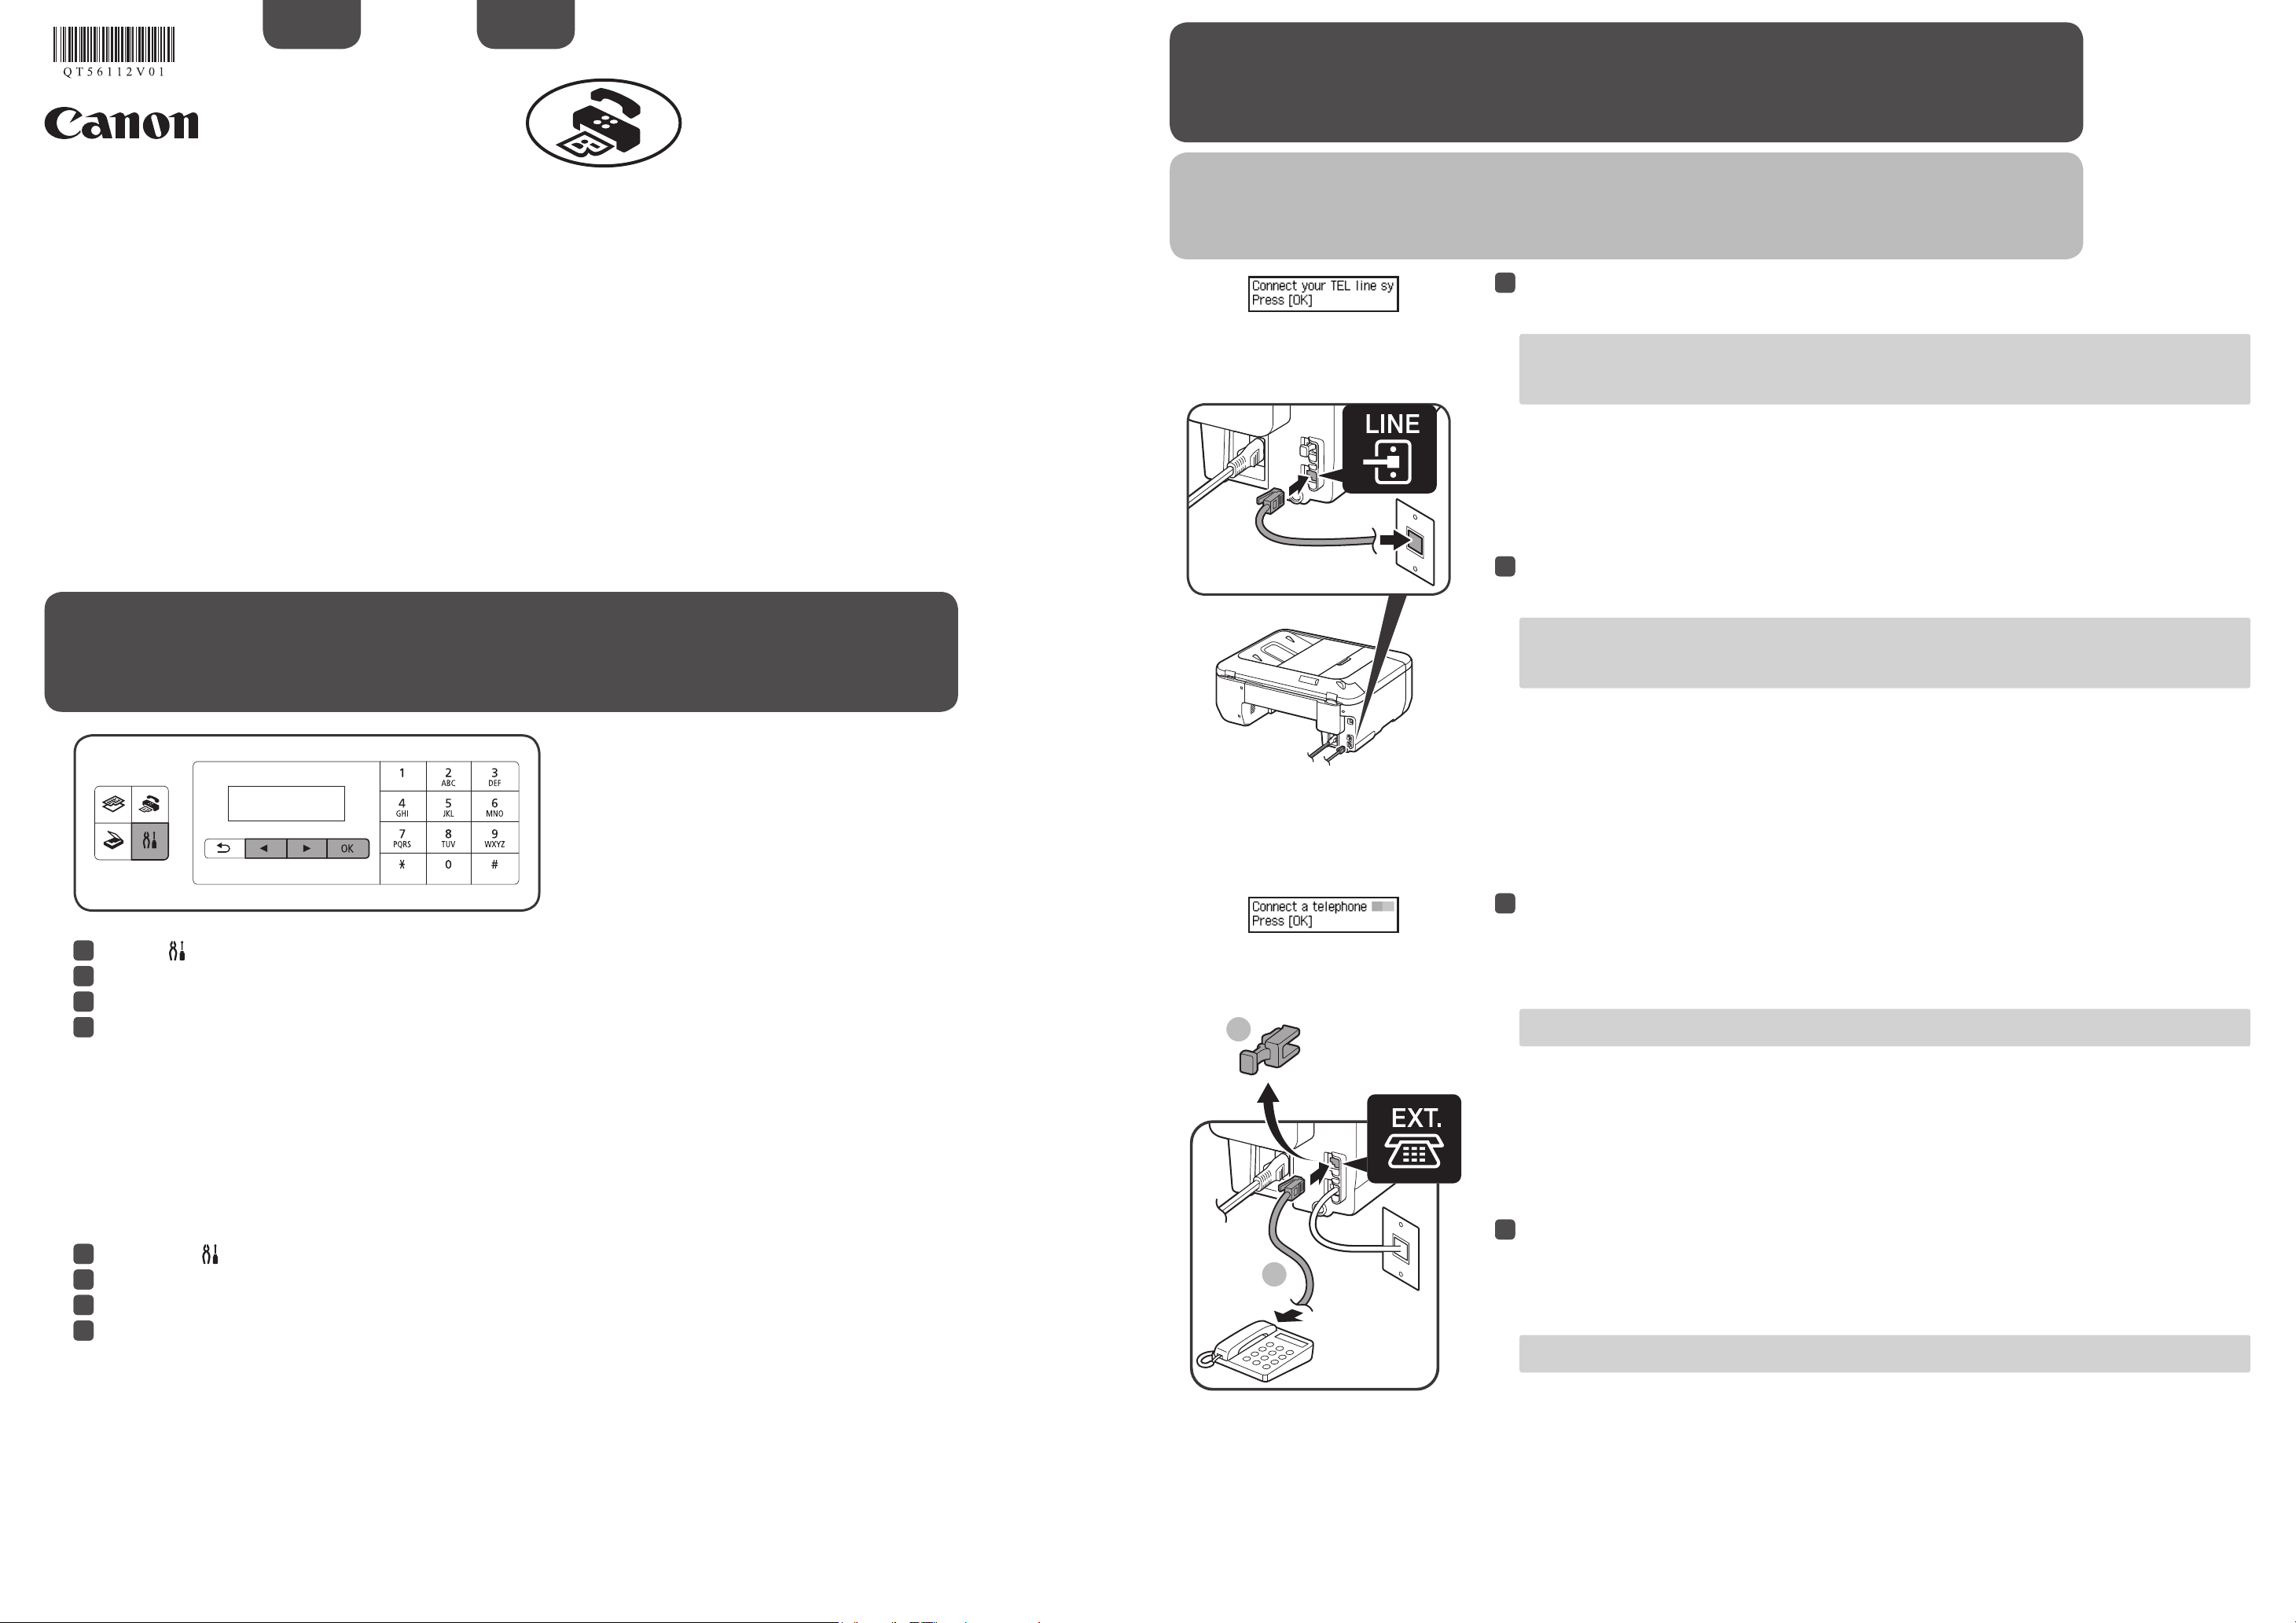
When Connect your TEL line system to the device's LINE jack is displayed, connect the machine to a
telephone jack with the supplied telephone line cable, then press the OK button.
A basic connection method is shown in this figure. For other connection methods, refer to the Online Manual.
•
Users in Europe: If you prepare your own telephone line cable, be sure it is a 6-wire telephone line cable.
•
Cuando aparezca al mensaje Conecte su sistema de línea tel. a la toma del dispositivo (Connect your
TEL line system to the device's LINE jack), conecte el equipo a la toma telefónica con el cable de línea de
teléfono suministrado y, a continuación, pulse el botón OK.
En esta figura se muestra un método de conexión básico. Para ver otros métodos de conexión, consulte el
•
Manual en línea.
Usuarios en Europa: si utiliza su propio cable de línea telefónica, asegúrese de que es un cable de línea
•
telefónica de 6 hilos.
Press the button to display the Setup menu.
Use the [] button to select Fax settings, then press the OK button.
Use the [] button to select Easy setup, then press the OK button.
Use the [] button to select Start setup, then press the OK button.
Easy setup starts up.
Follow the on-screen instruction to complete the settings in accordance with the operating environment.
Pulse el botón para mostrar el Menú Congurar (Setup menu).
Utilice el botón [] para seleccionar Conguración fax (Fax settings) y, a continuación, pulse el botón OK.
Utilice el botón [] para seleccionar Conguración fácil (Easy setup) y, a continuación, pulse el botón OK.
Utilice el botón [] para seleccionar Iniciar cong. (Start setup) y, a continuación, pulse el botón OK.
Se inicia la Conguración fácil (Easy setup).
Siga las instrucciones en pantalla para nalizar la conguración en función del entorno operativo.
When a message to prompt connection of a telephone or an answering machine is displayed and you want
to connect the device, remove the Cap, connect a telephone or an answering machine with a telephone line
cable and press the OK button.
If you do not want to connect a telephone or an answering machine, just press the OK button.
Do not use a telephone jack line duplexer.
•
Users in UK: Use a B.T. adapter for connection as required.
•
Cuando aparezca un mensaje solicitando que conecte un teléfono o un contestador, y desee conectar un
dispositivo, retire la tapa, conecte un teléfono o un contestador con el cable de línea de teléfono, y pulse el
botón OK.
Si no desea conectar ningún teléfono o contestador, simplemente pulse el botón OK.
No utilice un adaptador de clavija telefónica doble.
•
Usuarios de Reino Unido: utilice un adaptador de B.T. para la conexión, si fuera necesario.
•
QT5-6112-V01 PRINTED IN XXXXXXXX
XXXXXXXX
© CANON INC. 2013
Select a Line Type
Enter the External Answering Machine settings
Seleccione un tipo de línea
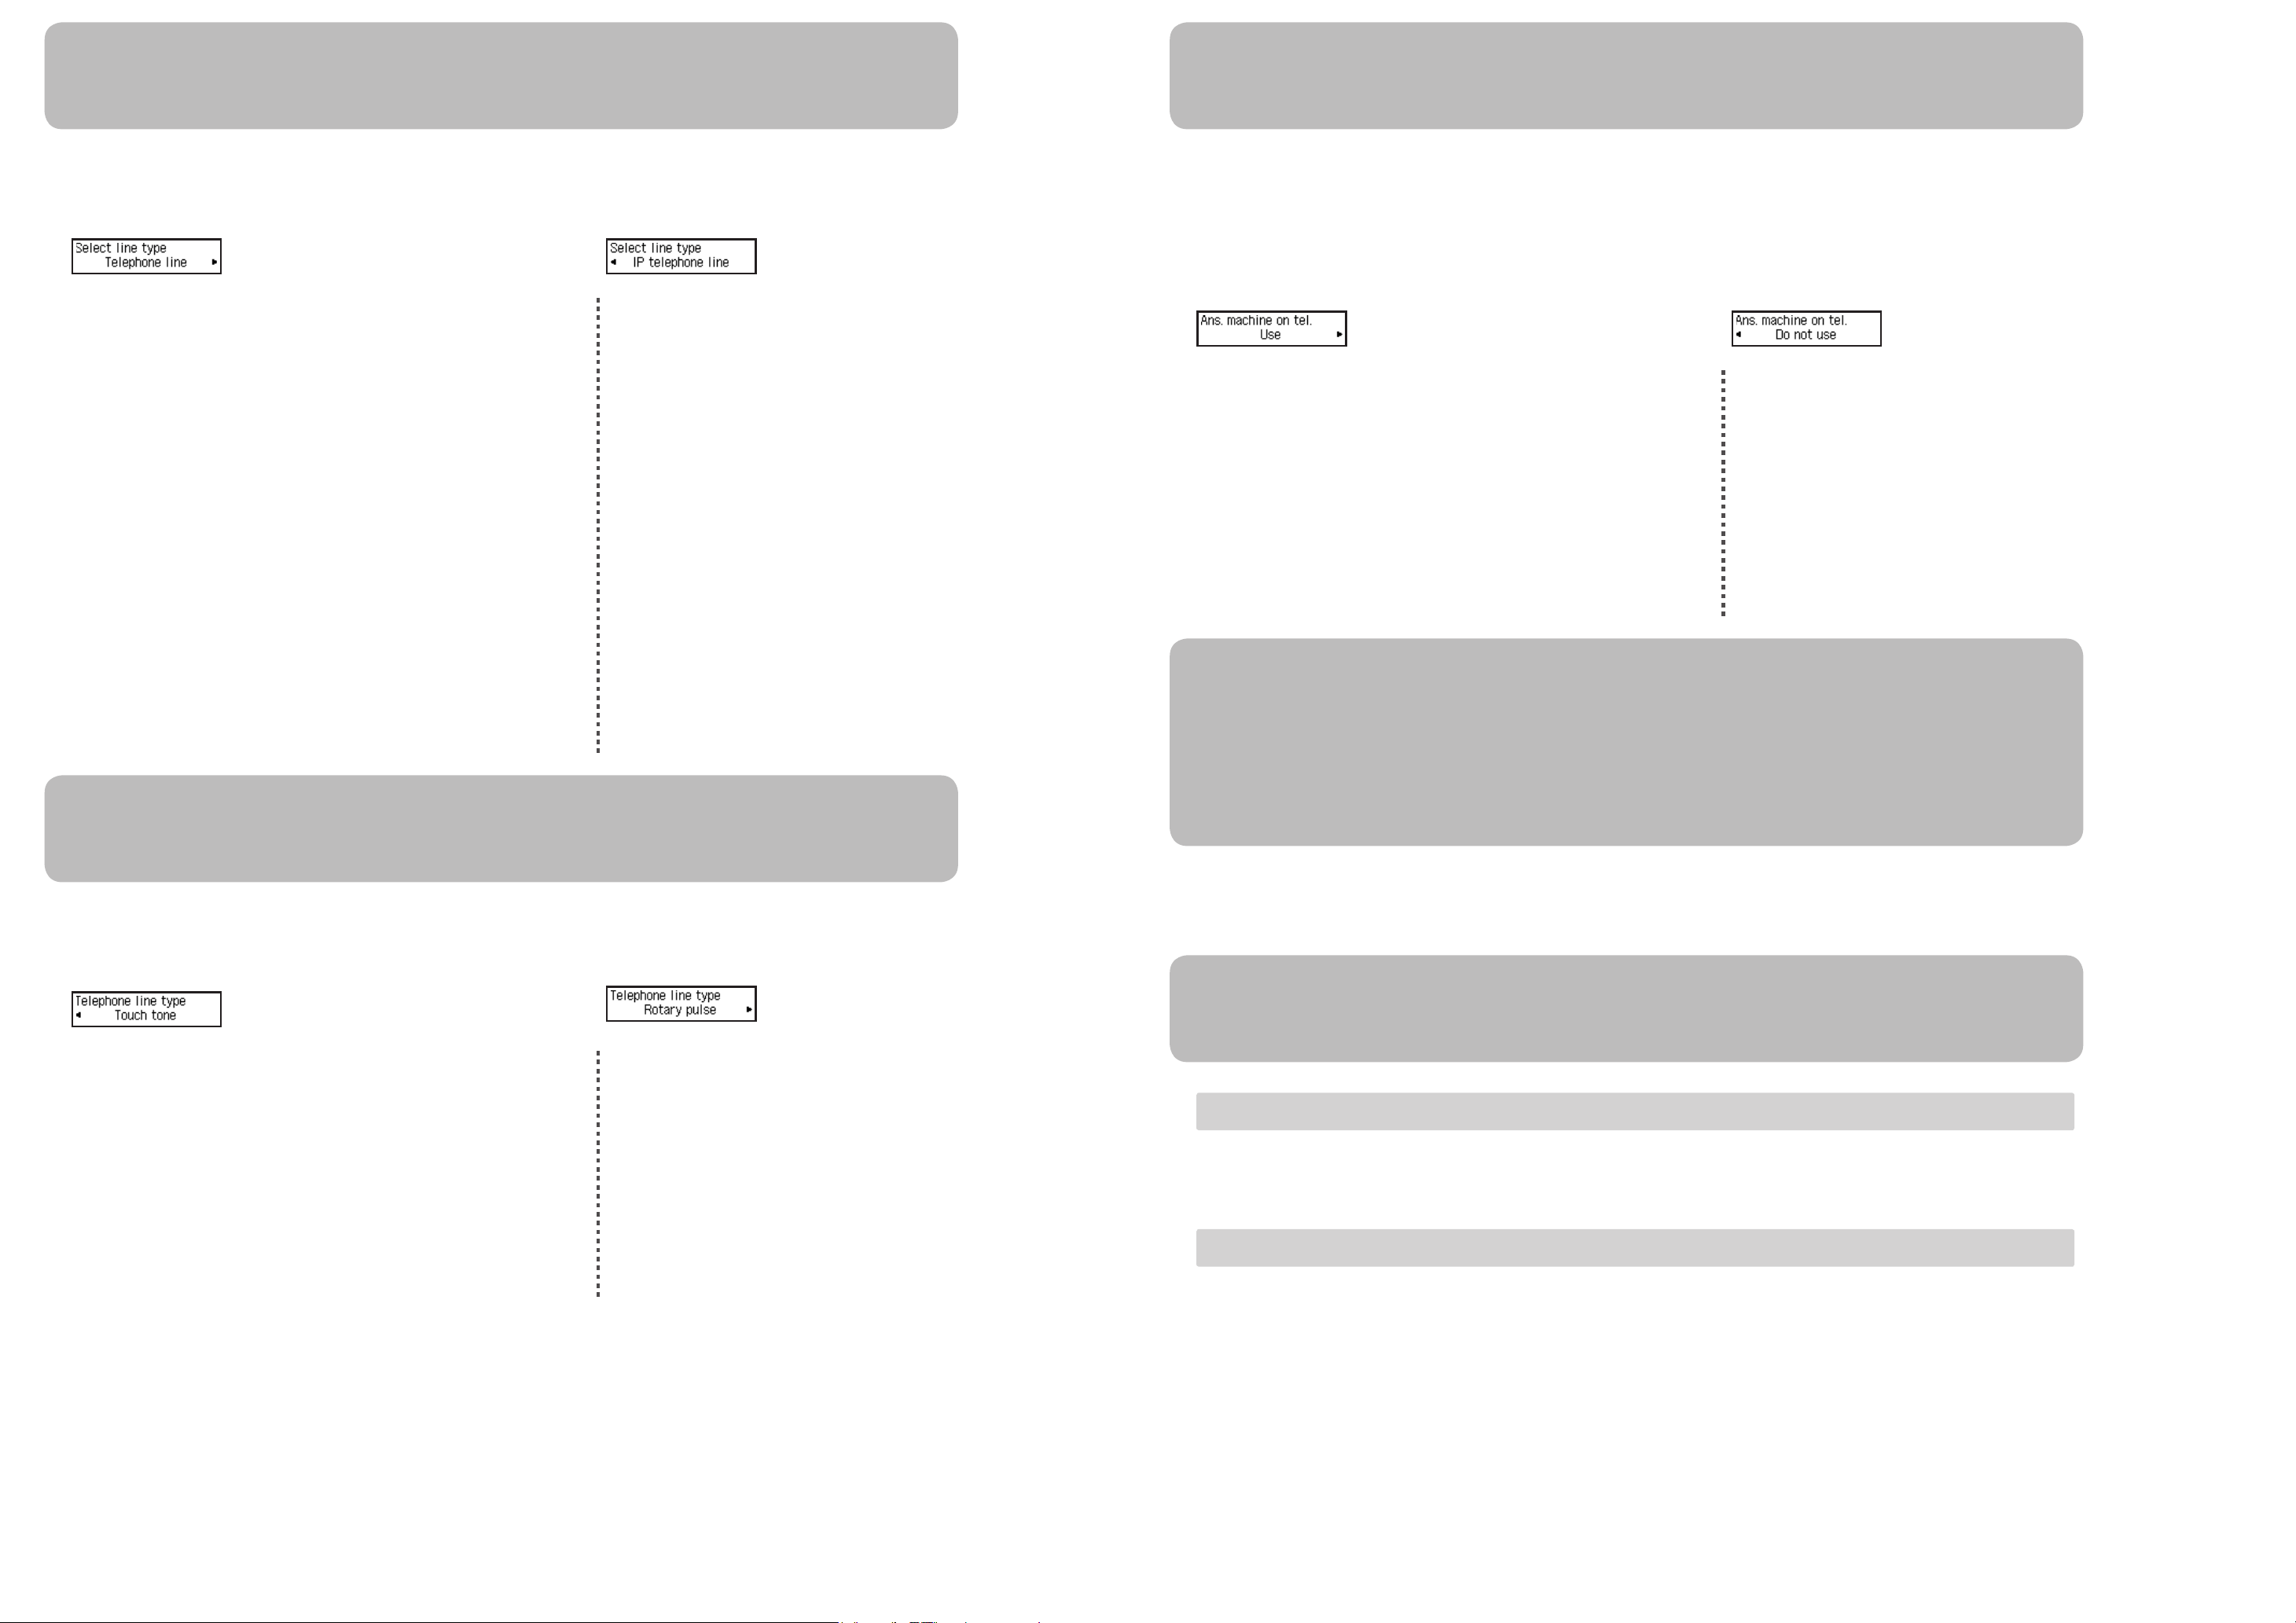
When Select line type is displayed, select a line type.
Cuando aparezca el mensaje Conectar a (Select line type), seleccione un tipo de línea.
To connect directly to the telephone jack on the wall
•
To connect to a PBX extension line or a xDSL splitter
•
Use the [] button to select Telephone line, then press the OK button.
Para conectar directamente la clavija de línea telefónica de la pared
•
Para conectar una línea de extensión de PBX o un divisor xDSL
•
Utilice el botón [] para seleccionar Línea de teléfono (Telephone line)
y, a continuación, pulse el botón OK.
•
•
•
•
•
•
To connect to an internet telephone
To connect to a xDSL modem
To connect to an ISDN line
Use the [] button to select IP telephone line, then press the OK button.
Para conectar un teléfono de Internet
Para conectar un módem xDSL
Para conectar una línea RDSI
Utilice el botón [] para seleccionar IP línea de teléfono (IP telephone
line) y, a continuación, pulse el botón OK.
Introduzca la conguración del contestador automático externo
When Ans. machine on tel. is displayed, select whether or not to use an answering machine in case fax and telephone are on the
same line.
Cuando aparezca Contestador en tel. (Ans. machine on tel.), seleccione si utilizar o no un contestador automático en caso de que
el fax y el teléfono compartan la misma línea.
If you want to use an answering machine
•
Use the [] button to select Use, then press the OK button.
Si desea utilizar un contestador automático
•
Utilice el botón [] para seleccionar Utilizar (Use) y, a continuación,
pulse el botón OK.
If you do not want to use an answering machine
•
Use the [] button to select Do not use, then press the OK button.
Si no desea utilizar un contestador automático
•
Utilice el botón [] para seleccionar No utilizar (Do not use) y, a
continuación, pulse el botón OK.
Set the Telephone line type
Dena el Tipo lín. telefónica (Telephone line type)
When Telephone line type is displayed, set the Telephone line type.
Cuando aparezca Tipo lín. telefónica (Telephone line type), establezca el Tipo lín. telefónica (Telephone line type).
A tone type
•
Use the [] button to select Touch tone, then press the OK button.
Not a tone type
•
Use the [] button to select Rotary pulse, then press the OK button.
Enter the FAX user settings and Date/time setting
Introduzca la Cong. usuario FAX (FAX user settings) y la Cong. hora/fecha (Date/time
setting)
Refer to the Online Manual to enter the settings.
Consulte el Manual en línea para introducir la conguración.
Enter the DRPD or Network switch settings
Introduzca la conguración del DRPD o del Conmutador de red (Network switch)
Refer to the Online Manual to enter the settings.
DRPD is available only in US and Canada.
•
Network switch may not be available depending on the region or country.
•
Un tipo de tono
•
Utilice el botón [] para seleccionar Tonos (Touch tone) y, a
continuación, pulse el botón OK.
Ningún tipo de tono
•
Utilice el botón [] para seleccionar Pulso rotativo (Rotary pulse) y, a
continuación, pulse el botón OK.
Consulte el Manual en línea para introducir la conguración.
DRPD sólo está disponible en Estados Unidos y Canadá.
•
El Conmutador de red (Network switch) podría no estar disponible dependiendo de la región o del país.
•
For the details of other settings, refer to the Online Manual.
Para obtener información sobre otras conguraciones, consulte el Manual en línea.
 Loading...