


Online Manual
My Image Garden Guide
English

Contents
Read Me First. . . . . . . . . . . . . . . . . . . . . . . . . . . . . . . . . . . . . . . . . . . . . . . . . . . . 6
Symbols Used in This Document. . . . . . . . . . . . . . . . . . . . . . . . . . . . . . . . . . . . . 7
Trademarks and Licenses. . . . . . . . . . . . . . . . . . . . . . . . . . . . . . . . . . . . . . . . . . . 8
Search Tips. . . . . . . . . . . . . . . . . . . . . . . . . . . . . . . . . . . . . . . . . . . . . . . . . . . . . 12
To Utilize Images Imported to the Computer. . . . . . . . . . . . . . . . . . . . . . . . . . . . 14
Saving Digital Camera Images to a Folder Subject to Image Analysis. . . . . . . . . . . . . . . . 16
General Notes (My Image Garden). . . . . . . . . . . . . . . . . . . . . . . . . . . . . . . . . . . 17
What Is My Image Garden?. . . . . . . . . . . . . . . . . . . . . . . . . . . . . . . . . . . . . . . . . 18
What You Can Do with My Image Garden. . . . . . . . . . . . . . . . . . . . . . . . . . . . . . . . . . . . . 19
File Formats. . . . . . . . . . . . . . . . . . . . . . . . . . . . . . . . . . . . . . . . . . . . . . . . . . . . . . . . . . . . . . . . . . . . . . . 23
Selecting Images, PDF Files, and Videos. . . . . . . . . . . . . . . . . . . . . . . . . . . . . . . . . . . . . . . . . . . . . . . . 25
Starting My Image Garden. . . . . . . . . . . . . . . . . . . . . . . . . . . . . . . . . . . . . . . . . . . . . . . . . 31
Utilizing the Item Recommendation Function. . . . . . . . . . . . . . . . . . . . . . . . . . . 32
Enjoying Items Recommended by My Image Garden. . . . . . . . . . . . . . . . . . . . . . . . . . . . 33
Registering Various Information to Photos. . . . . . . . . . . . . . . . . . . . . . . . . . . . . . . . . . . . . 36
Registering People. . . . . . . . . . . . . . . . . . . . . . . . . . . . . . . . . . . . . . . . . . . . . . . . . . . . . . . . . . . . . . . . . . 39
Registering People's Profiles. . . . . . . . . . . . . . . . . . . . . . . . . . . . . . . . . . . . . . . . . . . . . . . . . . . . . . 43
Registering Events. . . . . . . . . . . . . . . . . . . . . . . . . . . . . . . . . . . . . . . . . . . . . . . . . . . . . . . . . . . . . . . . . . 45
Registering Favorite Levels. . . . . . . . . . . . . . . . . . . . . . . . . . . . . . . . . . . . . . . . . . . . . . . . . . . . . . . . . . . 47
Printing. . . . . . . . . . . . . . . . . . . . . . . . . . . . . . . . . . . . . . . . . . . . . . . . . . . . . . . . 49
Printing Photos and Documents. . . . . . . . . . . . . . . . . . . . . . . . . . . . . . . . . . . . . . . . . . . . . 50
Printing Disc Labels (CD/DVD/BD). . . . . . . . . . . . . . . . . . . . . . . . . . . . . . . . . . . . . . . . . . . 53
Printing Recommended Items and Images Displayed in Slide Shows. . . . . . . . . . . . . . . . 57
Creating and Printing Items. . . . . . . . . . . . . . . . . . . . . . . . . . . . . . . . . . . . . . . . . . . . . . . . 60
Printing Photos in a Variety of Layouts. . . . . . . . . . . . . . . . . . . . . . . . . . . . . . . . . . . . . . . . . . . . . . . . . . 63
Printing Collages. . . . . . . . . . . . . . . . . . . . . . . . . . . . . . . . . . . . . . . . . . . . . . . . . . . . . . . . . . . . . . . . . . . 67
Printing Cards. . . . . . . . . . . . . . . . . . . . . . . . . . . . . . . . . . . . . . . . . . . . . . . . . . . . . . . . . . . . . . . . . . . . . 70
Printing Calendars. . . . . . . . . . . . . . . . . . . . . . . . . . . . . . . . . . . . . . . . . . . . . . . . . . . . . . . . . . . . . . . . . . 73
Printing Stickers. . . . . . . . . . . . . . . . . . . . . . . . . . . . . . . . . . . . . . . . . . . . . . . . . . . . . . . . . . . . . . . . . . . . 77
Printing in a Cinematic Layout. . . . . . . . . . . . . . . . . . . . . . . . . . . . . . . . . . . . . . . . . . . . . . . . . . . . . . . . . 80
Printing Paper Crafts. . . . . . . . . . . . . . . . . . . . . . . . . . . . . . . . . . . . . . . . . . . . . . . . . . . . . . . . . . . . . . . . 83

Downloading and Printing PREMIUM Contents. . . . . . . . . . . . . . . . . . . . . . . . . . . . . . . . . 86
Capturing and Printing Still Images from Videos. . . . . . . . . . . . . . . . . . . . . . . . . . . . . . . . 91
Creating Images of Merged Video Frames. . . . . . . . . . . . . . . . . . . . . . . . . . . . . . . . . . . . . . . . . . . . . . . 96
Correcting Still Images Captured from Videos. . . . . . . . . . . . . . . . . . . . . . . . . . . . . . . . . . . . . . . . . . . . . 98
Using Various Functions. . . . . . . . . . . . . . . . . . . . . . . . . . . . . . . . . . . . . . . . . . 101
Scanning Photos and Documents. . . . . . . . . . . . . . . . . . . . . . . . . . . . . . . . . . . . . . . . . . 102
Easy Scanning with Auto Scan. . . . . . . . . . . . . . . . . . . . . . . . . . . . . . . . . . . . . . . . . . . . . . . . . . . . . . . 103
Scanning Photos. . . . . . . . . . . . . . . . . . . . . . . . . . . . . . . . . . . . . . . . . . . . . . . . . . . . . . . . . . . . . . . . . . 106
Scanning Documents. . . . . . . . . . . . . . . . . . . . . . . . . . . . . . . . . . . . . . . . . . . . . . . . . . . . . . . . . . . . . . . 109
Scanning with Favorite Settings. . . . . . . . . . . . . . . . . . . . . . . . . . . . . . . . . . . . . . . . . . . . . . . . . . . . . . . 112
Cropping Scanned Images. . . . . . . . . . . . . . . . . . . . . . . . . . . . . . . . . . . . . . . . . . . . . . . . . . . . . . . . . . 115
Editing Items. . . . . . . . . . . . . . . . . . . . . . . . . . . . . . . . . . . . . . . . . . . . . . . . . . . . . . . . . . . 117
Setting the Design and Main People. . . . . . . . . . . . . . . . . . . . . . . . . . . . . . . . . . . . . . . . . . . . . . . . . . . 118
Changing Background. . . . . . . . . . . . . . . . . . . . . . . . . . . . . . . . . . . . . . . . . . . . . . . . . . . . . . . . . . . . . . 121
Changing Layout. . . . . . . . . . . . . . . . . . . . . . . . . . . . . . . . . . . . . . . . . . . . . . . . . . . . . . . . . . . . . . . . . . 124
Arranging Photos Automatically. . . . . . . . . . . . . . . . . . . . . . . . . . . . . . . . . . . . . . . . . . . . . . . . . . . . . . . 126
Adding, Deleting, or Rearranging Pages. . . . . . . . . . . . . . . . . . . . . . . . . . . . . . . . . . . . . . . . . . . . . . . . 128
Inserting Images. . . . . . . . . . . . . . . . . . . . . . . . . . . . . . . . . . . . . . . . . . . . . . . . . . . . . . . . . . . . . . . . . . 131
Adjusting, Correcting, or Enhancing Images. . . . . . . . . . . . . . . . . . . . . . . . . . . . . . . . . . . . . . . . . . . . . 134
Adding Text. . . . . . . . . . . . . . . . . . . . . . . . . . . . . . . . . . . . . . . . . . . . . . . . . . . . . . . . . . . . . . . . . . . . . . 136
Adding/Adjusting Text Boxes. . . . . . . . . . . . . . . . . . . . . . . . . . . . . . . . . . . . . . . . . . . . . . . . . . . . . . . . . 138
Adding/Adjusting Image Layout Frames. . . . . . . . . . . . . . . . . . . . . . . . . . . . . . . . . . . . . . . . . . . . . . . . 142
Correcting/Enhancing Photos. . . . . . . . . . . . . . . . . . . . . . . . . . . . . . . . . . . . . . . . . . . . . . 145
Using Auto Photo Fix. . . . . . . . . . . . . . . . . . . . . . . . . . . . . . . . . . . . . . . . . . . . . . . . . . . . . . . . . . . . . . . 148
Using Red-Eye Correction. . . . . . . . . . . . . . . . . . . . . . . . . . . . . . . . . . . . . . . . . . . . . . . . . . . . . . . . . . . 150
Using Face Brightener. . . . . . . . . . . . . . . . . . . . . . . . . . . . . . . . . . . . . . . . . . . . . . . . . . . . . . . . . . . . . . 153
Using Face Sharpener. . . . . . . . . . . . . . . . . . . . . . . . . . . . . . . . . . . . . . . . . . . . . . . . . . . . . . . . . . . . . . 156
Using Digital Face Smoothing. . . . . . . . . . . . . . . . . . . . . . . . . . . . . . . . . . . . . . . . . . . . . . . . . . . . . . . . 159
Using Blemish Remover. . . . . . . . . . . . . . . . . . . . . . . . . . . . . . . . . . . . . . . . . . . . . . . . . . . . . . . . . . . . 162
Adjusting Images. . . . . . . . . . . . . . . . . . . . . . . . . . . . . . . . . . . . . . . . . . . . . . . . . . . . . . . . . . . . . . . . . . 165
Cropping Photos. . . . . . . . . . . . . . . . . . . . . . . . . . . . . . . . . . . . . . . . . . . . . . . . . . . . . . . . 167
Enhancing Photos Using Special Filters. . . . . . . . . . . . . . . . . . . . . . . . . . . . . . . . . . . . . . 169
Enhancing with Fish-eye Effect. . . . . . . . . . . . . . . . . . . . . . . . . . . . . . . . . . . . . . . . . . . . . . . . . . . . . . . 171
Enhancing with Miniature Effect. . . . . . . . . . . . . . . . . . . . . . . . . . . . . . . . . . . . . . . . . . . . . . . . . . . . . . . 174
Enhancing with Toy Camera Effect. . . . . . . . . . . . . . . . . . . . . . . . . . . . . . . . . . . . . . . . . . . . . . . . . . . . 177
Enhancing with Soft Focus. . . . . . . . . . . . . . . . . . . . . . . . . . . . . . . . . . . . . . . . . . . . . . . . . . . . . . . . . . 179
Blurring the Background. . . . . . . . . . . . . . . . . . . . . . . . . . . . . . . . . . . . . . . . . . . . . . . . . . . . . . . . . . . . 181

Creating/Editing PDF Files. . . . . . . . . . . . . . . . . . . . . . . . . . . . . . . . . . . . . . . . . . . . . . . . 184
Extracting Text from Images (OCR Function). . . . . . . . . . . . . . . . . . . . . . . . . . . . . . . . . . 186
Downloading Images from Photo Sharing Sites. . . . . . . . . . . . . . . . . . . . . . . . . . . . . . . . 187
My Image Garden Screens. . . . . . . . . . . . . . . . . . . . . . . . . . . . . . . . . . . . . . . . 189
Main Screen. . . . . . . . . . . . . . . . . . . . . . . . . . . . . . . . . . . . . . . . . . . . . . . . . . . . . . . . . . . 191
Create or Open Items View. . . . . . . . . . . . . . . . . . . . . . . . . . . . . . . . . . . . . . . . . . . . . . . . . . . . . . . . . . 194
Item Edit Screen. . . . . . . . . . . . . . . . . . . . . . . . . . . . . . . . . . . . . . . . . . . . . . . . . . . . . . . . . . . . . . 197
Set Design and Paper Dialog. . . . . . . . . . . . . . . . . . . . . . . . . . . . . . . . . . . . . . . . . . . . . . . . 201
Select Background Dialog. . . . . . . . . . . . . . . . . . . . . . . . . . . . . . . . . . . . . . . . . . . . . . . . . . . 203
Select Layout Dialog. . . . . . . . . . . . . . . . . . . . . . . . . . . . . . . . . . . . . . . . . . . . . . . . . . . . . . . 205
Advanced Settings Dialog (Stickers). . . . . . . . . . . . . . . . . . . . . . . . . . . . . . . . . . . . . . . . . . . 206
Advanced Settings Dialog (Photo Layout). . . . . . . . . . . . . . . . . . . . . . . . . . . . . . . . . . . . . . . 207
Advanced Settings Dialog (Calendar). . . . . . . . . . . . . . . . . . . . . . . . . . . . . . . . . . . . . . . . . . 209
Advanced Settings Dialog (Disc Label (CD/DVD/BD)). . . . . . . . . . . . . . . . . . . . . . . . . . . . . 214
Calendar View. . . . . . . . . . . . . . . . . . . . . . . . . . . . . . . . . . . . . . . . . . . . . . . . . . . . . . . . . . . . . . . . . . . . 215
Register Event/Edit Event Dialog. . . . . . . . . . . . . . . . . . . . . . . . . . . . . . . . . . . . . . . . . . . . . . . . . . 219
Event View. . . . . . . . . . . . . . . . . . . . . . . . . . . . . . . . . . . . . . . . . . . . . . . . . . . . . . . . . . . . . . . . . . . . . . . 221
Expanded Display of Event View. . . . . . . . . . . . . . . . . . . . . . . . . . . . . . . . . . . . . . . . . . . . . . . . . . 223
People View. . . . . . . . . . . . . . . . . . . . . . . . . . . . . . . . . . . . . . . . . . . . . . . . . . . . . . . . . . . . . . . . . . . . . . 226
Register Profile Dialog. . . . . . . . . . . . . . . . . . . . . . . . . . . . . . . . . . . . . . . . . . . . . . . . . . . . . . . . . . 228
Expanded Display of People View. . . . . . . . . . . . . . . . . . . . . . . . . . . . . . . . . . . . . . . . . . . . . . . . . 230
Unregistered People View. . . . . . . . . . . . . . . . . . . . . . . . . . . . . . . . . . . . . . . . . . . . . . . . . . . . . . . . . . . 233
Deleted Images of People View. . . . . . . . . . . . . . . . . . . . . . . . . . . . . . . . . . . . . . . . . . . . . . . . . . . . . . . 236
Folder View. . . . . . . . . . . . . . . . . . . . . . . . . . . . . . . . . . . . . . . . . . . . . . . . . . . . . . . . . . . . . . . . . . . . . . 238
Scan View. . . . . . . . . . . . . . . . . . . . . . . . . . . . . . . . . . . . . . . . . . . . . . . . . . . . . . . . . . . . . . . . . . . . . . . 241
Crop View (Scan View). . . . . . . . . . . . . . . . . . . . . . . . . . . . . . . . . . . . . . . . . . . . . . . . . . . . . . . . . 244
Save Dialog (Scan View). . . . . . . . . . . . . . . . . . . . . . . . . . . . . . . . . . . . . . . . . . . . . . . . . . . . . . . . 246
PDF Settings Dialog. . . . . . . . . . . . . . . . . . . . . . . . . . . . . . . . . . . . . . . . . . . . . . . . . . . . . . . 248
Photo Sharing Sites View. . . . . . . . . . . . . . . . . . . . . . . . . . . . . . . . . . . . . . . . . . . . . . . . . . . . . . . . . . . 250
Save Dialog (Photo Sharing Sites View). . . . . . . . . . . . . . . . . . . . . . . . . . . . . . . . . . . . . . . . . . . . 254
Video Frame Capture View. . . . . . . . . . . . . . . . . . . . . . . . . . . . . . . . . . . . . . . . . . . . . . . . . . . . . . . . . . 255
Correct View. . . . . . . . . . . . . . . . . . . . . . . . . . . . . . . . . . . . . . . . . . . . . . . . . . . . . . . . . . . . . . . . . 259
Merge Frames View. . . . . . . . . . . . . . . . . . . . . . . . . . . . . . . . . . . . . . . . . . . . . . . . . . . . . . . . . . . . 262
Save Dialog (Video Frame Capture View). . . . . . . . . . . . . . . . . . . . . . . . . . . . . . . . . . . . . . . . . . . 264
Download PREMIUM Contents View. . . . . . . . . . . . . . . . . . . . . . . . . . . . . . . . . . . . . . . . . . . . . . . . . . . 265

Downloaded PREMIUM Contents View. . . . . . . . . . . . . . . . . . . . . . . . . . . . . . . . . . . . . . . . . . . . . . . . . 266
Correct/Enhance Images Window. . . . . . . . . . . . . . . . . . . . . . . . . . . . . . . . . . . . . . . . . . 268
Crop Window. . . . . . . . . . . . . . . . . . . . . . . . . . . . . . . . . . . . . . . . . . . . . . . . . . . . . . . . . . . . . . . . . . . . . 275
Save Dialog (Correct/Enhance Images or Special Image Filters Window). . . . . . . . . . . . . . . . . . . . . . 276
Special Image Filters Window. . . . . . . . . . . . . . . . . . . . . . . . . . . . . . . . . . . . . . . . . . . . . 277
Create/Edit PDF File View. . . . . . . . . . . . . . . . . . . . . . . . . . . . . . . . . . . . . . . . . . . . . . . . 281
Save Dialog (Create/Edit PDF File View). . . . . . . . . . . . . . . . . . . . . . . . . . . . . . . . . . . . . . . . . . . . . . . 285
File Settings Dialog. . . . . . . . . . . . . . . . . . . . . . . . . . . . . . . . . . . . . . . . . . . . . . . . . . . . . . . . . . . . 286
Print Settings Dialog. . . . . . . . . . . . . . . . . . . . . . . . . . . . . . . . . . . . . . . . . . . . . . . . . . . . . 288
Paper Size List. . . . . . . . . . . . . . . . . . . . . . . . . . . . . . . . . . . . . . . . . . . . . . . . . . . . . . . . . . . . . . . . . . . . 295
Preferences Dialog. . . . . . . . . . . . . . . . . . . . . . . . . . . . . . . . . . . . . . . . . . . . . . . . . . . . . . 297
Troubleshooting. . . . . . . . . . . . . . . . . . . . . . . . . . . . . . . . . . . . . . . . . . . . . . . . . 301
Cannot Use PREMIUM Contents. . . . . . . . . . . . . . . . . . . . . . . . . . . . . . . . . . . . . . . . . . . 302
How to Check the Version - My Image Garden -. . . . . . . . . . . . . . . . . . . . . . . . 304
Read Me First
Notes on Online Manual Usage
How to Print
Notes on Online Manual Usage
• Reproduction, diversion or copying of any text, photo or image published in the Online Manual
(hereinafter referred to as "this guide"), in whole or in part, is prohibited.
• In principle, Canon shall change or delete the contents of this guide without prior notice to customers.
In addition, Canon may suspend or stop the disclosure of this guide due to unavoidable reasons.
Canon shall not be liable for any damage suffered by customers as a result of changes in or deletion
of information in this guide, or suspension/stoppage of disclosure of this guide.
• Although the contents of this guide have been prepared with utmost care, please contact the service
center if you find any incorrect or missing information.
• In principle, the descriptions in this guide are based on the product at the time of its initial sale.
• This guide does not disclose the manuals of all the products sold by Canon. See the manual supplied
with the product when using a product that is not described in this guide.
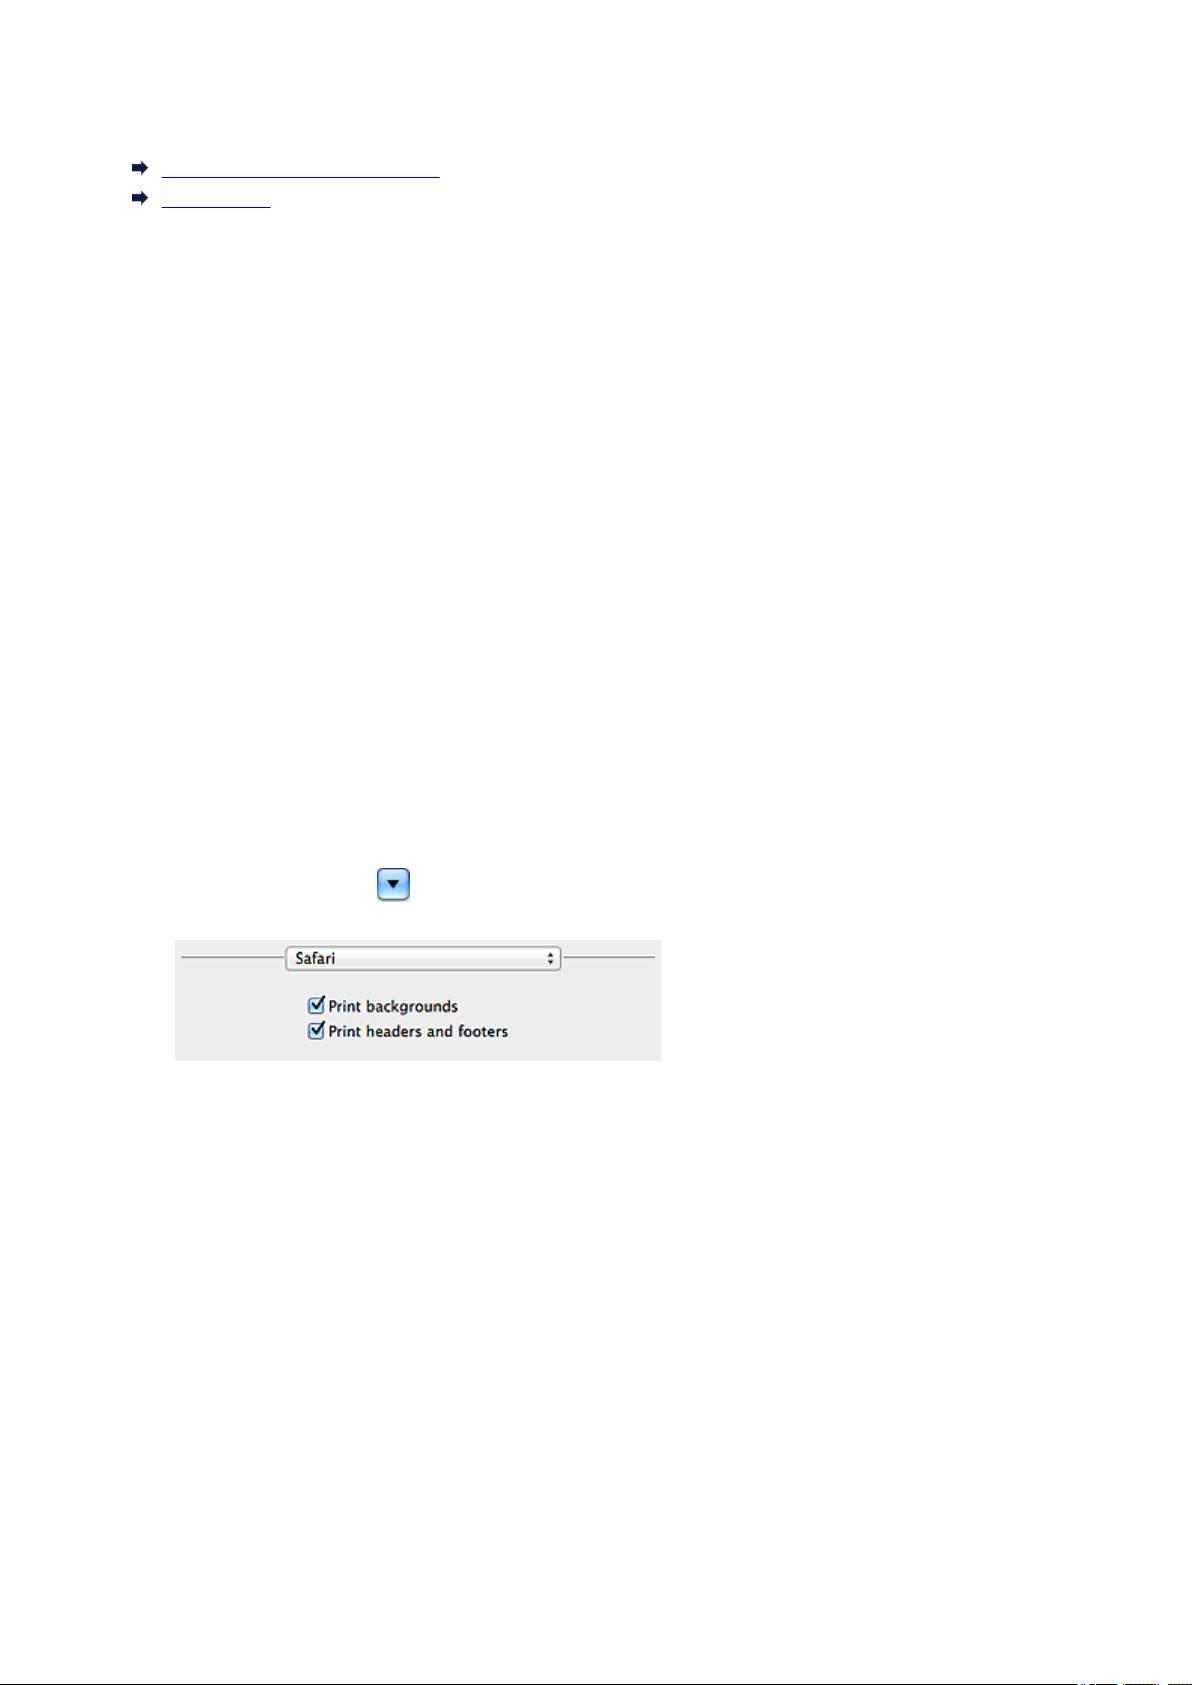
How to Print
Use the print function of your Web browser to print this guide.
To print background colors and images, follow the steps below to display the Print dialog options, then
select the Print backgrounds checkbox.
1. Click Print... from the File menu.
2. Click Show Details or (Down Arrow).
3. Select Safari from the pop-up menu.
6

Symbols Used in This Document
Warning
Instructions that, if ignored, could result in death or serious personal injury caused by incorrect
operation of the equipment. These must be observed for safe operation.
Caution
Instructions that, if ignored, could result in personal injury or material damage caused by incorrect
operation of the equipment. These must be observed for safe operation.
Important
Instructions including important information. To avoid damage and injury or improper use of the
product, be sure to read these indications.
Note
Instructions including notes for operation and additional explanations.
Basic
Instructions explaining basic operations of your product.
Note
• Icons may vary depending on your product.
7

Trademarks and Licenses
• Microsoft is a registered trademark of Microsoft Corporation.
• Windows is a trademark or registered trademark of Microsoft Corporation in the U.S. and/or other
countries.
• Windows Vista is a trademark or registered trademark of Microsoft Corporation in the U.S. and/or other
countries.
• Internet Explorer is a trademark or registered trademark of Microsoft Corporation in the U.S. and/or
other countries.
• Mac, Mac OS, AirPort, Safari, Bonjour, iPad, iPhone and iPod touch are trademarks of Apple Inc.,
registered in the U.S. and other countries. AirPrint and the AirPrint logo are trademarks of Apple Inc.
• IOS is a trademark or registered trademark of Cisco in the U.S. and other countries and is used under
license.
• Google Cloud Print, Google Chrome, Android, Google Play and Picasa are either registered trademarks
or trademarks of Google Inc.
• Adobe, Photoshop, Photoshop Elements, Lightroom, Adobe RGB and Adobe RGB (1998) are either
registered trademarks or trademarks of Adobe Systems Incorporated in the United States and/or other
countries.
• Photo Rag is a trademark of Hahnemühle FineArt GmbH.
• Bluetooth is a trademark of Bluetooth SIG, Inc., U.S.A. and licensed to Canon Inc.
Note
• The formal name of Windows Vista is Microsoft Windows Vista operating system.
Copyright (c) 2003-2004, Apple Computer, Inc. All rights reserved.
Redistribution and use in source and binary forms, with or without modification, are permitted provided
that the following conditions are met:
1. Redistributions of source code must retain the above copyright notice, this list of conditions and the
following disclaimer.
2. Redistributions in binary form must reproduce the above copyright notice, this list of conditions and
the following disclaimer in the documentation and/or other materials provided with the distribution.
3. Neither the name of Apple Computer, Inc. ("Apple") nor the names of its contributors may be used to
endorse or promote products derived from this software without specific prior written permission.
THIS SOFTWARE IS PROVIDED BY APPLE AND ITS CONTRIBUTORS "AS IS" AND ANY EXPRESS
OR IMPLIED WARRANTIES, INCLUDING, BUT NOT LIMITED TO, THE IMPLIED WARRANTIES OF
MERCHANTABILITY AND FITNESS FOR A PARTICULAR PURPOSE ARE DISCLAIMED. IN NO
EVENT SHALL APPLE OR ITS CONTRIBUTORS BE LIABLE FOR ANY DIRECT, INDIRECT,
INCIDENTAL, SPECIAL, EXEMPLARY, OR CONSEQUENTIAL DAMAGES (INCLUDING, BUT NOT
LIMITED TO, PROCUREMENT OF SUBSTITUTE GOODS OR SERVICES; LOSS OF USE, DATA, OR
PROFITS; OR BUSINESS INTERRUPTION) HOWEVER CAUSED AND ON ANY THEORY OF
LIABILITY, WHETHER IN CONTRACT, STRICT LIABILITY, OR TORT INCLUDING NEGLIGENCE OR
OTHERWISE) ARISING IN ANY WAY OUT OF THE USE OF THIS SOFTWARE, EVEN IF ADVISED OF
THE POSSIBILITY OF SUCH DAMAGE.
Apache License
Version 2.0, January 2004
http://www.apache.org/licenses/
TERMS AND CONDITIONS FOR USE, REPRODUCTION, AND DISTRIBUTION
8

1. Definitions.
"License" shall mean the terms and conditions for use, reproduction, and distribution as defined by
Sections 1 through 9 of this document.
"Licensor" shall mean the copyright owner or entity authorized by the copyright owner that is granting
the License.
"Legal Entity" shall mean the union of the acting entity and all other entities that control, are controlled
by, or are under common control with that entity. For the purposes of this definition, "control" means
(i) the power, direct or indirect, to cause the direction or management of such entity, whether by
contract or otherwise, or (ii) ownership of fifty percent (50%) or more of the outstanding shares, or (iii)
beneficial ownership of such entity.
"You" (or "Your") shall mean an individual or Legal Entity exercising permissions granted by this
License.
"Source" form shall mean the preferred form for making modifications, including but not limited to
software source code, documentation source, and configuration files.
"Object" form shall mean any form resulting from mechanical transformation or translation of a Source
form, including but not limited to compiled object code, generated documentation, and conversions to
other media types.
"Work" shall mean the work of authorship, whether in Source or Object form, made available under
the License, as indicated by a copyright notice that is included in or attached to the work (an example
is provided in the Appendix below).
"Derivative Works" shall mean any work, whether in Source or Object form, that is based on (or
derived from) the Work and for which the editorial revisions, annotations, elaborations, or other
modifications represent, as a whole, an original work of authorship. For the purposes of this License,
Derivative Works shall not include works that remain separable from, or merely link (or bind by name)
to the interfaces of, the Work and Derivative Works thereof.
"Contribution" shall mean any work of authorship, including the original version of the Work and any
modifications or additions to that Work or Derivative Works thereof, that is intentionally submitted to
Licensor for inclusion in the Work by the copyright owner or by an individual or Legal Entity
authorized to submit on behalf of the copyright owner. For the purposes of this definition, "submitted"
means any form of electronic, verbal, or written communication sent to the Licensor or its
representatives, including but not limited to communication on electronic mailing lists, source code
control systems, and issue tracking systems that are managed by, or on behalf of, the Licensor for
the purpose of discussing and improving the Work, but excluding communication that is
conspicuously marked or otherwise designated in writing by the copyright owner as "Not a
Contribution."
"Contributor" shall mean Licensor and any individual or Legal Entity on behalf of whom a Contribution
has been received by Licensor and subsequently incorporated within the Work.
2. Grant of Copyright License. Subject to the terms and conditions of this License, each Contributor
hereby grants to You a perpetual, worldwide, non-exclusive, no-charge, royalty-free, irrevocable
copyright license to reproduce, prepare Derivative Works of, publicly display, publicly perform,
sublicense, and distribute the Work and such Derivative Works in Source or Object form.
3. Grant of Patent License. Subject to the terms and conditions of this License, each Contributor hereby
grants to You a perpetual, worldwide, non-exclusive, no-charge, royalty-free, irrevocable (except as
stated in this section) patent license to make, have made, use, offer to sell, sell, import, and
otherwise transfer the Work, where such license applies only to those patent claims licensable by
such Contributor that are necessarily infringed by their Contribution(s) alone or by combination of
9

their Contribution(s) with the Work to which such Contribution(s) was submitted. If You institute patent
litigation against any entity (including a cross-claim or counterclaim in a lawsuit) alleging that the
Work or a Contribution incorporated within the Work constitutes direct or contributory patent
infringement, then any patent licenses granted to You under this License for that Work shall terminate
as of the date such litigation is filed.
4. Redistribution. You may reproduce and distribute copies of the Work or Derivative Works thereof in
any medium, with or without modifications, and in Source or Object form, provided that You meet the
following conditions:
1. You must give any other recipients of the Work or Derivative Works a copy of this License; and
2. You must cause any modified files to carry prominent notices stating that You changed the files;
and
3. You must retain, in the Source form of any Derivative Works that You distribute, all copyright,
patent, trademark, and attribution notices from the Source form of the Work, excluding those
notices that do not pertain to any part of the Derivative Works; and
4. If the Work includes a "NOTICE" text file as part of its distribution, then any Derivative Works that
You distribute must include a readable copy of the attribution notices contained within such
NOTICE file, excluding those notices that do not pertain to any part of the Derivative Works, in at
least one of the following places: within a NOTICE text file distributed as part of the Derivative
Works; within the Source form or documentation, if provided along with the Derivative Works; or,
within a display generated by the Derivative Works, if and wherever such third-party notices
normally appear. The contents of the NOTICE file are for informational purposes only and do not
modify the License. You may add Your own attribution notices within Derivative Works that You
distribute, alongside or as an addendum to the NOTICE text from the Work, provided that such
additional attribution notices cannot be construed as modifying the License.
You may add Your own copyright statement to Your modifications and may provide additional or
different license terms and conditions for use, reproduction, or distribution of Your modifications,
or for any such Derivative Works as a whole, provided Your use, reproduction, and distribution of
the Work otherwise complies with the conditions stated in this License.
5. Submission of Contributions. Unless You explicitly state otherwise, any Contribution intentionally
submitted for inclusion in the Work by You to the Licensor shall be under the terms and conditions of
this License, without any additional terms or conditions. Notwithstanding the above, nothing herein
shall supersede or modify the terms of any separate license agreement you may have executed with
Licensor regarding such Contributions.
6. Trademarks. This License does not grant permission to use the trade names, trademarks, service
marks, or product names of the Licensor, except as required for reasonable and customary use in
describing the origin of the Work and reproducing the content of the NOTICE file.
7. Disclaimer of Warranty. Unless required by applicable law or agreed to in writing, Licensor provides
the Work (and each Contributor provides its Contributions) on an "AS IS" BASIS, WITHOUT
WARRANTIES OR CONDITIONS OF ANY KIND, either express or implied, including, without
limitation, any warranties or conditions of TITLE, NON-INFRINGEMENT, MERCHANTABILITY, or
FITNESS FOR A PARTICULAR PURPOSE. You are solely responsible for determining the
appropriateness of using or redistributing the Work and assume any risks associated with Your
exercise of permissions under this License.
8. Limitation of Liability. In no event and under no legal theory, whether in tort (including negligence),
contract, or otherwise, unless required by applicable law (such as deliberate and grossly negligent
acts) or agreed to in writing, shall any Contributor be liable to You for damages, including any direct,
indirect, special, incidental, or consequential damages of any character arising as a result of this
License or out of the use or inability to use the Work (including but not limited to damages for loss of
10

goodwill, work stoppage, computer failure or malfunction, or any and all other commercial damages
or losses), even if such Contributor has been advised of the possibility of such damages.
9. Accepting Warranty or Additional Liability. While redistributing the Work or Derivative Works thereof,
You may choose to offer, and charge a fee for, acceptance of support, warranty, indemnity, or other
liability obligations and/or rights consistent with this License. However, in accepting such obligations,
You may act only on Your own behalf and on Your sole responsibility, not on behalf of any other
Contributor, and only if You agree to indemnify, defend, and hold each Contributor harmless for any
liability incurred by, or claims asserted against, such Contributor by reason of your accepting any
such warranty or additional liability.
END OF TERMS AND CONDITIONS
11
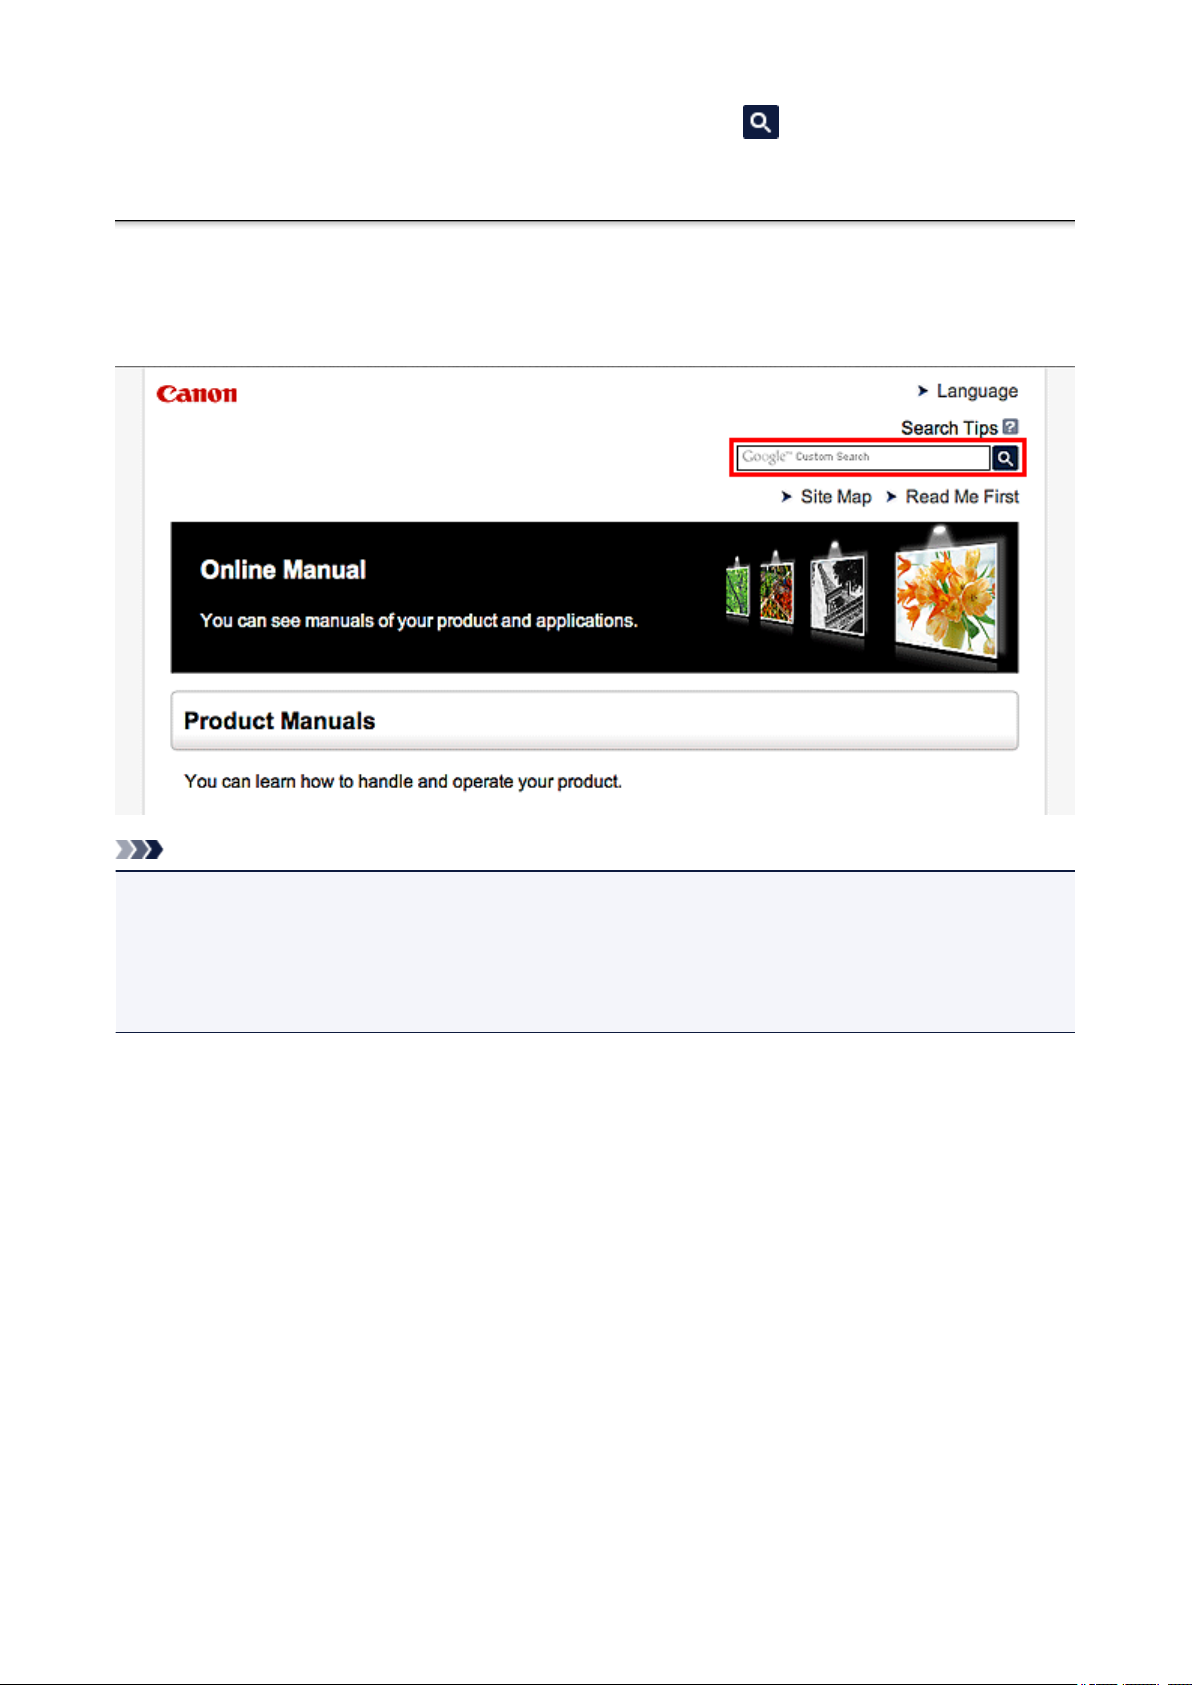
Enter keywords in the search window and click (Search).
You can search for target pages in this guide.
Search Tips
You can search for target pages by entering keywords in the search window.
Note
• The displayed screen may vary.
• When searching from this page or the "Home" page without entering your product's model name or your
application's name, all products supported by this guide will be considered for the search.
If you want to narrow down the search results, add your product's model name or your application's
name to the keywords.
• Searching for Functions
Enter your product's model name and a keyword for the function you want to learn about
Example: When you want to learn how to load paper
Enter "(your product's model name) load paper" in the search window and perform a search
• Troubleshooting Errors
Enter your product's model name and a support code
Example: When the following error screen appears
Enter "(your product's model name) 1000" in the search window and perform a search
12

Note
• The displayed screen varies depending on your product.
• Searching for Application Functions
Enter your application's name and a keyword for the function you want to learn about
Example: When you want to learn how to print collages with My Image Garden
Enter "My Image Garden collage" in the search window and perform a search
• Searching for Reference Pages
Enter your model name and a reference page title*
* You can find reference pages more easily by entering the function name as well.
Example: When you want to browse the page referred to by the following sentence on a scanning
procedure page
Refer to "Color Settings Tab" for your model from Home of the Online Manual for details.
Enter "(your product's model name) scan Color Settings Tab" in the search window and perform a
search
13

To Utilize Images Imported to the Computer
Depending on the application to be started upon connecting a digital camera or inserting a picture CD,
images may be saved in a special format and thus may not be utilized in other applications. In that case, see
this page and change to an application that saves images to a standard folder.
Checking/Changing the Application to Start upon Digital Camera Connection
Checking/Changing the Application to Start upon Picture CD Insertion
Important
• My Image Garden cannot utilize images in the iPhoto library.
Checking/Changing the Application to Start upon Digital Camera
Connection
You can check/change the application to be started upon connecting a digital camera or inserting an SD
card by following the steps below. To utilize images imported to the computer in My Image Garden, it is
recommended that you start Image Capture and save the images.
1.
From the Go menu of Finder, select Applications, then double-click the iPhoto icon.
iPhoto starts.
Note
• If the message "Do you want to use iPhoto when you connect your digital camera?" appears,
click No.
2.
Select Preferences... from the iPhoto menu.
3.
Check Connecting camera opens on the General tab.
When an application other than Image Capture is specified:
Specify Image Capture. Thereafter, Image Capture will start upon connecting a digital camera to or
inserting an SD card into your computer. You can utilize various functions by setting My Image Garden
to analyze the folder in which images imported with Image Capture are saved. Refer to the following
for details on the setting procedure.
Saving Digital Camera Images to a Folder Subject to Image Analysis
When Image Capture is specified:
The images on the digital camera or SD card are saved to the folder specified for Import To in the
Image Capture screen. You can utilize various functions by adding the folder in which images imported
with Image Capture are saved to Perform Image Analysis in the Following Folder(s) in the
Preferences dialog of My Image Garden.
Image Analysis Settings Tab
Checking/Changing the Application to Start upon Picture CD Insertion
You can check/change the application to be started upon inserting a picture CD by following the steps
below.
14

1. From the Go menu of Finder, select Applications, then double-click the System
Preferences icon.
The System Preferences window appears.
2. Click CDs & DVDs.
Check When you insert a picture CD.
3.
Follow the steps below if an application other than My Image Garden is specified.
Select Open other application... for When you insert a picture CD.
4.
5.
Select the My Image Garden icon, then click Choose.
Thereafter, My Image Garden will start upon inserting a picture CD in the disc drive.
Note
• The picture CD will appear below the computer name in Global Menu on the left side of the
screen.
15

Saving Digital Camera Images to a Folder Subject to Image
Analysis
You can utilize the following functions when the folder in which to save images imported from digital
cameras and SD cards are registered as a folder subject to image analysis for My Image Garden.
Leave Item Creation to My Image Garden
Organize Photos Easily
In My Image Garden, the Pictures folder is the default folder subject to image analysis; therefore, it is
recommended that you specify the Pictures folder as the folder in which to save images.
Note
• Saving digital camera images with Image Capture is used as an example in the following descriptions.
• Refer to "Checking/Changing the Application to Start upon Digital Camera Connection" for how to set
Image Capture to be started upon connecting a digital camera.
1.
Connect a digital camera or SD card to your computer.
Image Capture starts.
Note
• If Image Capture does not start, from the Go menu of Finder, select Applications, then double-
click the Image Capture icon.
2.
Select Image Capture for Connecting this camera opens.
3.
Specify the Pictures folder for Import To.
When specifying a folder other than Pictures, change the folder subject to image analysis for My Image
Garden according to Import To. Refer to the following for details on the setting procedure.
Image Analysis Settings Tab
Note
• Perform Steps 2 and 3 for each digital camera and SD card to be used.
4. Select images and click Import, or click Import All.
The images are saved to the specified folder.
16

General Notes (My Image Garden)
My Image Garden is subject to the following restrictions. Keep these points in mind.
• Refer to the Canon website for products supporting My Image Garden.
• Available functions and settings vary depending on your scanner or printer.
• In this guide, descriptions are mainly based on the screens displayed when using Mac OS X v10.9.
• The designs of PREMIUM Contents provided in this guide are subject to change without prior notice.
Item Recommendation Function Restriction
• To use the item recommendation function, you need to install Quick Menu. You can download Quick
Menu from the Canon website.
Restrictions on Displaying Images
• To display images in the Calendar view, Unregistered People view or People view, or to use the
item recommendation function, the folders in which the images are saved need to be subject to image
analysis.
• Folders subject to image analysis can be set in the screen that appears when starting My Image
Garden for the first time or in the Preferences dialog. The Pictures folder is selected by default. Refer
to "Image Analysis Settings Tab" to change the folders that are subject to image analysis.
Restrictions on Printing
• Printing on disc labels (CD/DVD/BD), paper larger than A4, business card size paper, or sticker
sheets is available with supported models only.
• You cannot print your items if a printer driver that supports My Image Garden is not installed on your
computer.
• Borderless printing is available with supported models only.
• In bordered printing, the margins may be uneven as shown below, depending on your model.
Restrictions on Scanning
• You cannot scan items if a scanner driver supporting My Image Garden is not installed on your
computer.
• You cannot scan items whose image size will be larger than 10208 pixels x 14032 pixels (equivalent
to a platen-size item scanned at 1200 dpi resolution) when scanned.
Refer to "General Notes (Scanner Driver)" for your model from Home of the Online Manual for restrictions
on scanning using ScanGear (scanner driver).
17

What Is My Image Garden?
What You Can Do with My Image Garden
File Formats
Selecting Images, PDF Files, and Videos
Starting My Image Garden
18
What You Can Do with My Image Garden
My Image Garden is an application that allows you to utilize photos taken with digital cameras and other
images saved on your computer, in many ways for various purposes.
You Can Do the Following
Leave Item Creation to My Image Garden
Organize Photos Easily
Print Photos and Documents Easily
Print Personalized Items
Print Disc Labels (CD/DVD/BD)
Capture and Print Still Images from Videos
Scan Photos and Documents Easily
Correct/Enhance Photos
Note
• File formats available in My Image Garden vary by function. Refer to "File Formats" for details.
Leave Item Creation to My Image Garden
My Image Garden employs a technology called "Image Assorting Technology" that provides the following
functions.
• The image analysis function that groups images by person by detecting face areas in photos, and also
registers images and videos to a calendar automatically by detecting information such as the shooting
date and time
• The item recommendation function that automatically recommends items in which analyzed images
are suitably laid out
You can easily print various items such as collages and cards by utilizing this technology.
Utilizing the Item Recommendation Function
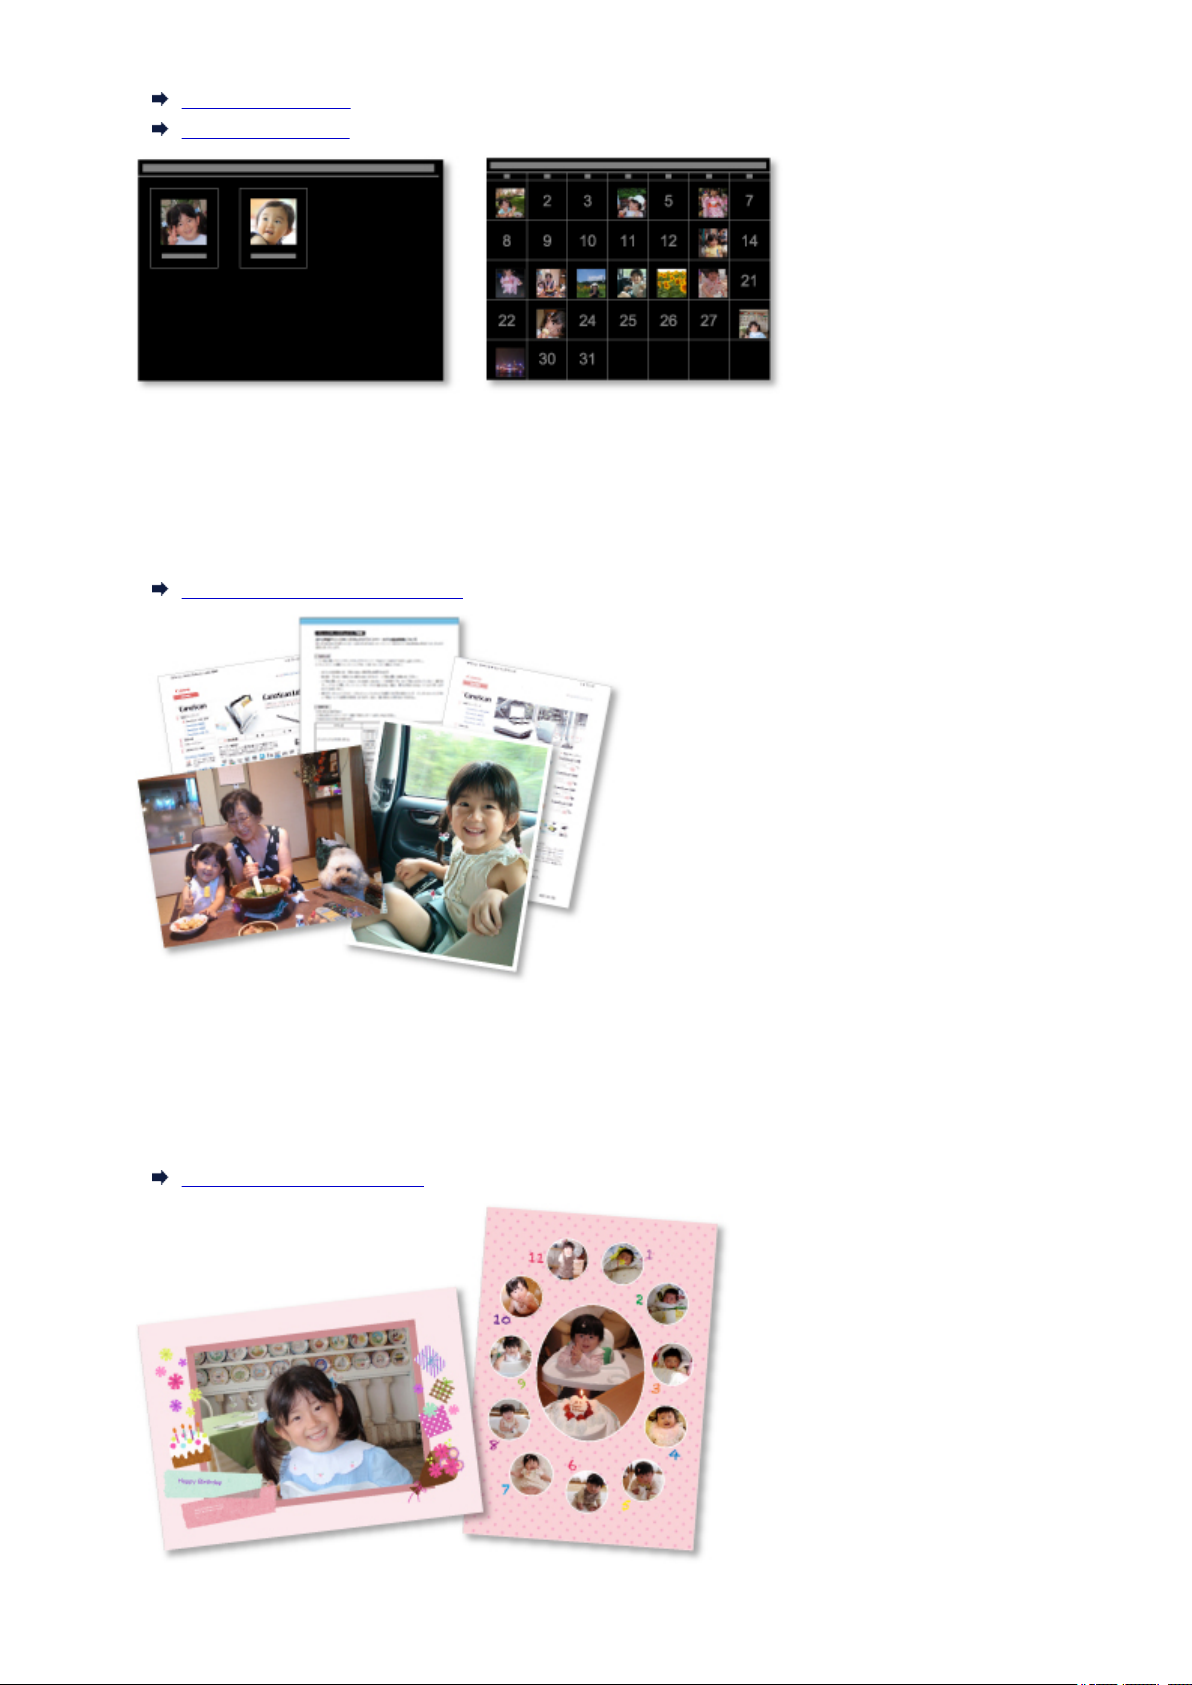
Organize Photos Easily
Images analyzed in My Image Garden appear in the Unregistered People view or People view by
person, and also appear in the Calendar view based on the shooting date and time. By registering
people's profiles and event information, you can easily organize a vast number of images, or quickly
search for images you want to see.
19
Registering People
Registering Events
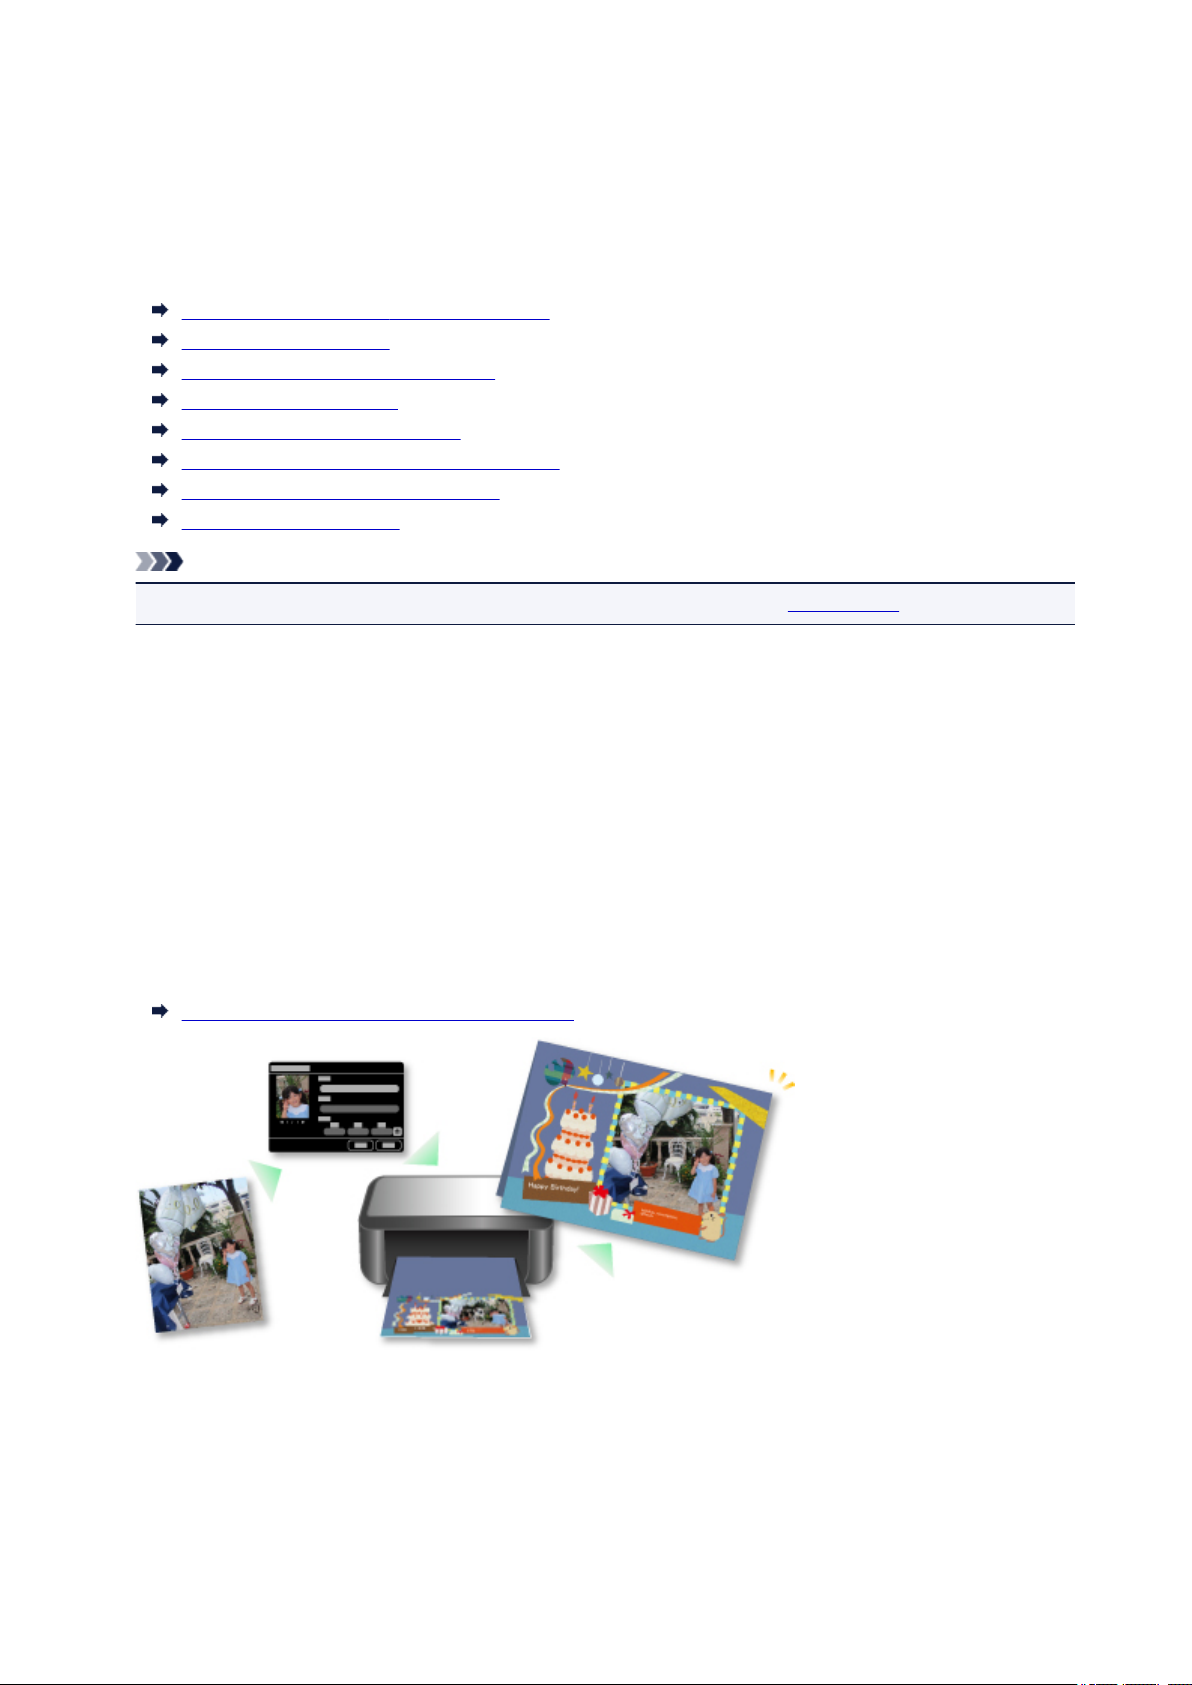
Print Photos and Documents Easily
You can print your favorite photos easily after checking them in preview. You can also print documents
saved as PDF files.
Printing Photos and Documents
Print Personalized Items
You can combine your favorite photos with preset designs to create and print personalized items such as
collages and cards.
Creating and Printing Items
20

Print Disc Labels (CD/DVD/BD)
You can create personalized disc labels (CD/DVD/BD) using your favorite photos and print them.
Printing Disc Labels (CD/DVD/BD)
Capture and Print Still Images from Videos
You can capture your favorite scenes from videos and print them as still images.
Capturing and Printing Still Images from Videos
Scan Photos and Documents Easily
You can scan photos and documents easily by automatically detecting the item type.
Easy Scanning with Auto Scan
21
Correct/Enhance Photos
You can correct red eyes or adjust the brightness and contrast of images.
Correcting/Enhancing Photos
Note
• In My Image Garden, there are many screens for selecting images, PDF files, and videos. Refer to
"Selecting Images, PDF Files, and Videos" for details.
22

File Formats
File formats available for use or saving in each function of My Image Garden are as follows.
File Formats Available for Printing
File Formats Available for Use as Materials in Items
File Formats Available for Use in Video Frame Capture
File Formats Available for Saving Scans
About Exif Print
File Formats Available for Printing
• JPEG (.jpg, .jpeg)
• TIFF (.tif, .tiff)
• PNG (.png)
• PDF (.pdf)
Important
• For PDF files, only those created in My Image Garden or IJ Scan Utility are supported. PDF files
created or edited in other applications are not supported.
File Formats Available for Use as Materials in Items
• JPEG (.jpg, .jpeg)
• TIFF (.tif, .tiff)
• PNG (.png)
File Formats Available for Use in Video Frame Capture
• MOV (.mov)
• MP4 (.mp4)
Important
• Only video files recorded with Canon digital cameras or digital camcorders are supported. In addition,
ImageBrowser Ver.6.5 or later or ImageBrowser EX Ver.1.0 or later supplied with the digital camera
or digital camcorder needs to be installed.
• Only MOV format video files are available when ImageBrowser is used.
• MOV and MP4 format video files are available when ImageBrowser EX is used.
File Formats Available for Saving Scans
• JPEG/Exif (.jpg, .jpeg)
• TIFF (.tif, .tiff)
• PNG (.png)
• PDF (.pdf)
Note
• The following TIFF file formats are supported.
• Uncompressed, black and white binary
• Uncompressed, RGB (8 bits per channel)
23

• Uncompressed, YCC (8 bits per component)
• Uncompressed, RGB (16 bits per channel)
• Uncompressed, YCC (16 bits per component)
• Uncompressed, Grayscale
About Exif Print
My Image Garden supports "Exif Print."
Exif Print is a standard for enhancing the communication between digital cameras and printers. By
connecting to an Exif Print-compliant digital camera, print results suitable for the shooting conditions,
shooting scenes, etc. can be obtained based on the camera information at the time of shooting.
24

Selecting Images, PDF Files, and Videos
In My Image Garden, there are many screens for selecting images, PDF files, and videos. You can select
images, PDF files, or videos by clicking the thumbnails displayed in the screens. White frames appear
around the selected files.
Searching by date of shooting or creation (Calendar view)
Selecting files of registered events (Event view)
Selecting files of registered people (People view)
Searching for photos containing people (Unregistered People view)
Selecting files saved in specific folders (folder view)
Important
• For PDF files, only those created in My Image Garden or IJ Scan Utility are supported. PDF files
created or edited in other applications are not supported.
• You cannot print images and PDF files at the same time. Print images and PDF files separately.
• To select multiple files in the same folder at the same time, click the thumbnails of images, PDF files, or
videos while pressing the command key or shift key. You cannot select images in different folders or
views at the same time.
Note
• You can also select still images by capturing them from videos.
Capturing and Printing Still Images from Videos
• You can also select images downloaded from photo sharing sites on the Internet.
Downloading Images from Photo Sharing Sites
• For videos, only MOV or MP4 format videos recorded with Canon digital cameras or digital camcorders
appear.
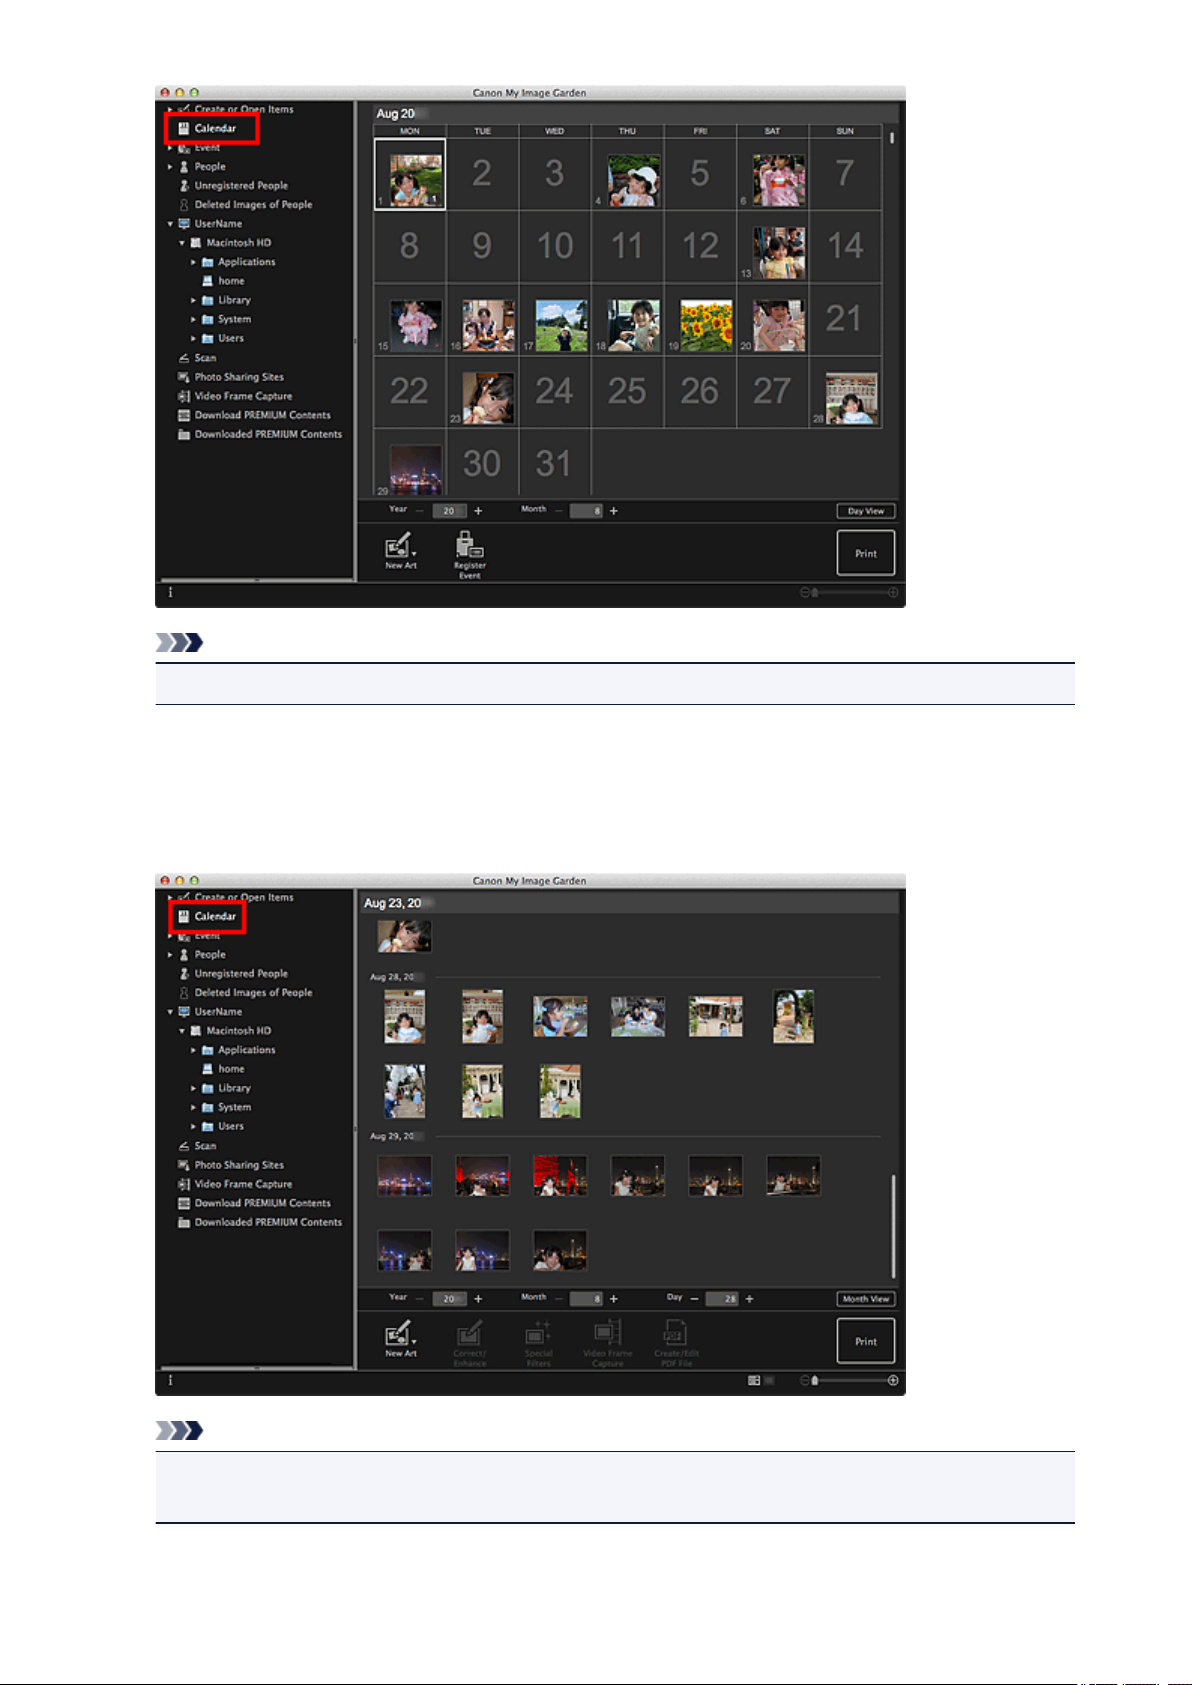
Calendar View (Images, PDF Files, and Videos)
In Month View:
When you click Calendar, the view switches to Calendar set to Month View and a thumbnail of one of
the images or PDF files registered to the date appears for each date. When you click a thumbnail, all
images, PDF files, and videos contained in the date will be selected.
25
Note
• Click a date and select Select All from the Edit menu to select all dates of the month.
In Day View:
When you click Day View in the Calendar view set to Month View, the view switches to Calendar set to
Day View, and images, PDF files, and videos appear as thumbnails by date.
Note
• Click a thumbnail of an image or PDF file and select Select All from the Edit menu to select all
images, PDF files, and videos of the date.
26
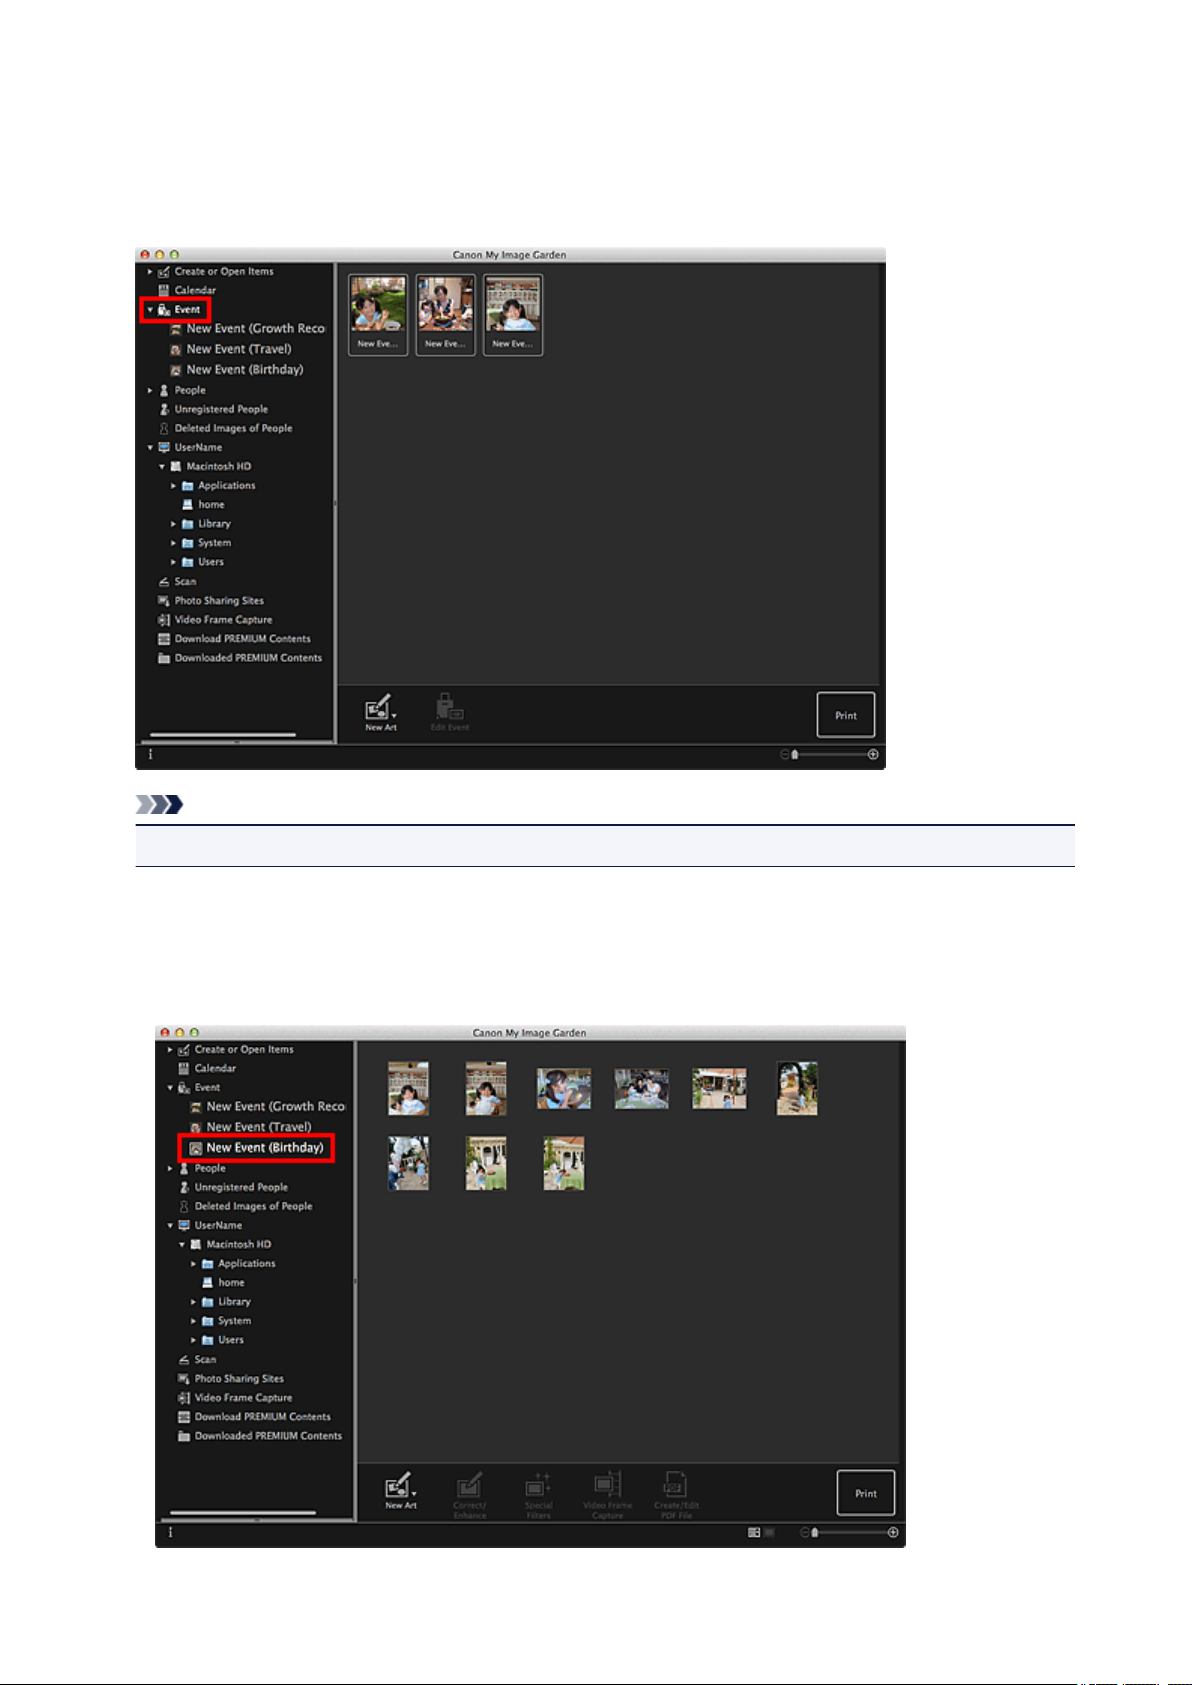
Event View (Images, PDF Files, and Videos)
When you click Event, the view switches to Event and the registered events with their representative
images appear as thumbnails. When you click a thumbnail, all images contained in the event will be
selected.
Note
• Select Select All from the Edit menu to select all events.
In Expanded display:
When you click an event name displayed below Event, or double-click an event in the Event view,
images, PDF files, and videos contained in the event appear as thumbnails.
27
Note
• Double-clicking an event label in the Month View calendar also displays images, PDF files, and
videos contained in the event as thumbnails.
• Select Select All from the Edit menu to select all images, PDF files, and videos.
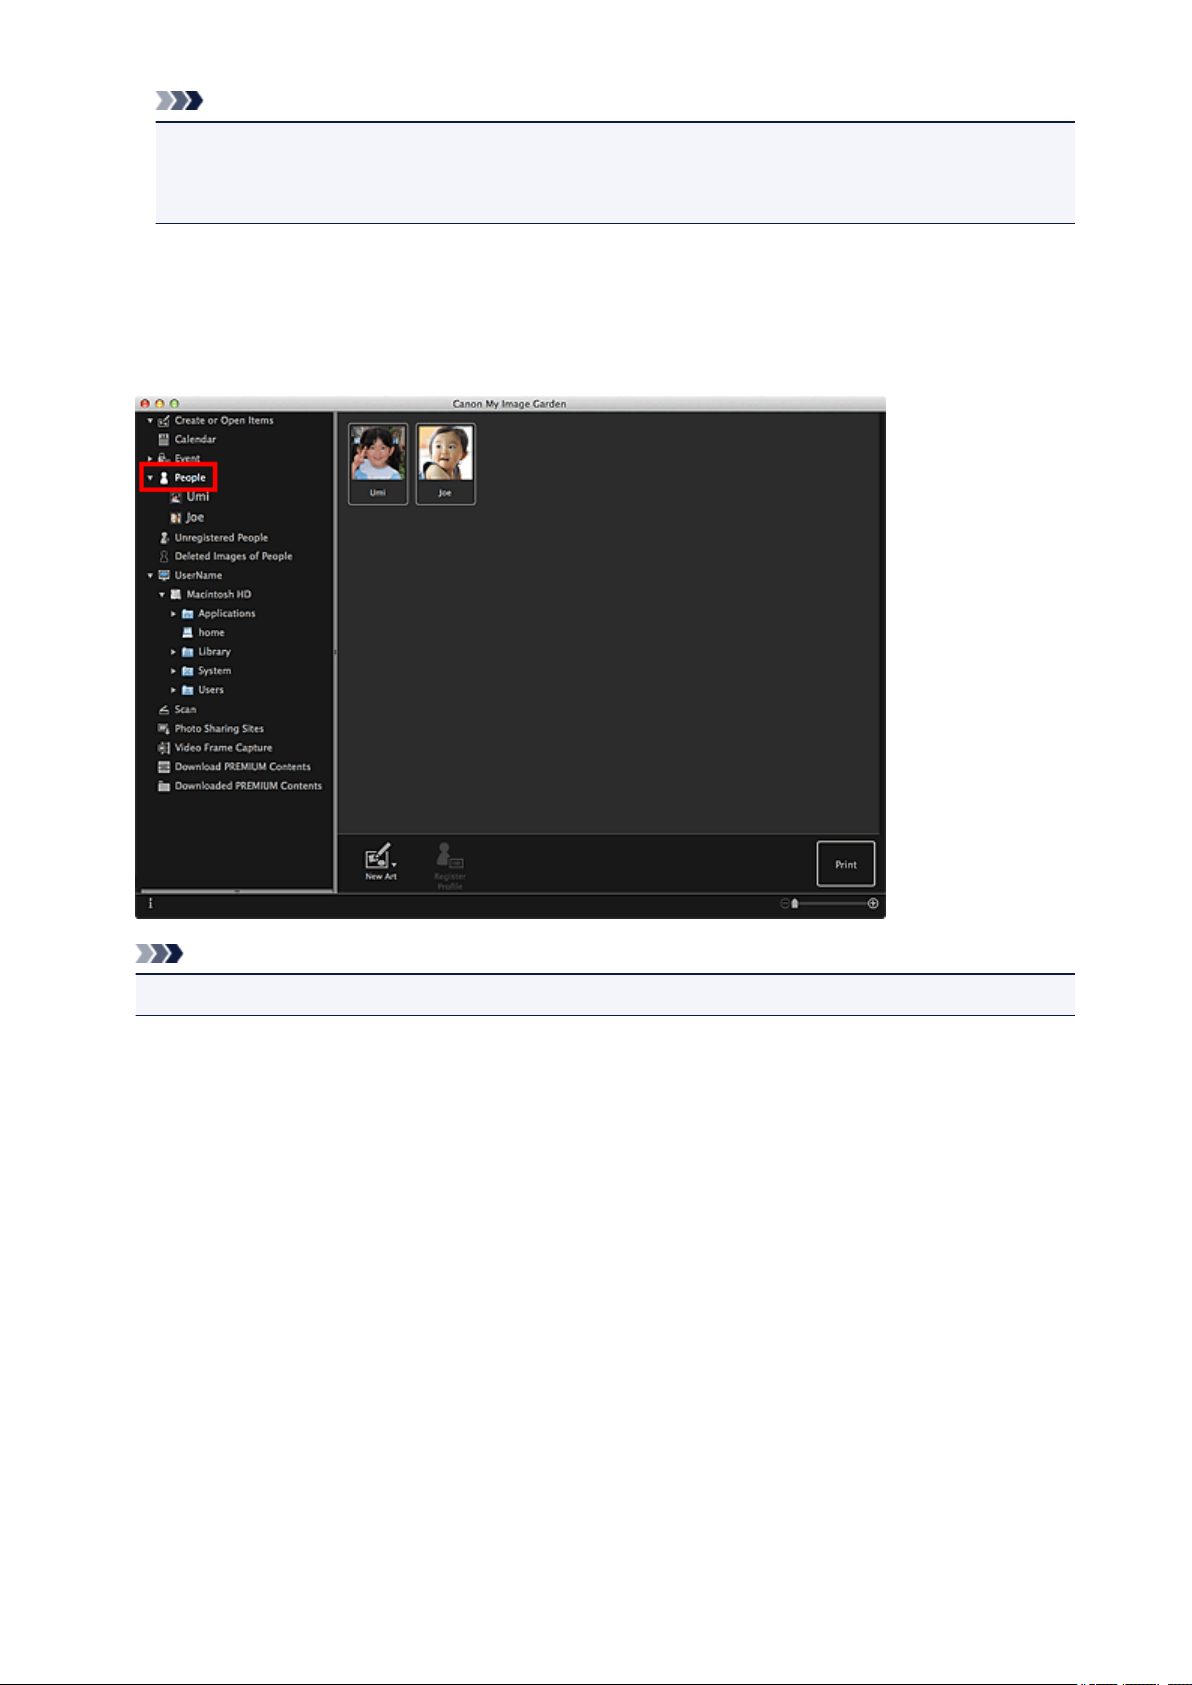
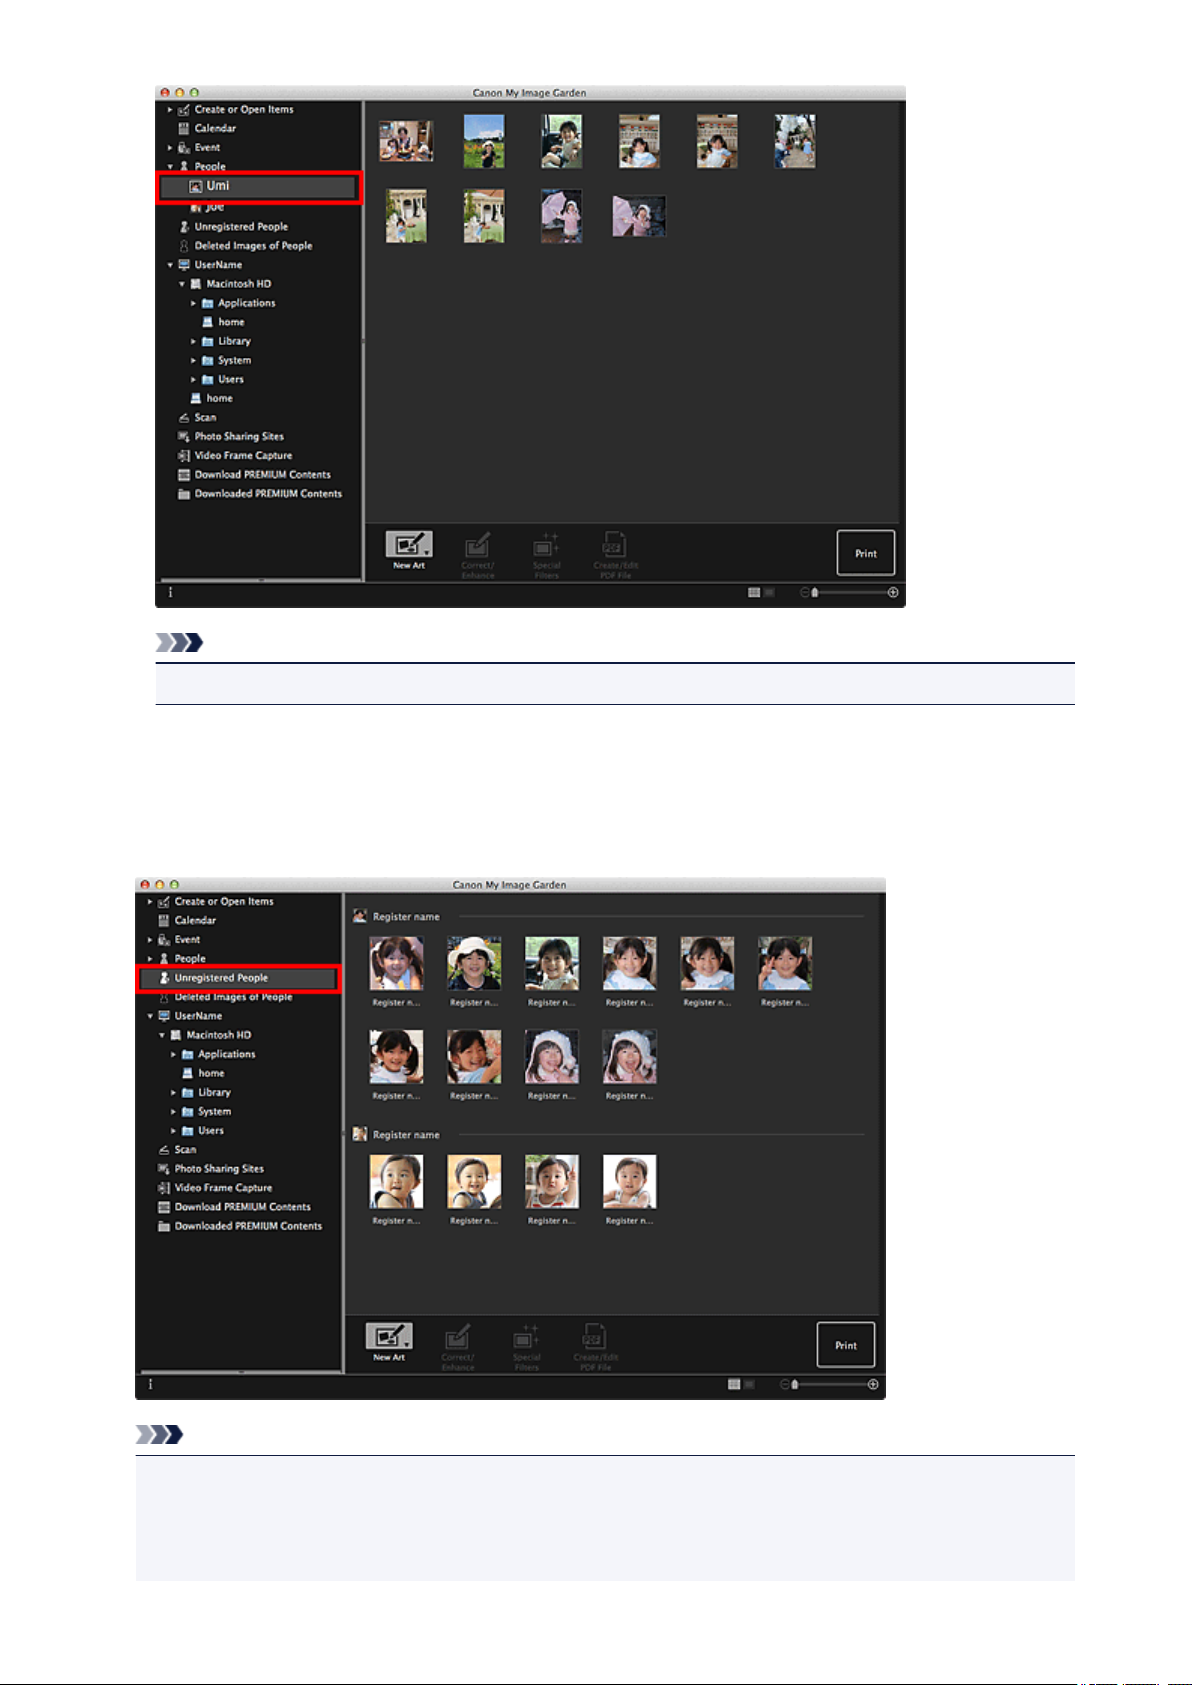
People View (Images)
When you click People, the view switches to People and the images of registered people appear as
thumbnails. When you click a thumbnail, all images contained in the person will be selected.
Note
• Select Select All from the Edit menu to select all people.
In Expanded display:
When you click a name displayed below People, or double-click a person in the People view, the view
switches to the expanded display of People and the images registered to the person appear as
thumbnails.
28
Note
• Select Select All from the Edit menu to select all images.
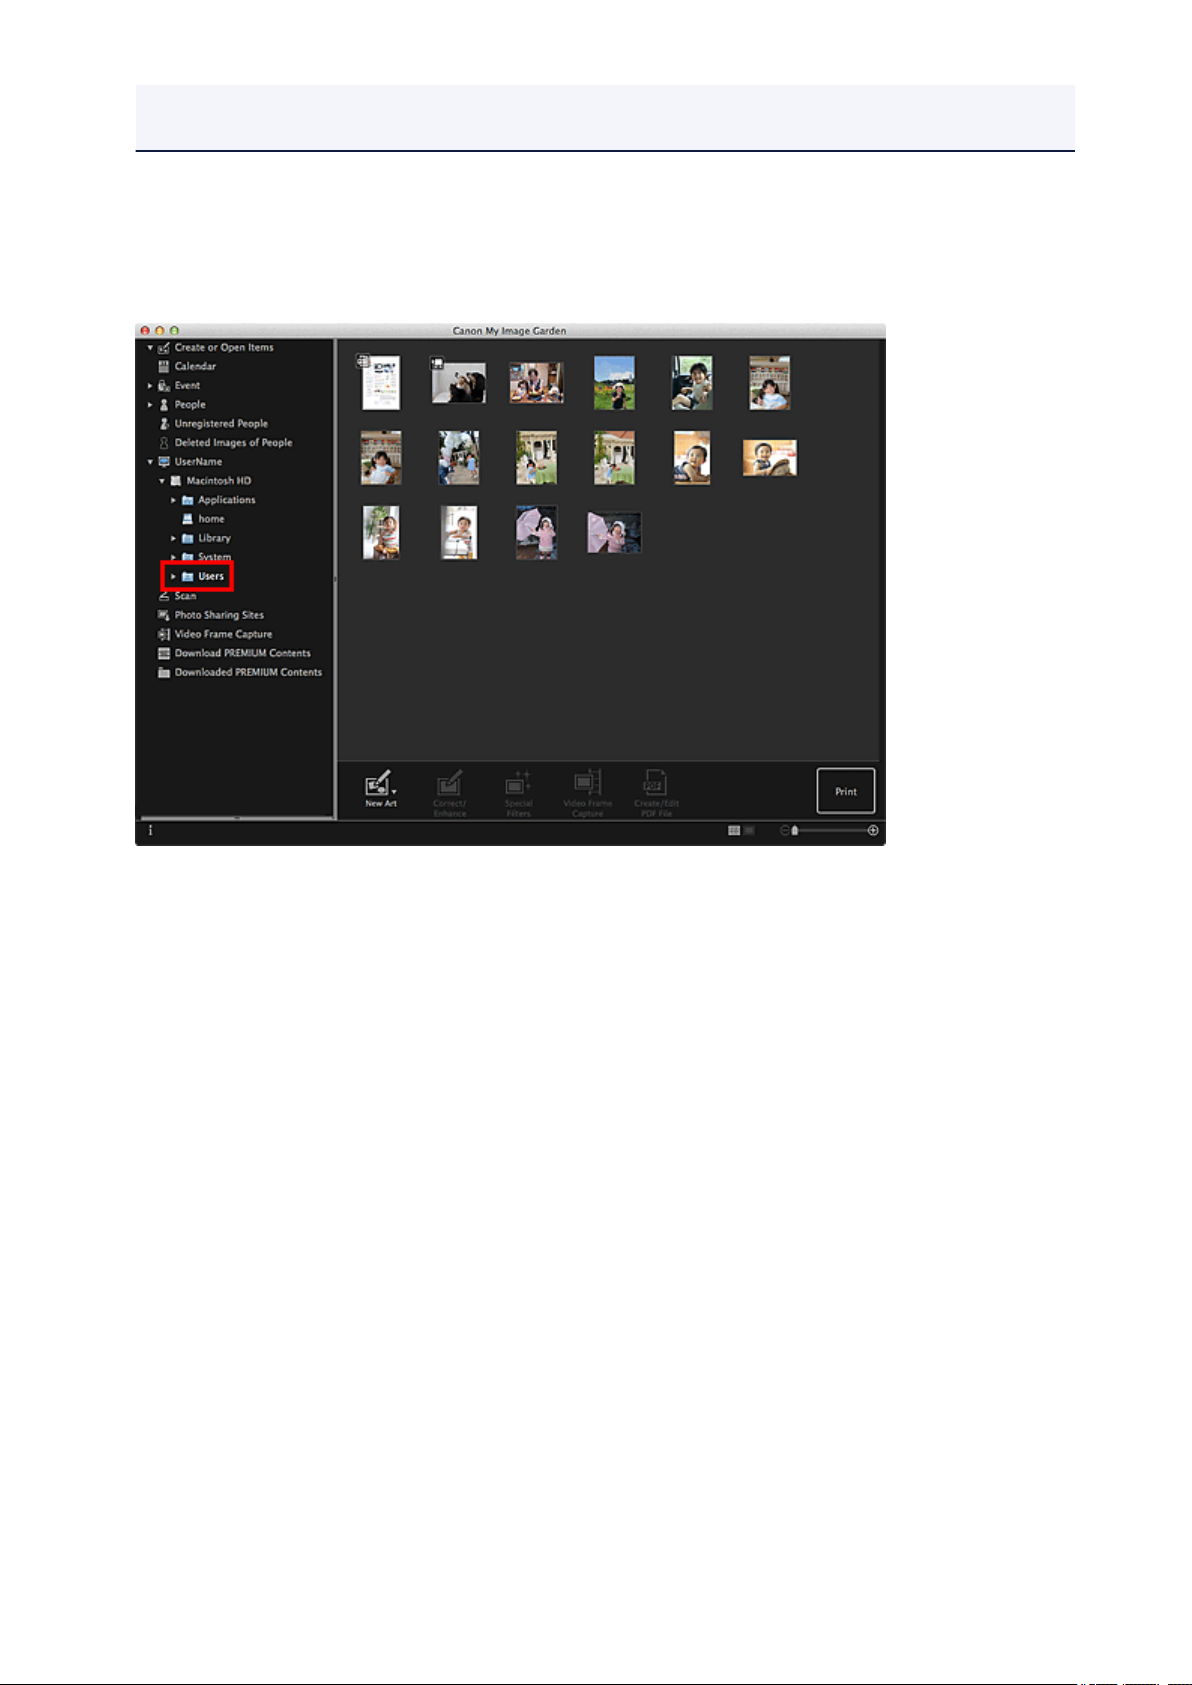
Unregistered People View (Images)
When you click Unregistered People, the view switches to Unregistered People and images detected
as a result of image analysis appear as thumbnails.
Note
• Click a smaller thumbnail to select all images that are automatically organized as those of the same
person.
• Click a thumbnail of an image and select Select All from the Edit menu to select all images that are
automatically organized as those of the same person.
29
• Identifying people appears at Unregistered People in Global Menu on the left side of the screen
during image analysis.
Folder View (Images, PDF Files, and Videos)
When you select a folder in the folder tree, images, PDF files, and videos in the folder appear as
thumbnails.
30

Starting My Image Garden
My Image Garden can be started with the following two methods.
• Click (Start My Image Garden) on Quick Menu
• From the Go menu of Finder, select Applications, then double-click the Canon Utilities folder, My
Image Garden folder, and then My Image Garden icon.
Note
• My Image Garden analyzes the images in the folders subject to image analysis and displays them in
the Calendar view, Unregistered People view or People view, or uses them in recommended items
displayed in Image Display.
Folders subject to image analysis can be set in the screen that appears when starting My Image
Garden for the first time or in the Preferences dialog. The Pictures folder is selected by default.
• Refer to "Image Analysis Settings Tab" for how to change the folders that are subject to image
analysis.
• If you are using ImageBrowser EX Ver.1.2.1 or later, you can start My Image Garden from
ImageBrowser EX.
31

Utilizing the Item Recommendation Function
Enjoying Items Recommended by My Image Garden
Registering Various Information to Photos
Registering People
Registering People's Profiles
Registering Events
Registering Favorite Levels
32

Enjoying Items Recommended by My Image Garden
When you register people's profiles and event information, items such as collages and calendars with
automatically selected/placed photos will appear as slide shows in Image Display of Quick Menu. You can
easily print items such as calendars full of family memories with simple mouse clicks.
Note
• Refer to "Registering Various Information to Photos" for how to utilize the item recommendation
function.
• Refer to "Printing Recommended Items and Images Displayed in Slide Shows" for how to print items
displayed in slide shows.
Record Your Children's Growth Process (Growth Record)
When you register your child's birthday and relationship with you to the child's profile...
After the First Birthday:
Collage in which photos shot every month up to the first birthday are automatically laid out
The layout focuses on face areas.
After the Third Birthday:
Collage in which photos shot every three months up to the third birthday are automatically laid out
The layout focuses on face areas.
You can enjoy the growth record collages for up to the sixth birthday.
Various Designs Corresponding to Your Children's Growth
My Image Garden recommends delightful items corresponding to various scenes.
Celebrate the Birthday
When you register a birthday event in the Calendar view...
33

Collage/card in which photos shot on the birthday are automatically laid out
Preserve the Proud Moments
When you register a recital event in the Calendar view...
Collage/card/calendar in which photos shot on the day of the recital are automatically laid out
Record the Memories of Family Travel
When you register a travel event in the Calendar view...
Collage/card/calendar in which photos shot during the travel period are automatically laid out
Photos of people and landscape photos are laid out in a good balance.
The layout will be like a series of snapshots portraying the places visited.
Celebrate the Start of a New Chapter in Life
When you register a wedding event in the Calendar view...
Collage/card/calendar in which photos shot on the wedding day are automatically laid out
In addition to these, numerous items such as the following are provided. Enjoy the item recommendation
function of My Image Garden by registering memorable events, ceremonies, and various other occasions.
34

• Calendars with seasonal photos displayed once every month, every six months, and every year
• Items with photos of your hobbies
• Items with photos of the family's memories of one month, three months, six months, or one year
And more!
35

Registering Various Information to Photos
The more people's profiles and event information you register, the more items suitable for the people and
events will appear as slide shows in Image Display.
In addition, registering information will make it easier to find the target photos when you search for them, or
to create and print the items you like.
Registering People and Profiles
Registering Event Information
Registering Favorite Levels
Registering People and Profiles
This will make it easier to organize or browse photos by person. You can register images that are
automatically identified as those of the same person, at once, or register by specifying the face area in
images one by one.
Registering People
In addition, after registering a person in the Unregistered People view, you can register the person's
profile (birthday, relationship with you, etc.) to the person.
When the birthday is registered, the person's growth record of the previous age (from the day after the
birthday to the next birthday) will appear automatically.
In addition, when the relationship with you is registered, the person will be placed with priority in items.
For example, when Daughter is set for the relationship, items with layouts focusing on Daughter will
appear.
36

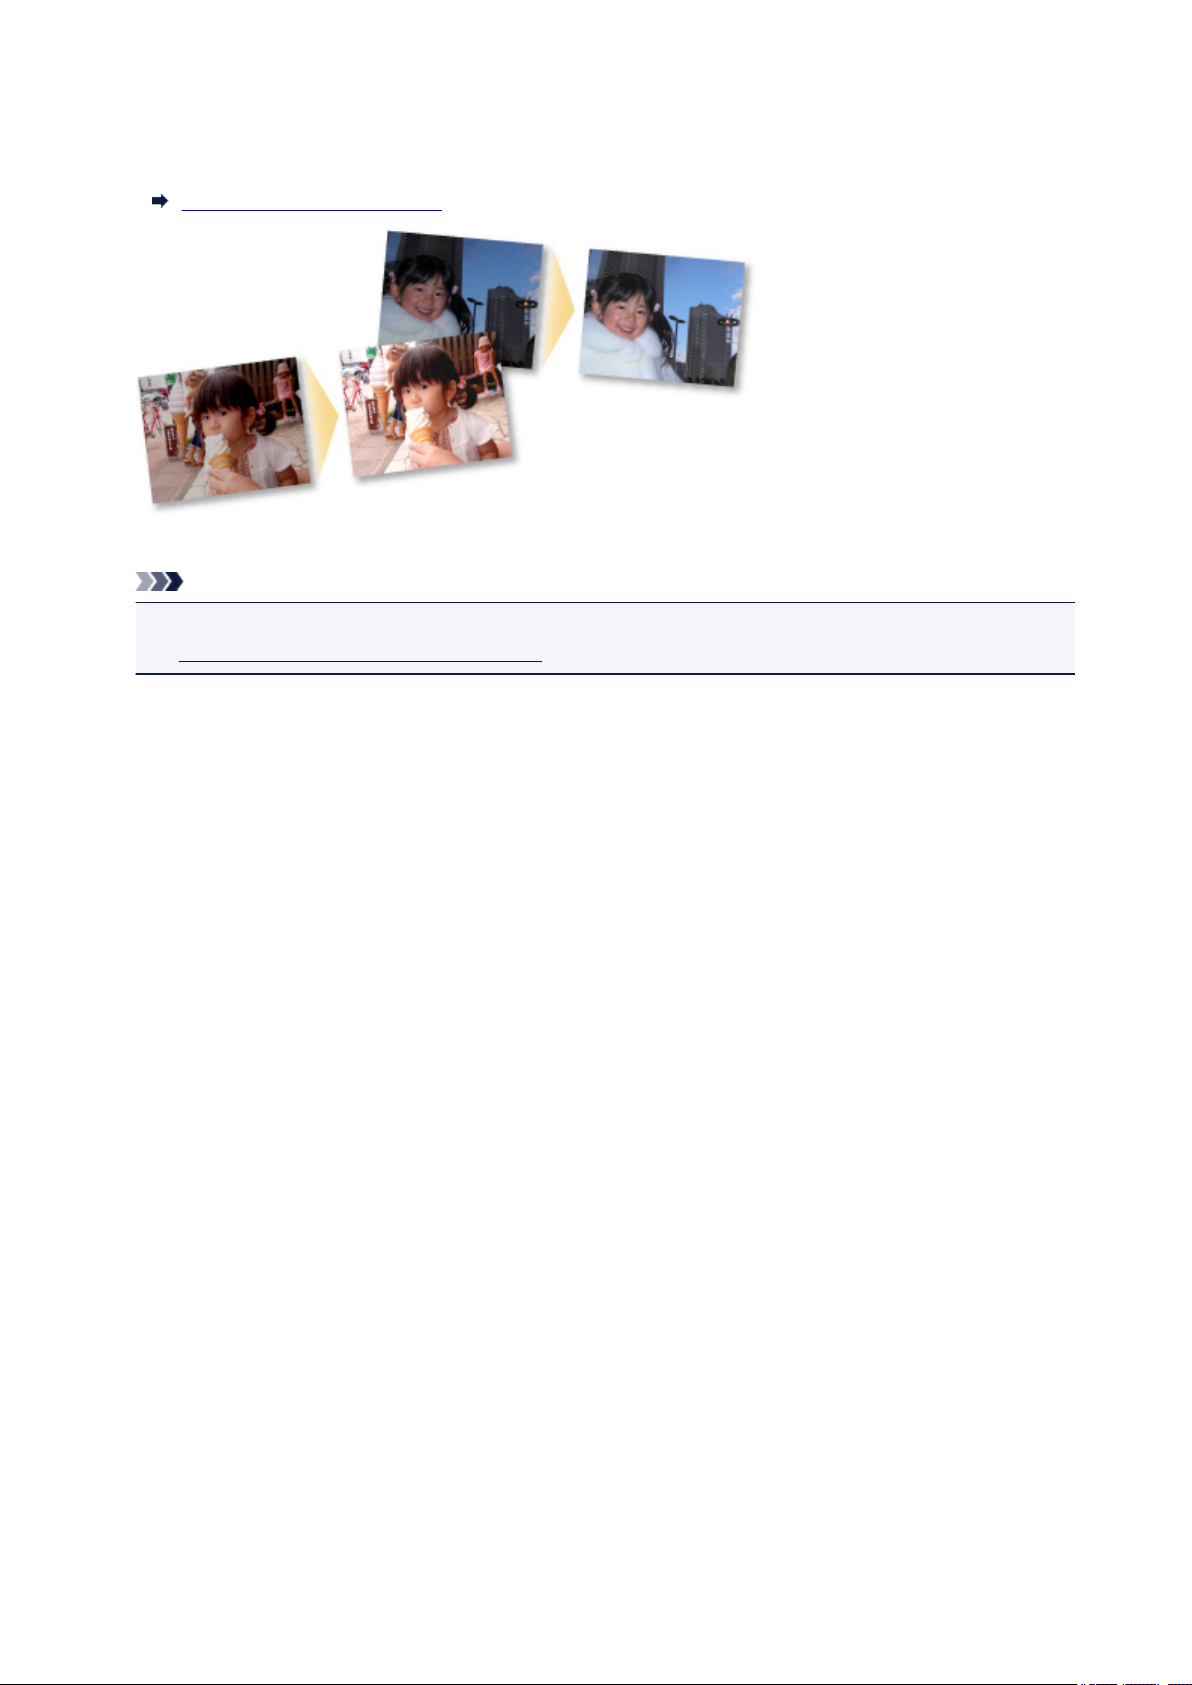
When the relationship is not registered:
The daughter may appear smaller, or the layout may focus on a friend.
When the relationship is registered:
The layout focuses on the daughter.
Moreover, if the parent-child relationship is registered, items that enrich family memories will also appear.
Registering People's Profiles
Registering Event Information
This will make it easier to organize or browse photos displayed in the Calendar view by event. You can
easily register events while checking the images displayed in a calendar. When event information is
registered, various items in which images shot during the event period are used will appear according to
the category.
Registering Events
37

Items Displayed by Category
Category Items Displayed
Growth record
Kids
Anniversary
Leisure Travel, Others
Hobby - Favorite item collages, cards, calendars, etc.
Entrance ceremony, Graduation,
Recital, Sports day, Birthday,
Others
Wedding
Birthday, Others
Unisex collages, cards, calendars, etc. of growth
records
Unisex collages, cards, calendars, etc. specific
for each event
Photo studio-like collages, marriage cards,
calendars, etc. of weddings
Collages, cards, calendars, etc. specific for each
event
Collages, cards, calendars, etc. of memories with
your family/grandparents/friends
Registering Favorite Levels
Images that will be automatically laid out in items are placed in the following order of priority.
1. In descending order of stars of images for which favorite levels are set
2. In descending order of print count
3. In descending order of access count
4. In descending order of shooting date
To make your favorite photos more likely to be placed, it is recommended that you register favorite levels
to the images. You can register favorite levels on a photo-by-photo basis, or to multiple photos at once.
Registering Favorite Levels
38

Registering People
Register the information of people to images so that you can browse the images by person.
Registering People from the Unregistered People View
Registering People from the Details View
Important
• The information of people can only be registered to images saved in folders subject to image analysis.
Refer to "Image Analysis Settings Tab" for how to set folders that are subject to image analysis.
Registering People from the Unregistered People View
Photos containing people appear automatically in the Unregistered People view as a result of image
analysis. You can register images that are identified as those of the same person, at once, or register
images one by one.
1.
Click Unregistered People.
The view switches to Unregistered People.
Note
•
Identifying people appears during image analysis.
•
Images may not be correctly identified as those of the same person depending on the face
status (expression, glasses, angle, etc.).
•
Areas that are not of people in photos may be identified as people. To remove, control-click the
image and select Delete from the displayed menu, or drag and drop it to Deleted Images of
People in Global Menu on the left side of the screen. The image is moved to the Deleted
Images of People view.
•
Image analysis only applies to images saved in folders subject to image analysis. Refer to
"
Image Analysis Settings Tab" for details on image analysis.
39

2. Click Register name, then enter the name.
When Registering All Images Identified as Those of the Same Person:
Click Register name displayed next to the smaller thumbnail, then enter the name.
When Registering People in Images One by One:
Select a larger thumbnail and click Register name displayed below it, then enter the name.
A registration completion message appears and the image(s) is (are) registered to the People view.
Note
• When a registered name is entered, its image(s) and the name(s) appear in the pop-up menu.
To register as the same person as the registered person, select the name in the pop-up menu.
To register as a different person, click an area outside the white frame to complete the name
entry.
• For registered people, you can also register by dragging and dropping the thumbnail to the
name displayed below People in Global Menu on the left side of the screen.
• If a person is identified as a different person, register the name individually or drag and drop the
thumbnail to the name displayed below People in Global Menu on the left side of the screen.
•
To delete a registered person, control-click the person in the People view and select Delete
from the displayed menu. Images whose names of people have been deleted appear as those
of unregistered people in the Unregistered People view.
•
You can also set the profiles of registered people, such as their relationships with you and their
birthdays.
Registering People's Profiles
Registering People from the Details View
You can register people by specifying the face area in the image preview. People can be registered one
by one even when there are multiple people in one photo.
1.
Switch the image to the details view.
40

Select an image or images in the Calendar view set to Day View, the expanded display of the Event
view, the expanded display of the People view, the Unregistered People view, or folder view, then
click (Details View) at the bottom right of the screen to switch to the details view.
Click Specify Person.
2.
A white frame to specify the area to register appears on the image.
3.
Specify the area of the person you want to register.
Drag the white frame on the image to specify the area to register. The area specified here appears as
the thumbnail in the People view.
Note
•
Click (Close) to remove the white frame.
4. Click Register name below the white frame, then enter the name of the person to
register.
41

5. Click an area outside the white frame.
A registration completion message appears and the image(s) is (are) registered to the People view.
Note
• When a registered name is entered, its image(s) and the name(s) appear in the pop-up menu.
To register as the same person as the registered person, select the name in the pop-up menu.
To register as a different person, click an area outside the white frame to complete the name
entry.
To delete a registered person, control-click the person in the People view and select Delete
•
from the displayed menu. Images whose names of people have been deleted appear as those
of unregistered people in the Unregistered People view.
You can also set the profiles of registered people, such as their relationships with you and their
•
birthdays.
Registering People's Profiles
Important
• When the file name of an image is changed or an image is moved, the registered information of people
may be lost.
• Even if you copy images with information of people registered, the registered information of people will
not be retained.
Related Topic
Unregistered People View
People View
Expanded Display of People View
42

Registering People's Profiles
For registered people, you can set your relationships with them and their birthdays. You can also change the
names.
1. Click People.
The view switches to
2.
Select the person of whom you want to set a profile, then click Register Profile.
People.
The Register Profile dialog appears.
3. Set Name, Relationship, and Birthday.
43

4.
Click OK.
The profile is saved.
Related Topic
People View
44

Registering Events
Register the event information to images so that you can browse the images by event.
1. Click Calendar.
The view switches to
Calendar.
Note
• Events can be registered only when the Calendar view is set to Month View. If set to Day View,
click Month View at the bottom right of the screen to switch to Month View.
2.
Select the date for which you want to register an event, then click Register Event.
45

The Register Event dialog appears.
Note
•
You can register up to four events to each date.
3. Set Event Name and Category.
Note
Refer to "Register Event/Edit Event Dialog" for the Register Event dialog.
•
4.
Click OK.
The event label appears in the Calendar view, and the registered event name appears below Event in
Global Menu on the left side of the screen.
Note
• When you place the cursor over either end of an event label, the shape of the cursor changes to
(Left Right Arrow). In that state, you can drag the label to extend or shorten the event period.
• To delete a registered event, control-click the event in the Event view and select Delete from the
displayed menu.
Important
• When the file name of an image is changed or an image is moved, the registered event information may
be lost.
• Even if you copy images with event information registered, the registered event information will not be
retained.
Note
• You can edit the information of an existing event by one of the following operations.
• Select an event in the Event view, then click Edit Event
• Select an event label in the Calendar view set to Month View, then click Register Event
Related Topic
Calendar View
Event View
Expanded Display of Event View
46

Registering Favorite Levels
When you register favorite levels to images, those with higher favorite levels are more likely to be laid out
automatically in recommended items.
Important
• Favorite levels can only be registered to images saved in folders subject to image analysis. Refer to
"Image Analysis Settings Tab" for how to set folders that are subject to image analysis.
Even if a favorite level is set, the image may not be placed with priority in the item depending on the
image analysis result.
1.
Control-click the thumbnail of the image to which you want to register a favorite level, then
select Favorite Level.
Note
•
Select multiple images and control-click to specify the same favorite level to them at once.
•
When a person is selected in the People view or when a date is selected in the Calendar view set
to Month View, you can specify the same favorite level to all images registered to the selected
person or date.
2. Register the favorite level.
Specify the number of (Stars) according to the favorite level of the image.
The favorite level can be specified in six levels. The more stars, the higher the favorite level becomes.
Note
•
You can also register the favorite level by selecting an image then selecting Favorite Level from
the Image menu.
47

Important
• When the file name of an image is changed or an image is moved, the registered favorite level may be
lost.
• Even if you copy images with favorite levels set, the set favorite levels will not be retained.
48

Printing
Printing Photos and Documents
Printing Disc Labels (CD/DVD/BD)
Printing Recommended Items and Images Displayed in Slide Shows
Creating and Printing Items
Printing Photos in a Variety of Layouts
Printing Collages
Printing Cards
Printing Calendars
Printing Stickers
Printing in a Cinematic Layout
Printing Paper Crafts
Downloading and Printing PREMIUM Contents
Capturing and Printing Still Images from Videos
Creating Images of Merged Video Frames
Correcting Still Images Captured from Videos
49

Printing Photos and Documents
You can print your favorite photos easily.
You can also print documents (PDF files) created in My Image Garden.
1.
Make sure that your printer is turned on.
2.
Start My Image Garden.
3.
Select the image(s) or PDF file(s) you want to print.
4.
Click Print.
The Print Settings dialog appears.
Note
•
The screen is an example of when printing from the folder view.
50

5. Set the number of copies to print, the printer and paper to use, etc.
Note
• Refer to "Print Settings Dialog" for details on the Print Settings dialog.
6.
Load paper.
7.
Click Print.
A message appears.
8.
Click OK.
The Print dialog appears.
Important
•
If you change the printer in the Print dialog, a message appears and printing will be canceled.
9. Click Print.
Important
•
When you print a large number of high resolution images at one time, printing may stop halfway
through.
•
When you print on a bordered layout, the margins on the left and right or the top and bottom may
become wider than the other.
Note
• You can correct or enhance images before printing.
Correcting/Enhancing Photos
51

Enhancing Photos Using Special Filters
• Colors may fade with time if the printed paper is left for a long period of time.
After printing, dry the paper sufficiently, avoid high temperatures, high humidity, and direct sunlight, and
store or display indoors at room temperature and normal humidity.
To avoid direct exposure to air, it is recommended that you store the paper in an album, plastic folder,
photo frame, etc.
52

Printing Disc Labels (CD/DVD/BD)
You can create personalized disc labels (CD/DVD/BD) using your favorite photos and print them.
Note
• This function is available with supported models only.
Important
• Do not set the disc tray until a message prompting you to load a printable disc appears. Loading a
printable disc while the printer is operating may damage the printer.
1.
Start My Image Garden.
2.
Select the image(s) you want to use for a disc label (CD/DVD/BD).
3.
Click Disc Label (CD/DVD/BD) from New Art.
The Set Design and Paper dialog appears.
4.
Set the design, Paper Size, etc., then click OK.
53

The disc label (CD/DVD/BD) appears in the Item edit screen.
Note
• The layout may not be as expected depending on the photo information or analysis results of the
selected images.
5.
Edit the item according to your preference.
Note
•
If you want to change the print area, you can set it in the Advanced Settings dialog displayed by
clicking Advanced... at the bottom of the screen. If Advanced... is not displayed, click
Scroll).
54
(Right

• In cases such as when Identifying people appears at Unregistered People in Global Menu on
the left side of the screen, the result may not be as expected since automatic placement does not
apply to images for which analysis has not been completed.
•
Refer to "Inserting Images" to swap automatically placed images.
6. Click Print at the bottom right of the screen.
The Print Settings dialog appears.
Set the number of copies to print, the printer and paper to use, etc.
7.
Note
• Refer to "Print Settings Dialog" for details on the Print Settings dialog.
8.
Click Print.
A message appears.
9. Click OK.
The Print dialog appears.
Important
•
If you change the printer in the Print dialog, a message appears and printing will be canceled.
10. Click Print.
When a message appears, set the disc tray.
55

Related Topic
Item Edit Screen
56

Printing Recommended Items and Images Displayed in Slide
Shows
You can print recommended items and images displayed as slide shows in Image Display on the desktop
with simple steps.
Important
• To use Image Display, you need to install Quick Menu. You can download Quick Menu from the Canon
website.
Internet connection is required to download the software. Internet connection fees apply.
Note
• When you register information of people/events to photos, recommended items will appear as slide
shows in Image Display. Refer to "Utilizing the Item Recommendation Function" for details.
• Refer to "Quick Menu Guide" for your model from Home of the Online Manual for how to operate slide
shows displayed in Image Display.
(1) Image Display
(2) Quick Menu
1. Click an item or image displayed in Image Display.
My Image Garden starts. When an item is clicked, it appears in the Item edit screen. When an image is
clicked, the Calendar view appears in Day View.
2. Click Print.
57

The Print Settings dialog appears.
3.
Set the number of copies to print, the printer and paper to use, etc.
Note
•
Refer to "Print Settings Dialog" for details on the Print Settings dialog.
4. Click Print.
A message appears.
5. Click OK.
58

The Print dialog appears.
Important
•
If you change the printer in the Print dialog, a message appears and printing will be canceled.
6. Click Print.
Note
• You can correct or enhance images before printing.
Correcting/Enhancing Photos
Enhancing Photos Using Special Filters
• You can swap images in items.
Inserting Images
Related Topic
Item Edit Screen
Calendar View
59

Creating and Printing Items
You can easily create personalized items using your favorite photos and print them.
Select an image or images in the Calendar view, Event view, People view, Unregistered People view, or
folder view, then click New Art at the bottom of the screen to select the item you want to create.
Note
• You can also insert images by selecting the type and design of your item from the Create or Open
Items view.
You can create and print items such as the following.
Printing Photos in a Variety of Layouts
You can print your favorite photos with dates or in a variety of layouts.
Printing Collages
You can create collages using your favorite photos and print them.
Printing Cards
You can create cards for anniversaries and annual events using your favorite photos and print them.
60

Printing Calendars
You can create personalized calendars using your memorable photos and print them.
Printing Stickers
You can create personalized stickers by printing your favorite photos on sticker sheets.
Printing in a Cinematic Layout
You can print your favorite photos in a layout that resembles a film or theater.
61

Printing Paper Crafts
You can print downloaded PREMIUM Contents (paper crafts) and create three-dimensional art.
62

Printing Photos in a Variety of Layouts
You can print your favorite photos with dates or in a variety of layouts.
1.
Start My Image Garden.
2.
Select the image(s) you want to print.
3.
Click Photo Layout from New Art.
The Set Design and Paper dialog appears.
4.
Set the design, Paper Size, etc., then click OK.
63

An item with the image(s) placed according to the selected design appears in the Item edit screen.
Note
• The layout may not be as expected depending on the photo information or analysis results of the
selected images.
5.
Edit the item according to your preference.
Note
•
In cases such as when Identifying people appears at Unregistered People in Global Menu on
the left side of the screen, the result may not be as expected since automatic placement does not
apply to images for which analysis has not been completed.
•
Refer to "Inserting Images" to swap automatically placed images.
64

6. Add the date according to your preference.
Select the image to which you want to add the date to display the image editing tool. Click Add date to
place a checkmark; the date is added to the image.
Note
In the Advanced Settings dialog displayed by clicking Advanced... at the bottom of the screen,
•
you can make advanced settings to the text of the date to be printed or set to print dates on all
images. When using an ID photo design, you can also add the same image to all frames within
the page or apply the angle and size set to an image to all copies of the same image within the
page. If Advanced... is not displayed, click
7.
Click Print at the bottom right of the screen.
The Print Settings dialog appears.
8.
Set the number of copies to print, the printer and paper to use, etc.
(Right Scroll).
Note
•
Refer to "Print Settings Dialog" for details on the Print Settings dialog.
9. Click Print.
A message appears.
10. Click OK.
65

The Print dialog appears.
Important
•
If you change the printer in the Print dialog, a message appears and printing will be canceled.
11. Click Print.
Related Topic
Item Edit Screen
66

Printing Collages
You can create collages using your favorite photos and print them.
1.
Start My Image Garden.
2.
Select the image(s) from which you want to create a collage.
3.
Click Collage from New Art.
The Set Design and Paper dialog appears.
4.
Set the design, priority of people for Main People, Paper Size, etc., then click OK.
67

The collage appears in the Item edit screen.
Note
• Even if a high priority is set, the person may not be placed in the item depending on the selected
design.
• The layout may not be as expected depending on the photo information or analysis results of the
selected images.
5.
Edit the item according to your preference.
Note
•
In cases such as when Identifying people appears at Unregistered People in Global Menu on
the left side of the screen, the result may not be as expected since automatic placement does not
apply to images for which analysis has not been completed.
68

• Refer to "Inserting Images" to swap automatically placed images.
6. Click Print at the bottom right of the screen.
The Print Settings dialog appears.
7. Set the number of copies to print, the printer and paper to use, etc.
Note
• Refer to "Print Settings Dialog" for details on the Print Settings dialog.
8.
Click Print.
A message appears.
9. Click OK.
The Print dialog appears.
Important
•
If you change the printer in the Print dialog, a message appears and printing will be canceled.
10. Click Print.
Related Topic
Item Edit Screen
69

Printing Cards
You can create cards for anniversaries and annual events using your favorite photos and print them.
1.
Start My Image Garden.
2.
Select the image(s) from which you want to create a card.
3.
Click Card from New Art.
The Set Design and Paper dialog appears.
4.
Set the design, priority of people for Main People, Paper Size, etc., then click OK.
70

The card appears in the Item edit screen.
Note
• Even if a high priority is set, the person may not be placed in the item depending on the selected
design.
• The layout may not be as expected depending on the photo information or analysis results of the
selected images.
5.
Edit the item according to your preference.
Note
•
In cases such as when Identifying people appears at Unregistered People in Global Menu on
the left side of the screen, the result may not be as expected since automatic placement does not
apply to images for which analysis has not been completed.
71

• Refer to "Inserting Images" to swap automatically placed images.
6. Click Print at the bottom right of the screen.
The Print Settings dialog appears.
7. Set the number of copies to print, the printer and paper to use, etc.
Note
• Refer to "Print Settings Dialog" for details on the Print Settings dialog.
8.
Click Print.
A message appears.
9. Click OK.
The Print dialog appears.
Important
•
If you change the printer in the Print dialog, a message appears and printing will be canceled.
10. Click Print.
Related Topic
Item Edit Screen
72

Printing Calendars
You can create personalized calendars using your memorable photos and print them.
1.
Start My Image Garden.
2.
Select the image(s) you want to use for a calendar.
3.
Click Calendar from New Art.
The Set Design and Paper dialog appears.
4.
Set the design, priority of people for Main People, Paper Size, etc., then click OK.
73

The calendar appears in the Item edit screen.
Note
• Even if a high priority is set, the person may not be placed in the item depending on the selected
design.
• The layout may not be as expected depending on the photo information or analysis results of the
selected images.
5.
Click Advanced....
The Advanced Settings dialog appears.
Note
•
If Advanced... is not displayed, click (Right Scroll).
74

6. Set the calendar display format and holidays, then click OK.
Advanced Settings Dialog (Calendar)
Click OK to return to the Item edit screen.
7. Edit the item according to your preference.
Note
• In cases such as when Identifying people appears at Unregistered People in Global Menu on
the left side of the screen, the result may not be as expected since automatic placement does not
apply to images for which analysis has not been completed.
Refer to "Inserting Images" to swap automatically placed images.
•
8.
Click Print at the bottom right of the screen.
The Print Settings dialog appears.
9. Set the number of copies to print, the printer and paper to use, etc.
75

Note
• Refer to "Print Settings Dialog" for details on the Print Settings dialog.
10.
Click Print.
A message appears.
11.
Click OK.
The Print dialog appears.
Important
• If you change the printer in the Print dialog, a message appears and printing will be canceled.
12.
Click Print.
Related Topic
Item Edit Screen
76

Printing Stickers
You can create personalized stickers by printing your favorite photos on sticker sheets.
1.
Start My Image Garden.
2.
Select the image(s) from which you want to create stickers.
3.
Click Stickers from New Art.
The Set Design and Paper dialog appears.
4.
Set the design, Paper Size, etc., then click OK.
77

The sticker appears in the Item edit screen.
5.
Edit the item according to your preference.
Note
•
In the Advanced Settings dialog displayed by clicking Advanced... at the bottom of the screen,
you can set to use the same image in all frames within the page or apply the angle and size set to
an image to all copies of the same image within the page. If Advanced... is not displayed, click
(Right Scroll).
•
In cases such as when Identifying people appears at Unregistered People in Global Menu on
the left side of the screen, the result may not be as expected since automatic placement does not
apply to images for which analysis has not been completed.
•
Refer to "Inserting Images" to swap automatically placed images.
78

6. Click Print at the bottom right of the screen.
The Print Settings dialog appears.
7. Set the number of copies to print, the printer and paper to use, etc.
Note
• Refer to "Print Settings Dialog" for details on the Print Settings dialog.
8.
Click Print.
A message appears.
9.
Click OK.
The Print dialog appears.
Important
•
If you change the printer in the Print dialog, a message appears and printing will be canceled.
10. Click Print.
Related Topic
Item Edit Screen
79

Printing in a Cinematic Layout
You can print your favorite photos in a layout that resembles a film or theater.
1.
Start My Image Garden.
2.
Select the image(s) you want to place in a cinematic layout.
Note
• You can also use still images captured from videos directly to create items. Refer to "Capturing
and Printing Still Images from Videos" for how to capture still images from a video.
3.
Click Video Layout from New Art.
The Set Design and Paper dialog appears.
4. Set the design, Paper Size, etc., then click OK.
80

An item with the image(s) placed according to the selected design appears in the Item edit screen.
Note
• Even if a high priority is set, the person may not be placed in the item depending on the selected
design.
• The layout may not be as expected depending on the photo information or analysis results of the
selected images.
5.
Edit the item according to your preference.
Note
•
In cases such as when Identifying people appears at Unregistered People in Global Menu on
the left side of the screen, the result may not be as expected since automatic placement does not
apply to images for which analysis has not been completed.
81

• Refer to "Inserting Images" to swap automatically placed images.
6. Click Print at the bottom right of the screen.
The Print Settings dialog appears.
7. Set the number of copies to print, the printer and paper to use, etc.
Note
• Refer to "Print Settings Dialog" for details on the Print Settings dialog.
8.
Click Print.
A message appears.
9. Click OK.
The Print dialog appears.
Important
•
If you change the printer in the Print dialog, a message appears and printing will be canceled.
10. Click Print.
Related Topic
Item Edit Screen
82

Printing Paper Crafts
You can print downloaded PREMIUM Contents (paper crafts) and create three-dimensional art.
Important
• Keep these points in mind when printing paper crafts.
• Refer to "Downloading PREMIUM Contents" for how to download PREMIUM Contents.
• You may only use downloaded or printed PREMIUM Contents for personal purposes.
You may not use the content for commercial purposes.
1.
Start My Image Garden.
2.
Click Paper Craft from New Art.
The Set Design and Paper dialog appears.
3. Select the design, then click OK.
83

The paper craft appears in the Item edit screen.
4.
Click Print at the bottom right of the screen.
The Print Settings dialog appears.
5.
Set the number of copies to print, the printer and paper to use, etc.
Note
•
Refer to "Print Settings Dialog" for details on the Print Settings dialog.
6. Click Print.
84

A message appears.
7. Click OK.
The Print dialog appears.
Important
• If you change the printer in the Print dialog or click PDF (PDF or Preview when using Mac OS X
v10.6), a message appears and printing will be canceled.
Click Print.
8.
Related Topic
Item Edit Screen
85

Downloading and Printing PREMIUM Contents
You can download works of renowned artists in the Download PREMIUM Contents view.
You can also print downloaded PREMIUM Contents, or create personalized items by adding your favorite
photos and text to them.
Downloading PREMIUM Contents
Printing PREMIUM Contents
Important
• Keep these points in mind when using PREMIUM Contents.
• To download PREMIUM Contents, make sure that genuine Canon ink tanks/ink cartridges are
installed for all colors on a supported printer.
• You may only use downloaded or printed PREMIUM Contents for personal purposes. You may not
use the content for commercial purposes.
• If your printer does not support PREMIUM Contents, an error message appears after clicking
Download PREMIUM Contents.
Downloading PREMIUM Contents
Downloadable PREMIUM Contents are as follows.
• Cards
• Collages
• Calendars
• Paper crafts
1. Start My Image Garden.
2. Click Download PREMIUM Contents.
86

The view switches to Download PREMIUM Contents.
Important
• To download PREMIUM Contents, allow cookies and enable JavaScript on Safari.
• Internet connection is required to use this function. Internet connection fees apply.
Note
• When you click Download PREMIUM Contents, a message screen appears. Follow the on-
screen prompts.
3.
Select a category.
4.
Select and download the PREMIUM Contents you want to print.
Printing PREMIUM Contents
You can edit and print downloaded PREMIUM Contents.
Downloaded PREMIUM Contents appear in the following screens.
Set Design and Paper Dialog
•
Downloaded PREMIUM Contents View
•
The following explains how to edit/print from the Downloaded PREMIUM Contents view.
Important
The allowed number of print copies and the usage period are set for some PREMIUM Contents.
•
PREMIUM Contents will be deleted when the set number of copies is exceeded or when the usage
period has elapsed.
1. Start My Image Garden.
87

2. Click Downloaded PREMIUM Contents.
Downloaded PREMIUM Contents appear as thumbnails.
Note
• When you click Downloaded PREMIUM Contents, a message screen appears. Follow the on-
screen prompts.
3.
Select the PREMIUM Contents you want to print, then click Edit.
The Paper Size dialog appears.
Note
•
Double-clicking the PREMIUM Contents you want to print also displays the Paper Size dialog.
88

4. Set Paper Size.
Set Paper Size in the Paper Size dialog, then click OK.
The PREMIUM Contents appears in the Item edit screen.
Note
•
Move the cursor over a thumbnail of PREMIUM Contents in the Downloaded PREMIUM
Contents view to check supported paper sizes and other information.
5.
Edit the item according to your preference.
Note
Available editing functions vary depending on the PREMIUM Contents.
•
6.
Click Print at the bottom right of the screen.
The Print Settings dialog appears.
7.
Set the number of copies to print, the printer and paper to use, etc.
Note
•
Refer to "Print Settings Dialog" for details on the Print Settings dialog.
8. Click Print.
A message appears.
9.
Click OK.
The Print dialog appears.
89

Important
• If you change the printer in the Print dialog or click PDF (PDF or Preview when using Mac OS
X v10.6), a message appears and printing will be canceled.
10. Click Print.
Related Topic
Download PREMIUM Contents View
Downloaded PREMIUM Contents View
Item Edit Screen
90

Capturing and Printing Still Images from Videos
You can capture video frames to create still images and print them.
Important
• If videos do not appear, check the system requirements and file formats. Refer to "File Formats" for
details.
• Videos may not play smoothly depending on your environment.
• Video color tones changed via the settings of the graphic driver (video card) or its utility are not
reflected in captured still images. Therefore, color tones may differ between videos and captured still
images.
1.
Start My Image Garden.
2.
Select the video from which you want to capture still images.
3.
Click Video Frame Capture.
The view switches to Video Frame Capture, and the video appears with the still image capture panel.
4. Display the frame you want to capture as a still image.
Drag the slider in the Video Frame Capture view or use the still image capture panel to display the
frame you want to capture.
91

Note
• (Pause) or (Playback) appears on the still image capture panel while a video is playing or
stopped, respectively.
Using (Pause) and (Frame Backward)/(Frame Advance) on the still image capture panel
•
makes it easier to display the frame you want to capture.
5.
When the frame you want to capture as a still image appears, click Capture (single frame)
on the still image capture panel.
Note
Refer to "Video Frame Capture View" for how to switch between Capture (single frame) and
•
Capture (multiple).
• In Capture (multiple), you can capture multiple still images from a video at one time by specifying
the number of captures, etc.
• Select the Prefer clearer images checkbox to automatically detect less blurry frames when
capturing images. Capture may take time depending on your environment.
92

When image capture is completed, the captured image(s) appear(s) in the Captured Images area.
Important
• You can capture up to 150 still images from one video.
Note
To sort still images in the Captured Images area by time of recording, click Sort by Timeline at
•
the bottom of the screen.
• To correct a captured still image, select the still image you want to correct in the Captured Images
area, then click Correct at the bottom of the screen.
Correcting Still Images Captured from Videos
6.
Select the image(s) you want to print, then click Print.
93

7.
Set the number of copies to print, the printer and paper to use, etc.
Note
•
Refer to "Print Settings Dialog" for details on the Print Settings dialog.
8. Click Print.
A message appears.
9. Click OK.
The Print dialog appears.
94

Important
• If you change the printer in the Print dialog, a message appears and printing will be canceled.
10. Click Print.
Note
• To save still images captured from videos, select the still image(s) you want to save in the Captured
Images area, then click Save.
• Click Layout Print at the bottom of the screen to edit or print an item created from the captured still
images in a cinematic layout.
Printing in a Cinematic Layout
• You can overlap and merge multiple captured still images in the order of the time code to create an
image depicting the flow of a moving subject.
Creating Images of Merged Video Frames
Related Topic
Video Frame Capture View
95

Creating Images of Merged Video Frames
You can overlap and merge multiple still images captured from a video in the order of the time code to
create an image depicting the flow of a moving subject.
Important
• You can merge between 5 and 30 still images.
• Still images corrected in the Correct view cannot be used. The original uncorrected still images will be
used.
Note
• It is recommended that you use still images captured from a video recorded with a steady camera (fixed
to a tripod, etc.) without zooming or adjusting focus while recording.
• Refer to "Capturing and Printing Still Images from Videos" for how to capture still images.
1.
Select the still images you want to merge in the Captured Images area of the Video Frame
Capture view.
2.
Click Merge Frames.
The view switches to Merge Frames, and the merged image appears in the Preview area.
Note
•
When you click Merge Frames, a message screen appears. Follow the on-screen prompts.
•
To change the images to merge, select images from the Selected Images area, then click Start
Re-merging.
3. Click Save.
96

The Save dialog appears.
4.
Specify the save settings.
Save Dialog (Video Frame Capture View)
Note
• The created image can be saved in JPEG/Exif format only.
5.
Click Save.
The created image is saved, and the Merge Frames view reappears.
6.
Click Close.
The Video Frame Capture view reappears.
Important
•
If the created image is not saved, the merged content will be deleted.
Related Topic
Merge Frames View
97

Correcting Still Images Captured from Videos
You can reduce noise or roughness in still images captured from videos.
Important
• When a frame in which the subject or camera has moved significantly is captured, the still image may
not be corrected properly.
Note
• Refer to "Capturing and Printing Still Images from Videos" for how to capture still images.
1.
Select the still image(s) you want to correct in the Captured Images area of the Video
Frame Capture view.
Click Correct.
2.
The view switches to Correct, and the image appears in the Preview area.
3.
Select the image you want to correct from the Selected Images area.
98

Note
• You can also select and correct multiple images.
4.
Click Noise Reduction or Enhance Resolution according to purpose.
The image is corrected, and the (Correction) mark appears on the upper right of the image.
Note
•
Click Undo to undo the correction.
5. Click Close.
The Video Frame Capture view reappears.
99

Related Topic
Correct View
100
 Loading...