

Canon IXUS i, SD10 Quick Start Guide
ENGLISH
This guide explains the required operations the
first time the camera is used, and how to
connect to a computer. For usage precautions
and detailed instructions, please refer to the
manuals listed below.
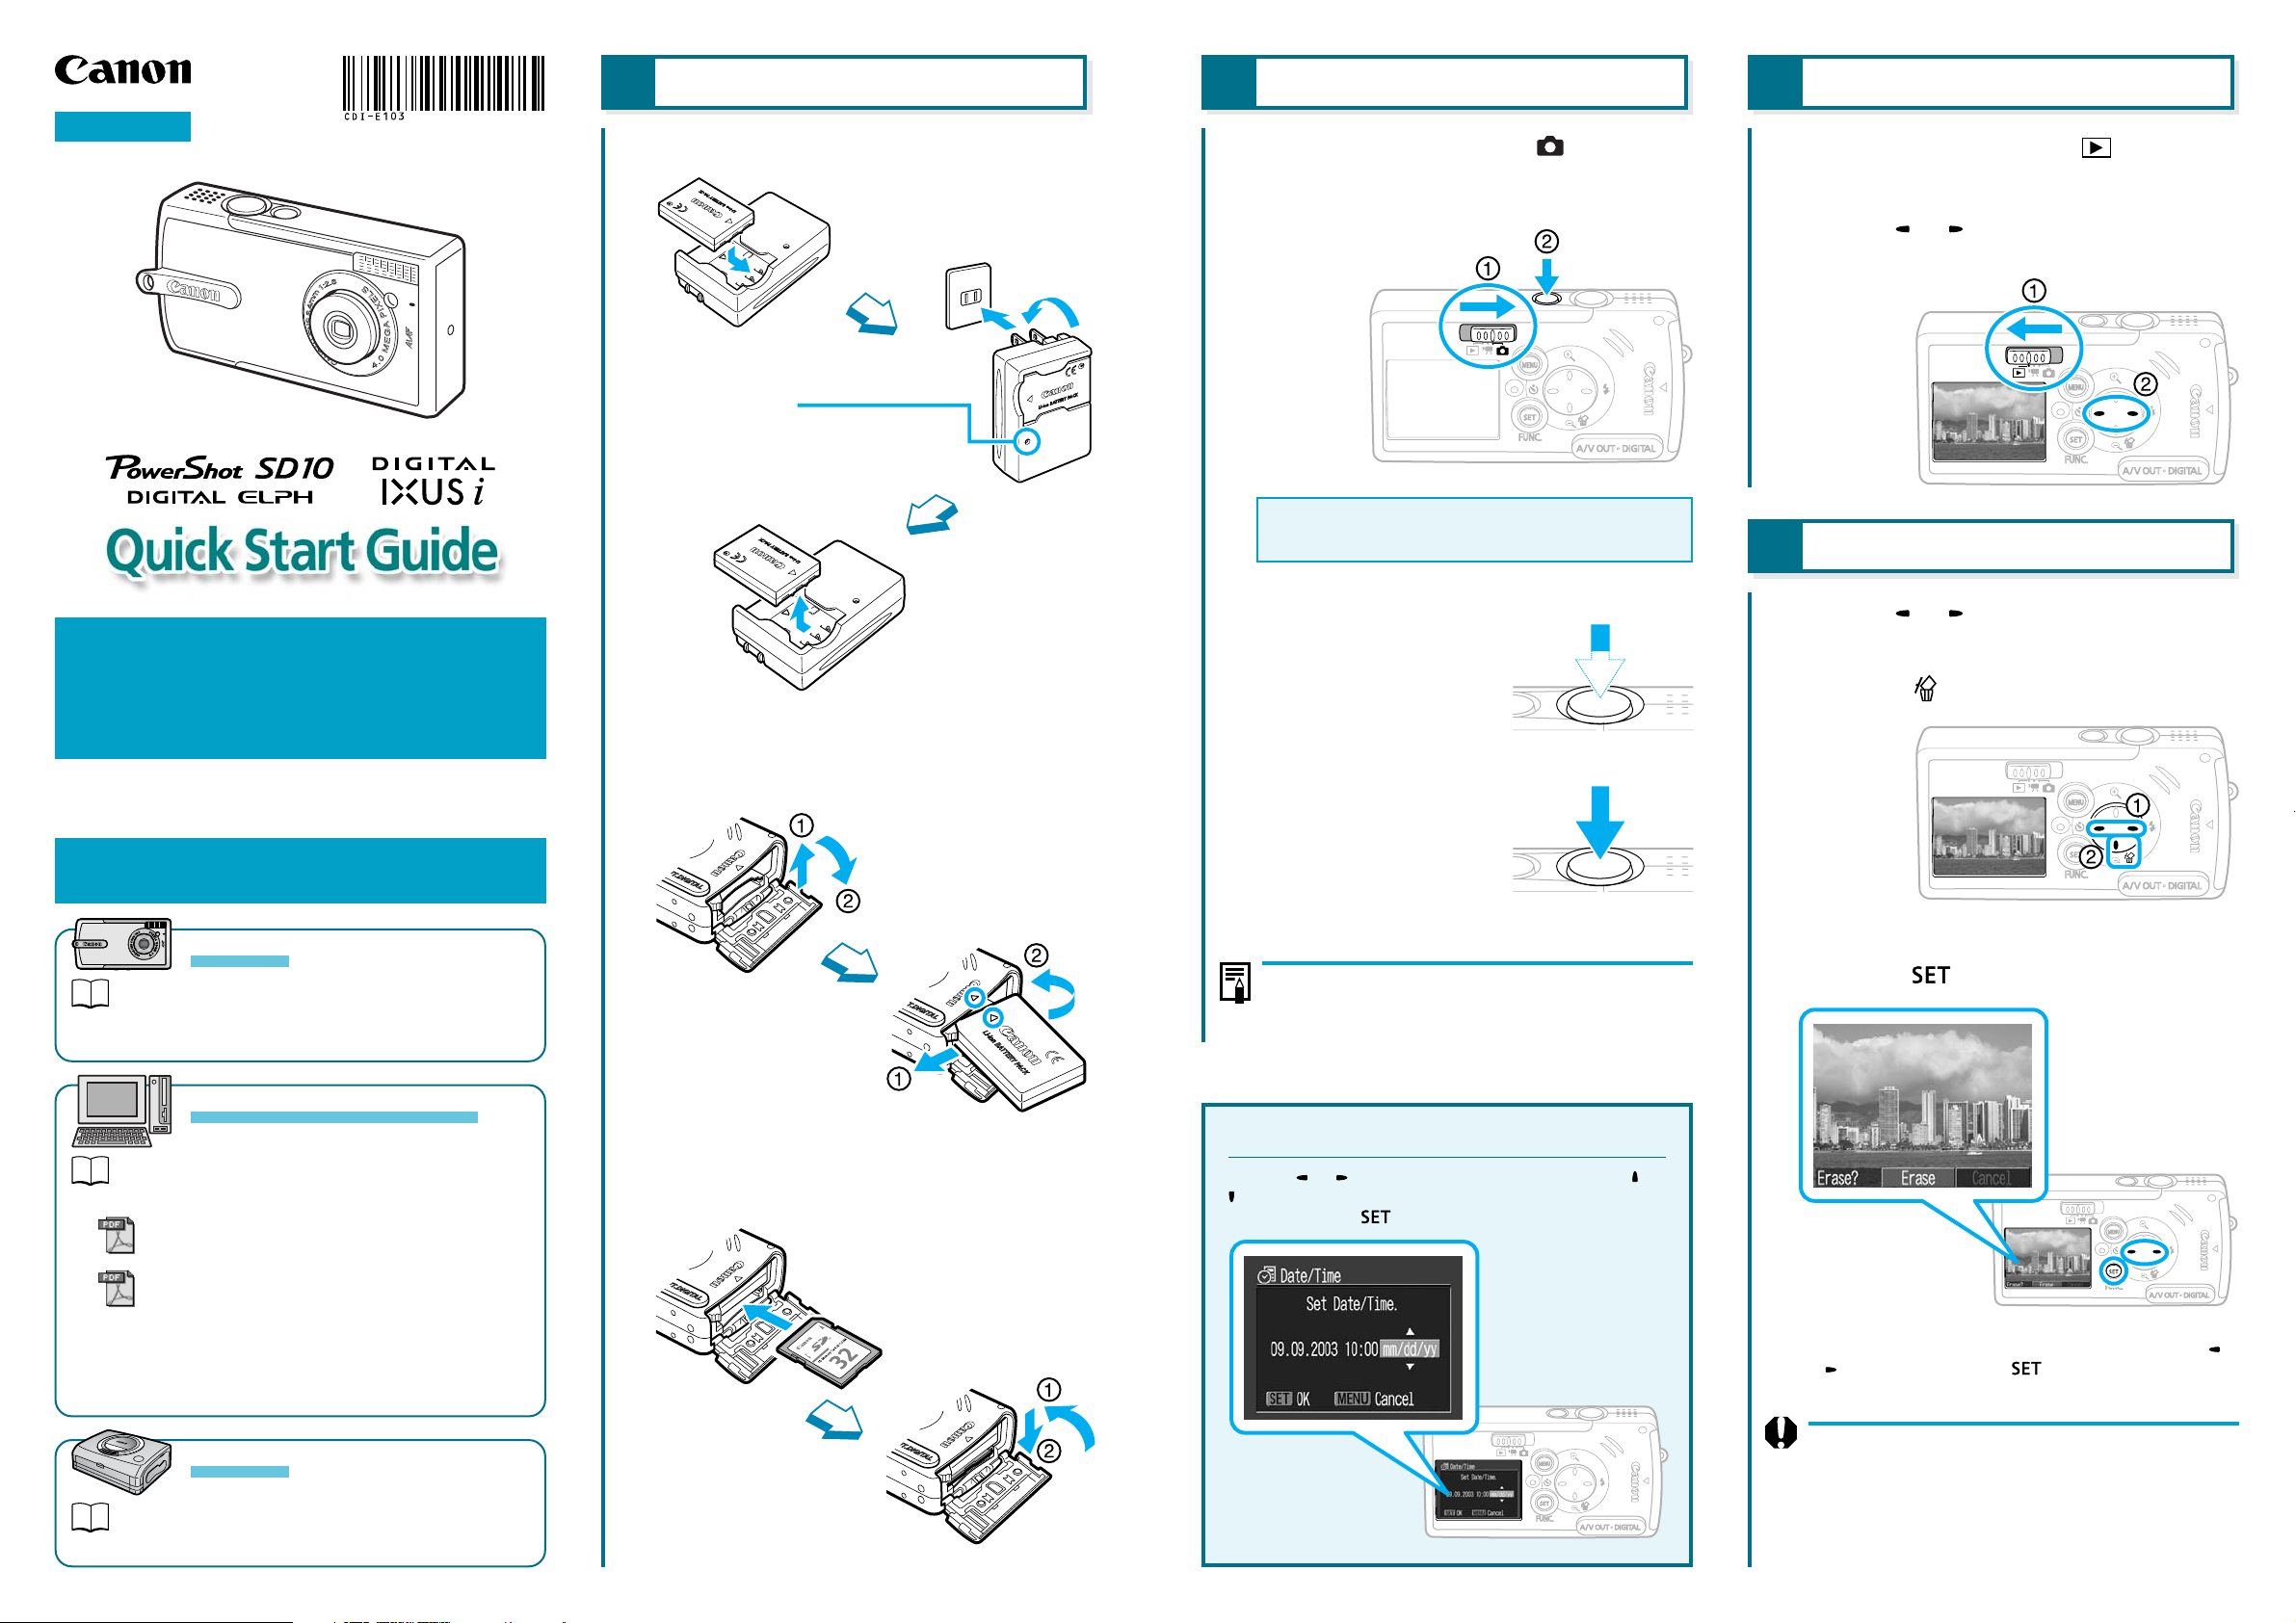
1 Preparing the Camera
Charge the battery.
1.
Install the battery.
Charge Indicator
Charging: Red
Charging complete: Green
(Charging time: Approx. 95 min.)
Remove the battery.
2 Shooting
Slide the mode switch to
1.
(Shooting) and press the On/Off
button until the camera powers on.
The first time you use the camera, set the date and
time. See “Set the Date and Time” below.
Focus.
2.
Press the shutter button
halfway. The camera beeps
twice when the subject is in
focus.
3 Reviewing an Image
Slide the mode switch to
1.
(Playback).
Use the or button to display an
2.
image.
4 Erasing an Image
Use the or button to display an
1.
image.
Press the button.
2.
CDI-E103-010 XXXXXX © CANON INC. PRINTED IN JAPAN
Do not connect the camera to the computer
before the software is installed.
Camera
Camera User Guide
Handling precautions and detailed operations for
the camera
Computers and Software
Software Starter Guide
Basic software operations
ZoomBrowser EX Software User Guide
®
(Windows
ImageBrowser Software User Guide
(Macintosh)
The PDF format manuals contain detailed software
operations, and are available on the Canon website.
Please download them from the following URL:
http://web.canon.jp/Imaging/information-e.html
)
Printers
Install the battery.
2.
Open the cover.
Install the SD card.
3.
Insert the
SD card.
Install the battery.
Shoot.
3.
Press the shutter button fully.
You will hear the sound of the
shutter close when the shot
is complete.
Basic Shooting Operations
For an overview of basic shooting operations, see
“Overview” on the reverse side.
Set the Date and Time
Use the or button to select items, and use the or
button to change the value. To put the settings into
effect, press the
button.
Check that [Erase] is selected and
3.
press the button.
To exit instead of erasing, select [Cancel] using the
or button and press the button.
Please note that erased images cannot be recovered.
Exercise caution before erasing a file.
Direct Printer User Guide
Detailed printer operations
Close the cover.
Continued on the reverse side.
5
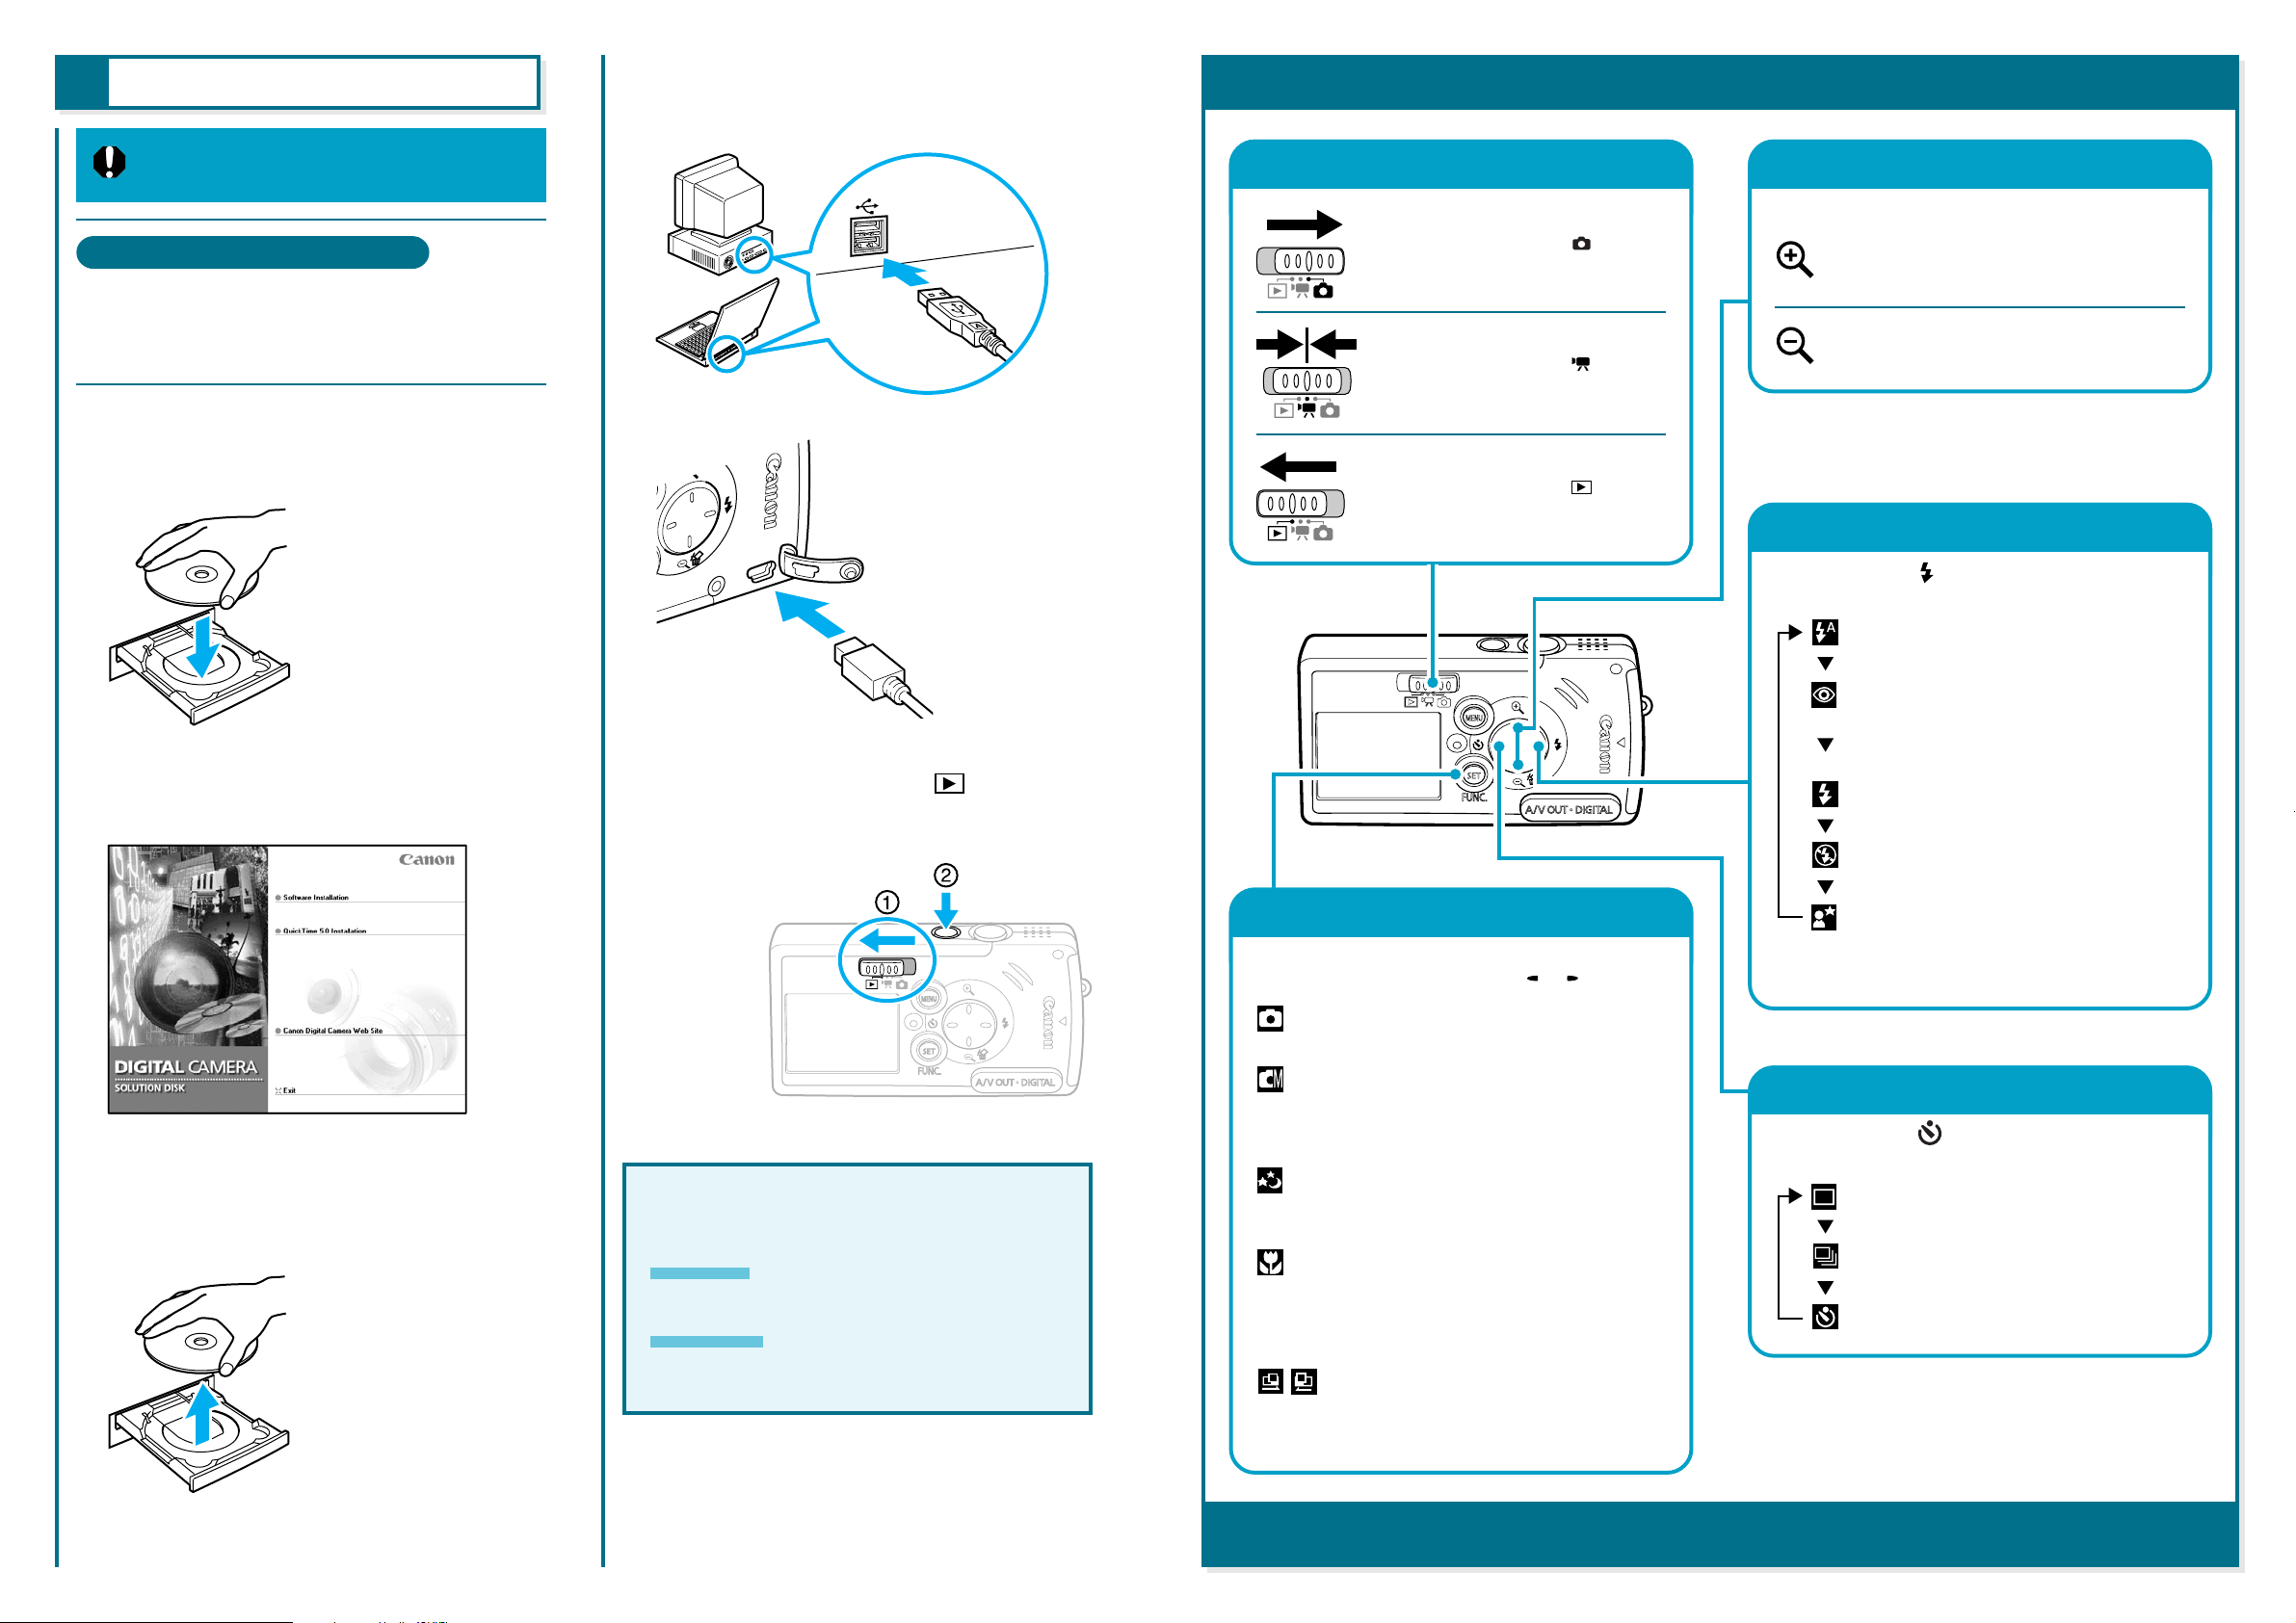
Connecting to a Computer
Do not connect the camera to the
computer before the software is installed.
Connect the camera to the computer
4.
using the USB cable.
Computer
Mode Switch
Overview
Digital Zoom
List of Things to Prepare
• Camera and computer
• Canon Digital Camera Solution Disk
• USB cable (use the cable provided with the
camera)
Place the Canon Digital Camera
1.
Solution Disk in the computer’s CDROM drive.
Install the software from the disk.
2.
For details on software installation, see the Software
Starter Guide.
Camera
Slide the mode switch to
5.
(Playback) and turn on the camera’s
power.
Shooting:
Slide the mode switch to
Movie:
Slide the mode switch to
Playback:
Slide the mode switch to
Images can be magnified up to approximately 5.7x.
.
.
.
Press this button for a telephoto shot.
The subject becomes larger.
Press this button for a wide-angle shot.
The subject becomes smaller.
Flash*
Each press of the button cycles between the
following settings.
: Auto
: Auto with Red-Eye Reduction
Prevents the light of the flash from
reflecting back from the eyes and making
them appear red.
: Flash On
: Flash Off
Remove the disk from the CD-ROM
3.
drive when the installation is
complete.
For further instructions, see the
Software Starter Guide.
Windows
Downloading Images to the Computer
Macintosh
Starting ImageBrowser ➔
Downloading Images to the Computer
Shooting Modes
Press the SET/FUNC. button once.
Select a shooting mode using the
: Auto
Lets the camera select settings.
: Manual
Lets you set settings such as the
exposure, the white balance and the
photo effect.
: Long Shutter
Lets you shoot images with a slow
shutter speed.
: Macro
Lets you shoot from a distance of 3 cm
(1.2 in.) from the front of the lens to the
subject. The recordable area for closeups is 2.4 x 1.8 cm (0.94 x 0.71 in.).
: Stitch Assist
Lets you shoot overlapping images that
can be merged into one panoramic
image.
or button.
: Slow Synchro
The flash timing is adjusted to a slow
shutter speed, allowing you to shoot
night sceneries.
Continuous Shooting, Self-timer*
Each press of the button cycles between the
following settings.
: Single Shot
: Continuous Shooting
:Self-timer
* Some settings are not available in certain shooting
modes.
Some modes have other functions available, see “Functions Available in Each Shooting Mode” at the end of the Camera User
Guide.
 Loading...