


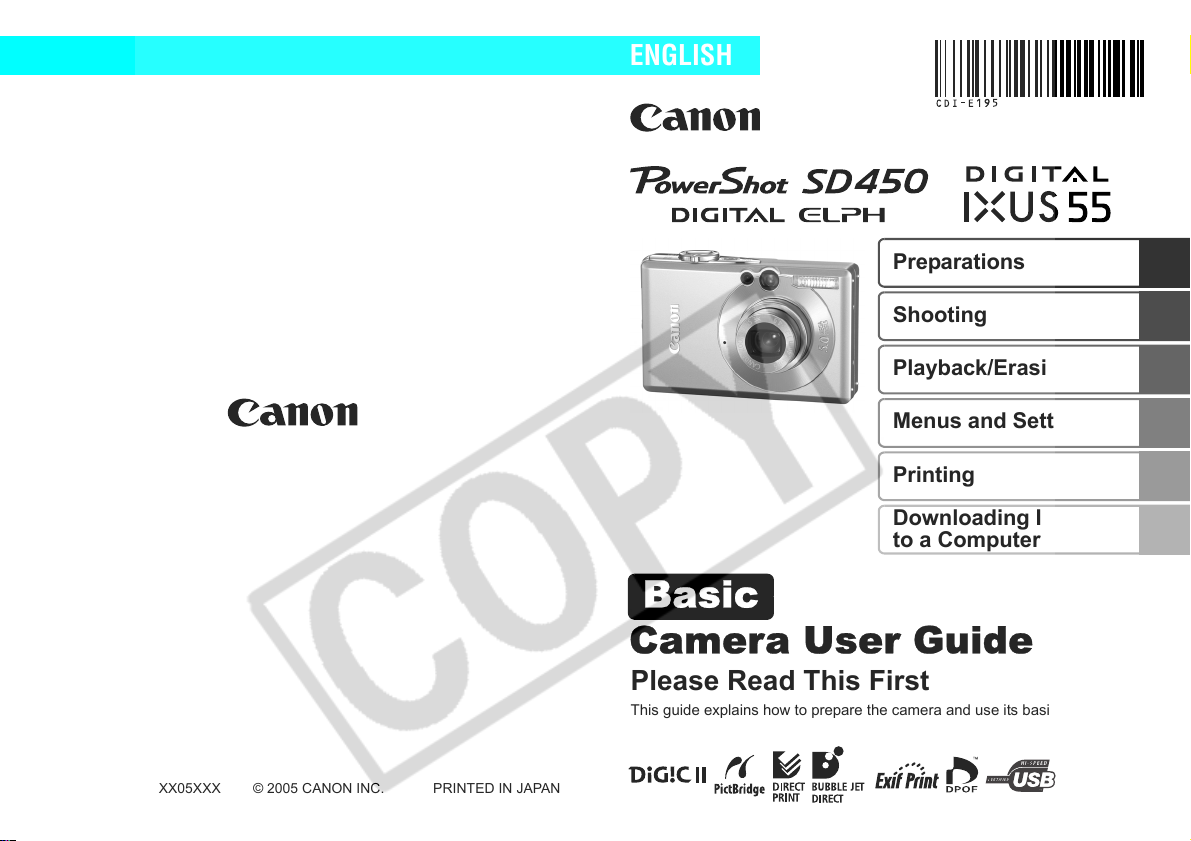
Canon IXUS 55, PowerShot SD450 Basic User Guide
ENGLISH
Basic
Preparations
Shooting
Playback/Erasing
Menus and Settings
Printing
Downloading Images
to a Computer
CDI-E195-010 XX05XXX
Camera User Guide
Please Read This First
This guide explains how to prepare the camera and use its basic features.
© 2005 CANON INC. PRINTED IN JAPAN
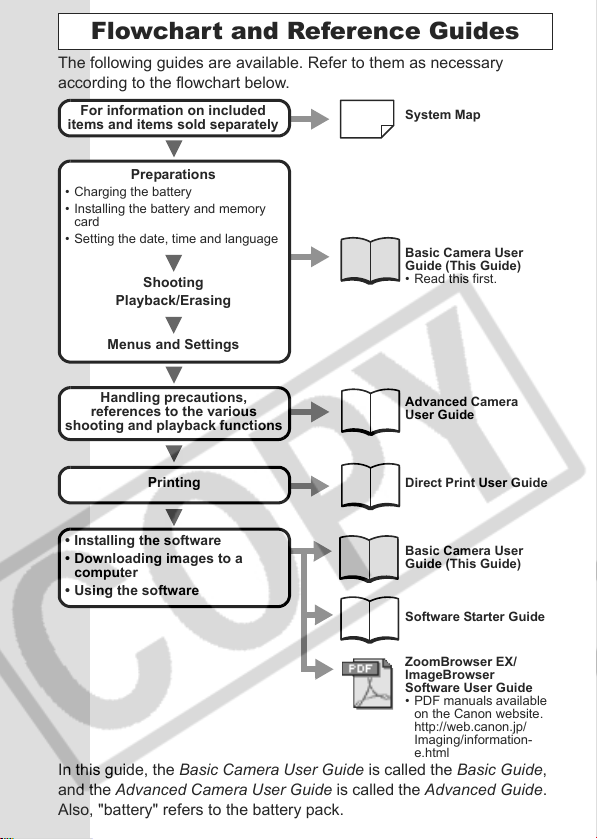
Flowchart and Reference Guides
The following guides are available. Refer to them as necessary
according to the flowchart below.
For information on included
items and items sold separately
System Map
• Charging the battery
• Installing the battery and memory
card
• Setting the date, time and language
Shooting
Basic Camera User
Guide (This Guide)
• Read this first.
Playback/Erasing
Menus and Settings
Preparations
Handling precautions,
references to the various
shooting and playback functions
Printing
• Installing the software
• Downloading images to a
computer
Advanced Camera
User Guide
Direct Print User Guide
Basic Camera User
Guide (This Guide)
• Using the software
Software Starter Guide
ZoomBrowser EX/
ImageBrowser
Software User Guide
• PDF manuals available
on the Canon website.
http://web.canon.jp/
Imaging/information-
e.html
In this guide, the Basic Camera User Guide is called the Basic Guide,
and the Advanced Camera User Guide is called the Advanced Guide.
Also, "battery" refers to the battery pack.
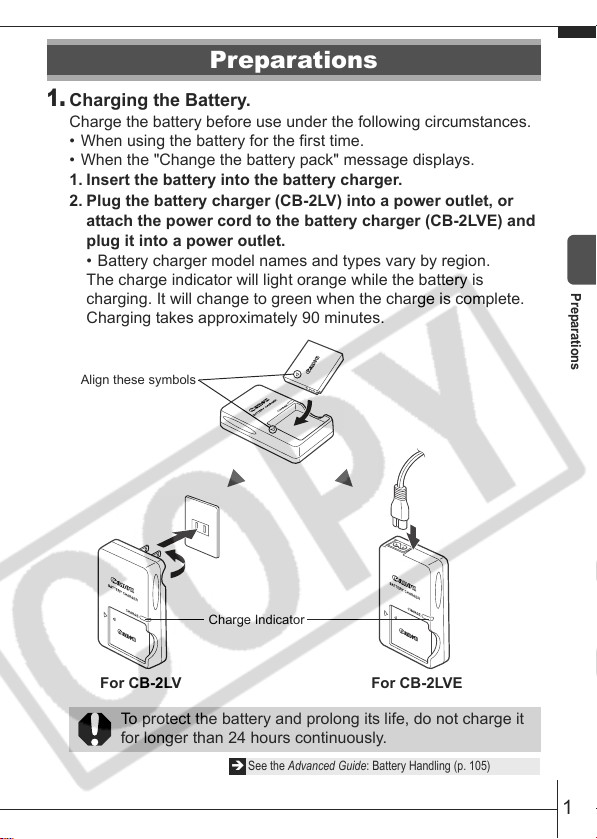
Preparations
1.
Charging the Battery.
Charge the battery before use under the following circumstances.
• When using the battery for the first time.
• When the "Change the battery pack" message displays.
1. Insert the battery into the battery charger.
2. Plug the battery charger (CB-2LV) into a power outlet, or
attach the power cord to the battery charger (CB-2LVE) and
plug it into a power outlet.
• Battery charger model names and types vary by region.
The charge indicator will light orange while the battery is
charging. It will change to green when the charge is complete.
Charging takes approximately 90 minutes.
Align these symbols
Charge Indicator
Preparations
For CB-2LV For CB-2LVE
To protect the battery and prolong its life, do not charge it
for longer than 24 hours continuously.
See the Advanced Guide: Battery Handling (p. 105)
1
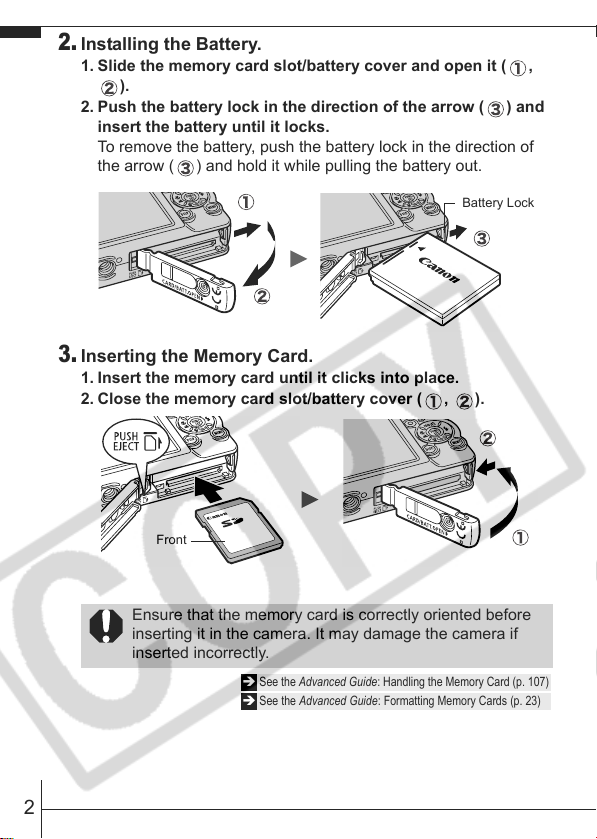
2.
Installing the Battery.
1. Slide the memory card slot/battery cover and open it ( ,
).
2. Push the battery lock in the direction of the arrow ( ) and
insert the battery until it locks.
To remove the battery, push the battery lock in the direction of
the arrow ( ) and hold it while pulling the battery out.
Battery Lock
3.
Inserting the Memory Card.
1. Insert the memory card until it clicks into place.
2. Close the memory card slot/battery cover ( , ).
Front
Ensure that the memory card is correctly oriented before
inserting it in the camera. It may damage the camera if
inserted incorrectly.
See the Advanced Guide: Handling the Memory Card (p. 107)
See the Advanced Guide: Formatting Memory Cards (p. 23)
2
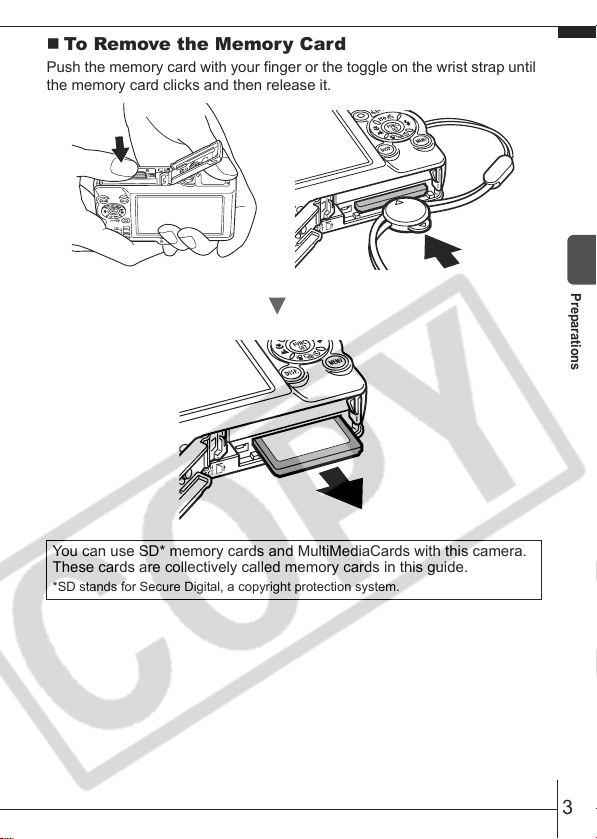
To Remove the Memory Card
Push the memory card with your finger or the toggle on the wrist strap until
the memory card clicks and then release it.
You can use SD* memory cards and MultiMediaCards with this camera.
These cards are collectively called memory cards in this guide.
*SD stands for Secure Digital, a copyright protection system.
Preparations
3
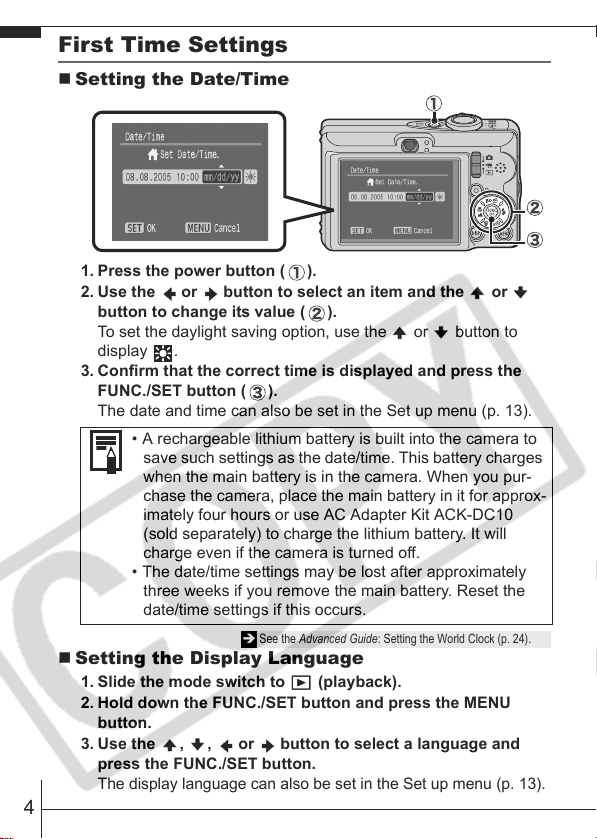
First Time Settings
Setting the Date/Time
1. Press the power button ( ).
2. Use the or button to select an item and the or
button to change its value ( ).
To set the daylight saving option, use the or button to
display .
3. Confirm that the correct time is displayed and press the
FUNC./SET button ( ).
The date and time can also be set in the Set up menu (p. 13).
• A rechargeable lithium battery is built into the camera to
save such settings as the date/time. This battery charges
when the main battery is in the camera. When you pur-
chase the camera, place the main battery in it for approx-
imately four hours or use AC Adapter Kit ACK-DC10
(sold separately) to charge the lithium battery. It will
charge even if the camera is turned off.
• The date/time settings may be lost after approximately
three weeks if you remove the main battery. Reset the
date/time settings if this occurs.
See the Advanced Guide: Setting the World Clock (p. 24).
Setting the Display Language
1. Slide the mode switch to (playback).
2. Hold down the FUNC./SET button and press the MENU
button.
3. Use the ,
press the FUNC./SET button.
The display language can also be set in the Set up menu (p. 13).
4
, or button to select a language and
Shooting
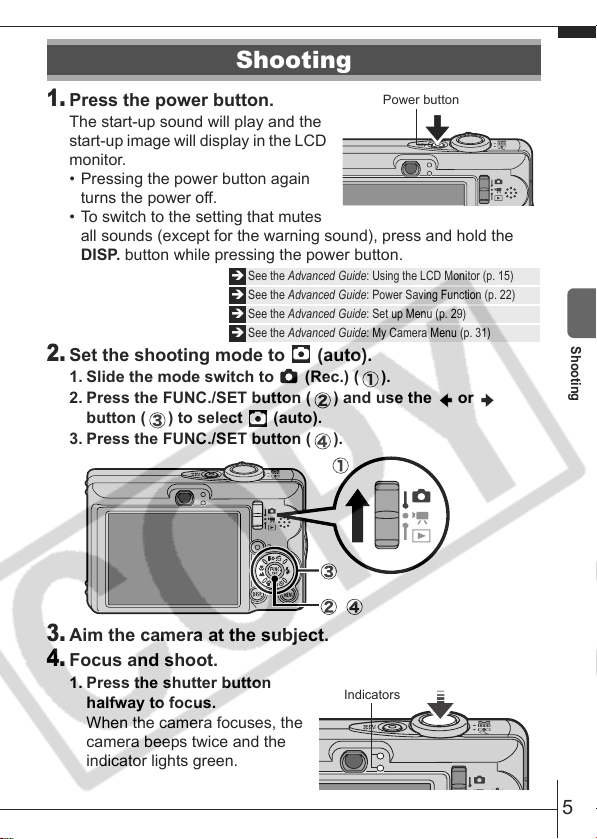
1.
Press the power button.
The start-up sound will play and the
start-up image will display in the LCD
monitor.
• Pressing the power button again
turns the power off.
• To switch to the setting that mutes
all sounds (except for the warning sound), press and hold the
DISP. button while pressing the power button.
2.
Set the shooting mode to (auto).
1. Slide the mode switch to (Rec.) ( ).
2. Press the FUNC./SET button ( ) and use the or
button ( ) to select (auto).
3. Press the FUNC./SET button ( ).
3.
Aim the camera at the subject.
4.
Focus and shoot.
1. Press the shutter button
halfway to focus.
When the camera focuses, the
camera beeps twice and the
indicator lights green.
See the Advanced Guide: Using the LCD Monitor (p. 15)
See the Advanced Guide: Power Saving Function (p. 22)
See the Advanced Guide: Set up Menu (p. 29)
See the Advanced Guide: My Camera Menu (p. 31)
Power button
Indicators
Shooting
5
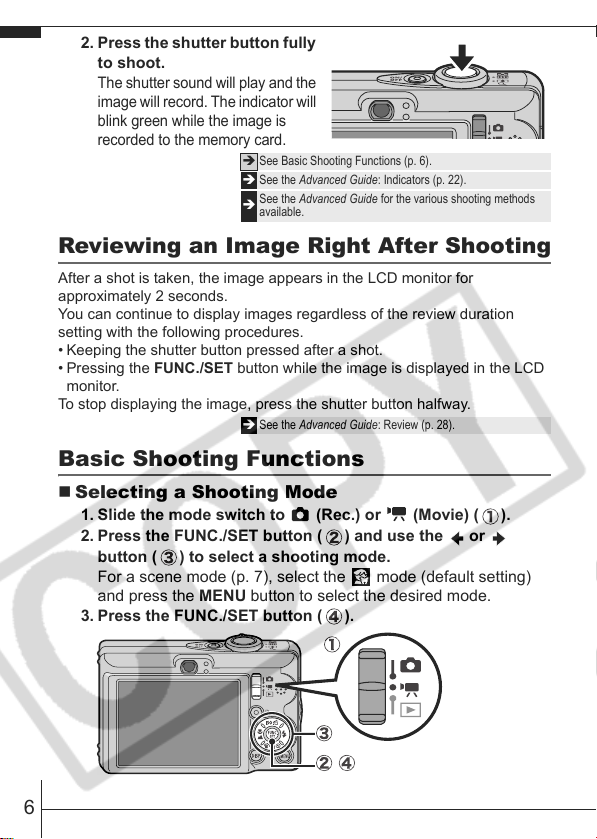
2. Press the shutter button fully
to shoot.
The shutter sound will play and the
image will record. The indicator will
blink green while the image is
recorded to the memory card.
See Basic Shooting Functions (p. 6).
See the Advanced Guide: Indicators (p. 22).
See the Advanced Guide for the various shooting methods
available.
Reviewing an Image Right After Shooting
After a shot is taken, the image appears in the LCD monitor for
approximately 2 seconds.
You can continue to display images regardless of the review duration
setting with the following procedures.
• Keeping the shutter button pressed after a shot.
•Pressing the FUNC./SET button while the image is displayed in the LCD
monitor.
To stop displaying the image, press the shutter button halfway.
See the Advanced Guide: Review (p. 28).
Basic Shooting Functions
Selecting a Shooting Mode
1. Slide the mode switch to (Rec.) or (Movie) ( ).
2. Press the FUNC./SET button ( ) and use the or
button ( ) to select a shooting mode.
For a scene mode (p. 7), select the mode (default setting)
and press the MENU button to select the desired mode.
3. Press the FUNC./SET button ( ).
6
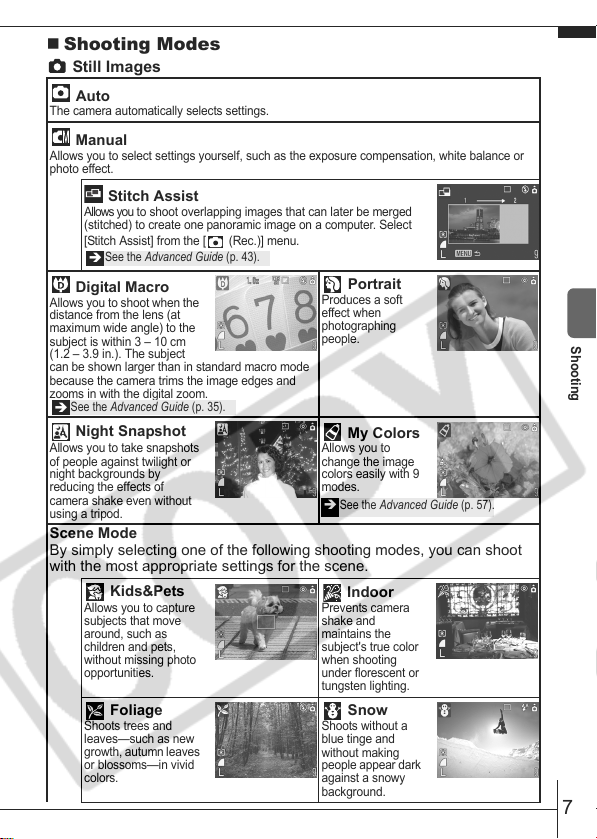
Shooting Modes
Still Images
Auto
The camera automatically selects settings.
Manual
Allows you to select settings yourself, such as the exposure compensation, white balance or
photo effect.
Stitch Assist
Allows you to shoot overlapping images that can later be merged
(stitched) to create one panoramic image on a computer. Select
[Stitch Assist] from the [ (Rec.)] menu.
See the Advanced Guide (p. 43).
Digital Macro
Allows you to shoot when the
distance from the lens (at
maximum wide angle) to the
subject is within 3 – 10 cm
(1.2 – 3.9 in.). The subject
can be shown larger than in standard macro mode
because the camera trims the image edges and
zooms in with the digital zoom.
See the Advanced Guide (p. 35).
Night Snapshot
Allows you to take snapshots
of people against twilight or
night backgrounds by
reducing the effects of
camera shake even without
using a tripod.
Scene Mode
By simply selecting one of the following shooting modes, you can shoot
with the most appropriate settings for the scene.
Kids&Pets
Allows you to capture
subjects that move
around, such as
children and pets,
without missing photo
opportunities.
Foliage
Shoots trees and
leaves—such as new
growth, autumn leaves
or blossoms—in vivid
colors.
Portrait
Produces a soft
effect when
photographing
people.
My Colors
Allows you to
change the image
colors easily with 9
modes.
See the Adv anced Guide (p. 57).
Indoor
Prevents camera
shake and
maintains the
subject's true color
when shooting
under florescent or
tungsten lighting.
Snow
Shoots without a
blue tinge and
without making
people appear dark
against a snowy
background.
Shooting
7
 Loading...