

Canon CanoScan FB 1200S, FilmGet FAU User Manual

Canon Film Adapter Unit
Software
FilmGet FAU
User’s Guide
Quick Start
For those who prefer to jump right
into scanning
Steps 1-3
For those who prefer a methodical
approach
Other Functions
For those who are detail oriented
For Windows & Macintosh
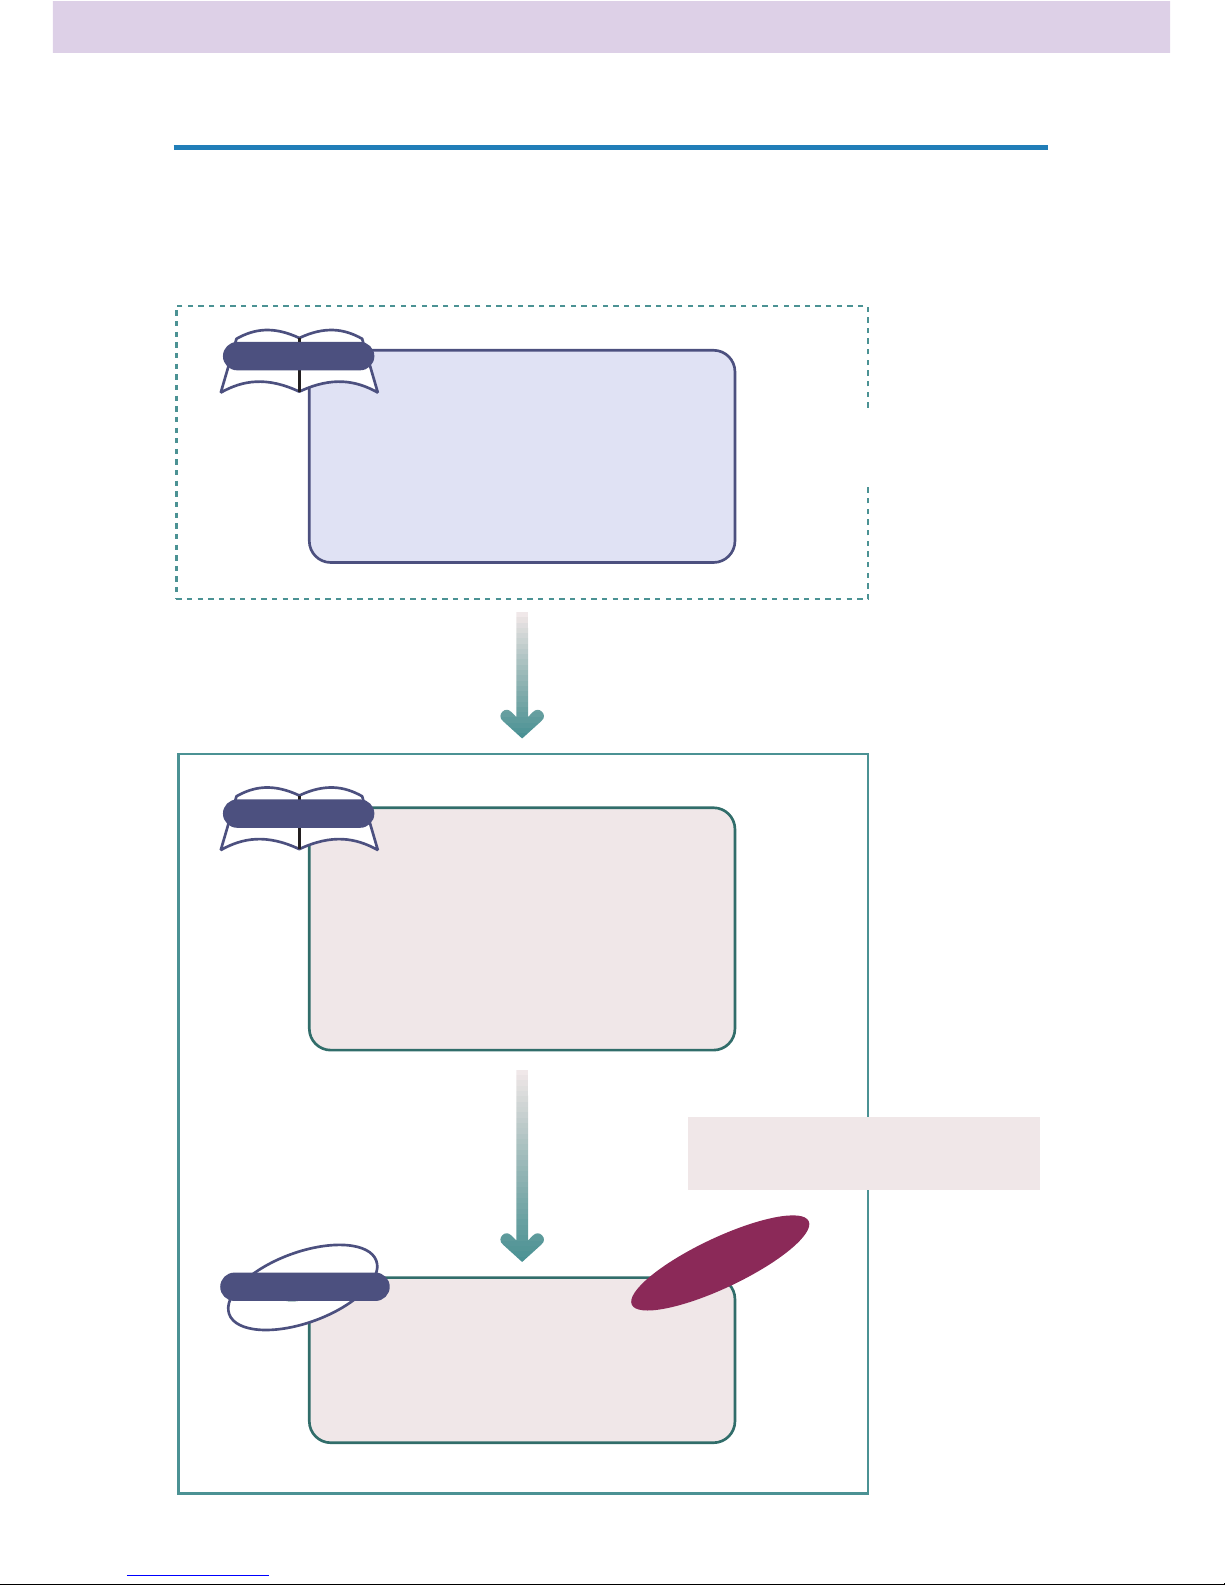
How to Use the Guides
The following chart explains how to best use the guides that accompany this Film
Adapter Unit. You may also wish to refer to the guides that accompany your
scanner.
Printed Manual
A complete guide to setting up the
scanner, attaching the cables,
installing the software and performing
a test scan.
CanoScan FB1200S
Getting Started
Printed Manual
A complete guide to installing the
Film Adapter Unit (FAU), attaching
the cables, installing the software
and positioning film. Read this guide
before you first use the FAU.
FAU-S10
Setup Guide
Printed Manual
A detailed description of how to use
FilmGet FAU.
FilmGet FAU
User's Guide
This Guide
After you have read the above
guide to setup and test the
scanner, read this manual to set
up the Film Adapter Unit.
Electronic Manual
Film Adapter Unit Manuals
Scanner Manuals
After you read how to
setup the FAU, read this
manual to learn advanced
scanning techniques.

3
FilmGet FAU User’s Guide
How to Use this Guide
This is the users guide for FilmGet FAU 1.0 for Windows and FilmGet FAU 1.0 for
Macintosh, the driver software for scanning films and transparencies with the Film
Adapter Unit FAU-S10 option for CanoScan FB1200S flatbed scanners. Start the
Windows version as a TWAIN driver from within TWAIN-compliant applications and
the Macintosh version as the plug-in compliant driver software from within plug-in
compatible applications.
Please read this guide in conjunction with your Windows or Macintosh guides and
the guides for individual TWAIN-compliant or plug-in compliant application
programs.
Organization of the Guide
Quick Start
A digest of FilmGet FAU commands and procedures. Recommended
for those who prefer to jump right into scanning.
Step 1 Installing the Software
An explanation of how to install or uninstall FilmGet FAU. All should
read this section.
Step 2 Scanning
A step-by-step explanation of FilmGet FAU commands and procedures. All should read this section.
Step 3 Adjusting Images
An explanation of how to adjust the color balance and brightness of
preview images. Read this section as required.
Other Functions
An explanation of the FilmGet FAU menu items and settings. Read this
section as required.
Appendices
The appendices include a troubleshooting section, a glossary and the
index. Refer to this section as required.

4
FilmGet FAU User’s Guide
Symbols in this Guide
The following symbols are used to draw your attention to important
topics throughout the guide.
WARNING
This symbol introduces operating precautions and othe critical information. Be sure to read these topics
This symbol introduces supplementary information. Read
these topics at your discretion.
Notation
FilmGet FAU 1.0 for Windows may be used with the W indows® 95,
Windows® 98 and Windows NT® 4.0 operating systems. References
to Windows in this guide include all three.
FilmGet FAU 1.0 for Macintosh may be used with Version 7.5 or later
versions of the Mac System Software.
Both FilmGet FAU 1.0 for Windows and FilmGet FAU 1.0 for
Macintosh are referred to as FilmGet FAU throughout most of this
guide.
Although the screen samples provided in this guide mostly show the
Windows version of FilmGet FAU, the Macintosh version features a
virtually identical user interface. Separate explanations are provided
only for items requiring different procedures.
The following notation is used for menu items, tools and messages:
Menu items and commands requiring user selection are shown i
[square brackets]
For example, click [Paper Size] and select [Letter]
Messages and item names are shown between ‘single quotation
marks
•
NOTE
•

5
A Scanner Driver that Adjusts Images Too
FilmGet FAU is the driver software for the Film Adapter Unit FAU-S10 option installed on
CanoScan FB1200S flatbed scanners. It is also equipped with a variety of image processing functions and input and output controls. FilmGet FAU is supplied in both Windows
and Macintosh compatible versions. The Windows version can be opened as a 32-bit
TWAIN driver from within TWAIN-compliant application programs. The Macintosh version
can be opened as a plug-in from within plug-in compliant application programs.
Simple User Interface
The Windows and Macintosh versions of FilmGet FAU both share the same userfriendly interface. Moreover, the menu names and arrangements are consistent with
many other popular application programs used on the two platforms. The result is
an intuitive and easy-to-use interface that requires very little effort to master.
Color Matching System Support
This software supports color matching systems so that the colors read by the
scanner are faithfully reproduced on your monitor without you having to perform
any troublesome adjustments.
Batch Scans
Save time and effort by setting the color adjustment and resolution settings for
individual frames and then scanning the selected images in a single batch.
Easy Scanning with Auto Settings
Settings for images that are to be used for specific purposes, such as for display on
a monitor, for output to a printer or for transmission in a fax, can be set automatically. You are now free to scan without bothering with resolution and size settings.
Tool Tips Provide Guidance
Guidance is always at hand when you position the mouse cursor over a button or
tool. The tool tips provide useful information if you are unsure how to use an item.
Common Windows and Macintosh User Interface
The Windows and Macintosh versions of FilmGet FAU both share the same userfriendly window design and functions. You can switch between either platform
without noticing the transition.
* FilmGet FAU does not support ScanGear Toolbox CS or CanoScan Toolbox CS.
FilmGet FAU Features

6
FilmGet FAU User’s Guide
Table of Contents
FilmGet F AU Features ..........................................................................5
Quick Start
Quick Start........................................................................................11
Step 1 Installing the Software
Installing FilmGet FAU .......................................................................17
Preparations before Installation .................................................17
System Requirements ................................................................17
Installing and Uninstalling FilmGet FAU .....................18
Installing and Uninstalling FilmGet FAU ......................21
Step 2 Scanning
Starting and Exiting FilmGet FAU .......................................23
Starting FilmGet FAU.................................................................23
Exiting FilmGet FAU ..................................................................24
Starting and Quitting FilmGet FAU ....................................25
Starting FilmGet FAU.................................................................25
Quitting FilmGet FAU ................................................................26
Main Window...................................................................................27
Main Window ...........................................................27
Main Window ...........................................................28
Menu Bar in the Main Window .................................................28
Tool Bar in the Main Window....................................................28
Preview All Window..........................................................................29
Preview All Window..................................................................29
Toolbar in the Preview All Window ............................................29
How to Find Help......................................................................30
Scanning Procedures.........................................................................31
Positioning Film.................................................................................32
Preparing the Film Adapter Unit ................................................32
Positioning Film.........................................................................32
Setting the Film Type.........................................................................33
Setting the Image Mode ...................................................................34

7
FilmGet FAU User’s Guide
Determining the Image Mode ...................................................35
Previewing All the Frames .................................................................36
Selecting Frames ...............................................................................37
Selecting/Deselecting All ...........................................................37
Selecting/Deselecting a Single Frame.........................................37
Adjusting Trimming Frames ...............................................................39
Moving the Trimming Frames ....................................................39
Resizing the Trimming Frames ...................................................39
Restoring Default Trimming Frame Settings ...............................39
Zooming an Image for Verification ............................................39
Moving Images within the Preview All Window.........................40
Settings for 120 Format Films....................................................40
Previewing ........................................................................................41
Previewing ................................................................................41
Switching between Preview Images...........................................42
Switching Images with the Preview All Window ........................43
Using the Toolbar to Manipulate Images ...........................................44
Zooming an Image for Verification ............................................44
Moving an Image within the Preview Area ................................45
Rotating Images........................................................................45
Using Auto Correction on Images .............................................45
Adjusting the Scan Settings...............................................................46
Important Facts about Scan Settings .........................................46
Guide to the Scan Settings Section............................................47
Procedures Common to All Scan Modes....................................48
Saving to a File..........................................................................50
Pasting Images in Documents/Outputting Images to Printers/
Sending Images as Facsimiles ....................................................54
Image and File Sizes ..................................................................55
Displaying Images on Monitors .................................................56
Outputting Images to Standard Photo Sizes ..............................57
Using the Custom Mode ...........................................................58
Adding Scan Settings ................................................................60
Adding and Deleting Items........................................................61
Adjusting Brightness and Coloring ....................................................62
Selecting the Scan Area ....................................................................63

8
FilmGet FAU User’s Guide
Selecting the Scan Area.............................................................63
Adjusting the Scan Area Selection Frame...................................63
Adjusting the Selected Scan Area..............................................63
Final Scan .........................................................................................64
Step 3 Adjusting Images
Image Adjustment Modes .................................................................67
Guide to the Image Adjustment Section....................................67
Adjustment Mode Types............................................................68
Procedures Common to all Image Adjustment Modes ...............69
How to Use Each Image Adjustment Mode .......................................71
Adjusting a Histogram ......................................................................73
Guide to the Histogram Tab ......................................................73
Interpreting a Histogram ...........................................................74
How to Adjust a Histogram.......................................................74
Adjusting Brightness/Contrast ...........................................................75
Guide to the Brightness/Contrast Tab ........................................75
Adjusting the Brightness ...........................................................76
Adjusting the Contrast..............................................................76
Adjusting the Color Balance..............................................................77
Guide to the Color Balance Tab .................................................77
Adjusting the Tone Curve..................................................................79
Guide to the Tone Curve Tab .....................................................79
Interpreting Tone Curves ...........................................................80
Adjusting a Tone Curve .............................................................80
Adjusting the Gamma Value .............................................................81
Guide to the Gamma Value Tab ................................................81
Correcting the Gamma Value ....................................................82
Adjusting the Threshold Value...........................................................83
Guide to the Threshold Value Tab..............................................83
Other Functions
Settings Menu ..................................................................................85
Setting the Exposure .................................................................85
Setting the Preferences .............................................................86
Setting the Power Saving Features.............................................89
Restoring the Default Settings...................................................89

9
FilmGet FAU User’s Guide
Device and Help Menus ....................................................................91
Selecting a Scanner...................................................................91
Checking a Scanner ..................................................................91
Viewing the Device Version Information ....................................92
Viewing the Software Version Information ................................92
Appendices
Troubleshooting ................................................................................94
Glossary............................................................................................99
Index ..............................................................................................103

Quick Start
For Those Who Prefer to Jump Right into Scanning
Quick Start
This section provides the essentials of scanning with FilmGet FAU. If you wish more
information on a particular procedure, refer to the pages quoted for that topic.
○○○○○○○○○○○○○○○○○○○○○○○○○○○○○○○○○○
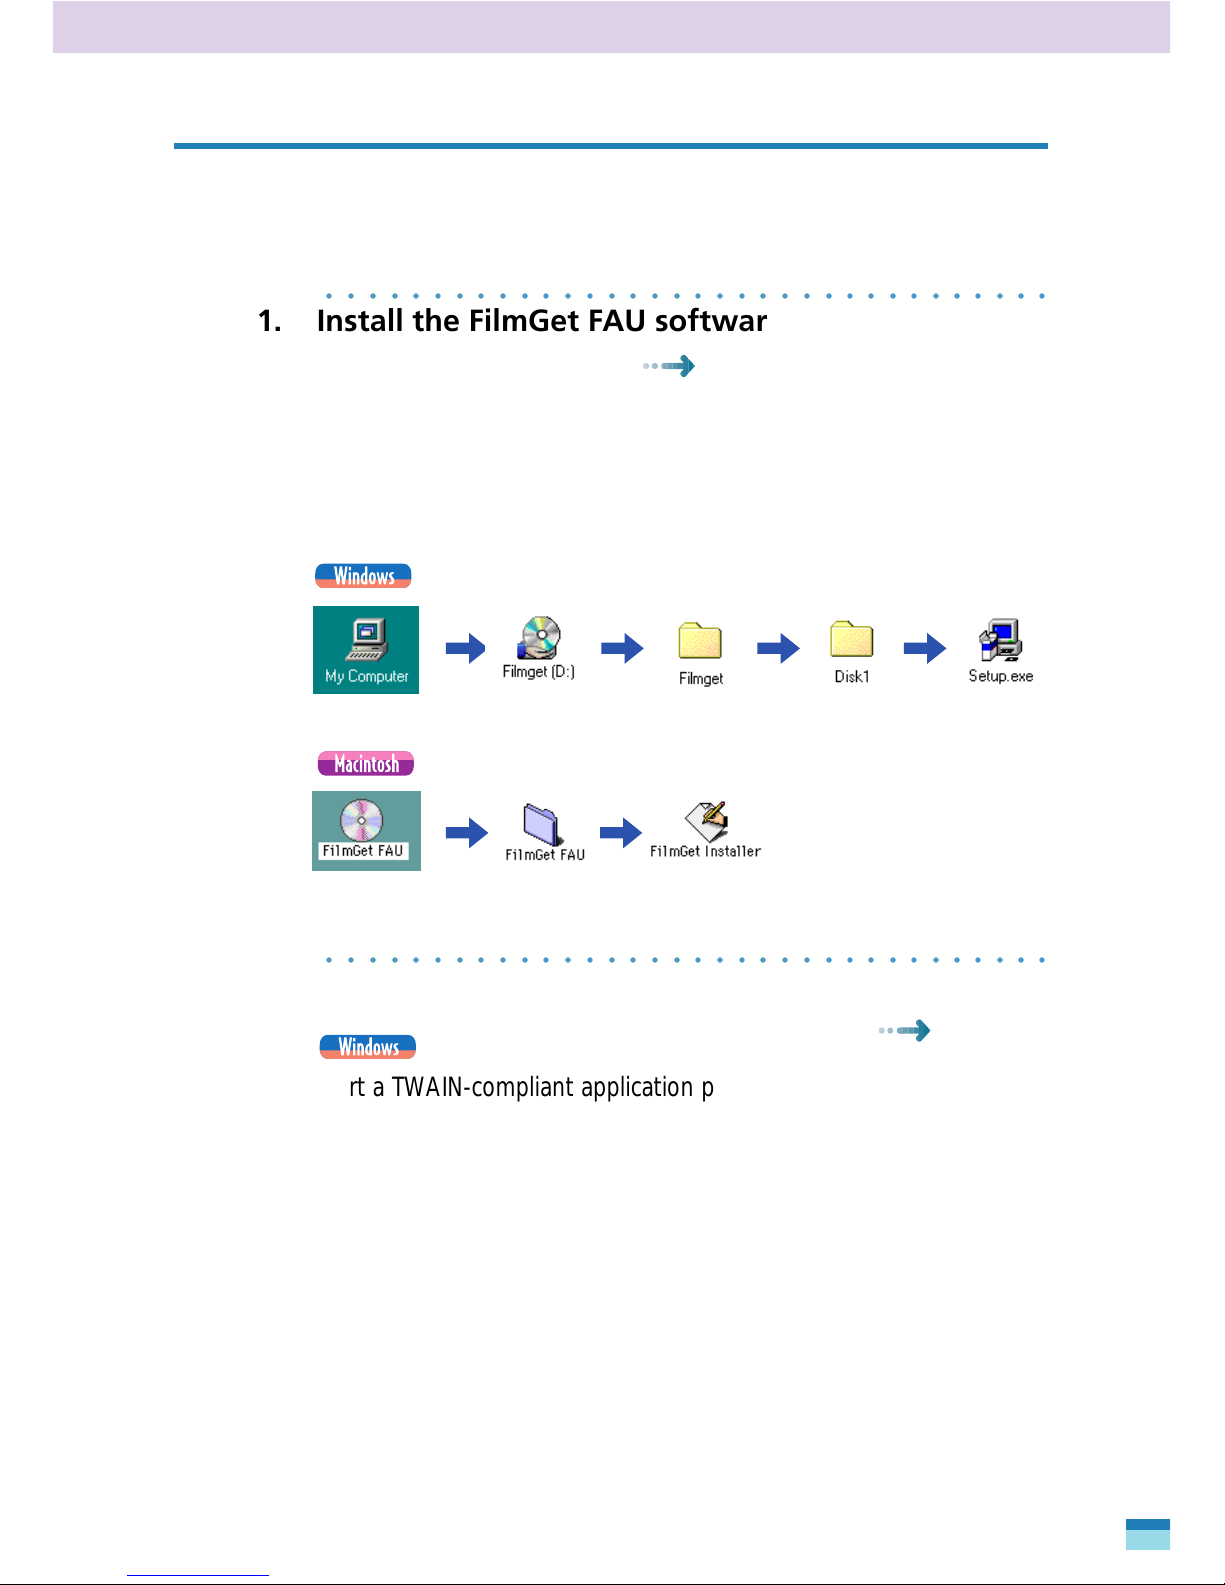
1. Install the FilmGet FAU software.
See the Getting Started, p. 16.
(1)Place the CD-ROM containing the FilmGet FAU software into the
drive.
(2)Double-click the following folders in order and install FilmGet
FAU.
○○○○○○○○○○○○○○○○○○○○○○○○○○○○○○○○○○
2. Start FilmGet FAU
See p. 23.
Start a TWAIN-compliant application program, select the Film Adapter
Unit with a menu or button, and start FilmGet FAU as a TWAIN driver.
The following is a sample procedure using Adobe Photoshop 5.0 LE.
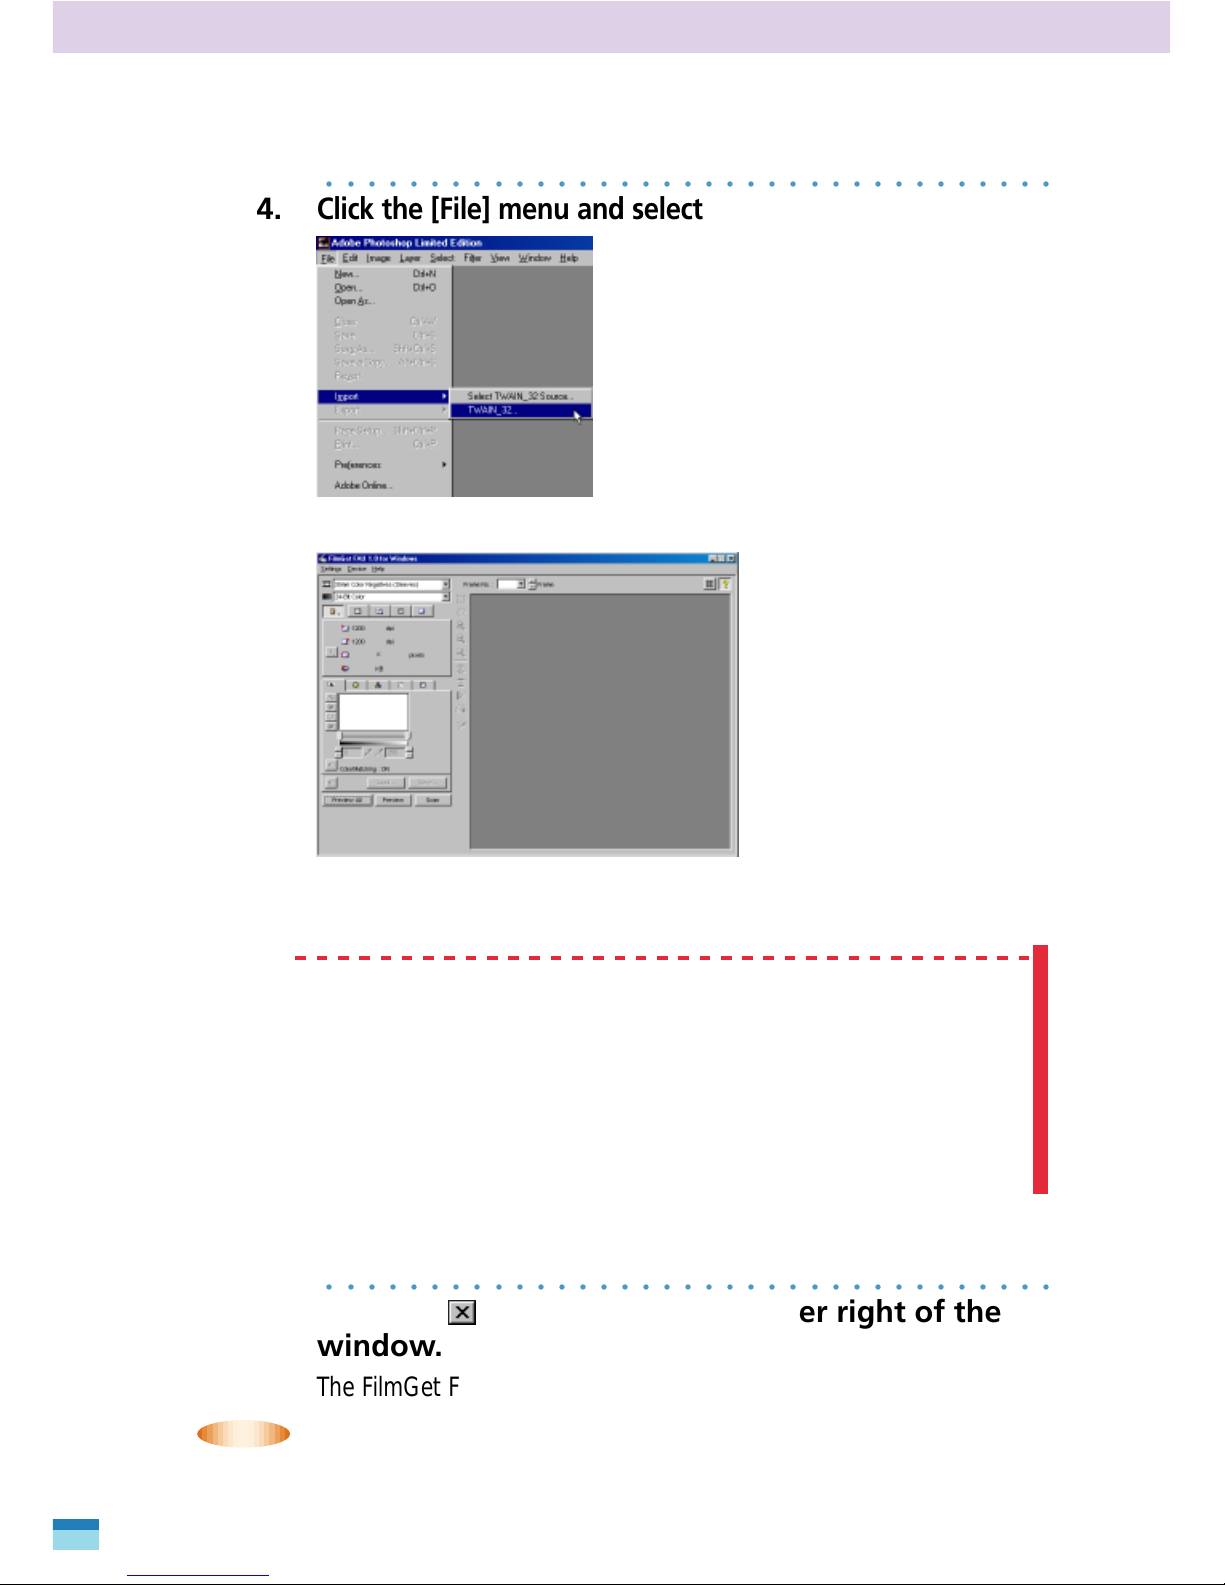
(1)Start Adobe Photoshop 5.0 LE.
(2)Click the [File] menu and select [Import], [Select TWAIN_32
Source... ], and [Canon FilmGet FAU 1.0 for Windows].
(3)Click the [File] menu and select [Import] and [TWAIN_32 ...].
The FilmGet FAU main window will display.
11
FilmGet FAU User’s Guide
Quick Start
12
FilmGet FAU User’s Guide
Start a plug-in compliant application program and select [FilmGet
FAU] using the menu item or button.
The following is a sample procedure using Adobe Photoshop 5.0 LE.
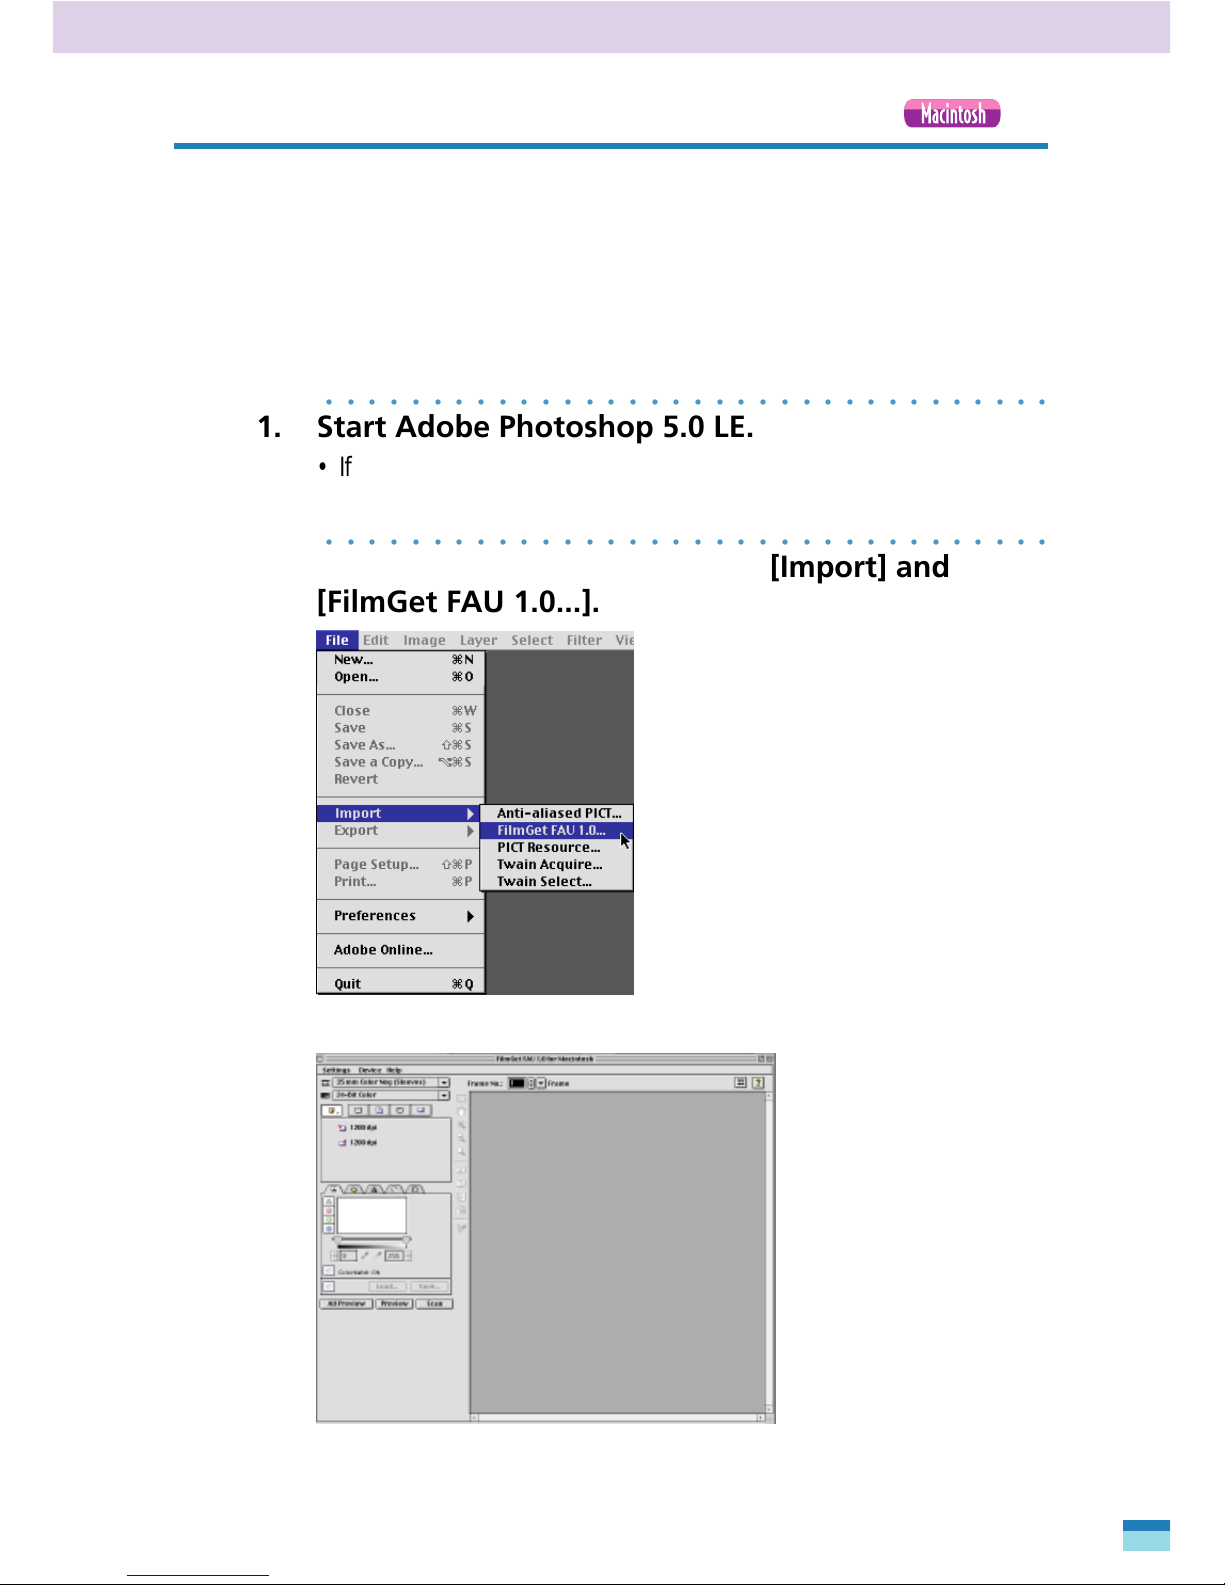
(1) Start Adobe Photoshop 5.0 LE.
(2) Click the [File] menu and select [Import] and [FilmGet FAU 1.0...].
The FilmGet FAU main window will display.
○○○○○○○○○○○○○○○○○○○○○○○○○○○○○○○○○○
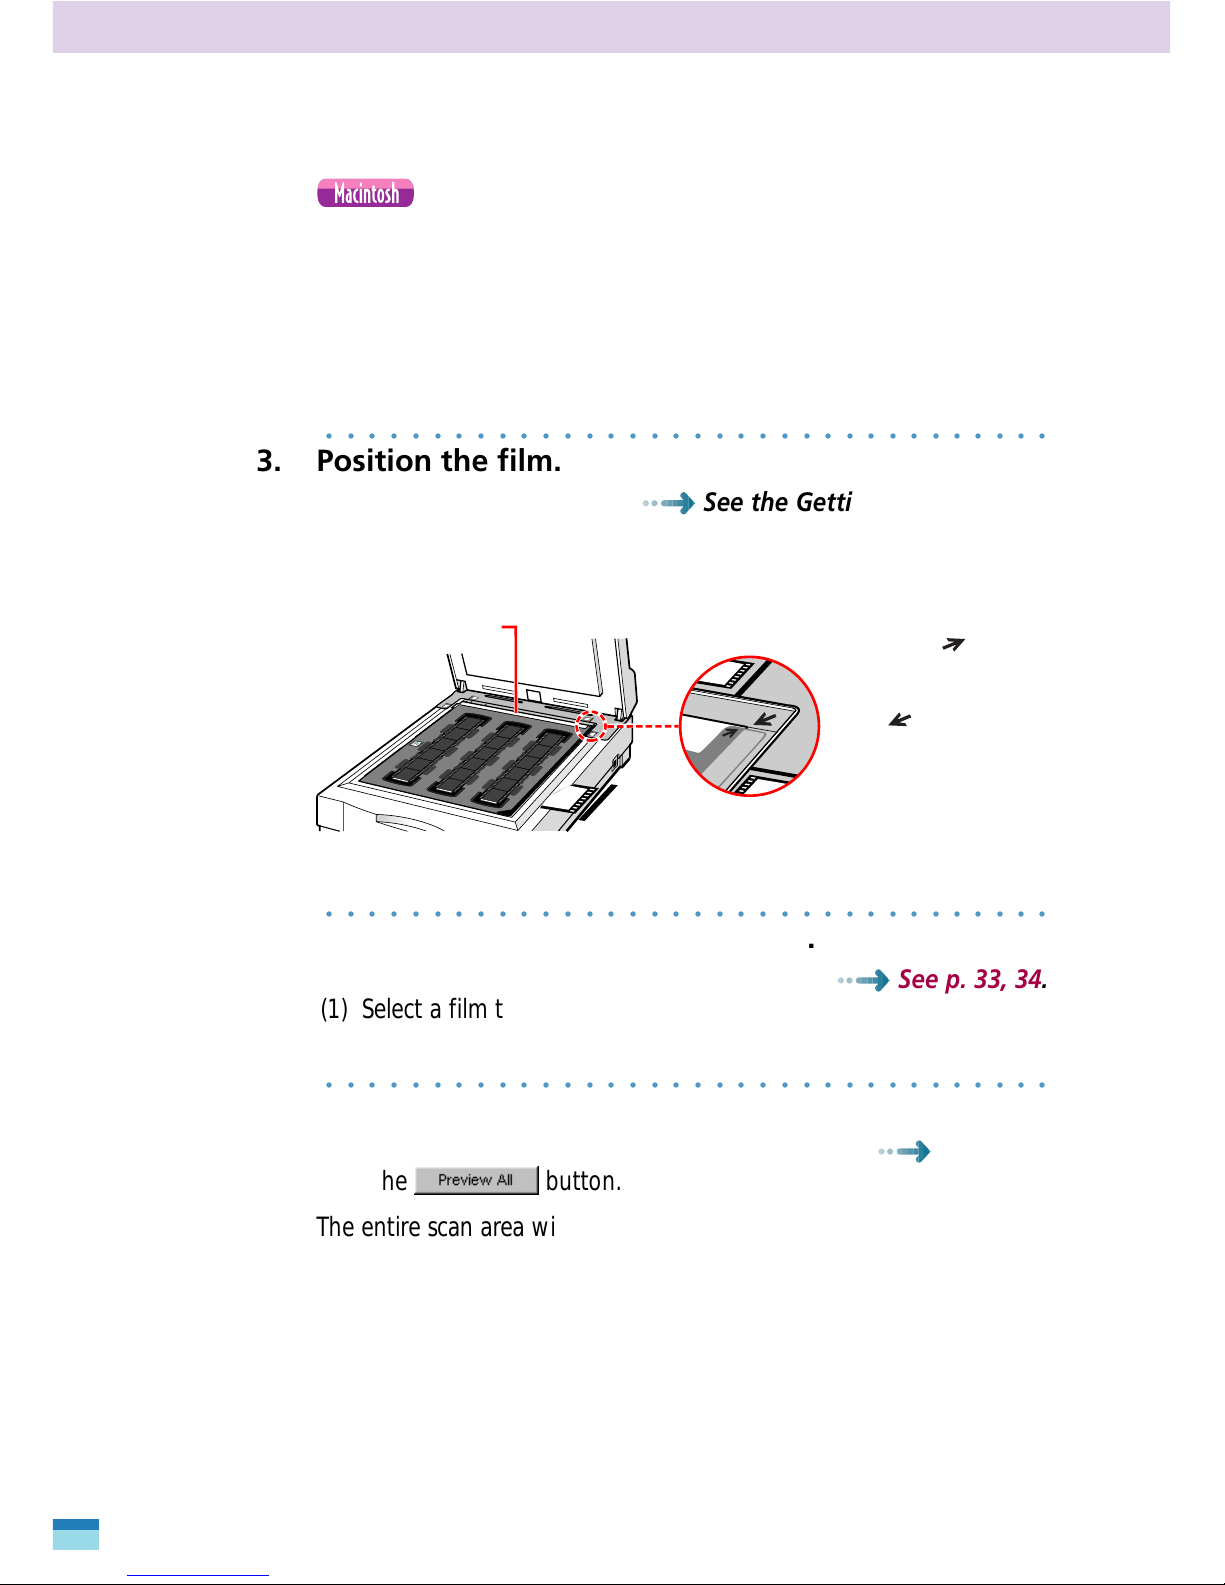
3. Position the film.
See the Getting Started, p. 24.
Insert the film in a film guide and place the film guide on the scanner
platen.
○○○○○○○○○○○○○○○○○○○○○○○○○○○○○○○○○○
4. Set the film type and image mode.
See p. 33, 34.
(1) Select a film type that matches the film you are scanning.
(2) Set the image mode (color, grayscale or black and white).
○○○○○○○○○○○○○○○○○○○○○○○○○○○○○○○○○○
5. Preview all of the frames on the scanner platen.
See p. 36.
Click the button.
The entire scan area will be scanned and the film position and
trimming frames will display in the preview all window.
Calibration Strip
Align the
alignment mark on
the film guide with
the
alignment
mark on the
positioning guide on
the scanner.

13
FilmGet FAU User’s Guide
Quick Start
○○○○○○○○○○○○○○○○○○○○○○○○○○○○○○○○○○
6. Select a frame you wish to scan.
See p. 37.
Click the corresponding trimming frame to select a frame. The
selected frame will be displayed with a green border.
○○○○○○○○○○○○○○○○○○○○○○○○○○○○○○○○○○
7. Adjust the trimming frame.
See p. 39.
The size and position of the trimming frame can be adjusted.
○○○○○○○○○○○○○○○○○○○○○○○○○○○○○○○○○○
8. Preview the selected frame.
See p. 41.
Click the button.
The image will display in the preview area.
•
NOTE
•
• The cancel command may take a few moments to take effect.
• If you have selected multiple frames for the preview scan,
switch between the individual frames by clicking on the
[frame no.] at the top of the preview area or by doubleclicking an image in the preview all window.
Preview All Window
Trimming Frame
Position of the Film
The preview progress bar will
display. Press the
button if you wish to stop
the preview scan.
Main Window
14
FilmGet FAU User’s Guide
○○○○○○○○○○○○○○○○○○○○○○○○○○○○○○○○○○
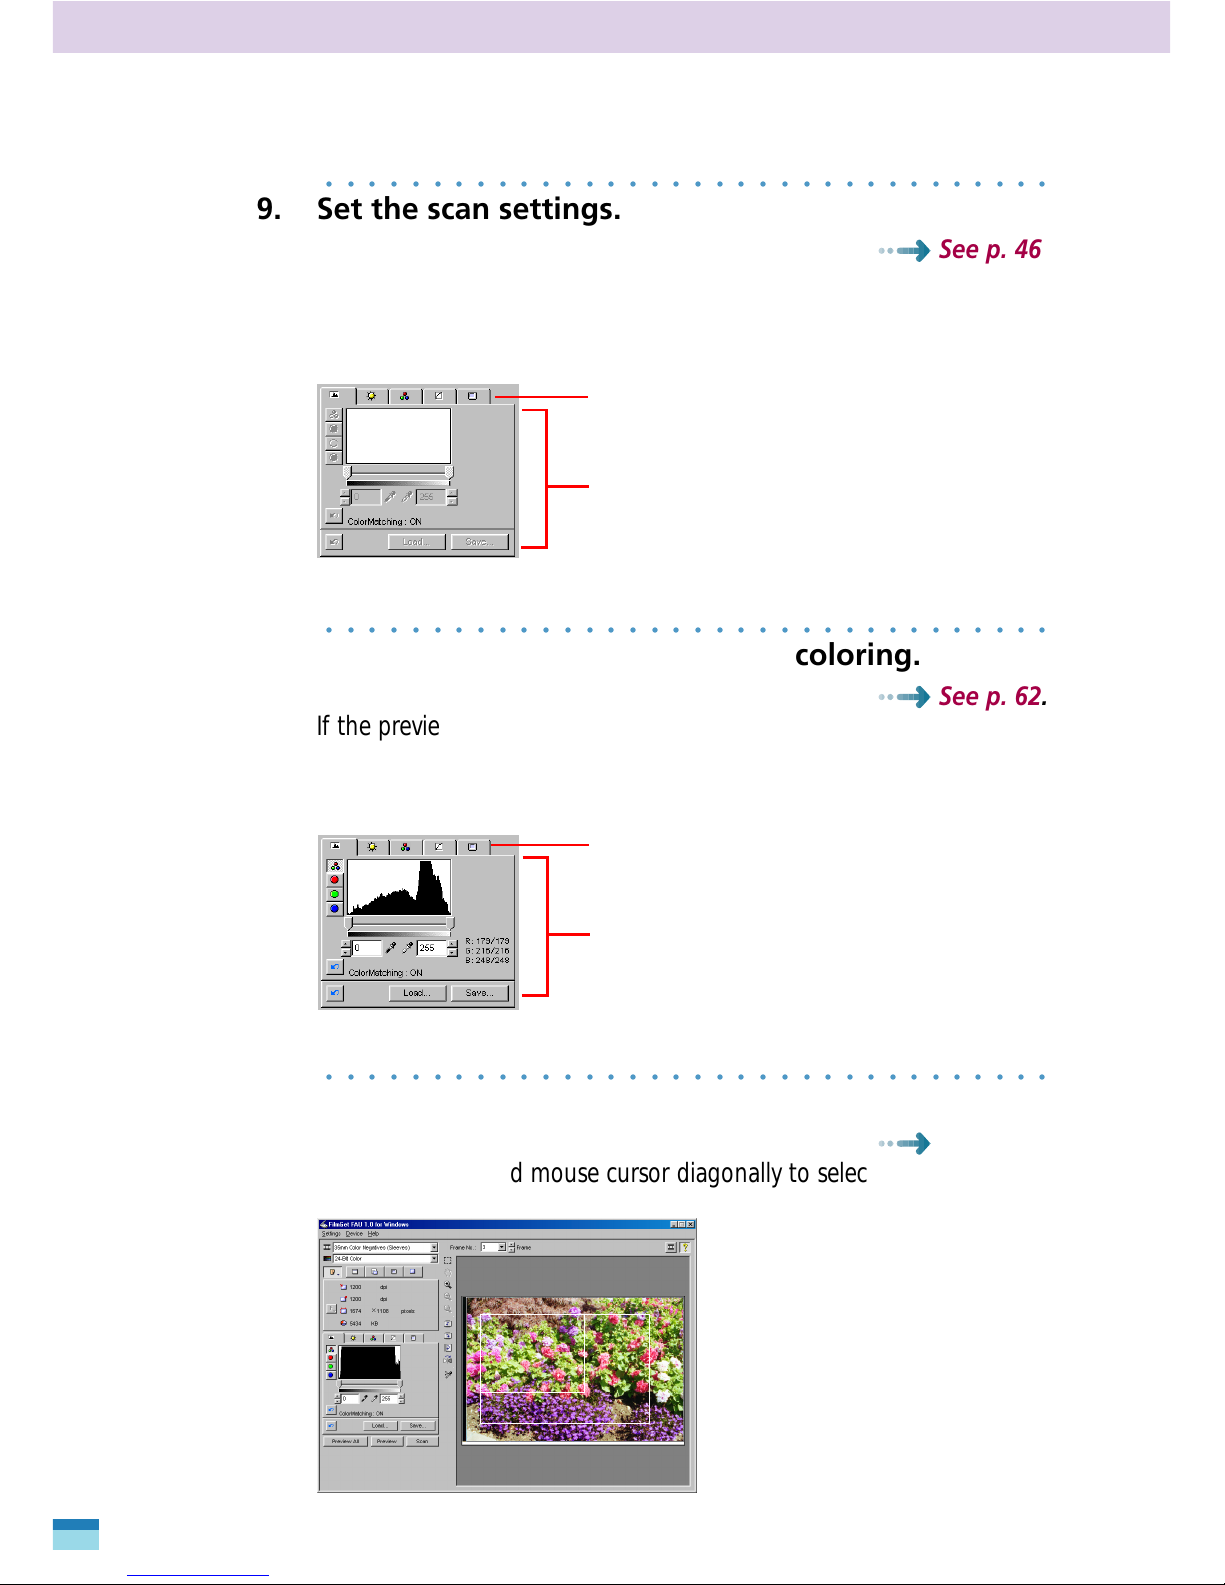
9. Set the scan settings.
See p. 46.
Set the scan settings frame by frame. Click a button in the scan
settings section to select an appropriate settings mode, resolution and
output method.
○○○○○○○○○○○○○○○○○○○○○○○○○○○○○○○○○○
10. Adjust the image brightness and coloring.
See p. 62.
If the preview images are not to your satisfaction, adjust the images
frame by frame. Click an image adjustment settings tab and adjust
the brightness and coloring.
○○○○○○○○○○○○○○○○○○○○○○○○○○○○○○○○○○
11. Select the scan area for each image.
See p. 63.
Drag the ‘+’ shaped mouse cursor diagonally to select a scan area.
Image Adjustment Section
Set the values for each adjustment mode.
Select an Image Adjustment Mode
(Contrast/Brightness, etcetera)
Scan Settings Section
Set the values for each scan mode.
Select a mode corresponding to
the purpose of the scanned image.
+

15
FilmGet FAU User’s Guide
○○○○○○○○○○○○○○○○○○○○○○○○○○○○○○○○○○
12. Initiate the final scan.
See p. 64.
Click the button.
The scanned image will appear in the window of the application
program from which FilmGet FAU was summoned.
○○○○○○○○○○○○○○○○○○○○○○○○○○○○○○○○○○
13. Retouch the image as required.
See the Manual for your application program.
Print or save inage to disk with the application program from which
FilmGet FAU was started.
Images from all the
selected frames will display.
Quick Start

STEP 1
Installing the Software
Proceed directly to Step 2
if you have already
installed FilmGet FAU with
the instructions from the
Getting Started.

17
FilmGet FAU User’s Guide
Installing the Software
Installing FilmGet FAU
Preparations before Installation
Check the following items before installing FilmGet FAU.
• Has the Film Adapter Unit been correctly installed onto the scanner?
See the Getting Started, p. 10.
• Are the scanner and Film Adapter Unit correctly plugged into
electric outlets? (You must plug in and connect both the scanner
and Film Adapter Unit before you start up your computer.)
System Requirements
The computer you use to run FilmGet FAU must meet the following
minimum requirements. Install FilmGet FAU onto the hard disk drive.
Operating System: Windows 95, Windows 98, W indows NT 4.0
CPU: i486 or greater for WIindows 95, 98
Pentium or greater for Windows NT 4.0
Hard Disk: 50 MB or more available
RAM: 32 MB or more (64 MB or more recommended)
Display: VGA, 256 colors or more (32,000 colors recommended),
800 x 600 pixels or more
Other: CD-ROM drive
You are recommended to install the latest service pack for Windows.
Operating System: System Software 7.5 or later
CPU: PowerPC
Hard Disk: 50 MB or more available
RAM: 32 MB or more (64 MB or more recommended)
Display: 256 colors or more (32,000 colors recommended), 640 x
480 pixels or more
Other: CD-ROM drive
18
FilmGet FAU User’s Guide
Installing and Uninstalling FilmGet FAU
This topic explains the procedures for the Windows platform. For
Macintosh, see p. 21.
Installing
Install FilmGet FAU from its CD-ROM. For instructions, see p.17, ‘Installing the FAU Software Program (Windows),’ in the Getting Started.
Uninstalling
Click the Windows [Start] menu and select [Settings], [Control Panel]
and [Add/Remove Programs] to delete FilmGet FAU.
• Deleting FilmGet FAU directly, with the Windows Explorer for
instance, will leave unnecessary data in the system files. Use
the following procedures for the best results. Some information in files such as the WIN.INI file will remain undeleted.
○○○○○○○○○○○○○○○○○○○○○○○○○○○○○○○○○○
1. Click the [Start] menu and select [Settings] and
[Control Panel].
The Control Panel will display.
○○○○○○○○○○○○○○○○○○○○○○○○○○○○○○○○○○
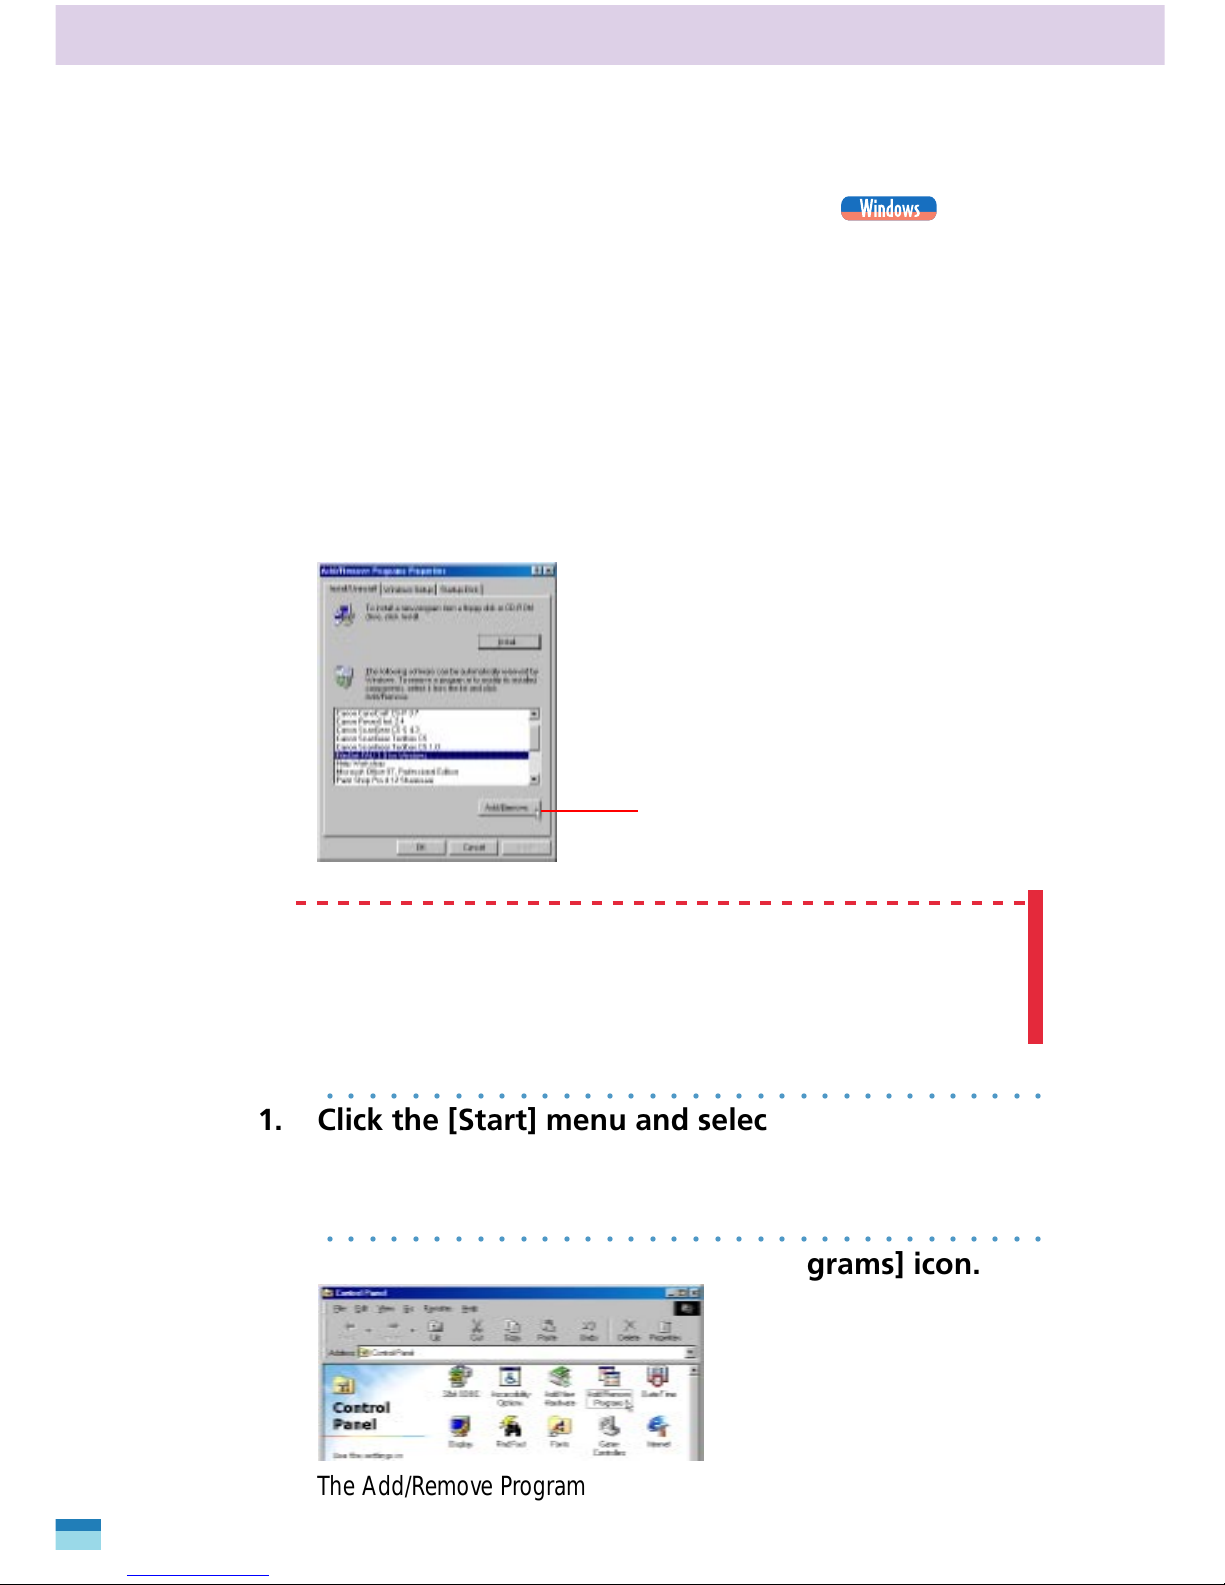
2. Double-click the [Add/Remove Programs] icon.
The Add/Remove Programs Properties window will display.
Select FilmGet FAU in this
window and click the [Add/
Remove] button.
WARNING
19
FilmGet FAU User’s Guide
Installing the Software
○○○○○○○○○○○○○○○○○○○○○○○○○○○○○○○○○○
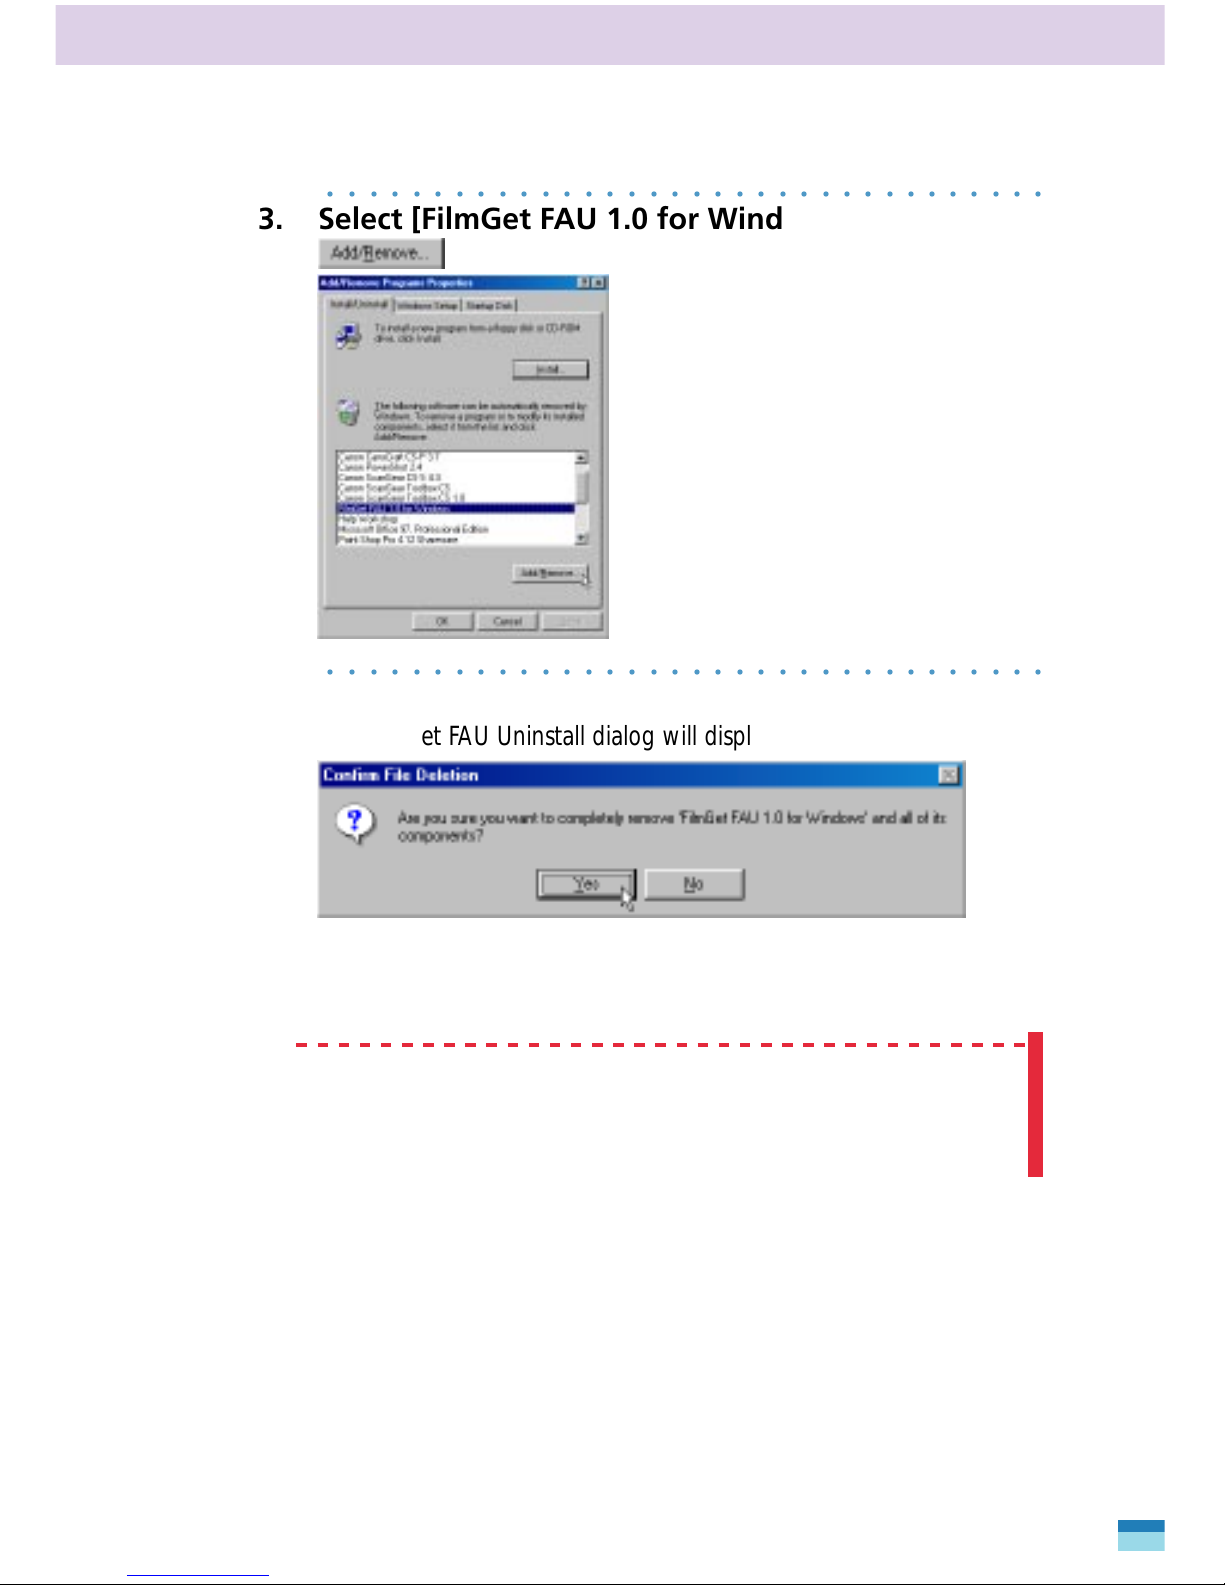
3. Select [FilmGet FAU 1.0 for Windows] and click the
button.
○○○○○○○○○○○○○○○○○○○○○○○○○○○○○○○○○○
4. Click the [Yes] button.
The FilmGet FAU Uninstall dialog will display.
Continue the procedure by following the on-screen messages.
• Place a check mark beside all of the uninstall categories.
• If other Canon software for flatbed or film scanners is
installed, a message asking confirmation to delete common
files will display. Follow the on-screen messages to complete
the procedure.
WARNING

20
FilmGet FAU User’s Guide
○○○○○○○○○○○○○○○○○○○○○○○○○○○○○○○○○○
5. Click the [OK] button.
The Add/Remove Programs Properties dialog will display again.
○○○○○○○○○○○○○○○○○○○○○○○○○○○○○○○○○○
6. Click the close box at the upper right of the
window.
This completes the uninstall procedure.
21
FilmGet FAU User’s Guide
Installing the Software
Installing and Uninstalling FilmGet FAU
This topic explains the procedures for the Macintosh platform. For
Windows, see p. 18.
Installing
Install FilmGet FAU from its CD-ROM. For instructions, see p. 21,
‘Installing the FAU Software Program (Macintosh),’ in the Getting
Started.
Uninstalling
Use the following procedures to uninstall (delete) FilmGet FAU before
you upgrade to a newer version or when you desire to remove the
program from your hard disk.
○○○○○○○○○○○○○○○○○○○○○○○○○○○○○○○○○○
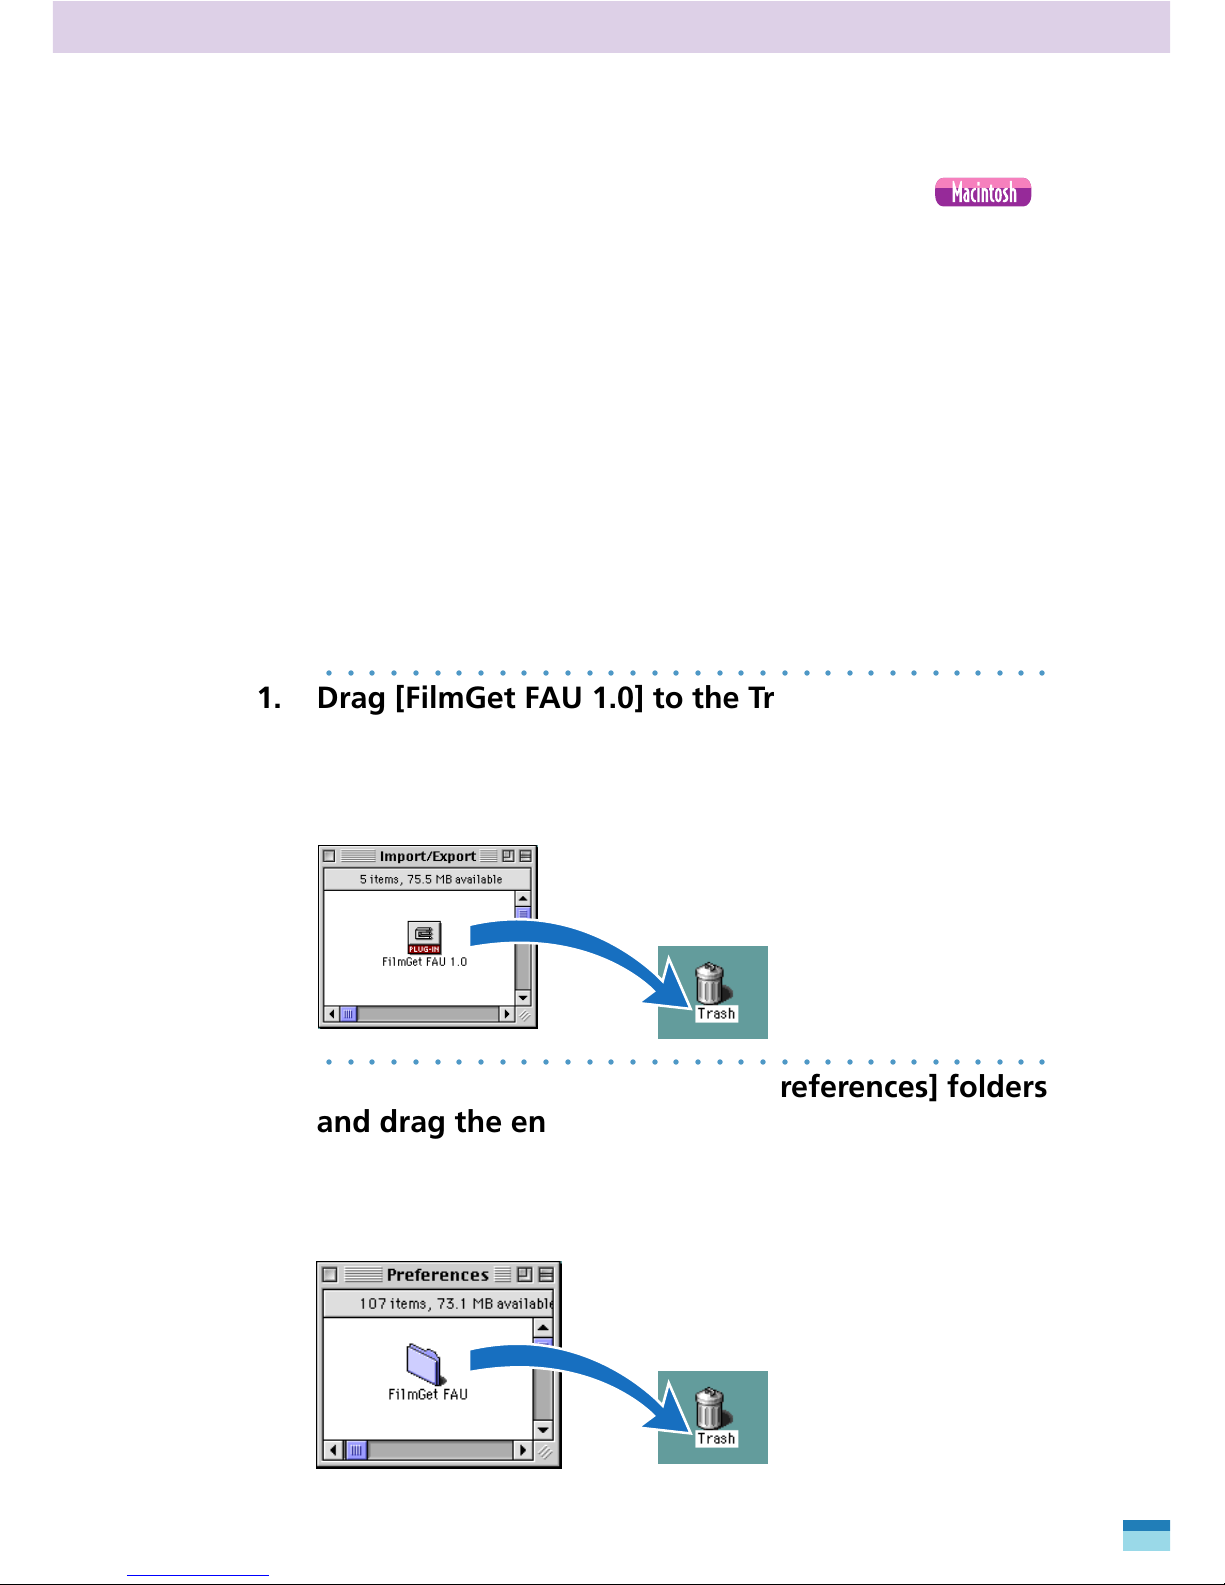
1. Drag [FilmGet FAU 1.0] to the Trash from the
folder in which it was installed.
If you have installed it into the folder of more than one application
program, drag each copy to the Trash.
○○○○○○○○○○○○○○○○○○○○○○○○○○○○○○○○○○
2. Double-click the [System] and [Preferences] folders
and drag the entire [FilmGet FAU] folder to the
Trash.
This concludes the uninstall procedures.

STEP 2
Scanning
23
FilmGet FAU User’s Guide
Scanning
Starting and Exiting FilmGet FAU
This topic explains the procedures for the Windows platform.
For Macintosh, see p. 25.
Starting FilmGet FAU
Start FilmGet FAU from within a TWAIN-compliant application
program. Adobe Photoshop 5.0 LE is used in the example below.
○○○○○○○○○○○○○○○○○○○○○○○○○○○○○○○○○○
1. Start Adobe Photoshop 5.0 LE.
• If you are using a different TWAIN-compliant application program,
start that program.
○○○○○○○○○○○○○○○○○○○○○○○○○○○○○○○○○○
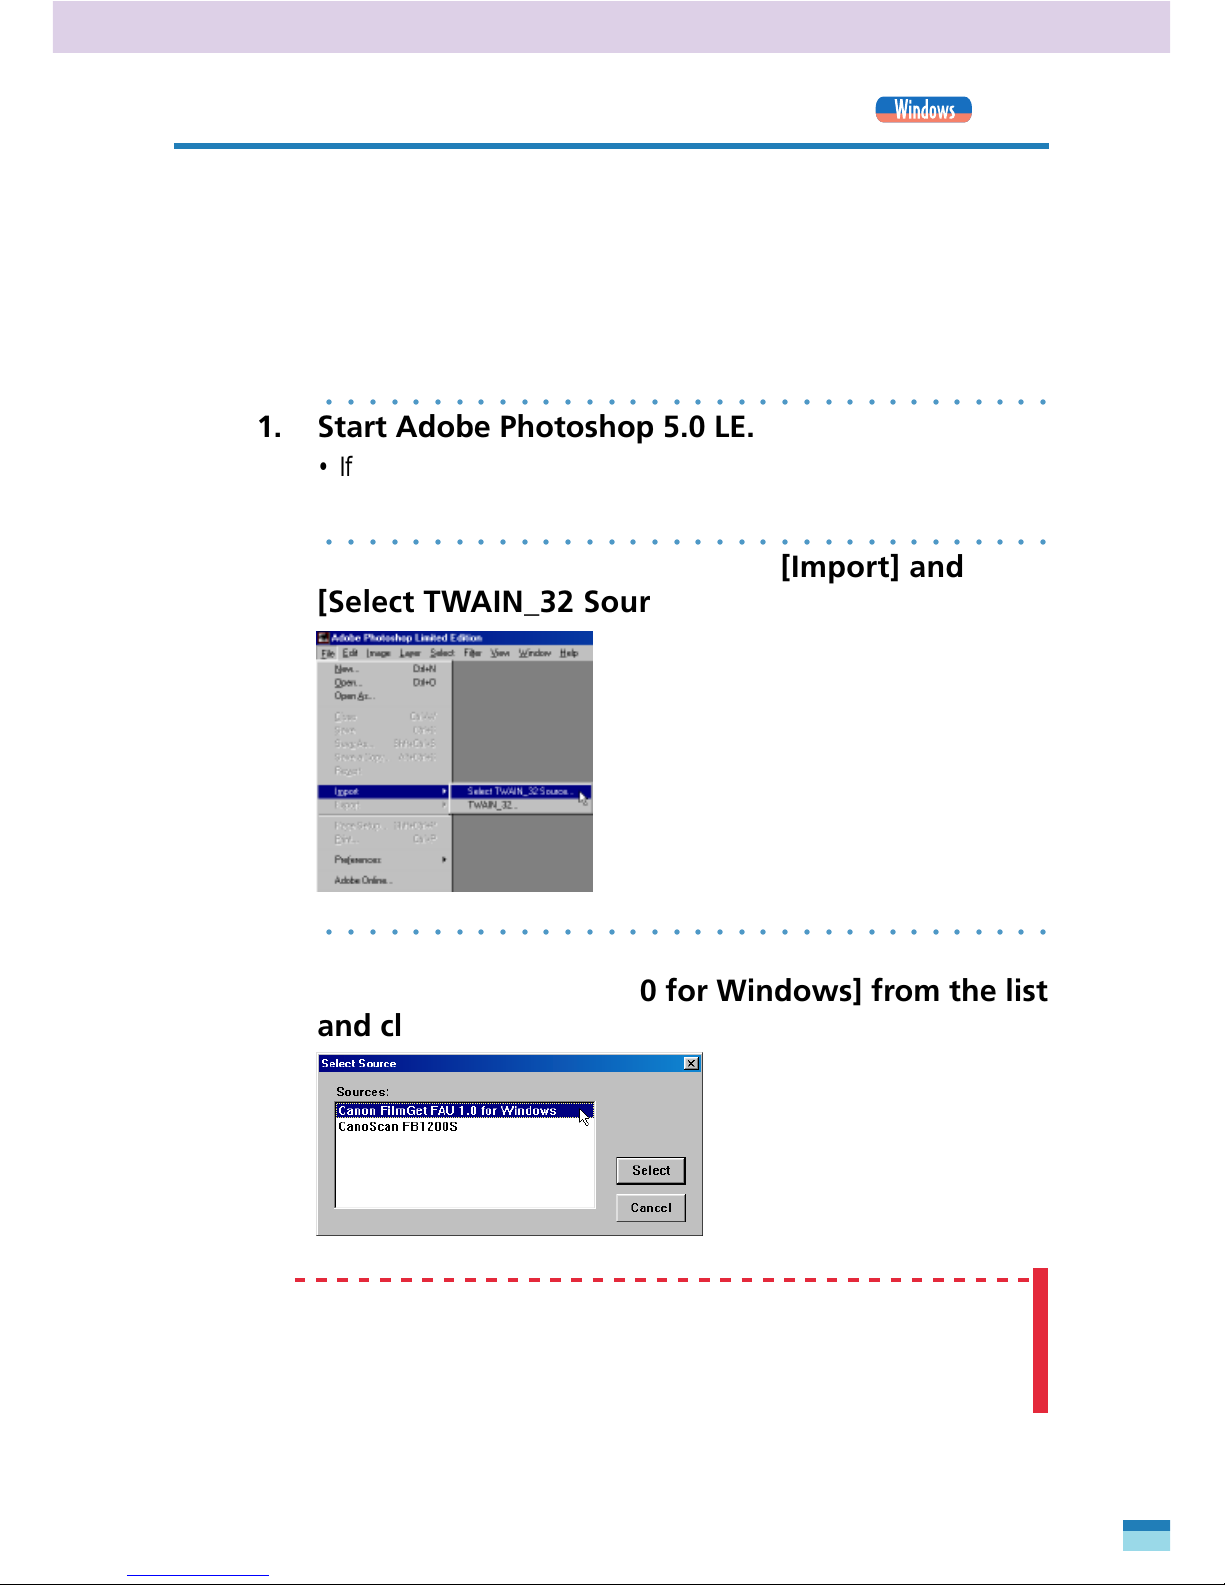
2. Click the [File] menu and select [Import] and
[Select TWAIN_32 Source...].
○○○○○○○○○○○○○○○○○○○○○○○○○○○○○○○○○○
3. The Select Source dialog will display. Select
[Canon FilmGet FAU 1.0 for Windows] from the list
and click the [Select] button.
• The third step selects the scanning device. This step need only
be taken the first time the Film Adapter Unit is used or when
an alternate scanner or digital camera driver, such as
ScanGear CS-S, has been used in the interim.
WARNING
24
FilmGet FAU User’s Guide
○○○○○○○○○○○○○○○○○○○○○○○○○○○○○○○○○○○
4.
Click the [File] menu and select [Import] and [Twain_32...].
The FilmGet FAU main window will display.
This window is used to view the scanned images.
• Some TWAIN-compliant application programs offer the choice
of TWAIN_16 or TWAIN_32 for the items in steps 2 and 4. To
use FilmGet FAU, select the TWAIN_32 option.
• Please refer to the manuals accompanying the individual
software package for the procedures for opening a TWAIN
driver from within a TWAIN-compliant application program
other than Adobe Photoshop 5.0 LE.
Exiting FilmGet FAU
○○○○○○○○○○○○○○○○○○○○○○○○○○○○○○○○○○○
1. Click the (close box) at the upper right of the
window.
The FilmGet FAU main window will close.
•
NOTE
•
• FilmGet FAU will automatically close when the ‘Close FilmGet
FAU after Acquire’ option has been turned on in the [Preferences] item of the [Settings] menu. See p. 88.
WARNING
25
FilmGet FAU User’s Guide
Scanning
Starting and Quitting FilmGet FAU
This topic explains the procedures for the Macintosh platform. For Windows, see p.
23.
Starting FilmGet FAU
Start FilmGet FAU from within a plug-in compliant application
program. Adobe Photoshop 5.0 LE is used in the example below.
○○○○○○○○○○○○○○○○○○○○○○○○○○○○○○○○○○
1. Start Adobe Photoshop 5.0 LE.
• If you are using a different plug-in compliant application program,
start that program.
○○○○○○○○○○○○○○○○○○○○○○○○○○○○○○○○○○
2. Click the [File] menu and select [Import] and
[FilmGet FAU 1.0...].
▼The FilmGet FAU main window will display.
• This window is used to view the scanned images.
26
FilmGet FAU User’s Guide
•
NOTE
•
• Please refer to the manuals accompanying the individual
software package for the procedures for opening a plug-in
from within a plug-in compliant application program other
than Adobe Photoshop 5.0 LE.
Quitting FilmGet FAU
○○○○○○○○○○○○○○○○○○○○○○○○○○○○○○○○○○
1. Click the (close box) at the upper left of the
window.
▼The FilmGet FAU main window will close.
•
NOTE
•
• FilmGet FAU will automatically close when the ‘Close FilmGet
FAU after Acquire’ option has been turned on in the [Preferences] item of the [Settings] menu. See p. 88.
27
FilmGet FAU User’s Guide
Scanning
Main Window
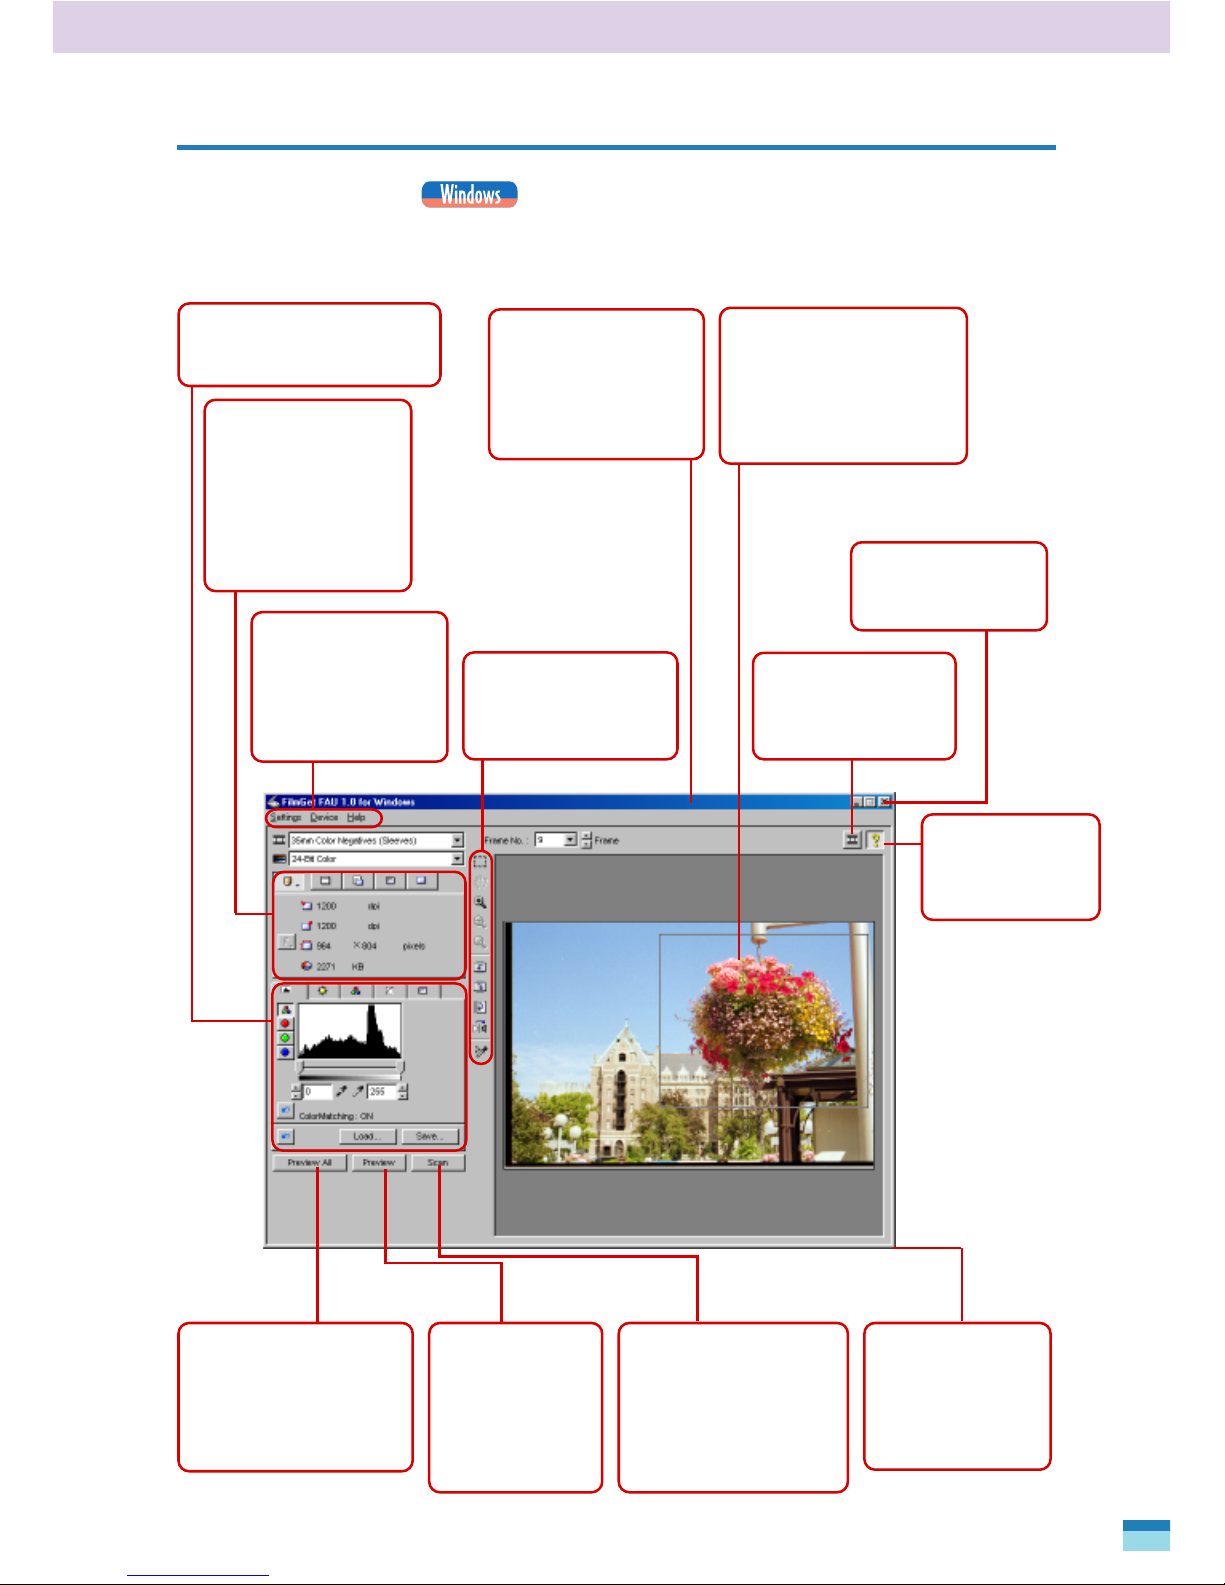
Main Window
The main window is the first to display when FilmGet FAU is launched.
Image Adjustment Section
Adjusts the brightness and
coloring of preview images.
Scan Settings
Section
Sets the resolution
and output target
settings according to
the primary purpose
of the scanned
image.
Title Bar
Displays the window
title. Click here and
drag the window to
change its position on
the desktop.
Preview Area
Displays the preview image
for a single frame. Use this
area to set the scan area
and inspect adjustments to
the image.
Menu Bar
Contains the various
commands and
settings to control
how FilmGet FAU
operates.
Toolbar
Contains the tools that
control how previewed
images are processed.
Close Box
Closes FilmGet FAU
(Windows).
Show Preview All
Window
Shows the preview
all window.
Show/Hide Tool
Tips
Shows or hides
the tool tips.
Window Resizing
Click and drag
anywhere along
the right or bottom
edges to resize the
window.
Scan Button
Initiates the final scan
and displays the scanned
images in the window of
the application program
from which FilmGet FAU
was started.
Preview Button
Initiates a
preview scan and
displays the
images one at a
time in the
preview area.
Preview All Button
Initiates a preview scan
of the entire scanner
platen and displays the
position of each frame in
the preview all window.
28
FilmGet FAU User’s Guide
Main Window
The FilmGet FAU main window is virtually
indistinguishable between the Windows and
Macintosh versions. The primary difference is
the location of the close box. On the Macintosh
version it is located at the top left corner of the
window.
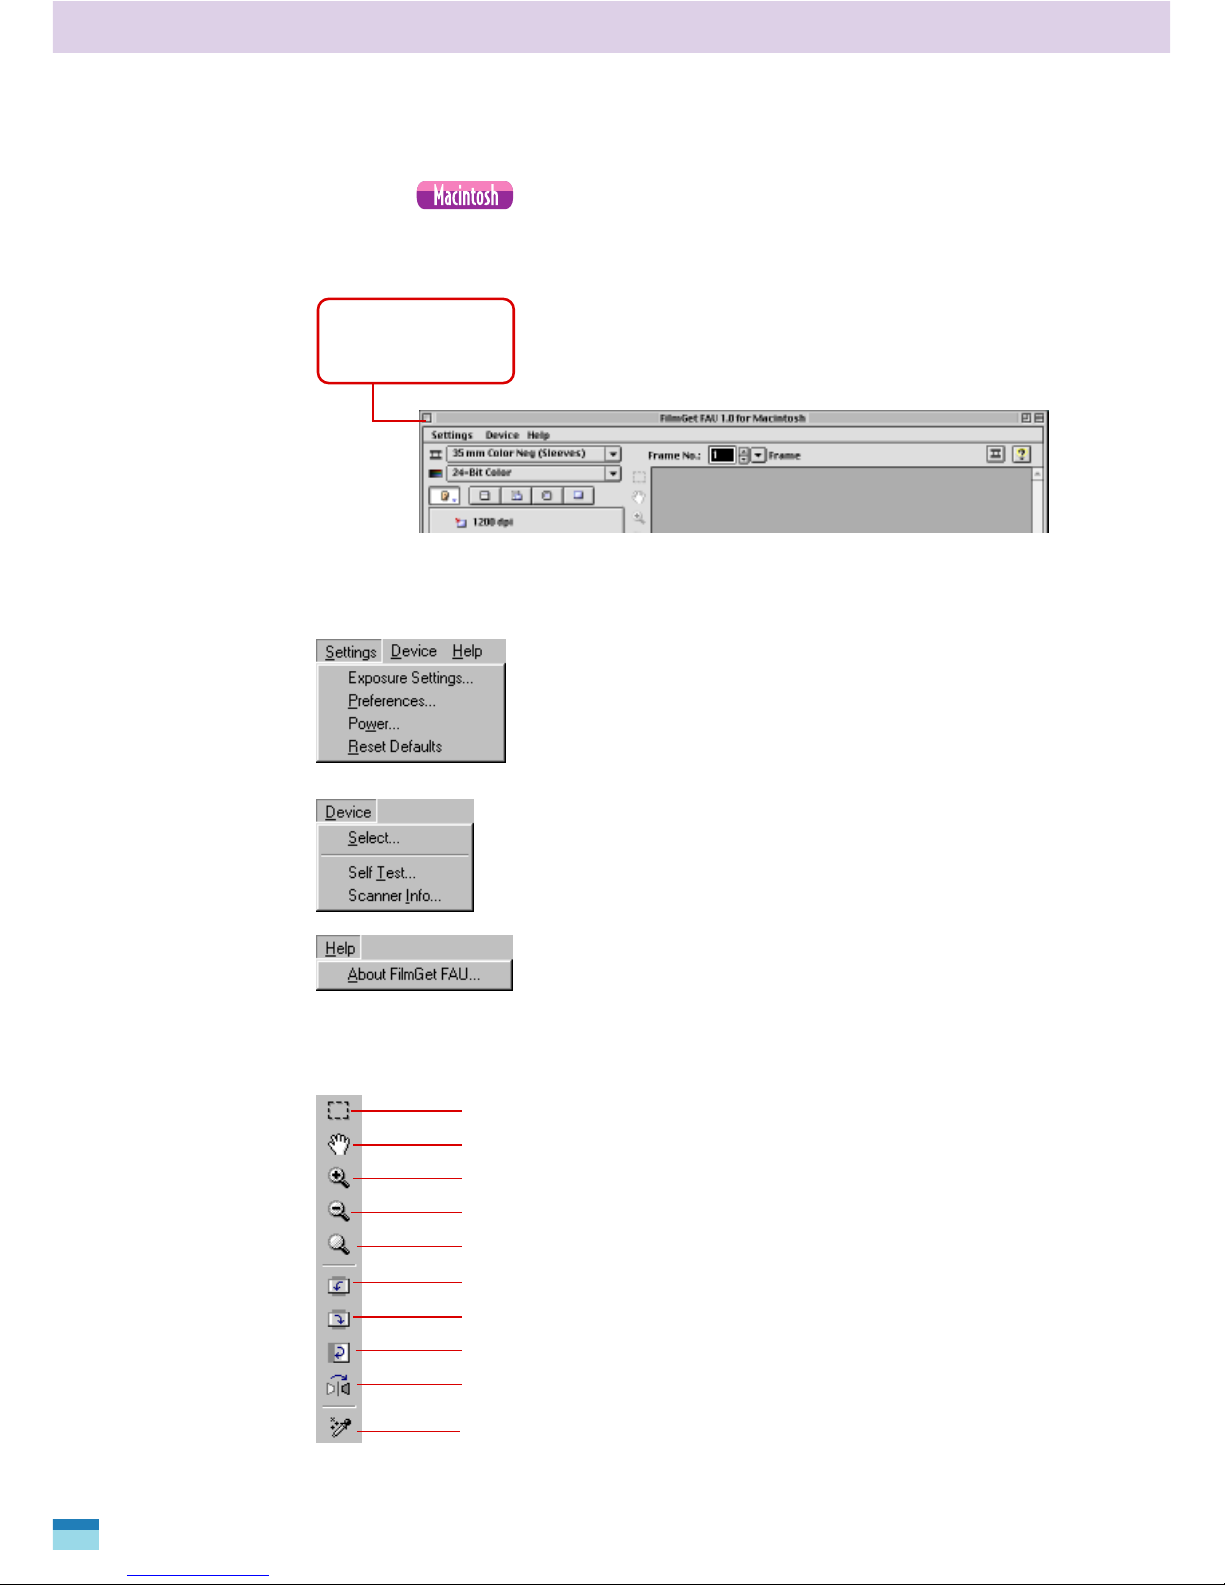
Menu Bar in the Main Window
Tool Bar in the Main Window
Selector Tool. See p. 63.
Grab Tool. See p. 45.
Zoom In Tool. See p. 44.
Zoom Out Tool. See p. 44.
Zoom Reset Tool. See p. 44.
Rotate 90 Degrees Left Tool. See p. 45.
Rotate 90 Degrees Right Tool. See p. 45.
Rotate 180 Degrees Tool. See p. 45.
Flip Tool. See p. 45.
Auto Correct Tool. See p. 45.
Close Box
Closes FilmGet FAU
(Macintosh).
Settings Menu
Sets the auto exposure, the preview settings and
the color matching system settings among
others. See p. 85.
Device Menu
Selects the scanner, runs a scanner test or
displays scanner information. See p. 91.
Help Menu
Displays FilmGet FAU help topics or software
version data. See p. 92.

29
FilmGet FAU User’s Guide
Scanning
Preview All Window
Preview All Window
The preview all window is the window that appears when you click the
or (Show Preview All Window) button.
Toolbar in the Preview All Window
Selector Tool. See p. 39.
Grab Tool. See p. 40.
Zoom In Tool. See p. 39.
Zoom Out Tool. See p. 40.
Zoom Reset Tool. See p. 40.
Select All Frames Tool. See p. 37.
Deselect All Frames Tool. See p. 37.
Reset Trimming Frames Tool. See p. 39 .
120 Format Settings Tool. See p. 40.
Title Bar
Displays the window
title. Click here and drag
the window to change its
position on the desktop.
Toolbar
Contains the tools
that control how
previewed images
are processed.
Trimming Frame
A border for confirming
and adjusting the position
of each frame in the
previewed film.
Close Box
Closes FilmGet FAU
(Macintosh).
Frame No.
Close Box
Closes FilmGet FAU (Windows).
Show/Hide Tool Tips Button
30
FilmGet FAU User’s Guide
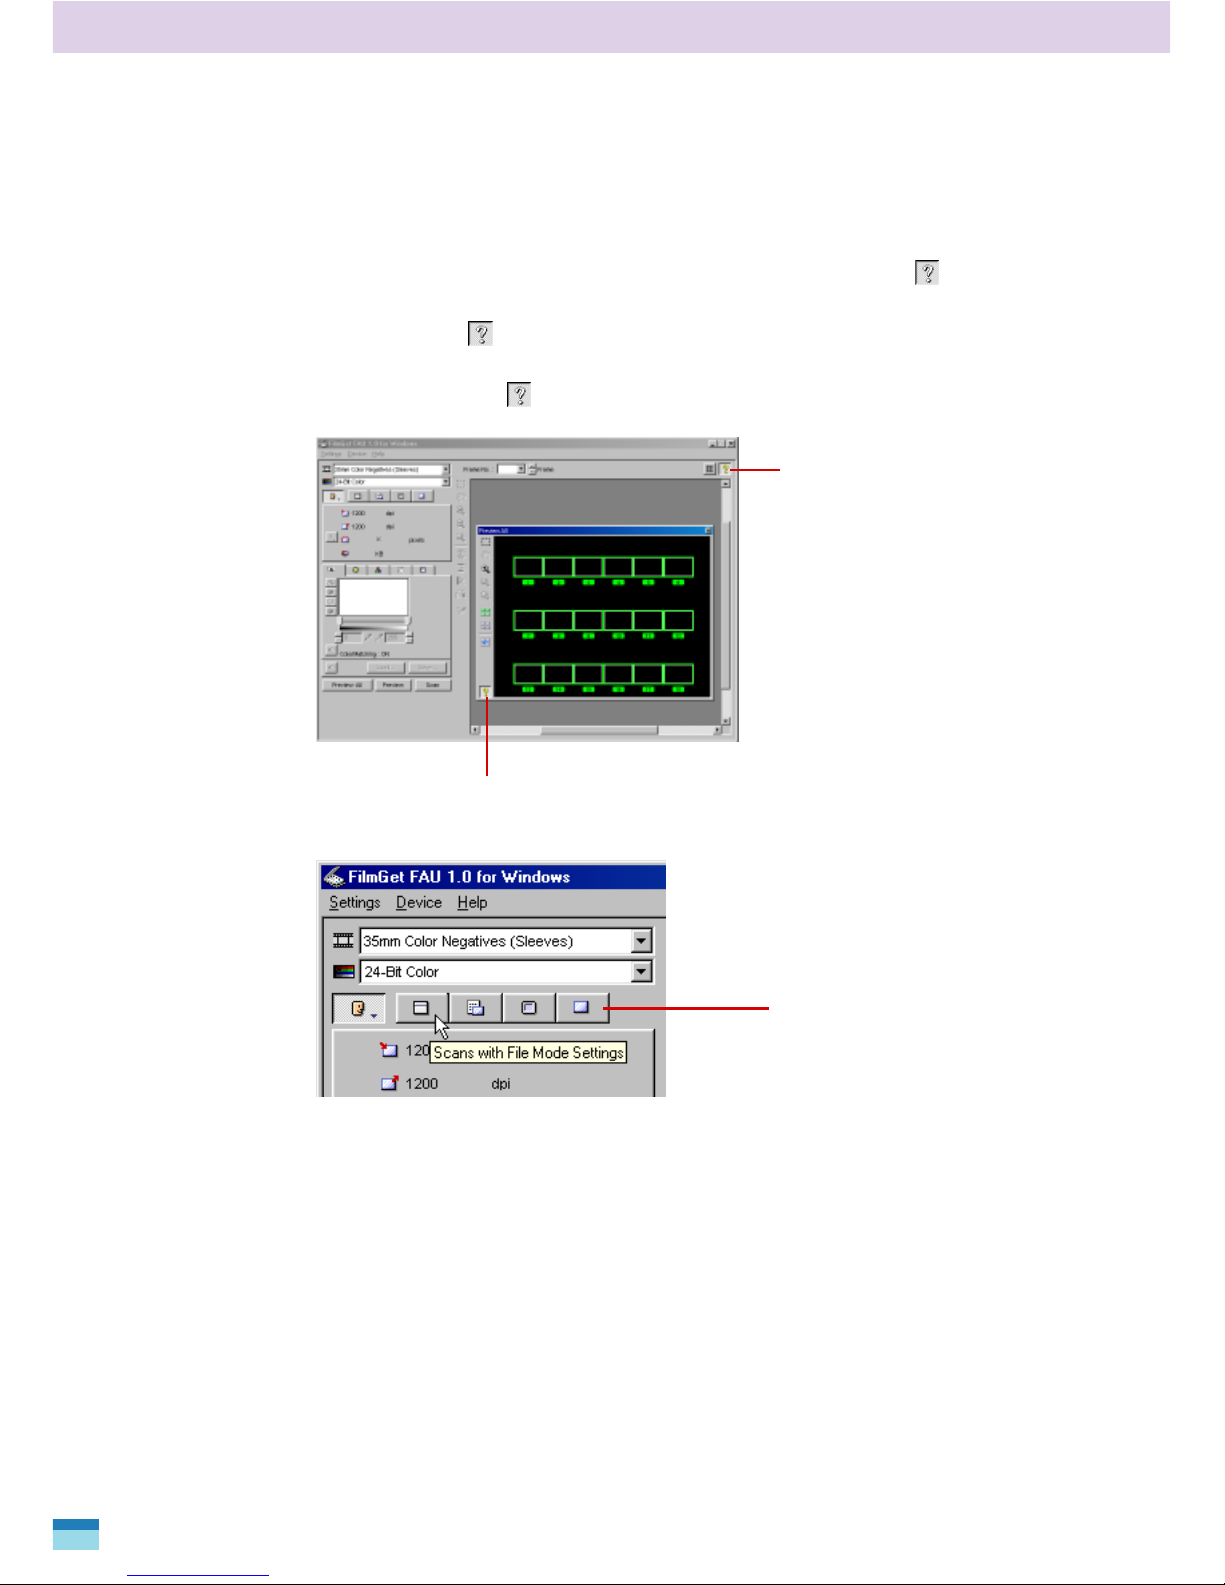
How to Find Help
FilmGet FAU is equipped with tool tips that explain the functions of
the buttons and tools in the window. When you click the button at
the top right of the preview or preview all window, the button will
change to the button. In this state, positioning the mouse cursor
over a button or tool will display the tool tip for that item. To hide the
tool tips, click the button again.
Tool Tip
Show/Hide Tool Tips
Button
Show/Hide Tool Tips Button
 Loading...