

Canon EOS-1D/DS, EOS-1D, EOS-DS Af Point Management
1 2 3
The Canon EOS-1D/Ds-series offers the broadest
and most sophisticated autofocus capabilities of all
EOS DSLRs. For example, the EOS-1D Mark IV
alone offers 16 different AF custom functions. Many of
these functions are unfamiliar to new users, yet even
users who are familiar with them may have trouble
remembering the full range of options.
This QuickGuide will therefore provide a
summary of the most popular and useful functions
related to AF point management, how they work,
and the photographic problems they’re designed to
solve. We encourage you to experiment with various
settings so you can become familiar with how they
operate and conrm which are most useful and when.
EOS-1D/Ds cameras allow you to control:
• Whether AF points are selected automatically or
manually
• How many manual AF points are available for
selection
• Which manual AF point you select to be active
• Whether the manual AF point can expand if
necessary to achieve focus
Automatic AF Point Selection
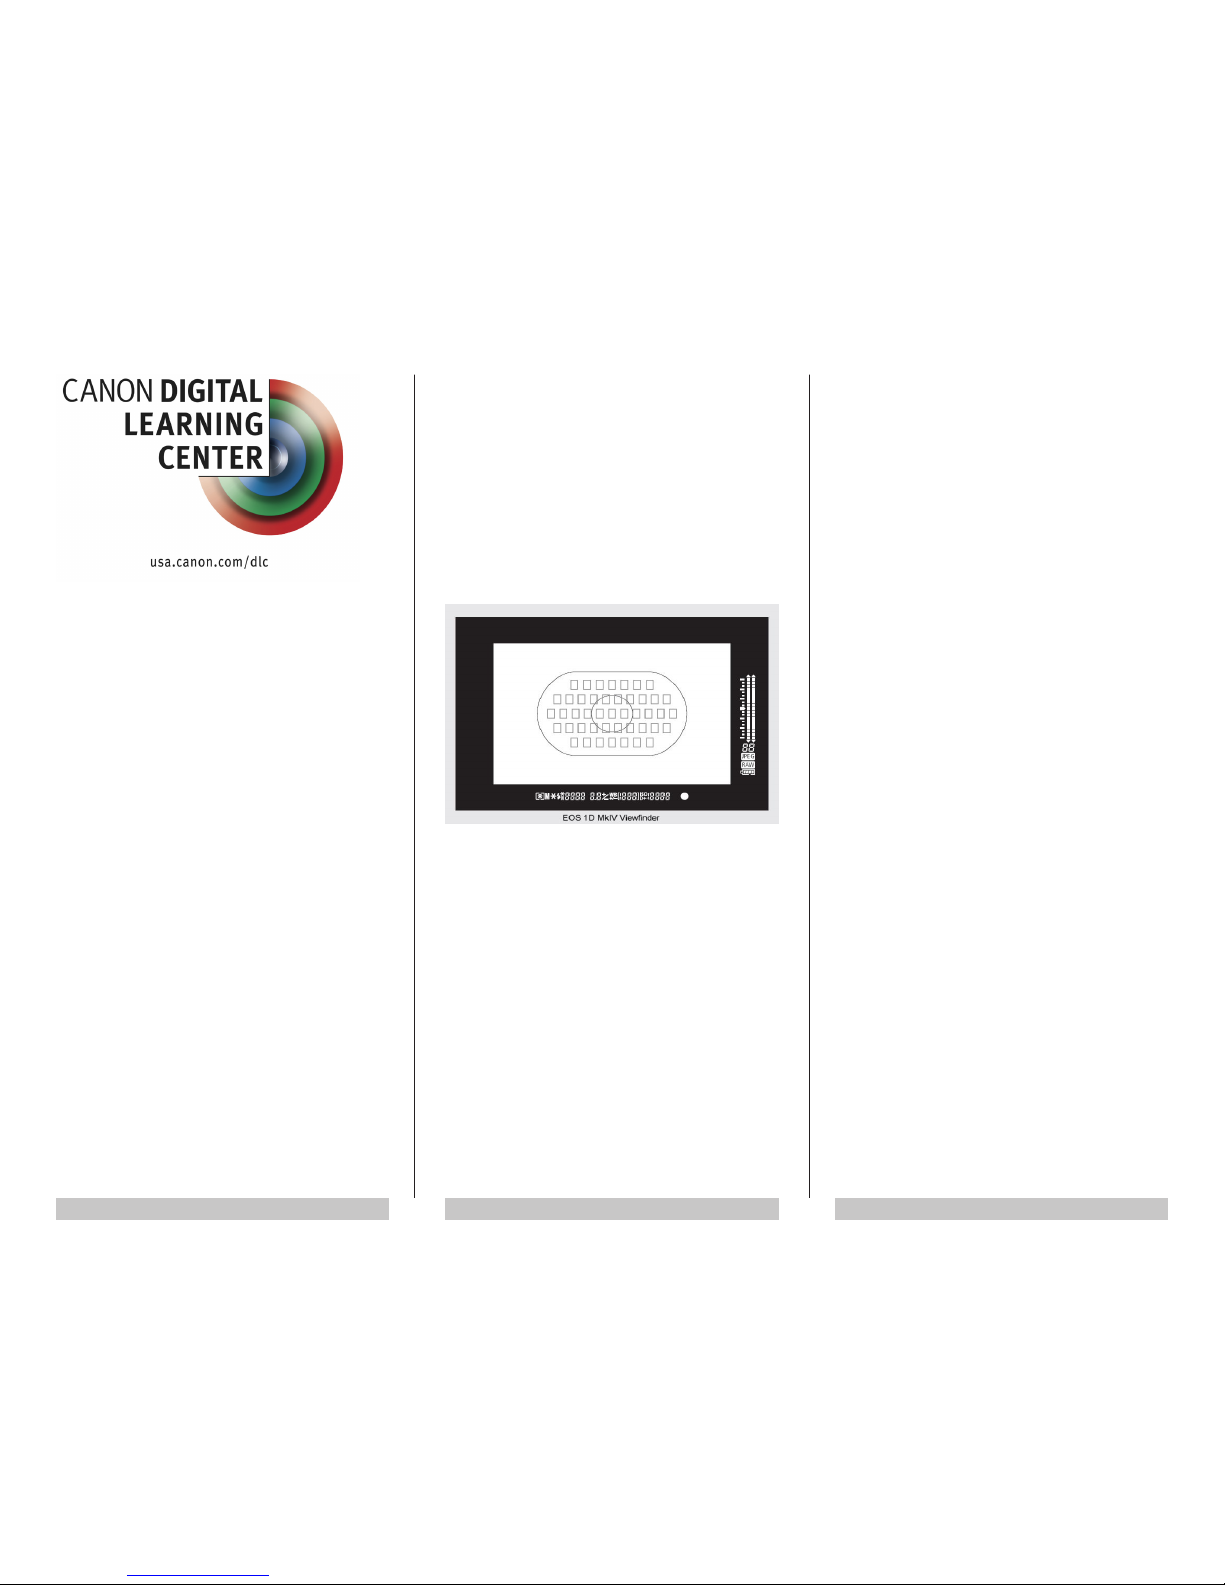
This is the default mode. All 45 AF points are active.
Whenever you’re set to Automatic AF point selection
mode, the camera will automatically choose which of
the 45 available points to use to achieve and maintain
focus on your subject. This makes automatic AF point
selection mode ideal for rapid shooting situations
where the camera can focus more quickly than you
can. How the AF points are selected and displayed
in the viewnder will depend on which AF mode the
camera is set to.
One-Shot AF Mode: The camera will select the
AF point(s) that cover the nearest subject with
recognizable detail. The point(s) it selects will
light up red in the viewnder.
AI Servo AF Mode: The camera will rst use
the center AF point to focus and begin tracking
the subject. If the subject moves away from the
center, the camera will automatically transfer
focus to the outer AF points to continue tracking
the subject. When Automatic AF point selection is
combined with AI Servo AF, the active AF points
will not light up red in the viewnder.
Manual AF Point Selection
This mode allows you to manually select any of
the available AF points to use for focusing on your
subject. With any “Mark III” model you can manually
select 19 of the 45 points, one at a time. With “Mark
IV” models you can manually select any one of the 45
points.
Regardless of whether the camera is set for OneShot AF or AI Servo AF, the AF point you manually
select will be the only one available. It should ideally
be the one closest to the area of your subject you
want tack-sharp and that will require the least amount
of re-framing. To manually select an AF point:
1. Press the rear AF Point Select Button. You
will then have six seconds to turn whatever
dial you prefer to use to select AF points.
2. Use either the rear Quick Control Dial, the
top Main Dial, or the Multi-controller to
navigate from one AF point to another.
Whenever you’re selecting an AF point, the one that
is active will appear red in the nder. If a “ring” of
outer points lights-up red, you’re in Automatic AF point
selection mode. Either way, you can stop selecting
when the point (or points) you want light red in the
nder.
Manual vs. Automatic AF Point Selection
As a rule, professional photographers prefer to
manually select the AF point closest to the area of
the subject where they wish to focus. This minimizes
the need to reframe as well as the risk of focus
shift caused by reframing. When shooting moving
subjects, you should set the camera to AI Servo AF.
As long as you keep the AF point centered on the
subject the camera will maintain focus.
There may be occasions when the area you’ve
picked doesn’t have enough detail or it’s difcult to
keep the AF point centered on the subject. The EOS
1D and Ds therefore have custom functions that can
be set to automatically adjust for such situations and
thereby increase the percentage of sharply focused
images. Custom Functions allow you to rene the
AF controls on your camera to suit specic needs,
preferences, and circumstances.
QuickGuide to EOS-1D/Ds
AF Point Management
4 5 6
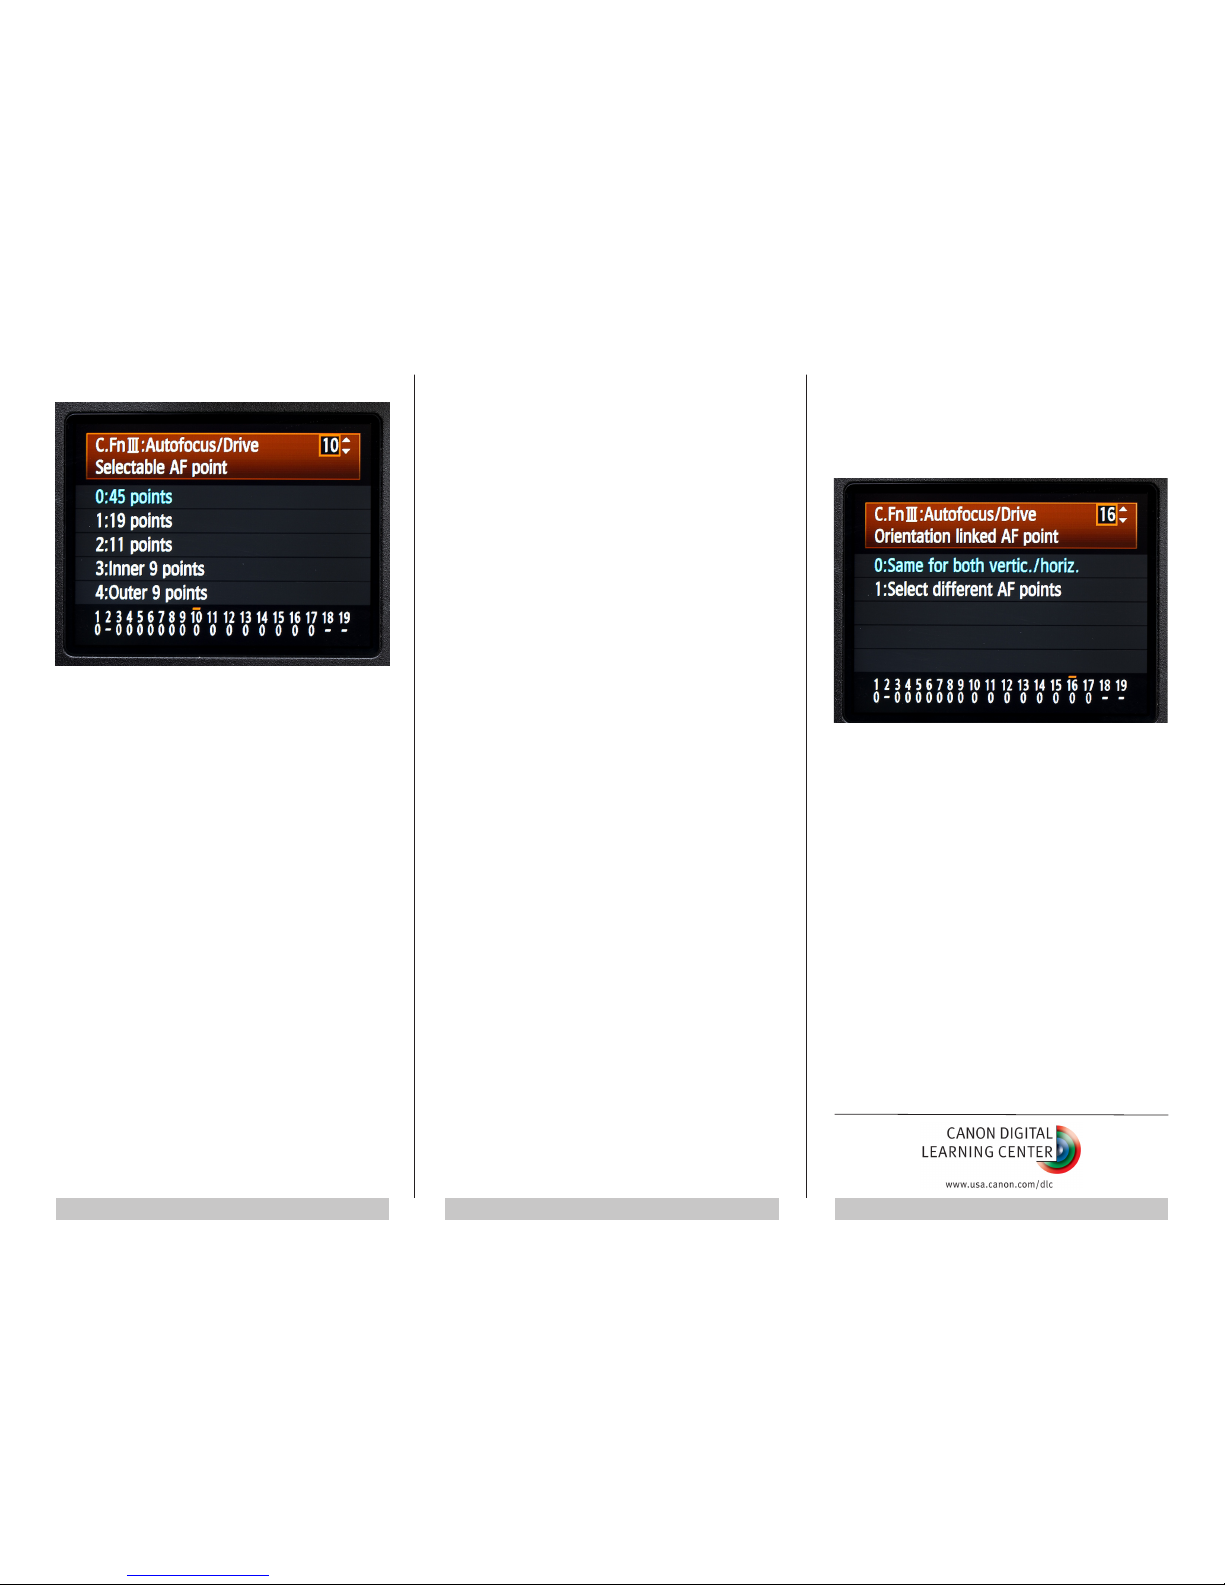
Selectable AF Point
This C.Fn allows you to reduce the number of available
AF points, which in turn allows you to move more
quickly from one point to the next. Similarly, if you nd
that you never use the inner or outer focusing points,
you can use this C.Fn to disable one set or the other.
Your available options include:
19 points
11 points (Mark II and IV models only)
Outer 9 points
Inner 9 points
Consider combining either of the last two settings with
C.Fn IV-3-3 (Quick Control Dial—AF point selection).
This will allow you to instantly change AF points with
the Quick Control Dial without having to press the AF
point selection button rst. To instantly return to the
center AF point, simple press in on the Multi-controller
button. Note that when the Quick Control Dial is set
to select AF points it won’t be available to adjust
exposures. Instead, press the AF point select button
and turn the Main Dial.
AF Expansion With Selected Point
A single AF point can be so small that it becomes
difcult to keep centered on a fast-moving subject.
The AF point expansion C.Fn programs the camera
to automatically activate adjacent AF points and
thereby expand the potential size of the AF area when
necessary. EOS-1D/1Ds models allow you to add a
left and right point, a ring of six surrounding points, or
an expanded cluster of up to 18 points (EOS-1D Mark
IV only), that can move around the whole 45-point
area if necessary.
This function can be very useful with fast-moving
subjects, especially those that lack enough texture or
detail for the AF to latch onto. Keep in mind, however,
that the larger the focusing area, the greater the
chance that the camera may focus on something
other than what you have in mind.
Switch to Registered AF Point
This C.Fn allows the camera to memorize the position
of any AF point. You can then instantly return to the
memorized point by pressing the Multi-controller
button. This is a great feature for when you need
to quickly move from, for example, the center point
to an outer point, or from a point you’ve chosen for
horizontal shots to another point for verticals. To
register an AF point:
1. Manually select an AF point you want
memorized.
2. Hold down the AF point selection button and
press the ISO button. “SEL HP” will appear
on the top LCD panel and in the viewnder
to conrm that the camera has registered
this point as a “Home Point."
There are two ways to instantly access your
registered Home Point:
1. Press in on the Multi-controller. To return to
your previous AF point, press in on Multicontroller again.
or:
2. Hold down the AF stop button on your
lens (if it has one), then press the FE lock
button. Repeat the procedure to return to
the previous AF point. To use this method,
you must rst set C.Fn III-6-6 (AF stop button
function/Switch to registered AF point).
Orientation Linked AF Point (EOS-1D Mk IV only)
This C.Fn allows you to pre-select separate AF points
for vertical and horizontal orientation and instantly
change AF points simply by turning the camera. You
can even select the AF point you want to use in three
different camera orientations: horizontal, vertical/grip
on top, and vertical/grip on bottom.
It’s also possible to select different AF point select
modes; for example, a single point for horizontals and
Automatic AF point selection for verticals. If you clear
the camera settings to their defaults, the selected AF
points for the respective orientations will reset to the
center AF point.
To activate this C.Fn:
1. Select option 1: “Select different AF points.”
2. Hold the camera horizontally and manually
dial-in the AF point you want.
3. Turn the camera vertically and select a
different AF point.
 Loading...