

Page 1
Page 2
INSTRUCTION BOOK
English edition
Page 3

INTRODUCTION
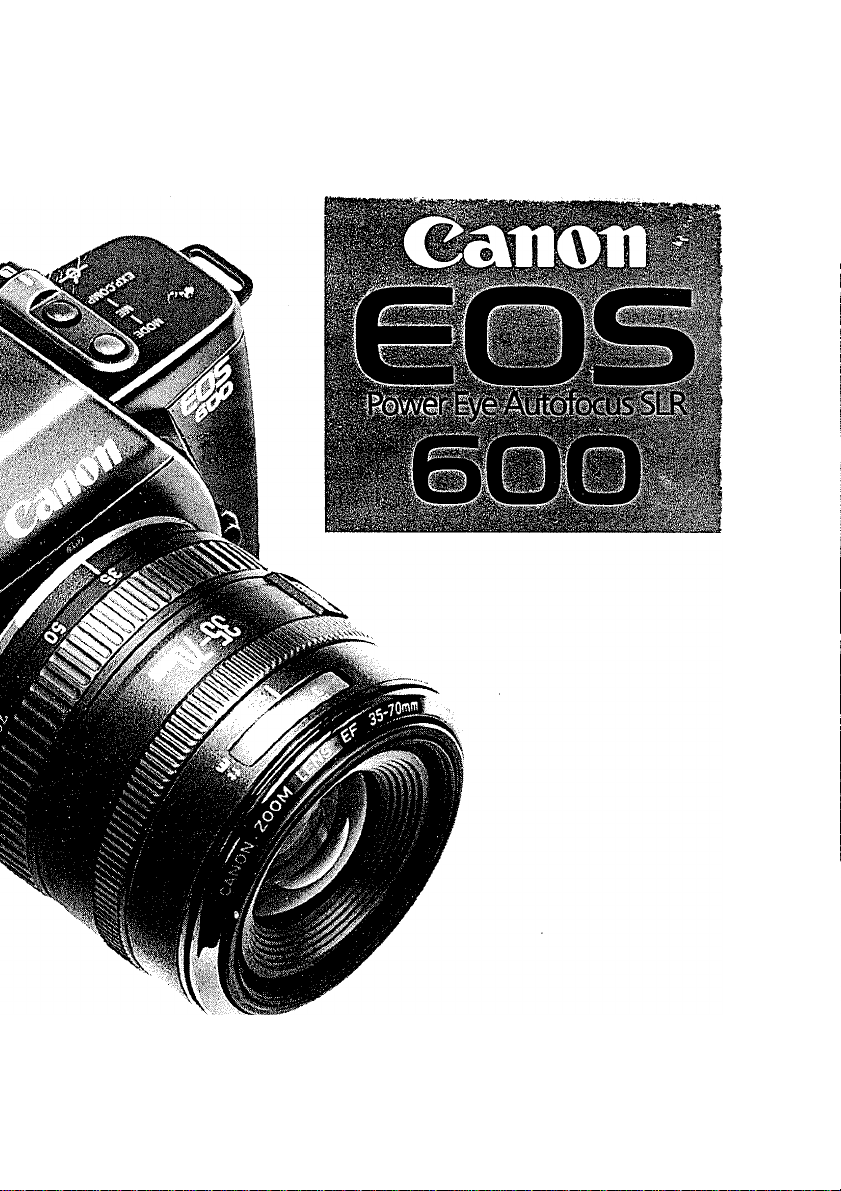
Thank you for purchasing the Canon EOS 600,
an autofocus and auto exposure SLR camera
designed with the most advanced electronic and
computer technology.
The EOS 600 features a dedicated EF lens with
a built-in motor, a newly-developed distance me
tering sensor (BASIS; base-stored image sensor)
and a high-speed super microprocessor, all com
bined to offer accurate and fast focus. Its
Predictive Focus control captures high-speed
subjects even when coming head-on. The built-in
motor drive lets you take approximately 5 frames
per second for continuous shooting.
Other advanced functions include Programmed
Image Oontrol that sets controls for 7 types of
photos, and Oustom Function Oontrol that lets
you re-program 7 operations to your Individual
preference.
Please read this manual carefully for a full un
derstanding before using the camera.
Page 4

Important information
The Canon EOS 600 will give optimum per
formance together with specially designed
Canon EF lenses, flash units and other Canon
brand accessories. It is possible that the use of
incompatible lenses or other accessories may
result in unsatisfactory performance or dam
age to your Canon EOS 600. We, therefore
suggest the use of Canon EF lenses and ac
cessories. Damage to your camera, as a result
of malfunction or improper connections
caused by the use of incompatible products
may void the product warranty.
Page 5
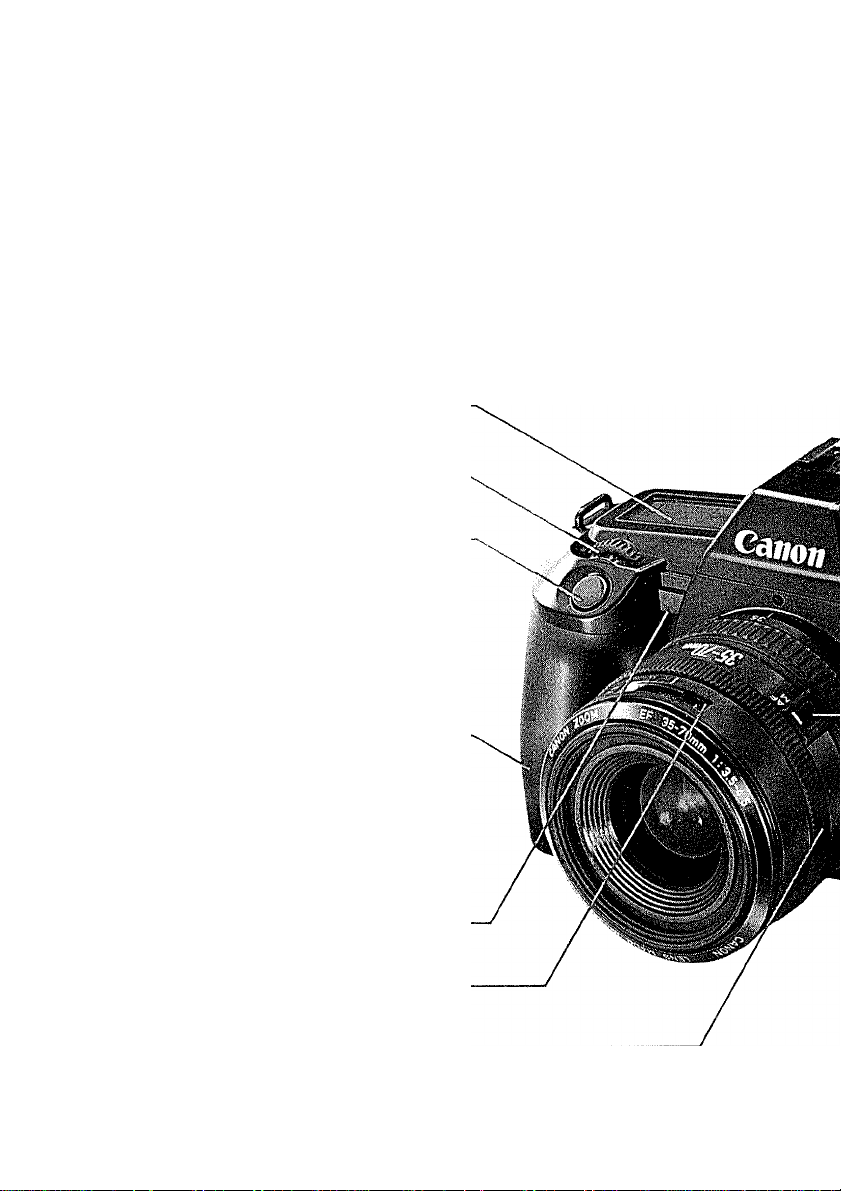
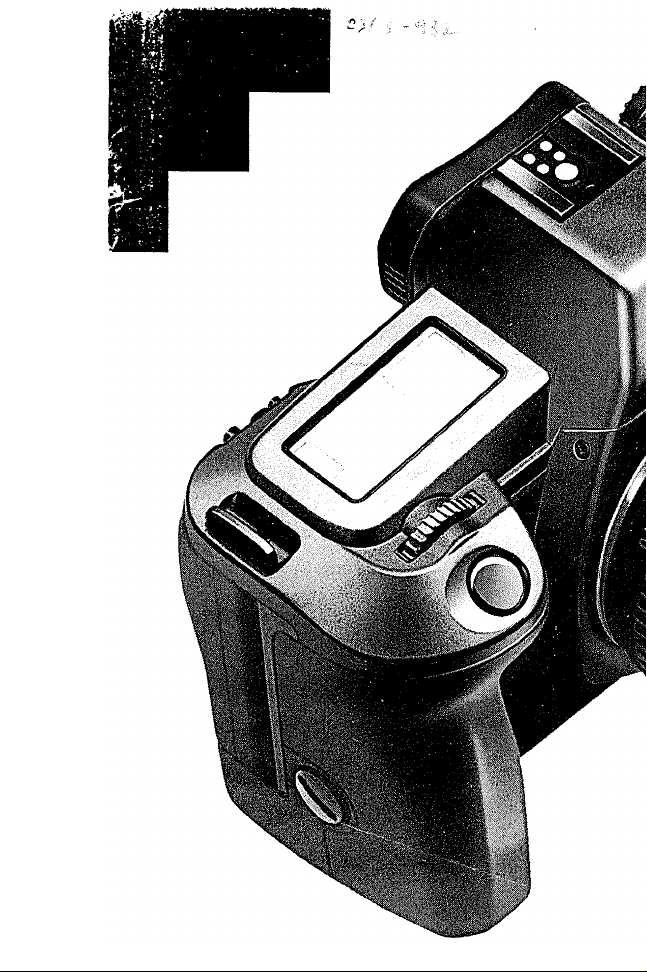
NOMENCLATURE
LCD Display Panel
Electronic Input Dial
Shutter Button
Grip/
Battery Cover
Self-timer Operation
Indicator (LED)
Distance Index
lanual Focusing Ring
Page 6
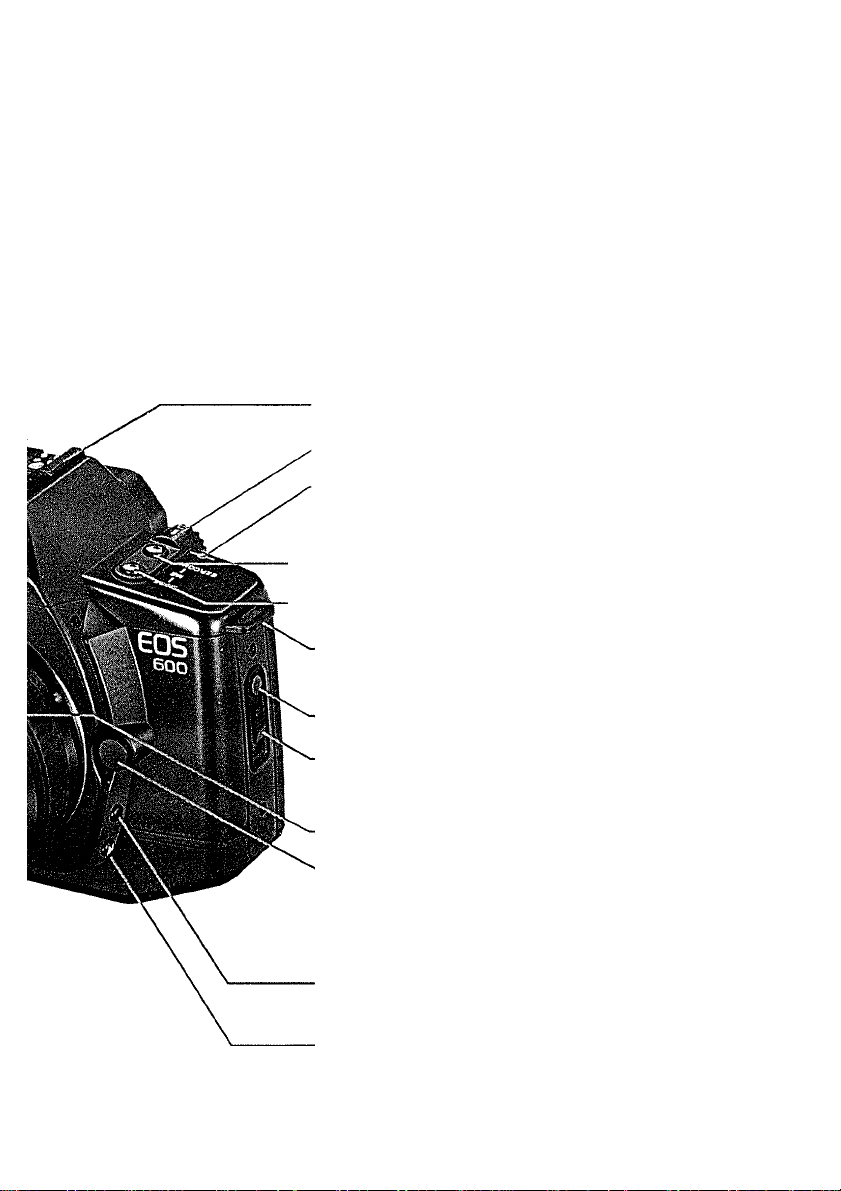
Accessory Shoe
Main Switch
Film Plane Indicator
Exposure Compensation Button
Shooting Mode Selector
Neckstrap Fixture
Back Cover Lock Button
Back Cover Latch
Focus Mode Switch
Lens Release Button
Depth-of-Field Check Button
lanual Aperture Set Button
Page 7
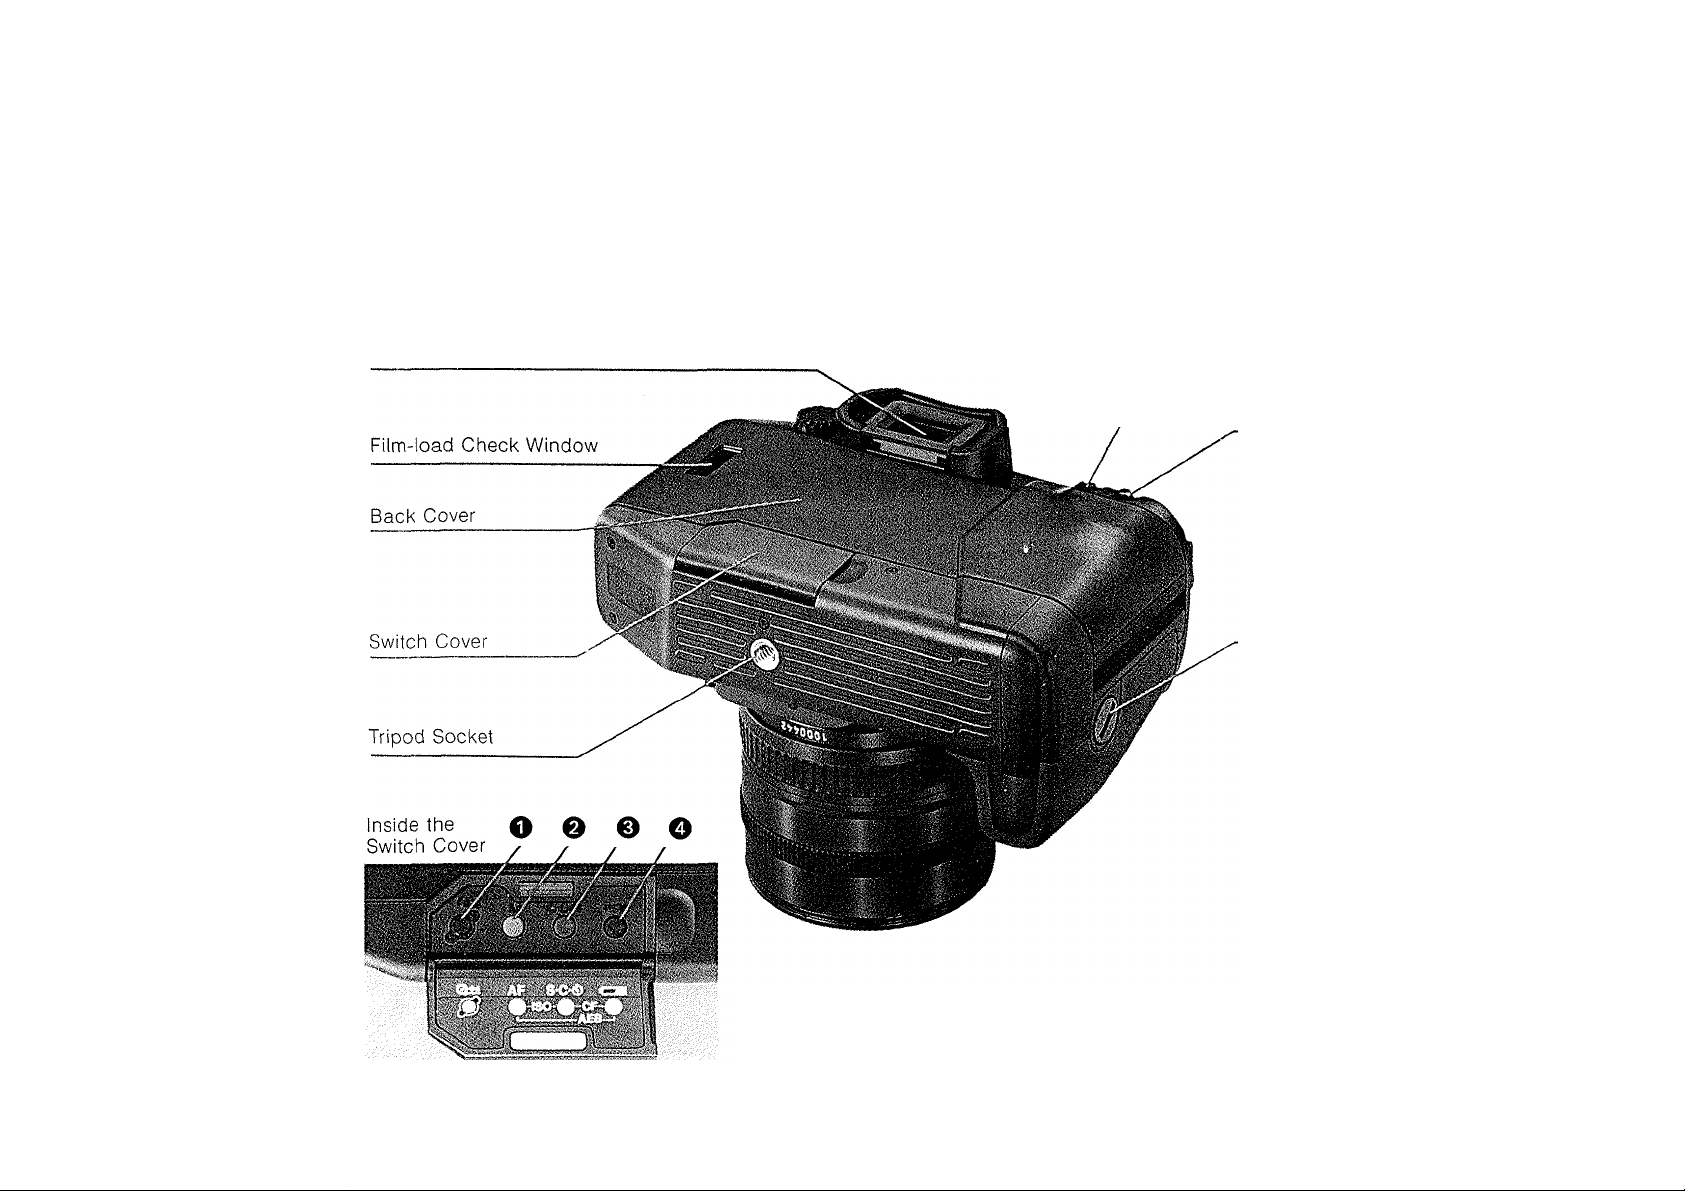
Viewfinder Eyepiece
Display Panel Illumination
Button
Partial Metering Button
Grip Screw
O Filnn Rewind Button
Q AF Mode Selector
O Film Winding Mode Selector
O Battery Check Button
66
Page 8

TABLE OF CONTENTS
Preliminary Preparations and Operation at the
Standard Position
Loading the Battery.............................................. 6
Checking the Battery............................................ 7
Attaching the Lens
Holding the Camera ............................................ 10
AF Focusing
Loading the Film
Manual Film Speed Setting ................................. 13
Standard (Full-Auto) Position .............................. 14
Focus Lock
Automatic Film Rewind
Programmed Image Control
Setting the AF Mode
Setting the Film Winding Mode
Self-timer Photography
Difficult Subjects for Autofocus
Manual Focusing
..........................................................
..............................................
.......................................................
.................................................
.......................................
................................
...........................................
...........................
........................................
...........................
.................................................
8
11
12
15
16
18
22
23
24
26
28
Page 9

Making the Most of Your EOS 600
Setting the Shooting Mode
................................
30
Program AE ...................................................... 31
Program Shift Function...................................... 32
Shutter-Priority AE
............................................
33
Aperture-Priority AE........................................... 34
Depth of Field
....................................................
35
Depth of Field AE............................................... 36
Manual Override
...............................................
38
Partial Metering ................................................. 39
Exposure Compensation
...................................
40
Auto Exposure Bracketing ................................ 41
Multiple Exposure
Bulb (Long Exposure)
Custom Function Control
Accessories
Dedicated Flash Photography
Interchangeable Focusing Screens
Dioptric Adjustment Lenses
..............................................
.......................................
..................................
...........................
...................
..............................
43
45
46
48
50
52
Camera Cases .................................................. 53
Precautions........................................................ 54
Other Notes
......................................................
55
Appendix............................................................ 57
Specifications..................................................... 62
Page 10

PRELIMINARY PREPARATIONS
AND
OPERATION AT THE STANDARD POSITION
Page 11

LOADING THE BATTERY
This camera uses one, six-volt lithium battery pack 2CR5.
1) Remove the grip with a coin or
similar object.
• When replacing the battery,
first push the orange lever up.
• When using a tripod, dis
mount the camera before re
placing the battery.
2) As shown in the photo, load
the battery so that its termi
nals face in the direction of
the camera. Make sure the
battery is pushed in ail the
way until it is locked by the
orange lever,
3) Replace the grip securely.
Page 12

CHECKING THE BATTERY
1) Set the main switch to the
green "A” or "((•))” mark.
The display will come on at
this time. If the display does
not appear, confirm that the
battery is loaded correctly.
(example)
2) Open the switch cover and
press the battery check button
(tzai). Battery power shows in
the display panel.
be
. . . Q
Battery power
sufficient
(blinking)
Replace with new battery
be
-
D ,
Have a new
battery handy
(no battery
check mark)
Page 13

ATTACHING THE LENS
1) Turn the rear lens cap in the 2) Turn the body cap counter- 3) Next, align the lens mount
direction of the arrow until it
stops and remove it.
To attach,
align its "O” nnark with the
red dot on the lens. Then light
ly push it in, and turn clock
wise until it stops.
clockwise and remove it.
To attach,
align its “O” ^he
camera’s red dot, then turn
the cap clockwise.
positioning point with the
camera’s red dot.
Page 14

4) Then turn the lens clockwise
until it stops and the lens is
locked with a click.
• To remove the lens, turn it
counterclockwise while press
ing the lens release button.
5) Remove the front lens cap. 6)
CAUTION
• The electronic contacts must
be clean for proper connec
tion. Do not touch these con
tacts.
• Be sure to place the lens’front
end down to avoid damaging
the electronic contacts.
Slide the
switch to '
lens
‘AF”.
focus mode
Page 15

HOLDING THE CAMERA
10
Page 16

Your pictures will not be sharp if the camera
moves as the shutter button is pressed. To avoid
this, try the following technique:
1) Hold the camera firmly, with your left hand
supporting the camera and lens.
2) Keep your left elbow close to your body.
3) Lightly hold the camera against your cheek or
forehead and look into the viewfinder.
4) Spread your feet about shoulder width for a
steady, natural stance.
Page 17

AF FOCUSING
Page 18

1) Center the AF frame
‘C 1” over the main
subject.
2) Press the shutter button halfway and auto
matic focus (AF) starts. When correct focus is
obtained, the green AF symbol lights up in the
viewfinder and the AF signal (short beeper
tone) sounds. Press completely to take the
picture.
• Shutter button action plays an important part
in taking sharp pictures. A quick stroke with
the tip of your finger or fingernail may cause
camera shake.
• When AF is impossible, the green AF symbol
will start blinking and the shutter will not
release (see pp. 26 to 27).
11
Page 19

LOADING THE FILM
12
1) Push the back cover latch
down while pressing the back
cover lock button.
Plastic insert
№
curtain
Insert the upper-flat end of the
film cartridge into the film
chamber first. The film-load
check mark «a) appears in
the display panel.
CAUTION
• Before loading the first roll of film, remove the plastic insert.
• NEVER touch the shutter curtain. Its high-precision design
makes it sensitive to pressure. Also, when loading the film, be
careful that the film leader does not touch the shutter curtain.
Pull the film leader across the
shutter curtain until its tip is
aligned with the orange mark.
Close camera back and film is
automatically to frame. (Blink
ing bars on the LCD panel in
dicate “re-loading”.)
Page 20

MANUAL FILM SPEED SETTING
The camera automatically sets film speed by sensing the DX code marked on the film cartridge.
(ISO 25-5000 according to the DX code.) The automatically-set film speed will appear in the display panel
while the film advances to the first usable frame. When using film without a DX code, set the speed manually
by following these steps; (ISO 6-6400).
r
J i i*-
1) Set the main switch to either
"A" or "((•))".
2) Open the switch cover, and
press both the blue and yellow
buttons at the same time to
display the ISO film speed
number.
3) Turn the electronic input dial
until your film speed appears.
• The previously-set film speed
blinks if the film speed has not
been set. The warning stops
after correct film speed set
ting.
13
Page 21

STANDARD (FULL-AUTO) POSITION
1) Set the camera’s
main switch to the
green mark “O”. The
following displays
will appear:
14
ONE SHOT
(
[ J
f 1
.
2) Center the AF frame
"c □” over the sub
ject.
If "P” is blinking in the display panel, press the
shooting mode selector and turn the elec
tronic input dial until “1” appears on the LCD
panel.
s
Page 22

3) Press the shutter button halfway to focus the
subject, and gently press the shutter button
completely to take the picture.
Correct exposure display (example)
P
OC c c
f|
_
1 J.U
ONE SHOT
T|
1
^—V
íгs 5.5
Shutter speed
AF symbol
Aperture
Once the shutter button is pressed halfway,
the display is held on for approximately six
seconds.
• When the automatically-set shutter speed is
too slow to hand-hold, the camera-shake
warning sounds (long beeper tone). We rec
ommend using a tripod or a flash.
Page 23

FOCUS LOCK
When your subject isn’t in the center of the picture frame, use the focus lock function. Focus on the intended
subject remains locked as long as the shutter button is held halfway. This function lets you vary
composition by putting the subject off-center.
1) Put the AF frame over the subject, and press
the shutter button halfway to lock focus. Make
sure the green AF symbol lights up.
• When using focus lock, be sure that the distance between you and the subject does not change.
• Focus lock clears when you remove your finger from the shutter button.
2) Reframe the picture as desired while pressing
the shutter button halfway. Then press the
shutter button completely to take the picture.
15
Page 24

AUTOMATIC FILM REWIND
The film automatically rewinds at the end of the roll.
1) During rewind the film transport bars move in
sequence from right to left to indicate the
function in progress while the frame counter
counts in descending order.
2) Film rewind stops automatically when the film
has been completely rewound. Open the back
cover vvhen the film-load check mark Ǥ!)
blinks and remove the cartridge.
Rewinding Mid-Roll
16
Press the film rewind button ((§b) to rewind before
the roll ends. The function begins immediately.
 Loading...