

Page 1
ENGLISH
Introduction
Software for Playing, Merging and Saving Movies
EOS MOVIE Utility for EOS-1D C
Ver. 1.1
Instruction Manual
● Content of this Instruction Manual
● EMU is used for EOS MOVIE Utility for
EOS-1D C.
● X indicates the selection procedure of the
menu.
(Example: [File] menu X [Quit].)
● Square brackets are used to indicate items such
as menu names, button names and window
names that appear on the computer screen.
● Text inside < > indicates a key on the keyboard.
● p.** indicates a reference page.
Click to move to the relevant page.
● : Marks information that should be read
before use.
● : Marks additional information you may find
helpful.
● Switching Between Pages
● Click on arrows on the bottom right of the screen.
: next page
: previous page
: return to a page you had previously
displayed
● Click on the headings on the right side of the
screen to switch to the contents page of that
heading. Also, click the item you want to read
about on the table of contents to move to the
relevant page.
Contents
Preparation
Basic
Screen
Playing Back
Confirming File
Information
Saving
Quitting EMU
Reference
© CANON INC. 2013 CEL-ST8VA211
Page 2

Introduction
EOS MOVIE Utility for EOS-1D C (hereinafter, “EMU”) is software for
playing, merging and saving movies shot on a CINEMA EOS camera
EOS-1D C.
● Main Features of EMU
With EMU, you can play movie files shot with an EOS-1D C
smoothly. You can also use View Assist for playing movies shot with
Canon Log gamma. In addition, you can consecutively play back
multiple 4 GB movie files created from one clip (a successive
shooting), merge them into a single file, and save it. Extracting still
image is also possible.
● What is Canon Log gamma?
This function allows rich gradation expression from dark points to
bright points, applying a wide dynamic range. It maximizes the
excellent capability of CMOS sensor.
System Requirements
OS
Computer
RAM Minimum 4 GB
● When editing 4K movies with this software, using CF cards and CF
card readers with the following specifications is recommended.
• CF card: Supporting UDMA 7, 100 MB/sec. or higher effective
writing/reading speed
• CF card reader: USB 3.0 connection, supporting UDMA 7, 100 MB/
sec. or higher effective reading speed
For information related to operation verification of CF cards and CF
card readers, refer to Canon website, etc.
● See the Canon website for support information including the latest
OS.
Mac OS X 10.7
Mac OS X 10.8
Macintosh with one of the above OS preinstalled
Introduction
Contents
Preparation
Basic
Screen
Playing back
● What is a movie clip?
A movie recorded in a single shooting operation is called a movie
clip.
● With this software, you cannot play back movies shot on a
camera other than the EOS-1D C.
● Do not remove the memory card from the card reader during
access.
Confirming File
Information
Saving
Quitting EMU
Reference
2
Page 3

Contents
Introduction ................................................................ 2
Introduction
Merging and Saving Movie Files ............................. 17
System Requirements................................................ 2
Installing the Software................................................ 4
Starting up EMU......................................................... 4
Basic Screen .............................................................. 5
Main Window ................................................................ 5
Playing Back a Movie Clip.......................................... 6
Movie Clip Playback ..................................................... 6
Playback Control........................................................... 7
Adjusting Volume.......................................................... 8
Changing the Playback Speed ..................................... 8
Moving the Playback Position....................................... 8
Playing Back Movies Shot with Canon Log Gamma set to
[On] ...............................................................................
Playing Back in Full Screen .......................................... 9
Operations Using Keyboard.......................................... 9
Checking the Movie Files in a Movie Clip................... 17
Merging Split Movie Files and Saving as a Single File...
18
Contents
Merging All the Split Movie Files in the Folder and
Saving as a Single File ...........................................
18
Preparation
Merging Split Movie Files for a Single Movie Clip and
Saving as a Single File...............................................
Quitting EMU ........................................................... 21
20
Basic
Screen
Reference ................................................................ 21
Troubleshooting.......................................................... 21
Error Messages .......................................................... 22
Keyboard Controls...................................................... 23
Uninstalling the Software............................................ 24
9
About This Instruction Manual .................................... 25
Trademarks ................................................................ 25
Playing Back
Confirming File
Information
Saving
Switching the Movie Display Size .............................. 10
Confirming the Movie File Information ..................... 11
Saving Still Images................................................... 12
Still Image Capture Settings ...................................... 12
Still Image Saving Controls........................................ 14
Saving Individual Still Images .................................... 14
Saving Multiple Still Images....................................... 15
Quitting EMU
Reference
3
Page 4
Installing the Software
Click
When installing this software, an administrator-level privilege is
required.
Double-click the compressed EMU file (.gz format)
1
downloaded from the Canon website to open it.
Double-click “emum-1-1-0-0-9l.dmg” in the folder.
2
➜The disk image “emum110” is mounted.
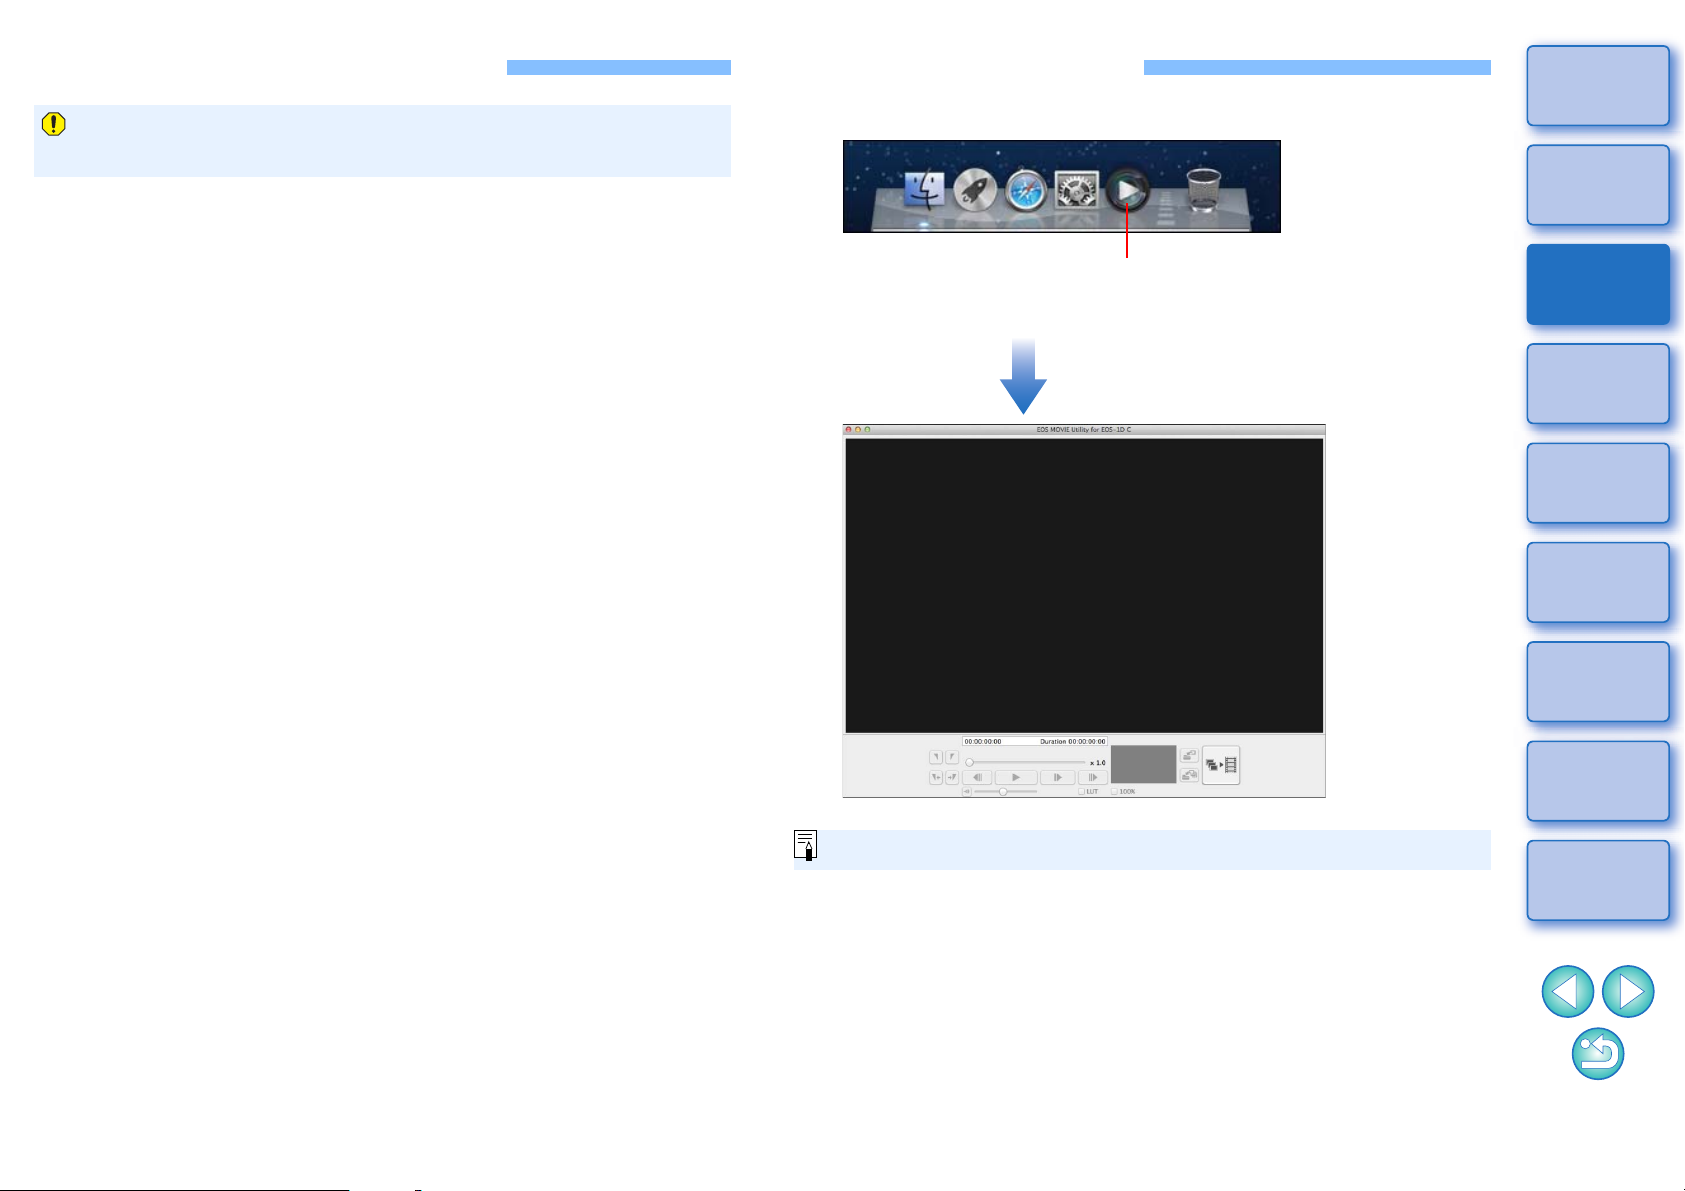
Starting up EMU
Click the shortcut in your desktop’s Dock.
➜EMU starts up and the main window appears.
Introduction
Contents
Preparation
Double-click the disk image “emum110”, and double-
3
click “EMUInstaller” in the displayed folder.
Follow on-screen instructions for installation.
4
Basic
Screen
Playing Back
Confirming File
Information
Saving
Quitting EMU
Starting up multiple EMU at the same time is not possible.
Reference
4
Page 5
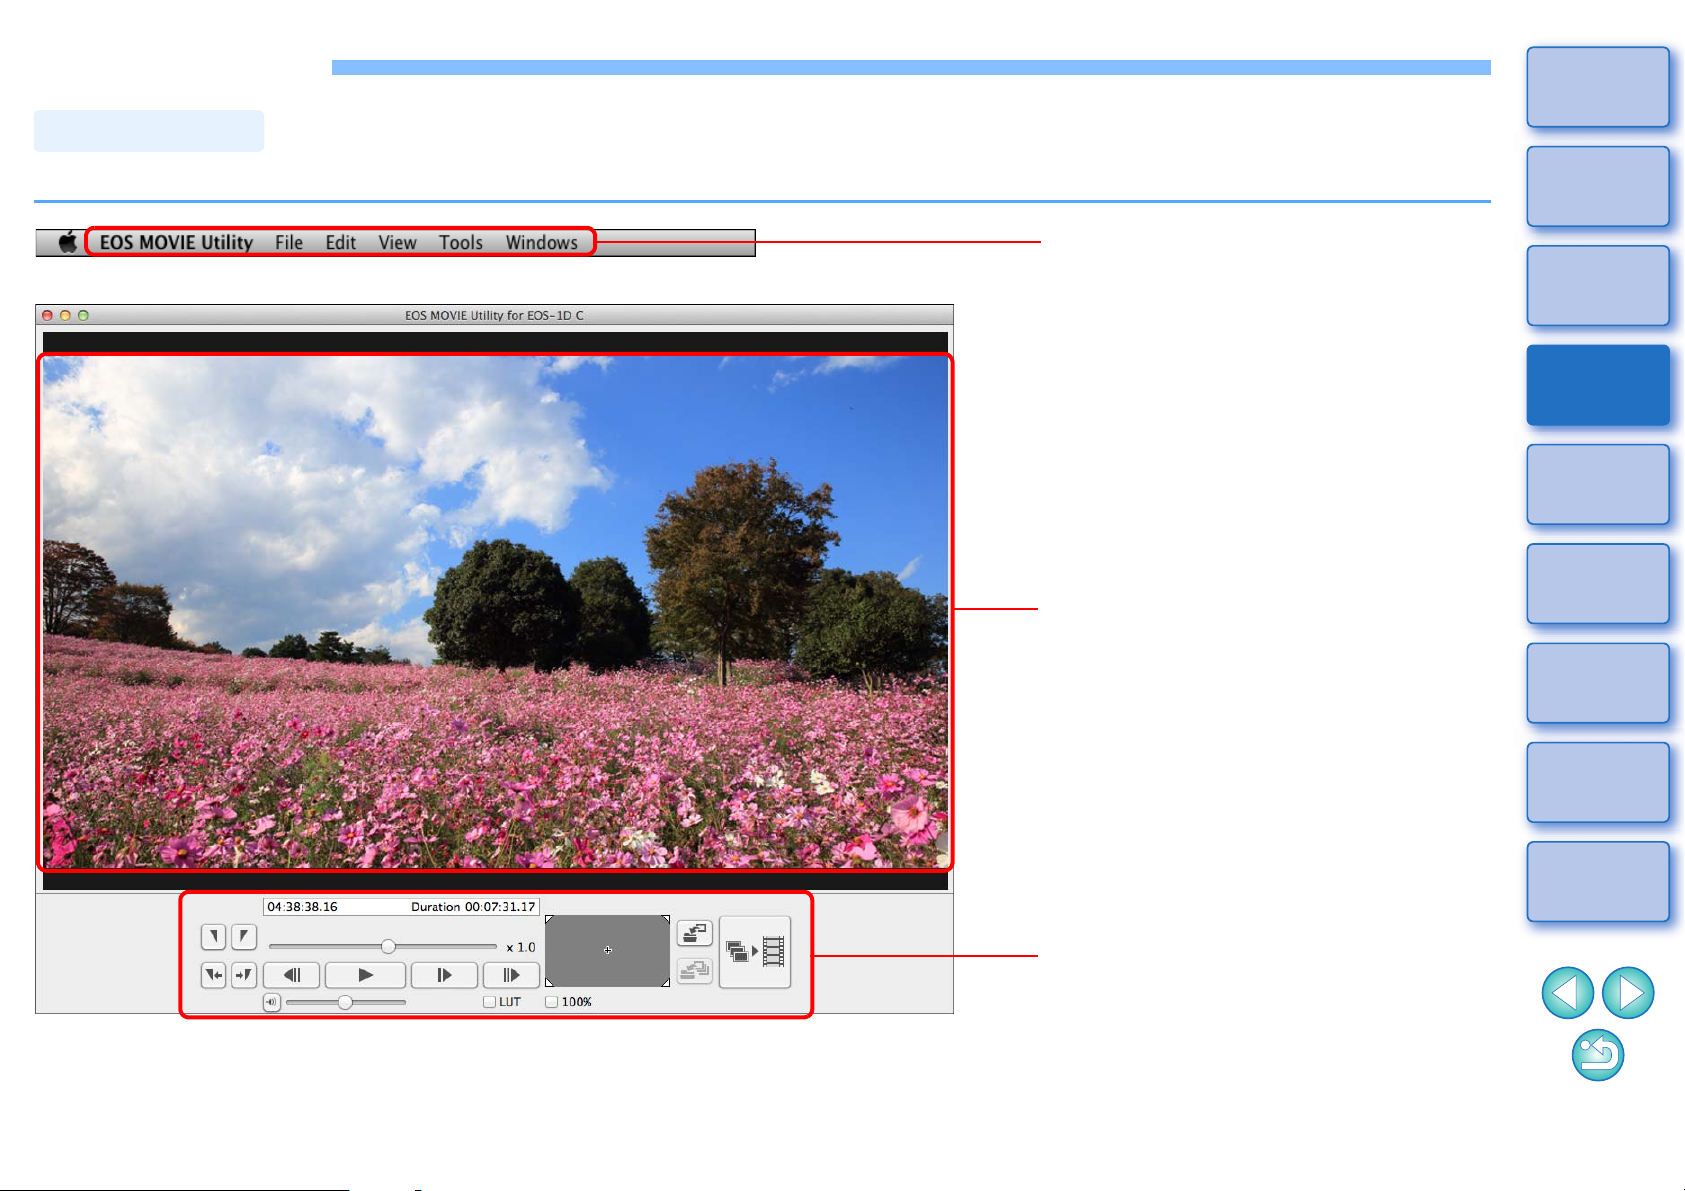
Basic Screen
Main Window
Menu
Menu to execute all functions.
Preview area
Displays a clip to be played back.
Control area
Controls playback operations.
Introduction
You can view, play back or stop movie clips in the main window.
Contents
Preparation
Basic
Screen
Playing Back
Confirming File
Information
Saving
Quitting EMU
Reference
5
Page 6
Playing Back a Movie Clip
Movie Clip Playback
㻌
㻌
DCIM 100CANON
101CANON
102CANON
MVI_xxxx.MOV
MVI_xxxx.MOV
MVI_xxxx.MOV
MVI_xxxx.MOV
MVI_xxxx.MOV
MVI_xxxx.MOV
MVI_xxxx.MOV
MVI_xxxx.MOV
MVI_xxxx.MOV
MVI_xxxx.MOV
MVI_xxxx.MOV
MVI_xxxx.MOV
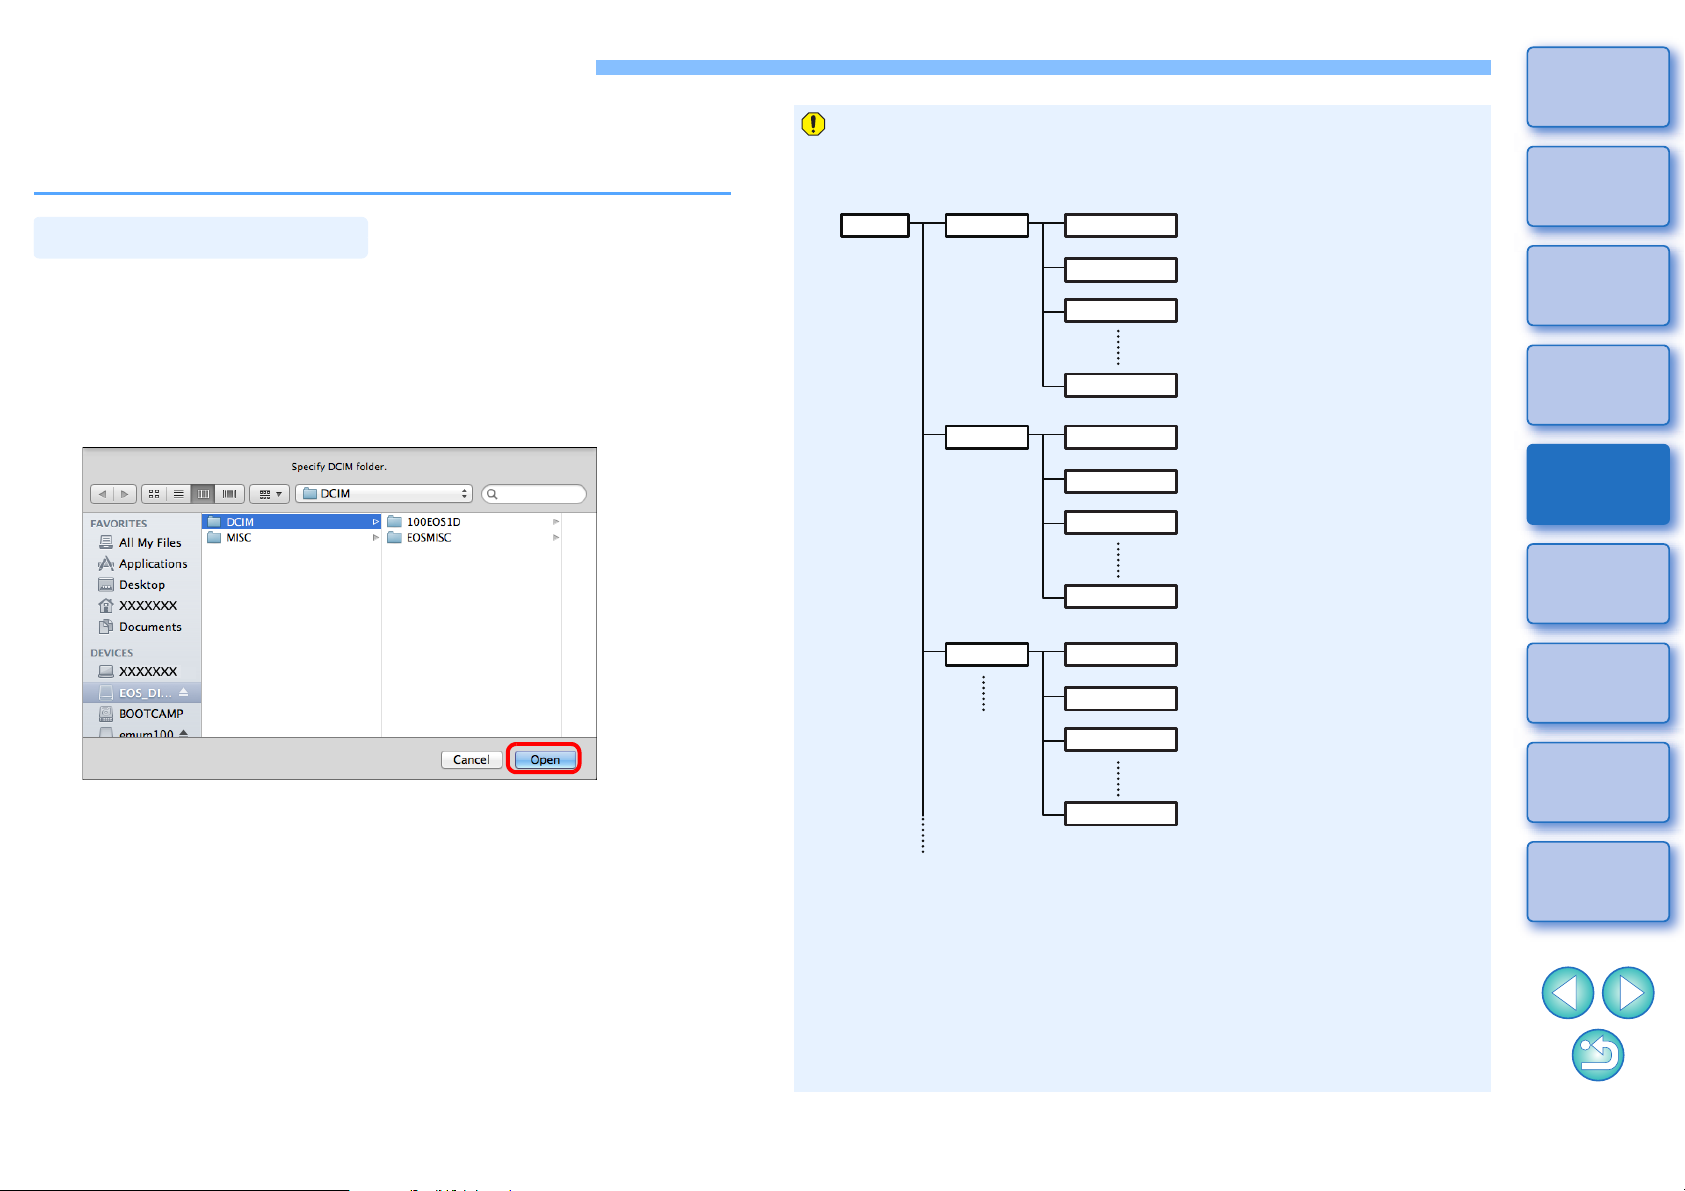
The method for playing back a movie clip is described here.
It is recommended that you first copy the folder where the movie clip is
saved on the memory card to your computer with a card reader.
Introduction
Movie files shot on a camera are recorded on the memory card with
the folder structure shown below.
Contents
In the main window, select the [File] menu X
1
[Open...].
➜A dialog box for selecting a folder appears.
Select the folder where the movie clip to play is
2
saved, and then click the [Open] button.
➜The [Clip list] dialog box appears.
● After inserting the memory card in the card reader, you can also
connect the reader to the computer to select folders on the
memory card directly.
● You cannot connect the camera to the computer to directly select
folders on the camera’s memory card.
With this software, if the above folder structure is not maintained, it
may not be possible to play back the movie clips properly. When
playing back movie clips, make sure the above folder structure is
maintained and the DCIM folder at the upper layer of the folder
structure is selected. Even when the folder structure is maintained,
be aware that it may not be possible to play back the clips properly if
the name of the selected folder, originally [DCIM], has been
changed to another name.
Preparation
Basic
Screen
Playing Back
Confirming File
Information
Saving
Quitting EMU
Reference
6
Page 7
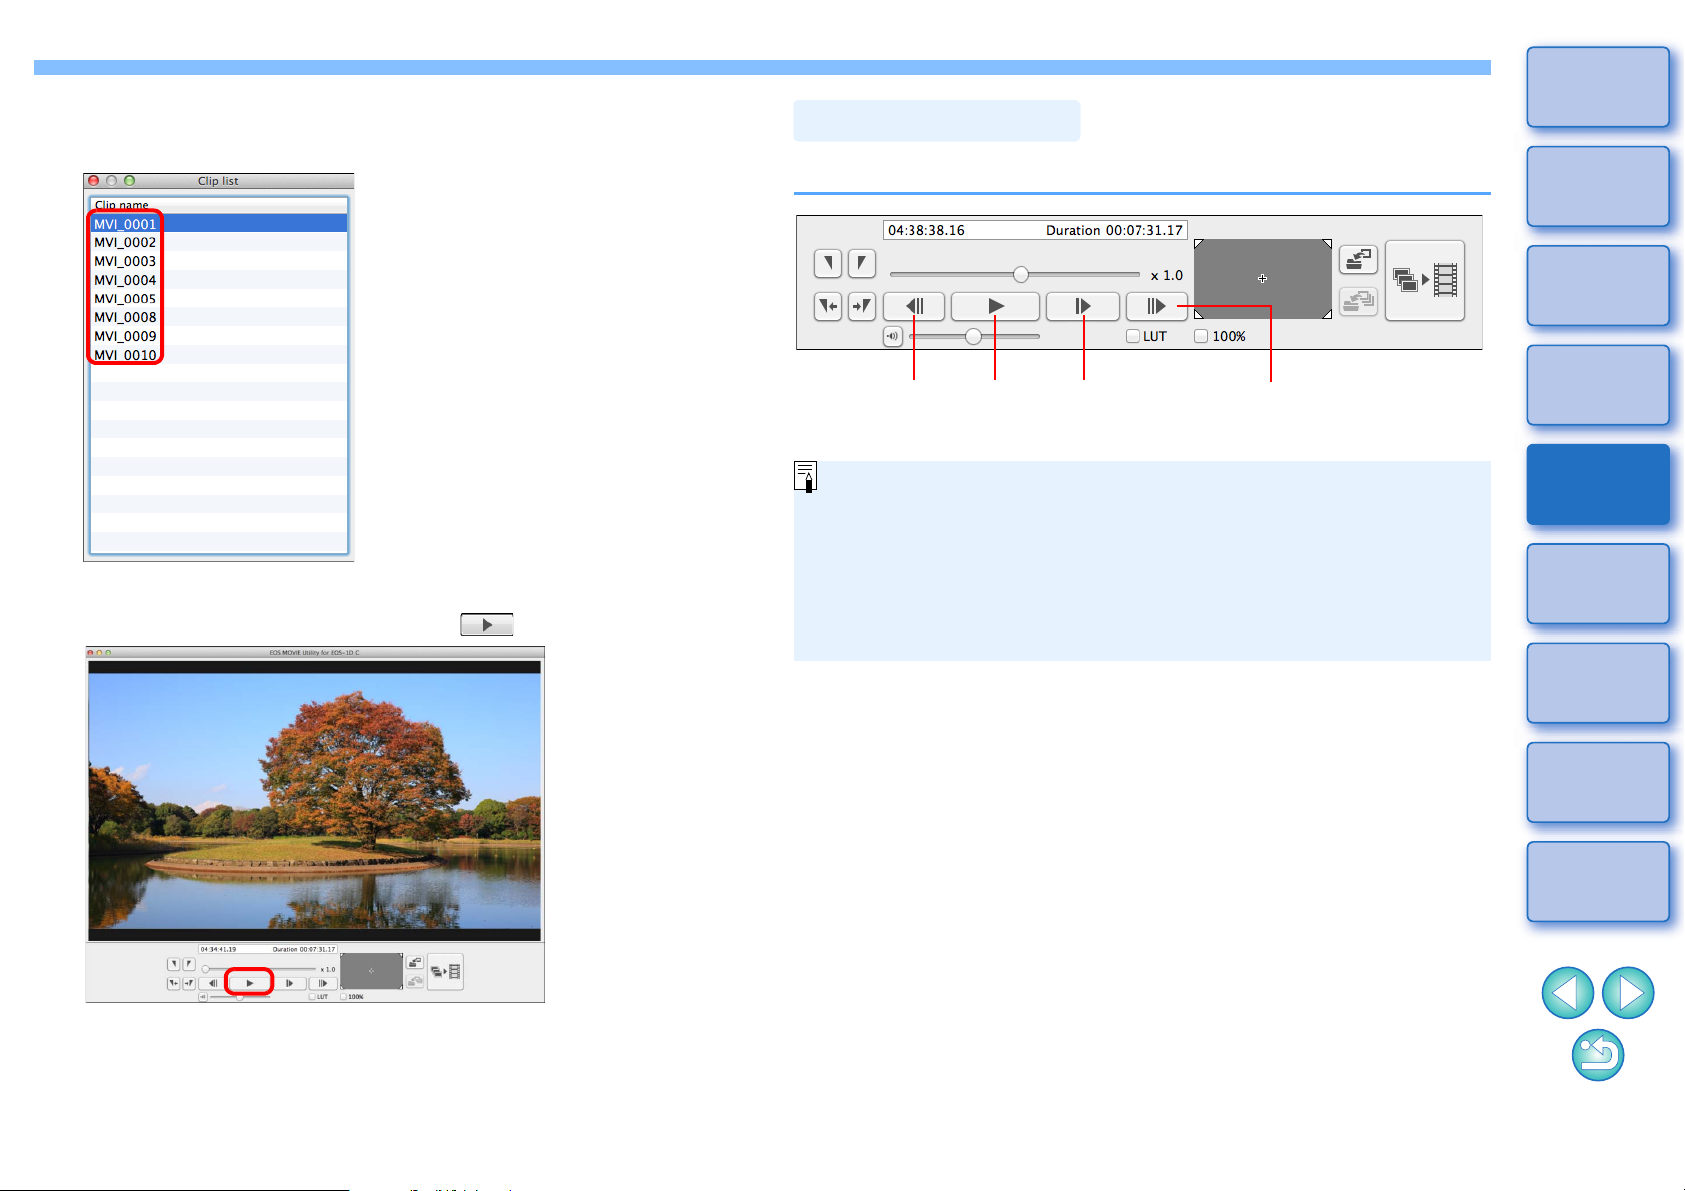
Select the movie clip to be played back in the [Clip
Playback Control
Previous
frame
Play/Stop
Adjust playback
speed
Next frame
3
list] dialog box.
Introduction
During playback, buttons allow you to perform the following operations.
Contents
Preparation
Basic
Screen
➜The image of the movie clip appears in the main window.
In the main window, click the [ ] button.
4
➜The movie clip is played.
● For operations during playback, see “Playback Control” on the
right of this page, and p.8 to p.10 (“Adjusting Volume” to
“Switching the Movie Display Size”).
● In the [Clip list] dialog box, you can switch between movie clips
with the <><> keys on the keyboard or by clicking the mouse.
● You can also double-click a movie clip name in the [Clip list]
dialog box to play back a movie clip.
● Even if you close the [Clip list] dialog box, the content of the list is
saved. If you select [Clip list] from the [View] menu, the [Clip list]
reappears.
Playing Back
Confirming File
Information
Saving
Quitting EMU
Reference
7
Page 8
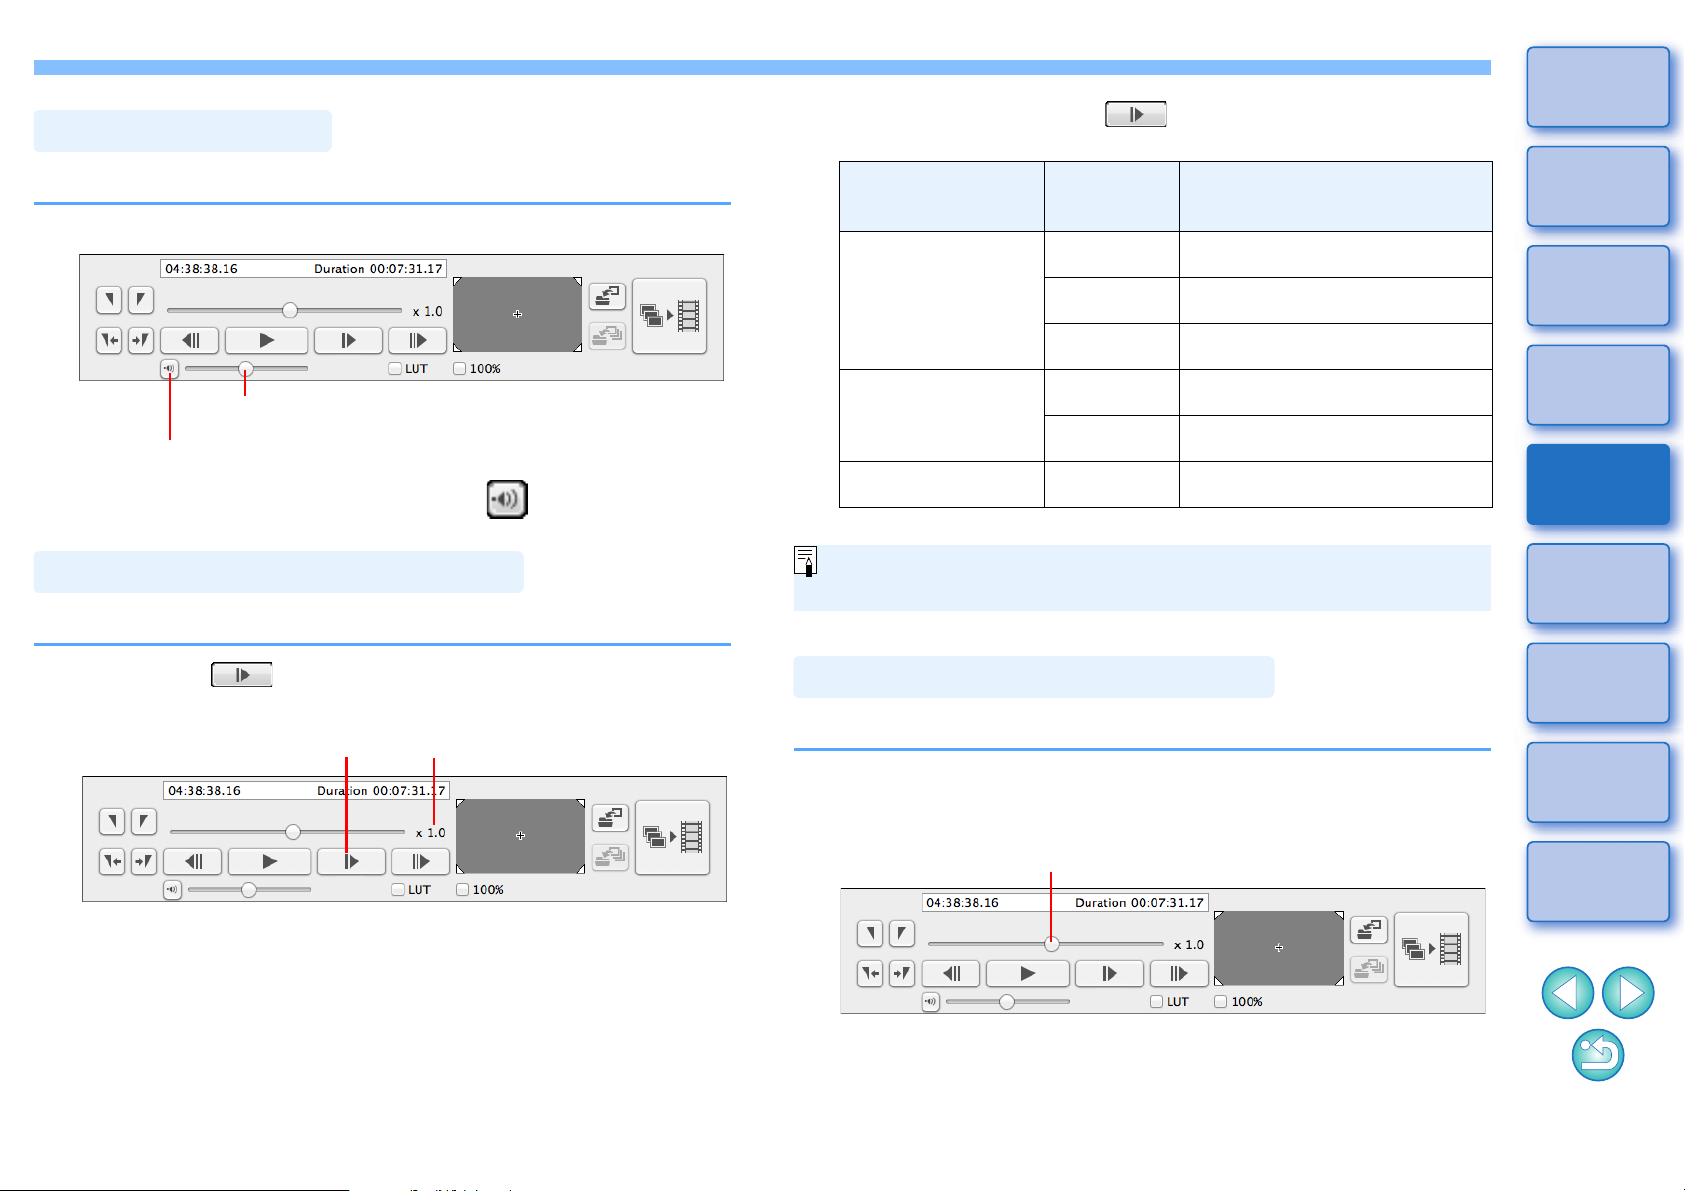
You can adjust volume during playback with the volume slider.
Adjusting Volume
Mute button
Volume slider
Changing the Playback Speed
Playback speed
adjustment button
Current
playback speed
Moving the Playback Position
Frame position slider
Drag the volume slider left or right.
● Each time you click the [ ] button, the playback speed
changes as follows.
Movie clip frame
rate
59.94p x1.0 59.94p
50p x1.0 50p
Playback
speed
x0.5 29.97p
x0.4 23.98p
x0.5 25p
Frame rate after changing
playback speed
Introduction
Contents
Preparation
Basic
Screen
● To temporarily turn audio off, click the [ ] (mute) button.
You can change the movie playback speed.
Click the [ ] button while a movie is played.
Other than above* x1.0 Movie clip frame rate
* You cannot click the playback speed adjustment button.
Audio is not played during slow playback (when playback speed is
x0.5 or x0.4).
You can move the playback position with the frame position slider.
Drag the frame position slider left or right while a clip
is played or stopped.
Playing Back
Confirming File
Information
Saving
Quitting EMU
Reference
8
Page 9

Introduction
Playing Back Movies Shot with Canon Log
Gamma set to [On]
Playing Back in Full Screen
Operations Using Keyboard
Without modification, movies shot with Canon Log gamma (p.2) set to
[On] will look dark and have low contrast. If you apply a look-up table
(LUT) and view the clip, you can check the clip with an image close to
normal display.
Checkmark the [LUT] checkbox.
1
● [LUT] is not available if movies were shot with Canon Log
gamma set to [Off].
Play back the selected movie.
2
● Perform the operations described in “Movie Clip Playback” (p.6).
➜The LUT is applied and the movie is played back.
You can check or uncheck the LUT checkbox with the <B> key on
the keyboard.
Play back a movie.
1
● Follow operations in “Movie Clip Playback” (p.6).
In the main window, select the [View] menu X [Full
2
Screen].
➜The movie played back is displayed in full screen.
● You can also double-click the preview area to display the movie
in full screen.
● To cancel full screen display, press the <Esc> key or double-click
the preview area.
You can use the keyboard for the following operations.
Keyboard Operation
<Space> Play/Stop
<> Previous frame
<> Next frame
<Home> Move to first frame
Contents
Preparation
Basic
Screen
Playing Back
Confirming File
Information
Saving
Quitting EMU
<End> Move to last frame
Reference
<B> Enable/Disable look-up table (LUT)
<L> Play
<K> Stop
<S> Adjust playback speed
<V> Switch display mode ([100% view]/[Fit to window])
9
Page 10

Introduction
Switching the Movie Display Size
[Fit to window] mode [100% view] mode
Enlarged position in guide area
You can apply either of [Fit to window] mode and [100% view] mode as
a method for displaying a movie in the preview area.
Select the [View] menu X [Fit to window]/[100%
view].
➜The image is displayed in the preview area with the selected
display mode.
● In [Fit to window] mode, the image is displayed completely within
the preview area.
● In [100% view] mode, the image is enlarged to 100% (actual
pixel size) and displayed in the preview area.
● Checkmark the [100%] checkbox in the control area to view in
[100% view] mode. Remove the checkmark from the [100%]
checkbox to view in [Fit to window] mode.
● To change the display position of an image in [100% view] mode,
drag the image in the preview area.
Contents
Preparation
Basic
Screen
Playing Back
Confirming File
Information
Saving
Quitting EMU
Reference
10
Page 11

Confirming the Movie File Information
You can display and confirm shooting information for movie clips.
Introduction
In the main window, select the [View] menu X [Clip
1
list...].
➜The [Clip list] dialog box appears.
● Note that this function is available after you select a folder in
which the movie files to be confirmed are saved. If no folder is
selected, follow steps 1 to 2 in “Movie Clip Playback” (p.6) to
select a folder.
In the [Clip list] dialog box, select a movie clip to
2
display its shooting information.
In the main window, select the [View] menu X
3
[Shooting Information...].
➜The shooting information is displayed in the [Shooting
Information] window.
Contents
Preparation
Basic
Screen
Playing Back
Confirming File
Information
Saving
Quitting EMU
Reference
11
Page 12

Saving Still Images
Still Image Capture Settings
Still images can be extracted and saved from the current movie clip.
First, complete the settings for how still images are saved from movies.
In the main window, select the [EOS MOVIE Utility]
1
menu
➜The [Still Image Capture Settings] dialog box appears.
On the [General] tab, complete the settings as
2
necessary.
X [Still Image Capture Settings].
● Under [Kind of file], select the desired file format.
Select [TIFF] to save images as uncompressed 8-bit RGB TIFFs.
By default, [JPEG] saves images at the highest setting in [Image
quality].
● When the file format specified in [Kind of file] under [Image
format] is set to [JPEG] and [Capture as-is when re-enco
ecessary] is checkmarked, still images will be extracted
not n
from movies without modifications for the following movies.
Faster processing will be achieved.
• 4K movies shot with Canon Log gamma set to [Off]
• 4K movies shot with Canon Log gamma set to [On] without
applying an LUT
● To specify the destination, click the [ ] button under [Folder
for Exported Files] and choose the location in the [Browse For
Folder] dialog box.
● To save still images in a new subfolder, checkmark
[Automatically Generate Subfolders]. This option prevents files
from being renamed if the destination folder already contains files
with the same name.
ding is
Introduction
Contents
Preparation
Basic
Screen
Playing Back
Confirming File
Information
Saving
Quitting EMU
Reference
12
Page 13

On the [File name] tab, complete the settings as
3
necessary and click the [OK] button.
➜The settings are now complete.
● To name still image files or edit existing names, checkmark
[Rename Files]. In [New file name], enter a name or change the
existing name. File names can be up to 30 characters. Note that
still image files cannot be renamed unless this option is
checkmarked. In such a case, the file name will be the same with
the original movie clip.
● To append a serial number to file names that indicates the
number of times still images have been captured from a movie
clip, checkmark [Include still image capture count]. In [Still image
capture count], enter the first serial number, in the range 0–
99999.
● To reset the serial number in [Still image capture count] when you
select another movie clip, checkmark [Reset when selected as
clip].
● To append the time code to the end of file names, select [Time
code] under [Image sequence settings]. To append a serial
number, select [Initial Value for Consecutive Numbers].
Introduction
Contents
Preparation
Basic
Screen
Playing Back
Confirming File
Information
Saving
Quitting EMU
Reference
13
Page 14

When you save still images, you can perform the following operation
Still Image Saving Controls
Set the In point for multiple still images
Set the Out point for multiple still images Save a still image
Jump to the frame at the In point for multiple still images
Jump to the frame at the Out point for multiple still images
In point marker (display only)
Out point marker (display only)
Save multiple
still images
Saving Individual Still Images
Save individual still image button
with buttons.
In the main window, select the [View] menu X
1
[Clip list].
➜The [Clip list] dialog box appears.
Select a movie clip in the [Clip list] dialog box.
2
Drag the frame position slider left or right to display
3
the frame to save.
Introduction
Contents
Preparation
Basic
Screen
Playing Back
Click the Save individual still image button.
4
➜A still image is saved following the settings in the [Still Image
Capture Settings] dialog box.
● You can also click this button during movie playback to save still
images. In this case, playback is paused as the current frame is
saved as a still image.
● To save still images with the LUT applied, checkmark [LUT].
● Focal length, shutter speed, ISO speed, and white balance in the
shooting information appended to the image are values when the
movie shooting started. However, the date and time when the still
image was actually shot will be calculated and appended as
shooting date and time.
Confirming File
Information
Saving
Quitting EMU
Reference
14
Page 15

By specifying a segment in the current movie clip, you can save all
Saving Multiple Still Images
In point button
In point marker
Out point button
Out point marker
frames within the segment as still images.
In the main window, select the [View] menu X
1
[Clip list].
➜The [Clip list] dialog box appears.
Select a movie clip in the [Clip list] dialog box.
2
Drag the frame position slider left or right to display
3
the starting frame, and then click the In point button
when a frame from which you want start saving
appears.
Drag the frame position slider left or right to display
4
the ending frame, and then click the Out point
button.
➜The Out point marker is now displayed, and the ending point for
still images to save is set.
● You can also click this button during movie playback to specify
the Out point.
● Once you have specified the Out point, you can jump to the
frame at the Out point by clicking the [ ] (move to OUT point)
button. If no Out point has been set, clicking this button jumps to
the last frame. You can also click the [ ] (move to OUT point)
button during movie playback.
● The maximum range between In and Out points is one hour.
Introduction
Contents
Preparation
Basic
Screen
Playing Back
Confirming File
Information
Saving
➜The In point marker is now displayed, and the starting point for
still images to save is set.
● You can also click this button during movie playback to specify
the In point.
● Once you have specified the In point, you can jump to the frame
at the In point by clicking the [ ] (move to IN point) button. If
no In point has been set, clicking this button jumps to the first
frame. You can also click the [ ] (move to IN point) button
during movie playback.
Quitting EMU
Reference
15
Page 16

Click the Save multiple still images button.
Save multiple still
images button
5
Introduction
Contents
Preparation
➜Still images are saved following the settings in the [Still Image
Capture Settings] dialog box. All frames between the In and Out
points are saved as still images.
● You can also click this button during movie playback to save still
images. In this case, playback is paused during capture.
● To save still images with the LUT applied, checkmark [LUT].
● Focal length, shutter speed, ISO speed, and white balance in the
shooting information appended to the image are values when the
movie shooting started. However, the date and time when the still
image was actually shot will be calculated and appended as
shooting date and time.
Basic
Screen
Playing Back
Confirming File
Information
Saving
Quitting EMU
Reference
16
Page 17

Merging and Saving Movie Files
Checking the Movie Files in a Movie Clip
Movie file names are displayed
in several lines for a movie clip
made up of split movie files.
When you shoot movies with the EOS-1D C, the movie file will be split
by 4 GB and multiple movie files will be created automatically, even for
the single shooting. You can merge these multiple files and save them
as a single file with this function.
In EMU, the split movie files will be displayed as a single movie clip. You
can check the structure of a movie clip and see the movie files that
consist the movie clip in the procedures as below.
In the main window, select the [View] menu X [Clip
1
list...].
➜The [Clip list] dialog box appears.
● To use this function, you must first select the folder in which the
movie clips to check are saved. If a folder is not selected, follow
steps 1 to 2 of “Movie Clip Playback” (p.6) to select a folder.
In the [Clip list] dialog box, select the movie clip
2
whose structure you want to check, then click while
holding down the <control> key, and select [Show
structure of the clip...] from the menu that appears.
Introduction
Contents
Preparation
Basic
Screen
Playing Back
Confirming File
Information
Saving
➜The [Structure of Clip] dialog box appears.
Quitting EMU
Reference
17
Page 18

You can merge multiple split movie files composing a movie clip and
Merging Split Movie Files and Saving as a
Single File
Merge split files button
save them as a single file. The original movie files are kept as they are
in the folder they were originally saved.
Merging All the Split Movie Files in the Folder
and Saving as a Single File
Click the Merge split files button in the main window.
1
➜The [Merge Files] dialog box appears.
● In the main window, you can also select the [Tools] menu X
[Merge split files...] to display the [Merge Files] dialog box.
Click the [ ] button for [Folder for Files to be
2
Merged] and then select the folder in which the
movie files to be merged are saved.
● All the movie files saved in the selected folder will be merged.
Introduction
Contents
Preparation
Basic
Screen
Playing Back
Confirming File
Information
Saving
Quitting EMU
Reference
18
Page 19

Movie files shot on a camera are recorded on the memory card with
㻌
㻌
DCIM 100CANON
101CANON
102CANON
MVI_xxxx.MOV
MVI_xxxx.MOV
MVI_xxxx.MOV
MVI_xxxx.MOV
MVI_xxxx.MOV
MVI_xxxx.MOV
MVI_xxxx.MOV
MVI_xxxx.MOV
MVI_xxxx.MOV
MVI_xxxx.MOV
MVI_xxxx.MOV
MVI_xxxx.MOV
the folder structure shown below.
Click the [ ] button for [Folder for Exported Files]
3
and then select the folder for saving the merged
movie file.
Introduction
Contents
Preparation
With this software, if the above folder structure is not maintained, it
may not be possible to merge the split movie files properly. When
performing "Merge all the split movie files in the folder and save as a
single file" operation, make sure the above folder structure is
maintained and the DCIM folder at the upper layer of the folder
structure is selected. Even when the folder structure is maintained,
be aware that it may not be possible to merge the movie files
properly if the name of the selected folder, originally [DCIM], has
been changed to another name.
Click the [Start] button.
4
➜Merging and saving starts.
● A message appears when merging and saving are complete.
● If you checkmark [Automatically Generate Subfolders], a
subfolder is created in the folder for the merged movie file
selected in step 3, then the merged movie file is saved there. A
file can be saved without changing its file name even if another
file with the same file name is already in the folder.
● If you checkmark [Rename Files], you can change the file name
of the merged movie file when saving it.
● To create file names with consecutive numbering, enter the initial
value in the [Initial Value for Consecutive Numbers] box. You can
enter an initial value that is up to 5 digits. Checkmark [Remember
Consecutive Numbering] to allow consecutive numbering to
continue even after closing the [Merge Files] dialog box and
opening it again to merge and save movie files.
● If you checkmark [Include Unsplit Clips], movie files not split but
saved in the folder selected in step 2 are copied to the folder for
saving the merged file together.
Basic
Screen
Playing Back
Confirming File
Information
Saving
Quitting EMU
Reference
19
Page 20

In the main window, select the [View] menu X [Clip
Merging Split Movie Files for a Single Movie
Clip and Saving as a Single File
1
list...].
➜The [Clip list] dialog box appears.
● Note that this function is available after you select a folder in
which the movie files to be merged are saved. If no folder is
selected, follow steps 1 to 2 of “Movie Clip Playback” (p.6) to
select a folder.
In the [Clip list] dialog box, select the movie clip to
2
be merged, then click while holding down the
<control> key, and select [Merge split files...] from
the menu that appears.
➜The [Merge Files] dialog box appears.
Click the [ ] button for [Folder for Exported Files]
3
and then select the folder for saving the merged
movie file.
Introduction
Contents
Preparation
Basic
Screen
Playing Back
Confirming File
Information
Saving
Click the [Start] button.
4
➜Merging and saving starts.
● A message appears when merging and saving are complete.
Quitting EMU
Reference
20
Page 21

Quitting EMU
Troubleshooting
In the main window, select the [EOS MOVIE Utility]
menu
➜EMU quits.
X [Quit EOS MOVIE Utility].
Reference
If EMU is not operating correctly, refer to the information below.
EMU does not work
Introduction
Contents
● Even if your computer has the RAM capacity (memory) described in
the system requirements (p.2), if other applications are running at the
same time as EMU, you may not have sufficient RAM (memory). Quit
applications other than EMU.
Preparation
Basic
Screen
Playing Back
Confirming File
Information
Saving
Quitting EMU
Reference
21
Page 22

Introduction
Error Messages
If an error message appears, refer to the information below.
Message Cause and solution
Cannot create a folder
at the selected
destination.
Please enter
consecutive numbers.
The memory card specified for the save
destination is write-protected. Insert a
writable memory card.
No consecutive numbering is entered.
Enter an initial value for consecutive
numbering when there are several movie
clips with movie files to be merged.
The size of the file you
are saving is not
supported on the
destination file system.
Sufficient consecutive
numbers are not
provided for the files.
EOS MOVIE Utility has
already started by other
user.
The file system specified for the save
destination does not support the size of the
file being saved. Change the save
destination.
Consecutive numbering for file names
exceeds 99999. Change the value entered
for numbering or the file save destination.
Log into the user account in Macintosh in
which EOS MOVIE Utility is running, quit
EOS MOVIE Utility, and start it up again.
The merge process has
been failed.
Check that there is a save destination
folder. If the save destination folder is on an
external storage device, check that it is
connected to the computer correctly.
Contents
Preparation
Basic
Screen
Playing Back
Confirming File
Information
Saving
4 GB or larger files may
not be supported on the
file system of output
destination. Do you
want to continue?
Could not merge
because there was not
enough available space.
The merged movie file may not be saved to
the drive where the save destination folder
is located. Check that the file system
specified for the save destination drive
supports files of 4 GB or larger.
There is insufficient space on the drive
where the save destination folder is
located. Create enough space or change
the save destination, and then repeat the
merge process.
Quitting EMU
Reference
22
Page 23

Introduction
Keyboard Controls
Key
Space Play/Stop
Next frame
Previous frame
Shift+ Jump to Out point for multiple still images
Shift+ Jump to In point for multiple still images
Home Move to first frame
End Move to last frame
B Enable/Disable look-up table [LUT]
L Play
K Stop
S Adjust playback speed
V Switch display size
F Full screen display
Contents
Preparation
Basic
Screen
Playing Back
Confirming File
Information
Saving
I Set the In point to save multiple still images
O Set the Out point to save multiple still images
Command+S Save a still image
Command+T Save multiple still images
D Merge all split files in folder and save
Quitting EMU
Reference
23
Page 24

● Quit any applications before uninstalling the software.
Uninstalling the Software
You cannot retrieve deleted data once you have emptied the Trash,
so be particularly careful when deleting data.
● Log into the account used when installation was performed.
● When you have moved the folders and the software to be deleted to
the Trash, select the [Finder] menu X [Empty Trash...] and empty the
Trash. You cannot reinstall the software until you have emptied the
Trash.
Introduction
Contents
Preparation
Display the folder in which the software is saved.
1
● Open the [Canon Utilities] folder.
Drag the folder for the software to be uninstalled to
2
the Trash.
Select [Finder] menu on the desktop X [Empty
3
Trash...].
➜The software is deleted.
● When uninstallation ends, restart your computer.
Basic
Screen
Playing Back
Confirming File
Information
Saving
Quitting EMU
Reference
24
Page 25

About This Instruction Manual
● It is prohibited to reproduce, in whole or part, the contents of this
Instruction Manual without permission.
● Canon may change without notice the software specifications and
contents of this Instruction Manual.
● The software screens and displays printed in this Instruction Manual
may differ slightly from the actual software.
● The content of this Instruction Manual has been reviewed thoroughly.
However, if you should notice any errors or omissions, please contact
a Canon Service Center.
● Please note that irrespective of the above-mentioned, Canon does
not take responsibility for the outcome of the operation of the
software.
Trademarks
● Macintosh and Mac OS are trademarks of Apple Inc., registered in the
U.S. and other countries.
● All other trademarks are the property of their respective owners.
Introduction
Contents
Preparation
Basic
Screen
Playing Back
Confirming File
Information
Saving
Quitting EMU
Reference
25
 Loading...