

Page 1
00-QSG_E_Cov.fm Page 1 Monday, April 7, 2003 2:07 PM
CANON INC.
30-2, Shimomaruko 3-chome, Ohta-ku
Tokyo 146-8501, Japan
CANON U.S.A., INC.
Digital Home and Personal Systems Division
2995 Redhill Avenue, Costa Mesa, CA 92626, U.S.A.
Customer Care Center
http://www.usa.canon.com/consumer
CANON CANADA INC.
6390 Dixie Road, Mississauga, Ontario L5T 1P7, Canada
1-800-OK CANON
http://www.canon.ca
CANON LATIN AMERICA, INC.
703 Waterford Way, Suite 400
Miami, Florida 33126, U.S.A.
CANON MEXICANA, S. de R.L. de C.V.
Anillo Periferico Sur No. 4124, Torre Zafiro (II) Colonia
Ex-Rancho de Anzaldo, Piso 5 y 6, Mexico D.F.
Tel. (525) 5490-2000
CANON PANAMA, S.A.
Apartado 7022, Panama 5, Rep. de Panama
Tel. (507) 279-8900
CANON CHILE, S.A.
Ave. Manquehue Norte #1337, Piso 3, Casilla 187-9
Santiago, Chile
Tel. (562) 366-6600
CANON ARGENTINA, S.A.
Ave. Corrientes 420 (1043)
Buenos Aires, Argentina
Tel. (5411) 432-59800
CANON EUROPA N.V.
P.O. Box 2262 1180 EG Amstelveen, The Netherlands
CANON (UK) LTD.
Woodhatch, Reigate, Surrey RH2 8BF, United Kingdom
For technical support, please contact Canon Helpdesk.
Helpdesk:
P.O. Box 431, Wallington, Surrey SM6 0XU
Tel: (08705) 143 723 (Calls may be recorded)
Fax: (08705) 143 340
For sales enquiries: (0121) 666-6262
CANON COMMUNICATION & IMAGE FRANCE S.A.
102 Avenue du Général de Gaulle
92257 LA GARENNE COLOMBES CEDEX, France
Tél: 01.41.30.15.15 Fax: 01.41.30.15.05
http://www.canon.fr
CANON DEUTSCHLAND GmbH
Postfach 528, 47705 Krefeld, Germany
CANON- Hotline-Service
Customer Support: (0 21 51) 349-555
Info-Desk: (0 21 51) 349-566
Telefax: (0 21 51) 349-588
CANON ITALIA S.p.A
Palazzo L, Strada 6, 20089 Milanofiori-Rozzano (MI), Italy
Tel: 02/8248.1 Fax: 02/8248.4600
Pronto Canon 02/8249.2000
http://www.canon.it
CANON NEDERLAND N.V.
Neptunusstraat 1, 2132 JA Hoofddorp, The Netherlands
Tel: 023-5 670 123 Fax: 023-5 670 124
Helpdesk: 023-5 681 681
http://www.canon.nl
CANON BELGIUM N.V./S.A.
Bessenveldstraat 7, 1831 Diegem, Belgium
Tel: 02 7220411 Fax: 02 7213274
Helpdesk: 02 7220404
http://www.canon.be
CANON GmbH
Zetschegasse 11, 1230 Wien, Austria
http://www.canon.at
CANON (SCHWEIZ) A.G.
Industriestrasse 12, 8305 Dietlikon, Switzerland
Tel: (01) 835 61 61 Fax: (01) 835 68 85
157 30 20
Hotline:
http://www.canon.ch
: 1-757-413-2848
CANON ESPAÑA S.A.
C/Joaquin Costa No 41, 28002, Madrid, Spain
Help Desk:
Tel.: 91-538 4500 Fax.: 91-411 4176
CANON DANMARK
Vasekær 12, DK-2730 Herlev, Denmark
Hotline:
http://www.canon.dk
CANON NORGE AS
Hallagerbakken 110, Boks 33, Holmlia, 1210 Oslo 12, Norway
Tlf: 2262 9321 Faks: 2262 0615
http://www.canon.no
CANON SVENSKA AB
Gustav III:s Boulevard 26, S-169 88 Solna, Sweden
Support-Under garantitiden:
Support-Efter garantitiden:
E-post support: anvandar.klubben@canon.se
http://www.canon.se
CANON OY AB
Kornetintie, 3, 00380 Helsinki, Finland
Puhelin: 010 54420 Fax: 010 544 4571
Helpdesk:
Helpdesk:
Sähköposti: helpdesk@canon.fi
Internet: www.canon.fi
CANON SINGAPORE PTE. LTD.
79 Anson Road #09-01/06, Singapore 079906
http://www.canon-asia.com
CANON MARKETING SERVICES PTE. LTD.
No. 1, Jalan Kilang Timor, #09-00 Pacific Tech Centre, Singapore, 159303
Tel: 65-7998888, Fax: 65-2736786
Hotline:
http://www.canon.com.sg
CANON MARKETING (MALAYSIA) SDN. BHD.
Block D, Peremba Square
Saujana Resort, Section U2, 40150 Shah Alam, Selangor Darul Ehsan
Malaysia
Tel: 603-7446000, Fax: 603-7446048
Helpdesk:
Enquiry: print&scan@canon.com.my
http://www.canon.com.my
CANON MARKETING (THAILAND) CO. LTD.
179/34-45 Bangkok City Tower, 9th-10th Floor
South Sathorn Road, Thungmahamek
Sathorn, Bangkok 10120, Thailand
Tel: 662-3449999, Fax: 662-3449968
http://www.canon.co.th
CANON MARKETING (PHILIPPINES) INC.
Marvin Plaza Building, 2153 Don Chino Roces Ave,
Makati City, Metro Manila, Philippines
Tel: 632-8126047, Fax: 632-8120067/8109797
CANON INDIA LTD.
Neela Gagan, Mandi Road, Mehrauli, New Delhi-110030, India
Tel: 91-11-6806572, Fax: 91-11-6807180
CANON HONGKONG CO., LTD.
9/F, The Hong Kong Club Building 3A, Chater Road, Central, Hong Kong
TEL: (852) 2739 0802 FAX: (852) 2739 6428
CANON AUSTRALIA PTY. LTD.
1 Thomas Holt Drive, North Ryde, Sydney N.S.W. 2113, Australia
Info-Line: (02) 9805 2864
CANON NEW ZEALAND LTD.
Fred Thomas Drive, Takapuna, P.O. Box 33-336, Auckland, New Zealand
Info-Line: (09)489 0470
ADOBE SYSTEMS INCORPORATED
http://www.adobe.com
ARCSOFT, INC.
http://www.arcsoft.com
SCANSOFT, INC.
http://www.scansoft.com
906.301255
44 88 26 66
Tel. 08-744 86 20
Tel. 0900-20 30 555
0600 0 22606 (9,95 mk/min+pvm)
0600 0 22666 (enint. 40 mk/puhelu+pvm)
65-3342726
603-7446008/9
Quick Start Guide
Quick Start Guide
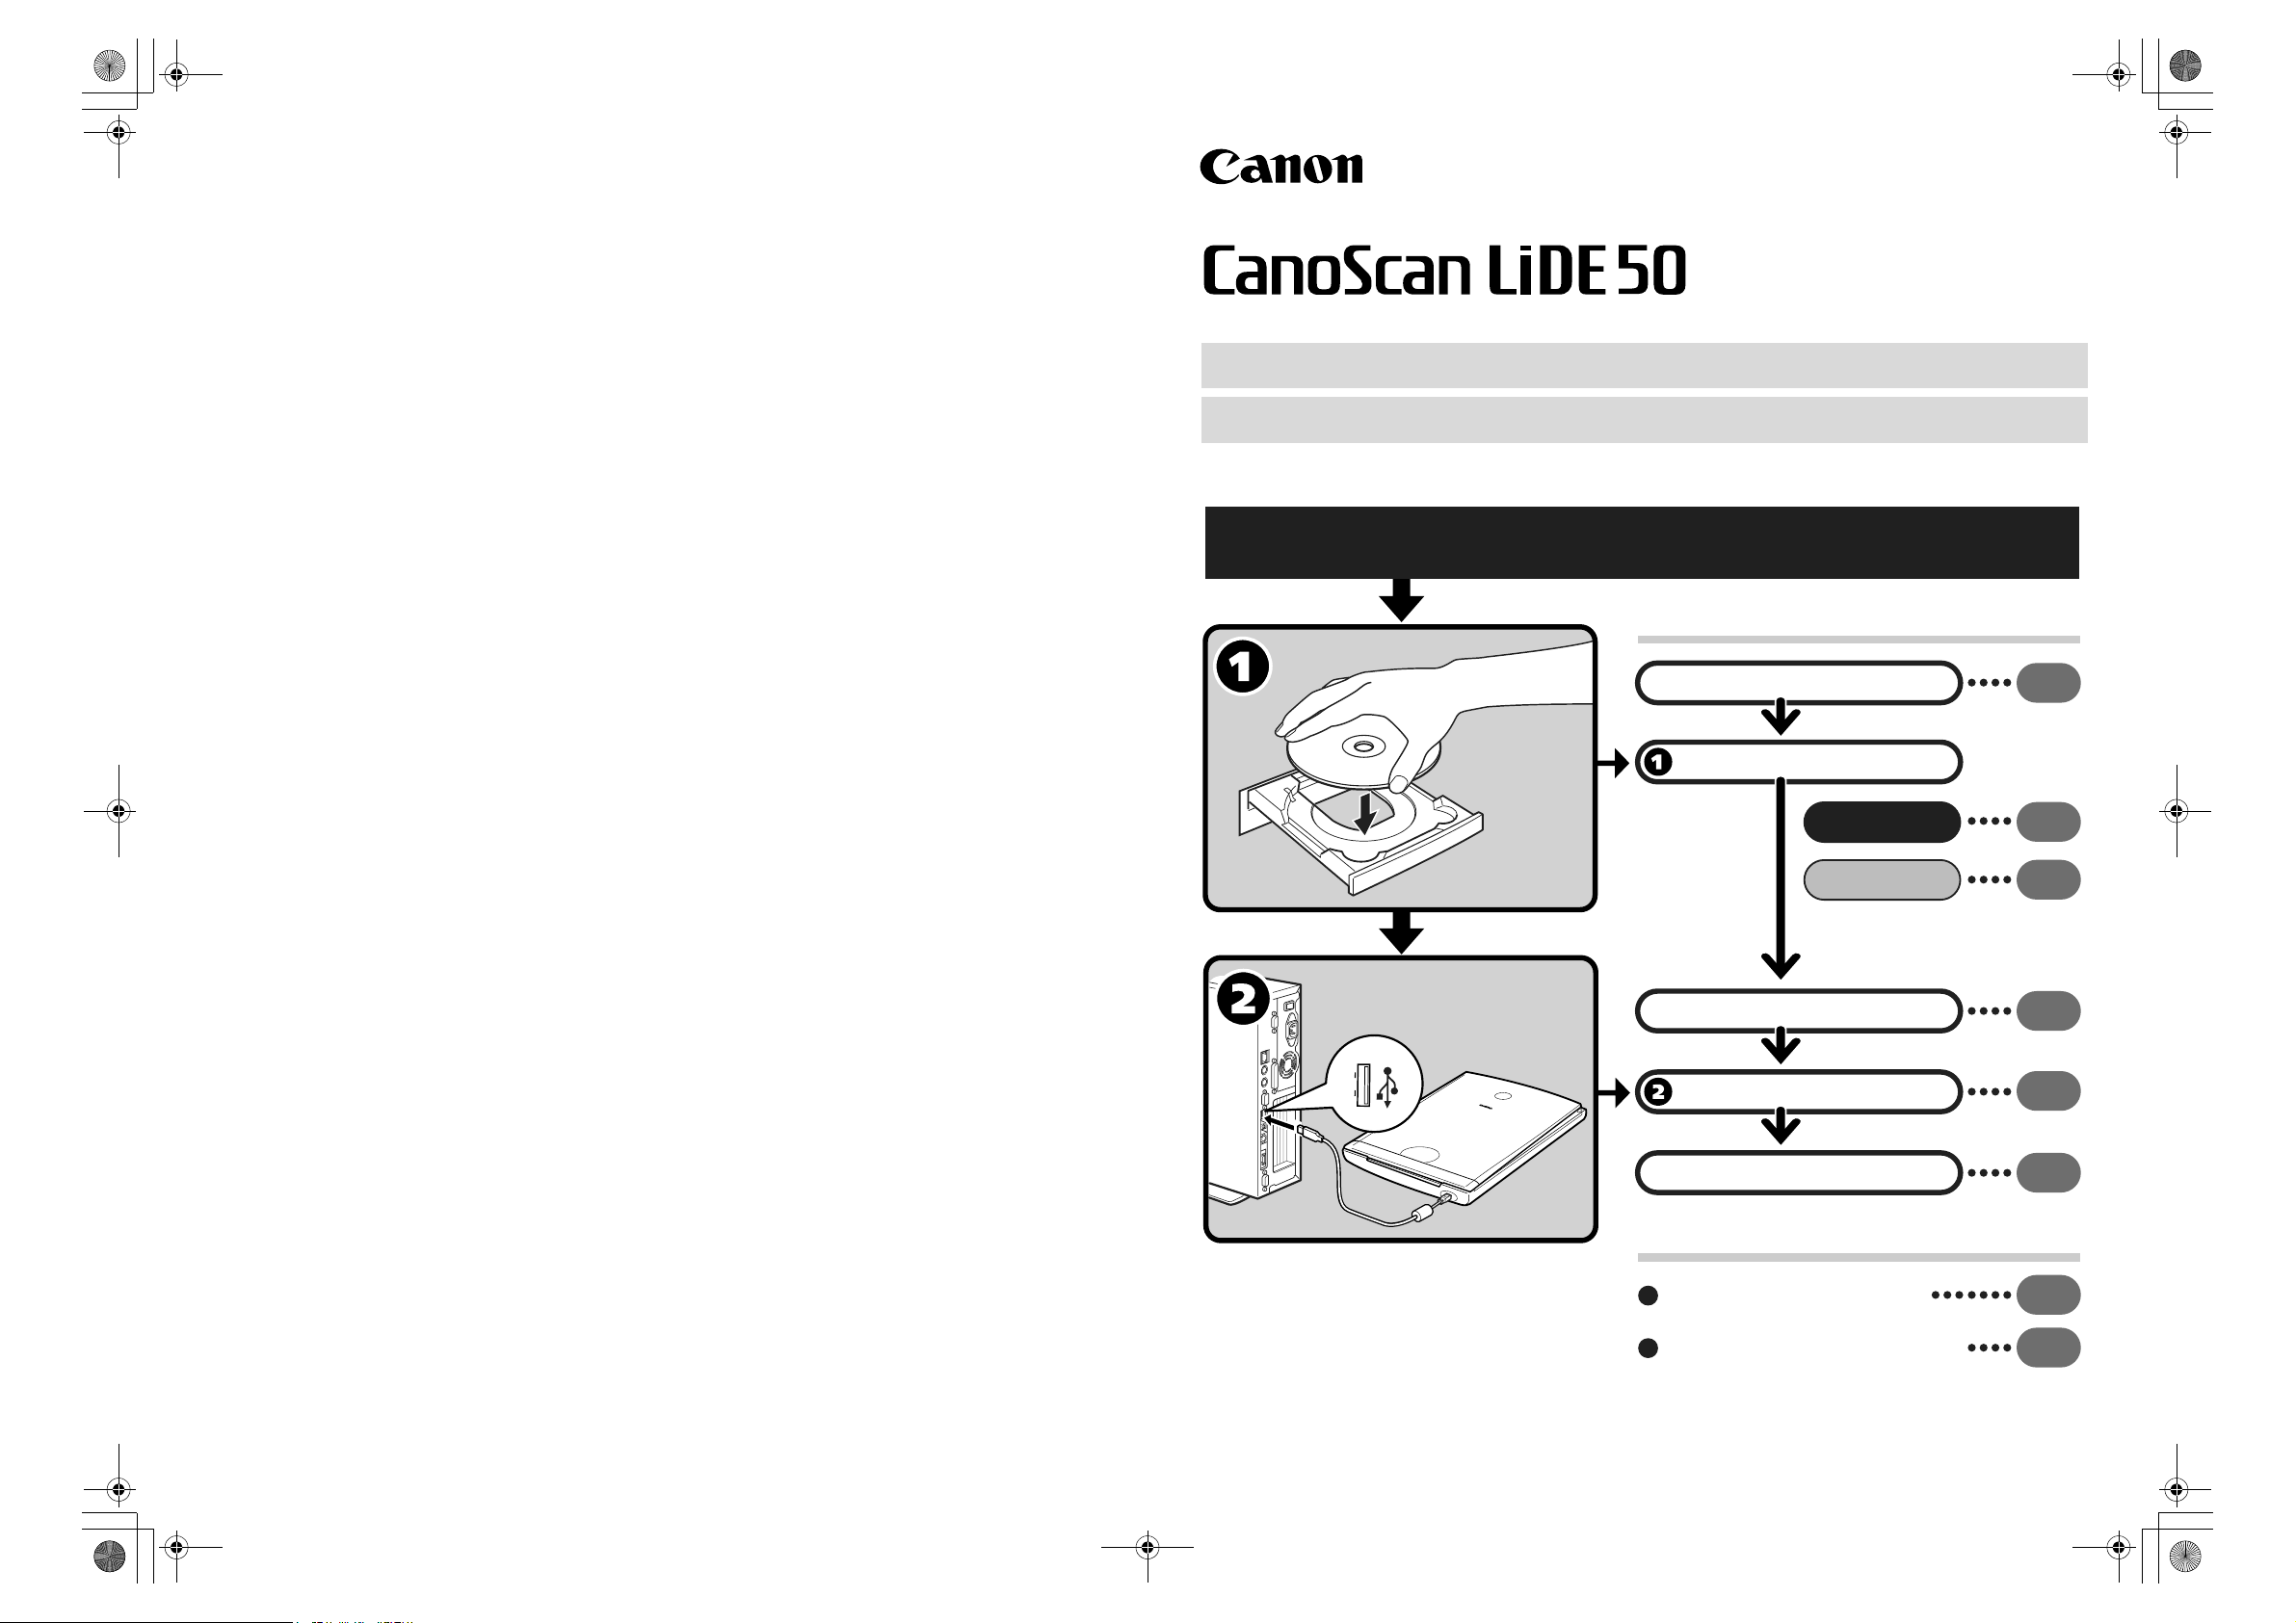
Be sure to install the software programs before connecting the scanner
to the computer!
Setup and Scanning
Check the Package Contents
Install the Software
Windows
Macintosh
Unlock the Scanning Unit
Connect the Scanner
Try Scanning
p.2
p.3
p.4
p.5
p.6
p.7
Try the Additional Features
Using the Scanner Buttons
Using the Scanner in the Upright Position
p.10
p.11
I-IE-068A ©CANON INC. 2002 PRINTED IN CHINA
Page 2
00-QSG_E_Cov.fm Page 2 Monday, April 7, 2003 2:07 PM
Color Image Scanner Models F916900: (CanoScan LiDE 50)
This device complies with Part 15 of the FCC Rules. Operation is subject to the following two conditions: (1) This device may not
cause harmful interference, and (2) this device must accept any interference received, including interference that may cause
undesired operation.
Note: This equipment has been tested and found to comply with the limits for class B digital device, pursuant to Part 15 of the FCC
Rules. These limits are designed to provide reasonable protection against harmful interference in a residential installation. This
equipment generates, uses and can radiate radio frequency energy and, if not installed and used in accordance with the
instructions, may cause harmful interference to radio communications. However, there is no guarantee that interference will not
occur in a particular installation.If this equipment does cause harmful interference to radio or television reception, which can be
determined by turning the equipment off and on, the user is encouraged to try to correct the interference by one or more of the
following measures:
• Reorient or relocate the receiving antenna.
• Increase the separation between the equipment and receiver.
• Connect the equipment into an outlet on a circuit different from that to which the receiver is connected.
• Consult the dealer or an experienced radio/TV technician for help.
Use of shielded cable with the ferrite core provided with the scanner is required to comply with Class B limits Subpart B of Part 15
of the FCC rules.
Do not make any changes or modifications to the equipment unless otherwise specified in the manual. If such changes or
modifications should be made, you could be required to stop operation of the equipment.
Canon U.S.A. Inc.
One Canon Plaza, Lake Success, NY 11042, U.S.A
Tel No.(516)-328-5600
The socket-outlet shall be installed near the equipment and shall be easily accessible.
Use of a shielded cable with the ferrite core(s) provided with the scanner is necessary to comply with the technical
requirements of the EMC Directive.
Warning
When you use this product, you should pay attention to the following legal issues:
• Scanning of certain documents, such as bank notes (bank bills), government bonds and public certificates, may be prohibited by
law and may result in criminal and/or civil liability.
• You may be required under law to obtain authorization from a person possessing copyrights or other legal rights to the item
being scanned.
If you are uncertain of the legality of scanning any particular item, you should consult your legal adviser in advance.
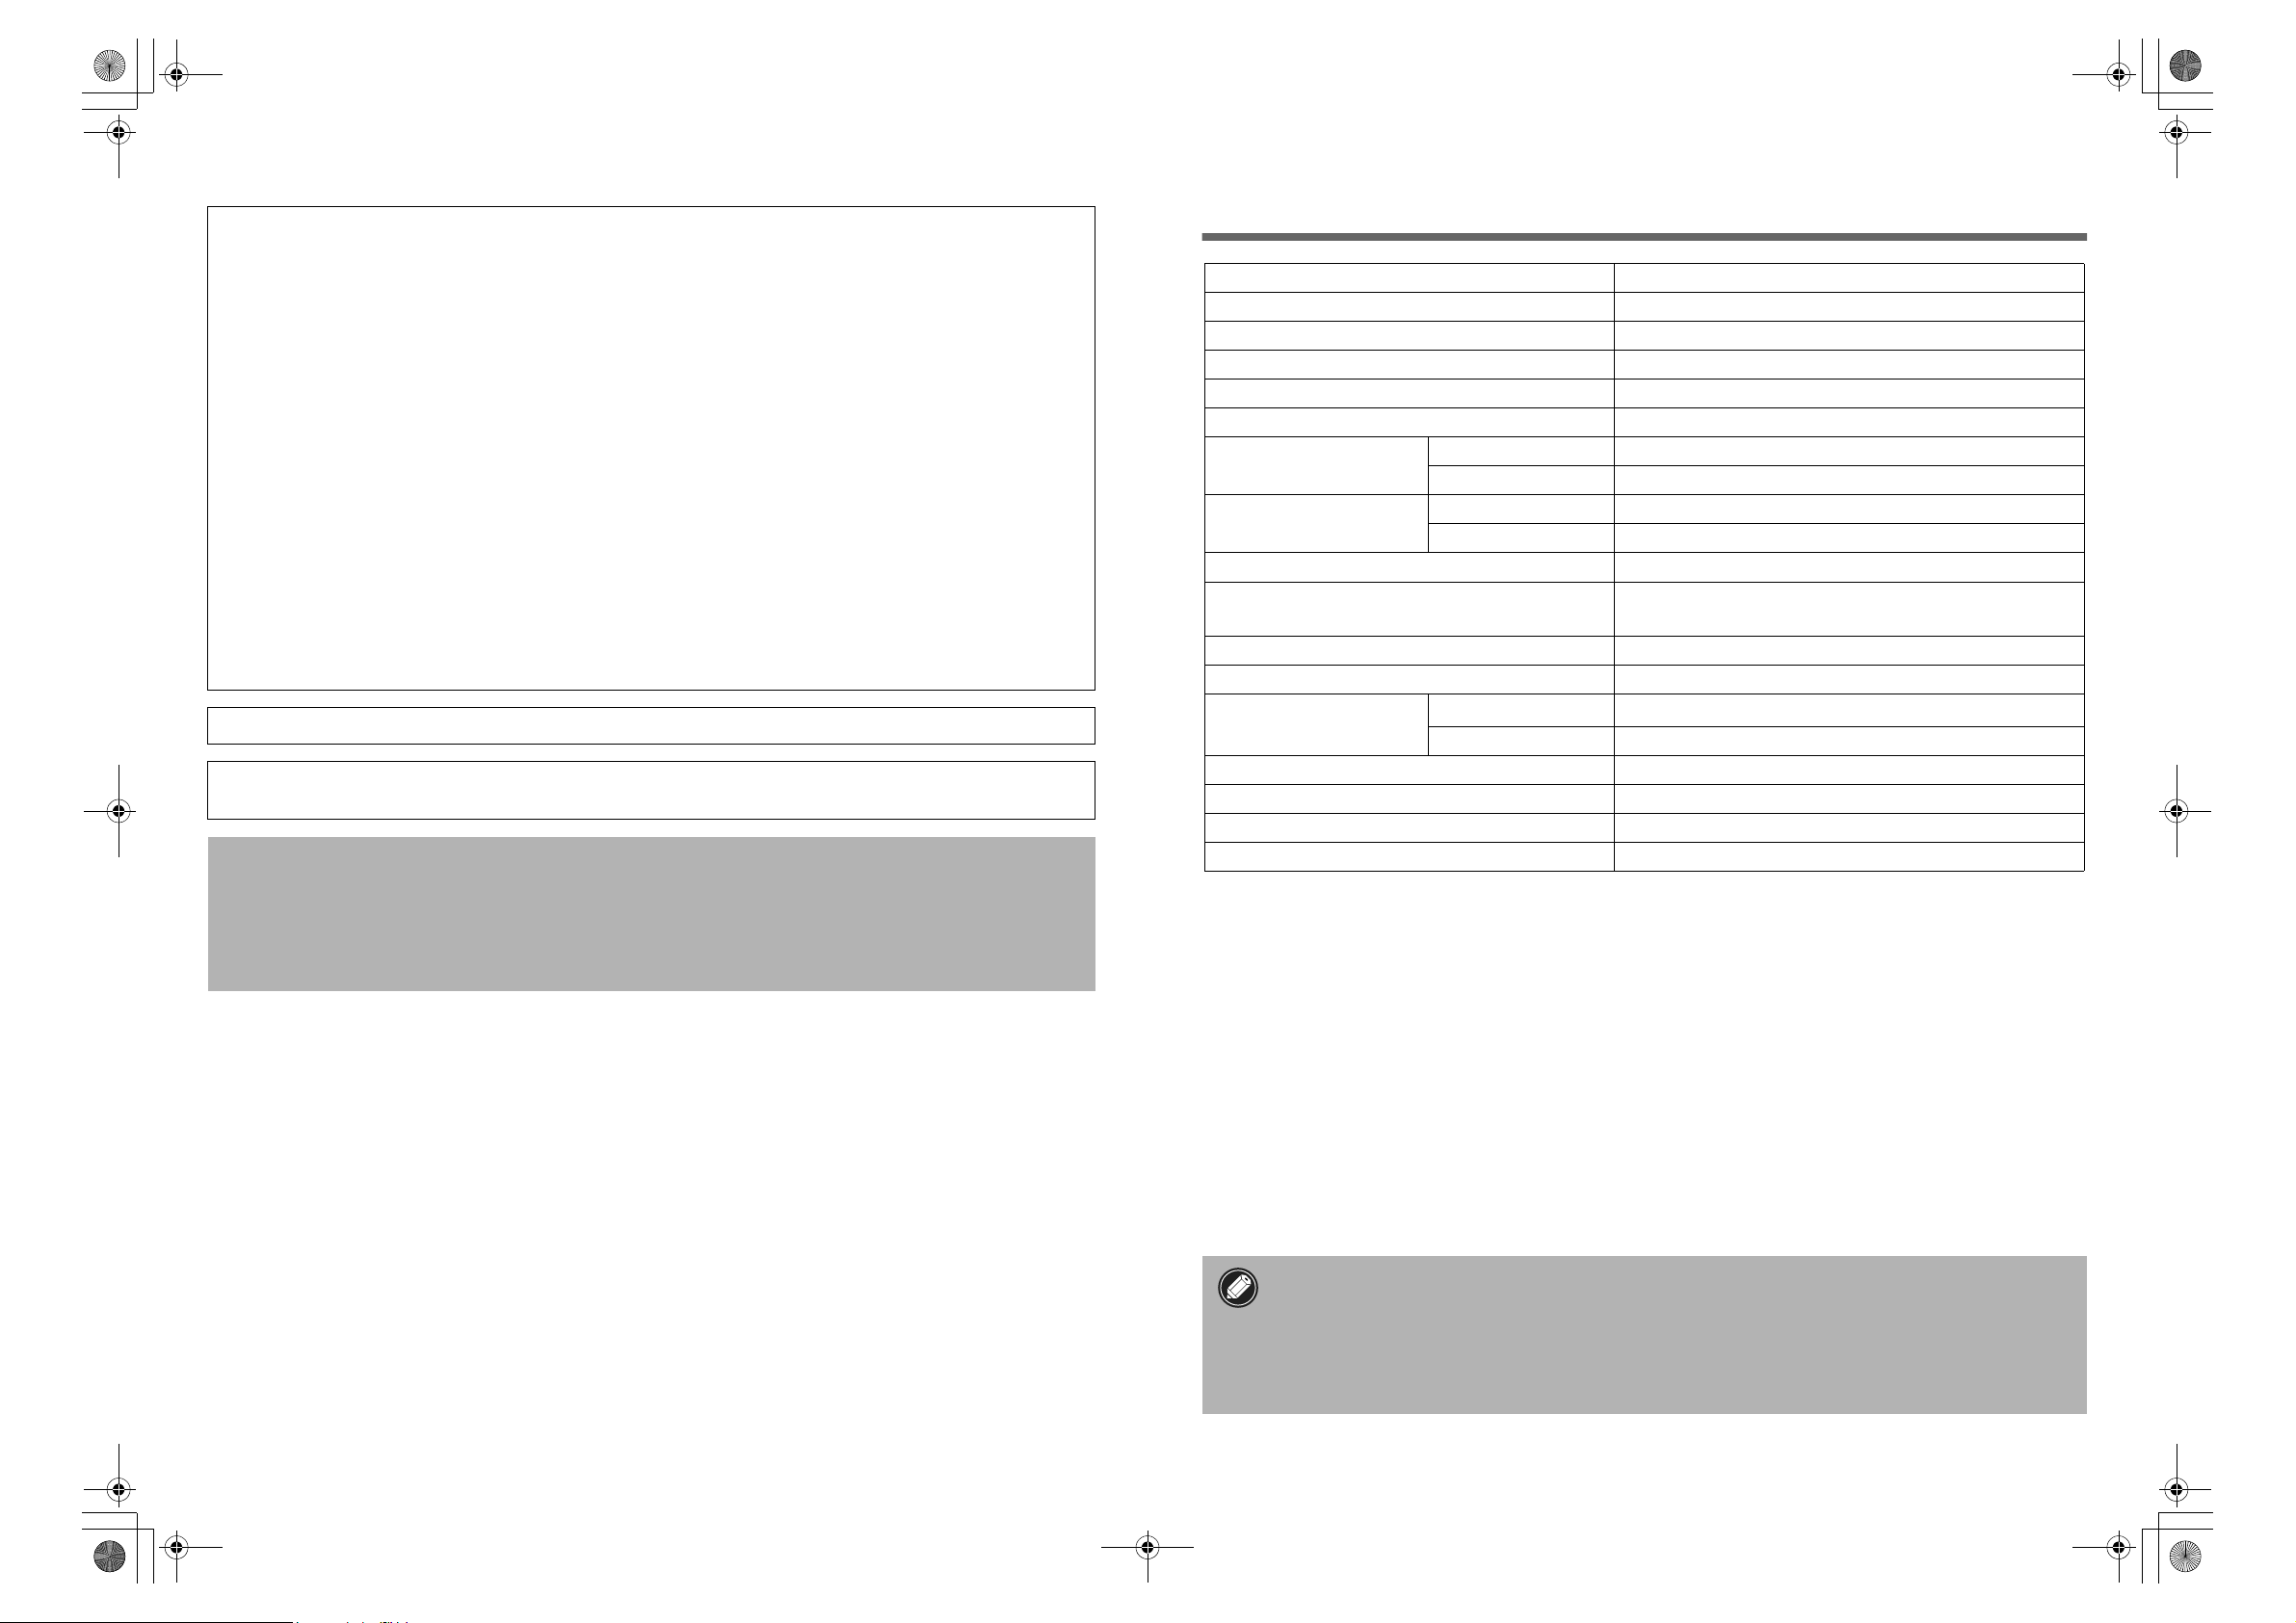
Specifications
Scanner Type
Scanning Element
Light Source
Optical Resolution
Selectable Resolution
Scanning Bit Depth
Scanning Speed
*1
(Photo or Document)
Preview Speed
*2
Color
Grayscale
Color
Grayscale, B&W
16 bit input / 16 bit or 8 bit output for each color (RGB)
6.4 msec./line (600 dpi), 12.7 msec./line (1200 dpi)
3.1 msec./line (600 dpi), 4.2 msec./line (1200 dpi)
Interface
Maximum Document Size
Scanner Buttons
Operating Range
Te m p e r at u r e
Humidity
10% to 90% RH (without condensation formation)
Power Requirements
Power Consumption
In operation: 2.5 watts maximum, Stand-by: 1.5 watts
Maximum Exterior Dimensions
Weight
*1
USB 2.0 Hi-Speed mode. Transfer time to computer is not included.
*2
Calibration processing time is not included.
• Specifications are subject to change without notice.
25 - 9600 dpi (ScanGear CS)
USB 2.0 Full Speed (USB 1.1 equivalent)
A4/Letter: 216 x 297 mm (8.5 x 11.7 in.)
4 buttons: COPY, SCAN, FILE, E-MAIL
258 x 374 x 38 mm (10.1 x 14.7 x 1.5 in.)
Approximately 1.8 kg (4.0 lbs.)
CanoScan LiDE 50
Flatbed
CIS (Contact Image Sensor)
3-color (RGB) LED
1200 x 2400 dpi
16 bit input / 8 bit output
Approximately 9 sec.
USB 2.0 Hi-Speed,
°
5
C to 35°C (41°F to 95°F)
Supplied via USB port
• CanoScan and ScanGear are trademarks of Canon Inc.
• Adobe
• Microsoft and Windows are registered trademarks of Microsoft Corporation in the U.S. and other countries.
• Macintosh, Power Macintosh and Mac OS are trademarks of Apple Computer, Inc., registered in the U.S. and other countries.
• ScanSoft and OmniPage are trademarks of ScanSoft, Inc.
• Other names and products not mentioned above may be trademarks or registered trademarks of their respective companies.
In this guide, Windows XP screen shots are used to illustrate explanations common to all operating systems.
®
, Acrobat® and Photoshop® are trademarks of Adobe Systems Incorporated.
• Before you upgrade to Windows XP from Windows 98/Me/2000, you must uninstall
ScanGear CS and CanoScan Toolbox using the “Uninstall the Software” menu of the
CanoScan Setup Utility CD-ROM. The scanner may not work if you upgrade to Windows
XP with these programs still installed. After upgrading to Windows XP, reinstall
ScanGear CS and CanoScan Toolbox according to the steps on page 3. For details, please
read the “Troubleshooting” section of the Scanning Guide (HTML format manual).
Page 3
00-QSG_E_MAIN.fm Page 1 Monday, April 7, 2003 2:08 PM
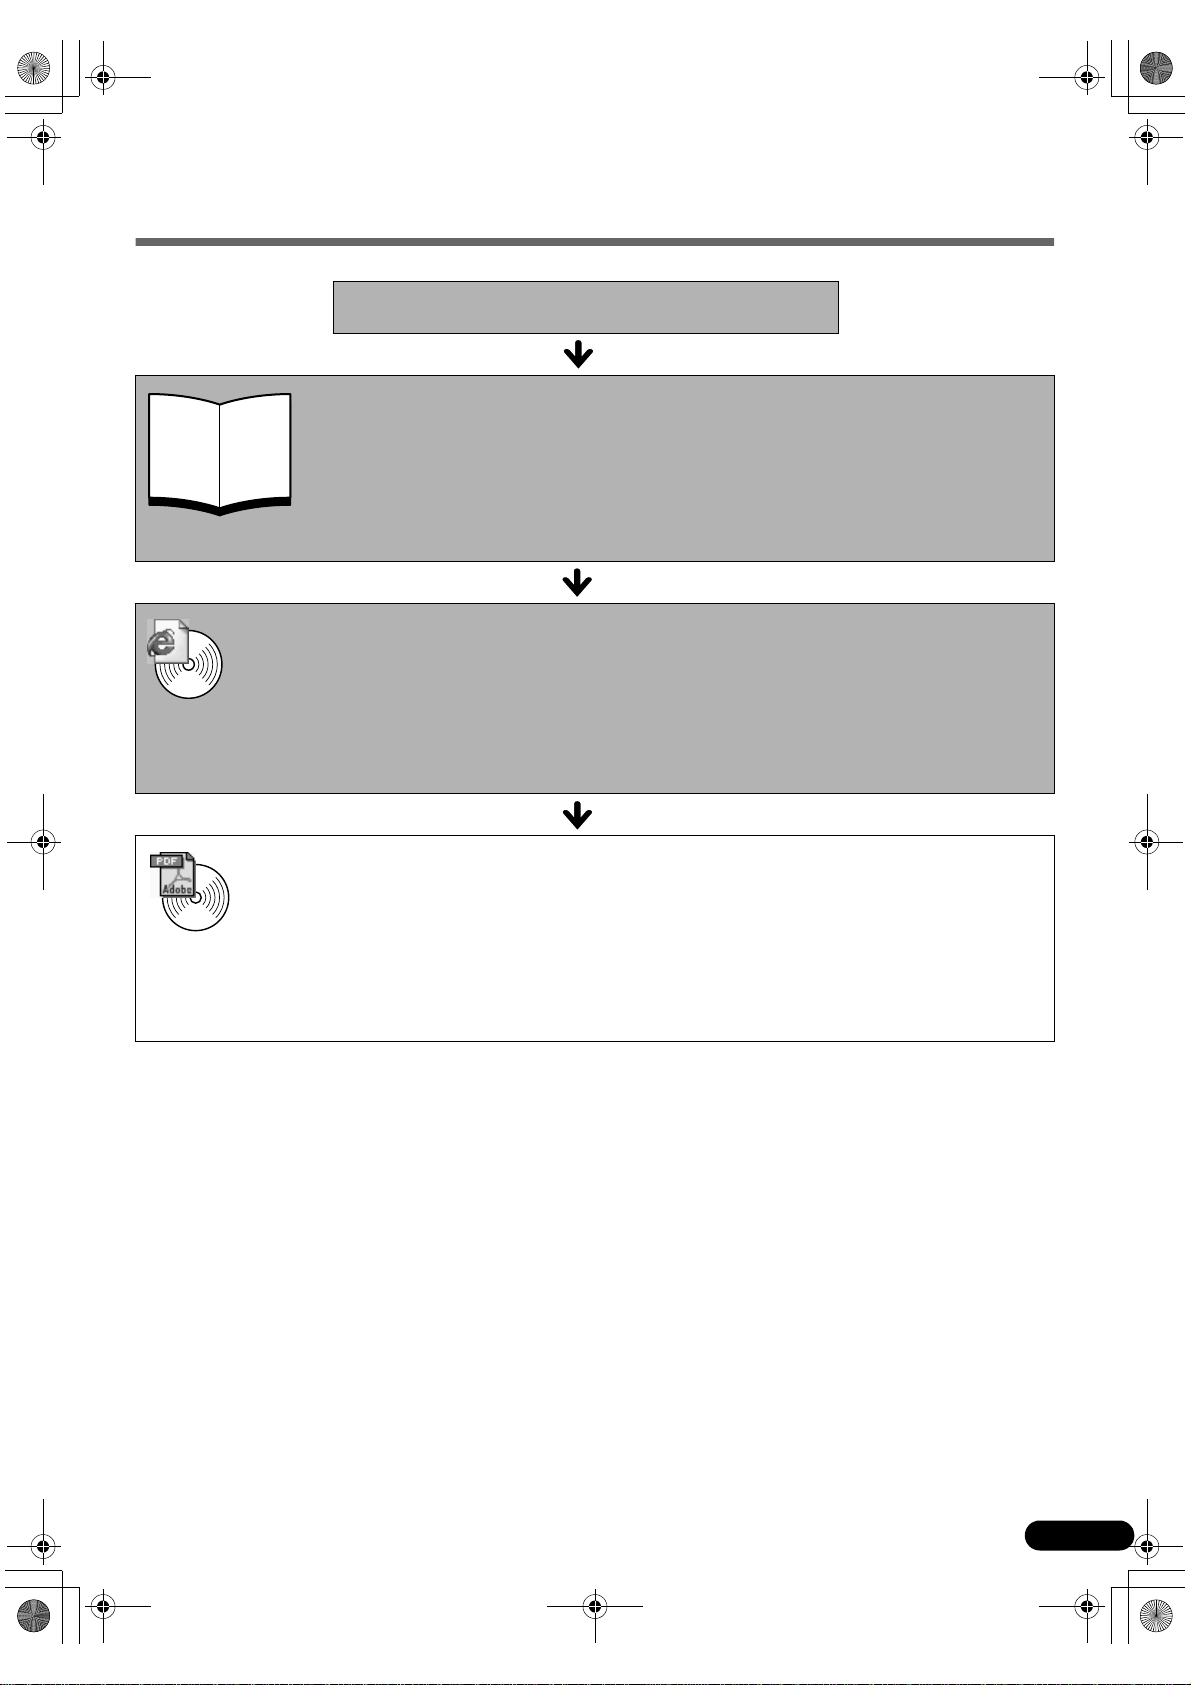
Guide to the Manuals
Open the Package
Quick Start Guide (this guide)
This guide describes a series of processes, from opening the package to using the
scanner.
READ THIS GUIDE FIRST!
Scanning Guide (HTML format manual)
Refer to this guide when you have finished setting up the scanner according to the procedures
in the Quick Start Guide. It describes how to utilize the scanner with the bundled software,
HTML
and how to solve problems when they occur. You can install this manual onto the hard disk
together with the software programs. When you install it, the Scanning Guide icon will appear
on the desktop. Double-click the icon to view it with a browser program, such as Internet
Explorer.
PDF
User’s Guides for Application Programs (PDF format manuals)
•
ArcSoft PhotoStudio
•
ArcSoft PhotoBase
•
OmniPage SE
•
Presto! PageManager (Windows only)
Select the “View the Electronic Manuals” menu on the CanoScan Setup Utility CD-ROM. To
read these manuals, Adobe Acrobat Reader should be installed on your computer.
1
Page 4
00-QSG_E_MAIN.fm Page 2 Monday, April 7, 2003 2:08 PM
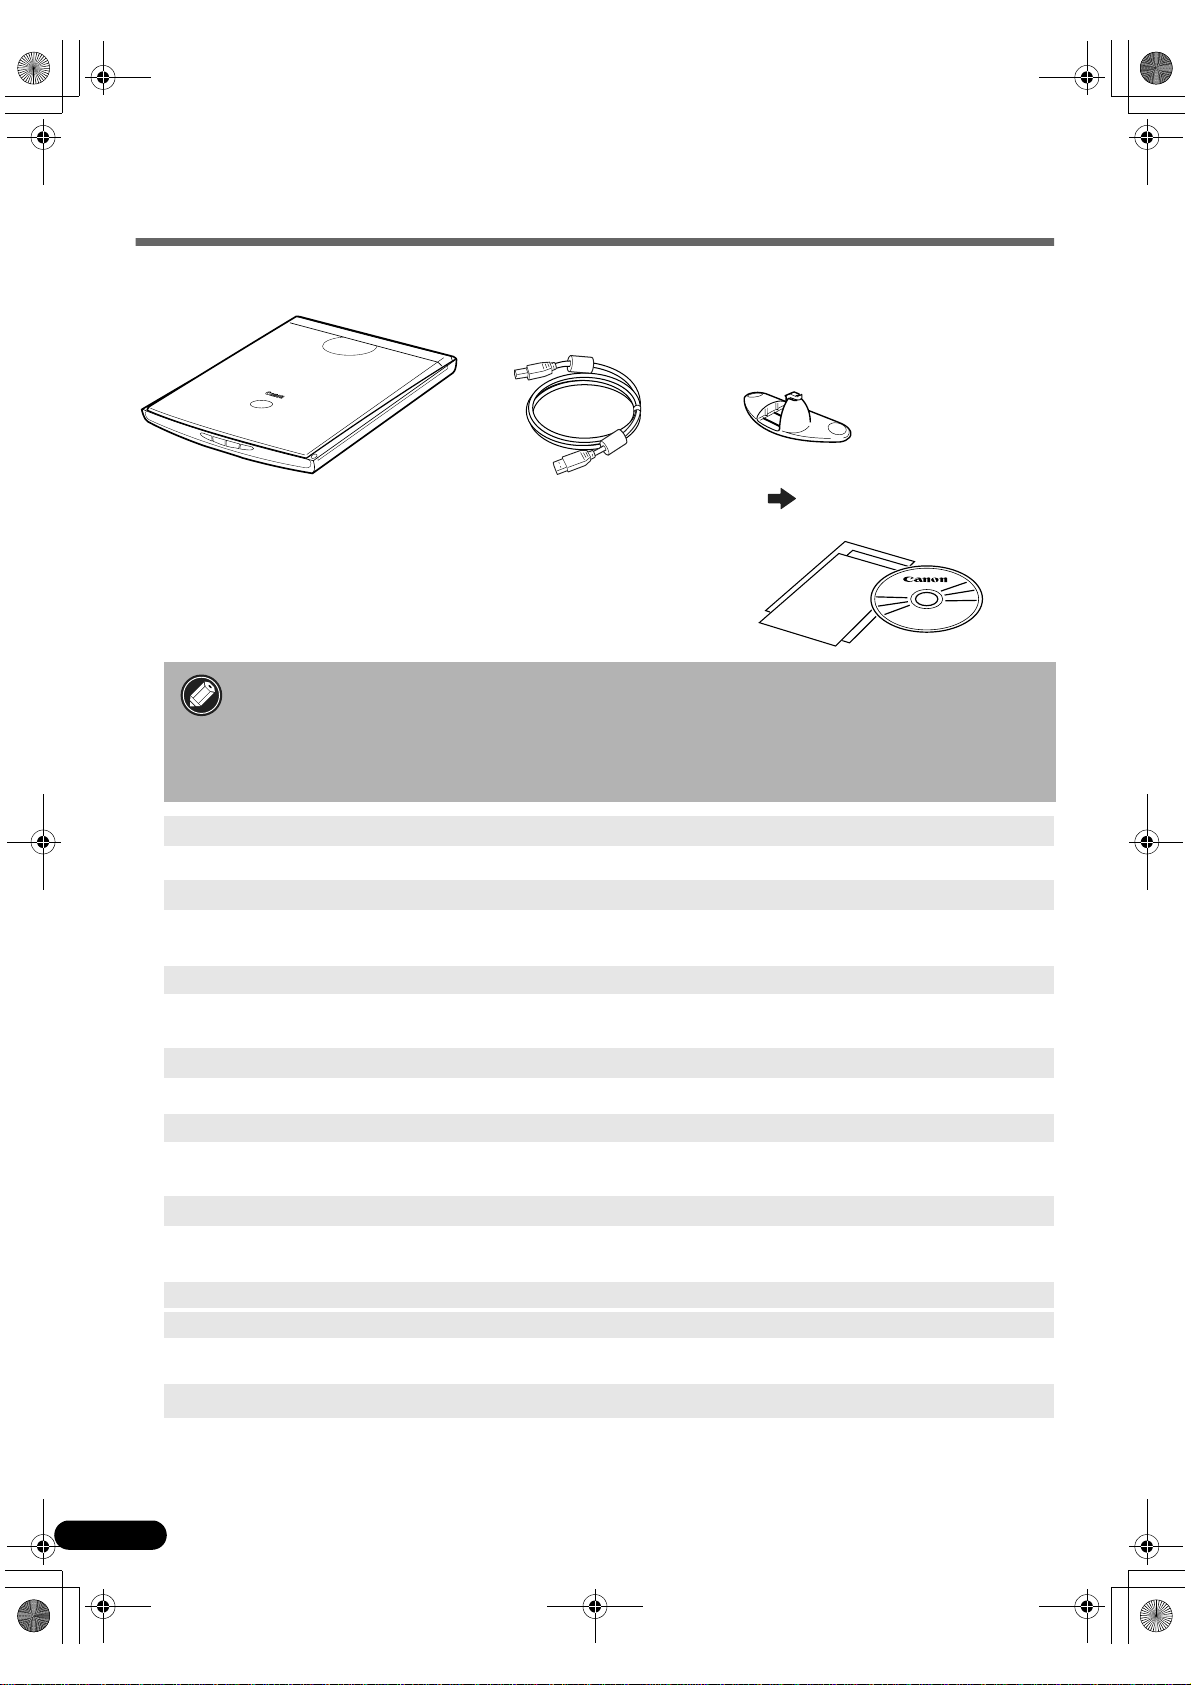
Check the Package Contents
Scanner and Accessories
Scanner
Documents and Software Programs
• Quick Start Guide (this guide)
• Additional Documents
• CanoScan Setup Utility CD-ROM
USB Interface Cable
Stand
Page 11
• The two figures in the brackets below indicate the respective sizes of the Windows/
Macintosh versions of the software.
• Approximately 479 MB (for Windows) / 189 MB (for Macintosh) of hard disk space on
your computer is required to install all the programs. Additional free hard disk space
is required to operate the programs.
ScanGear CS (25 MB / 5 MB) - Scanner Driver
It allows you to scan and load images from the scanner.
CanoScan Toolbox (5 MB / 3 MB) - Scanning Utility Program
It enables you to scan images and copy (print), attach images to e-mail messages or save images with
simple steps. It also works with the scanner buttons.
ArcSoft PhotoStudio (30 MB / 19 MB) - Image Editing Program
It allows you to load images from the scanner, edit and retouch them, and apply special effects and
enhancements.
ArcSoft PhotoBase (75 MB / 5 MB) - Photo Album Program
It allows you to create and edit image albums, perform image searches and create slide shows.
ScanSoft OmniPage SE (65 MB / 48 MB) - OCR (Optical Character Recognition) Program
It converts characters scanned from a book, magazine or newspaper into text data for editing or
digital transmission.
Presto! PageManager (Windows only) (150 MB) - Digital Document Management Program
It makes it easy to scan, share and organize documents and photos. It automatically links to other
popular programs and avoids file-sharing problems by creating self-executable files.
Adobe Acrobat Reader (24 MB / 24 MB) - PDF File Reader Program
Electronic manuals for the above software programs (HTML (5 MB) and PDF manuals)
• Adobe Photoshop Elements CD-ROM
Adobe Photoshop Elements (100 MB / 80 MB) - Image Editing Program
It loads images from the scanner and allows you to edit and retouch them or apply special effects
and enhancements. Please read the instruction sheet or electronic (PDF) manual for Adobe
Photoshop Elements.
2
Page 5
00-QSG_E_MAIN.fm Page 3 Monday, April 7, 2003 2:08 PM
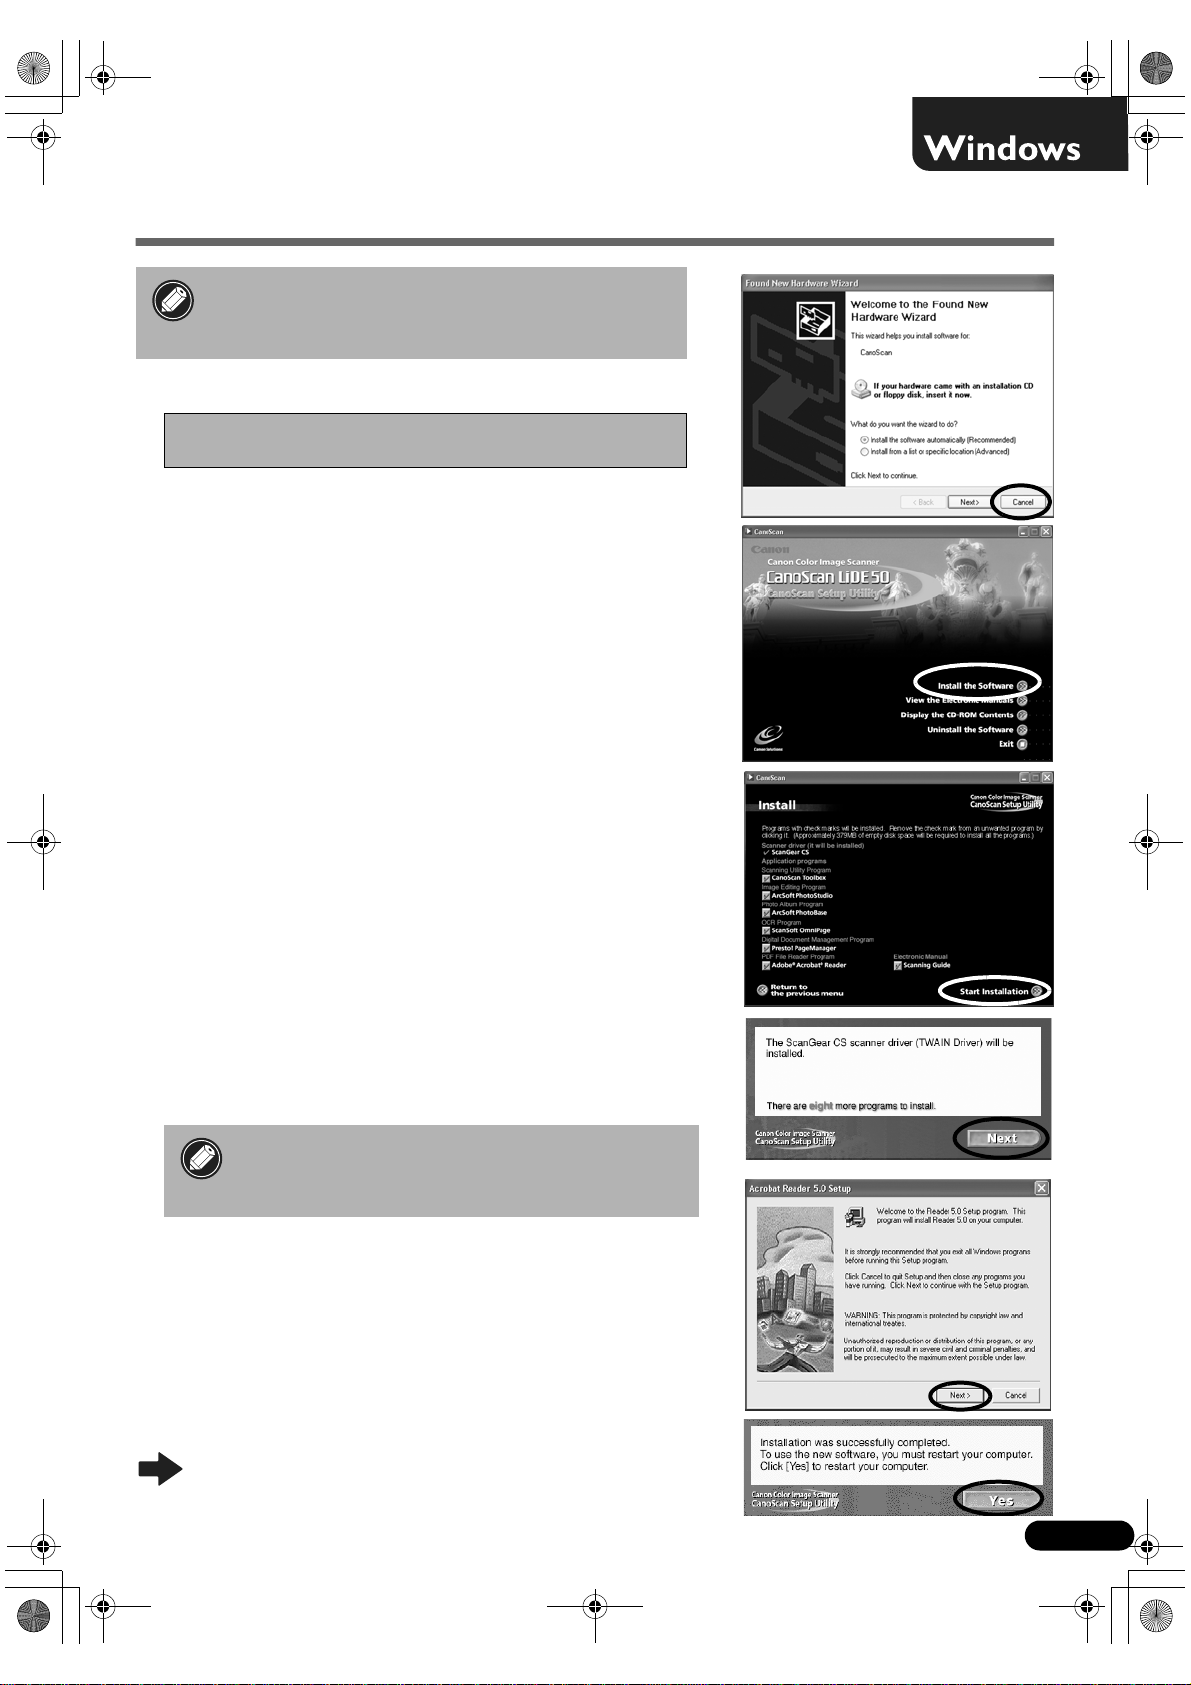
Install the Software (Windows)
• With Windows XP/2000, you should log on with
an administrator user name when you install or
uninstall software programs.
Turn the computer on.
1
If the "Found New Hardware Wizard" or
"Add New Hardware Wizard" appears, click [Cancel].
Place the CanoScan Setup Utility CD-ROM in the drive.
2
The CanoScan Setup Utility main menu will display.
Click [Install the Software].
3
Read the SOFTWARE USER LICENSE AGREEMENT. Click [Yes] if
you accept the terms.
The [Install] window will display.
Click [Start Installation].
4
You will install seven software programs and the Scanning Guide
(HTML format manual).
The installation procedure will start.
5
Follow the on-screen message prompts and click [Yes] or [Next]
to continue the installation.
• In few cases, your operating system may
require a restart. Follow the on-screen
messages to restart and resume installation.
When the installation is complete, click [Yes].
6
The computer will restart.
After Windows restarts, remove the CD-ROM from
7
the drive and store it in a safe place.
Continue on P. 5.
3
Page 6

00-QSG_E_MAIN.fm Page 4 Monday, April 7, 2003 2:08 PM
Install the Software (Macintosh)
Turn the computer on.
1
If the “...Would you like to look for the software
on the Internet?” appears, click [Cancel].
Place the CanoScan Setup Utility CD-ROM in the
2
drive.
The CanoScan Setup Utility main menu will display.
If no window displays, double-click the CD-ROM
icon, then the Setup icon.
Click [Install the Software].
3
Read the SOFTWARE USER LICENSE AGREEMENT. Click [Yes] if
you accept the terms.
The [Install] window will display.
Click [Start Installation].
4
You will install six software programs and the Scanning Guide
(HTML format manual).
The installation procedure will start.
5
Follow the on-screen message prompts and click [Yes], [Next]
or [Install] to continue the installation.
When the installation is complete, click [Yes].
6
The computer will restart.
After restarting, remove the CD-ROM from the drive
7
and store it in a safe place.
4
Page 7

00-QSG_E_MAIN.fm Page 5 Monday, April 7, 2003 2:08 PM
Unlock the Scanning Unit
• Unlock the scanning unit before connecting the scanner to the computer. If it is left
locked, a malfunction or other problem may occur.
Peel the caution seal from the front of the scanner.
1
Gently turn the scanner over.
2
Push the lock switch toward the
3
unlock mark ( ).
Return the scanner to a horizontal position.
4
• When transporting the scanner, always lock the scanning unit by pushing the lock switch
toward the lock mark ( ).
• Carrying or transporting the scanner without locking the scanning unit may damage it.
Be particularly careful to lock the scanning unit when transporting the scanner in a
vehicle.
Lock Switch
Unlock Mark
5
Page 8

00-QSG_E_MAIN.fm Page 6 Monday, April 7, 2003 2:08 PM
Connect the Scanner
• Confirm that the scanning unit is unlocked. (P.5)
Peel the caution seal from the back of the scanner.
1
Connect the scanner to the computer with the supplied USB interface cable.
2
Windows
Wide Flat Connector
USB Interface Cable
Small Square Connector
Macintosh
Wide Flat
Connector
USB Interface Cable
• Only use the USB interface cable provided with the scanner. Use of other cables may
lead to a malfunction.
• The scanner does not have a power switch. The power is activated as soon as the
computer is turned on.
Small Square Connector
6
Page 9

00-QSG_E_MAIN.fm Page 7 Monday, April 7, 2003 2:08 PM
Try Scanning
The following steps explain how to scan with ArcSoft PhotoStudio.
Place a photo or a picture on the glass
1
by aligning its top edge with the
alignment mark, and close the
document cover.
Alignment
Mark
Bottom
Top
Windows
Select [Start], [Programs] or [All
2
Programs], [ArcSoft PhotoStudio] and
[PhotoStudio 5].
Macintosh
Double-click the [Applications (Mac OS
2
9)] and [PhotoStudio] folder and the
[PhotoStudio] icon.
PhotoStudio will start.
PhotoStudio will start.
7
Page 10

00-QSG_E_MAIN.fm Page 8 Monday, April 7, 2003 2:08 PM
Try Scanning
Windows
Click the Acquire icon or click the
3
[File] menu and select [Acquire].
ScanGear CS will start.
If an error message appears, click the [File]
menu, choose [Select Source], select your
scanner model name and click the [Select]
button.
Macintosh
Click the Acquire icon or click the
3
[File] menu and select [Import...].
ScanGear CS will start.
When the [Select Source] dialog displays, select
[ScanGear CS 7.1] and click the [OK] button.
Select "Type of original".
4
You can select "Photo", "Magazine", "Newspaper" or
"Document".
• Photo: Color, 300 dpi
• Magazine: Color, 150 dpi
• Newspaper: Black and White, 300 dpi
• Document: Grayscale, 300 dpi
Click [Preview].
5
After calibration, the preview scan will start and gradually
display the image.
The image is automatically cropped at its original size.
If you want to trim the image further, drag the mouse
diagonally to select the area.
8
Page 11

00-QSG_E_MAIN.fm Page 9 Monday, April 7, 2003 2:08 PM
Click [Scan].
6
The final scan will start.
Click or (close box) in the ScanGear CS
7
window to close it.
The scanned image will appear in the PhotoStudio window.
Try Scanning
Save the scanned image.
8
Click the [File] menu and select [Save As]. Select the folder
where you wish to store the image file, enter a file name,
select a file type (JPG format is recommended) and click [Save].
Click or (close box) in the PhotoStudio
9
window to close it.
• If the scanner does not perform as described above, read the "Troubleshooting" section
of the Scanning Guide.
• For details about the bundled software, read the Scanning Guide or the User’s Guide
(PDF format manual) for each software program on the CanoScan Setup Utility CD-ROM.
9
Page 12

00-QSG_E_MAIN.fm Page 10 Monday, April 7, 2003 2:08 PM
Using the Scanner Buttons
You can use the four convenient buttons on the front of the scanner to scan and perform related tasks easily
with a single touch of the button. Place an item on the scanner before pressing a button.
• To use these buttons, ScanGear CS, CanoScan Toolbox, ArcSoft PhotoBase and Presto!
PageManager (Windows) / Acrobat Reader (Macintosh) should be installed from the
CanoScan Setup Utility CD-ROM.
COPY Button
To print (copy) the scanned image with a printer:
Press the [COPY] button.
1
The scanner will scan the item.
2
The scanned image will print.
3
• The printer driver should be installed and the
printer should be on-line to use this function.
SCAN Button
To open the scanned image in the PhotoBase
window:
Press the [SCAN] button.
1
The scanner will scan the item.
2
The scanned image will appear in the
3
PhotoBase window.
FILE Button
To save the scanned image as a PDF file:
E-MAIL Button
To e-mail the scanned image as an attached file:
Press the [E-MAIL] button.
1
The scanner will scan the item.
2
The [E-mail software selection] dialog
3
will appear. Select an option from the
list and click [OK].
This step is required only for the first scan.
The e-mail software will start and the
4
scanned image will be attached in a
new message window.
Enter the receiver’s address and title,
5
write a message, confirm the required
settings, and send the message.
• The e-mail software, such as Outlook Express,
Microsoft Outlook, Eudora or Netscape
Messenger, should be installed and enabled.
With certain e-mail programs, you should
enable the MAPI function (for Windows).
Press the [FILE] button.
1
The scanner will scan the item.
2
The scanned image will be saved as a
3
PDF document and appear in Presto!
PageManager (Windows) or Adobe
Acrobat Reader (Macintosh).
• While scanning, you can change the default settings for scanning by clicking the
[Cancel] button. For changing settings or arranging the scanner button assignments,
refer to the CanoScan Toolbox section of the Scanning Guide (HTML format manual).
10
Page 13

00-QSG_E_MAIN.fm Page 11 Monday, April 7, 2003 2:08 PM
Using the Scanner in the Upright Position
Installing the Stand
Positioning an Item
Removing the Stand
Removing the stand.
Press the hook.
11
Page 14

00-QSG_E_MAIN.fm Page 12 Monday, April 7, 2003 2:08 PM
System Information
This form should be used to record the operating environment for the purchased scanner.
If any problems occur with the scanner, you will need this information when you contact our Customer
Support Help Desk. Be sure to record the information and store it in a safe location.
• This information is also required to request a repair under warranty. Make sure you record the
information and store it in a safe location.
• Guaranteed servicing for this equipment will expire five years after production ceases.
Date of Purchase:
Dealer Tel:
Dealer Address:
Scanner Model: CanoScan LiDE 50
Serial Number (on the back of the equipment):
• About the Computer Used
Manufacturer: Model:
CPU: Clock Speed: MHz
Memory Capacity (RAM): MB
Space Available: MBHard Disk Capacity: MB
OS: Windows XP Me 2000 98
Macintosh OS 9.0 OS 9.1 OS 9.2 OS X v10.1
Monitor Type: Monitor Size: inches
Printer: Manufacturer:
Type of Printer: Printer Resolutions:
Installed Virus Protection Program:
Installed Compression Program:
On-Board Expansion Cards:
Attached Peripherals:
Connected Network System:
12
 Loading...