

Page 1

uniFLOW Login Device Client Guide
uniFLOW Login Device Client Guide
Please read this guide before operating this product.
After you finish reading this guide, store it in a safe place for future reference.
Lisez ce guide avant d’utiliser ce produit.
Après avoir pris connaissance de son contenu, conservez-le dans un endroit sûr pour pouvoir le
consulter en cas de besoin.
Bitte lesen Sie dieses Handbuch, bevor Sie mit dem Produkt arbeiten.
Nachdem Sie das Handbuch gelesen haben, bewahren Sie es zum Nachschlagen an einem sicheren Ort auf.
Leggere questa guida prima di iniziare ad utilizzare il prodotto.
Terminata la lettura, conservare la guida in un luogo sicuro per eventuali consultazioni.
Por favor, lea esta guía antes de usar este producto.
Después de leer esta guía, guárdela en un lugar seguro para posteriores consultas.
Page 2

English
imageRUNNER
1133/1133A/1133iF
uniFLOW Login Device
Client Guide
Page 3

English
To view the manual in PDF format, Adobe Reader/Adobe Acrobat Reader is required. If Adobe Reader/Adobe Acrobat Reader is not installed on your
system, please download it from the Adobe Systems Incorporated website.
Considerable effort has been made to ensure that this manual is free of inaccuracies and omissions. However, as we are constantly improving our
products, if you need an exact specification, please contact Canon.
Page 4

Contents
English
Preface . . . . . . . . . . . . . . . . . . . . . . . . . . . . . . . . . . . . . . . . . . . . . . . . . . . . . . EN-iv
How to Use This Manual . . . . . . . . . . . . . . . . . . . . . . . . . . . . . . . . . . . . . . . . EN-iv
Symbols Used in This Manual . . . . . . . . . . . . . . . . . . . . . . . . . . . . . . . . . . .EN-iv
Keys Used in This Manual . . . . . . . . . . . . . . . . . . . . . . . . . . . . . . . . . . . . . .EN-iv
Displays Used in This Manual . . . . . . . . . . . . . . . . . . . . . . . . . . . . . . . . . . . EN-v
Trademarks . . . . . . . . . . . . . . . . . . . . . . . . . . . . . . . . . . . . . . . . . . . . . . . . . EN-v
Legal Notices . . . . . . . . . . . . . . . . . . . . . . . . . . . . . . . . . . . . . . . . . . . . . . . . . EN-vi
Copyright . . . . . . . . . . . . . . . . . . . . . . . . . . . . . . . . . . . . . . . . . . . . . . . . . . .EN-vi
Disclaimers. . . . . . . . . . . . . . . . . . . . . . . . . . . . . . . . . . . . . . . . . . . . . . . . . .EN-vi
Managing the Machine with the uniFLOW Integration. . . . . . . . . . . . . . . . . EN-1
What You Can Do with the uniFLOW Integration. . . . . . . . . . . . . . . . . . . . . EN-2
uniFLOW Server-based Authentication Modes and Log-in Methods. . . EN-2
Login and Document Release . . . . . . . . . . . . . . . . . . . . . . . . . . . . . . . . EN-2
Using Cost Centers . . . . . . . . . . . . . . . . . . . . . . . . . . . . . . . . . . . . . . . . EN-2
Activation and Settings of the uniFLOW Integration . . . . . . . . . . . . . . . . . . EN-3
System Environment. . . . . . . . . . . . . . . . . . . . . . . . . . . . . . . . . . . . . . . . EN-3
Settings of the uniFLOW Integration. . . . . . . . . . . . . . . . . . . . . . . . . . . . EN-3
Authentication Modes by the uniFLOW Integration . . . . . . . . . . . . . . . . . . . EN-3
Authentication to the Machine . . . . . . . . . . . . . . . . . . . . . . . . . . . . . . . . EN-3
Authentication to the Login and Document Release Function . . . . . . . . EN-3
Log-in Methods by the uniFLOW Integration . . . . . . . . . . . . . . . . . . . . . . . . EN-4
User ID and Password . . . . . . . . . . . . . . . . . . . . . . . . . . . . . . . . . . . . . . EN-4
PIN Code . . . . . . . . . . . . . . . . . . . . . . . . . . . . . . . . . . . . . . . . . . . . . . . . EN-4
ID Card . . . . . . . . . . . . . . . . . . . . . . . . . . . . . . . . . . . . . . . . . . . . . . . . . . EN-4
Department ID and PIN . . . . . . . . . . . . . . . . . . . . . . . . . . . . . . . . . . . . . EN-4
Settings of Department ID Management for the uniFLOW Integration . . . . EN-5
Operating the Machine As the System Manager . . . . . . . . . . . . . . . . . . . . . EN-6
Resetting the IP Address of the Machine. . . . . . . . . . . . . . . . . . . . . . . . . . . EN-7
Logging in to the Machine . . . . . . . . . . . . . . . . . . . . . . . . . . . . . . . . . . . . . . . EN-8
Entering a User ID and Password . . . . . . . . . . . . . . . . . . . . . . . . . . . . . . . . EN-8
Entering a PIN Code . . . . . . . . . . . . . . . . . . . . . . . . . . . . . . . . . . . . . . . . . EN-10
Using the ID Card. . . . . . . . . . . . . . . . . . . . . . . . . . . . . . . . . . . . . . . . . . . . EN-12
Entering a Department ID and PIN . . . . . . . . . . . . . . . . . . . . . . . . . . . . . . EN-13
Keeping Documents Unprinted Until Logging-In
(Login and Document Release) . . . . . . . . . . . . . . . . . . . . . . . . . . . . . . . . . . EN-15
To log in to the machine first and print your documents: . . . . . . . . . . . EN-15
To log in to the Login and Document Release function:. . . . . . . . . . . . EN-18
EN-iii
Page 5
Preface
Thank you for purchasing the Canon imageRUNNER 1133/1133A/1133iF. Please read this
manual thoroughly before operating the machine to familiarize yourself with its capabilities,
and to make the most of its many functions. After reading this manual, store it in a safe place
for future reference.
How to Use This Manual
Symbols Used in This Manual
The following symbols are used in this manual to explain procedures, restrictions,
handling precautions, and instructions that should be observed for safety.
English
IMPORTANT
NOTE
Indicates operational requirements and restrictions. Be sure to read
these items carefully to operate the machine correctly, and avoid
damage to the machine or property.
Indicates a clarification of an operation, or contains additional
explanations for a procedure. Reading these notes is highly
recommended.
Keys Used in This Manual
The following table provides a few examples of how keys on the operation panel to
be pressed are expressed in this manual:
Keys Example
[Key icon] + (Key Name) [ ] (Menu)
[Key Name] [OK]
[Key Icon] [ ], [ ], etc.
EN-iv
Page 6

English
Displays Used in This Manual
Screen shots used in this manual may differ from actual displays depending on the
machine configuration.
Trademarks
uniFLOW and MiCard® are registered trademarks of NT-ware
Systemprogrammierung GmbH.
Other product and company names herein may be the trademarks of their
respective owners.
EN-v
Page 7

Legal Notices
Copyright
Copyright 2013 Canon Inc. All rights reserved.
No part of this publication may be reproduced or transmitted in any form or by any
means, electronic or mechanical, including photocopying and recording, or by any
information storage or retrieval system without the prior written permission of
Canon Inc.
Disclaimers
The information in this document is subject to change without notice.
CANON INC. MAKES NO WARRANTY OF ANY KIND WITH REGARD TO THIS
MATERIAL, EITHER EXPRESS OR IMPLIED, EXCEPT AS PROVIDED HEREIN,
INCLUDING WITHOUT LIMITATION, THEREOF, WARRANTIES AS TO
MARKETABILITY, MERCHANTABILITY, FITNESS FOR A PARTICULAR
PURPOSE OR USE OR NON-INFRINGEMENT. CANON INC. SHALL NOT BE
LIABLE FOR ANY DIRECT, INCIDENTAL, OR CONSEQUENTIAL DAMAGES OF
ANY NATURE, OR LOSSES OR EXPENSES RESULTING FROM THE USE OF
THIS MATERIAL.
English
EN-vi
Page 8
Managing the Machine with the uniFLOW Integration
English
This section provides the overview of the uniFLOW integration.
The uniFLOW server, a server in which the uniFLOW software is installed, detects
the machine in a network and activates the uniFLOW integration in the machine.
The uniFLOW server authenticates users logging in at the machine and provides
the machine with setting information. Once activated, the uniFLOW server and
machine continue communicating to accomplish the uniFLOW integration.
uniFLOW Server
• activates the uniFLOW
integration in the machine
• authenticates users
• provides setting information
uniFLOW Server Machine
Functions with the uniFLOW integration
• uniFLOW server-based Authentication
• Login and Document Release
• Selecting a Cost Center
EN-1
IMPORTANT
The uniFLOW integration is activated only when the machine is connected to the
uniFLOW server over a network. The uniFLOW server is a server in which the optional
uniFLOW software is activated.
Managing the Machine with the uniFLOW Integration
Page 9

What You Can Do with the uniFLOW Integration
Equipped in the machine are the functions activated by the uniFLOW server. The
major functions are as follows:
uniFLOW Server-based Authentication Modes and Log-in Methods
You can manage the machine by limiting its use only to the users who are
registered in the uniFLOW server. There are two authentication mode options:
authentication to the machine and to the Login and Document Release function,
with various log-in methods such as by an ID card* or by entering a PIN code. (See
"Authentication Modes by the uniFLOW Integration," on p. EN-3 and "Log-in
Methods by the uniFLOW Integration," on p. EN-4.)
* Optional NT-ware's MiCard Reader is required.
Login and Document Release
You can set the machine to keep documents unprinted until the user who sent the
print data logs in to the machine or the Login and Document Release function. You
can also set the machine to allow users to select jobs they want to print. The
documents are printed out only when the user logs in at the machine. This means
the user can securely collect confidential documents and eliminate the problem of
forgotten printouts in the machine's output tray. This function is made possible by
the uniFLOW server (as a print server) that holds print jobs and wait for the user to
log in. For instructions on how to perform the Login and Document Release
function, see "Keeping Documents Unprinted Until Logging-In (Login and
Document Release)," on p. EN-15.
English
Using Cost Centers
You can register cost centers (accounting tables for counting the costs for
performed jobs) and allot them to users in the uniFLOW server. Examples of cost
centers usage are described below:
■ Selecting a cost center when logging in:
When a user logs in at the machine, a screen prompting the user to select a cost
center may appear on the display. The user selects a cost center so that the
uniFLOW server counts the cost for the user's job.
■ Displaying the cost for Login and Document Release jobs on the screen:
You can set the machine to display the calculated cost for the job on the display
when a user is performing Login and Document Release at the machine.
For more information on cost centers, see the documentation included with the
uniFLOW software.
Managing the Machine with the uniFLOW Integration
EN-2
Page 10

English
Activation and Settings of the uniFLOW Integration
The overview of the activation and settings of the uniFLOW integration is provided
below.
System Environment
To activate the uniFLOW integration, the machine must be connected to the
uniFLOW server (a server in which the uniFLOW software is installed) over a
network. For more information, see the documentation included with the uniFLOW
software.
Settings of the uniFLOW Integration
The settings of the uniFLOW integration such as user registration can be made
only on the uniFLOW server. Although no special settings on the machine are
required, be sure to check the Department ID Management settings for a proper
setting combination of the Department ID Management and the uniFLOW
integration. (See "Settings of Department ID Management for the uniFLOW
Integration," on p. EN-5.)
Authentication Modes by the uniFLOW Integration
The uniFLOW integration provides the following authentication modes:
EN-3
Authentication to the Machine
Users are prompted to log in to the machine. This means that users must
authenticate themselves when they use the machine's functions such as the Copy
or Scan functions.
Authentication to the Login and Document Release Function
Users are prompted to log in to the Login and Document Release function. This
means that users can use the machine's functions such as Copy or Scan functions
without logging in at the machine. Instead, users must authenticate themselves
only when they use the Login and Document Release function.
Managing the Machine with the uniFLOW Integration
Page 11

Log-in Methods by the uniFLOW Integration
The uniFLOW integration provides the following log-in methods:
NOTE
• For instructions on how to log in to the machine as the System Manager, see
"Operating the Machine As the System Manager," on p. EN-6.
• For instructions on how to log in to the machine with each log-in method, see "Logging
in to the Machine," on p. EN-8.
User ID and Password
On the machine's operation panel, users enter their user ID and password.
PIN Code
On the machine's operation panel, users enter their PIN code.
ID Card
Users hold their ID card over the MiCard Reader attached to the machine.
IMPORTANT
The MiCard Reader is optional.
Department ID and PIN
On the machine’s operation panel, users enter their department ID and PIN.
English
IMPORTANT
The log-in method using the department ID and PIN is available only when
"Authentication to the Machine" (p. EN-3) is applied as the authentication mode.
Managing the Machine with the uniFLOW Integration
EN-4
Page 12
Settings of Department ID Management for the uniFLOW Integration
Before you use the uniFLOW integration, be sure to set the Department ID
Management setting as indicated on the table below.
English
Authentication Mode
(See p. EN-3)
Authentication to the
Machine
Authentication to the
Login and Document
Release Function
NOTE
• To use the department ID and PIN as the log-in method, register the System Manager
ID and System Manager PIN (p. EN-6), and department IDs and PINs in the machine.
Setting procedure for registering users is as follows:
- In the machine, register the System Manager ID and System Manager PIN for the
System Manager.
- In the machine, register department IDs and PINs for other users (end users).
- On the uniFLOW server, assign the System Manager ID and System Manager PIN
or a department ID and PIN to the System Manager or other users.
• For more information on how to register users in the uniFLOW server, see the
documentation included with the uniFLOW software.
Log-in Method (See
p. EN-4)
User ID and
Password
PIN Code
ID Card
Department ID and
PIN
User ID and
Password
PIN Code
ID Card
Required Settings of the Department
ID Management on the Machine
ON/OFF
ON
OFF
EN-5
Managing the Machine with the uniFLOW Integration
Page 13
Operating the Machine As the System Manager
The System Manager log-in procedure varies depending on the applied
authentication mode provided by the uniFLOW integration. See the table below.
NOTE
The System Manager can set or change the System Settings and other settings
accessible only to the System Manager.
Authentication Mode
(p. EN-3)
Authentication to the
Machine
Authentication to the Login
and Document Release
NOTE
• You can give a user System Manager privileges by the procedures below (The
procedures and the privileges are applicable only when "Authentication to the
Machine" is applied.). For more information, see the documentation included with the
uniFLOW software.
- For the user ID and password/PIN code/ID card, select the user type as the System
Manager when you register the user in the uniFLOW server.
- For the department ID and PIN, assign the System Manager ID and System
Manager PIN registered in the machine to the user when you register in the
uniFLOW server.
• When you log in to the machine as an end user in "Authentication to the Machine
mode", you cannot access the System Settings and other settings accessible only to
the System Manager, and a message such as <System settings is restricted.>
appears. To access these settings, once log out of the machine and again log in as
the System Manager.
Log-in Procedure As the System Manager
Log in to the machine with the user ID and password, PIN
code, ID card, or department ID and PIN for the System
Manager. Otherwise log-in procedures are similar to those for
end users. (See "Logging in to the Machine," on p. EN-8.)
To access the System Settings and other settings accessible
only to the System Manager, enter the System Manager ID
and System Manager PIN registered in the machine. When
they are not set, any user can log in to the machine as the
System Manager and can access the System Settings and
other settings accessible only to the System Manager.
English
Managing the Machine with the uniFLOW Integration
EN-6
Page 14

English
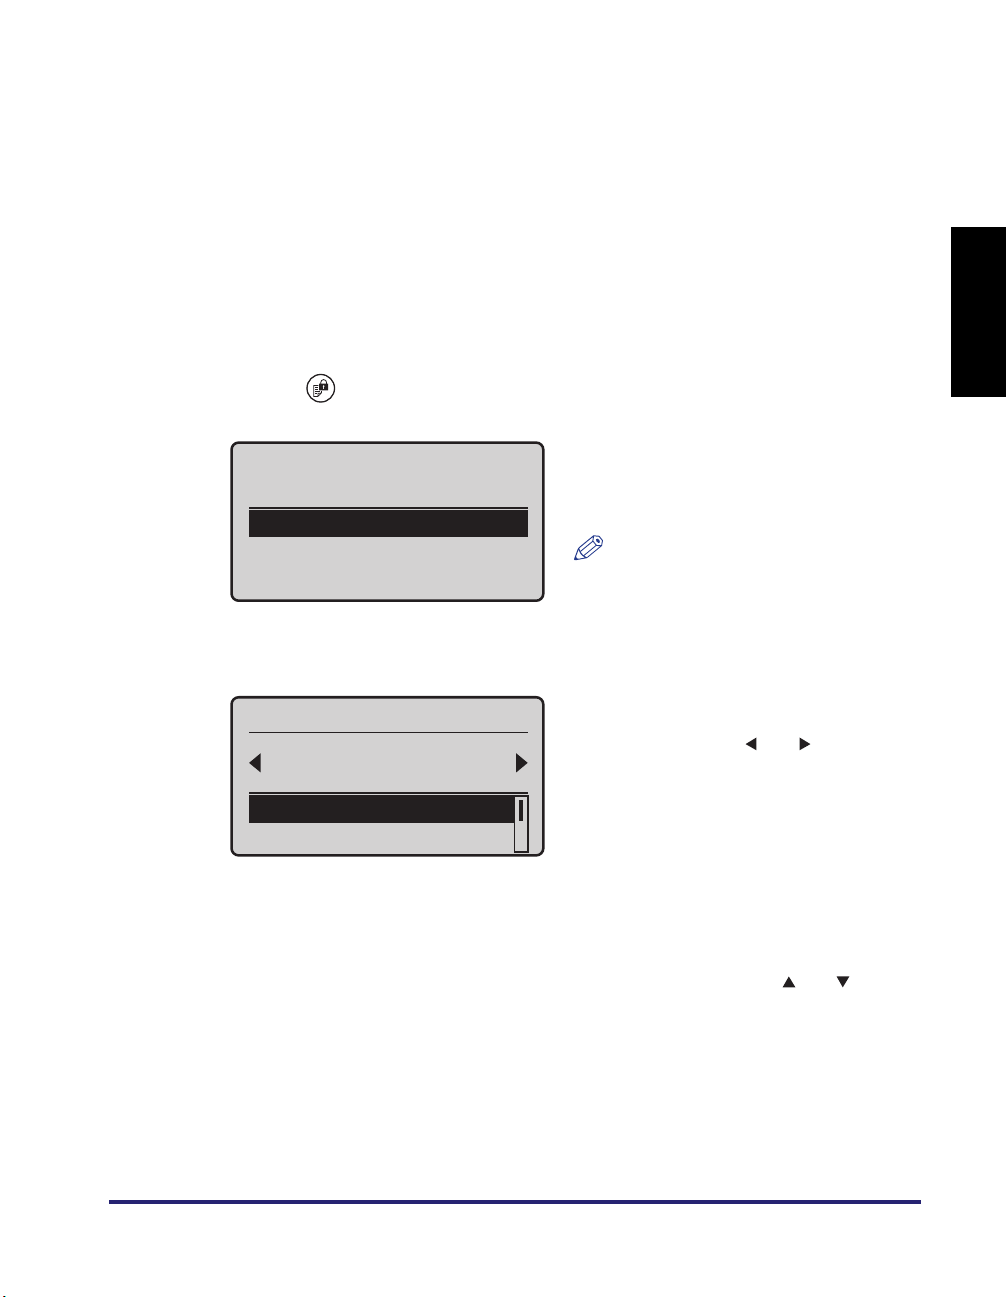
Resetting the IP Address of the Machine
If the message <Cannot connect to the server. Contact the system manager.>
persists on the display after the machine is turned ON, the IP address of the
machine may not be properly set. Resume communications between the machine
and the uniFLOW server by resetting the IP address of the machine as described
below.
1
Press (Menu).
2
Press [OK] to open the <Network Settings> menu.
● If a screen prompting you to enter the System Manager ID and System
Manager PIN appears:
❑
Select <Manager ID> using [ ] or [ ] and press [OK].
❑ Enter the System Manager ID using the numeric keys and press [OK].
❑ Select <PIN> using [ ] or [ ] and press [OK].
❑ Enter the System Manager PIN using the numeric keys and press [OK].
❑ Press (Log In/Out).
NOTE
The System Manager ID and System Manager PIN are both set to '7654321' as
default.
EN-7
3
Check the IP address of the machine and set it on <Network
Settings>.
NOTE
Set the IP address of the machine depending on the network environment you are
using.
4
Restart the machine.
Turn OFF the machine and wait at least 10 seconds before turning it back ON.
Managing the Machine with the uniFLOW Integration
Page 15
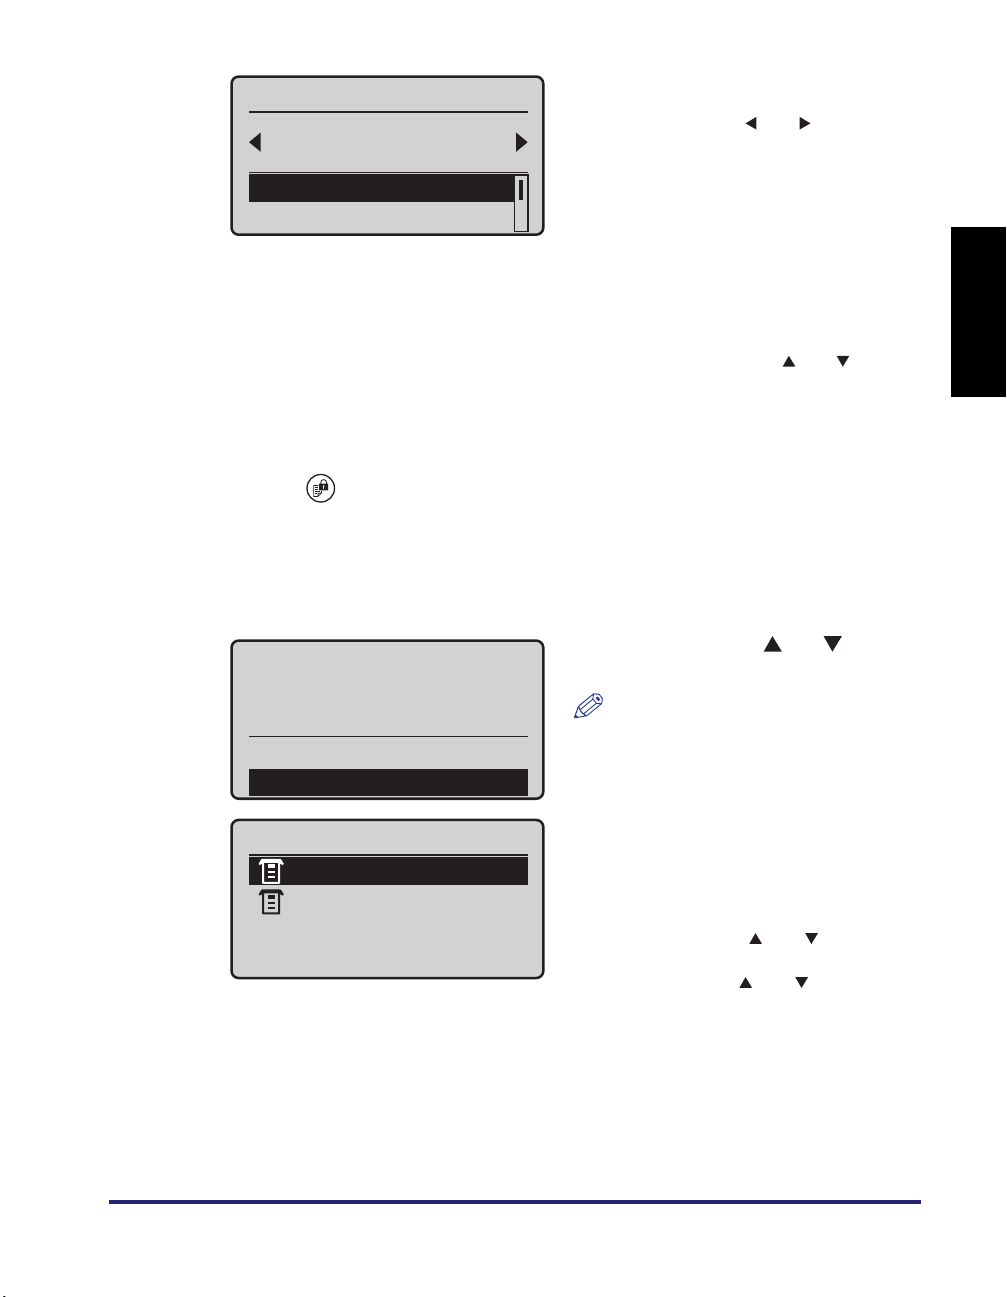
Logging in to the Machine
This section describes the operation procedures for the log-in methods provided by
the uniFLOW integration.
NOTE
When the optional MiCard Reader is attached to the machine, you can log in and log
out by holding your ID card over the MiCard Reader, regardless of the applied log-in
method (except when the department ID and PIN is applied as the log-in method).
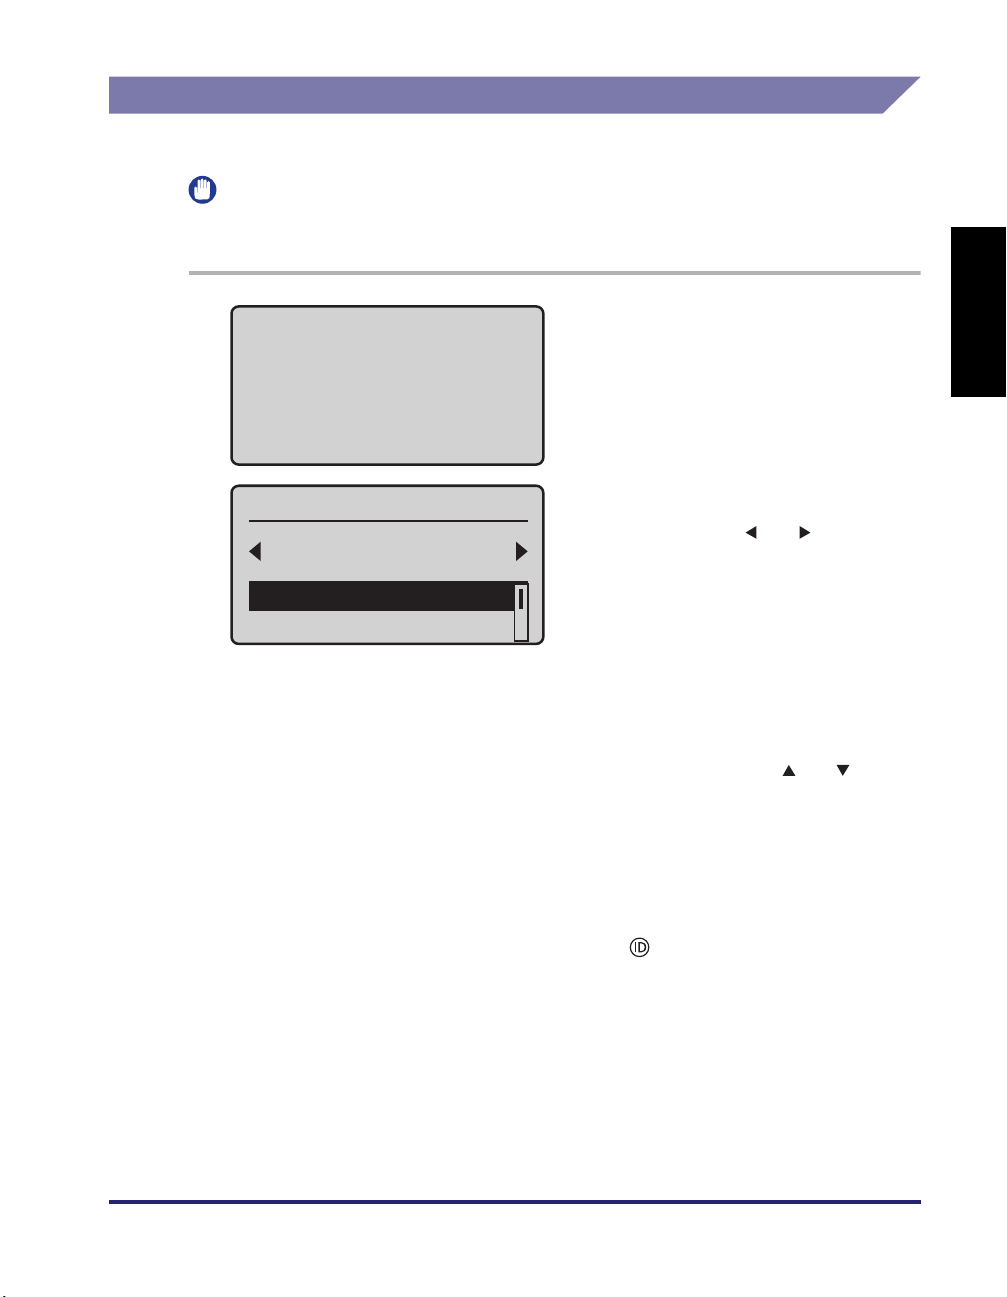
Entering a User ID and Password
Enter your user ID and password to log in when the screen shown in step 1 is
displayed.
NOTE
To log in to the machine, you must have a valid user ID and password (if set)
registered. For instructions on how to register a user ID and password in the uniFLOW
server, see the documentation included with the uniFLOW software.
English
1
Enter User ID & Pswrd
Login: Press ID
Logout: Press ID
User ID:
Password:
User ID
User01
<Apply>
Entry Mode: 12
Enter your user ID and password
(up to 32 characters respectively)
using the numeric keys.
❑ Select <User ID> using [ ] or [ ] and
press [OK].
❑ Enter your user ID.
You can change the text entry mode by
changing <Entry Mode>.
❑ Select <Apply> using [ ] or [ ] and
press [OK].
Logging in to the Machine
EN-8
Page 16
English
❑ On the screen shown in step 1, select
Password
12345678
<Apply>
Entry Mode: 12
2
Press [ ] (Log In/Out).
NOTE
• If no password is set for the user ID, leave <Password> blank.
• If you make a mistake when entering the user ID/password, press [ ] (Clear) and
enter the correct user ID/password.
• If the user ID/password that you entered is incorrect, an error message will appear.
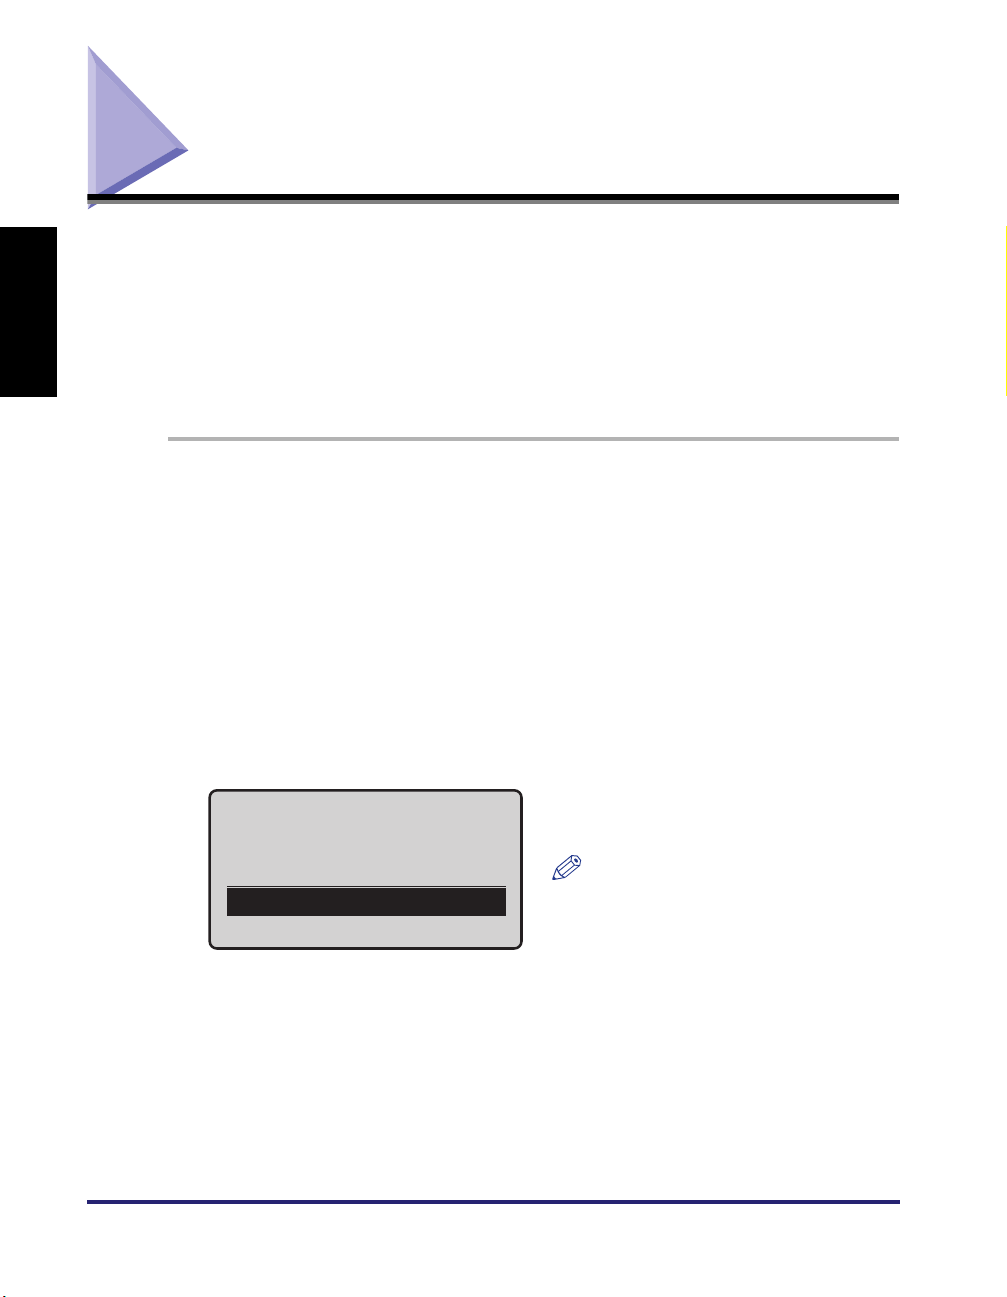
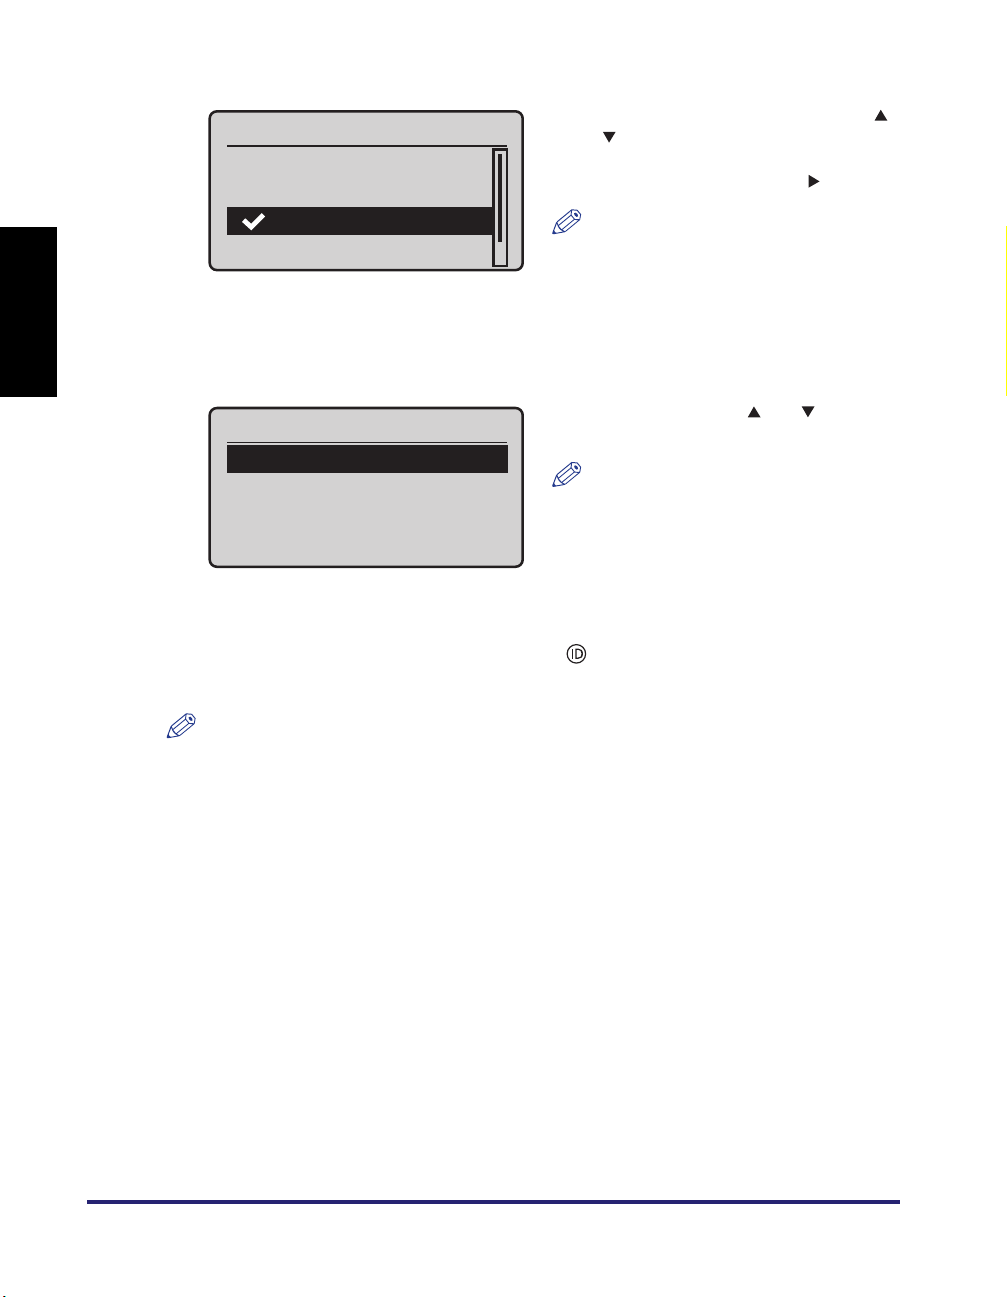
Select Cost Center
Canon
Group 1
<Log In>
<To Sub Cost Center>
<Password> using [ ] or [ ] and press
[OK].
❑ Enter your password.
You can change the text entry mode by
changing <Entry Mode>.
❑ Select <Apply> using [ ] or [ ] and
press [OK].
The characters that you enter for the
password will be displayed as asterisks
(*******) when the screen returns to the
initial log-in screen.
❑ If a screen prompting you to select a cost
center appears, select the appropriate
cost center using [ ] or [ ].
• Select a cost center in the lower or
upper level by using <To Sub Cost
Center> or <To Parent Cost Center>.
• You can search for cost centers by
using <Search>.
• You can select a cost center from the
history by using <Display History>.
For more information on these search
options, see the note on p. EN-10.
❑ Select <Log In> using [ ] or [ ] and
press [OK].
The standby display appears.
EN-9
Logging in to the Machine
Page 17
NOTE
The search options for cost centers are displayed on the bottom of the screen. Use
NOTE
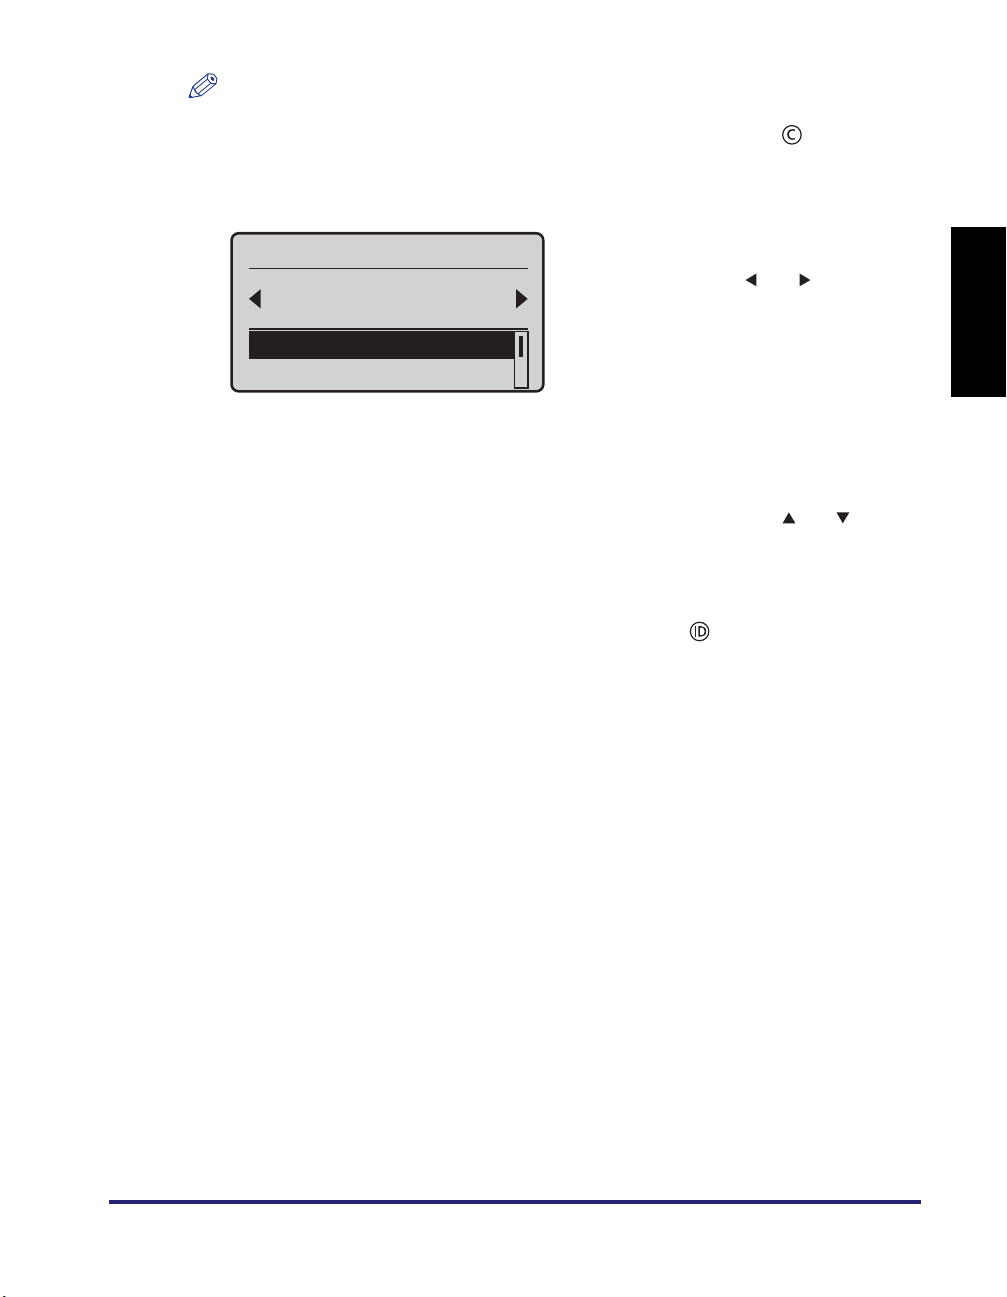
Select Cost Center
Canon
Group 1
<To Sub Cost Center>
<To Parent Cost Cen
...
Enter PIN Code
Login: Press ID
Logout: Press ID
PIN Code:
ޓ
PIN Code
ޓ
12345678
(Apply: Press OK)
[ ] or [ ] to select the desired search option and press [OK].
• <To Sub Cost Center>: Use to move to
the cost centers in the lower level.
• <To Parent Cost Center>: Use to move
to the cost centers in the upper level.
• <Search>: Use to search for cost
centers by entering the first several
characters of the cost center name.
• <Display History>: Use to display and
select the cost centers previously
used.
3
When your operations are complete, press [ ] (Log In/Out) to log
out.
Entering a PIN Code
Enter your PIN code to log in when the screen shown in step 1 is displayed.
To log in to the machine, you must have a valid PIN code registered. For instructions
on how to register a PIN code in the uniFLOW server, see the documentation included
with the uniFLOW software.
English
1
Enter your PIN code (up to 20
digits) using the numeric keys.
❑ Press [OK].
❑ Enter your PIN code and press [OK].
The PIN code that you enter will be
displayed as asterisks (*******) when the
screen returns to the initial log-in
screen.
Logging in to the Machine
EN-10
Page 18
English
2
Press [ ] (Log In/Out).
NOTE
• If you make a mistake when entering the PIN code, press [ ] (Clear) and enter the
correct PIN code.
• If the PIN code that you entered is incorrect, an error message will appear.
❑ If a screen prompting you to select a cost
Select Cost Center
Canon
Group 1
<Log In>
<To Sub Cost Center>
3
When your operations are complete, press (Log In/Out) to log
center appears, select the appropriate
cost center using [ ] or [ ].
• Select a cost center in the lower or
upper level by using <To Sub Cost
Center> or <To Parent Cost Center>.
• You can search for cost centers by
using <Search>.
• You can select a cost center from the
history by using <Display History>.
For more information on these search
options, see the note on p. EN-10.
❑ Select <Log In> using [ ] or [ ] and
press [OK].
The standby display appears.
out.
EN-11
Logging in to the Machine
Page 19
Using the ID Card
Use your ID card to log in when the screen shown in step 1 is displayed.
IMPORTANT
Logging-in by using the ID card is available only when the optional MiCard Reader is
attached to the machine.
1
Hold your card over
the reader until you
hear a beep. Press the
Hold your ID card over the
MiCard Reader until the display
switches to the next log-in step
or the standby display.
ID Key to log out
after the operation.
❑ If a screen prompting you to select a cost
Select Cost Center
Canon
Group 1
<Log In>
<To Sub Cost Center>
2
When your operations are complete, hold your ID card over the
MiCard Reader until the log-in screen shown in step 1 appears.
center appears, select the appropriate
cost center using [ ] or [ ].
• Select a cost center in the lower or
upper level by using <To Sub Cost
Center> or <To Parent Cost Center>.
• You can search for cost centers by
using <Search>.
• You can select a cost center from the
history by using <Display History>.
For more information on these search
options, see the note on p. EN-10.
❑ Select <Log In> using [ ] or [ ] and
press [OK].
The standby display appears.
English
You can also log out of the machine by pressing [ ] (Log In/Out).
Logging in to the Machine
EN-12
Page 20
English
Entering a Department ID and PIN
Enter your Department ID and PIN to log in when the screen shown in step 1 is
displayed.
IMPORTANT
This log-in method is available only when "Authentication to the Machine" (p. EN-3) is
applied as the authentication mode.
NOTE
To log in to the machine, you must have a valid department ID and PIN (if set)
registered. For more information, see the documentation included with the uniFLOW
software.
1
Enter Dept. ID & PIN
Login: Press ID
Logout: Press ID
Dept. ID:
PIN:
Dept. ID
ޓ
0123456
(Apply: Press OK)
PIN
ޓ
*******
(Apply: Press OK)
2
Press [ ] (Log In/Out).
Enter your department ID and
PIN (up to 7 digits respectively)
using the numeric keys.
❑ Select <Dept. ID> using [ ] or [ ] and
press [OK].
❑ Enter your department ID and press
[OK].
❑ On the screen shown in step 1, select
<PIN> using [ ] or [ ] and press [OK].
❑ Enter your PIN and press [OK].
The PIN that you enter for the PIN is
displayed as asterisks (*******).
EN-13
Logging in to the Machine
Page 21
NOTE
• If no PIN is set for the department ID, leave <PIN> blank.
• If you make a mistake when entering the department ID/PIN, press [ ] (Clear) and
enter the correct department ID/PIN.
• If the department ID/PIN that you entered is incorrect, an error message will appear.
❑ If a screen prompting you to select a cost
Select Cost Center
Canon
Group 1
<Log In>
<To Sub Cost Center>
3
When your operations are complete, press [ ] (Log In/Out) to log
center appears, select the appropriate
cost center using [ ] or [ ].
• Select a cost center in the lower or
upper level by using <To Sub Cost
Center> or <To Parent Cost Center>.
• You can search for cost centers by
using <Search>.
• You can select a cost center from the
history by using <Display History>.
For more information on these search
options, see the note on p. EN-10.
❑ Select <Log In> using [ ] or [ ] and
press [OK].
The standby display appears.
out.
English
Logging in to the Machine
EN-14
Page 22
Keeping Documents Unprinted Until Logging-In (Login and Document Release)
English
You can keep your documents unprinted until you log in to the machine or the Login
and Document Release function. Your documents are printed out only when you
log in at the machine. This means you can securely collect confidential documents
and eliminate the problem of forgotten printouts in the machine's output tray.
The machine prompts you to log in either when you are using the machine or using
the Login and Document Release function, depending on the setting. Follow the
procedure below.
To log in to the machine first and print your documents:
If a log-in screen is displayed when turning on the machine or clearing the Sleep
mode, log in to the machine first to use the Login and Document Release function
by the procedure below.
1
On your computer, perform a command for printing the document
you want to print.
Click [Print] or [OK] on the dialog box of the printer driver. The command name varies
depending on the application software you are using.
2
Enter User ID & Pswrd
Log in to the machine as
indicated on the screen.
Login: Press ID
Logout: Press ID
User ID:
Password:
NOTE
The screen shown left is an example
of the log-in screens. For more
information on the other log-in
methods, see "Logging in to the
Machine," on p. EN-8.
EN-15
Keeping Documents Unprinted Until Logging-In (Login and Document Release)
Page 23
Select Cost Center
Canon
Group 1
<Log In>
<To Sub Cost Center>
3
Press [ ] (Secure Print).
4
Print the document.
● If set to display cost:
Print 2 job(s)?
Total Cost:
$2.00
<No>
<Yes>
If a screen prompting you to select a cost
❑
center appears, select the appropriate
cost center using [ ] or [ ].
• Select a cost center in the lower or
upper level by using <To Sub Cost
Center> or <To Parent Cost Center>.
• You can search for cost centers by
using <Search>.
• You can select a cost center from the
history by using <Display History>.
For more information on these search
options, see the note on p. EN-10.
❑ Select <Log In> using [ ] or [ ] and
press [OK].
The standby display appears.
❑ Select <Yes> using [ ] or [ ] and
press [OK].
NOTE
The total cost for the job(s) may be
displayed depending on the setting.
English
The <Copy/Print Job Status> screen is
Copy/Print Job Status
displayed.
13:30PM Printing
13:30PM Waiting
Keeping Documents Unprinted Until Logging-In (Login and Document Release)
To view the details of the print job status
or cancel the print job, select the
desired job using [ ] or [ ] and press
[OK]. On the <Details> screen, select
<Cancel> using [ ] or [ ] and press
[OK] to cancel the job.
EN-16
Page 24
● If set to display My Print Jobs:
English
My Print Jobs
<Update>
<Print All>
Canon01.pdf 2013/0
Samplepage.pdf 2
...
Print/Delete
<Print>
<Delete>
5
When printing is complete, press [ ] (Log In/Out) to log out of the
❑ Select the job you want to print using [ ]
or [ ] and press [OK].
Repeat this procedure to select all jobs
you want to print, and press [ ].
NOTE
• If the jobs you want to print are not
displayed, select <Update> and
press [OK]. Jobs will be loaded
again.
• You can print all print jobs by
selecting <Print All> and pressing
[OK].
❑ Select <Print> using [ ] or [ ] and
press [OK].
NOTE
You can delete selected jobs by
selecting <Delete> and pressing [OK].
machine.
EN-17
NOTE
You can also log out of the machine by holding your ID card over the optional MiCard
Reader (except when the department ID and PIN is applied as the log-in method).
Keeping Documents Unprinted Until Logging-In (Login and Document Release)
Page 25
To log in to the Login and Document Release function:
If a standby display such as for Copy function, instead of a log-in screen, is
displayed when turning on the machine or clearing the Sleep mode, log in to the
Login and Document Release function by the procedure below.
1
On your computer, perform a command for printing the document
you want to print.
Click [Print] or [OK] on the dialog box of the printer driver. The command name varies
depending on the application software you are using.
2
Press [ ] (Secure Print).
English
3
Enter User ID & Pswrd
Login: Press ID
User ID:
Password ID:
Select Cost Center
Canon
Group 1
<Log In>
<To Sub Cost Center>
Log in to the Login and
Document Release function as
indicated on the screen.
NOTE
The screen shown left is an example
of the log-in screens. For more
information on the other log-in
methods, see "Logging in to the
Machine," on p. EN-8.
❑ If a screen prompting you to select a cost
center appears, select the appropriate
cost center using [ ] or [ ].
• Select a cost center in the lower or
upper level by using <To Sub Cost
Center> or <To Parent Cost Center>.
• You can search for cost centers by
using <Search>.
• You can select a cost center from the
history by using <Display History>.
For more information on these search
options, see the note on p. EN-10.
❑ Select <Log In> using [ ] or [ ] and
press [OK].
Keeping Documents Unprinted Until Logging-In (Login and Document Release)
EN-18
Page 26

English
4
Print the document.
● If set to display cost:
Print 2 job(s)?
Total Cost:
$2.00
<No>
<Yes>
Copy/Print Job Status
13:30PM Printing
13:30PM Waiting
● If set to display My Print Jobs:
Select <Yes> using [ ] or [ ] and
❑
press [OK].
NOTE
The total cost for the job(s) may be
displayed depending on the setting.
The <Copy/Print Job Status> screen is
displayed.
To view the details of the print job status
or cancel the print job, select the
desired job using [ ] or [ ] and press
[OK]. On the <Details> screen, select
<Cancel> using [ ] or [ ] and press
[OK] to cancel the job.
My Print Jobs
<Update>
<Print All>
Canon01.pdf 2013/0
Samplepage.pdf 2
...
Print/Delete
<Print>
<Delete>
❑ Select the job you want to print using [ ]
or [ ] and press [OK].
Repeat this procedure to select all jobs
you want to print, and press [ ].
NOTE
• If the jobs you want to print are not
displayed, select <Update> and
press [OK]. Jobs will be loaded
again.
• You can print all print jobs by
selecting <Print All> and pressing
[OK].
❑ Select <Print> using [ ] or [ ] and
press [OK].
NOTE
You can delete selected jobs by
selecting <Delete> and pressing [OK].
EN-19
Keeping Documents Unprinted Until Logging-In (Login and Document Release)
Page 27

English
Keeping Documents Unprinted Until Logging-In (Login and Document Release)
EN-20
Page 28

imageRUNNER
Français
1133/1133A/1133iF
Guide d’uniFLOW Login
Device Client
Page 29

Français
Pour visualiser le manuel au format PDF, Adobe Reader/Adobe Acrobat Reader est nécessaire. Si Adobe Reader/Adobe Acrobat Reader n’est pas
installé sur le système, il est possible de le télécharger depuis le site Web d’Adobe Systems Incorporated.
Un soin particulier a été apporté à la rédaction de ce guide afin d’éviter les inexactitudes ou omissions. Toutefois, du fait de notre souci constant
d’amélioration de nos produits, il est possible d’obtenir des spécifications techniques précises auprès de la société Canon.
Page 30

Table des matières
Français
Préface . . . . . . . . . . . . . . . . . . . . . . . . . . . . . . . . . . . . . . . . . . . . . . . . . . . . . . FR-iv
Présentation du guide . . . . . . . . . . . . . . . . . . . . . . . . . . . . . . . . . . . . . . . . . . FR-iv
Conventions adoptées dans ce guide . . . . . . . . . . . . . . . . . . . . . . . . . . . . . FR-iv
Touches utilisées dans ce guide . . . . . . . . . . . . . . . . . . . . . . . . . . . . . . . . . FR-iv
Affichages utilisées dans ce guide . . . . . . . . . . . . . . . . . . . . . . . . . . . . . . . . FR-v
Marques . . . . . . . . . . . . . . . . . . . . . . . . . . . . . . . . . . . . . . . . . . . . . . . . . . . . FR-v
Mentions légales . . . . . . . . . . . . . . . . . . . . . . . . . . . . . . . . . . . . . . . . . . . . . . FR-vi
Copyright . . . . . . . . . . . . . . . . . . . . . . . . . . . . . . . . . . . . . . . . . . . . . . . . . . . FR-vi
Limites de responsabilité . . . . . . . . . . . . . . . . . . . . . . . . . . . . . . . . . . . . . . . FR-vi
Gestion de l’imprimante avec l’intégration uniFLOW . . . . . . . . . . . . . . . . . FR-1
Intérêts de l’intégration uniFLOW. . . . . . . . . . . . . . . . . . . . . . . . . . . . . . . . . FR-2
Modes d’authentification serveur uniFLOW et méthodes de connexion . . . FR-2
Connexion et publication de documents . . . . . . . . . . . . . . . . . . . . . . . . FR-2
Utilisation des centres de coûts . . . . . . . . . . . . . . . . . . . . . . . . . . . . . . . FR-2
Activation et réglages de l’intégration uniFLOW . . . . . . . . . . . . . . . . . . . . . FR-3
Environnement système . . . . . . . . . . . . . . . . . . . . . . . . . . . . . . . . . . . . . FR-3
Configuration de l’intégration uniFLOW . . . . . . . . . . . . . . . . . . . . . . . . . FR-3
Modes d’authentification par l’intégration uniFLOW. . . . . . . . . . . . . . . . . . . FR-3
Authentification au niveau de l’imprimante . . . . . . . . . . . . . . . . . . . . . . FR-3
Authentification par la fonction de connexion et de publication
de documents . . . . . . . . . . . . . . . . . . . . . . . . . . . . . . . . . . . . . . . . . . . . FR-4
Méthodes de connexion par l’intégration uniFLOW . . . . . . . . . . . . . . . . . . . FR-4
ID utilisateur et mot de passe. . . . . . . . . . . . . . . . . . . . . . . . . . . . . . . . . FR-4
Code PIN . . . . . . . . . . . . . . . . . . . . . . . . . . . . . . . . . . . . . . . . . . . . . . . . FR-4
Carte d’identité. . . . . . . . . . . . . . . . . . . . . . . . . . . . . . . . . . . . . . . . . . . . FR-4
Numéro de service et code PIN. . . . . . . . . . . . . . . . . . . . . . . . . . . . . . . FR-4
Configuration de la gestion des numéros de service en vue
de l’intégration uniFLOW . . . . . . . . . . . . . . . . . . . . . . . . . . . . . . . . . . . . . . . FR-5
Utilisation de l’imprimante comme administrateur système . . . . . . . . . . . . . FR-6
Redéfinition de l’adresse IP de l’imprimante . . . . . . . . . . . . . . . . . . . . . . . . FR-7
Connexion à l’imprimante. . . . . . . . . . . . . . . . . . . . . . . . . . . . . . . . . . . . . . . . FR-8
Saisie d’un ID utilisateur et d’un mot de passe . . . . . . . . . . . . . . . . . . . . . . FR-8
Saisie d’un code PIN . . . . . . . . . . . . . . . . . . . . . . . . . . . . . . . . . . . . . . . . . FR-10
Utilisation de la carte d’identité . . . . . . . . . . . . . . . . . . . . . . . . . . . . . . . . . FR-12
Saisie d’un numéro de service et d’un code PIN . . . . . . . . . . . . . . . . . . . . FR-13
Suspension de l’impression de documents sans connexion
(fonction de connexion et de publication de documents) . . . . . . . . . . . . . FR-15
Pour vous connecter à l’imprimante, puis imprimer
vos documents :. . . . . . . . . . . . . . . . . . . . . . . . . . . . . . . . . . . . . . . . . . FR-15
Pour se connecter à la fonction de connexion et de publication
de documents : . . . . . . . . . . . . . . . . . . . . . . . . . . . . . . . . . . . . . . . . . . FR-18
FR-iii
Page 31

Préface
IMPORTANT
REMARQUE
Nous vous remercions d’avoir porté votre choix sur l’imprimante Canon imageRUNNER
1133/1133A/1133iF. Nous vous invitons à lire attentivement ce guide avant toute utilisation
afin de tirer le meilleur parti des fonctionnalités de l’imprimante. Nous vous conseillons
également de conserver ce guide afin de pouvoir le consulter en cas de besoin.
Présentation du guide
Conventions adoptées dans ce guide
Des symboles sont utilisés dans ce guide pour attirer l’attention sur les procédures,
restrictions, précautions d’emploi et consignes de sécurité à observer.
Point important concernant le fonctionnement. A lire attentivement pour
bien utiliser la machine et éviter de l’endommager ou de causer des
dommages matériels.
Informations complémentaires concernant le fonctionnement ou les
procédures. Il est conseillé de lire ces informations.
Touches utilisées dans ce guide
Français
Le tableau suivant explique la manière dont les touches tactiles du panneau de
commande sont désignées dans ce guide :
[Icône de la touche] + (nom de
la touche)
[Nom de la touche] [OK]
[Icône de la touche] [ ], [ ], etc.
Touches Exemple
[ ] (Menu)
FR-iv
Page 32

Affichages utilisées dans ce guide
Marques
Français
Selon la configuration de votre machine, il est possible que les captures d’écran
figurant dans ce guide ne reflètent pas tout à fait la réalité.
uniFLOW et MiCard® sont des marques déposées de NT-ware
Systemprogrammierung GmbH.
Les autres noms de produits et de sociétés cités dans le présent guide peuvent
être des marques de leurs propriétaires respectifs.
FR-v
Page 33

Mentions légales
Copyright
Copyright 2013 Canon Inc. Tous droits réservés.
Aucune partie de ce document ne peut être reproduite ou transmise sous quelque
forme et par quelque moyen que ce soit, électronique ou mécanique, notamment
par photocopie ou enregistrement, ou par tout système de stockage ou d’extraction
d’informations, sans le consentement écrit préalable de la société Canon Inc.
Limites de responsabilité
Les informations contenues dans ce document peuvent être modifiées sans avis
préalable.
À L’EXCEPTION DE LA GARANTIE CI-INCLUSE, CANON INC. NE FOURNIT
AUCUNE AUTRE GARANTIE QUELCONQUE AVEC CETTE MACHINE,
EXPLICITE OU IMPLICITE, Y COMPRIS MAIS NON LIMITÉE À TOUTE
GARANTIE DE COMMERCIALISATION, DE VALEUR COMMERCIALE,
D’ADÉQUATION À UN USAGE PARTICULIER OU DE CONTREFAÇON. CANON
INC. NE POURRA PAS ÊTRE TENU POUR RESPONSABLE DES DOMMAGES
DIRECTS, SECONDAIRES OU INDIRECTS DE QUELQUE NATURE QUE CE
SOIT, NI MÊME DES PERTES OU DES FRAIS RÉSULTANT DE L’EMPLOI DE
CE MATÉRIEL.
Français
FR-vi
Page 34

Gestion de l’imprimante avec l’intégration uniFLOW
IMPORTANT
Fonctions avec l’intégration uniFLOW
• Authentification serveur uniFLOW
• Connexion et publication de documents
• Sélection d’un centre de coûts
Serveur uniFLOW
• active l’intégration uniFLOW
dans l’imprimante
• authentifie les utilisateurs
• indique les réglages
Serveur uniFLOW Imprimante
Français
Cette section présente l’intégration uniFLOW.
Le serveur uniFLOW, c’est-à-dire le serveur sur lequel le logiciel uniFLOW est
installé, détecte l’imprimante sur le réseau et active l’intégration uniFLOW dans
l’imprimante. Le serveur uniFLOW authentifie les utilisateurs qui se connectent à
l’imprimante et indique les réglages à cette dernière. Lorsque l’intégration est
activée, le serveur uniFLOW et l’imprimante continuent de communiquer pour
mettre en œuvre l’intégration uniFLOW.
FR-1
L’intégration uniFLOW est activée seulement si l’imprimante est reliée au serveur
uniFLOW par le réseau. Le serveur uniFLOW est un serveur sur lequel le logiciel
uniFLOW en option est activé.
Gestion de l’imprimante avec l’intégration uniFLOW
Page 35

Intérêts de l’intégration uniFLOW
Les fonctions intégrées à la machine sont activées par le serveur uniFLOW. Voici
les principales fonctions disponibles :
Modes d’authentification serveur uniFLOW et méthodes de
connexion
Vous pouvez gérer l’imprimante en restreignant son usage aux utilisateurs
enregistrés sur le serveur uniFLOW. Il existe deux possibilités d’authentification:
l’authentification au niveau de l’imprimante et l’authentification par la fonction de
connexion et de publication de documents. Chacun des modes d’authentification
propose différentes méthodes de connexion (par carte d’identité* ou par saisie d’un
code PIN, par exemple). (Voir « Modes d’authentification par l’intégration
uniFLOW », p. FR-3 et « Méthodes de connexion par l’intégration uniFLOW »,
p. FR-4.)
* Le module MiCard Reader de NT-ware, en option, est nécessaire.
Connexion et publication de documents
Vous pouvez régler l’imprimante de façon à empêcher l’impression des documents
tant que l’utilisateur envoyant les données d’impression ne s’est pas connecté à
l’imprimante ou à la fonction de connexion et de publication de documents. Vous
pouvez également configurer la machine pour autoriser les utilisateurs à
sélectionner les tâches qu'ils souhaitent imprimer. Les documents ne sont
imprimés que lorsque l’utilisateur se connecte à l’imprimante. Cette procédure
permet à l’utilisateur de rassembler, en toute sécurité, des documents confidentiels
et évacue le problème des impressions oubliées dans le bac de sortie de
l’imprimante. Cette fonction est possible grâce au serveur uniFLOW (serveur
d’impression) qui suspend les tâches en l’absence de connexion de l’utilisateur.
Pour plus d’instructions sur l’utilisation de la fonction de connexion et publication de
documents, consultez « Suspension de l’impression de documents sans connexion
(fonction de connexion et de publication de documents) », p. FR-15.
Utilisation des centres de coûts
Vous pouvez enregistrer les centres de coûts (tables comptables pour le calcul des
coûts des tâches réalisées) et les imputer aux utilisateurs dans le serveur
uniFLOW. Vous trouverez ci-dessous quelques exemples d’utilisation des centres
de coûts:
■ Sélection d’un centre de coûts au moment de la connexion:
Lorsqu’un utilisateur ouvre une session sur l’imprimante, un écran l’invitant à
sélectionner un centre de coûts peut apparaître sur l’afficheur. L’utilisateur choisit
un centre de coûts de sorte que le serveur uniFLOW enregistre le coût de la tâche
effectuée par l’utilisateur.
Français
Gestion de l’imprimante avec l’intégration uniFLOW
FR-2
Page 36

■ Affichage des coûts liés aux tâches de la fonction de connexion et de
publication de documents à l’écran :
Il est possible de régler l’imprimante de manière à afficher les coûts générés par la
tâche sur l’afficheur lorsqu’un utilisateur recourt à la fonction de connexion et de
publication de documents de l’imprimante.
Pour plus d’informations sur les centres de coûts, consultez la documentation
accompagnant le logiciel uniFLOW.
Activation et réglages de l’intégration uniFLOW
L’activation et la configuration de l’intégration uniFLOW se présentent de la
manière suivante.
Français
Modes d’authentification par l’intégration uniFLOW
Environnement système
Pour activer l’intégration uniFLOW, l’imprimante doit être reliée au serveur
uniFLOW (serveur sur lequel le logiciel uniFLOW est installé) par le biais du
réseau. Pour plus d’informations à ce sujet, consultez la documentation
accompagnant le logiciel uniFLOW.
Configuration de l’intégration uniFLOW
Les différents réglages de l’intégration uniFLOW comme l’enregistrement de
l’utilisateur ne sont réalisables que sur le serveur uniFLOW. Même si aucun
réglage particulier n’est requis sur l’imprimante, pensez à vérifier les réglages de
gestion des numéros de services pour garantir le bon fonctionnement de la gestion
des numéros de service avec l’intégration uniFLOW. (Voir « Configuration de la
gestion des numéros de service en vue de l’intégration uniFLOW », p. FR-5.)
L’intégration uniFLOW dispose des modes d’authentification suivants :
Authentification au niveau de l’imprimante
Les utilisateurs sont invités à se connecter à l’imprimante. Les utilisateurs sont
tenus de s’identifier lorsqu’ils font appel aux fonctions de l’imprimante telles que les
fonctions Copie ou Lecture.
FR-3
Gestion de l’imprimante avec l’intégration uniFLOW
Page 37

Authentification par la fonction de connexion et de publication de
REMARQUE
IMPORTANT
IMPORTANT
documents
Les utilisateurs sont invités à se connecter à la fonction de connexion et de
publication de documents. Dans ce cas, les utilisateurs peuvent utiliser les
fonctions de l’imprimante, comme les fonctions Copie ou Lecture, sans s’y
connecter. En revanche, les utilisateurs doivent s’identifier dès lors qu’ils veulent
utiliser la fonction de connexion et de publication de documents.
Méthodes de connexion par l’intégration uniFLOW
L’intégration uniFLOW autorise les méthodes de connexion suivantes :
• Pour savoir comment se connecter à l’imprimante en tant qu’administrateur système,
consultez « Utilisation de l’imprimante comme administrateur système », p. FR-6.
• Pour obtenir des informations sur la manière de se connecter à l’imprimante selon
chacune des méthodes, consultez « Connexion à l’imprimante », p. FR-8.
ID utilisateur et mot de passe
Les utilisateurs saisissent leur ID utilisateur et leur mot de passe sur le panneau de
commande de l’imprimante.
Code PIN
Les utilisateurs saisissent leur code PIN sur le panneau de commande de
l’imprimante.
Carte d’identité
Les utilisateurs placent leur carte d’identité au-dessus du module MiCard Reader
relié à l’imprimante.
Le module MiCard Reader est livré en option.
Numéro de service et code PIN
Les utilisateurs saisissent leur numéro de service et leur code PIN sur le panneau
de commande de l’imprimante.
La méthode de connexion via le numéro de service et le code PIN est disponible
uniquement lorsque l’utilisateur sélectionne « Authentification au niveau de
l’imprimante » (p. FR-3) comme mode d’authentification.
Français
Gestion de l’imprimante avec l’intégration uniFLOW
FR-4
Page 38

Configuration de la gestion des numéros de service en vue
REMARQUE
de l’intégration uniFLOW
Avant de pouvoir utiliser l’intégration uniFLOW, veillez à paramétrer la gestion des
numéros de services comme indiqué dans le tableau suivant.
Français
Mode d’authentification
(Voir p. FR-3)
Authentification au
niveau de l’imprimante
Authentification par la
fonction de connexion
et de publication de
documents
• Pour utiliser le numéro de service et le code PIN comme méthode de connexion,
enregistrez le code admin. système et le PIN admin. système (p. FR-6), ainsi que les
numéros de service et les codes PIN dans l’imprimante. La procédure
d’enregistrement des utilisateurs est la suivante :
- Dans l’imprimante, enregistrez le code admin. système et le PIN admin. système
correspondant à l’administrateur système.
- Dans l’imprimante, enregistrez les numéros de service et les codes PIN
correspondant aux autres utilisateurs (utilisateurs finaux).
- Sur le serveur uniFLOW, affectez le code admin. système et le PIN admin. système
ou un numéro de service et un code PIN à l’administrateur système ou aux autres
utilisateurs.
• Pour plus d’informations sur la méthode d’enregistrement des utilisateurs dans le
serveur uniFLOW, consultez la documentation qui accompagne le logiciel uniFLOW.
Méthode de
connexion (Voir
p. FR-4)
ID utilisateur et mot
de passe
Code PIN
Carte d’identité
Numéro de service
et code PIN
ID utilisateur et mot
de passe
Code PIN
Carte d’identité
Réglages requis de la gestion des
numéros de service sur l’imprimante
OUI/NON
OUI
NON
FR-5
Gestion de l’imprimante avec l’intégration uniFLOW
Page 39

Utilisation de l’imprimante comme administrateur
REMARQUE
REMARQUE
système
La procédure de connexion comme administrateur système varie selon le mode
d’authentification appliqué lors de l’intégration uniFLOW. Pour plus d’informations,
consultez le tableau ci-dessous.
L’administrateur système peut définir ou modifier les réglages système et d’autres
réglages auxquels lui seul peut accéder.
Mode d’authentification
(p. FR-3)
Authentification au niveau
de l’imprimante
Authentification par la
fonction de connexion et
de publication de
documents
• Vous pouvez octroyer à un utilisateur des privilèges d’administrateur système en
suivant les procédures ci-après. Ces procédures et privilèges sont applicables
uniquement lorsque vous sélectionnez « Authentification au niveau de l’imprimante ».
Pour plus d’informations à ce sujet, consultez la documentation accompagnant le
logiciel uniFLOW.
- Pour l’ID utilisateur et le mot de passe, le code PIN ou la carte d’identité,
sélectionnez le type d’utilisateur comme administrateur système lorsque vous
enregistrez l’utilisateur dans le serveur uniFLOW.
- Pour le numéro de service et le code PIN, affectez le code admin. système et le PIN
admin. système enregistrés dans l’imprimante à l’utilisateur lorsque vous enregistrez
ce dernier dans le serveur uniFLOW.
• Si vous vous connectez à l’imprimante en tant qu’utilisateur final en mode
« Authentification au niveau de l’imprimante », vous ne pouvez pas accéder aux
réglages système et aux autres réglages réservés à l’administrateur système, et un
message de type <Réglages système limités.> s’affiche. Pour accéder à ces réglages,
déconnectez-vous de l’imprimante, puis reconnectez-vous en tant qu’administrateur
système.
Procédure de connexion comme administrateur système
Connectez-vous à l’imprimante en utilisant votre ID et le mot
de passe correspondant, votre code PIN, votre carte
d’identité ou encore votre numéro de service et votre code
PIN en tant qu’administrateur système. Les autres
procédures de connexion sont similaires à celles utilisées
par les utilisateurs finaux. (Voir « Connexion à l’imprimante »,
p. FR-8.)
Pour accéder aux réglages système et à d’autres réglages
auxquels seul l’administrateur système peut accéder,
saisissez le code admin. système et le PIN admin. système
dans l’imprimante. Dans le cas contraire, tous les utilisateurs
peuvent se connecter à l’imprimante en tant
qu’administrateurs système et sont en mesure d’accéder aux
réglages système et à d’autres réglages réservés à
l’administrateur système.
Français
Gestion de l’imprimante avec l’intégration uniFLOW
FR-6
Page 40

Redéfinition de l’adresse IP de l’imprimante
REMARQUE
REMARQUE
Français
Si le message <Connexion au serveur impossible. Contacter admin. système.>
reste affiché après la mise sous tension de l’imprimante, il est possible que
l’adresse IP de cette dernière ne soit pas correctement définie. Rétablissez les
communications entre l’imprimante et le serveur uniFLOW en redéfinissant
l’adresse IP de l’imprimante comme décrit par la suite.
1
Appuyez sur (Menu).
2
Appuyez sur [OK] pour ouvrir le menu <Réglages réseau>.
● Si un écran vous invitant à saisir le code admin. système et le PIN admin.
système s’affiche :
❑
Sélectionnez <Code admin> à l’aide de [ ] ou [ ], puis appuyez sur [OK].
❑ Saisissez le code admin. système à l’aide du clavier numérique, puis appuyez sur
[OK].
❑ Sélectionnez <Code PIN> à l’aide de [ ] ou [ ], puis appuyez sur [OK].
❑ Saisissez le PIN admin. système à l’aide du clavier numérique, puis appuyez sur
[OK].
❑ Appuyez sur (Connexion/Déconnexion).
FR-7
Le code admin. système et le PIN admin. système sont tous deux réglés par
défaut sur ‘7654321’.
3
Vérifiez l’adresse IP de l’imprimante et réglez-la sur <Réglages
réseau>.
Définissez l’adresse IP de l’imprimante selon l’environnement réseau que vous
utilisez.
4
Redémarrez l’imprimante.
Mettez l’imprimante hors tension et patientez 10 secondes au moins avant de la mettre
à nouveau sous tension.
Gestion de l’imprimante avec l’intégration uniFLOW
Page 41

Connexion à l’imprimante
REMARQUE
REMARQUE
Saisir ID / mot passe
Connex.: Code conf.
Déconnex.: Code conf.
ID util.:
Mot passe:
ID utilisateur
Util.01
<Appliquer>
Mode de saisie: 12
Cette section décrit les procédures à suivre pour les différentes méthodes de
connexion proposées par l’intégration uniFLOW.
Lorsque le module MiCard Reader en option est relié à l’imprimante, vous pouvez
vous connecter et vous déconnecter en plaçant votre carte d’identité au-dessus du
module MiCard Reader, quelle que soit la méthode de connexion appliquée (sauf
lorsque vous sélectionnez la méthode de connexion via le numéro de service et le
code PIN).
Saisie d’un ID utilisateur et d’un mot de passe
Saisissez un ID utilisateur et un mot de passe pour vous connecter lorsque l’écran
illustré à l’étape 1 apparaît.
Pour vous connecter à l’imprimante, vous devez disposer d’un ID utilisateur et d’un
mot de passe (s’il est défini) valides et enregistrés. Pour plus d’informations sur
l’enregistrement d’un ID utilisateur et d’un mot de passe sur le serveur uniFLOW,
consultez la documentation accompagnant le logiciel uniFLOW.
1
Saisissez votre ID utilisateur et
votre mot de passe (jusqu’à 32
caractères respectivement) à
l’aide du clavier numérique.
❑ Sélectionnez <ID util.> à l’aide de [ ] ou
[ ], puis appuyez sur [OK].
❑ Saisissez votre ID utilisateur.
Vous pouvez modifier le mode de saisie
de texte en changeant le <Mode de
saisie>.
❑ Sélectionnez <Appliquer> à l’aide de [ ]
ou [ ], puis appuyez sur [OK].
Français
Connexion à l’imprimante
FR-8
Page 42

Français
REMARQUE
Mot de passe
12345678
<Appliquer>
Mode de saisie: 12
Sélect. centre coûts
Canon
Groupe 1
<Se connecter>
<Vers centre de coû
...
❑ Sur l’écran illustré à l’étape 1,
sélectionnez <Mot de passe> à l’aide de
[ ] ou [ ], puis appuyez sur [OK].
❑ Saisissez votre mot de passe.
Vous pouvez modifier le mode de saisie
de texte en changeant le <Mode de
saisie>.
❑ Sélectionnez <Appliquer> à l’aide de [ ]
ou [ ], puis appuyez sur [OK].
Les caractères que vous avez saisis
pour le mot de passe apparaissent sous
forme d’astérisques (*******) lorsque
l’écran de connexion initial est rétabli.
2
Appuyez sur [ ] (Connexion/Déconnexion).
• Si aucun mot de passe n’est défini pour l’ID utilisateur, laissez le champ <Mot de
passe> vide.
• En cas d’erreur de saisie l’ID utilisateur/mot de passe, appuyez sur [ ] (Effacement)
et saisissez l’ID utilisateur/mot de passe correct.
• Si l’ID utilisateur/mot de passe que vous avez indiqué est incorrect, un message
d’erreur s’affiche.
FR-9
Connexion à l’imprimante
❑ Si l’écran vous invitant à spécifier un
centre de coûts apparaît, sélectionnez le
centre de coûts qui convient à l’aide des
touches [ ] ou [ ].
• Sélectionnez un centre de coûts dans
le niveau inférieur ou supérieur à l’aide
de l’option <Vers centre de coûts
inférieur> ou <Vers centre de coûts
parent>.
• Vous pouvez rechercher les centres de
coûts à l’aide de l’option
<Rechercher>.
• Vous pouvez sélectionner un centre de
coûts dans l’historique à l’aide de
l’option <Afficher l’historique>.
Pour plus d’informations sur ces
options de recherche, consultez la
remarque à la p. FR-10.
❑ Sélectionnez <Se connecter> à l’aide de
[ ] ou [ ], puis appuyez sur [OK].
L’écran de veille s’affiche.
Page 43

REMARQUE
Les options de recherche des centres de coûts se trouvent dans la partie inférieure de
REMARQUE
Sélect. centre coûts
Canon
Groupe 1
<Vers centre de coût
<Vers centre de coû
...
Saisir code PIN
Connex.: Code conf.
Déconnex.: Code conf.
Code PIN:
ޓ
l’écran. Utilisez la touche [ ] ou [ ] pour sélectionner l’option de recherche de votre
choix, puis appuyez sur [OK].
• <Vers centre de coûts inférieur> :
utilisez cette option pour accéder aux
centres de coûts du niveau inférieur.
• <Vers centre de coûts parent> : utilisez
cette option pour accéder aux centres
de coûts du niveau supérieur.
• <Rechercher> : utilisez cette option
pour rechercher les centres de coûts
en saisissant les premiers caractères
du centre correspondant.
• <Afficher l’historique> : utilisez cette
option pour afficher et sélectionner les
centres de coûts utilisés
précédemment.
3
Lorsque vous avez terminé ces opérations, appuyez sur [ ]
(Connexion/Déconnexion) pour vous déconnecter.
Saisie d’un code PIN
Saisissez votre code PIN pour vous connecter lorsque l’écran illustré à l’étape 1
apparaît.
Français
Pour se connecter à l’imprimante, il est nécessaire de posséder un code PIN correct
enregistré. Pour plus d’informations sur l’enregistrement d’un code PIN sur le serveur
uniFLOW, consultez la documentation accompagnant le logiciel uniFLOW.
1
Saisissez votre code PIN
(20 chiffres au maximum) à l’aide
du clavier numérique.
❑ Appuyez sur [OK].
Connexion à l’imprimante
FR-10
Page 44

Français
REMARQUE
Code PIN
ޓ
12345678
(Appliquer: app. OK)
Sélect. centre coûts
Canon
Groupe 1
<Se connecter>
<Vers centre de coû
...
❑ Saisissez votre code PIN et appuyez sur
[OK].
Le code PIN que vous avez saisi
apparaît sous forme d’astérisques
(*******) lorsque l’écran de connexion
initial est rétabli.
2
Appuyez sur [ ] (Connexion/Déconnexion).
• En cas d’erreur de saisie du code PIN, appuyez sur [ ] (Effacement) et saisissez le
code PIN correct.
• Si le code PIN que vous avez indiqué est incorrect, un message d’erreur s’affiche.
❑ Si l’écran vous invitant à spécifier un
centre de coûts apparaît, sélectionnez le
centre de coûts qui convient à l’aide des
touches [ ] ou [ ].
• Sélectionnez un centre de coûts dans
le niveau inférieur ou supérieur à l’aide
de l’option <Vers centre de coûts
inférieur> ou <Vers centre de coûts
parent>.
• Vous pouvez rechercher les centres de
coûts à l’aide de l’option
<Rechercher>.
• Vous pouvez sélectionner un centre de
coûts dans l’historique à l’aide de
l’option <Afficher l’historique>.
Pour plus d’informations sur ces
options de recherche, consultez la
remarque à la p. FR-10.
❑ Sélectionnez <Se connecter> à l’aide de
[ ] ou [ ], puis appuyez sur [OK].
L’écran de veille s’affiche.
3
Lorsque vous avez terminé ces opérations, appuyez sur
(Connexion/Déconnexion) pour vous connecter.
FR-11
Connexion à l’imprimante
Page 45

Utilisation de la carte d’identité
IMPORTANT
Maintenir carte sur
lect. jusqu'à ce qu'un
bip soit émis. App.
sur Code conf. pour
se déconnec. après op.
Sélect. centre coûts
Canon
Groupe 1
<Se connecter>
<Vers centre de coû
...
Votre carte d’identité vous permet de vous connecter lorsque l’écran illustré à
l’étape 1 apparaît.
La connexion à l’aide de la carte d’identité n’est possible que si le module
MiCard Reader en option est relié à l’imprimante.
1
Placez votre carte d’identité
au-dessus du module MiCard
Reader jusqu’à ce que l’écran
affiche l’étape de connexion
suivante ou l’écran de veille.
❑ Si l’écran vous invitant à spécifier un
centre de coûts apparaît, sélectionnez le
centre de coûts qui convient à l’aide des
touches [ ] ou [ ].
• Sélectionnez un centre de coûts dans
le niveau inférieur ou supérieur à l’aide
de l’option <Vers centre de coûts
inférieur> ou <Vers centre de coûts
parent>.
• Vous pouvez rechercher les centres de
coûts à l’aide de l’option
<Rechercher>.
• Vous pouvez sélectionner un centre de
coûts dans l’historique à l’aide de
l’option <Afficher l’historique>.
Pour plus d’informations sur ces
options de recherche, consultez la
remarque à la p. FR-10.
❑ Sélectionnez <Se connecter> à l’aide de
[ ] ou [ ], puis appuyez sur [OK].
L’écran de veille s’affiche.
Français
2
Une fois les opérations terminées, placez votre carte d’identité
au-dessus du module MiCard Reader jusqu’à ce que l’écran de
connexion illustré à l’étape 1 apparaisse.
Vous pouvez également vous déconnecter de l’imprimante en appuyant sur [ ]
(Connexion/Déconnexion).
Connexion à l’imprimante
FR-12
Page 46

Saisie d’un numéro de service et d’un code PIN
IMPORTANT
REMARQUE
Saisir n° service&PIN
Connex: Tche Code conf
Déconnex: Code confid
N° de serv.:
Code PIN:
N° service
ޓ
0123456
(Appliquer: app. OK)
Code PIN
ޓ
*******
(Appliquer: app. OK)
Français
Saisissez un numéro de service et un code PIN pour vous connecter lorsque
l’écran illustré à l’étape 1 apparaît.
Cette méthode de connexion est disponible uniquement lorsque l’utilisateur
sélectionne « Authentification au niveau de l’imprimante » (p. FR-3) comme mode
d’authentification.
Pour vous connecter à l’imprimante, vous devez disposer d’un numéro de service et
d’un code PIN (s’il est défini) valides et enregistrés. Pour plus d’informations à ce
sujet, consultez la documentation accompagnant le logiciel uniFLOW.
1
Saisissez votre numéro de
service et votre code PIN
(jusqu’à 7 chiffres
respectivement) à l’aide du
clavier numérique.
❑ Sélectionnez <N° de serv.> à l’aide de
[ ] ou [ ], puis appuyez sur [OK].
❑ Saisissez votre numéro de service et
appuyez sur [OK].
❑ Sur l’écran illustré à l’étape 1,
sélectionnez <Code PIN> à l’aide de [ ]
ou [ ], puis appuyez sur [OK].
❑ Saisissez votre code PIN et appuyez sur
[OK].
Le code PIN saisi s’affiche sous forme
d’astérisques (********).
2
Appuyez sur [ ] (Connexion/Déconnexion).
FR-13
Connexion à l’imprimante
Page 47

REMARQUE
• Si aucun code PIN n’est défini pour le numéro de service, laissez le champ <Code
Sélect. centre coûts
Canon
Groupe 1
<Se connecter>
<Vers centre de coû
...
PIN> vide.
• En cas d’erreur de saisie du numéro de service/code PIN, appuyez sur [ ]
(Effacement) et saisissez le numéro/code correct.
• Si le numéro de service/code PIN que vous avez indiqué est incorrect, un message
d’erreur s’affiche.
❑ Si l’écran vous invitant à spécifier un
centre de coûts apparaît, sélectionnez le
centre de coûts qui convient à l’aide des
touches [ ] ou [ ].
• Sélectionnez un centre de coûts dans
le niveau inférieur ou supérieur à l’aide
de l’option <Vers centre de coûts
inférieur> ou <Vers centre de coûts
parent>.
• Vous pouvez rechercher les centres de
coûts à l’aide de l’option
<Rechercher>.
• Vous pouvez sélectionner un centre de
coûts dans l’historique à l’aide de
l’option <Afficher l’historique>.
Pour plus d’informations sur ces
options de recherche, consultez la
remarque à la p. FR-10.
❑ Sélectionnez <Se connecter> à l’aide de
[ ] ou [ ], puis appuyez sur [OK].
L’écran de veille s’affiche.
Français
3
Lorsque vous avez terminé ces opérations, appuyez sur [ ]
(Connexion/Déconnexion) pour vous déconnecter.
Connexion à l’imprimante
FR-14
Page 48

Suspension de l’impression de documents sans connexion
REMARQUE
Saisir ID / mot passe
Connex.: Code conf.
Déconnex.: Code conf.
ID util.:
Mot passe:
(fonction de connexion et de publication de documents)
Français
Il est possible de différer l’impression des documents tant que vous n’êtes pas
connecté à l’imprimante ou à la fonction de connexion et de publication de
documents. Vos documents seront imprimés à condition de se connecter à
l’imprimante. Cette procédure permet de rassembler, en toute sécurité, des
documents confidentiels et évacue le problème des impressions oubliées dans le
bac de sortie de l’imprimante.
L’imprimante vous invite à vous connecter soit lorsque vous l’utilisez, soit lorsque
vous utilisez la fonction de connexion et de publication de documents suivant le
réglage spécifié. Conformez-vous à la procédure suivante.
Pour vous connecter à l’imprimante, puis imprimer vos documents :
Si un écran de connexion s’affiche à la mise sous tension de l’imprimante ou à la
sortie du mode Veille, connectez-vous d’abord à l’imprimante pour utiliser la
fonction de connexion et de publication de documents comme indiqué ci-dessous.
1
Sur l’ordinateur, lancez la commande d’impression du document
à sortir.
Cliquez sur [Imprimer] ou sur [OK] dans la boîte de dialogue du pilote d’imprimante.
Le nom de la commande varie selon l’application logicielle utilisée.
2
FR-15
Suspension de l’impression de documents sans connexion (fonction de connexion et de publication de documents)
Connectez-vous à l’imprimante
comme illustré à l’écran.
L’écran figurant à gauche est un
exemple d’écran de connexion. Pour
plus d’informations sur les autres
méthodes de connexion, consultez
« Connexion à l’imprimante », p. FR-8.
Page 49

3
REMARQUE
Sélect. centre coûts
Canon
Groupe 1
<Se connecter>
<Vers centre de coû
...
Imprimer 2 tâche(s)?
Coût total:
$2.00
<Non>
<Oui>
Appuyez sur [ ] (Impression sécurisée).
❑
Si l’écran vous invitant à spécifier un
centre de coûts apparaît, sélectionnez le
centre de coûts qui convient à l’aide des
touches [ ] ou [ ].
• Sélectionnez un centre de coûts dans
le niveau inférieur ou supérieur à l’aide
de l’option <Vers centre de coûts
inférieur> ou <Vers centre de coûts
parent>.
• Vous pouvez rechercher les centres de
coûts à l’aide de l’option
<Rechercher>.
• Vous pouvez sélectionner un centre de
coûts dans l’historique à l’aide de
l’option <Afficher l’historique>.
Pour plus d’informations sur ces
options de recherche, consultez la
remarque à la p. FR-10.
❑ Sélectionnez <Se connecter> à l’aide de
[ ] ou [ ], puis appuyez sur [OK].
L’écran de veille s’affiche.
Français
4
Imprimez le document.
● Si configuré pour afficher le coût :
Suspension de l’impression de documents sans connexion (fonction de connexion et de publication de documents)
❑ Sélectionnez <Oui> à l’aide de [ ] ou
[ ], puis appuyez sur [OK].
Le coût total de la tâche ou des tâches
s’affiche éventuellement selon le
réglage utilisé.
FR-16
Page 50

Français
REMARQUE
REMARQUE
REMARQUE
Statut tch Copie/Impr.
13:30PM Impression
13:30PM En attente
Mes tâches impression
<Mettre à jour>
<Imprimer tout>
Canon01.pdf 2013/0
Samplepage.pdf 2
...
Imprimer/Supprimer
<Imprimer>
<Effacer>
L’écran <Statut tch Copie/Impr.>
s’affiche.
Pour afficher les détails du statut de la
tâche d’impression ou annuler la tâche
d’impression, sélectionnez la tâche de
votre choix à l’aide de la touche [ ] ou
[ ], puis appuyez sur [OK]. Sur l’écran
<Détails>, sélectionnez <Annuler> à
l’aide de la touche [ ] ou [ ], puis
appuyez sur [OK] pour annuler la tâche.
● Si configuré pour afficher Mes tâches impression :
❑ Sélectionnez la tâche que vous
souhaitez imprimer à l'aide de [ ] ou
[ ] et appuyez sur [OK].
Répétez cette procédure pour
sélectionner toutes les tâches que vous
souhaitez imprimer et appuyez sur [ ].
• Si les tâches que vous souhaitez
imprimer ne s'affichent pas,
sélectionnez <Mettre à jour> et
appuyez sur [OK]. Les tâches sont à
nouveau chargées.
• Vous pouvez imprimer toutes les
tâches d'impression en sélectionnant
<Imprimer tout> et en appuyant sur
[OK].
❑ Sélectionnez <Imprimer> à l'aide de [ ]
ou [ ] et appuyez sur [OK].
5
Lorsque l’impression est terminée, appuyez sur [ ] (Connexion/
Déconnexion) pour vous déconnecter de l’imprimante.
Vous pouvez également vous déconnecter en plaçant votre carte d’identité au-dessus
FR-17
du module MiCard Reader en option (sauf lorsque vous vous connectez via le numéro
de service et le code PIN).
Suspension de l’impression de documents sans connexion (fonction de connexion et de publication de documents)
Vous pouvez supprimer les tâches
sélectionnées en sélectionnant
<Effacer> et en appuyant sur [OK].
Page 51

Pour se connecter à la fonction de connexion et de publication de
REMARQUE
Saisir ID et mot passe
Connex.: Code confid.
ID util.:
Mot passe:
documents :
Si un écran de veille comme celui de la fonction Copie s’affiche au lieu de l’écran
de connexion lorsque vous allumez l’imprimante ou quittez le mode Veille,
connectez-vous à la fonction de connexion et de publication de documents de la
manière suivante.
1
Sur l’ordinateur, lancez la commande d’impression du document
à sortir.
Cliquez sur [Imprimer] ou sur [OK] dans la boîte de dialogue du pilote d’imprimante.
Le nom de la commande varie selon l’application logicielle utilisée.
2
Appuyez sur [ ] (Impression sécurisée).
3
Connectez-vous à la fonction de
connexion et de publication de
documents comme indiqué dans
l’écran.
L’écran figurant à gauche est un
exemple d’écran de connexion. Pour
plus d’informations sur les autres
méthodes de connexion, consultez
« Connexion à l’imprimante », p. FR-8.
Français
Suspension de l’impression de documents sans connexion (fonction de connexion et de publication de documents)
FR-18
Page 52

Français
REMARQUE
Sélect. centre coûts
Canon
Groupe 1
<Se connecter>
<Vers centre de coû
...
Imprimer 2 tâche(s)?
Coût total:
$2.00
<Non>
<Oui>
Statut tch Copie/Impr.
13:30PM Impression
13:30PM En attente
4
Imprimez le document.
● Si configuré pour afficher le coût :
Si l’écran vous invitant à spécifier un
❑
centre de coûts apparaît, sélectionnez le
centre de coûts qui convient à l’aide des
touches [ ] ou [ ].
• Sélectionnez un centre de coûts dans
le niveau inférieur ou supérieur à l’aide
de l’option <Vers centre de coûts
inférieur> ou <Vers centre de coûts
parent>.
• Vous pouvez rechercher les centres de
coûts à l’aide de l’option
<Rechercher>.
• Vous pouvez sélectionner un centre de
coûts dans l’historique à l’aide de
l’option <Afficher l’historique>.
Pour plus d’informations sur ces
options de recherche, consultez la
remarque à la p. FR-10.
❑ Sélectionnez <Se connecter> à l’aide de
[ ] ou [ ], puis appuyez sur [OK].
FR-19
Suspension de l’impression de documents sans connexion (fonction de connexion et de publication de
documents)
❑ Sélectionnez <Oui> à l’aide de [] ou
[], puis appuyez sur [OK].
Le coût total de la tâche ou des tâches
s’affiche éventuellement selon le
réglage utilisé.
L’écran <Statut tch Copie/Impr.>
s’affiche.
Pour afficher les détails du statut de la
tâche d’impression ou annuler la tâche
d’impression, sélectionnez la tâche de
votre choix à l’aide de la touche [ ] ou
[ ], puis appuyez sur [OK]. Sur l’écran
<Détails>, sélectionnez <Annuler> à
l’aide de la touche [ ] ou [ ], puis
appuyez sur [OK] pour annuler la tâche.
Page 53

● Si configuré pour afficher Mes tâches impression :
REMARQUE
REMARQUE
Mes tâches impression
<Mettre à jour>
<Imprimer tout>
Canon01.pdf 2013/0
Samplepage.pdf 2
...
Imprimer/Supprimer
<Imprimer>
<Effacer>
Sélectionnez la tâche que vous
❑
souhaitez imprimer à l'aide de [ ] ou
[ ] et appuyez sur [OK].
Répétez cette procédure pour
sélectionner toutes les tâches que vous
souhaitez imprimer et appuyez sur [ ].
• Si les tâches que vous souhaitez
imprimer ne s'affichent pas,
sélectionnez <Mettre à jour> et
appuyez sur [OK]. Les tâches sont à
nouveau chargées.
• Vous pouvez imprimer toutes les
tâches d'impression en sélectionnant
<Imprimer tout> et en appuyant sur
[OK].
❑ Sélectionnez <Imprimer> à l'aide de [ ]
ou [ ] et appuyez sur [OK].
Vous pouvez supprimer les tâches
sélectionnées en sélectionnant
<Effacer> et en appuyant sur [OK].
Français
Suspension de l’impression de documents sans connexion (fonction de connexion et de publication de
documents)
FR-20
Page 54

imageRUNNER
1133/1133A/1133iF
Deutsch
Handbuch zum
uniFLOW
Login Device Client
Page 55

Zum Ansehen eines Handbuchs in PDF-Format benötigen Sie den Adobe Reader/Adobe Acrobat Reader. Wenn Adobe Reader/Adobe Acrobat
Reader nicht auf Ihrem System installiert ist, laden Sie die Software bitte von der Website von Adobe Systems Incorporated herunter.
Bei der Erstellung dieser Handbücher und Anleitungen wurden größte Anstrengungen unternommen, um Ungenauigkeiten und Auslassungen zu
vermeiden. Außerdem kann es aufgrund von Produktverbesserungen zu Abweichungen kommen. Bitte kontaktieren Sie Canon, falls Sie genaue
Spezifikationen benötigen.
Deutsch
Page 56

Inhalt
Deutsch
Vorwort . . . . . . . . . . . . . . . . . . . . . . . . . . . . . . . . . . . . . . . . . . . . . . . . . . . . . . DE-iv
Verwendung dieses Handbuchs. . . . . . . . . . . . . . . . . . . . . . . . . . . . . . . . . . DE-iv
Markierungen und Symbole in diesem Handbuch . . . . . . . . . . . . . . . . . . . .DE-iv
Tastendarstellung in diesem Handbuch. . . . . . . . . . . . . . . . . . . . . . . . . . . .DE-iv
Anzeigen in diesem Handbuch . . . . . . . . . . . . . . . . . . . . . . . . . . . . . . . . . . DE-v
Marken . . . . . . . . . . . . . . . . . . . . . . . . . . . . . . . . . . . . . . . . . . . . . . . . . . . . . DE-v
Rechtliche Hinweise . . . . . . . . . . . . . . . . . . . . . . . . . . . . . . . . . . . . . . . . . . . DE-vi
Copyright . . . . . . . . . . . . . . . . . . . . . . . . . . . . . . . . . . . . . . . . . . . . . . . . . . .DE-vi
Hinweise zum Haftungsausschluss . . . . . . . . . . . . . . . . . . . . . . . . . . . . . . .DE-vi
Verwalten des Systems mit der uniFLOW-Integration . . . . . . . . . . . . . . . . . DE-1
So können Sie die uniFLOW-Integration nutzen . . . . . . . . . . . . . . . . . . . . . DE-2
Serverbasierte uniFLOW-Authentifizierungsmodi und
Login-Verfahren . . . . . . . . . . . . . . . . . . . . . . . . . . . . . . . . . . . . . . . . . . . DE-2
Login und Dokumentfreigabe. . . . . . . . . . . . . . . . . . . . . . . . . . . . . . . . . DE-2
Verwenden von Kostenstellen . . . . . . . . . . . . . . . . . . . . . . . . . . . . . . . . DE-2
Aktivierung und Einstellungen der uniFLOW-Integration . . . . . . . . . . . . . . . DE-3
Systemumgebung . . . . . . . . . . . . . . . . . . . . . . . . . . . . . . . . . . . . . . . . . DE-3
Einstellungen der uniFLOW-Integration . . . . . . . . . . . . . . . . . . . . . . . . . DE-3
Authentifizierungsmodi durch die uniFLOW-Integration. . . . . . . . . . . . . . . . DE-3
Authentifizierung beim System. . . . . . . . . . . . . . . . . . . . . . . . . . . . . . . . DE-3
Authentifizierung bei der Login- und Dokumentfreigabefunktion . . . . . DE-4
Login-Verfahren über die uniFLOW-Integration. . . . . . . . . . . . . . . . . . . . . . DE-4
Anwender ID und Passwort . . . . . . . . . . . . . . . . . . . . . . . . . . . . . . . . . . DE-4
PIN Code . . . . . . . . . . . . . . . . . . . . . . . . . . . . . . . . . . . . . . . . . . . . . . . . DE-4
ID-Karte . . . . . . . . . . . . . . . . . . . . . . . . . . . . . . . . . . . . . . . . . . . . . . . . . DE-4
Abteilungs-ID und PIN . . . . . . . . . . . . . . . . . . . . . . . . . . . . . . . . . . . . . . DE-4
Einstellung der Verwaltung per Abteilungs-ID für
die uniFLOW-Integration . . . . . . . . . . . . . . . . . . . . . . . . . . . . . . . . . . . . . . . DE-5
Betreiben des Systems als Systemmanager . . . . . . . . . . . . . . . . . . . . . . . . DE-6
Zurücksetzen der IP-Adresse des Systems. . . . . . . . . . . . . . . . . . . . . . . . . DE-7
Anmelden beim System . . . . . . . . . . . . . . . . . . . . . . . . . . . . . . . . . . . . . . . . . DE-8
Eingeben von Anwender ID und Passwort. . . . . . . . . . . . . . . . . . . . . . . . . . DE-8
Eingeben eines PIN-Codes . . . . . . . . . . . . . . . . . . . . . . . . . . . . . . . . . . . . DE-10
Verwenden der ID-Karte . . . . . . . . . . . . . . . . . . . . . . . . . . . . . . . . . . . . . . DE-12
Eingeben von Abteilungs-ID und PIN. . . . . . . . . . . . . . . . . . . . . . . . . . . . . DE-13
Ausdrucken von Dokumenten bei der Anmeldung
(Login und Dokumentfreigabe). . . . . . . . . . . . . . . . . . . . . . . . . . . . . . . . . . . DE-15
So melden Sie sich zuerst am System an und drucken Ihre
Dokumente: . . . . . . . . . . . . . . . . . . . . . . . . . . . . . . . . . . . . . . . . . . . . . DE-15
So melden Sie sich bei der Login- und
Dokumentfreigabefunktion an: . . . . . . . . . . . . . . . . . . . . . . . . . . . . . . . DE-18
DE-iii
Page 57

Vorwort
WICHTIG
HINWEIS
Vielen Dank, dass Sie sich für den Canon imageRUNNER 1133/1133A/1133iF entschieden
haben. Bevor Sie mit dem System arbeiten, lesen Sie dieses Handbuch bitte sorgfältig. So
informieren Sie sich über den optimalen Einsatz der Funktionen für Ihre speziellen
Anforderungen. Bewahren Sie das Handbuch dann immer als Nachschlagewerk in der Nähe
des Systems auf.
Verwendung dieses Handbuchs
Markierungen und Symbole in diesem Handbuch
Folgende Symbole werden in diesem Handbuch zur Erläuterung von
Vorgehensweisen, Einschränkungen, Vorsichtsmaßnahmen und Anweisungen
verwendet, die aus Gründen der Sicherheit beachtet werden sollten.
So werden Warnungen zur Bedienung und Einschränkungen angezeigt.
Bitte lesen Sie diese Hinweise unbedingt, damit Sie das System richtig
bedienen und Beschädigungen an der Maschine oder der Umgebung
vermeiden.
So sind Hinweise zur Bedienung und zusätzliche Erläuterungen
gekennzeichnet. Das Beachten solcher Hinweise ist empfehlenswert,
damit die Funktionen optimal genutzt werden können.
Deutsch
Tastendarstellung in diesem Handbuch
In der folgenden Tabelle finden Sie einige Beispiele, welche Namen in diesem
Handbuch für die zu drückenden Tasten auf dem Bedienfeld verwendet werden:
Tasten Beispiel
[Tastensymbol] +
(Tastenname)
[Tastenname] [OK]
[Tastensymbol] [ ], [ ] etc.
[ ] (Menü)
DE-iv
Page 58

Anzeigen in diesem Handbuch
Marken
Deutsch
Je nach Systemkonfiguration können die in diesem Handbuch verwendeten
Screenshots von den tatsächlichen Anzeigen abweichen.
uniFLOW und MiCard® sind eingetragene Markenzeichen der NT-ware
Systemprogrammierung GmbH.
Andere Firmen- oder Produktnamen, die in diesem Handbuch verwendet werden
und nicht in dieser Liste erwähnt sind, können Warenzeichen der entsprechenden
Firmen sein.
DE-v
Page 59

Rechtliche Hinweise
Copyright
Copyright 2013 Canon Inc. Alle Rechte vorbehalten.
Kein Teil dieser Veröffentlichung darf ohne die vorherige schriftliche Genehmigung
von Canon Inc. in irgendeiner Form oder auf irgendeine Weise, elektronisch oder
mechanisch, einschließlich Fotokopien und Aufzeichnungen, oder durch ein
Informationsspeicher- oder Abfragesystem reproduziert oder übertragen werden.
Hinweise zum Haftungsausschluss
Das Recht zu Änderungen an den in diesem Dokument enthaltenen Informationen
ohne Vorankündigung bleiben vorbehalten.
CANON INC. GIBT BEZÜGLICH DIESES MATERIALS KEINE
GEWÄHRLEISTUNGEN JEGLICHER ART, WEDER VERTRAGLICH NOCH
GESETZLICH, AUSSER DEN HIER ANGEGEBENEN, EINSCHLIESSLICH,
JEDOCH NICHT BESCHRÄNKT AUF, GEWÄHRLEISTUNGEN FÜR
MARKTFÄHIGKEIT, HANDELSÜBLICHE QUALITÄT, EIGNUNG FÜR EINEN
BESTIMMTEN ZWECK UND PATENTVERLETZUNG. CANON INC. ÜBERNIMMT
KEINE HAFTUNG FÜR IRGENDWELCHE UNMITTELBAREN, ZUFÄLLIGEN
ODER MITTELBAREN SCHÄDEN JEGLICHER ART ODER VERLUSTE ODER
AUFWENDUNGEN, DIE AUS DEM GEBRAUCH DIESES MATERIALS
ENTSTEHEN.
Deutsch
DE-vi
Page 60

Verwalten des Systems mit der uniFLOW-Integration
WICHTIG
Funktionen bei der uniFLOW-Integration
• serverbasierte uniFLOW-Authentifizierung
• Login und Dokumentfreigabe
• Auswahl einer Kostenstelle
uniFLOW-Server
• aktiviert die uniFLOW-Integration
beim System
• authentifiziert die Anwender
• bietet Einstellungsinformationen
uniFLOW-Server System
Deutsch
Dieser Abschnitt bietet einen Überblick über die uniFLOW-Integration.
Der uniFLOW-Server, ein Server, auf dem die uniFLOW-Software installiert ist,
erkennt das System in einem Netzwerk und aktiviert die uniFLOW-Integration beim
System. Der uniFLOW-Server authentifiziert die Anwender, die sich beim System
anmelden, und gibt die Einstellungsinformationen an das System weiter. Wenn die
Aktivierung erfolgt ist, setzen der uniFLOW-Server und das System die
Kommunikation fort, um die uniFLOW-Integration zu erreichen.
DE-1
Die uniFLOW-Integration wird nur aktiviert, wenn das System über ein Netzwerk mit
dem uniFLOW-Server verbunden ist. Der uniFLOW-Server ist ein Server, auf dem die
optionale uniFLOW-Software aktiviert ist.
Verwalten des Systems mit der uniFLOW-Integration
Page 61

So können Sie die uniFLOW-Integration nutzen
Das System ist mit den Funktionen ausgestattet, die durch den uniFLOW-Server
aktiviert wurden. Dies sind die Hauptfunktionen:
Serverbasierte uniFLOW-Authentifizierungsmodi und
Login-Verfahren
Sie können das System verwalten, indem Sie die Verwendung auf die Anwender
beschränken, die im uniFLOW-Server gespeichert sind. Es gibt zwei Optionen für
den Authentifizierungsmodus: Authentifizierung beim System oder bei der Loginund Dokumentfreigabefunktion mit verschiedenen Login-Verfahren wie z. B. über
eine ID-Karte* oder durch die Eingabe eines PIN-Codes. (Siehe
„Authentifizierungsmodi durch die uniFLOW-Integration“, auf S. DE-3 und
„Login-Verfahren über die uniFLOW-Integration“, auf S. DE-4.)
* Ein optionaler NT-ware MiCard Reader ist erforderlich.
Login und Dokumentfreigabe
Sie können das System so einrichten, dass die Dokumente erst ausgedruckt
werden, wenn sich der Anwender, der die Druckdaten gesendet hat, beim System
oder der Login- und Dokumentfreigabefunktion anmeldet. Sie können das Gerät
auch so einstellen, dass Benutzer die Aufträge auswählen können, die sie drucken
möchten. Die Dokumente werden nur ausgedruckt, wenn sich der Anwender beim
System anmeldet. Dies bedeutet, dass der Anwender vertrauliche Dokumente
sicher sammeln kann und keine vergessenen Ausdrucke im Ausgabefach des
Systems verbleiben. Diese Funktion kann genutzt werden, weil der
uniFLOW-Server (als Druckserver) Druckaufträge zurückhält und wartet, dass sich
der Anwender anmeldet. Anleitungen zur Nutzung der Login- und
Dokumentfreigabefunktion finden Sie unter „Ausdrucken von Dokumenten bei der
Anmeldung (Login und Dokumentfreigabe)“, auf S. DE-15.
Deutsch
Verwenden von Kostenstellen
Sie können Kostenstellen (Abrechnungsaufstellungen für die Kalkulation der
Kosten für durchgeführte Aufträge) speichern und sie im uniFLOW-Server
Anwendern zuweisen. Beispiele für die Nutzung von Kostenstellen finden Sie
unten:
■ Auswählen einer Kostenstelle bei der Anmeldung:
Wenn sich ein Anwender beim System anmeldet, wird eventuell ein Bildschirm
angezeigt, mit dem der Anwender zur Auswahl einer Kostenstelle aufgefordert
wird. Der Anwender wählt eine Kostenstelle, sodass der uniFLOW-Server die
Kosten für den Auftrag des Anwenders berechnet.
Verwalten des Systems mit der uniFLOW-Integration
DE-2
Page 62

■ Anzeigen der Kosten für Login- und Dokumentfreigabeaufträge auf dem
Bildschirm:
Sie können das System so einstellen, dass die berechneten Kosten für den Auftrag
auf dem Display angezeigt werden, wenn der Anwender die Login- und
Dokumentfreigabefunktion beim System nutzt.
Weitere Informationen zu den Kostenstellen finden Sie in der Dokumentation im
Lieferumfang der uniFLOW-Software.
Aktivierung und Einstellungen der uniFLOW-Integration
Nachfolgenden finden Sie einen Überblick über die Aktivierung und Einstellungen
der uniFLOW-Integration.
Systemumgebung
Um die uniFLOW-Integration zu aktivieren, muss das System mit dem
uniFLOW-Server (ein Server, auf dem die uniFLOW-Software installiert ist) über
ein Netzwerk verbunden sein. Weitere Informationen finden Sie in der
Dokumentation im Lieferumfang der uniFLOW-Software.
Deutsch
Authentifizierungsmodi durch die uniFLOW-Integration
Einstellungen der uniFLOW-Integration
Die Einstellungen der uniFLOW-Integration, wie z. B. das Speichern von
Anwendern, können nur beim uniFLOW-Server vorgenommen werden. Es sind
zwar keine besonderen Einstellungen beim System erforderlich, Sie sollten aber
dennoch die Einstellungen für die Verwaltung per Abteilungs-ID überprüfen, um
eine ordnungsgemäße Kombination der Einstellungen für die Verwaltung per
Abteilungs-ID mit der uniFLOW-Integration sicherzustellen. (Siehe „Einstellung der
Verwaltung per Abteilungs-ID für die uniFLOW-Integration“, auf S. DE-5.)
Die uniFLOW-Integration bietet die folgenden Authentifizierungsmodi:
Authentifizierung beim System
Die Anwender werden aufgefordert, sich beim System anzumelden. Dies bedeutet,
dass die Anwender sich selbst authentifizieren müssen, wenn sie die Funktionen
des Systems nutzen, wie z. B. die Kopieren- oder Scan-Funktionen.
DE-3
Verwalten des Systems mit der uniFLOW-Integration
Page 63

Authentifizierung bei der Login- und Dokumentfreigabefunktion
HINWEIS
WICHTIG
WICHTIG
Die Anwender werden aufgefordert, sich bei der Login- und
Dokumentfreigabefunktion anzumelden. Dies bedeutet, dass die Anwender die
Funktionen des Systems, wie die Kopieren- oder Scan-Funktionen, nutzen können,
ohne sich beim System anzumelden. Stattdessen müssen sich die Anwender nur
authentifizieren, wenn sie die Login- und Dokumentfreigabefunktion nutzen.
Login-Verfahren über die uniFLOW-Integration
Die uniFLOW-Integration bietet die folgenden Login-Verfahren:
• Anleitungen zur Anmeldung beim System als Systemmanager finden Sie unter
„Betreiben des Systems als Systemmanager“, auf S. DE-6.
• Anleitungen zur Anmeldung beim System mit dem jeweiligen Login-Verfahren finden
Sie unter „Anmelden beim System“, auf S. DE-8.
Anwender ID und Passwort
Die Anwender geben über das Bedienfeld des Systems die Anwender ID und das
Passwort ein.
PIN Code
Die Anwender geben über das Bedienfeld des Systems den PIN Code ein.
ID-Karte
Die Anwender halten ihre ID-Karte über den MiCard Reader, der über dem System
angebracht ist.
Der MiCard Reader ist optional.
Abteilungs-ID und PIN
Die Anwender geben über das Bedienfeld des Systems die Abteilungs-ID und PIN
ein.
Das Login-Verfahren über die Abteilungs-ID und PIN ist nur verfügbar, wenn
„Authentifizierung beim System“ (S. DE-3) als Authentifizierungsverfahren verwendet
wird.
Verwalten des Systems mit der uniFLOW-Integration
DE-4
Deutsch
Page 64

Einstellung der Verwaltung per Abteilungs-ID für die
HINWEIS
uniFLOW-Integration
Bevor Sie die uniFLOW-Integration nutzen, müssen Sie die Einstellungen für die
Verwaltung per Abteilungs-ID vornehmen, wie in der Tabelle unten aufgeführt.
Deutsch
Authentifizierungsverfahren
(Siehe S. DE-3)
Authentifizierung beim
System
Authentifizierung bei
der Login- und
Dokumentfreigabefunktion
• Um die Abteilungs-ID und PIN als Login-Verfahren zu verwenden, speichern Sie die
Systemmanager ID und Systemmanager PIN (S. DE-6) sowie die Abteilungs-IDs und
PINs im System. So werden Anwender gespeichert:
- Speichern Sie im System die Systemmanager ID und die Systemmanager PIN für
den Systemmanager.
- Speichern Sie im System die Abteilungs-IDs und PINs für andere Anwender
(Endanwender).
- Weisen Sie auf dem uniFLOW-Server die Systemmanager ID und die
Systemmanager PIN oder eine Abteilungs-ID und PIN zum Systemmanager oder
anderen Anwendern zu.
• Weitere Informationen zum Speichern von Anwendern im uniFLOW-Server finden Sie
in der Dokumentation, die mit der uniFLOW-Software bereitgestellt wird.
Login-Verfahren
(Siehe S. DE-4)
Anwender ID und
Passwort
PIN Code
ID-Karte
Abteilungs-ID und
PIN
Anwender ID und
Passwort
PIN Code
ID-Karte
Erforderliche Einstellungen für die
Verwaltung per Abteilungs-ID beim
System
EIN/AUS
EIN
AUS
DE-5
Verwalten des Systems mit der uniFLOW-Integration
Page 65

Betreiben des Systems als Systemmanager
HINWEIS
HINWEIS
Der Login-Vorgang für den Systemmanager variiert abhängig von den durch die
uniFLOW-Integration verwendeten Authentifizierungsmodi. Siehe Tabelle unten.
Der Systemmanager kann die Systemeinstellungen und andere Einstellungen, auf die
nur der Systemmanager zugreifen kann, festlegen oder ändern.
Authentifizierungsverfahren
(S. DE-3)
Authentifizierung beim
System
Authentifizierung bei der
Login- und
Dokumentfreigabefunktion
• Über folgendes Verfahren können Sie einem Anwender
Systemmanager-Berechtigungen gewähren (die Verfahren und Berechtigungen
gelten nur für, wenn „Authentifizierung beim System“ angewendet wird). Weitere
Informationen finden Sie in der Dokumentation im Lieferumfang der
uniFLOW-Software.
- Wählen Sie für die Anwender ID und Passwort/PIN Code/ID-Karte den Anwendertyp
als Systemmanager aus, wenn Sie den Anwender im uniFLOW-Server speichern.
- Weisen Sie für die Abteilungs-ID und PIN die Systemmanager ID und
Systemmanager PIN, die im System gespeichert ist, dem Anwender zu, wenn dieser
im uniFLOW-Server gespeichert wird.
• Bei einem Login am System als Endanwender im Modus „Authentifizierung beim
System“ können Sie nicht auf die Systemeinstellungen und anderen Einstellungen
zugreifen, für die nur der Systemmanager über Zugriff verfügt, und eine Meldung wie
<Systemeinstellungen sind beschränkt.> wird angezeigt. Um auf diese Einstellungen
zuzugreifen, müssen Sie sich einmal beim System abmelden und sich wieder als
Systemmanager anmelden.
Login-Verfahren als Systemmanager
Melden Sie sich beim System mit der Anwender ID und dem
Passwort, dem PIN Code der ID-Karte oder der
Abteilungs-ID und PIN für den Systemmanager an.
Ansonsten ähneln die Anmeldevorgänge denen für
Endanwender. (Siehe „Anmelden beim System“, auf
S. DE-8.)
Für den Zugriff auf die Systemeinstellungen und andere
Einstellungen, auf die nur der Systemmanager zugreifen
kann, geben Sie die Systemmanager ID und Systemmanager
PIN ein, die im System gespeichert sind. Wenn diese nicht
festgelegt sind, kann sich jeder andere Anwender ein Login
als Systemmanager am System ausführen und auf die
Systemeinstellungen und andere Einstellungen zugreifen, auf
die nur der Systemmanager zugreifen kann.
Deutsch
Verwalten des Systems mit der uniFLOW-Integration
DE-6
Page 66

Zurücksetzen der IP-Adresse des Systems
HINWEIS
HINWEIS
Deutsch
Wenn die Meldung <Verbind. zum Server nicht möglich. Systemmanager
benachricht.> auf dem Display verbleibt, nach dem das System auf EIN gesetzt
wurde, wurde die IP-Adresse des Systems eventuell nicht korrekt angegeben.
Nehmen Sie die Kommunikation zwischen dem System und dem uniFLOW-Server
wieder auf, indem Sie die IP-Adresse des Systems wie unten beschrieben
zurücksetzen.
1
Betätigen Sie (Menü).
2
Betätigen Sie [OK], um das Menü <Netzwerkeinstellungen> zu
öffnen.
● Wenn Sie über einen Bildschirm zur Eingabe der Systemmanager ID und
Systemmanager PIN aufgefordert werden:
❑
Wählen Sie <Manager ID> über [ ] oder [ ] und betätigen Sie [OK].
❑ Geben Sie die Systemmanager ID über die numerischen Tasten ein und betätigen
Sie [OK].
❑ Wählen Sie <PIN> über [ ] oder [ ] und betätigen Sie [OK].
❑ Geben Sie die Systemmanager PIN über die numerischen Tasten ein und betätigen
Sie [OK].
❑ Betätigen Sie (An-/Abmelden).
DE-7
Die Systemmanager ID und Systemmanager PIN sind beide standardmäßig auf
‚7654321‘ eingerichtet.
3
Überprüfen Sie die IP-Adresse des Systems und setzen Sie sie auf
<Netzwerkeinstellungen>.
Legen Sie die IP-Adresse des Systems abhängig von der verwendeten
Netzwerkumgebung fest.
4
Starten Sie das System neu.
Schalten Sie das System AUS, warten Sie mindestens 10 Sekunden und schalten Sie
es wieder EIN.
Verwalten des Systems mit der uniFLOW-Integration
Page 67

Anmelden beim System
HINWEIS
HINWEIS
Anw.ID & Passw.eingeb.
Login: ID wählen
Logout: ID wählen
Anwend. ID:
Passwort:
Anwender ID
Anwend.01
<Anwenden>
Eingabemodus: 12
Dieser Abschnitt beschreibt die Bedienschritte für die Login-Verfahren, die durch
die uniFLOW-Integration bereitgestellt werden.
Wenn der optionale MiCard Reader am System angebracht ist, können Sie sich an-/
abmelden, indem Sie Ihre ID-Karte über den MiCard Reader halten, unabhängig von
dem verwendeten Login-Verfahren (außer wenn die Abteilungs-ID und PIN als
Login-Verfahren verwendet werden).
Eingeben von Anwender ID und Passwort
Geben Sie Ihre Anwender ID und Ihr Passwort ein, um sich anzumelden, wenn der
in Schritt 1 dargestellte Bildschirm angezeigt wird.
Um sich beim System anzumelden, benötigen Sie eine gültige Anwender ID und ein
Passwort (falls eingestellt), die entsprechend gespeichert sein müssen. Anleitungen
zur Registrierung einer Anwender ID und eines Passworts beim uniFLOW-Server
finden Sie in der Dokumentation im Lieferumfang der uniFLOW-Software.
Deutsch
1
Geben Sie Ihre Anwender ID und
Ihr Passwort (jeweils bis zu 32
Zeichen) über die numerischen
Tasten ein.
❑ Wählen Sie <Anwend. ID> über [ ] oder
[ ] und betätigen Sie [OK].
❑ Geben Sie Ihre Anwender ID ein.
Sie können den Texteingabemodus
ändern, indem Sie die Option
<Eingabemodus> ändern.
❑ Wählen Sie <Anwenden> über [ ] oder
[ ] und betätigen Sie [OK].
Anmelden beim System
DE-8
Page 68

Deutsch
HINWEIS
Passwort
12345678
<Anwenden>
Eingabemodus: 12
Kostenstelle wählen
Canon
Gruppe 1
<Login>
<An Nebenkostenstel
...
❑ Wählen Sie in dem in Schritt 1
angezeigten Bildschirm die Option
<Passwort> über [ ] oder [ ] und
betätigen Sie [OK].
❑ Geben Sie Ihr Passwort ein.
Sie können den Texteingabemodus
ändern, indem Sie die Option
<Eingabemodus> ändern.
❑ Wählen Sie <Anwenden> über [ ] oder
[ ] und betätigen Sie [OK].
Die Zeichen, die Sie als Passwort
eingeben, werden als Sternchen
(*******) angezeigt, wenn der Bildschirm
zum ursprünglichen Login-Bildschirm
zurückkehrt.
2
Betätigen Sie [ ] (An-/Abmelden).
• Wenn für die Anwender ID kein Passwort festgelegt wurde, lassen Sie <Passwort> leer.
• Wenn Sie bei der Eingabe der Anwender ID/des Passworts einen Fehler gemacht
haben, betätigen Sie [ ] (Löschen) und geben Sie den richtigen Anwender ID/das
richtige Passwort ein.
• Wenn die eingegebene Anwender ID/das eingegeben Passwort falsch ist, wird eine
Fehlermeldung angezeigt.
DE-9
Anmelden beim System
❑ Wenn ein Bildschirm angezeigt wird, in
dem Sie zur Auswahl einer Kostenstelle
aufgefordert werden, wählen Sie mit [ ],
[ ] die entsprechende Kostenstelle.
• Wählen Sie eine Kostenstelle als Nebenoder Hauptkostenstelle aus, indem Sie
<An Nebenkostenstelle> oder <An
Hauptkostenstelle> auswählen.
• Sie können nach Kostenstellen
suchen, indem Sie die Option
<Suche> verwenden.
• Sie können eine Kostenstelle aus dem
Log auswählen, indem Sie Option
<Log anzeigen> verwenden.
Weitere Informationen zu diesen
Suchoptionen finden Sie im Hinweis
auf S. DE-10.
❑ Wählen Sie <Login> über [ ] oder [ ]
und betätigen Sie [OK].
Das Standby-Display wird angezeigt.
Page 69

HINWEIS
Die Suchoptionen für Kostenstellen werden unten im Bildschirm angezeigt.
HINWEIS
Kostenstelle wählen
Canon
Gruppe 1
<An Nebenkostenstell
<An Hauptkostenstel
...
PIN Code eingeben
Login: ID wählen
Logout: ID wählen
PIN Code:
ޓ
Verwenden Sie [ ] oder [ ], um die gewünschte Suchoption auszuwählen, und
betätigen Sie [OK].
• <An Nebenkostenstelle>: Wird
verwendet, um die Kostenstellen in die
untere Ebene zu verschieben.
• <An Hauptkostenstelle>: Wird
verwendet, um die Kostenstellen in die
obere Ebene zu verschieben.
• <Suche>: Wird verwendet, um nach
Kostenstellen zu suchen, indem die
ersten Zeichen des Namens der
Kostenstelle eingegeben werden.
• <Log anzeigen>: Wird verwendet, um
die zuvor verwendeten Kostenstellen
anzuzeigen und auszuwählen.
3
Wenn Sie alle Vorgänge abgeschlossen haben, betätigen Sie [ ]
(An-/Abmelden), um sich abzumelden.
Eingeben eines PIN-Codes
Geben Sie Ihren PIN-Code ein, um sich anzumelden, wenn der in Schritt 1
dargestellte Bildschirm angezeigt wird.
Deutsch
Um sich beim System anzumelden, müssen Sie über einen gültigen PIN-Code
verfügen, der registriert ist. Anleitungen zum Speichern eines PIN-Codes beim
uniFLOW-Server finden Sie in der Dokumentation im Lieferumfang der
uniFLOW-Software.
1
Geben Sie Ihren PIN-Code (bis zu
20 Stellen) über die numerischen
Tasten ein.
❑ Betätigen Sie [OK].
Anmelden beim System
DE-10
Page 70

Deutsch
HINWEIS
PIN Code
ޓ
12345678
(Anwend.: OK betätig.)
Kostenstelle wählen
Canon
Gruppe 1
<Login>
<An Nebenkostenstel
...
❑ Geben Sie Ihren PIN-Code ein und
betätigen Sie [OK].
Der eingegebene PIN-Code wird als
Sternchen (*******) angezeigt, wenn der
Bildschirm zum ursprünglichen
Login-Bildschirm zurückkehrt.
2
Betätigen Sie [ ] (An-/Abmelden).
• Wenn Sie bei der Eingabe des PIN-Codes einen Fehler gemacht haben, betätigen Sie
[ ] (Löschen) und geben Sie den richtigen PIN-Code ein.
• Wenn der eingegebene PIN-Code falsch ist, wird eine Fehlermeldung angezeigt.
❑ Wenn ein Bildschirm angezeigt wird, in
dem Sie zur Auswahl einer Kostenstelle
aufgefordert werden, wählen Sie mit [ ],
[ ] die entsprechende Kostenstelle.
• Wählen Sie eine Kostenstelle als
Neben- oder Hauptkostenstelle aus,
indem Sie <An Nebenkostenstelle>
oder <An Hauptkostenstelle>
auswählen.
• Sie können nach Kostenstellen
suchen, indem Sie die Option
<Suche> verwenden.
• Sie können eine Kostenstelle aus dem
Log auswählen, indem Sie Option
<Log anzeigen> verwenden.
Weitere Informationen zu diesen
Suchoptionen finden Sie im Hinweis
auf S. DE-10.
❑ Wählen Sie <Login> über [ ] oder [ ]
und betätigen Sie [OK].
Das Standby-Display wird angezeigt.
3
Wenn Sie alle Vorgänge abgeschlossen haben, betätigen Sie
(An-/Abmelden), um sich abzumelden.
DE-11
Anmelden beim System
Page 71

Verwenden der ID-Karte
WICHTIG
Halten Sie Ihre Karte
über den Scanner, bis
ein Piepton ertönt.Mit
der ID-Taste nach dem
Vorgang wd. ausloggen.
Kostenstelle wählen
Canon
Gruppe 1
<Login>
<An Nebenkostenstel
...
Verwenden Sie Ihre ID-Karte, um sich anzumelden, wenn der in Schritt 1
dargestellte Bildschirm angezeigt wird.
Die Anmeldung über die ID-Karte ist nur verfügbar, wenn der optionale MiCard
Reader am System angebracht ist.
1
Halten Sie Ihre ID-Karte über den
MiCard Reader, bis das Display
zum nächsten Anmeldeschritt
oder zum Standby-Display
wechselt.
❑ Wenn ein Bildschirm angezeigt wird, in
dem Sie zur Auswahl einer Kostenstelle
aufgefordert werden, wählen Sie mit [ ],
[ ] die entsprechende Kostenstelle.
• Wählen Sie eine Kostenstelle als
Neben- oder Hauptkostenstelle aus,
indem Sie <An Nebenkostenstelle>
oder <An Hauptkostenstelle>
auswählen.
• Sie können nach Kostenstellen
suchen, indem Sie die Option
<Suche> verwenden.
• Sie können eine Kostenstelle aus dem
Log auswählen, indem Sie Option
<Log anzeigen> verwenden.
Weitere Informationen zu diesen
Suchoptionen finden Sie im Hinweis
auf S. DE-10.
❑ Wählen Sie <Login> über [ ] oder [ ]
und betätigen Sie [OK].
Das Standby-Display wird angezeigt.
Deutsch
2
Wenn Sie alle Vorgänge beendet haben, halten Sie Ihre ID-Karte
über den MiCard Reader, bis der in Schritt 1 dargestellte
Anmeldebildschirm angezeigt wird.
Sie können sich auch beim System abmelden, indem Sie [ ] (An-/Abmelden)
bestätigen.
Anmelden beim System
DE-12
Page 72

Eingeben von Abteilungs-ID und PIN
WICHTIG
HINWEIS
Abt.-ID & PIN eingeben
Login: ID wählen
Logout: ID wählen
Abt.-ID:
PIN:
Abt.-ID
ޓ
0123456
(Anwend.: OK betätig.)
PIN
ޓ
*******
(Anwend.: OK betätig.)
Geben Sie Ihre Abteilungs-ID und PIN ein, um sich anzumelden, wenn der in
Schritt 1 dargestellte Bildschirm angezeigt wird.
Das Login-Verfahren ist nur verfügbar, wenn „Authentifizierung beim System“
(S. DE-3) als Authentifizierungsverfahren verwendet wird.
Um sich beim System anzumelden, benötigen Sie eine gültige Abteilungs-ID und PIN
(falls eingestellt), die entsprechend gespeichert sein müssen. Weitere Informationen
finden Sie in der Dokumentation im Lieferumfang der uniFLOW-Software.
Deutsch
1
Geben Sie Ihre Abteilungs-ID und
PIN (jeweils bis zu 7 Zeichen)
über die numerischen Tasten ein.
❑ Wählen Sie <Abt.-ID> über [ ] oder [ ]
und betätigen Sie [OK].
❑ Geben Sie Ihre Abteilungs-ID ein und
betätigen Sie [OK].
❑ Wählen Sie in dem in Schritt 1
angezeigten Bildschirm die Option
<PIN> über [ ] oder [ ] und betätigen
Sie [OK].
❑ Geben Sie Ihre PIN und betätigen Sie
[OK].
Die eingegebene PIN wird als Sternchen
(********) angezeigt.
2
Betätigen Sie [ ] (An-/Abmelden).
DE-13
Anmelden beim System
Page 73

HINWEIS
• Wenn für die Abteilungs-ID keine PIN festgelegt wurde, lassen Sie <PIN> leer.
Kostenstelle wählen
Canon
Gruppe 1
<Login>
<An Nebenkostenstel
...
• Wenn Sie bei der Eingabe der Abteilungs-ID/PIN einen Fehler gemacht haben,
betätigen Sie [ ] (Löschen) und geben Sie die richtige Abteilungs-ID/PIN ein.
• Wenn die eingegebene Abteilungs-ID/PIN falsch ist, wird eine Fehlermeldung
angezeigt.
❑ Wenn ein Bildschirm angezeigt wird, in
dem Sie zur Auswahl einer Kostenstelle
aufgefordert werden, wählen Sie mit [ ],
[ ] die entsprechende Kostenstelle.
• Wählen Sie eine Kostenstelle als
Neben- oder Hauptkostenstelle aus,
indem Sie <An Nebenkostenstelle>
oder <An Hauptkostenstelle>
auswählen.
• Sie können nach Kostenstellen
suchen, indem Sie die Option
<Suche> verwenden.
• Sie können eine Kostenstelle aus dem
Log auswählen, indem Sie Option
<Log anzeigen> verwenden.
Weitere Informationen zu diesen
Suchoptionen finden Sie im Hinweis
auf S. DE-10.
❑ Wählen Sie <Login> über [ ] oder [ ]
und betätigen Sie [OK].
Das Standby-Display wird angezeigt.
Deutsch
3
Wenn Sie alle Vorgänge abgeschlossen haben, betätigen Sie [ ]
(An-/Abmelden), um sich abzumelden.
Anmelden beim System
DE-14
Page 74

Ausdrucken von Dokumenten bei der Anmeldung
HINWEIS
Anw.ID & Passw.eingeb.
Login: ID wählen
Logout: ID wählen
Anwend. ID:
Passwort:
(Login und Dokumentfreigabe)
Deutsch
Sie können Ihre Dokumente so lange unausgedruckt lassen, bis Sie sich beim
System oder der Login- und Dokumentfreigabefunktion anmelden. Ihre Dokumente
werden nur ausgedruckt, wenn Sie sich beim System anmelden. Dies bedeutet,
dass Sie vertrauliche Dokumente sicher sammeln können und keine vergessenen
Ausdrucke im Ausgabefach des Systems verbleiben.
Abhängig von der Einstellung fordert das System Sie auf, sich entweder bei der
Nutzung des Systems oder der Nutzung der Login- und Dokumentfreigabefunktion
anzumelden. Befolgen Sie die unten aufgeführten Schritte.
So melden Sie sich zuerst am System an und drucken Ihre
Dokumente:
Wenn ein Anmeldebildschirm angezeigt wird, wenn Sie das System einschalten
oder den Energiesparmodus deaktivieren, melden Sie sich zuerst mit den unten
aufgeführten Schritten beim System an, um die Login- und
Dokumentfreigabefunktion zu nutzen.
1
Führen Sie auf Ihrem Computer den Befehl zum Drucken des
gewünschten Dokuments aus.
Klicken Sie im Dialogfeld des Druckertreibers auf [Druck] oder [OK]. Der Befehlsname
variiert abhängig von der verwendeten Anwendungssoftware.
2
DE-15
Ausdrucken von Dokumenten bei der Anmeldung (Login und Dokumentfreigabe)
Melden Sie sich entsprechend
der auf dem Bildschirm
angezeigten Aufforderung beim
System an.
Der links dargestellte Bildschirm ist ein
Beispiel des Anmeldebildschirms.
Weitere Informationen zu den anderen
Login-Verfahren finden Sie unter
„Anmelden beim System“, auf S. DE-8.
Page 75

3
HINWEIS
Kostenstelle wählen
Canon
Gruppe 1
<Login>
<An Nebenkostenstel
...
2 Aufträge drucken?
Kosten total:
$2.00
<Nein>
<Ja>
Betätigen Sie [ ] (Protected pressure).
❑
Wenn ein Bildschirm angezeigt wird, in
dem Sie zur Auswahl einer Kostenstelle
aufgefordert werden, wählen Sie mit [ ],
[ ] die entsprechende Kostenstelle.
• Wählen Sie eine Kostenstelle als
Neben- oder Hauptkostenstelle aus,
indem Sie <An Nebenkostenstelle>
oder <An Hauptkostenstelle>
auswählen.
• Sie können nach Kostenstellen
suchen, indem Sie die Option
<Suche> verwenden.
• Sie können eine Kostenstelle aus dem
Log auswählen, indem Sie Option
<Log anzeigen> verwenden.
Weitere Informationen zu diesen
Suchoptionen finden Sie im Hinweis
auf S. DE-10.
❑ Wählen Sie <Login> über [ ] oder [ ]
und betätigen Sie [OK].
Das Standby-Display wird angezeigt.
4
Drucken Sie das Dokument.
● Wenn die Einstellung so vorgenommen wurde, dass die Kosten
angezeigt werden:
❑ Wählen Sie <Ja> über [ ] oder [ ] und
betätigen Sie [OK].
Abhängig von der Einstellung werden
möglicherweise die Gesamtkosten für
den Auftrag/die Aufträge angezeigt.
Ausdrucken von Dokumenten bei der Anmeldung (Login und Dokumentfreigabe)
Deutsch
DE-16
Page 76

Deutsch
HINWEIS
HINWEIS
Stat. Kop./Druckauftr.
13:30PM Drucken
13:30PM Warten
Meine Druckaufträge
<Aktualisieren>
<Alles drucken>
Canon01.pdf 2013/0
Samplepage.pdf 2
...
Drucken/Löschen
<Drucken>
<Löschen>
Der Bildschirm <Stat. Kop./Druckauftr.>
wird angezeigt.
Um die Details zum Druckauftragsstatus
anzuzeigen oder den Druckauftrag
abzubrechen, wählen Sie den
gewünschten Druckauftrag über [ ]
oder [ ] aus und betätigen Sie [OK].
Wählen Sie auf dem Bildschirm
<Details> die Option <Abbruch> über
[ ] oder [ ] und betätigen Sie [OK],
um den Auftrag abzubrechen.
● Wenn die Einstellung so vorgenommen wurde, dass Meine
Druckaufträge angezeigt werden:
❑ Wählen Sie mit [ ] oder [ ] den Auftrag
aus, den Sie drucken möchten, und
drücken Sie [OK].
Wiederholen Sie diese Vorgehensweise,
um alle Aufträge auszuwählen, die Sie
drucken möchten, und drücken Sie [ ].
• Wenn die Aufträge, die Sie drucken
möchten, nicht angezeigt werden,
wählen Sie <Aktualisieren> aus und
drücken Sie [OK]. Die Aufträge
werden erneut geladen.
• Sie können alle Druckaufträge
drucken, indem Sie <Alles drucken>
auswählen und [OK] drücken.
❑ Wählen Sie mit [ ] oder [ ] das
Element <Drucken> aus und drücken
Sie [OK].
DE-17
Ausdrucken von Dokumenten bei der Anmeldung (Login und Dokumentfreigabe)
Sie können ausgewählte Aufträge
löschen, indem Sie <Löschen>
auswählen und [OK] drücken.
Page 77

5
HINWEIS
HINWEIS
Anw.ID & Passw.eingeb.
Login: ID wählen
Anwend. ID:
Passwort:
Betätigen Sie [ ] (An-/Abmelden), um sich beim System
abzumelden, wenn der Druckvorgang abgeschlossen ist.
Sie können Sie sich auch am System anmelden, indem Sie Ihre ID-Karte über den
optionalen MiCard Reader halten (außer wenn die Abteilungs-ID und PIN als
Login-Verfahren verwendet werden).
So melden Sie sich bei der Login- und Dokumentfreigabefunktion an:
Wenn statt des Anmeldebildschirms ein Standby-Bildschirm, z. B. für die
Kopierfunktion, angezeigt wird, wenn Sie das System einschalten oder den
Energiesparmodus deaktivieren, melden Sie sich mit den unten aufgeführten
Schritten bei der Login- und Dokumentfreigabefunktion an.
1
Führen Sie auf Ihrem Computer den Befehl zum Drucken des
gewünschten Dokuments aus.
Klicken Sie im Dialogfeld des Druckertreibers auf [Druck] oder [OK]. Der Befehlsname
variiert abhängig von der verwendeten Anwendungssoftware.
2
Betätigen Sie [ ] (Protected pressure).
3
Ausdrucken von Dokumenten bei der Anmeldung (Login und Dokumentfreigabe)
Melden Sie sich bei der Loginund Dokumentfreigabefunktion
an, wie auf dem Bildschirm
angezeigt.
Der links dargestellte Bildschirm ist ein
Beispiel des Anmeldebildschirms.
Weitere Informationen zu den anderen
Login-Verfahren finden Sie unter
„Anmelden beim System“, auf S. DE-8.
DE-18
Deutsch
Page 78

Wenn ein Bildschirm angezeigt wird, in
HINWEIS
Kostenstelle wählen
Canon
Gruppe 1
<Login>
<An Nebenkostenstel
...
2 Aufträge drucken?
Kosten total:
$2.00
<Nein>
<Ja>
Stat. Kop./Druckauftr.
13:30PM Drucken
13:30PM Warten
❑
dem Sie zur Auswahl einer Kostenstelle
aufgefordert werden, wählen Sie mit [ ],
[ ] die entsprechende Kostenstelle.
• Wählen Sie eine Kostenstelle als
Neben- oder Hauptkostenstelle aus,
indem Sie <An Nebenkostenstelle>
oder <An Hauptkostenstelle>
auswählen.
• Sie können nach Kostenstellen
suchen, indem Sie die Option
<Suche> verwenden.
• Sie können eine Kostenstelle aus dem
Log auswählen, indem Sie Option
<Log anzeigen> verwenden.
Weitere Informationen zu diesen
Suchoptionen finden Sie im Hinweis
auf S. DE-10.
❑ Wählen Sie <Login> über [ ] oder [ ]
und betätigen Sie [OK].
Deutsch
DE-19
4
Drucken Sie das Dokument.
● Wenn die Einstellung so vorgenommen wurde, dass die Kosten
angezeigt werden:
Ausdrucken von Dokumenten bei der Anmeldung (Login und Dokumentfreigabe)
❑ Wählen Sie <Ja> über [ ] oder [ ] und
betätigen Sie [OK].
Abhängig von der Einstellung werden
möglicherweise die Gesamtkosten für
den Auftrag/die Aufträge angezeigt.
Der Bildschirm <Stat. Kop./Druckauftr.>
wird angezeigt.
Um die Details zum Druckauftragsstatus
anzuzeigen oder den Druckauftrag
abzubrechen, wählen Sie den
gewünschten Druckauftrag über [ ]
oder [ ] aus und betätigen Sie [OK].
Wählen Sie auf dem Bildschirm
<Details> die Option <Abbruch> über
[ ] oder [ ] und betätigen Sie [OK],
um den Auftrag abzubrechen.
Page 79

● Wenn die Einstellung so vorgenommen wurde, dass Meine
HINWEIS
HINWEIS
Meine Druckaufträge
<Aktualisieren>
<Alles drucken>
Canon01.pdf 2013/0
Samplepage.pdf 2
...
Drucken/Löschen
<Drucken>
<Löschen>
Druckaufträge angezeigt werden:
❑
Wählen Sie mit [ ] oder [ ] den Auftrag
aus, den Sie drucken möchten, und
drücken Sie [OK].
Wiederholen Sie diese Vorgehensweise,
um alle Aufträge auszuwählen, die Sie
drucken möchten, und drücken Sie [ ].
• Wenn die Aufträge, die Sie drucken
möchten, nicht angezeigt werden,
wählen Sie <Aktualisieren> aus und
drücken Sie [OK]. Die Aufträge
werden erneut geladen.
• Sie können alle Druckaufträge
drucken, indem Sie <Alles drucken>
auswählen und [OK] drücken.
❑ Wählen Sie mit [ ] oder [ ] das
Element <Drucken> aus und drücken
Sie [OK].
Sie können ausgewählte Aufträge
löschen, indem Sie <Löschen>
auswählen und [OK] drücken.
Ausdrucken von Dokumenten bei der Anmeldung (Login und Dokumentfreigabe)
Deutsch
DE-20
Page 80

Italiano
imageRUNNER
1133/1133A/1133iF
Guida di uniFLOW Login
Device Client
Page 81

Per visualizzare i manuali in formato PDF, è necessario utilizzare Adobe Reader/Adobe Acrobat Reader. Se Adobe Reader/Adobe Acrobat Reader
non è installato nel computer in uso, scaricarlo dal sito Web di Adobe Systems Incorporated.
Per la stesura del presente manuale è stato fatto uno sforzo considerevole per evitare imprecisioni o omissioni. Tuttavia, poiché i prodotti sono in
continua evoluzione, si consiglia di rivolgersi a Canon nel caso in cui fossero necessarie informazioni specifiche sul prodotto.
Italiano
Page 82

Indice
Italiano
Prefazione. . . . . . . . . . . . . . . . . . . . . . . . . . . . . . . . . . . . . . . . . . . . . . . . . . . . . IT-iv
Come utilizzare il presente manuale . . . . . . . . . . . . . . . . . . . . . . . . . . . . . . . IT-iv
Simboli utilizzati nel manuale . . . . . . . . . . . . . . . . . . . . . . . . . . . . . . . . . . . . .IT-iv
Tasti utilizzati nel manuale. . . . . . . . . . . . . . . . . . . . . . . . . . . . . . . . . . . . . . .IT-iv
Schermate utilizzate nel manuale . . . . . . . . . . . . . . . . . . . . . . . . . . . . . . . . . IT-v
Marchi di fabbrica. . . . . . . . . . . . . . . . . . . . . . . . . . . . . . . . . . . . . . . . . . . . . . IT-v
Note legali. . . . . . . . . . . . . . . . . . . . . . . . . . . . . . . . . . . . . . . . . . . . . . . . . . . . . IT-vi
Copyright . . . . . . . . . . . . . . . . . . . . . . . . . . . . . . . . . . . . . . . . . . . . . . . . . . . .IT-vi
Declino di responsabilità . . . . . . . . . . . . . . . . . . . . . . . . . . . . . . . . . . . . . . . .IT-vi
Gestione della macchina con integrazione in uniFLOW . . . . . . . . . . . . . . . . IT-1
Azioni possibili grazie all’integrazione in uniFLOW . . . . . . . . . . . . . . . . . . . . IT-2
Modi di autenticazione e metodi di accesso basati sul server
uniFLOW. . . . . . . . . . . . . . . . . . . . . . . . . . . . . . . . . . . . . . . . . . . . . . . . . . IT-2
Accesso e rilascio dei documenti . . . . . . . . . . . . . . . . . . . . . . . . . . . . . . IT-2
Utilizzo dei centri di costo . . . . . . . . . . . . . . . . . . . . . . . . . . . . . . . . . . . . IT-2
Attivazione e impostazioni dell’integrazione in uniFLOW. . . . . . . . . . . . . . . . IT-3
Ambiente di sistema. . . . . . . . . . . . . . . . . . . . . . . . . . . . . . . . . . . . . . . . . IT-3
Impostazioni dell’integrazione in uniFLOW . . . . . . . . . . . . . . . . . . . . . . . IT-3
Modi di autenticazione con l’integrazione in uniFLOW . . . . . . . . . . . . . . . . . IT-3
Autenticazione per la macchina. . . . . . . . . . . . . . . . . . . . . . . . . . . . . . . . IT-3
Autenticazione per la funzione Accesso e rilascio dei documenti. . . . . . IT-3
Metodi di accesso con l’integrazione in uniFLOW . . . . . . . . . . . . . . . . . . . . . IT-4
ID utente e password . . . . . . . . . . . . . . . . . . . . . . . . . . . . . . . . . . . . . . . . IT-4
Codice PIN . . . . . . . . . . . . . . . . . . . . . . . . . . . . . . . . . . . . . . . . . . . . . . . . IT-4
Documento d’identità . . . . . . . . . . . . . . . . . . . . . . . . . . . . . . . . . . . . . . . . IT-4
PIN e ID di divisione. . . . . . . . . . . . . . . . . . . . . . . . . . . . . . . . . . . . . . . . . IT-4
Impostazioni di Gestione ID divisione per l’integrazione in uniFLOW . . . . . . IT-5
Funzionamento della macchina con accesso come Gestore sistema . . . . . . IT-6
Azzeramento dell’indirizzo IP della macchina. . . . . . . . . . . . . . . . . . . . . . . . . IT-7
Effettuare l’accesso alla macchina . . . . . . . . . . . . . . . . . . . . . . . . . . . . . . . . . IT-8
Inserimento di ID utente e password . . . . . . . . . . . . . . . . . . . . . . . . . . . . . . . IT-8
Inserimento di un codice PIN . . . . . . . . . . . . . . . . . . . . . . . . . . . . . . . . . . . . IT-10
Utilizzo di un documento d’identità. . . . . . . . . . . . . . . . . . . . . . . . . . . . . . . . IT-12
Inserimento di un PIN e di un ID di divisione . . . . . . . . . . . . . . . . . . . . . . . . IT-13
Conservare i documenti senza stamparli finché non viene effettuato
l’accesso (Accesso e rilascio dei documenti). . . . . . . . . . . . . . . . . . . . . . . . IT-15
Per effettuare l’accesso alla macchina prima di stampare i
documenti: . . . . . . . . . . . . . . . . . . . . . . . . . . . . . . . . . . . . . . . . . . . . . . . IT-15
Per effettuare l’accesso alla funzione Accesso e rilascio dei
documenti: . . . . . . . . . . . . . . . . . . . . . . . . . . . . . . . . . . . . . . . . . . . . . . . IT-18
IT-iii
Page 83

Prefazione
IMPORTANTE
NOTA
Vi ringraziamo per aver acquistato Canon imageRUNNER 1133/1133A/1133iF. Leggere
attentamente il manuale prima di utilizzare la macchina, in modo da imparare a conoscere
bene l’apparecchiatura e poterne sfruttare al meglio le molteplici funzioni. Terminata la
lettura, conservare il manuale per eventuali consultazioni future.
Come utilizzare il presente manuale
Simboli utilizzati nel manuale
I simboli utilizzati nel manuale e descritti di seguito indicano particolari procedure,
limiti, precauzioni e istruzioni da rispettare per utilizzare la macchina in condizioni
di sicurezza.
Indica avvertimenti e limitazioni relativi al funzionamento
dell’apparecchiatura. Leggere attentamente tali avvisi per utilizzare
l’apparecchiatura correttamente ed evitare di danneggiare il sistema
o altri beni.
Riporta la spiegazione di una determinata operazione o una
spiegazione supplementare relativa ad una procedura. Si consiglia
vivamente di leggere queste note.
Tasti utilizzati nel manuale
La seguente tabella riporta alcuni esempi di come i tasti da premere sul pannello di
controllo vengono raffigurati all’interno del manuale:
Tasti Esempio
[Icona tasto] + (nome tasto) [ ] (Menu)
[Nome tasto] [OK]
[Icona tasto] [ ], [ ] ecc.
Italiano
IT-iv
Page 84

Schermate utilizzate nel manuale
Le schermate utilizzate nel manuale possono differire da quelle effettive in base
alla configurazione dell’apparecchiatura.
Marchi di fabbrica
uniFLOW e MiCard® sono marchi di fabbrica registrati di NT-ware
Systemprogrammierung GmbH.
Gli altri nomi di prodotto e di azienda indicati nel manuale possono essere marchi
di fabbrica dei rispettivi proprietari.
Italiano
IT-v
Page 85

Note legali
Copyright
Copyright 2013 Canon Inc. Tutti i diritti riservati.
È vietata la riproduzione o la trasmissione, sia essa parziale o integrale, della
presente pubblicazione, in qualsiasi forma e con qualsiasi mezzo, elettronico o
meccanico, inclusa la riproduzione a mezzo fotocopia e la registrazione, oppure
attraverso un qualsiasi sistema di memorizzazione o consultazione delle
informazioni, senza l’autorizzazione scritta di Canon Inc.
Declino di responsabilità
Le informazioni contenute in questo documento sono soggette a modifiche senza
preavviso.
CANON, INC. NON FORNISCE GARANZIE DI ALCUN TIPO, ESPLICITE O
IMPLICITE, IN MERITO AL PRESENTE DOCUMENTO, AD ECCEZIONE DI
QUANTO ESPRESSAMENTE INDICATO NEL DOCUMENTO STESSO, INCLUSE,
SENZA LIMITAZIONI, GARANZIE DI COMMERCIABILITÀ, IDONEITÀ PER UNO
SCOPO PARTICOLARE O MANCATA VIOLAZIONE. CANON INC. NON È
RESPONSABILE DI EVENTUALI DANNI DIRETTI, ACCIDENTALI,
CONSEQUENZIALI O DI ALTRO GENERE, NÉ DI DANNI CAUSATI DALLA
PERDITA DI DATI DERIVANTI DALL’USO DI QUESTO MATERIALE.
IT-vi
Italiano
Page 86

Gestione della macchina con integrazione in uniFLOW
IMPORTANTE
Funzioni disponibili con l’integrazione in
uniFLOW
• Autenticazione basata sul server
uniFLOW
• Accesso e rilascio dei documenti
• Selezione di un centro di costo
Server uniFLOW
• attiva l’integrazione in
uniFLOW della macchina
• autentica gli utenti
• fornisce informazioni sulle
impostazioni
Server uniFLOW Macchina
La presente sezione fornisce una panoramica dell’integrazione in uniFLOW.
Il server uniFLOW, un server su cui è stato installato il software uniFLOW, rileva la
macchina all’interno di una rete e attiva l’integrazione in uniFLOW della macchina.
Il server uniFLOW autentica l’accesso degli utenti alla macchina e fornisce alla
macchina informazioni sulle impostazioni. Una volta completata l’attivazione, il
server uniFLOW e la macchina continuano a comunicare per completare
l’integrazione in uniFLOW.
Italiano
IT-1
L’integrazione in uniFLOW è attivata soltanto quando la macchina è collegata al
server uniFLOW tramite una rete. Il server uniFLOW è un server su cui è attivato il
software opzionale uniFLOW.
Gestione della macchina con integrazione in uniFLOW
Page 87

Azioni possibili grazie all’integrazione in uniFLOW
La macchina dispone delle funzioni attivate dal server uniFLOW. Le funzioni
principali sono le seguenti:
Modi di autenticazione e metodi di accesso basati sul server
uniFLOW
È possibile gestire la macchina limitando il suo utilizzo ai soli utenti registrati sul
server uniFLOW. Sono disponibili due opzioni per l’autenticazione: autenticazione
per la macchina e autenticazione per la funzione Accesso e rilascio dei documenti,
con diversi metodi di accesso, per esempio tramite un documento di identità* o
mediante l’inserimento di un codice PIN. (Vedere “Modi di autenticazione con
l’integrazione in uniFLOW,” a p. IT-3 e “Metodi di accesso con l’integrazione in
uniFLOW,” a p. IT-4.)
* È necessaria l’unità opzionale NT-ware’s MiCard Reader.
Accesso e rilascio dei documenti
È possibile impostare la macchina in modo da conservare i documenti senza
stamparli finché l’utente che ha inviato i dati di stampa non accede alla macchina o
alla funzione Accesso e rilascio dei documenti. È anche possibile configurare la
macchina per consentire agli utenti di selezionare i lavori che desiderano stampare.
I documenti vengono stampati solo dopo che l’utente ha effettuato l’accesso alla
macchina. Questo significa che l’utente può gestire con la massima sicurezza
documenti riservati, inoltre elimina il problema di documenti stampati e dimenticati
nel vassoio d’uscita della macchina. Questa funzione è possibile grazie al server
uniFLOW (che funge da server di stampa) che trattiene i lavori di stampa in attesa
che l’utente effettui l’accesso. Per ulteriori istruzioni su come utilizzare la funzione
Accesso e rilascio dei documenti, vedere “Conservare i documenti senza stamparli
finché non viene effettuato l’accesso (Accesso e rilascio dei documenti),” a
p. IT-15.
Utilizzo dei centri di costo
È possibile registrare centri di costo (tabelle contabili per il conteggio dei costi dei
lavori eseguiti) e addebitarli agli utenti sul server uniFLOW. Qui di seguito sono
elencati alcuni esempi di utilizzo dei centri di costo:
■ Selezione di un centro di costo al momento dell’accesso:
Quando un utente effettua l’accesso alla macchina, può essere visualizzata una
schermata che chiede all’utente di selezionare un centro di costo sul display.
L’utente seleziona un centro di costo; il server uniFLOW registra il costo per il
lavoro dell’utente.
Gestione della macchina con integrazione in uniFLOW
IT-2
Italiano
Page 88

■ Visualizzazione del costo sulla schermata per i lavori eseguiti con la
funzione Accesso e rilascio dei documenti:
È possibile impostare la macchina in modo che visualizzi il costo calcolato per il
lavoro sul display quando un utente utilizza la funzione Accesso e rilascio dei
documenti sulla macchina.
Per ulteriori informazioni sui centri di costo, consultare la documentazione in
dotazione con il software uniFLOW.
Attivazione e impostazioni dell’integrazione in uniFLOW
La panoramica dell’attivazione e delle impostazioni dell’integrazione in uniFLOW è
riportata di seguito:
Ambiente di sistema
Per attivare l’integrazione in uniFLOW, la macchina deve essere collegata al server
uniFLOW (un server su cui è stato installato il software uniFLOW) attraverso una
rete. Per ulteriori informazioni, consultare la documentazione in dotazione con il
software uniFLOW.
Impostazioni dell’integrazione in uniFLOW
Le impostazioni dell’integrazione in uniFLOW, per esempio la registrazione degli
utenti, possono essere effettuate soltanto sul server uniFLOW. Benché non siano
richieste impostazioni particolari sulla macchina, occorre accertarsi di controllare le
impostazioni della Gestione ID divisione per assicurare la corretta combinazione
tra la Gestione ID divisione e l’integrazione in uniFLOW. (Vedere “Impostazioni di
Gestione ID divisione per l’integrazione in uniFLOW” a p. IT-5.)
Italiano
IT-3
Modi di autenticazione con l’integrazione in uniFLOW
L’integrazione in uniFLOW offre i seguenti modi di autenticazione:
Autenticazione per la macchina
Agli utenti viene chiesto di accedere alla macchina. Ciò significa che gli utenti
devono autenticarsi per utilizzare le funzioni della macchina, per esempio la
funzione di Copiatura o di Scansione.
Autenticazione per la funzione Accesso e rilascio dei documenti
Agli utenti viene chiesto di accedere alla funzione Accesso e rilascio dei documenti.
Ciò significa che gli utenti possono utilizzare le funzioni della macchina, per
esempio la funzione di Copiatura o di Scansione, senza effettuare l’accesso alla
macchina. Gli utenti devono autenticarsi soltanto quando vogliono utilizzare la
funzione Accesso e rilascio dei documenti.
Gestione della macchina con integrazione in uniFLOW
Page 89

Metodi di accesso con l’integrazione in uniFLOW
NOTA
IMPORTANTE
IMPORTANTE
L’integrazione in uniFLOW offre i seguenti metodi di accesso:
• Per indicazioni su come accedere alla macchina come Gestore sistema, vedere
“Funzionamento della macchina con accesso come Gestore sistema,” a p. IT-6.
• Per indicazioni su come accedere alla macchina con ciascun metodo di accesso,
vedere “Effettuare l’accesso alla macchina,” a p. IT-8.
ID utente e password
Gli utenti inseriscono l’ID utente e la password nel pannello di controllo della
macchina.
Codice PIN
Gli utenti inseriscono il proprio codice PIN sul pannello di controllo della macchina.
Documento d’identità
Gli utenti utilizzano la propria documento d’identità servendosi dell’unità MiCard
Reader collegata alla macchina.
L’unità MiCard Reader è opzionale.
PIN e ID di divisione
Gli utenti inseriscono il PIN e l’ID di divisione sul pannello di controllo della
macchina.
Il metodo di accesso tramite il PIN e l’ID di divisione è disponibile solo quando come
modo di autenticazione è selezionato “Autenticazione per la macchina” (p. IT-3).
Gestione della macchina con integrazione in uniFLOW
IT-4
Italiano
Page 90

Impostazioni di Gestione ID divisione per l’integrazione in
NOTA
uniFLOW
Prima di utilizzare l’integrazione in uniFLOW, accertarsi che l’impostazione di
Gestione ID divisione sia impostata come indicato nella tabella di seguito.
Italiano
Modo di autenticazione
(Vedere p. IT-3)
Autenticazione per la
macchina
Autenticazione per la
funzione Accesso e
rilascio dei documenti
• Per utilizzare il PIN e l’ID di divisione come metodo di accesso, registrare nella
macchina l’ID gestore sistema e il PIN gestore sistema (p. IT-6), nonché i PIN e gli ID
di divisione. La procedura di impostazione per registrare gli utenti è la seguente:
- Sulla macchina, registrare l’ID gestore sistema e il PIN gestore sistema per il
Gestore sistema.
- Sulla macchina registrare i PIN e gli ID di divisione per gli altri utenti (utenti finali).
- Sul server uniFLOW, assegnare l’ID gestore sistema e il PIN gestore sistema o un
PIN e un ID di divisione al Gestore sistema o agli altri utenti.
• Per ulteriori informazioni su come registrare utenti sul server uniFLOW, consultare la
documentazione in dotazione con il software uniFLOW.
Metodo di accesso
(Vedere p. IT-4)
ID utente e
password
Documento
d’identità
PIN e ID di divisione ATTIVAZ.
ID utente e
password
Documento
d’identità
Impostazioni richieste per la
Gestione ID divisione sulla macchina
ATTI VAZ. /D IS ATT IV.Codice PIN
DISATTIV.Codice PIN
IT-5
Gestione della macchina con integrazione in uniFLOW
Page 91

Funzionamento della macchina con accesso come Gestore
NOTA
NOTA
sistema
La procedura di accesso del Gestore sistema varia a seconda del modo di
autenticazione selezionato tra quelli offerti dall’integrazione in uniFLOW. Vedere la
tabella sottostante.
Il Gestore sistema può impostare o modificare le impostazioni di sistema e altre
impostazioni accessibili solo al Gestore sistema.
Modo di autenticazione
(p. IT-3)
Autenticazione per la
macchina
Autenticazione per la
funzione Accesso e
rilascio dei documenti
• È possibile assegnare a un utente privilegi da Gestore sistema attenendosi alle
procedure seguenti (Le procedure e i privilegi sono utilizzabili soltanto quando è
selezionato “Autenticazione per la macchina”.). Per ulteriori informazioni, consultare la
documentazione in dotazione con il software uniFLOW.
- Per l’ID utente e la password/il codice PIN/il documento d’identità, selezionare il tipo
di utente come Gestore sistema quando si registra l’utente sul server uniFLOW.
- Per il PIN e l’ID di divisione, assegnare all’utente l’ID gestore sistema e il PIN
gestore sistema registrati sulla macchina quando lo si registra sul server uniFLOW.
• Quando si accede alla macchina come utente finale nel “Modo di autenticazione per la
macchina”, non è possibile accedere alle impostazioni di sistema e alle altre
impostazioni accessibili soltanto al Gestore sistema; viene quindi visualizzato un
messaggio come <Restrizioni Impostazioni sistema.>. Per accedere a queste
impostazioni, disconnettersi dalla macchina ed effettuare nuovamente l’accesso come
Gestore sistema.
Procedura di accesso come Gestore sistema
Accesso alla macchina da parte del Gestore sistema con ID
utente e password, codice PIN, documento d’identità o PIN e
ID di divisione. Altrimenti le procedure di accesso sono simili
a quelle degli utenti finali. (Vedere “Effettuare l’accesso alla
macchina” a p. IT-8.)
Per accedere alle impostazioni di sistema e ad altre
impostazioni accessibili solo al Gestore sistema, inserire l’ID
gestore sistema e il PIN gestore sistema registrati sulla
macchina. Se questi non sono stati impostati, qualsiasi
utente può accedere alla macchina come Gestore sistema e
può accedere alle impostazioni di sistema e alle altre
impostazioni accessibili solo al Gestore sistema.
Italiano
Gestione della macchina con integrazione in uniFLOW
IT-6
Page 92

Azzeramento dell’indirizzo IP della macchina.
NOTA
NOTA
Se il messaggio <Connessione al server non riuscita. Contattare gestore sistema.>
continua a essere visualizzato sul display dopo che la macchina è stata accesa, è
possibile che l’indirizzo IP della macchina non sia impostato correttamente. Per
ristabilire le comunicazioni tra la macchina e il server uniFLOW azzerando
l’indirizzo IP della macchina, attenersi alla procedura indicata di seguito.
1
Premere (Menu).
2
Premere [OK] per aprire il menu <Impostazioni rete>.
● Se viene visualizzata una schermata che richiede di inserire l’ID gestore
sistema e il PIN gestore sistema:
❑
Selezionare <ID gestore> utilizzando [ ] o [ ], quindi premere [OK].
❑ Inserire l’ID gestore sistema utilizzando i tasti numerici, quindi premere [OK].
❑ Selezionare <PIN> utilizzando [ ] o [ ], quindi premere [OK].
❑ Inserire il PIN gestore sistema utilizzando i tasti numerici, quindi premere [OK].
❑ Premere (Accesso/disconnessione).
Italiano
IT-7
L’ID gestore sistema e il PIN gestore sistema sono stati impostati entrambi su
‘7654321’ come impostazione predefinita.
3
Controllare l’indirizzo IP della macchina e impostarlo su
<Impostazioni rete>.
Impostare l’indirizzo IP della macchina a seconda dell’ambiente di rete in uso.
4
Riavviare la macchina.
Spegnere la macchina e attendere almeno 10 secondi prima di riaccendere la
macchina.
Gestione della macchina con integrazione in uniFLOW
Page 93

Effettuare l’accesso alla macchina
NOTA
NOTA
Immett.ID uten.&passw.
Per accedere: Prem. ID
Per uscire: Prem. ID
ID utente:
Password:
ID utente
Utente01
<Applica>
Modo immissione: 12
Questa sezione descrive le procedure a cui attenersi con i metodi di accesso messi
a disposizione dall’integrazione in uniFLOW.
Quando l’unità opzionale MiCard Reader è collegata alla macchina, è possibile
effettuare l’accesso e la disconnessione posizionando il documento d’identità sopra
l’unità MiCard Reader, indipendentemente dal metodo di accesso utilizzato (a meno
che non sia utilizzato come metodo di accesso il PIN e l’ID di divisione).
Inserimento di ID utente e password
Quando viene visualizzata la schermata illustrata al punto 1, inserire l’ID utente e la
password per effettuare l’accesso.
Per accedere alla macchina, è necessario disporre di un ID utente valido e di una
password registrata (se impostata). Per indicazioni su come registrare un ID utente e
una password sul server uniFLOW, consultare la documentazione in dotazione con il
software uniFLOW.
1
Inserire l’ID utente e la password
(fino a un massimo di 32 caratteri
per ciascuno) utilizzando i tasti
numerici.
❑ Selezionare <ID utente> utilizzando [ ]
o [ ], quindi premere [OK].
❑ Inserire l’ID utente.
È possibile cambiare il modo di
immissione del testo modificando
<Modo immissione>.
❑ Selezionare <Applica> utilizzando [ ] o
[ ], quindi premere [OK].
Effettuare l’accesso alla macchina
IT-8
Italiano
Page 94

Italiano
NOTA
Password
12345678
<Applica>
Modo immissione: 12
Selez. Centro di costo
Canon
Gruppo 1
<Accedi>
<A centro di costo
...
❑ Sulla schermata illustrata al punto 1,
selezionare <Password> utilizzando [ ]
o [ ], quindi premere [OK].
❑ Inserire la password.
È possibile cambiare il modo di
immissione del testo modificando
<Modo immissione>.
❑ Selezionare <Applica> utilizzando [ ] o
[ ], quindi premere [OK].
I caratteri inseriti per la password sono
visualizzati sotto forma di asterischi
(*******) quando la schermata torna alla
schermata di accesso iniziale.
2
Premere [ ] (Accesso/disconnessione).
• Se non è stata impostata alcuna password per l’ID utente, lasciare vuoto il campo
<Password>.
• Se si commette un errore durante l’immissione dell’ID utente/della password, premere
[ ] (Azzera) e immettere l’ID utente/la password corretti.
• Se l’ID utente/la password inseriti non sono corretti, apparirà un messaggio di errore.
❑ Se viene visualizzata una schermata che
richiede di selezionare un centro di
costo, selezionare il centro di costo
appropriato utilizzando [ ] o [ ].
• Selezionare un centro di costo di livello
inferiore o superiore utilizzando <A
centro di costo secondario> o <A
centro di costo principale>.
• È possibile cercare i centri di costo
utilizzando <Ricerca>.
• È possibile selezionare un centro di
costo dalla cronologia utilizzando
<Visualizza cronologia>.
Per ulteriori informazioni su queste
opzioni di ricerca, vedere la nota a
p. IT-10.
❑ Selezionare <Accedi> utilizzando [ ] o
[ ], quindi premere [OK].
Viene visualizzata la schermata di
attesa.
IT-9
Effettuare l’accesso alla macchina
Page 95

NOTA
Le opzioni di ricerca per i centri di costo sono visualizzate nella parte inferiore dello
NOTA
Selez. Centro di costo
Canon
Gruppo 1
<A centro di costo s
<A centro di costo
...
Immettere codice PIN
Per accedere: Prem. ID
Per uscire: Prem. ID
Codice PIN:
ޓ
Codice PIN
ޓ
12345678
(Applica: Premere OK)
schermo. Utilizzare [ ] o [ ] per selezionare l’opzione di ricerca desiderata, quindi
premere [OK].
• <A centro di costo secondario>:
utilizzare per spostare i centri di costo
al livello inferiore.
• <A centro di costo principale>:
utilizzare per spostare i centri di costo
al livello superiore.
• <Ricerca>: utilizzare per cercare i
centri di costo inserendo i primi
caratteri del nome del centro di costo.
• <Visualizza cronologia>: utilizzare per
visualizzare e selezionare i centri di
costo utilizzati in precedenza.
3
Una volta completate le operazioni, premere [ ] (Accesso/
disconnessione) per disconnettersi.
Inserimento di un codice PIN
Quando viene visualizzata la schermata illustrata al punto 1, inserire il proprio
codice PIN per effettuare l’accesso.
Per effettuare l’accesso alla macchina, è necessario disporre di un codice PIN valido e
registrato. Per indicazioni su come registrare un codice PIN sul server uniFLOW,
consultare la documentazione in dotazione con il software uniFLOW.
1
Inserire il codice PIN (fino a 20
cifre) utilizzando i tasti numerici.
❑ Premere [OK].
❑ Inserire il codice PIN e premere [OK].
Il codice PIN inserito è visualizzato sotto
forma di asterischi (*******) quando la
schermata torna alla schermata di
accesso iniziale.
Effettuare l’accesso alla macchina
IT-10
Italiano
Page 96

2
NOTA
Selez. Centro di costo
Canon
Gruppo 1
<Accedi>
<A centro di costo
...
Premere [ ] (Accesso/disconnessione).
• Se si commette un errore durante l’immissione del codice PIN, premere [ ] (Azzera)
e immettere il codice PIN corretto.
• Se il codice PIN inserito non è corretto, apparirà un messaggio di errore.
❑ Se viene visualizzata una schermata che
richiede di selezionare un centro di
costo, selezionare il centro di costo
appropriato utilizzando [ ] o [ ].
• Selezionare un centro di costo di livello
inferiore o superiore utilizzando <A
centro di costo secondario> o <A
centro di costo principale>.
• È possibile cercare i centri di costo
utilizzando <Ricerca>.
• È possibile selezionare un centro di
costo dalla cronologia utilizzando
<Visualizza cronologia>.
Per ulteriori informazioni su queste
opzioni di ricerca, vedere la nota a
p. IT-10.
❑ Selezionare <Accedi> utilizzando [ ] o
[ ], quindi premere [OK].
Viene visualizzata la schermata di
attesa.
3
Una volta completate le operazioni, premere (Accesso/
Italiano
disconnessione) per disconnettersi.
IT-11
Effettuare l’accesso alla macchina
Page 97

Utilizzo di un documento d’identità
IMPORTANTE
Posiz. scheda sopra al
lettore fino a emiss.
segn.acustico. Premere
tasto ID per uscire al
termine dell'operaz.
Selez. Centro di costo
Canon
Gruppo 1
<Accedi>
<A centro di costo
...
Quando viene visualizzata la schermata illustrata al punto 1, utilizzare il proprio
documento d’identità per effettuare l’accesso.
L’accesso tramite documento d’identità è possibile soltanto quando l’unità opzionale
MiCard Reader è collegata alla macchina.
1
Posizionare il documento
d’identità sopra l’unità MiCard
Reader finché non appare la
schermata che visualizza il
passo successivo per l’accesso
oppure la schermata di attesa.
❑ Se viene visualizzata una schermata che
richiede di selezionare un centro di
costo, selezionare il centro di costo
appropriato utilizzando [ ] o [ ].
• Selezionare un centro di costo di livello
inferiore o superiore utilizzando <A
centro di costo secondario> o <A
centro di costo principale>.
• È possibile cercare i centri di costo
utilizzando <Ricerca>.
• È possibile selezionare un centro di
costo dalla cronologia utilizzando
<Visualizza cronologia>.
Per ulteriori informazioni su queste
opzioni di ricerca, vedere la nota a
p. IT-10.
❑ Selezionare <Accedi> utilizzando [ ] o
[ ], quindi premere [OK].
Viene visualizzata la schermata di
attesa.
Italiano
2
Una volta completate le operazioni, tenere il documento d’identità
sull’unità MiCard Reader fino a visualizzare la schermata di
accesso illustrata al punto 1.
È possibile anche disconnettersi dalla macchina premendo [ ] (Accesso/
disconnessione).
Effettuare l’accesso alla macchina
IT-12
Page 98

Inserimento di un PIN e di un ID di divisione
IMPORTANTE
NOTA
Immettere ID div.e PIN
Per accedere: Prem. ID
Per uscire: Prem. ID
ID div.:
PIN:
ID div.
ޓ
0123456
(Applica: Premere OK)
PIN
ޓ
*******
(Applica: Premere OK)
Quando viene visualizzata la schermata illustrata al punto 1, inserire il PIN e l’ID di
divisione per effettuare l’accesso.
Questo metodo di accesso è disponibile solo quando come modo di autenticazione è
selezionato “Autenticazione per la macchina” (p. IT-3).
Per accedere alla macchina, è necessario disporre di un ID di divisione valido e di un
PIN registrato (se impostato). Per ulteriori informazioni, consultare la documentazione
in dotazione con il software uniFLOW.
Italiano
1
2
Premere [ ] (Accesso/disconnessione).
Inserire l’ID di divisione e il PIN
(fino a un massimo di 7 cifre per
ciascuno) utilizzando i tasti
numerici.
❑ Selezionare <ID div.> utilizzando [ ] o
[ ], quindi premere [OK].
❑ Inserire l’ID di divisione e premere [OK].
❑ Sulla schermata illustrata al punto 1,
selezionare <PIN> utilizzando [ ] o [ ],
quindi premere [OK].
❑ Inserire il PIN e premere [OK].
Il PIN inserito è visualizzato sotto forma
di asterischi (********).
IT-13
Effettuare l’accesso alla macchina
Page 99

NOTA
• Se non è stato impostato alcun PIN per l’ID di divisione, lasciare vuoto il campo
Selez. Centro di costo
Canon
Gruppo 1
<Accedi>
<A centro di costo
...
<PIN>.
• Se si commette un errore durante l’immissione dell’ID di divisione/del PIN, premere
[ ] (Azzera) e immettere l’ID di divisione/il PIN corretti.
• Se l’ID di divisione/il PIN inseriti non sono corretti, apparirà un messaggio di errore.
❑ Se viene visualizzata una schermata che
richiede di selezionare un centro di
costo, selezionare il centro di costo
appropriato utilizzando [ ] o [ ].
• Selezionare un centro di costo di livello
inferiore o superiore utilizzando <A
centro di costo secondario> o <A
centro di costo principale>.
• È possibile cercare i centri di costo
utilizzando <Ricerca>.
• È possibile selezionare un centro di
costo dalla cronologia utilizzando
<Visualizza cronologia>.
Per ulteriori informazioni su queste
opzioni di ricerca, vedere la nota a
p. IT-10.
❑ Selezionare <Accedi> utilizzando [ ] o
[ ], quindi premere [OK].
Viene visualizzata la schermata di
attesa.
3
Una volta completate le operazioni, premere [ ] (Accesso/
disconnessione) per disconnettersi.
Effettuare l’accesso alla macchina
Italiano
IT-14
Page 100

Conservare i documenti senza stamparli finché non viene
NOTA
Immett.ID uten.&passw.
Per accedere: Prem. ID
Per uscire: Prem. ID
ID utente:
Password:
effettuato l’accesso (Accesso e rilascio dei documenti)
È possibile conservare i documenti senza stamparli finché l’utente non effettua
l’accesso alla macchina o alla funzione Accesso e rilascio dei documenti. I
documenti vengono stampati solo dopo che l’utente ha effettuato l’accesso. Questo
consente di gestire con la massima sicurezza documenti riservati, inoltre elimina il
problema di documenti stampati e dimenticati nel vassoio d’uscita della macchina.
A seconda dell’impostazione, la macchina richiede all’utente di accedere per
utilizzare la macchina o per utilizzare la funzione Accesso e rilascio dei documenti.
Attenersi alla procedura indicata di seguito.
Per effettuare l’accesso alla macchina prima di stampare i
documenti:
Se viene visualizzata una schermata di accesso all’accensione della macchina o
alla disattivazione del modo riposo, accedere prima alla macchina per utilizzare la
funzione Accesso e rilascio dei documenti attenendosi alla procedura descritta
sotto.
1
Sul computer selezionare il comando per la stampa del
Italiano
documento che si desidera stampare.
Fare clic su [Stampa] o [OK] nella finestra di dialogo del driver di stampa. Il nome del
comando cambia a seconda del software applicativo in uso.
2
IT-15
Conservare i documenti senza stamparli finché non viene effettuato l’accesso (Accesso e rilascio dei documenti)
Accedere alla macchina come
indicato sulla schermata.
La schermata illustrata sulla sinistra è
un esempio di schermata di accesso.
Per ulteriori informazioni su altri
metodi di accesso, vedere “Effettuare
l’accesso alla macchina,” a p. IT-8.
 Loading...