

Cabasse STREAM-AMP-100 Owners Manual

OWNER'S MANUAL
STREAM
AMP 100
www.cabasse.com
e n g l i s h
2424
25
190
91
218
e n g l i s h
2626
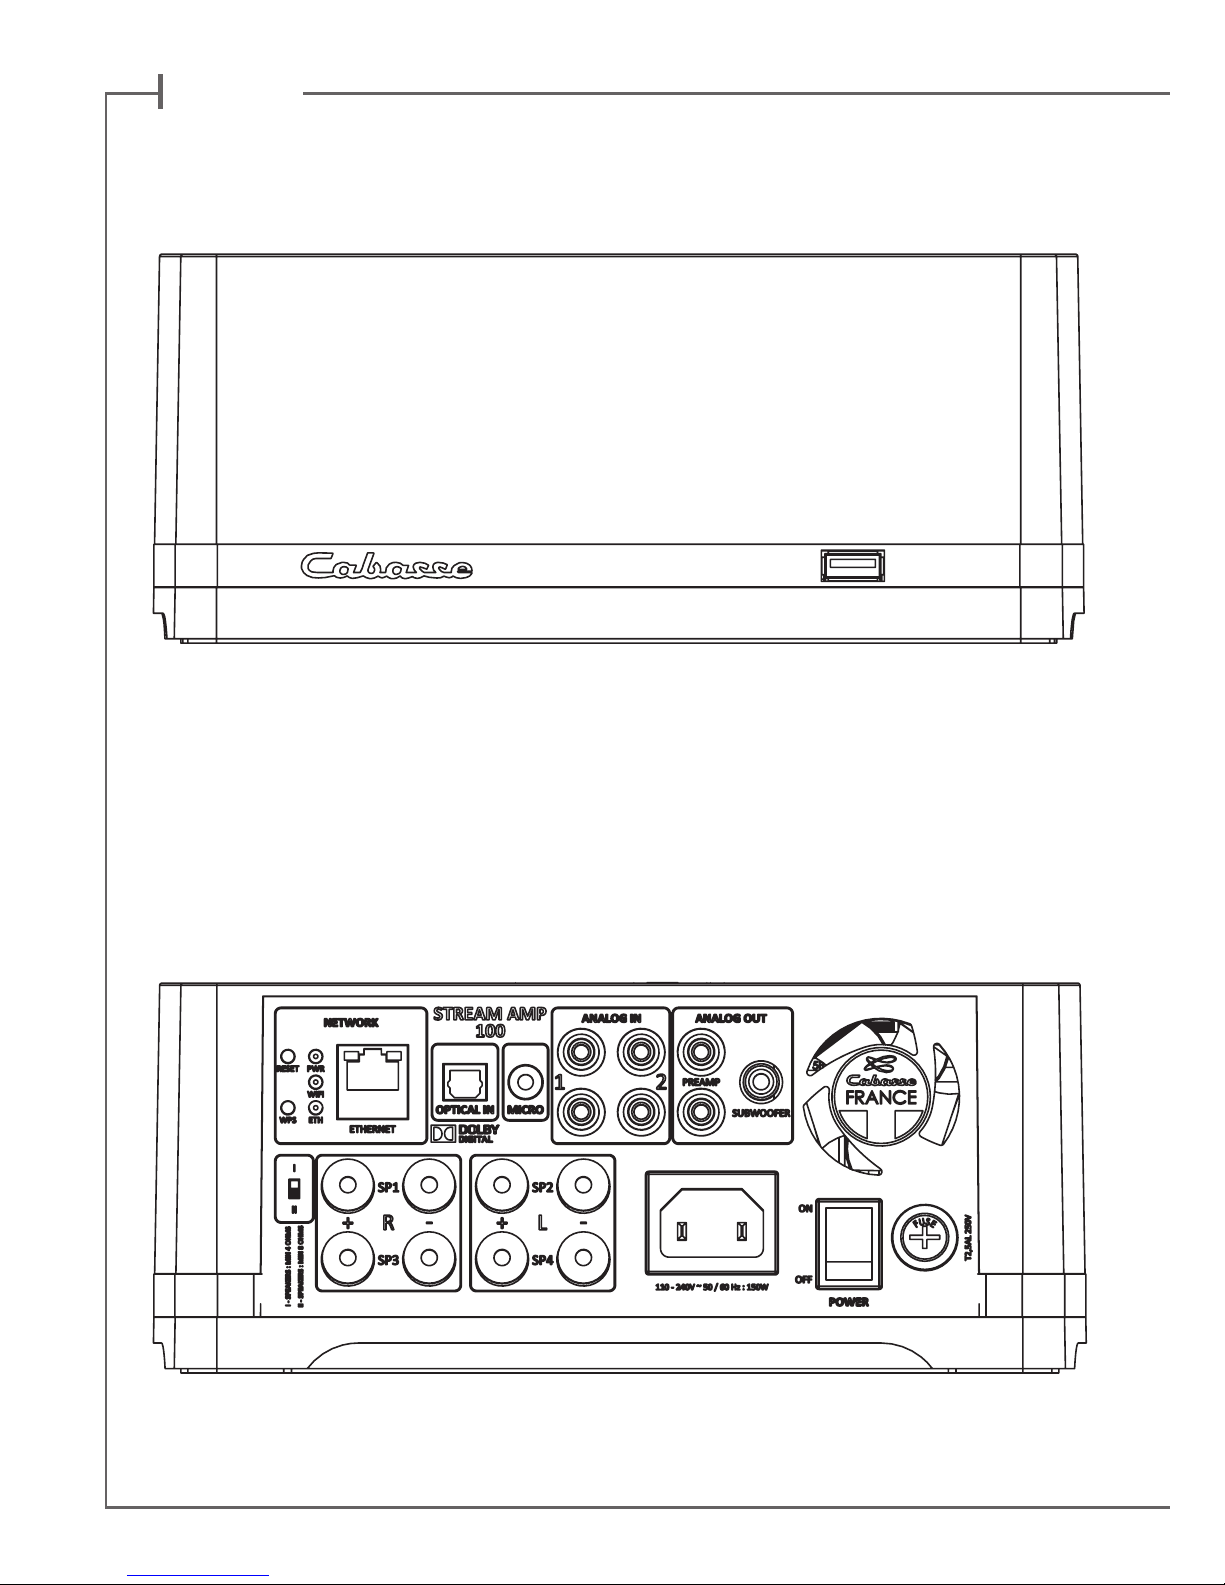
1
11
8
3
4
10
2
9
IDENTIFYING
CONTROLS
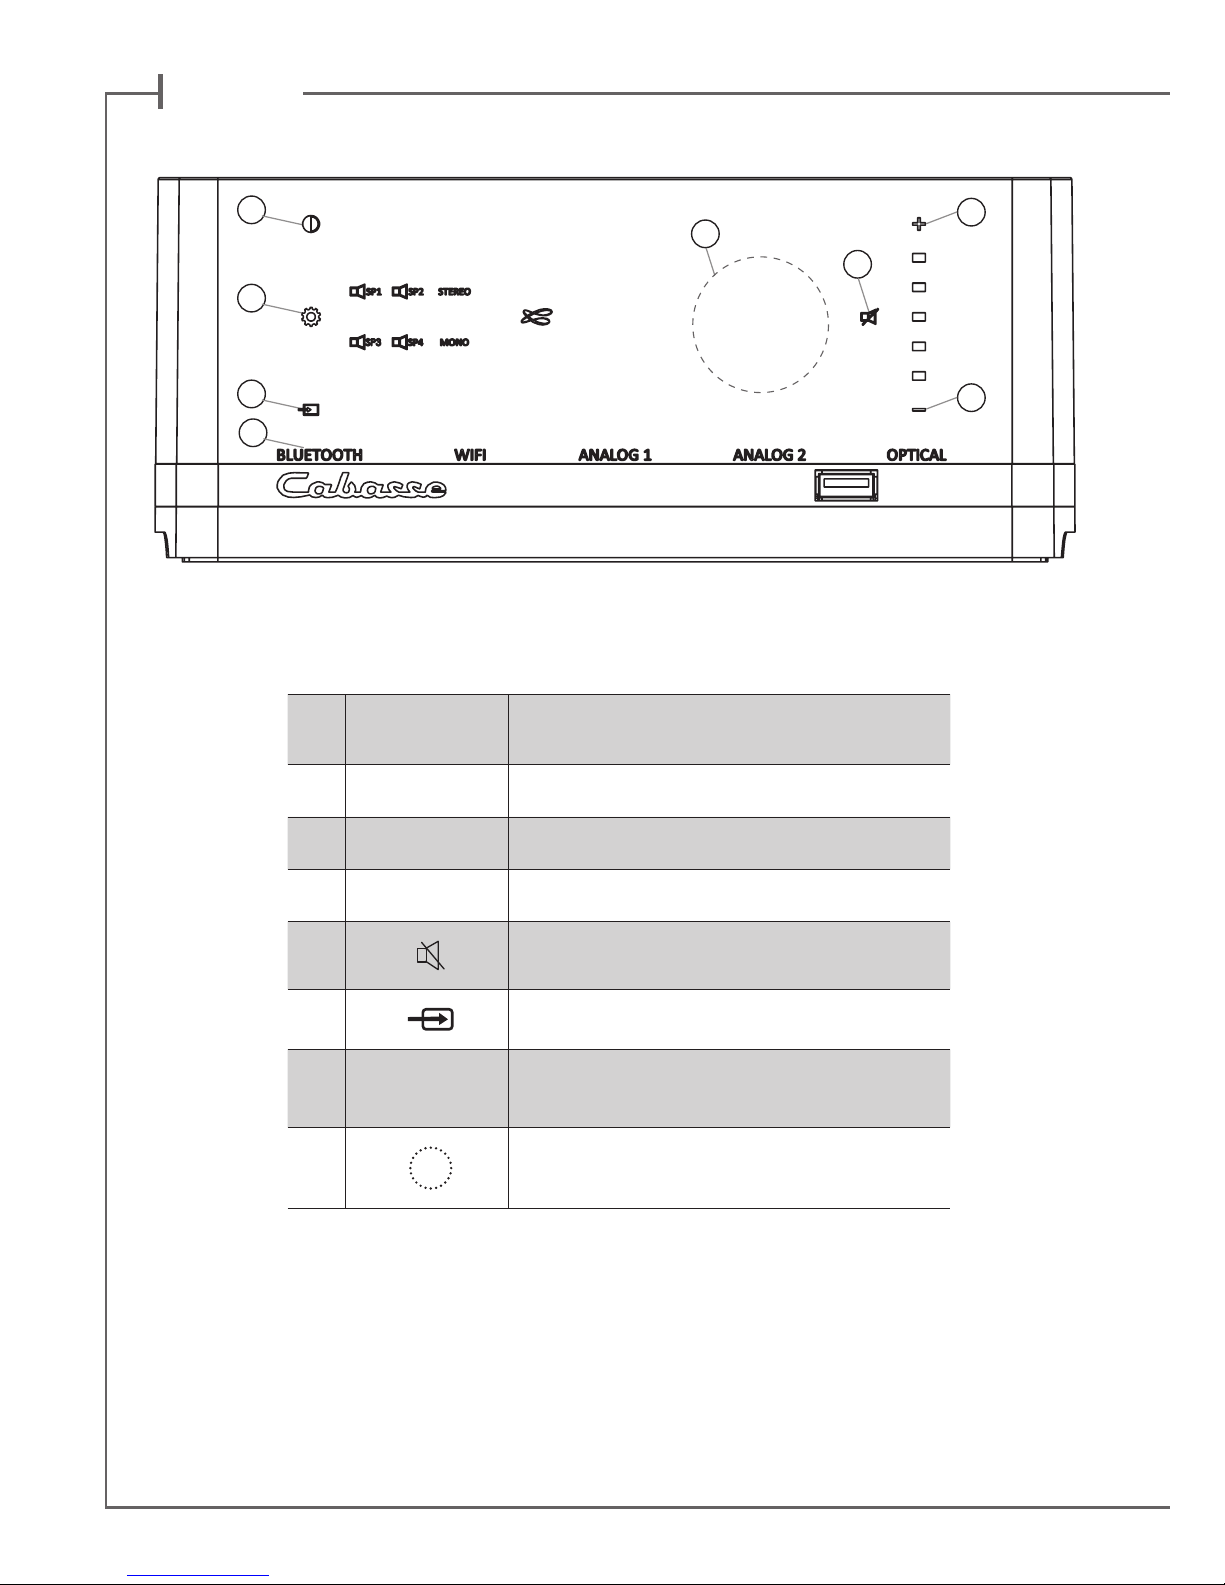
1
LED DISPLAY ON (white LED) / ECO (red LED)
2 VOL - Volume DOWN
3 VOL + Volume UP
4
Mute on/off
8
Source selection
9 SOURCES
BLUETOOTH - WIFI (WLAN/LAN) - RCA ANALOG 1 - RCA ANALOG 2 - OPTICAL
10
Position of the NFC patch

27
1
2
5
7
3
4
6
8
IDENTIFYING
CONTROLS
1
ON / ECO
2 VOL - Volume DOWN
3 VOL + Volume UP
4
Mute on/off
5
Previous title
of the played album
6
Next title
of the played album
7 Pause/Play
8
Source selection
FEATURES
Bluetooth
connection
WIFI/ETHERNET
via internet router
WIFI direct to
smartphone/tablet
Loss less audio playback
4 4
Access to any audio from
WLAN network (desktop...)
4
Multi-room
4
Tracks playback from
smartphone/tablet
4 4 4
Playback smartphone/
tablet a audio applications
(youtube…)
4
Playback from USB device
4 4
Web radio /DEEZER
4
Manufactured under licence from Dolby Laboratories.
Dolby and the double D symbol are trademarks of Dolby Laboratories.

e n g l i s h
28
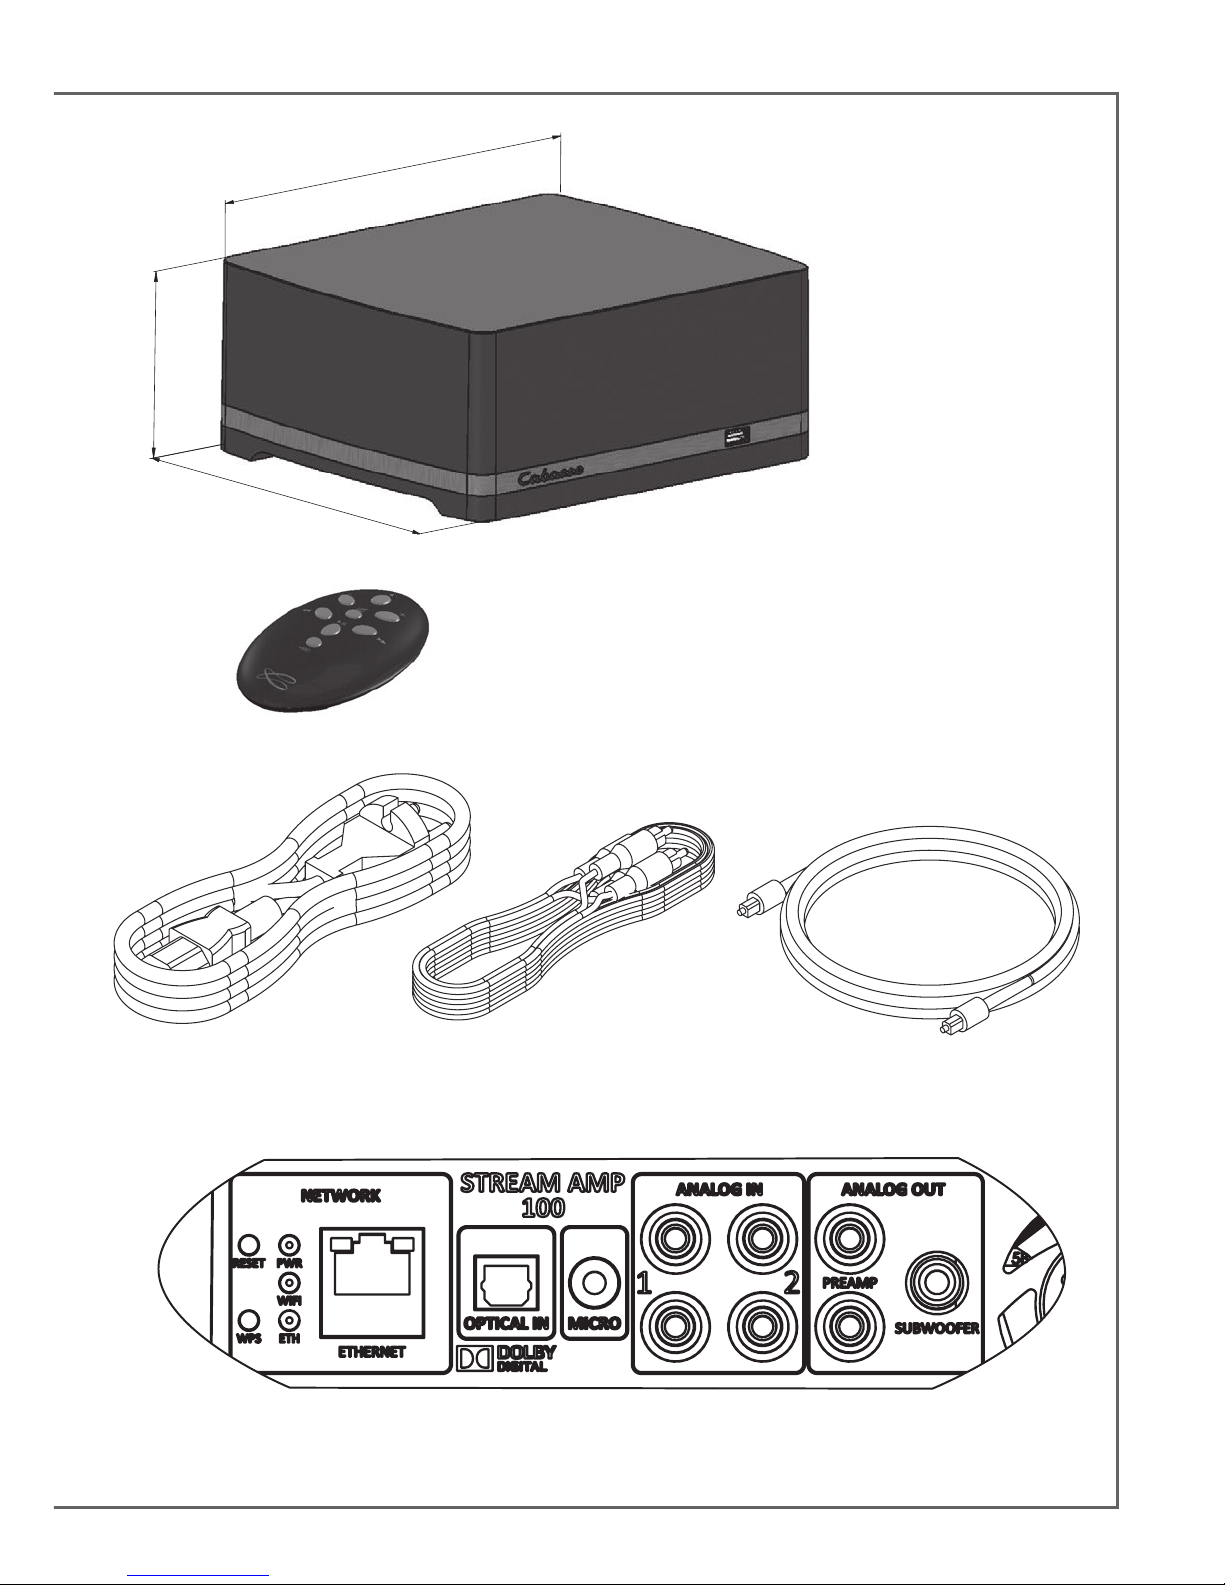
QUICK PLUG & PLAY
Place the STREAM AMP on a solid shelf
close to a mains plug, with enough available
headroom above, under and around, for the
optimum efciency of the Bluetooth and
WIFI antennas and proper ventilation of the
amplier.
Connect 2 or 4 loudspeakers to the
STREAM AMP. For a single pair of
loudspeakers, use SP1 (right speaker) and SP2
(left speaker) binding posts.
CAUTION: be assured that all “+” inputs are
effectively connected to “+” outputs as well as
all left outputs to left inputs.
Impedance range selector:
Position “I” (factory preset): power output is 2
x 50 W or 4 x 25 W RMS for loudspeakers with
a minimum impedance value below 6.4 ohms.
It goes down to 2 x 25 W and 4 x 12.5 W for
loudspeakers with minimum impedance value
above (or equal to) 6.4 ohms.
Position “II” : use this position to get 2 x 50 W
or 4 x 25 W RMS with minimum impedance value above (or equal to) 6.4 ohms, for instance
Cabasse Antigua IW or Archipel models.
Connect the power cable to the STREAM AMP, plug it to the mains and position the POWER
ON/OFF switch on "ON". STREAM AMP is ready to play when the LED
1
turns on. Press key
1
either on the STREAM AMP or the remote to get STREAM AMP on.
NOTE: the DLNA mode of STREAM AMP is available when the PWR (Power) LED has turned
from red to green, around 40 seconds after powering on the STREAM AMP.
2
1
29
3
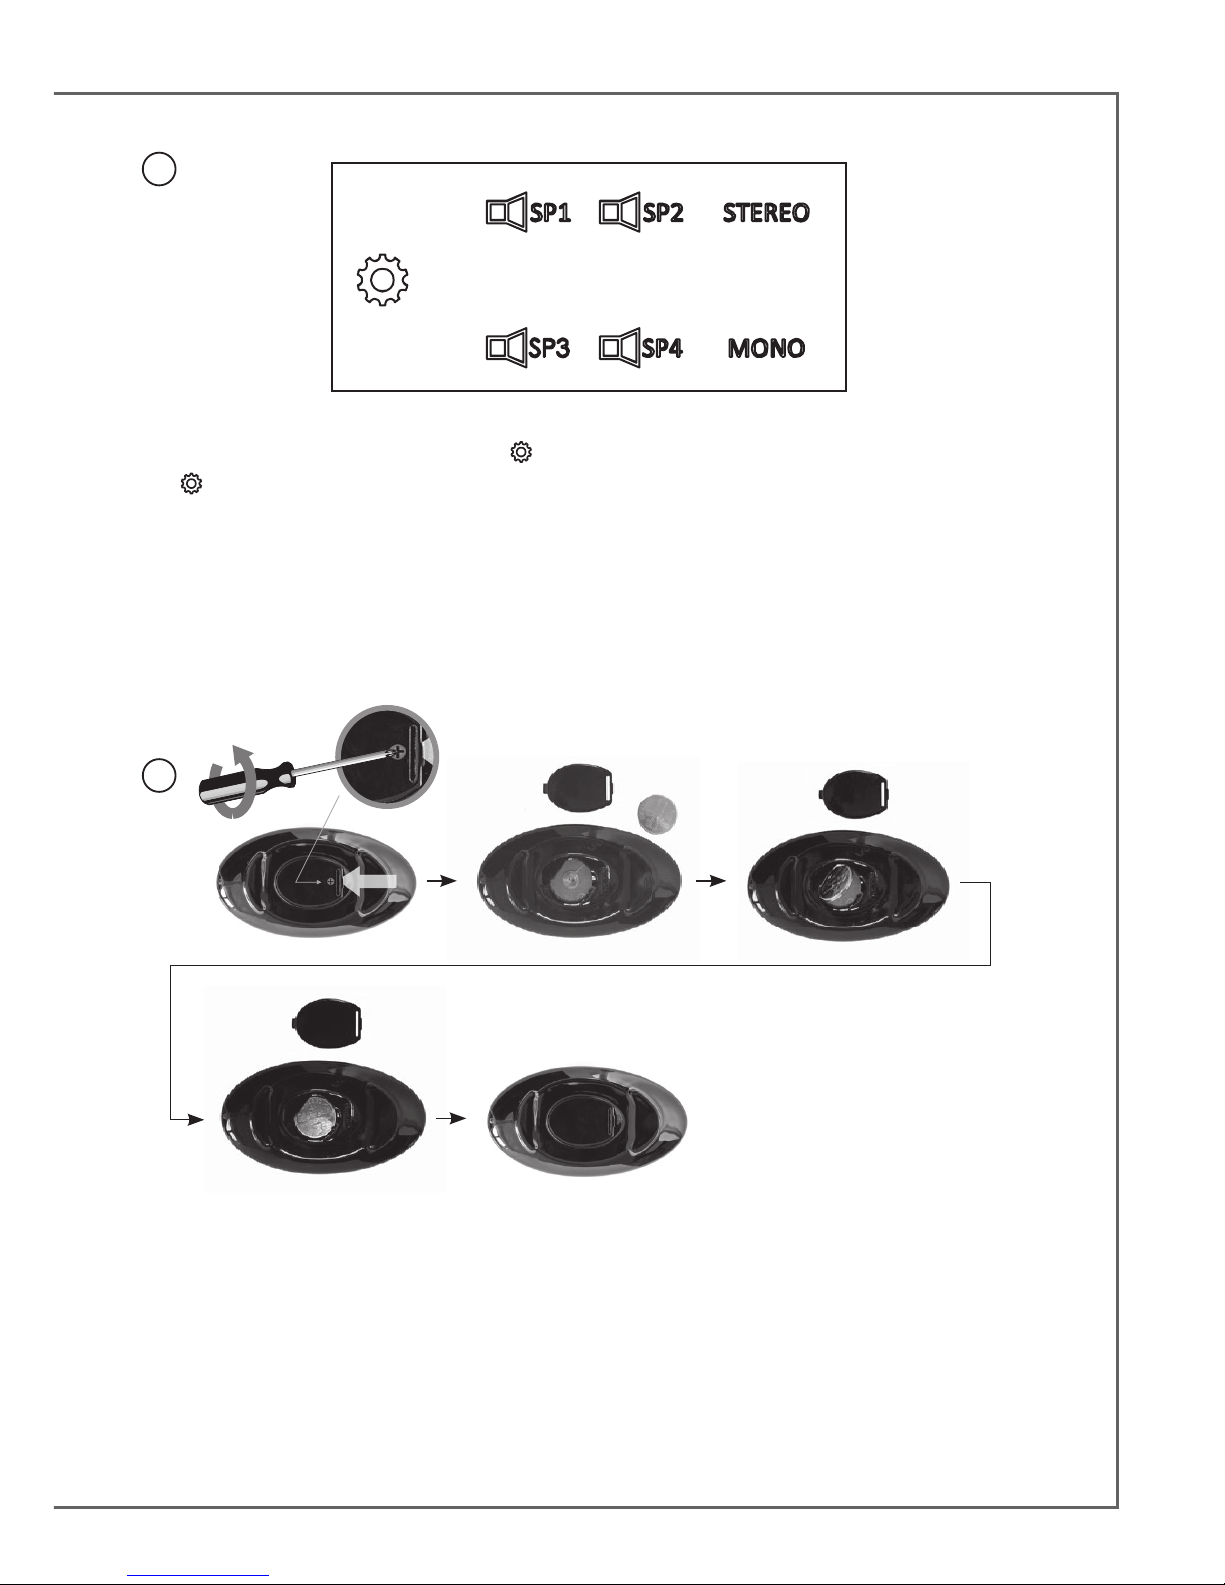
Settings of the loudspeakers outputs .
Press
to select between the 4 possible set-ups:
- 1 STEREO pair of loudspeakers (default mode). The SP1, SP2, STEREO LEDs are on.
- 2 STEREO pairs of loudspeakers. The SP1, SP2, SP3, SP4 and STEREO LEDs are on.
- 2 loudspeakers playing MONO. The SP1,SP2 and MONO LEDs are on.
- 4 loudspeakers playing MONO. The SP1,SP2, SP3,SP4 and MONO LEDs are on.
Before rst use, loosen the screw (PH00 screwdriver), remove the back cover, remove the battery
protection tab, replace the cover, retighten the screw.
Replacement of the CR-2025 type battery in the Stream remote control: loosen the screw, remove the
rear lid, remove the old battery and load the new battery properly with the "+" side on the clasp side,
put the rear cover back on, retighten the screw.
4

e n g l i s h
30
ANALOG INPUTS 1 AND 2
Select an audio source tted with an analogue output, either RCA or mini-jack type.
Get a RCA/mini-jack if the source is tted with a mini-jack output.
USB INPUT
Plug in an USB stick or a hard-drive to this input to get all the stored audio les available on
the domestic network. All the audio les, under formats compatible with the built-in DLNA
server of STREAM AMP, will be listed in the Stream Audio Control apps and can be played
by any Cabasse Stream player connected to the same domestic network. The USB input is
tted with a 1 ampere power output enabling the use of a portable hard drive with no need
of an external power supply.
5
6
7
Once the Bluetooth and Wi-Fi connections activated, press the 8
key of the remote control or on the front panel until you get the
requested source, with the appropriate LED on the panel being
on. The Wi LED stands for the Wi/WLAN source, the ETH LED
stands for the Ethernet/LAN source.
 Loading...