

Page 1
Instruction Manual
CBB31iBLK
CBB31iPINK
Page 2
Table of contents
Accessories included ............................3
Overview of controls .............................3
General operation ...........................4
Battery installation ..............................4
DC Mains operation .............................4
Standby mode ..................................4
Volume controls .................................4
Radio operation .............................4
Radio operation (cont). . . . . . . . . . . . . . . . . . . . . . . .5
Saving/recalling radio presets ...................5
CD operation ................................5
Load a CD .......................................5
Playing a CD .....................................5
Skip & search tracks ............................5
Repeat & Random playback .....................5
Programmed playback ..........................6
iPod/iPhone operation .......................6
Pod/iPhone controls .........................6
Auxiliary input ...............................7
Video output ................................7
Care & maintenance .........................8
Troubleshooting .............................8
Technical specifications ......................9
Product Codes
CBB31i
Please note that the iPod/iPhone docking
connector on this product is not compatible
with the iPhone 5 or iPods with the Lightning
connector.
Page 1
Page 3
Safety information
Important – Please read these instructions fully before installation
Safety Warnings
CAUTION: TO REDUCE THE RISK OF ELECTRIC
SHOCK, DO NOT REMOVE ANY COVER. NO
USER-SERVICEABLE PARTS INSIDE, REFER ANY
SERVICING TO QUALIFIED SERVICE PERSONNEL.
Please read this owner’s guide
• Please take the time to follow the instructions in
this owner’s guide carefully. It will help you set up
and operate your system properly and enjoy all of its
advanced features.
• Please save this owner’s guide for future reference.
• The product label is located on the back of the
product.
• This product must be used indoors. It is neither
designed nor tested for use outdoors, in recreation
vehicles, or on boats.
• Heed all warnings - on the product and in the
owner’s guide.
• Do not use this apparatus near water or moisture.
• Do not use this product near a bathtub, washbowl,
kitchen sink, and laundry tub, in a wet basement,
near a swimming pool, or anywhere else that water
or moisture is present.
• Only use attachments/accessories specified by the
manufacturer.
• Unplug this apparatus during lightning storms or
when unused for long periods of time - to prevent
damage to this product.
• Refer all servicing to qualified service personnel
• Servicing is required when the apparatus has
been damaged in any way: such as liquid has been
spilled or objects have fallen into the apparatus; the
apparatus has been exposed to rain or moisture,
does not operate normally, or has been dropped -
• Do not attempt to service this product yourself.
• Opening or removing covers may expose you to
dangerous voltages or other hazards.
• To prevent risk of fire or electric shock, avoid
overloading wall outlets, extension cords, or integral
convenience receptacles.
• Use proper power sources - Plug the product into a
proper power source, as described in the operating
instructions or as marked on the product.
• The mains plug is used as the disconnect device, the
disconnect device shall remain readily accessible
CAUTION
RISK OF ELECTRIC SHOCK!
DO NOT OPEN!
This symbol means that this unit is double
insulated. An earth connection is not required.
CAUTION : CLASS 1 LASER PRODUCT
Use of contents or adjustments of performance of
procedures other than those specified Herein may
result in hazardous radiation exposure.
LASER SAFETY
This unit employs a laser, only qualified
service personnel should attempt repair.
DANGER: Invisible laser radiation when open and
interlock failed or defeated avoid direct exposure to
beam.
CAUTION: hazardous laser radiation when open and
intelock defeated.
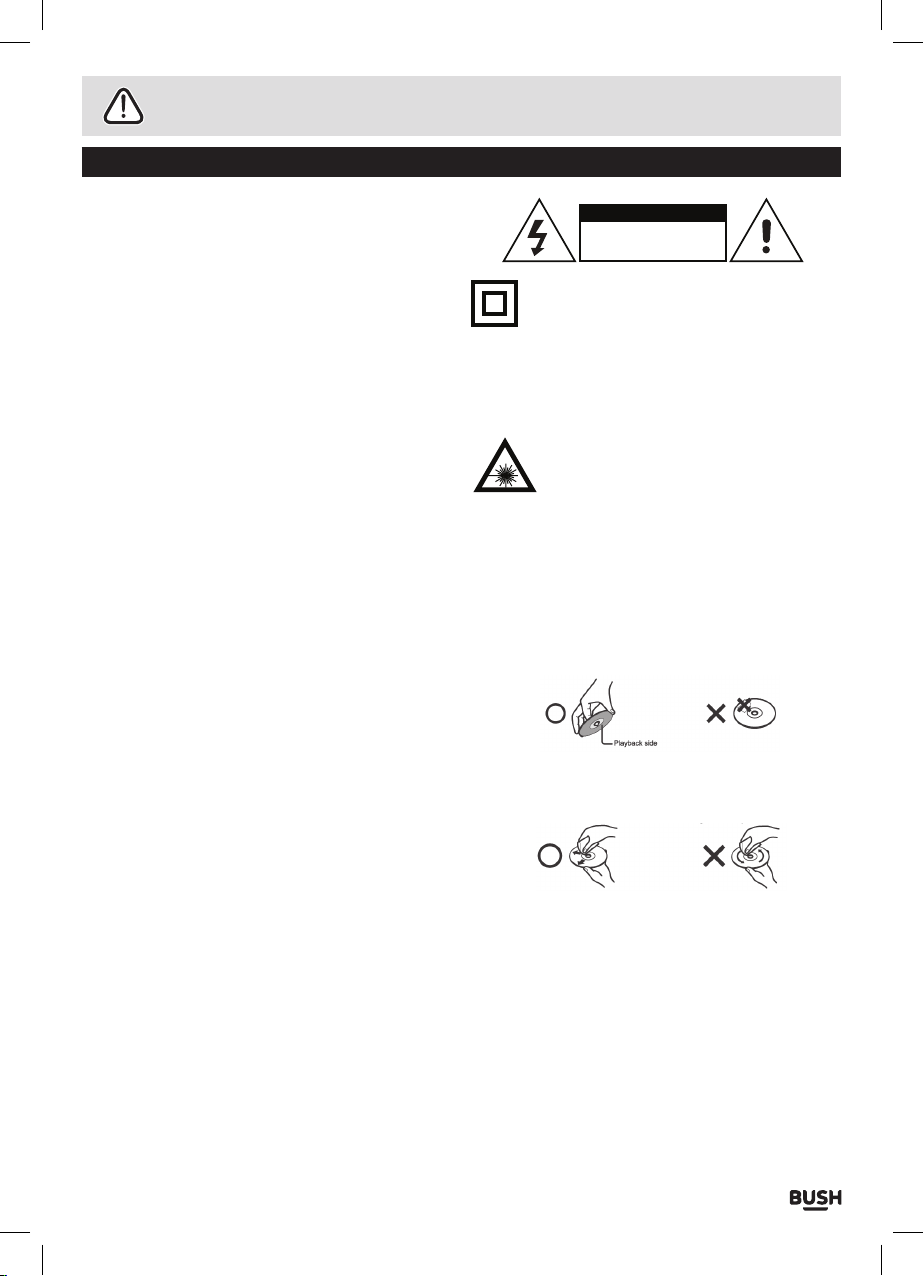
Disc handling
Do not touch the playback side of the disc.
Do not attach paper or tape to disc.
Fingerprints and dust on the disc cause picture and
sound deterioration. Wipe the disc from the centre
outwards with a soft cloth. Always keep the disc clean.
If you cannot wipe off the dust with a soft cloth, wipe
the disc lightly with a slightly moistened soft cloth and
finish with a dry cloth.
Do not use any type of solvent such as thinner, benzene,
commercially available cleaners or antistatic spray for
vinyl. It may damage the disc.
Do not store discs in a place subject to direct sunlight or
near heat source.
Do not store discs in a place subject to moisture and
dust such as a bathroom or near a humidifier.
Store discs vertically in a case, stacking or placing
object on discs outside or their case may cause warping.
Page 2
Page 4
Functions & controls
Please familiarize yourself with the parts and accessories listed below
Accessories included
• 1 x CBB31i • 1 x Mains adapter • 1 x Instruction manual • 3 x PVA pads
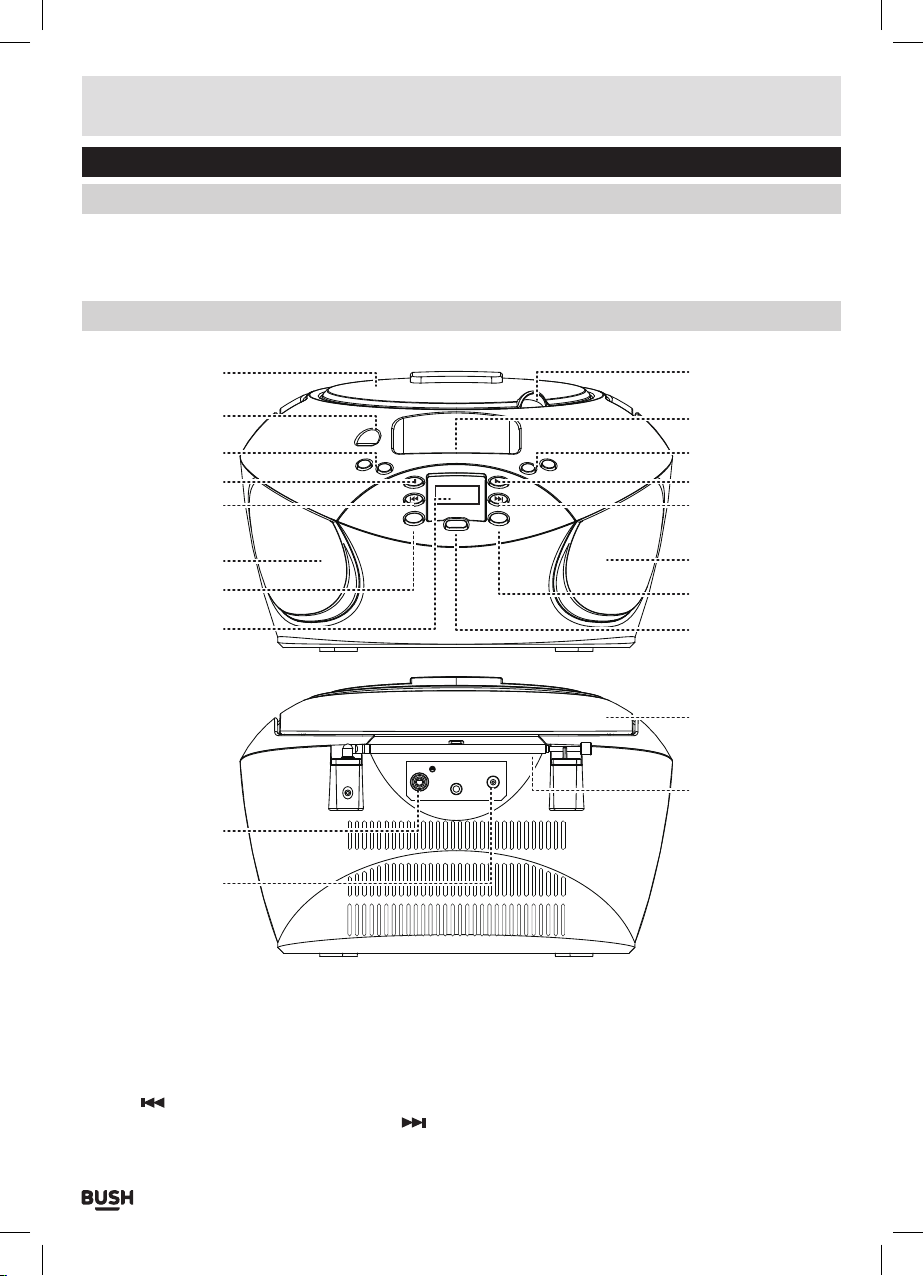
Overview of controls
18
19
1
2
3
5
AUX IN
MEM/PROG.
PLAY/PAUSE
SKIP+/M+
TUNING-
TUNING+
VOL+
VOL-
STOP
SKIP-/M-
PREP/RAN
POWER/FUNC
6
7
8
9
10
11
124
13
6
14
15
16
VIDEO
DC 10V
17
1: CD compartment lid
2: AUX INPUT socket
3: VOLUME +/- buttons
4: STOP button
5: SKIP
/MEMORY - button
6: SPEAKERS
7: REPEAT/RANDOM buttons
8: LCD display
9: CD LID open latch
10: iPod/iPhone dock
11: TUNING +/- buttons
12: PLAY/PAUSE button
13: SKIP
/MEMORY + button
14: MEMORY/PROGRAM button
15: POWER/FUNCTION button
16: CARRY HANDLE
17: ANTENNA
18: VIDEO OUTPUT socket
19: DC power input
Page 3
Page 5

User instructions
General operation
Battery installation
1: Remove the battery compartment cover carefully.
2: Install 8 x ‘C’ size batteries (UM-2 or equivalent)
while observing the correct polarities.
NOTE: There is an engraved diagram showing
battery installation directions inside the battery
compartment.
DC Mains operation
This unit is supplied with a DC mains adaptor.
1: To connect the power insert the mains socket jack
into the rear of the unit (19).
2: Insert the UK plug into a household power socket and
switch the power ON.
Standby mode
Using the standby mode will save power when the unit
is not in use.
1: When the unit is switched ON for the first time
STANDBY mode will be active.
2: To wake the unit from the STANDBY mode, press the
POWER/FUNCTION button (15). The unit will wake
and the POWER indicator next to the display will
illuminate.
3: To enter the STANDBY mode press and hold the
POWER/FUNCTION button (15) for at least 2 seconds.
The POWER indicator will dim.
NOTE: This unit is designed to enter STANDBY
mode automatically after 20 MINUTES of
inactivity. Press the STANDBY button to wake the
unit.
Volume controls
1: To increase the volume level press the VOL+ button
(3) repeatedly, or press and hold for rapid advance.
2: To decrease the volume level press the VO L- button
(3) repeatedly, or press and hold for rapid advance.
Radio operation
3: Replace the battery compartment cover.
NOTE: The mains cable must be detached
from the DC mains socket of the player for the
batteries to power the unit.
Leaking batteries may damage the battery cabinet
and the player as a whole, so they should be
removed from the cabinet when becoming flat or
when the player is not to be used with batteries for
some time.
Page 4
1: Wake the unit from STANDBY mode if required.
2: Press the POWER/FUNCTION button (15) repeatedly
until you see ‘87.5’ or another radio frequency on the
display.
3: Extend the antenna fully, and angle for best reception
(you may need to adjust once tuned to a station).
4: Tune to the required station using the TUNING + / -
buttons (11). Pressing either button once advances
the frequency in 0.05MHz increments. Press and hold
either button to search up or down the frequency
range, until a station is located. When a station is
found it will begin playback. You can stop the scan
at any time, by pressing either TUNING + / - button
again.
Page 6

User instructions
Radio operation (cont)
NOTE: When receiving an FM broadcast, fully
extend the telescopic antenna and angle it for the
best reception.
5: Adjust the volume to a comfortable listening level
using the volume controls (3).
Saving/recalling radio presets
After tuning to a radio station you may wish to store
the frequency to a preset location, so you can recall
easily at a later date.
1: When tuned to the station you wish to store, press
the MEM/PROG. button (14). You will see ‘PXX’ on the
display (XX indicates the preset location).
2: Use the
button (13) to cycle through the preset locations 1-20.
3: Once a preset location number has been selected,
press the MEM/PROG. button (14) to store the
current station to the selected preset location
number.
4: To recall a station saved to a preset location, press
either
button (13) to cycle through the preset locations 1-20.
When selected the stored station will begin playback
within 2 seconds.
SKIP / M- button (5) or SKIP / M+
SKIP / M- button (5) or SKIP / M+
Playing a CD (cont)
6: Press the PLAY/PAUSE button (12) once to PAUSE
the music playback, the elapsed track time flashes
to indicate the player is in Pause mode. Pressing the
PLAY/PAUSE button (12) resumes playback.
7: Press the STOP button (4) to cease music playback.
The LCD shows the total number of tracks again.
Skip & search tracks
1: Press the
playback to skip to the next track. To skip to a specific
track ahead, press this button several times until you
reach the track number required.
2: Press the
playback to return to the beginning of the current
track. Press the
repeatedly to skip to the previous track. To skip back
to a specific track, press this button several times.
3: Hold the
to fast forward the current track.
4: Hold the
fast rewind the current track.
Repeat & Random playback
Should you wish to play an entire disc in a random
order or simply repeat a single track or entire disc,
follow the below steps.
SKIP / M+ button (13) once during
SKIP / M- button (5) once during
SKIP / M- button (5) twice
SKIP / M+ button (13) during playback
SKIP / M- button (5) during playback to
CD operation
Load a CD
1: Open the CD door using the raised OPEN latch. (9)
2: Load a CD onto the disc tray with the label facing up.
3: Close the CD door.
Playing a CD
1: Wake the unit from STANDBY mode if required.
2: Press the POWER/FUNCTION button (15) repeatedly
until you see ‘----’ on the display with ‘CD’ appearing
above it.
3: Follow the steps above to load a disc (if not already
loaded).
4: The player begins to read the disc immediately.
5: When the disc is successfully read, the total number
of the tracks on the disc will appear on the LED
display (8) and playback follows with the first track.
1: During playback of a CD, press the REP/RAN button
(7). After one press you will see the ‘REP’ icon flash in
the bottom right corner of the display, to indicate the
current track will repeat.
2: Press the REP/RAN button (7) again and the ‘REP’
icon will stop flashing and become solid. This
indicates the entire disc will repeat.
3: Press the REP/RAN button (12) once more, you will
see the ‘RAN’ icon appear in the bottom left corner of
the display to indicate the RANDOM function is active.
4: Press the REP/RAN button (12) again. You will see the
‘RAN’ icon disappear, this indicates all REPEAT and
RANDOM functions have been disabled.
Page 5
Page 7

User instructions
Programmed playback
To program an alternative playback order of tracks
follow the below steps.
1: Make sure the unit is not playing anything.
2: Press the MEM/PROG. button (14) once. The program
sequence “P01” appears and ‘PROG’ flashes on the
LED display.
3: Select the first track to be programmed using either
SKIP / M+ button (13) or SKIP / M- button (5).
4: Press the MEM/PROG. button (14) again to store and
advance to the next programmed track.
The program sequence indication changes to “P02”
momentarily waiting for your next input.
5: Repeat the steps above to program more tracks.
A maximum of 20 tracks can be programmed.
6: Press the PLAY/PAUSE button (12) to begin the
programmed playback in the preferred order.
7: You can press the STOP button (4) to terminate
programmed playback.
8: In program stop mode, press the STOP button
again to clear the programmed sequence or press
the PLAY/PAUSE button to begin the programmed
playback again.
iPod/iPhone operation
1: Wake the unit from STANDBY mode if required.
2: Press the POWER/FUNCTION button (15) repeatedly
until you see ‘IP’ on the display.
3: Connect a compatible iPod / iPhone to the dock
connector (10). Take care when connecting not to
damage the 30 pin connector.
AUX IN
VOL+
VOL-
STOP
SKIP-/M-
PREP/RAN
POWER/FUNC
TUNING+
TUNING-
PLAY/PAUSE
SKIP+/M+
MEM/PROG.
iPod/iPhone operation (cont)
4: The unit will begin to play back the last selected track
on your device automatically. If you cant hear any
sound after 20 seconds, remove & re-seat the device.
5: You can now either select audio from your device to
play using the iPod / iPhone’s controls or by using the
buttons on the main unit.
6: While the iPod / iPhone is docked the internal battery
will be charged until full.
Pod/iPhone controls
Below are descriptions of button functions that
operate with an iPod / iPhone docked.
1: Press the
PLAY/PAUSE button (12) to pause or
resume playback.
2: Press the
3: Press the
STOP button (4) to stop playback.
SKIP / M+ button (13) once during
playback to skip to the next track. To skip to a specific
track ahead, press this button several times until you
reach the track number required.
4: Press the
SKIP / M- button (5) once during
playback to return to the beginning of the current
track. Press the button twice repeatedly to skip to the
previous track. To skip back to a specific track, press
the button several times.
5: Hold the
SKIP / M+ button (13) during playback
to fast forward the current track.
6: Hold the
SKIP / M- button (5) during playback to
fast rewind the current track.
7: Press the REP/RAN button (7), you will see the
REPEAT ONCE icon appear on iPod/iPhone display.
press again and the mode changes to REPEAT ALL.
The iPod/iPhone REPEAT icon will change to indicate
REPEAT ALL is active. Press again to disable all
REPEAT modes.
8: Press and hold the REP/RAN button (7), you will see
the SHUFFLE icon appear on the iPod/iPhone display.
Press and hold the REP/RAN button once more to
disable the SHUFFLE mode. The SHUFFLE icon will
disappear from the iPod/iPhone display.
Page 6
Page 8

User instructions
Pod/iPhone support pads
Included with the product is a pack of three adhesive
PVA pads of different thickness. Should you need
added support and vibration protection between the
back of your device and the boombox (dependant on
your iPod or iPhone model) these can be fitted in the
appropriate position, See FIG A.
FIG A
The pads can be used separately to give spacing’s
of 2mm or 4mm or can be piggybacked one on top of the
other to give a spacing of 6, 8 & 10mm (see FIG B).
FIG A
Auxiliary input
It is possible to connect an external audio source like
an MP3 player using a 3.5mm audio cable (not
supplied).
4mm 4mm 2mm
Auxiliary input (cont)
2: Wake the unit from STANDBY mode if required.
3: Press the POWER/FUNCTION button (15) repeatedly
until you see ‘AU’ on the display.
4: Press PLAY on the external audio source EG:-MP3
player.
NOTE: the volume output is effected by the
volume level on the source EG: MP3 player so
make sure that is set to about 70-80% ( not too
loud to avoid distortion ).
5: Adjust the VOLUME controls on the unit to the
required listening level.
Video output
If you have a compatible iPod/ iPhone, it is possible to
play stored videos through a connected TV.
1: Connect an RCA video cable (*not supplied) from the
VIDEO output socket (18), to the VIDEO input socket
of your TV (see TV manual).
TV
* COMPOSITE
VIDEO CABLE
1: Connect one end of the cable to the MP3 players
headphone output and the other end to the AUX input
(2) on the front of the unit.
AUX IN
VOL+
VOL-
STOP
SKIP-/M-
PREP/RAN
POWER/FUNC
TUNING+
TUNING-
PLAY/PAUSE
SKIP+/M+
MEM/PROG.
VIDEO
DC 10V
CBB31i BOOMBOX
2: Follow steps 1-3 of ‘iPod/iPhone operation’ Pg6 if an
iPod / iPhone is not already docked.
3: Power on your TV and select the correct VIDEO input
setting (the one you connected the RCA cable to).
4: You are now able to play video’s from a compatible
iPod / iPhone through the connected TV.
NOTE: Make sure your iPod/iPhone has the
‘TV OUT’ option enabled.
Page 7
Page 9

User instructions
Care & maintenance
Important: Always unplug the appliance from the power socket during cleaning and maintenance.
Never use any sharp instruments or abrasive substances, soap, household cleaner, detergent or wax polish for
cleaning.
Clean the external surfaces with a damp soft cloth only. Never use abrasive products or solvents as it may
damage the appliance.
Troubleshooting
In the unlikely event of difficulties with your appliance please follow the trouble shooting guide below.
If the problem persists, contact the retailer if the machine is still under guarantee.
Customer helpline: 0870 600 3030
Problem Reason(s) Solution(s)
No Power • Power cable not connected to
No Sound CD/AUX/RADIO/IPOD
No Sound from AUX input
Sound is distorted
Sound is distorted from AUX
input
Unable to Play • No disc in the tray
Static Sound • Poor reception • Re-locate the antenna (FM)
Unit switches off after 20
minutes of inactivity
wall socket
• Power socket is not switched on
• Volume is too low
• iPod/iPhone not docked
correctly
• AUX source volume is too low
• Volume is too high
• AUX source volume is too high
• Disc not loaded properly
• Disc is dirty
• Auto standby mode in operation • This unit is designed to enter
• Make sure the plug is connected
• Switch the power on
• Increase the volume
• Re-dock the iPod/iPhone
• Increase the output volume of the
AUX source.
• Reduce the volume
• Reduce the output volume of the AUX
source.
• Insert a compatible disc
• Check the disc loaded
• Clean the disc
STANDBY mode automatically after
20 MINUTES of inactivity. Press the
STANDBY button to wake the unit.
Page 8
Page 10

User instructions
Technical specifications
General
Power • Mains adaptor : 100-240V ~ 50/60 Hz
Power Consumption • 20 Watts
Dimensions • Approx. 23.5mm(L) x 25.5mm(W) x 12.5mm(H)
AUX In • 3.5mm stereo socket
Tuner
FM • 87.5 - 108 MHz
CD Player
Playback system • Compact Disc Digital Audio System
DAC • 1 Bit DA converter with 8 x over sampling.
Frequency response • 20Hz-20KHz
S/N ratio
Dynamic range • 90dB
Audio
Output Power • 2W x 2 (RMS)
Speaker impedance • 8 ohms
Disc Compatibility
Disc Type • CD-DA/CD-R/CD-RW
Size • 12cm & 8cm
• Mains adaptor output : 10V
• Battery : 12V 8 X 1.5V ‘C’ Size (UM-2)
• ≥45dB
DC 2000mA
Page 9
Page 11

Guarantee
PRODUCT GUARANTEE
This product is guaranteed against manufacturing defects for a period of
Year
This product is guaranteed for twelve months from the date of original purchase.
Any defect that arises due to faulty materials or workmanship will either be replaced,
refunded or repaired free of charge where possible during this period by the dealer from
whom you purchased the unit.
The guarantee is subject to the following provisions:
The guarantee does not cover accidental damage, misuse, cabinet parts, knobs or
consumable items.
The product must be correctly installed and operated in accordance with the instructions
contained in this manual.
It must be used solely for domestic purpose.
The guarantee will be rendered invalided if the product is re-sold or has been damaged by
inexpert repair.
Specifications are subject to change without notice.
The manufacturer disclaims any liability for the incidental or consequential damages.
The guarantee is in addition to, and does not diminish your statutory or legal rights.
Guarantor: Argos Limited
489 - 499 Avebury Boulevard
Central Milton Keynes
MK9 2NW
 Loading...