

Page 1
INSTALLATION MANUAL
Rapid Flow Induction
Vehicle Application Part Number
‘03,’04,’06,’07 Ford 6.0L Power Stroke #51100
‘05 Ford 6.0L Power Stroke #51101
Page 2

RAPID FLOW INDUCTION
TROUBLESHOOTING:
If you have questions during the installation of this product,
please visit www.bullydog.com/Product_Updates.php.
The latest version of these instructions can be found at the
same location. Please review the Troubleshooting section on
page before calling technical support to cover most common
issues. Technical support is available by calling 866-bullydog (866-285-5936).
TABLE OF CONTENTS
INTRODUC TION ...............................................................................................PG. 2
BILL OF MATERIALS .........................................................................................PG. 2
REMOVING THE STOCK INTAKE .................................................................... PGS. 34
INSTALLING THE RFI ................................................................................... PGS. 57
FILTER MAINTENANCE .....................................................................................PG. 8
WARRANTY & DISCLAIMER ............................................................................PG. 10
1
Page 3
RAPID FLOW INDUCTION
INTrOduCTION
Introduction: The following instruction set covers installation and maintenance of the Rapid
Flow induction system for 2003-2007 6.0L Ford Power Strokes. Notice that the installation process
for the 2005 model year 6.0L has installation dierences from the rest of the model years.
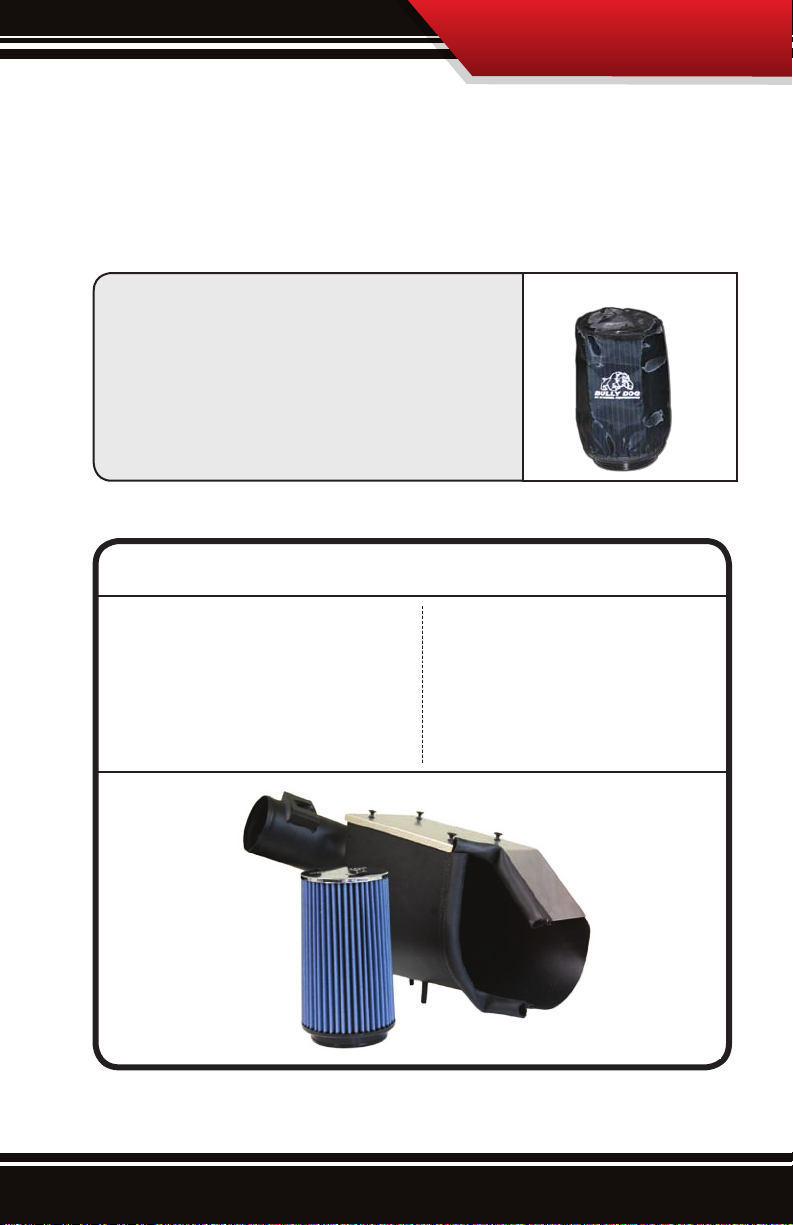
PREFILTER RECOMMENDED
Recommended with this kit but not included is a Bully
Dog prelter which can be purchased through a local Bully
Dog dealer. A prelter blocks large particles and insects
from becoming lodged in the lter ribs, this keeps air ow
at a maximum and makes cleaning much easier.
BILL OF MATERIALS
RFI Housing
Filter
Band clamp
Star Torx Bit (not in exclude ‘05)
TOOLS NEEDED
Pliers
Flat head screw driver
Bit Driver - (exclude ‘05)
2
Page 4
RAPID FLOW INDUCTION
rEmOvINg ThE STOCk INTAkE
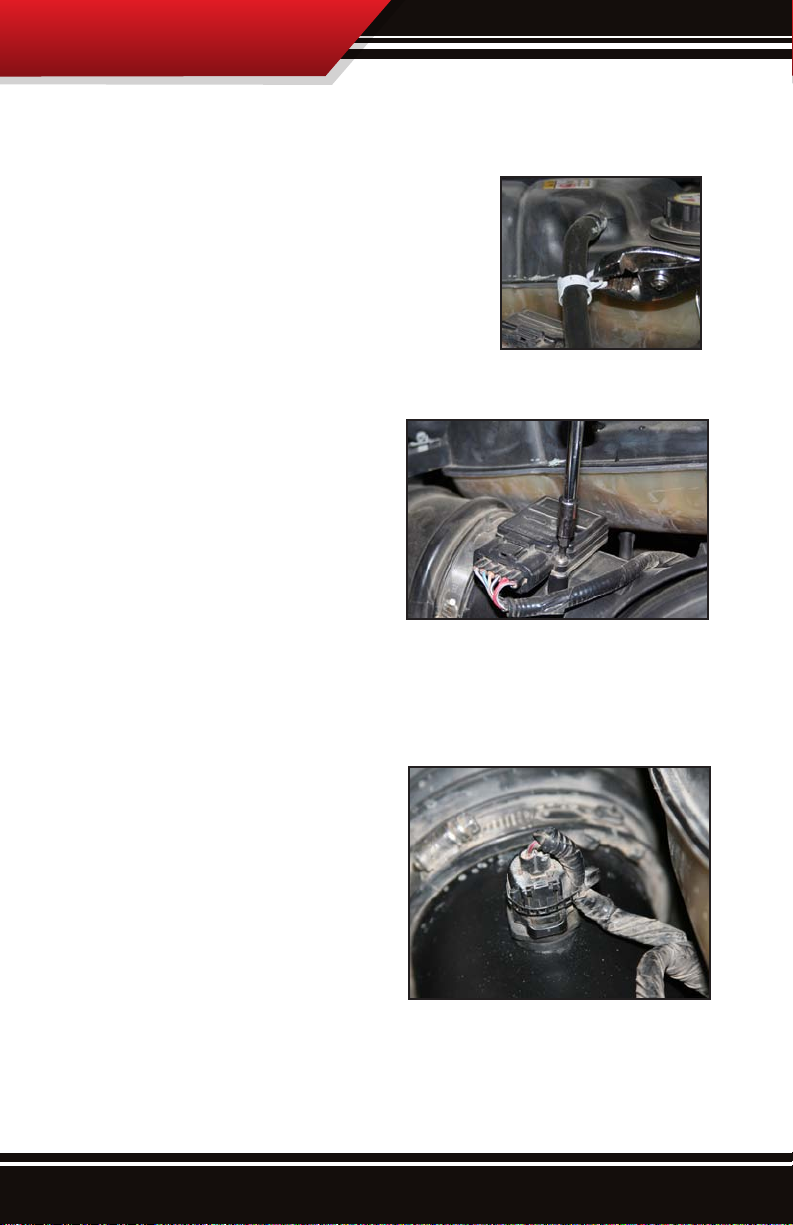
1. Disconnect the coolant overll hose, this will make the
removal of the stock intake easier.
2. Disconnect the Mass Air Flow sensor:
• (‘03, ‘04, ‘06, ‘07) Using a bit driver
and the torques bit included unscrew
the torques screws that hold the mass
air ow sensor onto the air intake exit
tube. Once the screws are out pull the
mass air ow sensor out of the tube,
disconnect it from the harness holder
and move it aside while completing
the installation.
• 2005 The mass air ow sensor sits in a
grommet that holds it in place on the
intake exit tube. Remove the MAF sensor by simply pulling up on the sensor,
then disconnect it from the harness
holder and move it aside while completing the installation. Also remove
the grommet that holds the MAF sensor in place from the stock intake, that
grommet will need to be installed on
the RFI along with the MAF sensor.
3
Page 5

3. Locate the Air Filter Restriction Gauge
on the back of the stock intake housing.
Remove the Air Filter Restriction Gauge
from the stock intake by simply pulling back on the gauge, it is held in by a
rubber grommet and will pull out easily.
Once out disconnect it from its communication harness and set it aside.
4. Loosen the band clamp that connects the
intake exit hose to the turbo inlet hose
and disconnect the tubes.
RAPID FLOW INDUCTION
5. Once the tubes are disconnected the entire air intake assembly can be removed from the vehicle as one piece. Pull the back end of the air intake up rst, once the back end of the intake
is above the coolant overll reservoir the front of the intake can be slid back and nally lifted
out from its stock location and removed.
4
Page 6

RAPID FLOW INDUCTION
PREINSTALLATION PROCEDURE
On 2005 models remove the rubber grommet that holds
the Mass Air Flow sensor in place from the stock intake
housing. Install the rubber grommet into the RFI in the predrilled hole on the intake outlet tube.
1. Notice the two holes at the bottom of
the intake seat inside the engine bay.
When setting the RFI into place, the
rods on the bottom of the RFI will need
to set into the two holes.
INSTALLINg ThE rFI
2. Set the front end of the RFI into the engine bay and snug it up to the radiator, then slide the
back side of the intake down into place. Make certain that the rods on the bottom of the RFI
have correctly set into the holes on the bottom of the intake seat.
5
Page 7

3. Connect the RFI tube up to the stock turbo
inlet hose. Use the stock band clamp to secure the connection; this will require the
use of a at head screw driver.
4. Installing the Mass Air Flow sensor:
• (‘03, ’04, ‘06, ‘07): Set the MAF (mass air
ow) sensor onto the RFI air outlet tube
in the same manner that it was installed
on the stock intake tube. Secure the MAF
sensor to the RFI using the stock toques
screws.
RAPID FLOW INDUCTION
• 2005 The MAF sensor must be installed in a particular direction, the MAF sensor must be in-
stalled perpendicular to the ow of air to take a proper air ow reading. This is important to note
and will aect how well the vehicle runs after installation is complete. Set the MAF (mass air
ow) sensor onto the RFI air outlet tube in the same manner that it was installed on the stock
intake tube.
6
Page 8

RAPID FLOW INDUCTION
5. Remove the lid from the RFI by pulling upward on the black snaps on top of the lid.
Remove the lid the same way whenever
performing maintenance on the lter.
6. With the lid o install the lter onto the intake outlet tube and secure it using the band clamp
that is included with the lter. If also installing a prelter put the prelter over the air lter
before installing the air lter. Once the lter is secure the lid can be placed back over the intake.
7
Page 9

RAPID FLOW INDUCTION
FILTEr mAINTENANCE:
The intake system should be cleaned at least every three months; in dusty climates the lter should
be cleaned more often. Cleaning the intake is a two part process, the rst part of the process
involves the physical cleaning of the lter with soap and water and the second part involves
oiling the lter. To properly clean the lter a Bully Dog cleaning kit should be used. Cleaning kits
are available at any Bully Dog dealer.
CLEANING KIT
PART 1, CLEANING THE FILTER:
1. Remove lter from lter housing. Clean the lter housing if
necessary.
2. Begin the cleaning process by ridding the lter of any dirt by
lightly tapping it. Then brush away any loose particles with a
soft-bristle brush. This step can usually be avoided with the
use of a prelter.
3. Spray cleaner generously over entire lter and let soak for
10 minutes.
4. Thoroughly rinse the lter with regular tap water (avoid
high-pressure hoses). Flush from the inside out or clean side
to the dirty side to prevent dirt from entering the lter.
5. Let the lter air dry before oiling, do not use any method to speed up the drying process. Using
a blow dryer or compressed air can cause the lter to disgure which would then allow particles
to pass through the lter.
PART 2, OILING THE FILTER:
1. Apply a small amount of oil to the soft bristle brush and spread the oil over the lter. Be sure to
apply a small amount of force so not to damage the lter element.
2. Continue applying oil to the lter using a soft bristle brush until the entire lter is covered in an
even amount of oil, just enough to give the lter a solid blue color. Apply enough oil to make the
lter a solid and uniform blue, but do not go beyond that.
3. Allow oil to sit for 20 minutes. Re-oil any dry spots that appear. Do not oil lter excessively. Excessive oiling can cause damage to intake sensors.
PART #: 229000
8
Page 10

RAPID FLOW INDUCTION
9
Page 11

RAPID FLOW INDUCTION
wArrANT y & dISCLAImEr
REMEMBER, THIS IS A PERFORMANCE PRODUCT, USE AT YOUR OWN RISK.
This product is not intended to be used to break the law.
Do not use this product until you have carefully read the following agreement. This agreement sets forth the terms and conditions
for the use of this product. The installation of this product indicates that the buyer has read and understands this agreement and
accepts the terms and conditions. Never exceed recommended vehicle or tire top speed ratings.
DISCLAIMER OF LIABILITY
Bully Dog Technologies, LLC. Its distributors, jobbers, and dealers (hereafter Seller) shall be in no way responsible for the product’s
proper use and service. THE BUYER HERBY WAIVES ALL LIABILITY CLAIMS.
The Buyer acknowledges that he is not relying on the Sellers skill or judgment to select or furnish goods suitable for any particular
purpose and that there are no liabilities which extend beyond the description on the face hereof, and the Buyers hereby waivers
all remedies or liabilities expressed or implied, arising by law or otherwise, (including without any obligation of the Seller with
respect tness, merchantability and consequential damages) or whether or not occasioned by the Seller’s negligence.
The Seller disclaims any warranty and expressly disclaims any liability for personal injury or damages. The Buyer acknowledges
and agrees that the disclaimer of any liability for personal injury is a material term for this agreement and the Buyer agrees to
indemnify the Seller and to hold the Seller harmless from any claim related to the item of the equipment purchased. Under no
circumstances will the Seller be liable for any damages or expenses by reason of use or sale of any such equipment.
The Seller assumes no liability regarding the improper installation or misapplication of its products. It is the installer’s responsibility to check for proper installation and if in doubt contact the manufacturer.
The Buyer is solely responsible for all warranty issues from the manufacturer.
LIMITATION OF WARRANTY
BULLY DOG TECHNOLOGIES, LLC. (Hereafter “Seller”) gives Limited Warranty as to description, quality, merchantability, and tness
for any particular purpose, productiveness, or any other matter of Seller’s product sold herewith. The Seller shall be in no way responsible for the products proper use and service and the Buyer hereby waives all rights other than those expressly written herein.
This warranty shall not be extended, altered or varied except be a written instrument signed by Seller and Buyer.
The Warranty is Limited to one (1) year from the date of sale and limited solely to the parts contained within the products kit. All
products that are in question of Warranty must be returned prepaid to the Seller and must be accompanied by a dated proof of
purchase receipt. All Warranty claims are subject to approval by BULLY DOG TECHNOLOGIES, LLC.
Under no circumstances will the Seller be liable for any labor charged or travel time incurred in diagnosis for defects, removal, or
reinstallation of this product or any other contingent expenses.
Under no circumstances will the Seller be liable for any damage or expenses incurred by reason of the use or sale of any such equipment.
IN THE EVENT THAT THE BUYER DOES NOT AGREE WITH THIS AGREEMENT: THE BUYER MAY PROMPTLY RETURN THIS PRODUCT, IN
A NEW AND UNUSED CONDITION, WITH A DATED PROOF OF PURCHASE TO THE PLACE OF PURCHASE WITHIN TEN (10) DAYS FROM
DATE OF PURCHASE FOR A FULL REFUND.
THE INSTALLATION OF THIS PRODUCT INDICATES THAT THE BUYER HAS READ AND UNDERSTANDS THIS AGREEMENT AND ACCEPTS
ITS TERMS AND CONDITIONS.
10
Page 12

Bully Dog Technologies, LLC is a team built on integrity that is dedicated to leading the vehicle performance
industry with an uncompromising code of ethics demonstrated in the soundness of its employees, excellent
customer service and superior products.
UNLEASH THE POWER
WITH BULLY DOG PERFORMANCE PRODUCTS
Downloaders
For a full listing of Diagnostic Trouble Codes go to: www.bullydog.com/DTC.php
Intake Systems
Exhaust SystemsCustom OutLook Pod
See More at: bullydog.com
Doc.# BD50012 Version 1.0.0
®
For Free Technical Support
Call: 866-bullydog (866-285-5936)
 Loading...