

Page 1
INSTALLATION MANUAL
Nissan 5.6L Titan ‘04-’10 Rapid Power Part #
Rapid Flow 3.5” Cat Back Dual Aluminized 84100
Page 2

RAPID FLOW INSTALLATION
INTRODUCTION
The Bully Dog Rapid Flow Exhaust Systems have been specially designed with the lowest mandrel bends
in the industry. The lower mandrel bends allow increased air ow which reduces exhaust temperatures
and burns more fuel in the combustion chamber resulting in additional horsepower and fuel economy.
This instruction set covers the Rapid Flow 3.5” Aluminized Cat Back Dual Exhaust for the 5.6L Nissan Titan
vehicles ‘04-’10.
Note: This instruction set and the Rapid Flow Exhaust systems included are made exclusively for the
5.6L Nissan Titan vehicles ’04-’10.
TABLE OF CONTENTS
Exhaust ComponEnts inCludEd .............................................................pG 2
REmoVinG thE stoCk Exhaust .............................................................pG 3-5
Exhaust installation ........................................................................pGs 6-9
QUICK LOCATION OVERVIEW.................................................................PG 6
tRoublEshootinG .................................................................................pG 10
1
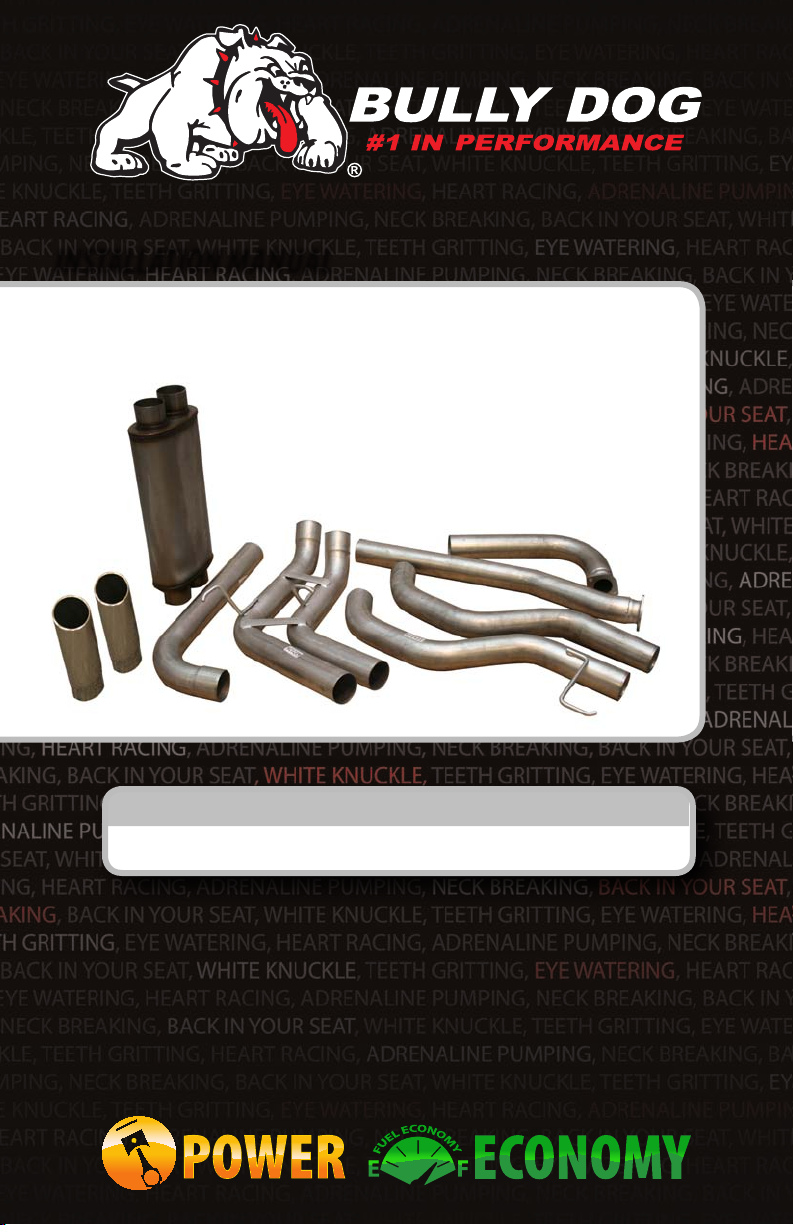
Rapid Flow Exhaust # 84100
Page 3
RAPID FLOW INSTALLATION
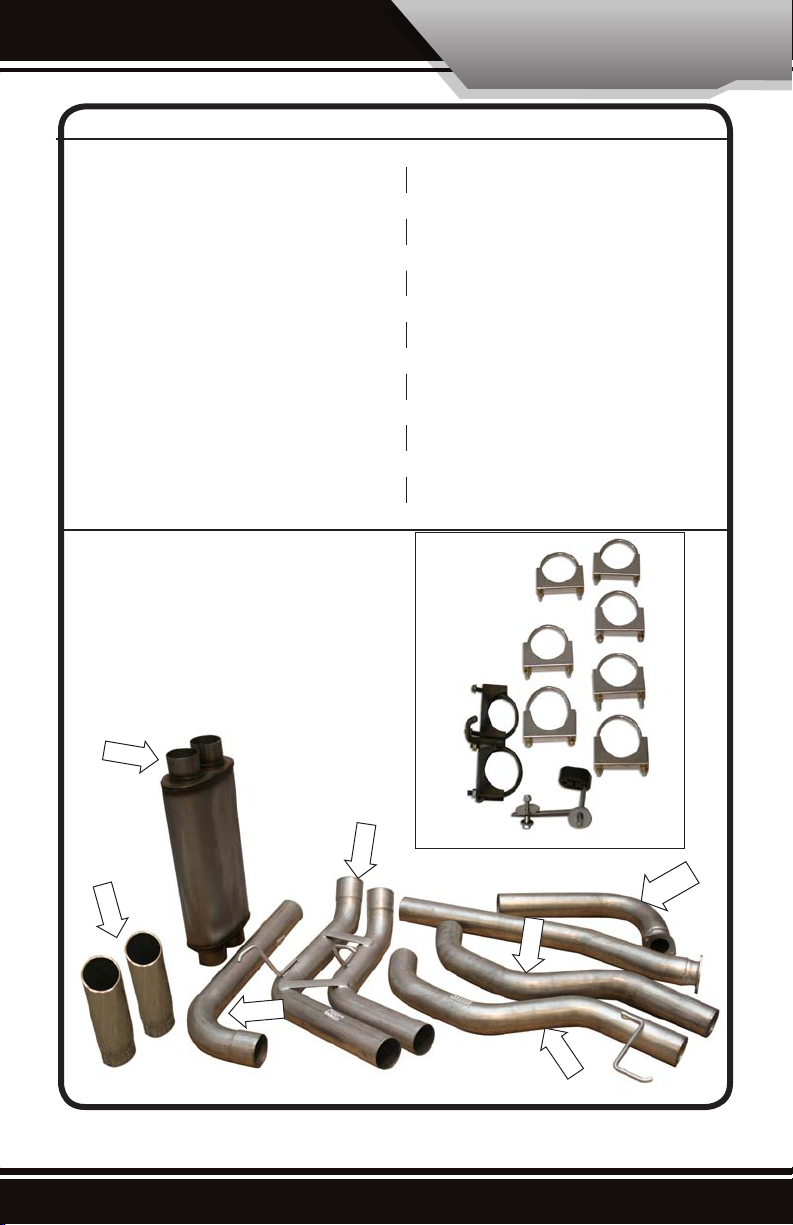
Exhaust ComponEnts
1. Driver side 1
2. Driver side 2
3. Passenger side 1
4. Muffler
5. Axle 2
6. Axle 1
7. Tail Pipe Tip
8. Tips (2)
9. Clamps (7 Pieces)
10. Hangers (2)
A. Dual tube hanger
B. Hanger adapter
tools nEEdEd
- 14 mm Hand Wrench or Socket
- Sawzall (Recommended)
- Silicone Spray Lubricant
- 9/16” Hand Wrench or Socket
-17mm Hand Wrench or Socket
4.
7.
8.
2.
Rapid Flow Exhaust # 84100
A.
B.
1.
6.
5.
2
Page 4
RAPID FLOW INSTALLATION
REmoVinG thE stoCk Exhaust systEm
IMPORTANT: It is illegal in all 50 states and Canada to remove the catalytic converter. Catalytic Converters must be
reinstalled in accordance with Federal Law.
In these steps you will remove the stock
exhaust system.
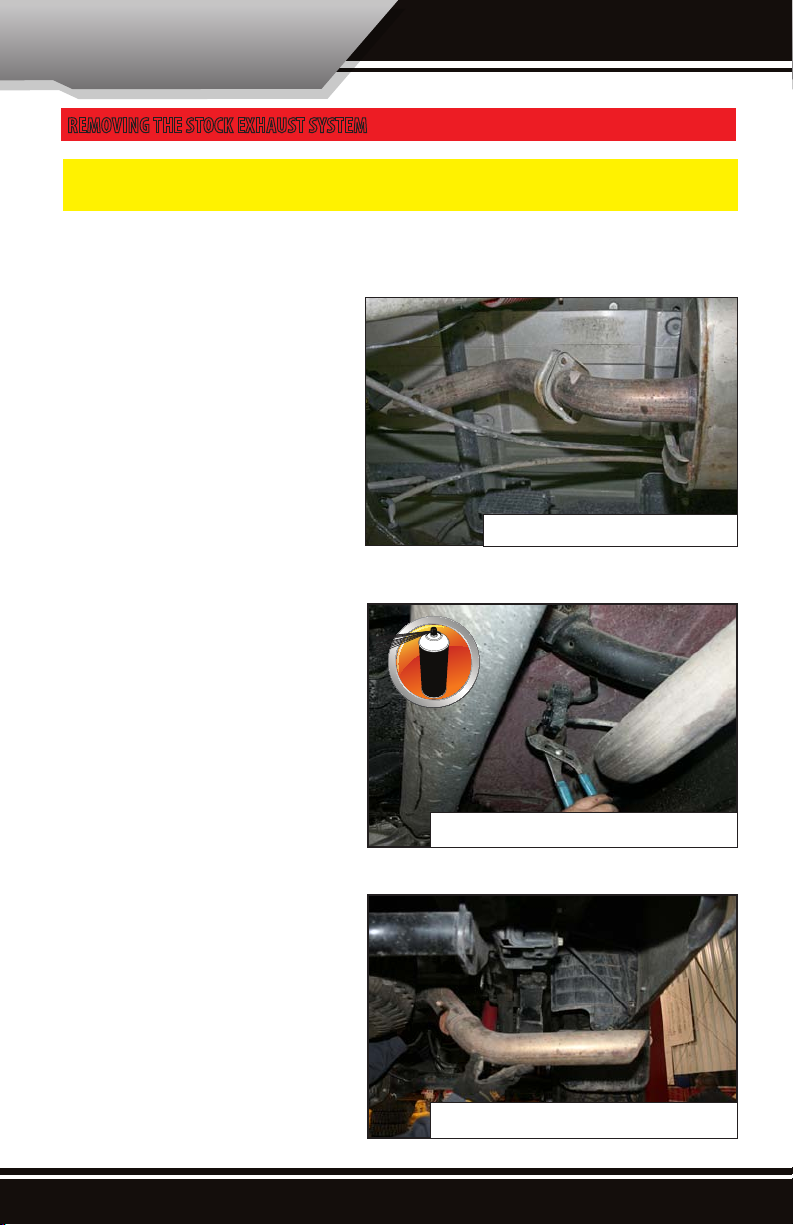
Remove the stock Tail pipe:
1. Locate the joint just behind the muer
that connects the tailpipe to the front section of the exhaust. Disconnect the tailpipe
from the front section of the exhaust, and
then move to the other end of the tail pipe
to remove the tail pipe through the rear
end of the vehicle.
2. Use channel locks and a graphite
lubricant to remove the hangers welded to
the tail pipe from the rubber grommets that
hold them in place. Once each hanger has
been removed from those grommets the
tail pipe can easily be removed in one peace
out the rear side of the vehicle.
Disconnect Tailpipe from muer
Remove all the necessary exhaust hangers
Remove the tailpipe
3
Rapid Flow Exhaust # 84100
Page 5
RAPID FLOW INSTALLATION
REmoVinG thE stoCk Exhaust systEm
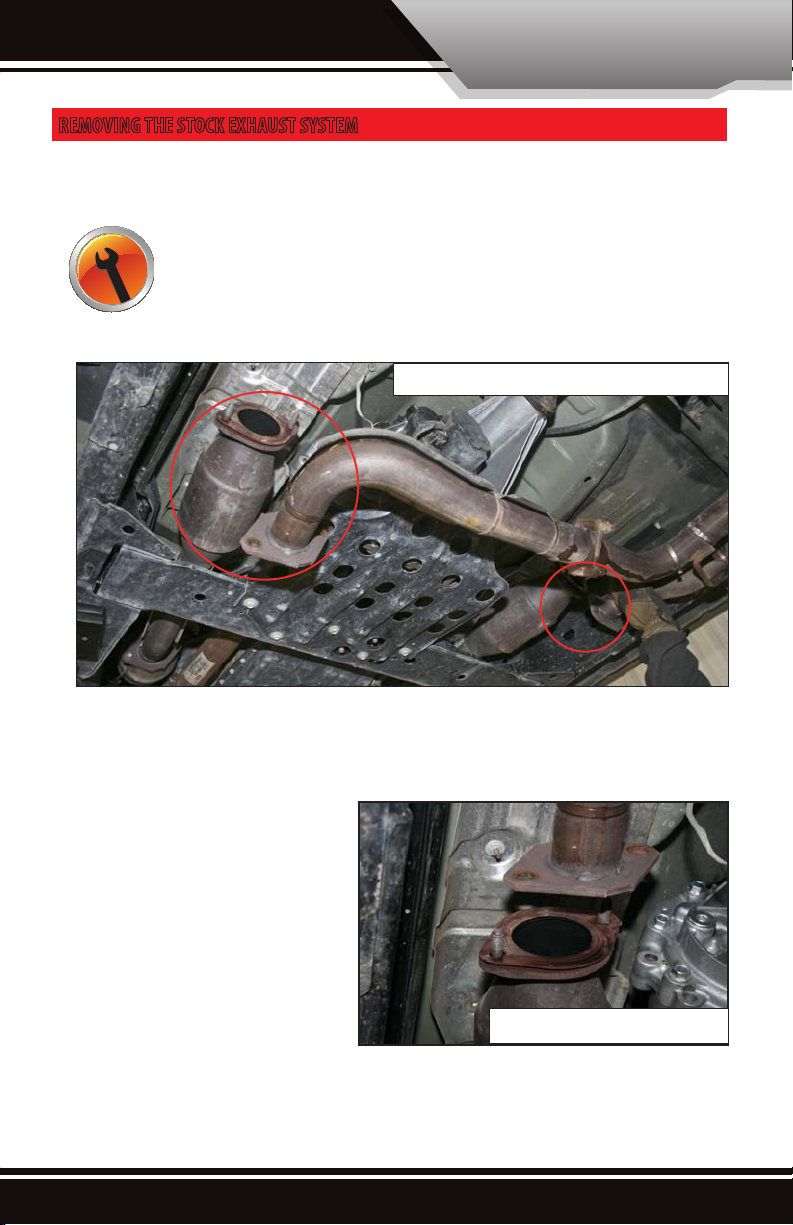
Remove the Muffler and front section: The Muffler and connected tubing which also connects to
the catalytic converter are removed in a single piece.
1. Locate the area along the exhaust stream just behind the catalytic converters. Notice
that the exhaust system can be disconnected just behind the catalytic converts on the driv-
14mm
ers side and passenger side. Use a 14mm hand wrench to loosen the nut and bolt holding
the exhaust onto the Catalytic Converter. Save all of the hardware and reuse the hardware
on the new systems.
Disconnect exhaust from Catalytic Converter
2. Notice that there is a gasket between the exhaust piece and the catalytic converter; save this gasket
because it needs to be reused for the install of the Bully Dog Exhaust System.
If the gasket material is worn out and will no
longer facilitate a good seal, a new gasket can
be purchased at an OEM dealer or the gasket
can be replaced by cutting out a gasket using
an exhaust rated gasket material.
Save the Gaskets and Hardware
Rapid Flow Exhaust # 84100
4
Page 6

RAPID FLOW INSTALLATION
REmoVal of stoCk Exhaust systEm
3. As was done on the tail pipe, remove
all exhaust hangers from the rubber
grommets. To make removing the Hangers
an easier process, it is recommended that
you use a graphite spray lubricant to spray
each of the rubber hangers holding the stock
exhaust. Once that is done the muer and
attached exhaust tubing will remove in one
large section.
One piece removal
Remove all the necessary exhaust hangers
5
Rapid Flow Exhaust # 84100
Page 7

RAPID FLOW INSTALLATION
installation of thE bully doG Rapid flow Exhaust systEm
In these steps you will install the Rapid Flow Exhaust System.
1. It is suggested that before installing the system on the truck, the Rapid Flow Exhaust System be laid out on a
large at surface to acknowledge the location of each piece.
QuiCk oVERViEw full Exhaust
Driver side 1
Axle 1
Axle 2
Tail Pipe
Tips
Clamp and hanGaR plaCEmEnt
Clamps (2)
Clamps (2)
Muer
Clamps (2)
Driver side 2
Passenger
side 1
Clamp
Hanger A
Hanger Adapter
Rapid Flow Exhaust # 84100
6
Page 8

RAPID FLOW INSTALLATION
2. Begin the installation with the Driver Side 1
pipe by attaching it to the drivers side catalytic converter. Make sure that the stock gasket is in place before attaching this exhaust
piece. Use the stock hardware to secure the
tube.
3. Attach Passenger Side 1 tube making sure to
reinstall the gasket. Use the stock hardware
to secure the tube.
Install Driver Side 1
Install Passenger Side 1
4. Hang the hanger A and secure passenger side
1 tube in hanger A. Do not tighten yet!
5. Attach Driver Side 2 to the end of Driver Side
1, use a clamp to secure the attachment but
do not completely tighten the clamp because
the pipe will need to be adjusted for t. Also
attach the tube into Hanger A and loosely attach in Hanger A.
7
Hanger A
Passenger side 1
Install Hanger A
Passenger side 1
Driver side 2
Install Driver Side 2
Rapid Flow Exhaust # 84100
Page 9

RAPID FLOW INSTALLATION
6. Install Axle piece 1, use the stock hanger location and the hanger that is welded onto Axle piece 1.
7. Install the muer onto the end of Axle piece 1. With the muer temporarily attached to Axle piece 1 measure the excess length on tube: passenger side 1, and driver side 2. Then remove the muer and cut any
excess length on the end of those two tubes. Some vehicles do not require any cutting.
Axle 1
8. Attach the muer using clamps to Axle piece 1, passenger side 1, and drivers side 2. Then attach Axle piece
number 2.
Axle 2
Axle 1
Muffler
Rapid Flow Exhaust # 84100
8
Page 10

RAPID FLOW INSTALLATION
9. Next install the hanger adapter in preparation for installing the Dual Tail Pipe. The Hanger Adapter simply
installs onto the vehicle frame next to the stock rubber grommet used to hang the stock exhaust. Then install
the tail pipe and attach the clamps to the joint between the Dual Tail Pipe, Axle 1 and Axle 2.
Hanger Adapter
Cross Member Installed
Dual Tail Pipe
10. Once the entire exhaust system is installed, inspect the system to ensure that no part of the exhaust is in direct contact with the chassis or body; adjustments may be necessary. Having any
part of the exhaust system in direct contact with any part of the body or chassis will the cause the
exhaust to rattle.
11. Return to each of the clamps and tighten with a 14mm wrench or socket driver. The clamps
should be tightened to hand tight, do not tighten to the point that exhaust tubing deforms.
9/16”
12. The nal step is to install the Exhaust Tips, once positioned tighten the bolt on tip using a
17mm hand wrench or socket driver.
17mm
9
Rapid Flow Exhaust # 84100
Page 11

TROUBLEShOOTINg/FAQ
CONDITION POSSIBLE SOURCES ACTION
Either one of the clamps is not tight or the exhaust
Exhaust Rattle Exhaust Sounds
Exhaust is too loud Exhaust Sounds
Exhaust is not loud
enough
Exhaust Sounds
is coming in contact with the chassis or body. Adjust
the exhaust to ensure that no contact is made.
If your exhaust seems too loud, Bully Dog can sell
you another muer which will allow you to double
stack muers. This extra muer would take place of
one of the straight pipes included with this system.
This is only applicable for aluminized systems.
If your exhaust is too quiet (and is being used exclusively for o-road use) you can purchase another
straight pipe to replace your muer.
This is only applicable for aluminized systems.
RAPID FLOW INSTALLATION
Rapid Flow Exhaust # 84100
10
Page 12
Doc.# 84100-99 V2.0
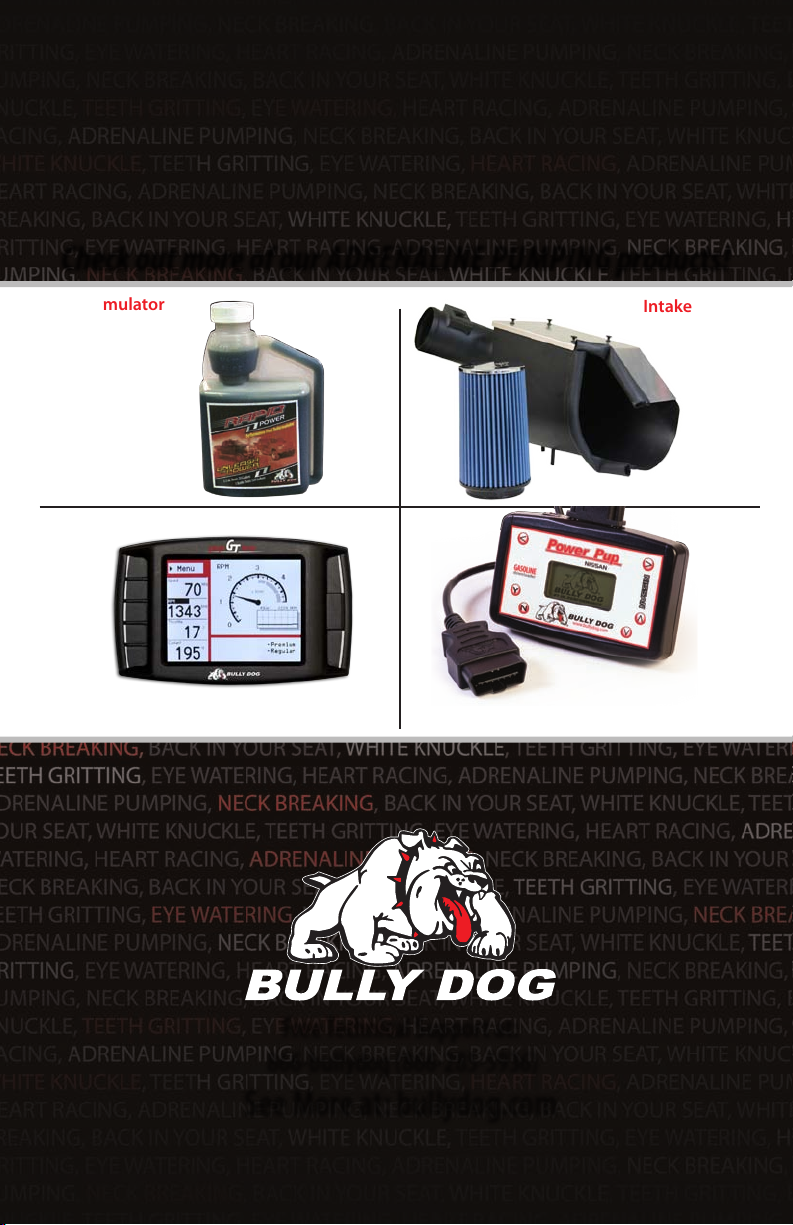
Check out more of our ADRENALINE PUMPING products!
Fuel Reformulator
Intake Systems
Triple Dog GT Nissan Power Pup
®
Free Technical Support at:
866-bullydog (866-285-5936)
See More at: bullydog.com
 Loading...