

Page 1
INSTALLATION MANUAL
Gas Downloader
Vehicle Application Power Pup Part#
Nissan 5.6L V8 Titan ‘05-’09
Nissan 5.6L V8 Armada ‘05-’09
Nissan 5.6L V8 Pathnder ‘08-’09
Nissan 4.0L V6 Pathnder ‘05-’09
Nissan 4.0L V6 Frontier ‘05-’09
Nissan 2.5L i4 Frontier ‘05-’09
Nissan 4.0L V6 Xterra ‘05-’09
Nissan 3.5L V6 Altima ‘05-’09
Nissan 2.5L i4 Altima ‘05-’09
Nissan 3.5L V6 Maxima ‘05-’09
Nissan 3.5L V6 HR 350Z ‘05-’09
Inniti 5.6L V8 QX56 ‘05-’09
Inniti 3.5L V6 HR G35 ‘05-’09
44590
Page 2
1
Updating Online
UPDATING THE PRODUCT ONLINE
Always update your product before installing on a vehicle using the Update Agent internet update
software. Obtain the Update Agent online at bullydog.com. See the system requirements below for
running the Update Agent on your PC. Sorry the Update Agent is not Mac compatible.
Hardware & Software requirements for the Update Agent include:
Windows™ XP, 2000, NT or Vista
Microsoft .Net framework version 2.0 re distributable package (x86)
64 MB minimum of RAM
200 MB free space on hard drive recommended
56 K minimum internet connection, DSL or cable connection strongly recommended
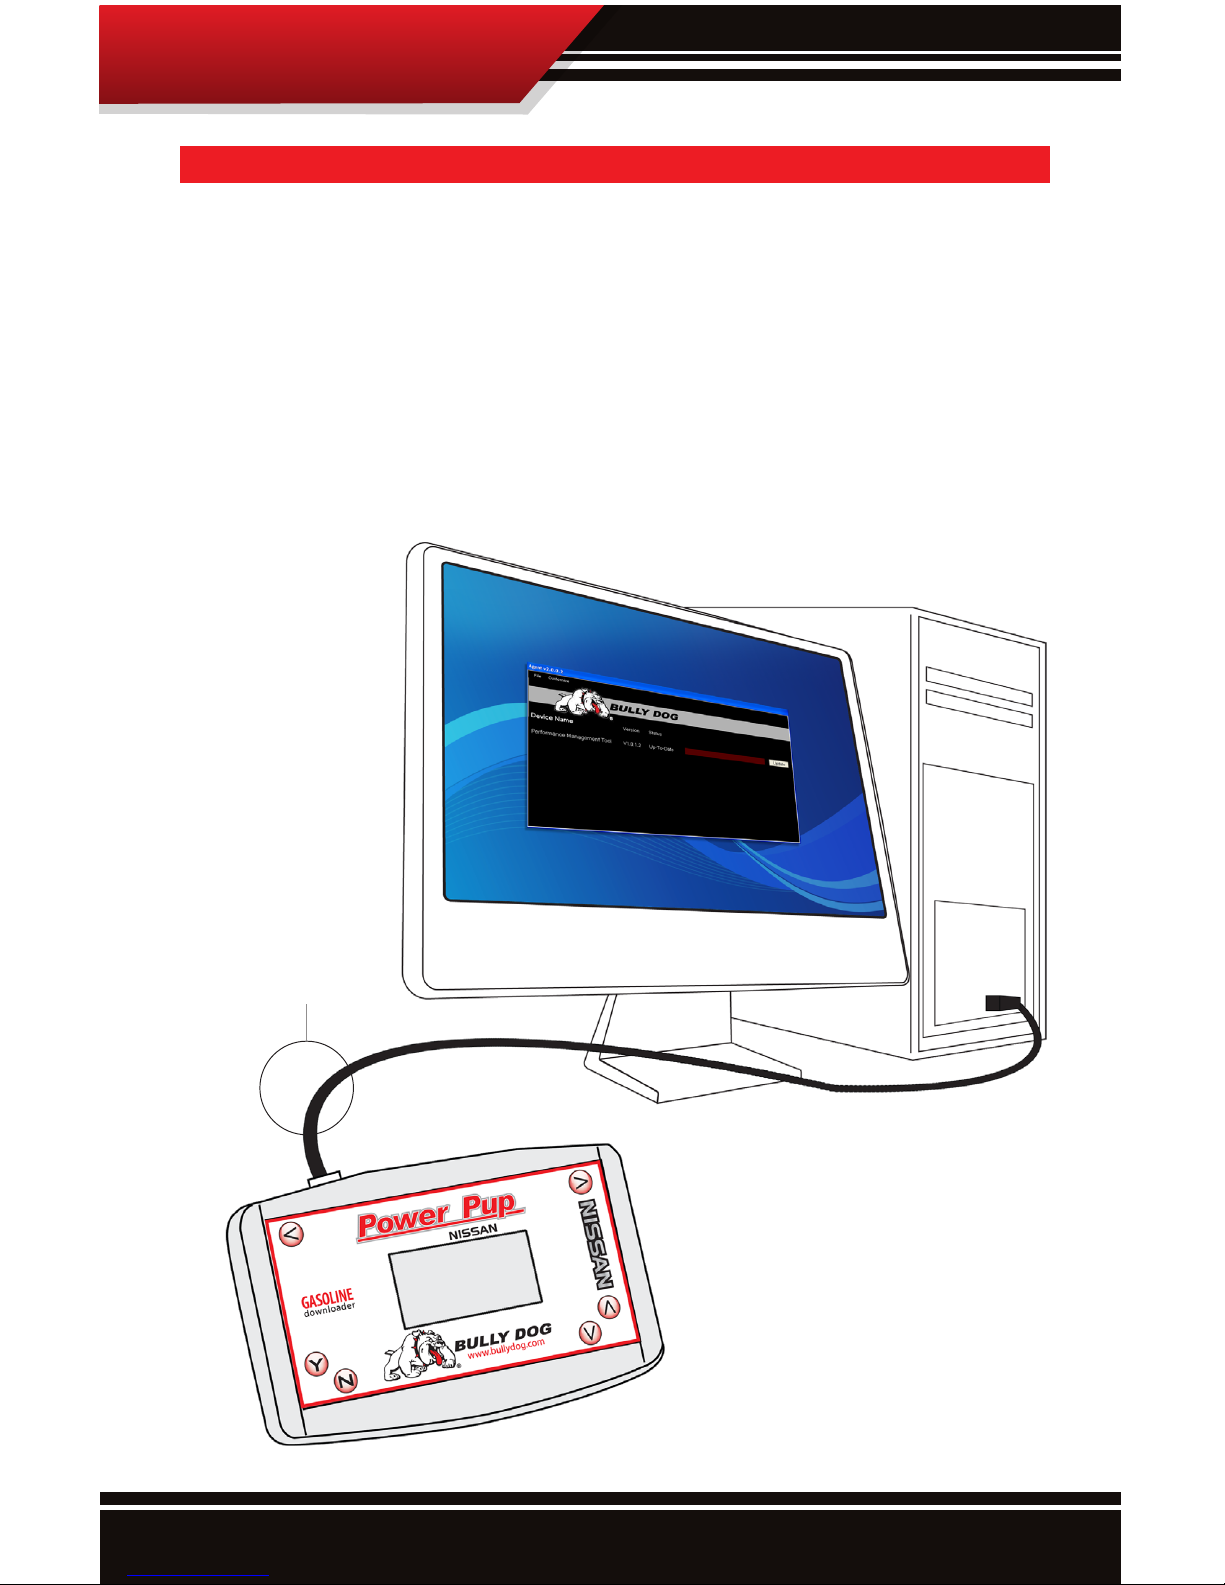
To get started updating the Power Pup online rst
download & install the Update Agent then connect the Power Pup to the pc that will be running
the Update Agent using the USB cable included in
the Power Pup package
USB Cable included
Page 3

2
Table of Contents
TABLE OF CONTENTS
INTRODUCTION ...............................................................................................PG. 3
VEHICLE APPLICATIONS CHART ........................................................................PG. 4
BILL OF MATERIALS .........................................................................................PG. 4
INSTALLATION PRECAUTIONS ...........................................................................PG. 5
INSTALLATION INTRODUCTION.........................................................................PG. 6
GETTING STARTED STARTING THE DOWNLOADER/ NAVIGATION ........................PG. 7
MAIN MENU OPTIONS ......................................................................................PG. 8
INSTALLING THE DOWNLOAD/ DOWNLOAD FEATURES ................................. PGS. 913
Downloader Flow Chart .....................................................................................................pgs. 9-11
Engine Tune ................................................................................................................................. pg. 12
Speed Limiter ...............................................................................................................................Pg. 12
Rev Limiter ....................................................................................................................................Pg. 13
WOT restriction ...........................................................................................................................Pg. 13
Changing download / Returning to stock SETTINGS ...................................................PG. 14
DTC MENU ....................................................................................................PG. 15
SETTINGS MENU ..................................................................................... PGS. 1617
Vehicle Options .................................................................................................................. pgs. 16-17
-Adjust Timing ........................................................................................................... pg. 16
- Adjust Idle ................................................................................................................ pg. 17
View Settings ............................................................................................................................. pg. 17
TROUBLE SHOOTING / WARRANTY ..................................................................PG. 18
Page 4

3
Introduction
INTRODUCTION
Congratulations on purchasing the Power Pup™, the Power Pup™ is the rst tuning device of its kind
to come available for the Nissan’s and Inniti’s. While the Power Pup is designed mainly to increase
horsepower and improve fuel economy, the Power Pup also carries some special features like: modifying
wide open throttle restriction, modify Rev Limiter, modify Speed Limiter, and Read and erase Diagnostic
Trouble Codes. Our rigorous development and testing processes ensures a quality product that produces
positive results.
This product is extremely easy to install. All installation takes place inside the cab of the vehicle through
the OBDII port. For installation questions or guidance contact your local dealer or distributor. You can also
contact the Bully Dog tech support group Monday-Friday, 8am-5pm Mountain Standard Time.
Bully Dog Technical Support: 866-285-5936.
Installation of this product can take up to 20 minutes. We strongly suggest that installation of the Power
Pup™ be done when the vehicle is not in need of use. We highly recommend that this product be installed
during the business hours: 8am to 3pm Mountain Standard Time to avoid any inconveniences associated
with installation issues. Installation of the program into the vehicle ECM is an easy but delicate process.
The download process, if interrupted, can create issues which may add time to complete a successful
install.
PRODUCT FEATURES
This is the list of features packed into this one amazing product.
• Engine Tuning: one Low Octane tune and one High Octane tune.
• Rev Limiter: Adjusts OEM RPM governor.
• Speed Limiter: Adjust vehicle top speed.
• WOT Restriction: Modify the Wide Open Throttle Restriction, available for 5.6L V8s only.
• Read and Erase Diagnostic Trouble Codes
• Adjust Timing: Adjust vehicle timing by two degrees up or down.
• Adjust Idle: Adjust the RPM level that the vehicle idles at while in park or neutral.
• View Settings: Menu item that shows exactly how all of the features above are setup.
Page 5
4
Bill of Materials
BILL OF MATERIALS
The list and diagram shown below includes all of the hard parts required for installation of the product on
the vehicle, and updating the product online.
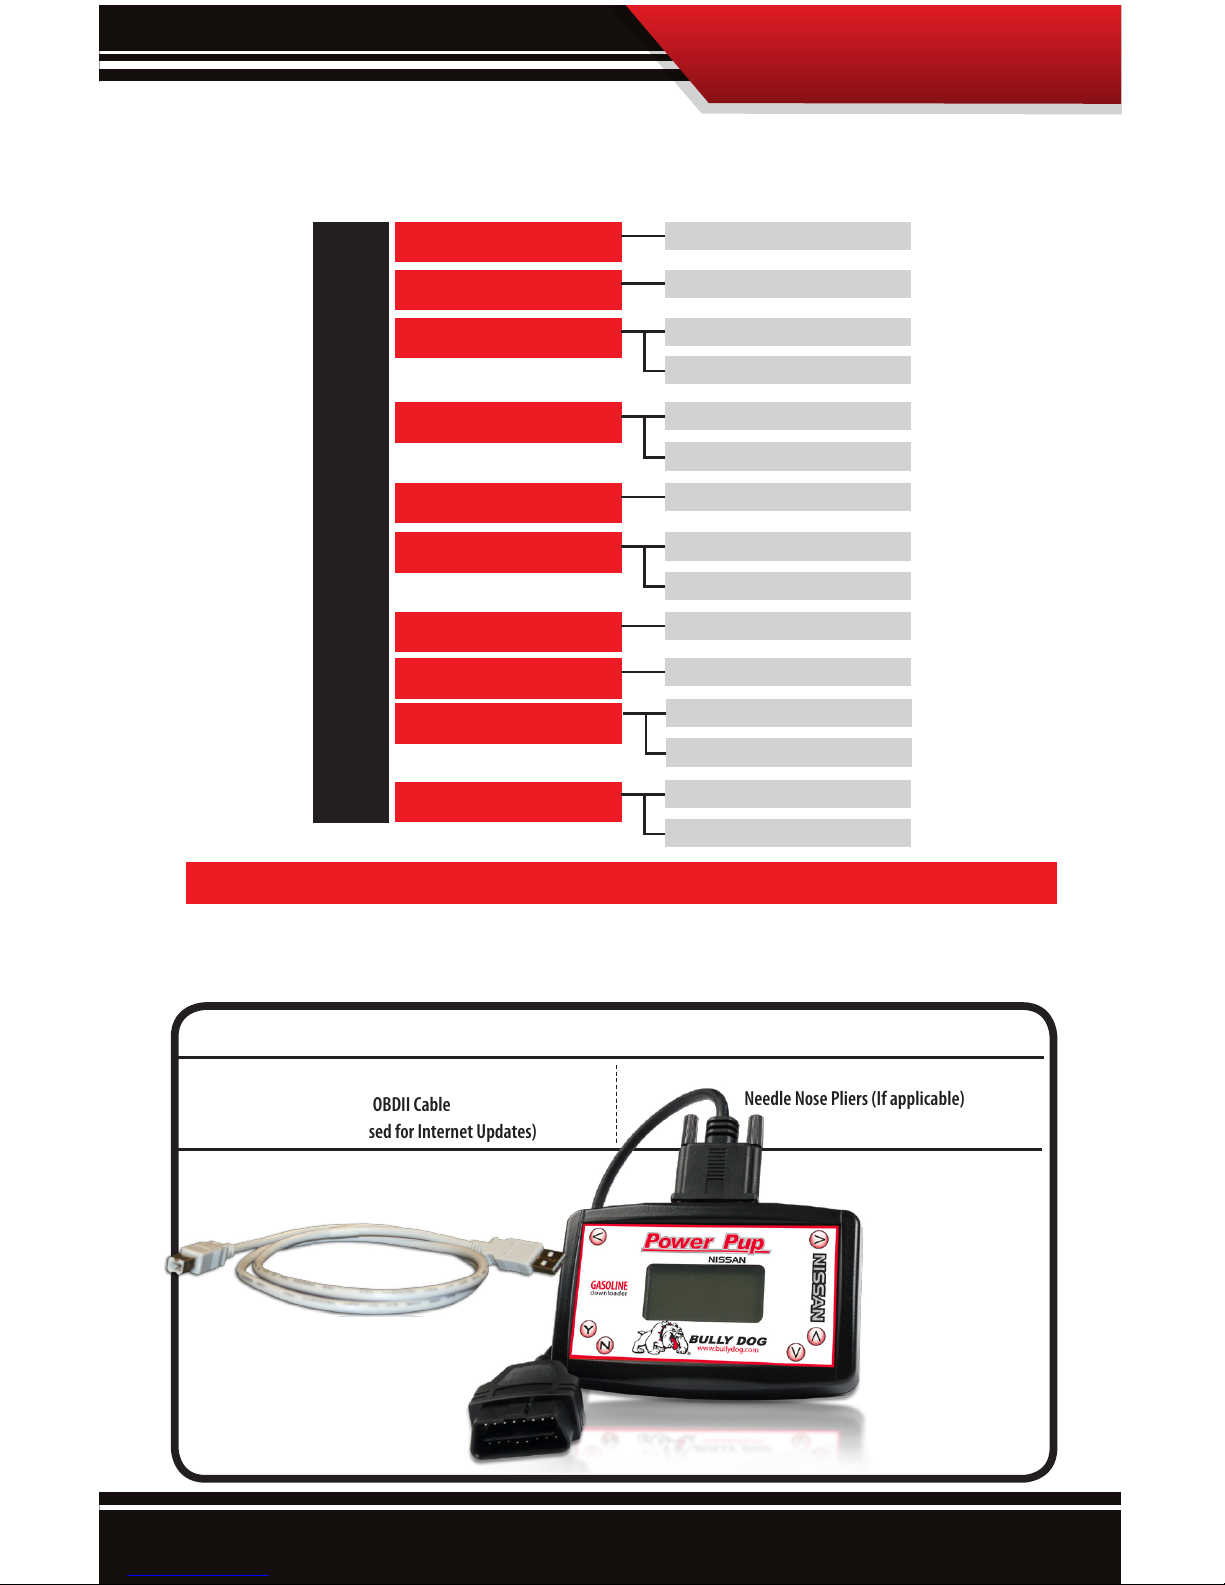
BILL OF MATERIALS
Power Pup™ Downloader
OBDII Cable
USB Cable (Used for Internet Updates)
TOOLS REQUIRED
Fuse Puller or
Needle Nose Pliers (If applicable)
VEHICLE APPLICATIONS
The Chart Below includes all of the vehicle applications for the Power Pup.
NISSAN/INFINITI
TITAN
5.6L V8‘05-’09
ARMADA
QX56
G35
350Z
PATHFINDER
FRONTIER
XTERRA
ALTIMA
MAXIMA
5.6L V8‘05-’09
5.6L V8‘05-’09
5.6L V8‘08-’09
4.0L V6‘05-’09
4.0L V6‘05-’09
3.5L V6‘05-’09
3.5L V6‘05-’09
4.0L V6‘05-’09
2.5L i4 ‘05-’09
2.5L i4 ‘05-’09
3.5L V6‘05-’06
3.5L HR V6 ‘07-’09
3.5L V6‘05-’06
3.5L HR V6 ‘07-’09
Page 6

5
INTRODUCTION
Installation Precautions
INSTALLATION PRECAUTIONS: VERY IMPORTANT
It is important to take some precautions before downloading, changing settings, or returning to
stock. These precautionary steps to installing the Power Pup™ will help ensure that downloads
are successful.
1. Before installation, always update the Power Pup™ online using our Update Agent. The Power Pup™ is an
online program that loads the latest vehicle programs from our web site to the Power Pup.
2. Only install during recommended install time. (Monday-Thursday 8am-3pm Mountain Standard Time)
3. Do not install while the vehicle is in a remote location or when the vehicle is immediately needed for transportation. In the unlikely event that installation fails, the installer may need resources such as computer access
and internet access to complete installation.
4. Allow up to one hour for installation. The Power Pup™ easily installs in under 30 minutes. However, allocate at
least an hour for installation in case any problems are encountered during installation.
5. Before installation, always make sure that the batteries have a full charge. It is even a good idea to have a battery charger nearby in case the batteries start draining. If the batteries loose their charge during a download,
the download will fail.
6. Before installation, turn o all electronics inside the vehicle including: headlights, heater, air conditioning,
stereo, any DVD players, etc. Failing to turn o all electronics may can prevent a successful download.
7. During installation it is very important that the Power Pup™ is not disrupted. If the download is disrupted the
vehicle may not start and the download process must be restarted. In worst case scenarios the Power Pup™
will have to perform a recovery process which adds even more time to the installation process.
The information above is extremely important to successful use of the Power Pup
IMPORTANT
It is not recommended that this product be used in conjunction with any other electronic module or downloader
that is intended to increase horsepower.
Performance products must always be removed before taking the vehicle in for any kind of service. The Bully Dog
software will be lost if an OEM scan tool is used to reflash the engine computer.
Page 7

6
Installation Introduction
OBDll Port Location
All OBDll ports are located under the
dash on the drivers side of the vehicle.
INSTALLATION INTRODUCTION/OBDII PORT
This is a very simple product to install and operate; all operations take place inside the cab of the vehicle
with the Power Pup™ hooked up to the OBDII port. Operating the Power Pup™ does not require any mechanical background. Refer to this instruction booklet for
general guidelines through the download process
and determining the different features available for
your vehicle.
The diagram below illustrates the location of the
OBDII port on the Nissan Titan. Some OBDII port locations may vary from the illustration below but all
OBDII ports are on the driver side of the vehicle inside
the cab.
Page 8

7
Getting started
Scroll Left Scroll Right
No/Exit Scroll Down
Yes/Enter
Scroll Up
GETTING STARTED STARTING THE DOWNLOADER/NAVIGATION
To get started, with any of the Power Pup functions, follow the steps below:
1. Make sure that your key is in the ignition and in the o position before
you plug the downloader into the vehicle’s OBDII port. The downloader
will later prompt you to turn the key to the on/run position.
2. Connect the OBDII cable that comes with the downloader into the top
of the downloader and then into the OBDII port.
3. The downloader will light up to display the opening screen, and
then it will go to the Main Menu. See the main
menu on the next page.
This Diagram illustrates how to use the buttons on the front of the downloader to navigate through the
menu systems and screen prompts given on the downloader.
Page 9

8
Main Menu
MAIN MENU OPTIONS
After starting the Power Pup, the Power Pup will boot up and display the Main Menu.
The Main Menu will display all of the following options, see the following pages for a
description of each menu item and submenus:
INSTALL DOWNLOAD: Select this option to begin the download process. Once the download process has begun
it will take 15-20 minutes to complete, the process will include selecting desired power level and selecting dierent
parameters in the vehicle specic features.
DTC MENU: Select this option to view and erase diagnostic trouble codes. This option should be used if the vehicle
gauge cluster is displaying a “Check Engine,” light.
SETTINGS: There are two options in this submenu; the rst VEHICLE OPTIONS, which on the Nissan titan contains
two items: Adjust Timing, and Adjust Idle. The second submenu is the VIEW SETTINGS submenu which if selected
shows all of the current download settings.
Page 10

9
Install Download
INSTALL DOWNLOAD
To begin the downloading process select the “Install Download” option from the main menu and follow
the screen prompts. The Flow chart below shows the download process as an illustration of each screen
seen during the download process. Always follow the installation precautions before downloading,
changing settings, or returning a vehicle to stock. Here is the material covered in this section:
• Download Sequence ow chart
• Engine Tuning
• Speed Limiter
• Rev Limiter
• WOT Restriction
• Changing Download Settings
• Returning to Stock
DOWNLOAD SEQUENCE FLOW CHART:
This diagram illustrates the entire download sequence screen by screen, the sentence below each screen shot
indicates if there is an action required from the user to continue.
50%
Main Menu
Install Download
DTC Menu
Settings
Disclaimer:
Are you the owner of this vehicle,
have you read the disclaimer and
do you agree t all of its terms &
conditions?
Press Y to agree
If this is not a Nissan Vehicle
please unplug now
Press Y to continue
with NISSAN
Install Download
Turn ignition key to RUN position.
do not start engine.
Key On
From the Main menu select Install Download to
initiate the download process.
Press “Y” to agree to the disclaimer and proceed
with the download.
Press “Y” to continue. Do not under any circumstances proceed if the vehicle is not a Nissan.
Turn the key to the run position and wait for the
downloader to establish communication.
The Download Sequence is continued on the next page.
Turn key to the “ON” position
when the Downloader
calls for it.
Do not start
the engine unless
the instructions or the
downloader specically
call for it.
Page 11

10
Install Download
Power Level
Regular
Select Level
Press Y to
Accept
Speed Limiter
Press Y to modify
Speed Limiter
Press N to use
Stock Speed Limiter
Speed Limiter
109
Select Level
Press Y to
Accept
Rev Limiter
Press Y to modify
Rev Limiter
Press N to use
Stock rev limiter
Rev. Limiter
6150
Select Level
Press Y to
Accept
Select the Desired Engine Tune at this point.
Press “Y” to opt into adjusting Speed Limiter.
Press “N” to continue without modifying.
This screen only appears if opted into adjusting
speed limiter. Choose value by pressing “Y”.
Press “Y” to opt into adjusting Rev Limiter
Press “N” to continue without modifying.
Press “Y” to modify the WOT restriction
Press “N” to continue without modifying.
This screen only appears if opted into adjusting
rev limiter. Choose value by pressing “Y”.
Reading Engine
50%
Please wait
DO NOT UNPLUG!
Verifying File
17%
Please wait
DO NOT UNPLUG!
Do not disturb the Power Pup.
Do not disturb the Power Pup.
The Download Sequence is continued on the next page.
Wide Open Throttle
Press Y to modify
WOT restriction
Press N to use
Stock WOT settings
Page 12

11
Install Download
Building File
41%
Please wait
DO NOT UNPLUG!
Downloading ...
0%
Please wait
DO NOT UNPLUG!
Finishing Download
Turn Key to OFF position
Press Y to continue
Finishing Download
6
Please wait
DO NOT UNPLUG!
Do not disturb the Power Pup Do not disturb the Power Pup
Follow on screen instructions, do not unplug
until the Power Pup indicates that it is OK.
Do not disturb the Power Pup.
Download is now complete
Download Finished
Press Y to return to
main menu
or unplug from vehicle
Processing Calibration
9%
Please wait
DO NOT UNPLUG!
Do not disturb the Power Pup.
Wide Open Throttle
Press Y to enable
WOT restriction
Press N to disable
WOT restriction
This screen only appears if opted into WOT
restriction rev limiter.
Page 13

12
Install Download
ENGINE TUNING FUEL OCTANE SETTINGS:
This feature determines how much power will be added to the vehicle based on the level of octane in the gasoline
that the vehicle will be running. It is important that the correct octane level is selected to achieve optimal efficiency and performance.
Use the Up and Down arrows to highlight an option,
press “Y” to select.
Premium – Select this option for maximum performance gains (must run at least 91 rated octane gasoline
to use this setting.)
Regular – Select this option for medium performance
gains, run any grade of fuel with this setting.
Stock – Select stock to utilize other Power Pup features without aecting horsepower.
SPEED LIMITER/SPEED GOVERN0R:
The OEM speed limiter will limit the vehicle to a top
speed that is determined by the OEM. This features enables changing the OEM speed limiter to a higher point
or lower point. By selecting “Yes,” to modify the speed
limiter you agree that your vehicle has tires, suspension,
and any other necessary modifications rated for speeds
in excess of 180 mph.
The speed limiter can be adjusted from 40 miles per hour
up to 180 mph. The Speed Limiter can be adjusted in incre-
ments of 5 mph. The Speed Limiter can be set anywhere
between 40 mph and 180 mph in increments of 5 mph.
Power Level
Regular
Select Level
Press Y to
Accept
Speed Limiter
Press Y to modify
Speed Limiter
Press N to use
Stock Speed Limiter
Speed Limiter
109
Select Level
Press Y to
Accept
To activate and utilize the speed limiter download feature, the feature must be activated
during the download.
Speed Limiter adjustment by Engine
Engine Minimum Maximum
2.5 L 45 mph 180 mph
3.5 L 45 mph 180 mph
3.5 L HR 45 mph 200 mph
4.0 L 45 mph 180 mph
5.6 L 45 mph 180 mph
Page 14

13
DTC MENU
Install Download
REV LIMITER TOP ENGINE SPEED:
The Rev Limiter regulates the highest RPM that an engine can
reach before the engine is electronically limited. The Rev Limiter
is set to a lower point from the factory than what the Power Pup
can set into the motor. Use the Power Pup to raise the Rev Lim-
iter as high as 6400 RPM. The Rev Limiter can be adjusted from
6400 rpm down to 3000 rpm in increments of 25 rpm.
This features is mainly recommended for racing purposes,
as it will enable the vehicle to shift at a higher RPM.
WIDE OPEN THROTTLE GOVERNOR WOT AVAILABLE FOR 5.6L V8S ONLY:
Wide open throttle refers to a throttle position governor placed on stock Nissan vehicles. It limits the driver from using
100% of the vehicle throttle from 0-40 mph. Bully Dog’s Wide Open Throttle feature will remove this governor from the
vehicle.
WARNING: using this vehicle option is at the risk of the vehicle owner.
Bully Dog recommends that this feature be used for drag racing
purposes only and should only be used on a designated drag race
vehicle on a sanctioned drag racing track. Removing Wide Open
Throttle will place added stress on drive train components, Bully
Dog will not be held responsible for damages incurred as a result of
the use of this feature.
If you press”Y” to modify the WOT restriction then downloader will
display a second WOT screen. On this screen Press “Y” to enable WOT.
Press “N” to disable or remove WOT restriction from the vehicle. After you select “Y” or “N” the downloader will continue through the
download sequence.
If you press “N” to use the “Stock” settings then the downloader will
continue through the download sequence.
Rev Limiter
Press Y to modify
Rev Limiter
Press N to use
Stock rev limiter
Rev. Limiter
6150
Select Level
Press Y to
Accept
To activate and utilize the speed limiter
download feature, the feature must be activated during the download.
Wide Open Throttle
Press Y to modify
WOT restriction
Press N to use
Stock WOT settings
Wide Open Throttle
Press Y to enable
WOT restriction
Press N to disable
WOT restriction
Rev Limiter adjustment by Engine
Engine Minimum Maximum
2.5 L Stock 6800
3.5 L Stock 7100
3.5 L HR Stock 8000
4.0 L Stock 6800
5.6 L Stock 6500
Page 15

14
CHANGING DOWNLOAD SETTINGS/ RETURNING TO STOCK SETTINGS:
To return the vehicle to stock or to change any of the Download settings: Engine Tune, Speed Limiter, or Rev
Limiter follow the steps below.
1. Select Install Download from the main menu
2. Follow the screen prompts on the downloader screen.
3. When the following Screen prompt appears you will need to
select “Y” to Change settings or “N” to return to stock.
After you have taken your original vehicle back to stock, you can
install the Power Pup™ in a dierent vehicle. Before installing
however, update the product online using the Update Agent. Before installing the Power Pup on a dierent vehicle, be
certain that the new vehicle ts within the range of vehicle applications that are compatible with the part number and
software version number associated with the Power Pup.
Change Download
This Vehicle Has a Download
Already Installed
Y to Change Download Settings
N to Return to Factory Stock
Already Downloaded
Page 16

15
DTC Menu
DTC MENU
DTCs or diagnostic trouble codes are warnings saved on the engine computer that generally point to a
particular malfunction in the vehicle. DTCs are an excellent method of diagnosing a vehicle, in fact this
method is used by the OEM.
To read or erase DTCs start by selecting “DTC menu” from the main menu. Once in the DTC menu you will
nd two options to choose from: Check DTCs and Clear DTCS. See the description for each below.
CHECK DTCS:
This function will look for any diagnostic trouble codes stored in the engine computer and will display all of
the codes on the Power pup screen. Notice that most codes are accompanied by a description of the code. The
diagram below illustrates the checking DTCs process screen by screen.
Once the DTCs have been checked and are displayed on the screen they can be erased within this function by
pressing “Y”. Press “N” to exit into the main menu.
ERASE DTCS:
This function will simply erase whatever DTCs are found on the vehicle computer without displaying any of the
DTCs on the screen. The diagram below illustrates the Erasing DTCs process screen by screen.
50%
Main Menu
Install Download
DTC Menu
Settings
DTC MENU
Turn ignition key to RUN position.
do not start engine.
DTC MENU
Turn ignition key to RUN position.
do not start engine.
DTC Menu NISSAN
Check DTC’s
Clear DTC’s
DTC Menu TO CLEAR
P 1610 1 OF 12
Unknown DTC
Select the DTC Menu item from the main menu
to enter the DTC Menu.
Select either Check DTC’s or Clear DTC’s from
the DTC menu to use either function.
Turn the key to the run position and wait for
the downloader to establish communication.
Turn the key to the run position and wait for the
downloader to establish communication.
Choosing this function will automatically erase
the DTCs on the vehicle and then exit directly
back into the Main Menu.
On this screen, scroll down to view all DTCs.
Press “Y” to erase the DTCs, Press “N” to exit
back into the main menu without erasing the
codes.
Page 17

16
Settings Menu
SETTINGS MENU
The settings menu contains two submenus: vehicle options and show settings. Each submenu is described in this section.
VEHICLE OPTIONS:
There are two vehicle options available: Adjust Timing, and Adjust Idle. Both of these functions are dierent
than download features in that they both require that the vehicle is running during these adjustments. Further,
the vehicle must be running at full operating temperature of at least 180 degrees for either of these adjustment
options to work. These vehicle options will not work unless the correct condition are met.
Note: these vehicle options aren’t locked to any one vehicle. These options can be performed on an unlimited
amount of vehicles. Be sure to check the vehicle applications available before proceeding with any attempt to
make adjustments to another vehicle using these options.
• Adjust Timing: This vehicle option will adjust timing by plus or minus 2 degrees. See the instructions on how
to use this feature below. Read the warning below.
To use the adjust timing vehicle function follow the steps below:
1. From the Vehicle Options menu select Adjust Timing.
2. The next screen on the downloader will display the current
operating temperature of the vehicle, only if the operating
temperature is not within 180-201 degree.
3. Once in the Adjust timing screen use the up and down arrow buttons to highlight the desired timing adjustment. The
eects of the timing adjustment take place in real time as
the timing is displayed on the screen.
4. Press “Y” to set the timing adjustment.
5. After setting the desired timing adjustment simply press
the left arrow key to exit this vehicle option.
Note: this feature can be adjusted as many times as is necessary to find the desired timing level.
Warning using this vehicle option is at the risk of the vehicle owner.
Advancing timing can cause predetonation or “pinging.” If you experience either one of these you must immediately use a higher octane fuel or reverse the vehicle option back to the stock position. If you are not educated
on what advancing timing or retarding timing does to the engine or what its aects on the engine are, it is not
recommended that you use this feature.
50%
Main Menu
Install Download
DTC Menu
Settings
50%
View Settings
Settings PRESS Y
Adjust timing PRESS N
To access this
option your vehicle
has to be at opertaing
temp. 180-201 degrees
Adjust timing PRESS N
This feature will allow you to
adjust timing +/- 2 degrees
Timing Adjusted - 0°
(Y) - set, up/down-change
Select the Settings menu item from the main
menu to enter the Settings Menu.
Select either Vehicle Options or View Settings
from the Settings menu to use either function.
This screen only appears if the vehicle is not up
to operating temperature.
Page 18

17
TROUBLE SHOOTING
Settings Menu
• Adjust Idle: This vehicle option will adjust the idle rpm level of the engine. The idle rpm level of the engine
can be raised by up to 250 rpms above stock. Idle can be adjusted in 12.5 rpm increments within the 250 rpm
total range.
To use the adjust idle vehicle option follow the steps below:
1. From the Vehicle Options menu select Adjust Idle.
2. The next screen on the downloader will display the current
operating temperature of the vehicle, only if the operating
temperature is not within 180-201 degrees.
3. Once in the Adjust Idle screen use the up and down arrow
buttons to highlight the desired idle adjustment. The eects
of the idle adjustment take place in real time as the idle is dis-
played on the screen.
4. Press “Y” to set the idle adjustment.
5. After setting the desired idle adjustment simply press the
left arrow key to exit this vehicle option.
Note: this feature can be adjusted as many times as is necessary to find the desired idle level.
VIEW SETTINGS:
Enter the view settings menu to see how all of the downloader features are setup. All of the following features
can be checked using this menu item.
• Octane (engine tune)
• Speed Limiter
• Rev Limiter
• Target Timing
• Target Idle
Adjust Idle
To access this
option your vehicle
has to be at opertaing
temp. 180-201 degrees
Adjust Idle PRESS N
This feature will allow you to
adjust idle + 250RPMSs
RPM Adjusted - 0
(Y) - set, up/down-change
Settings PRESS N
Octane Regular
Speed Limiter 95 Mph
Rev. Limiter 6200
Target Timing +2
Target Idle 1000
This screen only appears if the vehicle is not up
to operating temperature.
This screen displays all of the downloader settings as they are setup by the user.
Page 19

18
Trouble shooting/Warranty
POWER PUP™ TROUBLESHOOTING
CONDITION POSSIBLE SOURCES ACTION
Downloader displays
Unknown part #
Installation
If the downloader says Unknown Part Number when you
try to install, update the product using the Update Agent
software.
Downloader doesn’t light up
when plugged into OBDII
Installation
If the downloader doesn’t light up when plugged into the
OBDII check the cigarette lighter fuse. Replace the fuse if
blown.
Checksum error during initial
install
Installation
Try unplugging the downloader and try again. If problem
continues, update the product using the Update Agent
software and try again.
Where is Serial # Located Location
There is a sticker on the back of the downloader. It is also
displayed on the screen when the unit is rst plugged in.
Downloader displays:
high voltage
turn o ACC.
Too much voltage
running through ECM
Turn o all vehicle electronics including headlights stereo
AC & fan.
Downloader displays:
not factory, another aftermarket product has been
detected
there is another
downloader or software
program installed on the
vehicle
1. Uninstall other downloader or software program before
installing Bully Dog Power Pup.
2. It is not recommended that the Power Pup be installed
with any other downloader or software.
For more information on up-to-date troubleshooting guide for the Power Pup™, go to
www.bullydog.com/Product_Updates.php
WARRANTY INFORMATION:
Warranty information for the Power Pup™ downloader can be found in the Power Pup™ package along
with this instruction set. Warranty information can also be found on the web at:
www.bullydog.com
Page 20

For Free Technical Support
Call: 208-226-2500
®
See More at: bullydog.com
Doc.# 44590-99 v1.4.0
For a full listing of Diagnostic Trouble Codes go to: www.bullydog.com/DTC.php
Intake Systems
Exhaust Systems
UNLEASH THE POWER
WITH BULLY DOG PERFORMANCE PRODUCTS
T Shirts
Fuel Reformulator
 Loading...