

Page 1

Sensor Docking
A
MORE GREAT
BULLY DOG
PRODUCTS
More info on Bully Dog
products can be found
on our website at
bullydog.com
:
PRE-INSTALL CHECKLIST
Adapter Plug Mini USB Cable
SD Card Reader SD Card
Station
Accessories
Conrm that you have all the parts listed
below, and then update your GT (B).
Tools You May Need:
Fuse Puller
Windshield Mount
Voltage Tester
Battery Charger
Pliers
GT for Jeep®
QUICK INSTALL GUIDE
Not legal for sale or use in California on
pollution-controlled vehicles.
:
B
1. Install the Update Agent on
a Windows computer.
(www.bullydog.com/update_agent.php)
UPDATE YOUR GT
2. Plug in the card reader.
Plug the microSD card into
the reader, and plug the
reader into one of your
computer’s USB ports.
HDMI Cable Power Cable GT Head UnitFuse TapFuse Spade
3. Open the Update Agent
Launch the Update Agent
from the Windows Start menu
if it isn’t already open.
4. Select your vehicle on
the Update Agent using the
“Change” button.
5. Select “Update”.
Once the Agent indicates that the update is complete, place the MicroSD card into your GT and
proceed with installing your GT (C).
PHYSICAL INSTALLATION
C
:
1. Locate a key-on fuse.
a. It only has power when
the key is in the “on” (or
“run”) position.
b. Use a 12 volt test light
or your vehicle owner’s
manual to locate one.
The key-on fuse should be
either a 10 or 15 amp fuse.
2. Connect the
power cable.
a. Crimp the fuse
spade onto the
power wire.
b. Remove the fuse.
c. Slide the fuse tap
over one metal
prong of the fuse.
d. Slide the fuse spade
over the fuse tap
and put the fuse
back in the fuse
box.
The black ground
wire inside the
power cable is not
required.
3. Connect the adapter plug.
a. Find your vehicle’s diagnostic
port (OBDII) under the dash.
b. Connect the GT adapter plug
to the port.
c. Run the power cable from the
fuse box and connect it to the
adapter plug.
4. Install the HDMI cable.
a. Slide the switch on the
adapter plug to “BATT”
b. Connect one end of the
HDMI cable to the adapter
plug.
c. Run the cable under the
dash or weather stripping.
5. Mount and connect the GT.
a. Use the windshield
mount to attach the GT
head unit to the windshield in a safe place.
b. Make sure not to ob-
struct the driver’s view.
c. Connect the HDMI cable
to the GT head unit and
then begin the pre-tune
checklist (D).
Page 2
PRE-TUNE CHECKLIST
10
D
:
1. Business hours
Install during regular
business hours (MondayFriday 8am-5pm MST). For
assistance, you may contact
Bully Dog Technical Support
at 940-783-9915.
2. Check fuses
Check the
included red fuse
card if you have a
GM vehicle.
3. Internet access
In the unlikely event
that technical support is
needed, Internet access
may be required to
troubleshoot.
4. Allow enough time
Make sure you have
at least an hour
to complete the
installation process.
5. Check your battery
Before installation,
ALWAYS ensure that
the batteries are fully
charged. If you are not
sure, connect a battery
charger before you
begin installation.
6. Turn electronics OFF
Leaving electronics on
(stereo included) may
prevent a successful
download.
7. The download
Do not interrupt or
disconnect the GT
at any point during
the download. Leave
electronics o during
the entire process.
Proceed to (E).
GT DOWNLOAD (PART 1)
:
E
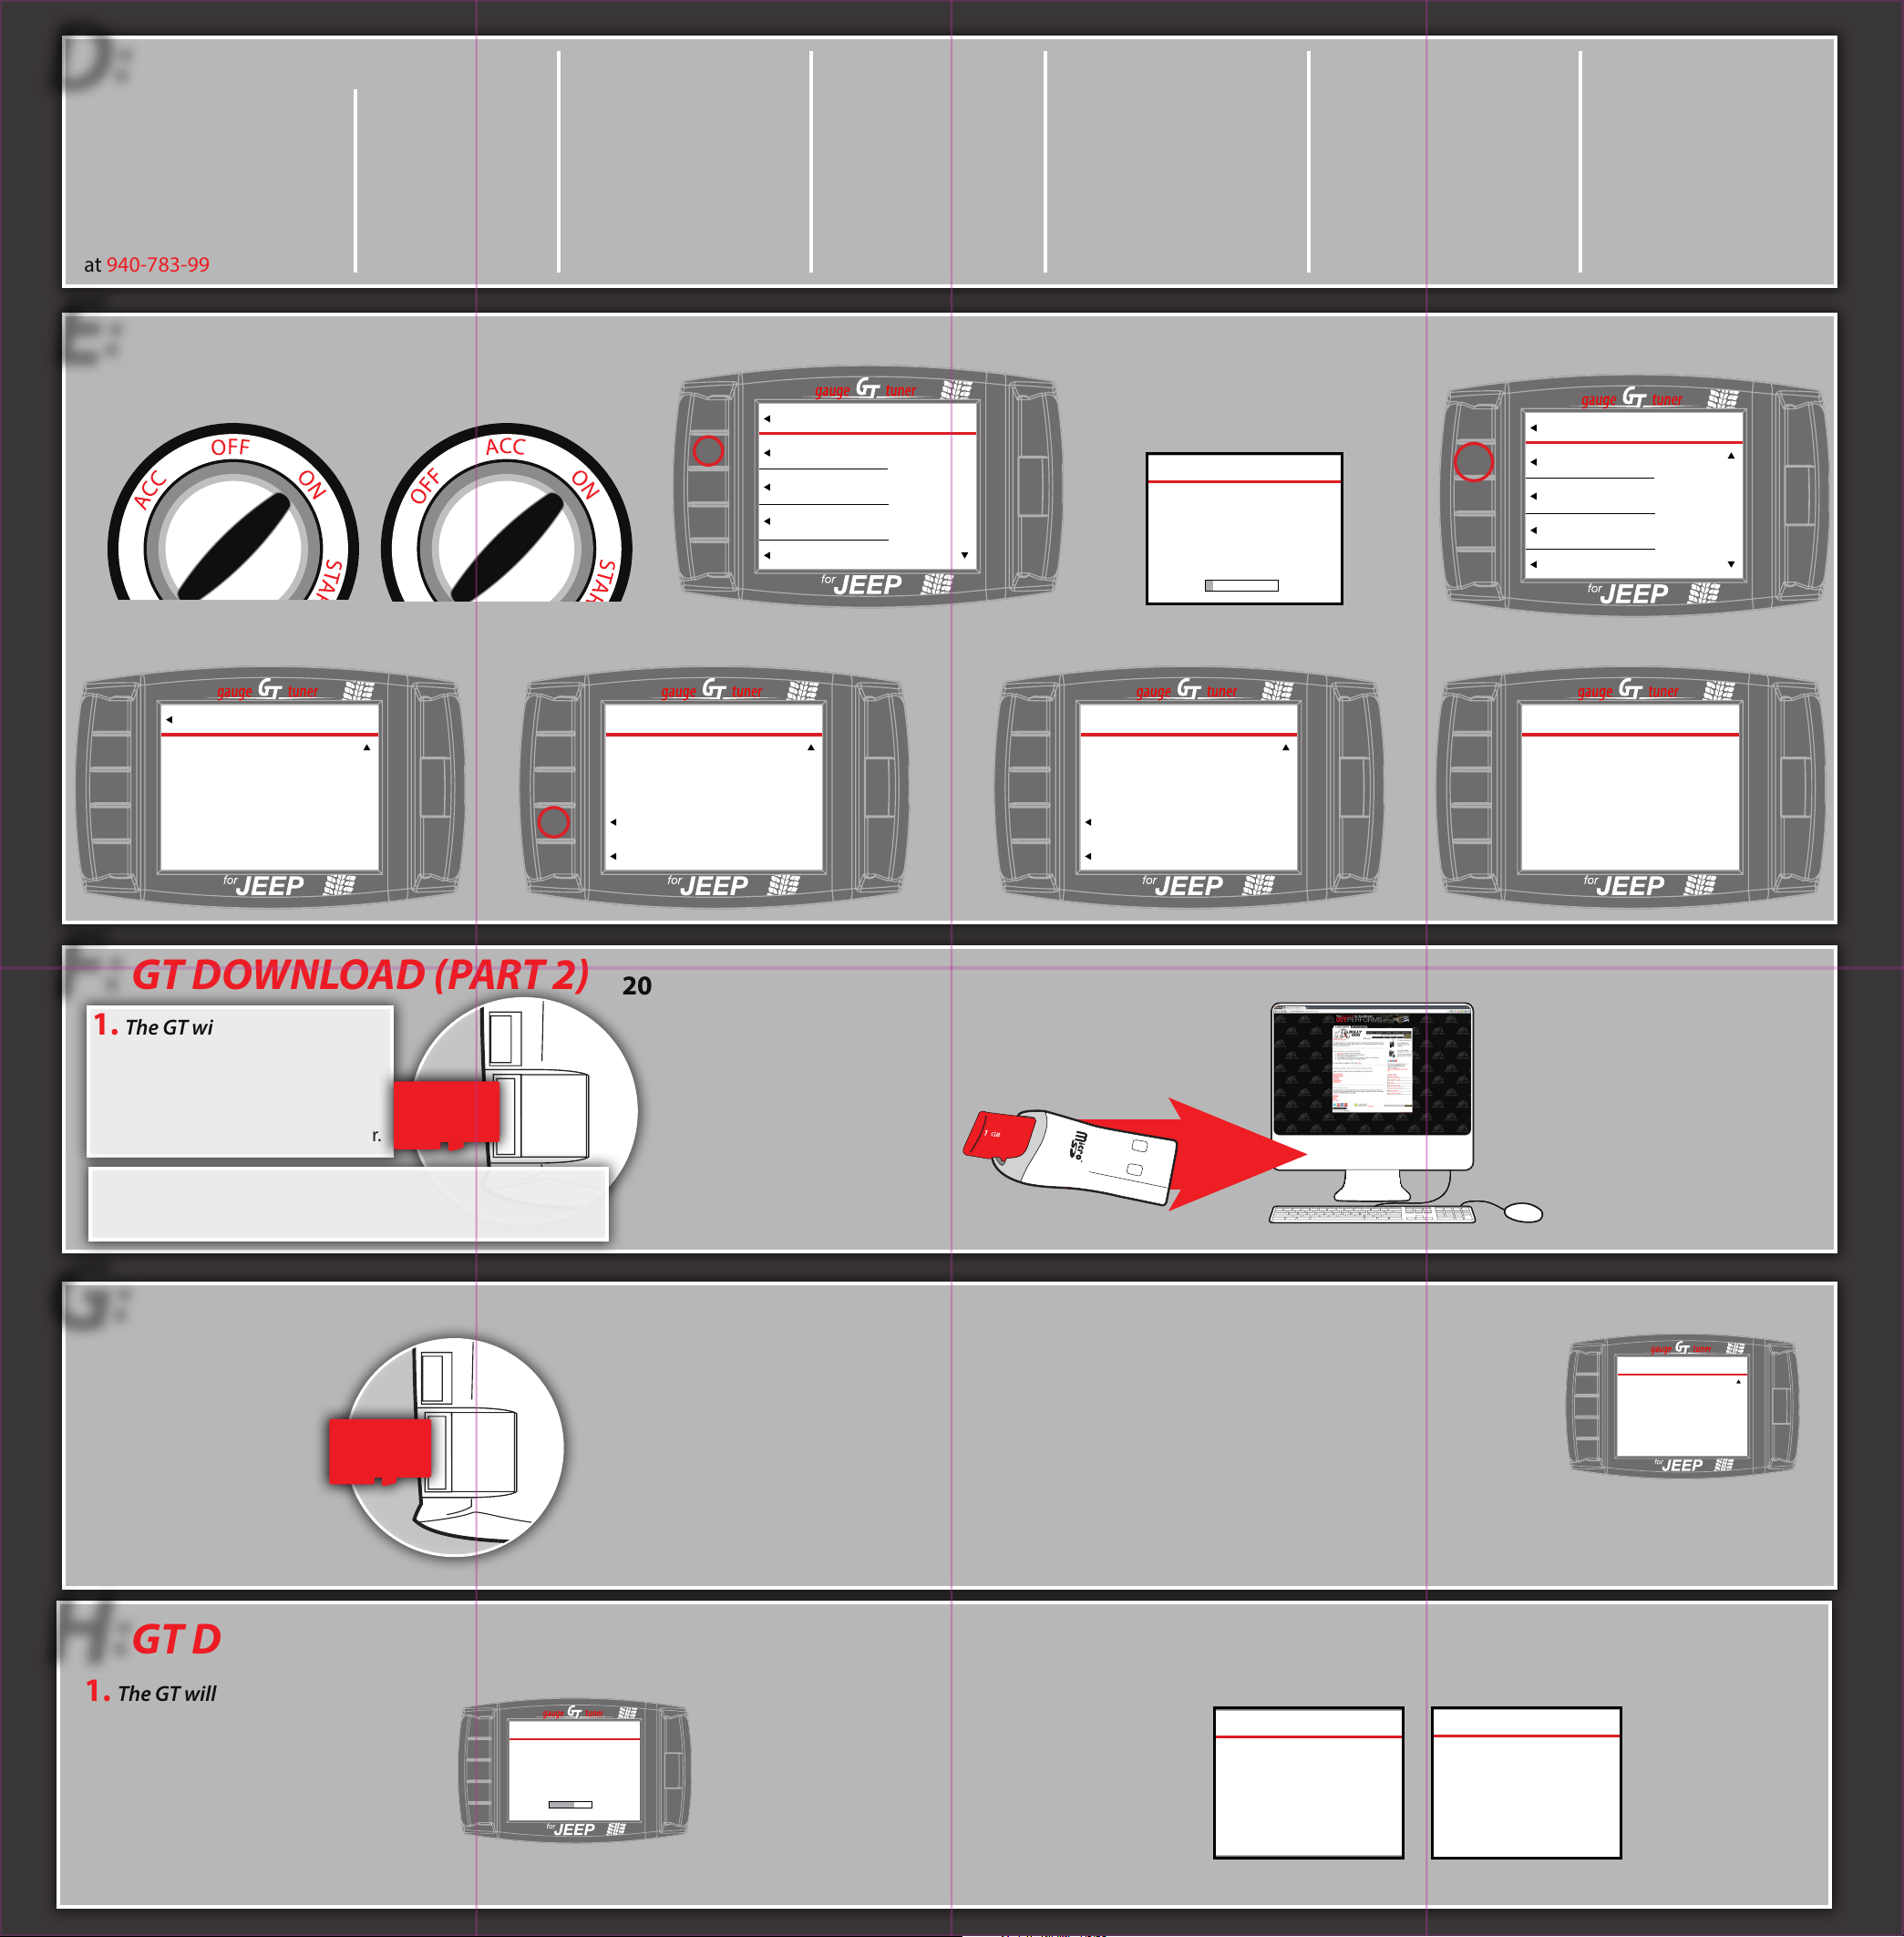
1. Turn your key to the “on” (or “run”) position.
• Do NOT start the engine.
or
5. Verify the vehicle type.
Go Back
to Main Menu
Please verify vehicle type.
Installing on a
XXXXXXXXXXXXXXXXXX
If this is correct, press Y to continue.
If not, restart and select the correct
vehicle.
CAUTION
YES
2. Choose “Change Vehicle” from the Main Menu.
Go Back
to General Disp
MAIN MENU
Change Vehicle
Install Download
Gauge Setup
Set User Options
3. Select the vehicle model,
engine and year.
• The GT will load les and
restart.
LOADING IMAGE
Selected:
XXXXXXXXXXXXXXXXXXX
Loading le from SD card.
%
4. Choose “Install Download” from the
Main Menu.
Go Back
to General Disp
MAIN MENU
Install Download
Gauge Setup
Set User Options
Performance Testing
6. Read the disclaimer and press “Agree.” 7. Read the battery disclaimer and press “Agree.” 8. The GT will retrieve vehicle data.
To download this agreement
go to:
www.bullydog.cm/warranty.php
This is the nal opportunity
to exit the download
procedure by pressing disagree.
AGREE
DISAGREE
BATTERY CONDITION
TOP
Press CONTINUE if you are
satised with your battery
condition or connected a
battery charger or booster.
CONTINUE
CANCEL
TOP
VEHICLE DATA
Retrieving Vehicle Data
Please Wait.
...
:
F
GT DOWNLOAD (PART 2)
1. The GT will display code 262.
• Remove the microSD memory
card from the GT.
• Connect it to the computer
with the included card reader.
Steps 2-4 must be completed outside the
vehicle on a computer with Internet access.
:
G
GT DOWNLOAD (PART 3)
Steps 1-4 are must be
completed with/inside
the vehicle.
1. Reinstall the microSD
memory card in the GT.
2012-2013 Wranglers only; for all other vehicles, skip to H-1.
2. Open the Bully Dog Update Agent.
• http://www.bullydog.com/domains/updateagent/setup.exe
3. Connect the microSD memory
card to the computer.
• Use the included
card reader and a
USB port on the
computer.
2012-2013 Wranglers only; for all other vehicles, skip to H-1.
5. The GT will begin the initial
2. Choose “Install Download” from the Main Menu.
3. Read the disclaimer and press “Agree.”
download.
• This will take several minutes.
• Do not interrupt the GT.
• Follow the onscreen instructions.
4. The Update Agent will display a
progress bar as it gathers les.
• When the Update Agent displays
a message that the process is
complete, click OK.
INITIAL DOWNLOAD
The Following Process
Takes Several Minutes
Please Press Continue
Continue
:
H
GT DOWNLOAD (PART 4)
1. The GT will read the engine les.
- This will take several minutes.
- Do not interrupt the GT.
- Follow the onscreen instructions.
READING
ENGINE
Please Wait....
Do Not Unplug the GT!
4. Read the battery disclaimer and press “Agree.”
2. The GT will prompt you to select tuning features:
58%
• Power Level
• Drive Rev. Limiter
• Neutral Rev. Limiter
• Speed Limiter
• MDS (if available)
• Adjust WOT Shift Points
(if available, automatic
transmissions only)
• Tire Size
• Axle Ratio
6. Once the GT has completed the
initial download, skip to step H-2.
3. The GT will build and download the tuning le.
• Do not interrupt the GT.
BUILDING FILE
TUNE
Please Wait....
XXXXXXXXX
24%
DOWNLOADING
TUNE
Part 2
Please Wait....
Do Not Unplug GT!
5. When the GT
has nished
installing the
tuning le, the
download is
complete!
• Slide the switch
on the adapter
plug to “KEY”
 Loading...