

Page 1
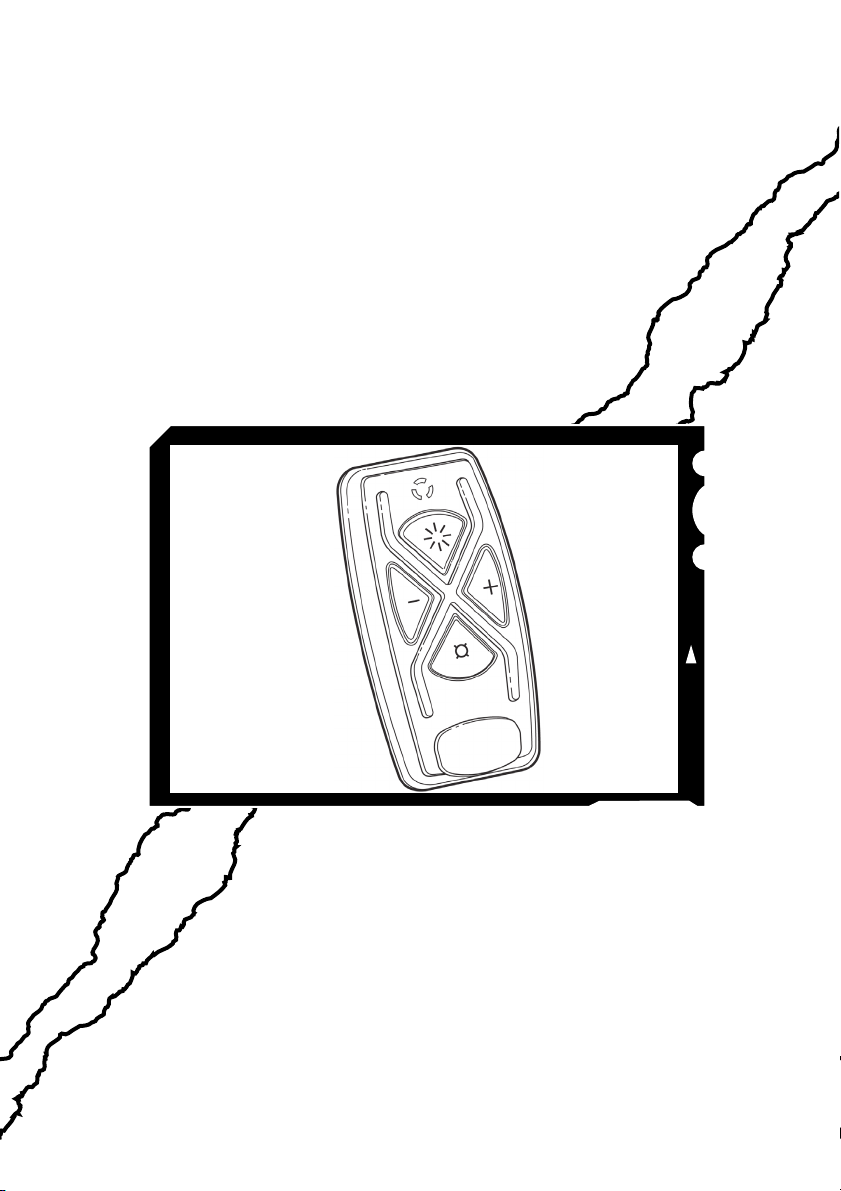
Model HCR3
ENGLISH
FRANÇAIS
ESPAÑOL
In USA - Broan, Wisconsin, USA
Register at www.broan.com
In CANADA - Venmar, Drummondville, QC, Canada
Enregistrer/register à/at www.broan.ca, www.nutone.ca, ou/or www.venmar.ca
Page 2
English
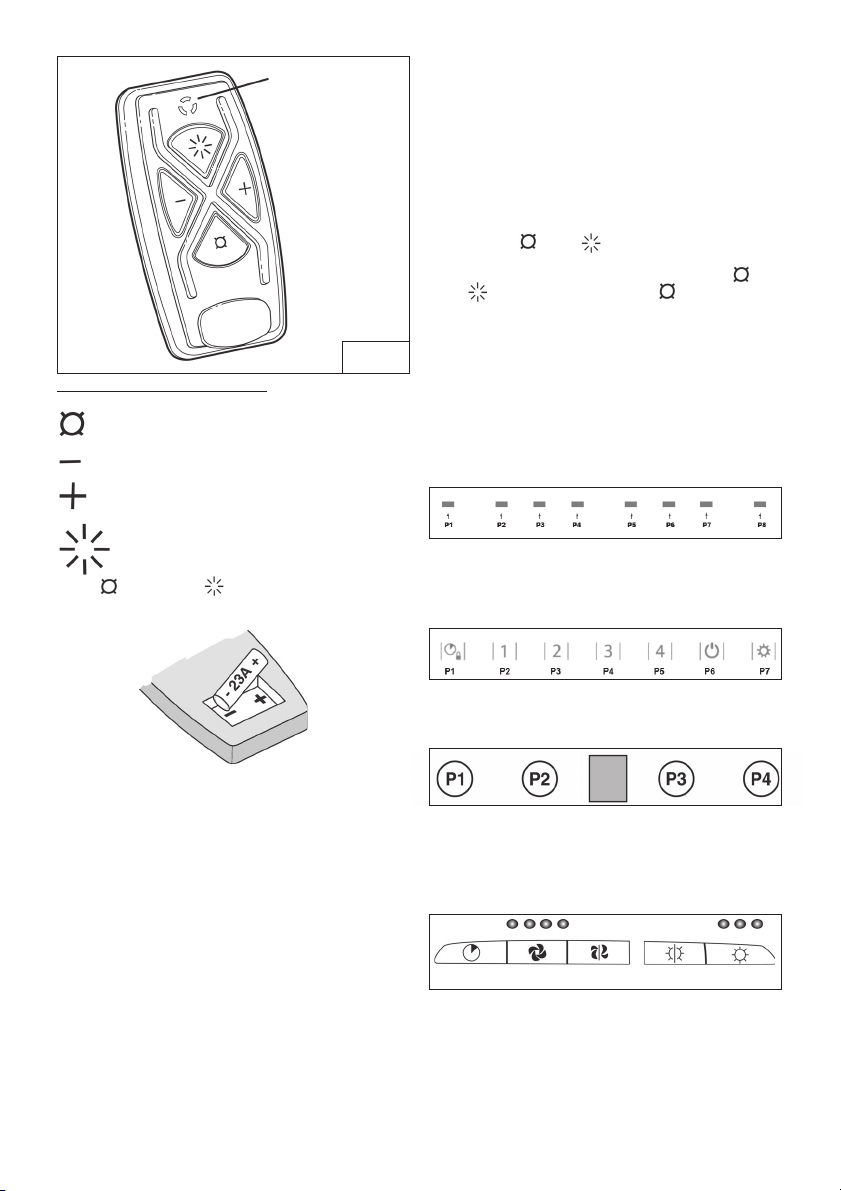
INDICATOR
LIGHT
FIG. 1
Remote Control Functions (Fig.1)
Delay - Off
Blower Speed Decrease and Off
Blower Speed Increase and On
Light
Press (Delay) and (Light) buttons together to
Reset Filter Alarm.
LINKING PROCEDURE
- The remote must be linked to the range hood in order
to work properly.
- This procedure is also useful if there are two or more
products that can be controlled by means of remote
control. For example, in apartments with adjacent
kitchens, showrooms, fairs, etc.
- If the remote is included with the range hood, this
linking procedure will have already been completed
at the factory.
1 - Determine the hood control from list below.
2 - Press and buttons on the remote
simultaneaously for 5 seconds, until the remote
control Indicator Light turns on. Release and
buttons. Press and release button to confirm
the linking. At this point the remote control Indicator
Light starts flashing to confirm the link is active.
3 - Within 3 seconds press and release the Link
Confirm button on the hood control (see below).
HOOD CONTROLS
Hood Control 1
LINK CONFIRM BUTTON - P1
Note: To complete link, press and hold “P1” for
3 seconds.
Hood Control 2
LINK CONFIRM BUTTON - P5
Note: To complete link, press and hold “P5” for
2 seconds.
CAUTION RISK OF EXPLOSION IF BATTERY IS
REPLACED BY AN INCORRECT TYPE. DISPOSE
OF USED BATTERY IN ACCORDANCE WITH
LOCAL REGULATIONS.
FCC ID: QUS-BESMARTNEW
• Changes or modifications not expressly approved
by the party responsible for compliance could void
the user’s authority to operate the equipment.
• This device complies with Part 15 of the FCC Rules.
Operation is subject to the following two conditions:
(1) This device may not cause harmful interference,
and (2) this device must accept any interference
received, including interference that may cause
undesired operation.
• This device complies with Industry Canada licenseexempt RSS standard(s). Operation is subject to
the following two conditions: (1) this device may not
cause interference, and (2) this device must accept
any interference, including interference that may
cause undesired operation of the device.
IC: 11613A-BESMARTNEW
Hood Control 3
LINK CONFIRM BUTTON - P4
Hood Control 4
LINK CONFIRM BUTTON - A
Note: To complete link, press and hold “A” until
hood user interface light intensity indicator 1
and 3 flash 3 times.
1234 123
SPEED
ABC D
LIGHTING INTENSITY
E
Page 3

Français
VOYANT
FIG. 1
Fonctions de la télécommande (Fig.1)
Arrêt différé - Arrêt
Diminution de la vitesse du moteur et arrêt.
Augmentation de la vitesse du moteur et
mise en marche.
Éclairage
Appuyez simultanément sur les boutons (arrêt
différé) et (éclairage) pour réinitialiser l’alarme
des filtres.
PROCÉDURE DE LIAISON
- La télécommande doit être liée à la hotte afin de
fonctionner correctement.
- Cette procédure est aussi utile s'il y a deux ou
plusieurs produits pouvant être contrôlés par une
télécommande: par exemple, des appartements
avec cuisines contiguës, salles de montre,
expositions, etc.
- Si la télécommande est fournie avec la hotte, cette
procédure de liaison a déjà été réalisée par la
société.
1 - Trouver la commande de la hotte de la liste ci-
dessus.
2 - Appuyez simultanément sur les boutons et
sur la télécommande pendant 5 secondes
jusqu’à ce que le Voyant de la télécommande
s’allume. Relâchez les boutons et puis
appuyez et relâchez le bouton pour confirmer
la liaison. À ce stade, le Voyant de la
télécommande commence à clignoter pour
confirmer que la liaison est active.
3 - Dans les 3 secondes, appuyez et relâchez le
bouton de confirmation de liaison sur la
commande de la hotte (voir ci-dessous).
COMMANDE HOTTE
Commande hotte 1
CONFIRMATION DE LIAISON BOUTON P1
Remarque: pour compléter la liaison appuyez
et maintenez “P1” pour 3 secondes.
Commande hotte 2
CONFIRMATION DE LIAISON BOUTON P5
Remarque: pour compléter la liaison appuyez
et maintenez “P5” pour 2 secondes.
ATTENTION IL Y A RISQUE D’EXPLOSION SI LA PILE
EST REMPLACÉE PAR UNE PILE DE TYPE INCORRECT.
METTRE AU REBUT LES PILES USAGÉES
CONFORMÉMENT A LA RÉGLEMENTATION LOCALE.
FCC ID: QUS-BESMARTNEW
• Tous changements ou modifications qui ne sont pas
• Cet appareil est conforme aux normes énoncées à la
(1) il ne doit pas produire de brouillage et (2) l’utilisateur
IC: 11613A-BESMARTNEW
approuvés par la partie responsable de la conformité
pourraient annuler la possibilité d’opérer l’équipement.
section 15 des règlements de la FCC et RSS 210
d’Industrie Canada. L’utilisation de cet appareil est
autorisée seulement aux conditions suivantes:
de l’appareil doit être prêt à accepter tout brouillage
radioélectrique reçu, même si ce brouillage est
susceptible de compromettre le fonctionnement de
l’appareil.
Commande hotte 3
CONFIRMATION DE LIAISON BOUTON P4
Commande hotte 4
CONFIRMATION DE LIAISON BOUTON A
Remarque: pour compléter la liaison appuyez et maintenez
“A” jusqu’à ce que les indicateurs d’intensités d’éclairage
1 et 3 clignotent 3 fois.
Vitesse
1234 123
ABC D
INTENSITE
ECLAIRAGE
E
Page 4

Español
INDICADOR
DE LUZ
FIG. 1
Funciones del mando a distancia (Fig.1)
Delay - Off
Disminuya la velocidad del motor y OFF.
Aumentos la velocidad del motor y ON.
PROCEDIMIENTO DE LINKING
- El mando a distancia debe estar conectado a la
campana con el fine de funcionar
correctamente.
- Este procedimiento resulta también útil en caso
de que haya dos o más productos controlables
mediante mando a distancia: apartamentos con
cocinas contiguas, salas de exposiciones,
ferias, etc.
- Si el control remoto se incluye con la campana.
este procedimiento de conexión ya se habrà
completado en la fàbrica.
1 - Determinar el control de la campana de la lista
de abajo.
2 - Pulse los botones y del mando a
distancia simultáneamente durante 5
segundos hasta que el Indicador de Luz del
mando a distancia se enciende. Suelte los
botones y y pulse y suelte el botón
para confirmar la conexión. En este punto, el
Indicador de Luz del mando a distancia a
parpadear para confirmar que la conexión
está activa.
3 - Dentro de los segundos, pulse y suelte el
botón de Link Confirman en los control de la
campana.
CONTROL CAMPANA
Luz
Prensa los botones (Delay) and (Luz) junto a
reiniciar alarma filtro.
ATENCIÓN
RIESGO DE EXPLOSIÓN SI SE SUSTITUYE LA BATERÍA
CON OTRA DE TIPO INCORRECTO. ELIMINE LAS
BATERÍAS USADAS DE ACUERDO CON LAS
NORMATIVAS LOCALES.
ID FCC: QUS-BESMART NUEVO
• Los cambios o modificaciones no aprobados
expresamente por la parte responsable del
cumplimiento podrían anular la autoridad del usuario
para operar el equipo.
• Este dispositivo cumple con la Parte 15 de las Normas
de la FCC. La operación está sujeta a las dos
condiciones siguientes: (1) Este dispositivo no debe
causar interferencias perjudiciales, y (2) este
dispositivo debe aceptar cualquier interferencia
recibida, incluyendo interferencias que puedan
causar un funcionamiento no deseado.
• Este dispositivo cumple con el estándar de Industry
Canada RSS (s) exento de licencia. La operación
está sujeta a las dos condiciones siguientes: (1)
este dispositivo no puede causar interferencias
perjudiciales y (2) este dispositivo debe aceptar
cualquier interferencia, incluidas las interferencias
que puedan causar un funcionamiento no deseado
del dispositivo.
IC: 11613A-BESTSMARTNEW
Control campana 1
LINK CONFIRMAN BOTON P1
Nota: para completar el linking, mantenga
pulsado “P1” durante 3 segundos.
Control campana 2
LINK CONFIRMAN BOTON P5
Nota: para completar el linking, mantenga
pulsado “P5” durante 2 segundos.
Control campana 3
LINK CONFIRMAN BOTON P4
Control campana 4
LINK CONFIRMAN BOTON A
Nota: para completar link mantenga pulsado “A”
hasta intensidad de luz 1 y 3 parpadean 3 veces.
1234 123
SPEED
ABC D
LIGHTING INTENSITY
E
04308743/1
 Loading...