

!
HL3 Series
Insert Manual
For complete installation instructions, see the Tube Heater General Manual
that accompanies this Series Insert Manual.
The HL3 Series Infrared Tube Heater is a positive pressure, two-stage radiant heater system. This insert
manual is a supplement to the Tube Heater General Manual and provides specific information related to
the HL3 Series model. All persons involved with the installation, operation and maintenance of the heater
system must read and understand the information in this insert manual and the accompanying Tube
Heater General Manual.
For Your Safety
If you smell gas:
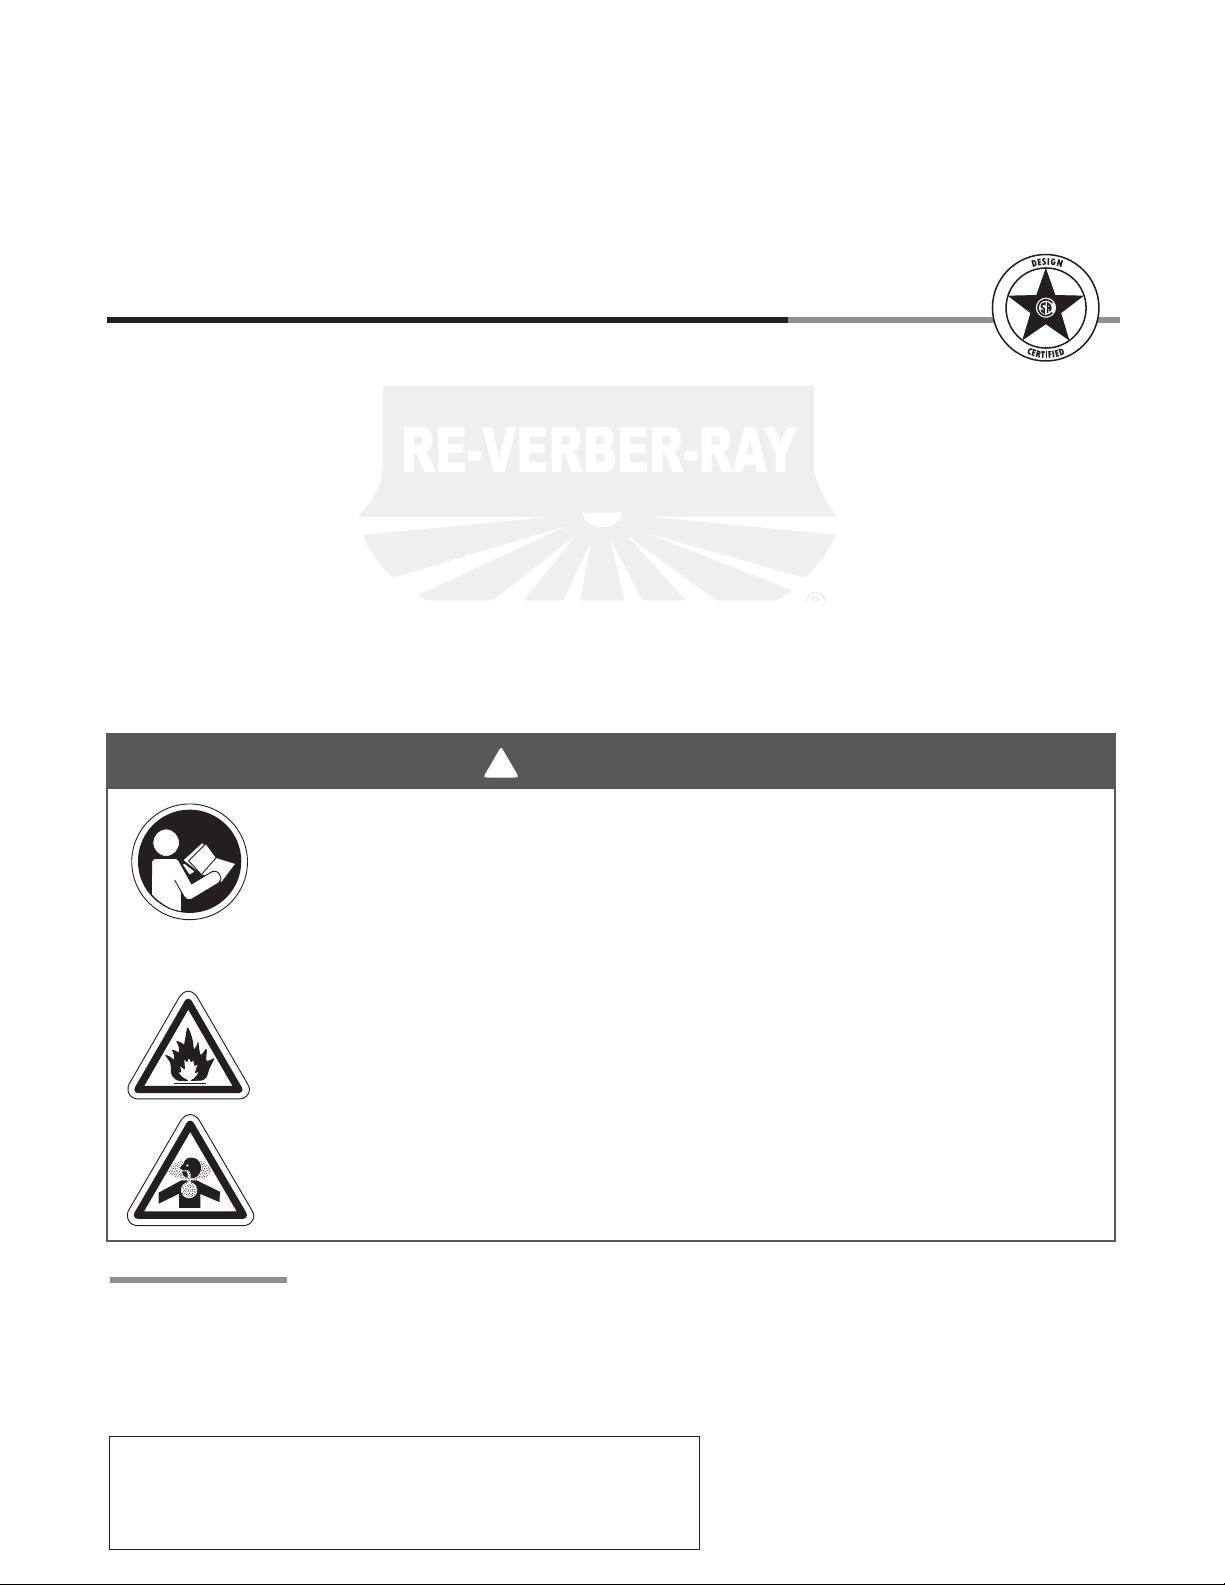
WARNING
Improper installation, adjustment, alteration, service or maintenance can cause
property damage, injury or death. Read the installation, operation and maintenance
instructions thoroughly before installing or servicing this equipment.
This heater must be installed and serviced by trained gas installation and service
personnel only. Failure to comply could result in personal injury, asphyxiation, death,
fire or property damage.
In locations used for the storage of combustible materials, signs must be posted to
specify the maximum permissible stacking height to maintain the required clearances
from the heater to the combustibles. Signs must either be posted adjacent to the
heater thermostats or in the absence of such thermostats, in a conspicuous location.
Not for residential use! Do not use this heater in the home, sleeping quarters,
attached garages, etc. Installation of a commercial tube heater system in
residential indoor spaces may result in property damage, serious injury,
asphyxiation or death.
• Do not try to light any appliance. • Immediately call your gas supplier from a neighbor’s phone.
• Do not touch any electrical switch. • Follow the gas supplier’s instructions.
• Do not use any phone in your building. • If you cannot reach your gas supplier, call the fire department.
INSTALLER: Present this manual to the end user.
Keep these instructions in a clean and dry place for future reference.
Model#: ___________________ Serial #: _________________________
(located on rating label)
Replace s: Rev.13012_ 3M -8 /12(CDS )
LIOHL3-Rev. 27512
Print: 3M-8 /13_r2-5/14(CDS)

HL3 Series
Contents
1.0 Safety...................................................................3
Safety Labels and Locations ............................................3
Clearances to Combustibles ............................................4
2.0 Installation . . . . . . . . . . . . . . . . . . . . . . . . . . . . . . . . . . . . . . . . . . . . . . . . . . . . . . . . . . . . . . 6
Electrical Requirements................................................6
Wiring . . . . . . . . . . . . . . . . . . . . . . . . . . . . . . . . . . . . . . . . . . . . . . . . . . . . . . . . . . . . . 7
Specifications ......................................................10
Tube Installation Sequence ............................................11
3.0 Op eration ..............................................................12
Sequence of Operation ...............................................12
Thermostat . . . . . . . . . . . . . . . . . . . . . . . . . . . . . . . . . . . . . . . . . . . . . . . . . . . . . . . . 12
Diagnostics . . . . . . . . . . . . . . . . . . . . . . . . . . . . . . . . . . . . . . . . . . . . . . . . . . . . . . . . 13
4.0 Troubleshooting Guide . . . . . . . . . . . . . . . . . . . . . . . . . . . . . . . . . . . . . . . . . . . . . . . . . . . 14
5.0 Parts ..................................................................18
Components . . . . . . . . . . . . . . . . . . . . . . . . . . . . . . . . . . . . . . . . . . . . . . . . . . . . . . . 18
Parts List ..........................................................18
Kit Contents Check List ...............................................20
Approvals..........................................................20
Limited Warranty ....................................................20
NOTE: See page 10 for a list of available models and specifications.
2
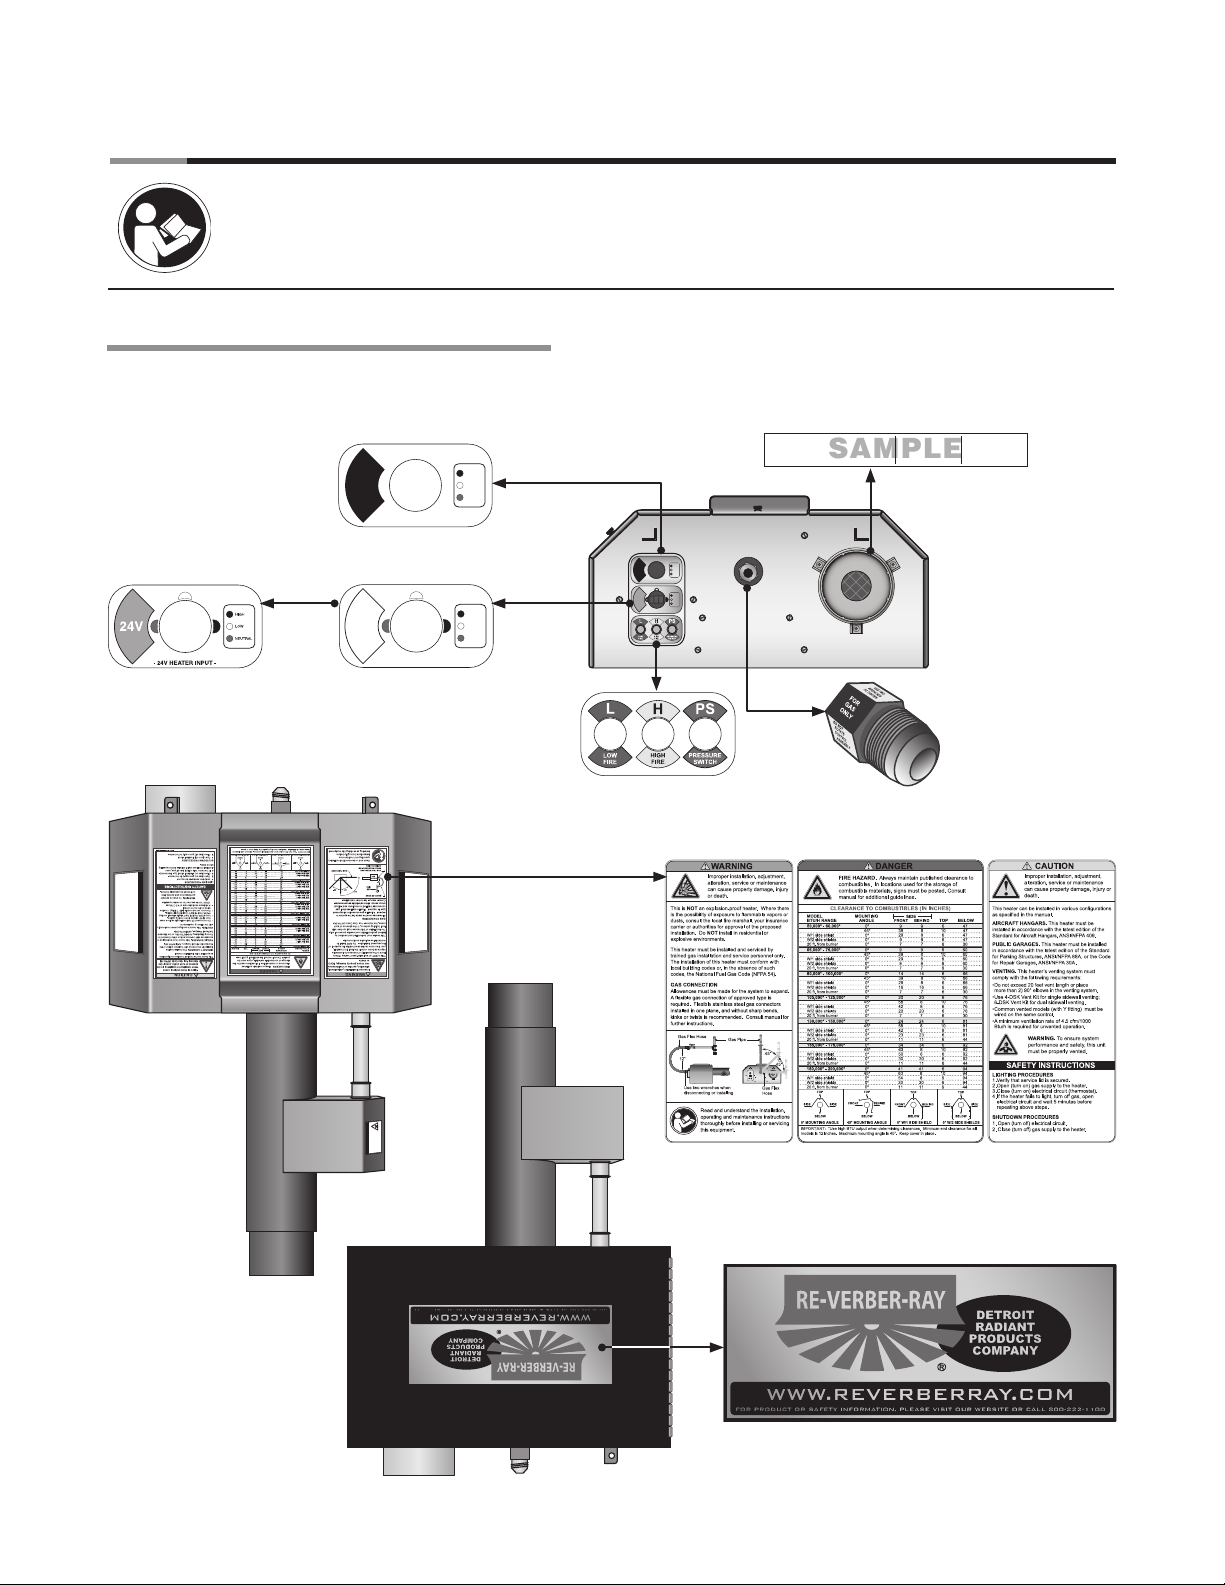
- 24V HEATER OUTPUT -
- 120V HEATER INPUT -
Air Metering Orifice
DO NOT REMOVE
TP-114
TP-3014
3”
SAMPLE
HL3 Series
1.0 Safety • Safety Labels and Locations
1.0 Safety
Read and understand all safety information and warnings in this insert manual and the Tube
Heater General Manual before installation, operation and maintenance of the radiant tube
heater system.
Safety Labels and Their Locations
Product safety signs or labels should be replaced by the product user when they no longer are legible.
Contact either your local distributor or the product manufacturer for obtaining replacement signs or labels.
F/N: LLV3EP2
(Orange
crescent -with
relay option)
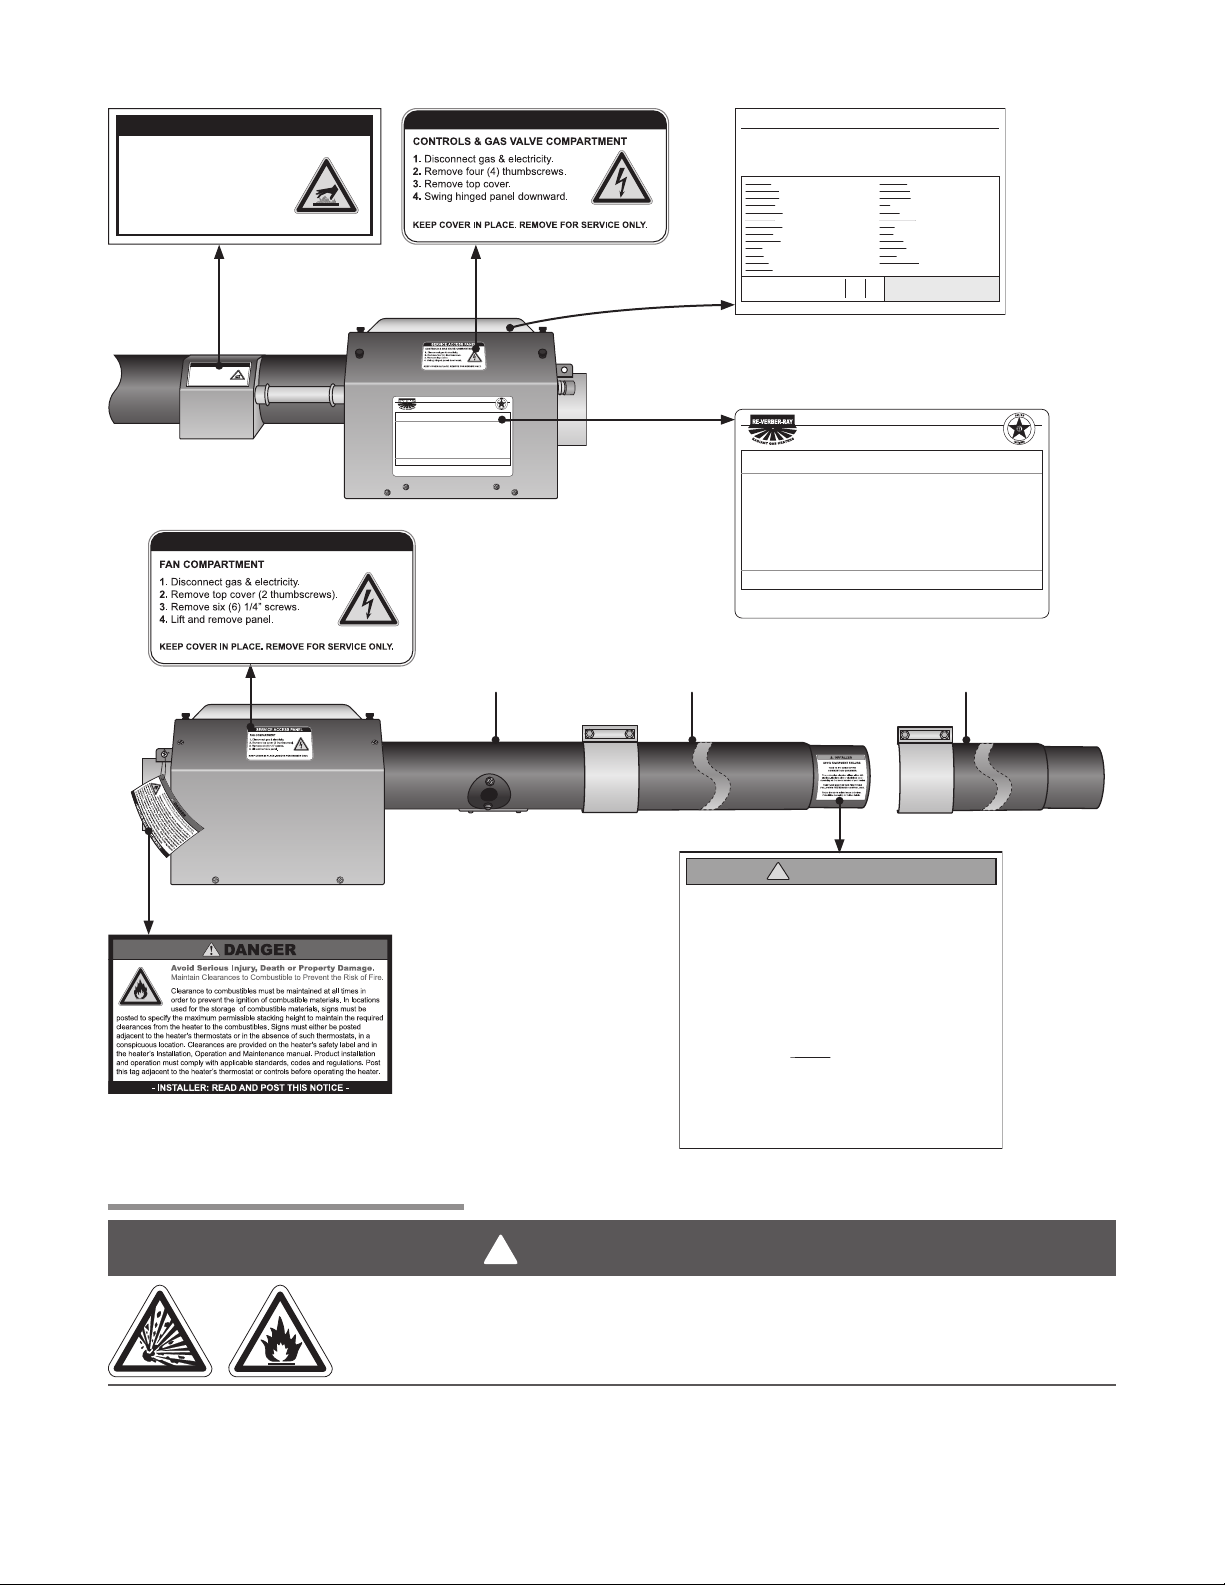
FAN COMPARTMENT
1. Disconnect gas & electricity.
2. Remove top cover (2 thumbscrews).
3. Remove tsix (6) 1/4” screws.
4. Lift and remove panel.
KEEP COVER IN PLACE. REMOVE FOR SERVICE ONLY.
SERVICE ACCESS PANEL
120V
F/N: LLV3EP1
24V
F/N: LLV3EP4
(White crescent
- no relay)
Top Panel
SERVICE ACCESS PANEL
KEEP COVER IN PLACE. REMOVE FOR SERVICE ONLY.
4. Swing hinged panel downward.
3. Remove top cover.
2. Remove four (4) thumbscrews.
1. Disconnect gas & electricity.
CONTROLS & GAS VALVE COMPARTMENT
HOT
NEUTRAL
EARTH
HIGH
LOW
24V OUT
HOT
NEUTRAL
120V
EARTH
- 120V HEATER INPUT -
HIGH
LOW
24V
NEUTRAL
- 24V HEATER INPUT -
F/N: LLV3EP14
(Operational Indicator Lights)
F/N: LLAC
Air Metering Orifice
Back Panel
F/N: LLTB018 (Natural Gas)
F/N: LLTB019 (LP Gas)
Bottom Panel
KEEP COVER IN PLACE. REMOVE FOR SERVICE ONLY.
CAUTION: HOT SURFACE.
SERVICE ACCESS PANEL
cover upward and outward.
2. Remove cover by lifting top
1. Disconnect gas & electricity.
IGNITER & FLAME SENSE COMPARTMENT
F/N: LLTCL001L/C/R
Clearance to Combustibles
Labels
F/N: LLLOGO1 Logo Label
3
!
AVOID EQUIPMENT FAILURE
THIS 10 FT. TUBE IS THE
COMBUSTION CHAMBER.
THIS TUBE MUST BE THE FIRST TUBE
FOLLOWING THE BURNER CONTROL BOX.
!
INSTALLER
The combustion chamber utilizes either 409
stainless, titanium alloy or aluminized steel -
depending on the model number of your heater.
Rotate the tube’s welded seam to bottom.
Consult the manual(s) for further details.
1.0 Safety • Safety Labels and Locations • Clearance to Combustibles
HL3 Series
SERVICE ACCESS PANEL
IGNITER & FLAME SENSE COMPARTMENT
1. Turn off gas & electricity.
2. Remove cover by lifting top
cover upward and outward.
CAUTION: HOT SURFACE.
KEEP COVER IN PLACE. REMOVE FOR SERVICE ONLY.
F/N : LLTB 0 2 6
SERVICE ACCESS PANEL
IGNITER & FLAME SENSE COMPARTMENT
1. Disconnect gas & electricity.
2. Remove cover by lifting top
cover upward and outward.
CAUTION: HOT SURFACE.
KEEP COVER IN PLACE. REMOVE FOR SERVICE ONLY.
Controls Compartment
SERVICE ACCESS PANEL
F/N: LLTB025R
SERVICE ACCESS PANEL
RE-VERBER-RAY INFRA-RED RADIANT TUBE HEATER
®
FOR INDOOR (Non-Residential) INSTALLATION ONLY.
Class IIIA Permanent Label
MODEL NO.
INPUT BTU/H
125,000 / 95,000
Manifold Pressure:
3.5 in.
Maximum Inlet Pressure:
14 in.
Minimum Inlet Pressure:
5.0 in.
Inches W.C.P.
Inches W.C.P.
Inches W.C.P.
FOR USE WITH
Natural Gas
Heater Type
C1
Minimum Mounting Angle:
045DEGREES
Maximum Mounting Angle:
DEGREES
Serial No.: 1208XXXXXXXXXX 0001
DET-40-125N(-3)
HL3
Volts AC:
120VAC - 60Hz
AMPS - Starting:
1.7
AMPS - Running:
1.1
Combustion Chamber:
4” Black Coated Aluminized
DESIGN COMPLIES WITH:
ANSI Z83.20b-2004-GAS FIRED LOW INTENSITY INFRA-RED HTR.
DETROIT RADIANT PRODUCTS COMPANY
21400 HOOVER ROAD - WARREN, MI
(586) 756-0950 - www. drp-co.com
16” Burner Tube Combustion Chamber
: LLTB 0 24L
F/N
HL-40-125N(-3)
HL3-125
Production Code:
7.08
Version:
Data on this label is for the model shown on this label. If your heater has been converted,
this information is not accurate. Please contact the factory for assistance.
BURNER COMPONENTS:
Gas Valve:
Circuit Board:
Wire Harness:
N.O. Switch:
N.O. VL Orifice:
N.C. Switch:
N.C. VL Orifice:
Diff Switch:
Diff VL Orifice:
Igniter:
Burner:
16” Tube:
Ind. Lights:
HEATER
TYPE:
C1
For parts replacement information, contact factory at 586-756-0950 or visit www.drp-co.com/parts.
(Specify TP-#’s)
36G54-224-N
35-66
3 PCS Harness
None
None
None
None
IS22010051F5166
SAMPLE
Grey (+ / -)
Norton
Mid
4” Gen.
Yellow - 24V
Orifice Type:
Gas:
TP-204#
Air:
1 5/16”
TP-44#191 7/16”
840A
851B
3252
N/A
N/A
264E
50
201B
380
828
C1 C2 C3
19
Serial No.: 0804XXXXXXXXXX 0001
None
Stock:
Add-On:
N/A
On Circuit Board
Diag. Light:
None
Term. Block:
40 VA
Transformer:
Fasco Lg.
Fan:
50Hz - 120V
Alt. Fan:
When Specified
Alt. Fan Usage:
Picker x2
Relay:
None
Filter:
3 T-plug
24 Volt In:
6’ Blk. Cord
120 Volt In:
7/8” FC
Gas In:
None
Extra VL Orifice:
Internal Use Only:
Electric:
19
LLWT038
Tag:
1 5/16”
None
Special 1:
Special 2:
N/A
826
55A
55B
1325
N/A
832
333
83
17
1 7/16”
Burner Control Box Component Label
(located inside the center compartment lid)
RE-VERBER-RAY INFRA-RED RADIANT TUBE HEATER
®
FOR OUTDOOR USE AND INDOOR (Non-Residential) INSTALLATION ONLY.
Class IIIA Permanent Label
MODEL NO.
HL-40-125N(-3)
Volts AC:
120V - 60Hz
AMPS - Starting:
4.8
AMPS - Running:
1.1
Combustion Chamber:
4” Black Coated Aluminized
DESIGN COMPLIES WITH:
ANSI Z83.20b-2004-GAS FIRED LOW INTENSITY INFRA-RED HTR.
DETROIT RADIANT PRODUCTS COMPANY
21400 HOOVER ROAD - WARREN, MI
(586) 756-0950 - www.drp-co.com
INPUT BTU/H
125,000 / 95,000
Manifold Pressure:
3.5 in.
W.C.P.
Maximum Inlet Pressure:
14 in.
W.C.P.
Minimum Inlet Pressure:
5.0 in.
W.C.P.
SAMPLE
For stainless steel upgrades: The combustion tube is 409 Series stainless steel.
FOR USE WITH
Natural Gas
Heater Type
C1
Minimum Mounting Angle:
045DEGREES
Maximum Mounting Angle:
DEGREES
Serial No.: 0807XXXXXXXXXX 0001
Rating
Plate
Radiant Tube(s)
Fan Compartment
F/N: LL01 - Clearance Safety Tag
(Affix adjacent to heater’s thermostat)
Clearance to Combustibles
Clearance to combustibles is defined as the minimum distance that must exist between the tube surface,
or reflector, and any combustible items (see Figure 1.1). It also pertains to the distance that must be
maintained from moving objects around the tube heater.
F/N: LLTB004 (orange)
(150,000-200,000 BTU/h models and all
heaters with 409 stainless steel tubes)
WARNING
Placement of explosive objects, flammable objects, liquids and vapors close to
the heater may result in explosion, fire, property damage, serious injury or death.
Do not store or use explosive objects, liquids or vapor in the vicinity of the heater.
4
HL3 Series
1.0 Safety • Clearance to Combustibles
When installing the tube heater system, clearances to combustibles for the model tube heater and
configuration must be maintained. Refer to Chart 1.1 below to determine the required distances for your model.
Chart 1.1 • Clearance to Combustibles in Inches (see Figure 1.1 for Mounting Angles)
Mounting
Model Number
HL3 (20, 30, 40) - (65, 75) [N, P]
with 1 side shield 0° 29 8 6 60
with 2 side shields 0° 9 9 6 60
20 ft. from burner 0° 7 7 6 30
HL3 (30, 40) - 100 [N, P]
with 1 side shield 0° 29 8 6 66
with 2 side shields 0° 16 16 6 66
20 ft. from burner 0° 7 7 6 30
HL3 (30, 40, 50) - 125 [N, P]
with 1 side shield 0° 42 8 6 76
with 2 side shields 0° 20 20 6 76
20 ft. from burner 0° 7 7 6 30
HL3 (40, 50, 60) - 150 [N, P]
with 1 side shield 0° 42 8 6 81
with 2 side shields 0° 23 23 6 81
20 ft. from burner 0° 11 11 6 44
HL3 (40, 50, 60, 70) - 175 [N, P]
with 1 side shield 0° 50 8 6 92
with 2 side shields 0° 30 30 6 92
20 ft. from burner 0° 11 11 6 44
HL3 (50, 60, 70) - 200 [N, P]
with 1 side shield 0° 54 8 6 94
with 2 side shields 0° 30 30 6 94
20 ft. from burner 0° 11 11 6 44
Heaters mounted on an angle between 0° to 45° must maintain clearances posted for 0° or 45°; whichever is greater.
*
Angle*
0° 9 9 6 60
45° 39 8 10 60
0° 14 14 6 66
45° 39 8 10 66
0° 20 20 6 76
45° 58 8 10 76
0° 24 24 6 81
45° 58 8 10 81
0° 34 34 6 92
45° 63 8 10 92
0° 41 41 6 94
45° 63 8 10 94
Front Behind Top Below
Sides
The stated clearance to combustibles represents a surface temperature of 90ºF (32ºC) above room
temperature. Building materials with a low heat tolerance (such as plastics, vinyl siding, canvas,
tri-ply, etc.) may be subject to degradation at lower temperatures. It is the installer’s responsibility to
assure that adjacent materials are protected from degradation.
Figure 1.1 • Mounting Angles
0° Mounting Angle
Top
Side
Side
Below
Front
45° Mounting Angle
Top
Behind
Below
0° Mounting Angle
with 1 Side Shield
(P/N: SSE)
Top
Front Behind
Below
5
0° Mounting Angle
with 2 Side Shields
(P/N: SSE)
Top
Side Side
Below
2.0 Installation • Electrical Requirements
!
2.0 Installation
WARNING
Improper installation, adjustment, alteration, service or maintenance can cause property
damage, serious injury or death. Read and understand the installation, operating and
maintenance instructions thoroughly before installing or servicing this equipment. Only
trained, qualified gas installation and service personnel may install or service this equipment.
Not for residential use! Do not use this heater in the home, sleeping quarters, attached
garages, etc. Installation of a commercial tube heater system in residential indoor
spaces may result in property damage, serious injury or death.
Instructions for the following are detailed in the Tube Heater General Manual:
• Design considerations
• Hanger suspension and placement
• Tube layout and assembly
• Burner control box suspension
• Reflectors (and accessories)
• Venting and combustion air intake
• Gas requirements
• Baffle assembly
HL3 Series
Note: Electronic versions of all manuals are available at www.detroitradiant.com
Gas Requirements
Type of Gas
Natural 3.5 Inches. W.C. 5.0 Inches. W.C. 14.0 Inches. W.C.
Liquefied Petroleum 10.0 Inches. W.C. 11. 0 Inches. W.C. 14.0 Inches. W.C.
IMPORTANT: Consult the Tube Heater General Manual for gas connection requirements.
Required Manifold
Pressure
Minimum Inlet
Pressure
Maximum Inlet
Pressure
Electrical Requirements
• 120 Volt - 60 Hz GRD, 3-wire.
• 24V thermostat connection.
• Starting current 4.8 amps
• Running current 1.1 amps
NOTICE
Connecting the thermostat with a voltage other than 24V may damage the heater. The HL3 Series
requires a 24V connection to the thermostat. This is either supplied by the heater internally (standard) or
by an external transformer (with optional isolation relays, P/N: HLRP). See Figure 2.1.
6

!
HL3 Series
If optional yellow
control cord is installed then
Wiring
WARNING
Electric Shock
Field wiring to the tube heater must be connected and grounded in accordance with national,
state, provincial, local codes and to the guidelines in the Tube Heater General Manual and
Series Insert Manual. In the United States refer to the most current revisions to the ANSI/NFPA
70 Standard and in Canada refer to the most current revisions to the CSA C22.1 Part I Standard.
Figure 2.1 • Field Wiring Diagrams
A. Single Heater, No Relay (Single Thermostat).
1/4” spade terminals
required (as supplied)
N
2.0 Installation • Wiring
To 120VAC
grounded outlet.
24V
HL3
Burner Box
NOTE:
24VAC
Low
Thermostat
When using a thermostat that requires constant power a common wire must
be run form the C terminal on the thermostat back to the transformer.
High
B. Multiple Heaters with Relay Option (Single Thermostat).
1/4” spade terminals
required (as supplied)
Thermostat
N
24VAC
Additional wire needed for thermostats
that require constant power.
Low
High
External Transformer
(field supplied)
24VAC
120VAC
the following wire colors apply:
24VAC Out = green
Low = white
High = black
To 120VAC grounded outlet.
HL3
Burner Box
To 120VAC grounded outlet.
HL3
Burner Box
To 120VAC grounded outlet.
NOTE: If optional yellow control cord is
installed then the following wire colors apply:
Neutral = green
Low = white
High = black
HL3
Burner Box
120VAC Power (observe polarity)
N
7

FEN 35-66 LADDER DIAGRAM - W/OUT HLRP RELAY PICKERS
L1
N
GND
VAL
24V
TH
PS
IGN/FS
L2
IGN/240L1IGN/120
LED
FC±
F2 F1
STAGE
1
2
FEN 35-66 LADDER DIAGRAM - W/OUT HLRP RELAY PICKERS
(FIELD SUPPLIED)
(FIELD SUPPLIED)
2-STAGE T'STAT
BK
GAS VALV E
BK
120VAC
L1
O
R
BL
BK
IGNITOR
FLAME
FEN 35-66 IGNITION MODULE
W
W
PR
BLOWER
BK
ROD
24VAC
120VAC
N
G
G
BK
BL
PK
BK
O
O
BK
TERMINAL
T'STAT
LIGHTS
INDICATOR
BK
BK
G
BK
Y
BK
TRANSFORMER
W
APS
PRESSURE SWITCH
GY
W
BK
BL
FEN 35-66 BLOCK DIAGRAM - W/OUT RELAY PICKERS
OR
2.0 Installation • Wiring
HL3 Series
Before field wiring this appliance - Check existing wiring; replace if necessary.
Note: If any of the original wire supplied with the appliance must be replaced, it must be replaced with
wiring material having a temperature rating of at least 105° C.
Figure 2.2 • Internal Wiring Diagrams
A. 35-66 Ladder Diagram
120VAC
BK
BK
Y
TRANSFORMER
120VAC
T'STAT
TERMINAL
1
STAGE
2
B. 35-66 Block Diagram
(FIELD SUPPLIED)
2
TERMINAL
24V
1
STAG E
2-STAGE T'STAT
(FIELD SUPPLIED)
IGNITION MODULE
L1
BK
120VAC
N
(FIELD SUPPLIED)
O
R
2-STAGE T'STAT
(FIELD SUPPLIED)
BK
BK
BK
BK
BK
INDICATOR
LIGHTS
BL
R
T'STAT
FEN 35-66
BK
BK
W
BL
PRESSURE SWITCH
APS
GAS VALV E
G
O
G
GY
BL
O
PK
PR
BK
BK
BK
BL
BK
G
BL
BL
O
PK
GY
G
GND
FEN 35-66 IGNITION MODULE
O
O
PK
BL
W
BK
BURNER
BLOWER
24VAC
W
BK
W
BK
O
TH
PS
24V
VAL
IGN/FS
LED
G
GY
APS
PRESSURE
+
SWITCH
BK
PR
Y
TRANSFORMER
BK
W
IGNITOR
IGNITOR
BK
W
L2
IGN/240L1IGN/120
F2 F1
FC±
BK
FLAME
ROD
GAS VALV E
BK
BLOWER
R
FLAME
ROD
GY
M
HI
CC
MCHI
C
LO
HI
PR
W
ON
BK
BK
G
G
OFF
BK
BK
INDICAT
LIGHTS
BK
8

FEN 35-66 LADDER DIAGRAM - WITH RELAY PICKERS
GND
VAL
24V
TH
PS
IGN/FS
L2
IGN/240
L1
IGN/120
LED
FC ±
F2
F1
STAGE
12
FIELD SUPPLIED
TRANSFORMER
CONNECTION
T'STAT
BK
GAS VALV E
G
LIGHTS
BK
INDICATO R
GY
PRESSURE
SWITCH
APS1
FEN 35-66 LADDER DIAGRAM - WITH RELAY PICKERS
120VAC
L1
IGNITOR
FLAME
FEN 35-66 IGNITION MODULE
W
W
PR
BLOWER
BK
ROD
BK
24VAC
120VAC
W
N
G
BK
BL
PK
BK
O
O
Y
BK
BK
G
BK
BK
BL
LOW
RELAY
BK
HIGH
RELAY
120/24VAC
TRANSFORMER
(FIELD SUPPLIED)
24VAC
120VAC
(FIELD SUPPLIED)
2-STAGE T'STAT
L1 N
Y(G)*
R (BK)*
O (W)*
120V
FEN 35-66 BLOCK DIAGRAM - WITH RELAY PICKERS
120V
OR
BL
BK
W
GY
BL
YY
R
* If thermostat connetion is via a yellow
control cord, use parenthesized color code
HL3 Series
Figure 2.3 • Alternative Wiring Diagrams
A. 35-66 Ladder Diagram - With HLRP Relay
2.0 Installation • Wiring
L1
BK
Y(G)*
O (W)*
R (BK)*
T'STAT
CONNECTION
120VAC
B. 35-66 Block Diagram - With HLRP Relay
L1 N
12
STAGE
2-STAGE T'STAT
(FIELD SUPPLIED)
24VAC
120VAC
120/24VAC
TRANSFORMER
(FIELD SUPPLIED)
BK
BK
INDICATO R
Y(G)*
R(BK)*
T'STAT
24V
2-STAGE T'STAT
(FIELD SUPPLIED)
CONNECTION
1
2
STAGE
O(W)*
FEN 35-66
IGNITION MODULE
120/24V
TRANSFORMER
(FIELD SUPPLIED)
L1
L1
N
AC
AC
BK
BK
W
FIELD SUPPLIED
* If thermostat connetion is via a yellow
control cord, use parenthesized color code
HIGH
RELAY
BK
BK
LIGHTS
FIELD SUPPLIED
COM
Y
COM
O
BK
BK
BL
BL
PRESSURE
GY
YY
O
SWITCH
APS1
R
LOW
RELAY
BK
GY
G
GAS VALV E
* If thermostat connetion is via a yellow
control cord, use parenthesized color code
HIGH
NO
NC
RELAY
LOW
RELAY
GY
NC
NO
BL
O
GY
O
BL
G
BL
PK
PR
BK
GY
O
PK
BL
W
BK
BK
BK
BK
BLOWER
Y
TRANSFORMER
120VAC
24VAC
PK
BL
O
BL
G
BK
W
BK
W
G
VAL
GND
24V
TH
PS
IGN/FS
LED
FEN 35-66 IGNITION MODULE
R
G
APS1 (NO)
PRESSURE
+
SWITCH
BK
PR
Y
TRANSFORMER
BK
W
IGNITOR
GAS VALV E
BK
L2
IGN/240
FC ±
FLAME
ROD
W
L1
IGN/120
F1
F2
R
IGNITOR
BK
BLOWER
BK
GY
HI M
CC
HI
C
LO
HI
M
C
W
BK
ON
FLAME
ROD
BK
BK
PR
OFF
G
G
INDICAT
LIGHTS
BK
BK
N
BK
9

2.0 Installation • Product Specifications
Specifications
Chart 2.1 • Specifications
Model
Number
Gas Type
(select one)
BTU/h
(High Fire)
BTU/h
HL3 Series
(Low Fire)
Straight Length
U-Tube Length
Standard
Weight (lbs.)
Stainless Steel Weight
(lbs.)
Recommended
Mounting Height
Combustion Chamber (Black Coated)
Radiant Emitter Tube(s)
(Black Coated)
Radiant Surface Area
(sq. ft.)
36” Baffle Quantity
HL3-20-65
HL3-20-75
HL3-30-65
HL3-30-75
HL3-30-100
HL 3-30 -125
HL3-40-65
HL3-40 -75
HL 3-40-100
HL 3-40-125
HL 3-40-150
HL 3-40-175
HL3-50-125
HL3-50-150
HL3-50-175
HL3-50-200
N or LP 65,000 50,000 21’-9” 13’-1” 120 N/A 9’ to 14’ Alum Alum 20.2 5
N or LP 75,000 50,000 21’-9” 13’-1” 120 145 10’ to 15’ Alum Alum 20.2 5
N or LP 65,000 50,000 31’-5” **17’- 9 ” 16 0 N/A 10’ to 15’ Alum Alum 30.4 4
N or LP 75,000 50,000 31’-5” **17’- 9 ” 16 0 195 11’ to 18’ Alum Alum 30.4 5
N or LP 100,000 65,000 31’-5” **17’-9” 160 195 12’ to 20’ Alum Alum 30.4 5
N or LP 125,000 82,000 31’-5” **17 ’- 9 ” 160 195 13’ to 23’ Alum Alum 30.4 6
N or LP 65,000 50,000 41’-1” 22’-9” 190 N/A 11’ to 18’ Alum Alum 40.5 3
N or LP 75,000 50,000 41’-1” 22’-9” 190 235 11’ to 18’ Alum Alum 40.5 4
N or LP 100,000 65,000 41’-1” 22’-9” 190 235 12’ to 20’ Alum Alum 40.5 4
N or LP 125,000 82,000 41’-1” 22’-9” 190 235 13’ to 23’ Alum Alum 40.5 5
N or LP *150,000 100,000 41’-1” 22’-9” 190 235 14’ to 25’ Titan Alum 40.5 5
N or LP *175,000 125,000 41’-1” 22’-9” 190 235 15’ to 27’ Titan Alum 40.5 5
N or LP 125,000 82,000 50’-9” **27’-5” 235 290 15’ to 27’ Alum Alum 50.6 3
N or LP *150,000 100,000 50’-9” **27’-5” 235 290 15’ to 27’ Titan Alum 50.6 3
N or LP *175,000 125,000 50’-9” **27’-5” 235 N/A 16’ to 30’ Titan Alum 50.6 3
N or LP *200,000 145,000 50’-9” **27’-5” 235 N/A 17’ to 35’ Titan Alum 50.6 2
HL3-60-150
HL3-60-175
HL3-60-200
HL 3-70-175
HL3-70-200
* Model requires stainless steel tube clamp (P/N: TP-220) to be located at the seam between the primary
combustion chamber and the secondary combustion tube downstream of the burner control box.
** Model requires 5EA-SUB accessory package when installing in a ‘U’ configuration (P/N: TF1B).
IMPORTANT: Reference box label to determine the number of required baffle sections for each model heater.
Titan = Black coated titanium stabilized aluminized steel.
Alum = Black coated aluminized treated steel.
N or LP *150,000 100,000 60’-5” 32’-5” 265 330 16’ to 30’ Titan Alum 60.7 2
N orLP *175,000 125,000 60’-5” 32’-5” 265 N/A 16’ to 30’ Titan Alum 60.7 2
N or LP *200,000 145,000 60’-5” 32’-5” 265 N/A 17’ to 35’ Titan Alum 60.7 2
N or LP *175,000 125,000 70’-1” **37’-3” 300 N/A 19’ to 42’ Titan Alum 70.9 2
N or LP *200,000 145,000 70’-1” **37’-3” 300 N/A 19’ to 42’ Titan Alum 70.9 2
10

HL3 Series
2.0 Installation • Tube Sequence • Heater Length
Tube Installation Sequence
Figure 2.4 • Tube Installation Sequence
Important! The combustion chamber & radiant tube sections must be installed in the following order.
20 Foot
30 Foot
40 Foot
Stainless steel clamp location on 150 - 200 MBH models (P/N : TP-220).
50 Foot
60 Foot
70 Foot
Stainless steel clamp location on 150-20 0 MBH models (P/ N: TP-220).
Stainless steel clamp location on 150-20 0 MBH models (P/ N: TP-220).
Key
Burner Control Box with
16-inch Burner Tube
Black Coated Combustion
Chamber Tube*
Black Coated Aluminized Combustion
Chamber/Radiant Emitter Tube
Standard Tube Clamp
Stainless Steel Tube
Clamp (P/N: TP-220)
150-200 MBH models only - Located
between 1st and 2nd 10 ft. tube sections.
Baffle Location
*Aluminized tubes (50,000 to 125,000 BTU/H models); Titan tubes (150,000 to 200,000 BTU/H models).
NOTE: Refer to the Tube Heater General Manual, Chart 3.6 (page 23) for secured reflector joints.
11

!
3.0 HL3 Series Operation • Sequence of Operation • Thermostat
HL3 Series
3.0 Operation
WARNING
This heater must be installed and serviced by trained gas installation and service
personnel only.
Do not bypass any safety features or the heater’s built in safety mechanisms will be
compromised.
Note: Reference the Tube Heater General Manual for installation requirements.
Sequence of Operation
Standby: The 35-66 control continually checks for internal faults, circuit integrity and relay contact
positioning.
Starting Circuit: Upon a call for heat, the control verifies that the differential switch is in the proper
position (open). The control energizes the fan. Once operational static pressure is achieved, the
differential switch will close initiating the ignition sequence. The glo-bar is powered and the gas valve
opens after 45 seconds. If the flame is not sensed, the heater will attempt to re-ignite for a total of three
(3) trials for ignition before proceeding to soft lockout.
Single Stage Running Circuit: After ignition, the flame rod monitors burner flame. If sense of flame is
lost, the control closes the gas valve within one second and a new trial sequence (identical to the starting
sequence) is initiated. If flame sense is not established within 8.5 seconds, the heater will attempt two (2)
additional ignition sequences before proceeding to soft lockout. The control can be reset by briefly
interrupting the power source.
Two Stage Running Circuit: The second stage on the gas valve is powered directly from the second
stage of the thermostat. In order for two stage to flow to a higher output, single stage must be energized
as well. The thermostat determines which stage to maintain for the desired temperature.
Shut Down: When the thermostat is satisfied, the fan will enter a two (2) minute post-purge cycle. Refer
to Soft and Hard Lockout under Diagnostics; p. 13.
Thermostat
HL3 Series heaters require a 24VAC, two-stage thermostat to operate. The burner control box is equipped
with a round terminal strip that accepts three (3) 1/4” insulated female spade terminals. Do not supply
120V to the 24V connection.
The HL3 Series is equipped with or without relays (P/N: HLRP). The optional relays must be factory
installed. NOTE: Units with a relay installed must have an external transformer (field supplied), see wiring
diagram. (Figure 2.2B).
Standard Configuration
Without relays (identified with white label around the terminal block):
• Single burner control box.
• Single thermostat.
24V
- 24V HEATER OUTPUT -
HIGH
LOW
24V OUT
Optional Configuration
With relays (identified with orange label around the terminal block):
• A single thermostat controls two or more burner control boxes.
• Heaters are common vented.
• Must be factory installed.
12

HL3 Series
3.0 Operation • Diagnostics
Diagnostics
Lockout:
The controls will automatically lockout the heater system when an external or system fault occurs. There
are two types of lockout:
Soft Lockout: The heater will attempt to light three times. In the event of a failed attempt to light, (gas
pressure, valve, no flame sense etc.), the heater will enter a soft lockout period for 15
minutes and then attempt to light three more times before entering Hard Lockout mode.
Hard Lockout : If proof of flame is not established, a component failure occurs or blockages are evident,
the heater will enter hard lockout. If lockout occurs, the control can be reset by briefly
interrupting the power source. Refer to Chart 3.1 below for a description of LED codes.
Figure 3.1 • Operational Indicator Lights
HOT
NEUTRAL
120V
EARTH
- 120V HEATER INPUT -
HIGH
LOW
24V
NEUTRAL
- 24V HEATER INPUT -
Light 1 (amber)
Indicates Low
Fire Mode
Light 2 (amber)
Indicates High
Fire Mode
Light 3 (green)
Indicates Pressure
Switch Closes
Operational Indicator Lights
Chart 3.1 • LED Fault Code Status (located internally on circuit board)
LED Code Fault Status Fault Code Delay*
Initial flash on power
up, then steady off
No fault,
normal operation
Steady ON Module failure / Internal fault No delay
1 flash Ignition failure 3 minutes
2 flashes
APS (Air Proving Switch)
(Fan / Intake / Exhaust)
3 flashes Lockout 17 minutes
Solenoid valve fault
4 flashes
Leaky valve
Flame amplifier fault
No flash on 117V startup Transformer fault No delay
*Some LED codes have a time delay before the LED will flash.
No delay
0 - 30 seconds
No delay
13

4.0 Troubleshooting Guide
4.0 Troubleshooting Guide
Turn up thermostat.
HL3 Series
Does the fan
blower turn on?
Yes
Find the source of the
electrical problem
between panel and
external transformer.
External transformer
is faulty and must be
replaced.
Is the power at the
No
heater 120V?
Yes
Does the heater have HLRP isolation
relays? (identified with orange
crescent around the terminal plug).
No
Find the source of the electrical problem between panel and heater.
No
Is there 120V on the
primary side of the
external transformer?
No
Is there 24 Volts from the
thermostat?
Yes
Is there 24V
to the
thermostat?
No
Is there 24V on the
secondary side of the
external transformer?
Yes
No
Find source of electrical problem between
the external transformer and thermostat.
Yes
No
Yes
Yes
The thermostat or wiring
is faulty and should be
replaced or repaired.
Troubleshooting with Optional HLRP Isolation Relays
Does the switch
light energize?
Repair the wiring
between the
transformer and
the 24V
terminal plug.
Yes
Does the igniter
warm up and
glow red?
Yes
Continued on page 16
No
Yes
No
Is the green light burnt out?
If so, replace.
Is there 24V
on the second-
ary side of the
transformer?
No
Replace transformer.
Is the igniter
physically
damaged?
No
Yes
Replace igniter.
No
Is the inlet or the outlet
of the unit plugged or
Yes
No
Is there 120V on
the primary side
of the internal
transformer?
No
Check voltage at igniter
sequence (usually 5 to 15
seconds after power to
heater). Is it 120V?
Yes
Is the resistance through
the igniter 50-400Ω?
14
No
obstructed?
No
Is the power
No
Repair the wiring between
power in and transformer.
No No
across the left
terminal of the
24V plug and
ground 24 Volts?
Is the inlet or the outlet
of the unit plugged or
obstructed?
Yes
Remove obstruction.
Yes

HL3 Series
4.0 Troubleshooting Guide
NOTICE
during normal operation or the heater’s built-in safety mechanisms will be compromised.
Without HLRP Isolation Relays:
Bypassing any switch is intended for testing purposes only. Do not leave switch bypassed
Start
Question
Is the power across
the 24V wire on the
circuit board and
ground 24V?
Process
Question
Yes
Is the power across
the t-stat wire on the
circuit board and
ground 24V?
No
The relay board is faulty
and must be replaced.
No
Key
Corrective
Action
Yes
With HLRP Isolation Relays:
Process
Question
Is the circuit
board sending
120V to the
fan?
Yes
Is the fan
obstructed?
No
Is the pressure
switch stuck in the
closed position?
Yes
Replace
switch.
Corrective
Action
Yes
No
Remove
obstruction.
Is there 120V on the
primary side of the
internal transformer?
Yes
No
Repair wiring between
power in and transformer.
Is the power across
the middle (low)
terminal of 24V plug
and ground (screw
on the Burner Control
Box) 24 Volts?
Yes
across the TH and
ground terminals
No
Repair thermostat or wiring from
thermostat to heater.
Check for loose wiring or
restrictions in hose connec-
tions to pressure switch.
Are they OK?
Yes
No
Replace wiring or hose connections.
The internal
transformer is
faulty and must
be replaced.
Is there 24V
on the circuit
board?
Yes
No
Correct wiring.
*A
fter 0-30 seconds of
non-operation has passed,
is there a flash code for
APS failure (2 flashes)?
No
Replace circuit board.
No
The circuit board is
faulty and must be
replaced.
No
No
Is the circuit
board sending
120V to the
Is the pressure switch stuck
in the closed position?
Yes
fan?
Replace the pressure switch after verifying:
• Baffle(s) are in the radiant tube furthest from
the burner.
Yes
• Heater, fan blowers ,squirrel cage, intake and
exhaust are clean and free from dirt and
obstructions.
• The 4” air intake pipe does not exceed 20 ft.
and/or 2 elbows.
• There is not a negative pressure experienced
at the area of air intake (e.g.; high winds, attic
space, tightly sealed building).
The fan is faulty and must be replaced.
Yes
Replace
pressure
switch
No
Is the fan
obstructed?
Yes
Remove
obstruction.
* Refer to LED diagnostic Fault Code Chart; p.13.
15

4.0 Troubleshooting Guide
Continued from page 14
HL3 Series
After igniter is
warmed up, does
gas valve open?
Yes
Does The
burner light?
Yes
Does the burner
stay on?
Yes
No
No
No
Test for 24V at valve opening period (usually 45 to 60 seconds
after power to heater). Is there 24V to valve for 8 seconds?
No
Replace circuit board.
Is the ball valve/
shut-off valve
in the ON position?
Yes
No
Turn on .
Does the burner stay on
for approx. 8 seconds
and then shut off?
Check to make sure gas pressure is within
minimum and maximum inputs, as indicated on
the heater’s rating plate. Is gas pressure OK?
No
Correct problem.
No
Does the burner come
on and turn off
immediately
(1 or 2 seconds)?
Yes
Check to make sure gas pressure
is within minimum and maximum
inputs, as indicated on the heater’s
rating plate. Is gas pressure OK?
Yes
Yes
Yes
Yes
Pressure
switch may
be faulty or
there is a
restriction in
the exhaust.
Does the heater
stay ON until a
call for heat ends?
Yes
Troubleshooting ends.
No
The heater can shut down due to:
• Improper grounding.
• High winds.
• Taking combustion air from the attic.
• Dirty environment.
• Improperly positioned baffles.
• Fluctuating gas pressure.
No
Correct problem.
16

HL3 Series
Check to make sure gas pressure is within minimum and
maximum inputs, as indicated on the heater’s rating plate.
Is gas pressure OK?
No
Correct problem.
Yes
4.0 Troubleshooting Guide
Replace gas valve.
Were the gas lines purged of air?
No
Purge gas line.
Is the heater properly
grounded? Is the heater’s
polarity correct?
Yes
With microampmeter, check DC
No
Correct problem.
If heater does not go into high fire mode:
Sensing rod is faulty or flame is weak.
Check to make sure heater is operating
at proper gas pressure as indicated on the
heater’s rating plate and then, if needed,
Yes
amperage at flame rod. Is it
greater than 1.0 microamps?
No
replace sensing rod.
Yes
Check to make sure flame
sensor wire is OK and then
replace circuit.
NOTE: To confirm that the heater is not in high fire mode, check manifold pressure.
If manifold pressure is 3.3” to 3.5” for natural gas or 9” to 10” for propane, the light is faulty and should
be replaced.
When the heater is in low fire mode, manifold pressure is approximately 2.0” to 2.5” for natural gas or
5.0” to 6.5” for propane. If this is the case, the following troubleshooting steps should be followed:
Is there 24V across the GROUND and HIGH
(HIGH to COM on heaters with optional
isolation relays) on the terminal strip located
on the outside of the control box?
No
Repair or replace faulty
wiring or thermostat.
Yes
Replace gas valve.
Measure voltage across the red wire
on the VALVE and GROUND (red wire
on RELAY to GROUND on heaters with
isolation relays). Is it 24V?
Yes
Replace relay.
17
No

5.0 Parts • Heater Components and Parts List
5.0 Parts
Figure 5.1 • Burner Assembly Components
3098
3094
85
83
333
84
3002A
331
76
3060
245
3099
212
25
70
3140, 3141
3008A
3252
1325
832
3044
68B
70A
331
332
219
826
851B
3010
204
3096
1018
264D/F, 1264A
3093
31D
3097
3011
3012
3001
222
50
217
10A
206
221
222A
205
3094A
3005A
9
5
3072, 201B
3004
383
321
HL3 Series
21B
3380
14
15
17
16
3003A
142 8
3033C
3014
3216
55A, 3215
828
Chart 5.1 • Parts List
Part # Description Part # Description
TP-5 Flange Gasket TP-70 1/2 in. Control Box Gasket (10.3 inches)
TP-9 Conduit Coupling TP-70A 1 in. Control Box Gasket (6 inches)
TP-10A Conduit 4” x 3/4” TP-76 Rubber Grommet
TP-14 Sight Glass Gasket TP-82 Reflector Center Support (RCS)
TP-15 Sight Glass TP-83 24 in. Stainless Steel Flexible Gas Connector
TP-16 Sight Glass Washer TP-84 1/2 in. Female / Male Flare Fitting
TP-17 Sight Glass Kit TP-85 1/2 in. Male / Male Flare Fitting
TP-19B 4 in. Wire Hanger with Tension Spring TP-105 Aluminum Reflector End Cap
TP-20C 120 in. Aluminum Reflector TP-106 Reflector End Cap Clips (8 pcs.)
TP-20D* 120 in. Stainless Steel Reflector T P -113 Reflector Tension Spring
TP-21B 4 in. Standard Tube Clamp TP-201B V.3 Mid-High Burner (Color Code - TAN)
TP-25 1/4 in. Female Spade Terminal (Qty. 3) TP-204 Gas Orifice (consult factory)
TP-26A 10 ft. Aluminized Radiant / Combustion Tube TP-205 Glo-Bar™ Holder
TP-26B 10 ft. Titanium Coated Combustion Tube TP-206 Glo-Bar™ Holder Spring Clip
TP-26D* 10 ft. 304 Stainless Steel Radiant Tube TP-212 1/2” x 3” Pipe Nipple
TP-26E* 10 ft. 409 Stainless Steel Combustion Tube TP-217 Brass Pressure Switch Barb Fitting
TP-31D Interlocking Mounting Bracket (Qty. 2) TP-219 Differential Vinyl Sensing Tube (burner)
TP-50 Glo-Bar™ Igniter TP-220 Stainless Steel Tube Clamp (150 & 200 MBH)
TP-55A 1/20 hp Inducer Assembly (50-150 MBH) TP-221 Glo-Bar™ Holder Gasket
TP-65I 36 in. Interlocking Turbulator Baffle TP-222 Flame Rod
TP-68B Large Strain Relief Bushing TP-222A Flame Rod Wire
* Optional upgrade or add-on item.
18

HL3 Series
Figure 5.2 • Tube & Reflector Components
5.0 Parts • Heater Components and Parts List
20C/D*
105
106
82
113
19B
105
26A/D*
579
26A/B/E*
21B, 220
65I
Part # Description Part # Description
TP-245 3/16” X 1/8” Plastic Gas Valve 90° Vent TP-3008A Gas Valve Mounting Bracket
TP-264D Differential Pressure Switch, 65 to 75 MBH TP-3 010 Service Panel Hinge
TP-264F Differential Pressure Switch, 150 to 200 MBH TP - 3 011 V.3 Igniter Box
TP-321 Ignition Plate Gasket TP-3012 V.3 Igniter Box Cover
TP-331 Green Self-Tap Ground Screw (Qty. 2) TP-3 014 Plastic Air Orifice with Screen
TP-332 Divider Grommet TP-3033C HL3 Power Entry Plate
TP-333 72 in. Black 120V Power Cord TP-3044 Gas Manifold
TP-383 Glo-Bar™ Igniter Plate TP-3060 V.3 Pressure Switch Mounting Bracket
TP-579 4 in. Wire Hanger w/o Tension Spring TP-3072 Low BTU Burner (Color Code - GREEN)
TP-826 40VA Transformer TP-3093 #8-23 Cage Nut (Qty. 4)
TP-828 24V Yellow Operational Indicator Light (Qty. 2) TP-3094A #8-32 x ½” Zinc Coated Steel Knurled Thumb
TP-832 Thermostat Terminal Strip
TP-851B 35-66 Diagnostic Circuit Board TP-3096 Valve Compartment Bottom Panel
TP-1018 Differential Switch Vinyl Sensing Tube (exhaust) TP-3097 Valve Compartment Top Panel
TP-1264A Differential Pressure Switch, 100 to 125 MBH TP-3098 Valve Compartment Side Panel
TP-1325 Optional HLRP Isolation Relay* (Qty. 2) TP-3099 Controls Mounting Panel
TP-1428 24V Green Operational Indicator Light TP-3140 36G54-224 Gas Valve - Natural Gas Assembly
TP-3001 Divider Panel TP-3141 36G54-226 Gas Valve - LP Gas Assembly
TP-3002A Plastic End Panel, Control Compartment TP-3215 1/15 hp Inducer Assembly (175-200 MBH)
TP-3003A Plastic End Panel, Fan Compartment TP- 3216 Reducer Plate (175-200 MBH)
TP-3004 V.3 Control Box TP-3252 4-Piece Wire Harness Set
TP-3005A Plastic Valve Chamber Lid TP-3380 V.3 16” HSI Burner Tube w/ Flange and Fittings
Screw (Qty. 4)
* Optional upgrade or add-on item.
19

Kit Contents Check List
Kit Contents Check List
Kit Contents - Reference the length column for your model.
HL3 Series Kit Contents
HL3 Series
TP-19B 4” Hanger with
Reflector Tension Spring
TP-83 24” Stainless Steel
Flexible Gas Connector
**TP-83A
Part No. Description 20 ft. 30 ft. 40 ft. 50 ft. 60 ft. 70 ft.
TP-19B 4” Hanger w/ Tension Spring 3 4 5 6 7 8
TP-21B 4” Tube Clamp 2 3 4 5* 6* 7*
TP-25 1/4” Female Spade Terminal 3 3 3 3 3 3
TP-82 4” Reflector Center Support 2 3 4 5 6 7
TP-83 24” S.S. Flexible Gas Connector 1 1 1 1 1 1
TP-10 5 Reflector End Cap 2 2 2 2 2 2
TP-10 6 Reflector End Cap Clips 8 8 8 8 8 8
LIOGT3 V3 General Tube Heater Manual 1 1 1 1 1 1
LIOHL3 HL3 Series Insert Manual 1 1 1 1 1
TP-82 4” Reflector
Center Support (RCS)
**TP-829**TP-19 C
TP-220 4” Tube Clamp
**TP-220
TP-105 Reflector End Cap
**TP-10 5A
LIOGT3 General Manual
Tub e H ea te r
General Manual
TP-106
Reflector
End Cap Clips
LIOHL3 HL3 Series Insert
HL3 Series
Insert Manual
TP-25 1/4”
Female Spade
Terminal
1
Filled By:
* NOTE: One 4” stainless steel tube clamp (P/N: TP-220) is provided for each 150,000 - 200,000 BTU/h model.
Place as shown on page 11.
** Part number for models upgraded with stainless steel options.
Approvals
• CSA.
• Indoor approval.
• Outdoor approval with OD-Kit.
• Commercial approval.
Limited Warranty
• 1 year - Burner box components.
• 5 years - Combustion and radiant tubes.
• 10 years - Stainless steel burner.
• See page 36 of the General Tube Heater Manual
for terms and conditions.
© 2014 Detroit Radiant Products Co.
21400 Hoover Road • Warren, MI 48089
Phone: (586) 756-0950 Fax: (586) 756-2626
www.detroitradiant.com • sales@drp-co.com
Printed in U. S. A.
20
 Loading...