

Page 1

he Bose Wave Radio/CD
Owner’s Guide
Page 2
WARNING: To reduce the risk of fire or eiectric shock, do not expose the Wave‘s Radio/CD
to rain or moisture.
As with any eiectronic product, use care not to spiii
iiquids into any part of the system. Liquids can cause
a faiiure and/or a fire hazard.
CAUTION
RISK OF ELECTRICAL SHOCK
DO NOT OPEN
CAUTION: TO REDUCE THE RISK OF ELECTRIC SHOCK,
DO NOT REMOVE COVER (OR BACK).
NO USER-SERVICEABLE PARTS INSIDE.
REFER SERVICING TO QUALIFIED PERSONNEL.
These CAUTION marks are located on the bottom and rear of your Wave Radio/CD:
The lightning flash with arrowhead symbol, within an equilateral triangle, is intended to alert
the user to the presence of uninsulated dangerous voltage within the system enclosure that
* ' may be of sufficient magnitude to constitute a risk of elecfric shock.
The exclamation point within an equilateral triangle, as marked on the system, is intended to
alert the user to the presence of important operating and maintenance instructions in this
owner’s guide.
CAUTION: To prevent eiectric shock, match wide biade of piug to wide siot, insert fuiiy.
ATTENTION : Pour éviter tes chocs éiectriques, introduce ia iame ia pius iarge de ia fiche
dans ia borne correspondante de ia prise et pousser jusqu'au fond.
Class 1 laser product
CLASS 1 LASER PRODUCT H
L“oSn’, “sKLTTf"" I CLASS 1 LASER PRODUCT label is located on the bottom
KLASS 1 LASER APPARAT H Tit
AVIS
RISQUE DE CHOC ÉLECTRIQUE
NE PAS OUVRIR
AFIN DE PRÉVENIR UN CHOC ÉLECTRIQUE NE PAS ENLEVER
LE COUVERCLE ARRIÈRE. IL NE SE TROUVE À L’INTÉRIEUR
AUCUNE PIÈCE POUVANT ÊTRE RÉPARÉE PAR
L'USAGER. S'ADRESSER À UN RÉPARATEUR COMPÉTENT.
This compact disc piayer is ciassified as a CLASS 1 LASER product. The
of the unit.
CAUTION: Use of controis or adjustments or performance of procedures other than those
specified herein may resuit in hazardous radiation exposure. The compact disc piayer
shouid not be adjusted or repaired by anyone except property quaiified service personnet.
Batteries
Please dispose of used batteries properly, following any local regulations. Do not incinerate.
Please read this owner’s guide
Please take the time to follow this owner’s guide carefully. It will help you set up and operate
your Wave Radio/CD properly, and enjoy all of its advanced features. Save your owner’s
guide for future reference.
Page 3

Where to fInA.M
Setting Up
Before you begin................................................................................................4
Unpacking the carton.......................................................................................... 5
Seiecting a iocation for your Wave® Radio/CD..................................................................5
Instaiiing the battery...................................................................................................6
Connecting the power cord.........................................................................................7
Adjusting the antennas............................................................................................... 7
Receiving cabie radio signais as an option.......................................................................7
Setting up the remote controi....................................................................................... 8
Connecting other components as an option
Operating Your Wave Radio/CD
Using the remote controi........................................................................................... 12
Using the Wave Radio/CD controi panei........................................................................13
Reading the Wave Radio/CD dispiay
Setting the time.......................................................................................................15
Customizing the dispiay............................................................................................ 15
Controliing the system.............................................................................................. 16
Using the radio.......................................................................................................17
Reading the radio dispiay.......................................................................................... 17
Using the CD piayer................................................................................................. 18
Reading the CD dispiay............................................................................................ 19
Setting the aiarms....................................................................................................20
Reading the alarm setup displays
Using the alarms.................................................................................................... 21
Maintaining Your Wave Radio/CD
Taking care of your Wave Radio/CD............................................................................. 22
Technical information............................................................................................... 22
Troubleshooting...................................................................................................... 23
Warranty period...................................................................................................... 23
Customer service.................................................................................................... 23
Index........................................................................................................................ 24
Quick Reference to Special Functions................................................................................ 28
Bose® Corporation
................................................................................
................................................................................
...................................................................
............................................................................
inside back cover
10
14
20
For your records
The serial number is located on the bottom of your system.
Wave Radio/CD serial number:
Purchase date:
We suggest you keep your sales receipt and warranty together with this owner’s guide.
Please complete and return the warranty card included with your system.
_______________________________
Page 4

Before you begin
Thank you for purchasing the Bose® Wave® Radio/CD.
Fourteen years of research by Bose Corporation bring you the benefits of award-winning
patented acoustic waveguide speaker technoiogy. Using this technoiogy, a tube efficientiy
transfers energy from a smail ioudspeaker to the outside air over a whoie range of bass
notes. And, by foiding iong waveguides into intricate patterns, they fit into products smaii
enough to be piaced comfortabiy in your home. There is a 27-inch (68-cm) iong waveguide
inside the Wave Radio/CD’s compact enciosure, enabiing this tabietop system to produce
room-fiiiing sound with fuil, rich bass.
Your Wave Radio/CD inciudes:
• Integrated system design for high acoustic quaiity requiring no compiex adjustments
• A high performance stereo tuner with 6 AM and 6 FM station presets
• A CD piayer inciuding skip, scan, random, repeat, and programming features
• Two independent aiarms, with battery backup power to save the settings for wakeup
during a power ioss
• A credit card-size infrared remote controi with optionai mounting strip
• Inputs for an additional sound source, such as a TV, VCR, computer, or tape player
To discover how easy it is to use your new Wave Radio/CD, follow the steps on the Quick Set
Up Guide and play the demonstration CD. Like most functions, it can be done with the press
of a single button. Some special functions are available by pressing button combinations (for
details, see page 28).
To fully appreciate all of these features, please take the time to follow this owner’s guide
carefully. It helps you set up and operate your system, and enjoy its high-fidelity sound.
Page 5

Unpacking the caifon
Figure 1
What comes with your
Wave Radio/CD
Carefully unpack your system. Save all packing materials for possible future use. The original
packing materials provide the safest way to transport your Wave® Radlo/CD. If any part of the
product appears damaged, do not attempt to use It. Notify Bose® Product Support Immedi
ately (see phone numbers on the Inside back cover).
Check to be sure your Wave Radlo/CD contains the parts Identified In Figure 1.
Remote control
Wave Radio/CD
Selecting a location for your Wave Radio/CD
Please keep these guidelines In mind when selecting a location for your system:
• Place the Wave Radlo/CD on a table or other flat surface.
• Do not place It on a metal surface or table that could Interfere with AM reception.
• Do not place It on a heat-sensItIve surface. Like all electrical equipment, It generates some
heat.
• Do not use the system In a damp location. It Is Important to prevent moisture from getting
Into the unit.
• Keep It at least 12 Inches (30 cm) from a television, computer, or other monitor to prevent
picture quality Interference.
• Locate It within 2 feet of a wall for the best bass performance.
• Place It across the room from where you will be listening to enjoy maximum performance
from the Wave Radlo/CD.
Feel free to place and position It where you find the sound most pleasing.
9V battery
Demonstration CD
Mounting strip
©
Lithium
battery
Page 6
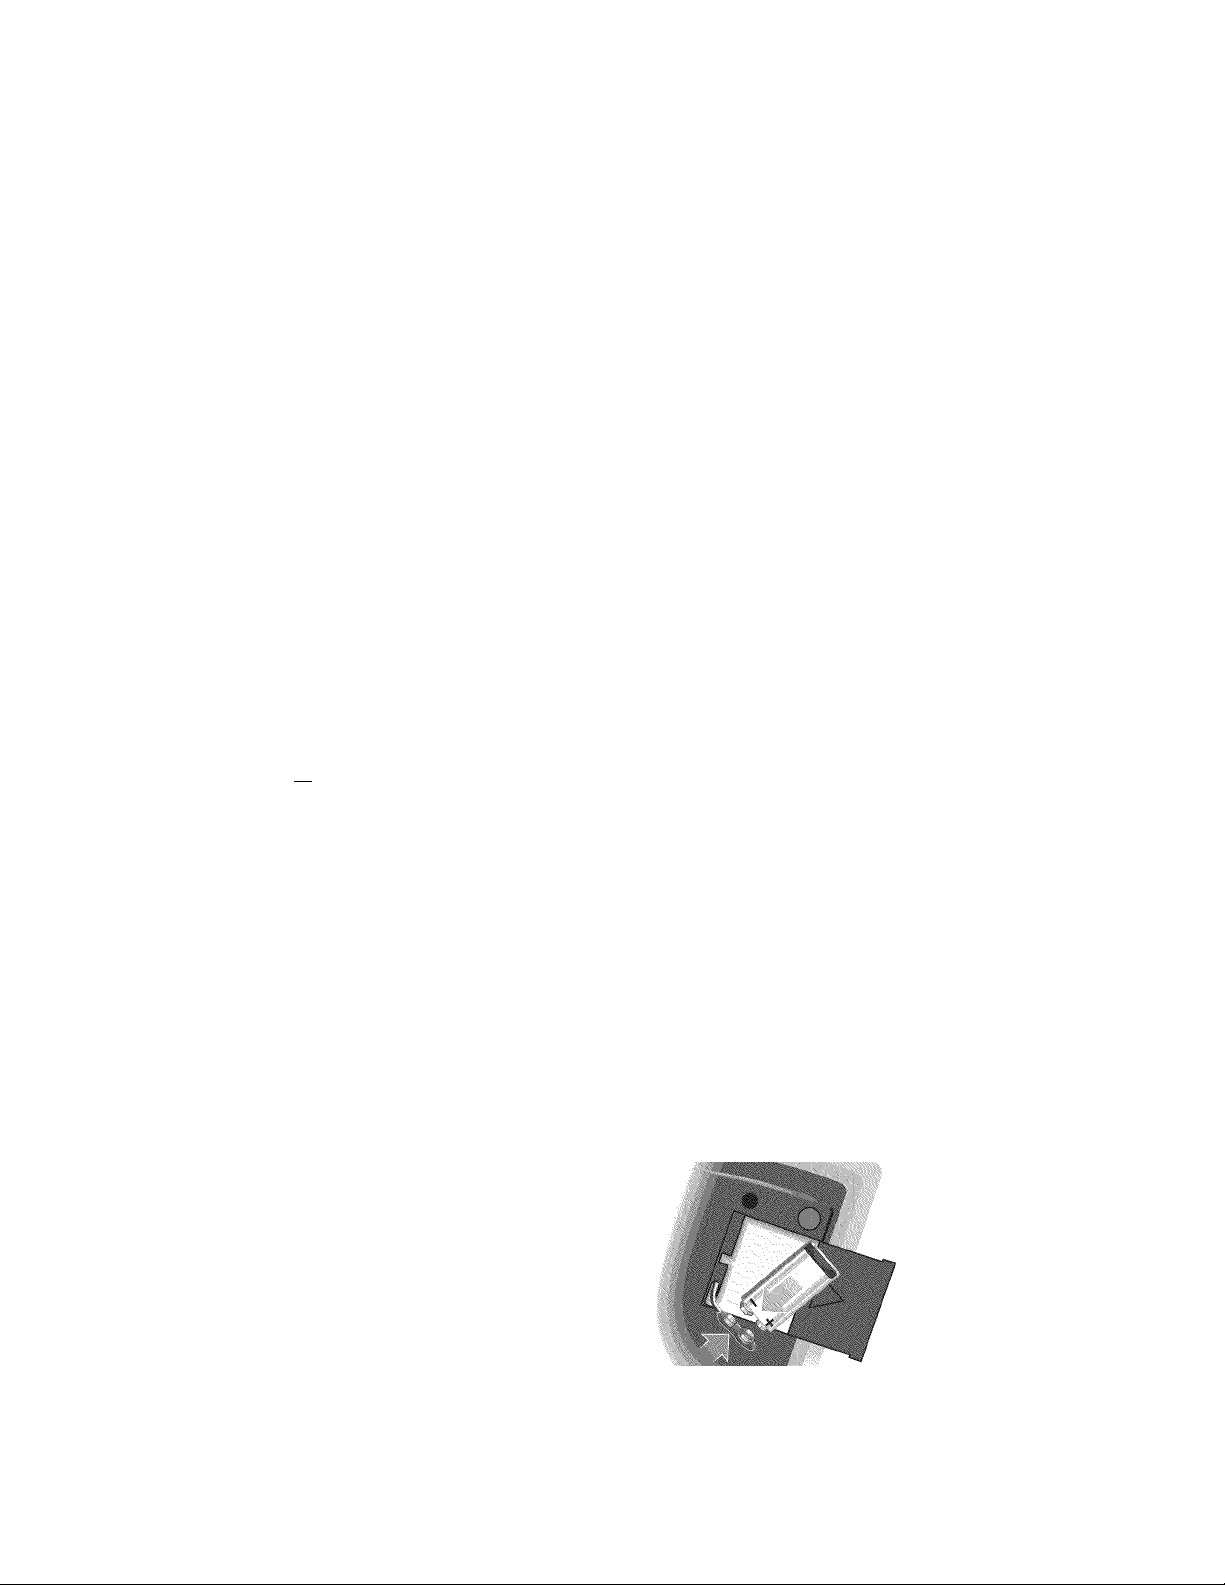
Instmlling the battery
jùk CAUTION: After you remove the transparent fiim, be sure to remove any CD before turning
The 9-volt battery maintains clock and alarm settings and operates the Wave® Radio/CD’s
backup alarm system for up to 24 hours, during a power loss or while the system is tempo
rarily unplugged. Operating without this battery leaves the memory unprotected, but will not
harm the product.
Use a standard 9V battery (IEC 6F22 in Europe), available at most retail stores. Use an
alkaline battery for longer backup time.
J' Note: The battery does not provide power for Wave Radio/CD operation or for the dispiay
1. Do not remove the protective transparent film with tabs from the front of the system. It
prevents the CD door from opening accidentally when you turn the system over.
2. Carefully turn your system upside down.
3. Locate the battery compartment on the bottom (Figure 2).
4. Press the arrow on the cover to slide the compartment open.
5. Match the large (-) terminal on the battery to the small terminal on the clip (which lifts out
of the compartment for easier connection).
6. Snap the terminals together firmly.
7. Slide the cover closed.
Note: Now is a good time to record the sériai number found on the bottom of your system.
Write it on your warranty card and in the space provided on page 3.
8. Turn the system right side up.
9. Remove the protective transparent film with tabs from the front of the system.
the system over With no fiim in piace, the CD cover opens freeiy whenever the system is
turned upside down, so a CD couid faii out.
Figure 2
Installing the battery
Page 7

Connecting the power cord
1. Unwind the power cord completely to ensure the best FM reception. The FM antenna is
built into the power cord.
2. Plug the power cord into an electric outlet (Figure 3). The display panel lights and the time
display begins flashing.
3. Press and hold either Time ^ or ► button to stop the flashing and set the time.
Figure 3
Connecting the power cord
Adjusting the antennas
With the FM antenna built into the power cord, adjusting the cord position affects FM radio
reception slightly. With the AM antenna built into the radio, turning the radio more to one side
or the other adjusts AM reception slightly.
Receiving cable radio signals as an option
To connect your system to receive the FM signal available from some cable TV companies,
contact your cable provider for assistance.
The cable screws onto threads of the FM 750 EXTERNAL antenna connector on the back of
the Wave Radio/CD. To make this connection easier, you may want to obtain a screw-on to
push-on RF adapter (available at electronics stores).
.A. CAUTION: Make sure the installation includes a signal splitter. It Is Important that only the
FM band, not the cable TV band, Is transmitted to the radio. This requires a splitter that filters
the signal to prevent any re-emisslons of the TV spectrum through the radio.
Page 8
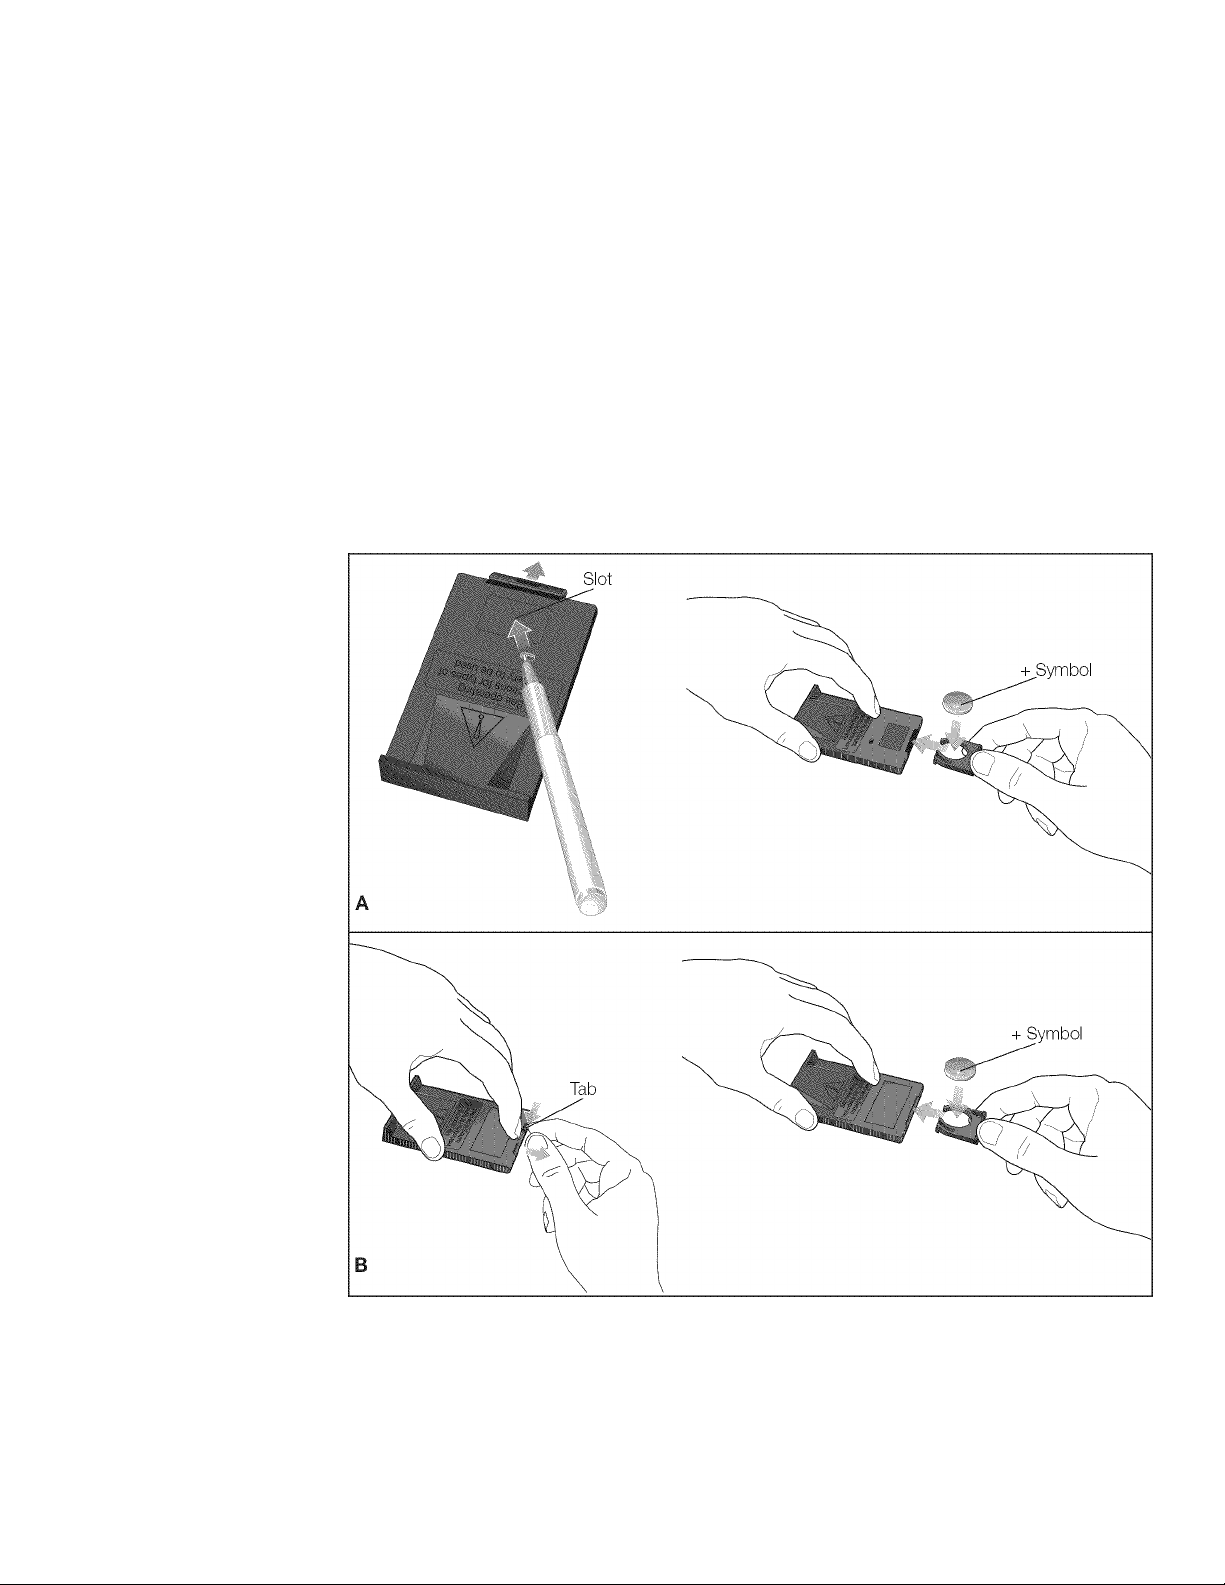
Setting up the remote control
WARNING: Keep the remote control battery away from children. It may cause a fire or
chemical burn if mishandled. Do not recharge, disassemble, heat above 212°F (100°C),
or incinerate. Dispose of used battery promptly. Replace only with a battery of the correct
type and model number.
Your remote control may be one of two types (Figure 4A or 4B). Each is identified by the way
the battery compartment unlocks to install or replace the battery.
1. Place the remote control face down on a flat surface.
2. If your remote has a slot on the back (Figure 4A), follow step A. Otherwise, follow step B
and refer to Figure 4B:
A. Insert the tip of a ballpoint pen into the slot. Push to the side as shown and hold. Slide
the battery compartment open with your finger.
B. Using your finger, push the tab lock to the side as shown and hold. Slide the battery
compartment open.
Figure 4A or B
Locating the safety lock
Page 9
Figure 5
Applying the mounting strip for
the remote control
J' Note: Use only a Duracell, Eveready Maxell, or Toshiba CR2032 or DL2032 lithium battery
(available at electronics stores). If you have difficulty finding a replacement battery contact
Bose"” Product Support (see phone numbers on the Inside back cover).
3. Keeping the remote control face down, insert the new battery into the compartment with
the + symbol facing up.
4. Gently slide the battery compartment closed. It locks automatically.
5. Use the supplied mounting strip if you want to attach the remote to a surface in your
listening room. Peel off the protective backing to stick one piece to the back of the remote
and the other to the selected surface (Figure 5).
Page 10

Connecting other components as an option
You can use your Wave® Radio/CD to improve the sound of a TV, VCR, computer, or tape player.
Or use it as extension speakers for a Bose® Lifestyle® music system. Connect one of these
components to the R (right) and L (left) AUX IN jacks.
To play your radio or CD player through external speakers, connect powered speakers with an
independent volume control to the system’s R (right) and L (left) LINE OUT jacks. Audio cables
for these connections are available at electronics stores.
Most audio cables are color coded. Match the red plug to the R (red) jack and the black or
white plug to the L (white) jack (Figure 6).
Note: Connecting external speakers does not shut off the Wave Radio/CD's speakers.
Figure 6
Connecting another component
Using other components
Select your TV, VCR, computer, or tape player, or other auxiliary source by pressing the AUX
button. Adjust the listening volume with the Wave Radio/CD volume buttons. Control all other
functions, including on and off, at the source, referring to its owner’s manual, if necessary. An
auxiliary component cannot be selected as the alarm sound source.
Control your auxiliary powered speakers from the Wave Radio/CD. Use the volume control on
the powered speakers to adjust the volume level.
10
Page 11

Component
Cable
Connection at
component
Connection at
Wa¥e Radio/CD Itlote
Portable tape player
CD changer, tape
deck, or VCR
Television or
computer
e .............
Bose® Lifestyle®
music system
One mlnlplug-tostereo audio cable
" j&s the player volume
•' -fea control to approxi
One stereo audio
cable
Use a standard RCA
cable for a TV with
stereo output jacks.
Use a standard Y
adapter for a TV with a
single (mono) audio
output jack.
You may need a special
adapter (such as a
miniplug stereo audio
cable) for a TV with a
headphone outlet.
stereo cable with
male-to-male RCA
plugs
Headphone jack
For best sound, set
mately % of maximum
volume.
Audio output jacks
If there are two sets of
oufpufs (fixed and
variable), use fixed so
the volume can
that
be controlled from the
Wave Radio/CD.
Audio output jacks
If there are two sets of
oufputs (fixed and
variable), use fixed so
that the volume can
be controlled from the
Wave Radio/CD.
TAPE (REC) jacks
AUX IN jacks
AUX IN jacks
AUX IN jacks
AUX IN jacks
AUX
€)
AUX
AUX
■0
AUX
IN
You can record from your Wave®
Radio/CD using the connections from
IN
the LINE OUT jacks.
To make sure the sound seems to
come from the screen, place the
Wave Radio/CD within a few feet of
IN
the TV. If fhere is any interference
with the TV picture, move the Wave
Radio/CD farther away.
CAUTION: To prevent interference
with the screen image, keep the
Wave Radio/CD at ieast 12 inches
from the TV, a computer, or other
monitors.
IN
Powered speakers Use the audio input Speaker system input
with volume cable that came with (as described in the
control your speakers. speaker owner’s
manual)
LINE CUT jacks
0
LINE
OUT
If your powered speaker audio inpuf
cable has three connectors on each
end, use only the two connectors that
look alike to connect to the Wave
Radio/CD outputs. DC NCT USE THE
THIRD CCNNECTCR.
Connecting speakers to the LINE CUT
jacks (fixed oufpuf) does not shut off
O
the Wave Radio/CD speakers, although
they can be MUTED while listening to
the external speakers.
11
Page 12

Using the remote control
You can use the remote control to operate the most frequently used functions of the radio,
CD player, and alarms. Aim the remote control at the display of your Wave Radlo/CD. Use the
remote buttons In the same way you use the system control panel.
The remote normally works up to 20 feet In front of the system, and 6 feet to either side.
Replace the remote control battery when It stops operating, or Its range seems reduced
(normally every year or two). Keep In mind that lighting and other room conditions. In addition
to battery age, can affect the operating range of an Infrared remote control.
You cannot use the remote control to set the time, alarms, CD random and repeat, or radio
presets, nor to customize the display.
Figure 7
The Wave Radio/CD remote
Turns the system on/off,
deactivates the alarm
Turns on CD play or pauses CD
Stops CD
Turns on FM
Turns on AM ■
Tunes radio, skips or scans CD ■
Turns system on and sets sleep time,
snoozes (delays) the alarm
Sleep A
Volume _
▼
Track
Tune
1 2
Presets
4 5
Wave Radio/CD
■ Raises or lowers volume
- Turns on AUX mode
- Mutes/unmutes the system
■ Turns on and selects a preset station
12
Page 13

Using the mdio/CD control panel
In addition to controiiing the most frequentiy used functions of the radio, CD piayer, and
aiarms, controi panei buttons ailow you to set the time, aiarms, CD mode, and radio presets
(Figure 8).
Using button combinations on the controi panei gives you access to additionai speciai
features (such as customizing the dispiay and programming the CD piayer). For detaiis, refer
to the “Quick Reference to Speciai Functions” on page 28.
Three raised dots on the Sleep/Snooze button of the controi panei help you locate this
frequently used button.
Figure 8
Sets the time
■ Turns Alarm 2 on/off
-Selects CD random/repeat
-Turns on AUX (auxiliary mode)
■ Turns on AM
13
Page 14

Reading the Wawe Radlo/CD display
Figure 9
The Wave Radio/CD display
Lights when Alarm 1 is
activated, flashes while
setting Alarm 1, and when
going off
ALARM I
■OFF 4'
ARM 2 AM i i—
A
Indicates the
Alarm 1 or 2
status in
setup mode,
shows nap
timer is on
Indicates
tone alarm
is set or
going off
Indicates
stereo reoeption
FM ( —(■
Indicates the
selected source
Shows ourrent time,
alarm time, sleep
time, snooze time,
nap time, AM/FM
frequenoy, CD time,
CD program item,
battery level
□ C
SLEEP
Indicates
CD is the
selected
source
n
AM
PM
Indicates
AM or PM
Flashes when
mute is
selected
Lights
when CD is
playing,
flashes for
pause or
low battery
MUTE
CD^
TRACK
REPEAT
RANDOM
Shows
volume,
FM or AM
preset
number,
CD track
number,
brightness
level
VOLUME-
iU
I I
PRESET
Lights for
presets and CD
programming
Lights when Alarm 2 is
activated, flashes while
setting Alarm 2, and when
going off
Indicates that sleep
or nap timer is
seleoted
Indicates which
CD play mode is
seleoted
14
Page 15

Setting the time
Function
To set the clock - Hold down either Time or ► button or press the same one twice.
The time dispiay changes slowiy at first, then faster. Reiease the ciock set button to stop.
Customizing the display
GDCID
Function
To set AM/PM (12 hour) or Military (24 hour) time - With the system off, hoid
down Alarm Setup and press On/Off to switch between AM/PM (12 hour) and Miiitary
(24 hour) time formats.
To select clock or source display mode - With the system on, hold down Alarm
Setup and press either Preset 1 to select clock display or Preset 2 to select source display.
• In clock display mode, the display shows the time while you are listening to the radio, CD,
or AUX.
• In source display mode, the display shows information about the selected source (radio,
CD, or AUX).
• In source display mode, press the Time ^ or ► to show the time momentarily.
To adjust the display brightness - The display dims automatically to medium or low
brightness, as appropriate for low light room conditions. You can adjust the brightness
setting of the display for both strong light and lowest light environments, but not for the
medium light setting. Turn the system off before setting brightness levels.
• In a strongly lit room, hold down CD Mode <=:►=> and press Volume A or T to adjust the
setting between 5 and 9 (it is preset to 8).
• In a barely lit room, hold down CD Mode and press Volume A or T to adjust the
setting between 1 and 5 (it is preset to 2).
• If you do not want the system to dim automatically, set both levels to 5.
To turn off the display - With the system off, hold down CD Mode and press
On/Off to turn off the main display. The display only lights briefly when you press any
buttons and while the alarm is sounding. Repeat this step to turn the main display back on.
hold ¿ind press
Alarm
Setup
i Alarm )
1 1
Lye-J
)
03 03
GDm
(* 1
LzJ
To check the volume setting when it is not displayed - With the system off or
on, hold down Alarm Setup and press Volume A or T to see the current volume setting.
To check the CD time or radio station frequency when it is not displayed -
With the system on, hold down Alarm Setup and press Track/Tune <3 or > to see the CD
time or station frequency.
To check the time when it is not displayed - With the system on or off, press the
Time ^ or ► briefly to see the current time.
f Alarm 1
1 Sutup j
Alarm
Setup
1 ^
1 -
-1
li > 1
H ► 1
15
Page 16

Controlling the system
Function
To turn on/off - Press On/Off once to turn on or off. The system turns
on to the last source played.
To select a source - Press FM or AM, CD, or AUX. To listen to a
component connected to AUX, be sure to turn on the component.
Pressing AUX does not turn on the component.
To adjust the volume - With the system on or off, press and hold
either button to reset the volume. The display shows the volume level,
from 0 (silent) to 99 (loud). With the system off, the maximum volume
you can preset Is 70.
To mute the sound - Using the remote control only, press to silence
the system. Press again to restore volume.
To shut off automatically - Press SleepVSnooze or Sleep to set
sleep time (timed shutoff).
• When sleep time Is first set, the display shows :I0 (minutes).
• Press again, or press and hold, to Increase the sleep time by
10-mlnute Increments, up to :90. After :90, the next press returns to the
sleep OFF setting, then begins again at :I0.
• Your selected sleep time Is held In memory for the next use of both
sleep and nap timer.
\
—
an
a
CD
Sleep/Snooze
Remi >te„c ontml
A
: Volume
Mute
—-
Sleep
J
To turn on automatically (as a nap timer) - Before setting the
nap timer, select your source and make sure that a radio station Is tuned
In or a CD Is In the player. Then, on the control panel only, hold down
Alarm Setup and press Sleep/Snooze to set the nap timer (to count
down and turn system on).
• The system Is silenced and the display shows either - :I0 (minutes) or
the last used nap or sleep time.
• Each additional press (or press and hold) of SleepVSnooze adds 10
minutes, up to - :90. The next press returns to the nap timer OFF
setting.
• You can check the time remaining by holding down Alarm Setup and
pressing Sleep/Snooze once.
• After the time counts down, the most recently selected source turns
on.
• Your selected nap time Is held In memory for the next use of both
sleep and nap timer.
hold
Alarm Ì
Setup J
and
press
16
Page 17

Using the i'adio
Function
To turn the radio on/off - Press On/Off once to turn on or off. The
system turns on to the last source played. Or, press FM or AM or any
Preset to turn the radio on.
To seek a station - Press Track/Tune <] or [> once to tune In the
next strong station. Repeat to locate a station you prefer. After manually
tuning (see below), wait 2 seconds for the system to return to seek
mode.
To manually tune in a station - Tap either Track/Tune <1 or [>
button quickly two or more times to tune the frequency In small steps.
Or, press and hold either Track/Tune <] or I> button until the desired
station Is reached. Then, you can press the button to adjust the fre
quency In small steps. After manually tuning, wait 2 seconds for the
system to return to seek mode.
To preset up to 6 AM and 6 FM stations - Use the Track/Tune
buttons to find the desired station. Then, on the control panel only, hold
down any Preset button until the preset number lights. The station Is
now preset to that number.
To select a preset station - Change to FM or AM, If needed. Press
the Preset button for the station you want.
rrw Remi >te -c ontml
@ ® ®
CZDCID
Track/Tune
< II >
CH3 C3Z3
CZD fT~)
C33) ( ^ ^ ]
© ®
- r ►
To display the selected station - If the display Is In clock mode
and the radio Is on, press FM (to check FM station) or AM (to check AM
station). Or, If you are not sure of the band, hold down Alarm Setup and
press Track/Tune <1 or |>.
Reading the radio display
Figure 10
An FM radio display example
Indicates FM is the
hold snd press
(.jq""' "] [
17
Page 18

Using the CD player
Figure 11
Setting up a CD
Lift the CD door (as shown). Place the CD, label-side up, on the spindle in the CD well. Gently
lower the door more than halfway, until it begins to close by itself. Or continue to close it
manually if you prefer.
Wm
Function
To turn on/off - Press On/Off once to turn on or off. The system turns
on to the last source played. Or, press CD Play ► llto turn on the CD
player. In CD mode, the CD begins to play as soon as you load a disc
and close the CD door.
To play or pause the CD - Press CD Play ► llto play the CD. The
play/pause ►lights. While playing, press CD Play ► llto pause the CD.
The play/pause ►flashes. After 10 minutes paused, the system shuts
off.
To stop the CD - Press CD Stop M. The display briefly shows the
disc’s total playing time. The number of tracks also shows.
To select a track - In CD mode, press either Track/Tune <3 or [>
until the desired track is selected.
Pressing Track/Tune <3 skips back to the beginning of the current track. A
second press within 2 seconds skips to the beginning of the previous track.
Pressing Track/Tune <1 at the beginning of the disc skips to the last track.
Pressing Track/Tune |> at the end of the disc skips to track 1.
To scan through a CD while playing - Press and hold
Track/Tune <3 or I> to scan through a track. Release the button to
stop. The display shows the track and playing time. After scanning,
wait 2 seconds to return to track selection.
To scan through a CD while paused - Press and hold Track/Tune
<3 or > to scan to the desired location. The play/pause ►flashes.
Press CD Play ► II to start at the selected position. Or, after scanning,
wait 2 seconds to return to track selection.
To scan through a CD while stopped - Press Track/Tune <3 or [>
once to change from total tracks display to track 1. Press and hold
Track/Tune <1 or C> to scan to the desired location. Press CD Play ► II
to start at the selected position. Or, after scanning, wait 2 seconds to
return to track selection.
n
Track/Tune
Track/Tune
cm) (ZED
Track/Tune
cm cm
a
Track/Tune
a
Reiffi
n
ite control
■
/A; r g/
18
Page 19

Functioti
To display CD information - If the display is in clock mode (see
page 15) and the CD is playing, hold down Alarm Setup and press
Track/Tune <3 or I> on the control panel only.
'ontrmpane/}^ Renu >fe a mtrol
iinciuTune
< f >
To display playing time for one track - After pressing CD Stop I
press Track/Tune <1 or [> to display total time for the selected track.
Press CD Play ► II to play the selected track.
To display elapsed or remaining time for a track or disc - In
play or pause mode, hold down Alarm Setup while pressing
CD Play ► II on the control panel only to change the display through
this sequence: elapsed track time, elapsed disc time, remaining track
time, and remaining disc time.
To select random and/or repeat play - Pressing CD Mode
selects between four random/repeat modes and regular CD play in the
following sequence:
RANDOM (plays all tracks randomly, one time each)
REPEAT RANDOM (repeats the disc in a new random order each time)
REPEAT (repeats the disc continuously)
TRACK REPEAT (repeats the selected track continuously)
TRACK (each track is played in regular order)
Repeat modes stop automatically after 24 hours.
To set continuous music - In CD play mode, to select a source to
play automatically after the CD ends, hold down Alarm Setup and
press FM, AM, or AUX on the control panel only. The selected source
lights on the display. Cancel continuous play by pressing CD Stop ■ or
On/Off.
GU
Track/Tune
CZDCIED
:0 SroG
• _
Track .
Tune '
Ф
To use the CD hold feature - In CD play mode, if you select
another source, the CD player holds your place for 10 minutes so you
can switch back to CD where you left off.
To program a CD - See “Quick Reference to Special Functions” on
page 28.
Reading the CD display
Figure 12
A CD display example
Shows CD elapsed time,
CD remaining time,
CD total time, ~
CD programming
(PrOi, Pr02...)
Indicates CD is the
selected source
Lights when CD is playing,
flashes for pause
J TRACK
REPEAT
RANDOM
Indicates which CD play mode is selected
iU .
I I
PRESET-
Shows CD
'track number
_ Lights for CD
programming
19
Page 20

Setting the alarms
Note: You can set alarms with the Wave Radio/CD on or off.
Function
■ro|
panel
To enter alarm setup mode - Press and release Alarm Setup. The system is now in alarm
setup mode. ALARM 1 flashes for 10 seconds.
To select which alarm to set - While ALARM 1 is flashing, set alarm time, volume, and alarm
sound (tone •>)), radio, or CD), for Alarm 1. Press Alarm Setup again until ALARM 2 is flashing.
While it flashes for 10 seconds, begin to set Alarm 2.
To set the alarm time - While the selected alarm is flashing, press the Time ^ or ► to set the
alarm time. The selected alarm flashes for 10 seconds.
To set the alarm source - While the selected alarm is flashing, press FM, AM, or CD to select
and display that source. The tone •>)) is no longer selected.
• To reset to tone, press the source currently selected (FM, AM, or CD), which deselects it.
• When no source is displayed, the alarm is set to tone •>))■
• Setting FM or AM alarm, the station last used for this alarm is shown. Or, use Presets or
Track/Tune <3 or |> to select a station.
• Setting CD alarm, track 1 is shown. Or, use Track/Tune <3 or I> to select a specific track or time
location for the alarm. Press CD Mode to select RANDOM or TRACK REPEAT. The CD
plays, repeating as needed, until the alarm shuts off.
• To set radio or CD followed by tone •>)), select radio or CD alarm, then press •>)) CD Stop M.
AUX is not available as an alarm source.
To set the alarm volume - While the selected alarm is flashing, press Volume A or T to set
the alarm volume, from 10 to 99. The selected alarm flashes for 10 seconds.
I Setup J
f AlBrm \
{ Setup J
pFlfFl
Track/Tune
m
( ^ )
To test the alarm volume - While the selected alarm is flashing, hold down Alarm Setup and
press Volume A or T to hear the volume setting, as demonstrated by the tone •>)) alarm only.
To adjust snooze time - The system is set for a standard 10-minute snooze time (the number
of minutes you can delay the alarm). While the selected alarm is flashing, hold down Sleep/Snooze
and press the Time ^ or ► to adjust the snooze time (from 1 to 30 minutes) for that alarm. The
number of minutes and Sn appear on the display to confirm your selected snooze time. You can
set a different snooze time for each alarm.
To exit from alarm setup - To leave alarm setup mode, wait 10 seconds for it to disengage.
Or you can press AUX once or Alarm Setup a few times until there is no ALARM 1 or ALARM 2
flashing.
To check the alarm setting - To display the alarm setting for 10 seconds, press and release
Alarm Setup. Press again to display one alarm setup and repeat to display the other alarm setup.
Reading the alarm setup displays
Figure 13
Examples of alarm setup
displays
ALARM 1
OFF •»)
ALARM 1 flashes. You can begin by setting the time.
ALARM I
OFF
Pressing FM selects it as the source for ALARM 1.
_ •! II 1 AH
J-U U
VOLUME
E'5
PRESET
OFF •>))
ALARM 2
Setup j
ALARM 2 flashes. You can begin by setting the time.
©
(
1
OFF
ALARM 2
Pressing CD selects it as the source for ALARM 2.
Sleep/Snooze ^
L^uiJ
f "Ala rm
[ Setup J
fi—' fi—a g—a VOLUME
1^*1 II |am
u-uu cb
1 1*1 II 1 I
U*U U TRAct 1
'Tl
20
Page 21

Using the alarms
Function
To turn Alarm 1 or Alarm 2 on/off - On the control panel only,
press Alarm 1 to activate this aiarm; ALARM 1 iights on the dispiay.
Press again to deactivate that aiarm. Press Alarm 2 to activate this
aiarm; ALARM 2 iights on the dispiay. Press again to deactivate that
aiarm.
The aiarms go off at the time, voiume, and source you have set for each.
To stop the alarm - Press On/Off. The aiarm indicator remains iit,
since the aiarm automaticaiiy resets to repeat daiiy. Use the Alarm 1 or
Alarm 2 button to deactivate the aiarm.
Or, if you do not press On/Off, the tone •>)) aiarm shuts off in 30 minutes,
the radio or CD aiarm shuts off in 60 minutes. If the aiarm is set for radio
or CD foiiowed by tone -i), the music piays for 10 minutes, then the
tone •>)) sounds for 30 minutes.
To use the snooze option - Press S/eepSnooze or Sleep to have
the aiarm snooze for either 10 minutes or your customized snooze time.
(See instructions for adjusting snooze time on page 20.) During the deiay,
the ALARM icon fiashes and Sn appears on the dispiay. After the siient
snooze time, the aiarm begins again as you have set it.
To change the duration of the current snooze only, press Sleep/Snooze or
Sleep once to display the remaining snooze time. Press the Time ^ or ►
while remaining snooze time is displayed to increase or decrease the time.
You can repeat the snooze cycle as many times as you want.
Li. Beitiftccfntml
Alarm 2
On/Oti
CIDGD
Sleep
To change the volume of the alarm while it is sounding - The
radio, CD, and tone •>)) alarms turn on and gradually increase to the
selected volume setting. To change the volume for one use only, press
Volume A or T while the alarm is sounding.
To use the alarm during a power failure - On the control panel
only, press On/Off to silence. The backup battery maintains the alarm for
approximately 24 hours without AC power. To conserve power in backup
mode, (1) only the tone alarm sounds (even if radio or CD alarm is
selected), (2) the display is off, and (3) the remote does not operate the
system. Normal operation resumes when power is restored. Replace the
9V battery after an extended power failure.
CID
CID
Volume '
▼
21
Page 22

Taking cam of your Wawe Radlo/CD
The only necessary maintenance is cleaning and periodic battery replacement.
Handling CDs
Handle discs by their edges to prevent fingerprints and scratches.
To remove stains or fingerprints from the surface of a disc, use a soft,
lint-free, dry cloth. Wipe in straight movements from the center of the
disc to the outside. Do not use any chemical products; they can
damage the disc.
Do not write on, or attach labels to the surface of the disc.
To minimize exposure to dust and dirt, replace discs in their cases
after use. Store each disc in its case, out of direct sunlight, high
temperatures, and humidity.
Cleaning your Wave Radio/CD
Use only a cloth to clean the outside of the Wave Radio/CD. If neces
sary, you may use a soft-bristled attachment to gently vacuum the
front of the system.
Do not use any solvents, chemicals, or cleaning solutions containing
alcohol, ammonia, or abrasives. Do not spray cleaners directly on the system. Do not allow
liquids to spill into any openings on the system.
CAUTION: If liquids get into the product, turn the system off. Call Bose"” Product Support as
soon as possible to arrange for service (see phone numbers on inside back cover).
Replacing the batteries
To maintain your Wave Radio/CD’s memory and backup alarm system, replace the 9V battery
every year or whenever you have an extended power loss. A dead battery may leak and
cause damage. Do not unplug your Wave Radio/CD from the power outlet while replacing the
battery. If you do unplug it, you will need to reset the clock and alarm settings.
Follow these steps to check the low-battery indicator:
1. Turn the system off.
2. Hold down Alarm Setup, and press CD Stop. The display indicates the remaining battery
For further information on replacing the backup battery, see “Installing the battery” on page 6.
For information on replacing the remote control battery, see “Setting up the remote control” on
page 8.
Technical information
Power rating
120V- 50/60 Hz SOW
power:
• Hi or number 78 or above mean adequate voltage to provide backup power.
• Number 77 or below means limited voltage.
• Lo means the voltage is too low for the battery to function. The play/pause ► flashes
to alert you to replace the battery soon.
22
Dimensions
14"W X 8V2"D X 4ye"H (35.6 cm x 21.6 cm x 11.1 cm)
Weight
7.4 lb (3.4 kg)
Page 23

Troubleshooting
Problem
System does not function
What to do
• Make sure the power cord is fully plugged into an operating AC wall outlet.
• Press On/Off to see if the display lights. The main display may be turned off (see page 15).
No sound • Increase the volume.
• Press the MUTE button on the remote control to unmute the sound.
• Be sure CD is loaded correctly.
• Check the connections for any auxiliary component.
• Select AUX to hear a source connected to the AUX IN jacks.
• Be sure that the component (connected to AUX IN) is turned on.
Remote control
is inconsistent
or does not work
• Check remote control battery and its polarity (+ and -).
• Replace battery, if necessary (see page 8).
• Operate the remote control closer to the system.
• Check for interference from room lighting or sunlight, or for dust or dirt on the lens. Try the
system in a different location.
AM reception is weak
• Adjust the internal AM antenna by turning the Wave Radio/CD slightly to one side or
the other.
• Move the radio farther from a TV, refrigerator, fluorescent lights, halogen lamps, dimmer
switches, or other electronic equipment that generates electrical noise.
• If neither suggestion works, you may be in an area of weak AM signal coverage.
FM reception is weak
• Extend the power cord as much as possible. The FM antenna is in the power cord.
• Move the power cord to adjust the FM antenna.
• If you still have problems with FM reception, you may need an external FM antenna. Call
Bose® Product Support to request one (see phone numbers on the inside back cover).
CD does not play • Check to see if the play/pause ► in the display is lit.
• If the play/pause ► is flashing, the disc is paused. Press CD Play ►llto play.
• Check to see if there is a disc in the player, label-side up.
• There may be dust or dirt on the CD. Clean the CD. See “Flandling CDs” on page 22.
• The disc may be defective. Try another disc.
• The Wave Radio/CD cannot play a DVD.
Display does not show the
expected information
• Check “Customizing the display” on page 15 or “Quick Reference...” on page 28 to change
the display settings (12 or 24 hour clock, display on or off, elapsed or remaining CD time).
• Unplug and reconnect the system to return to original settings.
Warranty period
The Bose® Wave Radio/CD is covered by a limited 1 -year transferable warranty. Details of the
warranty are provided on the warranty card that came with your Wave Radio/CD. Please fill
out the information section on the card and mail it to Bose.
Customer service
For additional help in solving problems, contact Bose Product Support. See the inside back
cover for Bose Corporation offices and phone numbers.
23
Page 24

acoustic waveguide 4
Aiarm 1 13, 14, 20, 21
Aiarm 2 13, 14, 20, 21
ALARM 1 or 2 indicator 20, 21
Aiarm Setup 13, 15-17, 19, 20, 28
aiarm time 14, 20
alarm volume 20, 28
alarms 4, 10, 12, 13, 20, 21
AM 4, 5, 12-14, 16, 17, 19, 20, 23
AM antenna 7, 23
AM reception 5, 23
AM/FM 17
AM/PM (12 hour) time 15, 28
antenna connector 7
automatic shutoff 16
automatic turn on 16
AUX 10-13, 15, 16, 19, 20, 23
AUX IN jacks 10, 11,23
auxiliary source 10, 23
B
backup alarm 6, 22
bass 4, 5
batteries 2, 5, 22, 23
battery (remote control) 4, 6,12, 21, 23
battery backup 4, 6, 21
battery carrier 8, 9
battery compartment 6, 8
battery voltage 14, 22
brightness level 14, 15, 28
C
cable radio signal 7
CD 4, 5, 7, 10-14, 16, 18-23, 28
CD changer 11
CD door 6,18
CD hold 19
CD Mode 13, 15, 20, 28
CD player 4, 10, 12, 13, 18, 19, 28
CD programming 4, 13, 14, 19, 28
CD Stop 18, 20
CD time 15, 23, 28
cleaning 22
clock 7, 13, 15, 17, 19, 20, 22
clock display 15, 23, 28
clock mode 17, 19
clock set 7, 15, 20
compact disc 2
computer 4, 5, 10, 11
connections 23
continuous music 19, 28
control panel 12, 13, 15-21,28
countdown 16
customer service 23
dim setting 14, 15, 28
dimensions 22
dimmer switch 23
disc 2, 18, 19, 22, 23, 28
display 6, 7, 12-23, 28
display brightness 14, 15, 28
DVD disc 23
E
elapsed disc time 19
elapsed time 19, 23, 28
elapsed track time 19
electrical noise 23
external antenna 7, 23
F
fluorescent lights 23
FM 4, 7, 12-14, 16, 17, 19, 20, 23
FM 750 EXTERNAL antenna connector 7
FM antenna 7, 23
FM reception 7, 23
frequency 14, 15, 17, 28
H
heat 5, 8
I
infrared 4,12
interference 11,23
Lifestyle® music system 10, 11
LINE OUT jacks 10, 11
lithium battery 9
location of system 5, 23
low-battery indicator 22
M
memory 6
military (24 hour) time 15, 28
moisture 2
monitor 5, 11
mounting strip 5, 9
music center 23
MUTE button 23
mute 14, 16
N
9V battery 5, 6, 21,22
nap timer 14, 16, 28
O
ON/OFF button 13, 21
On/Off 15, 16, 17, 18, 19, 21,23
24
Page 25

pause 14, 18, 19, 23, 28
play 12, 13, 14, 18, 19, 23, 28
playing time 18, 19
portable tape player 11
power cord 7, 23
power failure 6, 21,22
power rating 22
powered speakers 10
PrOI 19, 28
PRESET indicator 17
preset number 14,17
preset station 12,13,17
Preset buttons 20
presets 4, 14,17
product support 5, 9, 22, 23
programming a CD 4, 13, 14, 19,
28
radio display 17
radio reception 7, 23
radio station 15, 16, 28
RANDOM 19
random modes 4, 13, 19, 20
RCA cable 11
remaining disc time 19
remaining time 16, 19, 21,23, 28
remaining track time 19
remote control 4, 5, 8, 9, 12, 13, 16-19, 21-23
REPEAT 19
repeat modes 4, 13, 19, 20, 21
stereo tuner 4
T
tape player 4, 10,11
television 5, 11
time 2, 7, 12-15, 21,28
timed shutoff 16
tone 21
tone alarm 13,14, 21
total disc time 19
track 14, 18-20, 28
Track/Tune 15, 17, 18, 19, 28
transparent film 6
troubleshooting 23
turn on automatically 16
tuning 4, 12, 13, 17-19
TV 4, 7, 10, 11,23
U
unmute 23
unpack 5
V
VCR 4, 5, 10, 11
voltage 2
volume 10-13, 15, 16, 20, 21, 23
volume control 10, 11
volume setting 15, 21,28
W
warranty 3, 4, 5, 23
waveguide 4
weight 22
safety information 2
scan 4, 12, 13, 18
seek 17, 18
serial number 3, 6
shut off automatically 16
signal splitter 7
skip 4, 12, 13, 18
sleep mode 12, 13,14,16, 20, 21
Sleep/Snooze button 13
Sn 20, 21
snooze mode 12, 13, 14, 16, 20, 21,
source display 15, 20, 23, 28
station frequency 15, 17, 28
station presets 4,12,13, 17
stereo reception 17
28
25
Page 26

26
Page 27

27
Page 28

Fumctloii
use when...
ED
Alarm
betup
dJ
To use the nap timer
To adjust the snooze time
To test the aiarm volume
To set AM/PM (12 hour) or Military (24 hour) time
To check backup battery power level
To adjust the display brightness
To turn the display on/off
To check the volume setting
To check the CD time or radio station frequency
system is on or off
see page 16
in aiarm setup mode
see page 20
in aiarm setup mode
see page 20
system is off
see page 15
system is off
see page 22
system is off
see page 15
system is off
see page 15
voiume setting is not dispiayed
see page 15
dispiay is in ciock view or off
see pages 15, 17, 19
1 Setup J
f A/arm""^
[ Setup J
hold press
1 CPSfoirJ
i Alarm \
1 J
J Alarm J
f Alarm i
1 Setup J
............
j
a
f CD Macfel
llllflK/IIIIK:
ll:■||J^nulh!
GD
_ , , . . . , .. in piay or pause mode
To display elapsed or remaining time for a track or disc ^ ^ ^
_ ^ . in CD mode
To set continuous music
To program a CD - You can program up to 32 CD tracks.
1. Piace the seiected disc in the CD piayer.
2. Press CD Stop M.
3. Hoid down Alarm Setup and press CD Stop M. The dispiay shows PrOI to indicate
programming mode is ready for your first seiection.
4. Use Track/Tune
5. Hoid down Alarm Setup and press CD Mode to program this track. The program
counter shows Pr02 for the next seiection.
6. Continue to seiect tracks (Pr03, Pr04, etc.) untii your iist is compiete.
7. To iook through your programmed iist, hoid down Alarm Setup and press Track/Tune
<3 or I>. You can change an item whiie you are viewing it by foilowing steps 4 and 5. To
add more items at the end of your iist, re-program (step 5) the iast entry to continue
adding seiections.
8. Press CD Play ► II to piay the seiected tracks once each. The programmed tracks are
shown with the PRESET icon iit.
9. To erase the program, press CD Mode
<1
or ^ to seiect a track.
see page 19
see page 19
Note: Your program is saved until erased. The program plays all applicable track selec
tions for any disc in the CD player
28
Page 29

USA & Canada Sales
Bose Corporation, The Mountain
Framingham, MA 01701-9168
1-800-637-8781
USA & Canada Serwice
Bose Corporation, The Mountain
Framingham, MA 01701-9168
1-800-637-8781 or
508-879-7330, x63055
European Office
Bose B.V., Nijverheidstraat 8
1135 GE Edam, Nederiand
TEL 0299-390111 FAX 0299-390114
Australia
Bose Pty Limited
1 Sorreii Street
Parramatta NSW, 2150
TEL 02 9204-6111 FAX 02 9204-6122
Deutschland
Postfach 1468
48504 Nordhorn
TEL 0130-863 912
FAX 05921-833250
France
6, Rue Saint Vincent
78100 Saint Germain en Laye
TEL 01 -3061 6363 FAX 01 -3061 4105
Nederland
Nijverheidstraat 8
1135 GE Edam, Nederiand
TEL 0299-390111 FAX 0299-390114
United Kingdom
Freepost (EX 151)
Exeter
EX1 1ZY
TEL 0800 614 293 FAX 0180 240 2013
World Wide Web
www.bose.com
Page 30

 Loading...