

Bosch Motion Detector Instruction Manual

Motion Detector
Instruction Manual
Bosch Smart Home

Start making your home smart! Set up your product in just three steps
Ensure that you have a Bosch Smart
Home Controller and the Bosch Smart
Home App, and that you have set both
of them up successfully.
▶ Separating the
housing and
mounting bracket
▶ Start the Bosch
Smart Home App and
select “Add device”
▶ Scan the QR code
and follow the
instructions
Please be sure to install the
Bosch Smar t Home Controller first.
You can also use the explanatory video on our website to help
you install your Bosch Smart Home Motion Detector more ea sily:
www.bosch-smarthome.com/installation

5
Congratulations on purchasing your Bosch Smart Home Motion Detector. It will
help you to make your home even safer and smarter. It reliably detects movement
using passive infrared technology, an additional temperature sensor and an intelligent algorithm. Thanks to the integrated pet immunity function, false alarms triggered by pets weighing up to 25 kg can easily be avoided. The Bosch Smart Home
App immediately warns you in the event of unauthorized entry into your home or if
the Motion Detector is tampered with. The Motion Detector is quickly integrated into
your system via the Bosch Smart Home Controller.
We hope you enjoy your new product,
The Bosch Smart Home Team
Dear customer,

6 7
TABLE OF CONTENTS
1.0 Product description .................. 08
1.1 Intended use .............................. 09
2.0 In the box .................................. 10
3.0 Warning notices ........................ 12
3.1 Explanation of symbols .............. 12
3.2 Safety instructions ..................... 13
4.0 The motion detector.................14
4.1 Product overview........................ 14
5.0 Installation and setup ............... 18
5.1 Separating the housing
and fixing bracket ....................... 19
5.2 Starting the app and
scanning the QR code ................ 20
5.3 Inserting the battery
compartment ............................. 21
5.4 Configuring the device ................ 22
6.0 Fixing ......................................... 23
6.1 Fixing instructions ...................... 23
6.2 Choosing the type of fixing ......... 28
6.3 Corner fixing with screws ........... 30
6.4 Corner fixing with
adhesive tape ............................. 32
6.5 Wall fixing with screws................ 34
6.6 Wall fixing with adhesive tape ..... 36
6.7 Selecting pet immunity or
sneak-by guard ...........................38
6.8 Inserting the Motion Detector
into the mounting bracket........... 41
7.0 Functional test .......................... 42
8.0 Product details ..........................43
8.1 Technical data ............................43
8.2 Declaration of conformity ........... 45
8.3 Faults in radio operation ............. 46
8.4 Environmental protection
and disposal ............................... 47
9.0 Further information .................. 48

8 9
The network-enabled Motion Detector
with passive infrared technology
(PIR) is equipped with the following
components:
▶ Lens with 7 x 11 segments
▶ 90° and 12 m detection range
▶ Sneak-by guard or pet immunity
▶ Theft protection
▶ One long-life, replaceable battery
The device reliably warns you in the
event of unauthorized entry into your
house or your apartment. The app
provides information on the room and
the time of the alarm.
1.0 PRODUCT DESCRIPTION 1.1 Intended use
Do not modify the product in any way. Any other use is considered
unintended use. We will not assume liability for any resulting damage.
The product must only be used together
with original Bosch Smar t Home components, and is for indoor use only.
▶ Follow the safety instructions and the
directions in this manual and the Bosch
Smart Home App to ensure that the
product is set up correctly
▶ Please note the details in
the Technical Data section
(see p. 43)
▶ Avoid installing in areas prone
to high amounts of dust, direct
sunshine or heat
10 11
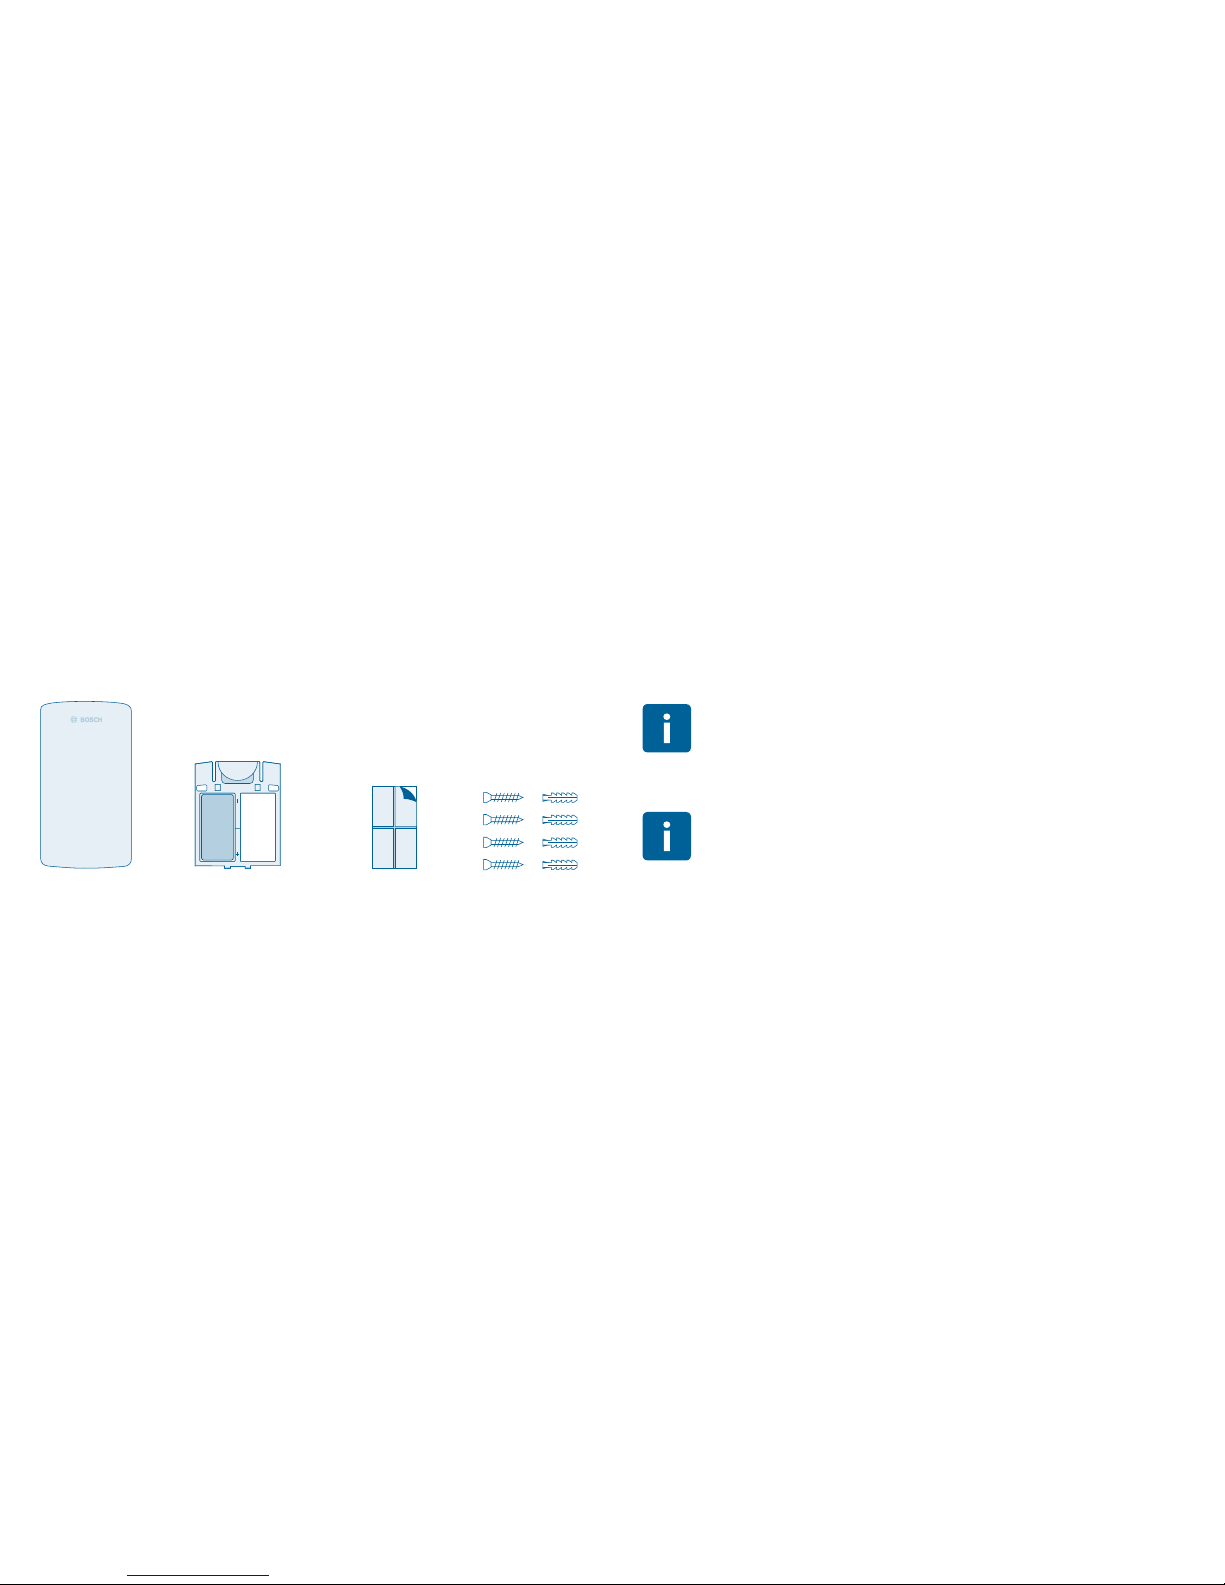
2.0 IN THE BOX
Motion
Detector
Battery compart-
ment with 1 battery
4 adhesive tapes 4 screws
4 plugs
To operate the Motion Detector you will require the app,
a Controller and an internet connection.
The scope of delivery includes a battery (123A) with a typical service
life of around five years. For a longer service life, you can also insert a
second battery into the battery compartment.
Optional

12 13
3.0 WARNING NOTICES
3.1 Explanation of symbols
3.2 Safety instructions
Info.
Indicates important information.
Warning.
This alerts you to danger.
Proper handling of batteries
▶ Take the batteries out of the device if it is not used for
a prolonged period of time
▶ The enclosed batteries are not suitable for charging
14 15
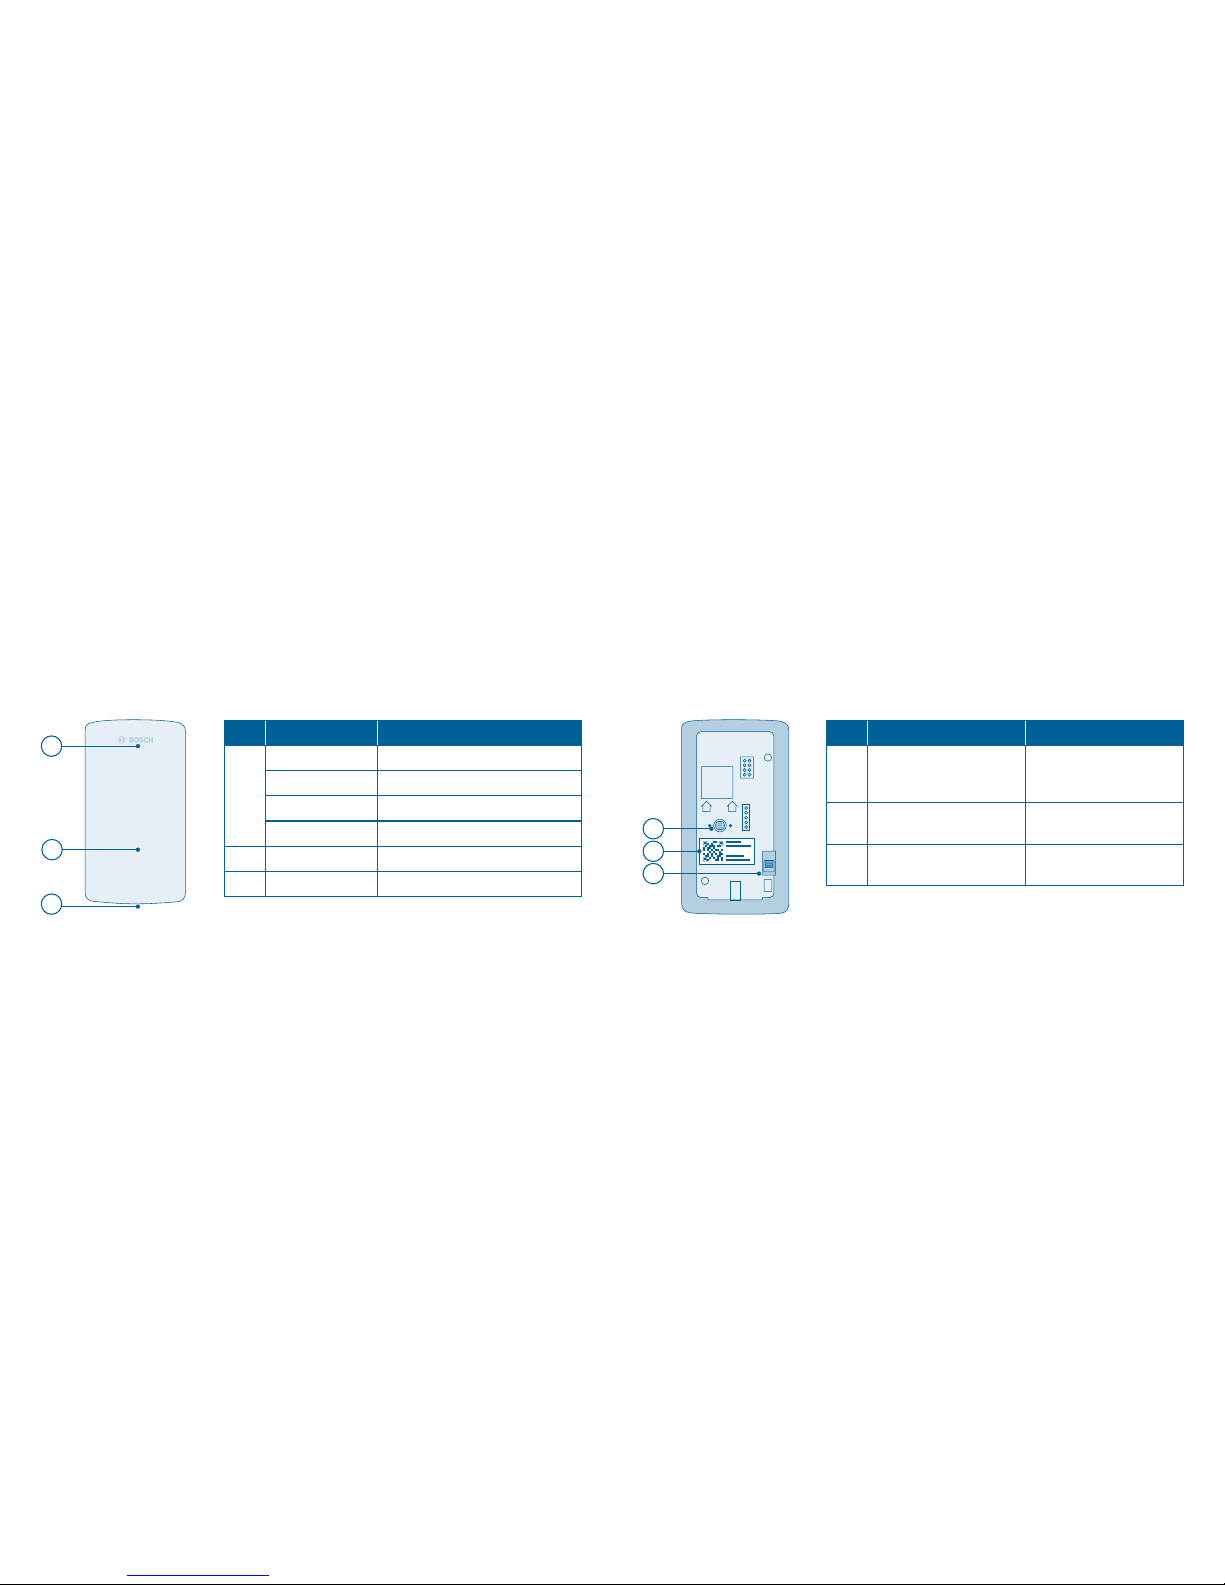
4.0 THE MOTION DETECTOR
4.1 Product overview
2
3
1
1
2
3
Item Part Explanation
1
LED indicator Status/fault
Red Fault, functional test
Orange Configuration process, update
Green Configuration successful
2 Sensor area With lens
3 Sneak-by guard Increased security
Item Part Explanation
1 Green rotary switch
For setting pet
immunity/sneak-by
guard
2 QR code
Scan for device
identification
3 Contact switch
For device resetting
and theft protection
Motion Detector – front side of housing Motion Detector – rear side of housing
16 17
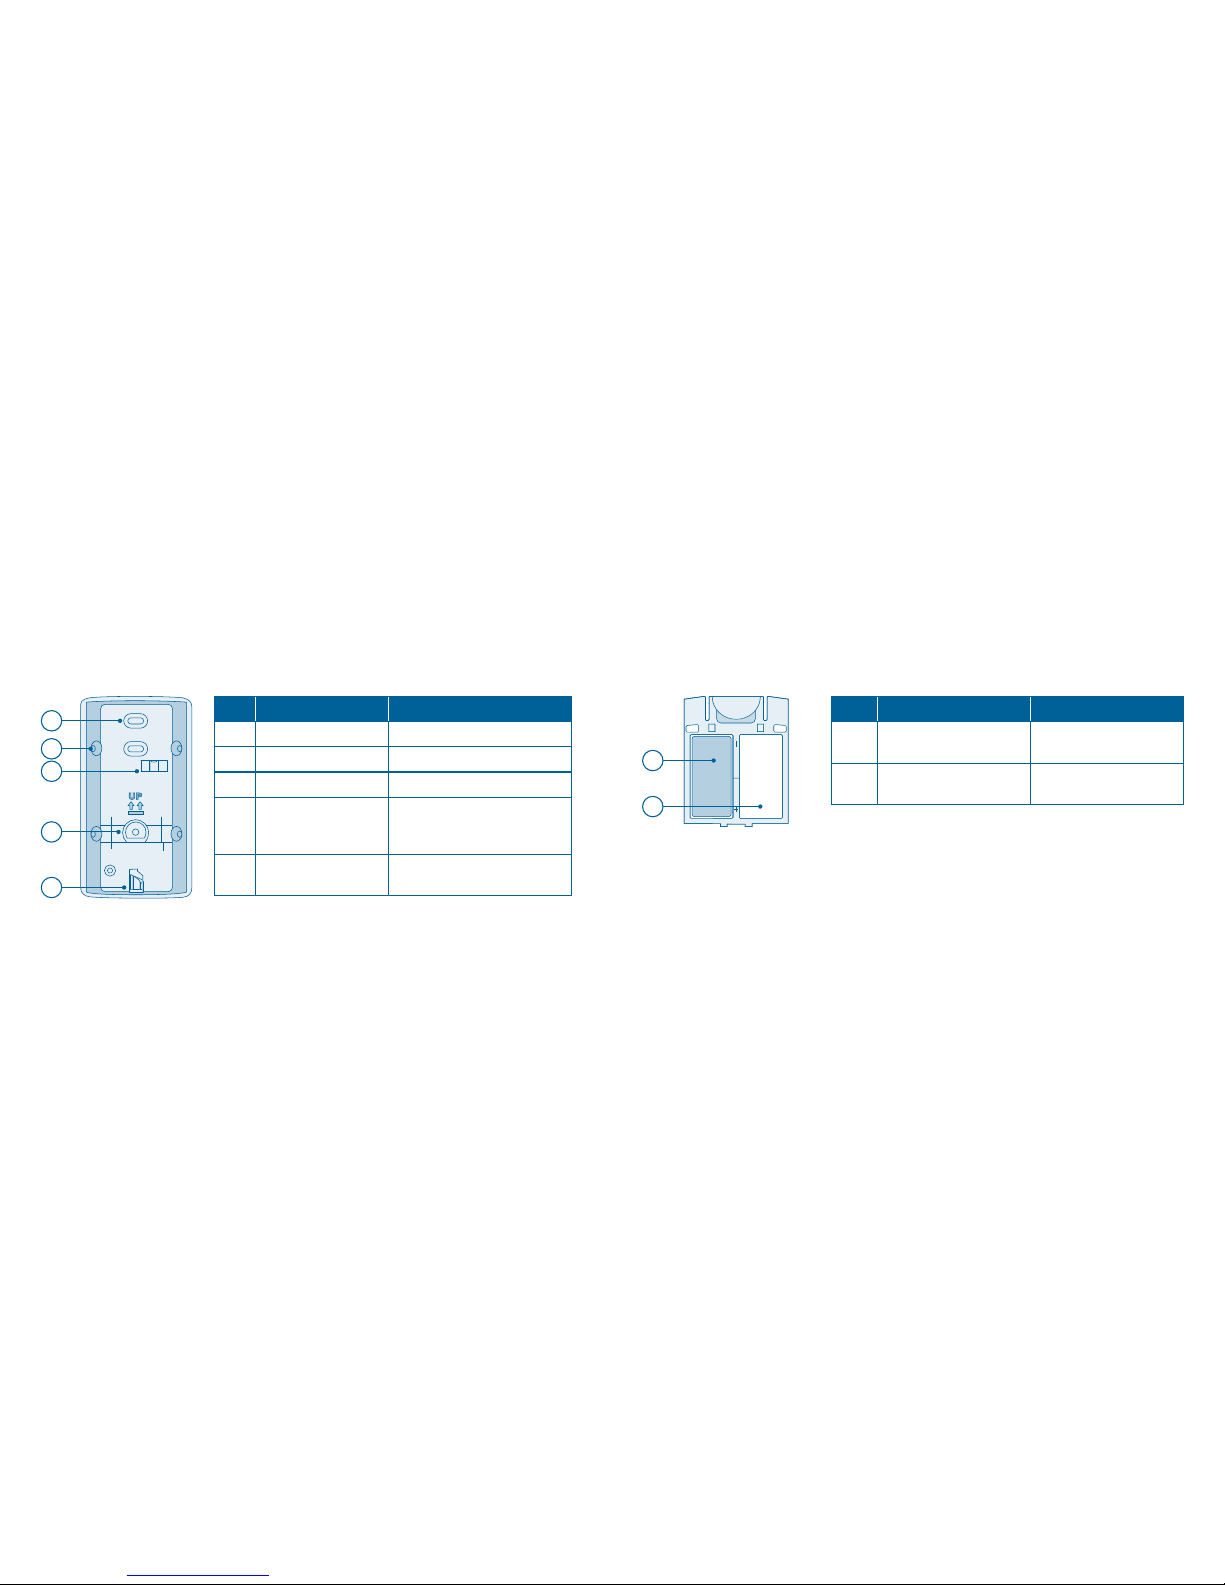
Item Part Explanation
1 Pre-punched holes For wall mounting
2 Pre-punched holes For corner mounting
3 Bubble level Aid for alignment
4 Theft protection
Remains on wall
in case of theft and sends
signal
5 Turn lock
For separating the housing
and mounting bracket
Motion Detector – front side of mounting bracket
Item Part Explanation
1 Batter y
One inserted
123A battery
2
Battery compartment
with placeholder
Option for another
batter y
Motion Detector – battery compartment
2
1
2
4
5
3
1
Optional
 Loading...