

Page 1
Use and Care Manual
for Bosch Electric Built-in
Single & Double Oven
Models HBL 43../44../45../46..
HBN 44../45../46..
Manuel d’utilisation et d’entretien
Four électrique Bosch encastré, simple et double
Modeles HBL 43../44../45../46..
HBN 44../45../46..
Ed. 03-03
114192
Page 2

Dear Bosch Oven Owner:
Thank you and congratulations on your choice and purchase of a Bosch oven.
Whether you are an expert chef or a beginning cook we believe that you will find your
Bosch oven meets and exceeds your expectations. Bosch engineers have spent years developing these units to be the most versatile and energy efficient so that you may take
great pride in the quality of construction of these fine ovens.
We also ask that you read this manual thoroughly before using your new oven.
Please pay particular attention to the Safety Instructions printed at the front of the book
and the numerous safety hints and cautions placed throughout this manual. Also, be sure
to familiarize yourself with the proper operation of the oven and its cleaning and maintenance procedures. Adherence to these instructions and procedures will assure that you
realize the full potential of your new Bosch oven as well as protect it from damage and
yourself from injury.
BSH Home Appliances
Cher client,
Chère cliente,
Tous nos remerciements et félicitations pour avoir choisi d’acquérir un four Bosch.
Que vous soyez un fin gastronome ou un débutant dans la matière, vous découvrirez que
votre four Bosch répond à toutes les exigences qu’on pourrait avoir à l’égard d’un four.
Les ingénieurs de Bosch ont passé des années à mettre au point ces appareils qui sont
parmi les plus polyvalents et les plus économiques, sans parler de leur haute qualité de
construction.
Nous vous demanderons de bien vouloir lire ce manuel avant d’utiliser votre nouveau four, surtout si c’est la première fois que vous possédez un four Bosch. Lisez attentivement les conseils de sécurité et les nombreuses mises en garde mentionnés dans ce
manuel. Prenez soin également de vous familiariser avec le fonctionnement de votre appareil et ses procédures d’entretien et de nettoyage. C’est en respectant ces instructions
et procédures que vous tirerez le plus de profit et le plus de plaisir de votre nouveau
four.
BSH Home Appliances
Page 3
U
f
S
M
se and Care Manual
or Bosch Electric Built-in
ingle & Double Oven
odels HBL 43../44../45../46..
HBN 44../45../46..
READ ALL INSTRUCTIONS BEFORE USING THIS APPLIANCE
114192
Page 4

Table of Contents
Important Safety Instructions......................................................................................................... 3
Product Features ............................................................................................................................... 4
About Your Oven......................................................................................................................... 4
Cooling Fan .......................................................................................................................... 4
Racks and Rack Positions....................................................................................................4
Baking Elements................................................................................................................... 5
Broiling Elements................................................................................................................. 5
Convection Element ............................................................................................................. 5
About Convection Ovens..................................................................................................... 5
Oven Operation.................................................................................................................................. 6
Oven Models ................................................................................................................................ 6
Using Your Oven ......................................................................................................................... 6
Cooking Function Settings, Table 3........................................................................................... 8
Oven Programmer........................................................................................................................ 9
Setting the Electronic Clock................................................................................................9
Timer ..................................................................................................................................... 9
Using the Oven Controls .................................................................................................................. 11
Manual Ope r a tion of Ov e n.......................................................................................................... 11
Electronic Control of Oven ............ .. .. .. .. .. .. .. .. .. .. .. .. .. .. .. .. .. .. .. .. .. .. .. .. .. .. .. .. .. .. .. .. .. .. .. .. .. .. .. .. .. .. .. . ...... 12
Immediate Start/Automatic Shut-Off.................................................................................. 12
Delayed Start/Automatic Shut-Off...................................................................................... 12
Care and Cleaning .. .. .. .. .. .. .. .. .. .. .. .. .. .. .. .. .. .. .. .. .. .. .. .. .. .. .. .. .. .. .. .. .. .. .. .. .. .. .. .. .. .. .. .. .. .. .. .. .. .. .. .. .. .. .. .. .. .. .. .. .. . 15
Using Self Cle an Fun ction ..... .. .. .. .. .. .. .. .. .. .. .. .. .. .. .. .. .. .. .. .. .. .. .. .. .. .. .. .. .. .. .. .. .. .. .. .. .. .. .. .. .. .. .. .. .. .. .. ....... 15
Replacing an Ov en Li ght................ .. .. .. .. .. .. .. .. .. .. .. .. .. .. .. .. .. .. .. .. .. .. .. .. .. .. .. .. .. .. .. .. .. .. .. .. .. .. .. .. .. .. ......... 16
Oven Door Removal .................................................................................................................... 17
Service and Repair............................................................................................................................ 18
Problem Solving, Table 4............................................................................................................ 19
If You Need Assi stance.... .. .. .. .. .. .. .. .. .. .. .. .. .. .. .. .. .. .. .. .. .. .. .. .. .. .. .. .. .. .. .. .. .. .. .. .. .. .. .. .. .. .. .. .. .. .. .. .. .. ......... 20
Model Information ....................................................................................................................... 20
Model Warranty................................................................................................................................21
2
Page 5

IMPORTANT SAFETY INSTRUCTIONS
WARNING - When using this appliance, basic safety precautions should always be followed to reduce
the risk of fire, electric shock, and/or injury to persons, including the following.
Read All Instruction Before Using the Oven
1.
Proper Installation -
2.
technician. Have the installer show you where the fuse or breaker box is located and how to turn
off the power to the oven.
Do Not Operate the Oven if it is Damaged or Not Working Properly
3.
Never Use Your Appliance for Warming or Heating the Room
4.
Do Not Leave Childr en Al one -
5.
appliance is in use. They should never be allowed to sit or stand on any part of the appliance.
Do Not Touch Heating Elements or Interior Surfaces of Oven -
6.
even though they are dark in color. Interior surfaces of the oven, including racks become hot
enough to cause serious burns. Do not touch or let clothing or other flammable material come into
contact with the heating elements or interior surfaces or racks of the oven during or immediately
after use. Allow the oven to cool.
Wear Proper Apparel -
7.
appliance. Fabric may ignite and result in personal injury.
Use Only Dry Potholders -
8.
steam. Do not let potholder touch hot heating elements. Do not use a towel or other bulky cloth.
User Servicing -
9.
mended in the manual. All other service should be referred to a qualified technician.
Storage in or on Appliance -
10.
face units.
Do Not Use Water on Grease Fires -
11.
tinguisher.
Use Care When Opening Door -
12.
Do Not Heat Unopened Food Containers -
13.
and result in injury.
Keep Oven Vent Ducts Unobstructed
14.
Placement of Oven Racks -
15.
rack must be moved while oven is hot, do not let potholder contact hot heating element in oven.
Do Not Clean Door Gasket -
16.
not to rub, damage, or move gasket.
Do Not Use Oven Cleaners -
17.
kind should be used in or around any part of the oven.
Clean Only Parts Listed in Manual
18.
Before Self-Cleaning the Oven -
19.
Check for Off When Done -
20.
finished cooking to make sure they are all in the off positions.
“CAUTION”
21.
climbing on the oven to reach items could be burned or otherwise seriously injured.
Always Disconnect the Electrical Supply Before Servicing the Oven
22.
23. The California Safe Drinking Water and Toxic Enforcement Act requires businesses to warn customers of potential exposure to substances which are known by the S tate of California to cause
cancer or reproductive harm.
The elimination of soil during self-cleaning generates some by-products which are on this list of
substances.
To minimize exposure to these substances, always operate this oven according to the instructions
in this manual and provide good ventilation to the room during and immediately after self-cleaning
the oven.
Be sure your appliance is properly installed and grounded by a qualified
Children should not be left alone or unattended in area where the
Loose-fitting or hanging garments should never be worn while using the
Moist or damp potholders on hot surfaces may result in burns from
Do not repair or replace any part of the appliance unless specifically recom-
Flammable materials should not be stored in an oven or near sur-
Smother fire or flame or use dry chemical or foam type ex-
Let hot air or steam escape before removing or replacing food.
Always place oven racks in desired location while oven is cool. If
The door gasket is essential for a good seal. Care should be taken
No commercial oven cleaner or oven liner protective coating of any
Remove oven racks and other utensils.
Always check the position of the oven control knobs when you have
- Do not store items of interest to children in cabinets above the oven - children
.
.
.
Heating elements may be hot
Build-up of pressure may cause container to burst
.
3
Page 6
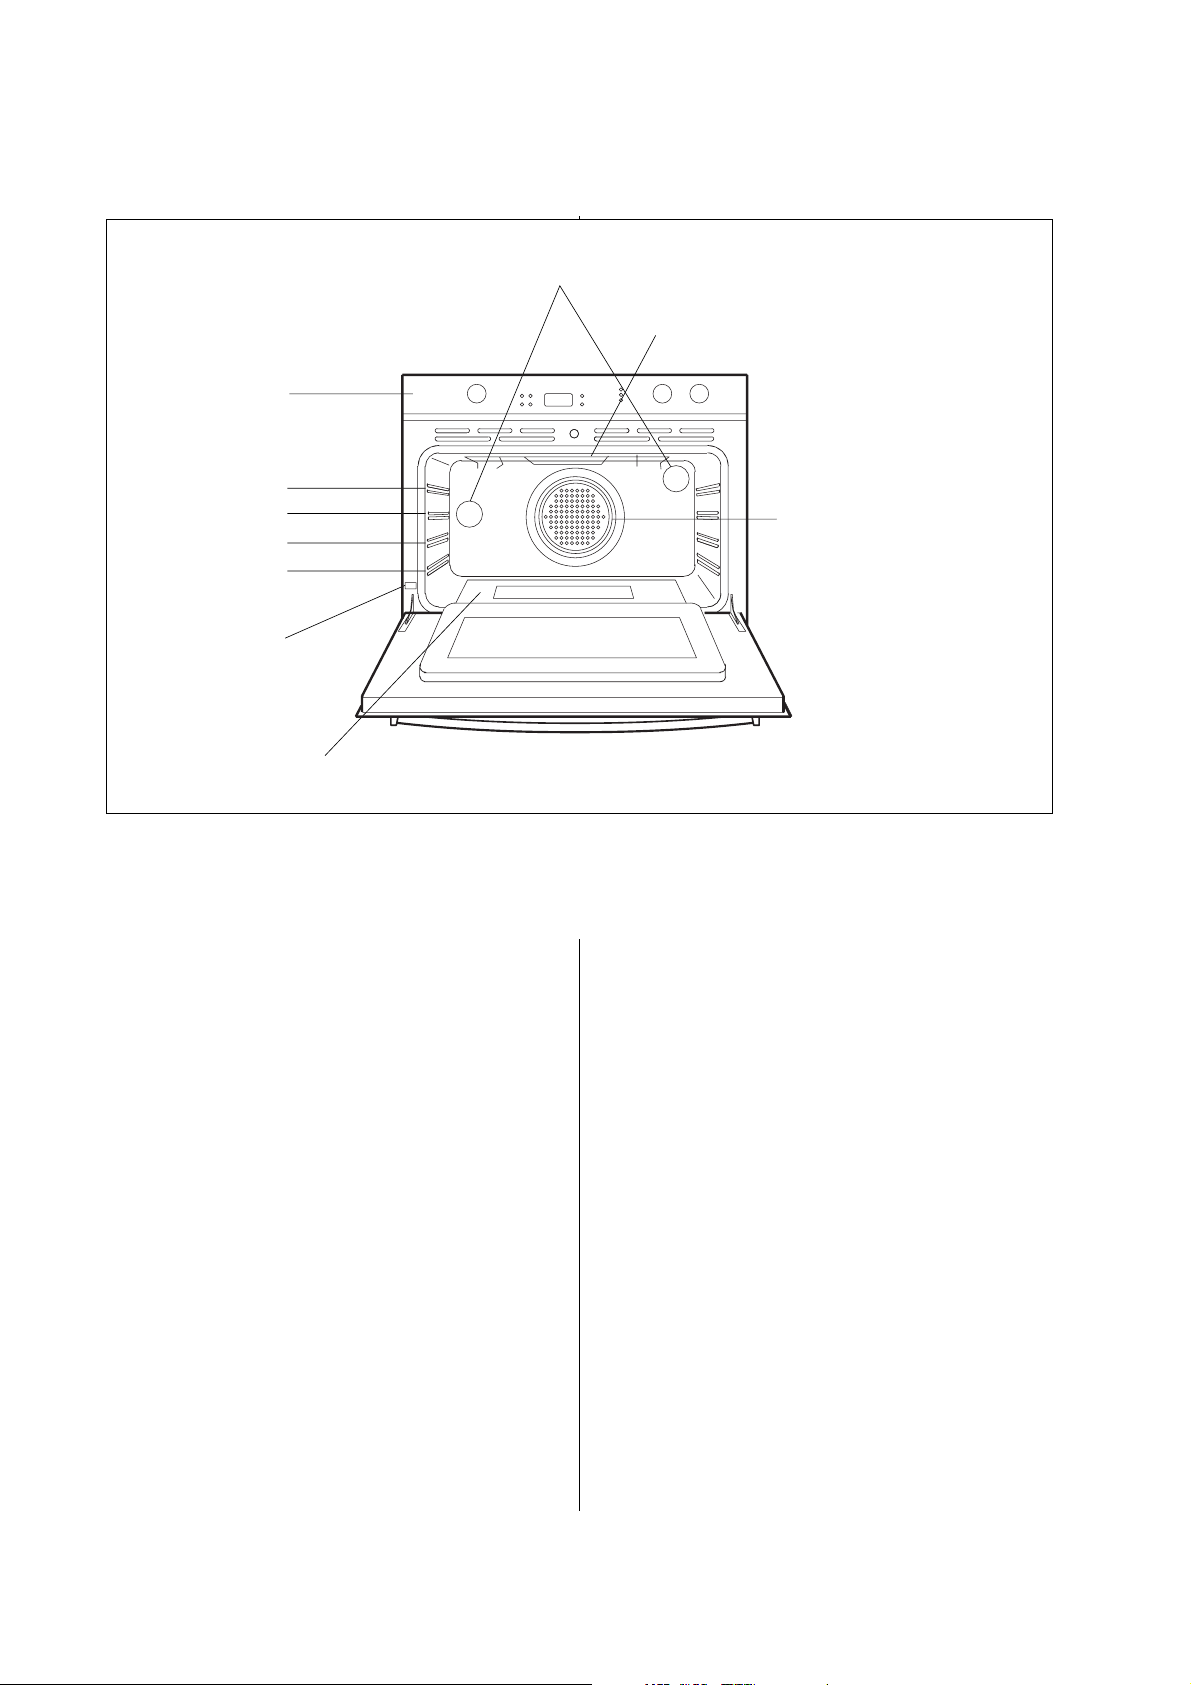
Product Features
Halogen lights
Broil and top elements
Control panel
level no. 4
level no. 3
level no. 2
level no. 1
Model and serial
number plate
Bake elements
(under oven floor)
BOSCH
Figure 1.
About Your Oven
Above you will find an illustration of a Bosch
oven showing the components of the oven.
This manual covers the complete line of Bosch
single and double ovens so some of the features
described may not be available on your oven.
Convection element (not visible)
and fan located on back of oven
cavity (Convection Models Only)
114193-2
Each level guide consists of paired supports
formed in the sidewalls on each side of the oven
cavity.
The rack should be positioned within the paired
supports. Each oven is provided with the following parts and utensils, see Figure 2:
• Rack(s)
Cooling Fan
All the ovens whether convection type or thermal
type have a cooling fan to cool the control panel.
You may hear this fan continue to run after cooking and/or cleaning has been completed.
The fan will run as long as the oven is hot or the
oven’s function selector is turned to any position
other than “Off”. This is normal operation.
Rack Positions
The oven has rack guides at four levels as shown
in the illustration.
4
Always be sure to position the oven racks, etc. before turning the oven on.
Make sure that the rack(s) are level once they are
in position.
To remove oven rack from the oven, lift rack at
front and lift out.
To replace oven rack:
1. Place rear of rack between the rack level
guides.
2. While lifting front of rack, slide rack in all
the way, then lower front.
Please refer to illustration if there is any
question as to which side is the front of the
rack.
Page 7

Baking Elements
About Convection Ovens
The Bosch oven uses two baking elements: one
located at the top of the oven and the second located below the floor of oven cavity to provide
ease in cleaning the oven cavity.
Both the single ovens and double ovens are available as either conventional thermal ovens or as
convection ovens.
Although most people are familiar with the operation of a conventional thermal oven many are unclear as to how a convection oven works or in
what ways it is superior to a conventional thermal
oven.
Below you will find a brief explanation of how a
convection oven works and its advantages.
In Bosch Ovens, the Genuine European Convection system (the 3 elements, fan and venting
panel) circulates even, heated air throughout the
oven. This process:
•
Seals in juices and flavor
•
Provides even baking and browning
•
Saves time and energy
•
Baking on multiple levels at the same time
•
Dehydrates herbs, fruits and vegetables
•
Bakes whole meals at once with no flavor
transfer
•
Thaws evenly
Broiling Elements
The broiling elements of the Bosch ovens are located at the top of the oven cavity.
Do not touch the heating elements or let potholders touch the broiler elements.
Never use a towel or bulky cloth for a potholder;
they could catch on fire.
Convection Element
If you have purchased one of the convection oven
models you will find the convection element (not
visible) and fan located at the back of the oven
cavity.
This element and fan combination performs the
cooking when in the convection bake mode.
When in any of the convection modes the fan is
on, see Table 3.
Many of your own recipes have time and temperature instruction for the regular bake cycle. As a
rule, most of these recipes can be cooked with
better results in one of the convection cycles. In
general, to convert standard recipes for use in
convection, you reduce the temperature by about
25°F and check for doneness at the minimum suggested cooking time.
When baking on more than 1 rack it may be necessary to increase the cooking time a few minutes
for each additional rack. As individual tastes vary,
you may find you need to adjust the time and temperature to achieve desired results.
We do not recommend you use oven thermometers found at many grocery stores to check oven
temperature. They may be inaccurate and are slow
to respond to temperature changes.
Page 8
Oven Operation
Oven Models
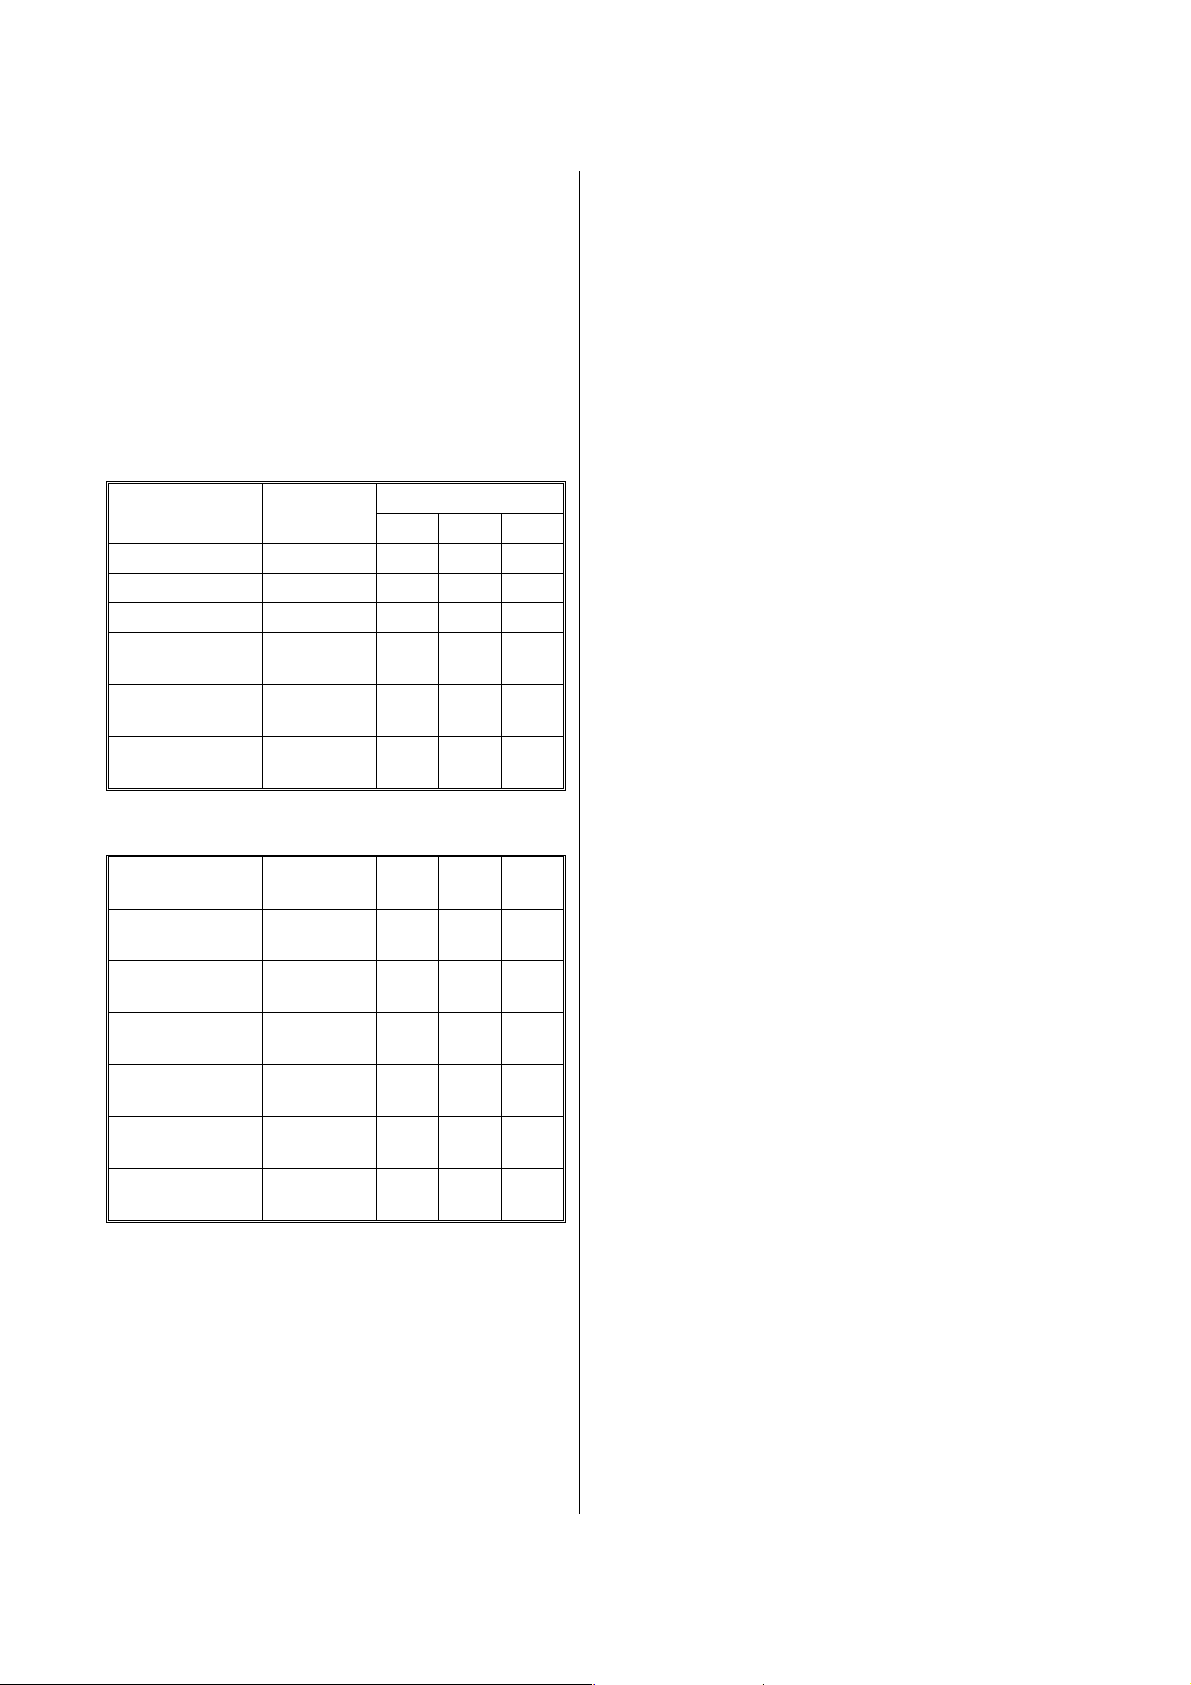
There are 21 different models of Bosch ovens, see
Tables 1 & 2, below. Bosch ovens are available in
27" or 30", in white, black or stainless steel, in
single or double oven configurations as well as
being provided as either standard, thermal-type
ovens or convection type, with the double ovens
being available with either a single convection
oven or with two convection ovens.
Single Oven
Models
HBL 432A UC No X
HBL 435A UC No X
HBL 436A UC No X
HBL 442A UC
HBN 442A UC
HBL 445A UC
HBN 445A UC
HBL 446A UC
HBN 446A UC
Convection
Yes X
Yes X
Yes X
Table 1.
Double Oven
Models
HBL 452A UC
HBN 452A UC
HBL 455A UC
HBN 455A UC
HBL 456A UC
HBN 456A UC
HBL 462A UC
HBN 462A UC
HBL 465A UC
HBN 465A UC
HBL 466A UC
HBN 466A UC
Convection
(top/bottom)
Yes/No X
Yes/No X
Yes/No X
Yes/Yes X
Yes/Yes X
Yes/Yes X
Table 2.
Due to the number of models offered not all the
features described below may apply to your oven.
Colors
Wht SS Blk
Wht SS Blk
Before Using for the First Time
Before using your Bosch oven for the first time
remove all packing and foreign materials from the
oven(s). Any material of this sort left in the
oven(s) may melt and/or burn when the oven(s)
are used.
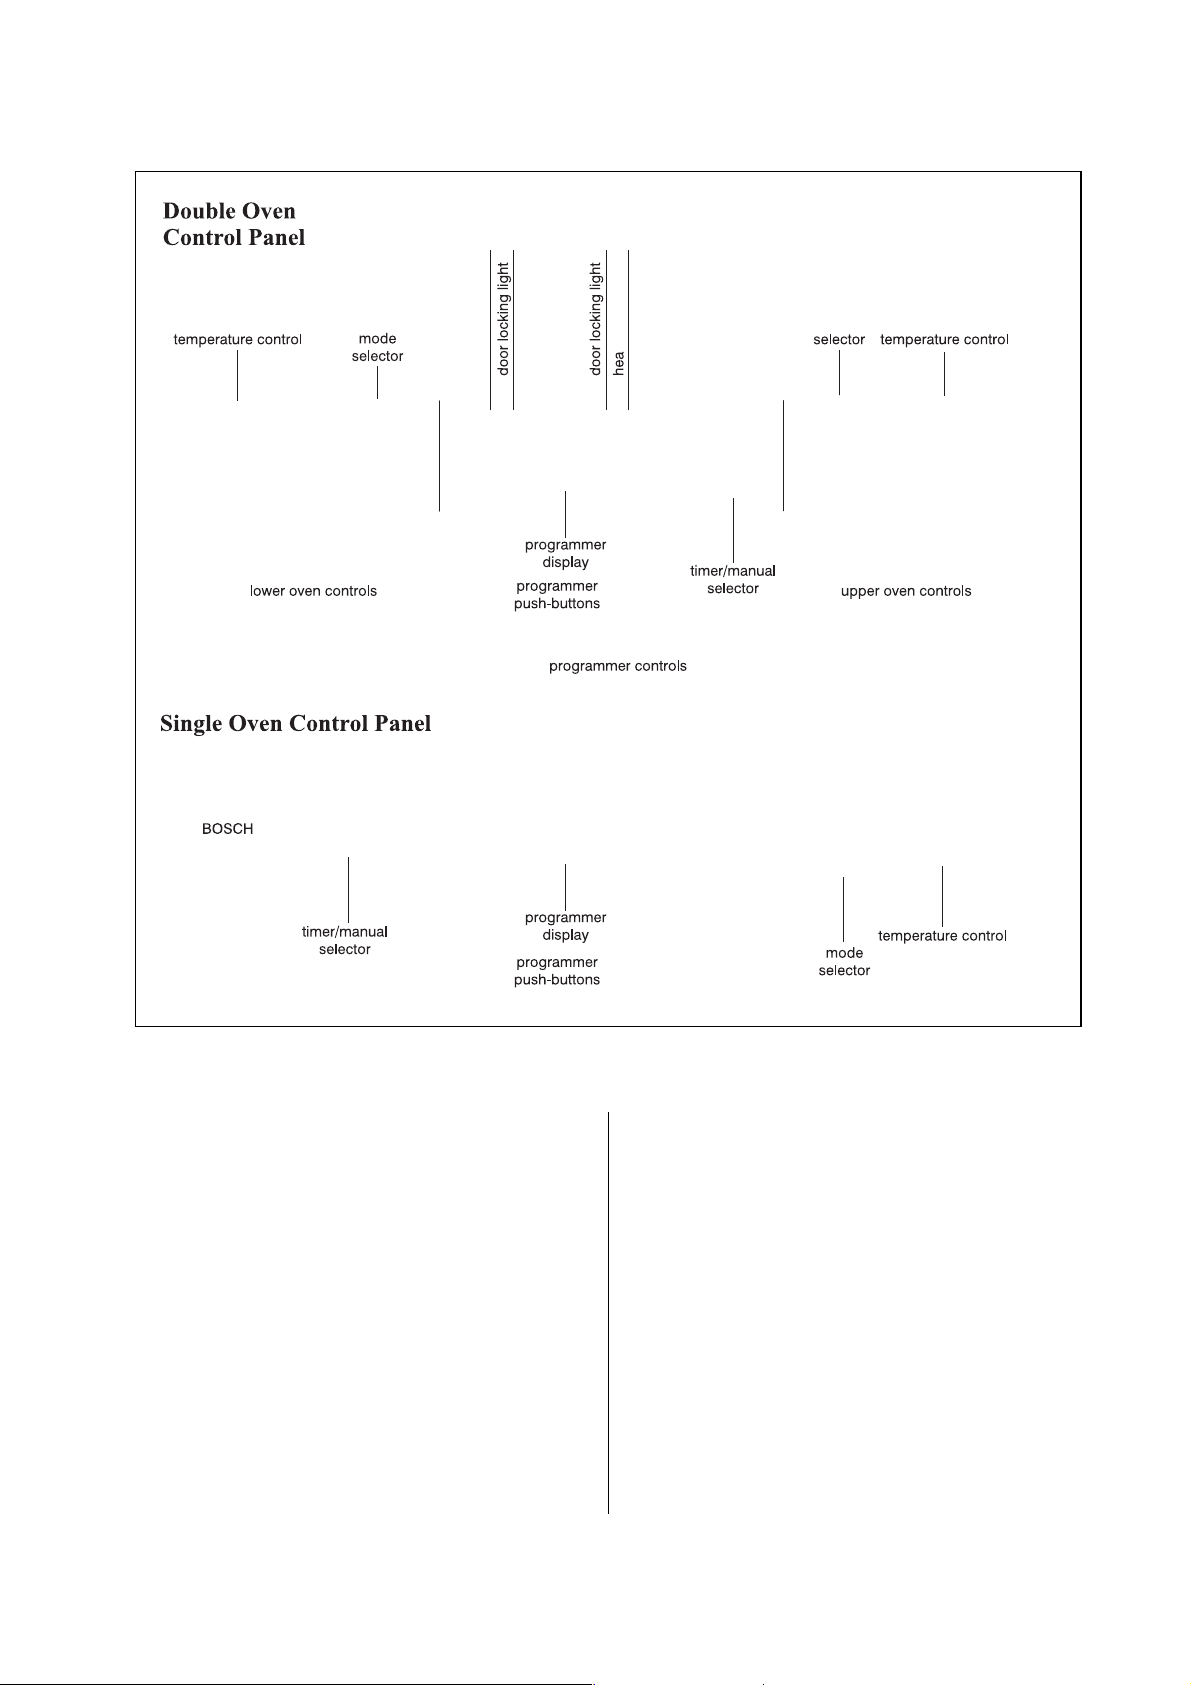
Oven Control Panel
All the ovens have the following controls, as
shown in Figure 3:
• Programmer push-buttons:
– Set Clock button
– Timer button
– Cook Time button
– Start Time button
– Time set + and - buttons.
• Programmer display
• On/Off light
• Heat light
• Door lock light
• Timer/Manual selector knob
• Temperature control knob(s)
• Mode selector knob(s)
The double oven control panel is the upper panel
shown in Figure 3 and the single oven control
panel is the lower panel shown.
Programmer Push-Buttons
The programmer push-buttons are used to set and
program the oven. See sections Timer and Pro-
gramming the Oven for explanation on how to
use the programmer push-buttons.
Programmer Display
The programmer display performs many functions. When the electricity to your oven is first
turned on the display will be blank. For information on setting the display and its use as a timer or
for programmed cooking see sections Timer and
Programming the Oven, following.
Timer/Manual Selector
Using Your Oven
It is very important to learn how to properly use
your oven to obtain the best cooking results.
Following you will find important information for
the safe and efficient use of your oven.
6
The Timer/Manual selector knob is used to set the
oven(s) for Manual or Timer mode.
On Light
The on light will be illuminated whenever the
oven is on.
Page 9
Heat Light
Temperature Control Knob
The heat light will be lit when you turn on your
oven. When the oven reaches the set temperature
the light will turn off to let you know the oven is
preheated. (Preheat time should take approximately 12-15 minute when using 240 volts. If
electrical supply is less than 240 volts preheat
times will be longer). The light is connected to
the cooking elements and will turn off and on as
the oven cycles to maintain the set temperature.
Door Lock Light
The door lock light will be illuminated whenever
the oven is in the self-clean mode and the door is
locked.
The temperature control knob is marked in degrees Fahrenheit (°F). This control knob is used to
adjust the oven temperature.
Mode Selector
The mode selector knob is used to set the oven to
Off, or for Self Clean, or to select the cooking
function desired. A number of modes are available depending on the model oven you have purchased.
Please see Table 3, Cooking Function Settings,
for information on selecting a cooking mode.
Page 10
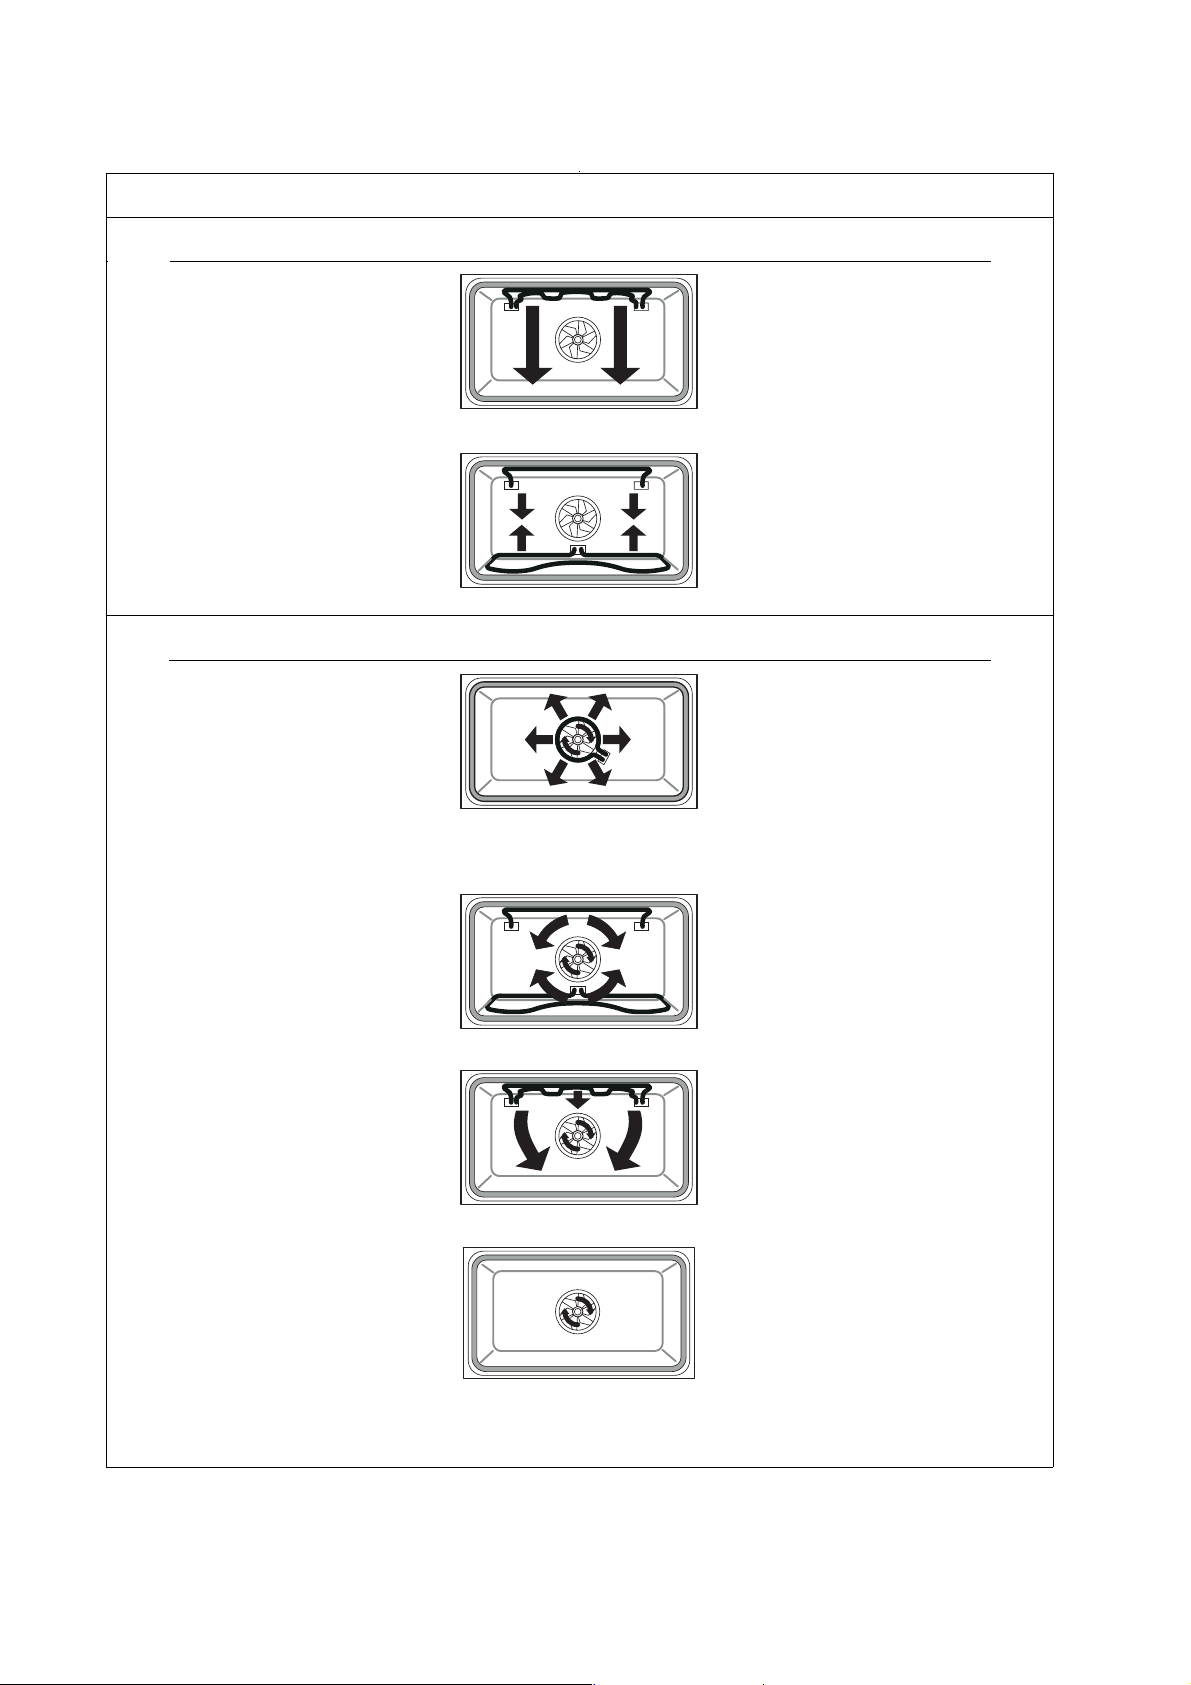
Note: Lower element shown for
clarity only. Lower element actually is located
below floor of cavity
Convection Ovens have following additional cooking functions
Cooking Function Settings
Thermal Oven Function Information
Broil - Used for broiling.
When set on Broil t h e top
elements operate whenever
heating.
May be used with door open or
closed.
Bake (Roast) - This mode is used
for baking, roasting and heating of
casseroles, etc. When set on Bake
the top element and the bottom
element operate whenever heating.
Convection Bak e - Th e mo st
versatile mode for baking and
heating a variety of dishes.
Also recommended for preparing
large quantities of food on several
racks.
When set on Convection the rear
circular bake element operates
whenever heating. Fan operates.
Note: Lower element shown for
clarity only. Lower element actually is located
below floor of cavity
Convection Ro ast - Use for
roasting.
When set on Convection Roast the
top element and the bottom
element operate whenever heating.
Fan operates.
Convection Broi l - Use of fish
and broiling thick cuts of meat.
The door must be closed when
Convection Broiling. When set on
Convection Broil top elements
operate whenever heating. Fan
operates.
Thaw - Use for defrosting.
When set on Thaw no elements
operate, only the fan is on.
Table 3. Cooking Function Settings
8
Page 11
Oven Programmer
The oven programmer can be used to electronically control the cooking in your oven. Figure 4
shows all the call-outs that are available on the
display and their locations. The buttons directly
adjacent to the display are the programming buttons. These are used to program the oven, including setting the clock.
Figure 4.
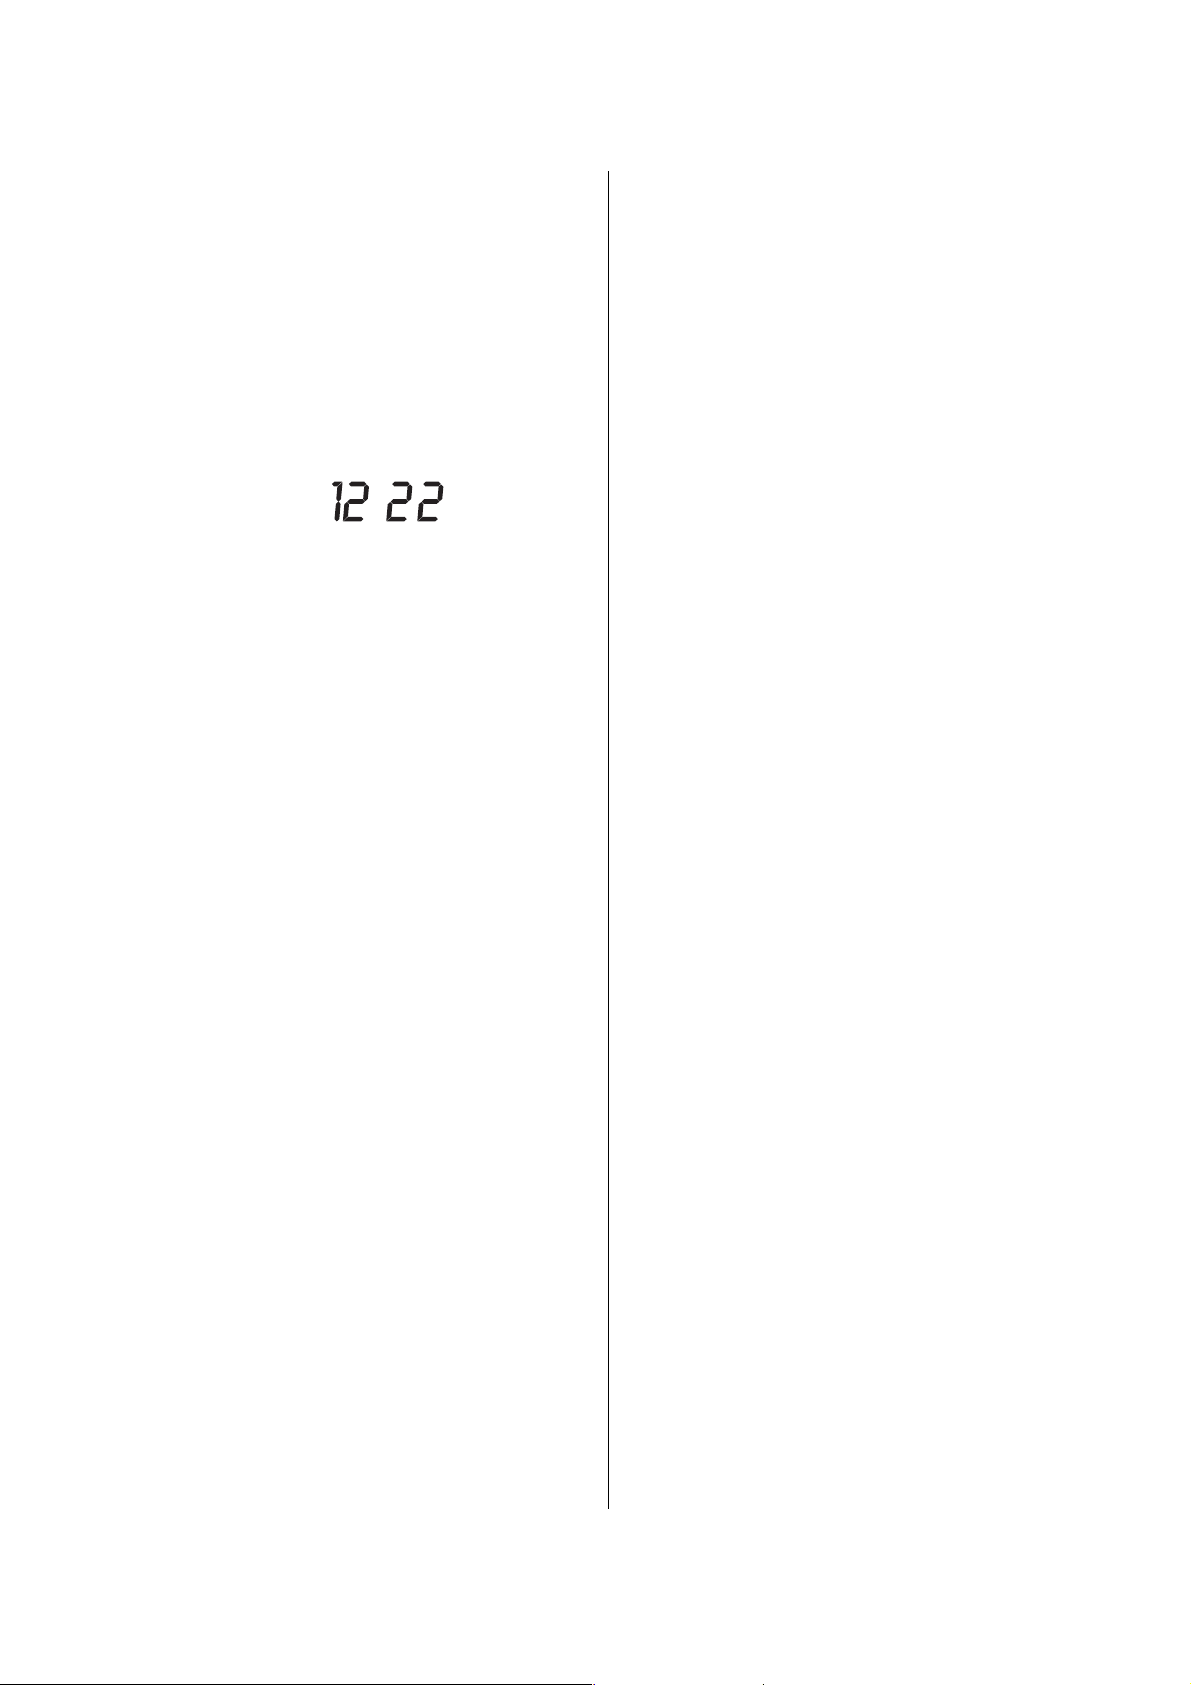
Setting the Electronic Clock
When you first turn on the power to your oven, or
if the power to the oven has been off for a while
the display will come on showing all the call-outs,
as shown in Figure 4, and then will become blank,
with dashes in the display area and the set clock
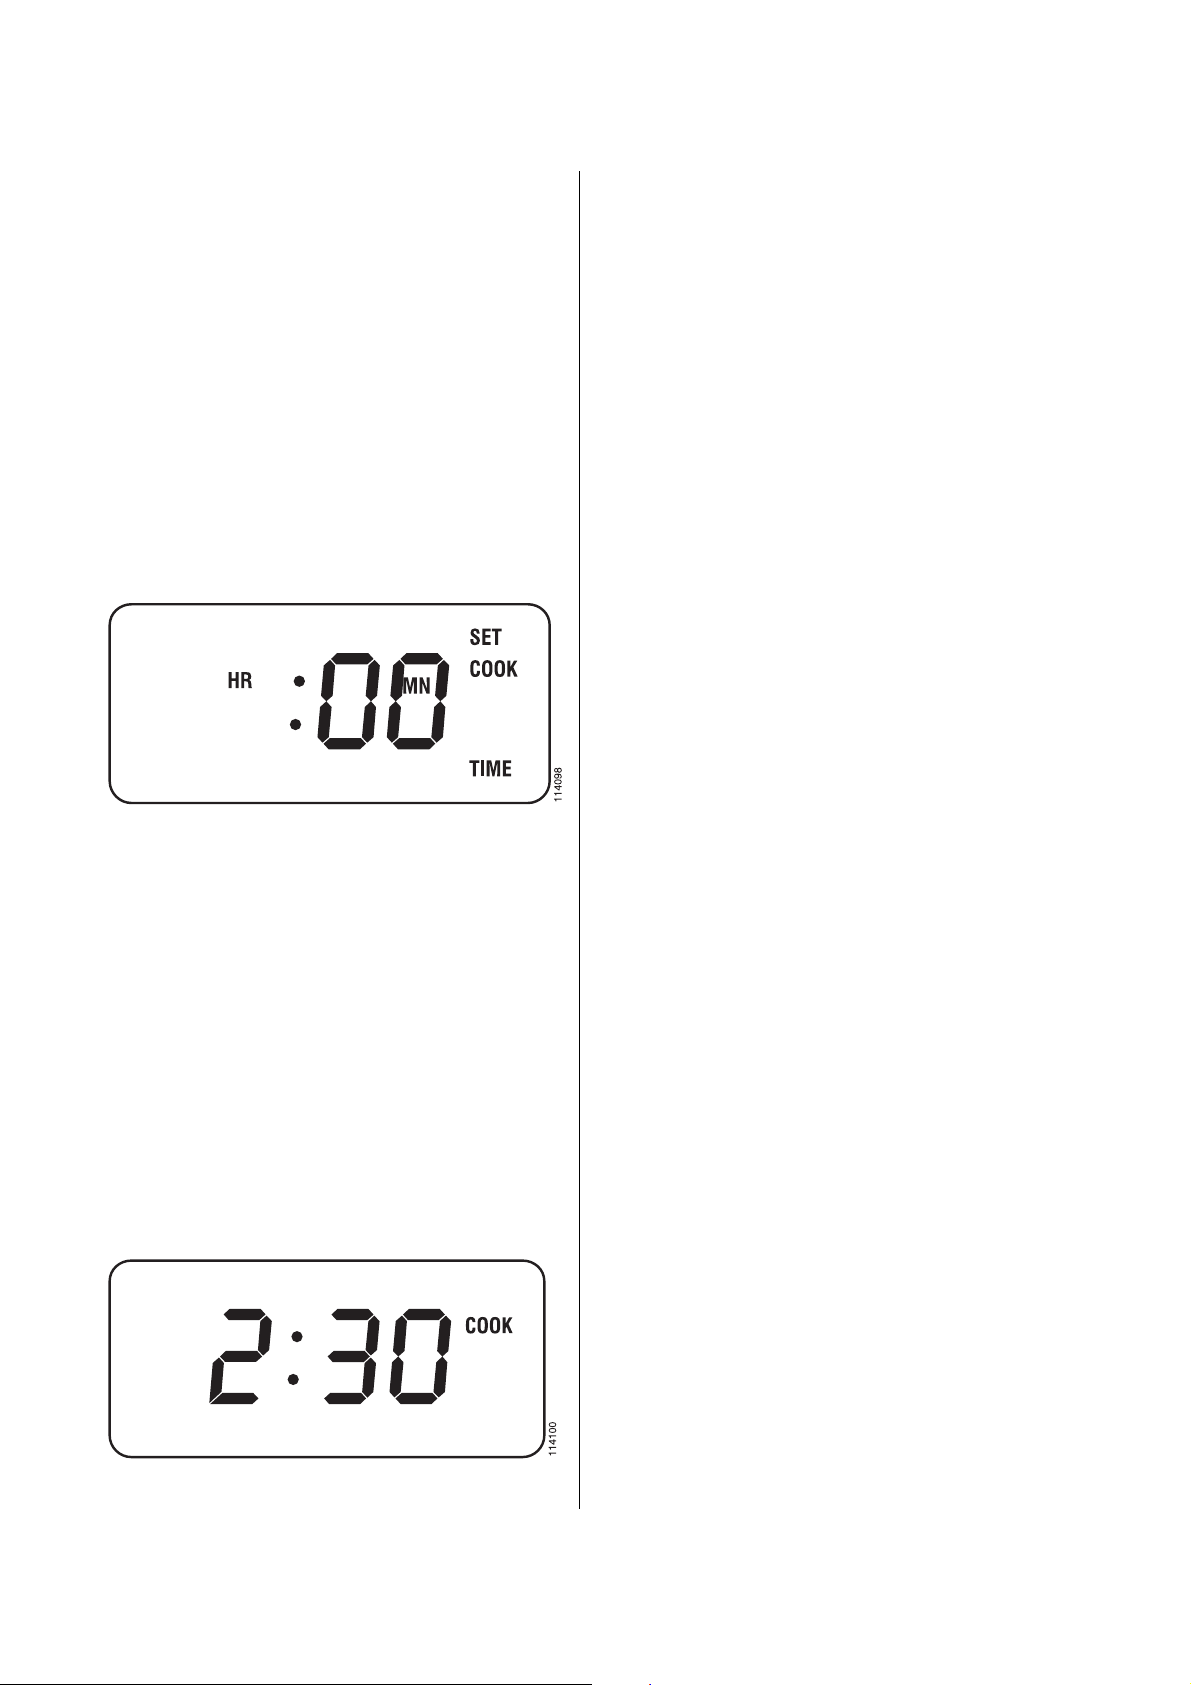
symbol in the upper right of the programmer display, as shown in Figure 5.
properly set depress the Set Clock button again to
enter the time. A “beep” will sound and the Set
Clock symbol, in the upper right, will disappear.
To change the time of day simply repeat the steps
described above. To check the time of day when
the timer is in use depress the Set Clock button.
The time of day will be displayed briefly and then
will return to the timer function.
Timer
The timer acts as a kitchen timer, counting down
from the set time.
To Set Timer
• Press Timer button. A “beep” will be heard
and the display will change from showing the
time of day to read zero (.00) and say SET
TIMER, to the right, as shown in Figure 6.
• Then press either the plus (+) or minus (-) but-
ton, to the right of the display, to set the timer
to the time interval desired.
Figure 5.
To set time of day
Press in Set Clock button. A “beep” will be
heard. Then press either the plus (+) or minus (-)
button, to the right of the display, to set the correct time. If the plus (+) or minus (-) button is
pressed it will advance or decrease the time in 1
minute increments, if the plus (+) or minus (-)
button is held in the minutes will increase or decrease in 10 minute increments. Once the time is
Figure 6.
Notes: 1. Each time the plus (+) or minus (-)
button is depressed the display will increase or decrease in 1 minute increments. If the plus (+) or minus (-) button is held in the display will increase
or decrease in 10 minute increments.
2. If the plus (+) or minus (-) button is
not depressed within 5 seconds of depressing the Timer button the Timer
button will have to be depressed again
to again call up the timer mode.
• Once the desired time interval is set release the
buttons.
• The timing interval will start after approxi-
mately 4 seconds.
Page 12

• The indicator word TIMER will remain in the
display during timer countdown.
• The timer will countdown in minutes until the
last minute when it will switch over and countdown in seconds.
• At the end of the timing interval the indicator
word TIMER will blink on and off and three
“beeps” will be heard.
• The display will return to time of day or any
active programmed function and “beeping” will
continue every 10 seconds until any button is
touched.
• Once any button is touched the flashing word
TIMER disappears from the display.
To Cancel Timer
With the indicator word TIMER in the display all
that is necessary to cancel the timer is to depress
the Timer button once.
If some other timed function has been programmed after setting the timer, the TIMER indicator word can be recalled to the display by depressing the Timer button.
Then with the indicator word TIMER in the display you can, as above, cancel the timer by depressing the Timer button a second time.
Then after 5 seconds the display will return to
time of day or any active programmed function.
To Check Timer During Timed Function
If some other timed function has been programmed after setting the timer, TIMER may be
recalled to the display by depressing the Timer
button.
The amount of time remaining on the timer can
then be viewed.
10
Page 13
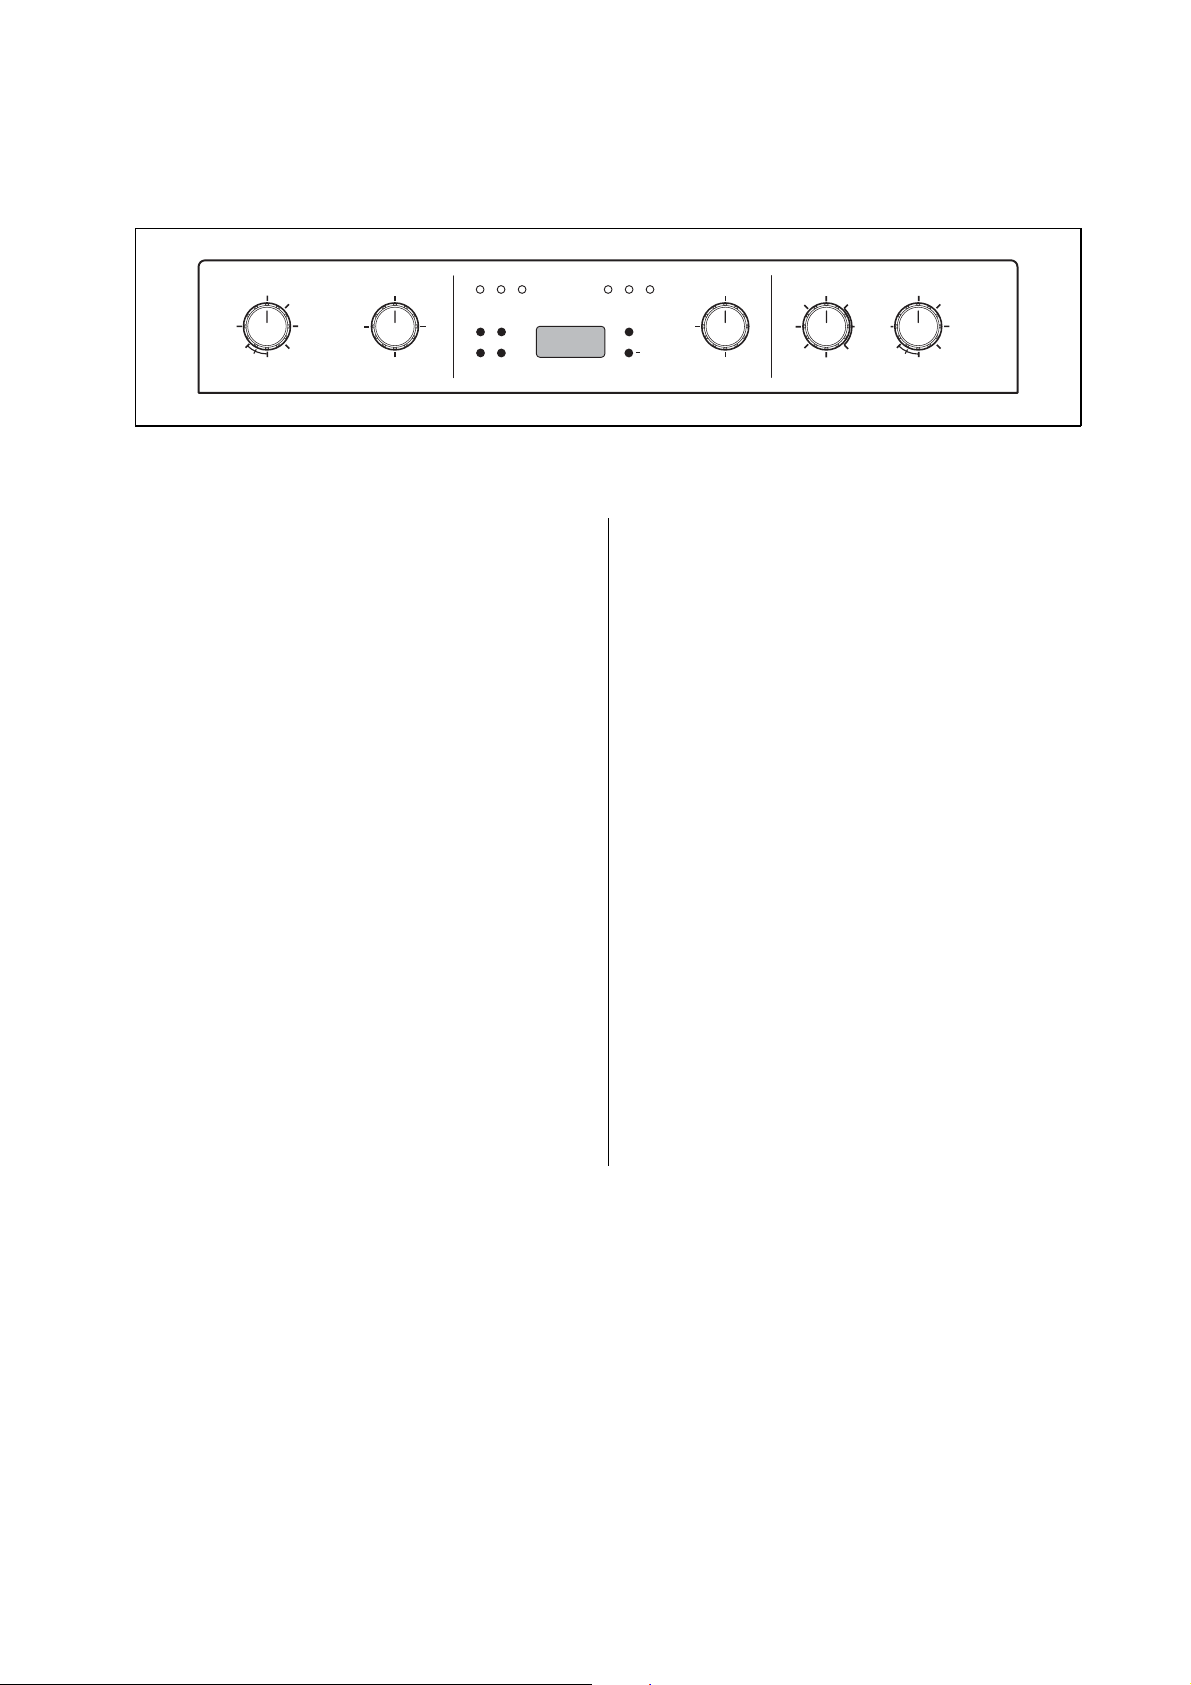
Using the Oven Controls
Temperature F°
Off
Clean
Broil
Lower Oven
Self
Clean
Off
Broil
Lower Oven
On Heat HeatDoor
Lock
Bake
Set
Cook
Clock
Time
Start
Timer
Time
Upper Oven
Lock
Figure 7. Double Oven Control Panel, HBL/HBN45..
The oven controls may be used to operate the
oven manually or under control of the oven programmer. Manual operation will be discussed first
and then use of the oven programmer.
Once you have set the mode selector to Manual
or, if you have a double oven, decided which oven
you are going to use:
1. Set Mode selector knob for the oven to the
Manual Operation of the Oven
Before turning on your oven, position the racks
properly for their intended use. To change the position of the racks, lift rack at the front and pullout and re-insert at the desired level.
For manual operation of the oven set the
Timer/Manual Selector knob (see Figure 3) to
Manual. If you have a double oven, as shown
above (Figure 7) you have three setting positions
available:
• Timer Upper Oven - when on this setting the
programmer must be used to control the upper
oven while the lower oven may be operated
manually
• Both Manual - when on this setting both ovens
may be used manually.
• Timer Lower Oven - when on this setting the
programmer must be used to control the lower
Note: The cooling fan will begin to run as soon
2. Set the temperature control knob for the
Note: If you have a convection oven and have
3. Once cooking has been completed be sure to
Timer Upper Oven
OnDoor
Both
Manual
+
Time
Timer Lower Oven
Upper Oven
Self
Clean
Broil
Bake
Thaw
Off
Temperature F°
Convection
Roast
Bake
Clean
Broil
Off
Broil
114196
oven while the upper oven may be operated
manually.
cooking mode desired. Refer to Figure 3 and
Table 3 if you are not sure which of the
knobs on your oven is the selector knob or
which function you wish the oven to perform.
as the function selector knob is turned
from the Off position.
oven to the temperature desired.
selected THAW it is not necessary to set
the temperature control knob as no heating takes place in THAW mode.
turn the selector knob and the temperature
knob to the Off position.
11
Page 14
Electronic Control of Oven
Immediate Start /Automatic Shut-Off
To use the electronic control so that your cooking
starts imme diately and then shuts-off automatica lly:
1. Set the oven rack(s) as desired and place
food in the oven.
2. Make sure that the oven clock is set to the
correct time.
3. Set the Timer/Manual Selector (Figure 3) to
Timer for the single oven or to Timer Upper
Oven or Timer Lower Oven for double
oven, so that oven programmer is enabled for
the oven you wish to use in programmed operation.
7. Then press either the plus (+) or minus (-)
button, to the right of the display, to set the
the timer to the time interval desired.
Maximum cooking time is 11 hours and 50
minutes (minimum cooking time is 1 minute).
Note: If the plus (+) or minus (-) button is not
depressed within 5 seconds of touching
the Cook Time button the Cook Time
button will have to be depressed again to
call up SET - COOK - TIME.
8. After the cook time has been set a “beep”
will sound and the indicator word COOK
will appear in the display and the oven will
begin heating. Figure 9 shows what the display would look like at this time if a cooking
time of 2 hours and 30 minutes had been set.
9. At the end of the programmed cooking time,
the oven will automatically shut-off and the
indicator word COOK will blink. Three
“beeps” will sound and the oven will continue to beep every 10 seconds until any button is pushed.
Figure 8.
4. Set oven Mode Selector knob to the cooking
function desired:
– Broil
– Bake
– Convection Bake
– Convection Roast
– Convection Broil
– Thaw
5. Set oven Temperature Control knob to the
desired temperature.
6. Depress Cook Time button, a “beep” will
sound and the display will show SETCOOK-TIME on the right hand side of the
display, as shown in Figure 8.
Be sure to turn the Mode Selector knob and the
Temperature knob to their Off positions after
electronic controlled cooking has been completed.
To Cancel Cook Time
To cancel cook time at any time depress Cook
Time button twice.
Delayed Start/Automatic Shut-Off
The programmer may also be used to have your
oven start at a later time, cook for a preset cooking period and shut itself off automatically. This
function is not recommended for foods that contain baking powder or yeast as these foods will
not rise properly if cooked in this way. Also,
please keep in mind that the time required for the
oven to come up to temperature must be included
in the cooking time. In most cases this means that
approximately 10 minutes should be added to the
cooking time. A preheat time is usually not necessary for convection function, but in all cases follow your recipe.
Figure 9.
12
Page 15
WARNING
When using delayed cooking special consideration must be given to avoid potential sickness and spoiling of food:
1. Avoid using foods that will spoil while
placed in the oven waiting for cooking to
begin. In particular avoid using foods containing eggs and dairy products in delayed
cooking. In addition unfrozen cooked or
uncooked meats, poultry and fish should
not be placed in the oven if they will be
there for more than two hours.
2. Do not allow food to remain in the oven
more than one hour after the end of the
cooking cycle.
To use the programmer so that your cooking will
start at some later time and shut-off automatically:
1. Set the oven rack(s) as desired and place
food in the oven.
2. Make sure that the oven clock is set to the
correct time.
3. Set the Timer/Manual Selector (Figure 3) to
Timer, for the single oven, or to Timer Up-
per Oven or Timer Lower Oven, for the
double oven, so that oven programmer is enabled for the oven you wish to use in programmed operation.
Figure 10.
4. Set oven Selector knob to the cooking function desired:
– Broil
– Bake
– Convection Bake
– Convection Roast
– Convection Broil
– Thaw
5. Set oven Temperature Control knob to the
desired temperature.
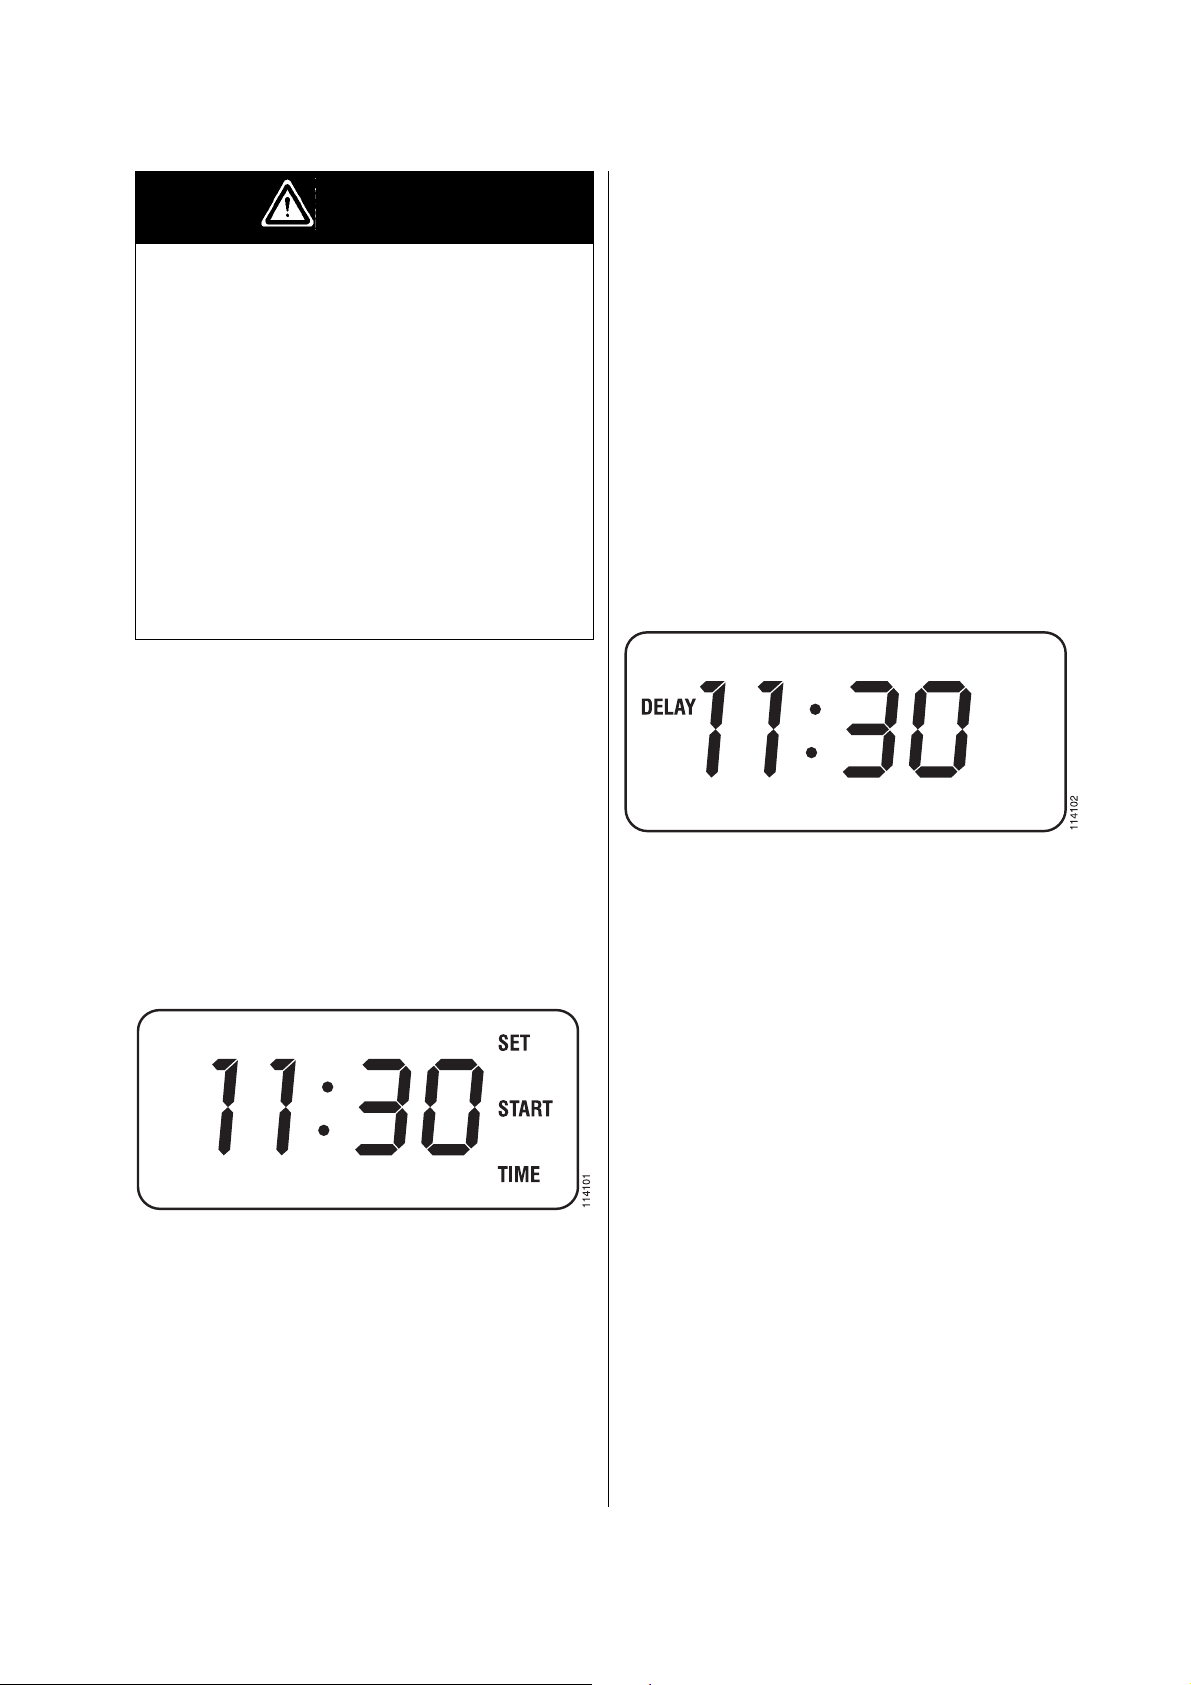
6. Depress Start Time button. A “beep” will
sound and the display will show SETSTART-TIME on the right hand side of the
display, as shown in Figure 10.
7. Then press either the plus (+) or minus (-)
button, to the right of the display, to set the
timer to the start time desired. After the time
has been entered a “beep” will be heard and
the indicator words DELAY-START-TIME
will appear briefly.
Note: If the plus (+) or minus (-) button is not
depressed within 5 seconds of touching
the Start Time button the Start Time button will have to be depressed again to call
up SET - START - TIME.
Figure 11.
8. Depress Cook Time button. A “beep” will
sound and the display will show SETCOOK-TIME on the right hand side of the
display as shown in Figure 8.
9. Then press either the plus (+) or minus (-)
button, to the right of the display, to set the
the timer to the time interval desired.
Maximum cooking time is 11 hours and 50
minutes (minimum cooking time is 1 minute).
The display will return to the time of the day
with the word DELAY appearing to the left
of the day, as shown in Figure 11.
10. When the start time is reached the indicator
word COOK will appear in the display with
the set cook time. At the end of the programmed cook time the oven will shut-off
automatically.
The indicator word COOK will blink and
three (3) “beeps” will be heard. The oven
will continue to “beep” every 10 seconds until any button is depressed.
13
Page 16

Be sure to turn the Mode Selector knob and the
Temperature knob to their Off positions after the
programmed cooking has been completed.
To Check Start Time/before cooking
begins
Depress Start Time button. The start time will be
displayed briefly and then the display will return
to time of day.
To Change Start Time/before Cooking
begins
Depress Start Time button. A “beep” will sound
and the display will show SET - START - TIME
on the right hand side of the display. Then press
either the plus (+) or minus (-) button to the right
of the display, to set the timer to the start time desired.
After the time has been entered a “beep” will be
heard and the indicator words DELAY-STARTTIME will appear briefly and then the display will
return to time of day with the word DELAY appearing to the left of the time of day, as shown
Figure 11.
To Check Cook Time
Depress Cook Time button. The cook time will be
displayed briefly, then the display will return to
on-going program.
To Change Cook Time
Depress Cook Time button. A “beep” will sound
and the display will show SET - COOK - TIME
on the right hand side of the display, see Figure 8.
Then press either the plus (+) or minus (-) button,
to the right of the display, to set the timer to the
time interval desired. Maximum cooking time is
11 hours and 50 minutes (minimum cooking time
is 1 minute).
To Cancel Delay Start
Depress Start Time button twice.
To Cancel Cook Time
Depress Cook Time button twice.
14
Page 17

Care & Cleaning
The Bosch line of ovens feature a pyrolytic selfcleaning function that eliminates the difficult and
time consuming manual scrubbing of the oven interior. During self-cleaning the oven uses very
high temperature (approx. 850°F) to burn away
soil and grease. The fumes produced during this
function of the oven are then filtered and expelled. You will note however that a powder ash
residue will be left on the bottom of the oven after
completion of self cleaning. Once the oven has
cooled sufficiently the residue may be removed
using a damp cloth or sponge. See the following
instruction on use of the self clean function.
WARNING
racks by leaving them in the oven when running the Self Clean function.
• Frame Outside Door Gasket Area
Make sure oven is cool, then use warm soapy
water. With a non-abrasive, plastic scrubbing
pad clean the frame surface outside the door
gasket area. This area must be cleaned by hand
because the area outside the gasket does not get
hot enough to burn off the soil (see Figure 12).
Hand clean frame
area outside gasket
BOSCH
DO NOT
Hand clean gasket
Make sure all controls are Off and the oven is
cool before cleaning. Failure to do so can result in burns or electrical shock.
For parts of the oven other than the oven cavity
the following cleaning methods are recommended:
• Control Panel
Use warm soapy water or spray glass cleaner to
clean the control panel. With a soft cloth or
sponge wash, rinse and dry the control panel
thoroughly. DO NOT use abrasive cleaners or
steel wool pads. These will damage the surface.
• Stainless Steel
To clean, use a standard cleaner designed for
stainless steel such as: Cameo®, Bar Keepers
Friend® or Bon-Ami®. Follow manufacture instructions. When clean, a polish such as Twinkle® or Stainless Steel Magic® can be applied.
DO NOT USE ABRASIVE MATERIALS
SUCH AS STEEL WOOL OR ROUGH
SPONGES. IT WILL SCRATCH THE SURFACE.
• Front of Oven Door(s) and Handle(s)
Use warm soapy water or spray glass cleaner to
clean the glass door surface. With a soft cloth
or sponge wash, rinse and dry the door front(s)
and handle(s) thoroughly. DO NOT use abrasive cleaners or steel wool pads. These will
damage the surface.
• Broiler Pan and Rack(s)
Use warm soapy water. With a steel wool pad
wash, rinse and thoroughly dry the pan and/or
rack(s). DO NOT clean the broiler pans or
Hand clean door area
outside gasket
114197-2
Figure 12.
• Door Outside gasket Area
Make sure oven is cool, then use warm soapy
water. With a non-abrasive, plastic scrubbing
pad clean the area outside the door gasket area.
This area must be cleaned by hand because the
area outside the gasket does not get hot enough
to burn off the soil (see Figure 12).
Using the Self Clean Function
The Self Clean function is a timed function and
therefore is used just as if using the oven in Im-
mediate Start/Automatic Shut-Off or Delayed
Start/Automatic Shut-Off. There are a few
preparations that must be made however as well
as some post function clean-up that you will find
described below:
1. Before using Self Clean be sure to remove
the racks. Also, if you have placed any aluminum foil in the oven this should also be removed.
Note: If items are left in the oven during self
cleaning they may become damaged and
racks will become discolored. Also, the
racks will become difficult to slide in and
out.
2. Clean soil from the frame around the door,
outside the door gasket (see Figure 12). Do
not clean the door gasket by hand as this
15
Page 18

could move or damage the gasket. The areas
outside the gasket area must be cleaned by
hand because these areas do not become hot
enough during Self Clean to burn away the
soiled spots.
3. Also wipe up excess grease and other food
spills with a damp cloth. This will minimize
the amount of smoke created during self
cleaning.
Figure 13.
4. Make sure that the oven door is completely
closed and the oven clock is set to the correct
time.
5. Set the Timer/Manual Selector knob (see
Figure 3) to Timer, for single oven, or to
Timer Upper Oven or Timer Lower Oven,
for double oven, so that oven programmer is
enabled for the oven you wish to have self
clean.
6. Set the Function Selector to Self Clean. The
display will change to say SET - CLEAN TIME with an initial setting of 3 hours. If the
plus (+) or minus (-) buttons are not depressed within a few seconds the display will
revert to CLEAN function, as shown in Figure 14.
7. Set the Temperature Control to Clean.
8. If you wish to change to a cleaning time of
other than 3 hours depress the COOK TIME
button. A “beep” will sound and the display
will show SET - CLEAN - TIME on the
right hand side of the display as shown in
Figure 13. The programmer setting is initially for a duration of 3 hours. The cleaning
time can be set for 2 hours and 30 minutes to
4 hours depending on how soiled the oven
cavity has become:
> Use 2:30 - to - 3:30 hours for light soil.
Use 3:00 - to - 3:30 hours for medium soil.
Use 3:30 - to - 4:00 hours for heavy soil.
9. To adjust the cleaning time press the plus (+)
or minus (-) button, to the right of the dis-
play.
Figure 14.
Note: If the plus (+) or minus (-) button is not
depressed within 5 seconds of touching
the COOK TIME button the COOK
TIME button will have to be depressed
again to call up SET - CLEAN - TIME.
10. After the Clean Time has been set a “beep”
will sound and the indicator word CLEAN
will appear in the display and the oven will
begin the self cleaning process. As the oven
heats past 560°F the automatic door lock will
operate to lock the door of the oven that is in
Self Clean. The Door Lock indicator light
will become illuminated to show that the
door is locked. The door will remain locked
and the indicator light will remain on
throughout the self cleaning process until the
temperature drops below the 560°F temperature noted above.
11. At the end of the programmed clean time the
oven will automatically shut-off. Allow the
oven to cool.
12. Open the door. Then after making sure that
the oven has cooled to a safe temperature,
use a damp cloth or sponge to clean out the
powder ash residue left in the oven. If white
spots remain in the oven they can be removed with a damp sponge. These white
spots are normally just salt spots that cannot
be removed by self cleaning.
13. Reinstall the oven racks and broiler pan.
Be sure to turn the selector knob and the temperature knob to the Off position after the electronic
controlled self cleaning has been completed.
Replacing an Oven Light
Each oven is equipped with two halogen lights located in the back wall of the oven. The lights are
switched on when the door is opened or when the
oven is in a cooking cycle. The oven lights are not
illuminated during SELF CLEAN. Each light as-
16
Page 19

sembly consists of a removable lens, a light bulb
as well as a light socket housing that is fixed in
place, see Figure 15. Light bulb replacement is
considered to be a routine maintenance item.
To replace a light bulb:
1. Read WARNING on this page.
2. Turn off power at the main power supply
(your fuse or breaker box).
3. In multifunction ovens remove the fan cover
by unscrewing the four screws.
4. Remove the lens by unscrewing it.
5. Remove the light bulb from its socket by
pulling it.
6. Replace the bulb with a new one taking care
to don’t touch it with naked fingers.
Their grease can damage the bulb when it becames hot.
The bulb is halogen 12V-20W.
7. Screw the lens back on.
8. Replace the fan cover if the cavity is provided with.
9. Turn the power back on at the main power
supply (your fuse or breaker box).
Oven Door Removal
The oven door can be removed for hand cleaning
if needed.
Figure 15.
WARNING
Make sure the oven and lights are cool and
power to the oven has been turned off before
replacing the light bulb(s). Failure to do so
could result in electrical shock or burns.
The lenses must be in place when using the
oven.
The lenses serve to protect the light bulb from
breaking.
The lenses are made of glass. Handle carefully
to avoid breakage. Broken glass could cause
an injury.
WARNING
Make sure oven is cool and power to the oven
has been turned off before removing the door.
Failure to do so could result in electrical
shock or burns.
The oven door is heavy and fragile. Use both
hands to remove the oven door. The door front
is glass. Handle carefully to avoid breakage.
Broken glass could cause an injury.
Grasp only the sides of the oven door. Do not
grasp the handle as it may swing in your hand
and cause damage or injury.
Failure to grasp the oven door firmly and
properly could result in personal injury or
product damage.
To remove the door fo r 30" mo dels HB L4..
1. Be sure to read the above WARNING before
attempting to remove oven door.
2. Open the door completely.
3. Lift up the hinge bracket on each hinge as
shown in Figure 16.
17
Page 20

Figure 16.
4. Hold the door firmly on both sides using
both hands and pull the door straight out of
the hinge slots pressing it in the direction of
closing. Hold firmly; the door is heavy.
5. Place the door in a convenient location for
cleaning.
After cleaning the door can be replaced by reversing the above procedure.
Be sure to slide the door straight into the slots, as
shown in Figure 17.
After moving the hinge brackets back down into
position be sure to close and open the door slowly
to assure that it is correctly and securely in place.
Figure 18.
4. Hold the door firmly on both sides using
both hands and close the door.
Hold firmly; the door is heavy.
5. Place the door in a convenient location for
cleaning.
After cleaning the door can be replaced by reversing the above procedure.
Be sure to slide the hinge parts (1, Fig. 19) into
their slots properly.
After moving the hinge brackets back down into
position be sure to close and open the door slowly
to assure that it is correctly and securely in place.
Figure 17.
To remove the door for 27" models HBN4..
1. Be sure to read the above WARNING before
attempting to remove oven door.
2. Open the door completely.
3. Lift up the hinge bracket (1, Fig. 18) into the
slot (2, Fig. 18).
18
Figure 19.
Service and Repair
The Bosch oven(s) require no special care other
than the care and cleaning noted above.
If service becomes necessary, contact your dealer
or installer or the Bosch Authorized Service Contractor in your area.
Do not attempt to repair the appliance yourself.
Any work performed by unauthorized personnel
may void the warranty.
If your appliance should fail to operate, before
calling for service please review Table 4 “Problem Solving”.
You could save the cost of a service call.
Page 21

Problem Solving
Ovens may exhibit problems that are unrelated to a malfunction of the oven itself. Service calls for
such items, not covered by warranty, must be paid for by you. The following may serve to answer your
questions about a problem you are having without having to call a service person.
PROBLEM POSSIBLE CAUSE SUGGESTION(S)
Nothing works Oven not connected to correct electrical
circuit.
A household fuse may have blown or circuit
breaker has tripped
Power supply connections are loose. Have qualified electricain check connections.
The oven will not
heat
Clock displays incorrect time of day
Cooking results are
not what was expected
Door will not open Oven is in SELF CLEAN and the oven
Oven light(s) will
not work
The Function Selector is in Off position Turn the function selector t o a cooking
The Temperature knob of the oven is not
turned up to a temperature.
Timed mode is selected, but COOK TIME
has not been set.
Delayed cooking has beeen selected and
START TIME has not been reached.
Time of day not properly set. See section of this manual headed Setting
The oven is not leveled. Level oven. See Installation Instructions.
Oven temperature calibration differs from
your previous oven.
The oven was not preheated before baking. Preheat oven when recipe calls for preheated
Incorrect cooking time, temperature or rack
position being used.
The recipe has not been tested or is not from
a reliable source.
The pan is not the correct type or size. Refer to a reliable cookbook or recipe for
Browning or baking results are not like they
used to be in the former oven.
temperature is above 560 °F.
Oven has finished SELF CLEAN but oven
temperature is still above 560 °F.
Light bulb is burned out. Replace bulb as described in this manual in
Oven is operating in SELF CLEAN. Li ghts do not come on in SELF CLEAN.
Have oven connected to properly sized
electrical power supply by a qualified
electrician.
Replace fuse or reset circuit breaker.
function.
Set the Temperature knob to temperature
desired.
Check display and review instruction for
programming oven.
Check time of day and check START TIME.
Oven should start at preselected START
TIME.
To cancel delayed start press START TIME
button twice.
Electronic Clock.
The calibration of your old oven may have
drifted gradually over time, while your new
oven is more exact. Adjust oven temperature
settings as needed.
oven.
Use only tested recipes from a reliable
source.
recommended pan size.
Change temperature settings in convection
bake as described on page 5 of this manual
and increase baking time accordingly.
Wait for oven to finish and cool down.
Wait for oven to cool.
section titled Repalcing an Oven Light.
Table 4.
19
Page 22

If You Need Assistance or Service
If after reviewing Table 4 you decide that you do
require service for your oven contact your dealer
or installer or the Bosch Authorized Service Contractor in your area. Do not attempt to repair the
appliance yourself. Any work performed by unauthorized personnel may void the warranty.
If you are having a problem with your Bosch oven
and are not pleased with the service you received:
• First, please contact your installer or the Bosch
Authorized Service Contractor in your area and
explain to them why you are not satisfied. This
will usually correct the problem.
• If after working with your installer or service
person the problem still has not been resolved
to your satisfaction, please let us know by
either writing to us at,
BSH Home Appliances
5551 McFadden Avenue,
Huntington Beach, CA 92649
or, calling us at, 800/735-4328
Please be sure to include, if writing, or have available, if calling the following information:
• Model Number
• Serial Number
• Date of Original Purchase
• Date Problem Originated
• Explanation of Problem
BOSCH
Model and serial
number plate
114198-2
Figure 20.
Model Information
As a handy reference, it is recommended that you
copy the information from your Model/Rating
Plate to the table below as well as the name of the
dealer from whom you purchased the oven and
the local Bosch Authorized Service Contractor.
Also, keep your invoice for the oven.
The invoice, with date of purchase, as well as the
model number and serial number will be required
for warranty validation:
Model No .: .............. .. .. .. .. .. .. .. .. .. .. .. .. .. .. .. .. .. .. .. .. .. .. .. .. ..
Seria l No.: .................................................................
Date of Purchase: .....................................................
Dea ler’s name: .... .. .. .. .. .. .. .. .. .. .. .. .. .. .. .. .. .. .. .. .. .. .. .. .. .. .. ..
Also, if writing, please be sure to include a daytime phone number.
You will find the model number and serial number information on the rating plate located on the
frame, to the left of the oven opening, as shown in
Figure 20.
20
Phone: ........................................................................
Bosch Authoriz e d S e rvice Con tractor: ...................
Phone: ........................................................................
Page 23

Model Warranty
Statement of Limited Warranty
The warranties provided by BSH Home Appliances (“Bosch") in this Statement of Limited Warranty apply only to the Bosch
Electric Built-ln Ovens (“Built-In Oven” ) sold to you, the first using purchaser, provided that the Built-In Oven was purchased (1) for your use and not for resale and (2) in the United States or Canada and is located in the country of purchase.
As used in this Statement of Limited Warranty, the term “Date of I nsta llation” shall refe r to the earlier of the date the Built-In
Oven is installed or ten (10) business days after the date the Built-In Ove n is sold to the f irst using pur chaser.
The warranties stated herein apply only to the first using purchaser and are not transferable.
Standard Limited Warranty
Bosch warrants that its Built-In Oven is free fr om defects in materials and workmanship for a period of twelve (12) months
from the Date of Installation. During the warranty period, B osch or its authorized service center will repair or replace, at its
sole option, any Built-In Oven that proves to have been defective under conditions of normal use without charge.
All removed parts and components shall become the property of Bosch, at Bosch’s option. All replaced and/or repaired parts
shall assume the identity of the original part for purposes of this warranty and this warranty shall not be extended with respect to such parts.
Other Conditions of the Limited Warranties
The warranties provided in this Statement of Limited Warranty exclude defects or damage resulting from (1) use of the BuiltIn Oven in other than its normal and customary manner (commercial use of the Built-In Oven sha ll not be deemed normal or
customary), (2) misuse, abuse, accidents or neglect, (3) improper operation, maintenance, installation or unauthorized service, (4) adjustment or alteration or modification of any kind, (5) a failure to comply with applicable state, local, city, and
county electrical and/or building codes, (6) spills of food or liquid, and (7) external forces such as floods, fires, acts of God
or other circumstances beyond Bosch’s control.
Also excluded from this warranty are scratches and damages on external surfaces and exposed parts or Built-In Ovens on
which the serial numbers have been altered, defaced or removed.
To the extent allowed by law, this warranty sets out your exclusive remedies with respect to products covered by it, whether
the claim arises in contract or tort (including strict liability, and negligence) or otherwise.
Bosch will not be liable for consequential or incidental damages, losses, or expenses.
THIS WARRANTY IS IN LIEU OF ALL OTHER EXPRESS WARRANTIES. ANY WARRANTY IMPLIED BY LAW,
WHETHER FOR MERCHA NTABILITY OR FITNESS FOR A PARTICULAR PURPOSE O R OTHERWISE, SHALL BE
EFFECTIVE ONLY FOR THE PERIOD THA T THI S EXPR ESS WARRA NTY IS EFFEC TIVE.
No attempt to alter, modify or amend this warranty shall be effective unless authorized in writing by an officer of BSH.
How to Obtain Warranty Service
To obtain warranty service for the Built-ln Oven, you should contact the nearest Bosch authorized service center.
BSH Home Appliances - 5551 McFadden Avenue, Huntington Beach, CA 92649 – 800/735-4328.
See Page 20.
21
Page 24

Page 25

M
F
s
M
anuel d’utilisation et d’entretien
114192
our électrique Bosch encastré,
imple et double
odeles HBL 43../44../45../46..
VEUILLEZ LIRE TOUTES LES INSTRUCTIONS AVANT D’UTILISER CET APPAREIL
HBN 44../45../46..
Page 26

24
Table des matières
Conseils de sécurité importants
Caractéristiques du produit
Détails sur votre four ....................................................................................................................... 27
Ventilateur de refroidissement ................................................................................................ 27
Position des grilles................................................................................................................... 27
Éléments de cuisson................................................................................................................. 28
Éléments du grilloir ................................................................................................................. 28
Élément chauffant de la convection ........................................................................................ 28
Caractéristiques des fours à convection.................................................................................. 28
Fonctionnement du four
Modèles de four ............................................................................................................................... 29
Utilisation de votre four................................................................................................................... 29
Réglage des fonctions de cuisson, Tableau 3.................................................................................. 31
Programmeur de four....................................................................................................................... 32
Réglage de l'horloge électronique ........................................................................................... 32
Minuteur................................................................................................................................... 32
Usage des commandes du four
Fonctionnement manuel du four...................................................................................................... 34
Contrôle électronique du four.......................................................................................................... 35
Allumage immédiat/Fermeture automatique.......................................................................... 35
Allumage retardé/Fermeture automatique .............................................................................. 35
Nettoyage et entretien
Utilisation de la fonction auto-nettoyage........................................................................................ 38
Remplacement de la lampe du four................................................................................................. 39
Enlèvement de la porte du four........................................................................................................ 40
Service et réparation
Solutions des problèmes, Tableau 4................................................................................................ 42
Besoin d'aide .................................................................................................................................... 43
Information sur le modèle................................................................................................................ 43
Dèclaration de garantie limitée
........................................................................................................................ 29
............................................................................................................................ 38
.............................................................................................................................. 41
............................................................................................................ 25-26
.................................................................................................................. 27
............................................................................................................. 34
............................................................................................................ 44
Page 27

25
CONSEILS DE SÉCURITÉ IMPORTANTS
MISE EN GARDE
sécurité de base afin de réduire tout risque de feu, de choc électrique et/ou de blessures.
1.
Lisez toutes les instructions avant d'utiliser le four.
- Lors de l'utilisation de cet appareil, il est impératif de toujours suivre des consignes de
2.
Installation correcte -
Assurez-vous que votre appareil est correctement installé et mis à la terre
par un technicien qualifié. Demandez à l'installateur de vous montrer où se trouvent les fusibles
ou la boîte du disjoncteur et comment couper le courant de votre four.
3.
Ne faites pas fonctionner le four s'il est endommagé ou ne fonctionne pas correctement.
4.
N'utilisez jamais votre appareil pour chauffer la pièce.
5.
Ne laissez pas les enfants seuls
ou sans surveillance dans une pièce où l'appareil est en marche.
Ne leur permettez jamais de s'asseoir ou de g rimper sur n' importe quelle partie de l' appareil.
6.
Ne touchez pas les éléments chau ffants ou les surfaces intérieures du four -
Même si les
éléments chauffants ne sont pas de couleur rouge, ils peuvent être très chauds. Les surfaces
intérieures et les grilles peuvent aussi être assez chaudes pour causer des brûlures. Durant et
après l'utilisation de votre appareil, ne touchez pas les éléments chauffants et ne laissez aucun
matériau inflammable en contact avec ceux-ci. Laissez le four se refroidir.
7.
Portez des vêtements adéquats -
Évitez de porter des vêtements amples ou qui pendent lorsque
vous cuisinez. Les tissus peuvent s'enflammer et causer des brûlures graves.
8.
Utilisez seulement des mitaines sèches -
Le contact des mitaines humides ou mouillées avec
une surface chaude, peut causer des brûlures dues à la vapeur. Ne touchez pas les éléments
chauffants avec des mitaines. N'utilisez pas de serviette ou de linge épais pour manipuler les
ustensiles.
9.
Service -
Ne réparez ni ne remplacez aucune pièce de l'appareil à moins que ce ne soit
spécifiquement recommandé dans ce manuel. Toute autre réparation doit être référée à un
technicien qualifié.
10.
Rangement d'articles dans ou sur l'appareil -
Ne rangez aucun article inflammable dans le
four.
11.
Ne jetez jamais d'eau sur de la graisse en feu -
Étouffez les flammes à l'aide d'un couvercle ou
utilisez un extincteur chimique sec ou à mousse.
12.
Faites attention en ouvrant la porte
- Laissez l'air chaud ou la vapeur s'échapper avant de
sortir ou de remuer les aliments.
13.
Ne faites pas chauffer d'aliments en boîte sans avoir au préalable ouvert la boîte -
pression dans une boîte fermée peut causer une explosion et des blessures.
14.
Gardez toujours les ouvertures de ventilation libres de toute obstruction.
15.
Installation des grilles de four -
Placez toujours les grilles de four à l'endroit désiré quand le
four est froid. Si vous devez déplacer la grille alors que le four est chaud, prenez soin de ne pas
toucher les éléments chauffants avec vos mitaine s.
La
Page 28

CONSEILS DE SÉCURITÉ IMPORTANTS
16.
Ne nettoyez pas le joint de la porte -
Prenez soin de ne pas le frotter, l'endommager ou le déplacer.
17.
N'utilisez pas de nettoyant pour four -
sur n'importe quelle pièce du four.
18.
Ne nettoyez que les pièces listées dans le manuel.
19.
Avant d'auto-nettoyer le four -
20.
Vérifiez que l'appareil est éteint lorsque vous avez fini -
les boutons de commande du four sont à la position OFF.
21.
MISE EN GARDE
au-dessus du four. Si un enfant grimpe sur l'appareil pour aller chercher ces articles, il pourrait se blesser
sérieusement.
22.
Débranchez toujours le four de l'alimentation électrique avant de le faire réparer.
23.
AVERTISSEMENT
Act» exige que les compagnies avisent les clients du danger potentiel d’exposition aux substances
reconnues par l’état de la Californie comme pouvant causer le cancer ou des problèmes de santé reliés à
la reproduction.
L’élimination des résidus pendant le fonctionnement auto-nettoyant peut générer centains sous produits
dérivés donnés dans la liste.
Afin de minimiser l’exposition à ces substances, toujours faire fonctionner ce four conformément aux
instructions de ce guide et assurer une bonne ventilation à la pièce pendant et immédiatement après le
nettoyage du four.
Enlevez les grilles du four et autres ustensiles.
Ne rangez pas d'articles qui peuvent intéresser les enfants dans les armoires
-
Le règlement «California Safe Drinking Water and Toxic Enforcement
–
Le joint de la porte est essentiel à la bonne fermeture du four.
N'utilisez aucun nettoyant ni revêtement protecteur pour four
À la fin de la cuisson, assurez-vous que tous
26
Page 29

27
Caractéristiques du produit
Lampes halogène
Grilloir et éléments du haut
Panneau de
commande
Niveau no 4
Niveau no 3
Niveau no 2
Niveau no 1
Plaque du modèle et
du numéro de série
Éléments de cuisson
(sous le fond du four)
BOSCH
Figure 1.
Détails sur votre four
Vous trouverez ci-dessus une illustration des composantes d'un four Bosch.
Ce manuel couvre la ligne complète des fours simples et doubles de Bosch, ce qui explique que certaines caractéristiques décrites ne se retrouvent pas
dans votre four.
Ventilateur de refroidissement
Tous les fours, à convection ou non, ont un ventilateur servant à refroidir le panneau de commandes.
Ce ventilateur continue souvent à tourner après la
cuisson ou le nettoyage, tant que le four est chaud et
que le sélecteur de fonction est à une autre position
que OFF. C'est le fonctionnement normal du ventilateur.
Positions des grilles
Il y a quatre niveaux de grilles, tel qu'illustré cidessus.
Élément de convection (non visible)
et ventilateur situésàl'arrière de lacavité du four (Modèles à convection
seulement)
Chaque niveau consiste en deux supports creusés sur
les côtés de la cavité.
La grille s'insère dans les supports.
Chaque four est équipé des pièces et ustensiles sui-
vants:
Des grilles.
•
Veillez toujours à placer les grilles, etc., avant d'allumer le four.
Assurez-vous que les g rilles sont horiz ontales.
Pour retirer la grille, soulevez la grille à l'avant et ti-
rez.
Pour le replacer:
1. Placez l'arrière de la grille entre les guides de niveau.
2. Tout en soulevant l'avant de la grille, faites glisser la grille entièrement à l'intérieur, puis abaissez
l'avant. Référez-vous à l'illustration si vous avez
des doutes sur l'avant et l'arrière de la g rille.
114193-3
Page 30

Les éléments de cuisson
Les fours Bosch sont munis de deux éléments de
cuisson: un situé en haut du four et un autre situé
sous le fond de la cavité du four pour faciliter le
nettoyage de la cavité du four.
Figure 2.
Éléments du grilloir
Les éléments du grilloir des fours Bosch sont situés
en haut de la cavité du four. Ne touchez pas ces éléments chauffants et évitez tout contact avec vos mitaines. N'utilisez pas de serviette ou de gros chiffons
pour retirer un ustensile, ils pourraient prendre feu.
Élément chauffant de la convection
Si vous avez un four à convection, vous trouverez
l'élément à convection (non visible) et le ventilateur
à l'arrière de la cavité du four. La co mbinaison de cet
élément et du ventilateur effectue la cuisson dans le
mode “convection bake”. Le ventilateur est toujours
en marche lorsque le four est en mode convection,
référez-vous au Tableau 3.
Caractéristiques des fours à convection
Les fours simples et doubles sont offerts en modèle
conventionnel thermique ou en modèles à convection. Nombreux sont ceux qui se posent des questions sur le système à convection et sur les raisons
pour lesquelles il est supérieur au système thermique. Vous trouverez ci-dessous une brève explication du fonctionnement d'un four à convection et de
ses avantages.
Dans les Fours à Convection Bosch, (Genuine European Convection System) les 3 éléments, le
ventilateur et le panneau de ventilation, l’air chaud
circule à travers le four dans une façon uguale. Il en
résulte plusieurs avantages:
• La conservation des jus et de la saveur
• La cuisson et il permet de rissoler les aliments
• L’épargne du temps et d’énergie
• La cuisson à de différents niveaux et simulta-
nément
• La déshydratation des herbes, des fruits et des
légumes
• La cuisson de repas complètes sans perdre la
saveur des aliments
• La décongélation des aliments
Beaucoup de recettes ont les instructions et les
températures pour le temps de cuisson du cycle
normal. En règle générale, la plupart des recettes
peuvent être cuisinèes avec les meilleurs résultats
dans un des cycles de convention, vous réduisez la
température de 25°F et vous vérifiez à ce point le
minimum de cuisson suggéré. Quand vous faites de
cuisson sur plus de 1 grille on doit augmenter le
temps de cuisson, quelques minutes en plus pour
chaque grille additionnelle.
Comme chaque goût varie, vous devrez essayer de
mettre le temps de cuisson exact ainsi que la juste
température pour obtenir de bons résultats.
Il est déconseillé d’employer des thermomètres à
four que vous pourrez trouver dans de grands magasins pour vérifier la température du four. Ils
pourraient être inexacts et ils ne pourraient pas répondre aux changements de température.
28
Page 31

29
c
Acier
x.
c
Acier
x.
Fonctionnement du four
Avant d'utiliser le four pour la première fois
Assurez-vous d'enlever tous les produits d'emballage
Modèles de fours
Il y a 21 modèles différents de fours Bosch (voir Tableaux 1 et 2 ci-dessous). Les fours Bosch sont of-
et autre matériel du four. Tout matériel de cette sorte
laissé à l'intérieur du four risque de fondre ou de brûler quand le four sera mis en marche.
ferts en 27” ou 30” en blanc, noir ou acier inoxydable, en configuration simple ou double et en modèle
standard, de type thermique ou de type à convection.
Les fours doubles sont offerts avec un seul four à
convection ou les deux à convection.
Modèles à four Convection
Tableau 1.
simple Blan
HBL 432A UC
HBL 435A UC
HBL 436A UC
HBL 442A UC
HBN 442A UC
HBL 445A UC
HBN 445A UC
HBL 446A UC
HBN 446A UC
NON X
NON X
NON X
OUI X
OUI X
OUI X
Couleurs
Noir
ino
Modèles à four Convection
Tableau 2.
duoble (Haut/Bas) Blan
HBL 452A UC
HBN 452A UC
HBL 455A UC
HBN 455A UC
HBL 456A UC
HBN 456A UC
HBL 462A UC
HBN 462A UC
HBL 465A UC
HBN 465A UC
HBL 466A UC
HBN 466A UC
OUI/NON X
OUI/NON
OUI/NON
OUI/OUI
OUI/OUI
OUI/OUI
Couleurs
Noir
ino
X
X
X
X
X
En raison des nombreux modèles offerts, toutes les
caractéristiques décrites ci-dessous peuvent ne pas
s'appliquer à votre four.
Panneau de commandes
Tous les fours comportent les commandes suivantes,
tel qu'illustré dans la figure 3:
•
Boutons-poussoirs du programm eur:
- Bouton de l'horloge
- Bouton du minuteur
- Bouton du temps de cuisson (Cook Time)
- Bouton de l'heure de début de cuisson
- Réglage de l'heure, boutons + et -
•
Affichage du programm eur
•
Lumière allumée/éteinte
•
Lumière de la chaleur
•
Lumière de fermeture de la porte
•
Bouton sélecteur manuel/Minuteur
•
Boutons de contrôle de température
•
Boutons sélecteur de mode
La Figure 3 montre en haut le panneau de commande
du four double; en bas le panneau de commande du
four simple.
Boutons-poussoirs du programmeur
Ces boutons servent à régler et programmer le four.
Voir les sections
four
pour plus d'explications sur l'usage de ces bou-
Minuteur
Programmation du
et
tons.
Afficheur du programmeur
L'afficheur du programmeur effectue plusieurs fonctions. Lorsque le four est branché pour la première
fois à l'électricité, l'afficheur est vide.
Voir les sections
four
pour plus d'explications sur le réglage de l'af-
Minuteur
Programmation du
et
ficheur et la cuisson programmée.
Utilisation de votre four
Il est très important d'apprendre à bien se servir de
son four pour obtenir les meilleurs résultats. Vous
trouverez
ci-après des informations importantes
pour l'utilisation efficace et sécuritaire de votre four.
Sélecteur du mode Minuteur/Manuel
Ce bouton sert à régler le four sur le mode Minuteur
(Timer) ou sur le mode Manuel.
Page 32

30
Lower Oven
Off
BOSCH
Clean
Self
Bake
Set
Cook
Clock
Time
Start
Timer
Set
Clock
Timer
Time
Cook
Time
Start
Time
Broil
+
Time
Off
Self
On
+
Time
Heat
Door
Loock
Clean
Broil
Bake
Thaw
Convection
Roast
Bake
Broil
Page 33

31
s
s
t.
s
a
s
s
t.
s
a
Réglage des fonctions de cuisson
Note:
Les éléments du ba
sont illustrés à des fin
de clarté seulemen
Ils sont en fait situé
sous le plancher de l
cavité du four.
Les fours à convection ont les fonctions de cuisson additionnelles suivantes
Four thermique Information sur les fonctions
BROIL (Grilloir) -
ments. Lorsque le four est réglé sur
"BROIL", les éléments du haut fonc tionnent et chauffent. Peut s'utiliser avec la
porte ouverte ou fermée.
BAKE (Rôtissoire) -
pour cuire, rôtir et réchauffer des mets
cuisinés, etc. Lorsque le four est réglé sur
"BAKE", l'élément du haut et celui du bas
fonctionnent et chauffent.
sert à griller les ali-
ce mode est utilisé
Convection Bake (Cuisson à convec-
c'est le mode le plus polyvalent de
tion) -
cuisson ou de ré chauffe ment d'une grand e
variété de plats. Idéal pour la préparation
d'une grande quantité de mets sur plusieurs grilles en même tem ps.
Lorsque le four est réglé sur "Convection Bake", les éléments pour le cuisson
circulair de l'arrière fonctionnent et le
ventilateur se met en marche.
Note:
.
Les éléments du ba
sont illustrés à des fin
de clarté seulemen
Ils sont en fait situé
sous le plancher de l
cavité du four.
Tableau 3. Réglages des fonctions de cuisson
Convection Roast (Rôtissage) -
faire rôtir les aliments.
Lorsque le four est réglé sur "Convection
Roast", l'élément du haut et l'élément du
bas fonctionnent. Le ventilateur se met en
marche.
Convection Broil (Grilloir) -
griller le poisson et les morceaux épais de
viande. La porte doit être fermée durant la
grillade à convection.
Lorsque le four est réglé sur "Convection
Broil", les élé ments du haut fonct ionnent.
Le ventilateur se met en m arche
Thaw (Décongélation) -
ler les aliments.
Lorsque le four est réglé sur "Thaw", aucun élément ne fonct ionne. Seul le ventilateur se met en marche
sert à déconge-
sert à
sert à faire
Page 34

32
Programmeur de four
Le programmeur sert à contrôler électroniquement la
cuisson dans votre four. La figure 4 montre toutes les
fonctions disponibles sur l'écran d'affichage et leurs
emplacements. Les boutons directement adjacents à
l'affichage sont les boutons de programmation. Ils
servent à programm er le four et à rég ler l'horloge.
Figure 4.
Réglage de l'horloge électronique
Lorsque le four est branché pour la première fois sur
l'électricité, ou s'il y a eu une panne de courant,
l'écran affichera toutes les fonctions (comme dans la
Figure 4) puis se videra complètement pour ne montrer que des tirets et le symbole de l'horloge dans le
coin supérieur droit (comme dans la Figure 5).
Pour changer l'heure du jour, répétez simplement les
étapes ci-dessus. Pour vérifier l'heure alors que le
minuteur est en marche, appuyez sur le bouton Set
Clock. L'heure apparaîtra brièvement à l' écran puis la
fonction de minutage reprendra.
Le minuteur
Le minuteur fait le compte à rebours de l'intervalle
de temps réglé.
Réglage du minuteur
•
Appuyez sur le bouton
tendre et l'affichage changera: l'heure disparaîtra
et sera remplacée par 00 et on pourra lire sur
l'écran SET TIMER, à la droite, comme dans la
Figure 6.
•
Appuyez ensuite sur les boutons plus (+) ou
moins (-), à droite de l'afficheur pour établir la
durée de cuisson désirée.
Timer.
Un bip se fera en-
Figure 5.
Réglage de l'heure
Appuyez sur le bouton
tendre. Puis appuyez sur les boutons plus (+) ou
moins (-), à droite de l'afficheur pour obtenir l'heure
juste. En appuyant simplement sur + ou -, l'heure
avancera ou diminuera de 1 minute à la fois, mais si
vous appuyez et maintenez la pression sur ces boutons, l'heure changera de 10 minutes à la fois. Quand
l'heure juste est atteinte, appuyez sur le bouton Set
Clock pour introduire l'heure. Un "bip" se fera entendre et le symbole de l'horloge dans le coin supérieur droit disparaîtra.
Set Clock
. Un bip se fera en-
Figure 6.
Note:
1. Chaque fois que vous appuierez sur les boutons
plus (+) ou moins (-), l'affichage augmentera ou
diminuera d'une minute. Si vous appuyez et m aintenez la pression sur ces boutons, l'affichage
augmentera ou diminuera de 10 m inutes à la fois.
2. Si vous n'appuyez pas sur les boutons plus (+) ou
moins (-) dans les 5 secondes après avoir appuyé
sur le bouton
core sur
•
Une fois que l'intervalle de temps désiré est programmé, relâchez les boutons.
•
L'intervalle de temps commencera après 4 secondes environ.
Timer
, vous aurez à appuyer en-
Timer
pour accéder au mode minutage.
Page 35

33
•
Le mot indicateur
Timer
restera affiché durant
tout le compte à rebours.
•
Le minuteur fera le compte à rebours en minutes,
Page 36

34
Usage des commandes du four
Temperature F°
Off
Clean
Broil
Lower Oven
Self
Clean
Off
Broil
Lower Oven
On Heat HeatDoor
Lock
Bake
Set
Cook
Clock
Time
Start
Timer
Time
Upper Oven
Lock
+
Time
OnDoor
Both
Manual
Figure 7. Panneau de commande du four double, HBL/HBN45..
Les commandes du four servent à faire fonctionner
le four soit manuellement, soit de façon programmée. Nous traiterons d'abord de la façon manuelle,
ensuite du programmeur.
Une fois que vous avez placé le bouton sélecteur sur
Manual ou, si vous avez un four double, décidé quel
four vous alliez utiliser:
1. Tournez le bouton sélecteur de mode et placez-le
Fonctionnement manuel du four
Avant d'allumer votre four, mettez les grilles en
place. Pour changer une grille de place, levez-la
grille, tirez-la vers vous et réinsérez-la au niveau désiré.
Placez le bouton sélecteur Minuteur/Manuel à la position
Manual
double, comme dans la Figure 7, vous avez le choix
entre trois positions:
•
Timer Upper Oven
- à cette position, vous devez utiliser le minuteur
pour contrôler le four supérieur, tandis que le
four inférieur peut être utilisé manuellement.
•
Both Manual
sition, vous pouvez utiliser les deux fours manuellement.
•
Timer Lower Oven
- à cette position, vous devez utiliser le minuteur
pour contrôler le four inférieur, tandis que le four
(voir Figure 3). Si vous avez un four
- Minuteur du four supérieur
- Les deux sur manuel - à cette po-
- Minuteur du four inférieur
au mode d% cuisson choisi. Référez-vous à la
Figure 3 ou au Tableau 3 si vous n'êtes pas sûr de
quel bouton il s'agit ou quelle fonction vous voulez choisir pour votre four.
Le ventilateur commence à fonctionner dès
Note:
que le bouton sélecteur n'est plus sur OFF.
2. Tournez le bouton de contrôle de la température
et placez-le à la température désirée.
S'il s'agit d'un four à convection et que vous
Note:
avez choisi la décongélation (
n'est pas nécessaire de toucher au bouton de
la température puisqu'il n'y a aucun chauffage dans ce mode.
3. Une fois que la cuisson est terminée, n'oubliez
pas de replacer le bouton sélecteur de mode et le
bouton de la température à la position OFF.
supérieur peut être utilisé manuellement.
Timer Upper Oven
Timer Lower Oven
Upper Oven
Self
Clean
Broil
Bake
Thaw
Temperature F°
Clean
Off
Broil
114196
THAW
), il
Off
Convection
Roast
Bake
Broil
Page 37

35
Contrôle électronique du four
Allumage immédiat/Fermeture automatique
Pour utiliser les commandes électroniques et faire en
sorte que la cuisson commence immédiatement et
s'arrête automatiquement:
1. Placez les grilles du four aux niveaux désirés et
posez les aliments.
2. Assurez- v ous que l'horloge du four est à l'heure.
3. Placez le bouton sélecteur Minuteur/Manuel (Figure 3) à la position
ou, s'il s'agit d'un four double, à
pour le four supérieur ou
Oven
pour le four inférieur. Le programmeur est
Oven
alors mis en marche.
pour un four simple
Timer
Timer Upper
Timer Lower
7. Pour cela, appuyez sur le bouton plus (+) ou
moins (-), à droite de l'écran, pour donner au minuteur la durée de cuisson choisie. La durée
maximum est de 11 heures et 50 minutes (la durée minimum est de 1 minute).
Si vous ne touchez pas aux boutons + ou -
Note:
dans les 5 secondes après avoir touché au
bouton
mencer, c'est-à-dire, appuyer sur
à nouveau pour obtenir SET-COOK-TIME.
8. Après avoir réglé le temps de cuisson, vous entendrez un bip, puis le mot indicateur COOK
(Cuisson) apparaîtra à l'écran et le four commencera à chauffer. La Figure 9 montre à quoi ressemblerait l'écran s'il avait été programmé pour
une cuisson de 2 heures et 30 minutes.
9. À la fin du temps de cuisson programmé, le four
s'éteindra automatiquement et le mot COOK clignotera. Vous entendrez 3 bips et le four continuera à émettre des bips toutes les 10 secondes
jusqu'à ce que vous touchiez à un bouton.
Cook Time
, vous aurez à recom-
Cook Time
Figure 8.
4. Placez le bouton sélecteur de mode à la fonction
- Broil (Grillade)
- Bake (Cuisson)
- Convection Bake
- Convection Roast (Rôtissage à convection)
- Convection Broil
- Thaw (Décongélation)
5. Placez le bouton de la température à la tempéra-
6. Appuyez sur le bouton
de cuisson désirée:
ture désirée.
Cook Time
cuisson). Un bip se fera entendre et l'écran affichera SET-COOK-TIME sur le côté droit (voir
Figure 8), ce qui signifie que vous devez introduire la durée de cuisson choisie.
(Temps de
Assurez vous de remettre le bouton sélecteur de
mode et le bouton de température à la position OFF
après la fin de la cuisson par contrôle électronique.
Annulation du temps de cuisson
Pour annuler le temps de cuisson programmé, appuyez deux fois sur le bouton
Cook Time.
Allumage retardé/Fermeture automatique
On peut aussi utiliser le programmeur pour faire en
sorte que la cuisson commence plus tard, dure un
certain temps et s'arrête automa tiquem ent.
Cette fonction n'est pas recommandée pour les aliments qui contiennent de la levure ou de la poudre à
lever car ceux-ci ne lèveront pas norm alement.
N'oubliez pas également d'inclure au temps de cuisson le temps nécessaire au four pour qu'il atteigne la
température désirée. La plupart du temps, il faut
ajouter environ 10 minutes au temps de cuisson.
Figure 9.
Ce temps de préchauffage n'est pas requis pour les
fours à convection, mais suivez quand même votre
recette.
Page 38

36
Page 39

37
Assurez vous de remettre le bouton sélecteur de
mode et le bouton de température à la position OFF
après la fin de la cuisson.
Vérification de l'heure de début de cuisson avant
que la cuisson ne commence:
Appuyez sur le bouton
Start Time.
L'heure de début
de cuisson apparaîtra brièvement à l'écran, puis disparaîtra pour retourner à l'heure du jour.
Changement de l'heure de début de cuisson avant
que la cuisson ne commence:
Appuyez sur le bouton
Start Time
. Un bip se fera
entendre et l'écran affichera SET-START-TIME sur
le côté droit. Ensuite appuyez sur le bouton plus (+)
ou moins (-), à droite de l'écran, pour donner au minuteur l'heure de début de cuisson désiré. Après
avoir introduit cette heure, un bip se fera entendre et
les mots DELAY-START-TIME (Heure de cuiss on
retardée) apparaîtront brièvement à l'écran puis
l'écran retournera à l'heure du jour avec le mot DELAY à gauche de l'heure, comm e dans la Fig ure 11.
Vérification de la durée de cuisson
Appuyez sur le bouton
Cook Time.
:
La durée de
cuisson apparaîtra brièvement à l'écran, puis disparaîtra pour retourner au programme courant.
Changement de la durée de cuisson:
Appuyez sur le bouton
Cook Time
. Un bip se fera
entendre et l'écran affichera SET-COOK-TIME sur
le côté droit (voir Figure 8). Ensuite appuyez sur le
bouton plus (+) ou moins (-), à droite de l'écran, pour
donner au minuteur la durée de cuisson désirée. La
durée de cuisson maximum est de 11 heures et 50
minutes (la durée minimum est de 1 minute).
Annulation de la cuisson retardée
Appuyez deux fois sur le bouton
Start Time.
Annulation du temps de cuisson
Appuyez deux fois sur le bouton
Cook Time.
Page 40

38
Nettoyage et entretien
La ligne de fours Bosch offrent une fonction d'autonettoyage pyrolytique qui élimine la tâche fastidieuse de nettoyage du four à la main. Durant l'autonettoyage, le four atteint une température de 850°F
pour brûler toutes les graisses et les débris d'aliments. Les fumées produites durant cet exercice sont
filtrées et évacuées. Vous remarquerez cependant
des cendres dans le fond du four à la fin de l'autonettoyage.
Page 41

39
2. Nettoyez le cadre autour de la porte et du joint de
porte (voir Figure 12). Ne nettoyez pas le joint à
la main car vous pourriez déplacer ou endommager le joint. Les surfaces autour du joint doivent
être nettoyées à la main car elles ne chauffent pas
assez durant
l'auto-nettoyage
pour brûler toutes
les souillures.
3. Essuyez les tâches de graisse ou autres débris
d'aliments à l'aide d'un chiffon humide. Cela réduira la quantité de fumée causée par l'autonettoyage.
Figure 13.
4. Assurez-vous que la porte est bien fermée et que
l'horloge du four est à l'heure.
5. Placez le bouton sélecteur Minuteur/Manuel (Figure 3) à la position
ou, s'il s'agit d'un four double, à
Oven
pour le four supérieur ou
Oven
pour le four inférieur. Le programmeur est
Timer
pour un four simple
Timer Upper
Timer Lower
alors mis en marche pour le four que vous voulez
nettoyer.
6. Réglez le bouton sélecteur à
Self Clean
(autonettoyage). L'écran affichera alors SET-CLEANTIME avec un réglage initial de 3 heures. Si vous
ne touchez pas aux boutons + ou -dans les secondes qui suivent, l'écran retournera à la fonction CLEAN, comme dans la Figure 14.
7. Réglez le bouton de la température à
Clean
.
8. Si vous désirez changer la durée du nettoyage
afin qu'elle soit autre que 3 heures, appuyez sur le
bouton
Cook Time.
Un bip se fera entendre et
l'écran affichera SET-CLEAN-TIME sur le côté
droit (voir Figure 13). La durée programmée est
de 3 heures, cependant, elle peut varier de 2 heures 30 minutes à 4 heures, selon que le four soit
peu sale ou très sale. Optez pour:
- 2h30 à 3h30 pour un four légèrement sale
- 3h à 3h30 pour un four moyennem ent sale
- 3h30 à 4h pour un four très sale
9. Pour ajuster la durée du nettoyage, appuyez sur
les boutons plus (+) ou moins (-), à droite de l'afficheur.
Note:
Si vous ne touchez pas aux boutons + ou -
dans les 5 secondes après avoir touché au
bouton
nouveau sur le bouton
Cook Time
, il faudra appuyer à
Cook Time
pour ob-
tenir à l'écran SET-CLEAN- TI ME.
Figure 14.
10. Après avoir réglé la durée du nettoyage (Clean
Time), vous entendrez un bip et le mot indicateur
CLEAN apparaîtra à l'écran. Le four commencera
alors le processus d'auto-nettoyage. Quand le four
atteindra 560°F, le processus de verrouillage automatique de la porte s'enclenchera et le voyant
lumineux de verrouillage de porte s'illum inera. La
porte restera verrouillée et le voyant allumé jusqu'à ce que la température du four descende audessous de 560°F.
11. À la fin de la période de nettoyage programmée,
le four s'éteindra automatiquement. Laissez le
four se refroidir.
12. Ouvrez la porte. Assurez-vous que le four s'est refroidi et a atteint une température sécuritaire.
Nettoyez les cendres qui se sont déposées au fond
du four à l'aide d'un chiffon humide ou d'une
éponge. S'il y a encore des taches blanches sur le
four, vous pouvez les enlever avec une éponge.
Ces taches blanches sont de simples taches de sel
qui ne partent pas durant l'auto-nettoyag e.
13. Réinstallez les grilles et la lèche-frite.
Assurez vous de remettre le bouton sélecteur et le
bouton de température à la position OFF à la fin du
nettoyage.
Remplacement d'une lampe de four
Chaque four est muni de deux lampes placées sur la
paroi arrière du four. Les lampes s'allument quand
on ouvre la porte du four ou quand un cycle de cuis-
Page 42

40
son est en cours. Les lampes du four ne s'allument
pas durant l'auto-nettoyage. Chaque système d'éclairage consiste en une lentille amovible, une ampoule
et une douille qui est fixée en place (voir Figure 15).
Le changement de lampe est une opération routinière
d'entretien.
Pour remplacer une lampe:
1. Lire la MISE EN GARDE qui suit.
2. Coupez le courant à la source principale (fusible
ou boîte de dérivation).
Page 43

41
Figure 16.
4. Agrippez fermement la porte des deux mains, par
les côtés et sortez-la des fentes à charnière en la
tirant vers vous. Tenez-la solidement car elle est
très lourde.
5. Placez-la dans un endroit pratique pour le nettoyage.
Après l'avoir nettoyée, vous la replacerez en effectuant les mêmes procédures en sens inverse. Veillez
à glisser correctement la porte dans les fentes tel
qu'indiqué à la Figure 17. Remettez les supports de
charnière en position, puis fermez et ouvrez lentement la porte pour vérifier qu'elle est correctement et
sécuritairement en place.
Page 44

42
Solution des problèmes
i-
é
-
-
e
-
e
.
-
é
e
a
i-
t
e
e
n
-
r
e
-
e
a
s
-
r
Il arrive que les fours présentent des problèmes qui ne se rapportent pas au mauvais fonctionnement de l'appareil. Les appels pour de tels problèmes ne sont pas couverts par la garantie et vous serez donc responsables
des frais de réparation. Le tableau ci-dessous vous aidera à résoudre ce genre de problèmes sans avoir à appeler un agent de service.
PROBLÈME CAUSE POSSIBLE SUGGESTIONS
Rien ne fonctionne Le four n'est pas branché au circuit électr
que adéquat.
Un fusible a sauté ou le disjoncteur est dé
clenché.
Les fiches de l'alimentation en courant n
sont pas bien branchées.
Le four ne cha uff
pas
Le bouton de la température n'a pas ét
Le mode de minutage a été choisi mais l
Vous avez choisi la cuisson retardée e
L'horloge du fou
n'est pas à la bonn
heure
Les résultats de l
cuisson ne sont pa
concluants La calibration de température de votre fou
La fonction Sélecteur est à la position OFF
placé à la température désirée.
durée de la cuisson n'a pas été rég lée.
l'heure de début de cuisson n'a pas encor
été atteinte.
Vous n'avez pas réglé correctement l'hor
loge.
Le four n'est pas de niveau. Mettez le four de niveau. Voir les instructions d'ins
Faites brancher le four à une source d'électricit
adéquate, par un électricien qualifié.
Remplacez le fusible ou ré-enclenchez le disjonc
teur.
Faites vérifier les connexions par un électricien qua
lifié.
Tournez le bouton sélecteur à une position de cuis
son.
Réglez le bouton de la température à la températur
désirée.
Vérifiez l'afficheur et relisez les instructions relat
ves à la programmation du four.
Vérifiez l'heure et l'heure de début (Start Time). L
four devrait chauffer à l'heure de début de cuisso
programmée. Pour annuler la cuisson retardée, ap
puyez deux fois s u r l e bou ton S TAR T TIME.
Voir section de ce manuel intitulée
l'horloge électronique.
tallation.
Réglage d
coec-0.q1 6 43t3v-0.q]TJ4( pprécéd8(o)0.qt0602 TD-0.012 Tc0.3162 Tw[(83)8.9(e)8.24( f)8()6.')1c6.'t re(]TJ8.6)t re(n)6.4 re(e6.')1vo(t re(t1 i )6]TJ8.6)e6.'t re(u]TJ8.6)
Page 45

43
Si vous avez besoin d'assistance ou de
service
Si, après avoir lu le Tableau 4, vous décidez que votre appareil a besoin d'être réparé, communiquez
avec votre concessionnaire ou avec l'installateur ou
encore avec l'Agent de service autorisé Bosch de v otre région. Ne tentez pas de réparer vous-même l'appareil. Tout travail effectué par une personne non autorisée aura pour effet d'annuler la garantie.
Si vous avez un problème avec votre four Bosch et
que vous n'êtes pas satisfait(e) du service qu'on vous
a offert:
•
Premièrement communiquez avec votre installateur ou avec l'Agent de service autorisé Bosch de
votre région et expliquez-lui pourquoi vous n'êtes
pas satisfait(e). Ils se feront un plaisir de régler
votre problème.
•
Si, après avoir travaillé avec l'installateur ou
l'agent de service, vous n'êtes toujours pas satisfait(e), faites le nous savoir en nous écrivant à:
BSH Home Appliances
5551 McFadden Avenue,
Huntington Beach, CA 92649
ou appelez-nous au
800/735-4328.
Veuillez vous assurer de nous communiquer les informations suivantes par écrit ou par téléphone:
•
Le numéro de modèle
•
Le numéro de série
•
La date de l'achat original
•
La date à laquelle le problème a commencé
•
L'explication du problème.
Si vous nous écrivez, assurez-vous aussi de nous
donner un numéro de téléphone de jour.
Vous trouverez les numéros de modèle et de série
sur la plaque d'identification fixée sur le cadre du
four, porte ouverte, côté gauche (voir Figure 20).
BOSCH
Plaque-numéro de
série et numéro
de modéle
114198-3
Figure 20.
Informations sur le modèle
La plaque d'identification fixée sur le cadre de l'appareil indique les numéros de modèle et de série de
votre four. Nous vous recommandons de recopier les
informations contenues sur cette plaque, dans le tableau ci-dessous. Votre facture ainsi que les informations inscrites ci-dessous seront requises pour valider
votre garantie.
No de modèle: ............................................................
No de série: ................................................................
Date d'achat: ...............................................................
Nom du marchand: ....................................................
No de téléphone du marchand: ..................................
Agent de service autorisé de Bosch: .........................
No de téléphone de l'agent: .......................................
Page 46

44
Déclaration de garantie lim itée
Les garanties fournies par BSH Home Appliances ("Bosch") dans cette déclaration de garantie limitée s'appliquent seulement aux fours
électriques encastrés Bosch ("Fours encastrés") achetés par vous, le premier achet eur, à condition que le Four encastré ait été acheté (1)
pour votre usage personnel et non pour la revente (2), aux États-Unis ou au Canada, et que le four se trouve dans le pays où il a été
acheté. Le terme «Date d'installation» utilisé dans cette déclaration se réfère à la date à laquelle le Four encastré a été installé ou à dix
(10) jours ouvrables après la date à laquelle le Four encastré a été vendu au premier acheteur/utilisateur. Les garanties mentionnées cidessous s'appliquent seulement au pre mier acheteur/utilisateur et ne sont pas transfé rables.
Garantie limitée sta ndard
Bosch garantit que ses fours encastrés sont libres de toute défectuosité de matériau ou de fabrication pour une période de douze (12)
mois à partir de la date d'installation. Durant cette période de garantie, Bosch ou son centre de service autorisé réparera ou remplacera,
à sa seule discrétion et sans frais, tout Four encastré qui s'avèrera défectueux, dans des conditions d'usage normal. Toutes les pièces et
composantes retirées d u fou r d eviendr ont la p rop riété d e Bosch , à la seul e discréti on de Bo sch. Tou tes les pi èces remplacées et/ou réparées assumeront l'identité de la pièce originale aux fins de cette garantie et cette garantie ne s'appliquera pas à de telles pièces.
Autres conditions de la garantie limitée
Les garanties fournies dans cette Déclaration de garantie limitée excluent les défectuosités et les dommages résultant de (1) l'usage du
Four encastré autre qu'un usage normal et habituel (l'usage commercial du Four encastré n'est pas considéré comme normal ou habituel), (2) le mauvais usage, l 'abu s, les accid ent s ou la n égligence, (3) l e fonctionnement incorrect, l'entretien, l'installation ou le service
non autorisés, (4) les rajustements, changements ou modifications de toutes sortes, (5) le fait de ne pas se conformer aux règlements et
codes électriques et/ou de construction locaux, municipaux, provinciaux et nationaux en vigueur, (6) les renversements d'aliments et
ou de liquides, et (7) les forces extérieures telles que inondations, incendies, actes naturels et autres circonstances hors du contrôle de
Bosch. Sont exclues également de cette garantie les éraflures et dommages aux surfaces extérieures et aux parties exposées du Four encastré sur lequel les numéros de série ont été effacés, changés ou enlevés.
Dans la mesure autorisée par la loi, cette garantie établit vos recours exclusifs relativement aux produits couverts par la garantie, que la
réclamation provienne du contrat ou d'un tort (incluant la stricte responsabilité et la négligence) ou autre. Bosch ne sera pas responsable des dommages-intérêts ind irects ou accessoires, d es pertes ou des dépen ses. CETTE GARANTIE REMPLACE TOUTE AUTRE
GARANTIE EXPRESSE OU ACCESSOIRE. TOUTE GARANTIE SUGGÉRÉE PAR LA LOI, QUE CE SOIT POUR LA QUALITÉ MARCHANDE OU L'USAGE A DES FINS PARTICULIERES OU AUTRE, NE SERA APPLICABLE QUE DURANT LA
PÉRIODE OU CETTE GARANTIE EXPRESSE EST EN VIGUEUR. Aucune tentative de modifier, changer ou amender cette garantie ne sera en vigueur à moins qu'elle ne soit autorisée par écrit par un cadre de BSH.
Comment obtenir un se r v ice de g a ra ntie
Pour obtenir un service sous g a ra ntie pour Four e nc as tr é, c ommuniquez ave c le c e ntre de s e rv ic e B osc h le plus proc he ou a v e c
BSH Home A pplianc e s – 5551 Mc Fa dde n Avenue, Huntington Beach, CA 92649.
Voir page 43.
Page 47

Page 48

Code 09BH0320 TPS Gallarate - (02-003)
 Loading...