

Page 1
Installation Instructions
Pro Ripper Shifter
1983-2003 Ford Mustang
with T-5, T-5 w/OD & T-45 Transmission
Part Number 45070
©2005, 2003, 2001 by B&M Racing and Performance Products
This B&M Pro Ripper Shifter has been designed to work on all 1983-2003 Ford Mustang models equipped with T-5, T-
5 w/OD and T-45 transmissions. It has been engineered to greatly reduce shift throw and improve shifter feel. Check the
parts and tools lists at the beginning of these instructions for the supplied parts and the tools required to install your B&M
Pro Ripper Shifter. Installation of the B&M Pro Ripper Shifter can be accomplished by anyone with minimal mechanical
experience.
INTRODUCTION
This B&M Pro Ripper Shifter can be installed in less than an hour by carefully following the instructions. Read all
instructions first to familiarize yourself with the parts, tools, and procedures. This kit contains all the parts necessary to
install the shifter.
PARTS
Upper StickB&M Pro Ripper
Heavy Spring (2) Shift Stop (2) Shift Stop Jam Nut
Washer (4) Mounting Nut (4) Mounting Stud (4)
Threaded Adapter
(2)
Printed in the U.S.A.
9500749-02
Page 2
Socket(8mm,10mm,13mm)
Button-head Screws (4)
PARTS
Thread Adhesive
TOOLS
Socket Drive Extension
Hex Wrench(3/16,1/4,
5/16)
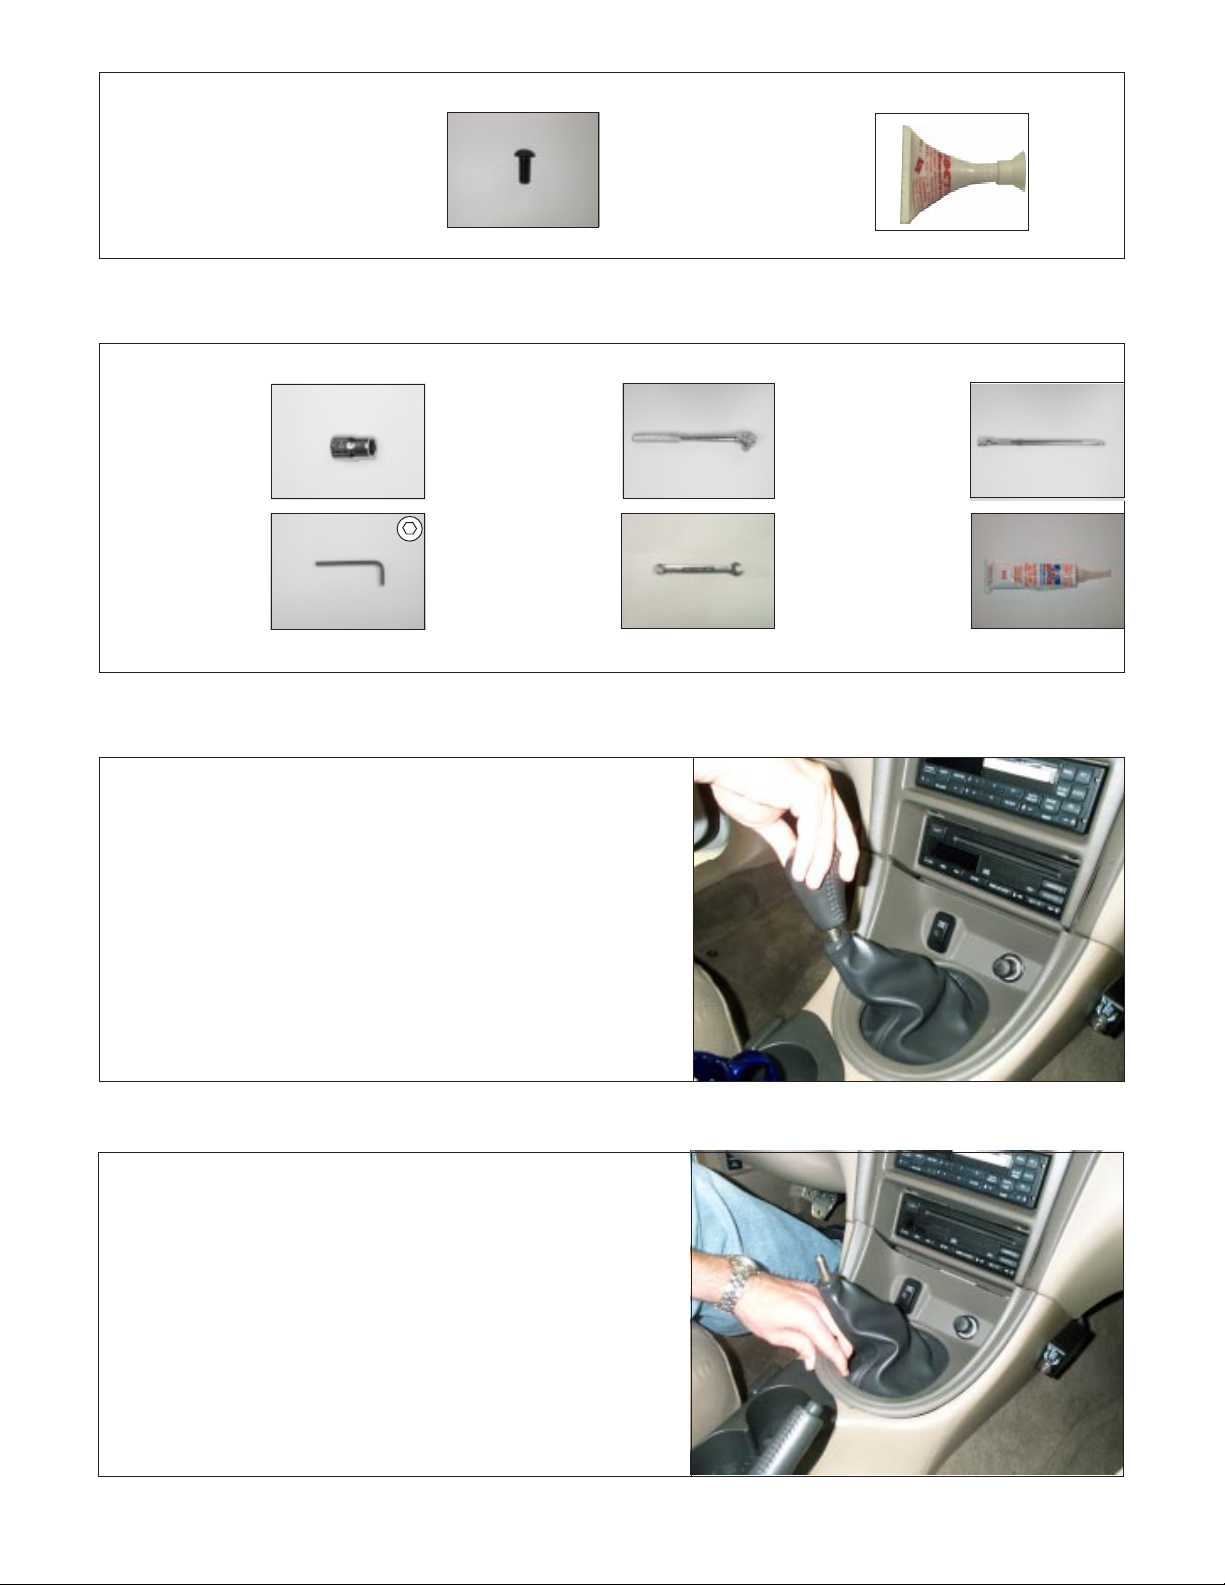
STEP 1. Unscrew knob.
Wrench (3/4")
DISASSEMBLY
RTV Silicone
STEP 2. Carefully unsnap shift boot from center console.
Page 3
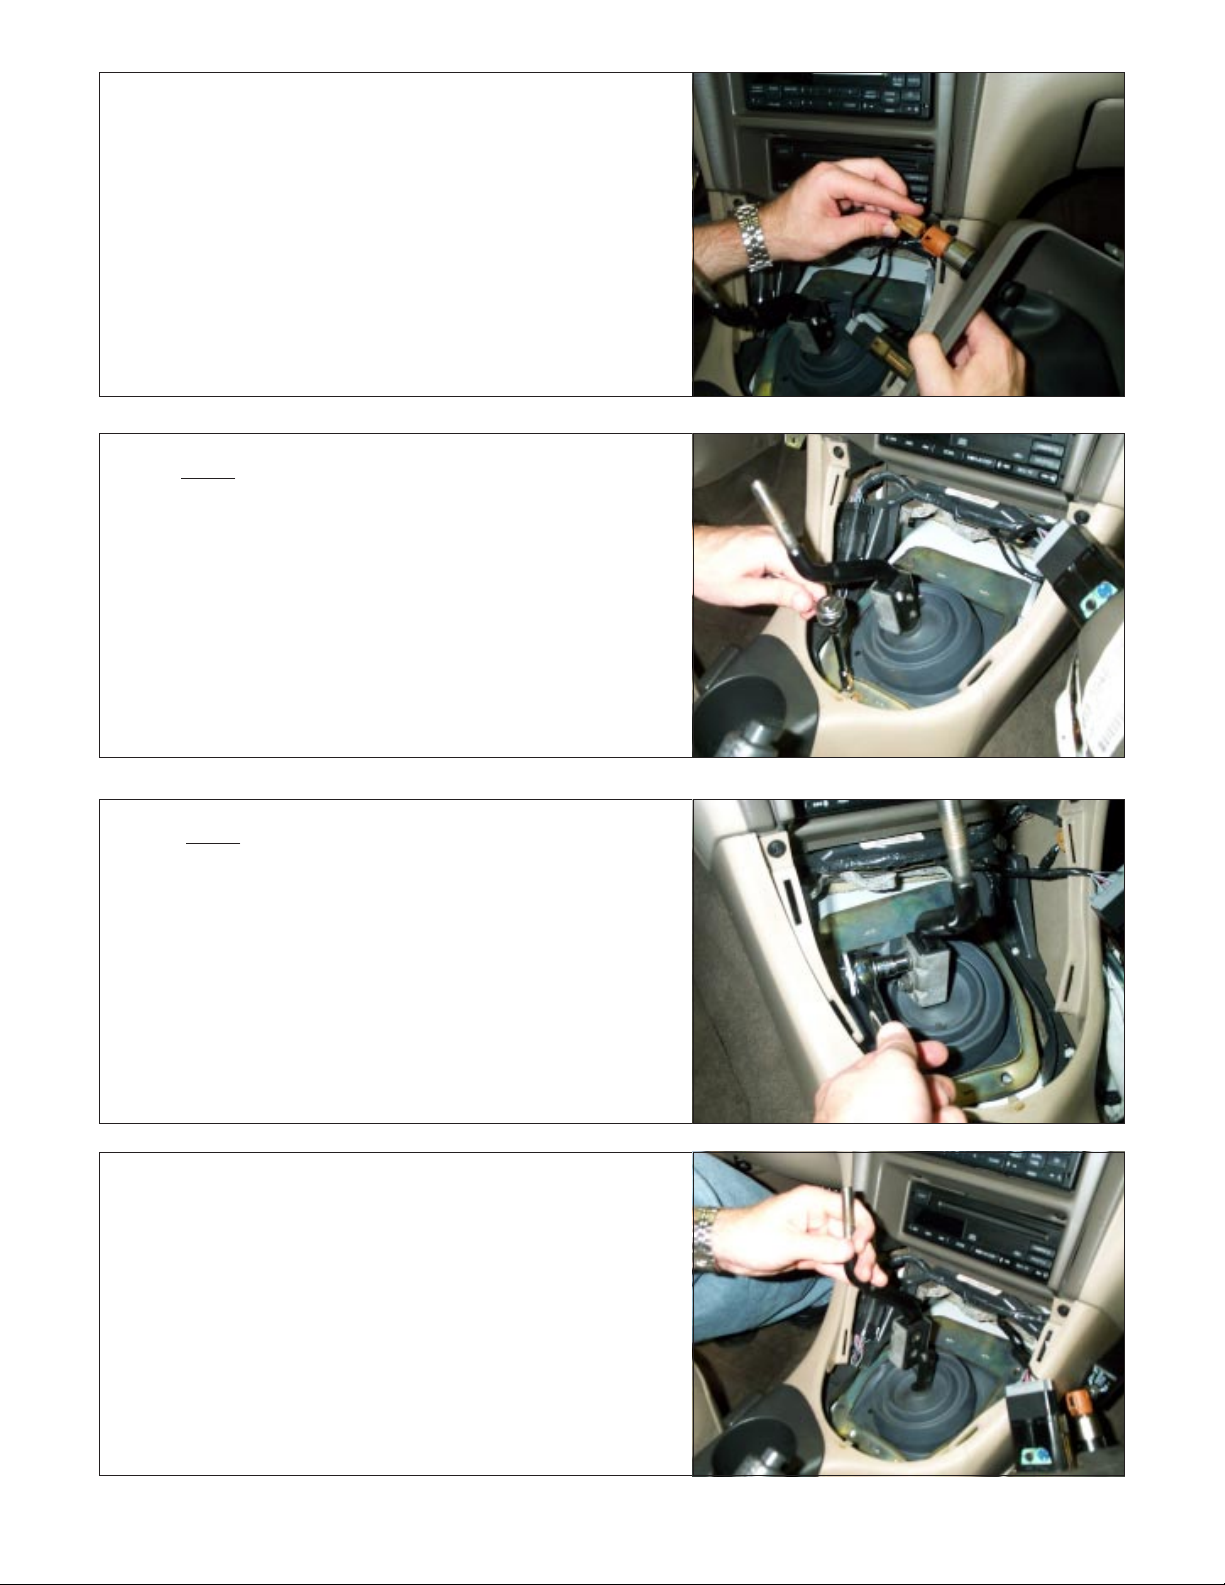
STEP 3. Unclip cigarette lighter wire harness.
STEP 4. Remove four (4) bolts from protective boot.
Tools: Drive, extension, 8mm socket
STEP 5. Remove two (2) upper stick bolts.
Tools: Drive, 10mm socket
STEP 6. Remove upper stick.
Page 4

STEP 7. Remove protective boot.
STEP 8. Remove four (4) shifter base bolts.
Tools: Drive, extension, and 13mm socket.
STEP 9. Remove shifter base.
STEP 10. Thread shift stops into appropriate holes.
Parts: Shift stop (2)
ASSEMBLY
Page 5

STEP 11. Thread jam nuts onto shift stops.
Parts: Shift stop jam nuts (2)
STEP 12. If a stiffer side-to-side action is desired, follow the next
three steps.
Remove socket locks from shift stop ring.
Tools: 5/16" Allen wrench
STEP 13. Replace softer springs with supplied stiffer springs.
Parts: Stiff springs (2)
STEP 14. Reinstall socket locks in shift stop ring.
NOTE: Make sure two (2) threads are exposed from shift
stop ring to socket lock.
If socket lock is down too far, transmission may
not engaged.
Tools: 5/16" Allen wrench
Page 6

STEP 15. Install four (4) mounting studs.
Tools: 4mm Allen wrench
Parts: Mounting studs
STEP 16. Apply bead of RTV silicone around perimeter of B&M
Pro Ripper base.
Parts: B&M Pro Ripper Shifter
Tools: RTV silicone
STEP 17. Install B&M Pro Ripper Shifter.
Part: B&M Pro Ripper Shifter
STEP 18. Install four (4) washers and four (4) mounting nuts.
Tools: Drive, extension, and 13mm socket
Parts: Washers, Mounting nuts
Note: If the transmission fluid level is low, add
more thru the fluid fill hole on the base
of the shifter.
Page 7

STEP 19. Adjust shift stops accordingly.
Note: Make sure all gears are fully engaged
Tools: 3/4" open-ended wrench, 1/4" allen wrench
STEP 20. Install protective rubber boot.
STEP 21. Install four (4) bolts securing protective boot.
Tools: Drive, extension, and 8mm socket
STEP 22. Decide placement of knob.
Knob angled
back, further from
dash
Knob angled
forward, closer
to dash
Page 8

STEP 23. Decide how short you want the lever. Bottom two holes
will provide a lower stick and shorter throws.
STEP 24. Install upper stick in position decided in steps 19 and
20 using thread adhesive.
Parts: Upper Stick, Button-head Screws(2) &
thread adhesive
Tools: 3/16" Allen wrench
NOTE: FAILURE TO USE THREAD ADHESIVE
COULD RESULT IN SHIFTER MALFUNCTION.
High Stick,
Longer Throw
Lower Stick,
Shorter Throw
STEP 25. Install threaded knob adapter.
NOTE: If adapter is installed as seen in picture, knob
will be closer to driver
Parts: Threaded Adapter, Button-head Screws (2) &
thread adhesive.
Tools: 3/16" Allen wrench
NOTE: FAILURE TO USE THREAD ADHESIVE
COULD RESULT IN SHIFTER MALFUNCTION.
STEP 26. Reconnect cigarette lighter wire harness.
Page 9

STEP 27. Install shift boot.
STEP 28. Install knob.
 Loading...